Washington, United States
Joined: August 09, 2002
KitMaker: 1,742 posts
Armorama: 1,658 posts
Posted: Monday, March 23, 2020 - 02:15 PM UTC
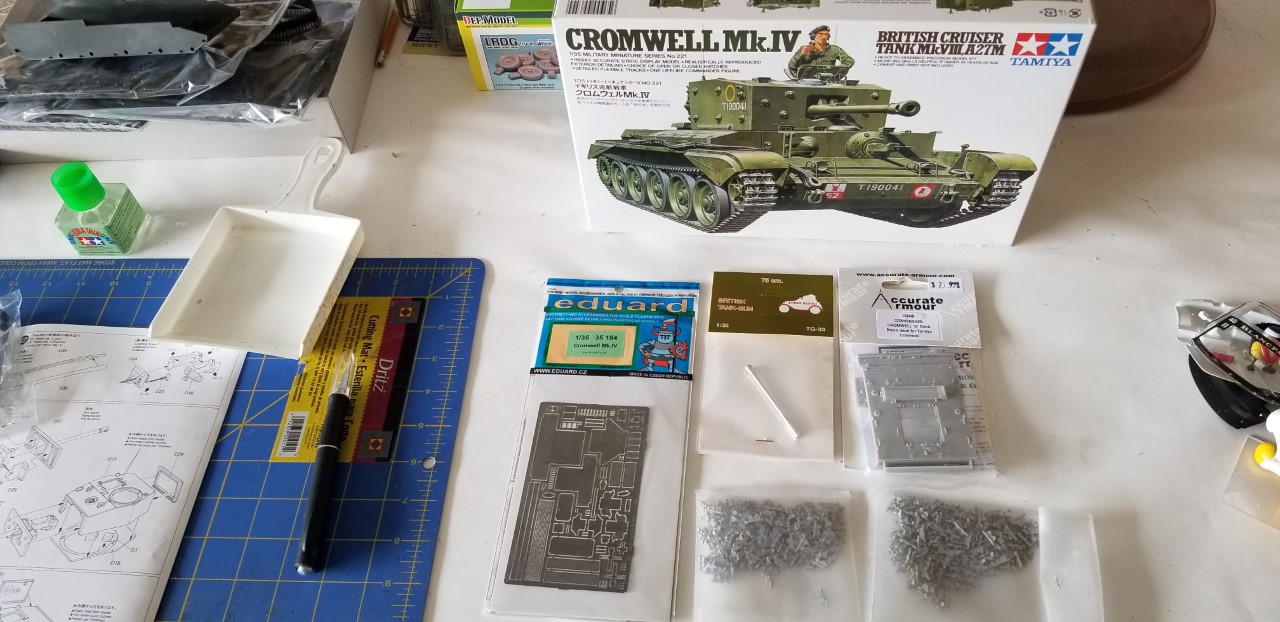
Now is the time to begin my Cromwell build. I have the time to build and you are board enough from staying home to follow it.
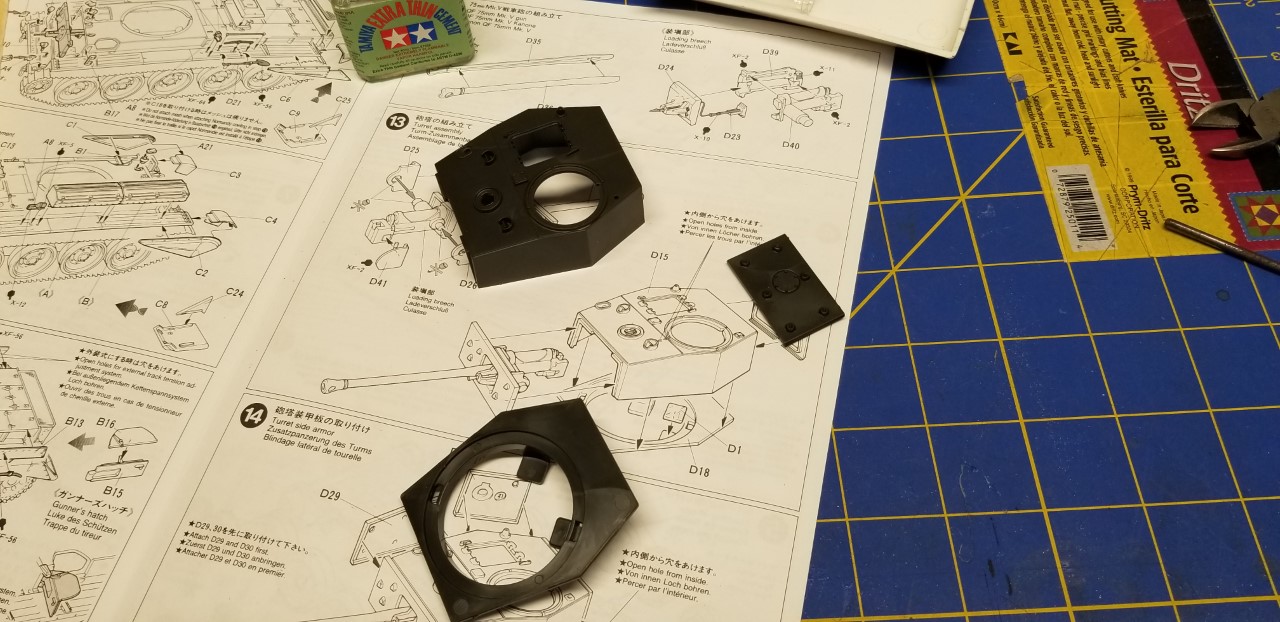
Here is a photo of what accessories I plan on using. All advice is greatly appreciated.
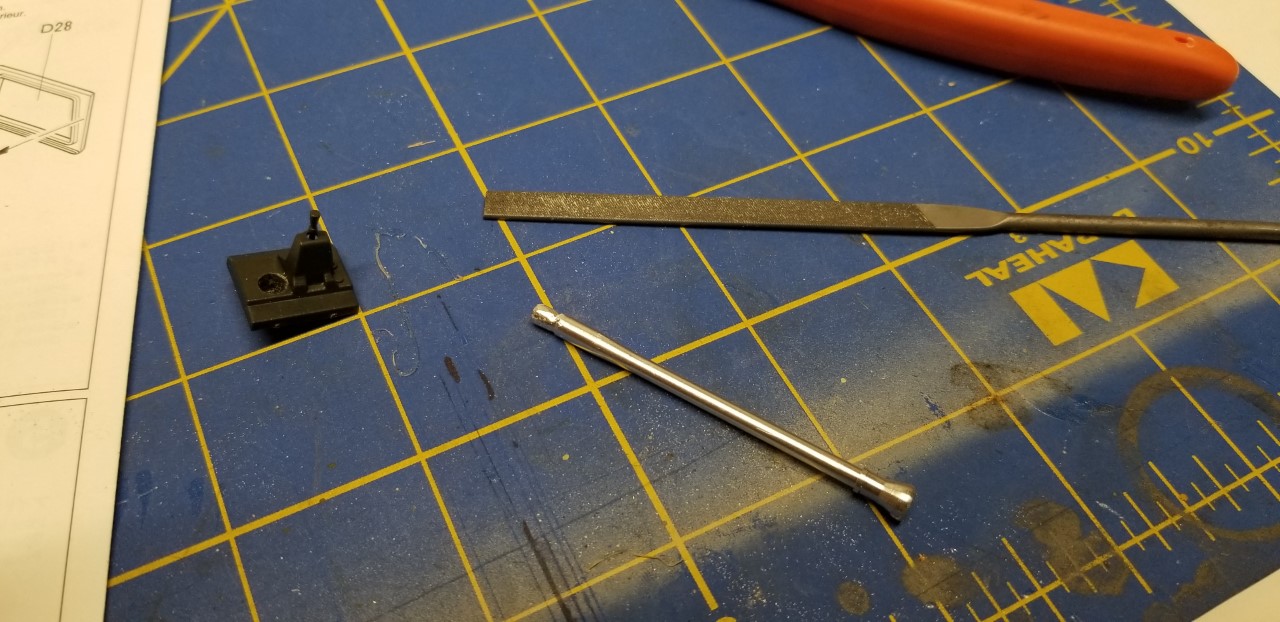
I started by installing the Metal barrel ...but a snag occurred. The
kit barrel is tapered where it fits into the mantlet but the metal barrel isn't so out comes the metal file and you taper the metal barrel to fit.
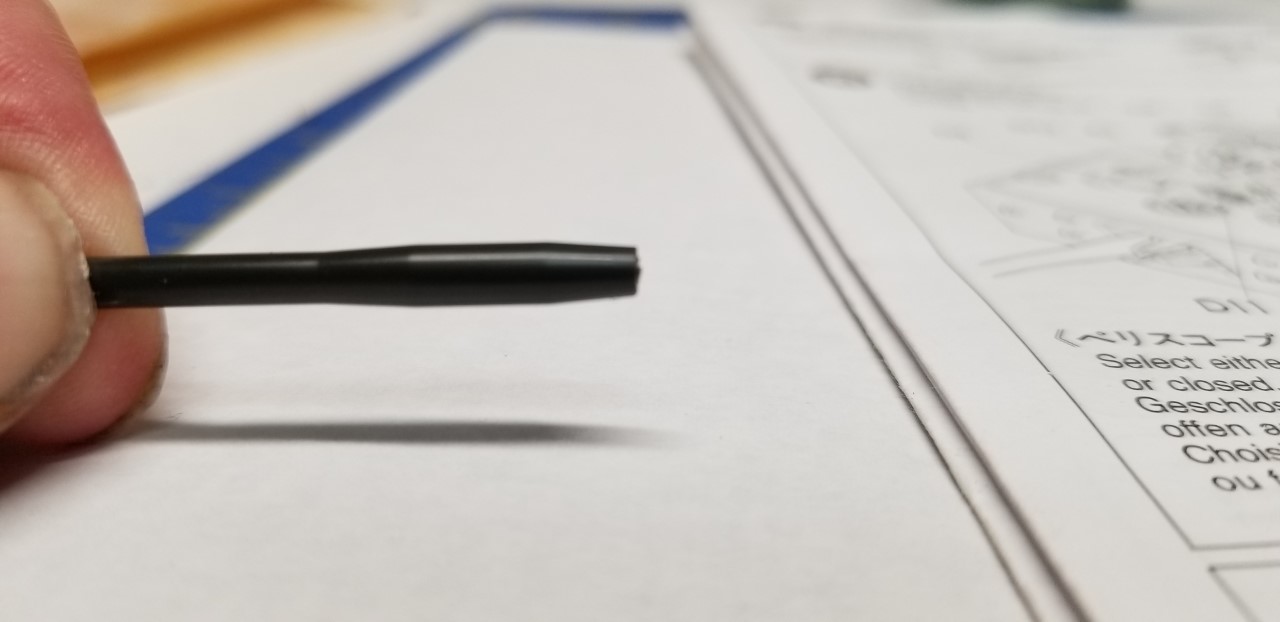
Maybe there is a simpler way... but its done.
Msgt Retired USMC
M48/ M60A1/ M1A1
Semper Fi!
Washington, United States
Joined: August 09, 2002
KitMaker: 1,742 posts
Armorama: 1,658 posts
Posted: Monday, March 23, 2020 - 02:57 PM UTC
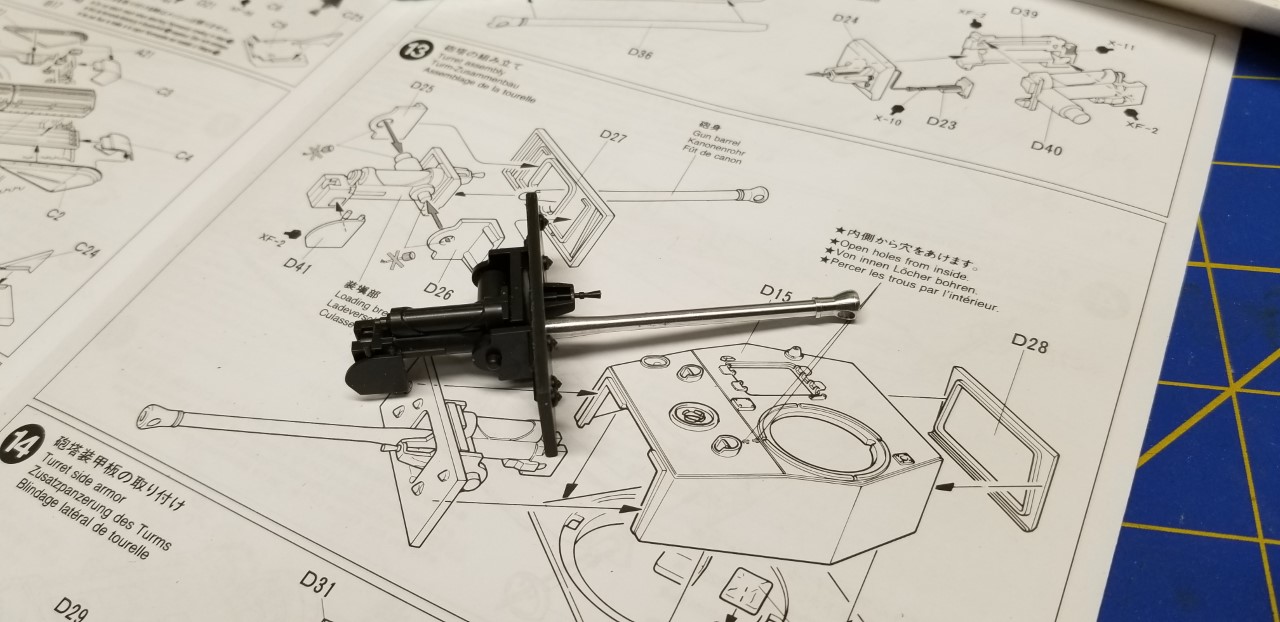
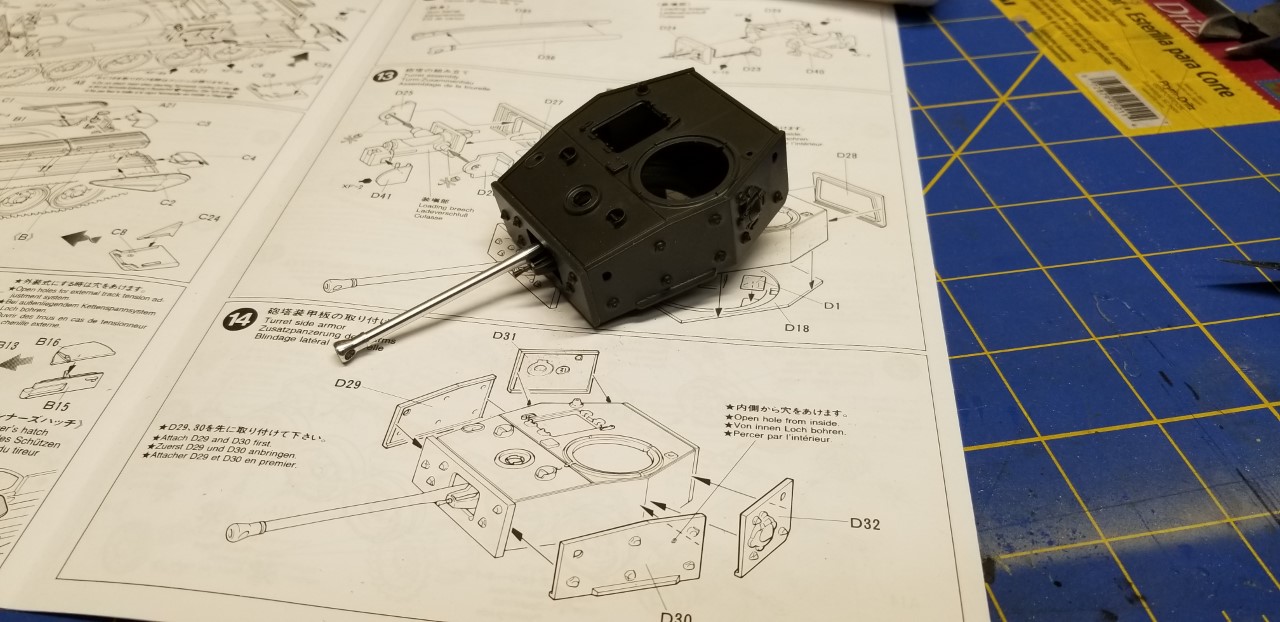
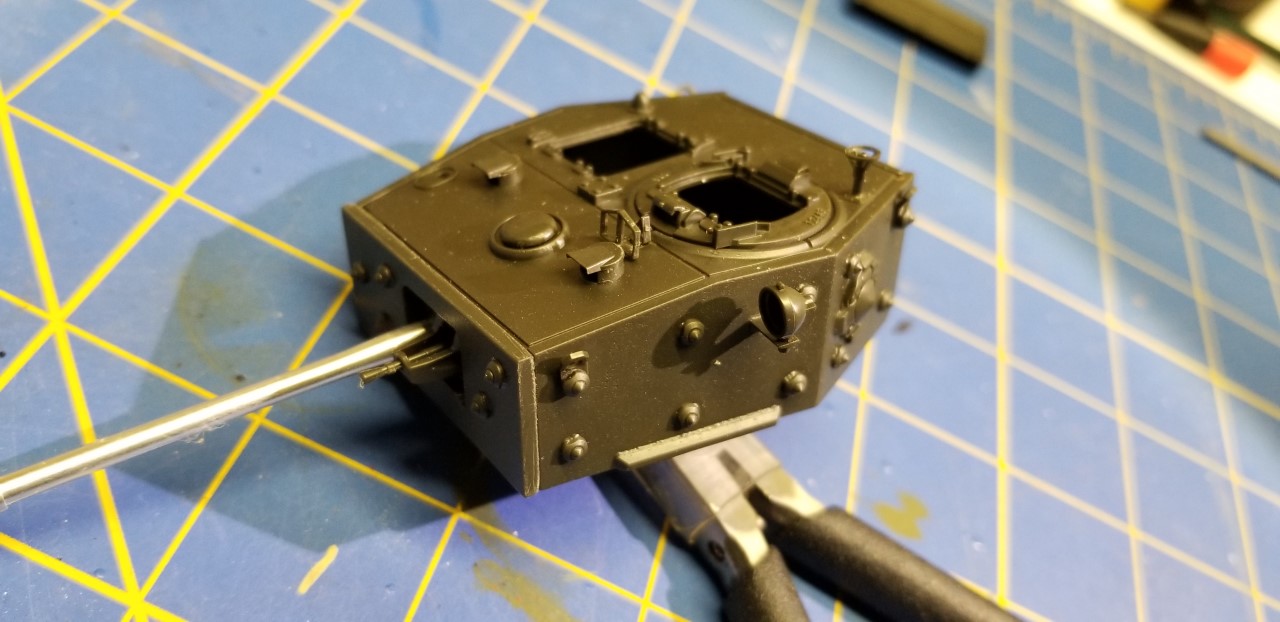
Now it's time to start assembling the turret.
gallery3.kitmaker.net
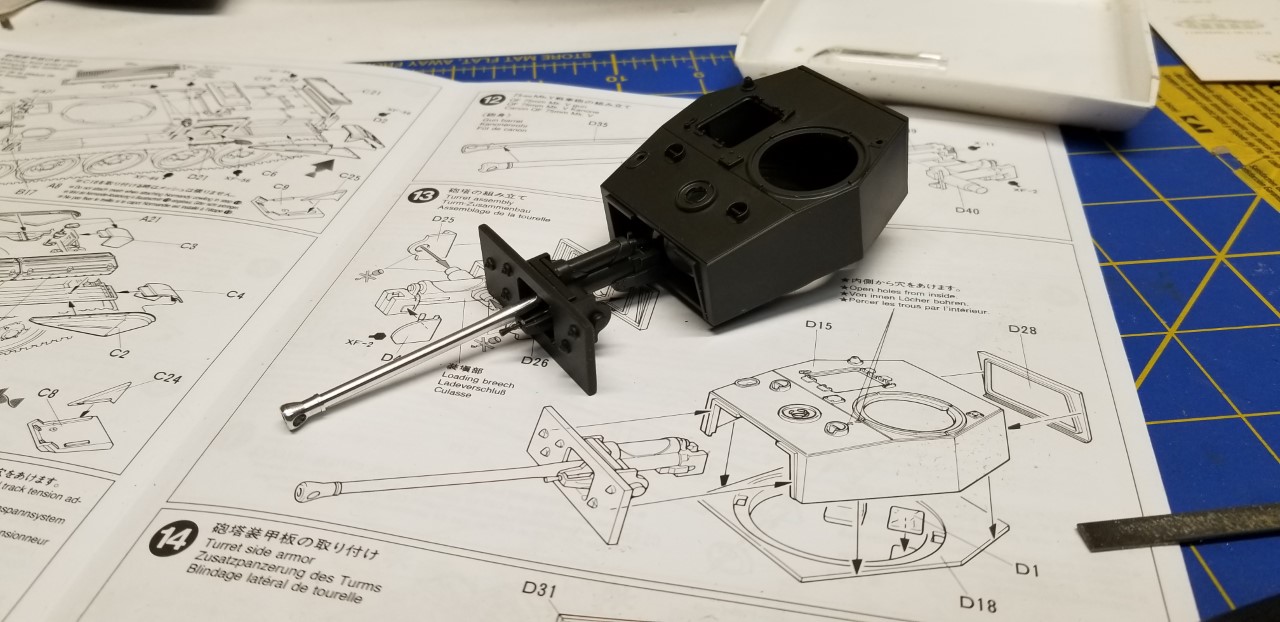
Well, the parts fit together flawlessly. A good sign of things to come.
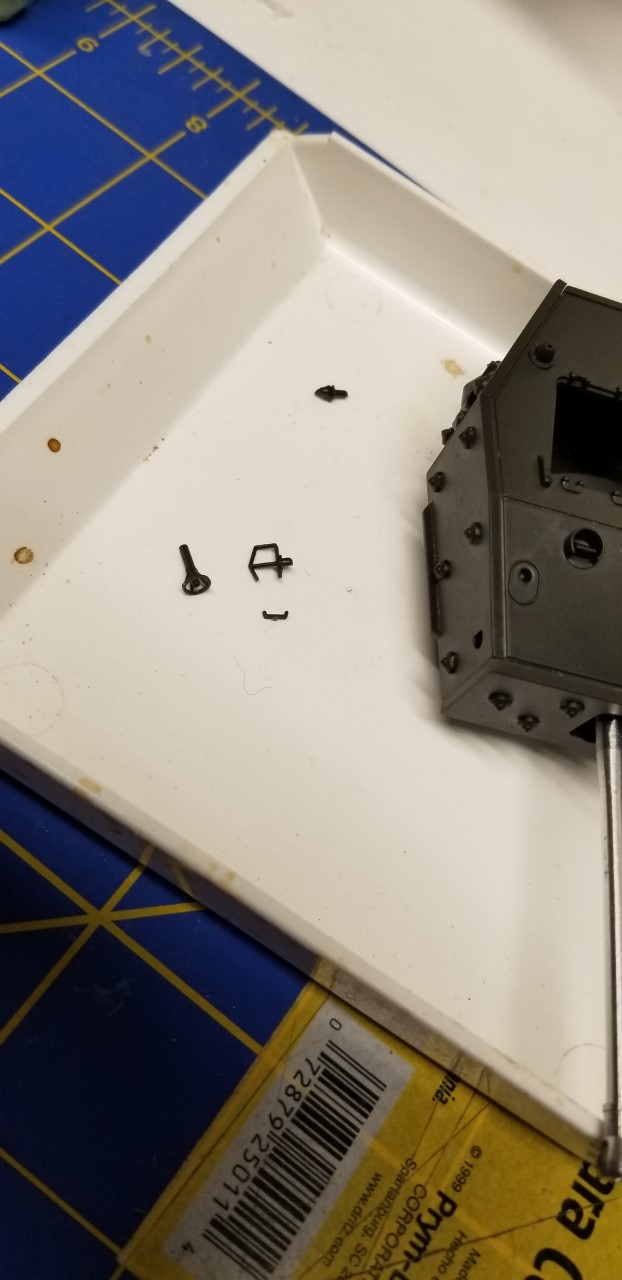
Spoke to soon. The sighting vain is delicate and it broke as I was removing it. Something else to fix. This was my last straw for my current sprue cutters. I am getting a set of nippers.
Msgt Retired USMC
M48/ M60A1/ M1A1
Semper Fi!

#417
Ontario, Canada
Joined: March 01, 2004
KitMaker: 3,123 posts
Armorama: 2,539 posts
Posted: Tuesday, March 24, 2020 - 03:46 AM UTC
Quoted Text
Spoke to soon. The sighting vain is delicate and it broke as I was removing it. Something else to fix. This was my last straw for my current sprue cutters. I am getting a set of nippers.
If I may suggest, for such small parts why not use a very fine razor saw to remove them from the sprue? It doesn't require that the part moves within the sprue to remove, the cut lines are very thin and the cutting forces imposed on the sprue can be very low.
Paul
Paul Roberts
Past Editor, Boresight
Armor Modeling and Preservation Society
Washington, United States
Joined: August 09, 2002
KitMaker: 1,742 posts
Armorama: 1,658 posts
Posted: Tuesday, March 24, 2020 - 12:33 PM UTC
I will give that suggestion a try, thanks.
Msgt Retired USMC
M48/ M60A1/ M1A1
Semper Fi!
Washington, United States
Joined: August 09, 2002
KitMaker: 1,742 posts
Armorama: 1,658 posts
Posted: Tuesday, March 24, 2020 - 12:42 PM UTC
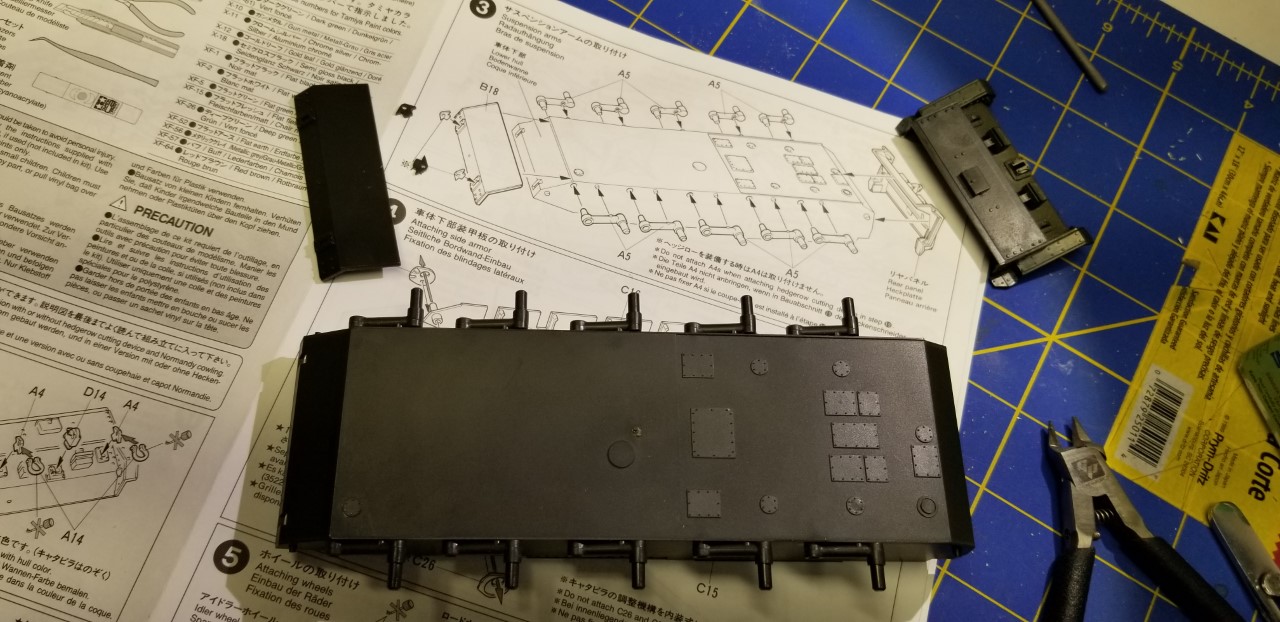
I was reading ahead and was confused when reading step 4 in the directions.
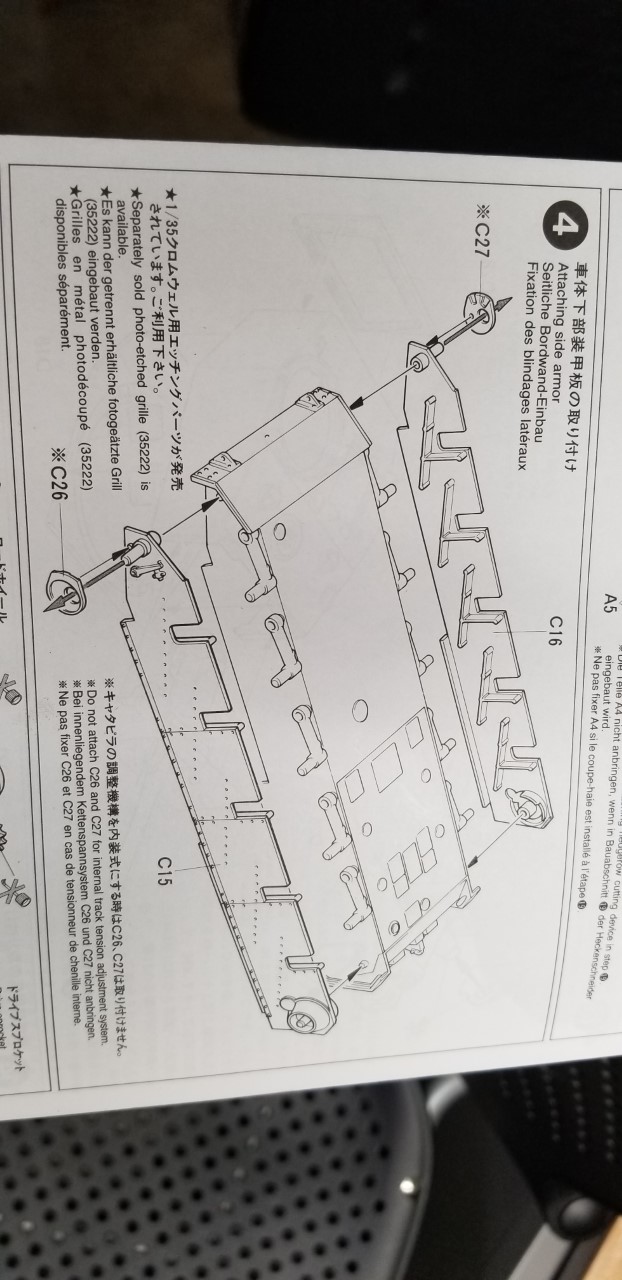
Is says " not to attach Parts C26/C27 for internal track adjustment system."
Is this something to do with allowing you to adjust track tension (I don't see how that would work with what is in the kit. Or is this referring to some model/ version of the Cromwell?
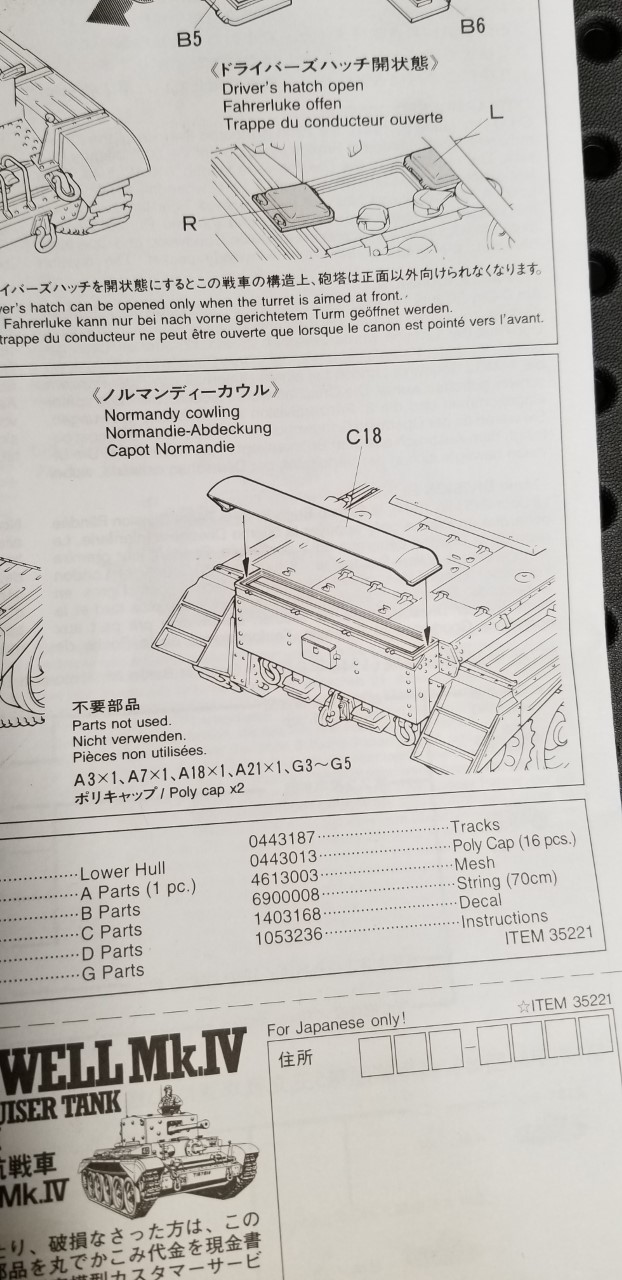
The second question involves the exhaust deflector part C 18.
Was this "Normandy Deflector" just left on or removed quickly?
I see some in photos and some without.
Msgt Retired USMC
M48/ M60A1/ M1A1
Semper Fi!
barkingdigger
 Associate Editor
#013
England - East Anglia, United Kingdom
Joined: June 20, 2008
KitMaker: 3,981 posts
Armorama: 3,403 posts
Posted: Tuesday, March 24, 2020 - 12:55 PM UTC
Cromwell tanks evolved from the Centaur tank. IIRC the Centaur used an internal track-adjusting system where the idler wheel was adjusted through small hatches in the glacis plate. The Cromwell did away with these hatches (and the obvious compromise they caused in the glacis armour) by using an external ratchet system represented by parts C26 & C27. There was a large adjusting bar (often called a hockey stick due to the bent end) that was used to rotate the ratchets. Tamiya uses the same plastic sprues for both its Centaur and Cromwell kits, so the instructions for each tell which parts to use.
"Glue, or Glue Not - there is no Dry-Fit" - Yoda (original script from Return of the Jedi...)
Washington, United States
Joined: August 09, 2002
KitMaker: 1,742 posts
Armorama: 1,658 posts
Posted: Tuesday, March 24, 2020 - 01:01 PM UTC
Thanks, so the Cromwell uses these parts because it lacks the internal system.
Msgt Retired USMC
M48/ M60A1/ M1A1
Semper Fi!
Nova Scotia, Canada
Joined: November 17, 2015
KitMaker: 407 posts
Armorama: 373 posts
Posted: Wednesday, March 25, 2020 - 02:31 AM UTC
Coming along nicely Greg, I have the same kit as a shelf queen. You have reignited my interest in finishing it. Best regards.......Dale
Washington, United States
Joined: August 09, 2002
KitMaker: 1,742 posts
Armorama: 1,658 posts
Posted: Wednesday, March 25, 2020 - 02:46 AM UTC
Thank you. I have to chuckel. It is sort of a pay it forward thing. When Darrin started his build it motivated me to get the kit.
Msgt Retired USMC
M48/ M60A1/ M1A1
Semper Fi!
Washington, United States
Joined: August 09, 2002
KitMaker: 1,742 posts
Armorama: 1,658 posts
Posted: Wednesday, March 25, 2020 - 02:57 AM UTC
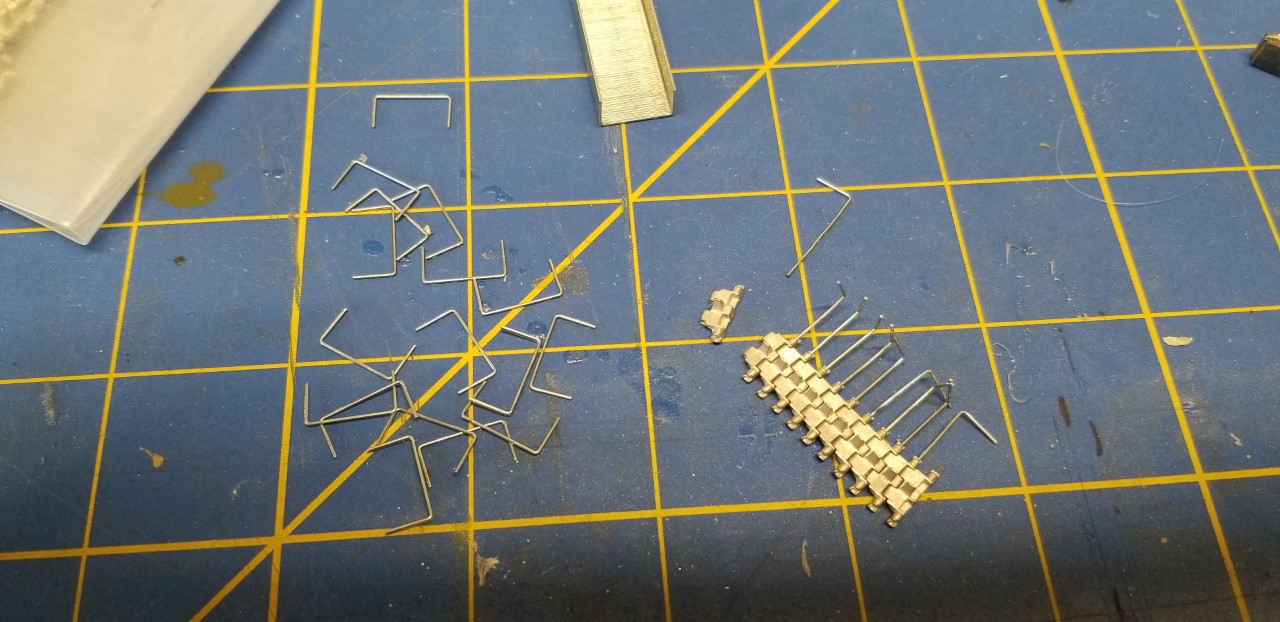
I finished up some of the smaller parts on the turret. I am leaving the hatches off for now. It is easier for me to paint them first then install them.
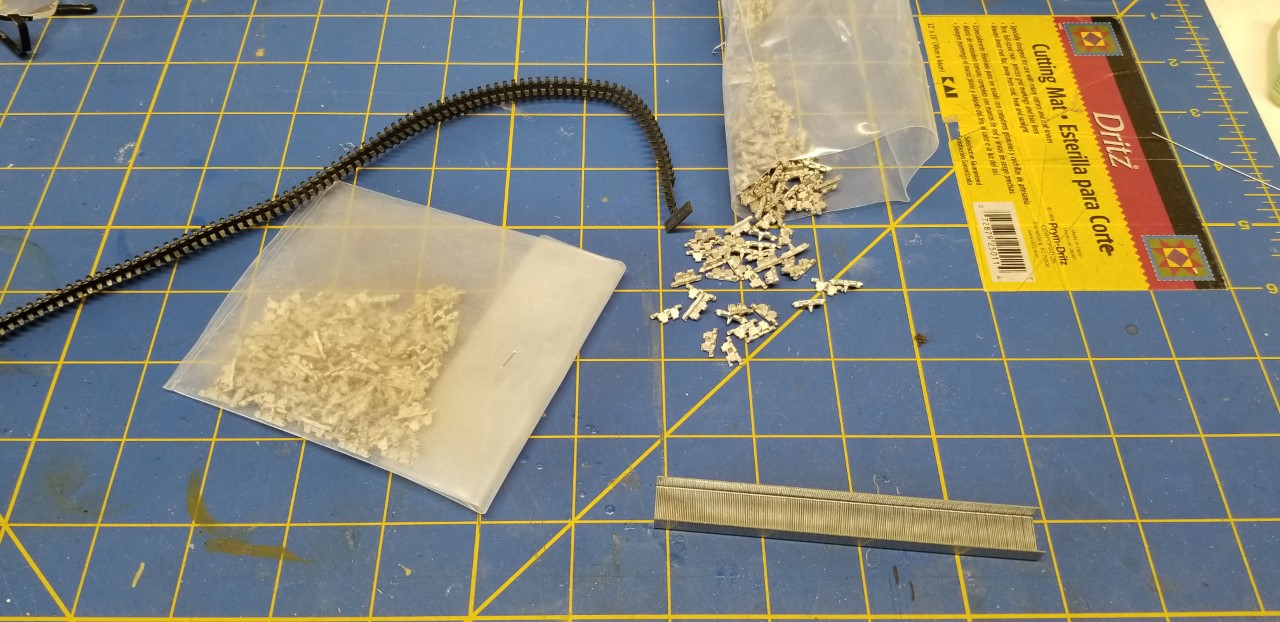
I am beginning the track today. I use staples for my track pins. I straighten one side then slide them through.
Msgt Retired USMC
M48/ M60A1/ M1A1
Semper Fi!
North Carolina, United States
Joined: April 29, 2014
KitMaker: 1,112 posts
Armorama: 886 posts
Posted: Wednesday, March 25, 2020 - 04:10 AM UTC
Quoted Text
Quoted Text
Spoke to soon. The sighting vain is delicate and it broke as I was removing it. Something else to fix. This was my last straw for my current sprue cutters. I am getting a set of nippers.
If I may suggest, for such small parts why not use a very fine razor saw to remove them from the sprue? It doesn't require that the part moves within the sprue to remove, the cut lines are very thin and the cutting forces imposed on the sprue can be very low.
Paul
Greg,
I agree with Paul. I like UMM USA micro saw.
http://umm-usa.com/onlinestore/product_info.php?cPath=21_28&products_id=49&osCsid=a4f32277ef24dc3875fd2ee98872554dA must for Bronco and Miniart kits. It can cut down (ha) on broken parts that cutters can cause. YMMV.
Washington, United States
Joined: August 09, 2002
KitMaker: 1,742 posts
Armorama: 1,658 posts
Posted: Thursday, March 26, 2020 - 03:02 AM UTC
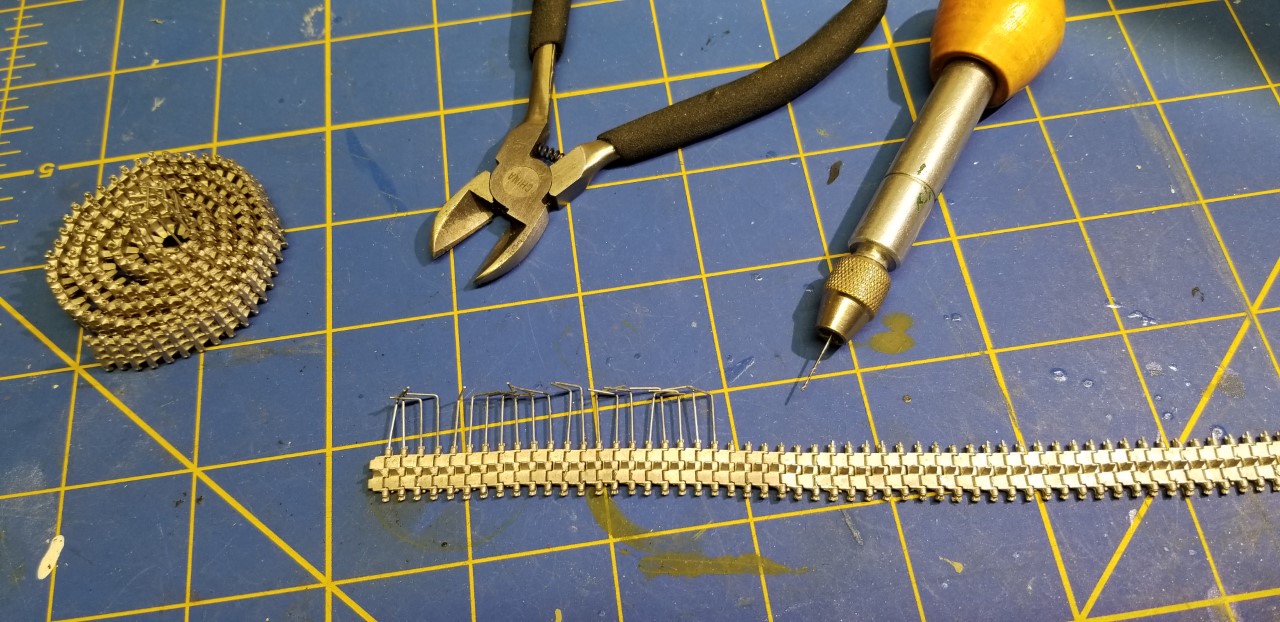
I have discovered that I needed to drill out many of the links. Care must be taken in assembling the track. This is the first set of Friules that I have assembled that were thin enough to tear through. I had to toss 3 links in the assembly process. I am not sure of how many links are on supposed to be each side but it felt closer to a thousand per side before I was done.
Msgt Retired USMC
M48/ M60A1/ M1A1
Semper Fi!
North Carolina, United States
Joined: November 22, 2018
KitMaker: 18 posts
Armorama: 18 posts
Posted: Thursday, March 26, 2020 - 11:53 AM UTC
This kit builds up very nicely when it's done. Looking good so far!
Washington, United States
Joined: August 09, 2002
KitMaker: 1,742 posts
Armorama: 1,658 posts
Posted: Thursday, March 26, 2020 - 02:07 PM UTC
So far, everything is fitting together perfectly, and the frustration level is quite low.

Msgt Retired USMC
M48/ M60A1/ M1A1
Semper Fi!
Washington, United States
Joined: August 09, 2002
KitMaker: 1,742 posts
Armorama: 1,658 posts
Posted: Thursday, March 26, 2020 - 02:12 PM UTC
I have removed the roadwheels and roadwheel arms in preparation of starting on the hull.
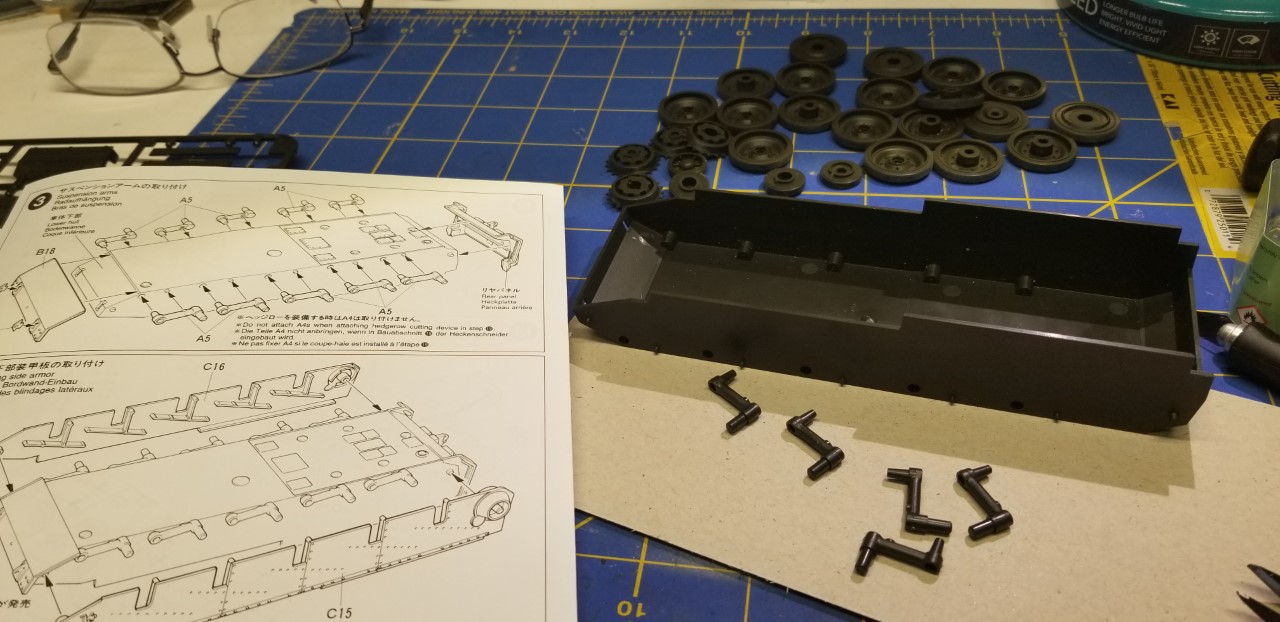
You do not have to worry about lining up the roadwheels so that they are level. Tamiya has a pin so that the alignment is perfect. However if you trim the pin off you could articulate the arms. The oily marks on the side of the hull are a good example of why I carefully wash the kit prior to painting...
Msgt Retired USMC
M48/ M60A1/ M1A1
Semper Fi!
Nova Scotia, Canada
Joined: November 17, 2015
KitMaker: 407 posts
Armorama: 373 posts
Posted: Thursday, March 26, 2020 - 02:54 PM UTC
Looking great Greg, another enjoyable update. I will keep following with much interest. Best regards......Dale
Washington, United States
Joined: August 09, 2002
KitMaker: 1,742 posts
Armorama: 1,658 posts
Posted: Saturday, March 28, 2020 - 03:24 AM UTC
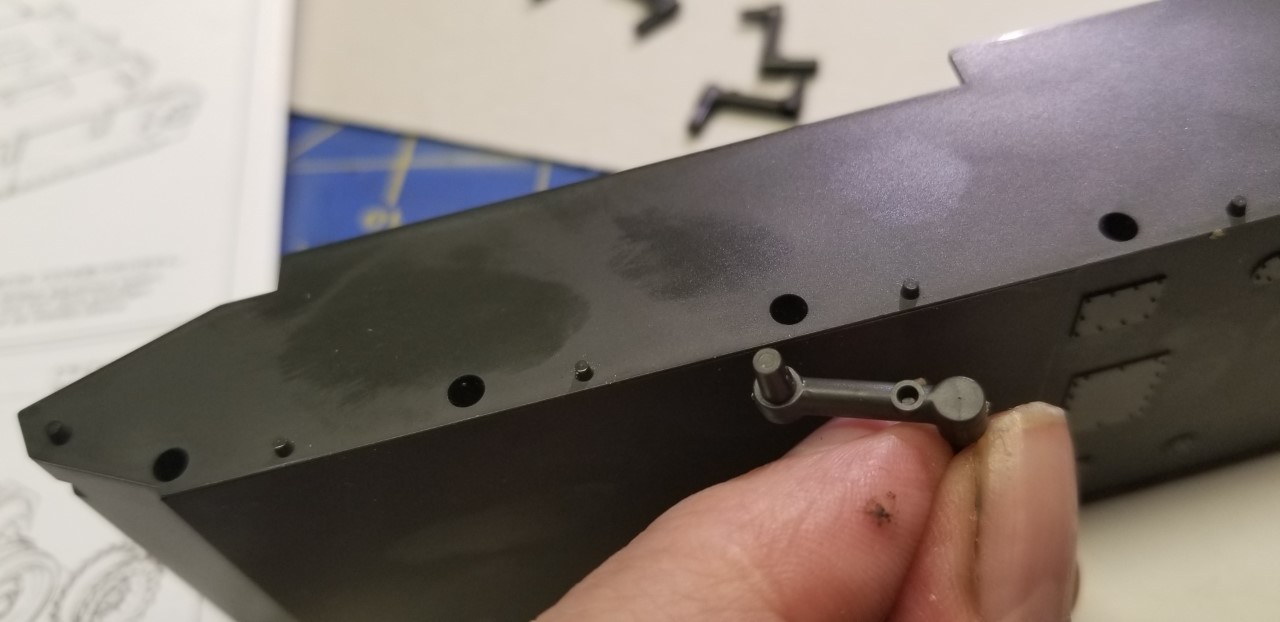
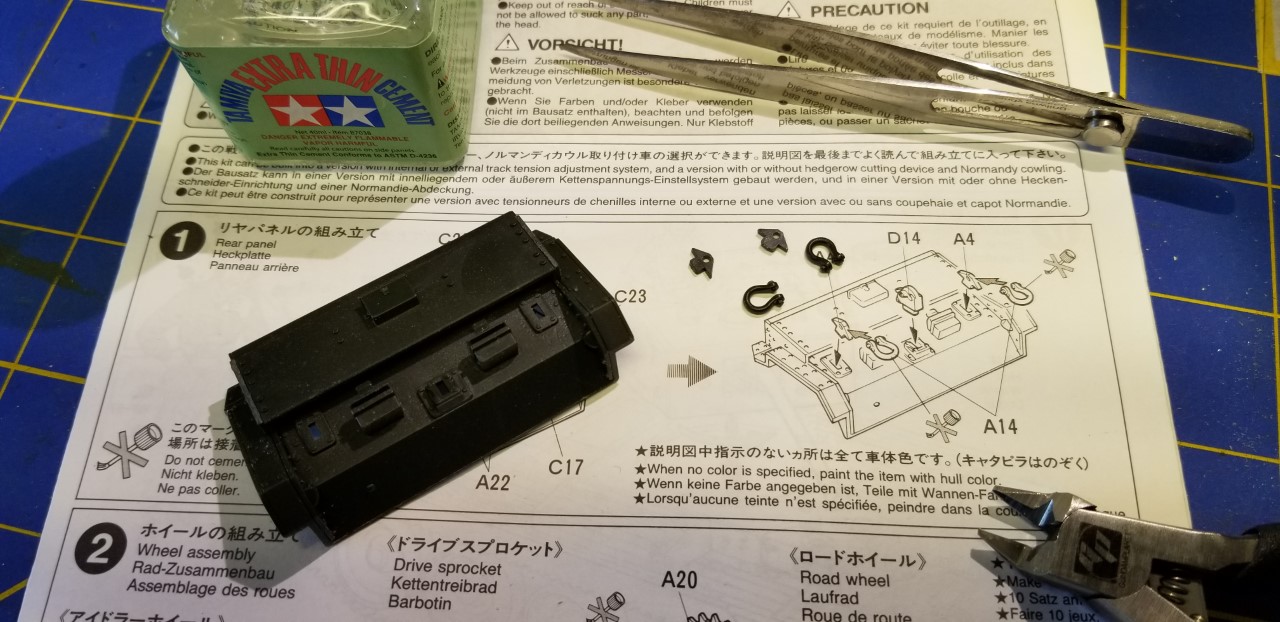
I have installed the roadwheel arms and snipped out the front and back plate.
I assembled the back plate and all the parts fit exactly.
Next I added the hull side armor plate.
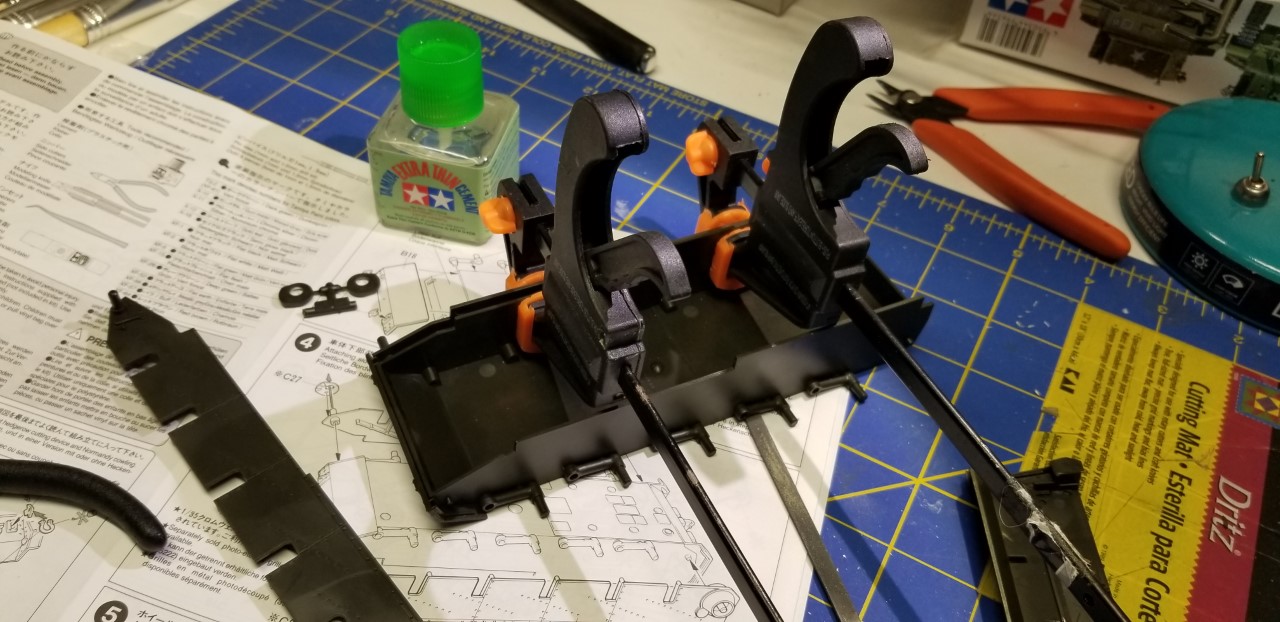
I then went to attach the rear hull plate and..oh @#$. One of the side plates slipped off the mounting pin as I tightened the clamps and the rear plate obviously will not come close to fitting. Am I the only one having issues with a build caused by the builder, or it just me today?
There is only one repair, pull off the side armor plate and reinstall it.

So I sanded and cleaned up the hull and side armor and re-glued the side armor back on and now the rear plate fits as intended.
Msgt Retired USMC
M48/ M60A1/ M1A1
Semper Fi!
Washington, United States
Joined: August 09, 2002
KitMaker: 1,742 posts
Armorama: 1,658 posts
Posted: Saturday, March 28, 2020 - 02:51 PM UTC
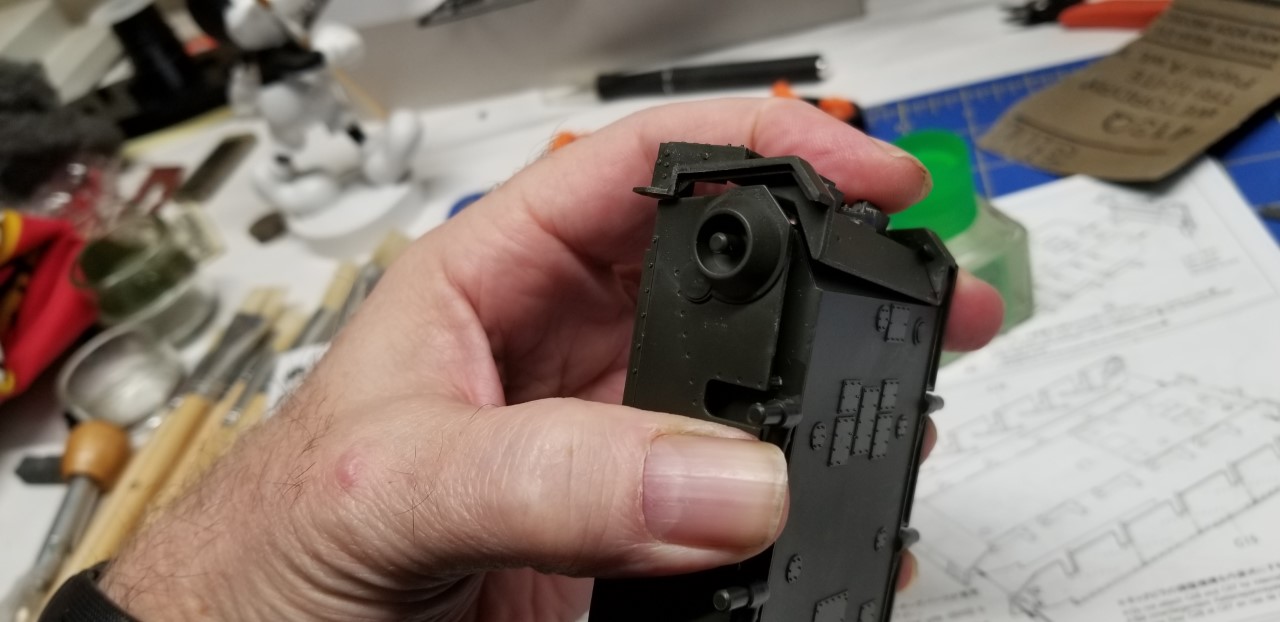
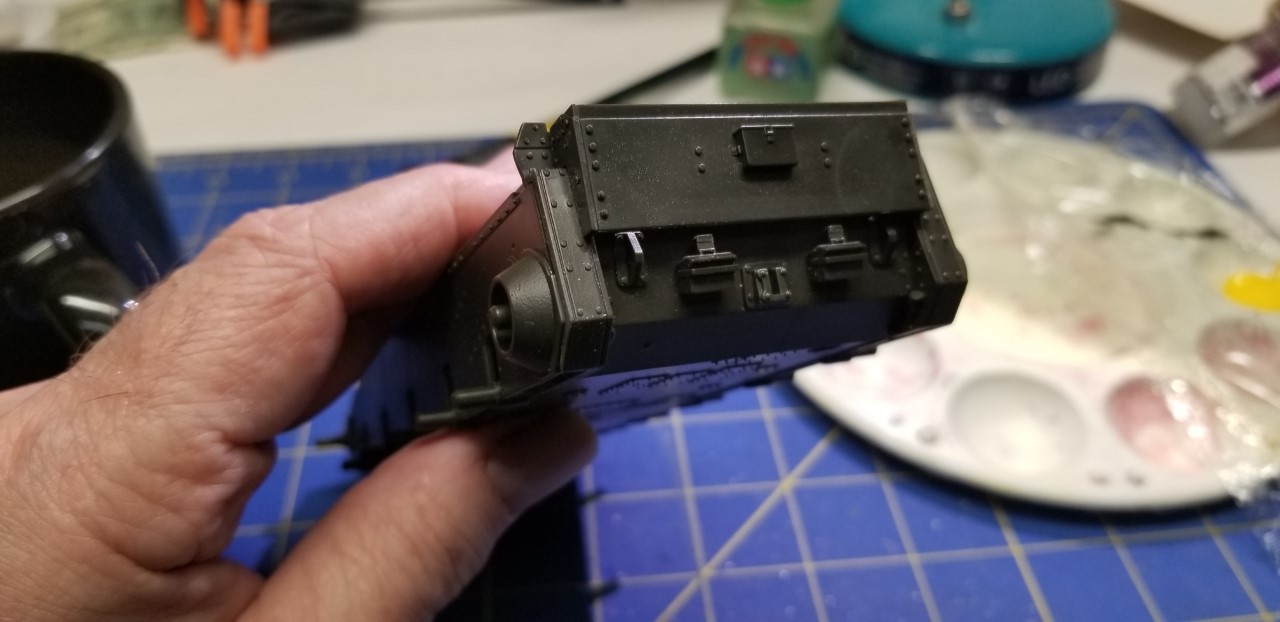
It is time for some expert help.

Part B13 is a piece that fits on the side of the upper rear hull. When fitted it only covers half the space between the top of the upper hull and the fender. I do not see what fits below it. There is a large gap that you can see through to the other side of the hull. So what belongs there?
Msgt Retired USMC
M48/ M60A1/ M1A1
Semper Fi!
Washington, United States
Joined: August 09, 2002
KitMaker: 1,742 posts
Armorama: 1,658 posts
Posted: Sunday, March 29, 2020 - 04:35 AM UTC
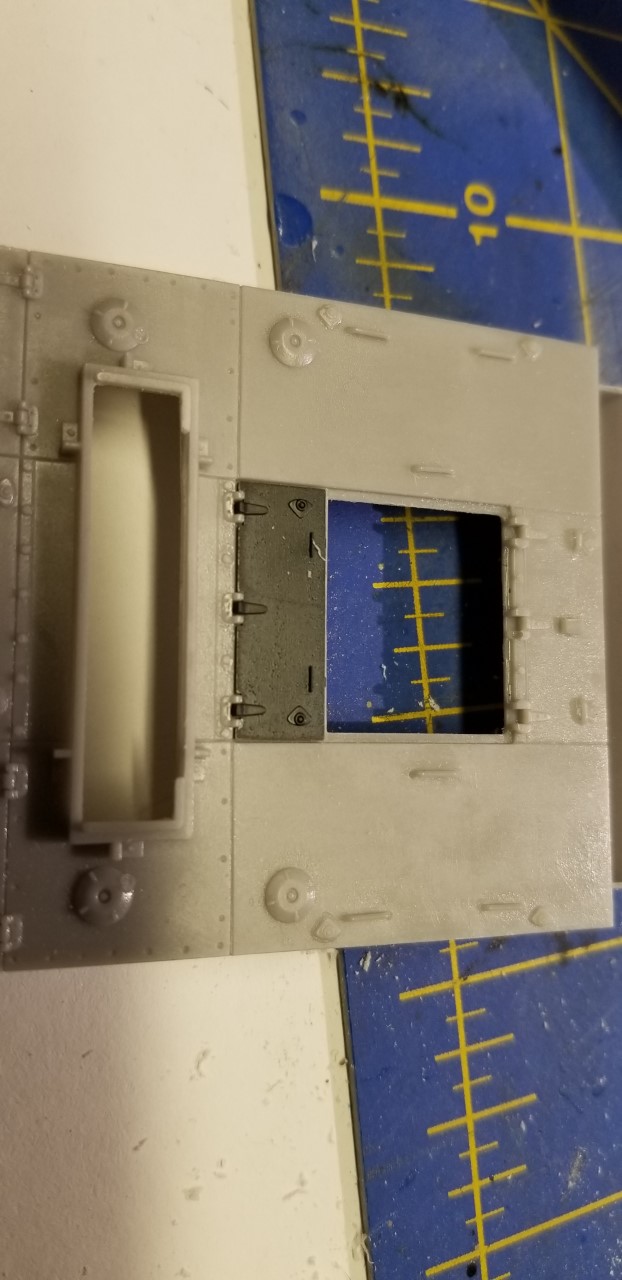
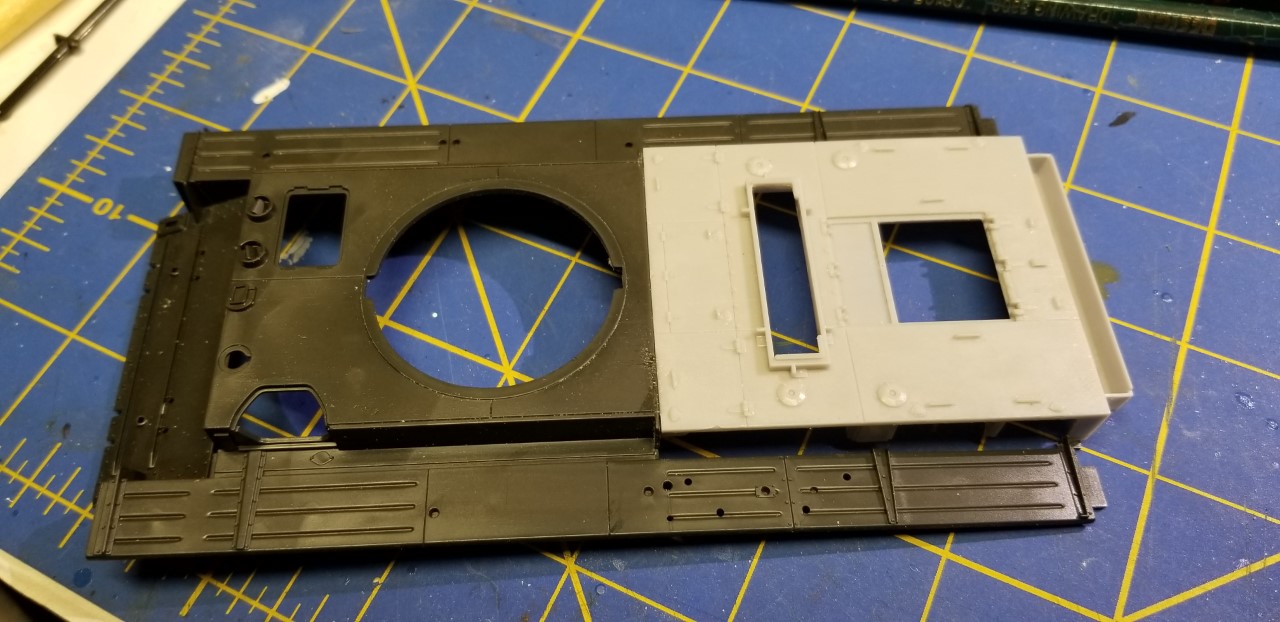
Humm.. No replies yet so I will move on. I am starting the rear deck conversion using Accurate Armors Deck D.
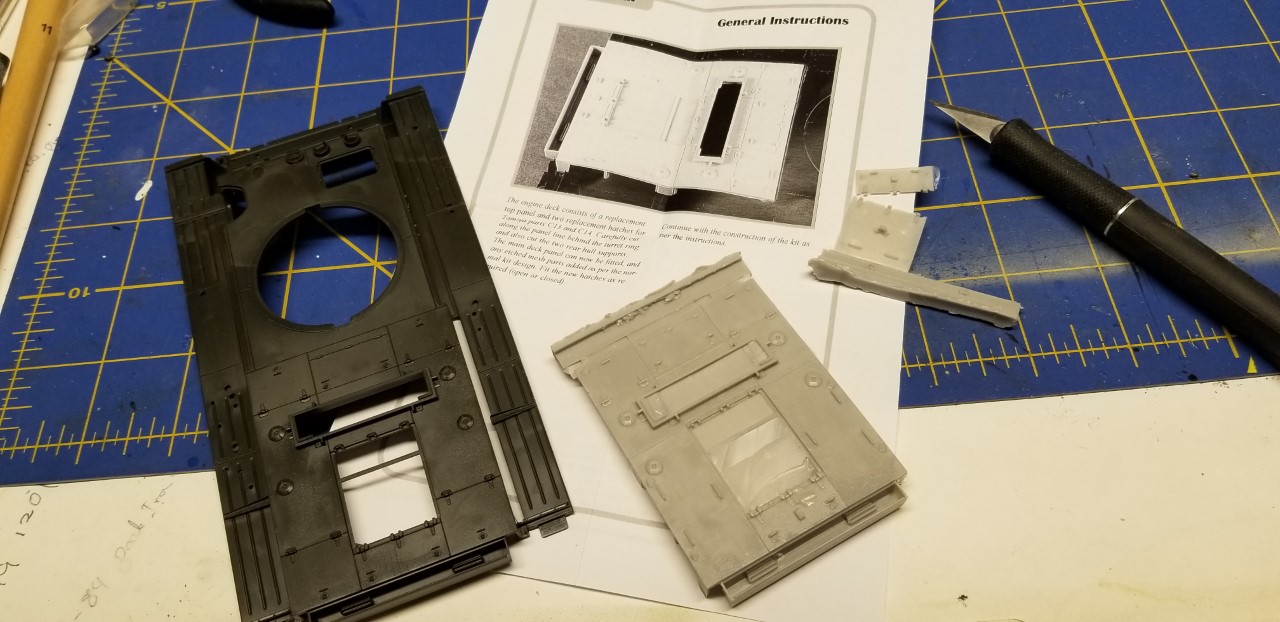
Make sure that when trimming the excess from the resin deck, leave the mounting tabs. ( edited: There will be a fit issue with the deck. The solution is simple but should be done now. The deck is too long. The easiest solution is to trim off a small piece off the front edge of the resin deck. It must be trimmed to the same length as the kit deck you are cutting off. Use some of the kits rear deck scraps to make new mounting lugs.)
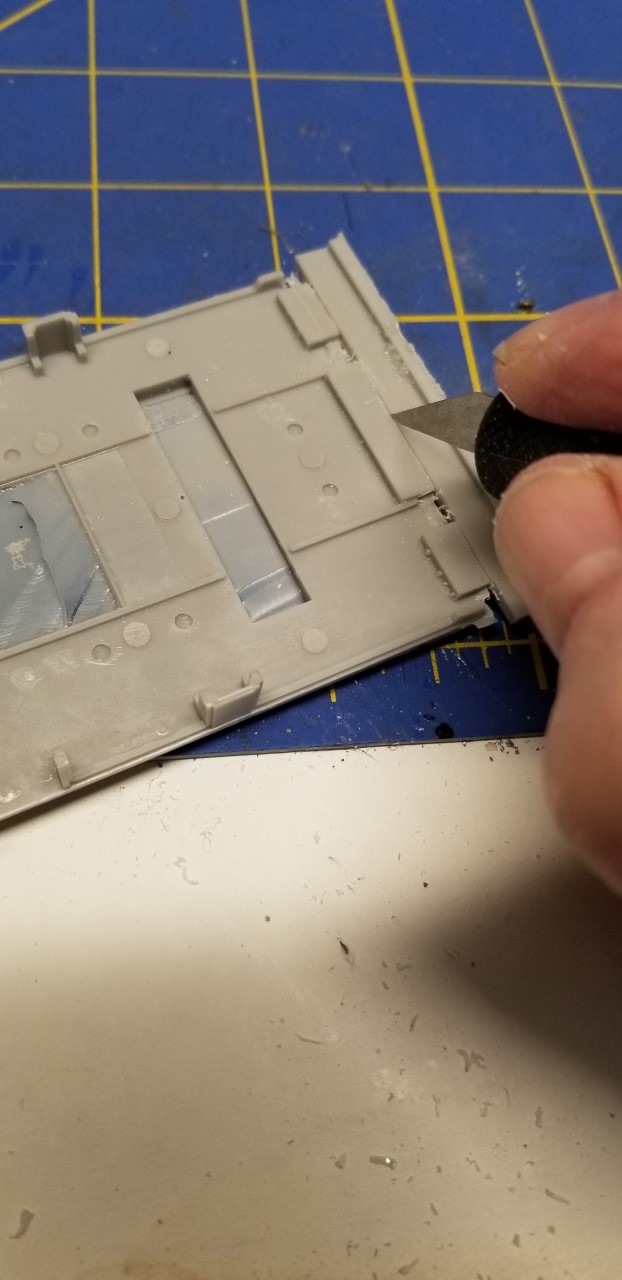
I trimmed out the Rear deck access doors and did a trial fit. The hinges did not align and the door was too narrow.
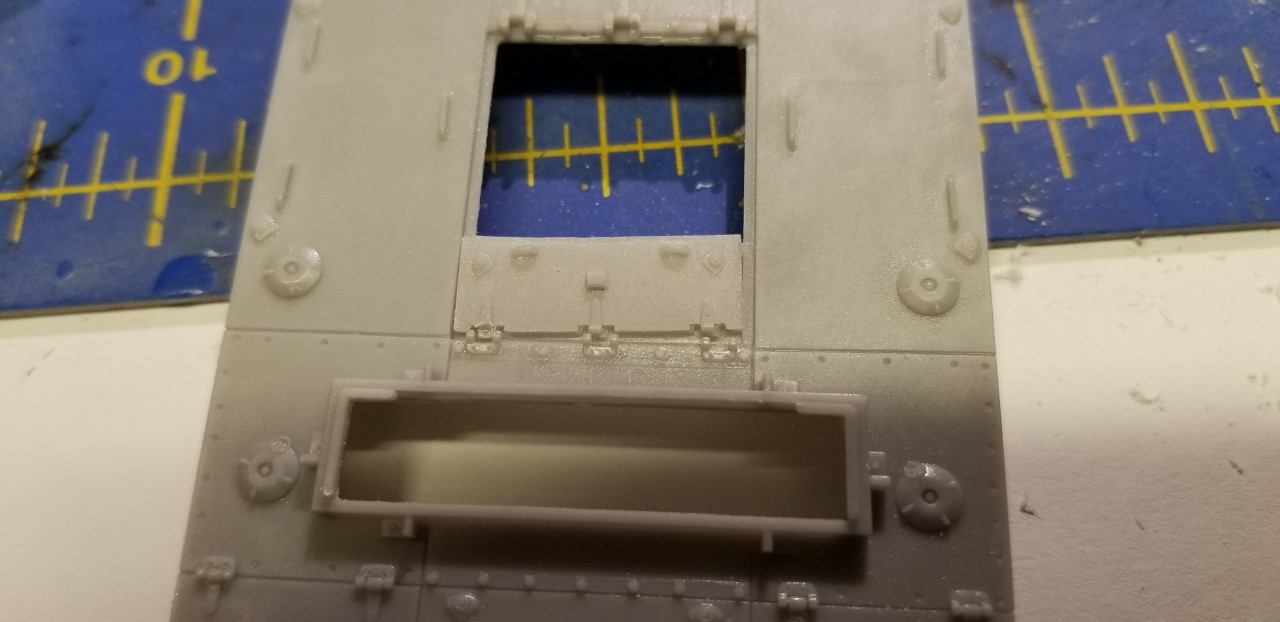
I trial fit the kit door and it was a perfect fit.
I repeated the process with the second door and again the hinges would not align and the door was too narrow.
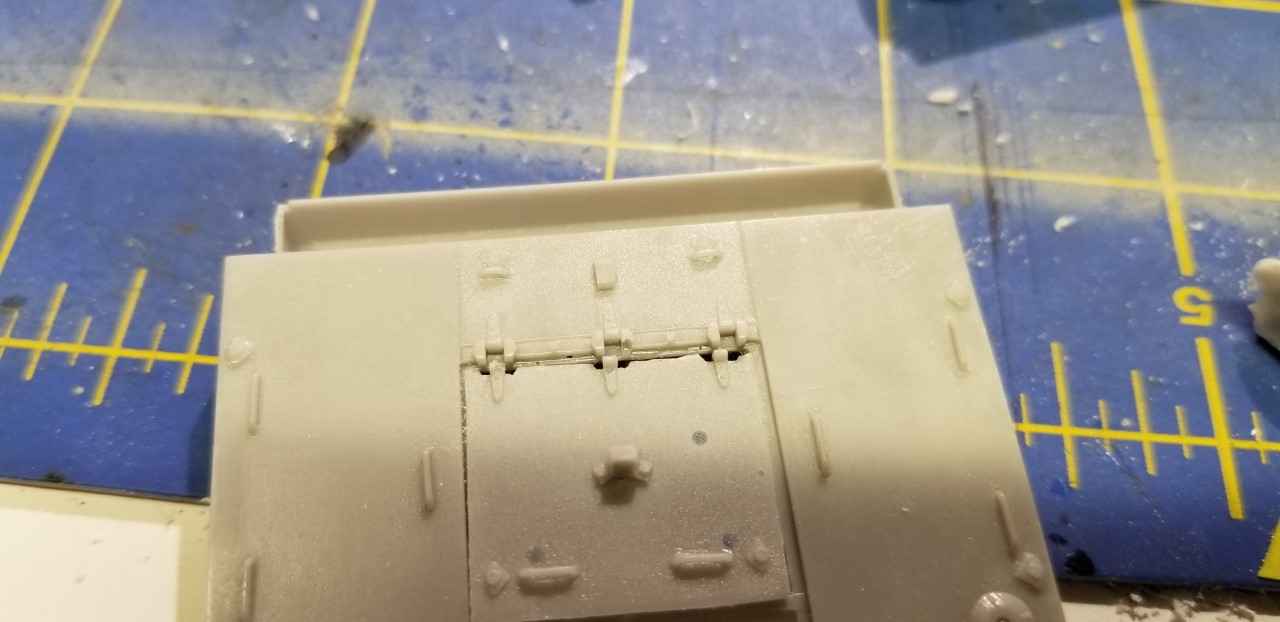
So I tried the kit part and all was well again.
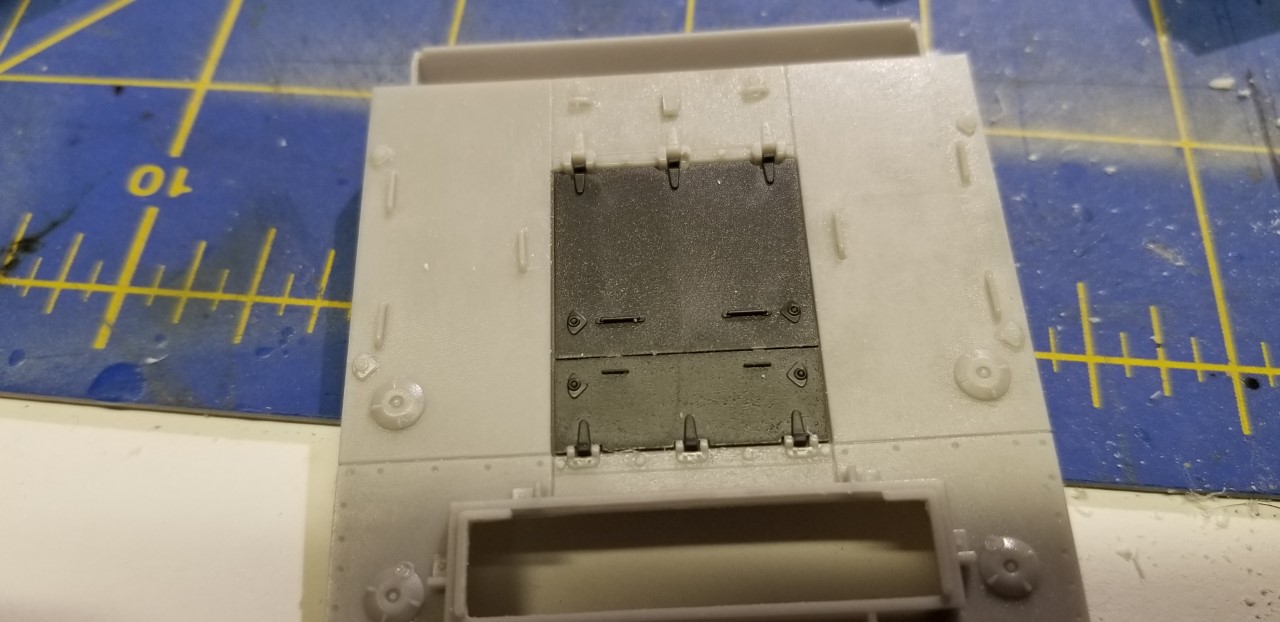
With that solved I glued the rear deck in.
Msgt Retired USMC
M48/ M60A1/ M1A1
Semper Fi!
barkingdigger
Associate Editor #013
England - East Anglia, United Kingdom
Joined: June 20, 2008
KitMaker: 3,981 posts
Armorama: 3,403 posts
Posted: Sunday, March 29, 2020 - 05:09 AM UTC
Parts B13 are covers for air intakes on the hull sides, so are open at the bottom.
If you haven't carved up the hull top yet you could avoid breaking up the structure by filling and scribing the plastic engine deck details to make a Type D arrangement rather than cutting it out to fit the resin deck. Oops - posted too late!
"Glue, or Glue Not - there is no Dry-Fit" - Yoda (original script from Return of the Jedi...)
Washington, United States
Joined: August 09, 2002
KitMaker: 1,742 posts
Armorama: 1,658 posts
Posted: Tuesday, March 31, 2020 - 10:54 AM UTC
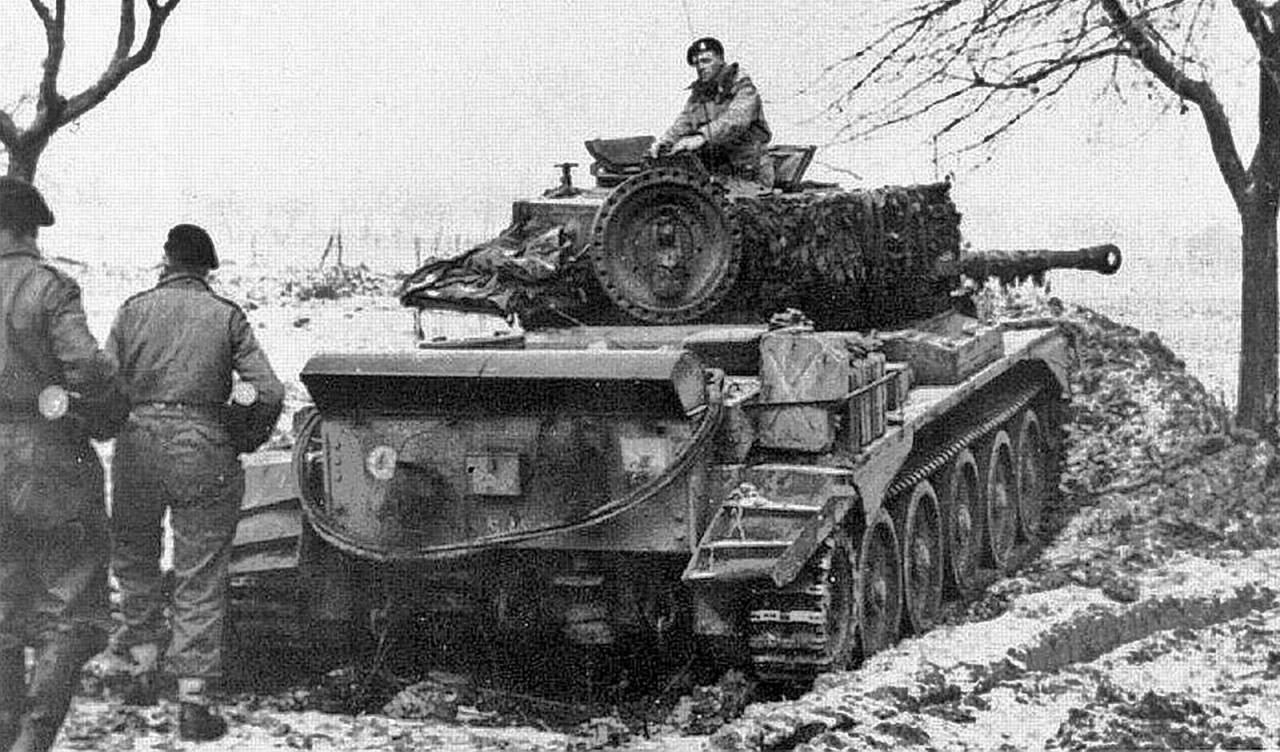
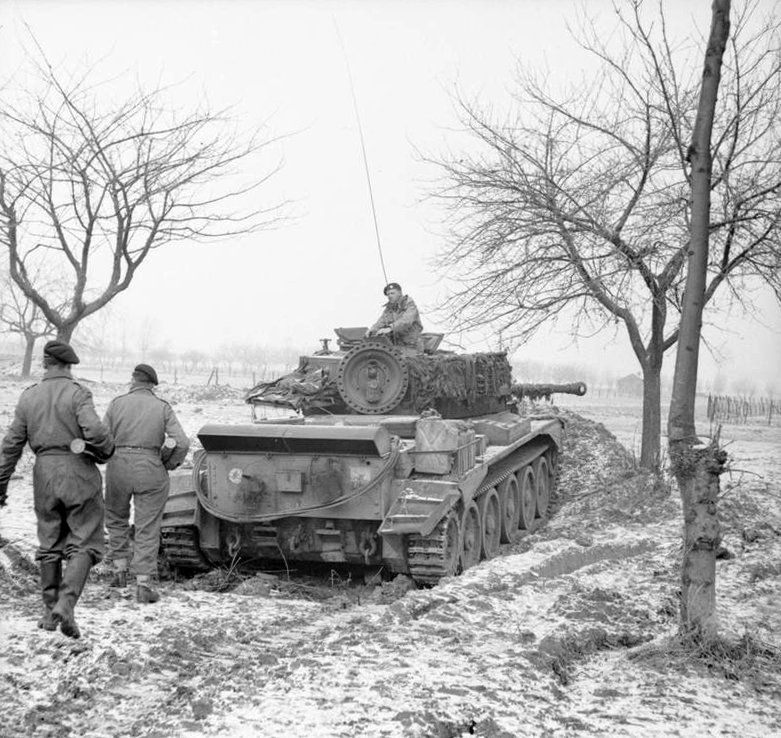
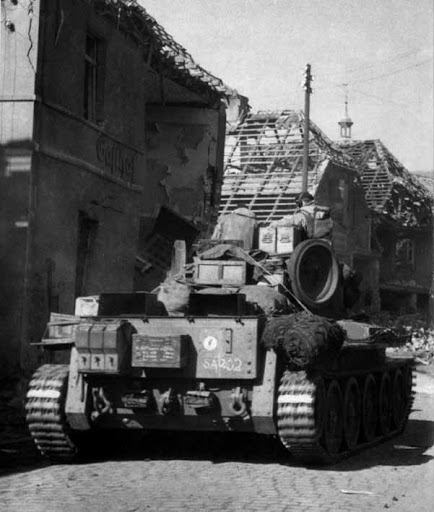
I want to find and install a spare roadwheel on the turret. I have several photo's but I can't identify what the attachment point is.
It sort of looks like one of the cone shaped rivits or bolts. Your thoughts?
Msgt Retired USMC
M48/ M60A1/ M1A1
Semper Fi!
barkingdigger
Associate Editor #013
England - East Anglia, United Kingdom
Joined: June 20, 2008
KitMaker: 3,981 posts
Armorama: 3,403 posts
Posted: Tuesday, March 31, 2020 - 11:03 AM UTC
I think it is just hung over the lifting tab in the rear corner of the turret - I can't see any actual fixing to hold it on other than gravity.
"Glue, or Glue Not - there is no Dry-Fit" - Yoda (original script from Return of the Jedi...)
Alberta, Canada
Joined: February 10, 2008
KitMaker: 221 posts
Armorama: 217 posts
Posted: Thursday, April 02, 2020 - 01:48 AM UTC
Hey Greg looking good so far. I have two of them in my stash so I'm following with interest. If you don't have the spare roadwheels yet, Ultracast make two really nice sets.
https://www.ultracast.ca Cheers
Todd
http://www.mvpa.org/
"Live, So That You May Live Forever".
Alberta, Canada
Joined: February 10, 2008
KitMaker: 221 posts
Armorama: 217 posts
Posted: Thursday, April 02, 2020 - 02:34 AM UTC
Oops Sorry Gary I just noticed in another thread that John Tapsell already passed on the Ultracast info.

Todd
http://www.mvpa.org/
"Live, So That You May Live Forever".
California, United States
Joined: February 01, 2010
KitMaker: 551 posts
Armorama: 543 posts
Posted: Thursday, April 02, 2020 - 03:46 AM UTC
I agree it appears to be using the rear lifting hook. Be advised you will need a little careful sanding to get the wheel to sit right. It will sit too high on the unmodified hook. I got my spare wheels from Panzerart as my spares boxes had nothing.


