

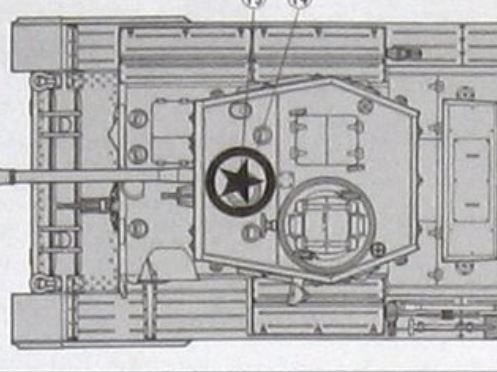
I am working on the white circle and star decal that goes on the roof of Tamiya's Cromwell. The circle went on perfectly. The Star came next and I placed it in the correct location and microsolved the star in. There is a prominent ventilator that the star has to mold around. As the star settled in, the points of the star pulled away from the circle. Because the ventilator is off set from center of the circle, the points are not equally distanced from the edge of the circle. A mess. So I removed the star and will have to repair the green paint under the star. The setting solution whitened the future that was under the star.
Now I admit this is my fault. The voice in the back of my head said "make a stencil" of the star and spray it on. I successfully overrode that thought and used the decal.
Now I have to make a stencil from scratch or order tamiya's decals and make a stencil from them.
Suggestions?
The outside diameter of the circle is 48/64ths and the inside diameter of the circle is 36/64ths. If you observe the star inside the circle, the 5 points are not exactly straight across the circle but off set somewhat making the distance point to point across the star less than the inside diameter of the circle.
I am positive that most everyone else that tried the decal had a similar issue.
Armor/AFV
For discussions on tanks, artillery, jeeps, etc.
For discussions on tanks, artillery, jeeps, etc.
Hosted by Darren Baker, Mario Matijasic
Help with a star decal

TopSmith

Joined: August 09, 2002
KitMaker: 1,742 posts
Armorama: 1,658 posts

Posted: Thursday, June 11, 2020 - 06:06 AM UTC

18Bravo
Joined: January 20, 2005
KitMaker: 7,219 posts
Armorama: 6,097 posts
Posted: Thursday, June 11, 2020 - 07:04 AM UTC
I'd be willing to bet that in real life they encountered a similar problem with their large stencil. But I feel your pain - I still mask off my invasion stripes nice and crisp whenever I do a plane that needs them, and we know they were far from perfect.
You can make the stencil easily enough by photo copying a star in the size you want and cutting it out with an X-Acto.
However, you might try another technique I developed - after making the photocopy, glue it to a piece of white decal paper with 3M Spray Mount. Cut out the star, remove the paper from the decal. Apply again as you did before, but this time tease the decal (the one tricky point of the star) out with a small brush. Lots of Solvaset will allow it to stretch fairly easily so it reaches the distance from the circle that you wannt.

RobinNilsson

Joined: November 29, 2006
KitMaker: 6,693 posts
Armorama: 5,562 posts
Posted: Thursday, June 11, 2020 - 08:16 AM UTC
My bet is on masking and painting. I think that ventilator is simply to big to be able to stretch the decal over it.
Draw a circle, make marks at 72 degree intervals (360 degrees divided by 5 points of the star = 72 degrees)
Cut out the inside of the circle to the same diameter as the inside of the white circle.
Tape the circle template on the turret to cover the white circle decal.
Connect the 5 marked points with very narrow strips of masking tape one at the time. Narrow strips are easier to coerce into making a straight line over a non flat surface. Use the edge of overlapping strips to cut (red lines) and remove the unwanted parts (black x-es) of underlying strips. For airbrushing: fill in the five segments (triangles with one curved edge) around the star with strips of masking tape. For hairbrushing: paint carefully inside the masked area.
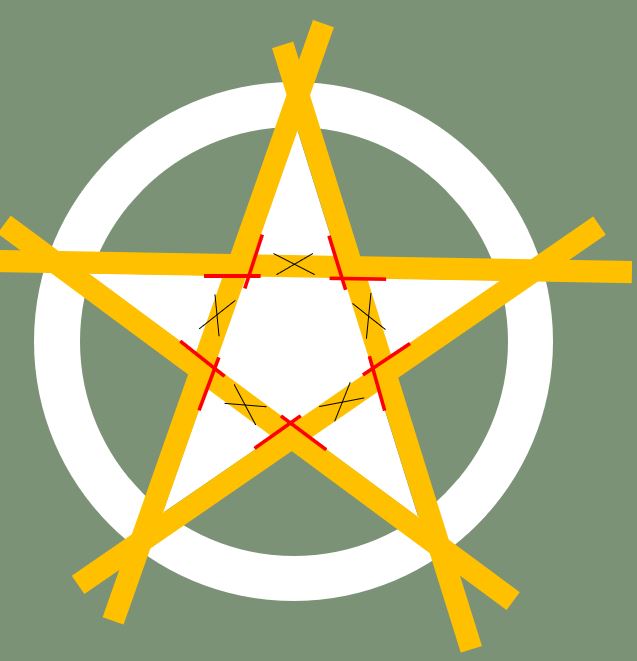
I cheated by choosing another marking option without that difficult star
/ Robin
Draw a circle, make marks at 72 degree intervals (360 degrees divided by 5 points of the star = 72 degrees)
Cut out the inside of the circle to the same diameter as the inside of the white circle.
Tape the circle template on the turret to cover the white circle decal.
Connect the 5 marked points with very narrow strips of masking tape one at the time. Narrow strips are easier to coerce into making a straight line over a non flat surface. Use the edge of overlapping strips to cut (red lines) and remove the unwanted parts (black x-es) of underlying strips. For airbrushing: fill in the five segments (triangles with one curved edge) around the star with strips of masking tape. For hairbrushing: paint carefully inside the masked area.
I cheated by choosing another marking option without that difficult star
/ Robin
18Bravo
Joined: January 20, 2005
KitMaker: 7,219 posts
Armorama: 6,097 posts
Posted: Thursday, June 11, 2020 - 08:59 AM UTC
Just as I am loathe to suggest someone's method won't work without trying it out for myself, I am equally loathe to suggest a method. without, uh trying it out for myself.
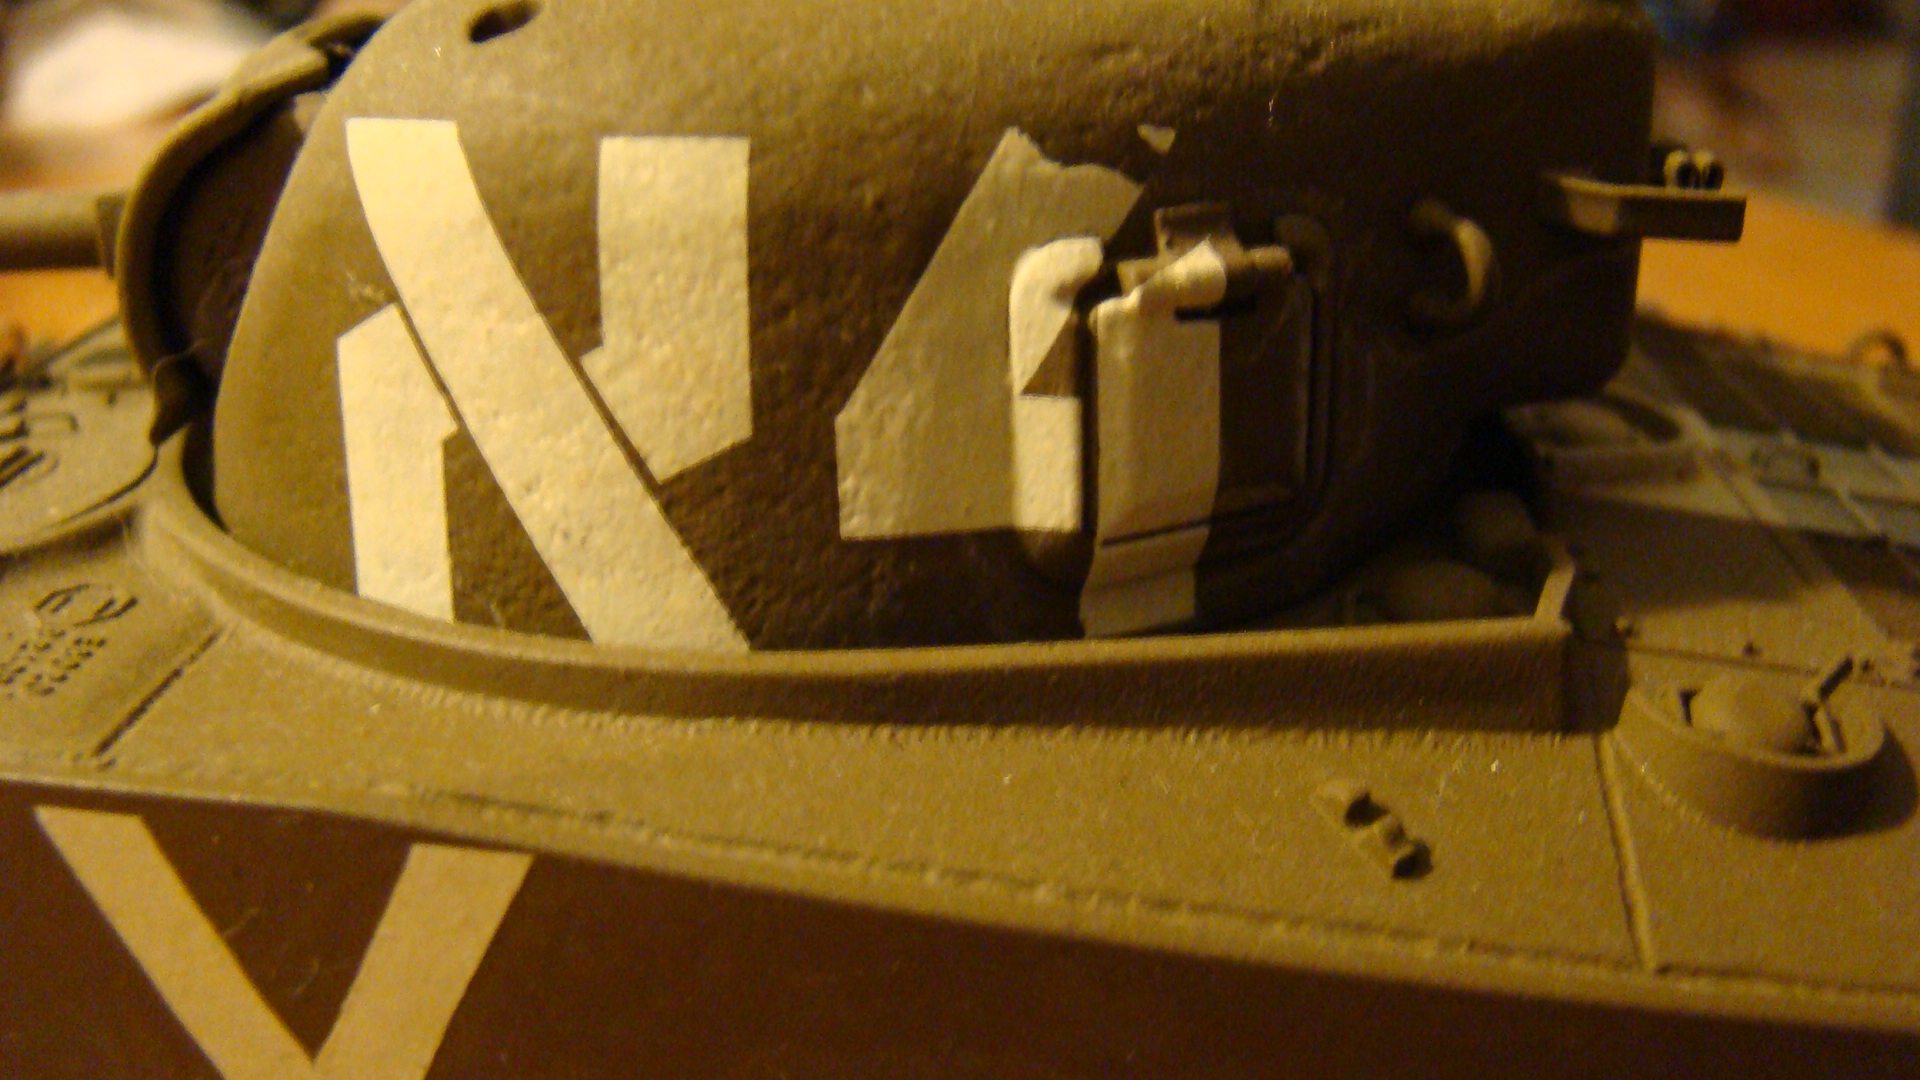
White decal fit very well around pistol port and raised numbers, with no perceptible distortion:
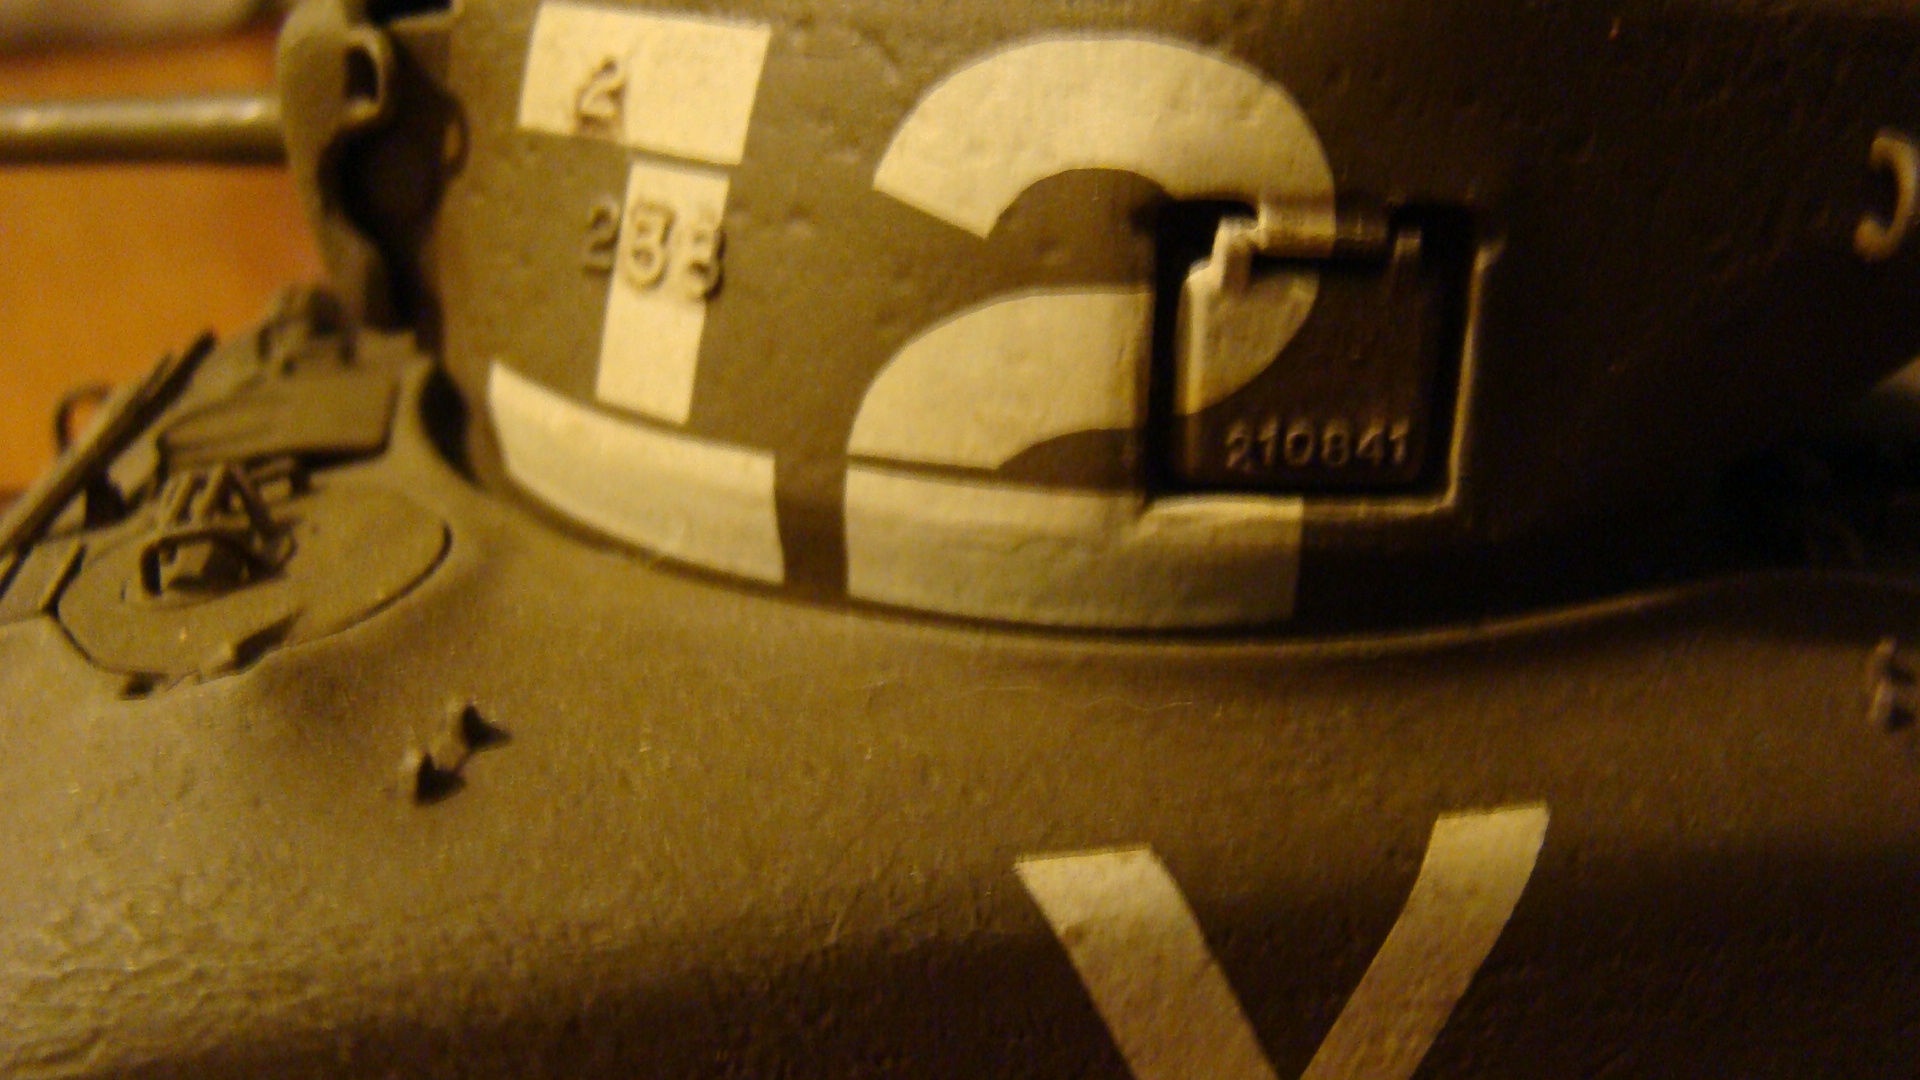
Same here with even more pistol port detail to work through, although top of "4" came off due to using too hot a thinner in weathering process. At least it shows it's a homemade decal and not paint.
Even works on cupola detail. Why bust out the airbrush if you don't need to? Plus I abhor painting with white paint:
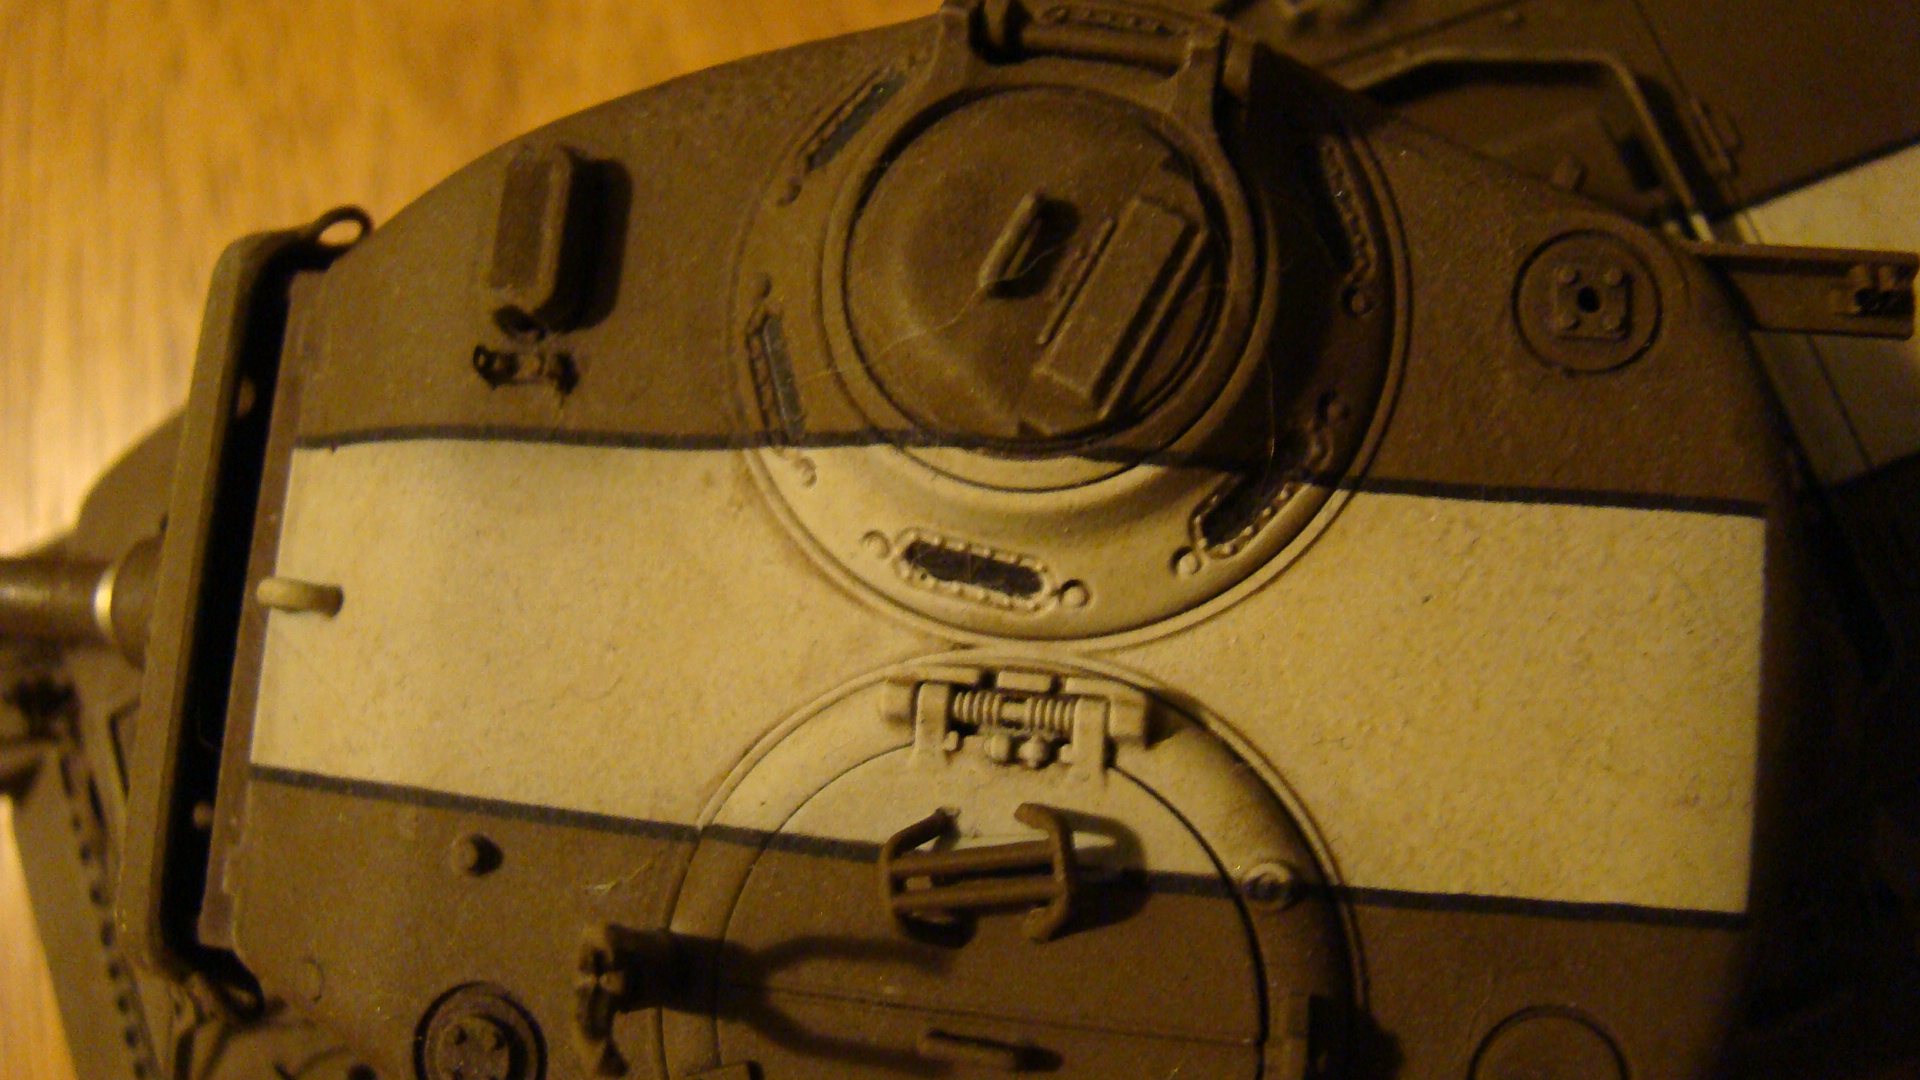
I think it may make a difference using decal stock from a company specializing in model railroading, as those decals generally have to go over surfaces not usually encountered in our world, i.e. large ribs and corrugations on hoppers, louvers on locomotive doors, etc.
White decal fit very well around pistol port and raised numbers, with no perceptible distortion:
Same here with even more pistol port detail to work through, although top of "4" came off due to using too hot a thinner in weathering process. At least it shows it's a homemade decal and not paint.
Even works on cupola detail. Why bust out the airbrush if you don't need to? Plus I abhor painting with white paint:
I think it may make a difference using decal stock from a company specializing in model railroading, as those decals generally have to go over surfaces not usually encountered in our world, i.e. large ribs and corrugations on hoppers, louvers on locomotive doors, etc.

salt6
Joined: February 17, 2002
KitMaker: 796 posts
Armorama: 574 posts
Posted: Thursday, June 11, 2020 - 04:47 PM UTC
Cut the decal into two parts. Cut out the portion for the ventilator. Apply the rest of the decal around the ventilator. Then the rest on top of the ventilator. Use your setting solution and touch up with paint.

Kevlar06

Joined: March 15, 2009
KitMaker: 3,670 posts
Armorama: 2,052 posts
Posted: Thursday, June 11, 2020 - 07:07 PM UTC
Quoted Text
Cut the decal into two parts. Cut out the portion for the ventilator. Apply the rest of the decal around the ventilator. Then the rest on top of the ventilator. Use your setting solution and touch up with paint.
Greg, I was facing the same thing with a Crocodile I built several years ago. I think I have some aftermarket circle/star decals around someplace, if youre running short, and I dont think we live to far from each other, which would make mailing them fairly easy if you need some but Ill need to look for them first. On another note, as I was doing research on my crocodile, I learned the real things were difficult to paint as well, and none of them looked perfect from all angles. I solved my problem using the technique posted above, and by nudging the decal in place with copious amounts of Solvaset.
VR, Russ

marcb

Joined: March 25, 2006
KitMaker: 1,244 posts
Armorama: 1,226 posts

Posted: Friday, June 12, 2020 - 07:35 AM UTC
Eduard makes stencils.
I'd first apply the star and then the circle.
I'd first apply the star and then the circle.

Hohenstaufen

Joined: December 13, 2004
KitMaker: 2,192 posts
Armorama: 1,615 posts

Posted: Friday, June 12, 2020 - 09:55 AM UTC
Quoted Text
I am positive that most everyone else that tried the decal had a similar issue.
Well I certainly did! I removed my model from the display cabinet to check what I did, as I remember it being a pain. It looks like I put on as much of the transfer as would go, then patched it up freehand with white paint. I also ran some dark grey into the details.
TopSmith
Joined: August 09, 2002
KitMaker: 1,742 posts
Armorama: 1,658 posts
Posted: Saturday, June 13, 2020 - 02:03 AM UTC
Thank you all. The circle is applied and in good shape...at this point. I used my compass and made a 36/64th circle on an old photograph. I found from my scratch building days that they make good stencils. Using Robin's idea, place 5 points on the circle 72 degrees apart, use a straight edge to "connect the dots" and cut it out. I tried this and was successful at making a star. Honestly, it looked better than I imagined. However, the kit I am working on has the ability to turn simplicity into complexity. As I placed the stencil, I noticed the difficulty in controlling the placement of the stencil because the points are an exact match for the inside of the circle so you sort of lose your reference points. I am going to make a second star  slightly larger so there will be a tiny overlap of the points onto the circle so I can have some reference points in centering the star.
For your reference, this sounds tricky but was quite easy and I did the star stencil to include cutting it out in 10 minutes. I would recommend this for medium to larger stars. The smaller the star the greater chance of error with clumsy fingers on the cutting out of the stencil.
slightly larger so there will be a tiny overlap of the points onto the circle so I can have some reference points in centering the star.For your reference, this sounds tricky but was quite easy and I did the star stencil to include cutting it out in 10 minutes. I would recommend this for medium to larger stars. The smaller the star the greater chance of error with clumsy fingers on the cutting out of the stencil.

Biggles2

Joined: January 01, 2004
KitMaker: 7,600 posts
Armorama: 6,110 posts

Posted: Saturday, June 13, 2020 - 03:58 AM UTC
Instead of trying to stretch the decal (if you still want to go the decal route) is when placing the decal, and there are prominent raised details in the way, is to use a SHARP blade and carefully slice into the corners where the decal is to sit. This will allow the decal to settle without distortion caused by stretching. Touch up with white paint.
RobinNilsson
Joined: November 29, 2006
KitMaker: 6,693 posts
Armorama: 5,562 posts
Posted: Saturday, June 13, 2020 - 04:37 AM UTC
Quoted Text
Thank you all. The circle is applied and in good shape...at this point. I used my compass and made a 36/64th circle on an old photograph. I found from my scratch building days that they make good stencils. Using Robin's idea, place 5 points on the circle 72 degrees apart, use a straight edge to "connect the dots" and cut it out. I tried this and was successful at making a star. Honestly, it looked better than I imagined. However, the kit I am working on has the ability to turn simplicity into complexity. As I placed the stencil, I noticed the difficulty in controlling the placement of the stencil because the points are an exact match for the inside of the circle so you sort of lose your reference points. I am going to make a second star
For your reference, this sounds tricky but was quite easy and I did the star stencil to include cutting it out in 10 minutes. I would recommend this for medium to larger stars. The smaller the star the greater chance of error with clumsy fingers on the cutting out of the stencil.
Umm ...
My suggestion was to make a circle with the 5 points marked.
Tape down the circle on the turret roof (on top of the decal circle).
Connect the points with narrow strips of masking tape, working on one strip at the time to get them straight when seen from above (perpendicular to the turret roof).
Mask of the 5 remaining segments outside of the strips,overlapping the narrow strips and out onto the circle.
Cut out the 5 middle bits of the narrow strips to create a complete mask.
I would not trust my skills to make a complete mask and make it fit over an uneven surface.
In theory, with an adequate 3D-model of the turret roof it could be possible to design a mask which, when applied over this uneven surface, generates a perfect star without distortion. In theory ....if pigs had wings ...
In practice: Cutting a flat mask and holding it down over an uneven surface will most likely distort it, for the same reasons as the flat decal doesn't work ...
/ Robin
RLlockie

Joined: September 06, 2013
KitMaker: 1,112 posts
Armorama: 938 posts
Posted: Saturday, June 13, 2020 - 05:26 AM UTC
Why do you think the turret roof was sometimes painted white? Maybe the squaddies decided that was easier than a star in a circle.... 😉
TopSmith
Joined: August 09, 2002
KitMaker: 1,742 posts
Armorama: 1,658 posts
Posted: Saturday, June 13, 2020 - 08:14 AM UTC
Ha!
Robin, you have the most accurate way, however, you have not witnessed my skill at applying an intricate shaped sticky item, like tape. I would have a small ball of tape in about 30 seconds. I plan on properly aligning the star then spray a light coat of white 90 degrees to the surface under low pressure from several inches out. This will transfer the star shape to the turret. I can then tape it off and finish painting it properly.
Robert, the white roof probably happened because the tanks were strafed even with the star by some overzealous pilot.
If it were my personal tank there would be two stars, one that covered the entire turret roof and one that covered the entire engine deck. I would look like a roving add for Tamiya.
Robin, you have the most accurate way, however, you have not witnessed my skill at applying an intricate shaped sticky item, like tape.
I would have a small ball of tape in about 30 seconds. I plan on properly aligning the star then spray a light coat of white 90 degrees to the surface under low pressure from several inches out. This will transfer the star shape to the turret. I can then tape it off and finish painting it properly. Robert, the white roof probably happened because the tanks were strafed even with the star by some overzealous pilot.
If it were my personal tank there would be two stars, one that covered the entire turret roof and one that covered the entire engine deck. I would look like a roving add for Tamiya.
RobinNilsson
Joined: November 29, 2006
KitMaker: 6,693 posts
Armorama: 5,562 posts
Posted: Saturday, June 13, 2020 - 08:58 AM UTC
Make a photo report of your progress 
I am certain that many of us are interested in seeing if it works, there is one of these in my future as well, not to mention other kits with similar "issues" (kits with special needs?)
Cheers / Robin
I am certain that many of us are interested in seeing if it works, there is one of these in my future as well, not to mention other kits with similar "issues" (kits with special needs?)
Cheers / Robin
 |

WEB HOSTING BY


Copyright ©2021 Armorama and Kitmaker Network, a subsidiary of Silver Star Enterprises
All Rights Reserved. Please read our Conditions of Use and Privacy Policy.
All Rights Reserved. Please read our Conditions of Use and Privacy Policy.