_GOTOBOTTOM
Armor/AFV: Group Builds
Build a model with your online buddies!
Hosted by Darren Baker
My Basic Traning Academy M1025 WIP
DeskJockey
Visit this Community
Virginia, United States
Joined: July 17, 2006
KitMaker: 1,558 posts
Armorama: 1,159 posts
Posted: Wednesday, September 06, 2006 - 05:30 AM UTC
Well, here is my reply to Henk's call to action. My contribution to this group build is an Academy M1025 Humvee I'm using to bring my skills back up to speed after a ten-year hiatus from modeling. Henk has already covered most of the basic assembly steps in his thread, so I'll fill in some details regarding parts preparation. Here is a picture of how I filled the many ejector pin marks that marred the surface of my kit.


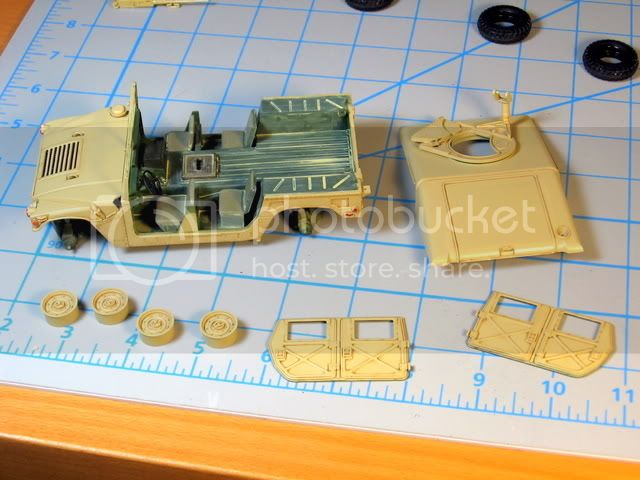
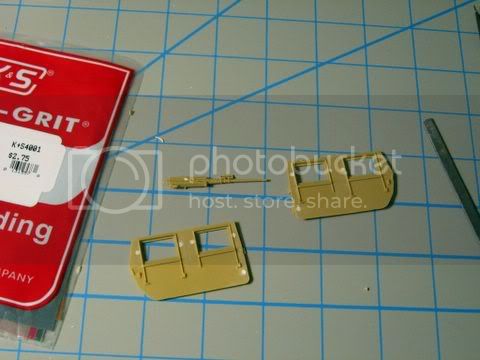
You will notice that some pin marks are in incovenvenient or inaccessible areas that could force you to choose between sanding away some detail or leaving the pin mark visible. On this kit I chose to fill the pin marks on the interior of the humvee if they would be visible, but to try to save as much detail as possible by carefully sanding with needle files or small bits of emery sticks. In four cases the ejector pins had left a deep mark on the door frame right where the raised window detail is. I used putty to build up the pin mark until it was above the raised detail on the door frame, then set it aside for a day or two to dry. I then came back and carefully filed the putty down so that the window frame outline was restored. You can see these four areas in my picture.

I had much the same problem with a pin mark on the M2 50 cal. That one took a lot of patience, and even then I managed to obliterate several raised details.

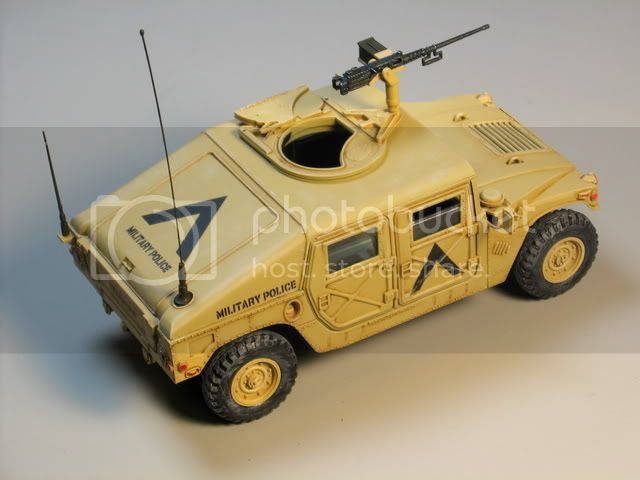
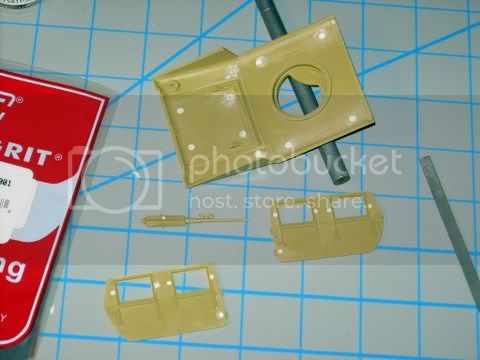
This next picture shows the Humvee's roof and rear hatch, where I had to perform much the same procedure.


Well, that's it for now. I've built up all of the main subassemblies (chasis, roof, doors) and will be painting the interior next. Once I do that, I'll join several subassemblies and paint the exterior. We'll see how it goes.
blackeast19
Visit this Community
Singapore / 新加坡
Joined: February 22, 2005
KitMaker: 394 posts
Armorama: 217 posts
Posted: Thursday, September 07, 2006 - 05:58 PM UTC
Hi,

That is the common problem with Academy`s kits.like U,
I used to use putty but later tried using some of the spruce for deeper marks.Tough job but keep it going, cant wait to see the progress.Cheers!

DeskJockey
Visit this Community
Virginia, United States
Joined: July 17, 2006
KitMaker: 1,558 posts
Armorama: 1,159 posts
Posted: Sunday, September 10, 2006 - 12:23 AM UTC
Painting the Interior

I tried to brush paint my Humvee's interior this week, and the results were, to put it kindly, not good. Thankfully, I tried it out first on the inside of the hood, where the damage could be contained. As a result, I decided to use a rattle can instead (Tamiya's NATO green). Here's my writeup of what I did.

The first step for me was paint preparation. I washed all subassemblies and parts in water with mild detergent to get rid of sanding dust, finger oils, and mold-release agents. I simply filled up a big Tupperware container with lukewarm water and some dishwashing soap, then submerged all the parts and lightly scrubbed them with a soft brush. I then allowed them to air dry for a day or so.

After washing the parts and letting them dry, I proceeded to mask areas that should not be painted. I masked as many attachment points as I could think of using rubber cement (you can easily rub it off when the paint is dry), and used masking tape to mask large, flat areas. As this was the first time I've masked a model in a long time, I made several mistakes. For one, I forgot to mask some attachment points, including the areas where the seats will be glued to the body. I also didn't do a good job masking a few areas on the body, and got some overspray.

Here's a picture of the painted parts with most masks still in place.


Another mistake I made with the rattle can was to linger too long over some areas as I painted. As a result, I got significant paint buildup in the chasis. At least with this particular Tamiya spray can, this resulted in a few areas acquiring a copper-colored metallic sheen. If you look at the above picture closely, you'll notice this problem on the front passanger side wheel attachment point. Thankfully, the areas with paint buildup won't be visible once the model is finished.

In hindsight, I should have left the frame separate from the body for ease of painting. I also shouldn't have gone the lazy route and painted the frame and the entire underside NATO green. This frame should be black, and several of the components visible on the underside have their own colors. I may go back and paint a couple of these areas, but since this will be a "curbside" model, I'm tempted to leave it as is.

Next up will be the assembly of most of the vehicle and the final paint prep for the overall sand color scheme.
DeskJockey
Visit this Community
Virginia, United States
Joined: July 17, 2006
KitMaker: 1,558 posts
Armorama: 1,159 posts
Posted: Saturday, October 14, 2006 - 09:09 AM UTC
Unfortunately, it's been a while since I last worked on my Humvee (work, life, and a USMC M60A1 with ERA have gotten in the way), but I finally got around to it again today. One of the reasons I set this kit aside was because I was unsure about how to tackle spraypainting it with a rattle can: should I build up the interior and mask off the windows? Should I mask the individual subassemblies and then assemble it?

I ended up deciding on a hybrid method that I hope will work well. I've left the interior largely unbuilt, masked it and the underside, and assembled the major subassemblies with white glue and painter's tape. This should allow me to paint the exterior without worrying about overspray marring the finished interior. I should then be able to disassemble everything, install the interior details, and reassemble the finished product. Tomorrow I'll put my masking skills to the test to see how it goes. Here are some pictures of how the Humvee looks right now.


DeskJockey
Visit this Community
Virginia, United States
Joined: July 17, 2006
KitMaker: 1,558 posts
Armorama: 1,159 posts
Posted: Saturday, November 04, 2006 - 07:30 AM UTC
I've made slow but steady progress on my Humvee. Experior painting went well with the rattle can (Tamiya Light Sand), and I've painted interior detail and used washes on both the interior and exterior. For the interior wash, I mixed some yellow ochre and titanium white oil paints (about 1 to1) and diluted them with mineral spirits to simulate sand dragged into the vehicle with a wash. I slathered it throughout the interior, making sure to pool quite a bit of it on the floors in uneven patches. I like the look of it--what do you folks think?


I also used a burnt umber oil wash on the exterior, diluting the paint until it was the consistency of strong coffee. I decided to use washes at this stage since it was easier to keep most surfaces horizontal for a good distrubution of the wash and to avoid pooling.

Next up, I'll be decaling, finishing assembly, and weathering further. I hope to be done within the month.
jlmurc
Visit this Community
England - East Anglia, United Kingdom
Joined: August 29, 2005
KitMaker: 1,267 posts
Armorama: 969 posts
Posted: Saturday, November 04, 2006 - 05:41 PM UTC
Looks good Lucas and I am sure it will turn out really well from the excellent start that you have made. I have one small suggestion. How about a small investment in some sand coloured pigments either Mig or the other main manufacturer whos name escapes me at this time, as it will add a great deal to your weathering, especially of the sand dragged in on the boots of the occupants, or that that just drifts in as vehicles move and the wind blows.

Just a small thought for you to contemplate.

John
DeskJockey
Visit this Community
Virginia, United States
Joined: July 17, 2006
KitMaker: 1,558 posts
Armorama: 1,159 posts
Posted: Sunday, November 19, 2006 - 07:50 AM UTC
John--Thanks for the tip. I'm leaving pigments for a future build. I want to get my basic skills back up to snuff before tackling resin, PE, pigments, and pre- and post-shading. I hope to make the leap next year. Right now I just ogle the astounding weathering jobs others are doing with pigments.

On a different note, I've finally finished my M1025. Here it is in all of its (very modest) glory. The only non-OOB element is the antenna--I used guitar string with a dollop of white glue for the ball at the tip. The decals on the doors were a pain to apply, even with Solvaset to help them conform. After 10 or so applications of Solvaset, they still refused to snuggle down. I had to use a cotton swab to press them down against the detail, shattering them in the process. I then had to go back with black paint and fill in where the decal had split and the paint was showing through. I applied an oil wash and lightly drybrushed the model to break up the monotone color.


I can't say that I loved the Academy kit, as it has many quirks and fit problems, but it was still a fun build nonetheless. I'm looking forward to building the two Tamiya Humvees in my stash at some point. Let me know what you all think!
sauceman
Visit this Community
Ontario, Canada
Joined: September 28, 2006
KitMaker: 2,672 posts
Armorama: 2,475 posts
Posted: Sunday, November 19, 2006 - 07:59 AM UTC
Nice job!

I do prefer the subtle weathering, you get to see more of the detail.

cheers
HeavyArty
Visit this Community
Florida, United States
Joined: May 16, 2002
KitMaker: 17,694 posts
Armorama: 13,742 posts
Posted: Sunday, November 19, 2006 - 08:03 AM UTC
Looks pretty good. Only thing I would add is that the bar across the tops of the open front door windows should be either sand or green. There is a metal strip across the top of the glass to protect the edge from chipping.

I like the weathering as well. Good job.
troubble27
Visit this Community
New Jersey, United States
Joined: October 10, 2003
KitMaker: 783 posts
Armorama: 637 posts
Posted: Sunday, November 19, 2006 - 07:31 PM UTC
Hey Lucas, your humvee looks great! I like the oil wash. Which color did you use? It looks very well done. Not too dark, not too light. The Tamiya Humvees are a lot better then the Academy ones. I have built a couple of Academy kits, and while they are good, the Tamiya Humvees tend to go together better, and have better details. From the looks of this one, youve DEFINITELY passed basic training! Get yourself and Eduard Photo etch set for the Tamiya ones in your stash. Its a lot of work, but if you have patience and arent in a rush to finish one, the little details really make the model come alive. Again, great job!
troubble27
Visit this Community
New Jersey, United States
Joined: October 10, 2003
KitMaker: 783 posts
Armorama: 637 posts
Posted: Sunday, November 19, 2006 - 07:39 PM UTC
Lucas, I almost forgot, the next time you have problems with decals like that, here is a solution for you. Dont use the decals at all. Go get yourself some of those vinyl peel and stick letters that are used for making signs and such. What you do is cut out the letters or characters you need to use, peel the letter itself out, then use the background as a stencil. Place your stick on stencil where you want it, then tape off the rest of the area and paint in the stencil area, and bingo, your done. I recently had to use this technique where I needed a white colored #3 that I didnt have in my decal collection. IN your case, you would have used a letter "V" upside down. This is what it looks like when done....................

PvtMutt
Visit this Community
Missouri, United States
Joined: July 01, 2006
KitMaker: 614 posts
Armorama: 601 posts
Posted: Sunday, November 19, 2006 - 09:24 PM UTC

Lucas,i've got to admit,at first I had my doubts
but you've done a very nice job of pulling this
model togeather.

I've already started on my first tank kit and i'm
going whole hog. Times awastein so jump in,
the waters fine.

...Tony...
DeskJockey
Visit this Community
Virginia, United States
Joined: July 17, 2006
KitMaker: 1,558 posts
Armorama: 1,159 posts
Posted: Monday, November 20, 2006 - 05:28 AM UTC
Thanks guys. I appreciate the comments and suggestions.

Gino--thanks for the tip on the metal bar. I was wondering why the windows had a molded lip on the top. I'll paint it on.

Gary--the wash is raw umber oil paint diluted in mineral spirits until it looks like strong coffee. Thanks for the tip on the vinyl numbers and letters, by the way. I'll probably use that for large tactical markings once I get my airbrush (here's to hoping the wife gets me one for Christmas!).

Tony--I've also gone ahead and started a tank--a Marines ODS M60A1. I've got it 95% finished and will post pictures of it tonight, if I have time.
Henk
Visit this Community
England - South West, United Kingdom
Joined: August 07, 2004
KitMaker: 6,391 posts
Armorama: 4,258 posts
Posted: Monday, November 20, 2006 - 05:56 AM UTC
Hi Lucas, appologies for not having caught your build earlier, but I agree that you did a splendid job. I really like the restraint but effective weathering.
"..like strong coffee.." I like tha analogie, but like "thinning paint to the consistency of milk..", it will be open to debate. :-) My version of strong coffee (i.e. the coffee that I drink) dissolves the spoon if left in the cup to long.. But on the other hand, the coffee prut makes a great mud.

Looking forward to your next build, and thanks for persevering with the group build.

Cheers
Henk
 _GOTOTOP