Introduction
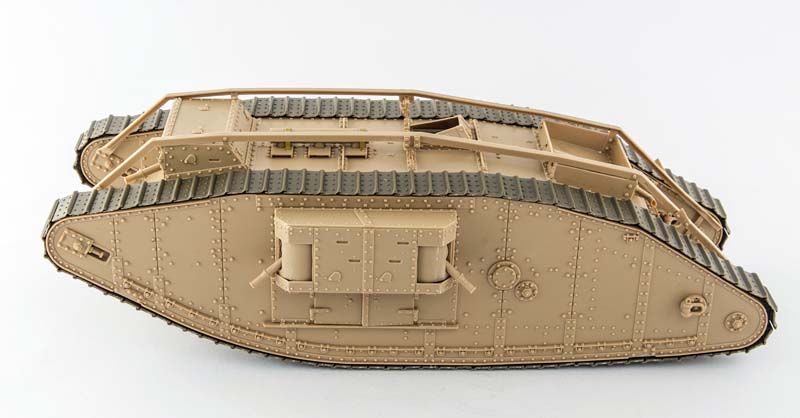
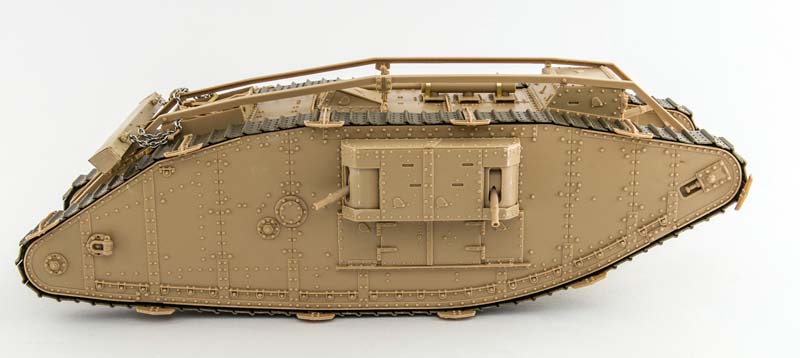
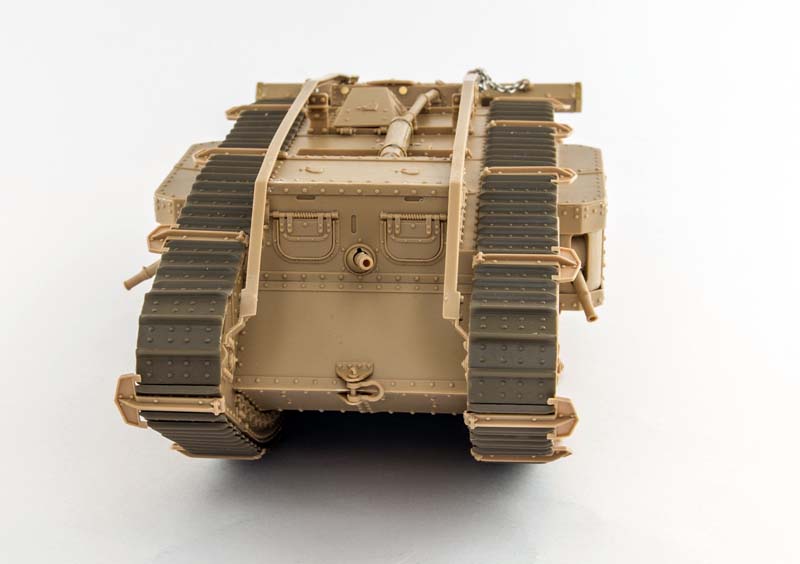
Great Britain had the very first tanks to enter combat. In 1916, the rhomboid shaped Mark I was deployed to battlefield and its primary goal was to cross trenches, cut the barbered wire and clear the road for the infantry. A year after, Mark IV, an up-armoured version of Mark I went into production and it had better protection, an unditching beam, and a fuel tank located in the rear. In total 1200 were made including 420 Males, 595 Females and unarmed supply carriers. The Male tank had two 6pdr guns located in side sponsons in addition to 3 Lewis machine guns, while the Female had 5 machine guns.
These tanks made considerable contribution to the British offensive operations; however, on the swampy and muddy ground they could be easily immobilized and destroyed by German artillery. Due to that, 40 Mark IVs were captured, repainted and used against its former owners.
For years WW1 subjects were ignored by major modelling companies while there was large hope that in 2014, marking the 100-year anniversary of the beginning of the First World War there will be something. First, an Ft-17 from Meng, then a St. Chamond from
Takom and it became obvious that a Mark IV is somewhere in the works. Suddenly, as often happens in the modelling world nowadays two manufacturers announced the same kit, Tamiya and
Takom. While with Tamiya it was clear that it is going to be shake-and-bake kit (although many were suspicious regarding the motorized version) the
Takom looked more detailed on the CAD images. Moreover, I am familiar with a person who was providing
Takom with materials for that project and he promised that the model would be as accurate as possible. Lets see what we finally got!
The kit
The large cardboard box is around 1 kg heavy due to the many sprues inside. These include beige plastic parts for tank itself (8 sprues) and around 1000 parts for the tracks (on 5 sprues), a small photo-etched fret, chain for the unditching beam, a thick assembly manual and a decal sheet. All sprues are packed in individual plastic bags and at the first glance the quality of moulding looks superb, without ugly pin marks or other defects.
The build
The very first thing that I noted at the beginning of the build is that the plastic is rather soft and it is easy to damage it during sanding and cutting. The second super thin Tamiya glue was not that effective and I had to wait considerable amount of time until the connections finally cured.
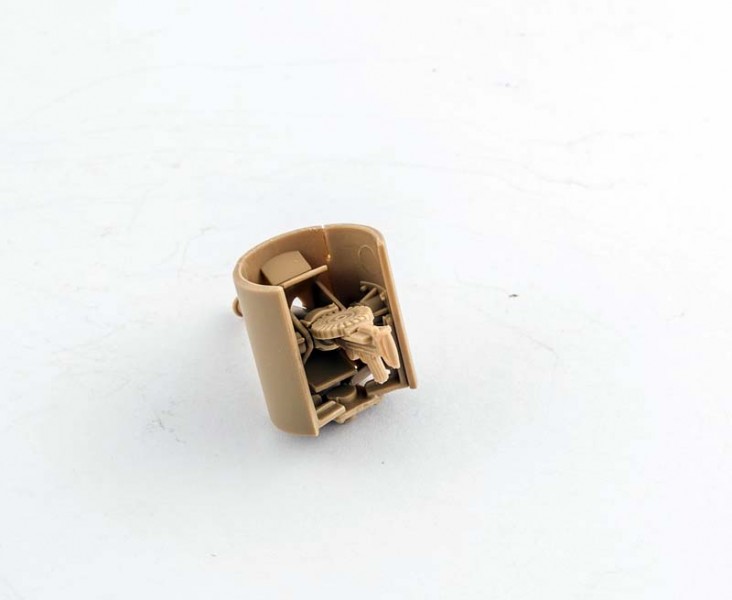
The assembly process starts with the front armour plate and it has a Lewis machine gun in a ball mount together with 2 visor hatches. The Lewis machine gun has a separate ammo magazine which would not be visible after assembly (true for all of the machine guns) and can be left for other projects if desired. The fit between the machine guns body and ball mount (part E25) is rather loose and it is best to glue them together, although leaving the ball mount itself unglued to parts D22 and E21 ensures that it is movable after assembly. Otherwise there is no internal detail in the front compartment should you wish to open the visor hatches. Be careful with alignment of the front compartment walls.
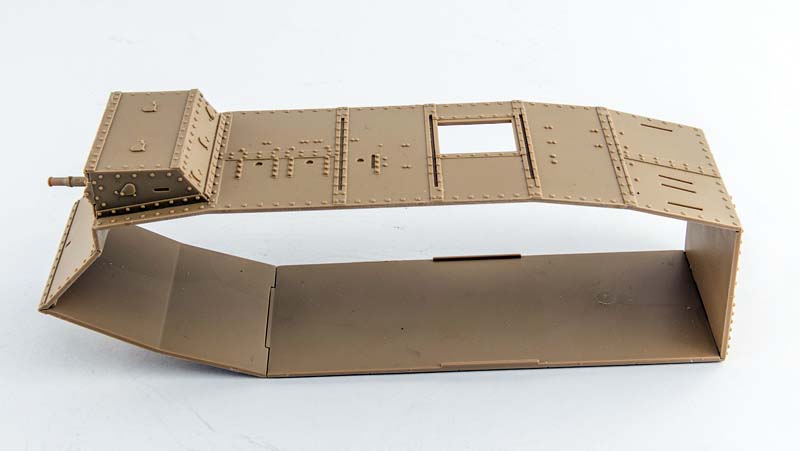
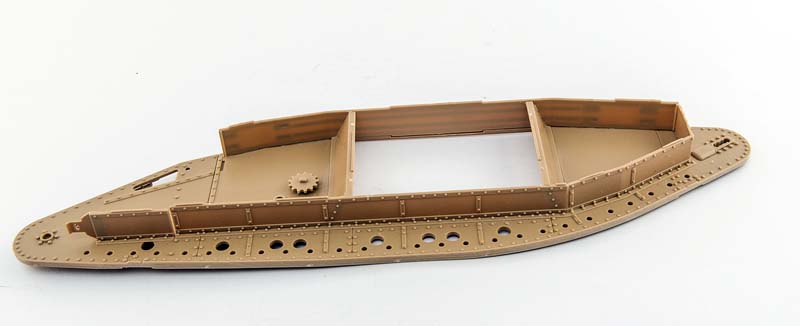
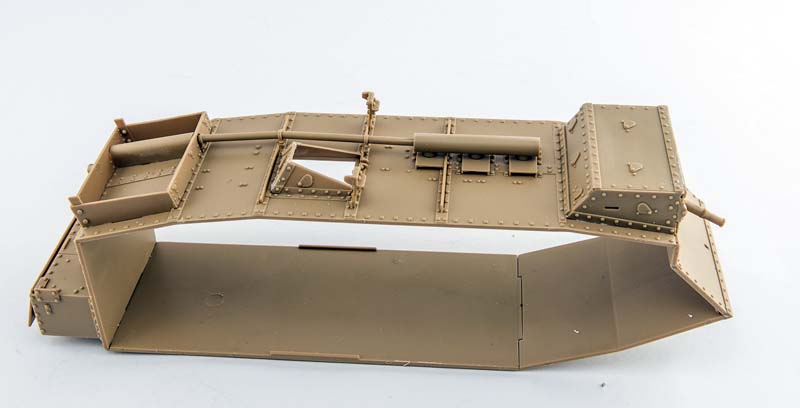
The main hull is then built of 6 parts plus the front compartment from the previous step and it is much easier to align these hull parts when using side hull parts as template to ensure the correct alignment of the main hull body. On the roof of the main hull the exhaust is attached as well as some of the supports for the unditching beam rail. Muffler parts E31 and E30 have a joint that must be filled.
At this step the top rear view hatch is assembled and installed as well and unfortunately it is a bit too narrow meaning that the angles of the hatch walls are incorrect too. There is an excellent example in an Armorama forum thread of how the hatch from Tamiya kit can be copied, but this of course depends on the skills of the modeller. Maybe there will be an aftermarket hatch or some kind of correction from
Takom in the future?
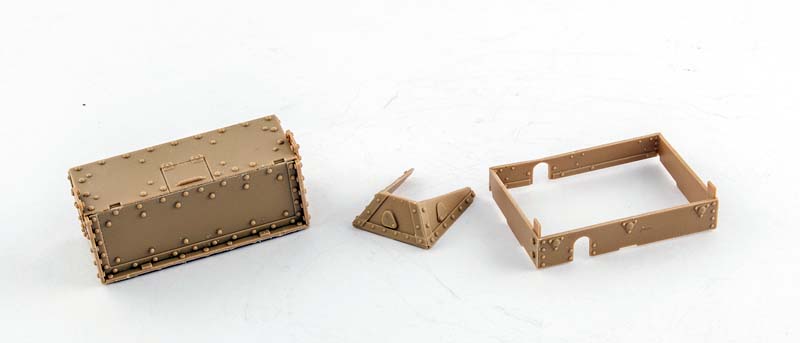
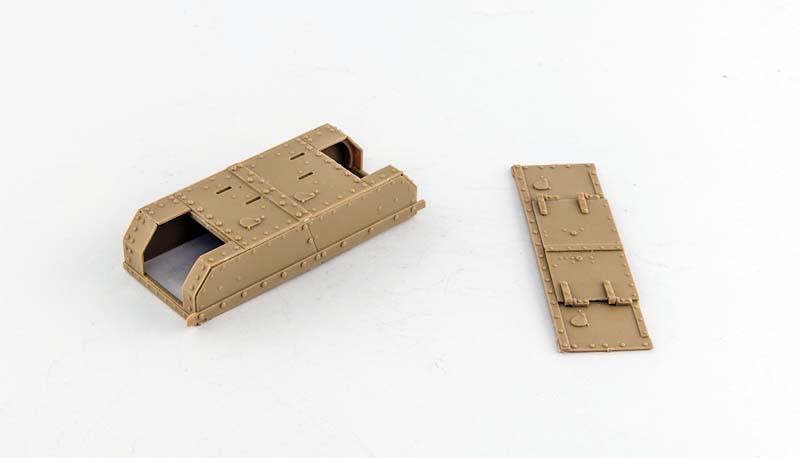
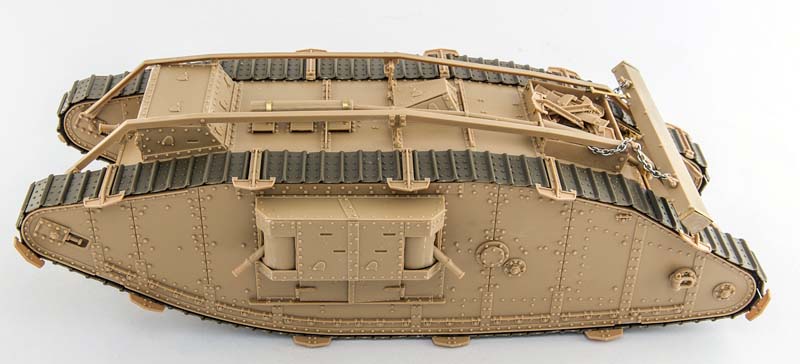
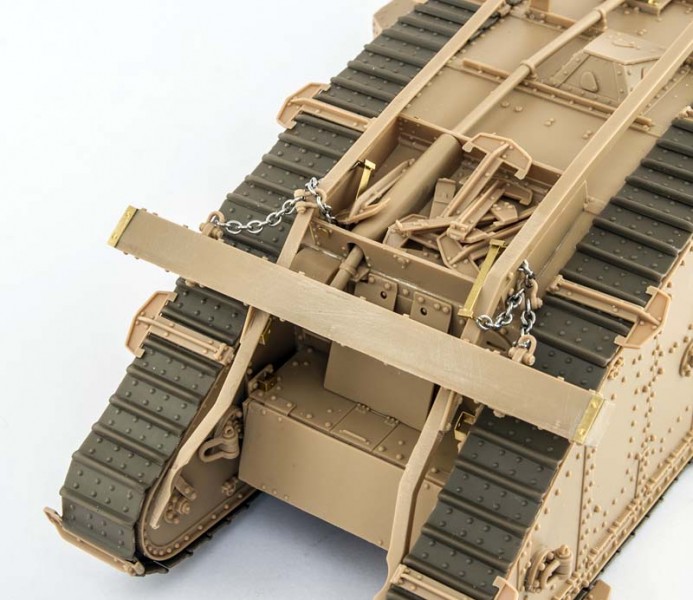
After the exhaust system is installed on the roof, the roof stowage box is assembled (these were used for track grousers or other items). Another prominent feature of the hull the rear fuel tank is assembled without any issues and has nice bolt detail all around. The handle on part D3 can be replaced with wire if desired for better appearance.
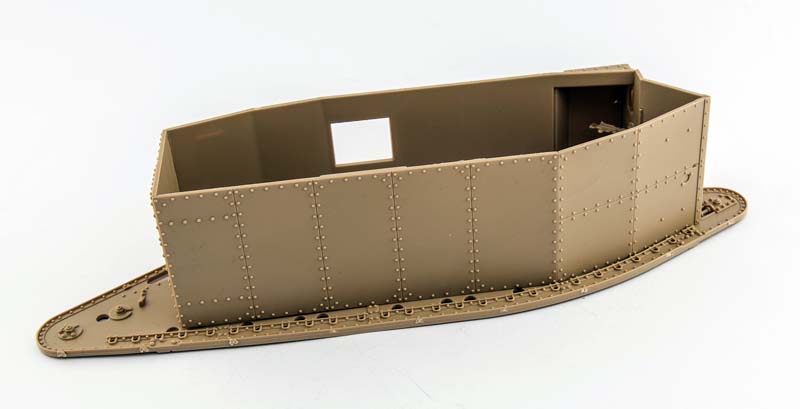
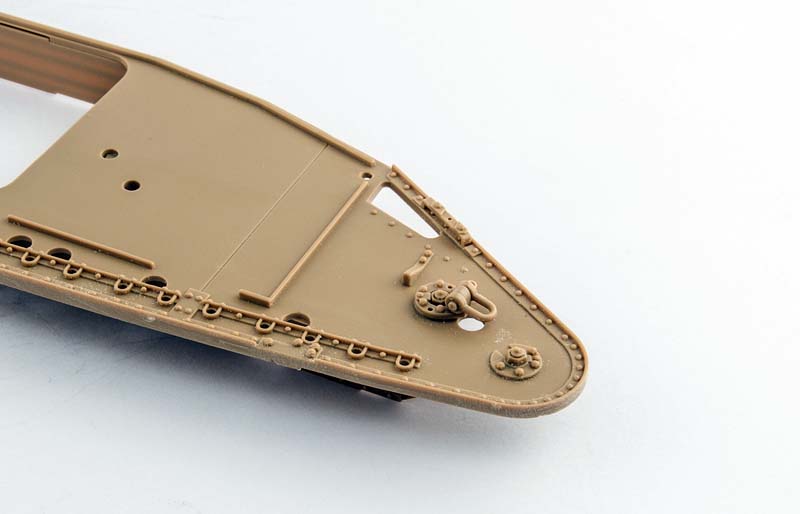
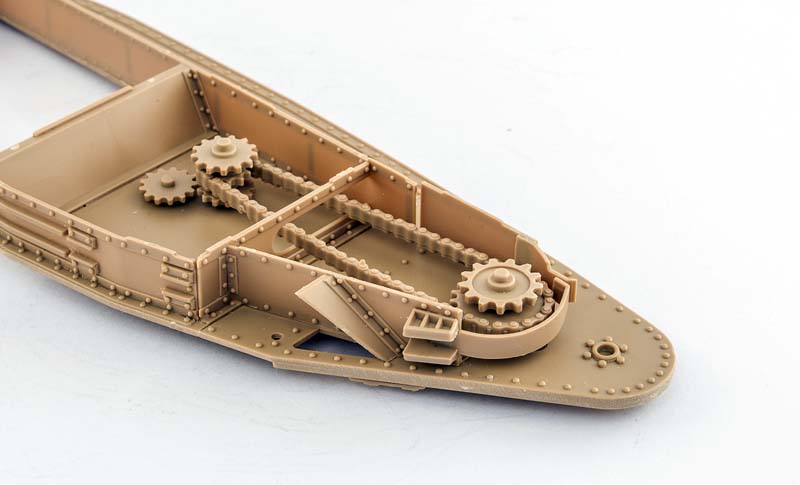
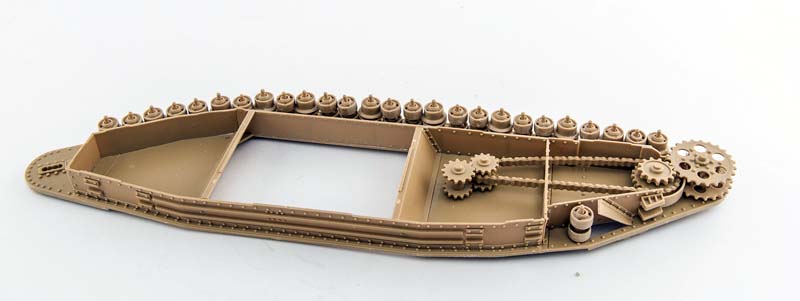
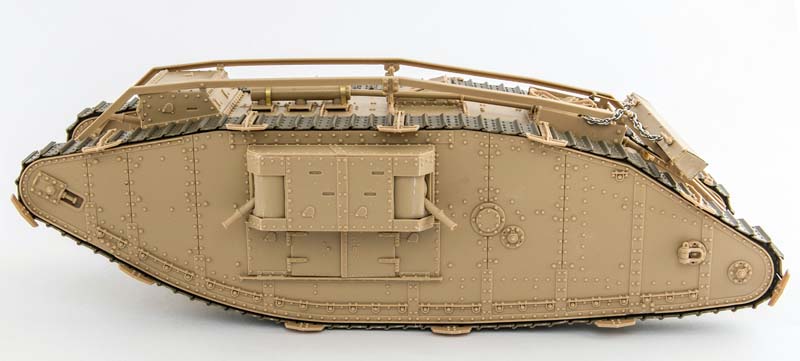
Next comes the side section assembly. Each section is made up of 2 large halves and separate inner panels. The fully detailed drive train with drive sprocket is a very nice feature included in the kit and it would be very useful if the model is going to be used with the broken tracks or damaged rear section. The towing hooks are molded so that they should have the shackles on and in case these are going to be removed a hole must be drilled in them. After the installation of the internal panels the road wheels must be built and each side has 11 road wheels with inner flanges and 16 without. 26 of those altogether sit in the lower part of the side sections while 1 wheel acts as return roller and should be fitted on top. The order of the road wheels is rather complex and there is a scheme provided for each side. The road wheels can be assembled fully movable, but I fixed them for better stability of the finished model. As soon as the road wheels are installed on one of the halves of the side sections it can be closed. Here it is important to press the road wheels into their corresponding location holes first and then glue the second half of the side section to the inner panels. Again, it is best to fix the whole assembly for some time to get 100% hardening.
The tracks appear to be the most challenging part of the kit as these are made of 5 parts per 1 track link. The inner flanges are made of 4 parts plus 1 part for track pad and all together it makes more than 900 parts to complete in case you wish to have fully assembled tracks as per instructions. Not the very best solution from the manufacturer especially since all these parts must be removed from sprues first. There is an easier way suggestion in the manual: to glue only track pads to the hull, but this would result in incorrect appearance as there must be a small gap between the hull sections and the tracks with part of the flanges visible. Here I did a simplified method suggested by John Tolcher only external halves of the flanges were glued to track pads resulting in only 3 parts per track. This way the external appearance of the tracks was preserved and they would sit correctly. Of course if one would like to show the damaged track the 5-part way should be used. At least for the opened damaged section. The kit provides track grousers as well and they can be either assembled as per manual 15 grousers per side or according to reference images where it appears more chaotic.
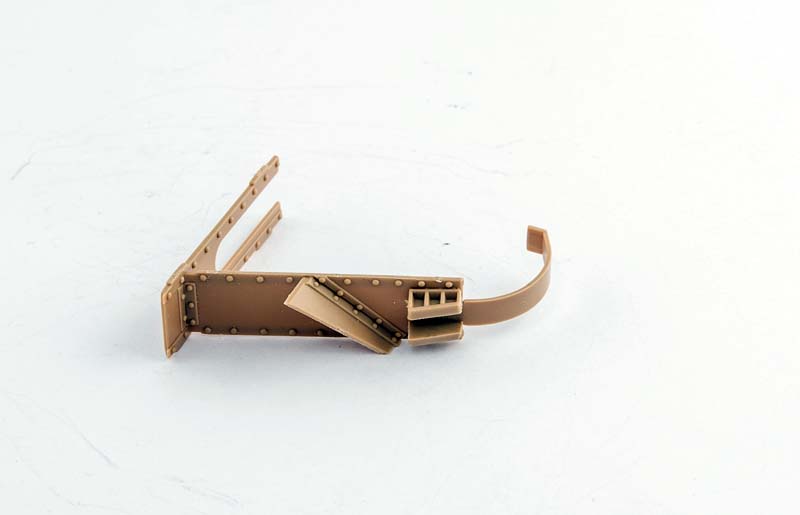
The side sponsons that contain the armament are made of several parts and here the machine gun turrets are assembled first. Again the ammo cartridges can be omitted as they will not be seen after the assembly as well as part H27. The turret walls are made of 3 parts and it is necessary to fill and sand the joinings to make a smooth surface without any gaps. When building the side access doors I discovered a problem that the location bar on the inner surface part H31 makes impossible to fit the sponson to the hull sides afterwards. These were removed and the fit was satisfactory. Another observation which I first though was the kits issue, but it is a feature of the original tank small gaps between parts H5, H7 and H4. These were 3 sections and not a single piece as I assumed initially. To install the sponson several rivets should be removed from the hull and this is indicated in the assembly manual. At the end it is only the unditching beam to be added. It can be assembled either resting on the rear section of the rail or attached to the tracks in the front of the tank. The variant with the beam resting in the rear requires assembly of photo-etched brackets and it is a bit tricky to join the chain to them as the number of chain rings shown in the manual is not sufficient to attach the element to the rails. The unditching beam has no wood texture molded.
As a bonus there is a figure of a German soldier with photo-camera included. The detail on the camera is quite nice with photo-etched parts included, while the figure is rather simple and not up to todays standard of detail.
Paint options
The decals included in the kit are for 2 variants British tank Flirt II at Cambrai in 1917 and German Ännchen at Pompelle, 1918. I cannot comment on the first option, but German Ännchen had no name on the rear as seen from period images and the cross was on the left side of the fuel tank, not in the center. The camouflage scheme is rather fictional as according to information from Rainer Strasheim these were repainted at the railcar repair facility in Belgium and should have had a 4 colour paint scheme with Railcar green, Railcar red, Ivory and Clay yellow.
References:
Book review Beute-Tanks - British Tanks in German Service
Information on German tanks near Pompelle (in French)
Armoramas feature with sprue images and video
Conclusion
A very welcome release of a highly detailed kit of the British Mark IV female tank. While the tracks would not be everybodys favorite it is still a very attractive and interesting subject.


Comments