Introductions
It is no secret that throughout modern history, Israel has had to remain vigilant in supplying the IDF (Israel Defence Force) with the best soldiers and equipment possible to counteract the constant threat from the neighbouring Arab nations. From the early days of the War for Independence to current times in the Gaza Strip, the IDF has relied heavily on heavy armor to help protect its lands.
Upon the closing of hostilities of the Second World War, the emergence of the British Centurion tank came about. Albeit too late to prove itself during WWII, the tank would go on to show its battlefield prowess, first in the early 1950s during the Korean War. Soon after, these early Centurion tanks would find their way into the ranks of the IDF and as with all newly acquired equipment the name would be changed. Enter the Shot (Whip). It would not be until 1970 when we would see the Shot Kal emerge. Modifications to the existing Shot tanks with new engines called for a new name; Kal would be a loosely derived word referring to the new Continental engines now in place.
As with all armor, variants to the Shot Kal would soon emerge. In an effort to stay current with newer technologies of the times as well as the needs of its army, modifications would be made resulting in four variants throughout the 1970s into the early 80s; Alef, Bet, Gimel and Dalet. The Shot Kal Dalet was the last of these variants and prologue to the development of the Merkava Siman 1. In fact many of the lessons learned and technological add-ons brought forth with the Shot Kals would be employed into the new Merkava Simon 1.
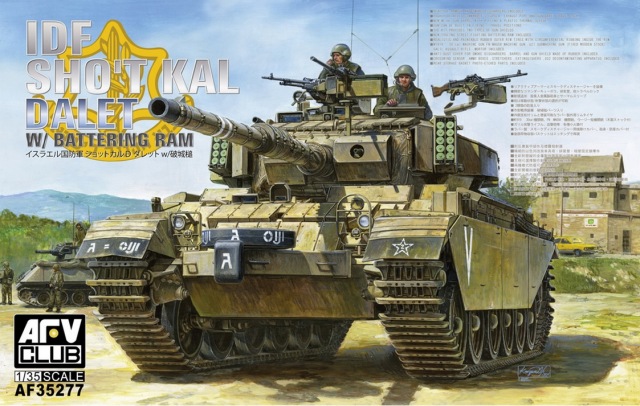
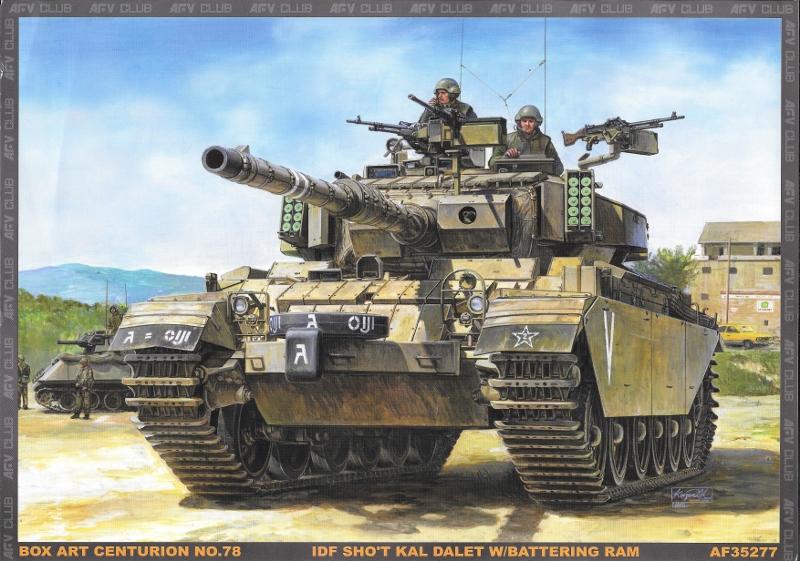
IDF Sho't Kal Dalet w/Battering Ram
Not so long ago
AFV Club released their latest version of 1/35 scale Centurion-based models with the
IDF Sho't Kal Dalet with Battering Ram. This is the seventh Centurion-based kit released from AFV since 2006. Although this is a different variant than the previously released kits, these kits retain many of the same sprues; you would figure this since they are all Centurion tanks, with some variation of parts and/or adding of new sprues to fit the particular variant.
AFV Club has pretty much gone up the evolutionary ladder as it pertains to the creation of these variants. The Shot Kal D (Dalet) is the final run for the Centurion as an MBT (Main Battle Tank) in the IDF and possibly the final run of IDF Centurions; however, the Centurion would go on to be used as a platform for APCs and other engineering vehicles so there may be more to come in the future.
The
IDF Sho't Kal Dalet with Battering Ram from
AFV Club comes in a standard slip-top cardboard box and all of the contents are nicely sealed in individual cellophane bags. This kit is basically a re-boxing of the previous kits with a few added and subtracted parts to accommodate for the upgraded version of the Shot Kal D. Unless my count is off by one or two parts, there are 921 parts contained within this box.
Contents
- 24 Olive green styrene sprues
- 1 Clear styrene sprue
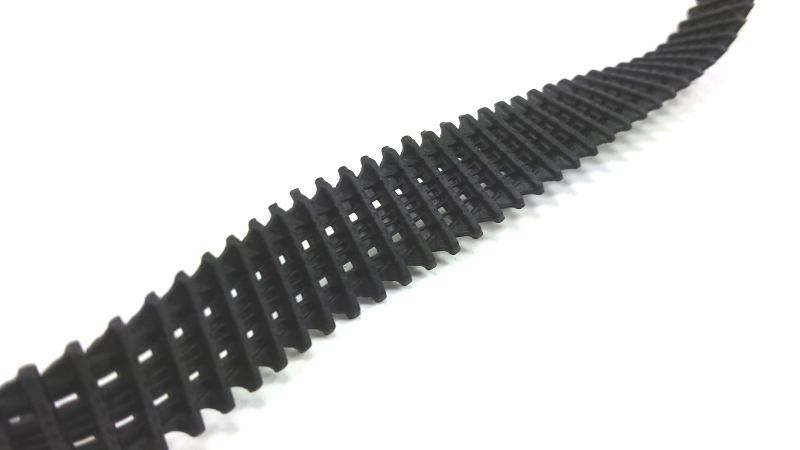
- 2 Polystyrene tracks
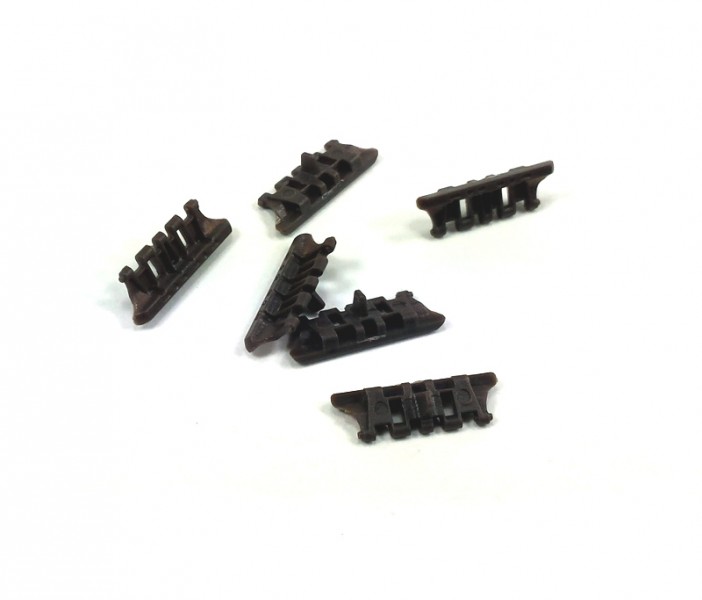
- 6 Individual brown styrene spare track links
- 24 Polystyrene tires
- 2 Polystyrene sprues (poly-caps)
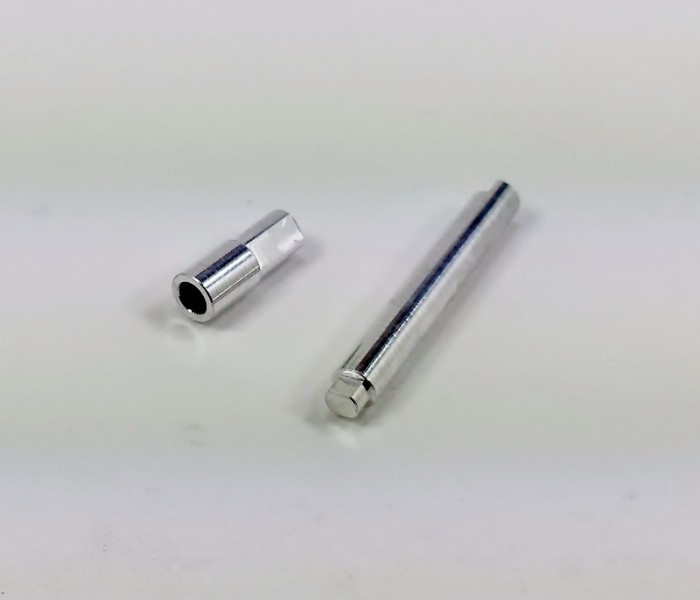
- 2 Turned aluminum barrel parts
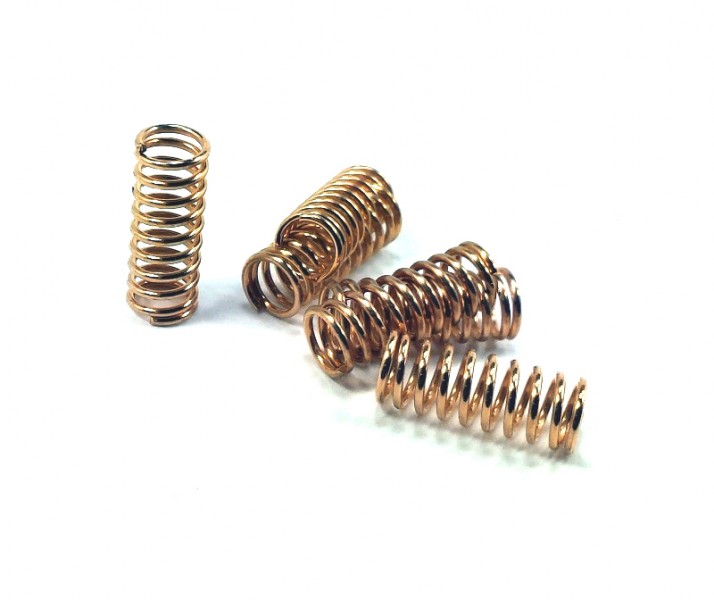
- 6 Copper coil springs
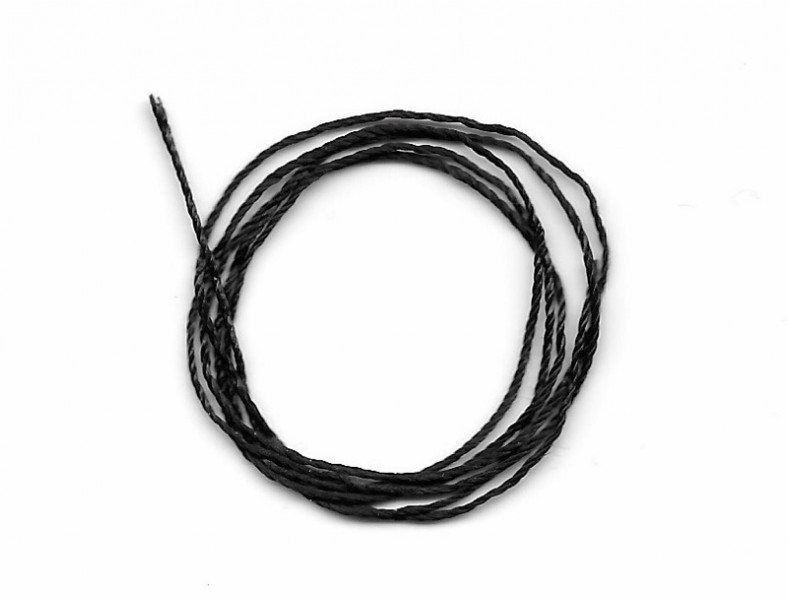
- 1 Length of rope
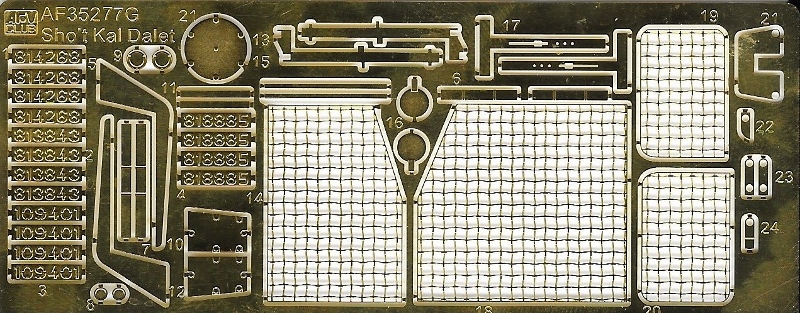
- 1 Sheet of photo etch parts
- 1 Decal sheet
- 1 Box art display sheet
- 1 Instruction booklet
review
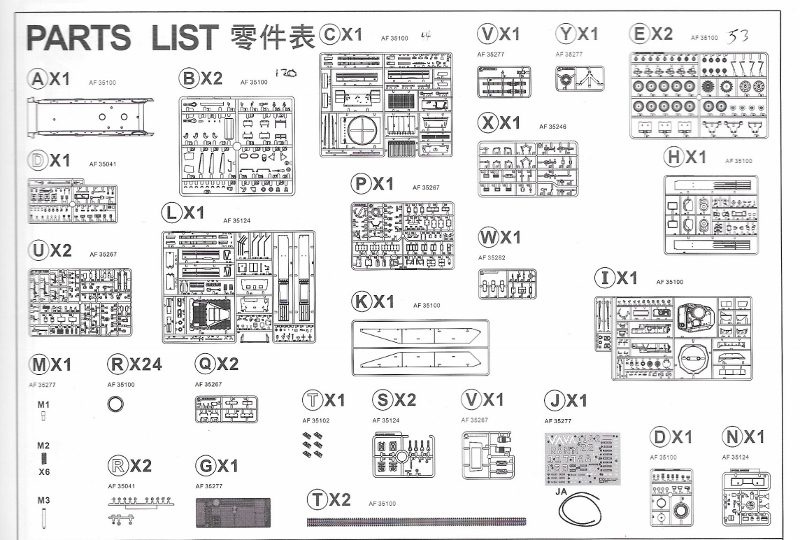
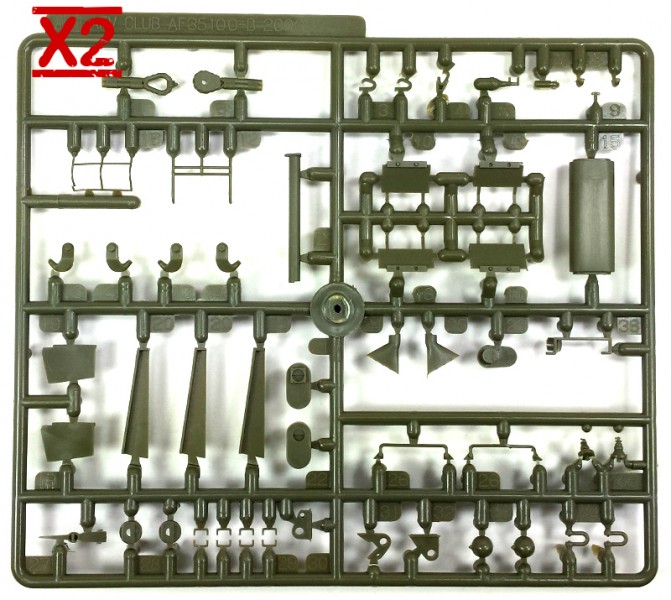
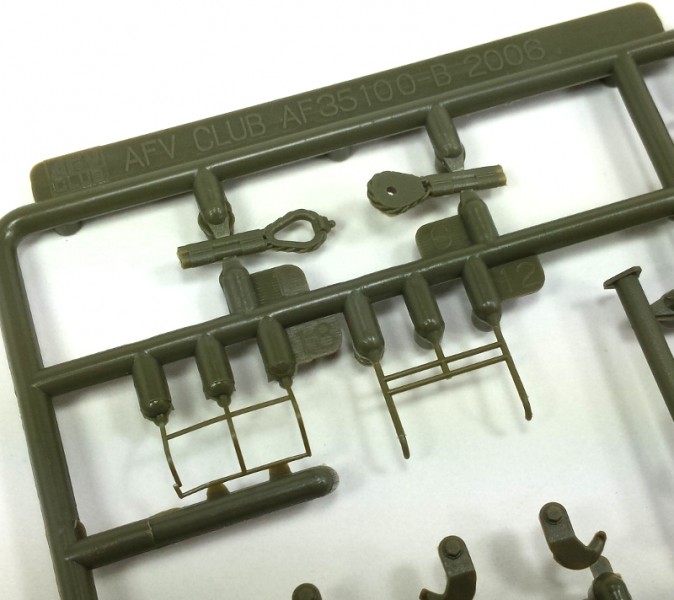
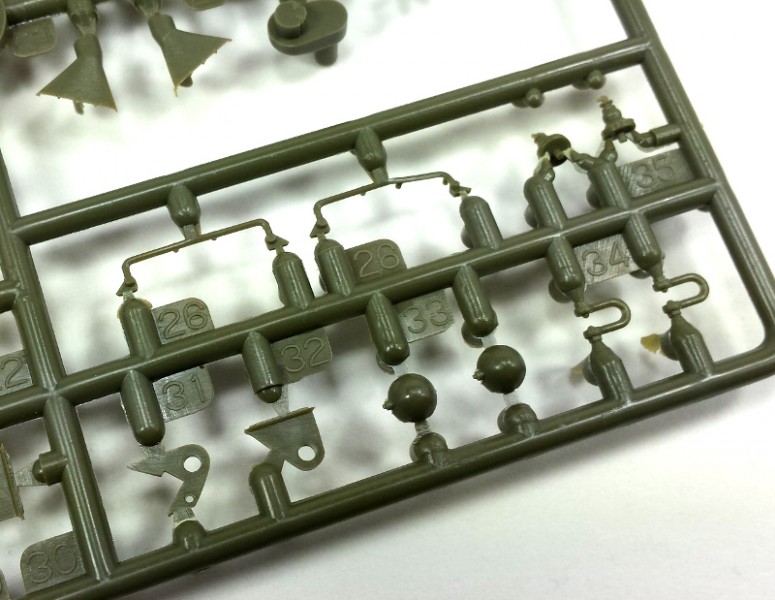
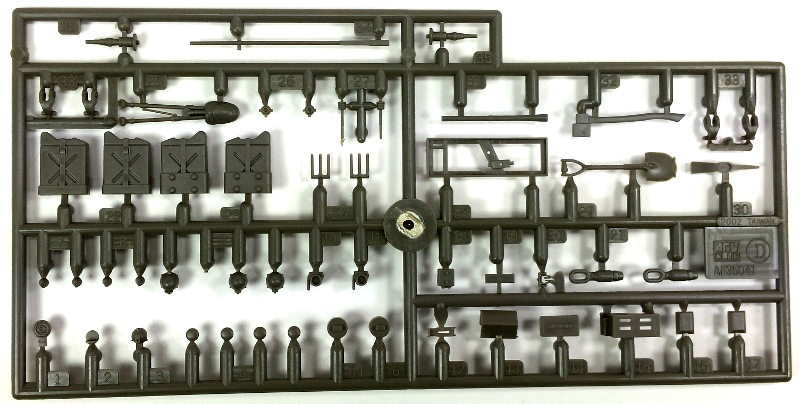
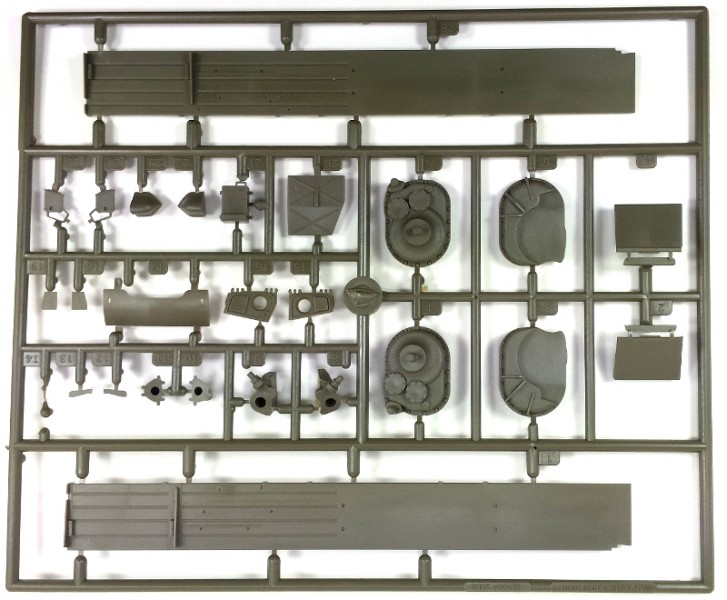
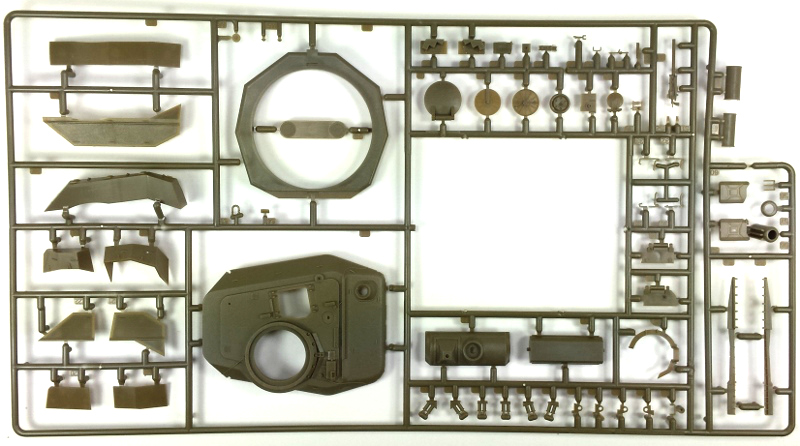
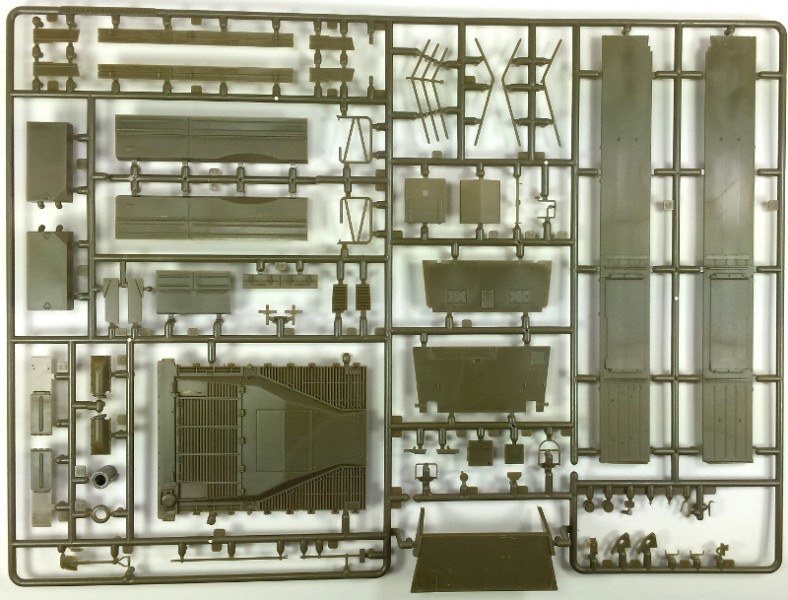
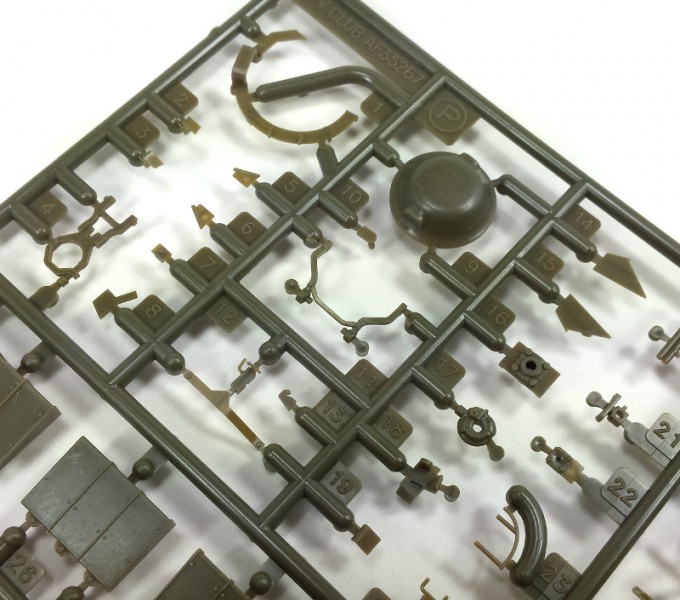
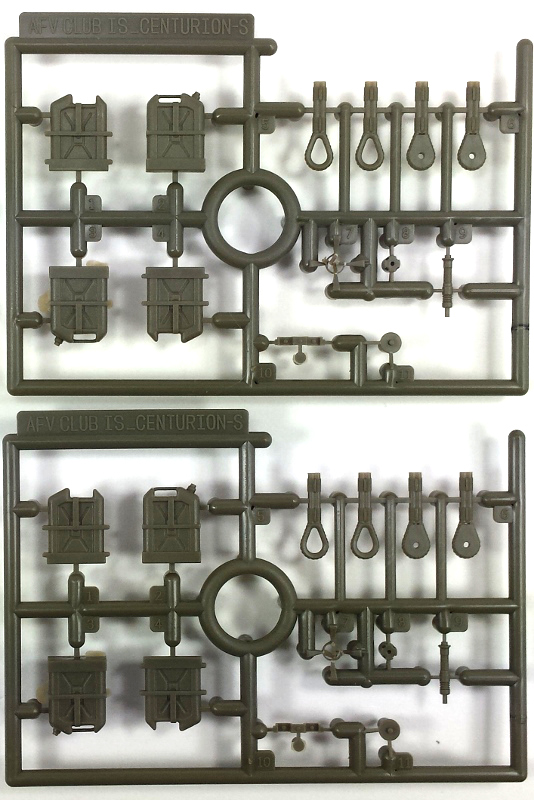
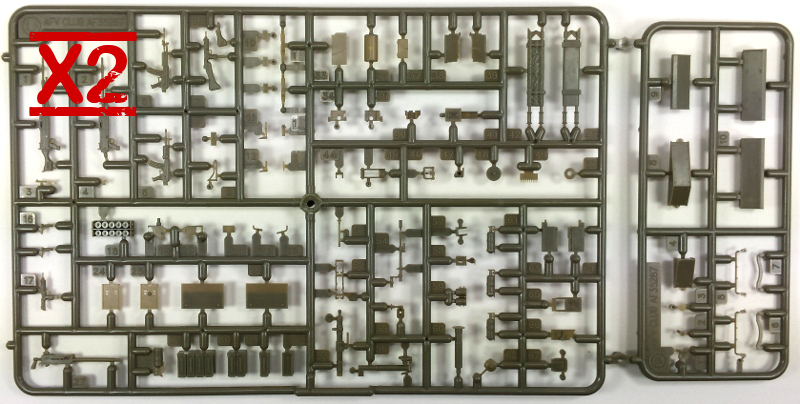
Upon opening the box, the first thing that strikes you is that this kit is filled to the brim with parts. The majority of the parts included in this kit are molded in an olive green styrene and the layout to the spues is quite good. Even without looking through the instructions you can see that each of the sprues are somewhat dedicate to particular sub-assembly of the model. Not all of the sprues are labeled with a letter designation; however, there is a parts legend at the rear of the instruction booklet and quick game of match the pictogram can be done to see which sprue is which in terms of lettering. I would suggest taking a small piece of masking tape to label the sprues as this is the easiest way to find what you are looking for during the construction process.
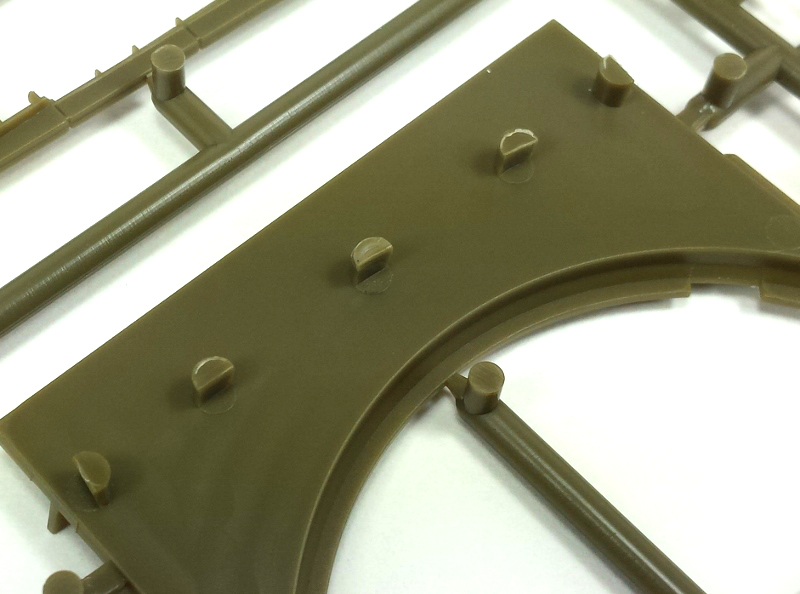
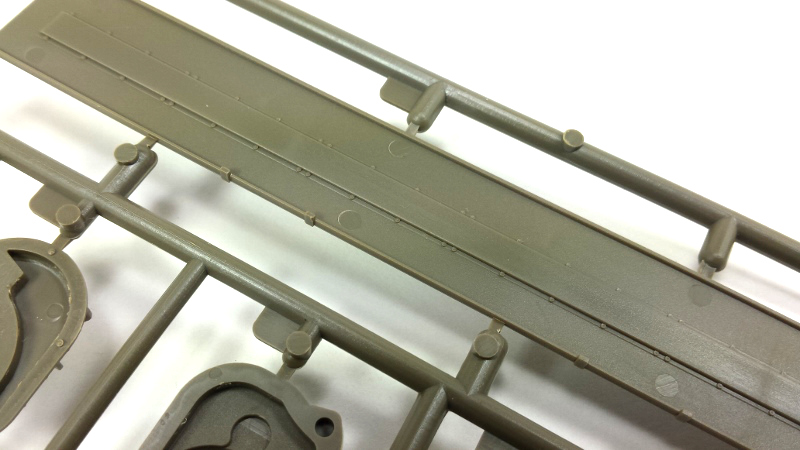
In looking over the parts, they all appear to be crisply molded and free from flash for the most part. There is a small amount of flash in some obscure locations; nothing a quick hit with a sanding stick or swipe with a #11 lade will not take care of. I noticed a few ejector pic marks throughout the kit, but these appear to be regulated into locations that will not be seen such as the underside of the fenders. Again, this is an easy clean-up if so desired. One interesting thing that jumped out at me is on Sprue C; it seems that a rather large amount of ejector pins were not removed from the backside of a few of the parts. Could be this be an oversight or maybe the manufacturer thought it best to leave this up to the consumer as they simple snip off pretty easy with any side angle cutters and being on the backside of the parts and do not require any major clean-up.
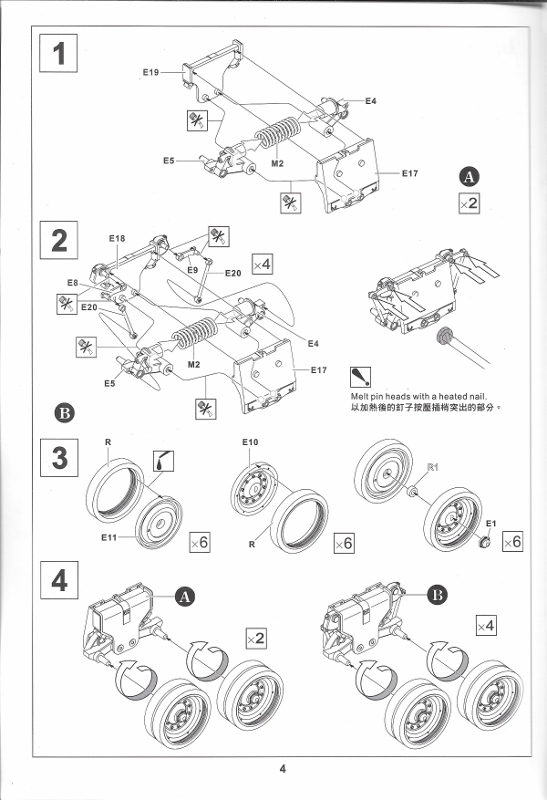
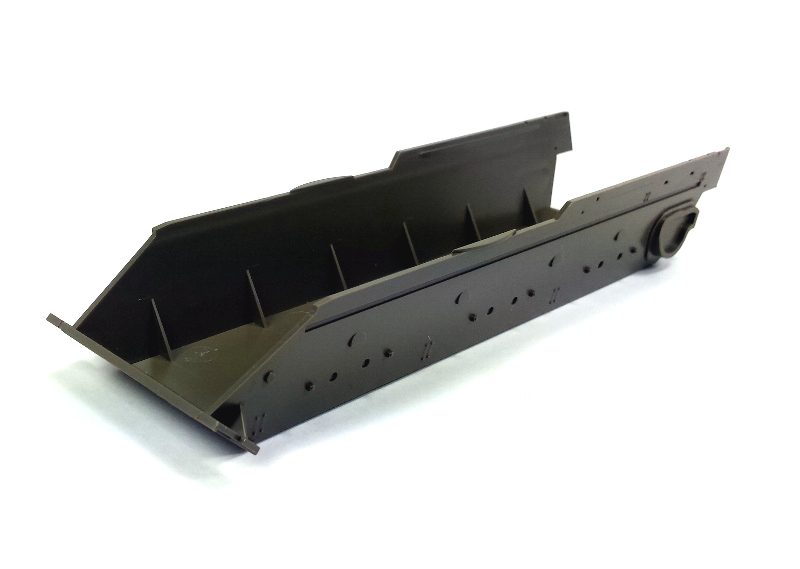
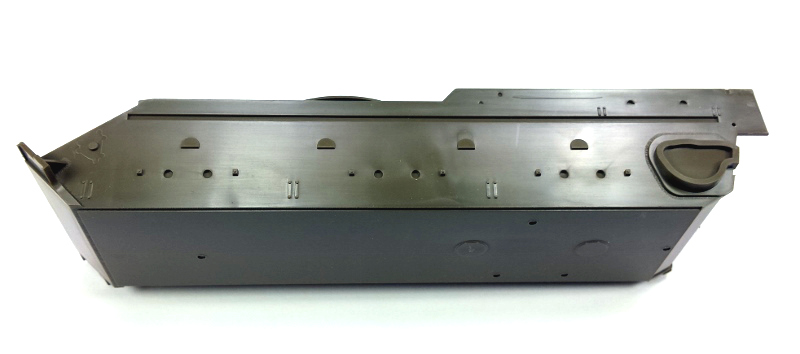
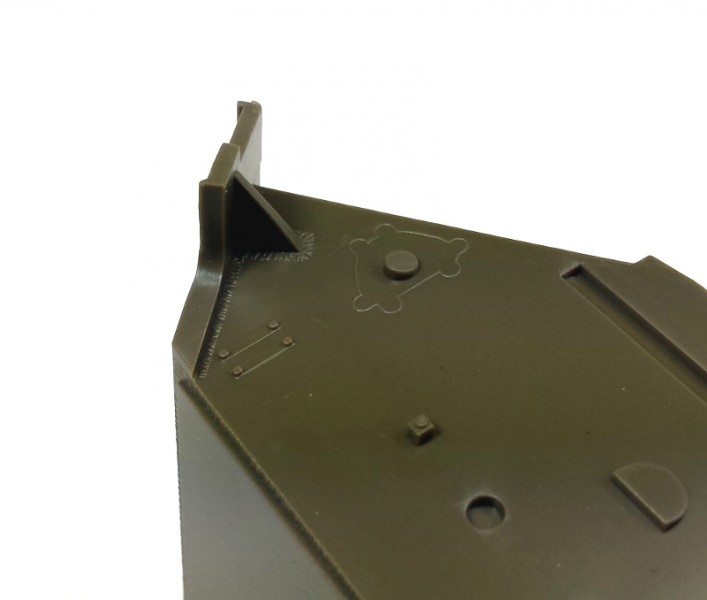
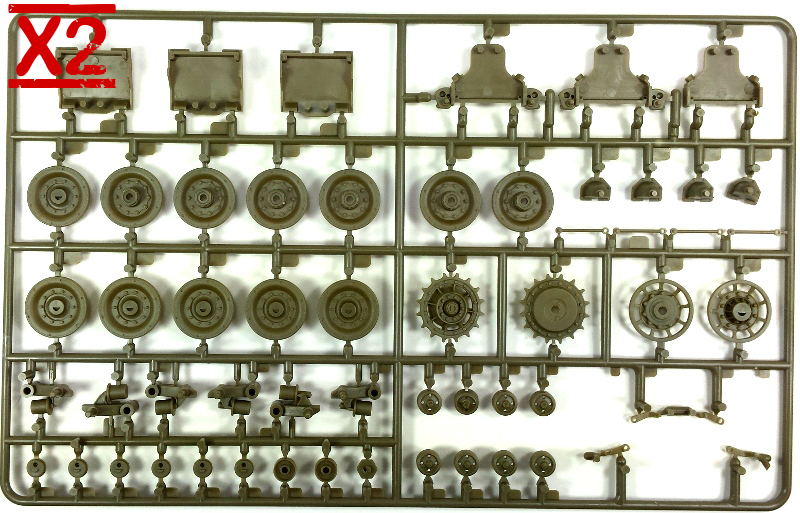
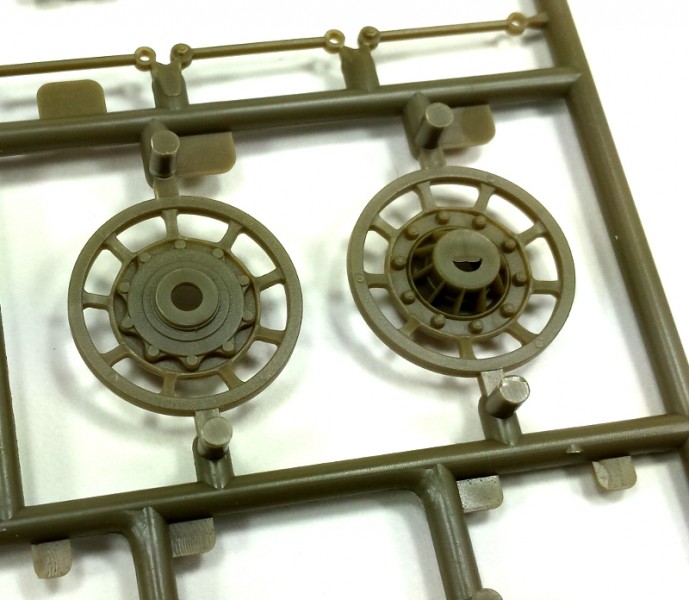
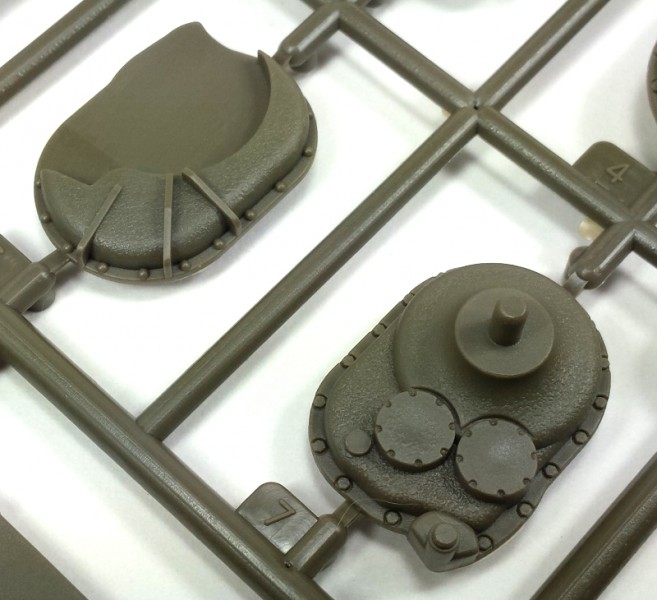
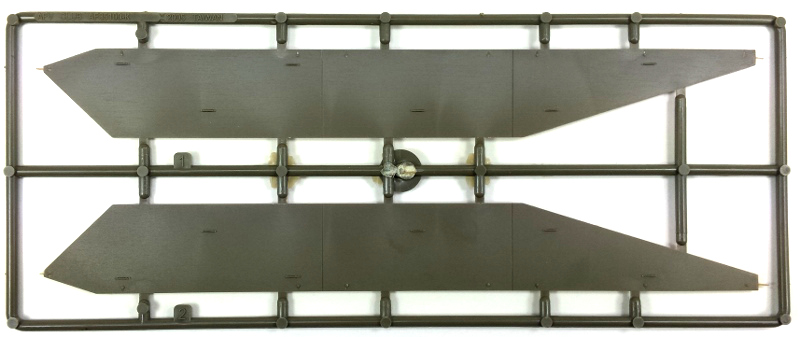
The lower hull to the kit is molded in on piece. There is an attempt at weld marks around the lower end of the plating at the front of the hull as well as around the transfer case for the drive sprockets. While this is not as well-defined as it could be, these points are not actually seen at the end of construction and if one was going to add any type of weathering to the area it would be completely obscured. As seen in the previous releases of IDF Shot Kals, this kit is supplied with a movable version of the bogies. These bogies are a multi-part construction with two main plates for the front and back, two swing arms and connecting rods as well as spring. This is where the six large copper coil springs are used. Once constructed, this gives the builder the option of positioning the suspension how they like. There appears to be some small sink marks in the top of the swing arms. The builder could take the time to actually fill and sand all of these prior to construction; however, these sink marks in the plastic are almost obscured by the bogie assembly and hidden from view by the wheels once they are installed.
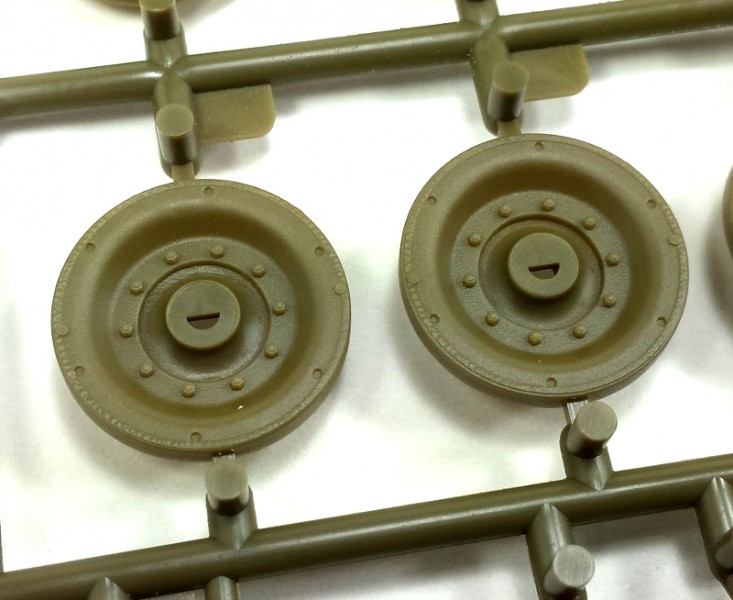
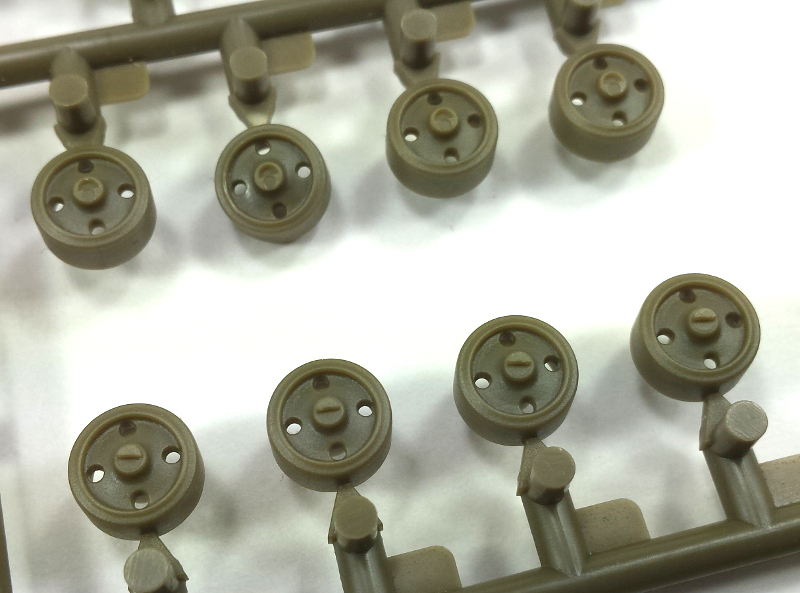
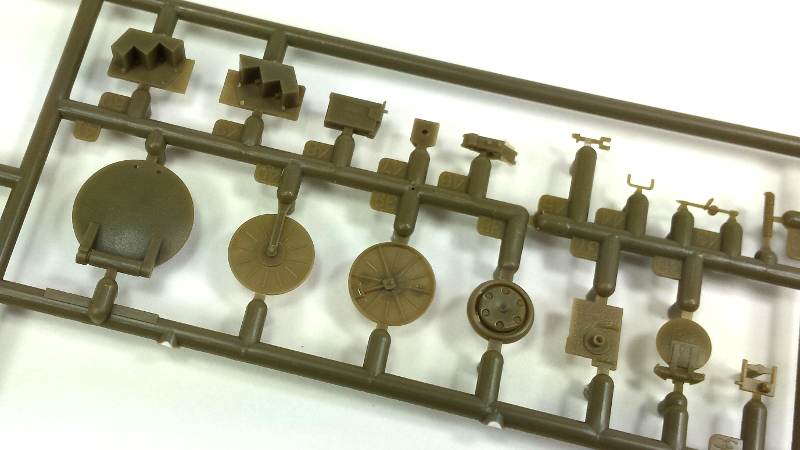
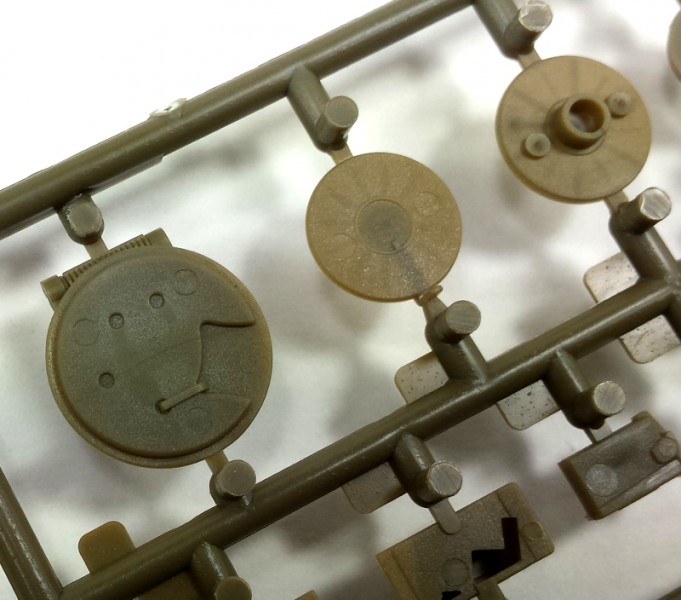
The wheels to this kit are nicely molded and indicative of what is seen on the original tank.
AFV Club has employed the use of poly-caps for attaching the wheels to the suspension. These poly-caps are a bit small for the task and will take some working back and forth of the wheels to attach them to the bogies. It would be best to test fit one or two sets of wheels to see if the aggravation of trying to work them on is worth it. At worst case, the wheels could simple be glued on as in more cases of armor modelling and eliminate the poly-caps in this location altogether.
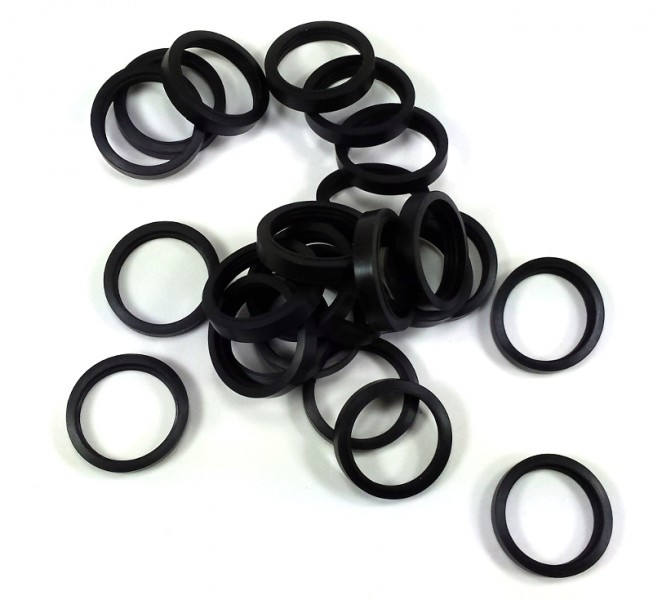
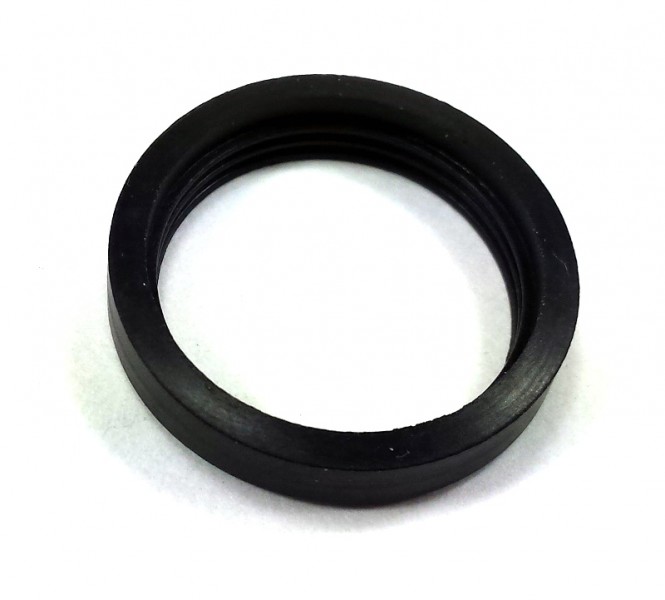
AFV Club supplies a separated rubber tire to the wheel assembly for this kit. All twenty-four of the rubber tires can be attached to the rims via the use of super-glue or PVA glue.
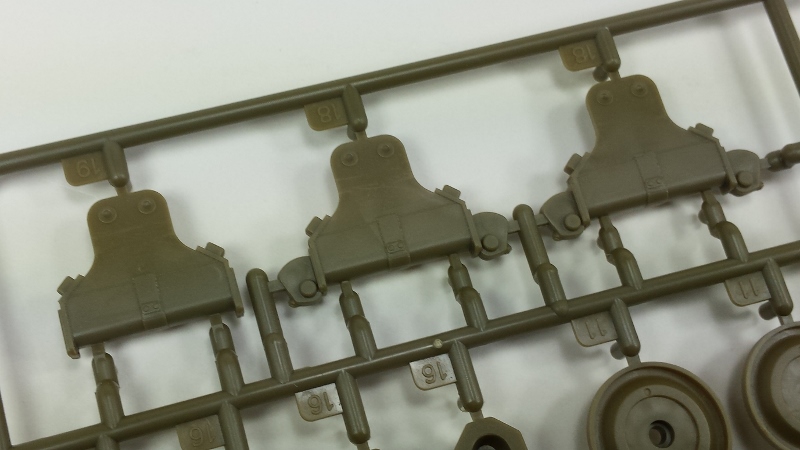
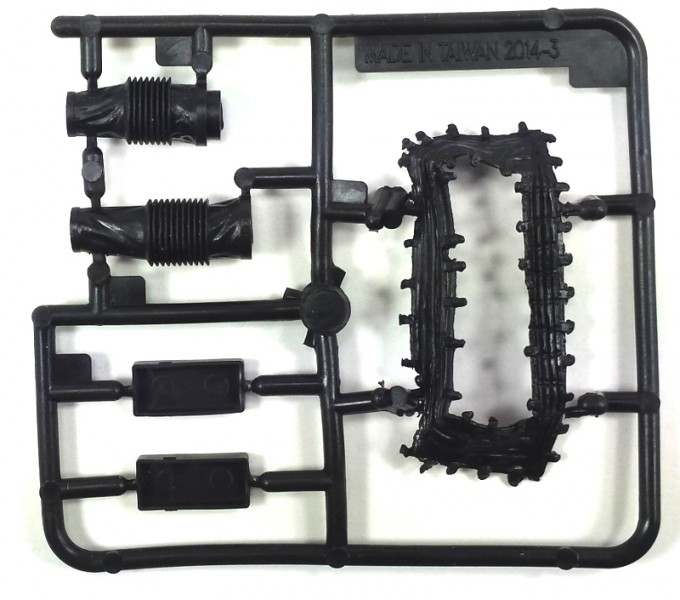
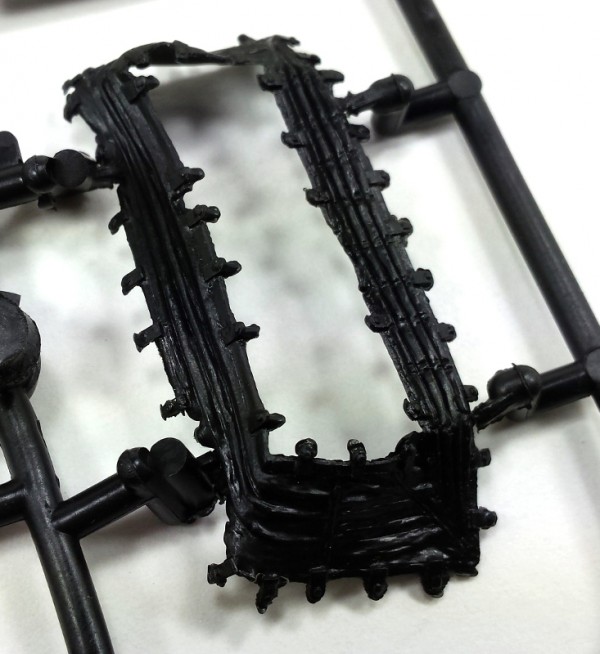
AFV Club includes the rubber form of tracks to equip this Shot Kal. While this would not be my first option when building a tank, the tracks are nicely molded and should do the trick quite well. There is not a lot of sag to the Shot Kals tracks so the lack of manipulation of the rubber tracks can be dealt with and if the side skirts are to be used, the majority of the tracks are actually hidden from sight leaving only the ends and the bottom run exposed.
AFV Club does in fact sell fans low-cost movable styrene track for the Centurion tank and these would make for a major upgrade without breaking the bank. What I have not quite figured out is why these tracks have just not been added to the kit in the first place. I dont think the cost of the kit would go up too much more and it certainly would be worth the added expense to have a movable track link included.
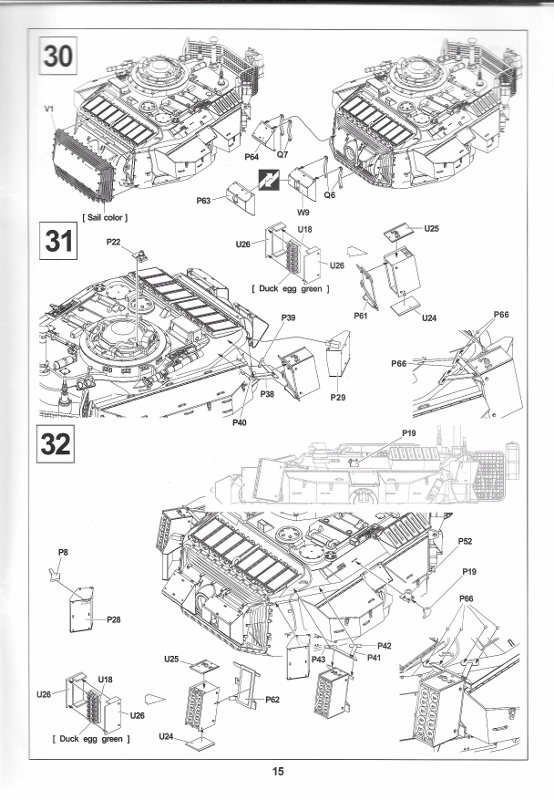
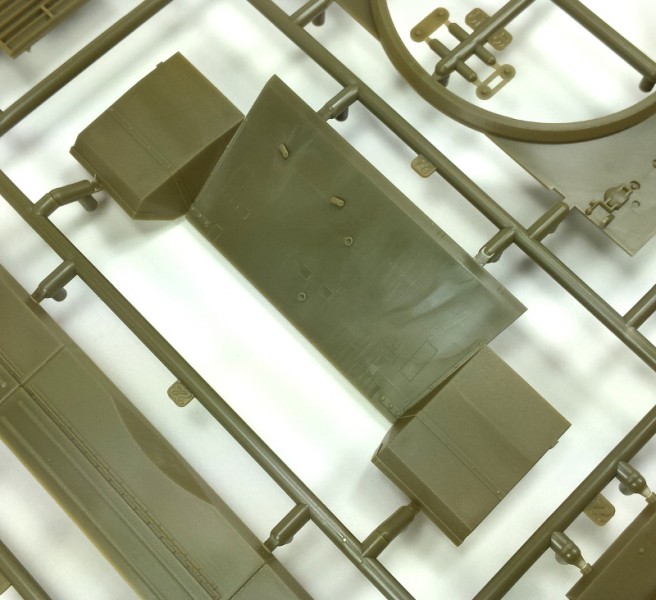
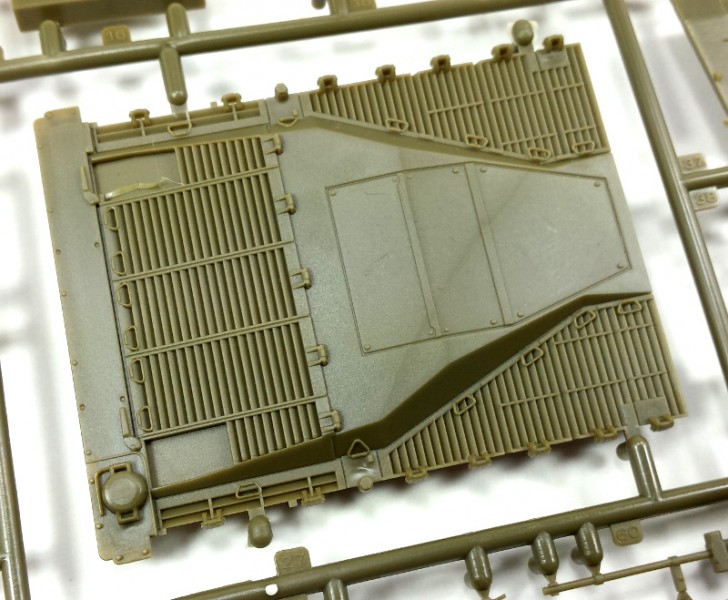
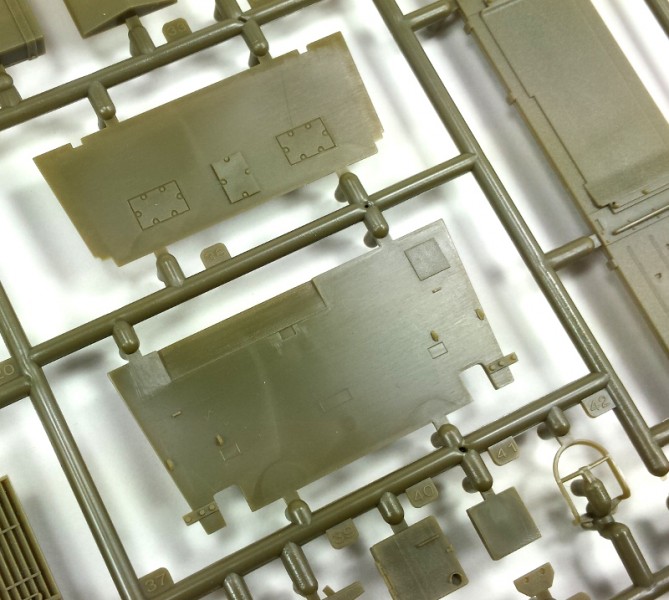
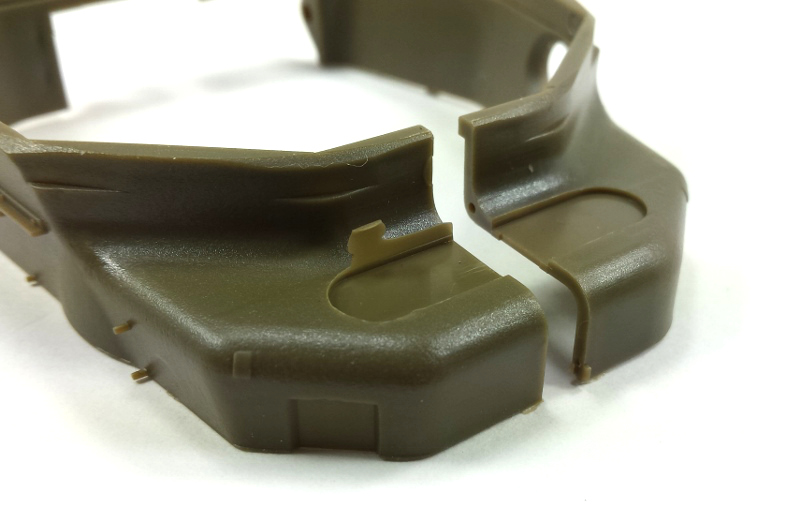
The upper hull sections to this model are broken down into multiple parts. All of the parts are nicely detailed and attach to the lower hull section individually rather than creating a flimsy sub-assembly. These are the parts I mentioned early on in this review that have the ejector pins still attached to the backside. It appears the parts could actually be installed with the pins in place if desired as they face into the empty space of the lower hull and do not impede the construction. Probably best to just snip them off and move on through the construction.
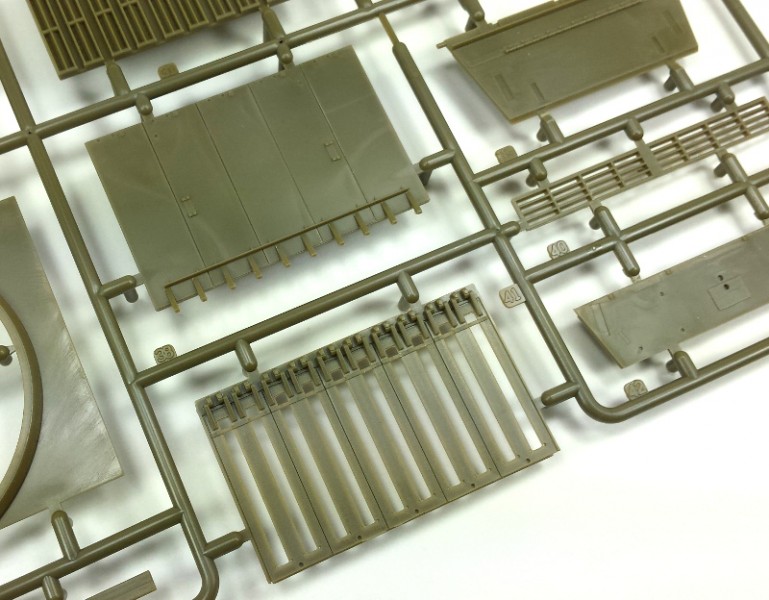
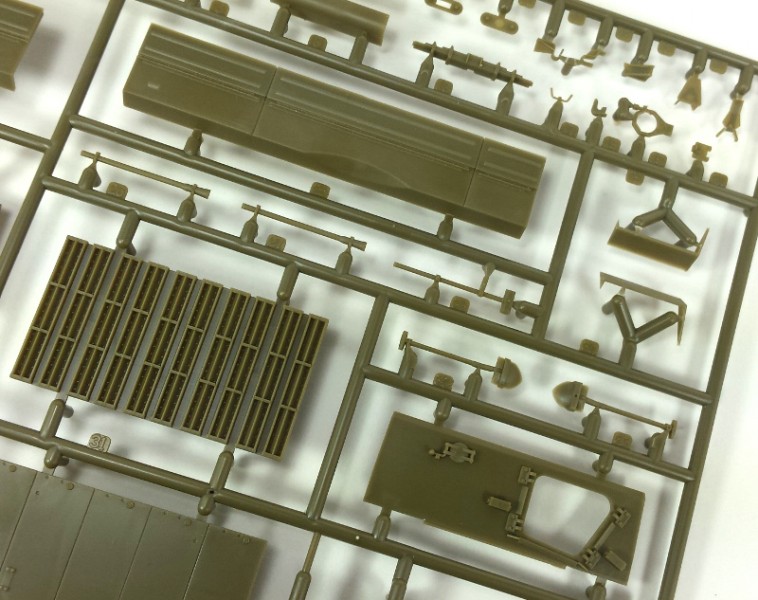
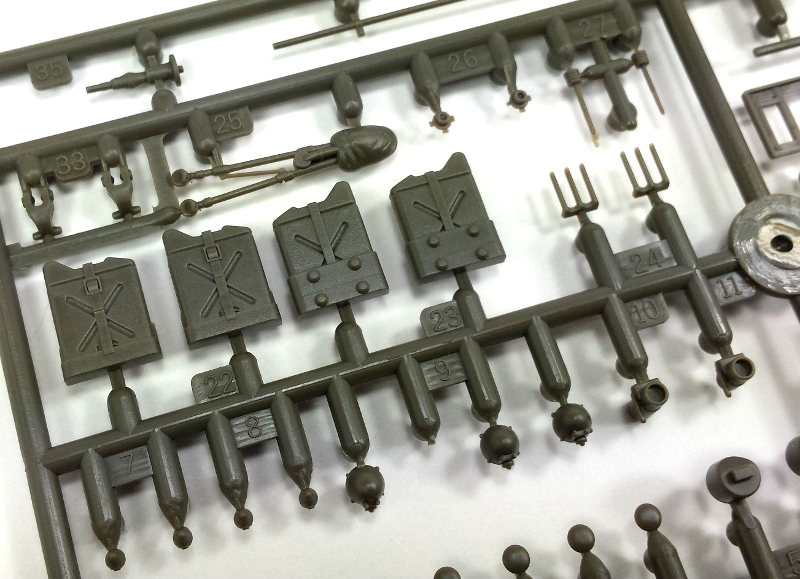
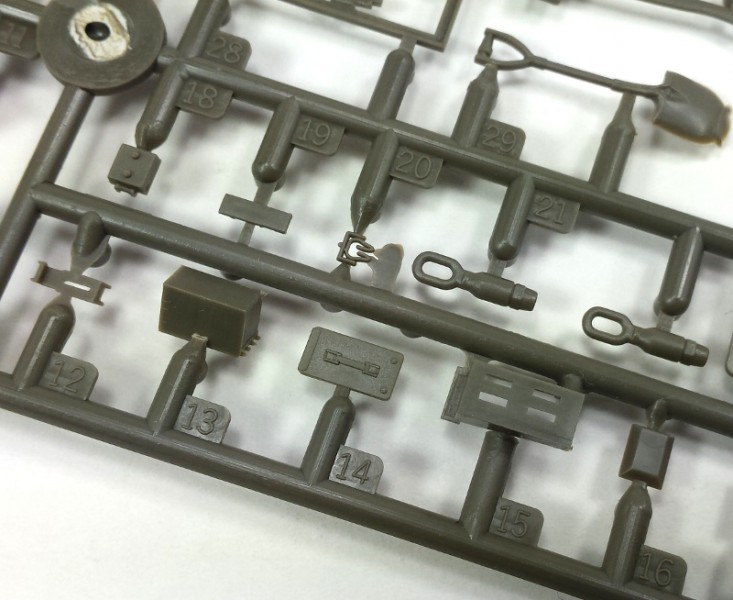
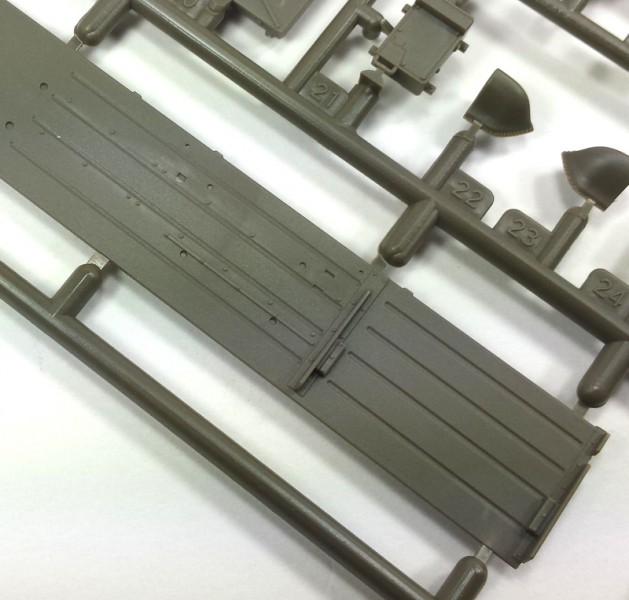
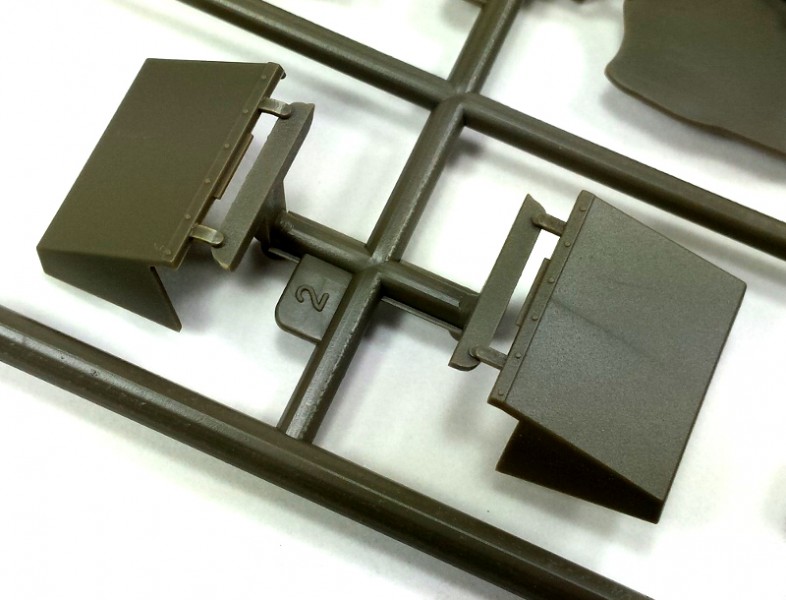
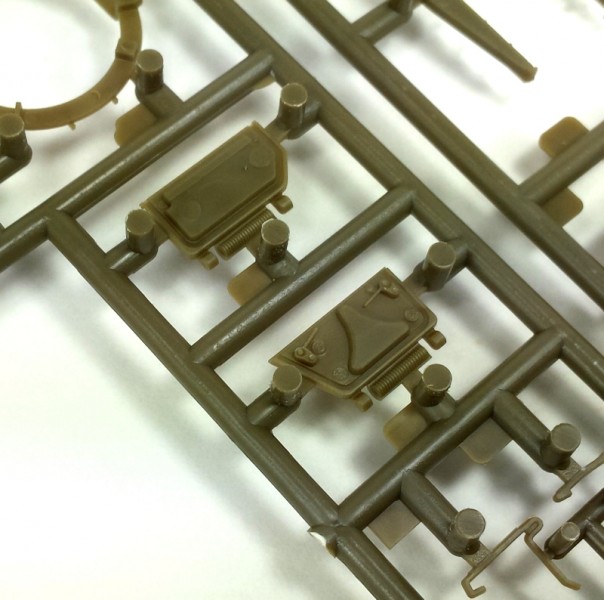
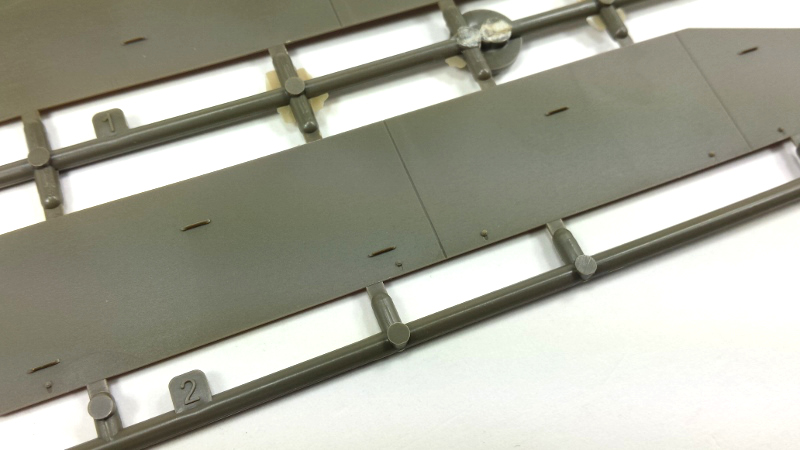
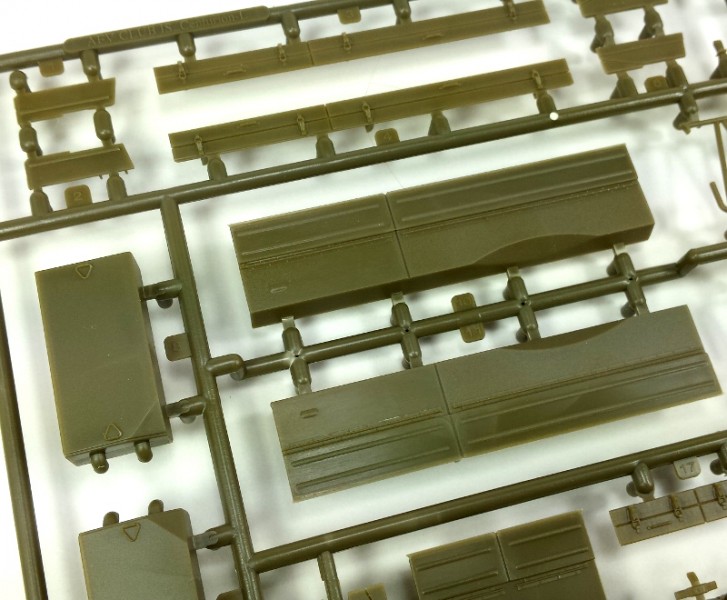
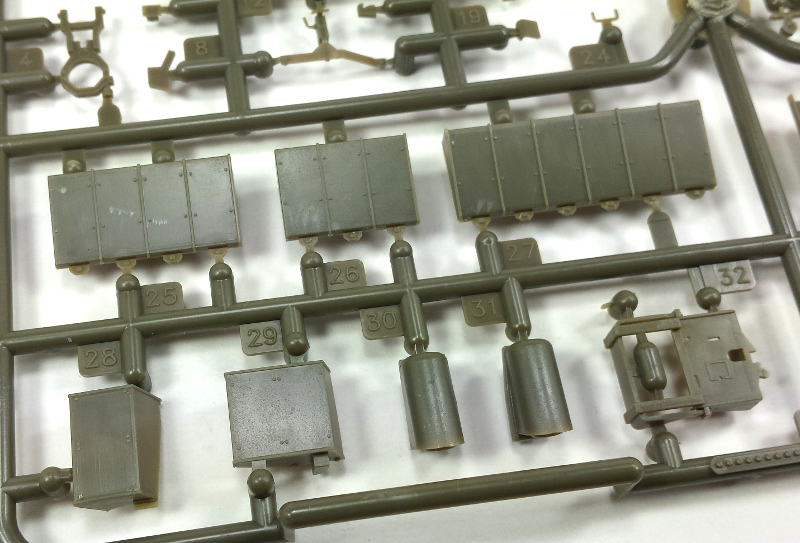
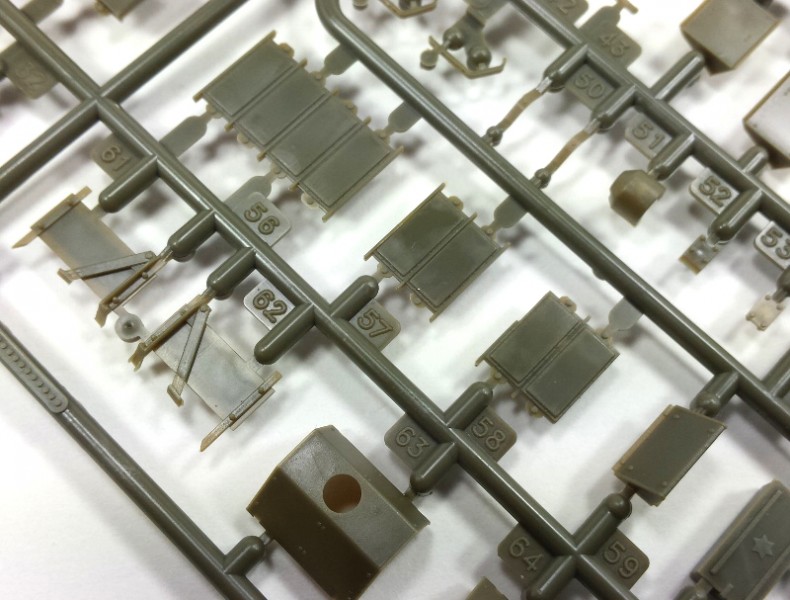
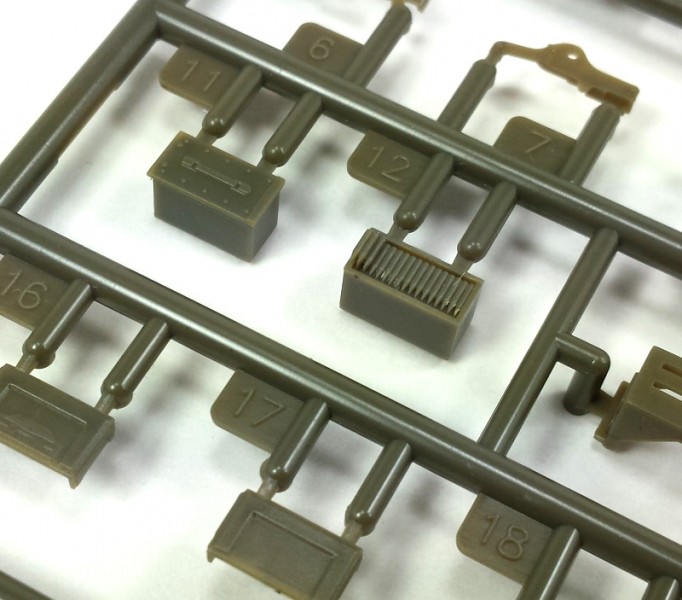
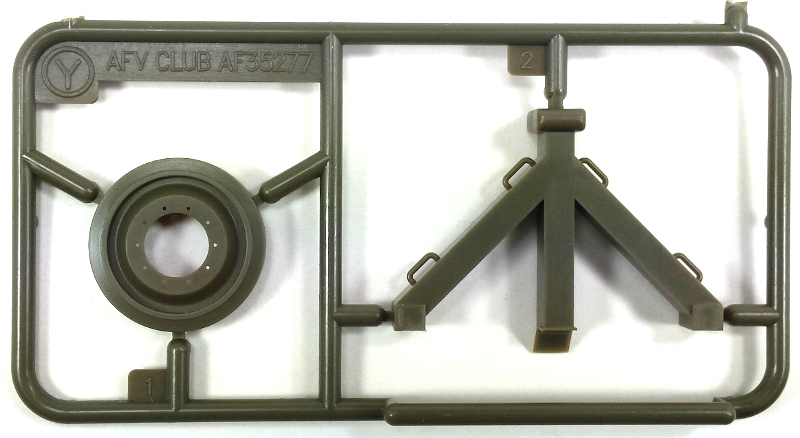
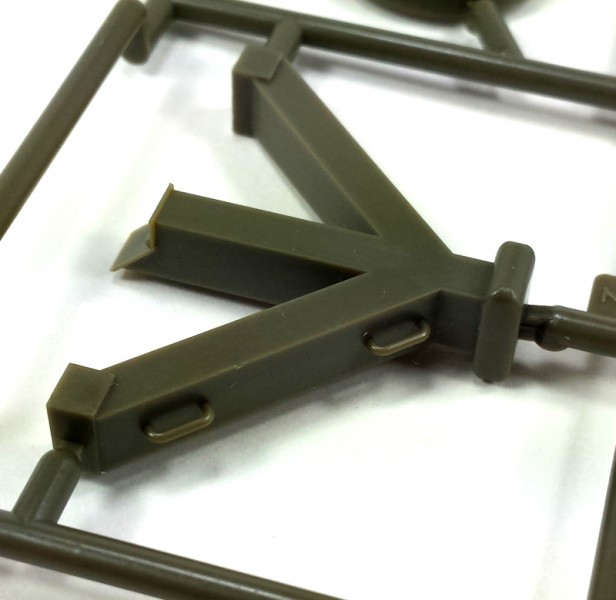
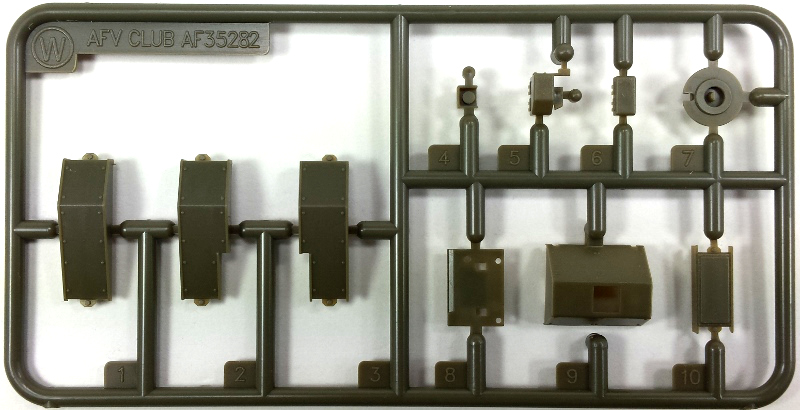
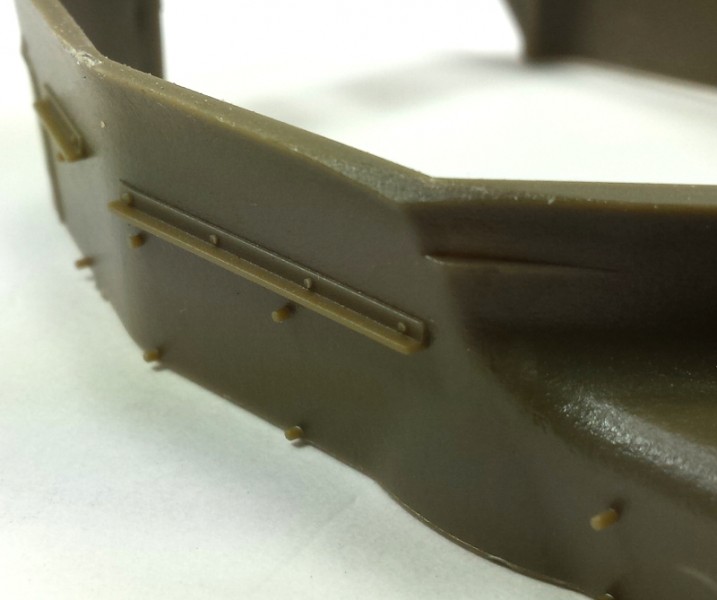
The fenders to the Shot Kal D are riddled with many items, so while the fenders appear to be nicely molded, this is mostly a mute part due to the fact of the addition all of the add-on parts. The front and rear fenders are separate, this is nice for the builder chooses to remove any number of them. There is a tremendous amount of detailing added to the fenders as the construction process goes on including fuel tanks, ERA blocks, Stowage bins and tool. All of these parts look to be very clean moldings and detailed very well. The same riddling of detail parts are added to the front and rear glacis of the tank as this vehicle was the upgraded version with newer reactive armor and other various parts. During the part covering the upper hull construction, the installation of the battering ram is defined. There is an option within the instructions to either use the battering ram or not as the kit does supply the unused tow brackets which can be mounted if so desired. The battering ram is one of those new sprues added to the kit form the previous releases of the kit. The detailing is nice on this one-piece design but could use the possible addition of some welds to the attachment points to dress it up a little.
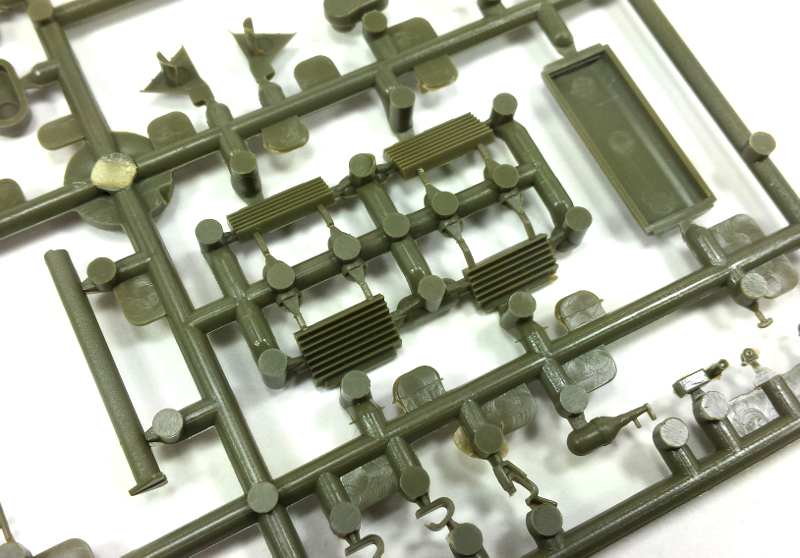
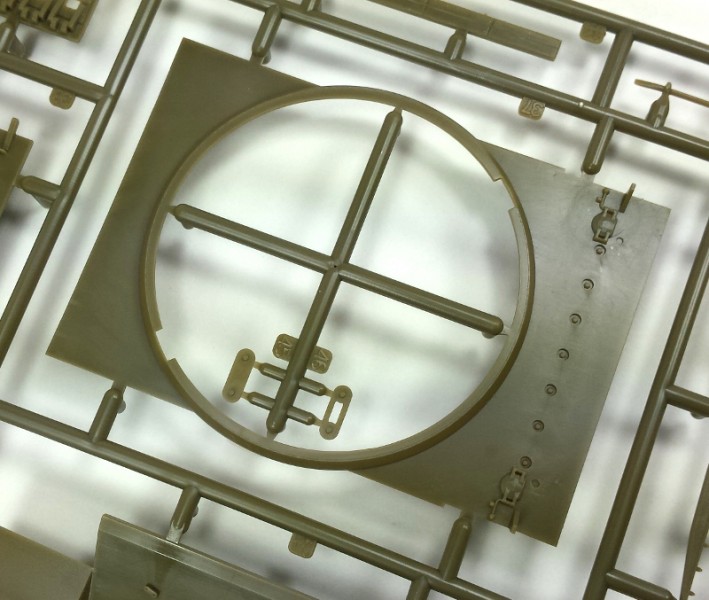
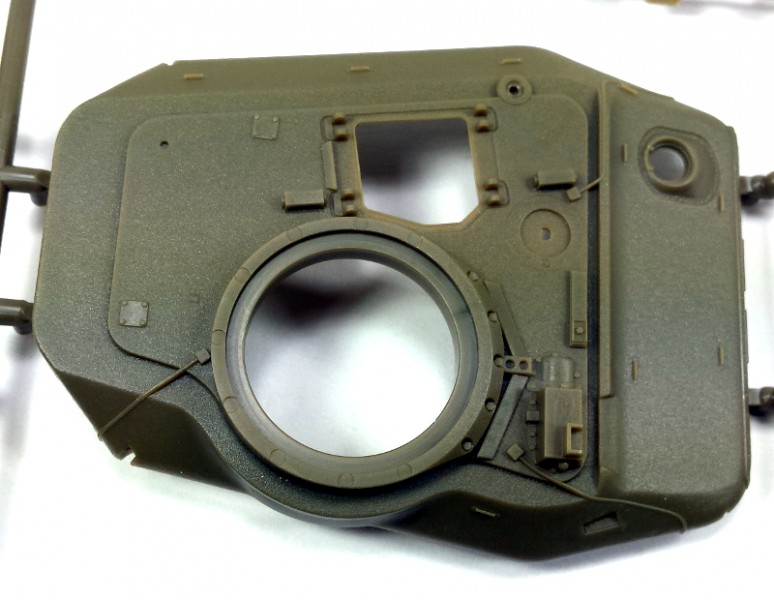
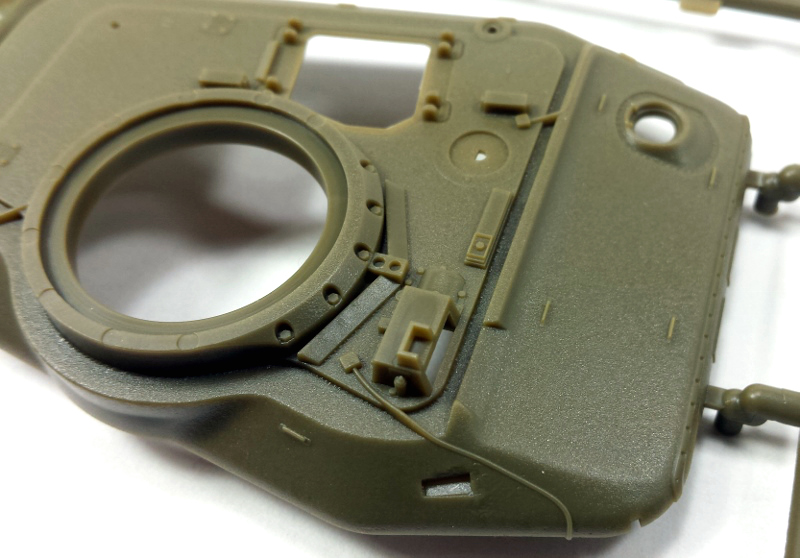
The turret is another section that makes up a big part of the construction involved with the kit. The Shot Kal D turret is covered with details from the ERA blocks, brackets and equipment to the stowage bins and basket. The main part of the turret is made up from six main parts. There is a rough casting appearance to the turret which has been incorporated into the mold. Oddly,
AFV Club has opted to make the turret from three bulk parts aside from the ring and mantlet. This means the top of the turret is one piece and two pieces to create the sides. This of course allows for a joint around the lid section of the turret as well as at the front and rear vertically. The front and rear joint are mostly obscured with the mantlet and stowage basket; however, with the rear, unless stowage is added to the basket, the joint will be seen. A quick sanding and then texturing should do the trick. There is some stowage items included in this kit and would certainly make light work of the joint as well. The mid-section joint does get seen in a few locations and best to fill and lightly sanding this joint followed with some texturing should bring things into perspective quite nicely.
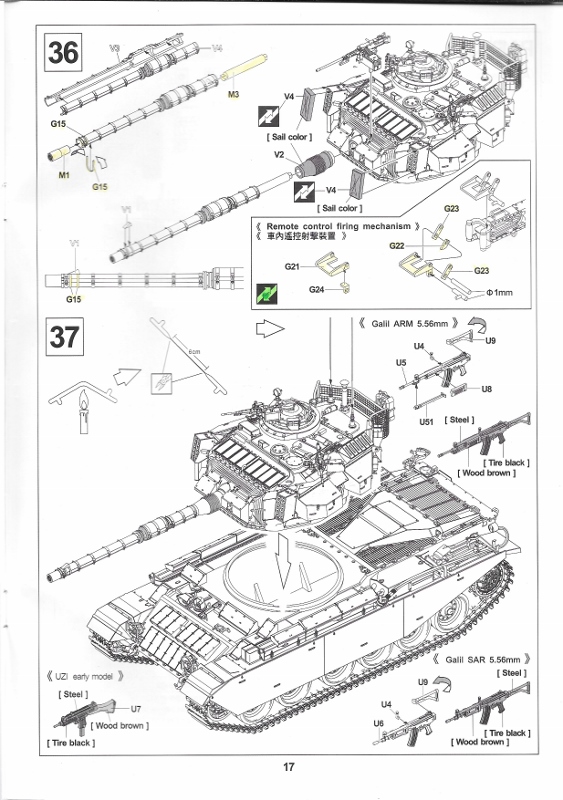
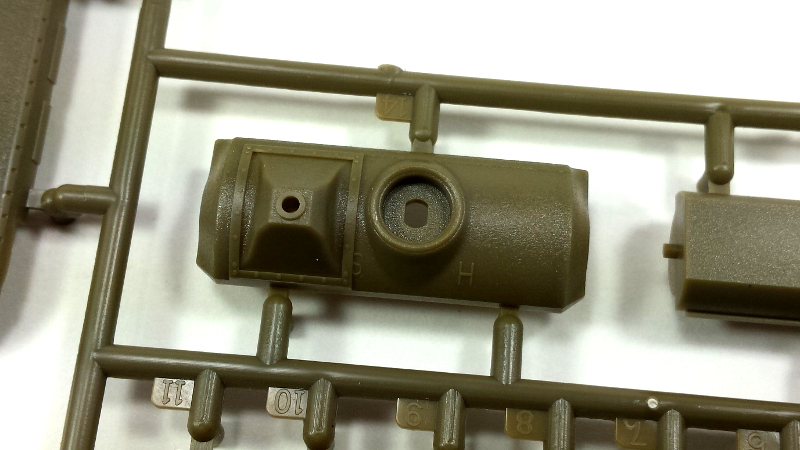
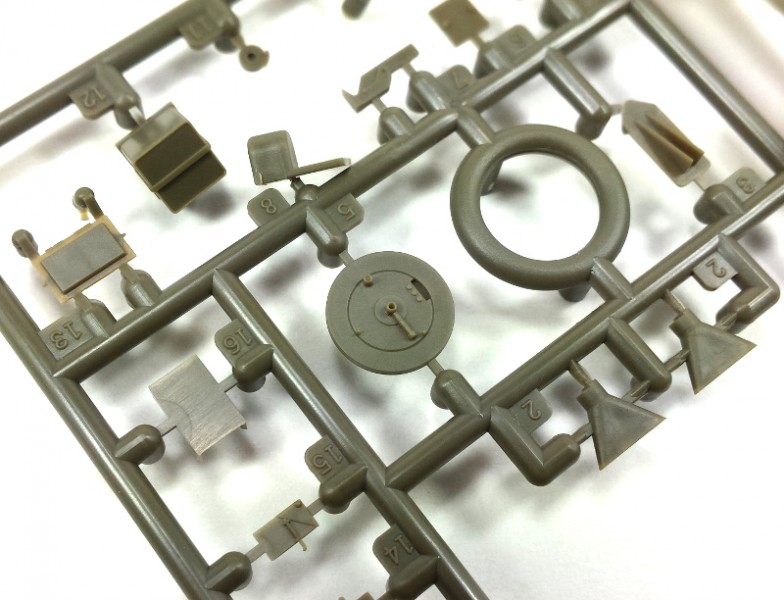
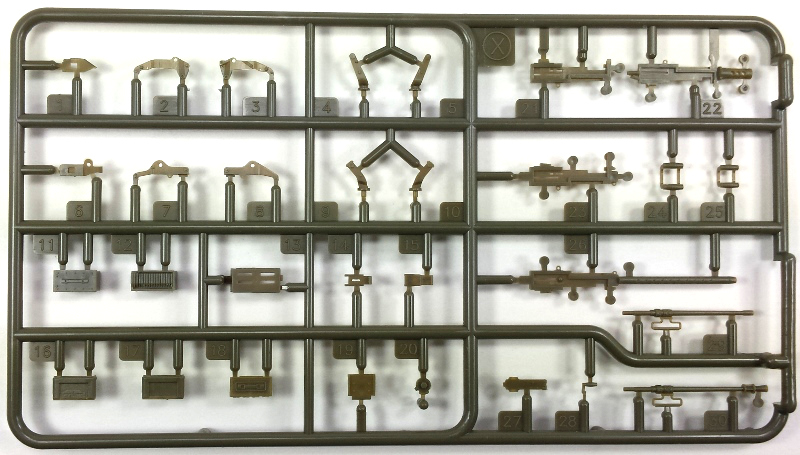
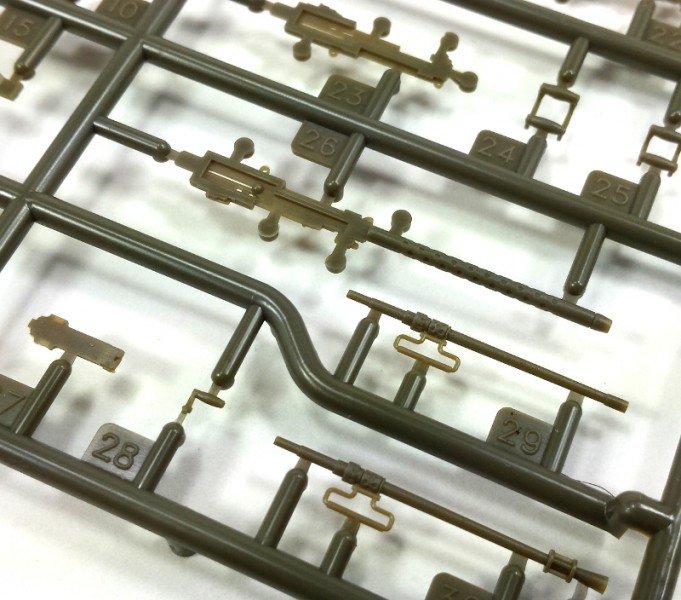
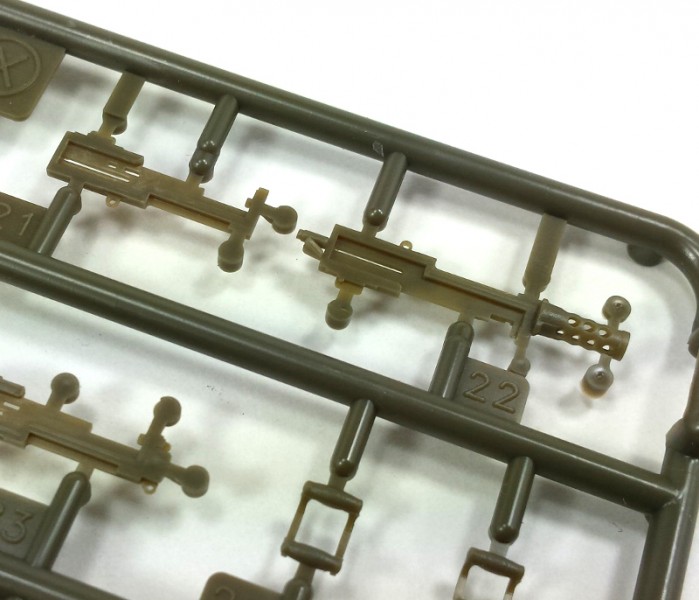
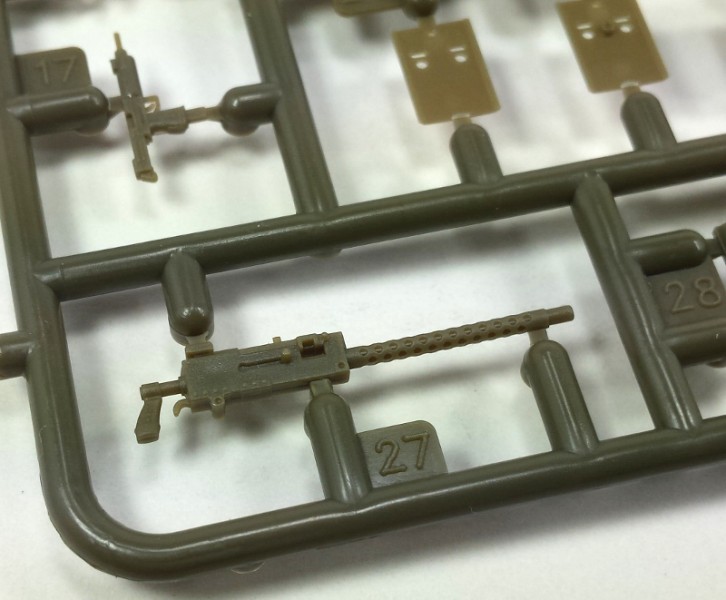
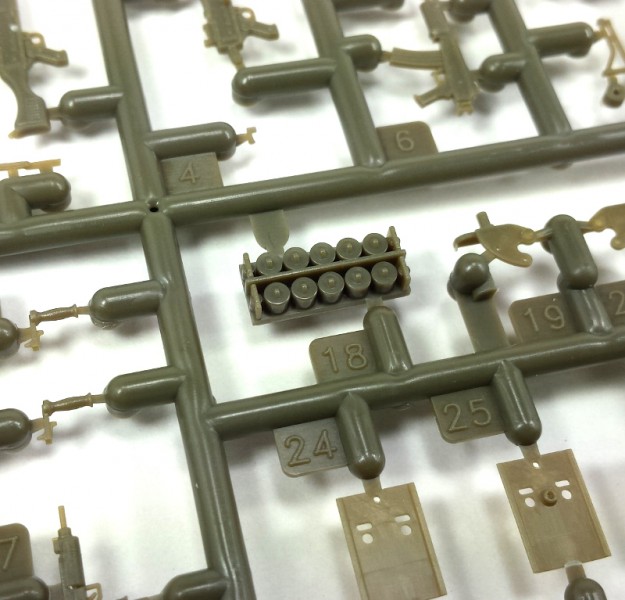
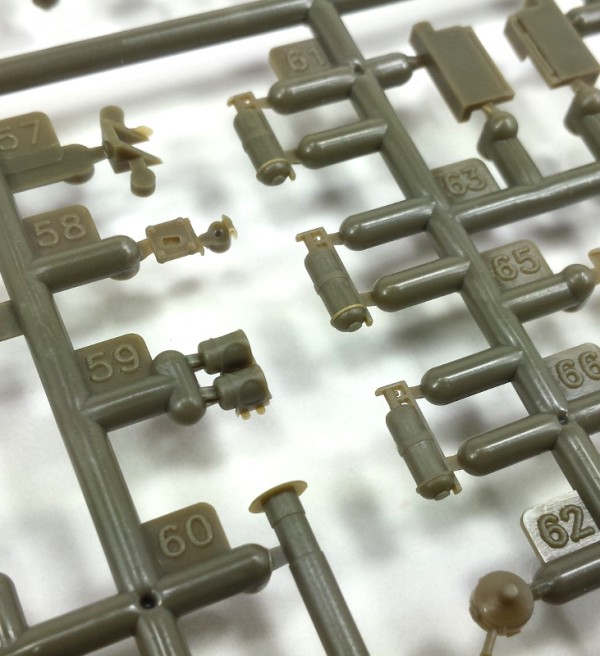
The ring to the commanders hatch is supplied as a clear part. The detailing is increased with the clear molding as well as making light work to the vision blocks which are molded directly into the piece. The added small arms to the tank which are attached to the top of the turret
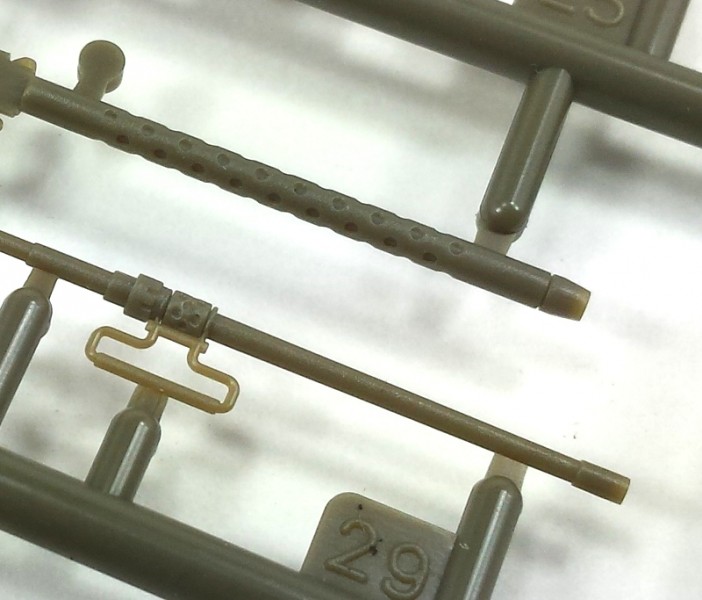
and there are several of them, are nicely done. The parts are detailed rather nicely as seen with the previous releases and even though there are several aftermarket option for these weapons, the detail appears to be more than sufficient to accommodate the build. Slide molding has allowed for the hollowing of the muzzles and the ammunition detailing in the open ammo boxes has been rendered very well.
For anyone familiar with the previous releases of the Centurion tank, Shot or otherwise, will recognize the majority of the parts included. As I mentioned, this kit is basically a re-boxing of the previously released kits with some parts removed and some newer ones put in their place. There is a slight change to the photo etch provided whereas some small parts were added to construct the alternate building of a remote firing system for one of the machine guns. The metal barrel that was seen in the
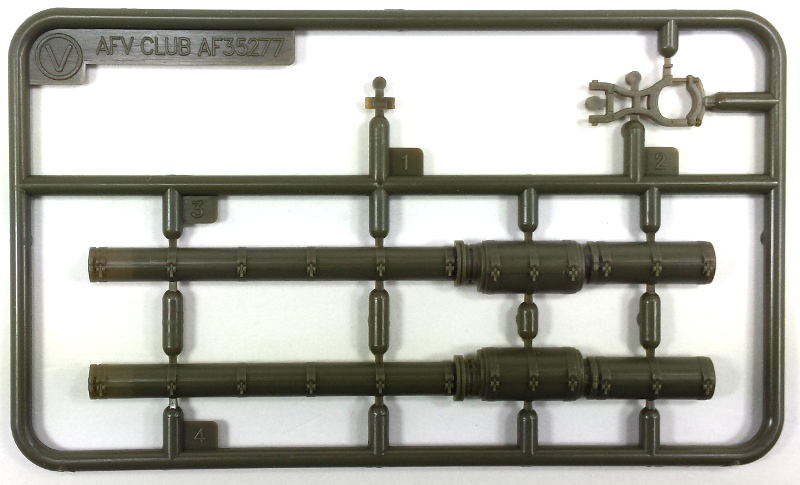
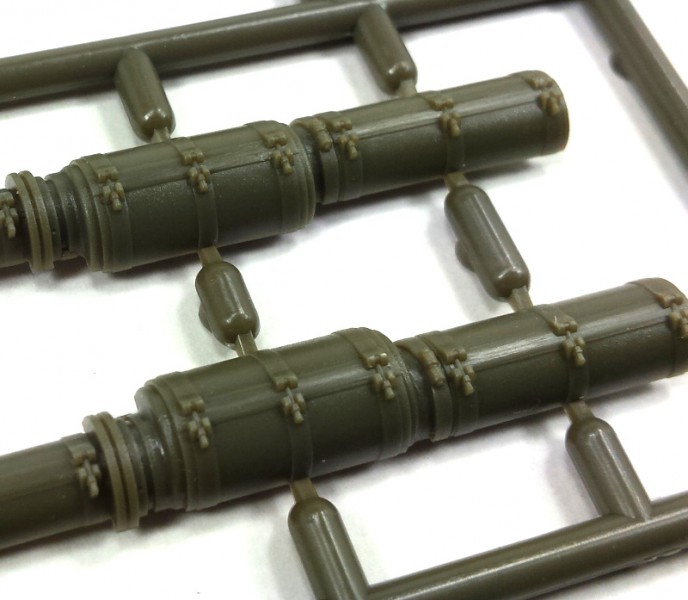
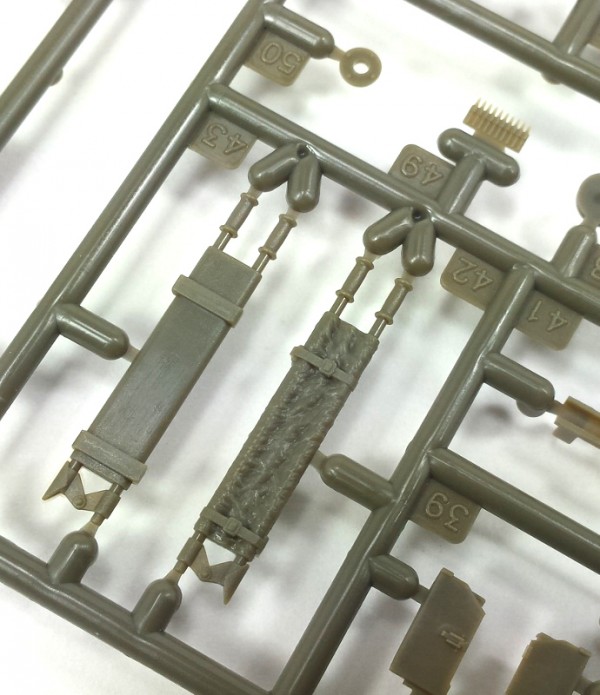
IDF Shot Kal Gimmel 1982 (35267) kit released just before this kit, has been removed and replaced with a two-piece version of the 105mm M-68 gun with thermal wrap.
AFV Club has incorporated a small aluminum section for the lower end of the barrel as well as a hollowed out aluminum muzzle piece. There is a small rubber dust sleeve that is provided for installation at the mantlet connection.
While the detailing is very nice on the barrel, I am personally not a big fan of having to glue the two parts together and deal with a seam line on the top and bottom of the barrel, especially with the added molded detailing this barrel has, as it makes it rather difficult to remove the seam line without removing the details. It is not impossible to smooth the joints out but there will be some careful sanding involved. One option is to replace the barrel completely. There are several different versions available on the open market including an original 105mm similar to the one seen in the Gimmel kit without the shields in place and sold by
AberInside the Armor.
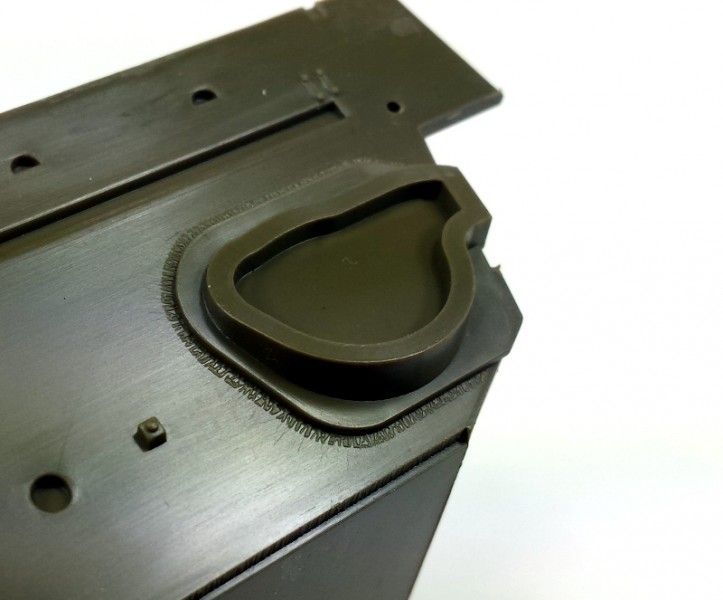
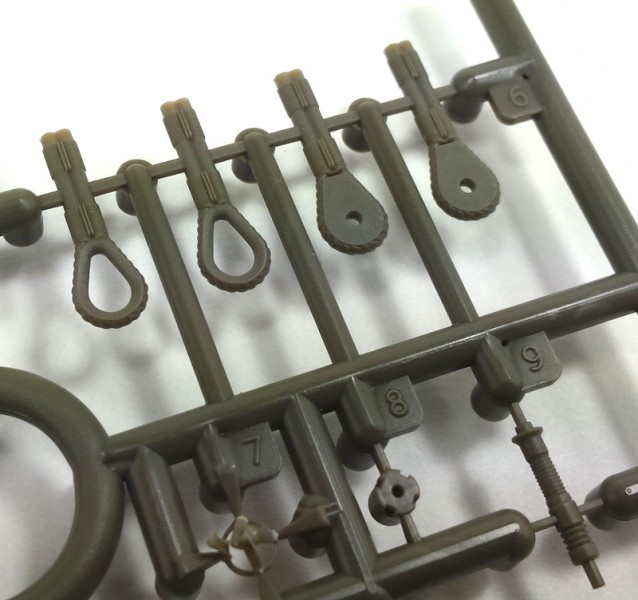
This kit comes with a small photo etch sheet of parts. This is mostly made up of the screening used on the turret basket but does include the front fender brackets as well as various smaller parts used in replacement of plastic parts and strap detailing to the end of the gun barrel. Included with the photo etch parts is an array of identification marking that are seen in use with the IDF. These markings give an excellent representation of the raised numbering as seen on the real tanks. There is a small length of rope included with the kit. This would be used for the construction of the tow cables, these appear to be a long enough to accomplish this task. Replacement of this rope with an aftermarket cable is relatively inexpensive and can often yield better results.
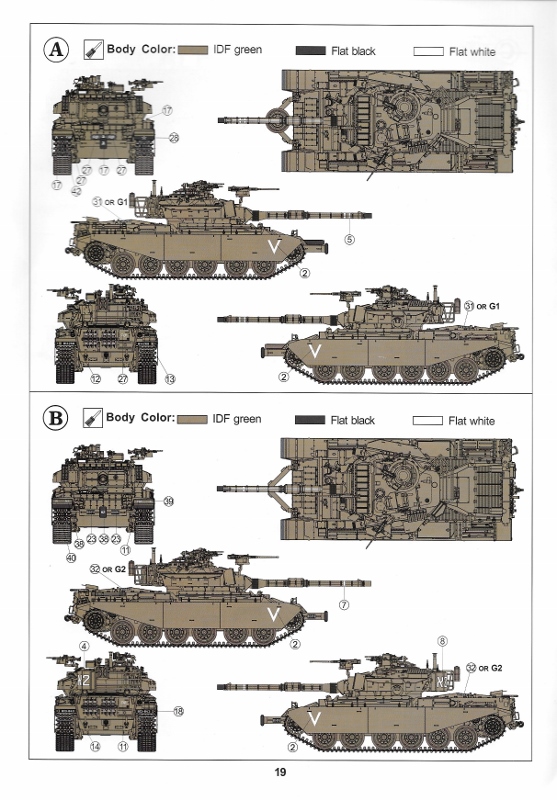
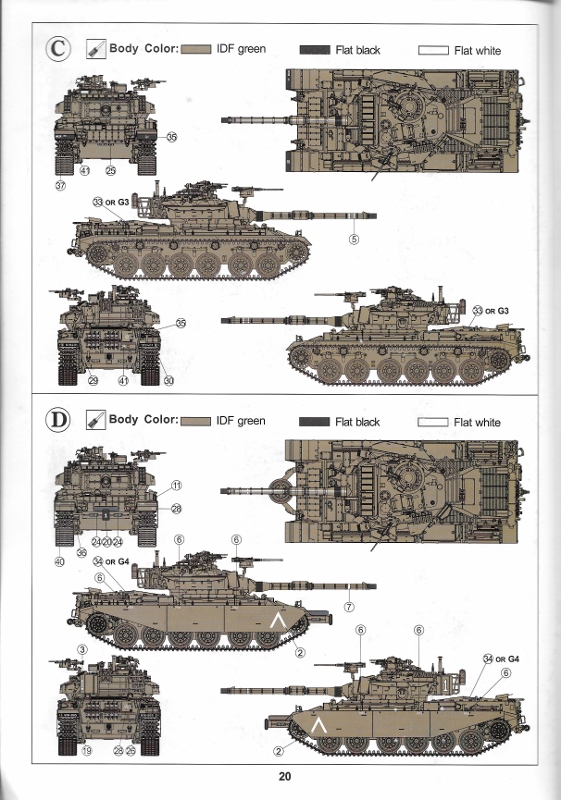
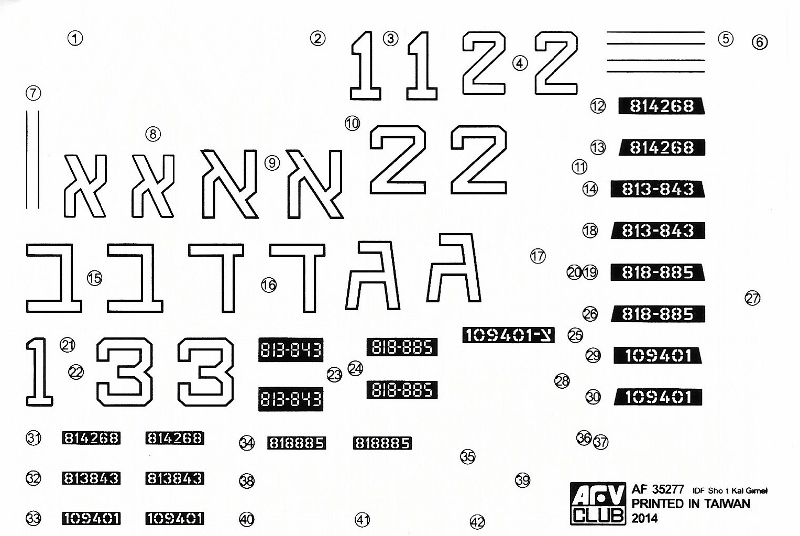
The decals included with the set are printed nicely and give the builder plenty of offerings for depiction of the tank in regards to unit placement. The sheet include the four chevrons in white only, Hebrew letters and numbers as well as small white bars to aid in showing the Battalion, Company and Platoons the tank would have been attached to in the field. This coincides with the two pages of four color options at the rear of the instruction booklet showing the color referencing and painting schemes.
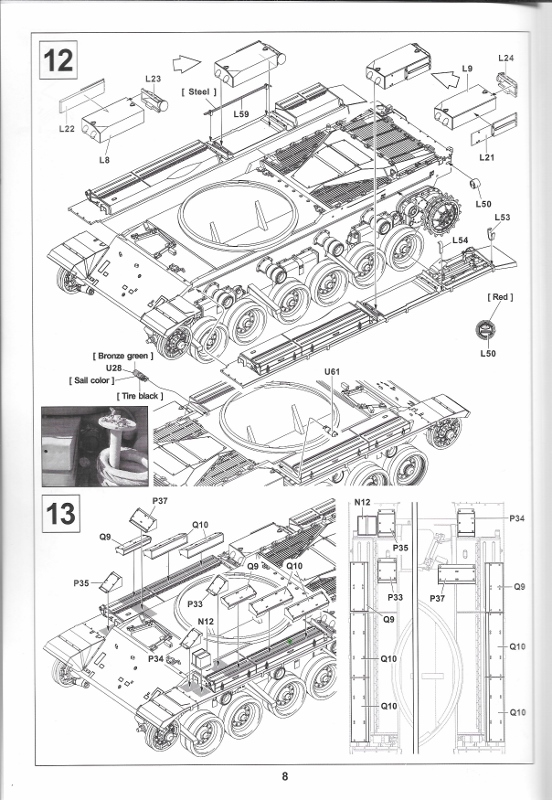
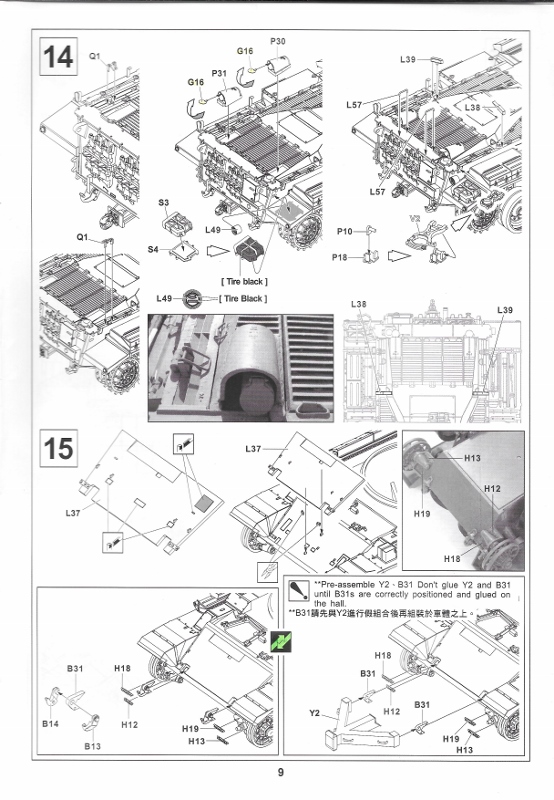
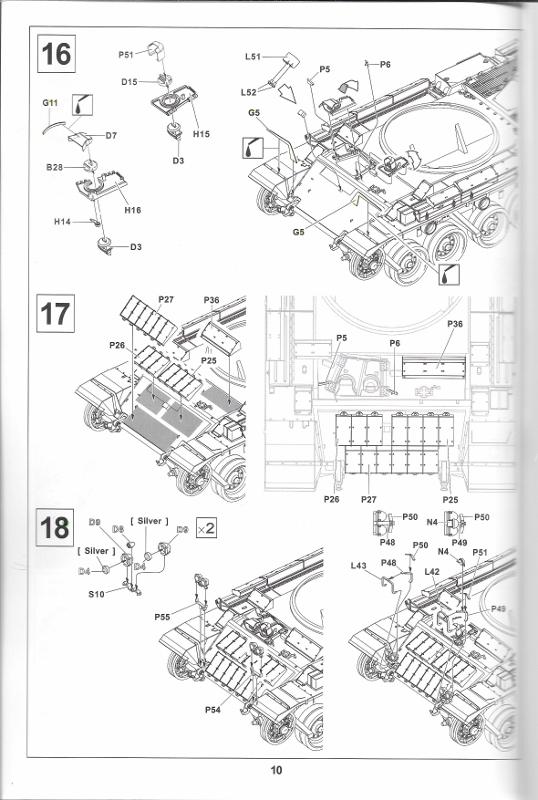
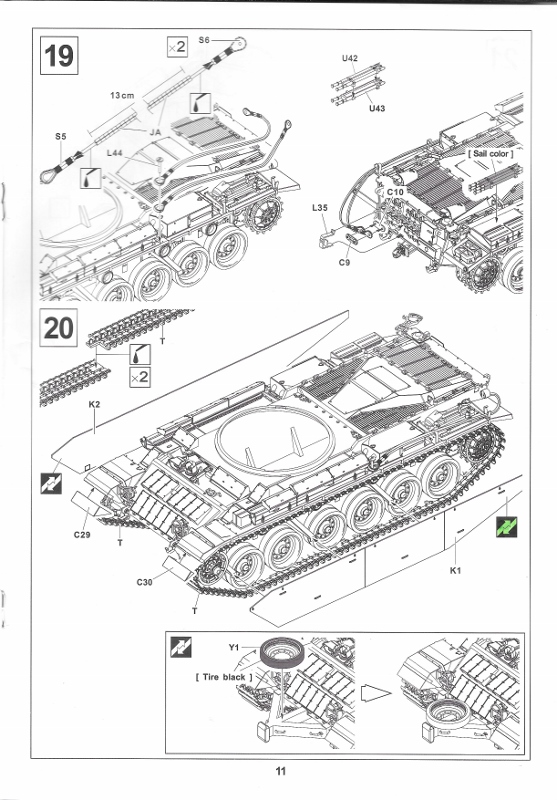
The instructions to this kit are spanned out over twenty pages and consist of thirty-seven steps. This is presented in a mostly black and white A4 exploded view format. The instructions are clear and easy to follow. All indications to any options and the installation of the photo etch parts is defined nicely throughout. I highlighted these options and photo etch constructions in the pictures of the instruction I provided for this review. There is the addition of some black and white reference photos added to the instruction to aid in the placement of parts as seen on the original tank.
Conclusion
Being a fan of IDF armor, I have to come off the block saying I really like this kit. Even though
AFV Club has essentially re-boxed a previous kit in a new box with a couple new parts tossed in, the kit is a solid representation of the real tank with their
IDF Sho't Kal Dalet with Battering Ram kit. The movable suspension if a fine point for me as it can be used on an uneven base without further modifications. The rubber tracks are not one of my favorite items and will be replaced with
AFV Clubs 1/35th scale workable Track link for all Centurion / SHO'T KAL DALET kits, a small price to pay to increase the level of detailing. While I do wish they incorporated a full turned aluminum barrel with the kit rather than using multiple pieces added to the standard two-piece plastic barrel seen with numerous kit, with care and a little elbow grease the kit supplied barrel would work just fine. The high part count of the kit might not be suitable for someone new to the hobby and could be a bit daunting to the average builder. But in any case, with a little time and patience anyone should be able to make their way through the construction process with little effort.
Overall, the detail to the kit is very well presented and the overly busy look to the upgrade armor of the Shot Kal D has been nicely represented with the kit. There is a great deal of crisp detailing to the parts and this should show through nicely with the finished model. Sure there are a few items I pointed out with this kit that may be a problem for some to want or have to deal with when building this particular kit, but in the end they are either easy to correct with either a little extra work on the part of the modeler or by simply purchasing a couple of low-cost items to solve these sidesteps. Finally, I do feel the $88.00 US MSRP pricing of this kit is a bit steep, especially with the inclusion of the rubbery tracks and two-piece barrel, but a quick search around on the internet uncovers some much lower pricing that can be had. I will recommend this kit to anyone interested in the Centurion subject matter and more specifically the
IDF Sho't Kal Dalet with Battering Ram.


Comments