The Remote Weapon System or Remote Weapon Station (RWS) has become much more prevalent on modern AFVs over the past decade. But the RWS is not something completely new. Back in WWII the Germans realised that exposed machine gunners on tank destroyers and assault guns were creating extremely high losses. The German weapon designers created what could be possibly be considering one of the first remote weapon stations for the Hetzer. The remote weapon mount allowed a gunner safely under armour protection to aim and fire the machine gun mounted on top of the turret by way of a periscope and remote trigger device. This differs from a more traditional bow mounted machine gun in that it was not just a point and spray technique. This first generation RWS incorporated a 3X scope and a fixed graticule pattern in order to remotely aim, fire, and adjust rounds on to target. It was not a huge success due to limitations with ammunition supply as well as elevation and traverse issues.
Jumping ahead to the present day we have seen a huge influx in a variety of styles and sizes of RWSs. Whether it be produced in the U.S., Israel, Canada, Germany, and about ten other nations they all serve a purpose on the vehicles they can be adapted to.
In Germany, Krauss-Maffei Wegmann designed the Fernbedienbare Leichte Waffenstation (FLW) family of weapon stations. They come in 100, 200, and 200 versions thus far and can mount a variety of different types of weapons and optics to go high tech with laser range finders, thermal imagers, and high resolution day cameras.
The FLW 200 is the mid range platform and can be fitted with a 12.7 mm HMG or a 40 mm grenade launcher. This allows the FLW to pack quite a punch over intermediate to long ranges. When fitted with the Wegmann 76 mm grenade dischargers the FLW 200 is a very well rounded offensive and defensive weapon system for any vehicle it is mounted on.
FLW 200 Kit:
Live Resin has become more than trend sending with their wide range of highly detailed weapons, figures, and accessories. Stepping up to the task Live Resin has produced the FLW 200 to the liking of many modellers interested in detailing their AFV models to the maximum potential.
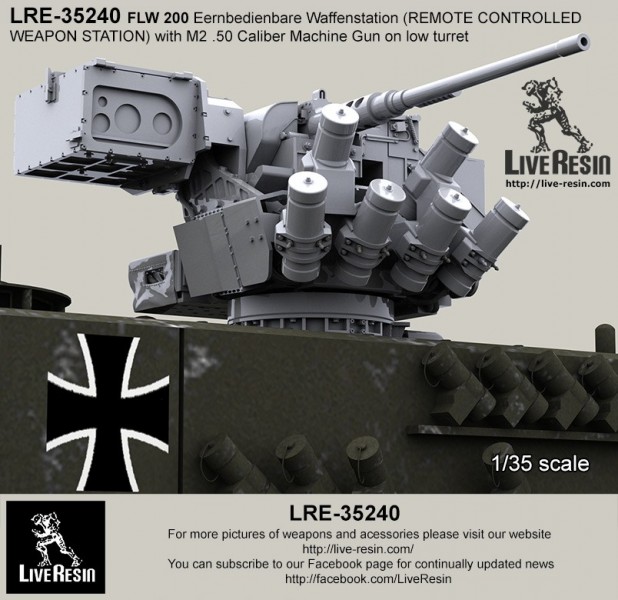
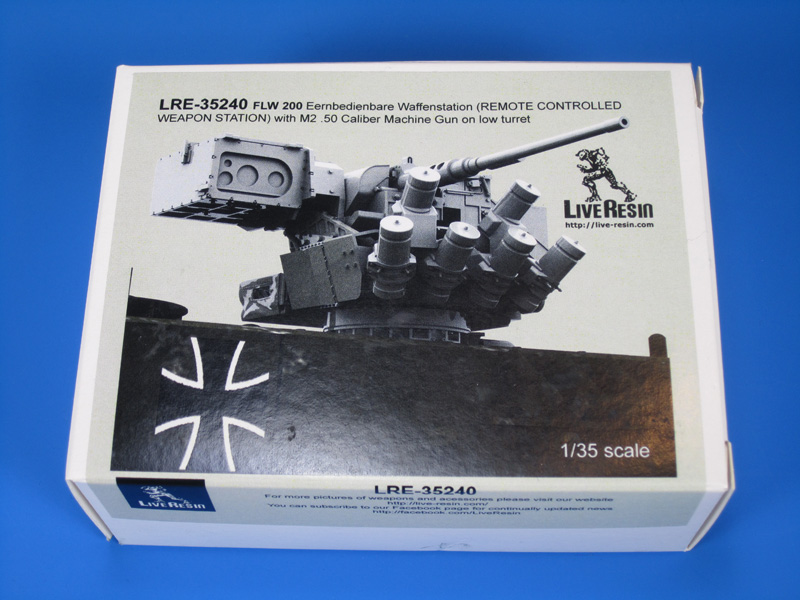
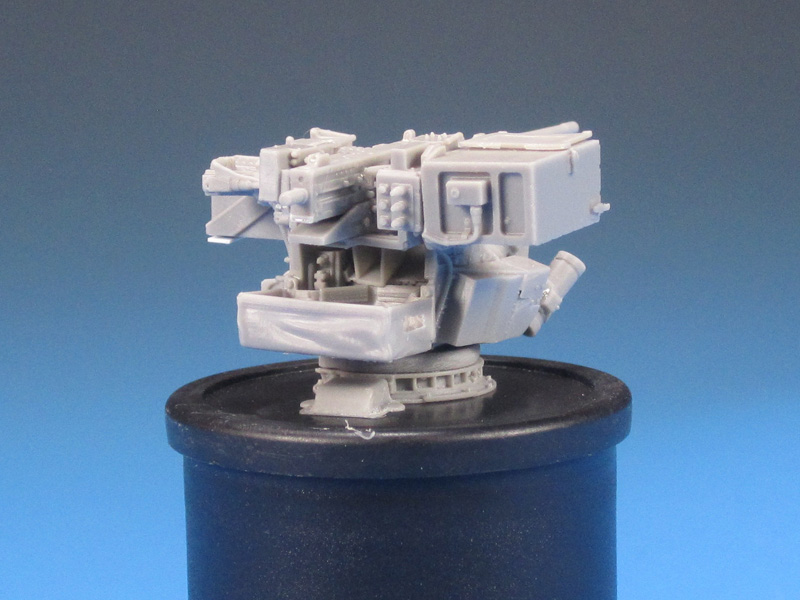
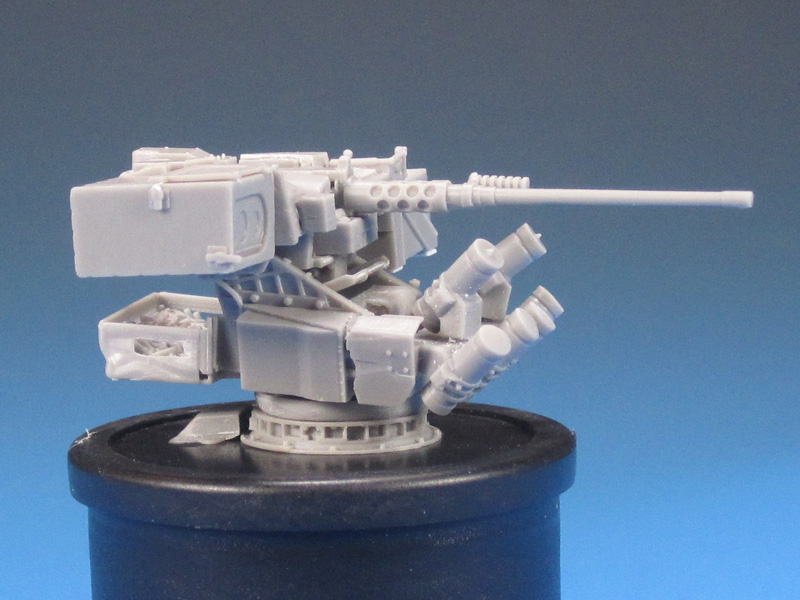
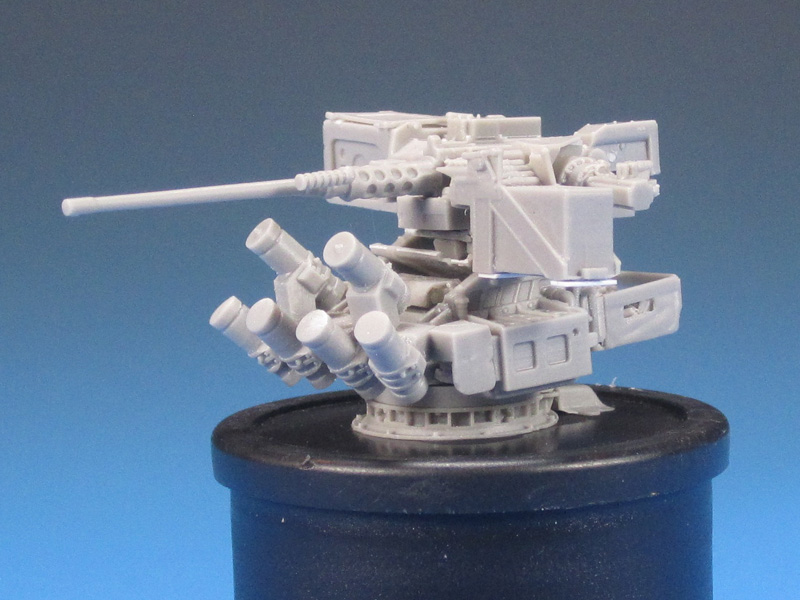
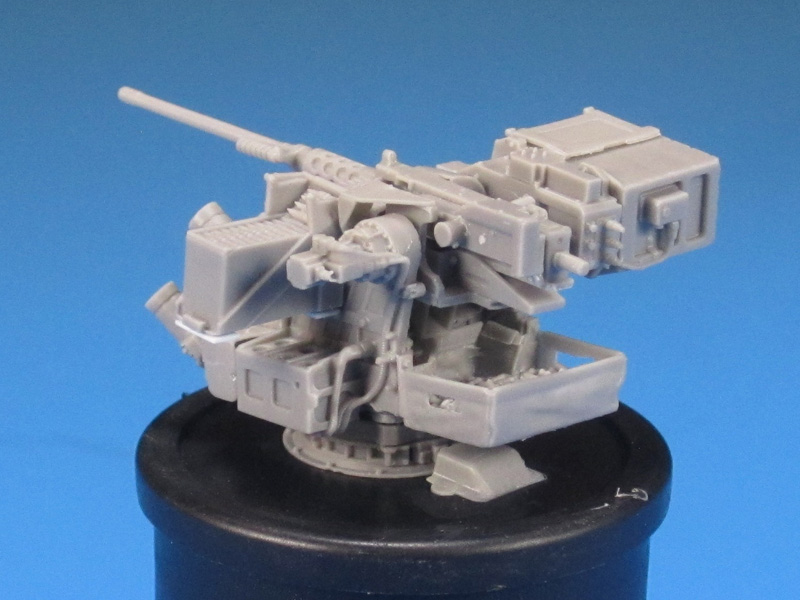
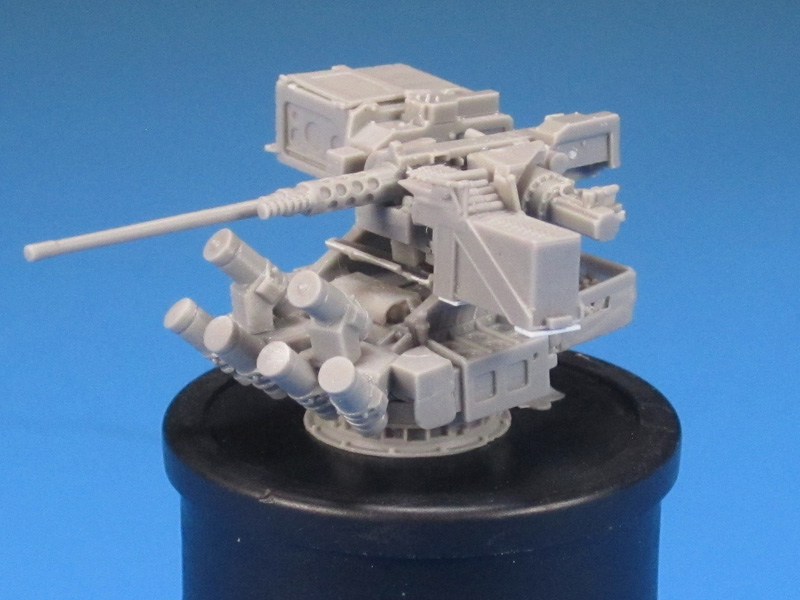
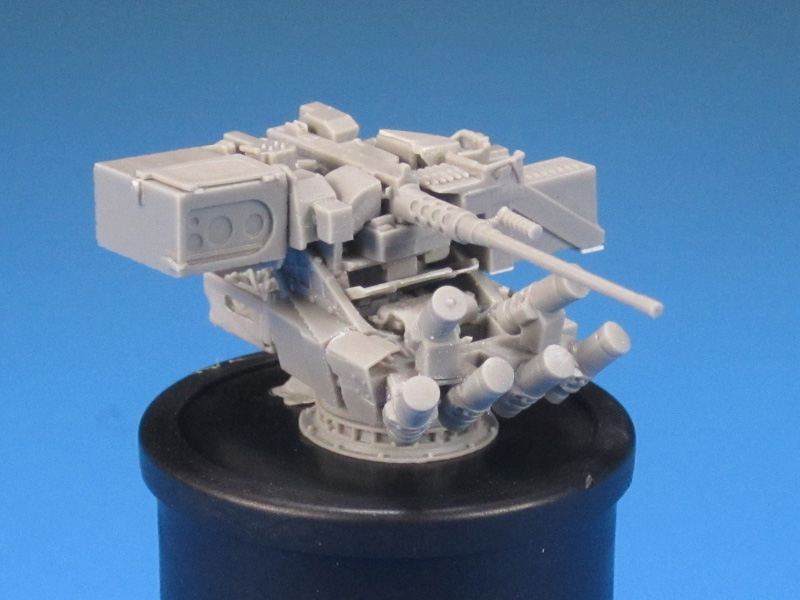
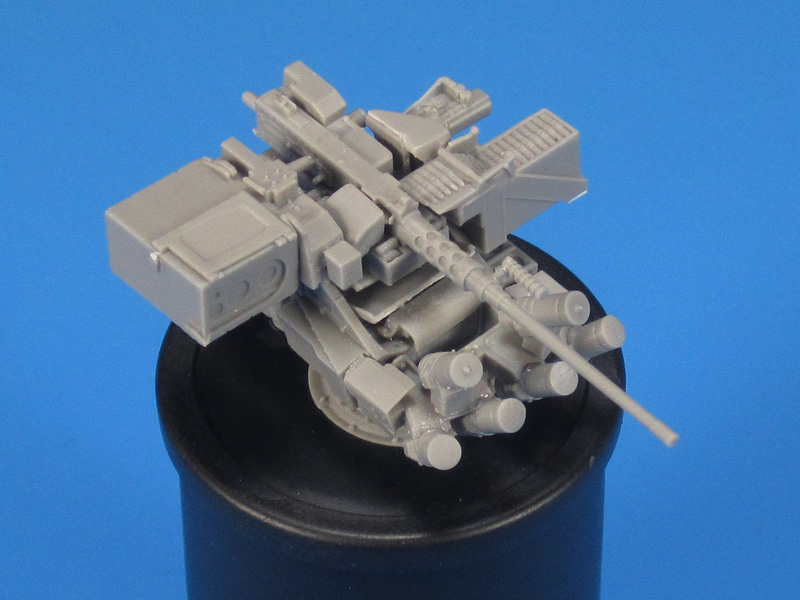
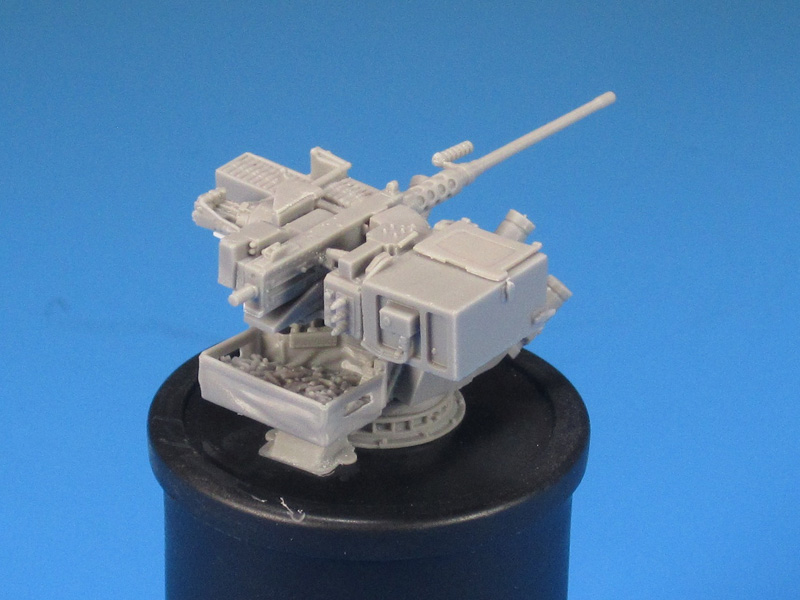
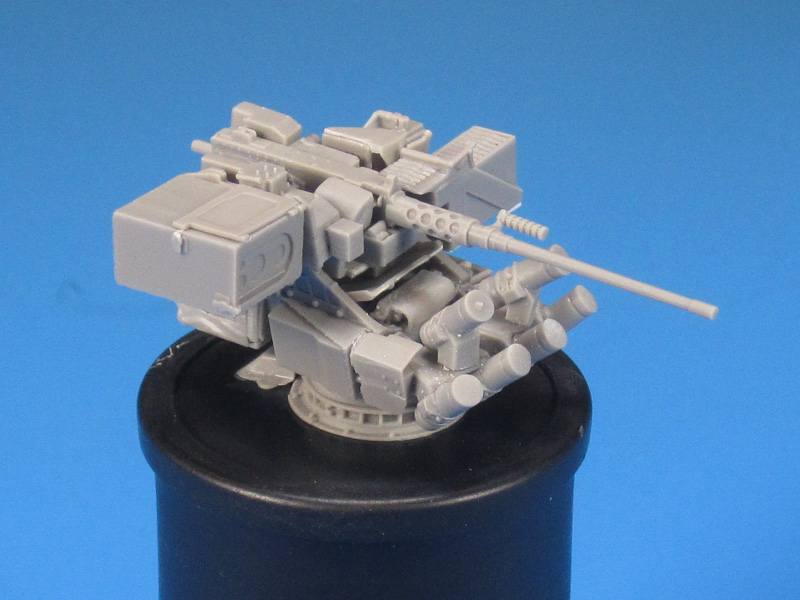
Live Resin LR-35240 is the FLW 200 with M2 .50 Caliber HMG on the low turret. The low turret appears to be the first version used for trials or testing or demonstrations on the Leopard 2A7, Leopard 2 PSO, Boxer GTK, and the Dingo. From what I can determine the low turret version had some challenges which limited functionality and therefore a high turret version has been adopted. Live Resin LR-35241 covers off the high turret version of the FLW 200.
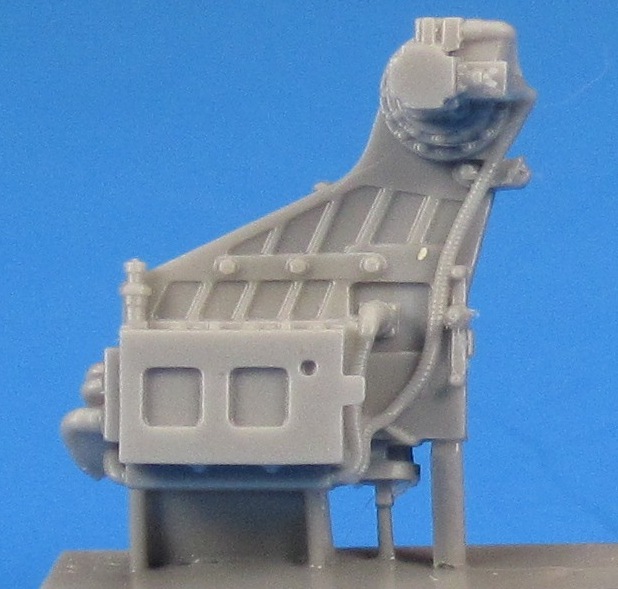
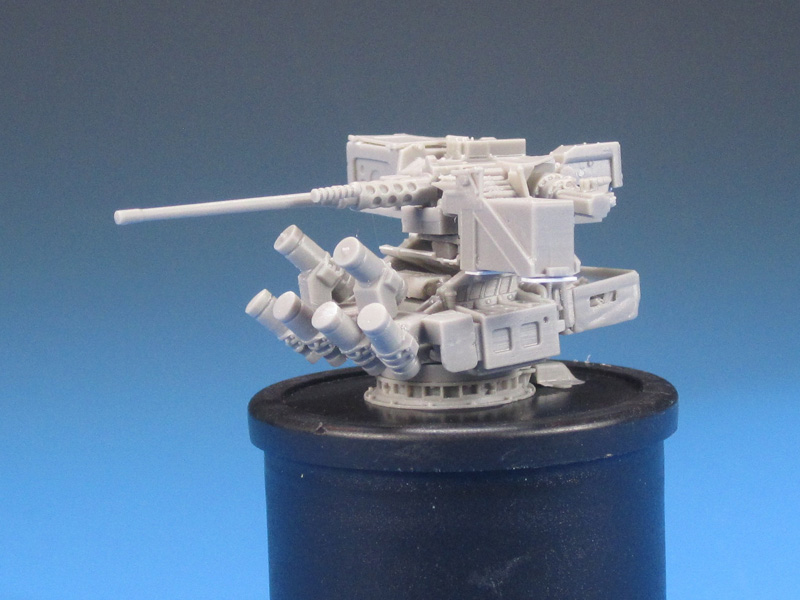
Back to LR-35240 it is equipped with a .50 Caliber HMG and the LAZ 200L Optical System. The kit also includes the grenade dischargers and the spent casing bag. The low turret includes the electrical connection interface for the roof/turret top.
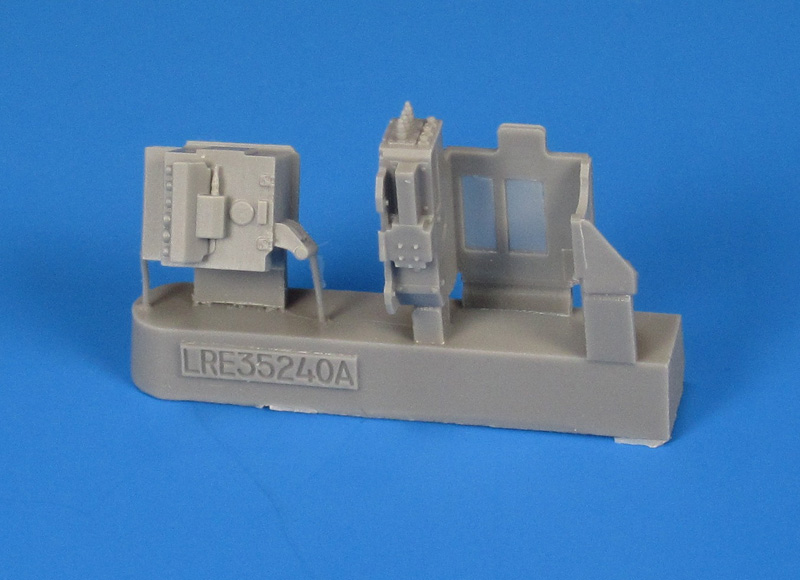
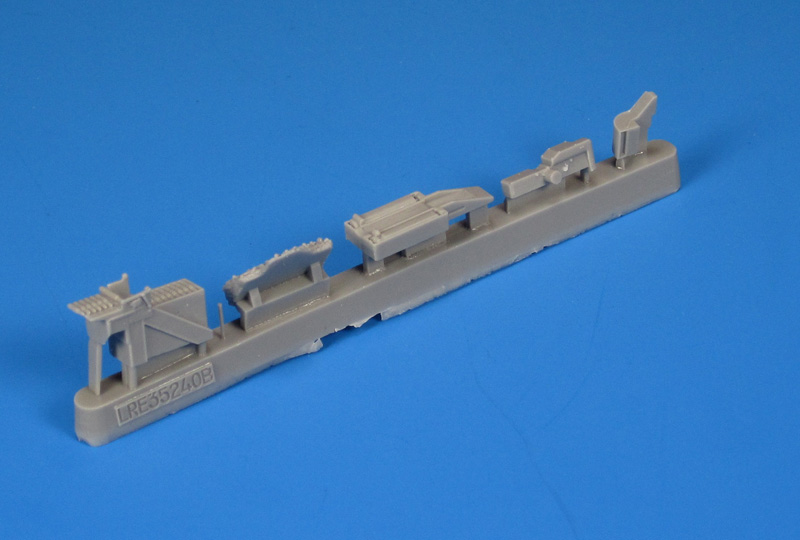
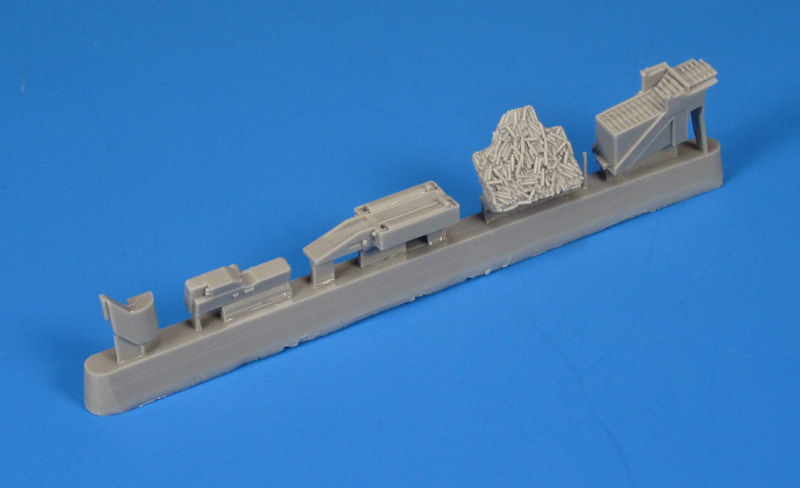
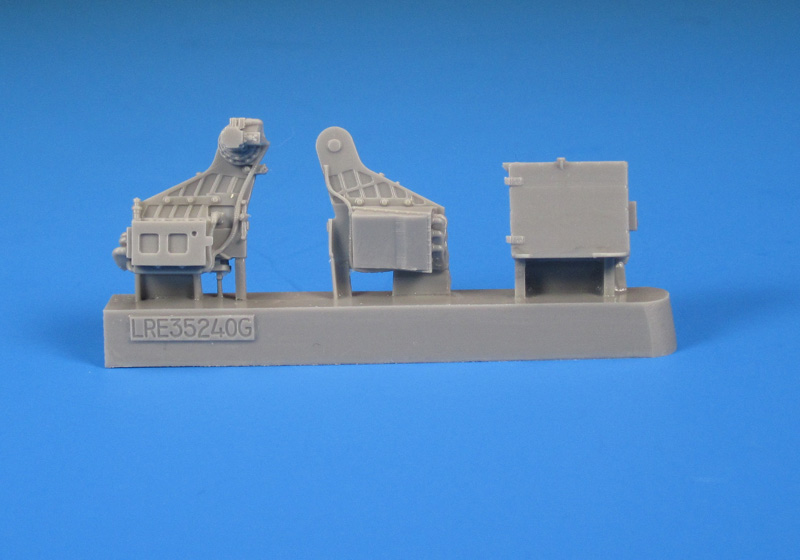
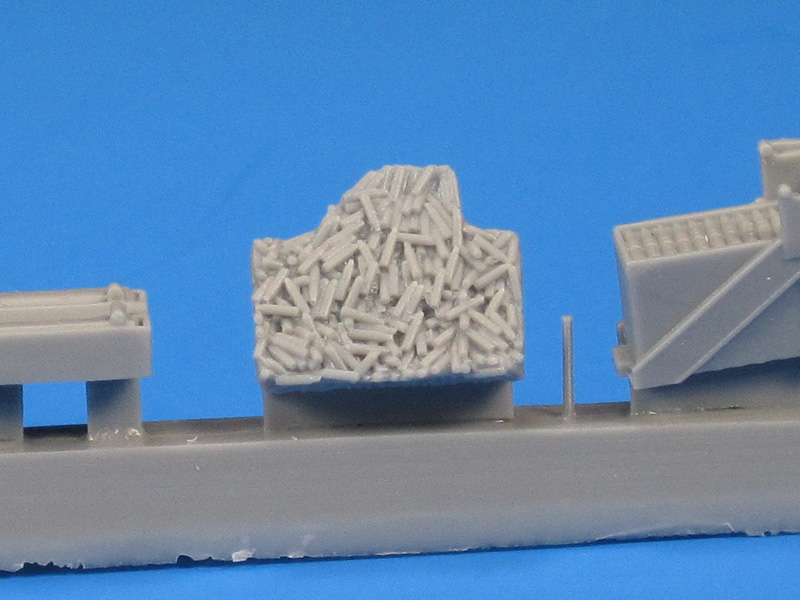
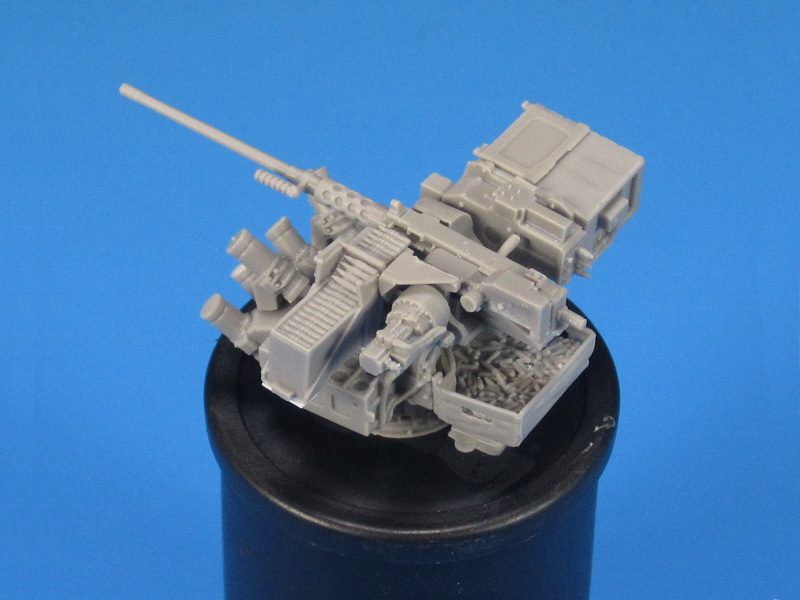
Live Resins LR-35240 come with 29 parts all moulded in dark grey resin. The detail on the castings is very high with intricate bolt patterns and a multiple snaking wires present. The spent casing bag is perforated on the bottom if depicted empty and a resin insert of .50 Caliber casings is provided is you want to show the FLW 200 in action.
I cannot stress enough that extreme care must be taken when removing the parts from the casting blocks. This is the second Live Resin kit that I have built that has included a .50 Cal. On both occasions the delicate butterfly triggers have broken during clean up. In this kit I was able to successfully remove the butterfly trigger/handles in one piece but it disintegrated instantly when I tried to trim off excess resin. It might be a very good idea for Live Resin to revisit the casting of this particular part on the .50 Cal HMGs.
Clean up of the resin parts is simple if you know exactly what to look far. Some of the parts seem fine when trimmed but then I realized during assembly additional trimming was required in order to make parts fit properly. Part of the issue is that some of the casting flash is incorporated so well into the parts it is very hard to tell where the part ends and where the flash stops. The other issue is the instructions. There are no instructions in the box. The front and back of the box provide some CAD drawings of the FLW 200 but they are not effective for assembling the kit.
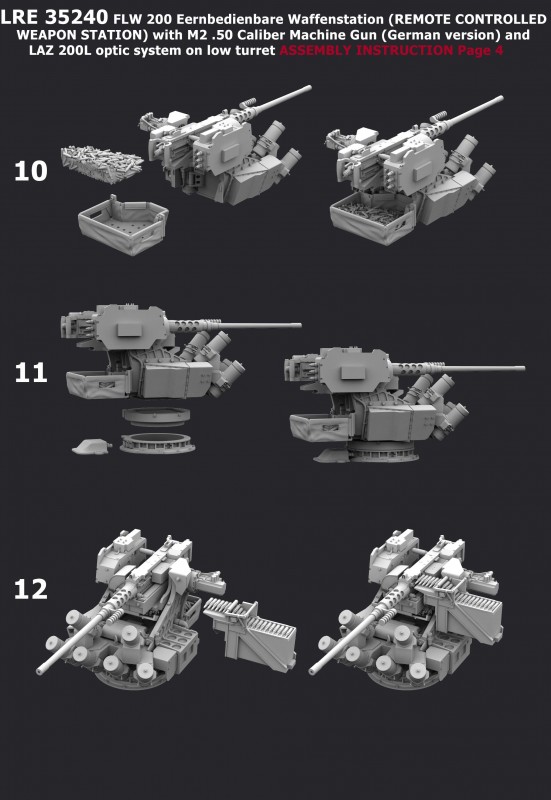
You must find the instructions on the Live Resin site. In this kit there are five pages of instructions to assemble the FLW 200. I would suggest saving them on your computer or printing them off. For your convenience I have included the instructions.
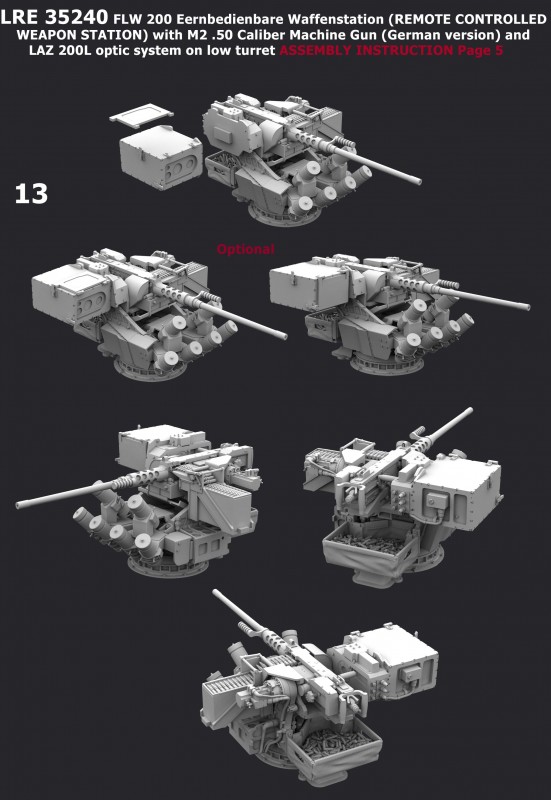
The instructions provide CAD drawings of the parts depicting 13 steps to assemble the kit. The steps are logical sub assemblies to continually build up the FLW 200.
I highly recommended studying the parts, studying the instructions, and then dry fitting parts before applying any CA glue.
There are no painting instructions or markings for the FLW 200. You can conduct internet searches to find images of the FLW 200 quite readily.
Building the FLW 200:
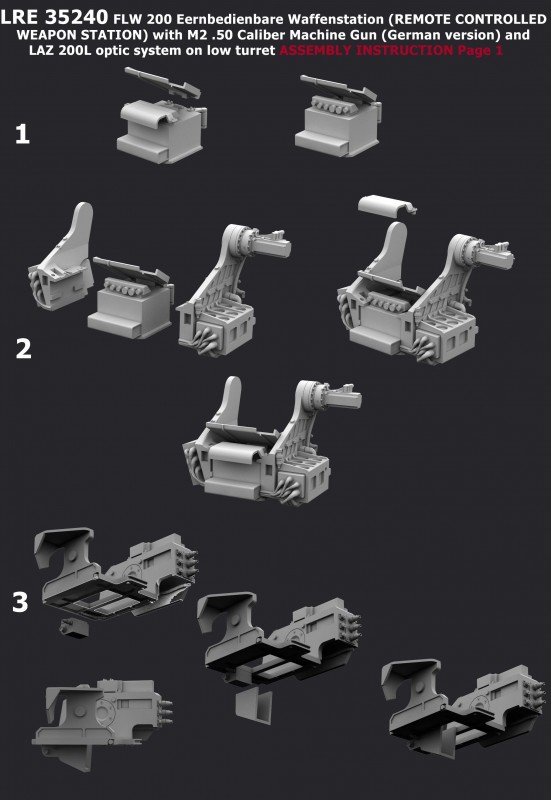
Step 1 consists of attaching a casing deflector plate to the top of a control box. The placement angle of the plate is best done with the Mark 1 eyeball.
Step 2 consisted of attaching the right and left support frames on either side of the control box.
Step 3 consists of attaching a casing chute and small box to the bottom of the weapon cradle.
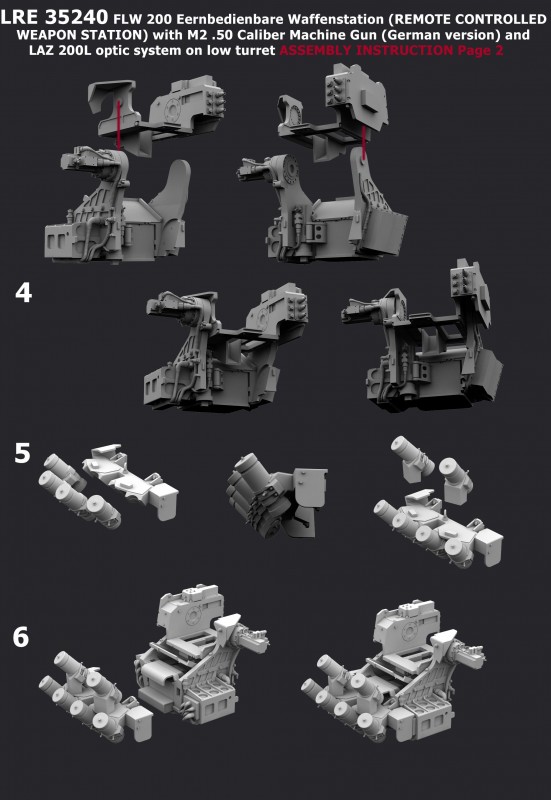
Step 4 consists of attaching the weapon cradle to the support frames. I didnt use any glue for this step as I wanted to allow the cradle to pivot during assembly.
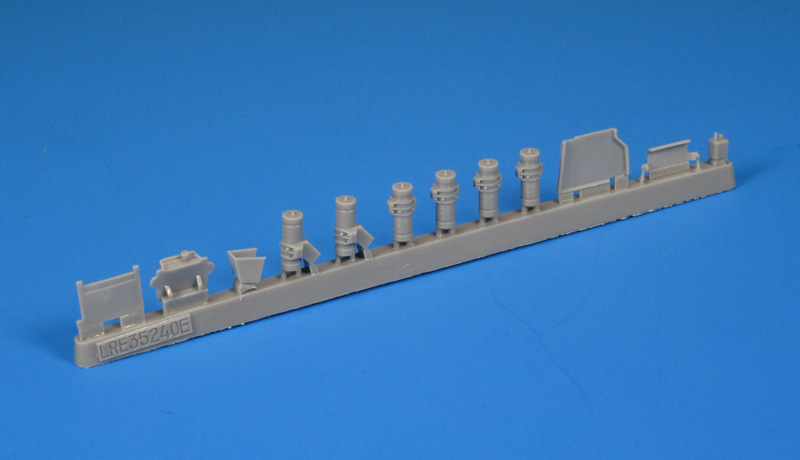
Step 5 consists of attaching the 6 x grenade dischargers to the grenade discharger mounting frame. Placement is very straight forward. One detail missing from these parts in the retaining cables from the protective caps to the grenade discharger. You will note that I said retaining cables instead of retaining chains. Chains are commonly used on the grenade dischargers used on AFVs such as Leopards but the FLW 200 uses a simple cable.
Step 6 consists of attaching the grenade discharger sub-assembly to the front of the FLW 200. I noted on my parts that the resin guards on the side are very flimsy and was easily damaged when cleaning up the parts. Extra care cannot be stressed enough!
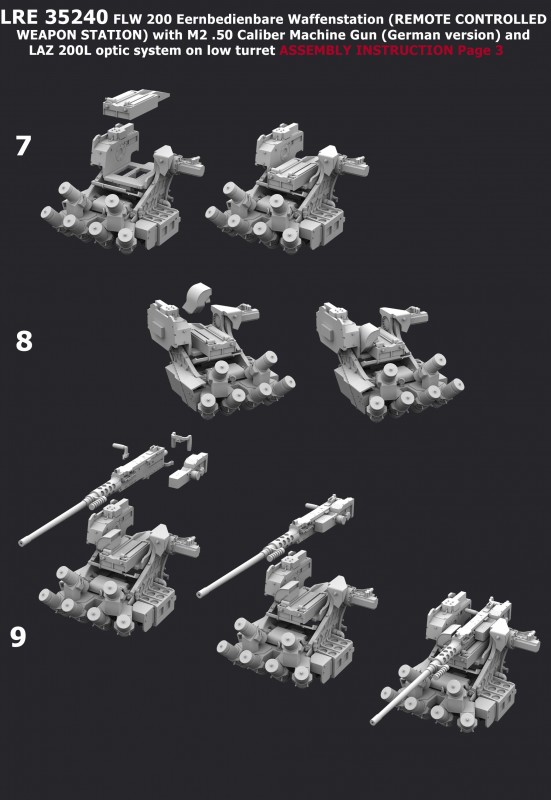
Step 7 consists of attaching the weapon mount to the top of the cradle. I found the instructions very subjective with respect to placement of this part and if I did it again I would not attach this part in this manner. I would attached the .50 Cal to the part and then attach it all at the same time to get an exact placement. This is critical for later steps when the ammunition box is attached.
Step 8 consists of adding a link chute to the left side of the cradle. I test fitted this part and then decided to bump this step to the end when I could know exactly how to line it up with the .50 Cal in the cradle.
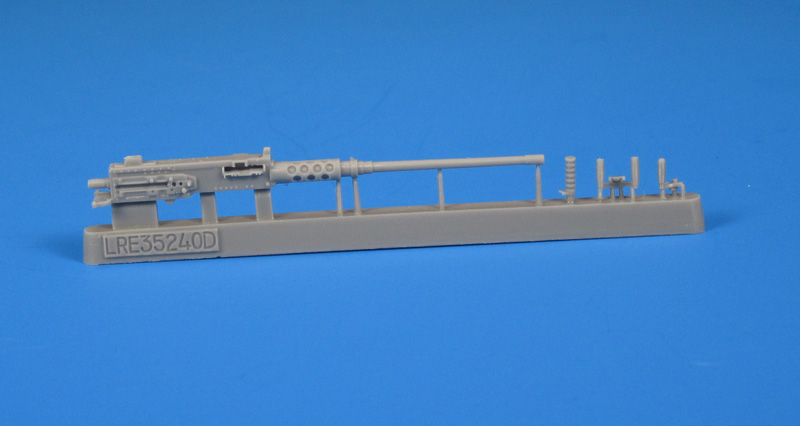
Step 9 consists of assembling the .50 Cal HMG. A barrel changing handle, cocking/charging handle, the butterfly trigger, and a firing solenoid are added to the HMG before positioning it on the cradle. The barrel of the .50 Cal will need drilling out for added detail. I did not note any barrel warp on my .50 Cal which is always great in a resin product. As my butterfly trigger disintegrated I did not attach it. In reality a back plate/buffer assembly could be attached without a butterfly trigger due to the firing solenoid.
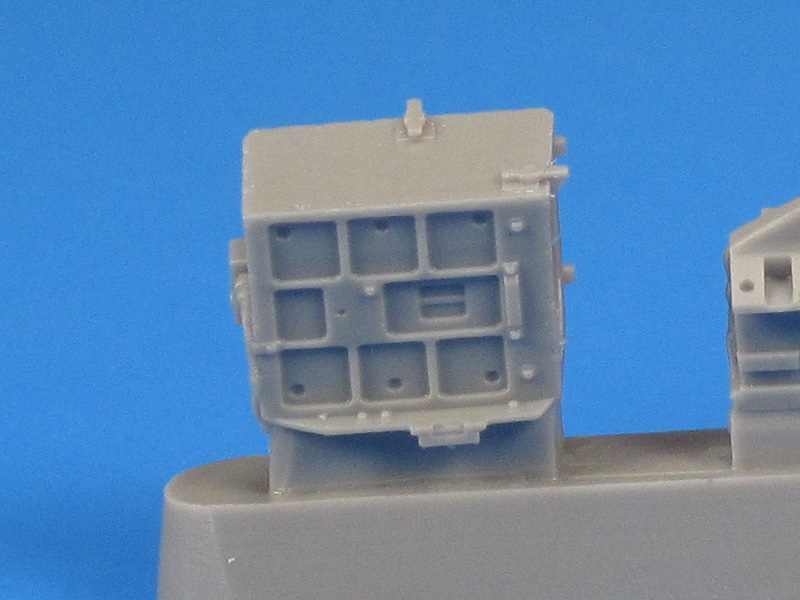
Step 10 consists of attaching the spent casing basket to the lower rear of the FLW 200. This is a really nice part with the option to put cast resin casings into the basket.
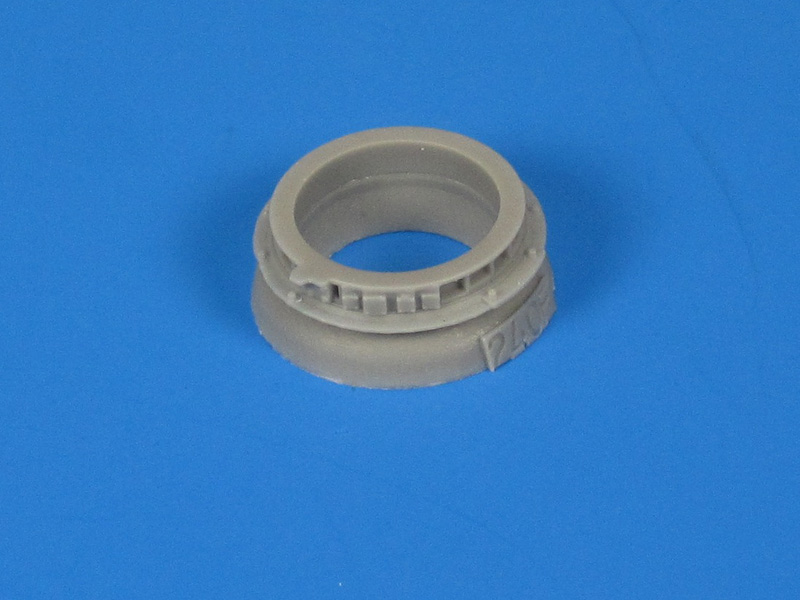
Step 11 consists of attaching the low turret rings to the bottom of the FLW 200. Small indents allow the correct positioning. Also included in an electrical interface but this should be added when you actually attached the FLW 200 to the top of an AFV in order to get the correct positioning.
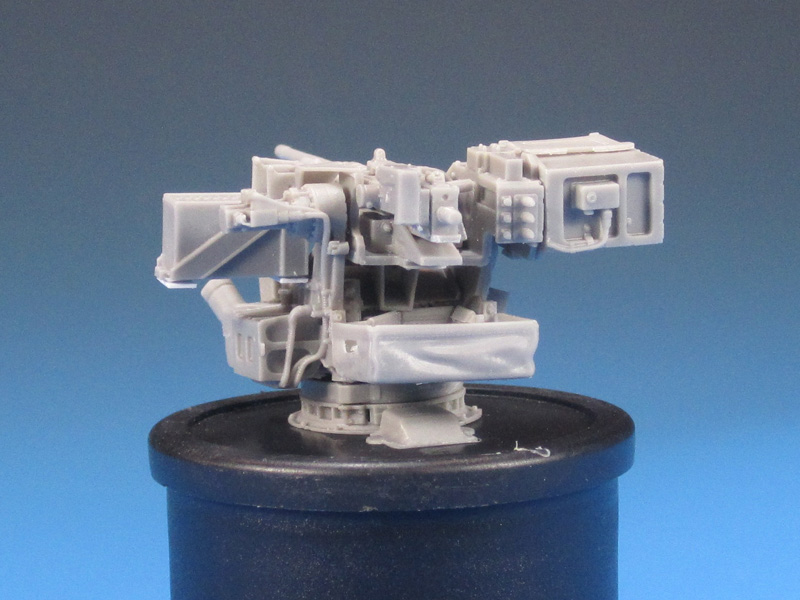
Step 12 consists of adding the .50 Cal ammunition box/tray to the left side of the FLW 200. Placement is straight forward but the attachment point is somewhat weak and not at all defined in the instruction images.
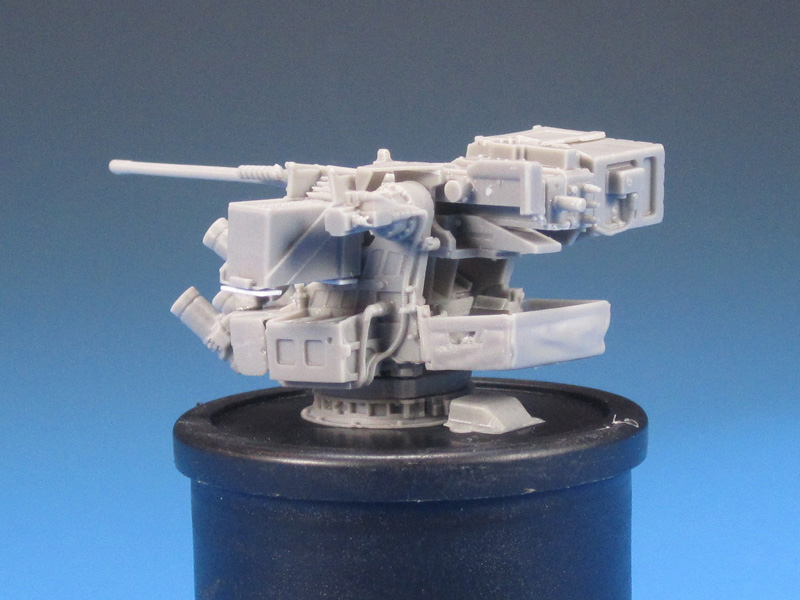
Step 13 consists of attaching the LAZ 200L optics box to the right side of the support frame. It fit like a glove and you can choose to have the optics cover open or closed.
Conclusion:
I did note in referring to reference images that some cables are not depicted in the kit. This mainly relates to the rear of the LAZ 200L where the cables should be a bit more pronounced and hanging or looping rather than tucked up against the components. This is a limitation of casting and a modeller can define the cabling as they wish.
This is an impressive little kit that will add to the detailing on an applicable AFV or even a what if project to add more firepower and spice up your project!
SUMMARY
Highs: The resin casting detail is superb. A great amount of detail is provided in a little package.Lows: The instructions while very pretty to look at are subjective to interpretation at times. The butterfly trigger on the .50 Cal is very fragile.Verdict: A highly detailed kit of a very modern weapon system. It will add excellent detail to your AFV project.
Our Thanks to Live Resin! This item was provided by them for the purpose of having it reviewed on this KitMaker Network site. If you would like your kit, book, or product reviewed, please contact us.


Comments