This set is for the Trumpeter 1/72 scale British AS-90 self-propelled howitzer (Trumpeter kit #07221).
the set
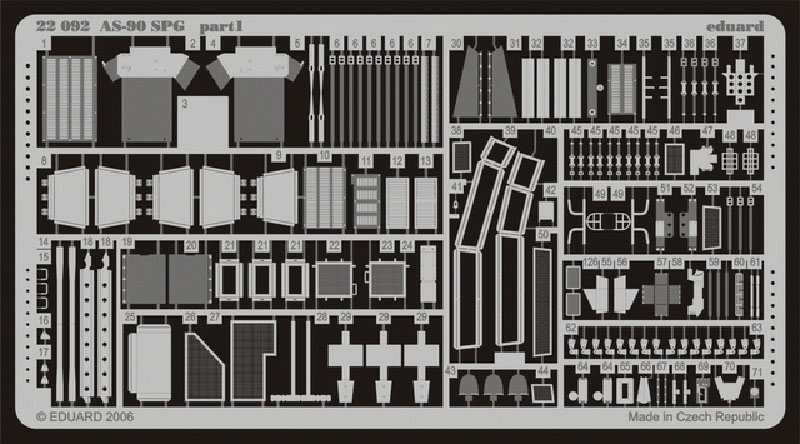
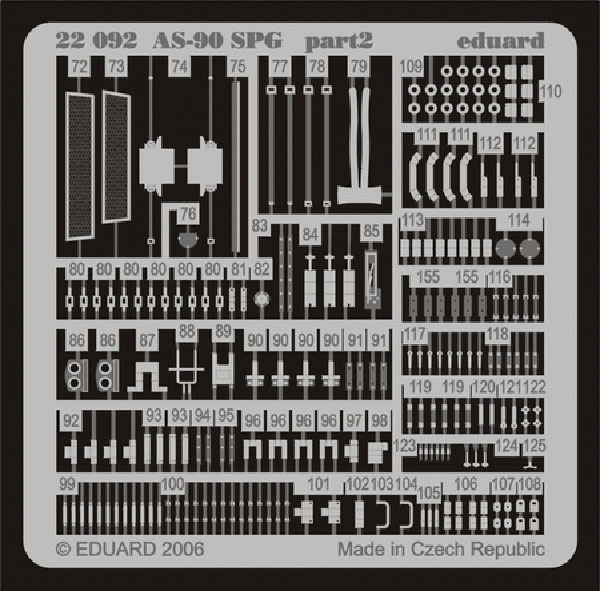
The Eduard set consists of two photo etched frets, one large and one small fret, and six pages of instructions. The parts are superbly made and very finely detailed. The photo etched parts go to number 125, but there are about 200 separate photo etched pieces. Many of these pieces are miniscule and would not be used by the average modeler, myself included.
Ive built many 1/72 scale models using both the older and newer Eduard photo etch sets. Here are some words of advice based on my experiences in dealing with 1/72 scale armor photo etch. Eduard uses multi-colored instructions with red to highlight molded on details and kit parts that must be cut or sanded away prior to installing the photo etched details. Use care in determining which details you remove. Sometimes it is better to leave the molded on kit details than risk damaging the surrounding surfaces. Additionally, some of the photo etched parts are ridiculously small and extremely difficult to assemble. Look at what parts replace the molded on detail before you cut or sand. The complexity of the photo etched subassembly may deter you from using it. Lastly, if you do decide to remove kit detail, make sure you go through the entire instruction sheet before beginning any photo etched assembly. Subsequent pages may show required cutting or filing on the piece youve just finished adding photo etched pieces.
The intent of the review is to follow the Eduard instructions page by page, pointing out the areas being detailed and any problems the builder may encounter.
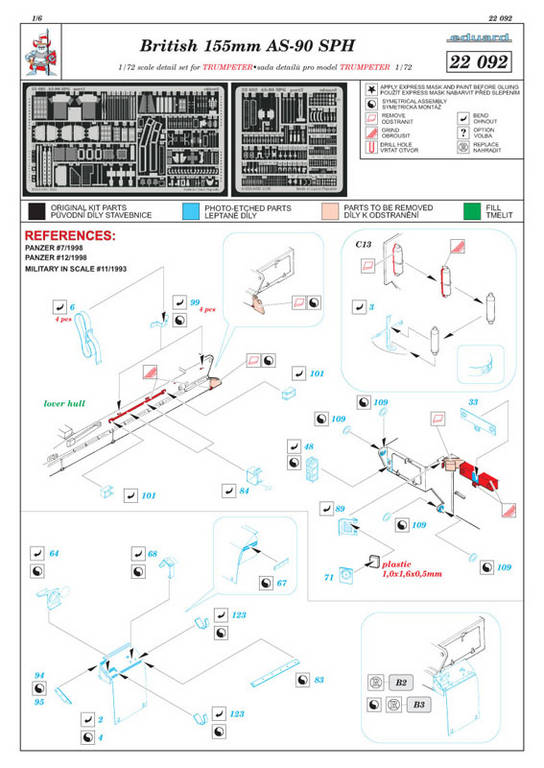
page 1
Page one begins by removing the tankers bar (long crowbar) from the left side of the upper hull and cutting away the rear fender extension. Tie down straps, brackets and clamps are added in place of the tankers bar. You will have to scratch build a replacement tankers bar from a piece of styrene rod or stretched sprue. Next the instruction show the removal of a 4mm long molded on fire extinguisher from kit part C13. The mini piece is then filed round and placed into a PE bracket.
The first page of instructions is rounded out by assembling the rear fender mud guards and some additional lower hull detailing. I recommend just using the PE mud guards and fender details to dress up the kits parts instead of replacing the kit mud guards B2 and B3. Of particular use here is a pair of taillight cages for the right and left side (parts number 48).
page 2
Page two shows the removal of the front fender mud guards and some molded on detail on the front slope of the upper hull. I hope you didnt add the photo etched assemblies from the first page without removing these details first! Eduard provides fine mesh grill covers for the engine intakes. These are nicely done and go right over the engine grills. Other good items on page two are guards for the headlights, drivers vision block details and the front light assemblies. The front light assemblies are particularly useful since my kit parts B13 and B14 had tiny sink marks in the top.
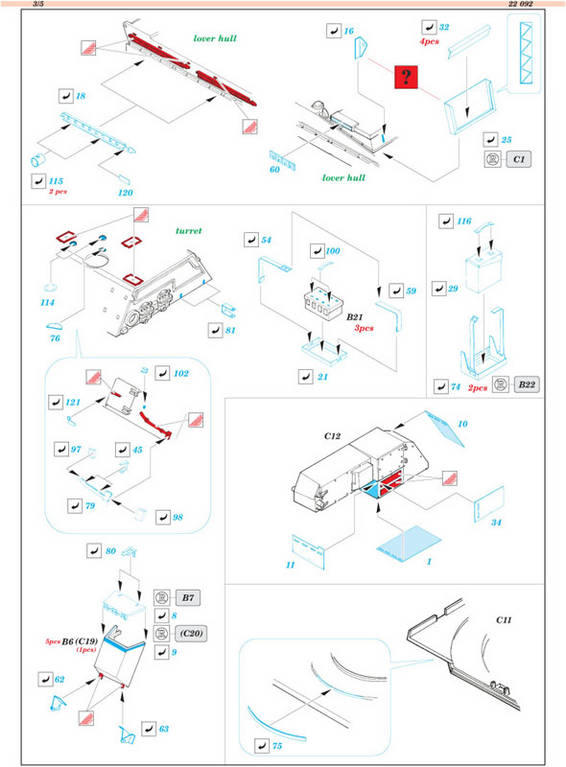
page 3
Once again the third page of instructions show the removal of more molded on detail on the lower hull, this time from the right side of the hull. The perforated metal pieces are supplied as photo etched replacements. A photo etched combat identification panel (CIP) is provided as well. The remainder of page three details the turret by adding small arms ammo racks, stowage box lids and a barely identifiable molded on axe.
page 4
Page four details the turret hatches, C17 and C18, with latches and details the commanders cupola sight, C10. More molded on pioneer tools are removed from the turret. The shovel head is replaced and the pick axes and handles are replaced as well. A PE sledge hammer is provided too.
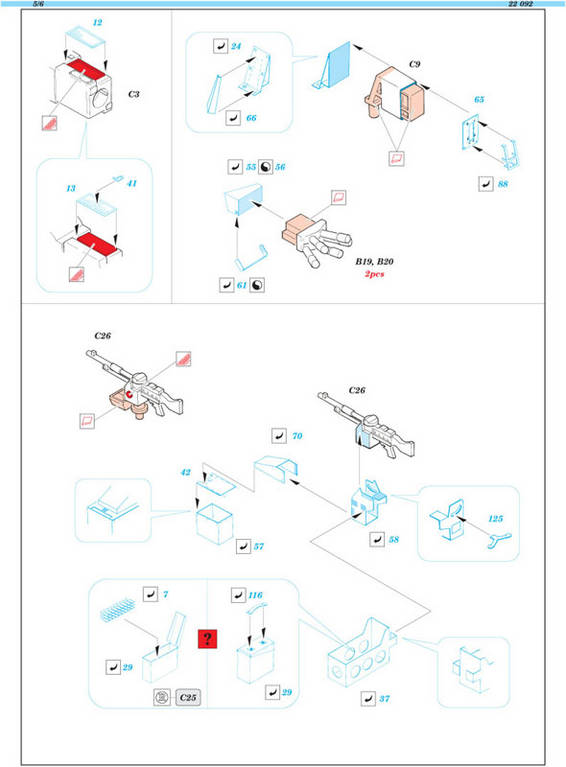
page 5
Page five details the main gun mount, C9 and C10, adds mounts to the smoke grenade launchers and super details the commanders machine gun by adding an ammo rack, ammo can and even adds a couple of belts of ammo for the can.
page 6
Page six deals with construction of the turret roof mounted camouflage net stowage bin. The multi-part assembly replaces kit part C21, which is molded solid. PE mesh is added to the PE frame, but the solid kit mesh could be cut away from part C21 and replaced by the PE mesh pieces if a simpler construction is desired.
in conclusion
Overall, the set is well made and is very useful in accurizing the Trumpeter AS-90. I recommend this set to modelers of intermediate experience or higher. It is definitely not for the beginner or someone not familiar with the use of photo etched parts in this scale. While there are many useful pieces in this set, do not feel compelled to use them all.
Take care in reading all the instructions before you start building, pick and choose which detail parts you want to use, and you should have no problems.
My thanks to Eduard for the review sample
SUMMARY
Useful, well thought out, but not for the beginner.
Our Thanks to Eduard! This item was provided by them for the purpose of having it reviewed on this KitMaker Network site. If you would like your kit, book, or product reviewed, please contact us.


Comments