Introduction
The long awaited, and greatly anticipated ICM 1/35th scale Studebaker US6 has arrived and, of course, I had to order several copies. I pre-ordered 2 from Dragon On Line USA when they were first posted on their website and strangely only received one in shipment and, as of this date, still havent received my back ordered one. On the other hand, I ordered one from Sprue Brothers and one from Great Models and both arrived a few days later. After reading several posts on the various sites about broken parts, Im happy to report that none of the three kits I have arrived with any broken parts although each did have a part or two loose in the box.
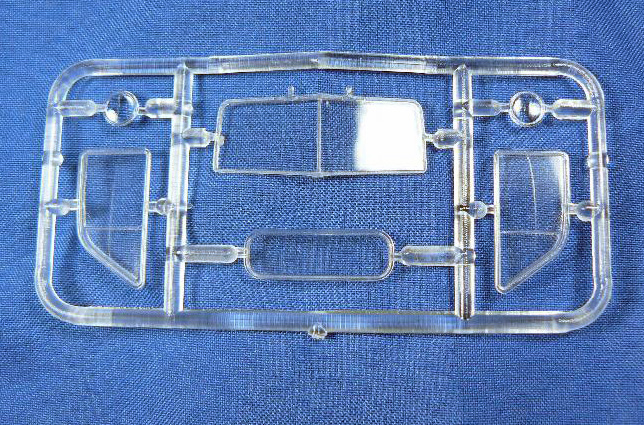
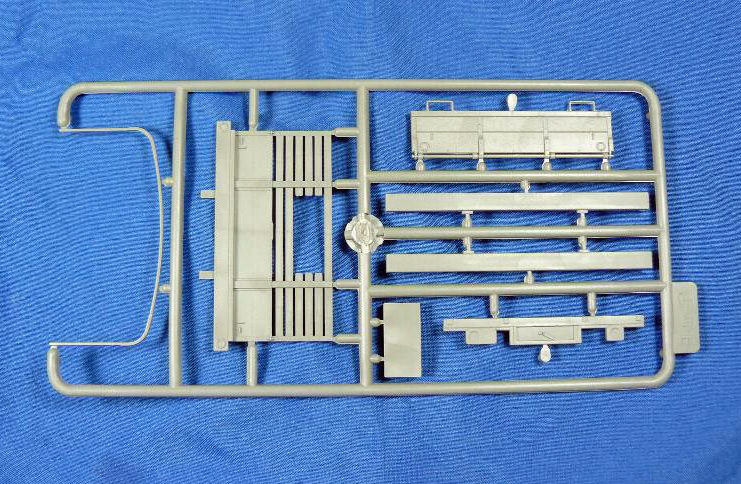
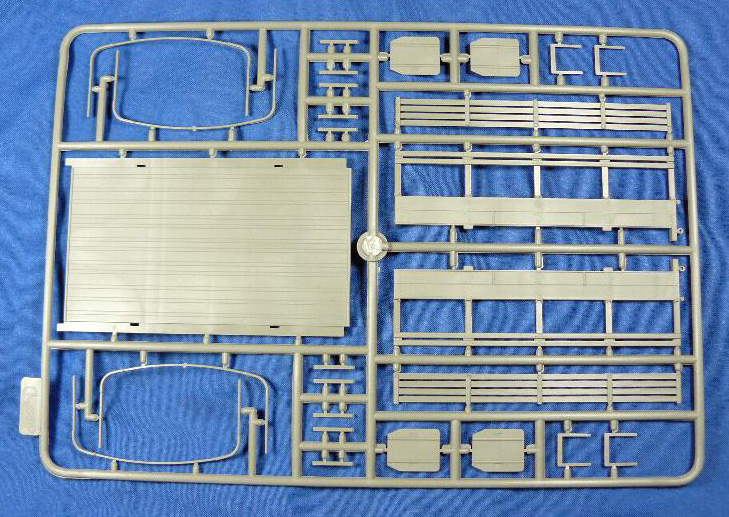
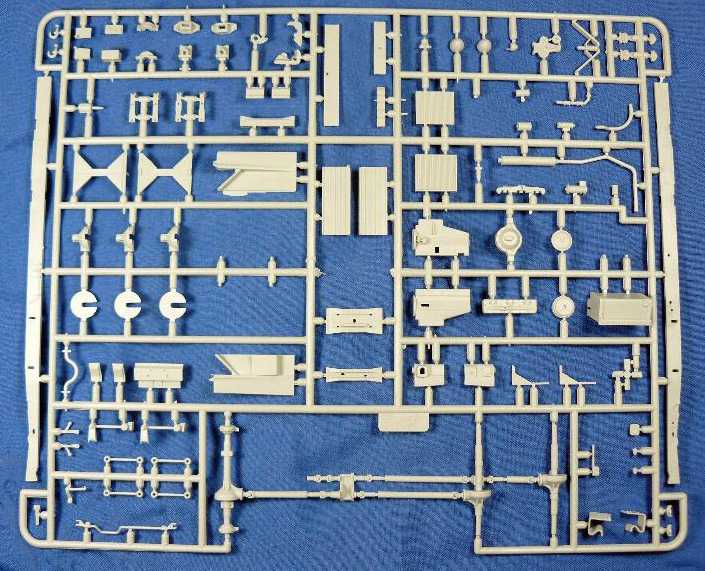
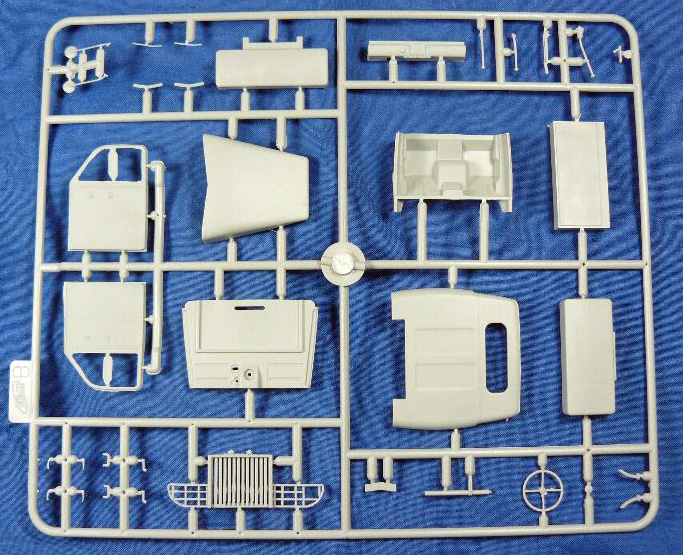
Molded in two slightly different color grays on 5 sprues, there are plenty of tiny, fragile parts that will require careful removal and clean up. Hardly any flash was on my kit and the ejection pin marks were extremely fine with the majority in places that you wont see. A sprue of clear parts contains the windows and headlight lenses. The Instructions are well drawn, easy to follow, and I ran into no problems in construction. Great care is needed in the tinier parts to remove faint mold lines and I had no mold shift on any parts, using very little filler on this kit.
Construction
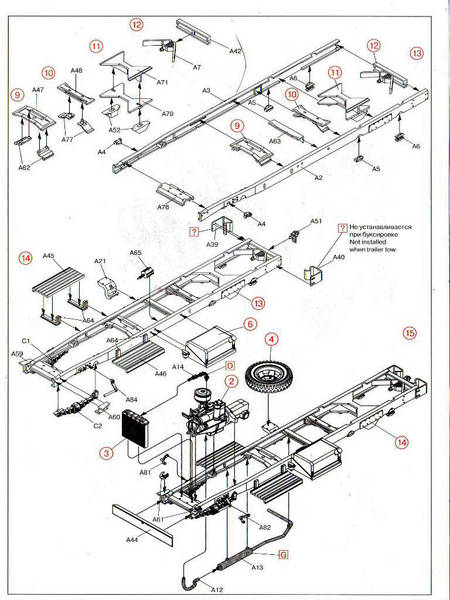
Construction starts out with the engine and this is a really nicely molded assembly. 17 parts make up the engine and transmission, 3 make up the radiator, and an additional part is added later when assembling them to the chassis. A really nice finished engine that can really be super detailed with wiring etc for those wishing to display the hood open.
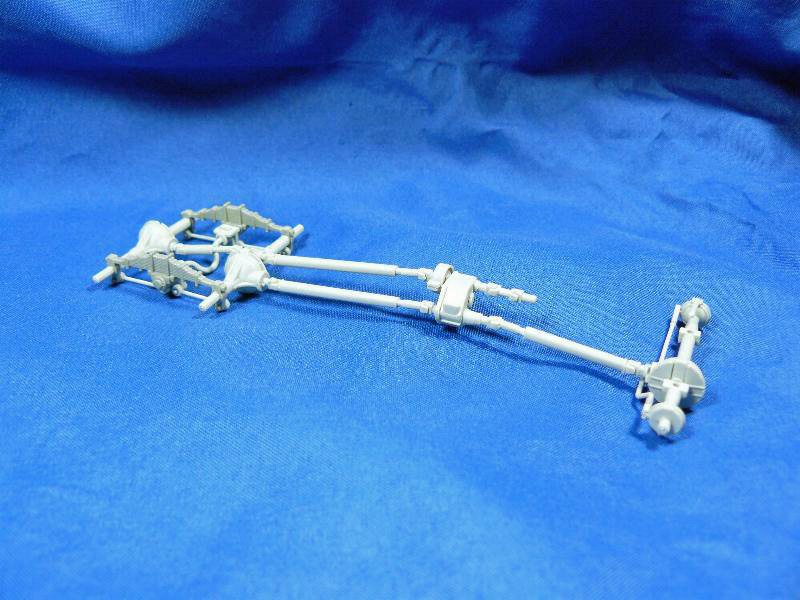
Next up is the assembly of the running gear. The main part is a one piece molding, with the differentials assembled, and springs and other smaller parts added. I held off assembling the springs and other parts that attach to the chassis at this time and moved ahead to the chassis.
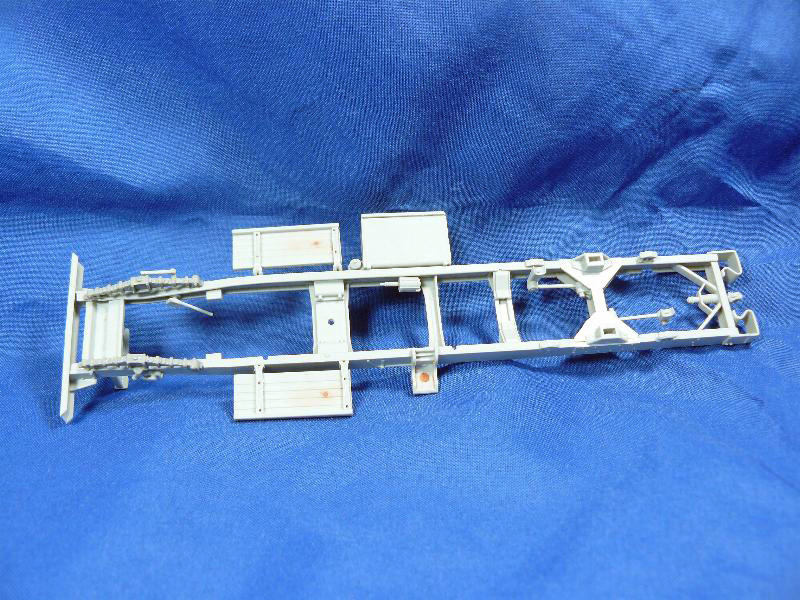
Chassis and body
The chassis is a multi-part affair, and a little care is needed to insure it is square. I left this over night to dry completely. There are quite a few really tiny parts to be attached so take your time and use tweezers. I flipped back to the running gear section and built the gas tank at this time and attached it to the chassis. I cleaned the springs, these being a breeze to clean up, and the mold line was so fine it was practically non-existent. I now attached the springs to the running gear and then set the chassis on top and allowed the glue to dry. After the springs dried, it was simply a matter to flip back and forth on the instruction sheet and attach the smaller parts as I went along.
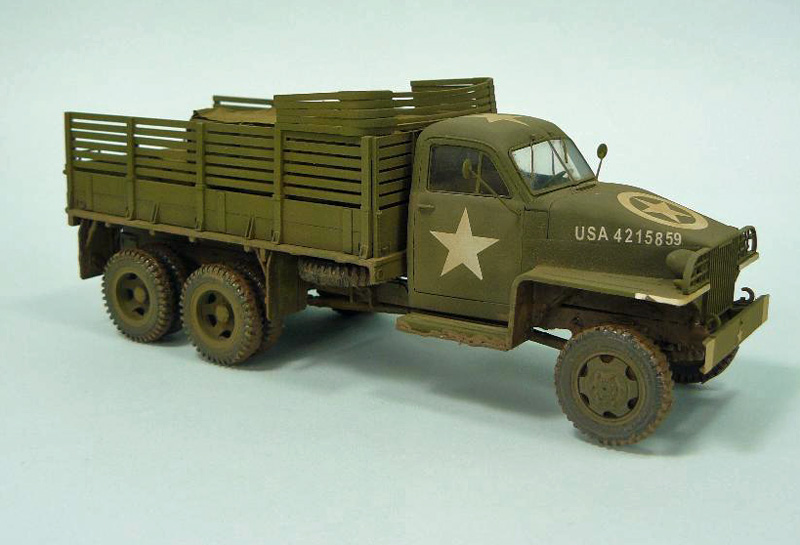
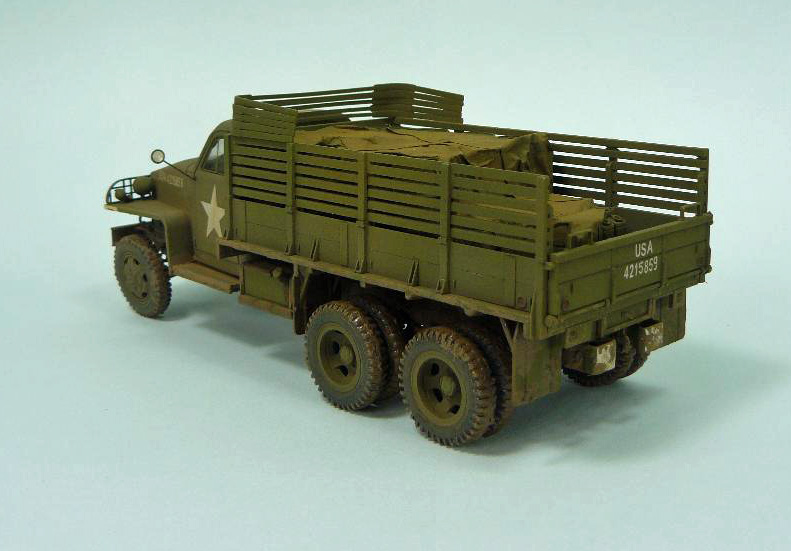
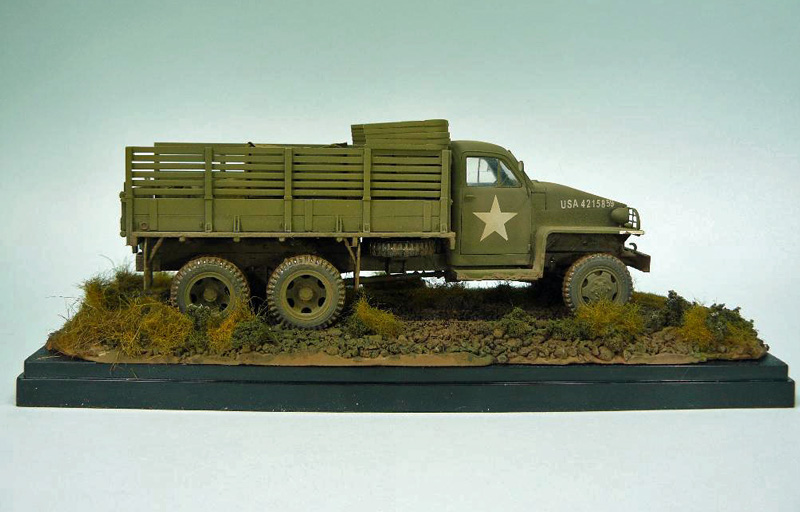
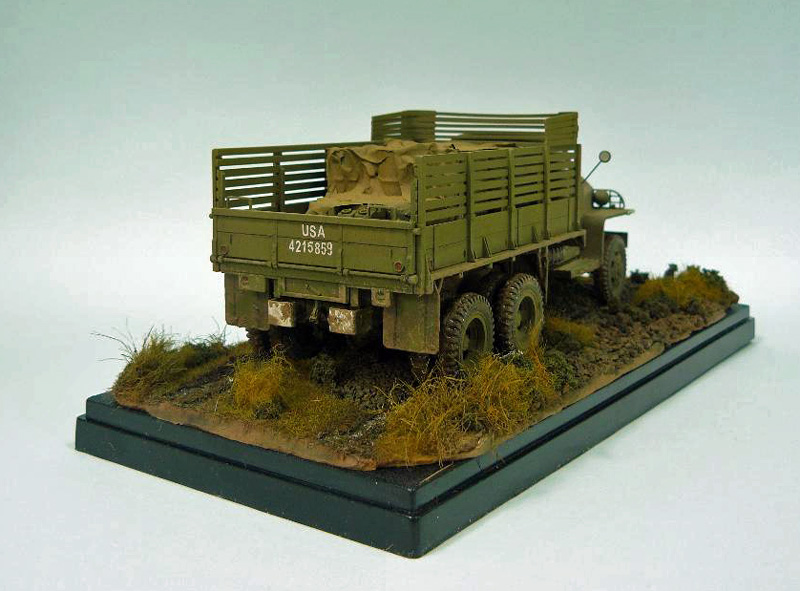
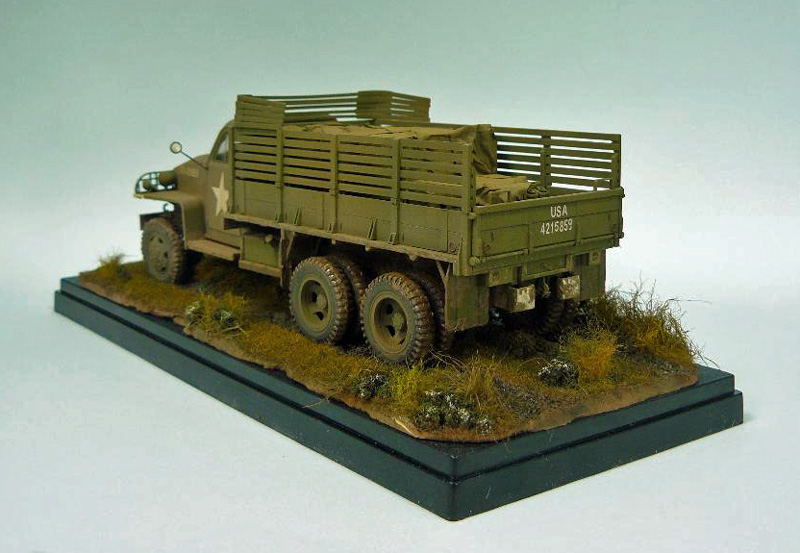
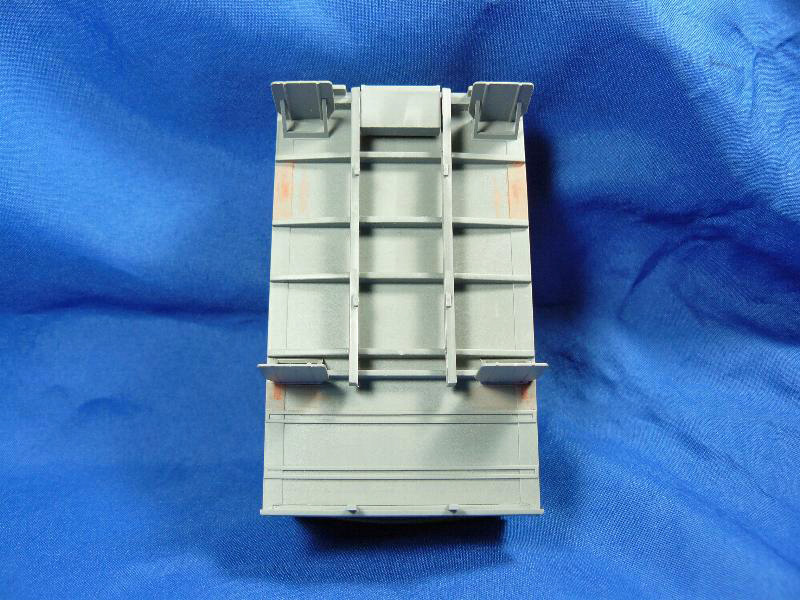
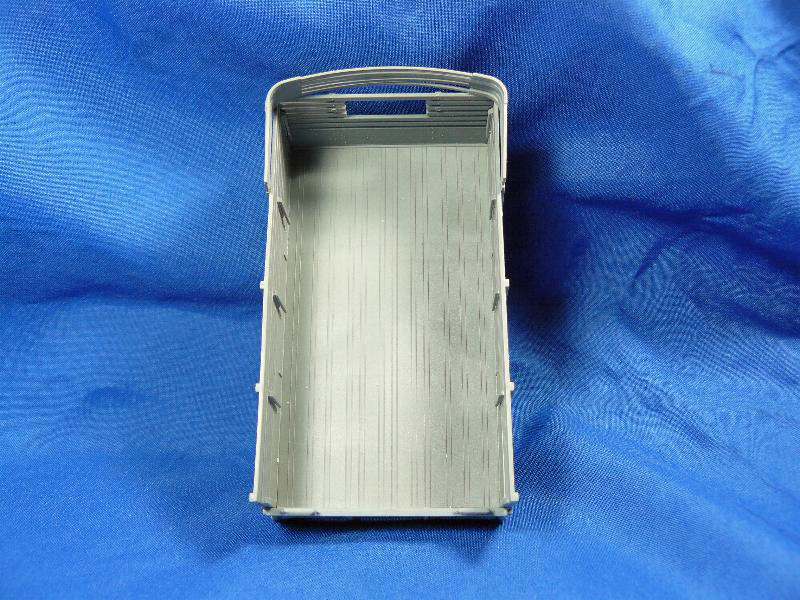
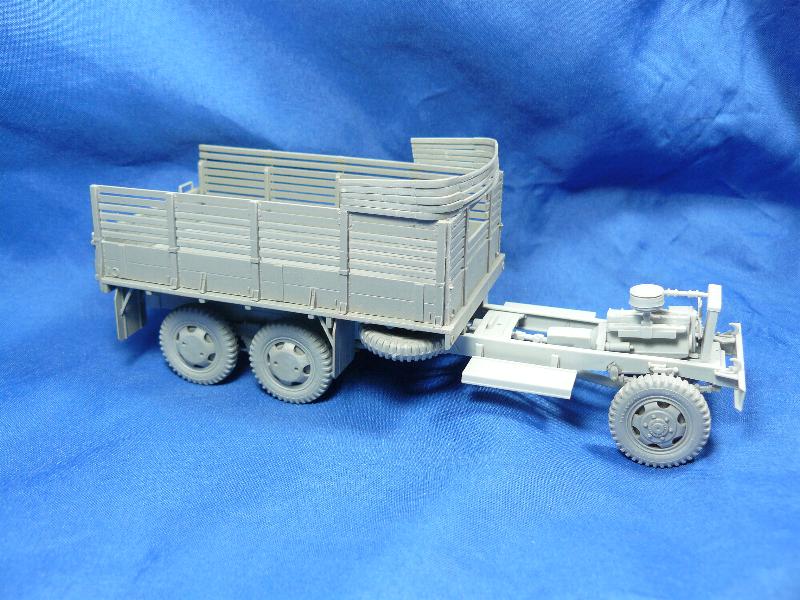
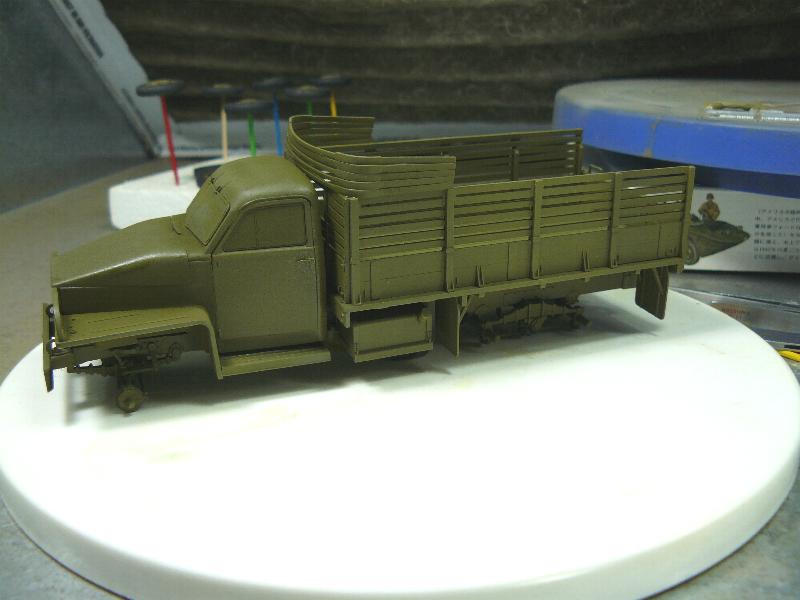
I next assembled the cargo body. This went together with out any problems. A few small ejection pin mark mar the front wall, nothing major, and the bottom has a few shallow pin marks and the four slots the sidepieces fit into to fill. The body itself is supposed to represent the wooden body but it has the wrong number of planks. Something I can live with but your mileage may vary. Be extremely careful removing and cleaning up the top bows as they are EXTREMELY FRAGILE and are easily snapped when cleaning up. The body was an excellent fit to the chassis.
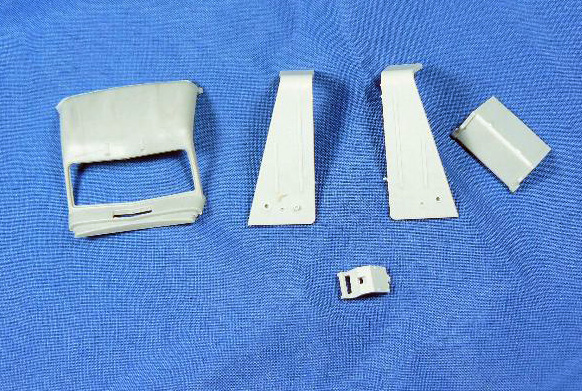
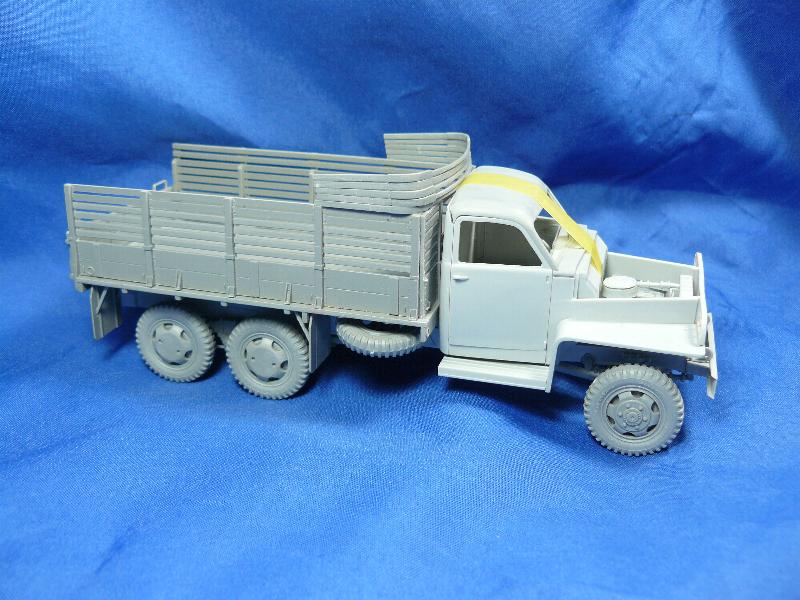
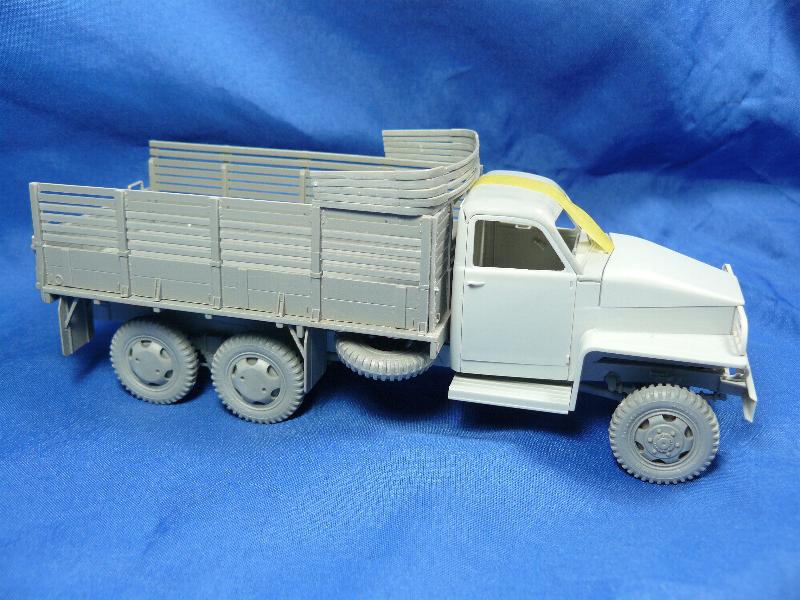
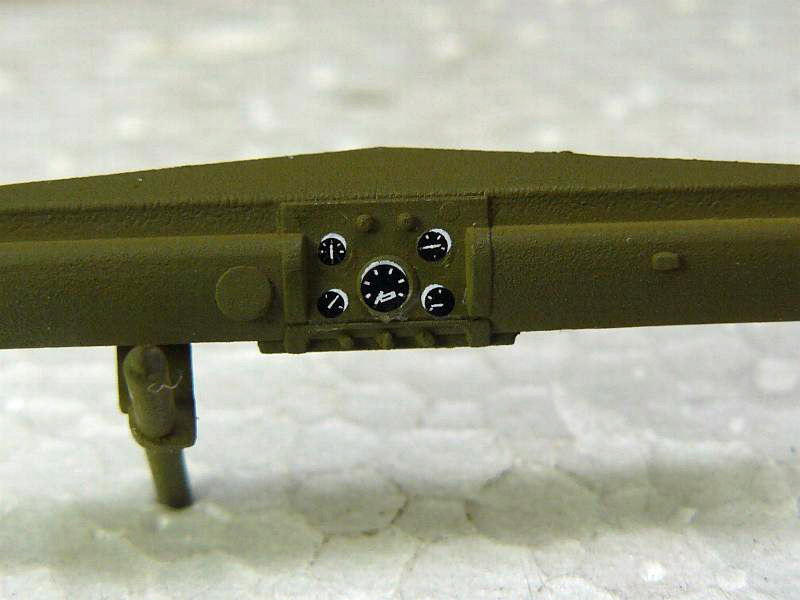
I really was impressed with the level of detail in the cab as it even has the octagon clutch and break pedals, very finely molded shifters, and a decent dash which includes decals for the instruments. I wasnt exactly thrilled with the front and back sectioning of the floor though, as a seam remains thats very difficult to clean up as it is between ridges. If you have the doors and windows in, you wont be able to see it anyway so for 99% of the builders I wouldnt loose any sleep over it. The only fit problem or filler I needed on the cab itself was along the top roof seam. It didn't have much gluing area and it separated on me several times until I used some tube glue, taped it over night to dry, then filled gaps with CA and sanded smooth.
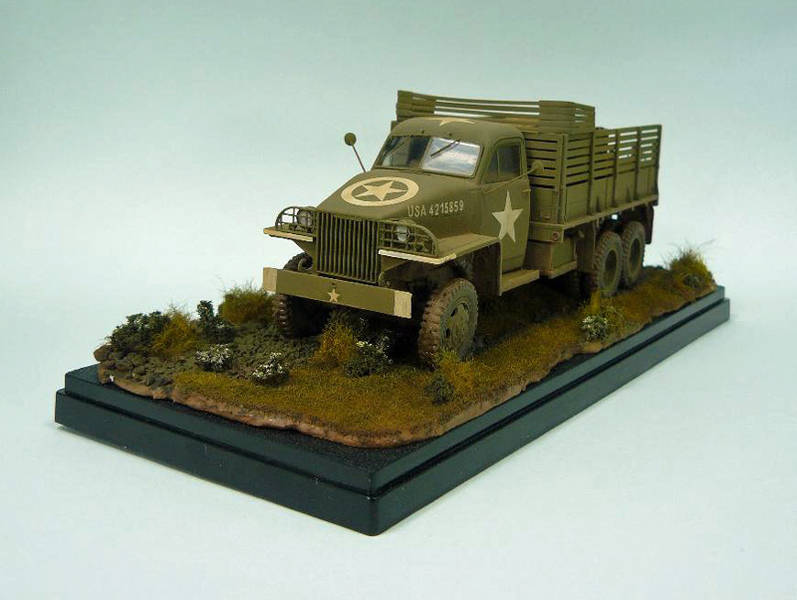
I found the fit of all the windows to be excellent. In fact, they are so tight I had to actually scrape the openings and the edges to get them to fit after painting. Extremely fine windshield wipers are also included, no need for photo etched replacements here and I left these as the last thing I added. A little fitting and sanding was needed when attaching the hood and its side pieces, nothing major, and nothing a little sanding and dry fitting wont correct. With all the really fine details and parts, I was surprised to find that the hood hold-downs arent included.
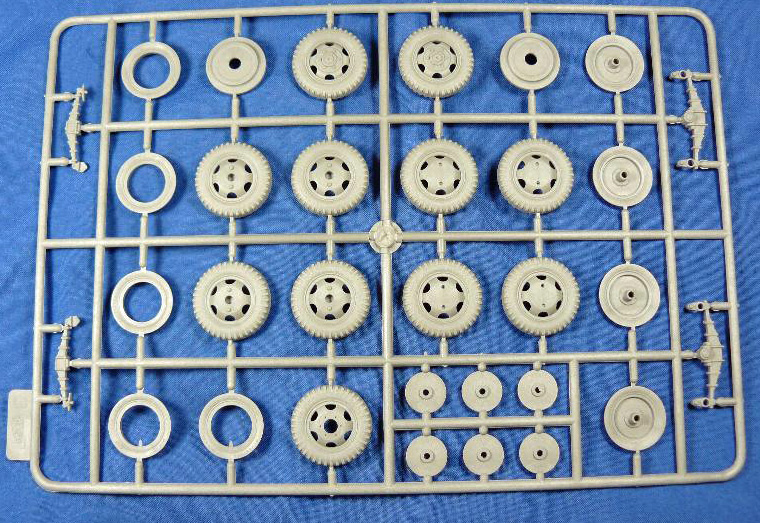
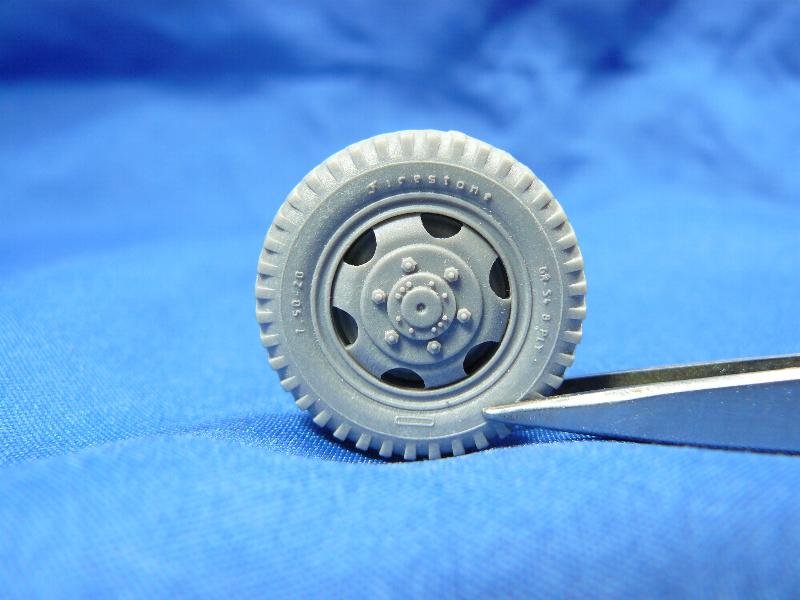
The Tires
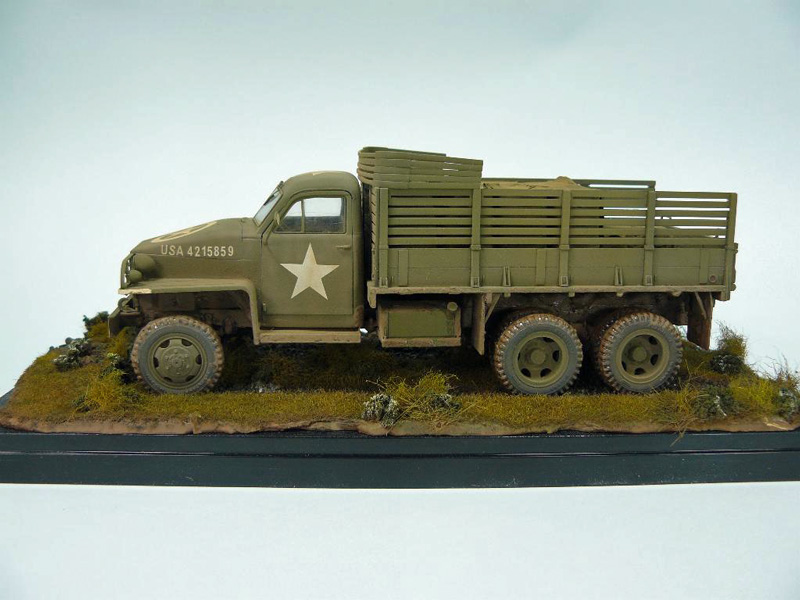
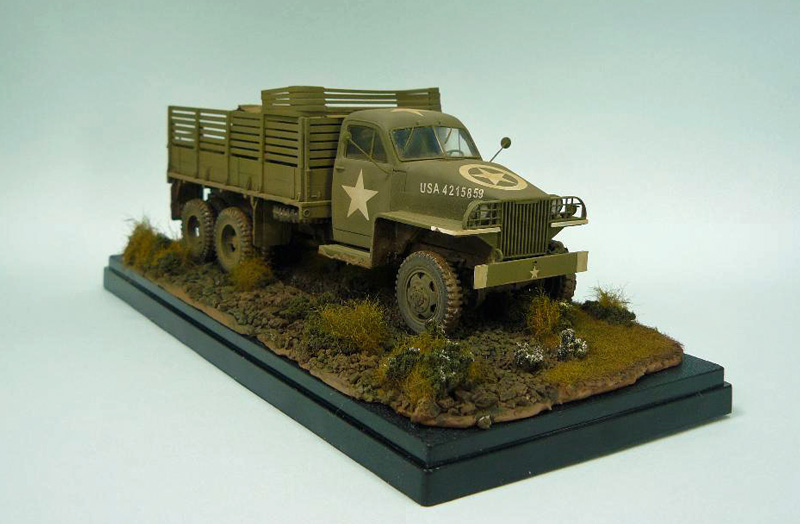
This area has to be the BIGGEST let down in the kit! These have beautifully molded sidewall details but unfortunately the mold maker must have had a few too many when he did the treads. Instead of being staggered and the lugs offset, they meet along the centerline! Since this is an Out Of The Box Build and Review, I bit the bullet and just used them. Spare box Tamiya, Italeri or Heller CCKW tires can probably be rigged up to fit the ICM axles or Im sure one of the resin guys will come up with a set or try using one of the aftermarket sets with chains. For my purposes, I got creative, and just slapped some mud on them and placed the vehicle in a somewhat muddy field as the finished build. It certainly would be nice if ICM re-tooled the tires on future issues of this kit.
My friend Marcos has a nice step by step on correcting the tires for those that might want to give it a try on his site:
http://www.webkits.com.br/news/templates/news.asp?articleid=396&zoneid=30If you dont speak the language, click on the British flag, and it comes up in British!
The Decals
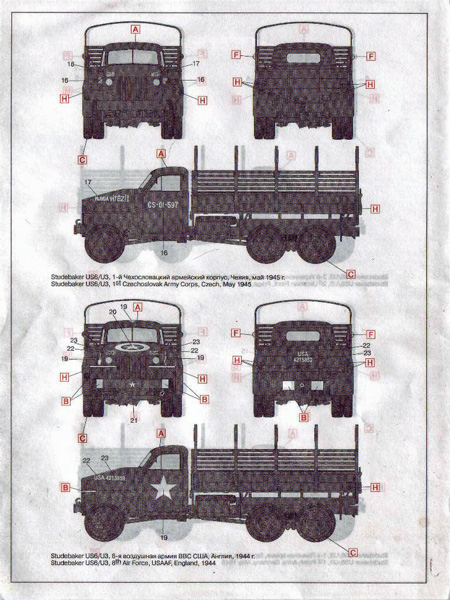
OK, these are your typical Eastern European type meaning they are the extremely thin, fragile, and fall-apart-when-wet variety, not to mention a silvering paradise. Markings are provided for 6 vehicles. 1 from 3d Byelorussian Front, Lublin, Summer 1944, 2 from 2d Ukrainian Front, Praga May 1945, 1 from the 1st Polish Army, Germany 1945, 1 from 1st Czechoslovak Army Corps, Czech, May 1945, and the one I chose 8th Air Force, USAAC, England, 1944.
On the point of the dashboard decals, I managed to get the gauges in crooked but with just the rear window to see them, its livable. The stars disintegrated on contact with water so I used stars from an old Micro Scale sheet and had a little better luck with the serial numbers etc. Although these didnt disintegrate, I certainly wasnt prepared for each letter and number floating free! I eventually managed to get them on in a somewhat straight and orderly manner. The next kit Ill break out my old stand by, Micro Scale Decal Film, and apply that before using the kit-supplied decals.
Finishing
I used my usual Model Masters Enamels for the majority of the painting with a little Tamiya and Polly Scale acrylics for weathering. The base is one of those plastic display cases for 1/24 cars. I find the clear plastic cover helps prevent dust and they are cheap enough and stack nicely. The groundwork is nothing more than old fashion Durhams Rock Hard Water Putty. I mix this up to a dry paste like putty, (not wet and sloppy if you know what I mean) and apply it to the plastic base and then sculpt to shape. While it is still soft/wet, I embed the rocks and bushes, which are just some Woodland Scenic foliage and railroad ballast. After all this dried, the Durhams will come free from the base. It doesnt stick to plastic or to wooden bases that have a good coating of Polyurethane. I then add my static grass, additional bushes, etc. Prime, paint, etc off of the base, and when done, simply use a little 30 minute epoxy to attach the ground work back to the base. Just remember when working on it, it is rock hard and does not flex and, if too thin in thickness, can be extremely fragile. I used Future to make the wet mud, and added a little white to the bushes to add a little color, and hopefully they look like the small flowers the weed-like bushes by my house get.


Comments