introduction
The T-34 tank is not only one of the most recognizable tanks of World War II, it is arguably the most produced tank in WWII, and is rivaled only by the American M4 Sherman series. Design and initial production was in Kharkov until the fall of 1941 when the factory was evacuated. Of the 35,595 T-34's built, 12,604 are credited to have been built at Factory 112. Out of all T-34's built, roughly 3,000 T-34/76 were built with the commander's cupola and 1,070 T-34/76 were converted to into OT-34/76. How many of both types were crossed (OT-34/Commander's Cupola) is unknown in any source I could find. The OT-34/76 was fitted with an internal ATO-41 (later an ATO-42) flamethrower that had a 105L capacity where the hull MG would be (allowing the 76mm main gun to still be operable), and taking up the space of the radio (necessitating its relocation to the turret). This allowed for 10 shots and a range of up to 130 meters. It was very useful, but also very conspicuous and they drew a LOT of enemy fire. No one liked being on the receiving end of flamethrowers.
This kit from
Dragon Models Limited is very similar to kit 6564 that I recently reviewed
here on Armorama, so much of this review is the same (I am not going to re-invent the wheel, so to speak). The model represents a late 1943 production T-34/76 from the Factory 112 in Gorkiy, Krasnoye Sormovo.
review
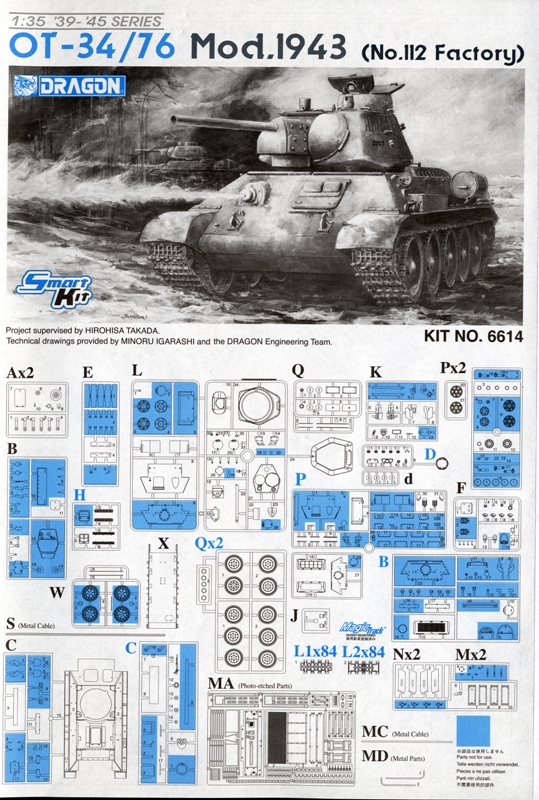
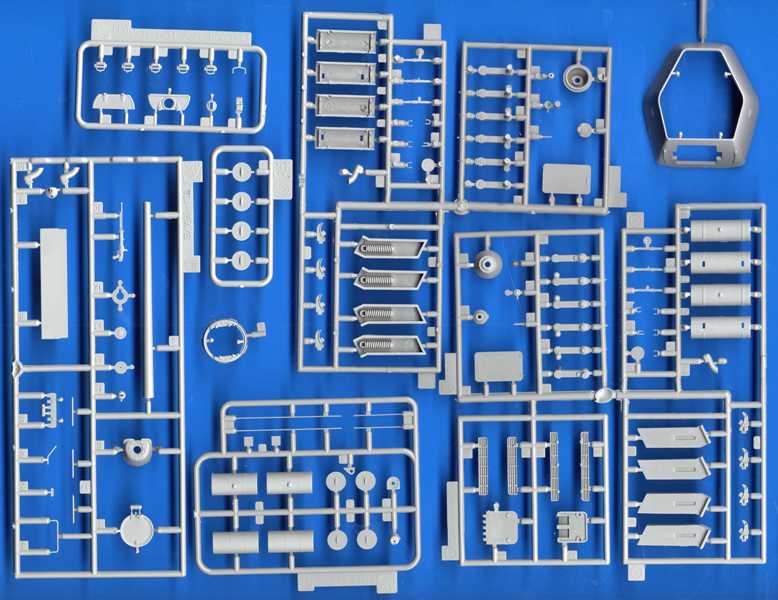
The kit is packaged in a sturdy box with attractive artwork on the cover and many of the kit features shown on the box sides and bottom. (This comment is a bit tongue-in-cheek for those of you who appreciate a good review of the packaging.) Although all sprues are not individually bagged, there was no breakage in my kit.
If you follow the instructions you can build an OT-34 m43 in 10 easy steps.
Step 1:
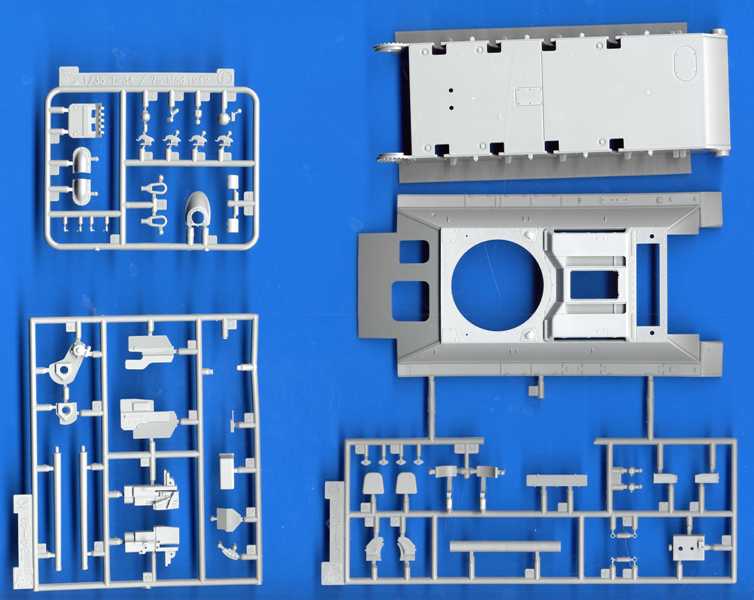
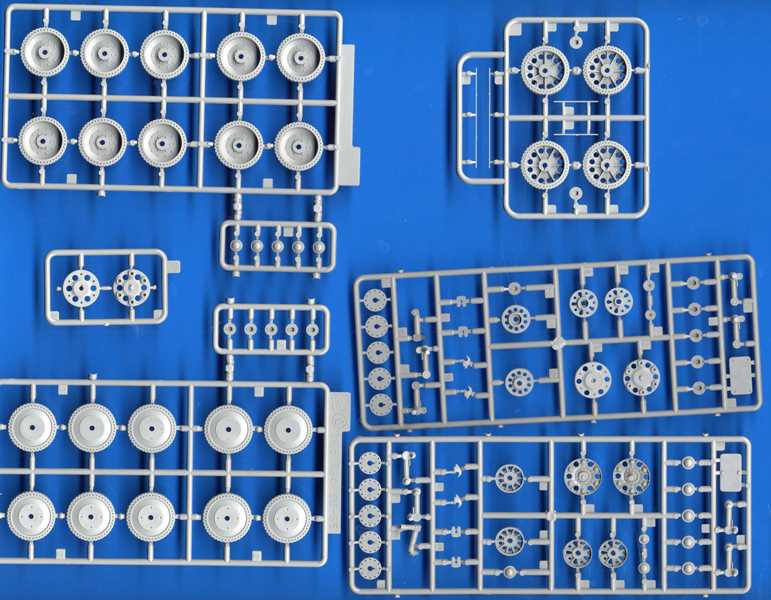
Building the road wheels, idler, and sprocket. The kit includes dish road wheels with lightening holes in the rubber edges and 16 bolts that are accurate compared to scale drawings and appear to replicate the real wheel detail very well. The idler and sprocket are also accurate when compared to drawings and photos. Sprocket parts P20/P21 are called for, but parts L3/4 could also be used. Parts D 8/9 CANNOT be used and don't exactly match any sprocket I have seen, but hey, they are not needed.
Step 2:
The addition of the suspension to the lower hull. Also, the instructions say to use part C8 for the lower front, which does not have rivets to be removed AND has a inside cut to the plate that does not seem accurate for this tank. As far as I can tell, this should actually be part B10, which DOES need to have the rivets shaved off. Part A6, the axle for the front idler, should be left loose until the tracks are put on to allow for better fitting to avoid the need for the dreaded "half track" piece (a gap that is half the size of one track piece).
Step 3:
Adding the back transmission cover and details to the lower hull. Part P4 for the lower hull back plate is correct for a 112 factory build. This needed to be noted as there have been problems with this specific plate in other kits. Also, part Q9 is a Factory 112 specific piece. Part B28 should be used in place of part B11 and the lower hull will need a small trim to allow part M4 to fit where it should.
I am not sure if this is all that is in Step 3 as there are a lot of small sub-assemblies that are being built on this page, but I will cover the rest below.
Step 4:
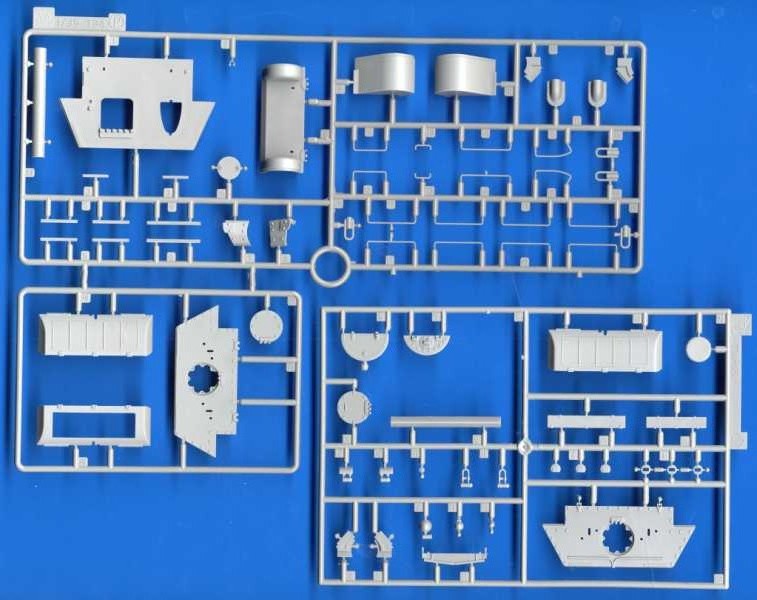
Adding the lower and upper hulls and LOTS of details (DML packs as much assembly per step as possible). For the cooling fan access hatch, you get either a solid plastic piece with molded on screen (P18) or a piece ready to accept the photo-etch screen/frame included in the kit (P19). P19 is a better open hatch than DML has offered in the past, but it still needs trimming on the inside front edges (towards the engine bay) to allow it to sit fairly flush with the deck. This was not a precision engineered piece on the real tank but it looks awkward as molded, so while DML keeps trying to improve this piece, they are still a bit off the mark. The PE screen and squared-off edging is about 2mm too big for the opening in the hatch and the interior edge of the hatch shows under the screen. It appears that the opening is correct in size and the PE is wrong. I do not have any aftermarket PE on hand, but I do have DML's #6359 SU-100 Premium kit and the PE Screen and edging is the correct size in that kit, so DML had something on hand that would work. This has not been dealt with since kit 6564, still a disappointment. The upper hull correctly adds part L8 for the front glacis, but the instruction drawing shows the piece with the wrong opening for the hull MG cover. Also, at this point you can make the hull MG port (C6) for either the MG or for the OT-76 flame thrower variant (parts Q1,Q4,Q6). If you make a T-34/76 without the flamethrower, you need to add the radio antenna where part L33 goes, as noted down in step 5. The fender mounted box (parts H10-H13) gets replacement hinges, which are better than the molded on detail, but with careful work these tiny details can improve the piece.
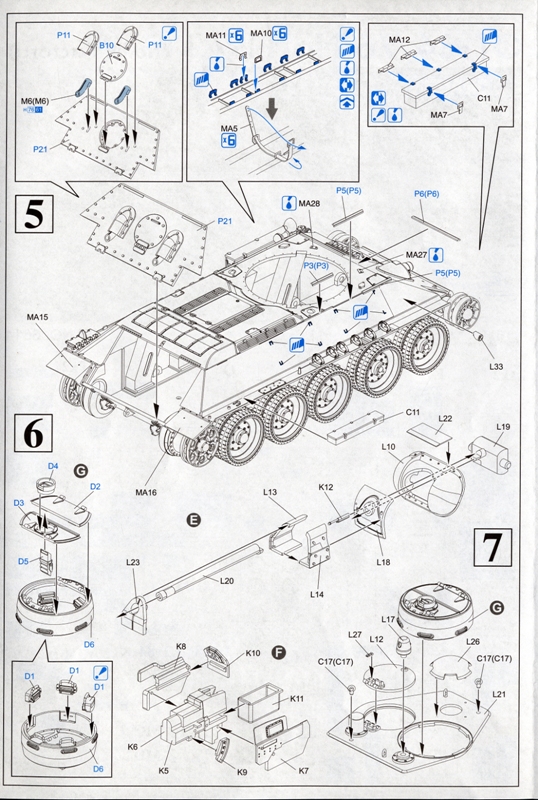
Step 5:
More hull detailing. Part P21 is correct for the rear upper hull back plate. Instead of using PE parts MA11, I would use parts E2 for the tie downs...they are more accurate, representing welded on 3D rods. While PE part MA10 is incorrect as flat metal, it is better than the molded on detail it replaces. Care should be taken adding the tiny PE pieces for part C11 (stowage box). These pieces are not entirely accurate, but they are better than the molded detail. Also, C11 will not fit properly on the right rear fender as is...some of the fender detail (the bolted plate) will have to be partially removed for it to fit correctly. While you are at it, remove the rod tie down just behind this area on the fender and replace with part E2. The radio antenna and mount (A8-A10) need to be added instead of L33 if NOT building the OT-34 version. The instructions also add part L33 to the side hull in place of the radio mount (remember, you will need to add the radio mount pieces (Parts A8,9,10) if you are making just the T-34/76). All photos I have seen of the OT-34/76 have this piece (L33) but I do not know if it was a simple plug, nor how common this was.
Parts P3, P5, and P6 are added to the edge of the front upper hull and are distinct pieces for a Factory 112 tank, as are PE parts MA27/28. DML also has call outs to remove the hull mounts for the early square fuel cells, BUT they still forget to tell you to get rid of the 4 mounting bars on each hull side as well. They also forget to tell you that parts C16 should go on the front edges of the top hull and while PE part MA8 might work here, they are too thin to be useful.
Step 6:
The Commanders cupola and main gun/mantlet assembly. Everything with the cupola is correct dimensionally and the separate periscopes are a nice touch. The only problem at this step seems to be at the end of the main barrel, the tip or "collar" - it is too elongated. While the barrel is nicely pre-hollowed out of slide-molded plastic, it is not the correctly done metal barrel that DML has included in other kits in the past. They could have easily copied their own metal barrel. Part K12, the Coaxial MG, is NOT hollow molded.
Step 7:
The turret roof. All details are correct for a No.112 m43 tank, including the roof molded "soup can" optics cover in front of the gunner's hatch. The cover may actually have been hollow with no top, but without a photo to show it differently, I prefer it solid.
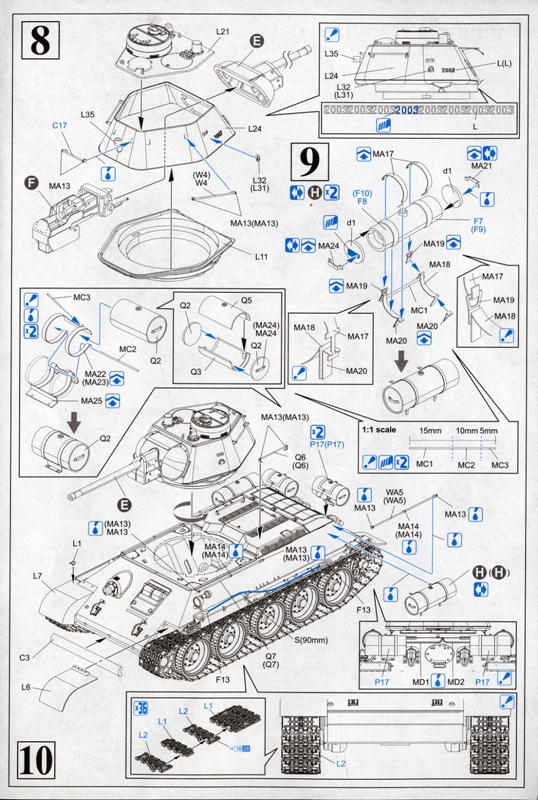
Step 8:
Putting the turret together. The turret shape and dimensions match the drawings in "T-34: Mythical Weapon". The PE attachment points, and the railings themselves depicted in the instructions, are incorrect for a factory 112 tank
they made the grab handles from rod with the ends bent 90 degrees and directly welded to the turret/hull. The style shown in the instructions is for a factory 183 tank. For a factory 112 tank, use part P3-P17 as needed. There are turret casting numbers on the top part of the L sprue, all of them the numbers 2003. This seems to be accurate. Part L35 is the relocated radio antenna mount from the right side hull.
Step 9:
External fuel tanks. DML partially fixed this. In the instructions there is a call-out for the fuel tanks as parts F7-F10...but the parts are not included in the kit and are not shown on the parts breakdown. This is a left-over from the mistake made in kit #6564 where New fuel tanks were supposed to be included. So you have to use the old tank halves, parts M7-M10. This will involve sanding off the molded on straps...a big pain. But the highlight of the kit is the new ACCURATE tank mounts...made from 8 pieces of PE and 1 plastic kit piece. This is a MUCH more accurate representation of the mounts than in previous kits I have seen.
DML only tells you to build 2 fuel tanks but they have given you enough PE pieces for 3 fuel tanks. You may also need to add one more set of handles to one of the fuel barrels as there are only 4 PE handles in the kit (I say maybe as sometimes the barrels were so close together you could not see the handles).
Also included are new canisters. I do not know if they are strictly fuel or if they represent early oil canisters (for making smoke screens). I also do not know if they are more common on OT-34/76's vs regular T-34/76's. Use at your discretion.
Step 10:
Final assembly. The tracks are DML's magic tracks and represent a standard 500mm track type of one with a guide horn and the next without. These tracks have holes in ONLY the non-guide horn tracks. The DML tracks have proud knock out marks that need to be sanded off the inside face of each link.
If you have gotten yourself safely to this point, you now have a Factory No. 112 OT-34/76 m43 with commander's cupola. Congratulations!
Markings:
The markings options are for only 1 vehicle, a winter wash-over-4BO-green vehicle from Tank Battalion Dmitri Donskoi, vaguely attributed to the Eastern Front in 1943. They are well printed and look thin.
conclusion
Overall, I am cautiously pleased with this kit. It does have a number of small, annoying issues and one big one (the PE engine screen). The instructions are VERY busy, incorrect in places, and omit important information. The parts included are very nicely detailed, but it can be very confusing to find all the correct parts, especially when there are multiple sprues with the same ID letter (2 different sprues both labeled as C for instance). This kit also has so many partially used sprues, you will get a lot of parts for the spares box.
In some ways this is a well thought out kit, (the fuel tank mounts, the attempted rework of the fan housing cover, the new OT-34 parts and radio mount) and in other ways it seems like partially refined project (correct exhaust pipes, notice to remove unnecessary details from the hull) with many warts still left from its obvious kit #6564 (and before) lineage (the PE deck screens, the incorrect main gun barrel, and the fuel barrels). The instructions are still somewhat sloppy and could still benefit from some extra proofreading and it is still annoying DML already has fixes for many of the issues just by looking in earlier released kits.
But this kit CAN be built as an OT-34/76 m43 Factory 112 Out Of the Box, the most necessary criteria.
Recommended with slight reservations.
Further Reading:
T-34: Mythical Weapon Airconnection Publishing - by Robert Michulec and Miroslaw Zientarzewski
Soviet Tanks in Combat 1941-45 (T-28, T-34, T-34/85, and T-44 medium tanks) Concord Publishing No. 7011 - by Steve Zaloga
Russian Armor: T-34 Medium Tank 1939-43 Ian Allen Publishing - by Mikhail Baryatinskiy


Comments