introduction
The new
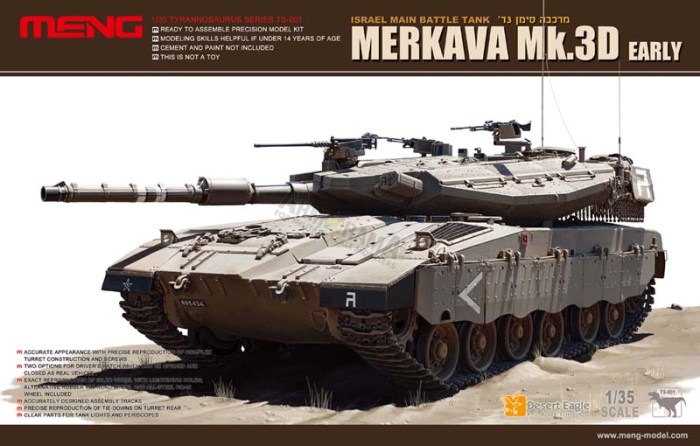
Meng Merkava arrived on my door step a few days ago, and needless to say I was VERY excited (like school girl before her first dance excited-complete with high pitched giggles and all). Its not that I am a huge geek for the Mk 3 or the 3D for that matter, but I do LOVE IDF armour and have been a geek about the whole Merkava program since the beginning when Tamiya first released the Mk 1.
The Mk 3D was the last (as far as I know) of the improvements made to the Mk3 line prior to the release of the Mk 4. Many of the Mk 3 D improvements were carried forward on the Mk 4 design, such as the extra armour package and improved fire control and stabilization. But lets face it, youre not here for the history lesson, youre here for the review. . . .
What you get
The box, at first look, is nice. Glossy full colour artist rendering on the box top and sides, with a few options for markings and such on the side panels. Then there is the little Desert Eagle Publications logo, on the lower left corner of the box, which indicates that Mr. Michael Mass has had something to do with the production of this kit (for those of you not in the know, Michael Mass is an IDF expert and guru). Mr. Mass provided technical assistance and reference photos , which no matter how you slice it, is pretty cool and a great asset for all of us.
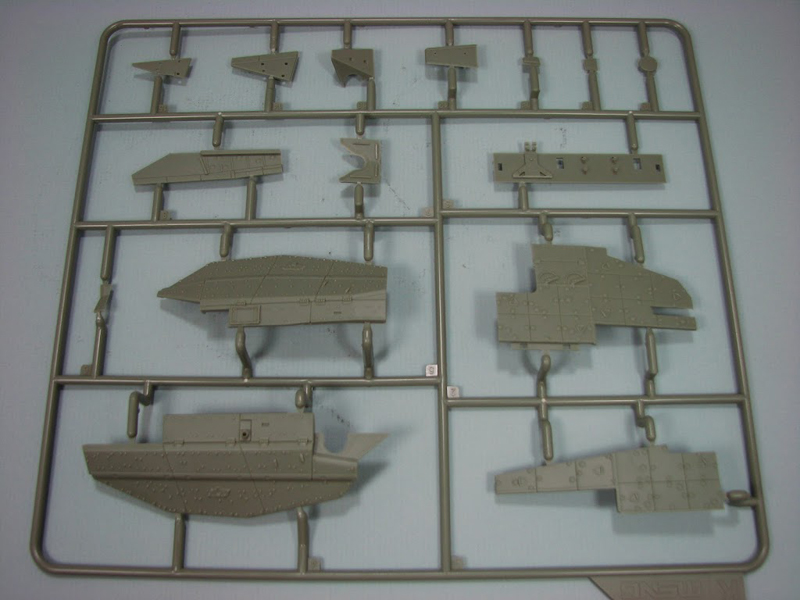
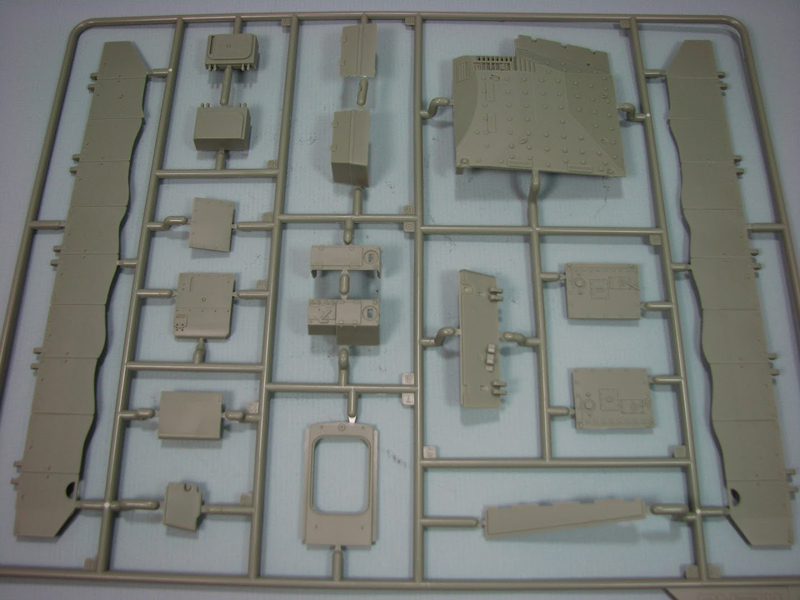
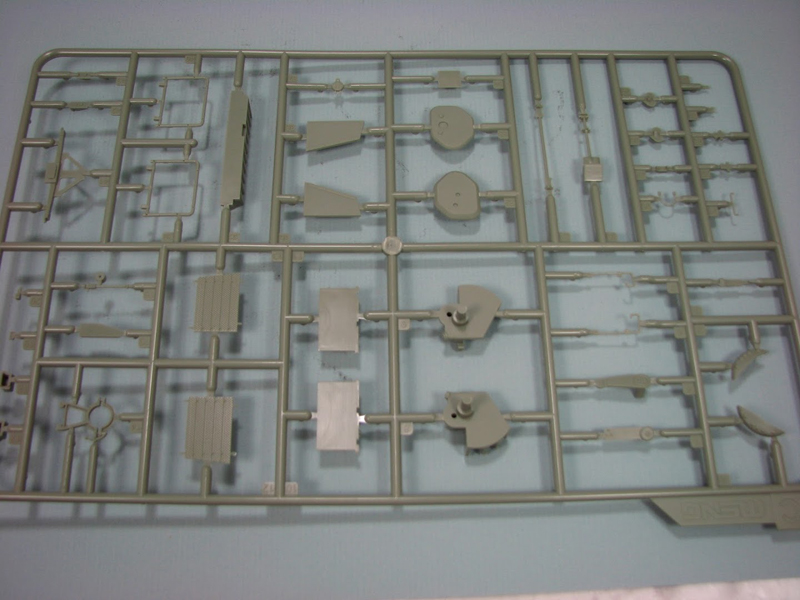
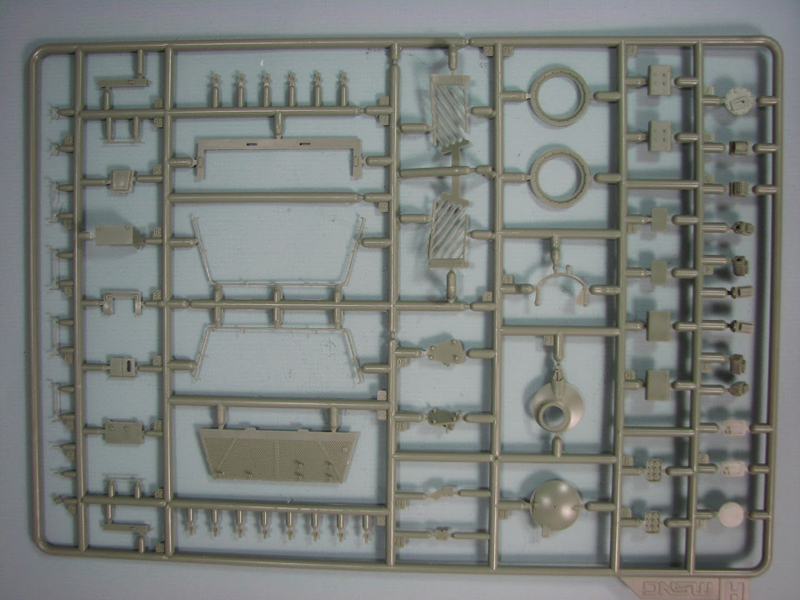
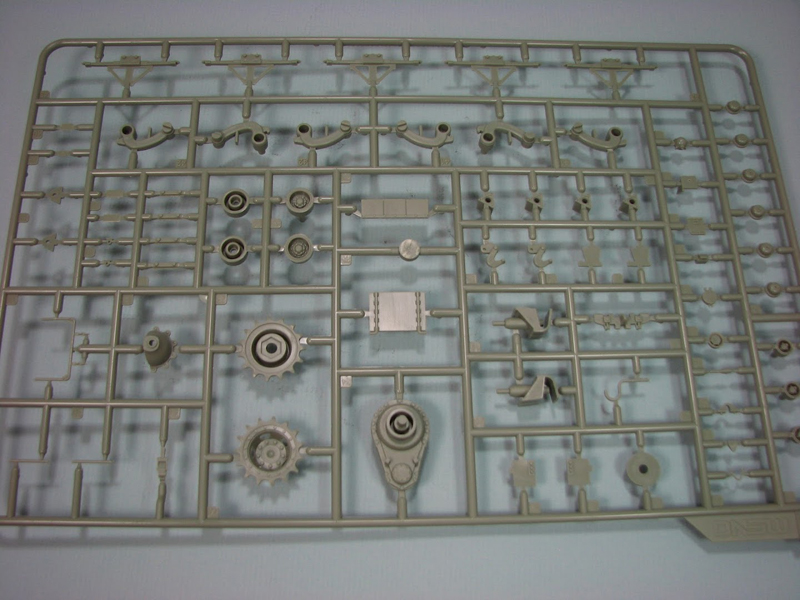
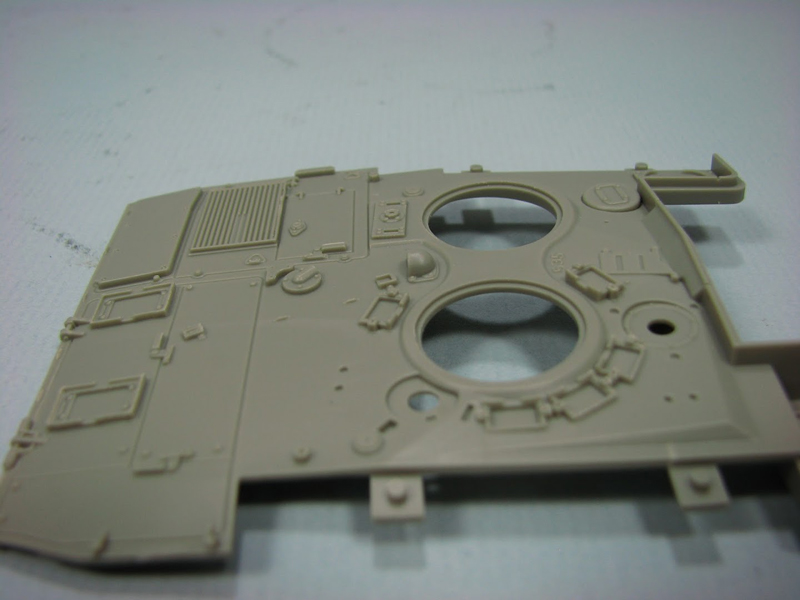
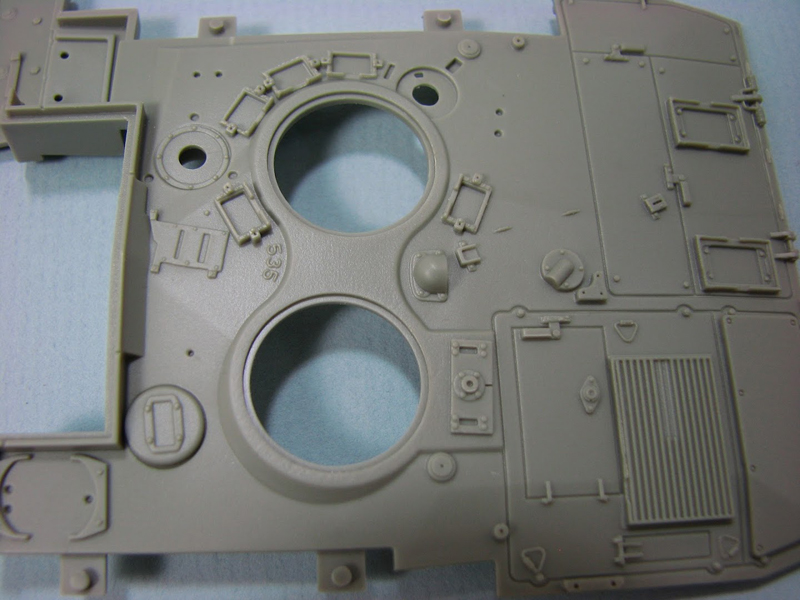
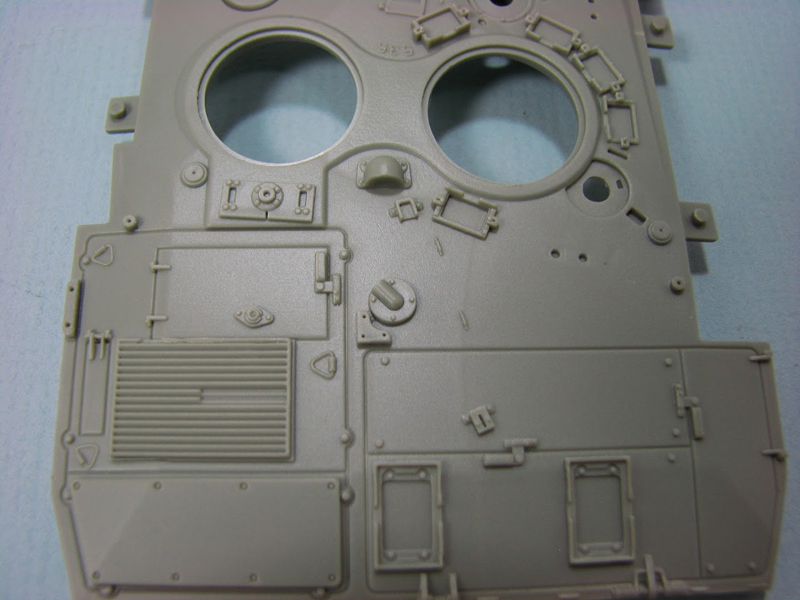
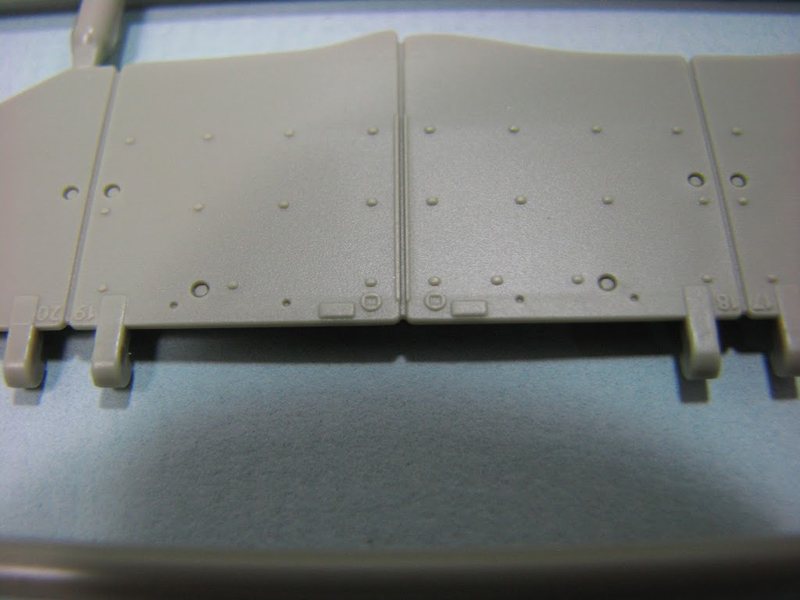
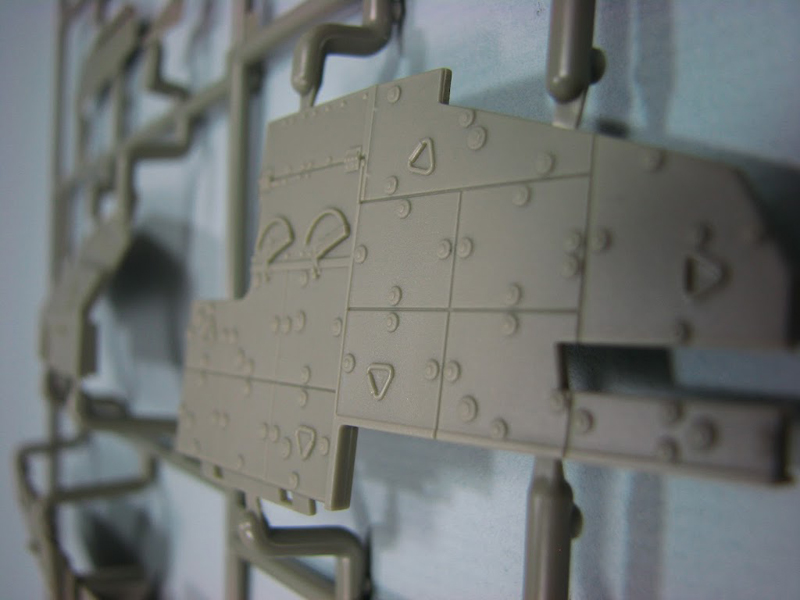
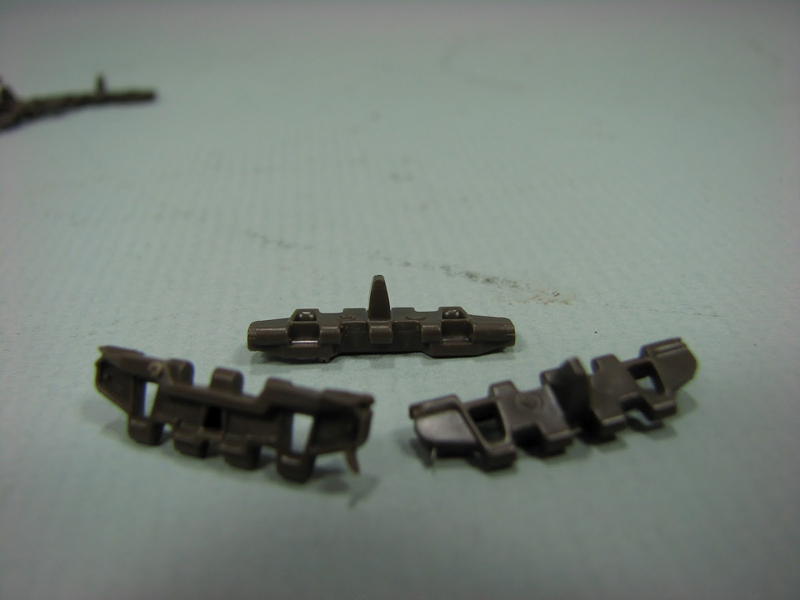
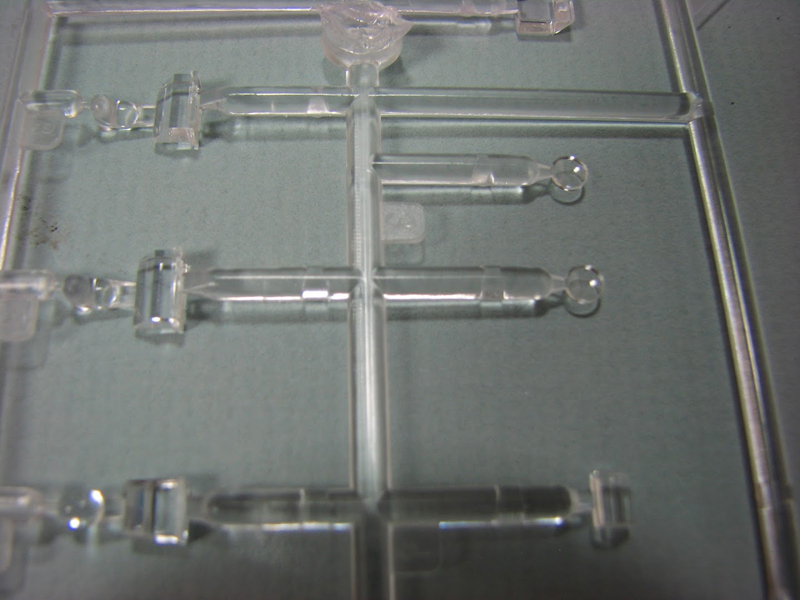
Upon opening the box, you are confronted with a stack of nicely wrapped sprues and a full colour glossy exterior cover of the same box artwork on the instructions manual, nice . To say there are a lot of sprues, is putting it lightly. If you think that Dragon stuffs the box, they have some competition now. The sprues are all molded in a light greenish-grey (think concrete) color plastic and upon first glance seem to be very detailed. There are a lot of small parts and sub assemblies from just looking at the sprues, including separate link to link tracks and (in your best high pitched voice) tiny little grab handles.
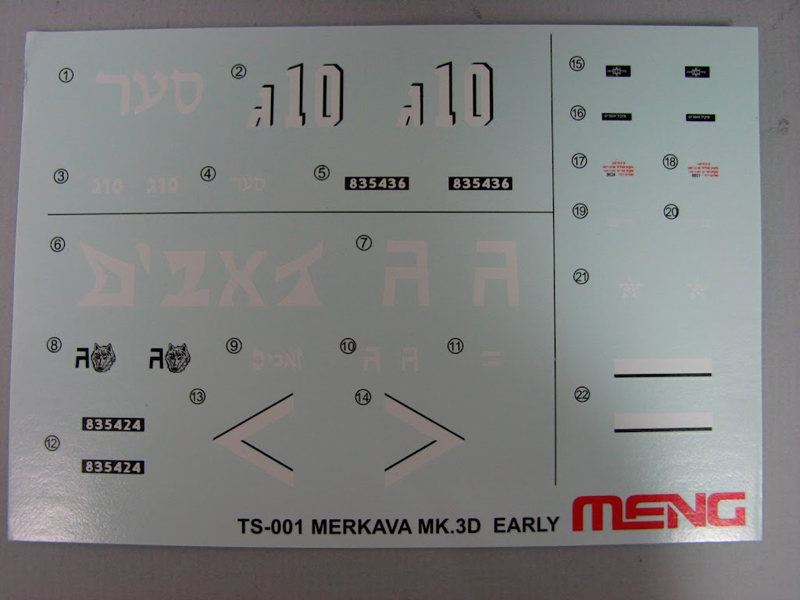
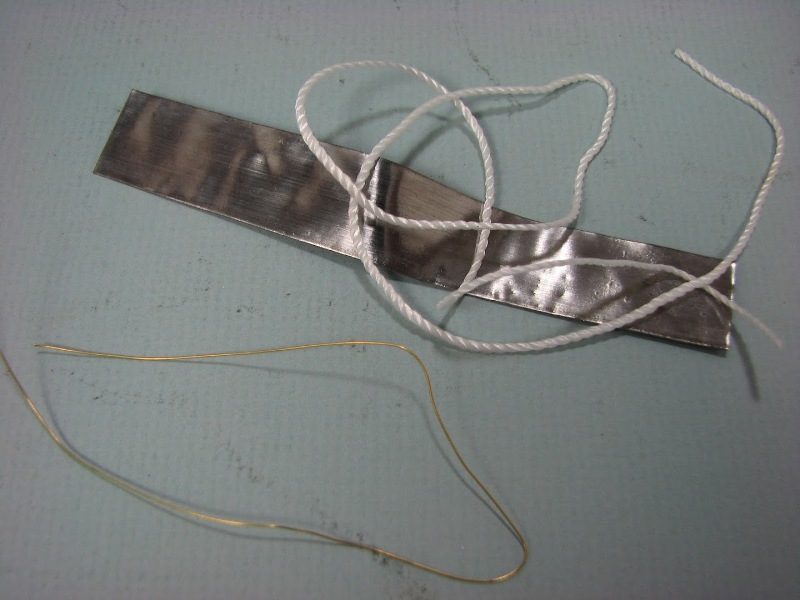
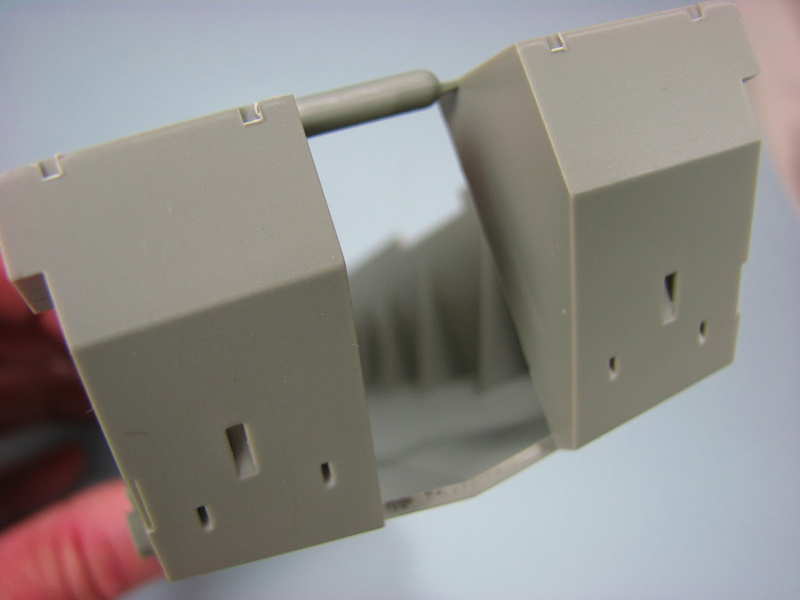
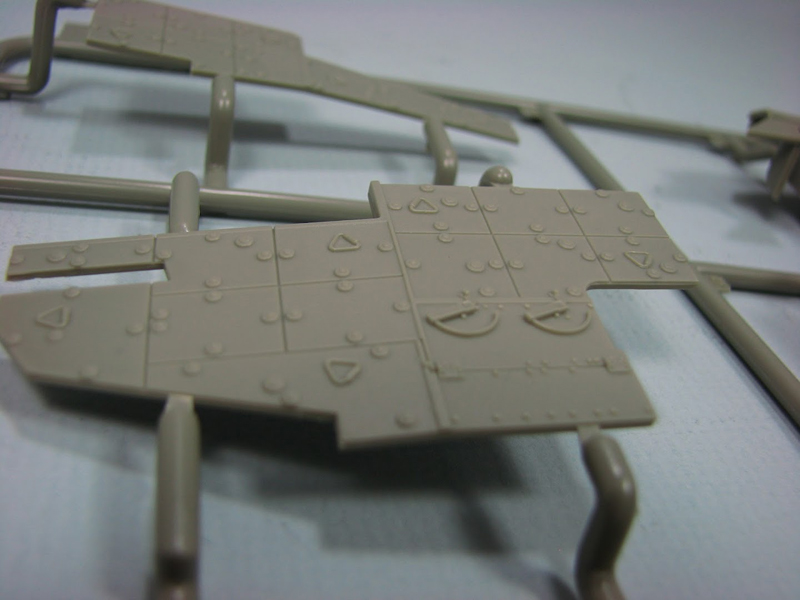
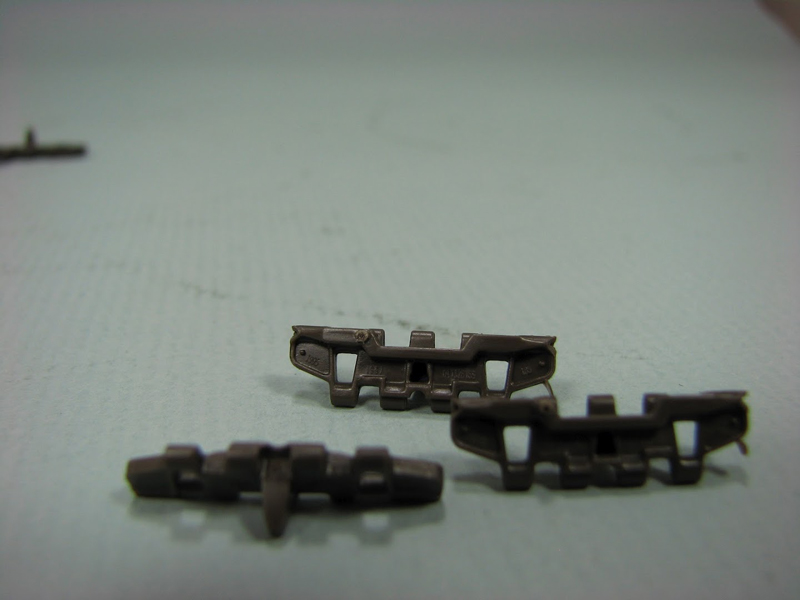
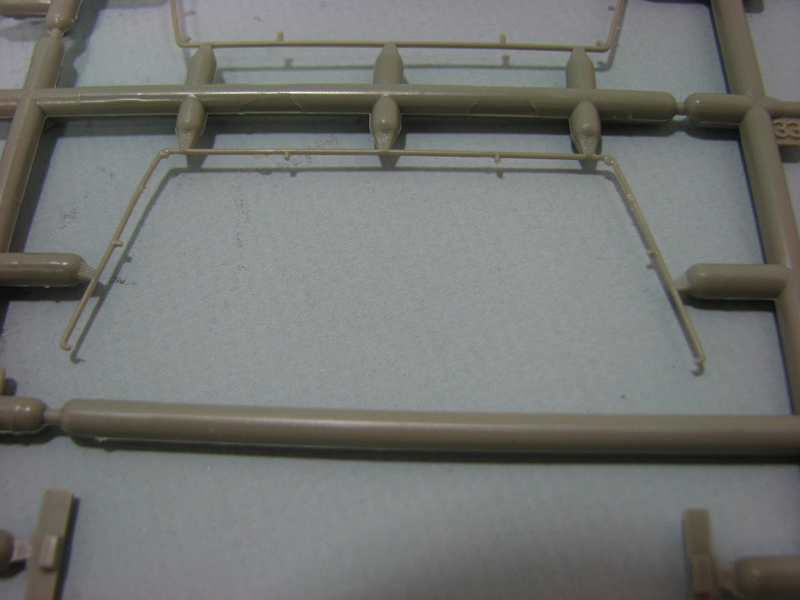
There are 12 sprues, two being doubles, as well as a length of string, a copper wire, a section of lead foil, 2 idler wheels (in their own pouch no less!), a section of poly caps, a lower and upper hull, turret bottom and turret top and a nifty decal sheet that gives you decals for at least 2 different vehicles. And a whole bag full of link to link plastic tracks, molded in a dark brown colour. The string is for the tow cables, the copper wire to help secure said tow cables to turret, and the foil for the unit markings on the turret basket. What I immediately notice is missing is a set of Photo Etched parts for the helplessly obsessive and the cast anti-skid coating that you see on almost all modern vehicles.
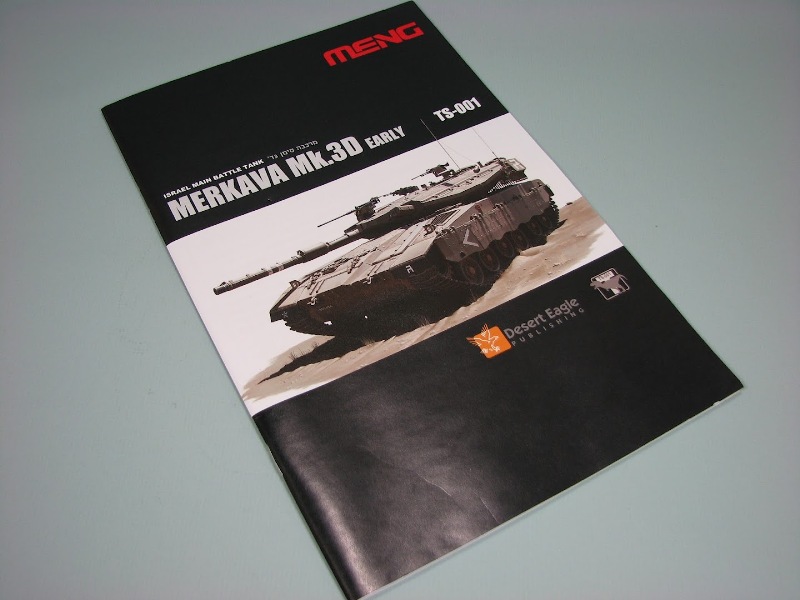
The instruction book is quite extensive, and reads like a small novella, with the steps worked out in good detail. And all in full colour black and white! (Not that anyone really expects you to print instructions in colour, I think that would be an unnecessary cost.) But, having sub assemblies or sprues called out with colour tags, might be a good thing for those of us that are a bit slower witted. . . .maybe its just me.
The instructions are written in English and what I assume is Chinese (I do not read Chinese so it could be Sanskrit and I wouldnt know the difference except that Sanskrit has more of a rounded character look, but I digress. . . .). At the beginning of the instruction booklet there is an introduction written by Michael Mass about his help and the development of the partnership (lets hope it is a long and successful one!) and the Merkava project development and the development of theMk3 and 3D. Which, to be honest, I find a nice touch. Something I would love to see in more model kits is some great full colour reference photos so that you do not have to go and open your own personal library for every kit you start. Or if companies want to be a bit self serving post a link in your kits where to find photos on your website, this might help drive more traffic and could create more sales too, but again I digress
.
Tools needed are called out on page 5 as well as a colour chart and recommendations for Gunze Hobby Color, Mr. Color and Vallejo (what? No love for Tamiya?) and the corresponding color codes.
going through the steps
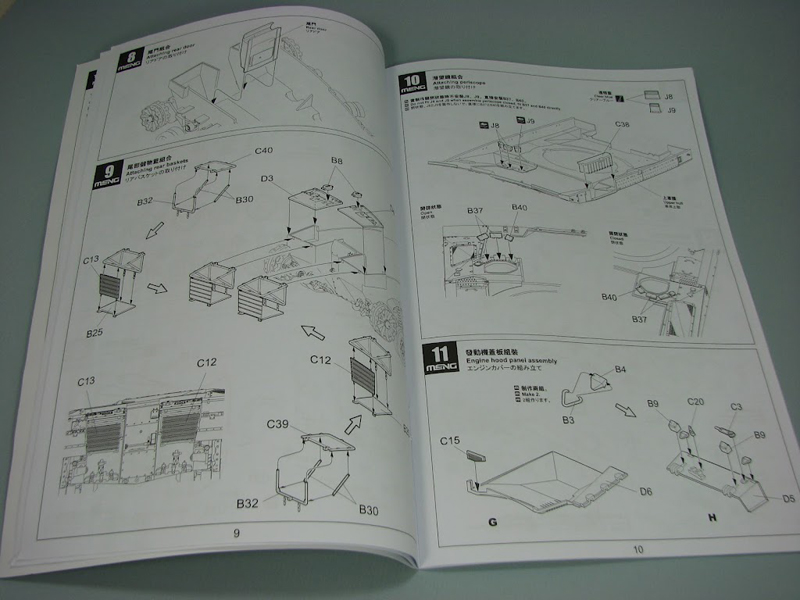
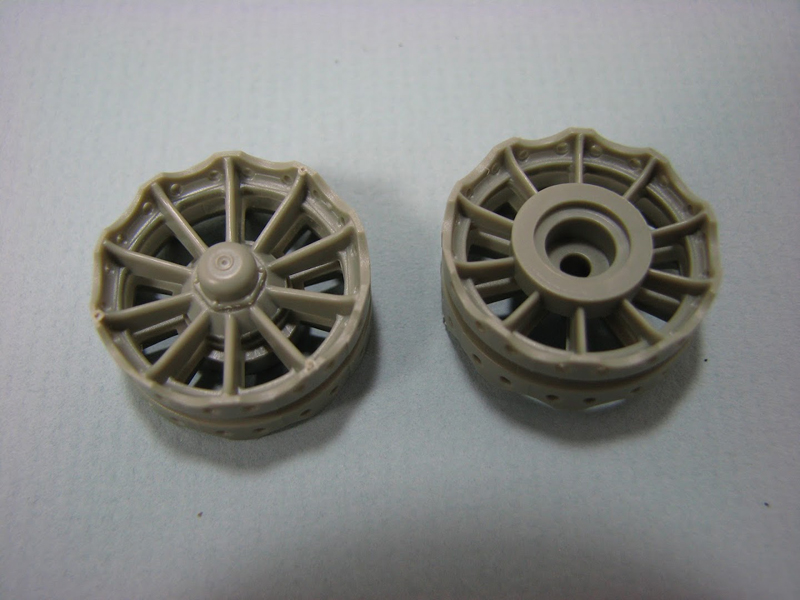
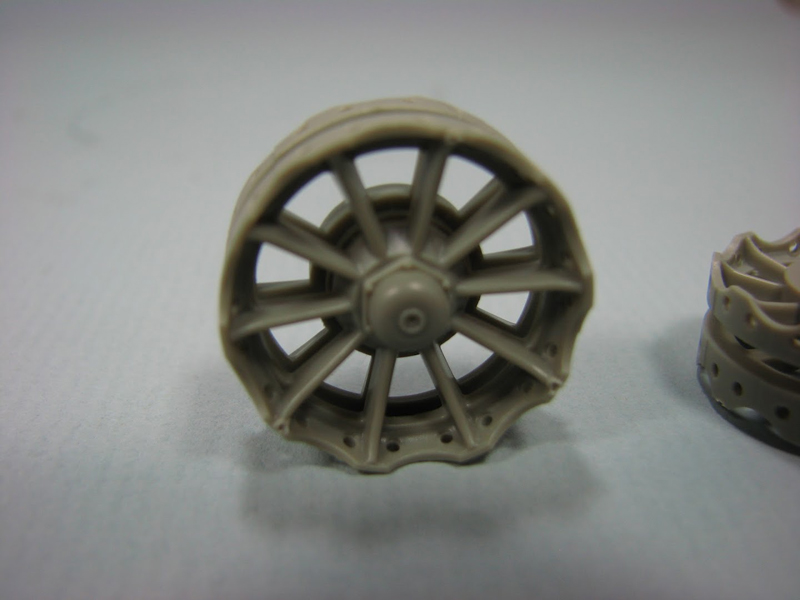
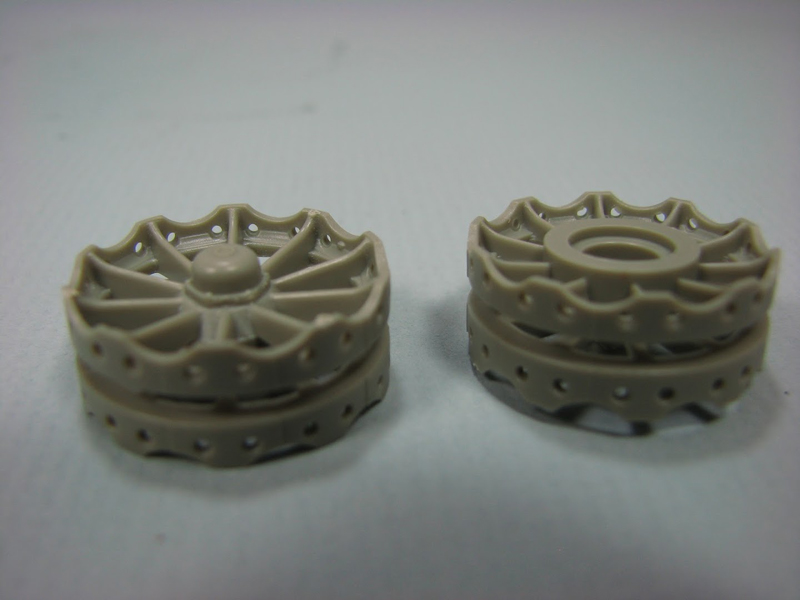
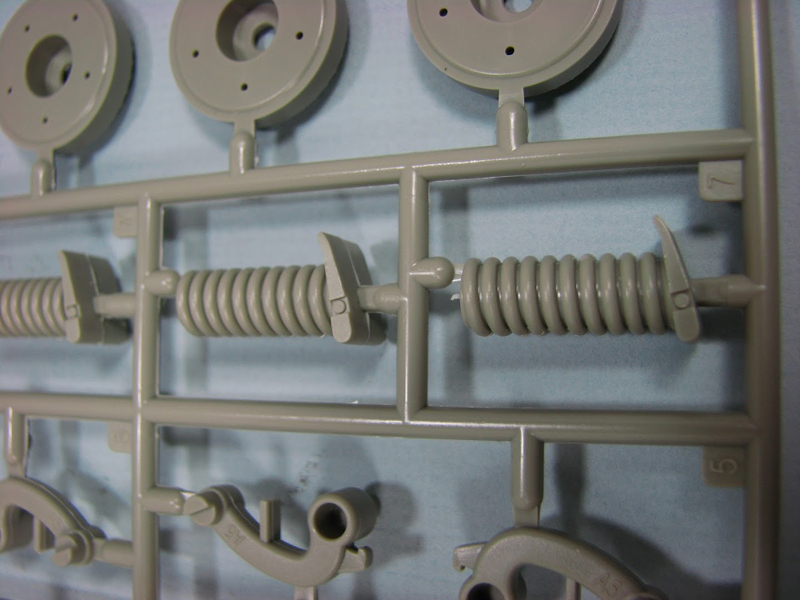
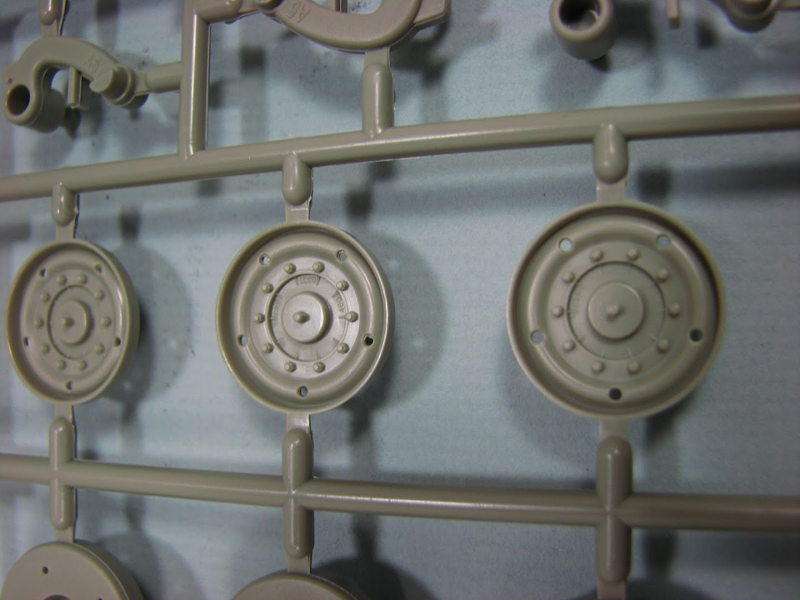
All of the action starts on page 6 with the assembly of the road wheels. Already I like what the folks at Meng are doing. Here they give you the choice of either the all steel wheels or the rubber rimmed road wheels, which is cool. My only issue here (and this is my own and nothing against the folks at Meng) is that I have NO idea where either of these would be right and or wrong, but thats my issue. Each road wheel goes together with 7 separate pieces, which is great for detail, but will be time consuming.
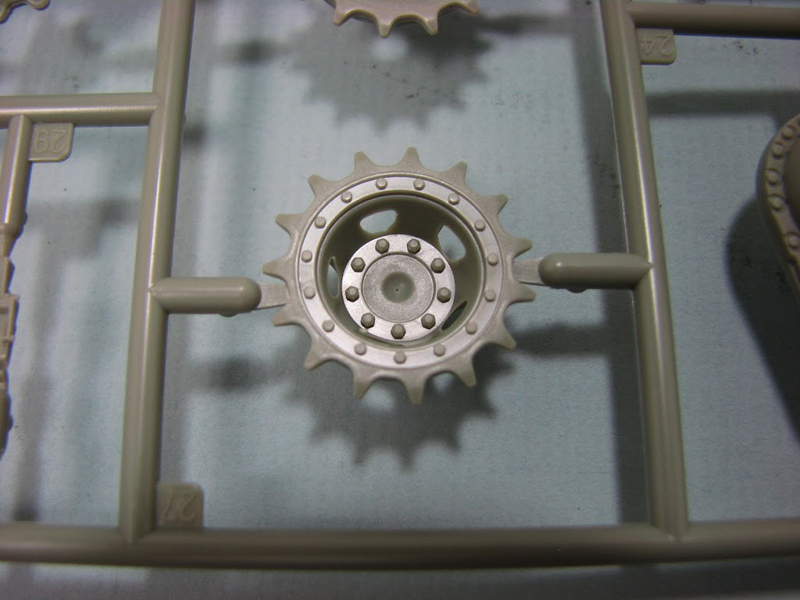
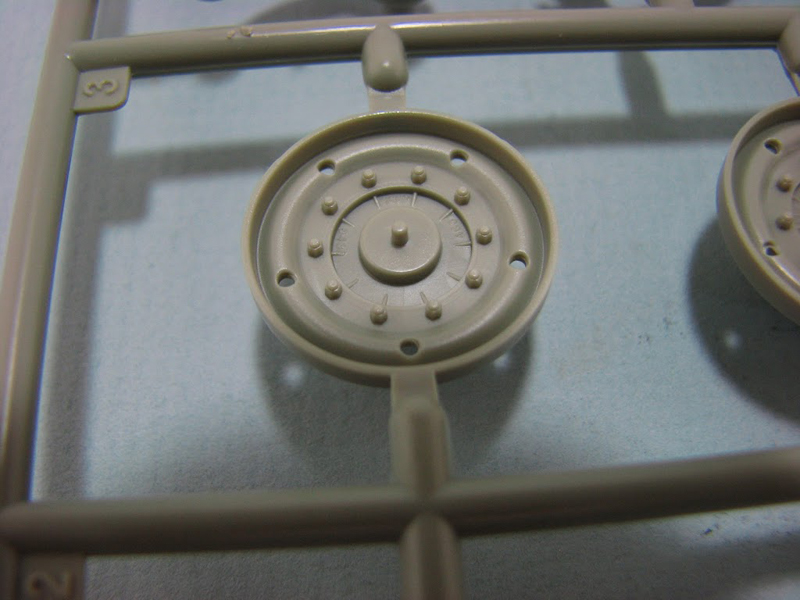
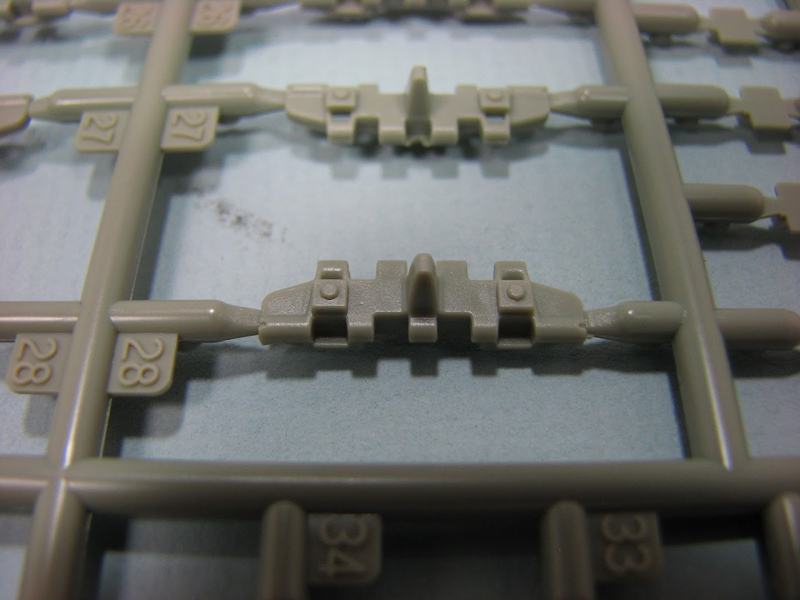
The parts for each type, steel or rubber, are the same except for parts A10/A9, A2/A8 and A5/B41, and these have a little double arrow icon (sort of a push me/pull you kind of deal, for those in the know). What I like about the road wheels is the separate hub cap piece where the wheels receive grease. This part seems to be well detailed and cast. The wheel face also seems to be well detailed and cast and I think the whole assembly should build up well. The idler wheels, return rollers and drive sprocket make up the rest of step 1. The idler wheels look to be really well detailed with the lightening holes in the rims, nice touch. The drive sprockets also have the mud holes in them that seem to be the proper shape and size (I am sure the influence of Mr. Mass).
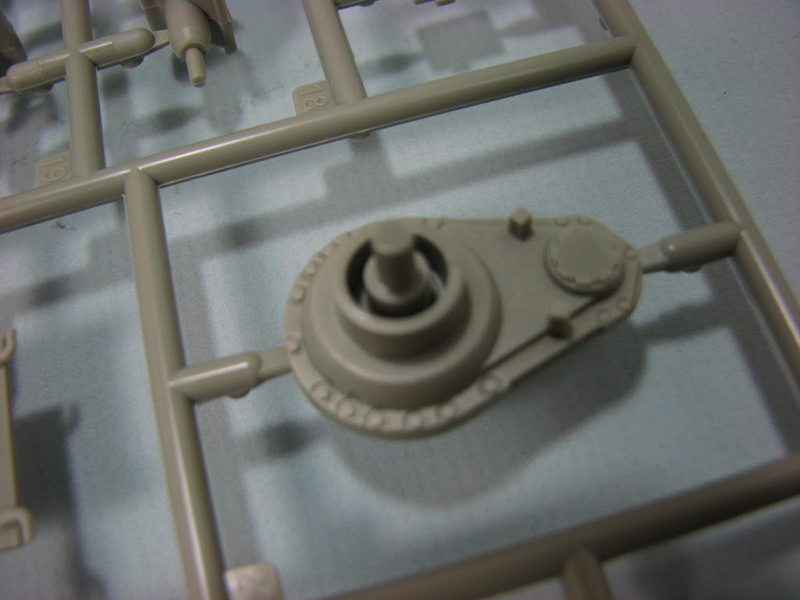
Step 2, called Walking Parts Assembly (I thought walking was for the crunchies?) is the assembly of the final drive units and track tension units. Again, good detail and here the assembly is only a few parts each. What is nice is the addition of the mud clearing device on the drive sprocket assembly. Moving on to page 7 and step 3 you have the addition of these sub assemblies to the lower hull, pretty straight forward. Step 4 is mounting the return roller attachments and some other small bits to the lower hull. Step 5 adds the tow hooks, the mounting brackets for mine rollers and such, and the return rollers to the hull as well. Step is attaching the road wheels and springs to the hull. As I said earlier you can add the all steel wheels or the rubber rimed wheels, OR you can add both!! Yes there is the option and I have seen photos to prove it, that you can mix and match these wheels on the actual vehicle. Instructions are given for all three configurations, (consult your own sources to check the possibilities).
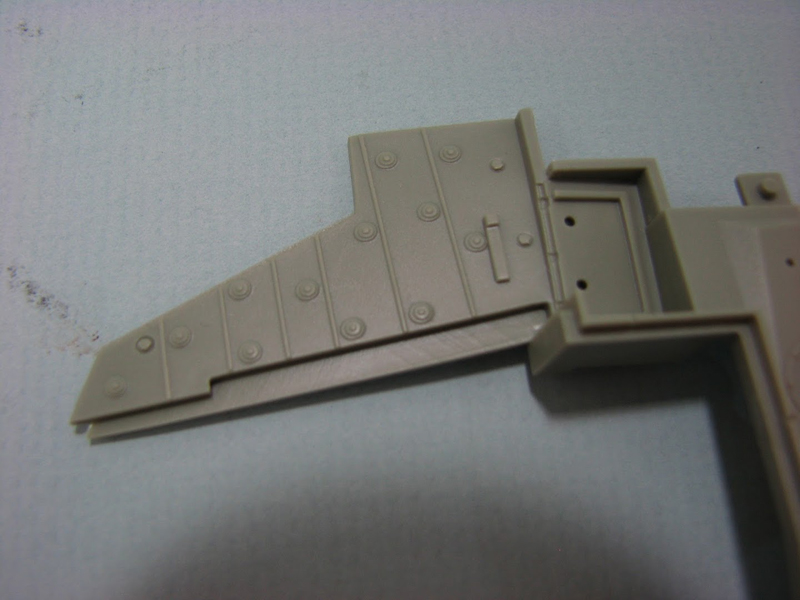
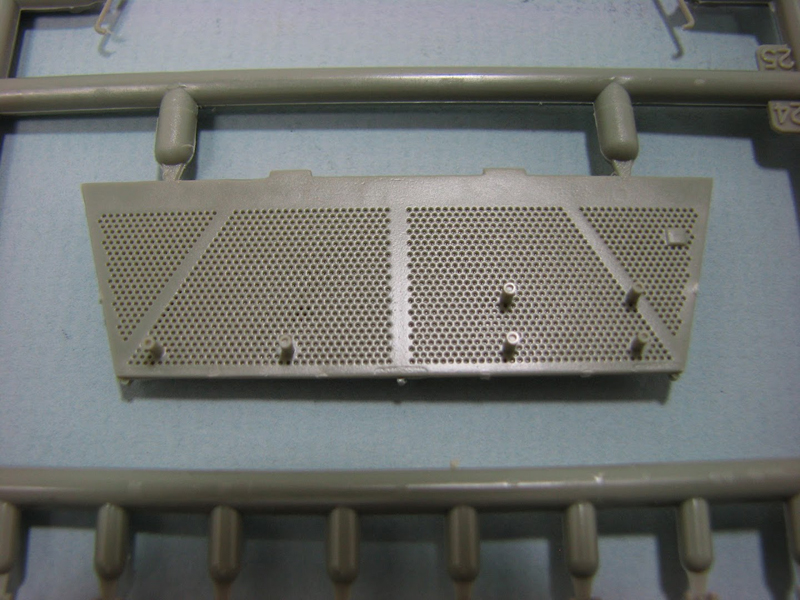
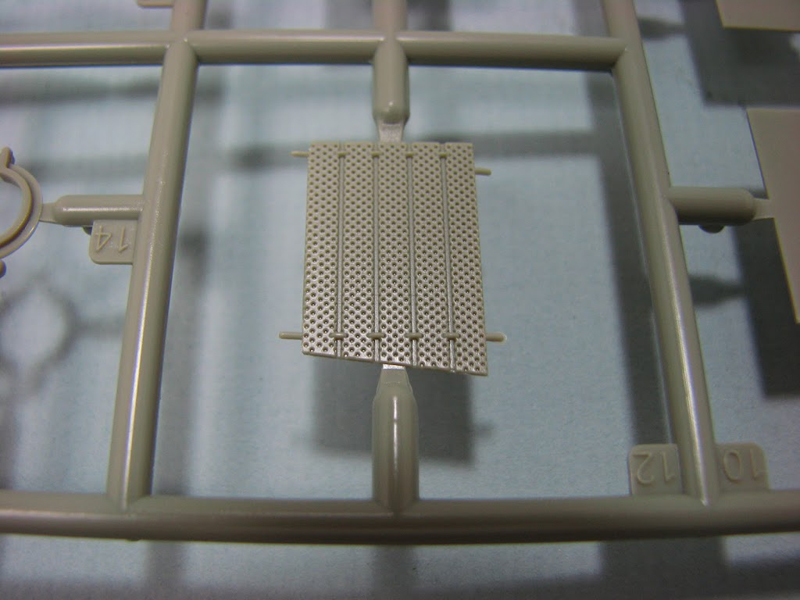
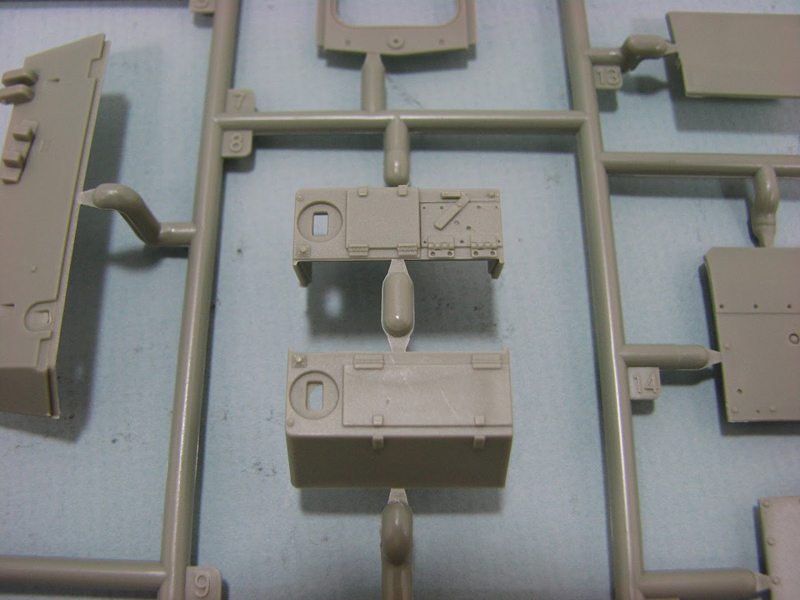
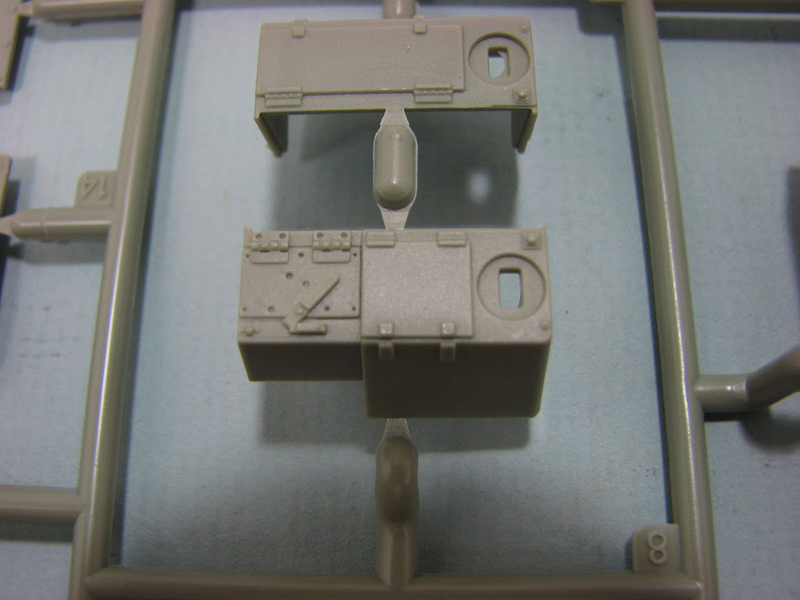
Step 7 is the assembly of the rear hatch, which I am assuming you can model opened, but not sure from the lack of directions on how to. It may just be really simple and I am over thinking it, but well see if anyone can confirm this sometime soon. Step 8 has you mounting said rear door to the lower hull and 9 is the addition of the rear baskets. The rear baskets are a really nice touch molded in plastic. The mesh metal panels are all one piece plastic but the detail is really nice. Could you upgrade to PE, sure. But when it looks this nice, do you need to?
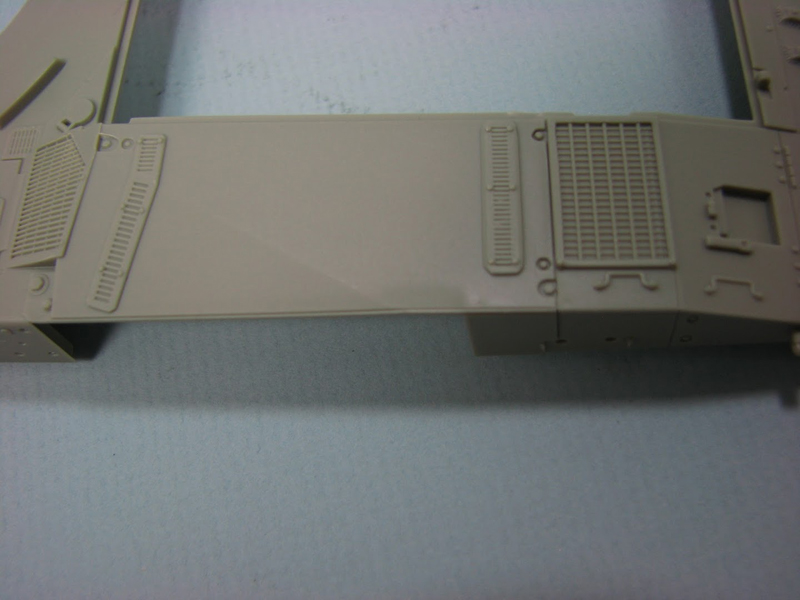
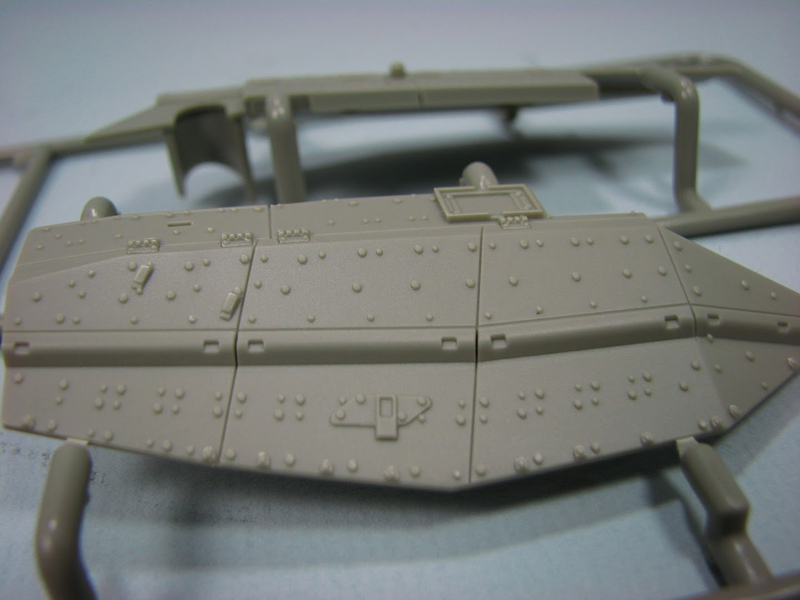
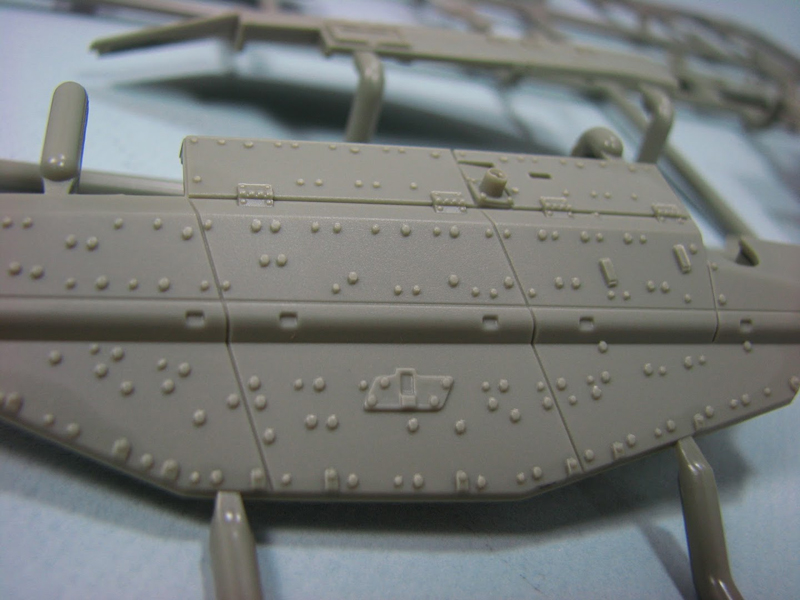
Step 10 is the official start of the upper hull assembly (whoo hoo!!) with the addition of the drivers periscopes and the engine exhaust grille. Drivers periscopes can be mounted either up or down, depending on your preference. Step 11 is the engine cover assembly. Moving on to page 11 you get into step 12 and 13 which is the addition of the engine cover assembly, the side skirt mounts and a few other upper hull details. I like the detail on the side skirt mounting springs, the only thing lacking is some small scale chain, but that should be easy enough to add for those that desire that uber-realistic touch, not that there is anything wrong with that. . . .Steps 14 & 15 are the addition of the drivers hatch, again two to choose from, but which is correct for which? Again, there is some nice clean detail on these parts as seems to be the theme for this kit.
Step 16 gives us the rear light assemblies and mud flaps. 17 is the right side skirt hangers and the pioneer tools as well as the main gun travel lock. Step 18 should bring the upper and lower hull halves together along with the track, assuming that you are following along in order. This SHOULD complete the hull assembly. . . . on to the business end of things.
So, quickly lets recap how the hull goes together in theory. Wheel assembly seems to be the most complicated items on the lower part of this beast, and it is really straight forward, just time consuming. Detail over all is pretty solid all the way round with very little wanting so far. Any questions? Ok. Moving on.
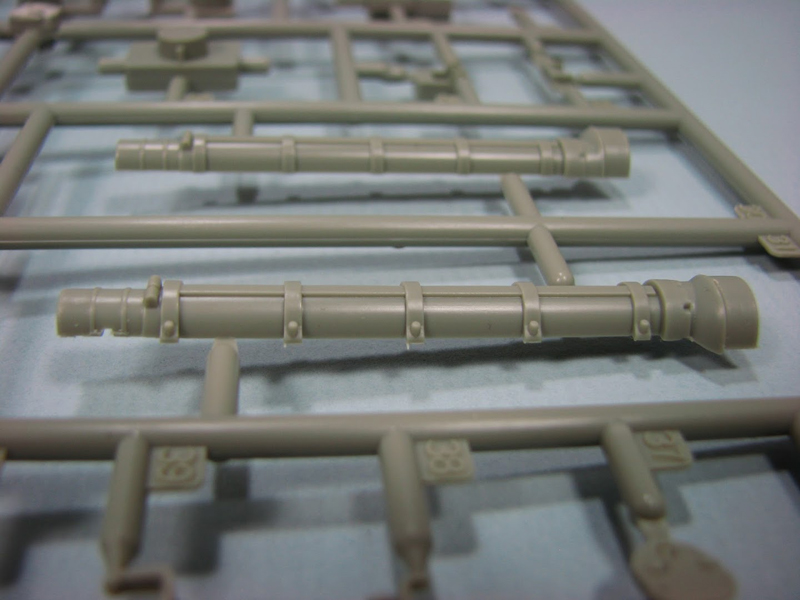
Step 19 is the main gun assembly, which involves 8 pieces PLUS the 6 attachment pieces needed to mount this to the turret. There are two halves forward of the bore evacuator and 3 pieces to the rear of it and two pieces on either end of the evacuator. The detail on the main gun looks good. My only issue is that the main gun comes in so many pieces. Yes, I realize that I am doing it now, but in this case hear me out (how many times have you said that?). Having the main gun molded in plastic is not my issue. My issue is why have it in so many parts. Would it not be easier to mold it as three solid parts? Everything forward of the BE, the BE itself, and everything aft of the BE. It would seem to me, and I am no expert here, that having the main gun in fewer pieces would be less expensive to produce and cast.
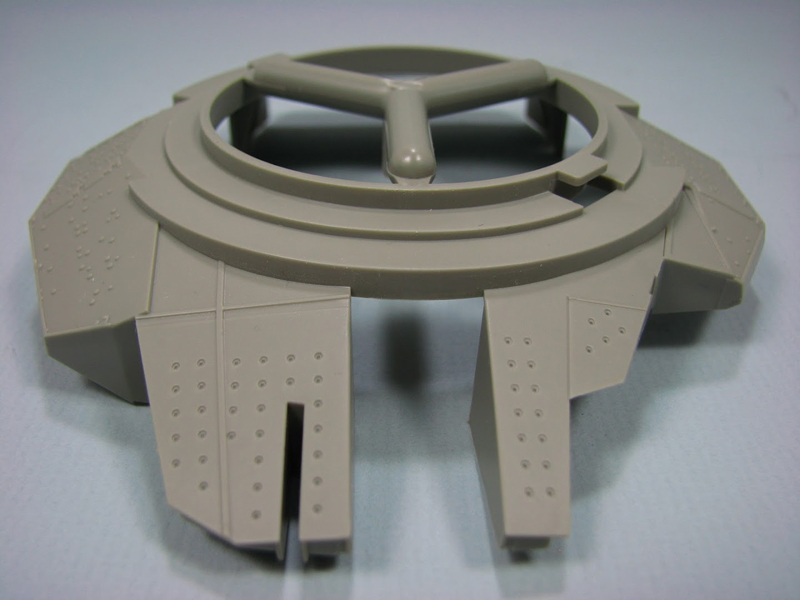
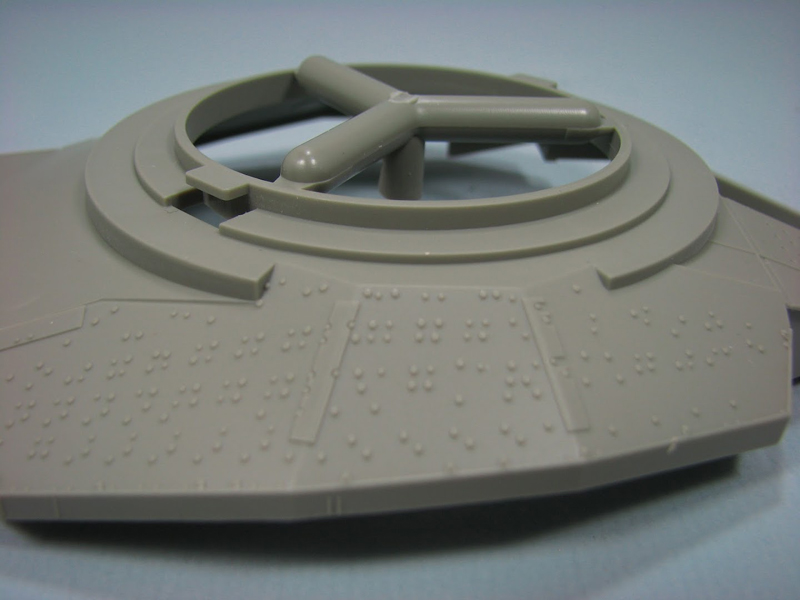
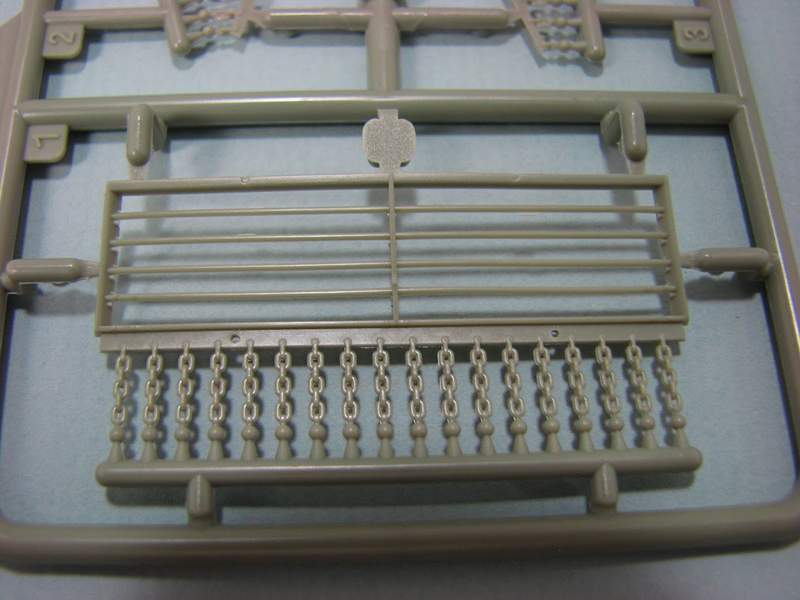
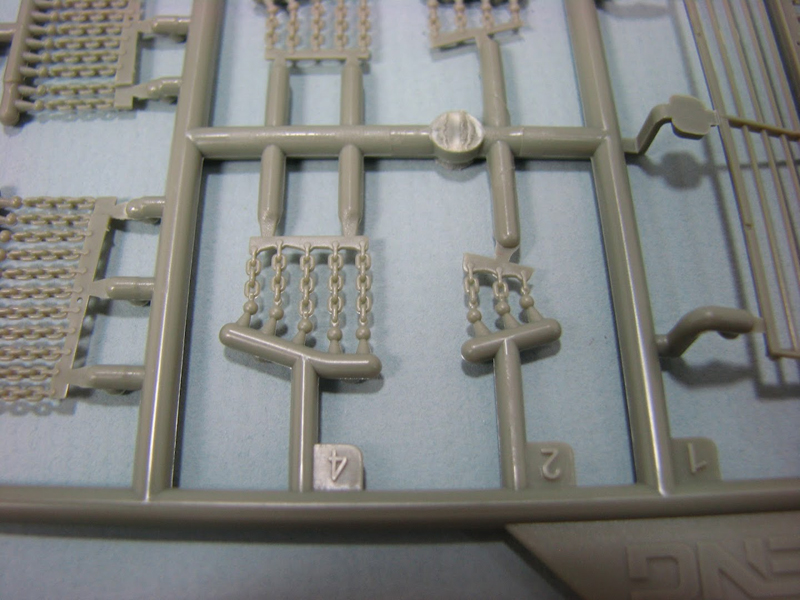
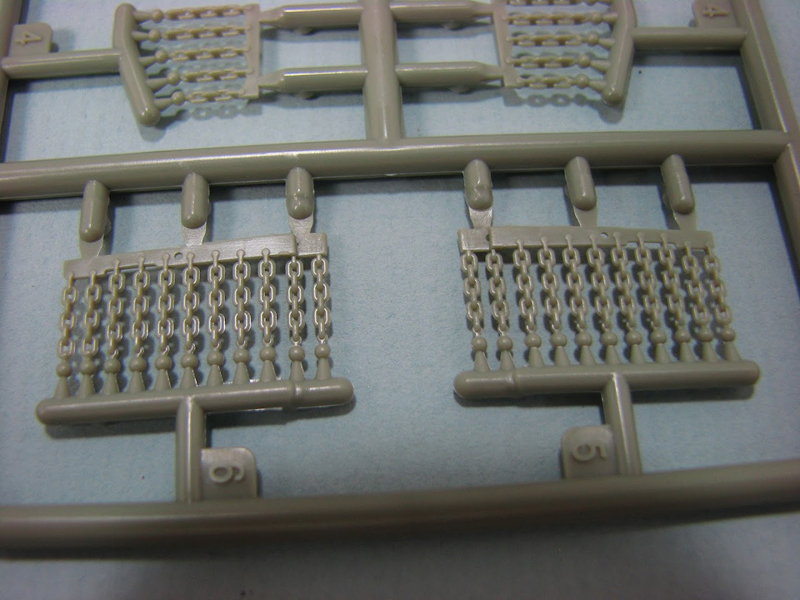
Step 20 begins the rear turret assembly with the spare track and antenna mounts. Step 21 attaches the last two sub assemblies to the turret bottom. Step 22 begins the turret basket assembly. Now, I will say that even though this set does not come with a set of PE I do not think it is necessary. Hear, me out. The turret basket bottom is molded in plastic and not only did Meng do a very fine job with it, but the holes in the mesh are actually holes! Punched through, the real deal. Bravo, sirs, bra-vo. The only down side I see with this assembly is the ball and chain armor that is also molded in one piece sections in full colour plastic. These are very well cast and as a result look very fragile. Cutting them from the sprue tree is going to be an exercise in patience as there is some flash on these (the only that I saw in the whole kit) that needs to be cleaned up, carefully as the whole thing is very fragile looking. But having these all ready to go is a huge plus in my book. Steps 23-25 deal with attaching the turret basket to the turret (where else would you attach it?)
Steps 26-30 are the turret armor assemblies and their attachment on the turret bottom. I am sure that there will be some care taken when attaching these as the turret basket will need to be mated to these when it all comes together.
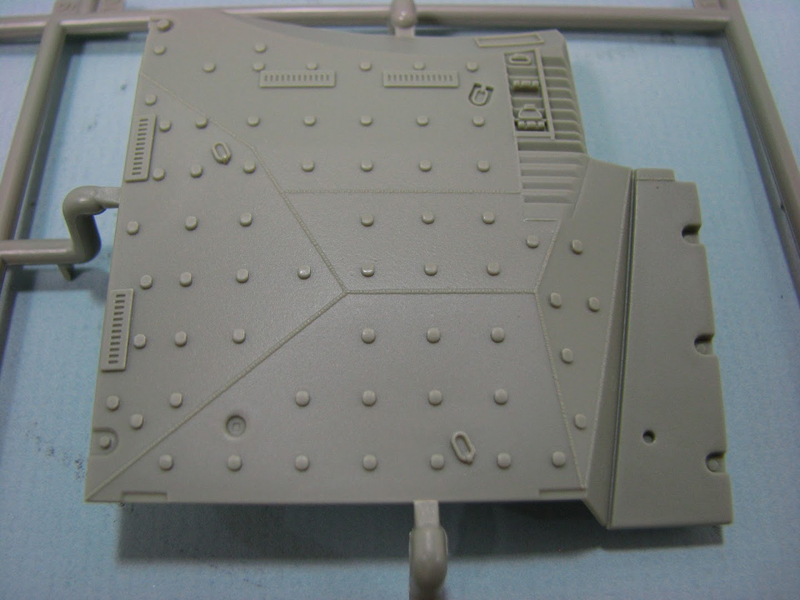
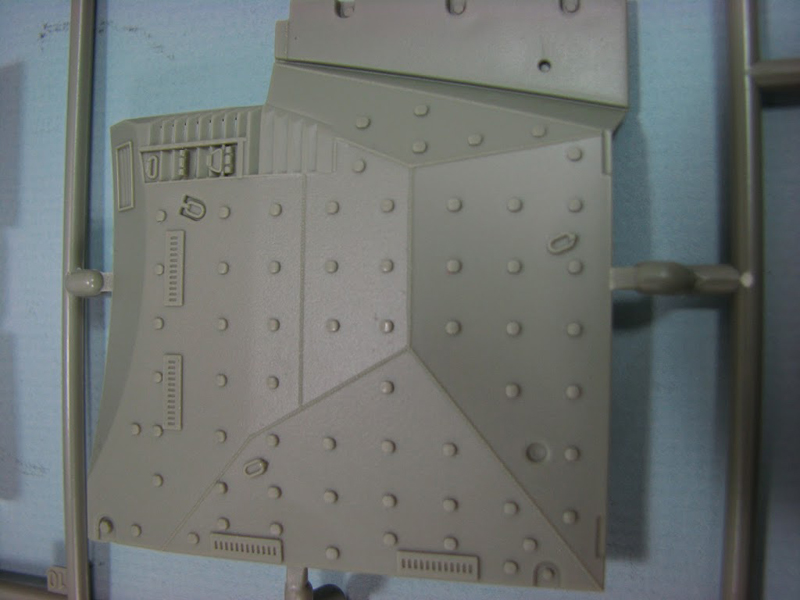
Step 31 begins the detail items to the upper turret, the loaders periscopes. 32 and 33 are the commander and loaders hatches. 34 is the addition of these to the turret top. Now, here again I am gonna call out something and this is in no way a serious criticism of this kit and/or its manufacturer, who have really done an outstanding job, as far as I am concerned. But, with all of this beautiful sculpting and detail and care taken, why didnt they include the non skid/anti slip texture to all of the upper surfaces on the hull and turret?? From here it seems like a no brainer and it really is one of the ONLY things missing from this kit. Maybe it was a production issue, no way to make it look perfect so why screw up a really good thing? Maybe it was time constraints, HB had their kit coming out too and Meng wanted to beat them to the punch. Who knows. What I do know is that you are going to have to add this feature yourself, which for many of you will not be an issue. For the less experienced modeler this might present a challenge.
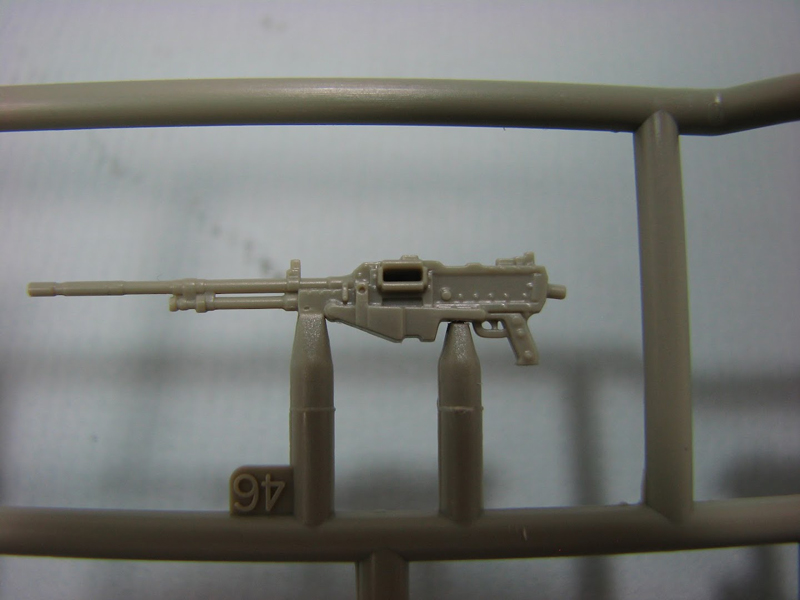
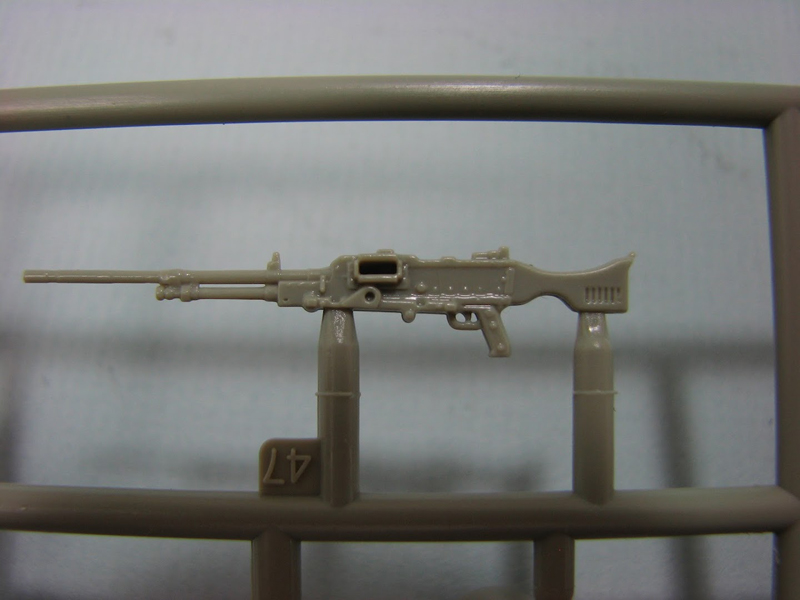
Steps 35 and 36 are the assembly of the smoke grenade dischargers, again very detailed and this time only 8 parts each, but well worth it. 37 and 38 are the assembly of the turret optics (dog house where I come from) and the 50cal. The .50 cal MG looks to be very nice with good detail on the body and barrel. The solenoids for the firing mechanism seem to also be well represented and the whole deal consists of 18 small parts over 3 sub assemblies. Again maybe a lot of parts but the detail does not suffer and lets face it this is why you buy tank models, right? For the shooty bits! Step 39 adds the .50 cal and the optics to the turret roof. Here I need to say that most of the construction seems to be notch and pin which, I am very very excited about as I hate gluing something in place only to find that I have set it in the wrong spot because there was no indicator. Bless you Mr. Meng, bless you. Steps 41 through 43 are the addition of the rest of the turret items including the commanders and loaders MGs and the 60mm mortar launcher. 44 brings it all home, easy peasy.
Final Thoughts
Well I cannot say that I am disappointed about this kit. Again I am no expert about the Mk 3D but what I see, I like. The sprues are nicely laid out with the numbers and letter of each sprue tree easy to see. Parts seem to be laid out in a logical order with each sprue tree having a function that is easily identifiable. The detail on the parts seems to be really high quality, at least on the level of what we have some to expect from Tamiya, Dragon and AFV Club if not others as well lately. The instructions seem to be laid out and organized well and not that it may matter to you but the paper that the instructions are printed on has a nice weight to it and does not seem to be flimsy. There are nice options on the kit, and not just the decals, to build different vehicles.
On the down side there is no molded on anti-skid, but again this seems to be only an issue to a small lot of us. The serious builder, the nitpicker, will miss this, but will be easily able to replicate it without much issue. The younger or more novice builder probably wont miss this feature much. So, again, I dont think this is a deal breaker. There is also no photo etch fret, that we all seem to be so addicted to now. But my question is, if the quality of the kit is this good, do you need it? And, furthermore, you know that at least 3 after market companies are going to be doing this anyway so why does Meng need to? I think it would be an unnecessary added cost that they did not need to add, so kudos to them for knowing when to say NO.
What else is missing? Color call outs in the instructions, color reference photos, some carbon fiber for antennas, pre-drilled out MG holes, turned aluminum main gun, all metal tracks and rubber band tracks (cause if we dont have them all you know someone is gonna make a stink) and a back rub. So, yeah, not much. I would say that for their first full on armour model I think they knocked it out of the park, or at least a stand up double, with an RBI. Had this come from a company that has been doing this for a while, like Trumpeter, AFV Club or even the mighty Tamiya wed still be impressed. The fact that this is from a new kid, makes it that much sweeter. Good job rookie. The fact that they incorporated comments from one of our own, even more so.
I really think that Meng has done a superb job with the release of this kit and for that matter the whole production of it. From the box, to the instructions, to the decals to the details it is all there. Minus the back rub.
Lets hope that Meng continues to turn out more great kits on less obvious subjects and continues to enlist the help of experts in our community to produce amazing results that all of us can get excited about.
For a video look at this kit by Jim Starkweather see here:
Unboxing: Meng Merkava Mk.3D


Comments