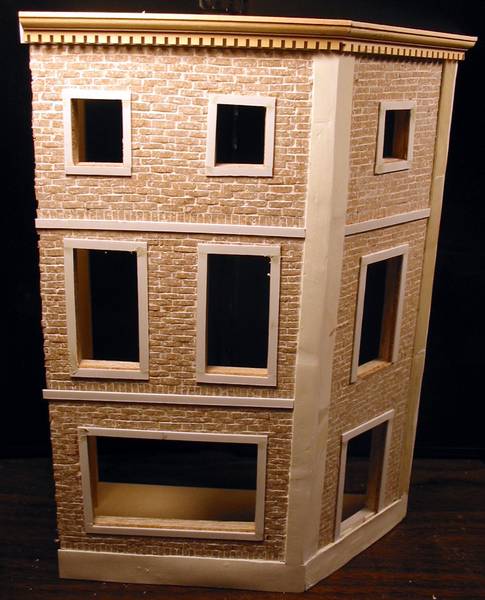
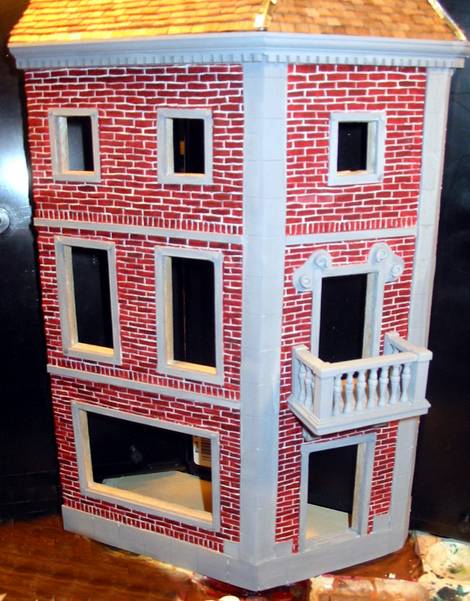
I was presented with a balcony to review and took the job. Well.. to review a balcony you have to have a building. This balcony is royal and impressive and therefore, deserving of an impressive building. I choose to build a three story urban brick and stone combination store and apartment building.
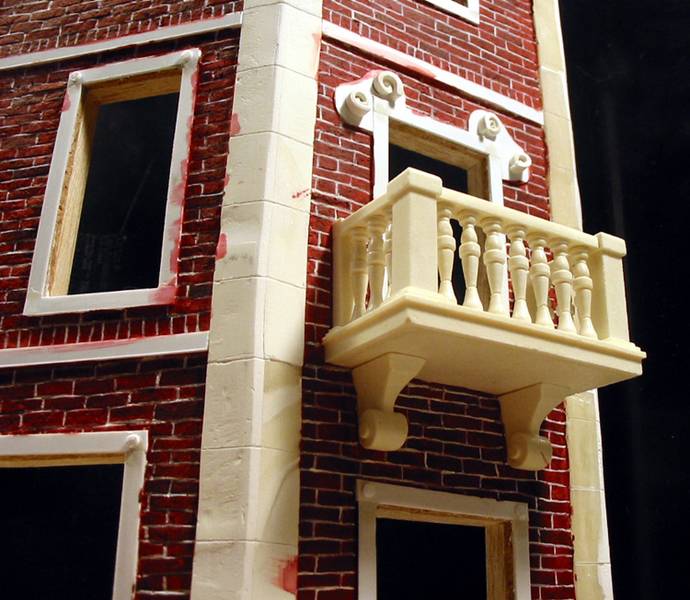
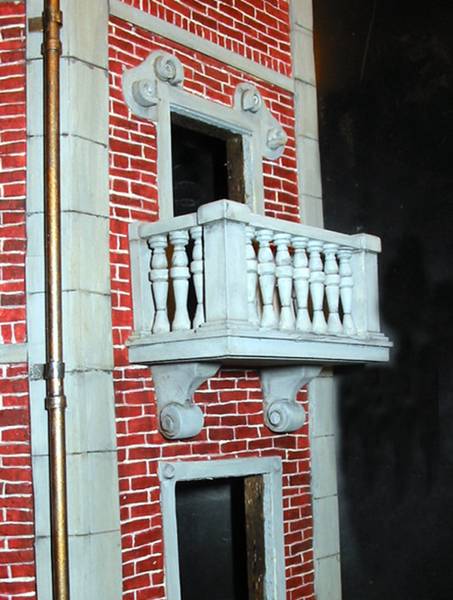
I choose to use the now infamous blockhaus cork method on this building and went on with designing the building. Part of the planning was to decide how the balcony would interact with the scene. I planned on having the balcony be a focal point. To do this I planned a corner building with a short wall at the corner. The balcony would take a prominent position on the short wall jutting out into the scene from the corner.
Visually, a corner sets the virtual middle of a scene and to have a second story balcony jutting out really accentuates the building and the balcony. Perfect for a diorama and a review.
The European Balcony Kit
The kit comes from 135th Construction Battalion, it is kit CD00111 European Balcony. There is an in-box review of this kit that will give you more information at that point in the overall process. The kit looked really nice; nice detail, nice pieces, very well done. Architecturally it is a great stone balcony, not delicate at all, no wrought iron, or railing. It is a balcony of substance.
Planning the building
For this review I will not go into a lot of detail of the building itself. That will be for a related article. I will discuss the steps and processes I went through that will address the balcony.
With the scene set in mind I went about measuring the balcony. This is a critical step when creating a centerpiece. You want this piece to fit and be prominent. You dont want a large wall to eat up the balcony, you also dont want a small building to be dwarfed and look out of scale for a beefy stone balcony such as this.
I wanted the balcony to be set evenly vertically and horizontally on the corner of the building. I measured and set the short wall width based on the balcony. That set my dimensions for the entire corner area.
From that point I drew a cardboard layout of the building.
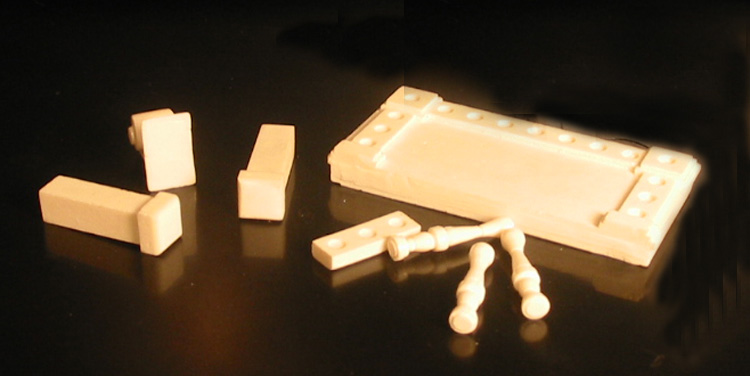
Balcony Assembly
The first part of this resin kit is to remove the resin blocks. I broke out the trusty razor saw and proceeded to remove the blocks. Nothing new here, this was easy to do and posed no problems. The blocks are in decent locations so you dont have to worry about a lot of delicate clean up or clean up on a prominent location.
After the blocks were removed the clean up of each piece was done. A needle file and some fine grit sandpaper were the tools of choice. Again, no problems. The flash was minimal, the excess resin was no big deal. In a couple of the decorative grooves on the balusters there was a bit of resin. The needle file handled these easily.
the fix
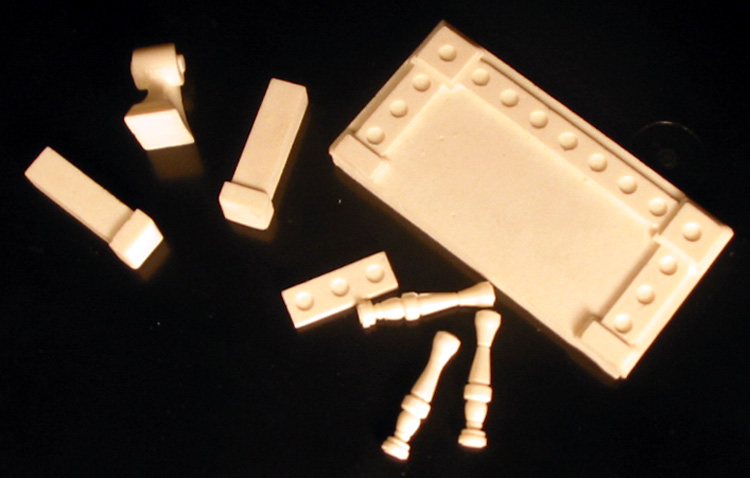
During clean up I noticed something! Two of the balusters were not like the others. Two of the balusters were shorter and didnt have one of the decorative grooves. This could only be a problem in the mold itself. I did not notice these in the In-box review because there are 14 balusters and at first review they seemed uniform. See the detail shot with the red circles.
This left me with a couple of choices. 1. Do nothing bad option, 2. Remold expensive and time consuming, 3. Modify the balusters doable, 4. scratch my own - doable. I considered option 2; I have the materials and it would have yielded a product. Option 4 is also very manageable, take a bit of doweling and carve two pieces, not to bad with only two. I opted for option 3 because I wanted to deal with what I have and provide a solution that I believed would address the majority of builders who would encounter this kit. Fixing what you have is something that everyone can deal with.
With the decision made I set out to achieve the goal. There are two problems with the pieces. 1 Theyre too short, 2 they are missing a decorative groove. The missing decorative groove is exactly the same size as the missing height.
I consider the fact that two balusters suffer the same problems as a good thing. This made uniformity easier. I made the decision to locate the balusters in as hidden/uniform a location as possible and put one on each side of the balcony. This way any discrepancy in cosmetics is hard to spot and the overall balance of the piece is upheld.
To accommodate for the shortness I simply used a small disk of sheet styrene. I placed the bottom of the baluster on the sheet. I traced the end to get the shape and cut it out. I used a bit of CA to glue it on and sanded it down to match the piece.
I fell back on the fact that there are two pieces missing the groove. This gave the option of simply using what I have balancing the kit. As long as the piece looks balanced it will raise the question of purpose. The viewer will have to ask, did they mean to do that?
Assembly
Assembly was easy to figure out from the box art. No instructions were provided and I do not believe any are necessary. The box art provides enough that you can figure out where pieces go.
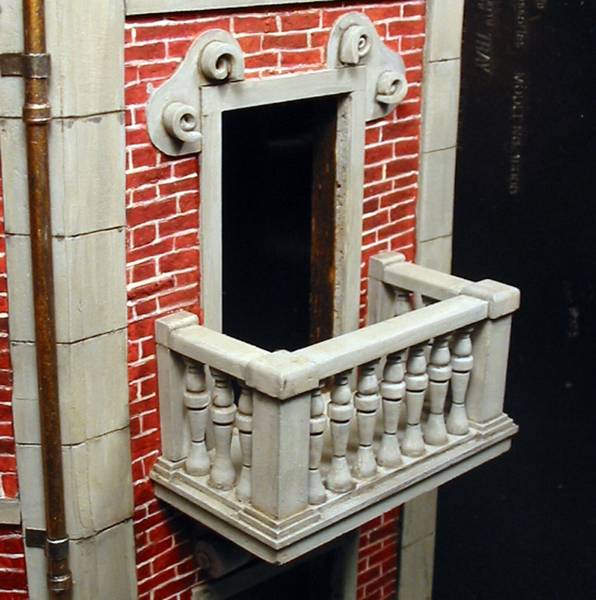
I test fit everything first. I gently placed the balusters in their place, and laid the railing on top. Once I was satisfied that the fit was good I placed everything in assembly order. I put the base down on the left, then laid out all the pieces to the right in the order I would need them.
The kit is nicely designed. It gives you tab A/slot B architecture for the balusters. Each one has a bottom recess on the base and a top recess on the underside of the railing. All the remaining joints are but joints and fit nicely. They pieces are all the correct length and meet nicely. The ends are all square and make good solid joints.
I approached this in a three phase assembly. Phase 1, get the balusters on the base, Phase 2, get the railings on, Phase 3 add the support pieces. This approach is to give each phase a chance to set and dry before moving to the next. Phase 1 I added a drop of CA to the recess of the balusters. To support the vertical position of the balusters I dry fit the railings on top. This gave support to the kit as the CA dried. I glued the corner supports in the same way at this time.
Phase 2 I added a drop of CA to the top of the balusters and repositioned the railings.
Phase 3 I chose to wait to attach the underside supports until I had a building to connect the balcony to. Since these pieces had to fit squarely against two separate kits I waited to see if there was any adjusting.
the building
As I mentioned the building was designed around the balcony and I drew from the details of the balcony. For more on how I made the building you can read the related feature (to be published in the near future).
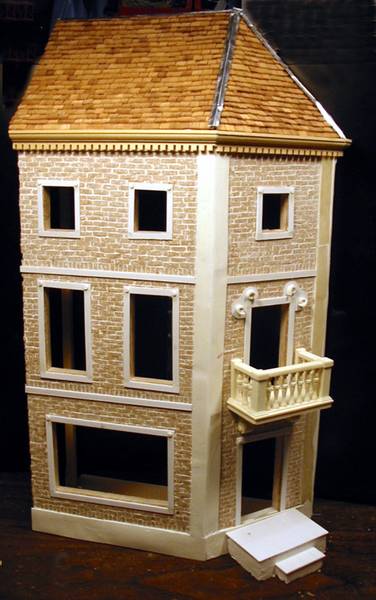
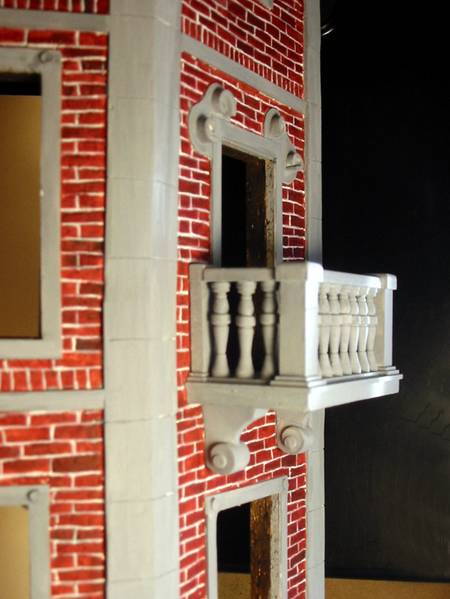
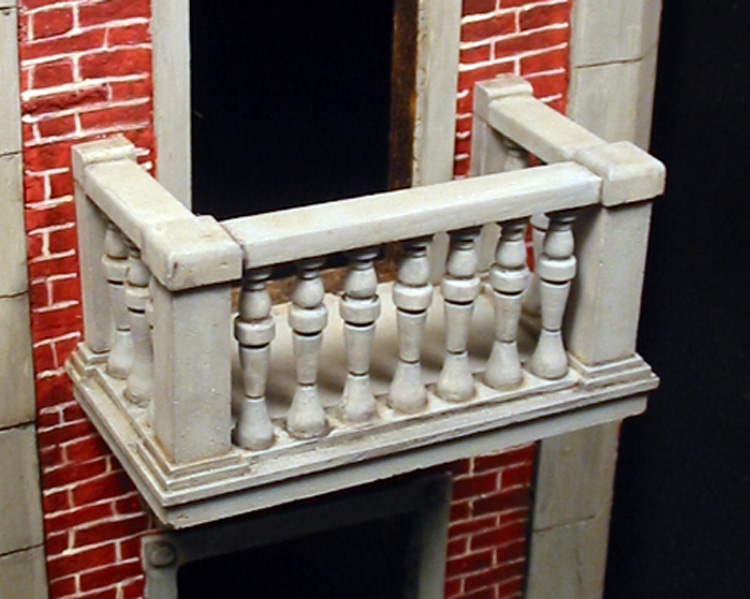
The weight of the balcony was the deciding point for how I would attach the balcony to building. Two-part epoxy resin was the choice. I mixed up a small batch of epoxy, located the the target location. Using a coffee stir stick I applied the epoxy to the balconys flat surface that would go on against the building.
With the building on its side I simply placed the balcony and gave it a nice firm push to make good contact. I let this cure before moving on. The next pieces to apply are the decorative support pieces on the bottom. I test fit these and there was no adjustments to make on fit. I mixed up a bit more epoxy and with a toothpick applied some to the support pieces. I firmly pushed these pieces into place and let them cure.
There were no problems what-so-ever here.
finishing
The balcony was built and in place and it was time for paint. I wanted an in tact recently used appearance. After doing a lot of research I found that this style of balcony was typically gray in color, so thats what I went with.
I mixed white and black Folk Art acrylic paint to get a nice stone colored gray. I thinned it a touch with a few drops of water to make it spread a bit easier. I applied it with a regular paintbrush.
After the gray dried I moved on to washes. The first wash was black the second was burnt umber. I use a turpentine and oil paint wash. For me this recipe flows the best gives the nicest final finish and is easiest to thin and mix as you go. It is easy to get a nice transparent wash. I always make a very thin wash and add more coats or layers. Its easier to add more than to take away. I applied two(ish) coats of black and three to four layers of brown wash.
The balcony took paint and washes very well. There is just enough texture in the resin pieces to give the paint a bit of bite. The lighter color of the resin make coverage very easy. Folk Art paints are nice and dark and really helped with that. The washes flowed well over all parts of the balcony and didnt resist any of the painting process.
Overall
This is a kit that I would acquire and use again, I would not hesitate to recommend this kit to anyone from a beginner to an expert. The deal with what you have solution came out totally fine and will suit a beginner modeler and the scope of the fix wont negate the overall value of the kit for an expert.
I have built buildings and even scratch built a balcony. This piece makes a statement and I like it. Is it perfect, the kit I received was not, that does not in anyway mean that you should not get this kit. I think the impact of this balcony to a building is great. The uniformity and easy of assembly and finishing saves a lot of time and energy in getting your building up.
SUMMARY
This is a the Built Review of a previously reviewed product. This is a great product and a fun assessory to add to your urban diorama.
About Scott Lodder (slodder) FROM: NORTH CAROLINA, UNITED STATES
I modeled when I was a teenager. College, family and work stopped me for a while. Then I picked it back up after about 12 years off. My main focus is dioramas. I like the complete artistic method of story telling. Dioramas involve so many aspects of modeling and I enjoy getting involved in the ...