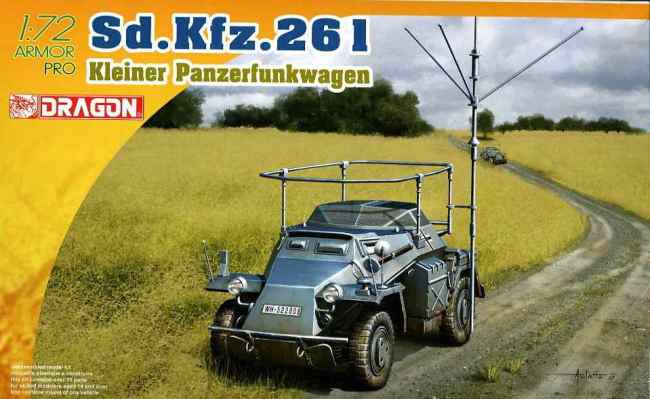
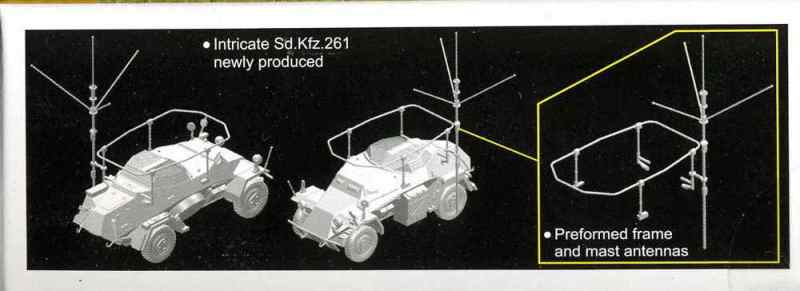
The Sd.Kfz. 261 Kleiner Panzerfunkwagen was a small armoured radio car based on a standard chassis common to numerous four wheel drive German armoured cars. Unlike the Sd.Kfz. 260, the 261 was equipped with a long range radio set with a frame antenna and a large mast antenna purportedly used for ground to air communications. Like the 260, it had a superstructure made of anti-grenade screening as opposed to a turret. Armament was restricted to the crews personal weapons.
The four wheel drive vehicle had a crew of four, was lightly armoured and weighed 4.3 tons. It was powered by an eight cylinder engine producing between 75 and 85 horsepower. Top speed was approximately 50 mph (80 km/h) with a range of 175 miles (300 km). They entered service in the spring of 1940 with Nachrichten (Signal) troops and remained in use to the end of the war.
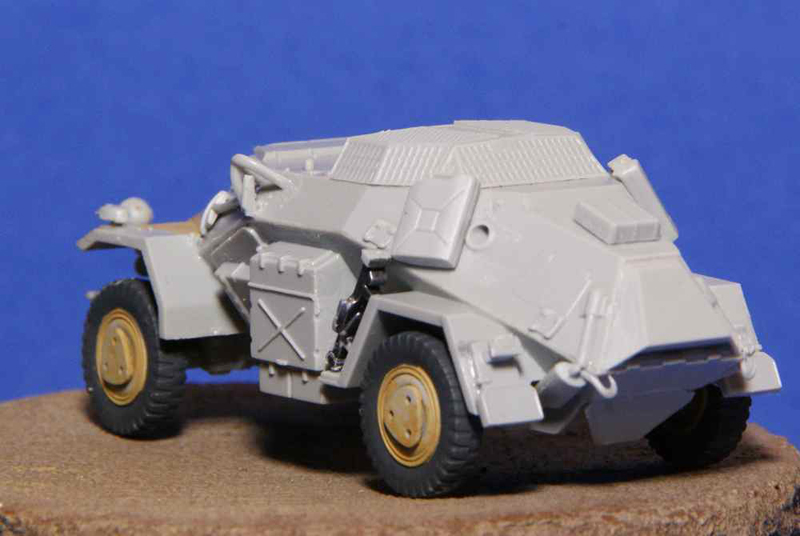
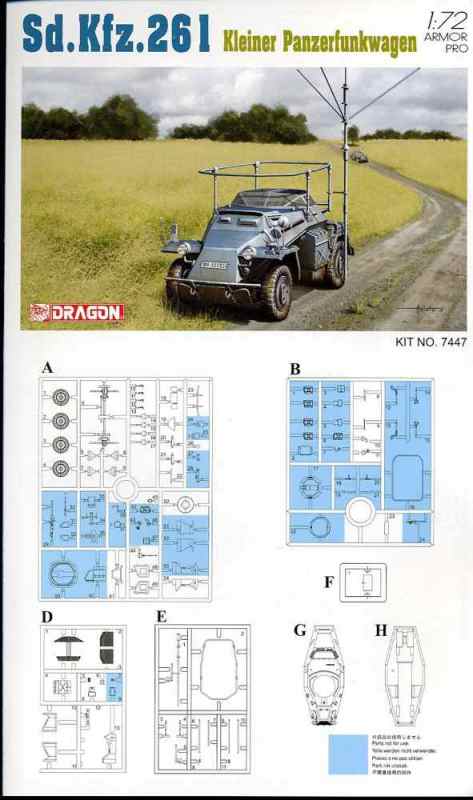
The subject of this review is the Dragon Models 1/72 Armor Pro Sd.Kfz. 261 Kleiner Panzerfunkwagen, kit #7447.
Contents
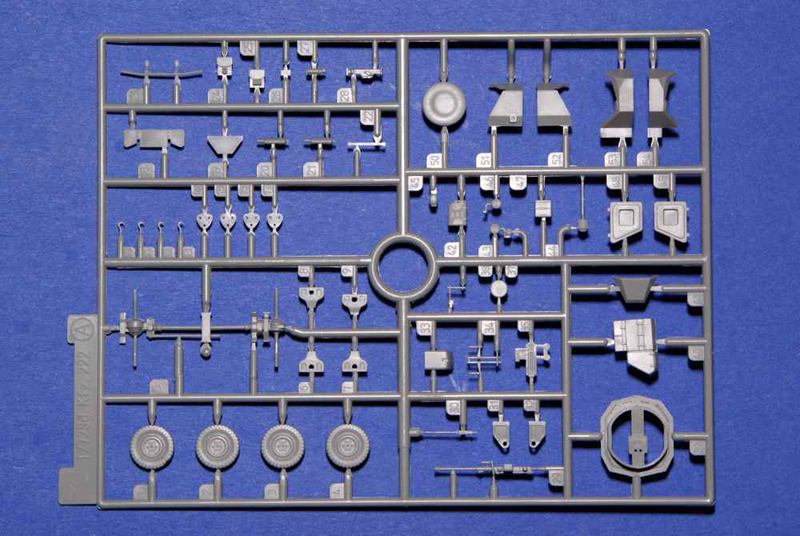
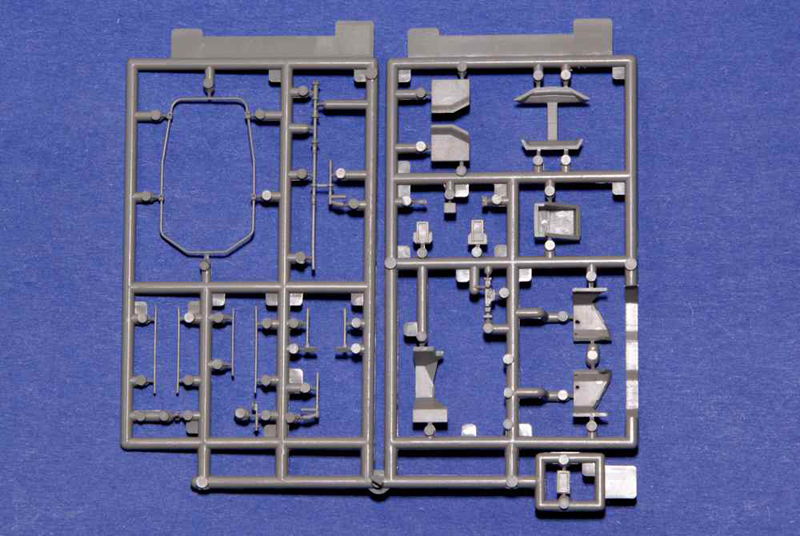
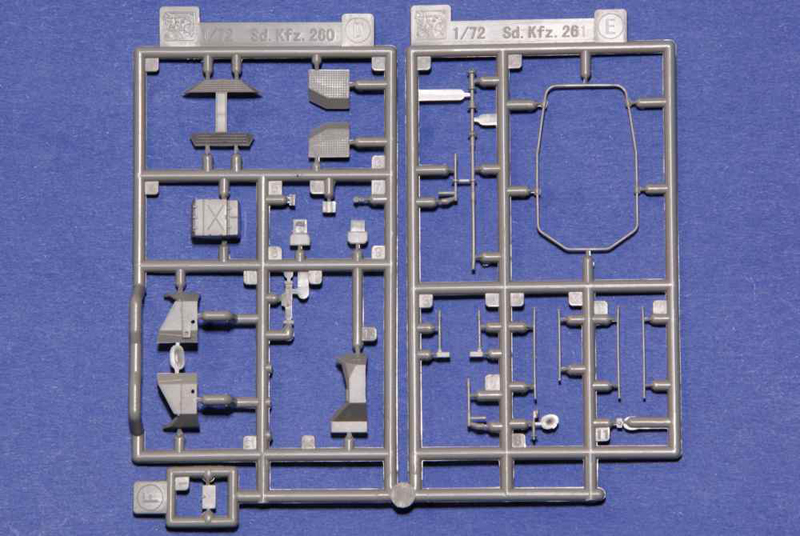
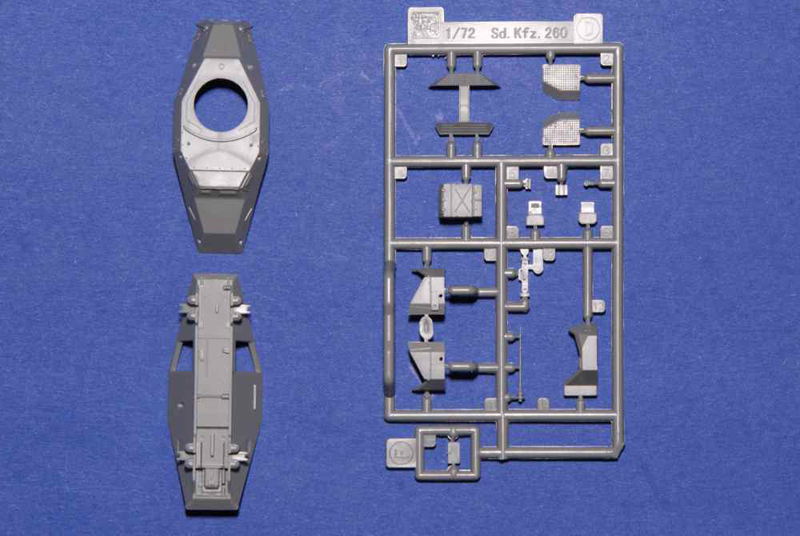
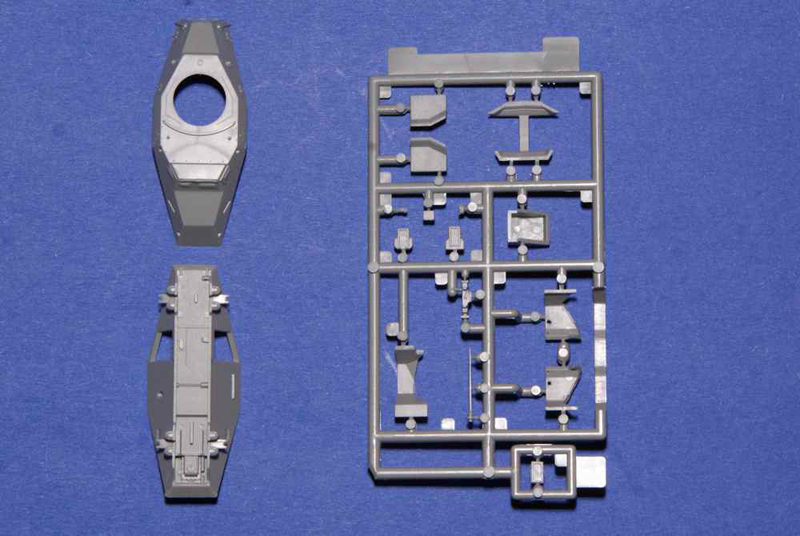
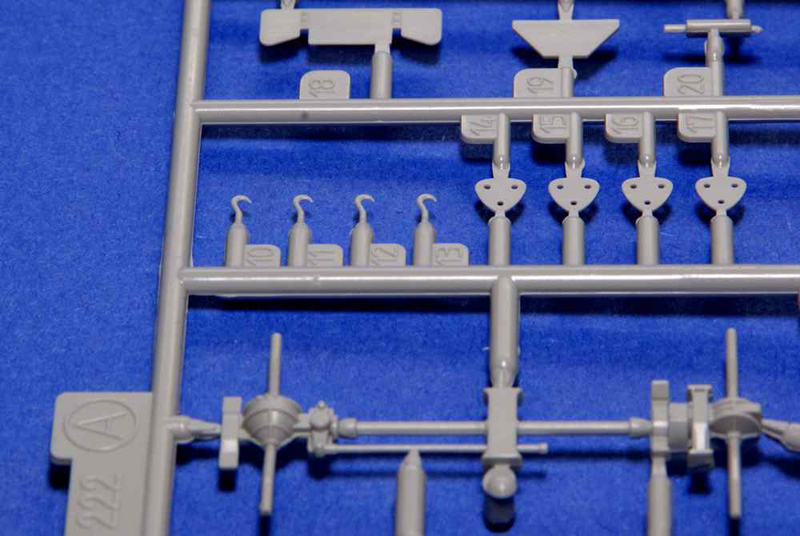
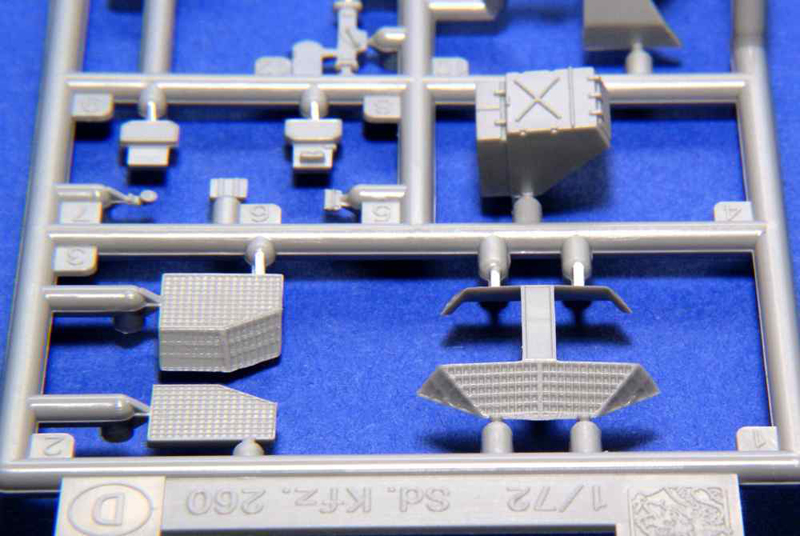
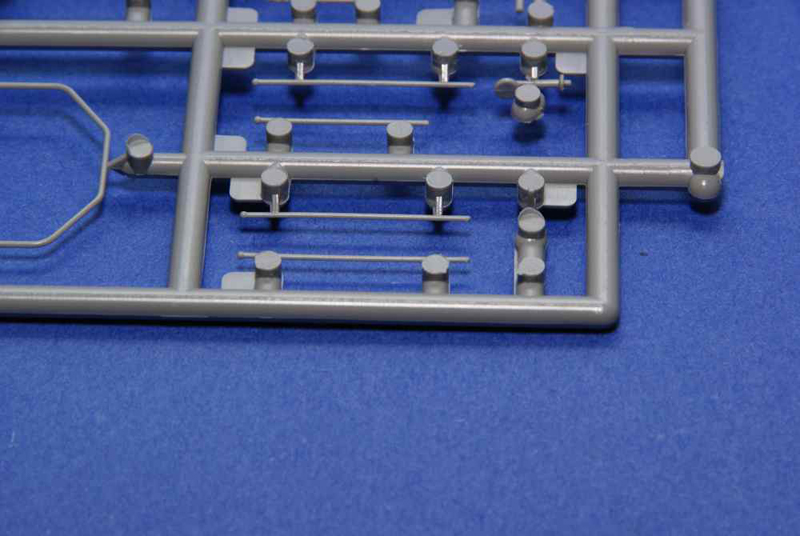
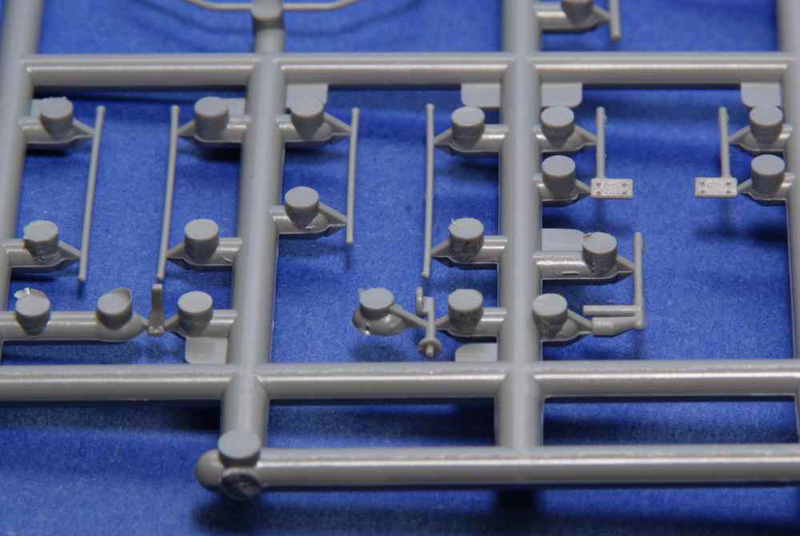
Four sprues of styrene plastic, moulded in the standard Dragon light grey colour, are present and will build one vehicle. The two larger sized sprues are common to the previous Sd.Kfz. 222 and Sd.Kfz. 223 kits and one mid-sized sprue is from the Sd.Kfz. 260 kit. Another mid-sized sprue and a sprue with a single part on it are specific to the 261 variant. A separately bagged hull bottom and hull top are also included. A Dragon accessory card is present and on it there is small bag containing a sheet of Cartograph decals.
Also in the box is a four sided instruction card. The card contains one page of sprue parts layout and two pages of build diagrams in the form of exploded view line drawings. The last page provides painting and marking options for two vehicles.
Overview
Perhaps the most telling feature that will strike the modeller will be the plethora of unused parts in this kit. The number of these parts total 46, out of a total part count of 103, that will be added to your spare parts container. These parts are made up of pieces from both the Sd.Kfz. 222, 223 and 260 kit sprues that are common with this kit. Turrets, weapons, Jerry cans, a Jerry can rack and even the entire 223 frame antenna are examples.
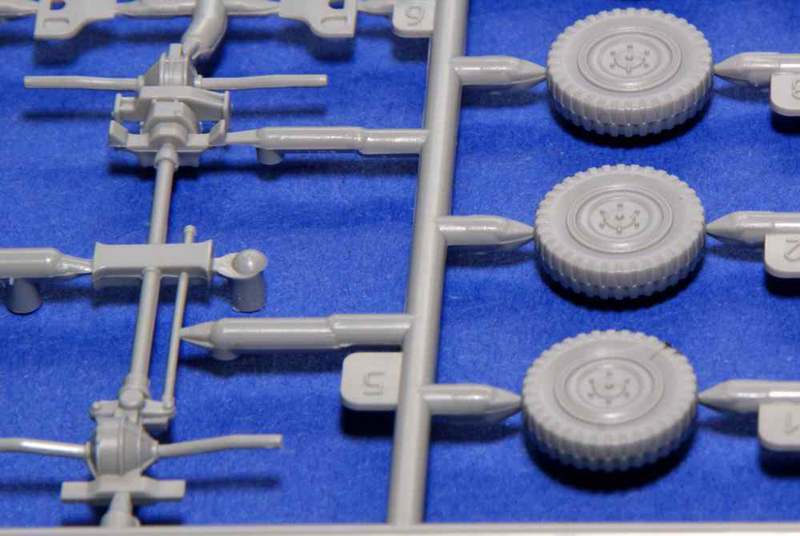
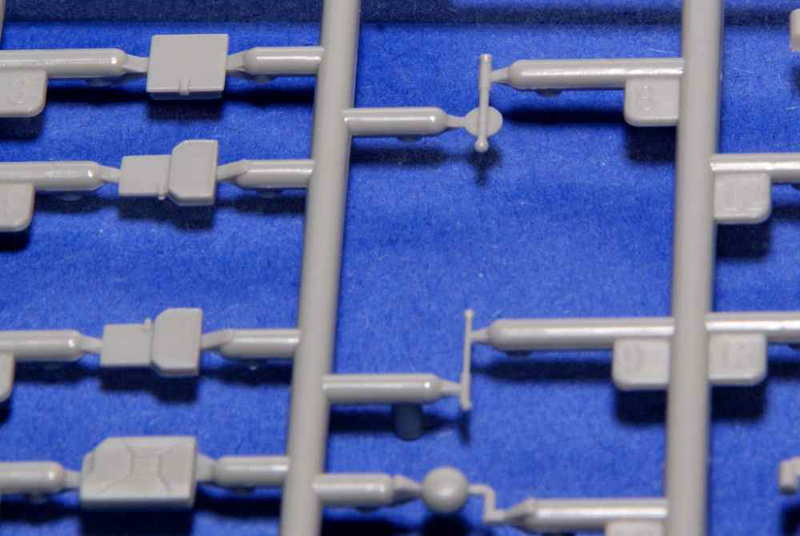
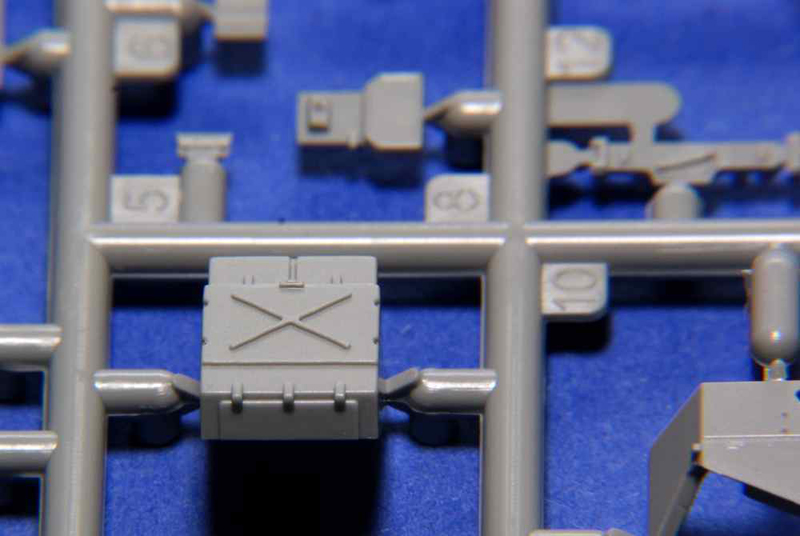
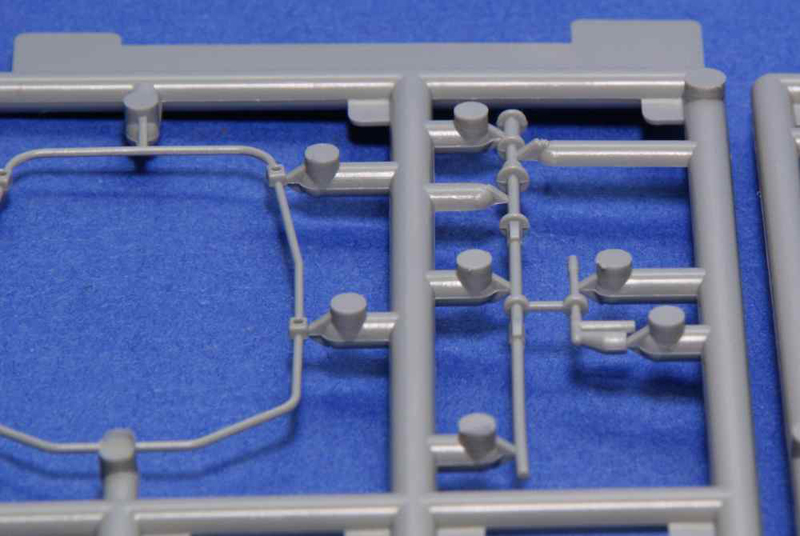
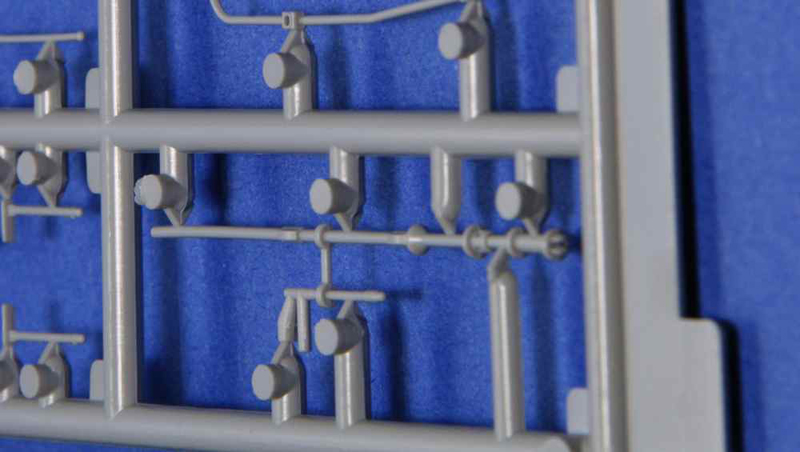
Looking over the sprues one will see that the parts are moulded with extremely crisp and fine detail. There are no sink holes and ejector pin marks are only present on areas that will be hidden after assembly. Flash is virtually nonexistent and the majority of moulding seam lines are light and should be easily removed with a scraping of a sharp hobby knife.
While an improvement in the size of sprue connection points (gates) is evident when compared to some older kits, its still not universal with the parts in this kit. Many of the smaller parts have equally small gates to them but some parts, such as the radiator cover, antenna parts and the top anti-grenade screen, have larger connectors, at awkward locations, that will require careful cleanup.
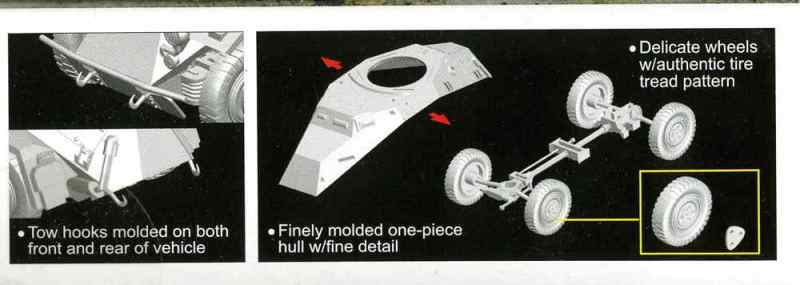
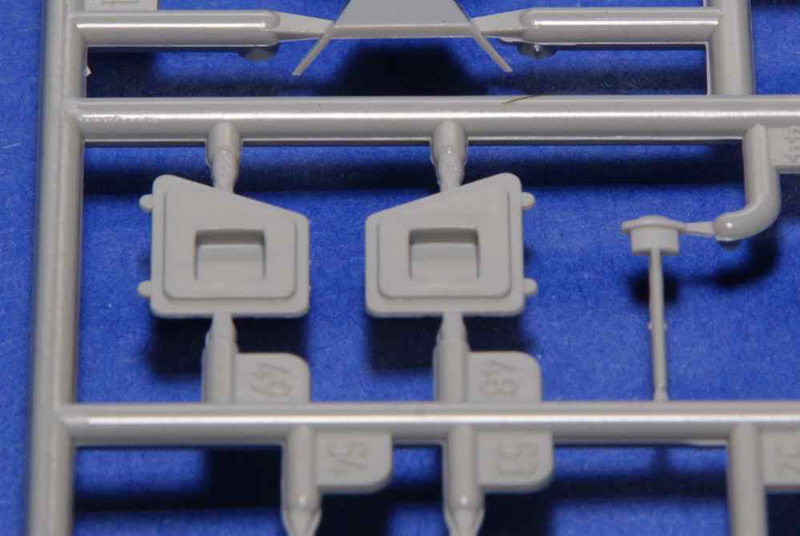
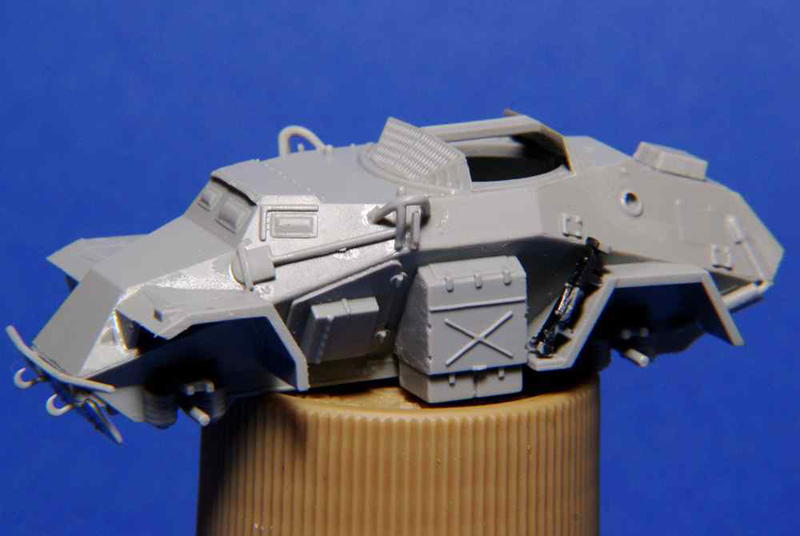
With only a few exceptions, the tools and external stowage are all moulded as individual pieces. Unfortunately, while separate pieces, the drivers doors have no internal detail and possess a rectangular depression where a moulded on storage box is present on both. The fighting compartment vision ports and engine compartment hatches are all moulded on. Other than a minimal amount of internal detail (seats and their supporting framework) left over from the previous incarnations of this chassis, there is no other interior detailing.
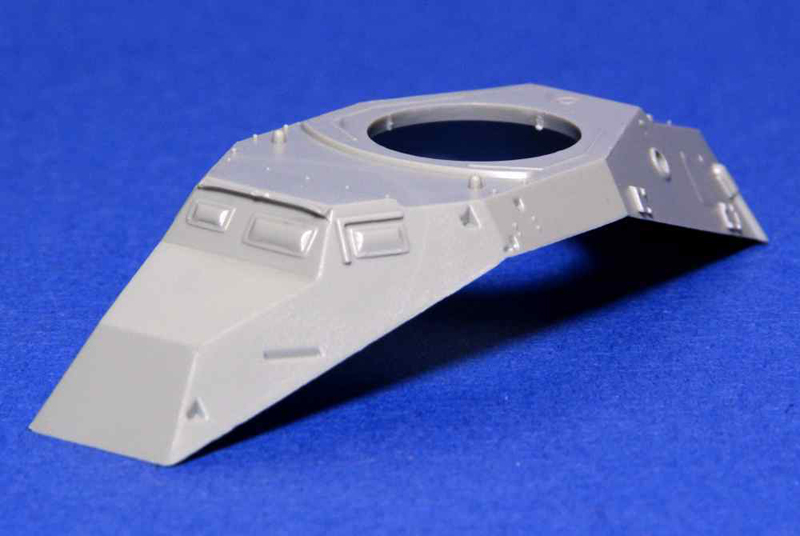
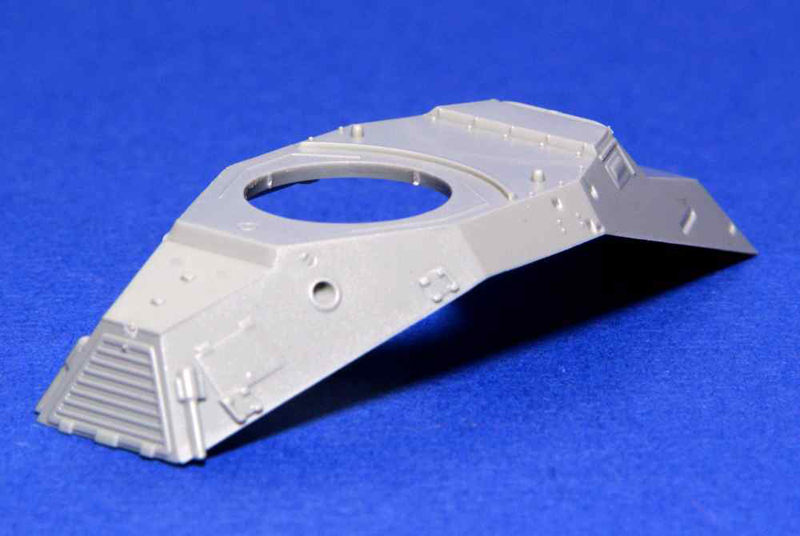
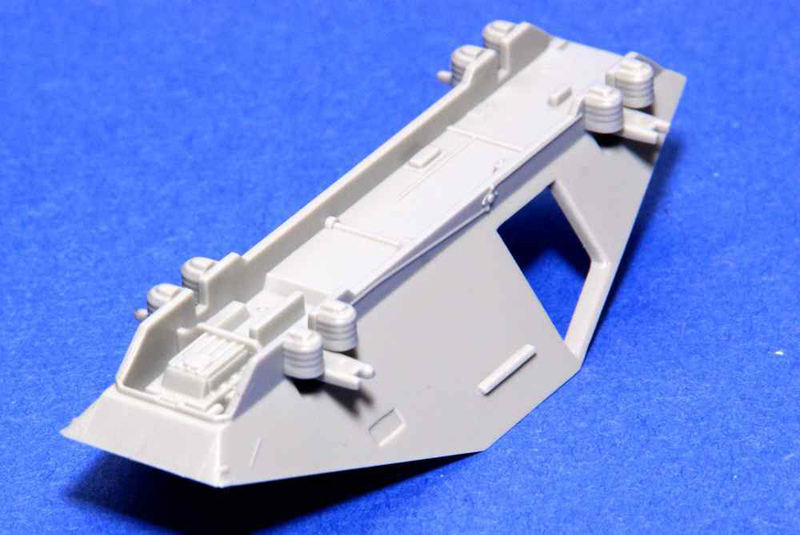
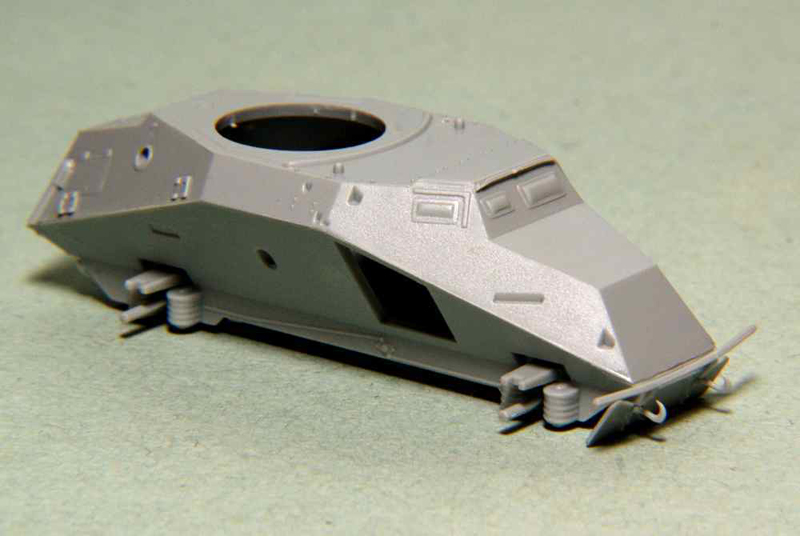
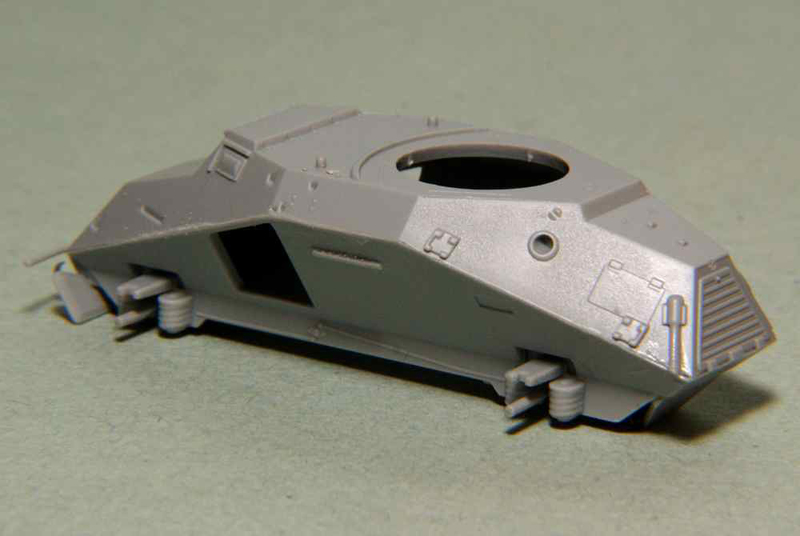
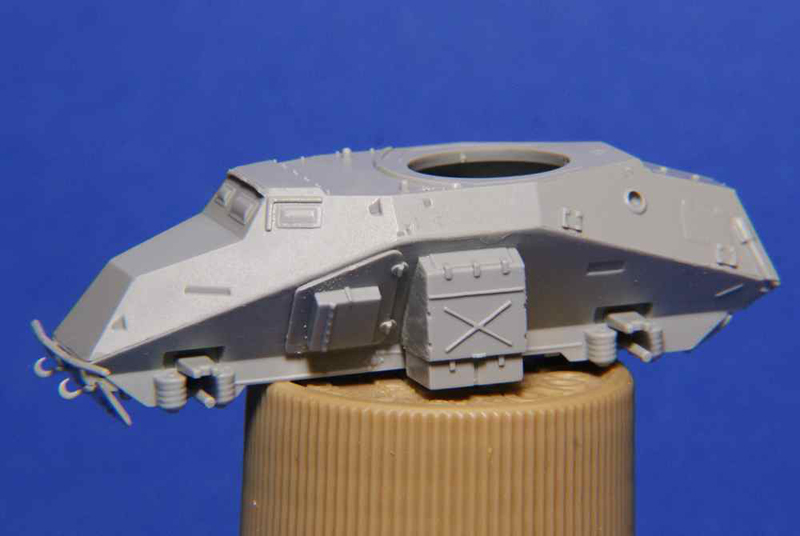
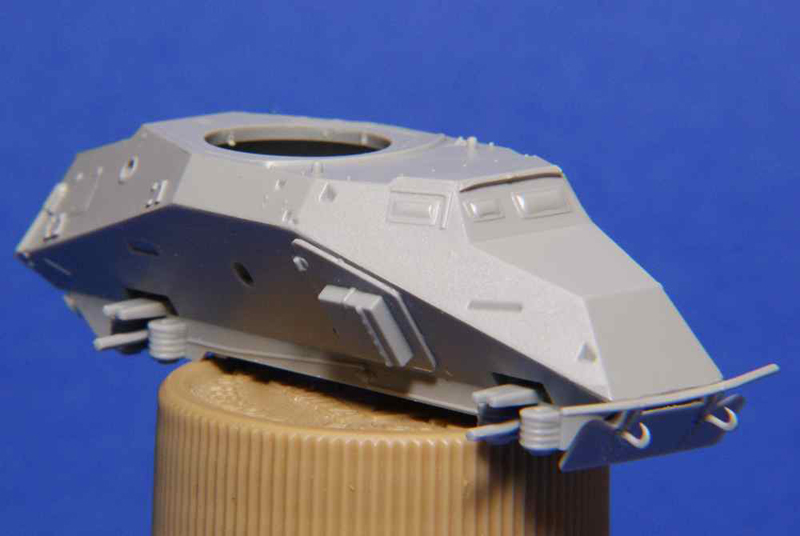
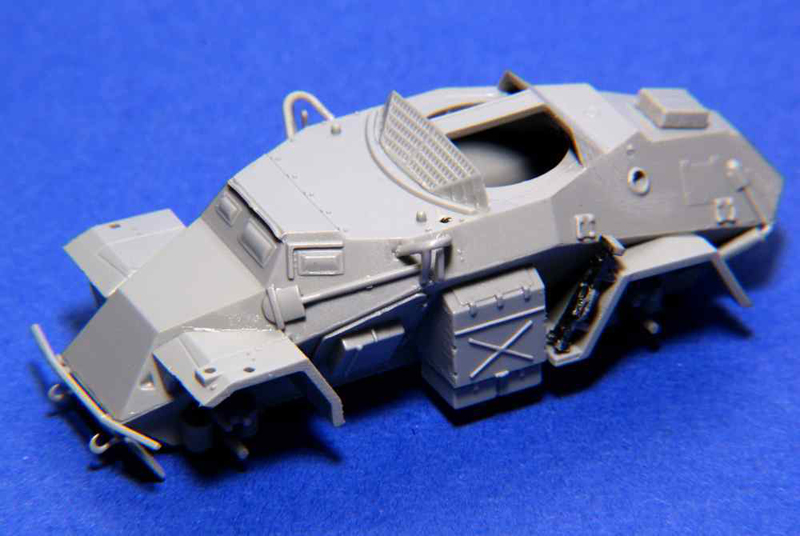
While the lower hull appears to be the same as in the other three variants of this chassis, the upper hull is quite definitely identical to that of the 260. This kit, as well as that of the 260 kit, have many subtle detail changes compared to the early ones. These include the front armour plate, vision ports and the engine compartment area. The side engine compartment access doors are more pronounced, as are the radiator shutters. There is some rivet detail on the upper body and what appear to be some sort of brackets in the rear area (presumably for holding parts of the mast antenna?).
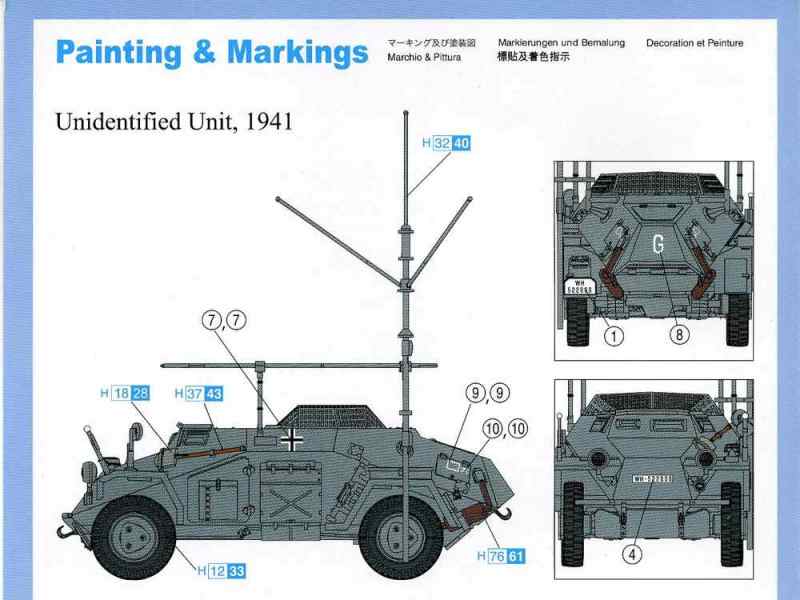
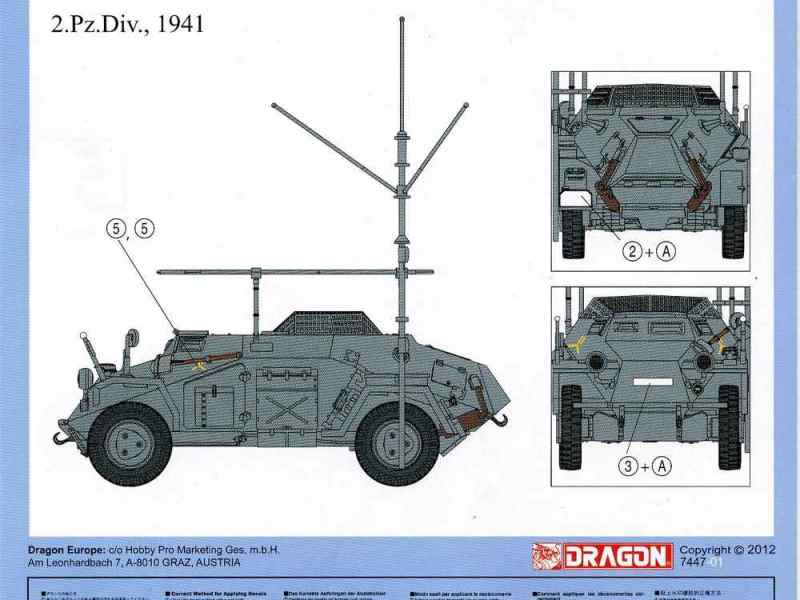
The options for painting and markings are as follows:
A Field Grey unidentified unit vehicle, 1941
A Field Grey 2 Pz. Div. vehicle, 1941
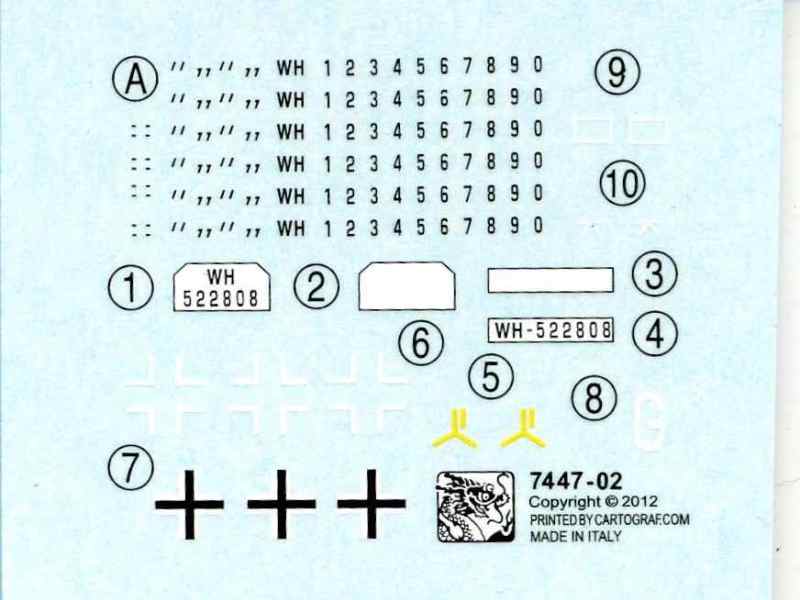
A full set of water-slide decals is provided for the vehicle. Unfortunately, while a good selection of decals are available, there is only full license plate decals provided for the unidentified unit.
Creating plate markings for the 2nd Panzer Division vehicle will prove frustrating for the majority of modellers. This is because the license plate decals are provided for as blank white plates and then individual numbers and letters to make up your own. These are absolutely tiny and will prove awkward to individually place and line up in this scale. I think that while one or two modellers will love this option, more will find it very frustrating and look for an alternative option. However, since there is a set of plate markings for the unidentified unit, the modeller could choose those for the 2 Pz. Div. vehicle.
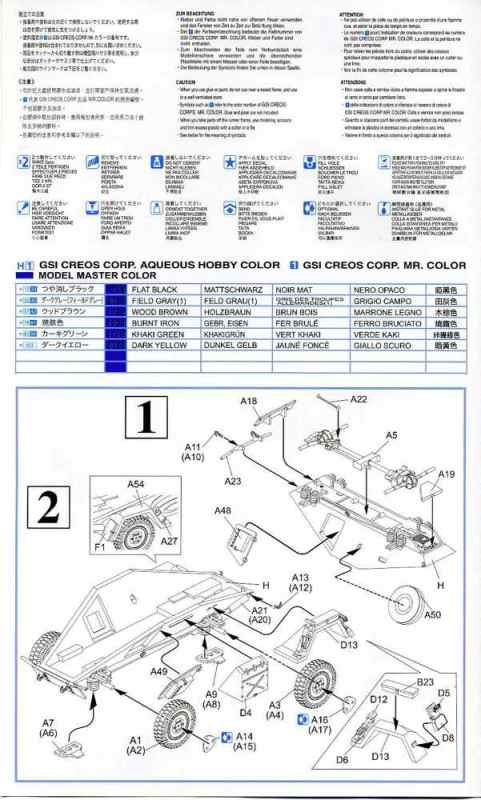
The colour references provided are for the GSI Creos Corp Aqueous Hobby Color, the same companys Mr. Color and Model Master enamels.
Build Analysis
The instructions present the builder with a five step process to assemble this kit. As with any kit it will serve the builder well to review these instructions before beginning assembly.
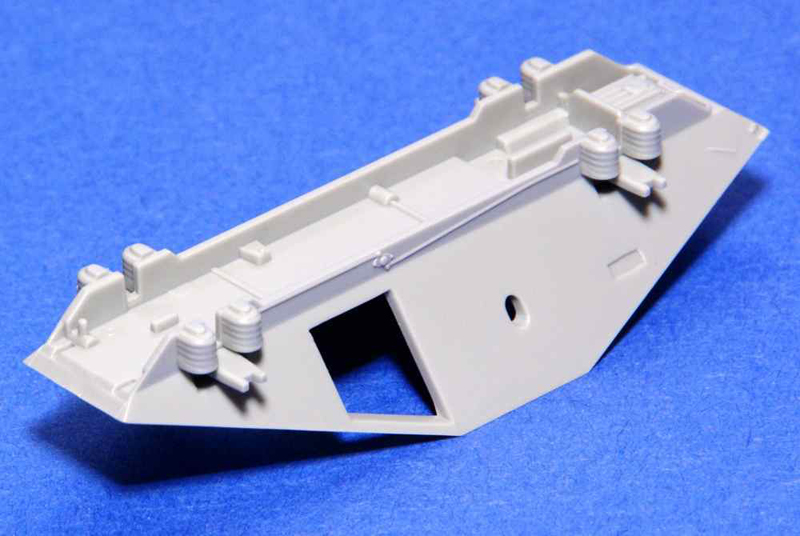
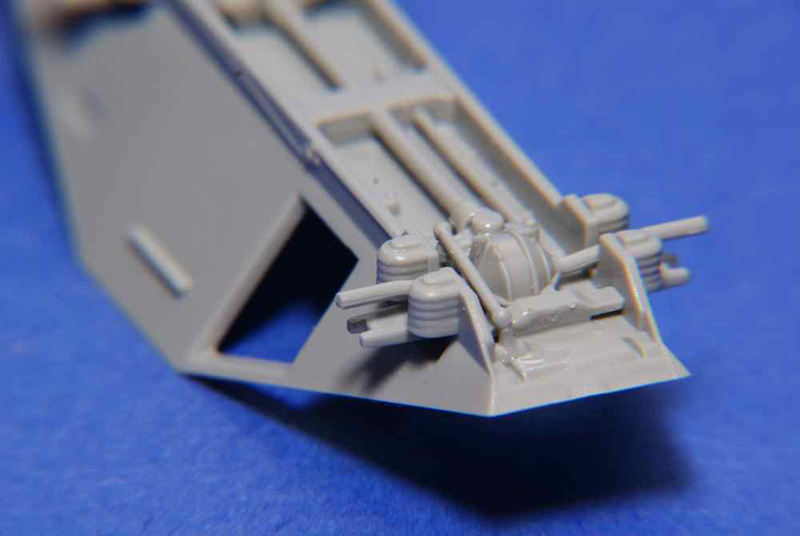
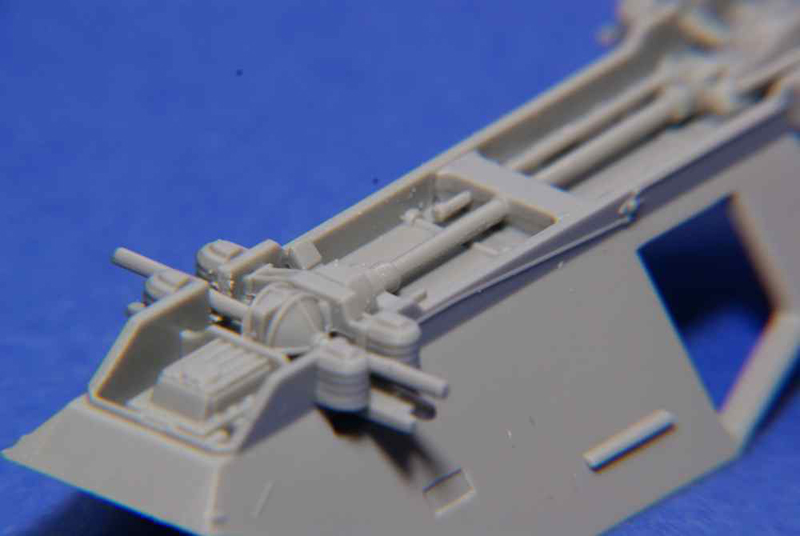
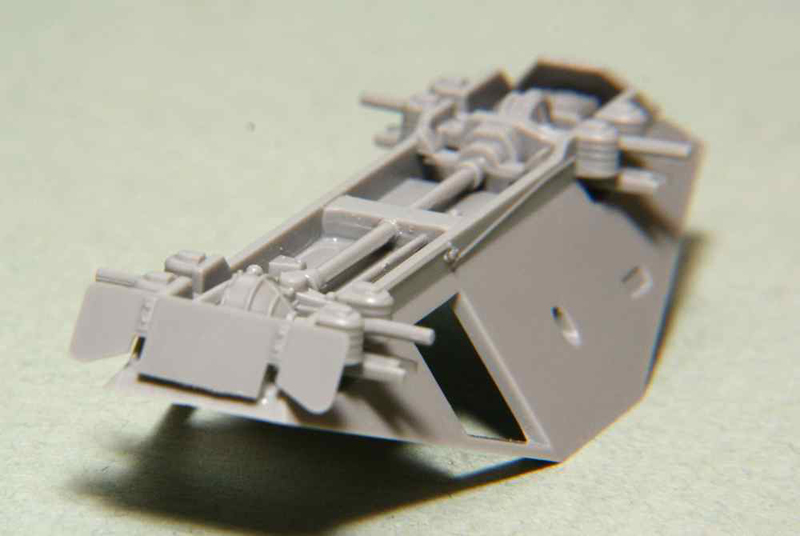
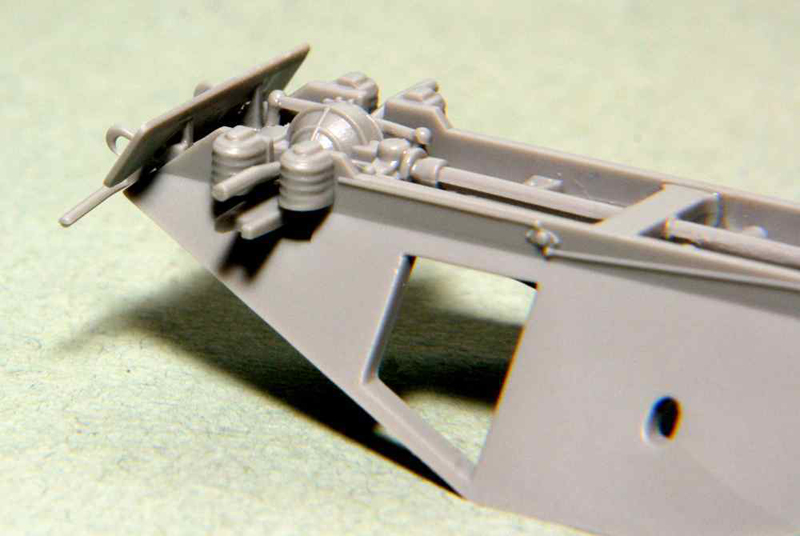
In Step 1, a highly detailed drive train (A5) is to be attached to the hull bottom. The fit and positioning of this piece was absolutely perfect. The second part to fit was a tie-rod (A22) that has no features to assist in its proper positioning. Each end fits onto two fine lugs or pins and there are no corresponding holes for them to engage. Care will be needed to achieve proper positioning.
The next part in this step is a rear plate (A19) that has a minimal locating tab. The builder will need to survey the drawings in the instructions to determine the final orientation of this part. For these types of parts I used a gel type tube glue. It should also be noted that the part depicted in the instructions does not match the look of the actual part on the sprue.
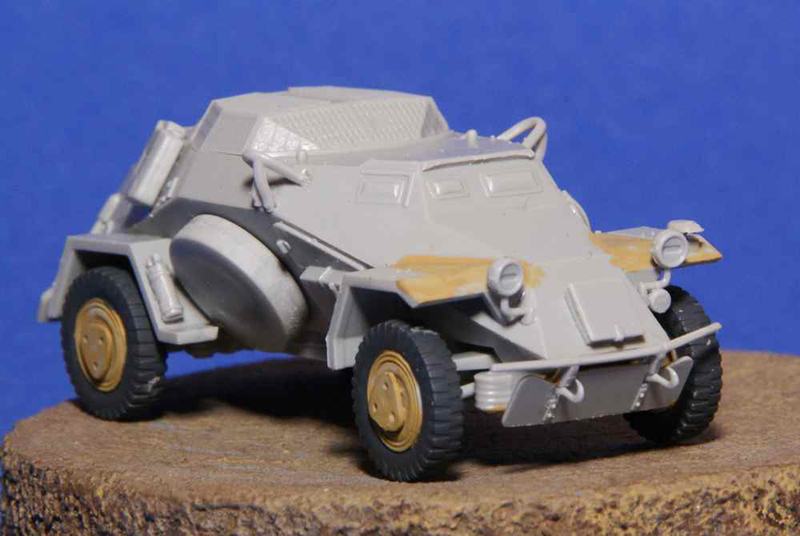
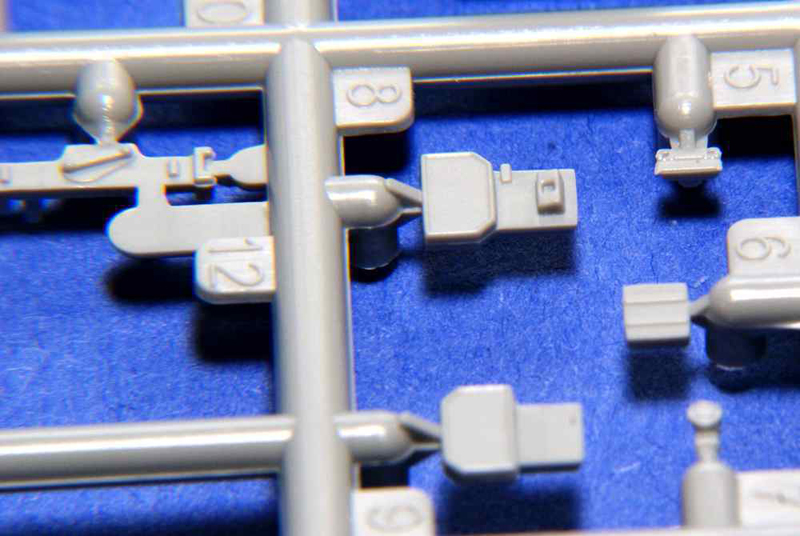
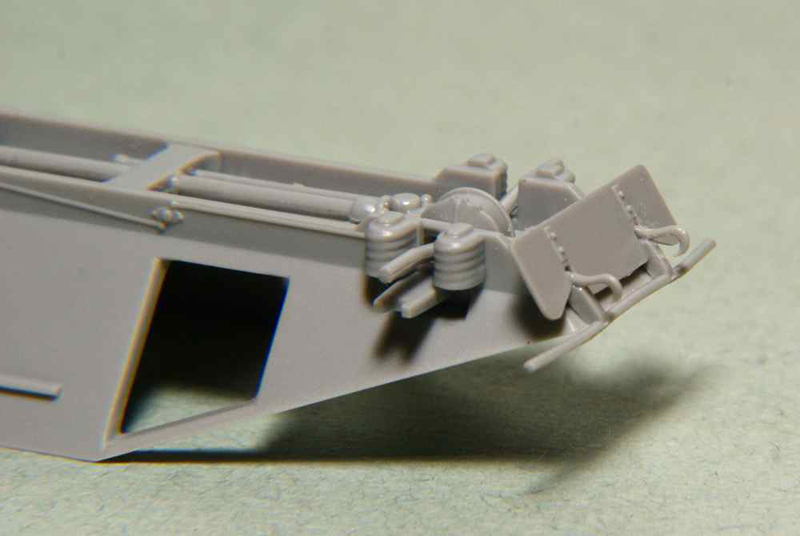
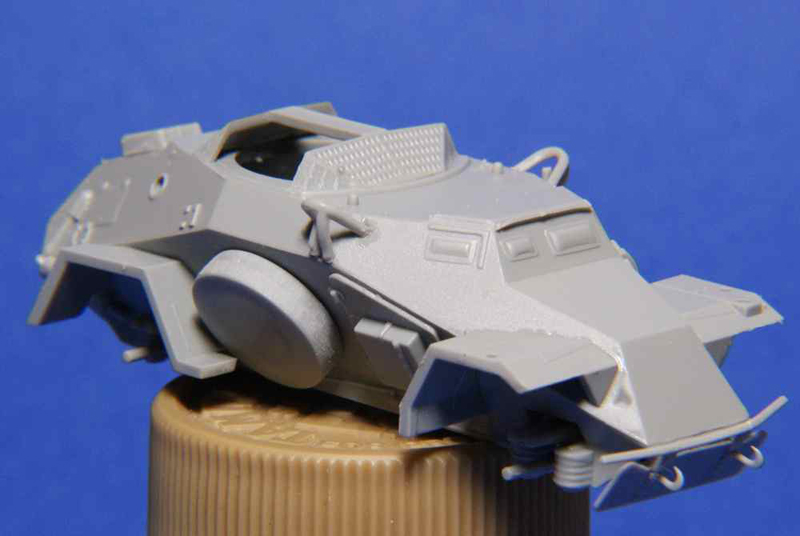
Construction continues with the right side hull door, spare tire and front lower hull details. These latter pieces are the front bumper (A23), tow-hooks (A12, A13) and a front plate (A18). As experienced earlier with the positioning of the rear hull plate, the front one has a couple, if minimal, positioning features. The builder may also find that the openings for the bumper and tow hooks in the front plate (A18) may need to be enlarged slightly.
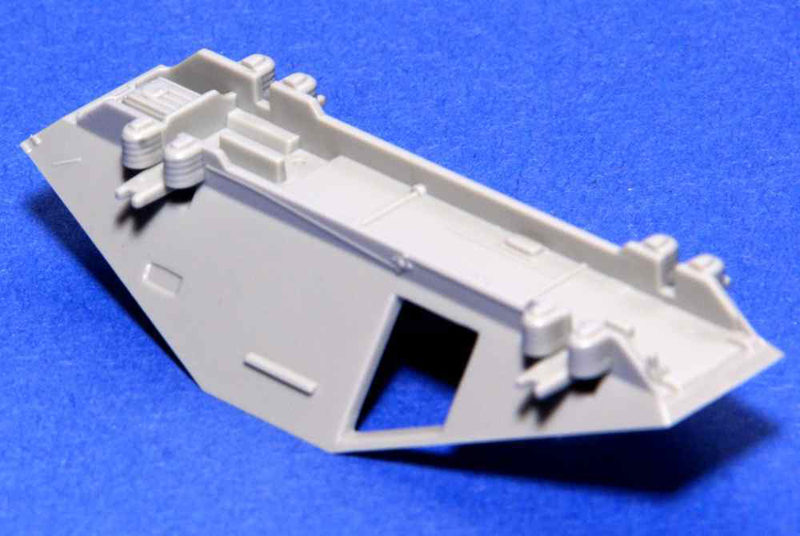
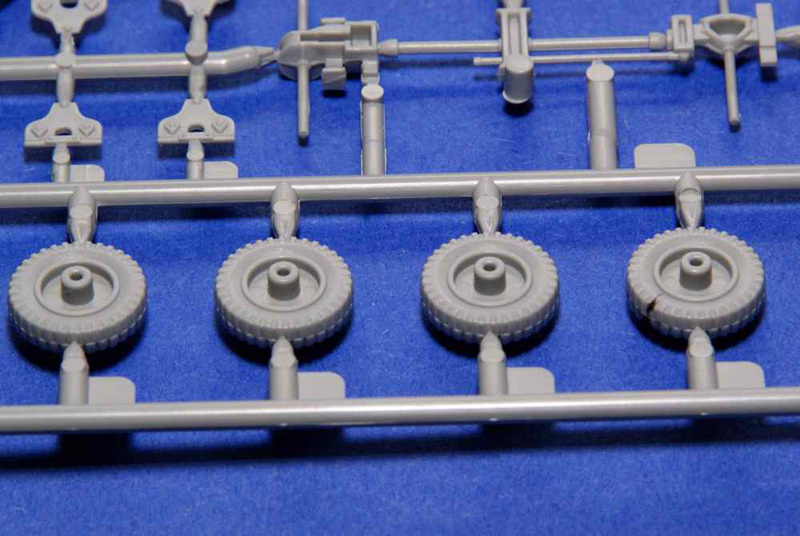
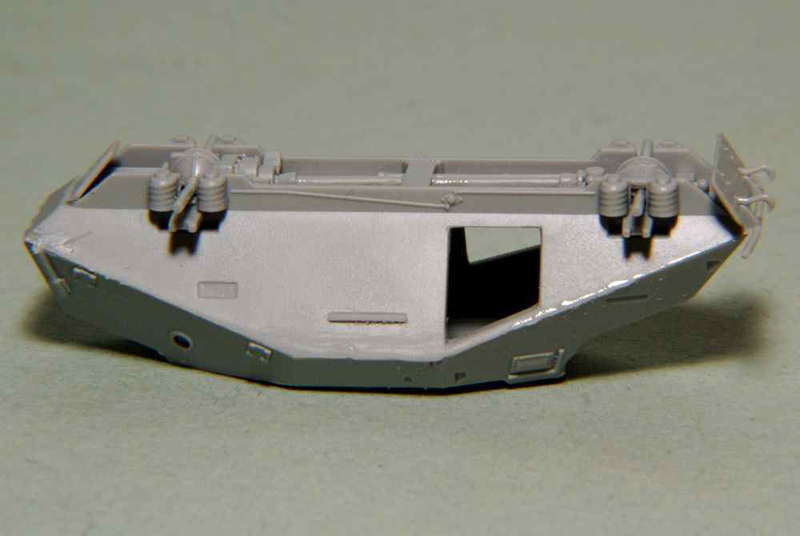
Step 2 is quite busy with a number of lower hull detail pieces being added including the completion of the suspension with wheels added, rear fenders, some lower hull stowage/details and rear tow hooks. The rear hull tow-hooks (A12, A13) are meant to fit into a shallow depression in the lower hull. This, combined with the tiny size of the hooks, will require patience and care.
It is also here that the lower muffler halves are attached to the hull. While there is a slightly raised line of plastic on the hull to show the mufflers approximate positioning, there is no other positive attachment feature to assist the builder with exact positioning. Getting these muffler pieces to line up with their upper bodys moulded on mating pieces could prove challenging.
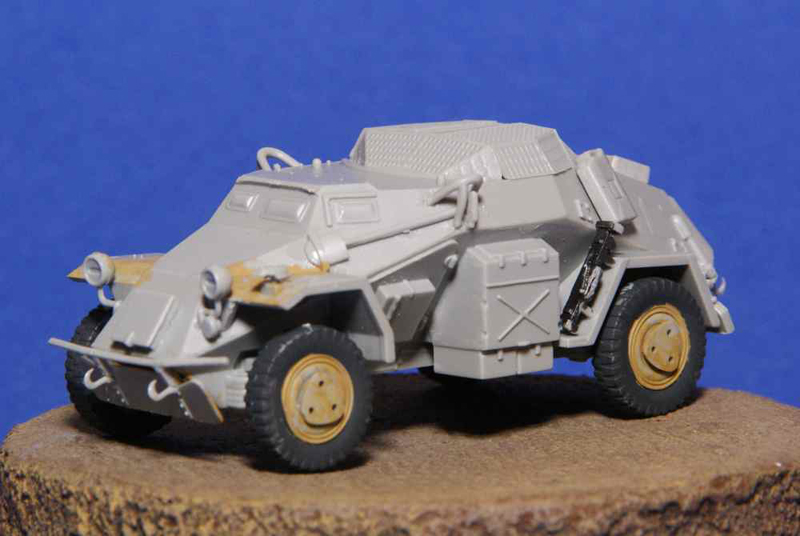
The rear fenders are attached during this step along with the stowage that resides on them. Two left license plate pieces (D8, D5) are added to the fender. The right rear side fender will not have a license plate frame and instead a small storage box is placed in that location.
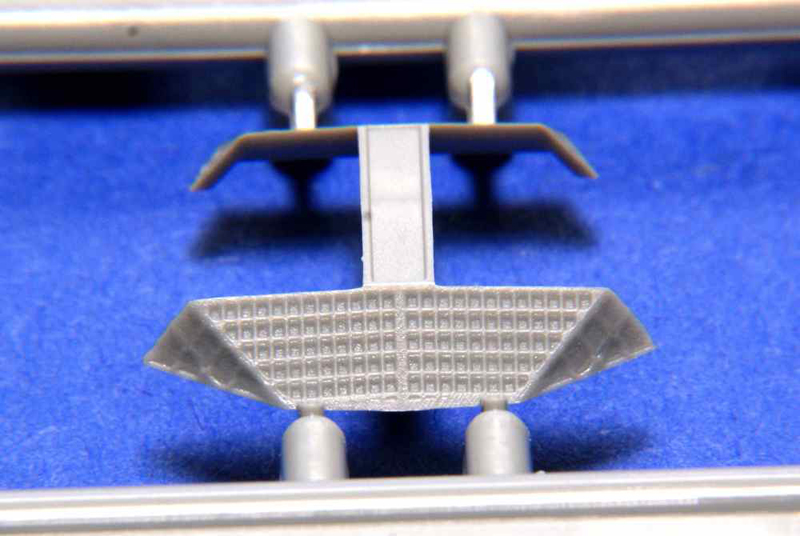
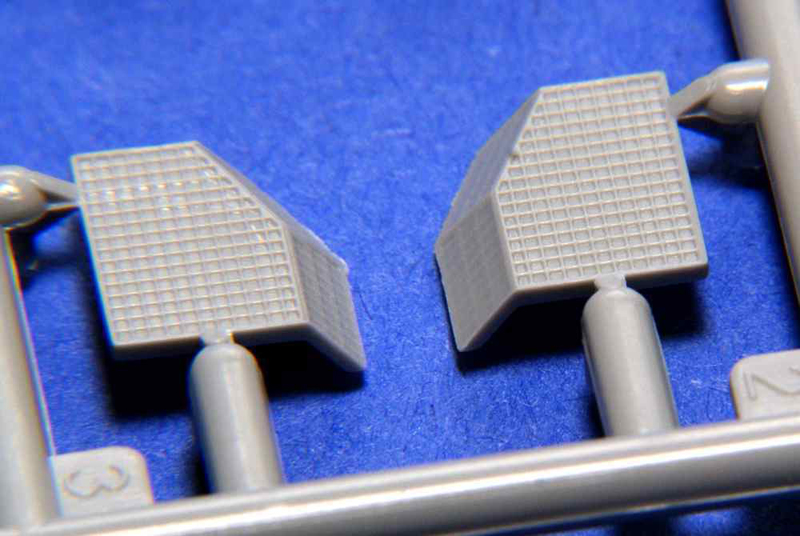
If one chooses to install the optional triangular armoured covers for the wheels, they should be aware that there are no positive locating features. Alignment and positioning by eye will be required.
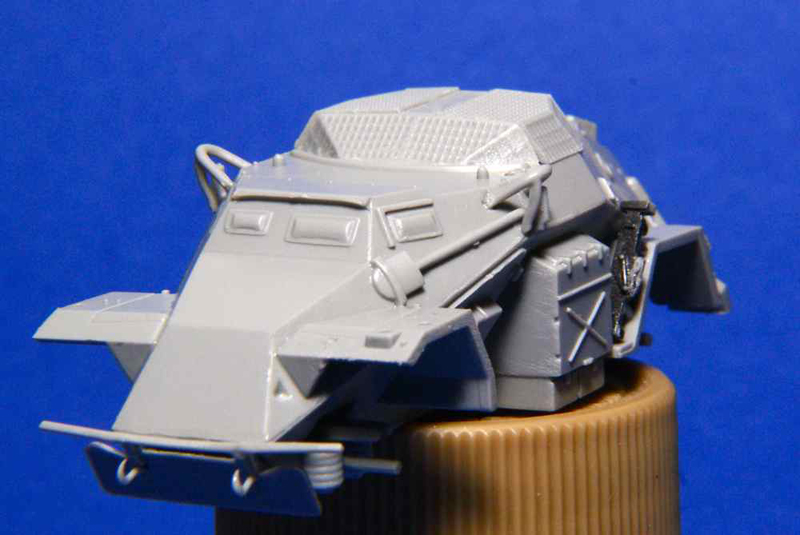
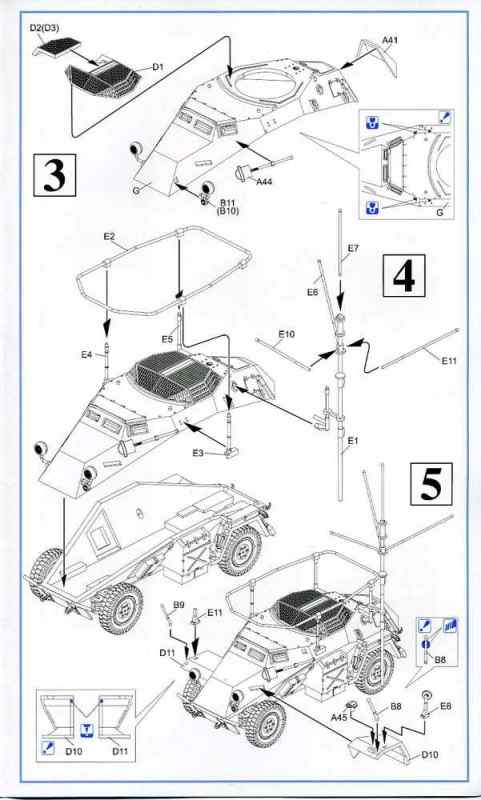
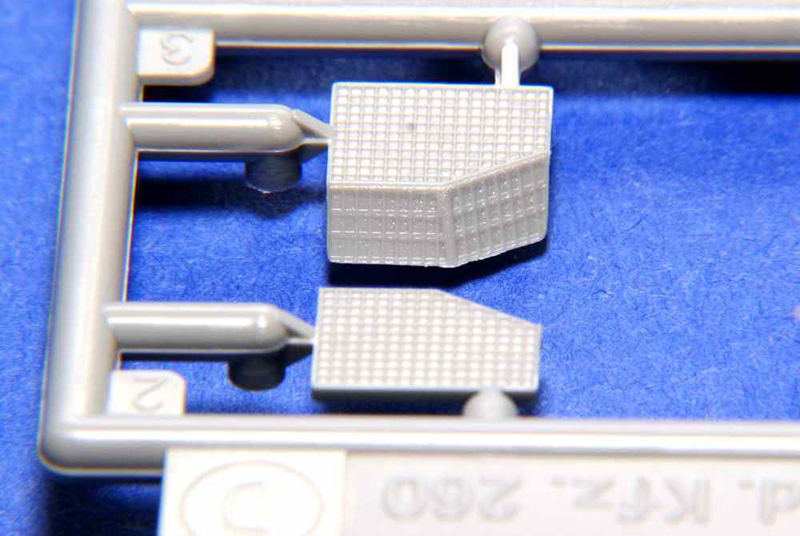
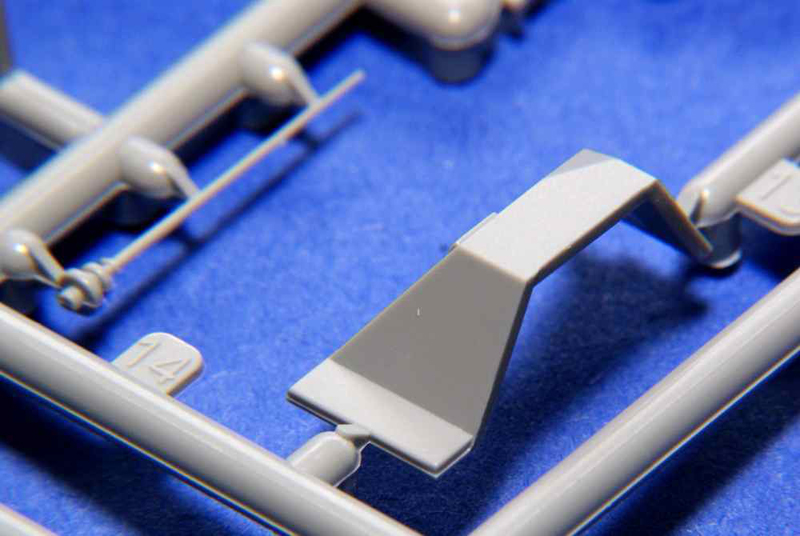
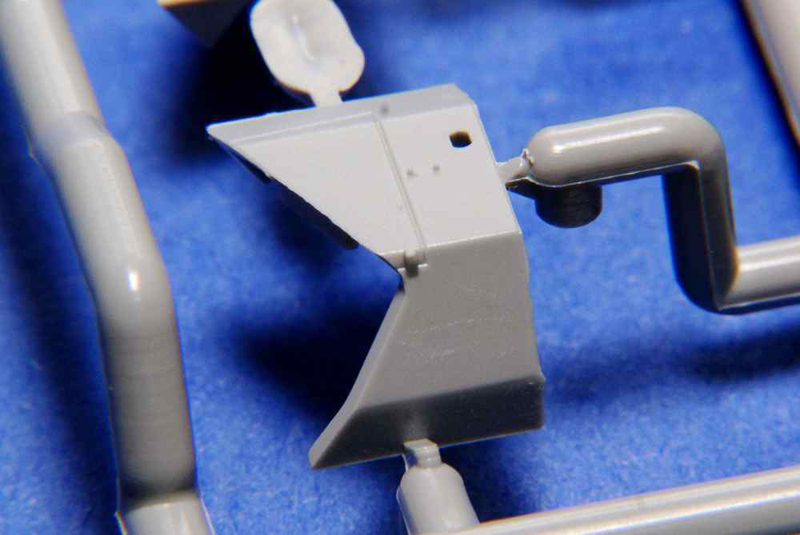
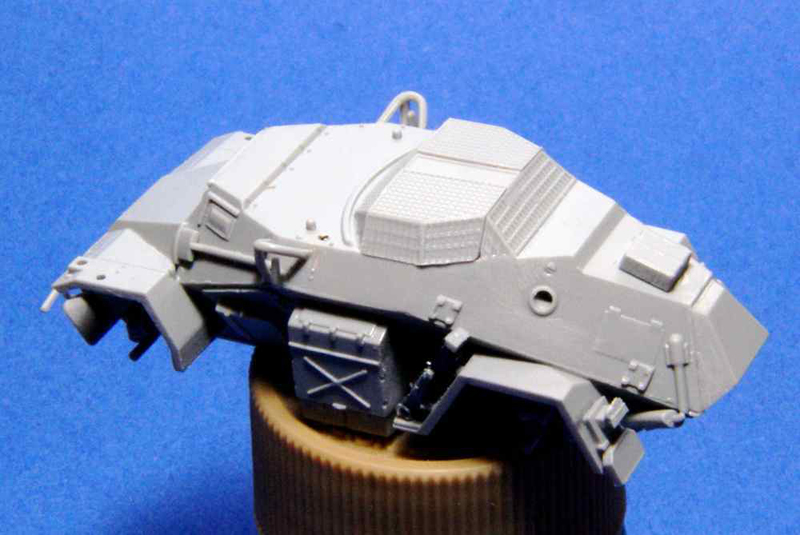
Step 3 focuses on adding details to the upper body. Among the largest pieces to attach at this point is the three piece anti-grenade screen. There are very shallow ridges in the upper hull to assist with the mostly visual alignment of the first main piece (D1). Two further side pieces (D2, D3) fit into D1 to complete this superstructure. These two side pieces engage the main piece using a press fit and there are no other features to assist in their positioning.
Other parts added at this point are the armoured radiator cover, headlights and shovel. Turn indicators and their associated brush guards are not used on this model and the instructions direct the builder to fill in the locating holes of the latter.
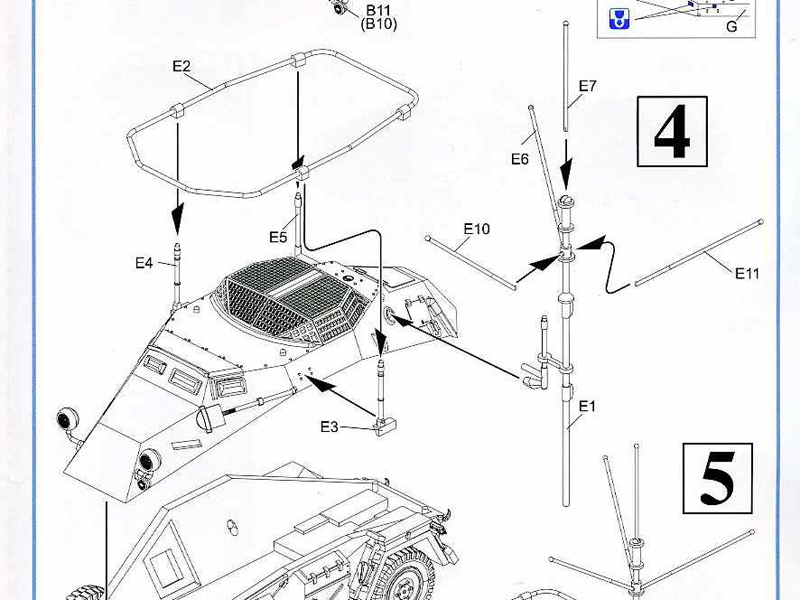
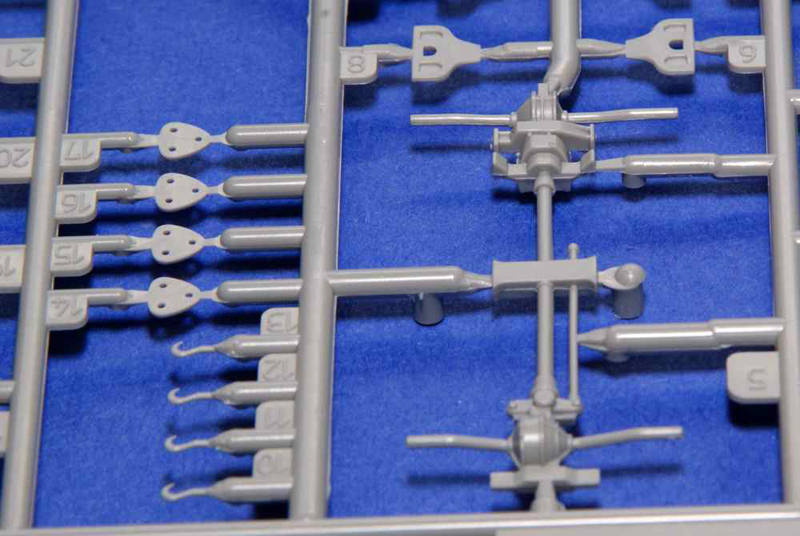
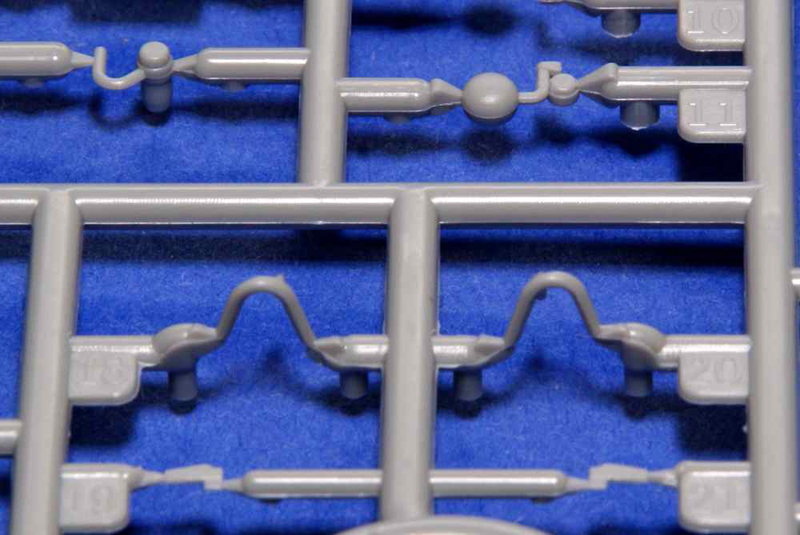
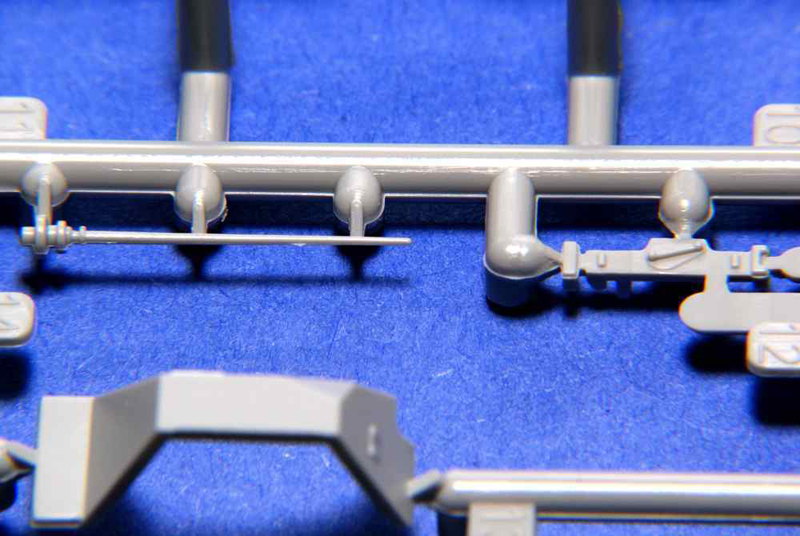
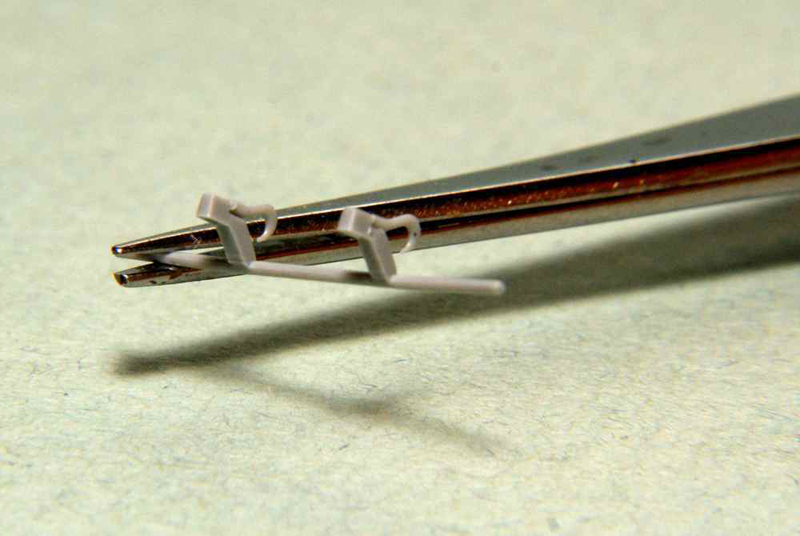
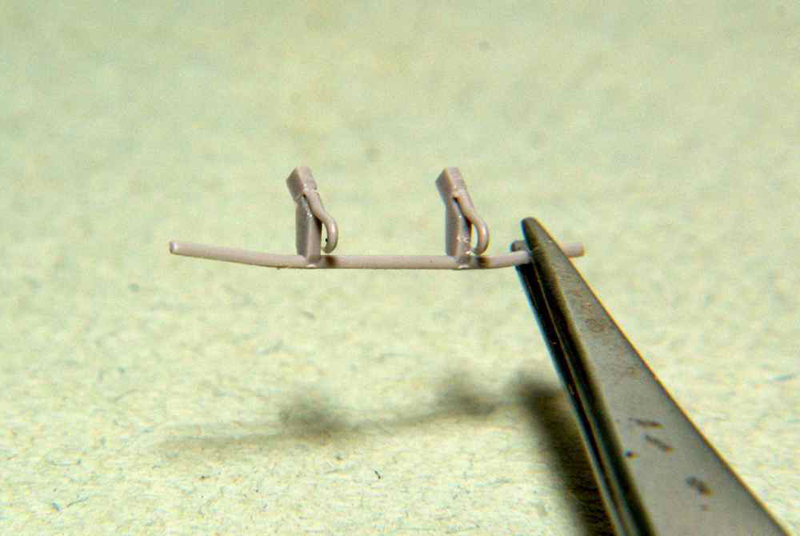
Step 4 focuses almost entirely on the construction of all the antenna components. This step will be the most daunting of the construction process. Most of the pieces for both the frame antenna and the mast are extremely fine and delicate. The main piece of the mast antenna (E1) also has the left rear support of the frame antenna moulded to it. Both it and the right rear frame antenna support (E5) attach to the rear hull using a round peg that mates with a large hole on the back part of the upper body.
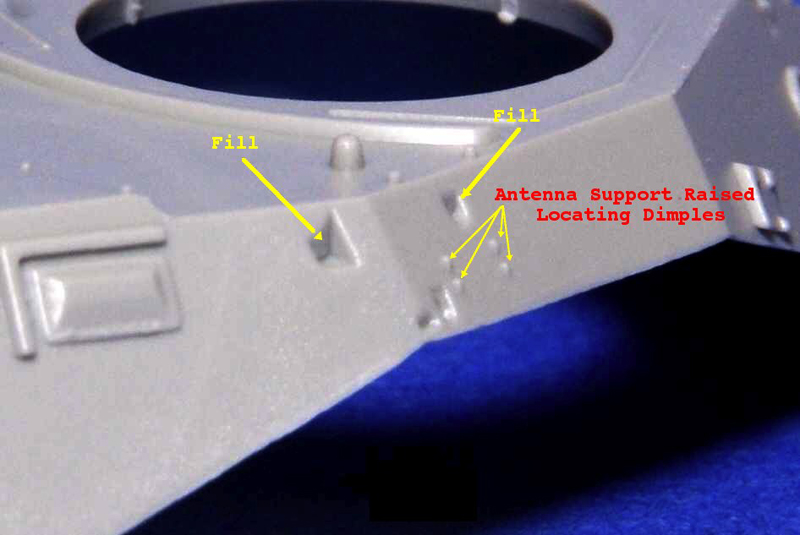
The forward two frame antenna supports (E3, E4) will prove problematic as their mating features are all but nonexistent. On each side of the forward upper body is a rectangular grouping of four tiny raised pimples of plastic that are ideally meant to mate with four equally miniscule depressions in the supports base. A further potential issue will arise with the placement of three rod pieces (E6, E10, E11) at a 45 degree upward angle near the top of the mast. Small depressions in the mast are the only features to assist with locating these rods. At the top of the mast a further rod (E7) is to be placed. This part will also need care in placing as its mating feature is extremely limited. Keeping all these items in their proper alignment and orientation will be quite the challenge for the large majority of modellers. It is also a part of this step to join the upper and lower body subassemblies.
Step 5 sees the final parts attached to the model and focuses exclusively on the two front fenders and the parts that attach to them. These parts include the Notek light, width indicators, a left side mirror and a right side support bracket.
Conclusions
This kit will produce a good model of the Sd.Kfz 261 communications vehicle. The fit of certain parts was as good as one would expect from Dragon. While inaccuracies in the instructions are minimal, the clarity of some parts placement is sorely lacking, clearly a rework of the 260 version.
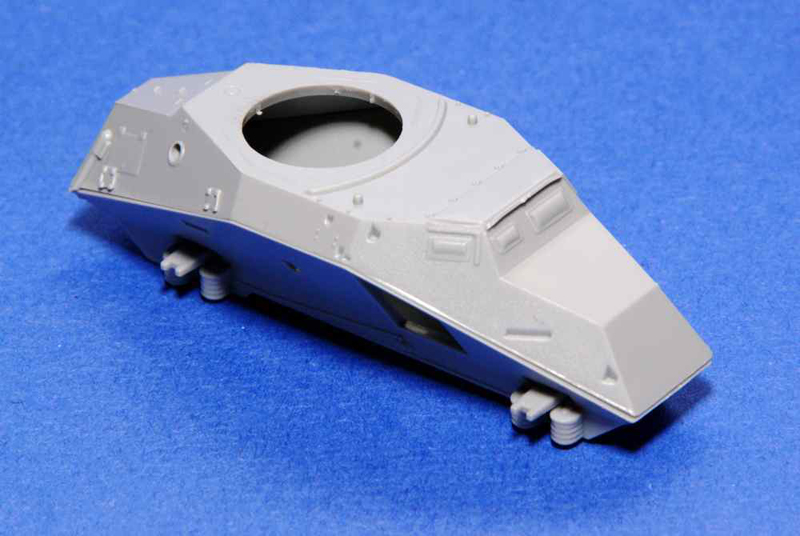
Perhaps the greatest failing in this kit is the lack of a photo-etch alternative for the anti-grenade screening. It is definitely a step backwards in Dragons quality. It could also be mentioned that the kits hull top opening to the crew compartment is the wrong shape. It is circular, as with the 223, but should have a hexagonal shape. However, this is of little concern considering that with the styrene screening and general lack of an interior, there is no option to see into the area.
One interesting thing that may inspire some modellers is the vast number of unused parts that have potential use on this vehicle. The large number of gas cans, a corresponding rack for them and numerous unused storage boxes could be used to embellish and individualize this model. So while also unimpressed with the lack of certain part locating features, I will still recommend this model of a rather unique subject. Definitely not for the novice or beginning builder.
SUMMARY
Highs: Very interesting subject with extremely delicate moulding and fine details. Many spare pieces to individualize the vehicle if desired.
Lows: Still issues with large sprue attachment points. Vague to nonexistent locating features on some parts. No PE alternative for anti-grenade screen.
Verdict: With proper care it should build into a fine representation of the subject vehicle. Not without faults but recommended.
Our Thanks to Dragon USA! This item was provided by them for the purpose of having it reviewed on this KitMaker Network site. If you would like your kit, book, or product reviewed, please contact us.
I've been building models since about age 10 with the occasional hiatus due to real life events. First armour model was a 1/76 Airfix Tiger I and was followed by a 1/72 Revell F4U Corsair. I've built primarily 1/76 and 1/72 armour and aircraft but occasionally have tinkered in other larger scales....
James,
Thanks for getting this review up. The build may not be complete but I felt it important to let potential buyers know what this kit is all about and any difficulties that they might run into.
Addendum
While I hope to have a separate finishing Blog, I'm not prepared to do so at this time. However, I have managed to get the two forward frame antenna supports attached. I did this by enlarging the holes on parts E3 and E4 using a #76 drill. With the holes enlarged slightly, it was easier to get them to grip the mounting dimples on the upper body. Please see the last two pictures in the review proper.
Cheers,
Jan
Another thorough and enjoyable review, Jan. The moulded grenade screen certainly does look rather on the blobby side, although I suppose it remains to be seen what might be done with some careful painting effects. Of course your photos below do magnify the thing by about five times, which does tend to reveal all limitations!
Having looked at a few photos, I wonder if this screen was sometimes not fitted to this vehicle, with the opening, or possibly the screen as well, often covered with a tarpaulin. So that could provide a solution.
Thank you Matthew for you kind words and I hope that even a more limited build review gives the reader a "taste" of what to expect from a kit.
The moulded screening will definitely prove to be a challenge when it comes to finishing. However, I am not without hope as I have tackled a somewhat similar situation with my Sd. Kfz. 223 vehicles as can be seen in the images below. The moulded on screening is just to the rear of the vehicles turret.
In my rather exhaustive research I have not ran into a picture of these vehicles without the screening and its frame. One image showed a damaged vehicle with the screening removed but its frame still mostly intact. It also appears that a tarp was often a standard "piece of kit" for these vehicles (how else to keep the snow and rain at bay).
In your picture above, what is fairly obvious is the crewman's head jutting out of the rooftop enclosure. On enlarging a similar photo, I find that the moveable "hatch" is not in evidence, perhaps suggesting that it was removed to facilitate easier egress as it might have interfered when trying to operate it with the covering in place?
Having a tarp covered enclosure is a very definite possibility. All will depend on whether or not the painting turns out looking effective and doesn't detract from the overall presentation.
Cheers,
Jan
WOW! Another 4 wheeled German armoured car, Jan? How many is that now? I was hoping for the 222 but this Was a total surprise. The antenna system looks like a real eye catcher and you must be getting pretty good at these suspensions. After seeing all these built the last little while, I think I might be intrigued enough to give one a try. As you mentioned it's a shame that that screening couldn't have been done better.
Regards,
AJ
weathering_one - AJ,
Sorry to take so long in answering but I'm going in circles and getting a bit dizzy from all the builds that I'm trying to finish. This is the fourth time I've tackled one of these body styles and while somewhat easier, the same problems persist in each version. The antenna system, while eye catching, is a royal nightmare! So far I have those front supports for the antenna located fairly well despite the locating features being all but non-exhistant. As for the screening, just check out the Finishing Dragon Sd. Kfz. 260 (#7446) thread for some hints on how I tackled it.
Once those front supports were set, I tested the frame antenna for fit.
I was lucky and it appears that I got the positioning right. I've tried the rear supports and was surprised to find that the fit is pretty bad. It looked like they would fit better but that is not the case. The 223 antenna system was a walk in the park compared to this one as at least it had some fairly positive locating/positioning features.
Cheers,
Jan
@tread_geek Jan,
Quit an extensive review but well written and informative. Good to know that this vehicle was used up to the end of the war, so Ill be adding this one to the stash.
Ill be following your build log to see how the antenna goes together and for any other corrections you may make to assemble and complete this vehicle. Great job with all of the photographs especially the close ups, and plenty of them too, providing us a good look at the kit contents.
~ Eddy
@Braille - Eddy,
Thanks for dropping by and your interest in this diminutive yet unique vehicle. If I haven't mentioned it elsewhere, as far as my research into these goes, these kits appear quite accurate as far as details and similarity to the originals (prototypes). For someone with your skills you might consider modifying one to be shown in it's travelling configuration with the mast antenna disassembled and stowed and the frame antenna folded down. It seems a shame that Dragon didn't offer this option, let alone a PE screening.
Cheers,
Jan
@tread_geek Jan,
Until you made mention of showing this vehicle with the antennas stowed in there traveling configuration I wasnt sure how I would be displaying this vehicle with its elaborate antenna system other than out of the box. But I like this idea of the antennas being stowed so I will go ahead and plan on doing just that! This vehicle will be part of the Panzer 46 army I have planned.
As for the grenade screens I my go ahead and paint mine as you have done by adding a dark wash and allowing that to run into the recesses and dry brushing the base color over the raised frame and screens, I think thats what you've done on your builds and this looks quit effective. Besides, even with a set of PE screens there's not much you can see inside.
~ Eddy


Comments