For some years Ukrainian company MiniArt have been developing a range of 1/35 scale buildings and diorama accessories, and more recently have introduced 1/72 buildings as well. From reading reviews here of the 1/35 scale buildings, those are largely made from vacuum formed parts, with some injection moulded details; in contrast, the 1/72 kit we will build here is entirely injection moulded.
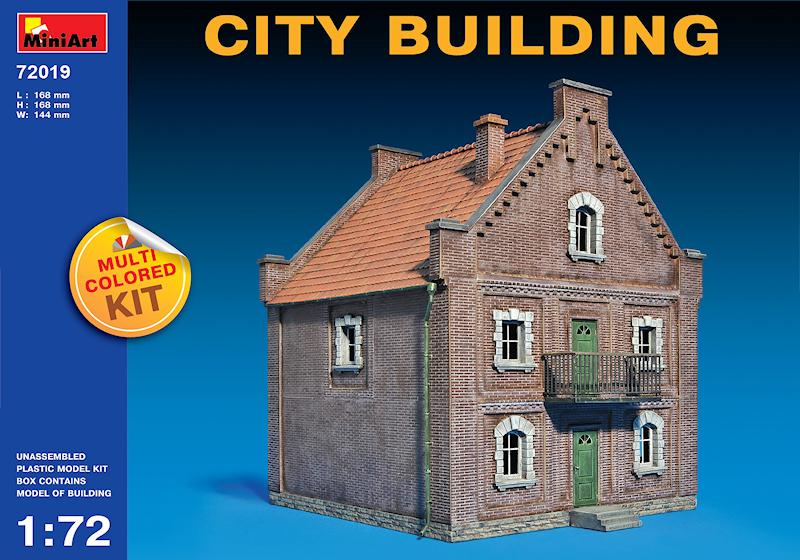
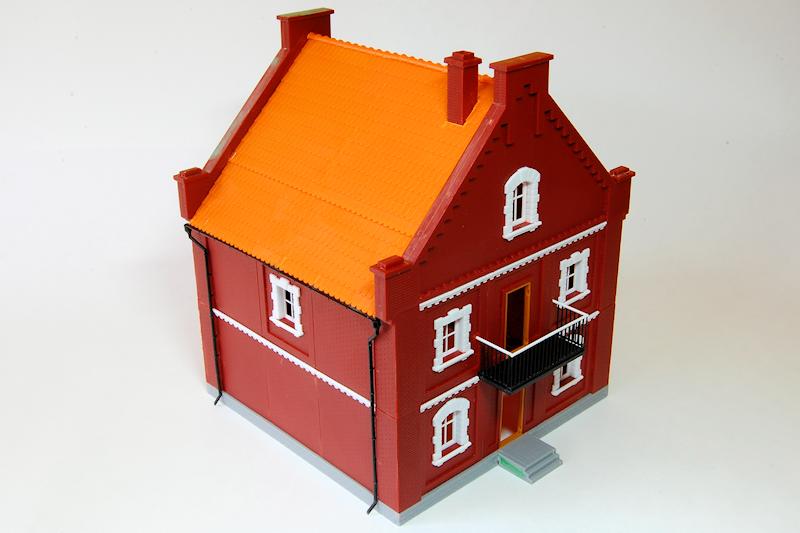
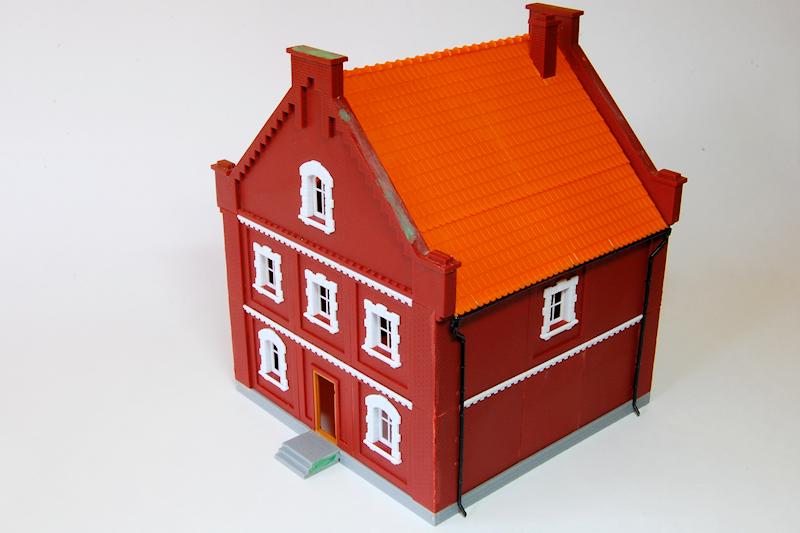
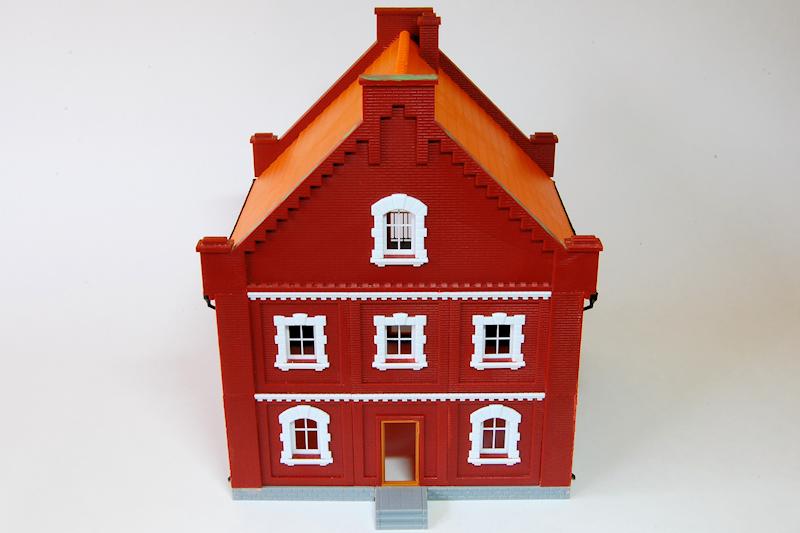
Although titled City Building, it looks more like a large urban house, with its two storeys plus an attic floor, and a single width front door. Obviously some buildings of this type and size may well be used as offices rather than residences. Im certainly no expert in European architecture, but its a type that looks as if it could exist in many countries, mainly I would have thought in northern and central Europe; to me it has a somewhat Flemish or Dutch look.
what you get
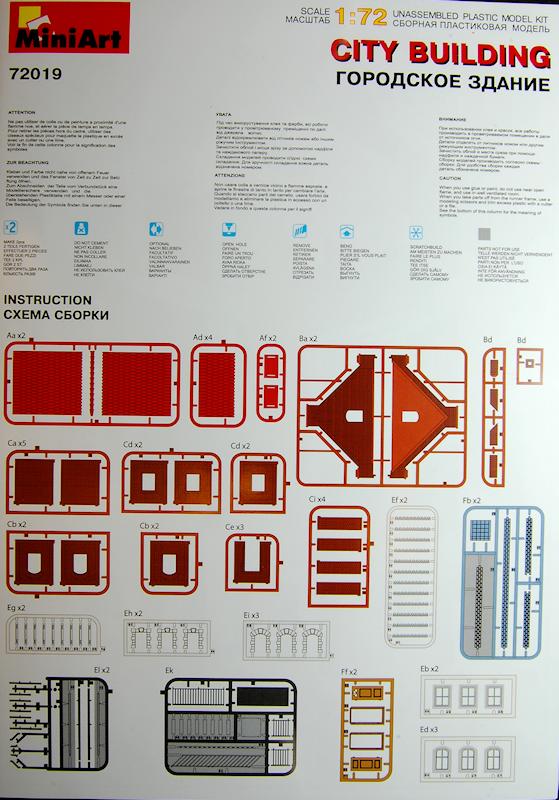
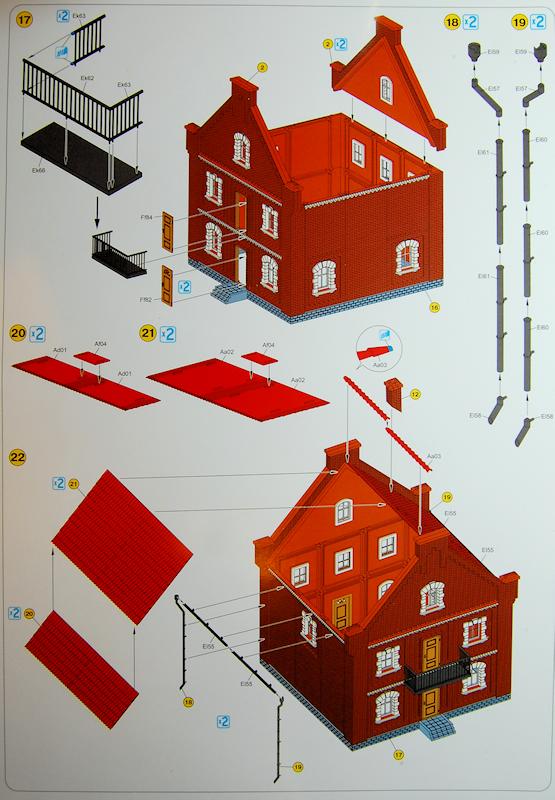
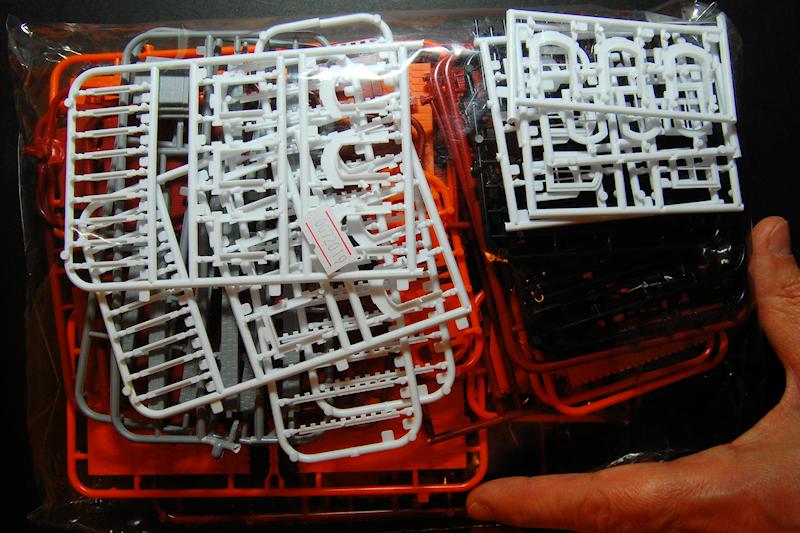
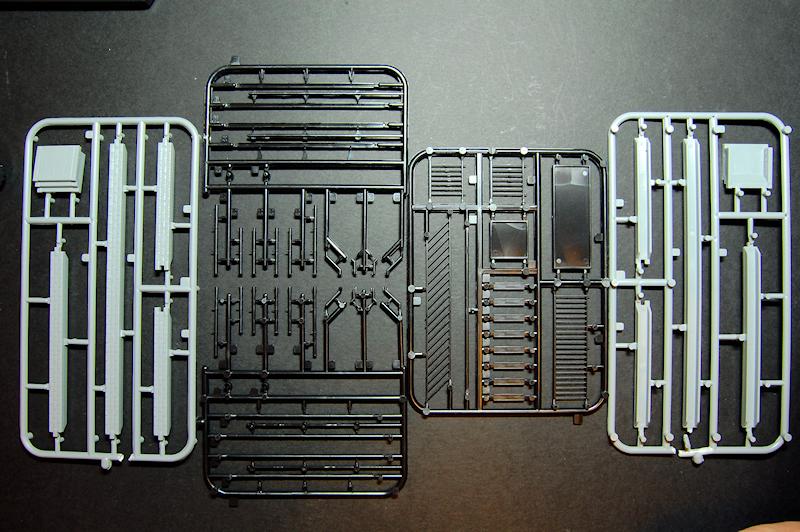
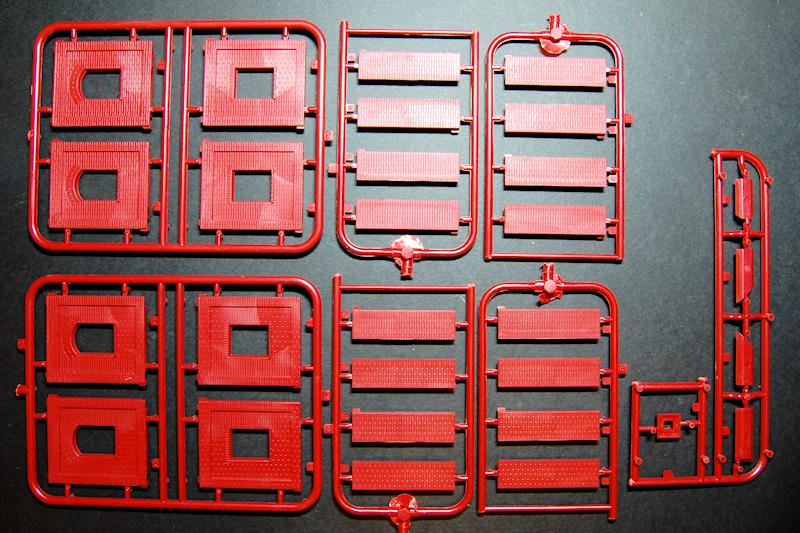
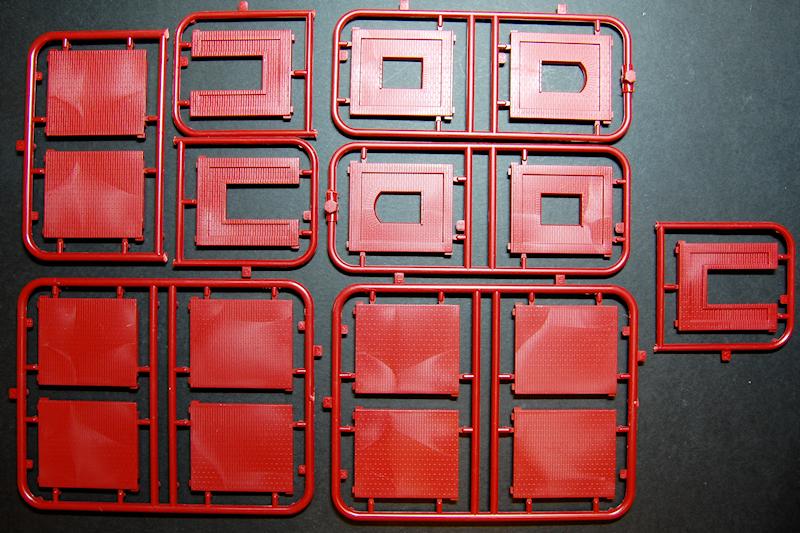
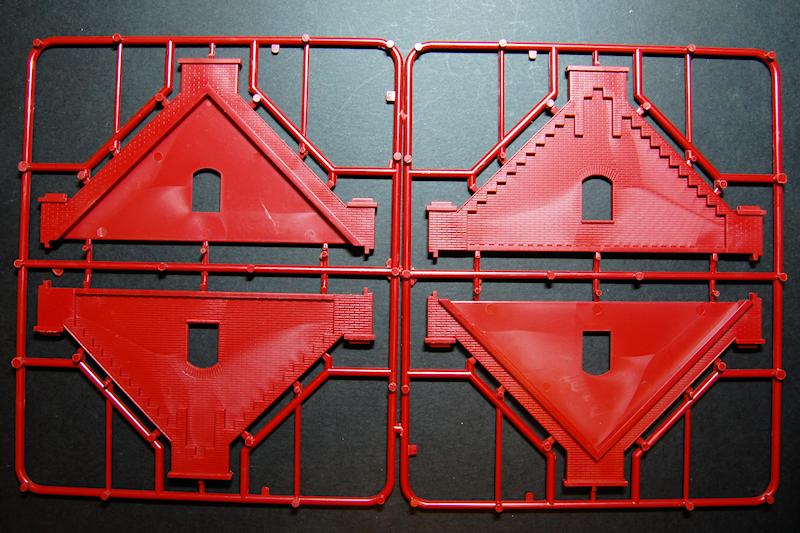
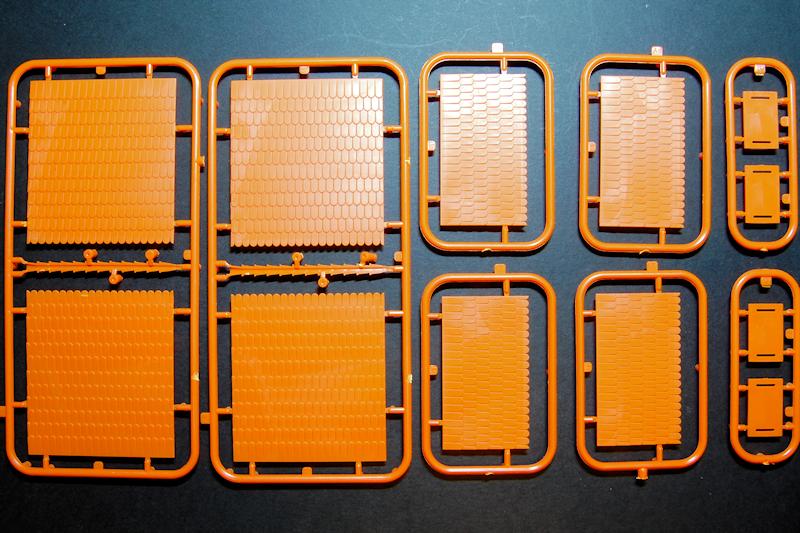
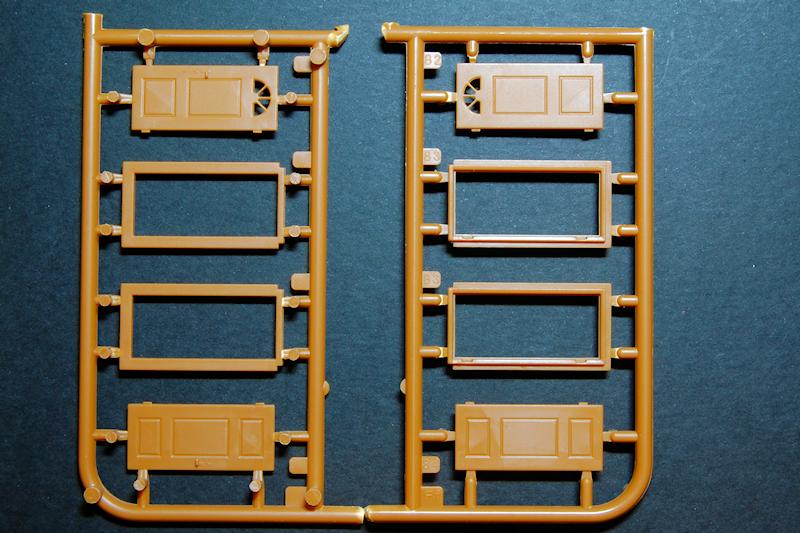
Although small scale, this is a big and heavy 1/72 kit box. Thats partly down to the size of the completed model, but also relates to the way the kit is broken down into small modular components which results in a lot of sprue plastic: a total of 53 separate sprues carry the parts. Rather than describe the breakdown, I refer you to the first image on the right of this review which shows the sprue diagram from the instructions. Image number 6 shows all the sprues bagged up in the box, which gives a good impression of the mass of plastic provided, and the following shots show the sprues and parts in more detail.
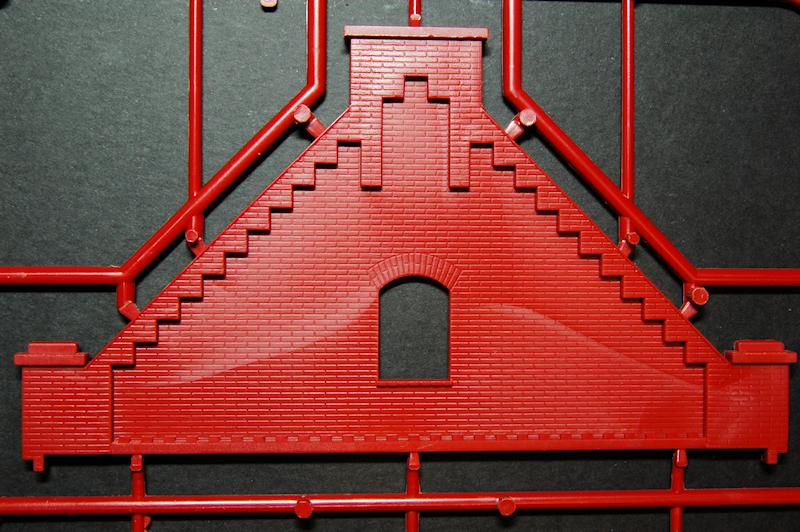
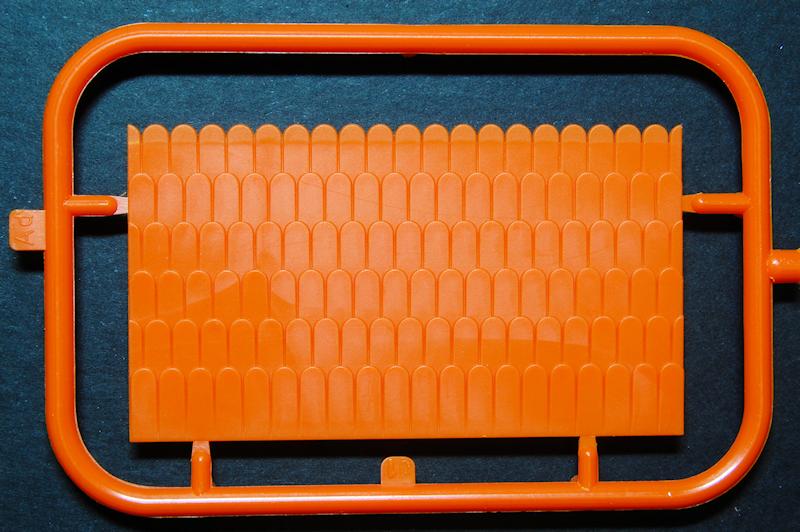
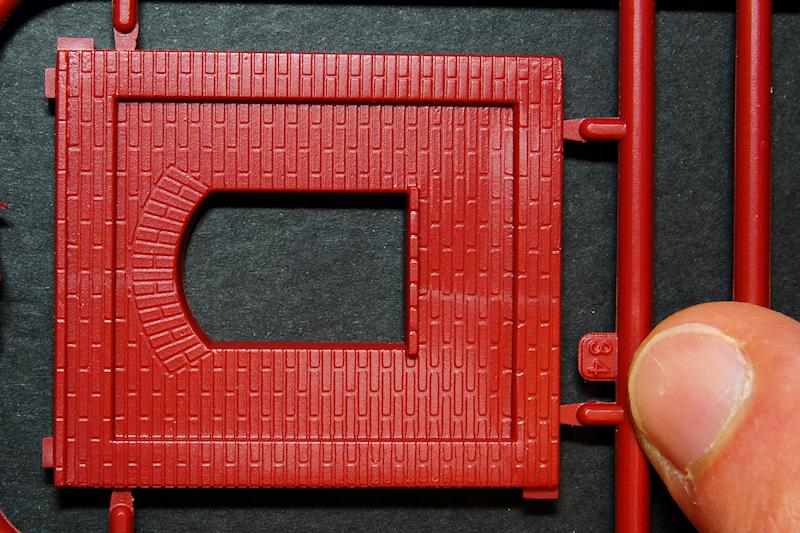
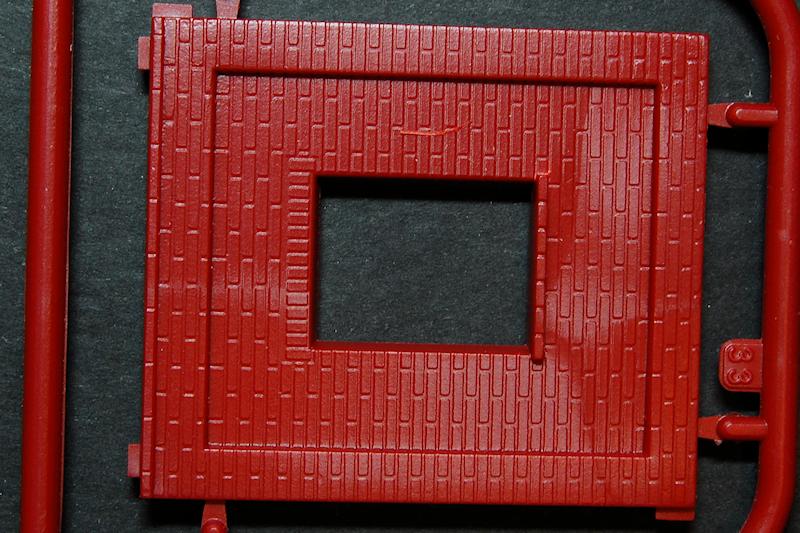
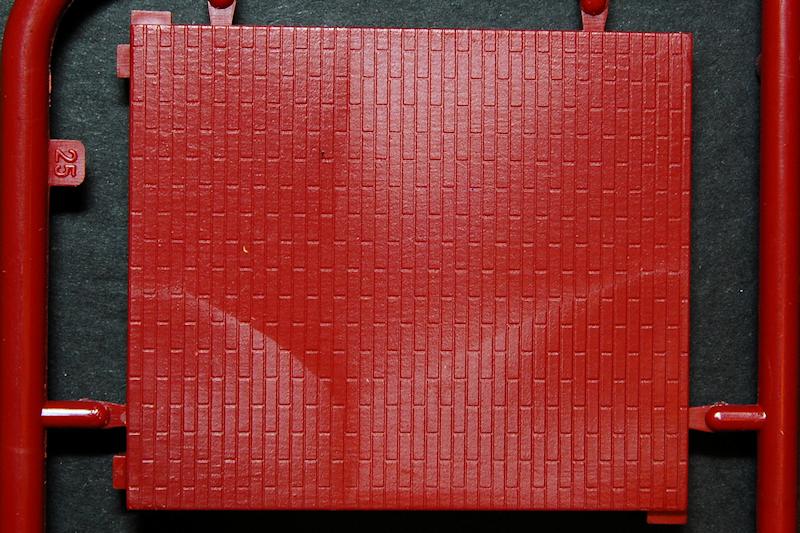
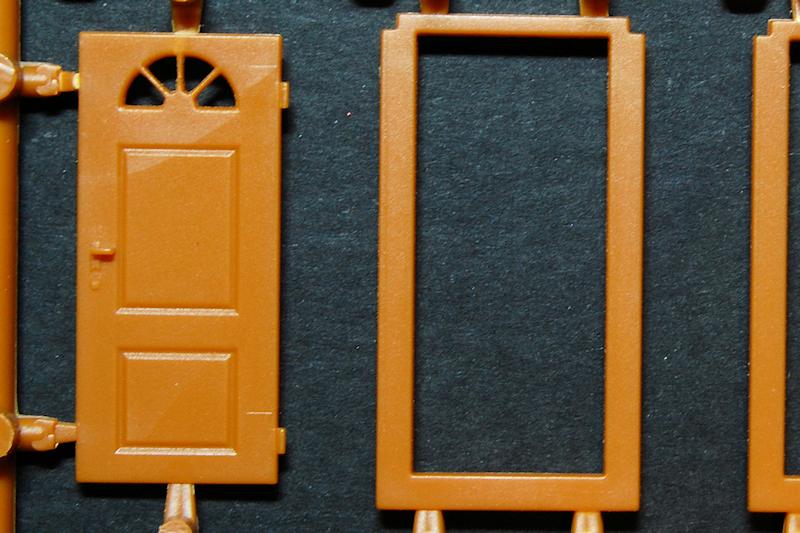
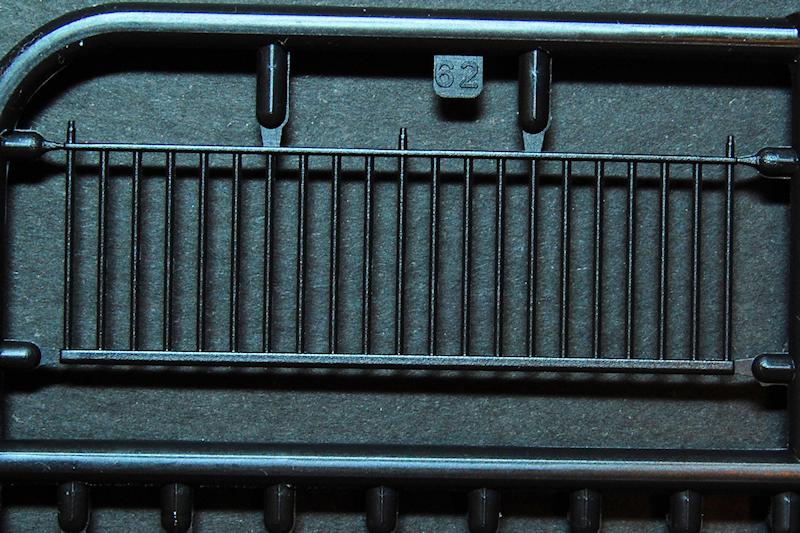
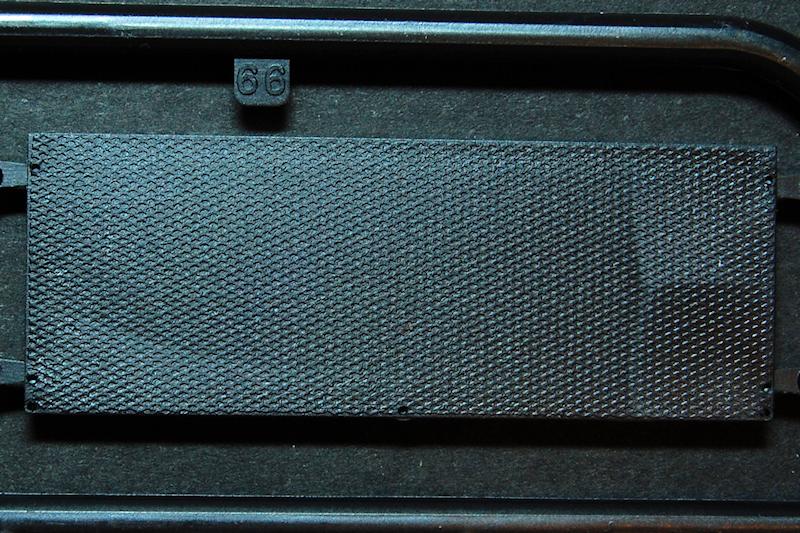
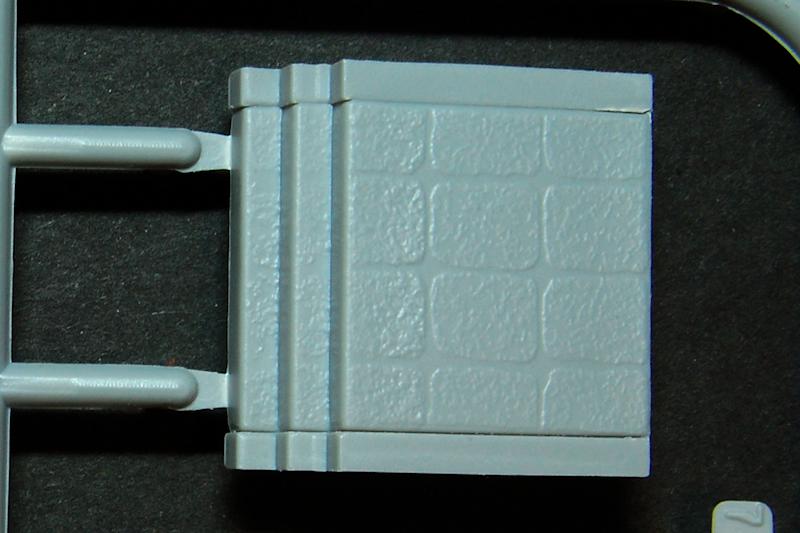
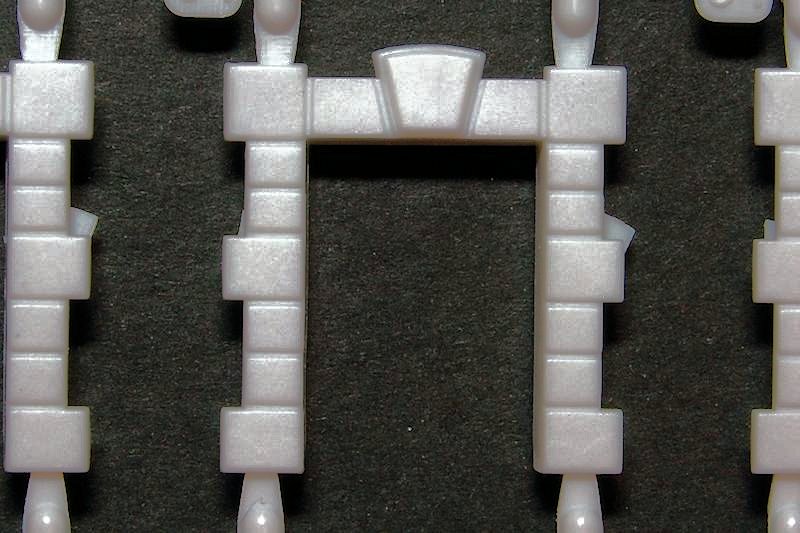
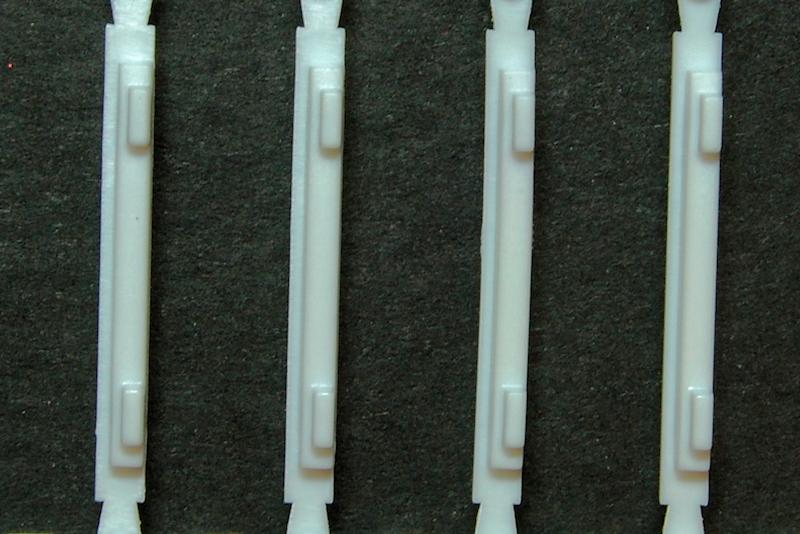
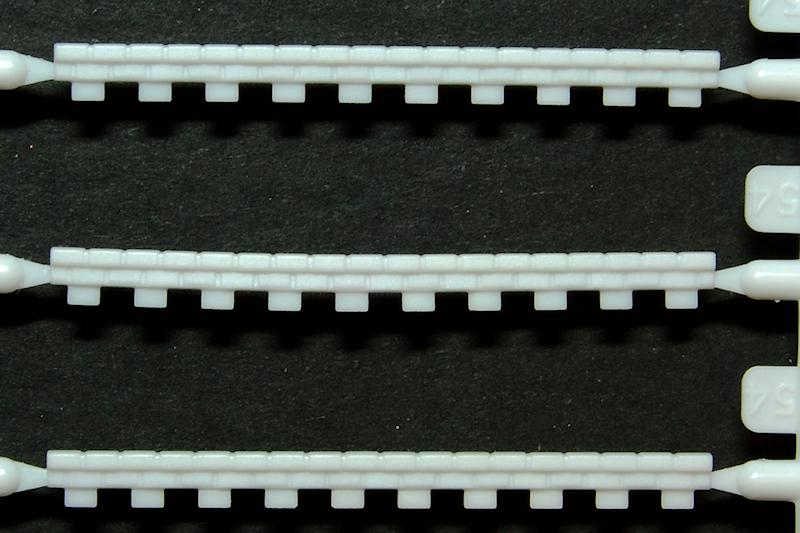
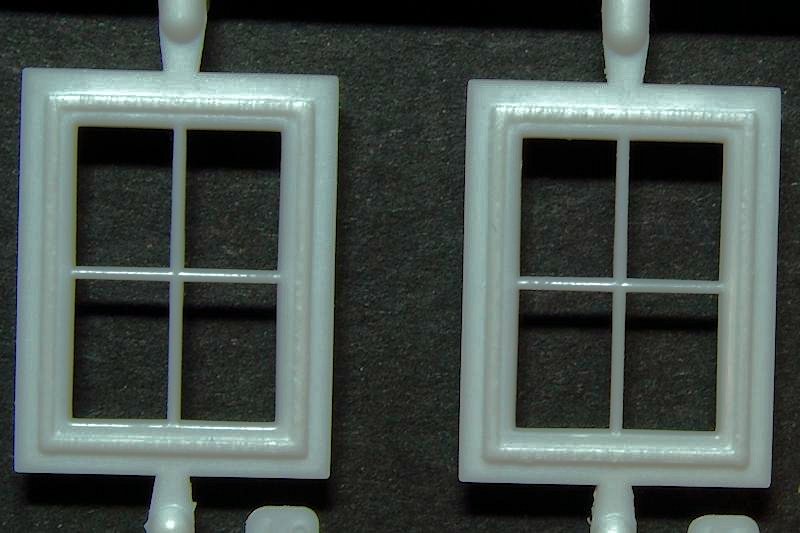
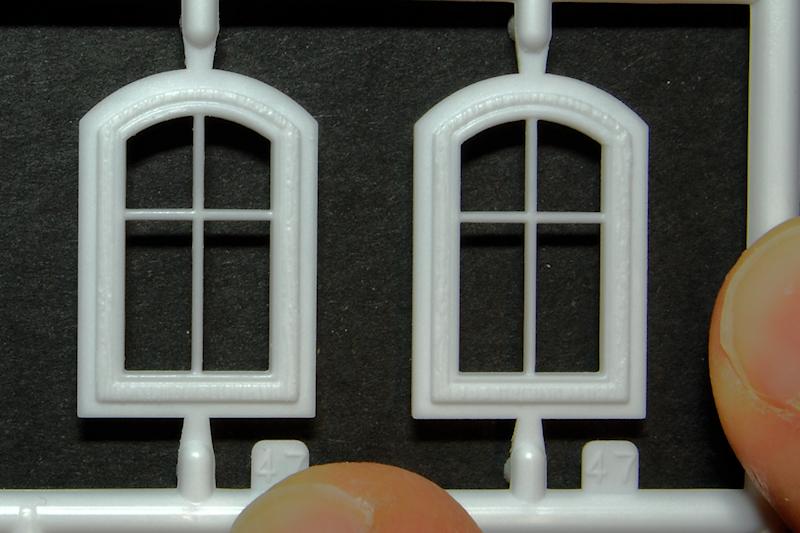
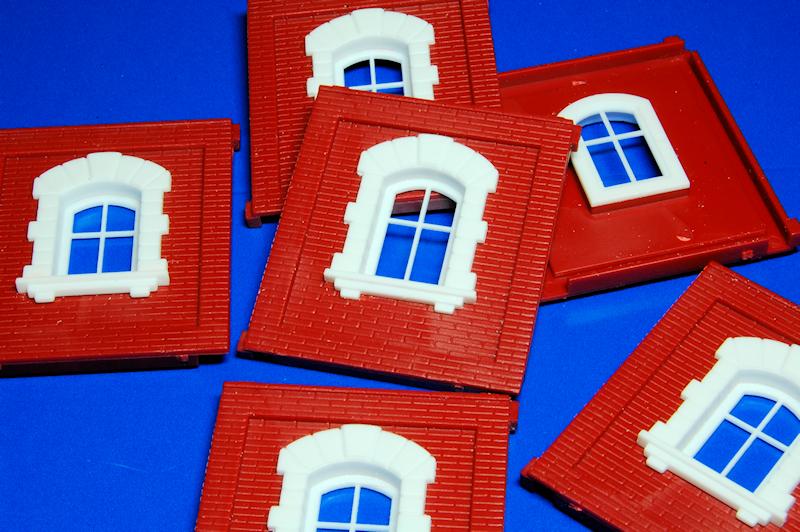
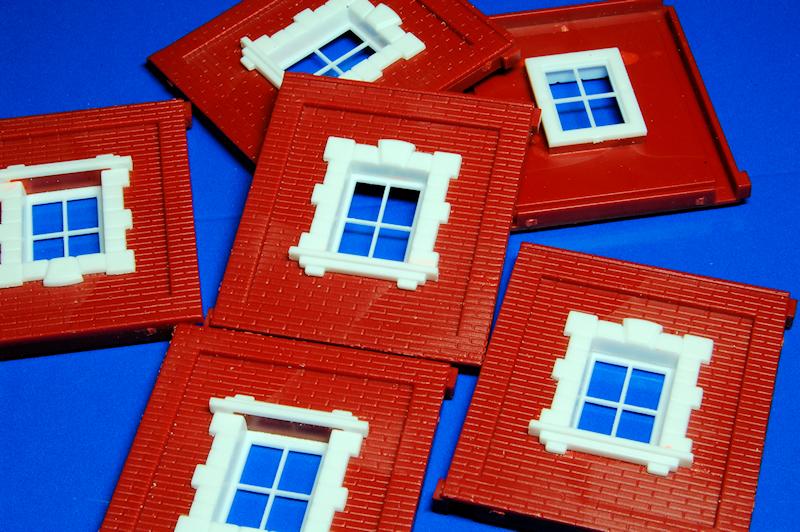
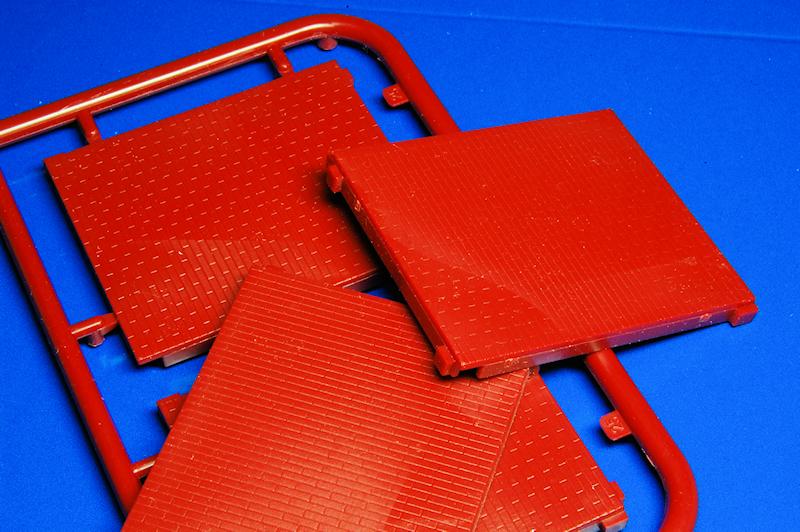
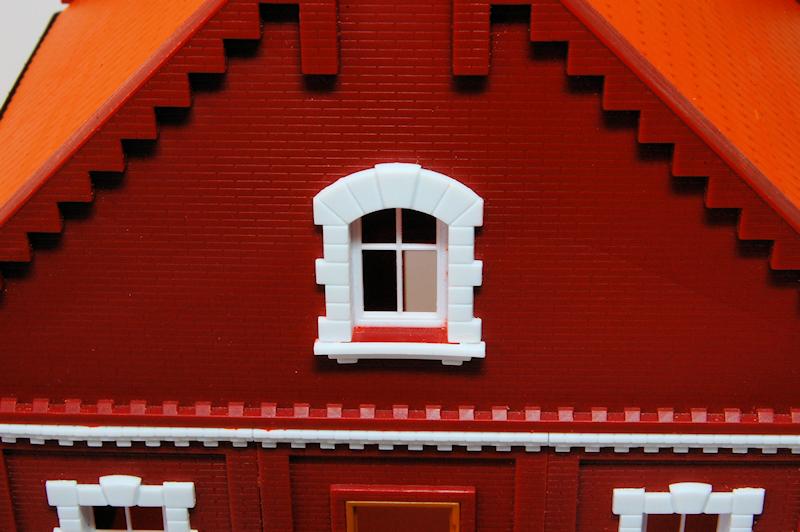
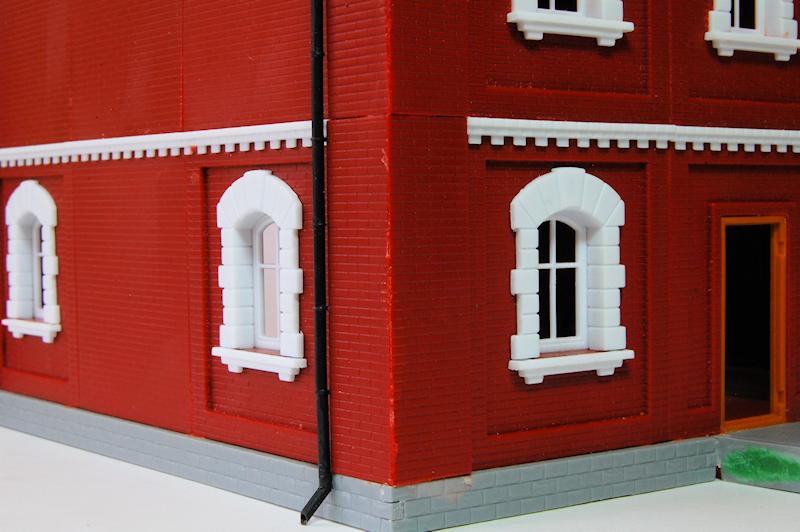
Apparent from the close ups is the well-defined moulding of the brickwork, decorative mouldings, stone window surrounds and footings, roof tiles and, for example, the tread pattern of the balcony. Details such as the balcony rails, window glazing bars, guttering and drain pipes are all quite fine, with some care needing to be taken, particularly to avoid any twisting of the window frames that might snap the cross pieces.
Instructions are fairly clear and all in colour which certainly helps with identifying the numerous parts, although Ill come back to one or two ambiguities in them when going through the construction. There are no decals or specific painting instructions, other than the colour photo on the box lid.
construction: windows
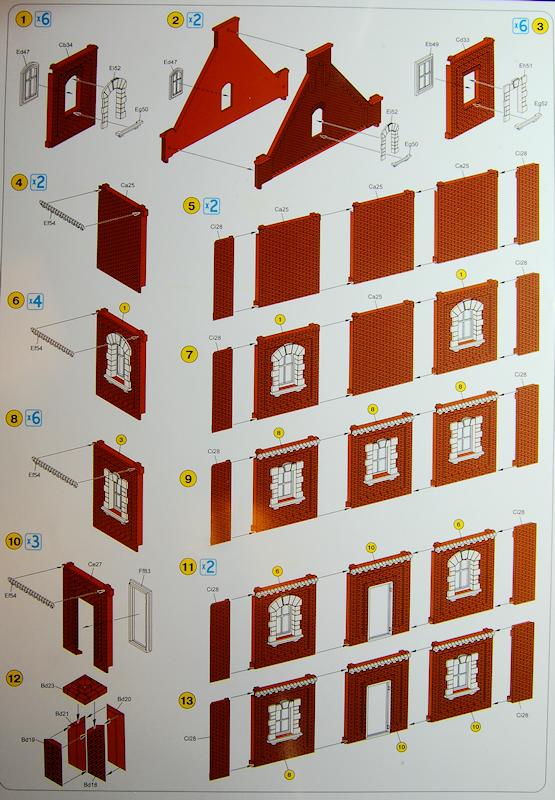
The walls are made up of individual brick panels, some for the windows, some plain brickwork. I start by making six arched window panels as instructed, so each one is a brick panel, a window frame, a stonework surround and a window ledge. The brick panels only need clean up on the edges where they butt together with each other; the white window frames need no preparation work, the fine cross pieces being entirely flash free. The ledges have a small circular mark that needs removal and when attached there appears to be a slight gap between them and the stone surround, but nothing serious.
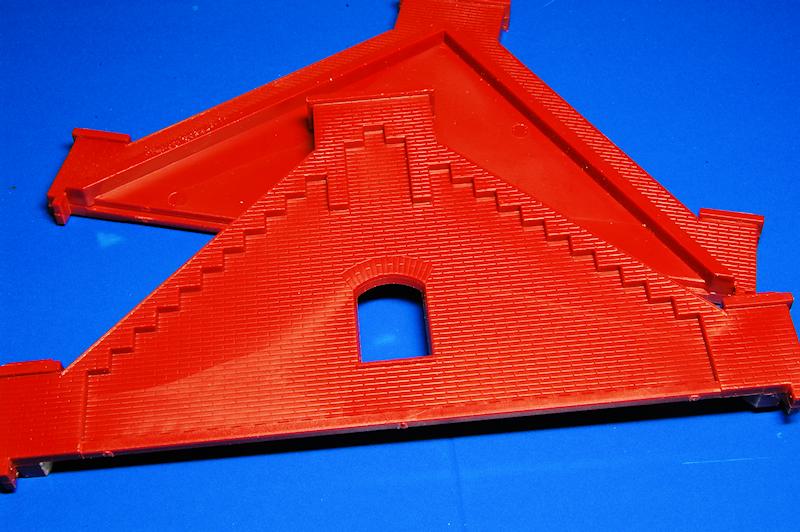
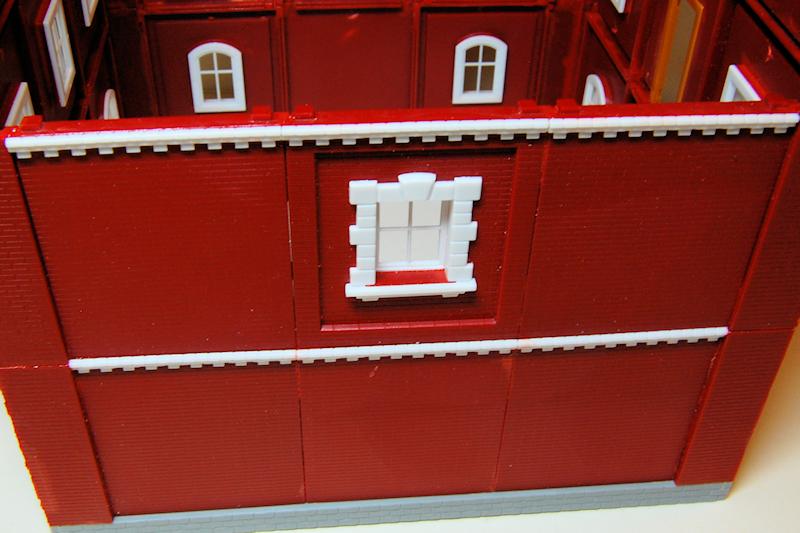
Those six done, I do another six for the square-headed windows (step 3, photos 30 and 31) then make up the roof gable units; these are two halves laminated together to make up a thick section of brickwork, and require some clean up both before and after construction. Steps 4, 6, 8, 10 all show the decorative stone mouldings being fixed above the windows and doorways, but I leave these off until the walls were all made up.
construction: walls
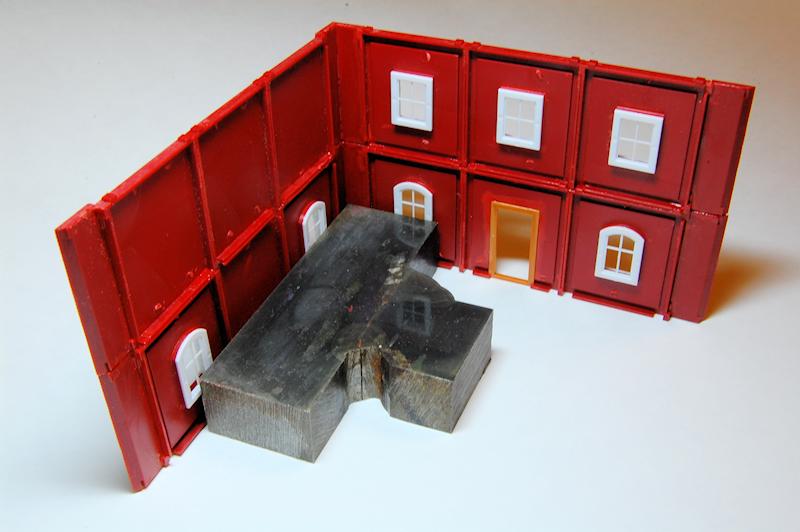
Next comes steps 5 (x2), 7, 9, 11 (x2), 13 and 14, which are all similar in that each involves three brickwork panels butting side by side, with an additional narrower corner panel added to each end (photo 34). The key here of course is to ensure that the panels are all aligned and create one long flat section, otherwise there will surely be trouble later when it comes to fitting them together.
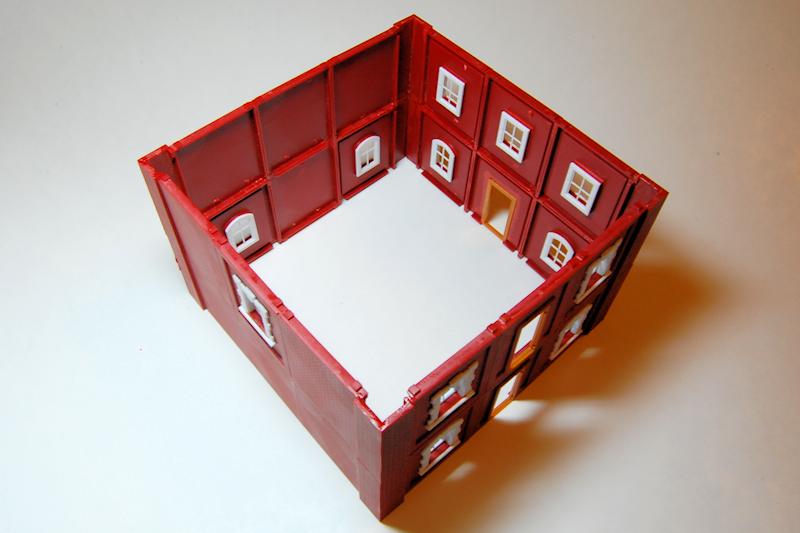
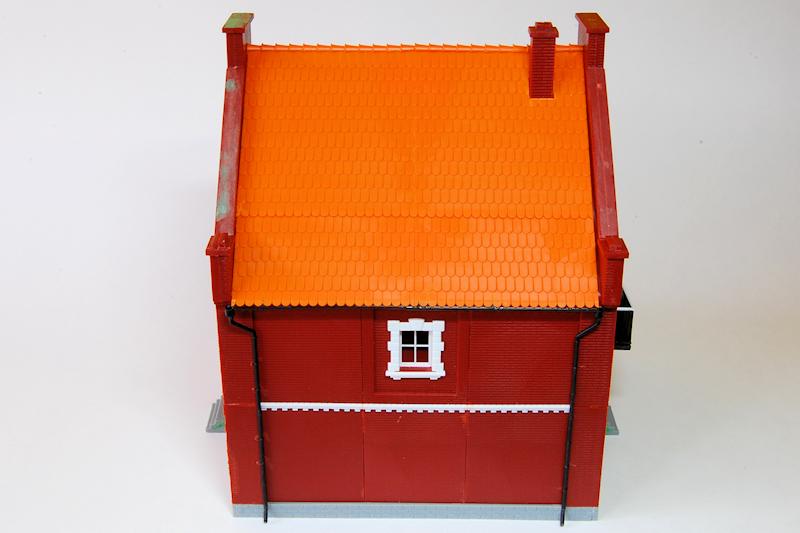
While I built mine up exactly as per the kit instructions, the modular breakdown would allow the configuration of the windows to be varied: if following the instructions, one side wall has two downstairs windows, the other one upstairs window; these could easily be moved around, to create three upstairs windows in a row on one side, or two up, one down, and so on. Obviously this is something to think about before you put all of the parts together. Another suggestion is that one might build all of the walls up before adding the window details; doing so would enable the walls to lie completely flat, while the slightly protruding window details makes things a little more wobbly.
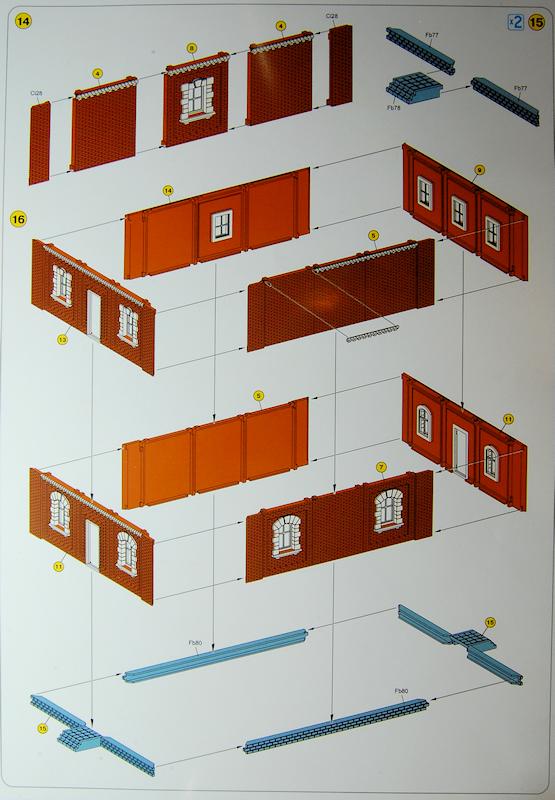
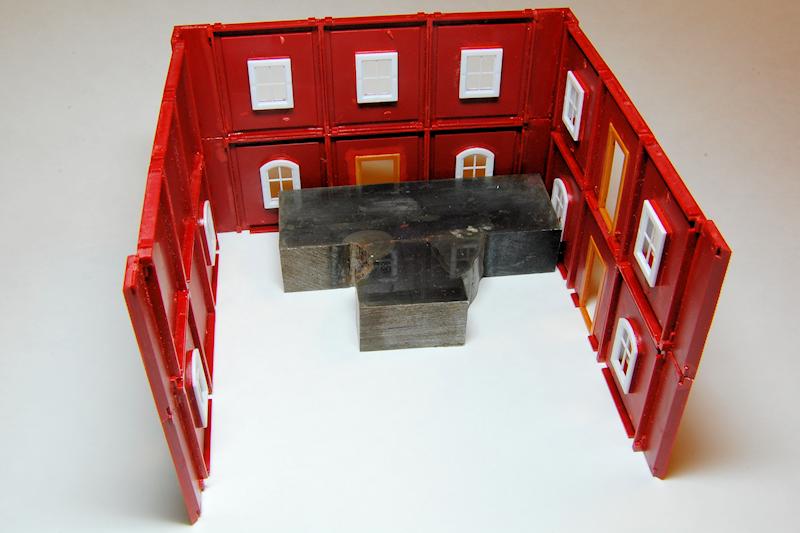
16 is the big step where all the walls go together, and theres some things to look out for. Keep each of the side walls flat and allow the glue to set before trying to assemble the walls corner to corner. Make sure that the corners are square you can see in photos 35 and 36 that I used a square chunk of metal to ensure a 90˚ join. Theres not a great deal there in terms of locating lugs or corner bracing, its just two thin 45˚ bevelled edges butting together to make a right angle. I wait until each joint is semi-set before fixing the next wall so that by the time all four are attached it is still possible to flex the joints to get them all square. In fact if you look at photos 36 to 39 youll see that I originally attached the walls in the wrong order so thats something else to look out for!
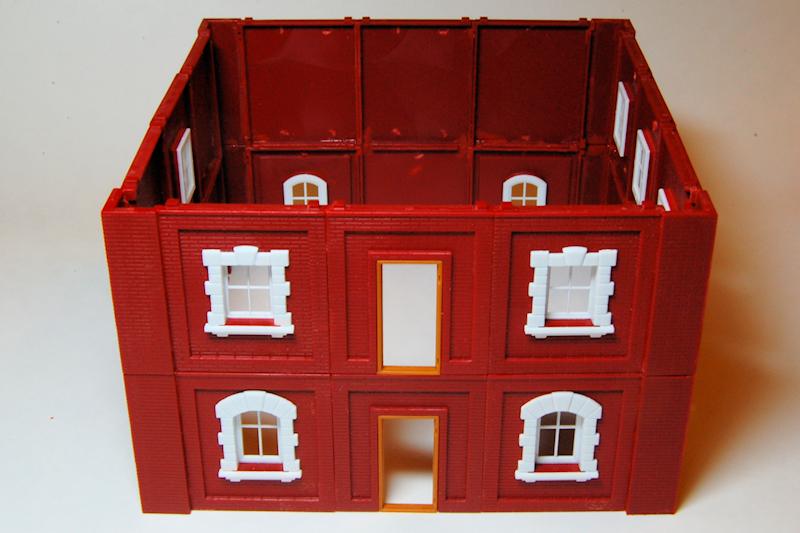
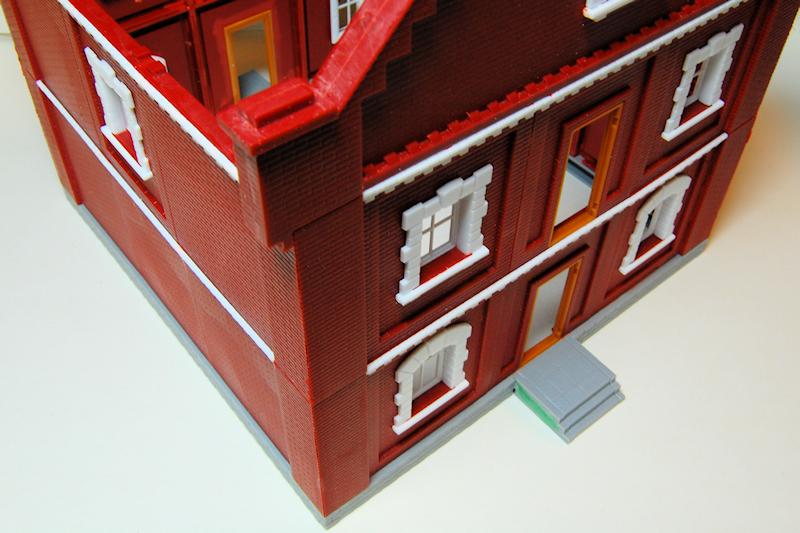
The two big gable walls are easily fitted on to the walls in step 17 and I do this before the final part of step 16, which is to build up and fit the stonework footing; this is the narrow grey strip that fits around the base of the building and incorporates the two step units. Again, due to the lack of any well-defined linkage, care is needed to ensure that the steps are perpendicular to the stonework, and that the four sides are square; see photos 41 and 42. I attach this to the bottom of the house walls one corner at a time and adjust it so all is square; some fairly slow setting cement helps. Note in photo 41 the green filler in the sides of the steps where they are a little concave.
construction: details
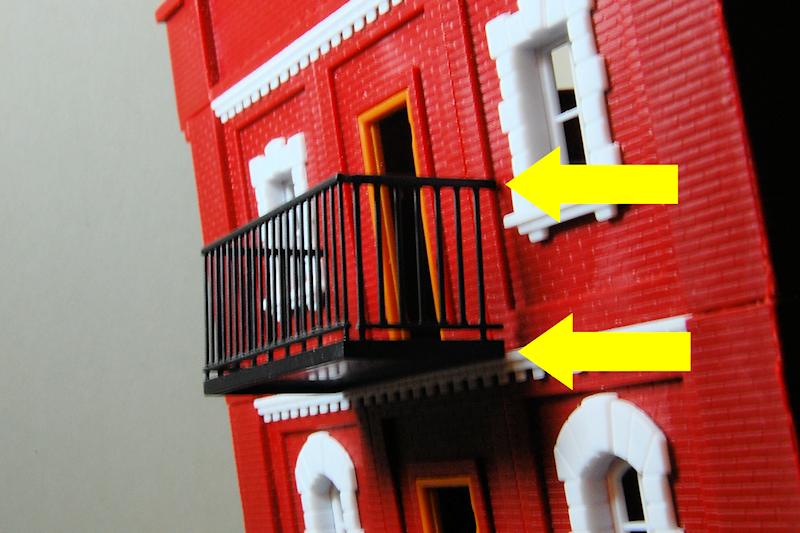
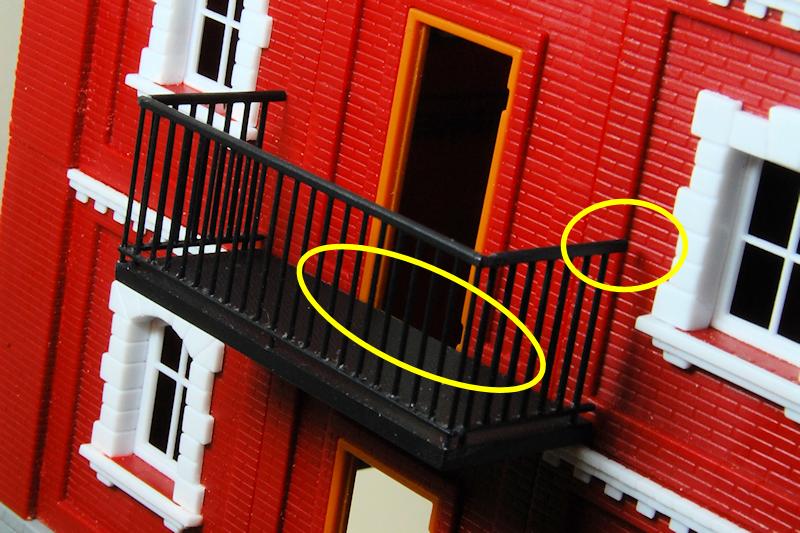
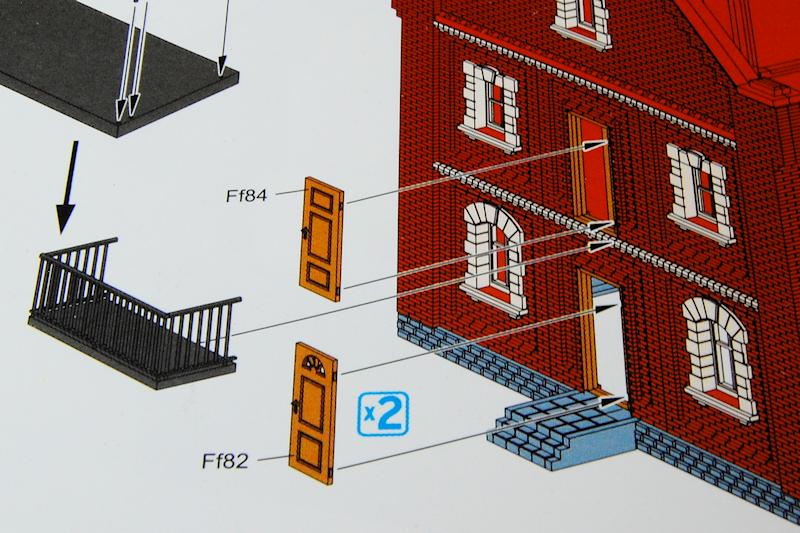
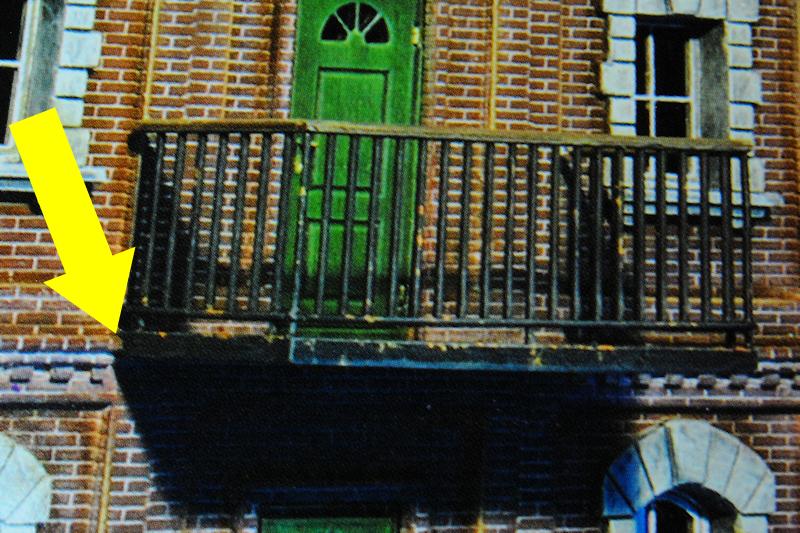
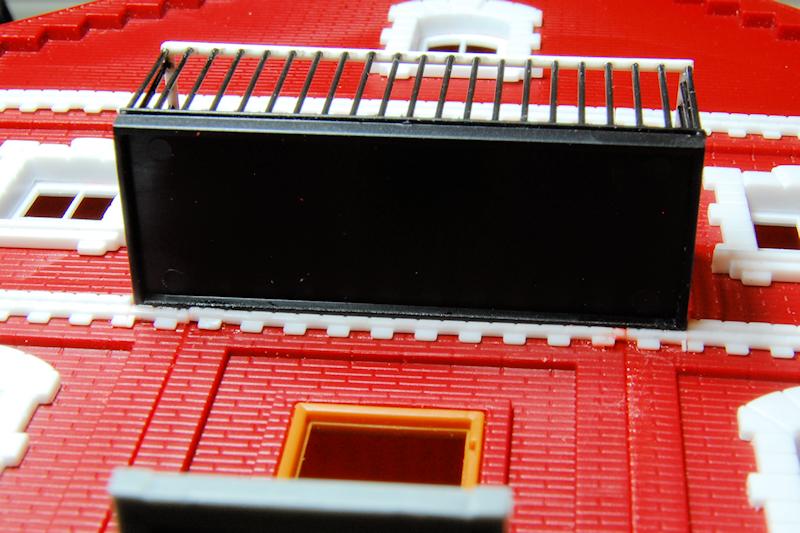
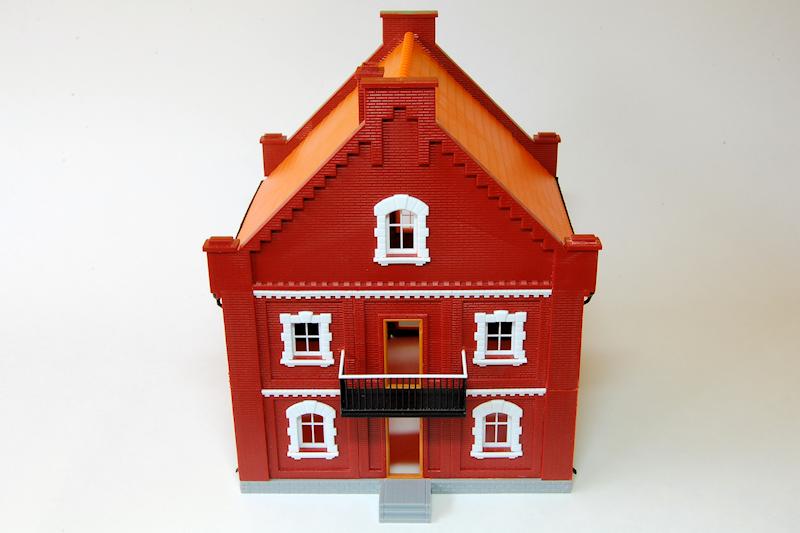
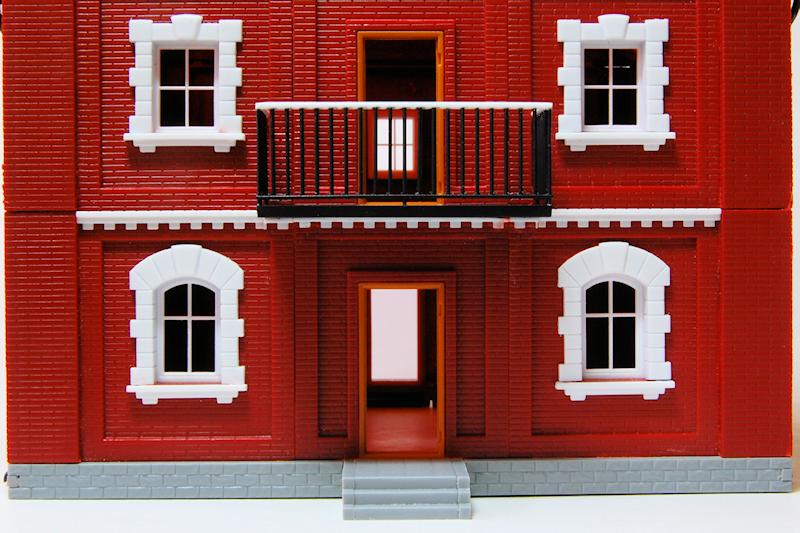
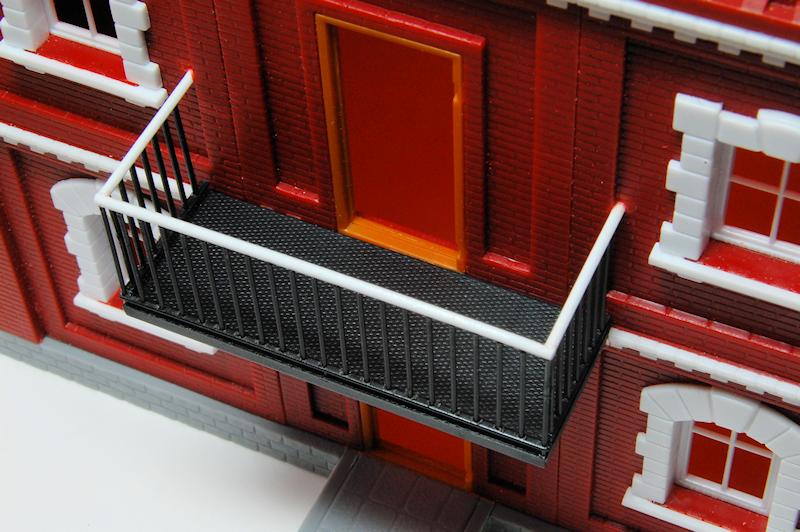
Now all the walls are together I add the white brickwork mouldings that decorate the top of each storey; however an issue then came up with the fitting of the balcony, which necessitated removing and altering the lower front three of these strips. The balcony has a couple of issues: in the instructions, parts EK63, the side rails are to be trimmed this should be about half the length available because the overhang of the horizontal members needs to be uneven front and back, although the part is moulded symmetrically. However, when test fitting the balcony to the front wall, it seems obvious that the upper side rails arent long enough to meet with the wall of the house, something Ive tried to illustrate in photo 47 notice the angle of the balcony in order for the rails to touch the wall. This is with the balcony floor mounted, as shown on the box art and the instructions (photos 49 and 50) right on the white moulding; if it sits on top of the moulding, then although the rails come nearer to the wall, another problem is created, which is that the doorway is then obstructed by the floor see photo 48. My solution is twofold: remove the three moulding strips, cut the centre one lengthways a little way into the middle course of bricks, and remove the same amount from left and right strips just for the first two bricks or so. The balcony can now sit on top of this reduced strip of moulding with the balcony floor level with the bottom of the doorway that leads on to it. Secondly, I carefully remove the entire balcony rail from the uprights and replace it with 0.8mm hexagonal strip so that the side rails are now long enough to reach the walls and be securely attached. See photo 51.
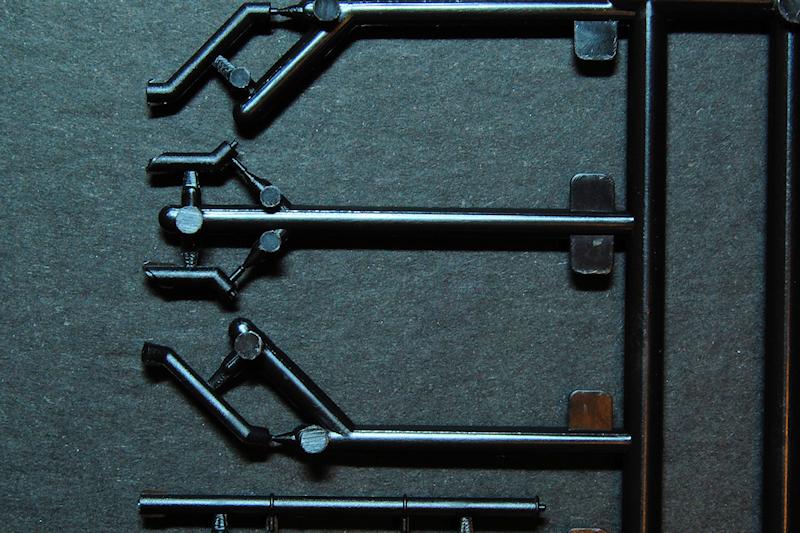
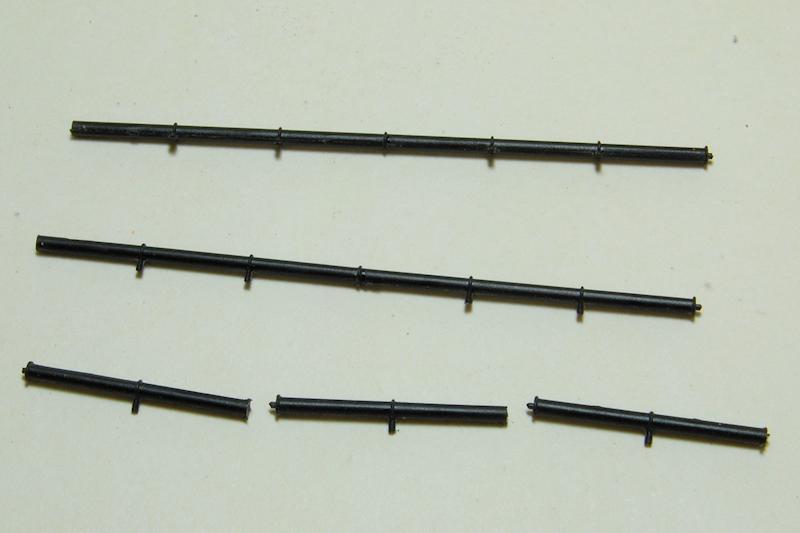
Steps 18 and 19 build the four gutter down pipes; for some reason one pair is to be made up with two lengths of three segments, the other with three lengths of two segments each (the segments being the lengths between each pipe support, see photo 52). I dont think either is correct as this gives a downpipe that is short of the ground by a scale two or three feet. Fortunately there are two spare lengths of two segment pipe in the box, so by halving each of these there is an additional single segment to go on each downpipe and, indeed, this seems to be what was done for the example shown on the front of the box (see photo 1, at the top). This involves some pfaffing about with removing the joining pins from the ends of the pipes, and the gluing is a little tricky as this black plastic seems slightly softer than normal styrene.
construction: roof
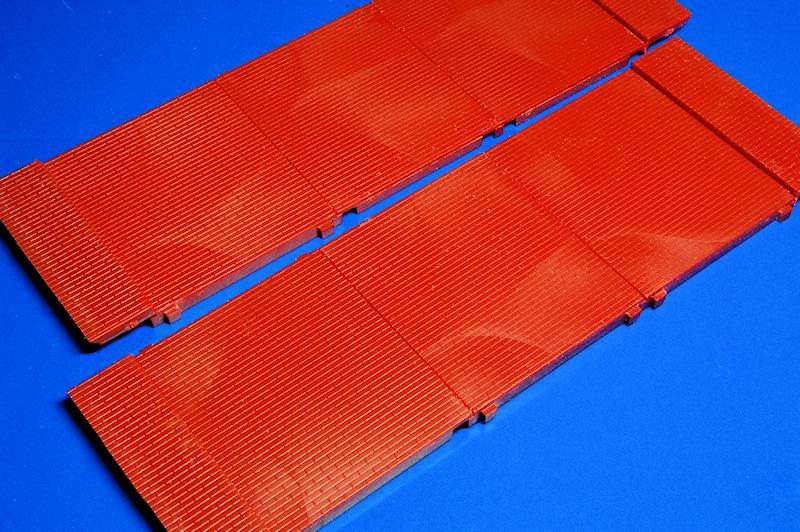
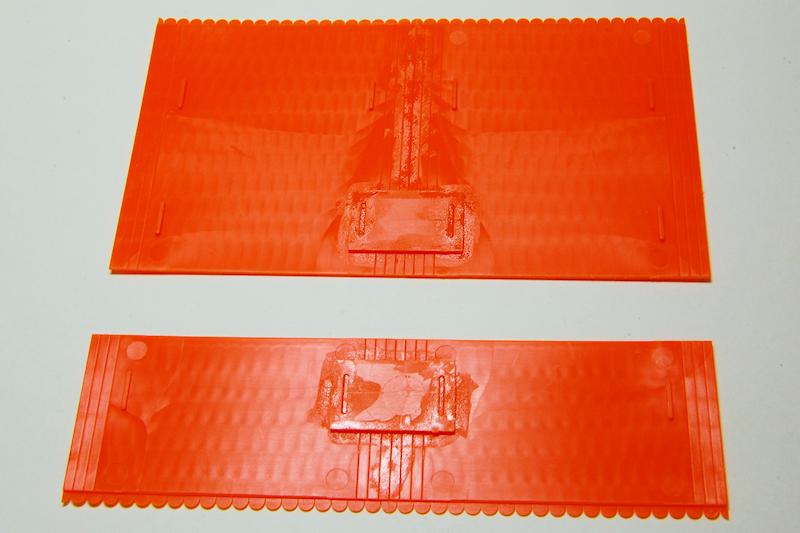
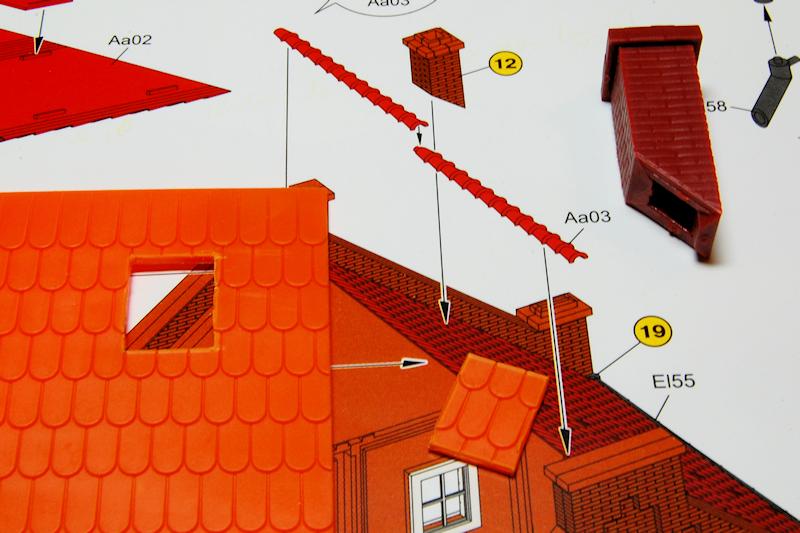
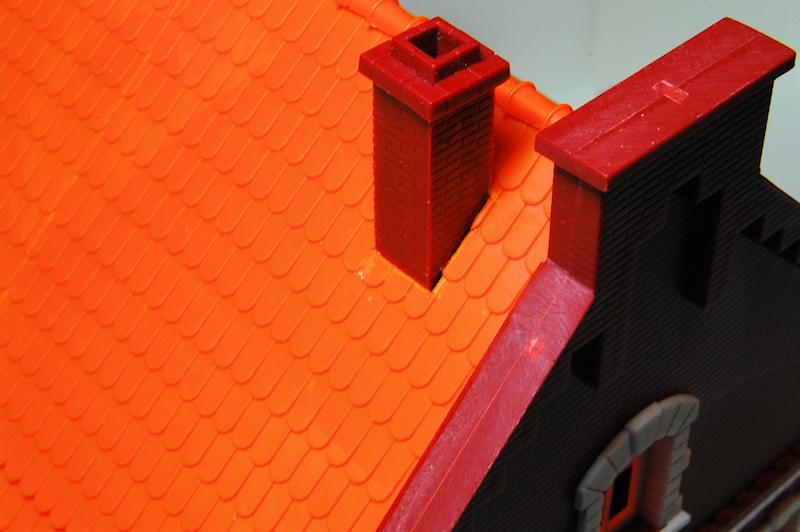
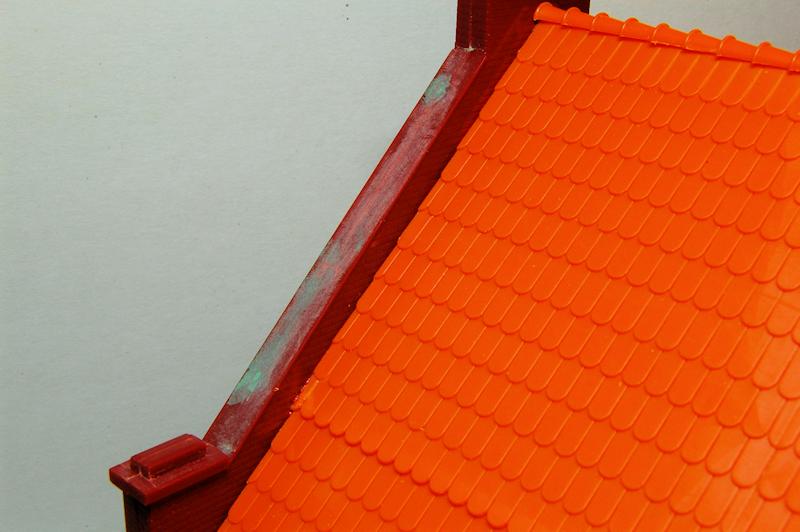
Its a good idea to let all that pipework set while making the roof in steps 20 to 22. Each side is in four sections, a wide upper and narrower lower, with two halves of each being joined by means of a flat plate. The instructions call for the chimney to be placed straight on to the tiles, but this results in it sitting on top of the uneven tiled surface, so I cut a hole in the tiles to allow it to drop through a little way (photos 54 and 55). Dont be fooled like I was, by the photos on the box side that clearly show the house, from front and back, both with a chimney visible on the near side: there is only one chimney! Rashly, having made up the chimney the previous week, I proceeded to cut two roof holes. Wrong.
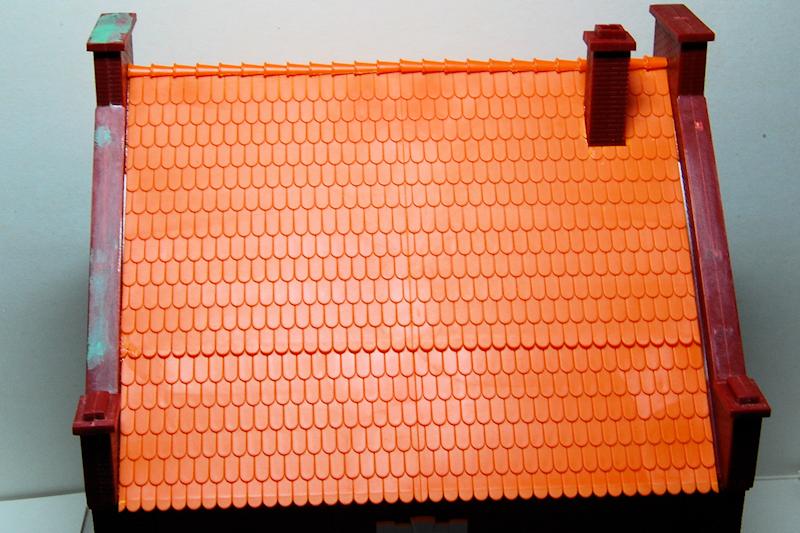
The roof sections go on the brickwork easily and meet at the top nice and square, allowing the two lengths of ridge tiles to sit perfectly on top (photo 56). An improvement would be to furnish the roof edges and the chimney with some simulated metal or cement flashing to cover the slight gaps (and stop the water getting in).
With the roof firmly fixed, now its time to attach the gutters; as with the drain pipes, theres some fiddling around to be done here in that the two lengths of guttering as provided are together too long for the roof, so I remove one segment from one half only. The instructions show the gutters being fitted to the wall, but doing this means theyd be pointlessly completely sheltered by the roof obviously they have to sit just under the bottom roof tiles to catch the rain, and this means they have to be fixed to the roof edges. This is fiddly, but OK, and once the glue has set (that black styrene again ) the down pipes are fitted to the walls and the end outlets (hoppers?) to the gutters. The instructions arent too clear where they should fix to the walls, and the box photo has them attached on the corner brickwork columns, mine go inside the inner corners of the same, as such a nice house should hide its iron pipe work from view (photo 66). With that, it is done, excepting the doors, which I have left off for painting purposes.
conclusion
Because almost all construction steps in the instructions are to be done several times, not only is this build longer than it may at first appear, but I found parts of it quite tedious; there are for example 40 individual brick panels making up the four square walls (when they could potentially each have been moulded as a single component) so be prepared for quite an involved build. I think the details provided are fairly good, although there is of course enormous scope for improvements and extra detailing: roof flashing for example, the ends of roof beams, additional pipework, shutters, window glass and so on. Then theres all the painting possibilities; although the kit has been moulded in various colours to suit the materials represented, obviously most modellers would want to give it a realistic painting and weathering job. The model on the box top looks a bit run down for such an imposing building, with its chipped balcony paint and faded looking green doors, and the model would look equally impressive with a well-maintained look. There is the question of how to deal with the interior, since there is nothing provided at all; obviously one could add semi-translucent window glass, or shutters, curtains etc. to disguise the inner void.
As we saw, there are a few inaccuracies and ambiguities in the instructions, and coupled with the lack of clear location points for some components, it pays to work out where and how some of the details fit. Theres also one or two indentations on the steps and the roof gables where some filler was used to level things out, as well as the difficulty that I had with the balcony. On the other hand, the general fit of parts is very good, and with all those wall sections, the whole building still ended up being perfectly true and square. The way that the wall sections fit together does mean that theres a few difficult to deal with joins, but they are quite subtle and probably best dealt with in the painting stage.
The finished building is impressive and quite large as can be seen in the last photo (with Hunors Ford V3000 parked outside). Im sure that the modular design of the kit means that some of the same components will be used in other MiniArt kits, but it also could be taken advantage of to change the layout of this building. Theres some iron stairs and a small platform that could be used to provide a fire escape type external stair up to the upper floor door, if that door is relocated to the side of the house rather than utilising the balcony. I think it would also be quite easy to split the whole building in two and create the facades of two buildings side by side, for use in a street scene diorama. Im looking forward to seeing one of these new MiniArt buildings appearing in a braille scale diorama somewhere around here soon.
SUMMARY
Highs: Well proportioned and realistic looking building with some nicely executed details; mostly goes together well, with flexibility to be adapted to different configurations.Lows: Some vagueness in fit and instructions affect some of the details. Interior void may need to be camouflaged in some way.Verdict: An impressively big and chunky full building with lots of potential uses, plus huge possibilities around extra detailing, painting and incorporation into dioramas.
Scale:
1:72
Mfg. ID:
72019
Suggested Retail:
£22.99
PUBLISHED:
Apr 15, 2013
NETWORK-WIDE AVERAGE RATINGS
THIS REVIEWER:
84.53%
MAKER/PUBLISHER:
85.88%
Our Thanks to Dragon USA! This item was provided by them for the purpose of having it reviewed on this KitMaker Network site. If you would like your kit, book, or product reviewed, please contact us.
About Matthew Lenton (firstcircle) FROM: ENGLAND - SOUTH EAST, UNITED KINGDOM
Earliest model memory is a Super Sabre my grandmother bought for me around 1972. Have always dabbled in painting and making things, and rediscovered doing that with plastic in 2008. Vowed then to complete the 30 year old stash, and have made some progress. Hobby goes hand in hand with BBC Radio 3...