_GOTOBOTTOM
Armor/AFV: Braille Scale
1/72 and 1/76 Scale Armor and AFVs.
Hosted by Darren Baker
Roden Sd.Kfz. 4/1 Build Review
vonHengest
Visit this Community
Texas, United States
Joined: June 29, 2010
KitMaker: 5,854 posts
Armorama: 4,817 posts
Posted: Tuesday, July 26, 2011 - 09:01 AM UTC
Here you will find my active build log that will accompany my build review and JackFlash's in box review of Roden's new 1/72 Sd.Kfz. 4/1 (15cm) Panzerwerfer 42.
All In Box photos are courtesy of Stephen Lawson


S.L.

S.L.
tread_geek
Visit this Community
Ontario, Canada
Joined: March 23, 2008
KitMaker: 2,847 posts
Armorama: 2,667 posts
Posted: Tuesday, July 26, 2011 - 09:17 AM UTC
Jeremy,

You have definitely caught my attention on this one. I am sure that others (firstcircle are you there?) will be equally interested. Depending on how it goes together it could be a great base for other variants of this creature.

Cheers,
Jan
vonHengest
Visit this Community
Texas, United States
Joined: June 29, 2010
KitMaker: 5,854 posts
Armorama: 4,817 posts
Posted: Tuesday, July 26, 2011 - 09:24 AM UTC
I have to say that I was pretty impressed at the quality and detail of the moldings when I first pulled the sprues out of the box as everything looked crisp and free of flash.

This is not the case however, so be prepared for a bit of delicate cleanup work.

I'm starting with the major components because I want to assess any fit problems before I get into the detailed parts. Keep in mind that I will be deviating from the instructions for this build.

The first piece that I wanted to address is the lower hull shell.
The exterior is free from blemishes, just make sure that you use a delicate hand when you are removing it from the sprue and trimming the attachment points off as the upper edge has a delicate razor sharp edge that you will want to preserve as much as possible. It will be easy to repair if you accidentally remove to much material at these points.

*note: If you are going to leave the hatches and visors closed then skip this portion and move on to the next step whether you are following Roden's kit instructions or my own.

The interior is a different story however, and while crisply detailed is riddled with casting depressions and pour plug marks. There is a nice subtle rough casting texture to the front portion which will unfortunately be lost when filling and sanding. The good news is that the front portion is largely hidden even with all hatches open on the upper hull, so just fill these and smooth them out and don't worry about adding the cast texture that you lost. There is a total of six(6) pour plug depressions that you will need to remove the flash from before you fill them. In addition to this there are two(2) parallel depressions (from the frame rails) and three(3) transverse depressions (from the bed/track rails).
Take your time addressing this so that you don't accidentally deform or cause further damage to the interior.


You will notice that I have not filled the sixth pour plug that will be located in the engine bay. It wasn't very prominent and it will be obscured by the upper hull shell and the completed engine. Just take care if you weather the engine bay so that you don't make this mark stand out.

vonHengest
Visit this Community
Texas, United States
Joined: June 29, 2010
KitMaker: 5,854 posts
Armorama: 4,817 posts
Posted: Tuesday, July 26, 2011 - 09:26 AM UTC

Quoted Text

Jeremy,

You have definitely caught my attention on this one. I am sure that others (firstcircle are you there?) will be equally interested. Depending on how it goes together it could be a great base for other variants of this creature.

Cheers,
Jan


Thanks Jan! I'm hoping that firstcircle will drop by and have a look, his scratchbuild was very impressive

I have been informed that Roden already has more variants either in the works or on the way which I think you will certainly enjoy
vonHengest
Visit this Community
Texas, United States
Joined: June 29, 2010
KitMaker: 5,854 posts
Armorama: 4,817 posts
Posted: Tuesday, July 26, 2011 - 09:33 AM UTC
I really like the way that the upper hull shell is attached to the sprue. Roden eliminated a lot of work for us by locating the attachment points to the lower lip of the upper hull shell and providing you a flat surface that you can quickly file down.

To help eliminate the chance of causing damage to the upper hull shell I chose to remove the the attachment points WITH the upper hull so that I would have a clear angle when removing them.


And you now have an armored caterpillar!!

vonHengest
Visit this Community
Texas, United States
Joined: June 29, 2010
KitMaker: 5,854 posts
Armorama: 4,817 posts
Posted: Tuesday, July 26, 2011 - 09:41 AM UTC
The upper hull only requires minimal cleanup, however there is flash located directly over each window that will require VERY CAREFUL TRIMMING. Take your time here and your results should like like this:


Thanks for looking, and more to come later
JackFlash
Visit this Community
Colorado, United States
Joined: January 25, 2004
KitMaker: 11,669 posts
Armorama: 256 posts
Posted: Tuesday, July 26, 2011 - 08:48 PM UTC
Roden has been advised so they will be eyeballing this too. Model On!
Korpse
Visit this Community
Queensland, Australia
Joined: October 06, 2009
KitMaker: 382 posts
Armorama: 378 posts
Posted: Tuesday, July 26, 2011 - 09:08 PM UTC
Hi Jeremy

I've been planning on getting this kit (and the ammo carrying version) for some time, so your build review is very welcome.

I haven't been able to find any proper reviews of this kit, just the 'in the box' type, which are useful enough, but dont tell us anything about fit of parts, things to look out for, etc.

Hope you can find the time for regular updates here, cos I will be looking out for them.

cheers
Neil
vonHengest
Visit this Community
Texas, United States
Joined: June 29, 2010
KitMaker: 5,854 posts
Armorama: 4,817 posts
Posted: Wednesday, July 27, 2011 - 04:00 AM UTC
Stephen: Excellent, thanks!

Neil: Thanks for dropping by and I hope you'll check in often as I should have updates for you on a daily basis or close to it. Although this kit has some quirks that modelers may find unpleasant depending on their skills and preferences, I think that this kit has a lot to offer OOB. Feel free to ask questions at any time and I'll promptly address them as best I can.
PedroA
Visit this Community
Valencia, Spain / España
Joined: December 27, 2010
KitMaker: 324 posts
Armorama: 322 posts
Posted: Wednesday, July 27, 2011 - 04:19 AM UTC
Thank for this explanations about the kit. Really seems a great kit. Perhaps some day I will buy some of they.

Regards. Pedro.
vonHengest
Visit this Community
Texas, United States
Joined: June 29, 2010
KitMaker: 5,854 posts
Armorama: 4,817 posts
Posted: Wednesday, July 27, 2011 - 04:55 AM UTC
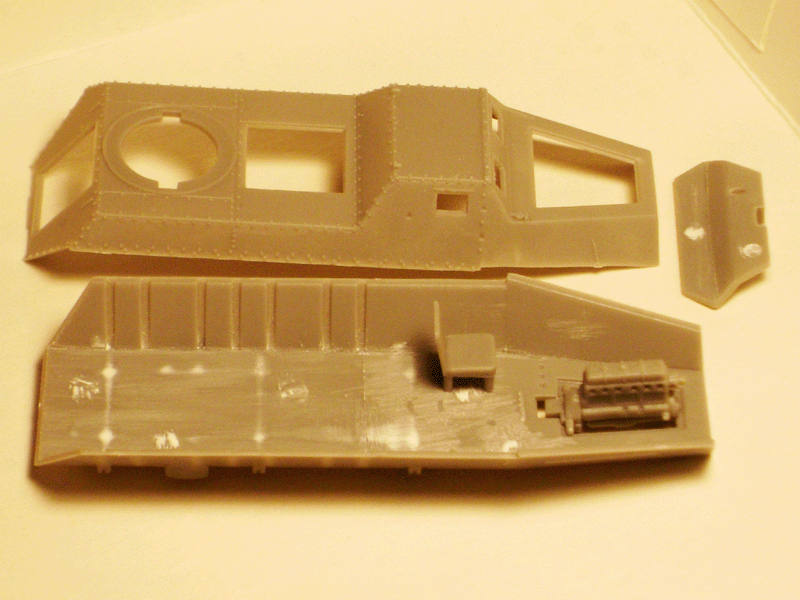
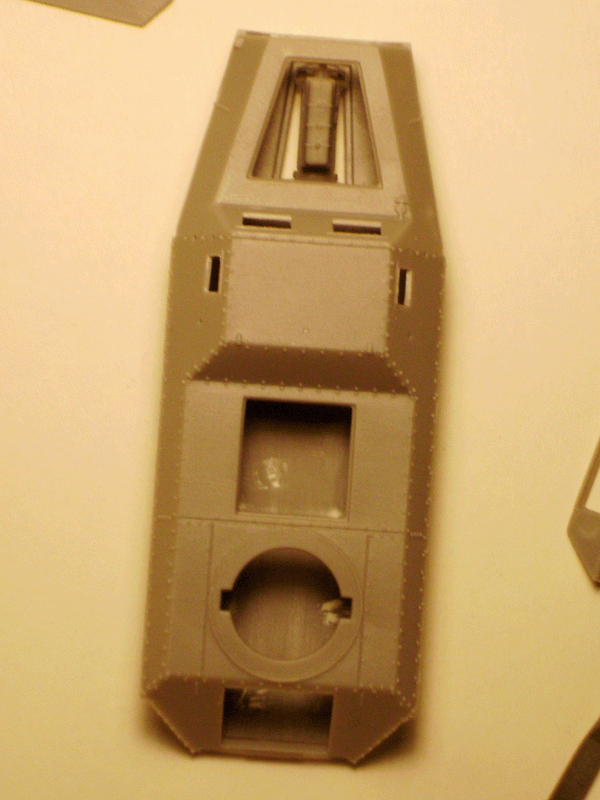
I wanted to take a moment to discuss the engine as it is one fo the features that make Roden's kit stand out. While this is a nicely molded piece, there are some definite positives and negatives regarding the way that Roden chose to mold the main pieces.

So here's the breakdown:

Positives=
-Crisp detail, nearly free of flash.
-Engine block molded in two SOLID halves, giving the engine more strength so that you don't accidentally squish it with your fingers or tweezers while also providing more surface area for the glue to grab. No more gooey messes trying to get the right amount of glue around the perimeter.
-The two haves fit together with very little play.
-Fully detailed and constructed for a literal "drop in" fit.
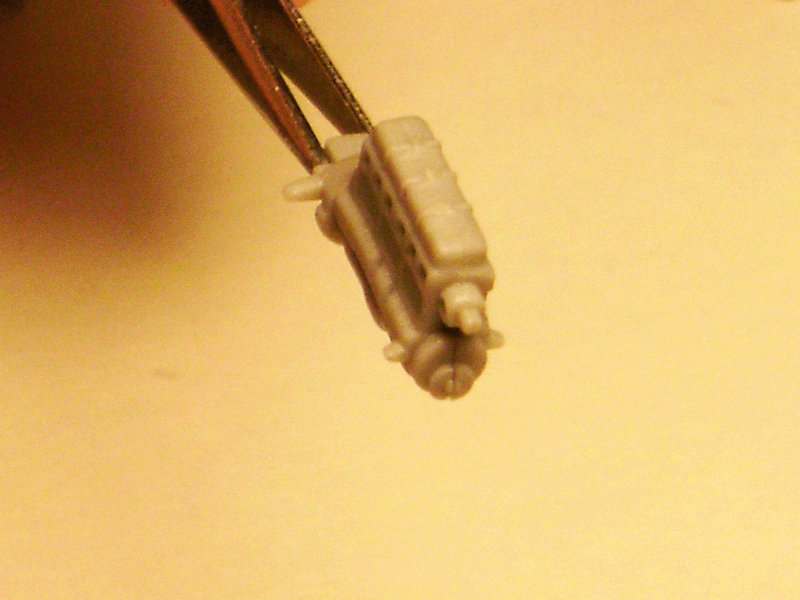
Negatives=
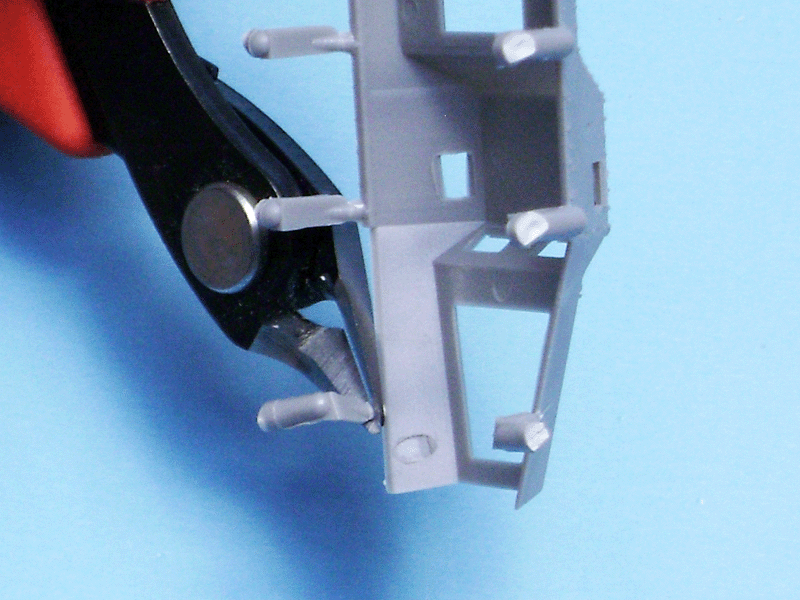
-This first one really kills me.. The valve cover and oil pan are cast as solid pieces with the block halves, meaning that both the valve cover and oil pan have a huge seam running through the center of them. This is easy to correct by filling and sanding on the oil pan because the real one is stamped sheet metal which is smooth by nature. The valve cover is an entirely different story however as it has both small details AND a subtle cast texture. There really isn't a good way around this without losing at least some detail. Of course if you are building the kit with the engine hatches closed then this isn't a problem. However for those of us who want to take advantage of the extra detail provided in Roden's kit this will be a sore point. In addition to this one of the attachment points to the sprue is located directly on a bolt for the valve cover. It is possible to reclaim the bolt head by roughing out the shape through careful trimming and filing, but you may just want to cut it off completely and add your own bolt head(s). If Roden cast the valve cover as a separate single piece then there wouldn't be any real issue with the engine.
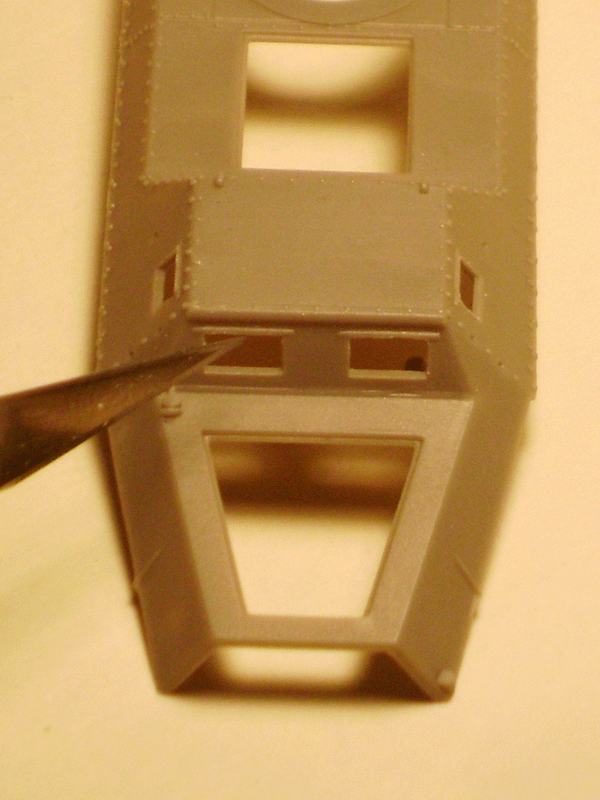
-The transmission case is also molded as part of the engine block halves and very simplified so one may wish to add some detail to it such as ribs and bolts. It is also slightly misshapen so you may want to take a little extra time to balance out the shape of the case.
-The attachment pegs for the fans and pulleys don't quite mate up, but any fit issues should be easy to resolve and the seam will be hidden behind the other engine components and the radiator.


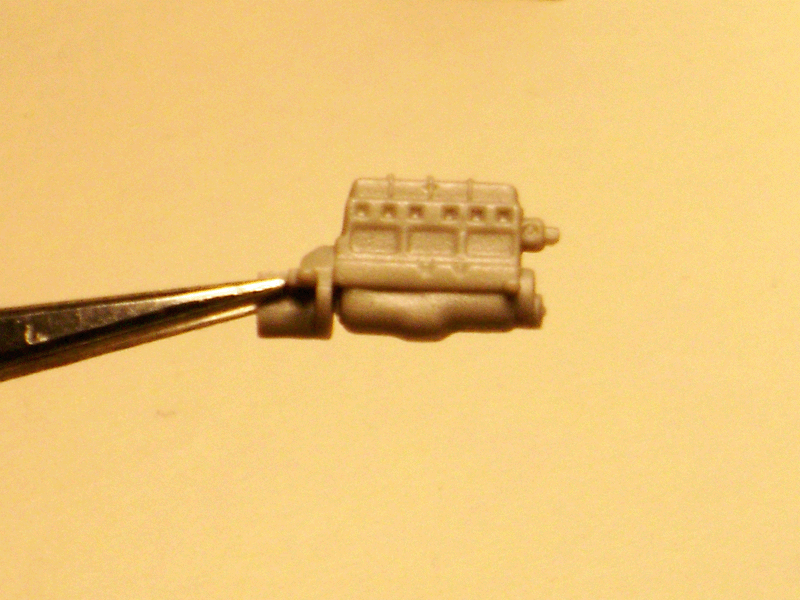
*Notice the deep depressions on the right side of the engine block just below the valve cover? These will come in extra handy for anyone wanting to add spark plugs and/or wires
vonHengest
Visit this Community
Texas, United States
Joined: June 29, 2010
KitMaker: 5,854 posts
Armorama: 4,817 posts
Posted: Wednesday, July 27, 2011 - 04:59 AM UTC

Quoted Text

Thank for this explanations about the kit. Really seems a great kit. Perhaps some day I will buy some of they.

Regards. Pedro.


Thanks for dropping by Pedro! Aside from some annoying cleanup, this is looking to be one of the best deals out there for 1/72 in styrene. I wholeheartedly recommend that you pick up at least one to try out
vonHengest
Visit this Community
Texas, United States
Joined: June 29, 2010
KitMaker: 5,854 posts
Armorama: 4,817 posts
Posted: Wednesday, July 27, 2011 - 05:09 AM UTC
Here are some photos to help give you a feel of how well the main engine assembly fits in the hull:

Neil: You were wondering about the fit of the kit parts correct? All of the parts have fit very solidly and without issue aside from the front end of the engine block, which is a very minor and easy to fix problem. I have not encountered any warped pieces or gaps thus far.


*note: The additional plate sitting next to the hull pieces is the firewall. Make sure that you trim and fill the pour plugs/knock out pins before you install this piece because you can see it through both the hull and the engine bay.

*note: The chairs fit superbly! Just take care when removing them from the sprue so that you don't accidentally gouge the back of the chair. It's an easy fix if you do damage it as the backing is flat. You may want to add a little bit of detail to the backs if you are building the model with the rear hatches open.
tread_geek
Visit this Community
Ontario, Canada
Joined: March 23, 2008
KitMaker: 2,847 posts
Armorama: 2,667 posts
Posted: Wednesday, July 27, 2011 - 08:58 AM UTC
Jeremy,

You're doing a great job explaining all the little pitfalls and potential issues with this kit. I doubt that there are any totally perfect kits so it's always great to read these types of in depth reviews.

Cheers,
Jan
retiredyank
Visit this Community
Arkansas, United States
Joined: June 29, 2009
KitMaker: 11,610 posts
Armorama: 7,843 posts
Posted: Wednesday, July 27, 2011 - 09:50 AM UTC
The rivet detail is excellent for a 1/72. Wish I wasn't addicted to 1/35. I'll try to keep an eye on this one.
vonHengest
Visit this Community
Texas, United States
Joined: June 29, 2010
KitMaker: 5,854 posts
Armorama: 4,817 posts
Posted: Wednesday, July 27, 2011 - 10:20 AM UTC
Jan: Thanks for the feedback! I agree that there is no perfect kit, and I greatly appreciate any input so keep it coming. Let me know if you have any particular questions about this kit that I can address for you

Matt: You are quite correct, the rivet detail on the armored hull is probably the nicest I've seen from a styrene armor kit in this scale. It's one of the aspects that I immediatly found attractive in this kit, and Roden did an excellent job when casting the mold so as to preserve this delicate detail. You won't lose one rivet on the body structure

I'll try to get some more progress to you by tonight.

I do have one question if anyone can help out?
Does anyone know the proper paint colors for the engine block, transmission, and/or any of the engine components (ie: valve cover, air cleaner housing, distributor cap, oil pan, and pulleys)?
This vehicle is running the Opel 3.6 litre inline 6 cylinder, but the instructions tell you to paint the entire engine assembly in aluminum which is absolutely not correct
erhntly
Visit this Community
Izmir, Turkey / Türkçe
Joined: June 11, 2004
KitMaker: 1,426 posts
Armorama: 464 posts
Posted: Wednesday, July 27, 2011 - 06:17 PM UTC
Thank you for review Jeremy...
SHarjacek
Visit this Community
Croatia Hrvatska
Joined: January 29, 2011
KitMaker: 977 posts
Armorama: 553 posts
Posted: Wednesday, July 27, 2011 - 06:50 PM UTC
Thanks for the detailed explanations.

Very nice work so far,cant wait to see more .


Kind regards,Sven.
Korpse
Visit this Community
Queensland, Australia
Joined: October 06, 2009
KitMaker: 382 posts
Armorama: 378 posts
Posted: Wednesday, July 27, 2011 - 09:56 PM UTC
Hi Jeremy

looking at your build so far makes me want to build one of these already !

I'm interested to see how the tracked assembly build goes.

Years ago I bought the Roden Maultier Blitz, which is probably the same parts, and is also a very nice kit. I found the tracked wheel assembly to be quite delicate , and I think somewhere else on the web (long ago) that someone else found the same and had to strengthen it before putting the tracks on. This should not be seen as a negative comment, its paying respect to the fact that the pieces are not overscale and have not been moulded thicker than they should be.

sorry I can't give you advice on engine area colours. Unless its going to be a factory fresh vehicle these arears get grimey quickly, and hard to know what colours are under the oil, grease & dirt on most vehicles

great to see your work

cheers
Neil


vonHengest
Visit this Community
Texas, United States
Joined: June 29, 2010
KitMaker: 5,854 posts
Armorama: 4,817 posts
Posted: Thursday, July 28, 2011 - 07:30 AM UTC
You're welcome guys, and thanks for stopping by!

Neil: I was actually thinking the same thing myself. I will focus on that tonight and post my findings for you sometime tomorrow.

Regarding the engine, what I will probably do is paint the block and maybe some other components in a dark metal and weather them accordingly. I will paint a few select sheet metal components with buff. This seems to be the most consistent method to approach the Opel 3.6 as it appeared in military use.
vonHengest
Visit this Community
Texas, United States
Joined: June 29, 2010
KitMaker: 5,854 posts
Armorama: 4,817 posts
Posted: Friday, July 29, 2011 - 06:33 AM UTC
Bear with me just a little longer fellas, the suspension is indeed quite delicate and I can't rush it without causing damage.
Braille
#135
Visit this Community
California, United States
Joined: August 05, 2007
KitMaker: 1,501 posts
Armorama: 1,485 posts
Posted: Friday, August 12, 2011 - 10:36 PM UTC
@vonHengest - Jeremy,

I finally managed enough time to read through your build log. Very well documented and photographed.

The suspension is usually what takes me the longest to complete on my builds. I remember when most of the suspension components where cast as a single piece making assembly a snap but was lacking in detail.

The newer kits come with most of the suspension components as separate parts making assembly time consuming but leaving you with an exceptionally well detailed replica. The price for this comes with the added cost of having to carefully remove all of the parts from the sprue tree and then cleaning them up. And at times having to modifying some of the components to get them aligned.

No hurry here. Take your time.
-Eddy
SchoeniR6
Visit this Community
Germany
Joined: November 21, 2010
KitMaker: 189 posts
Armorama: 189 posts
Posted: Saturday, August 13, 2011 - 01:59 AM UTC
Hi Jeremy

Nice kit. Great to see another panzerwerfer here in braille scale.
First steps of the build looking good.
Looking forward to see more.

Cheers Daniel
JackFlash
Visit this Community
Colorado, United States
Joined: January 25, 2004
KitMaker: 11,669 posts
Armorama: 256 posts
Posted: Tuesday, August 16, 2011 - 02:56 AM UTC
Here is the original news item on the kit.
Joel_W
Staff MemberAssociate Editor
AUTOMODELER
Visit this Community
New York, United States
Joined: December 04, 2010
KitMaker: 11,666 posts
Armorama: 1,143 posts
Posted: Tuesday, August 16, 2011 - 05:03 AM UTC
Your build and detailed review is just 1st rate. While I don't model in this scale, I envy those that do. But the tired old eyes, even with an optivisor just don't allow it.
 _GOTOTOP