

I have started work on the interior, the front compartment. Nothing to show yet. Having already bought the Eduard PE for the Maus I thought I might take a few shortcuts. Wrong! This set is crap, its dimensions and angles are wrong, the proportions are wrong. The radio rack might be useful, but that is about it. More that ten bucks for some [auto-censored]ty radio racks! Guys, if you have a Maus in your stash and consider buying Eduard set 35252, please DON'T!
So I'm crosschecking my references and doing measurements. The frames for the seats are done, the springs are next...
Hosted by Darren Baker
Maus 1:35 with interior

FlorinM

Joined: August 01, 2011
KitMaker: 385 posts
Armorama: 211 posts
Posted: Friday, November 02, 2012 - 03:16 AM UTC
FlorinM
Joined: August 01, 2011
KitMaker: 385 posts
Armorama: 211 posts
Posted: Monday, November 26, 2012 - 07:26 PM UTC
Back on track with the Maus! I have to admit, I was not in the mood to work on it for a month. And bitter experience has thought me that when not in the mood I'd best leave it in the box, because all sorts of bad things happen if I don't...
Anyway, I've finally managed to put the hull tub together. There are some welds that need to be added, but in essence that's it! I'll start adding stuff to it soon.
Anyway, I've finally managed to put the hull tub together. There are some welds that need to be added, but in essence that's it! I'll start adding stuff to it soon.

Braille

#135

Joined: August 05, 2007
KitMaker: 1,501 posts
Armorama: 1,485 posts

Posted: Wednesday, November 28, 2012 - 10:09 AM UTC
@FlorinM Florin,
No need to worry, I think most of us get that way. This hobby is just for fun and there are so many other things that make up our day that must be taking care of first. And I agree its best to leave well enough alone when not in the mood, especially for something that is suppose to be relaxing and enjoyable! You always do better work when you feel excited about what youre working on.
The bottom of the hull is looking good, youve even managed the recessed holes on the brackets nice detail!
~ Eddy
FlorinM
Joined: August 01, 2011
KitMaker: 385 posts
Armorama: 211 posts
Posted: Tuesday, December 04, 2012 - 09:01 PM UTC
In an earlier post I have said that the Eduard PE "correction set" is basically crap. Here it is:
As you can see the Eduard render of the driver's compartment won't fit between the hull walls as it is too wide and not high enough. There should have been a HUGE door/access panel for servicing the engine in the middle of the rear bulkhead and that is nowhere to be seen!
The thing should have looked more like this:
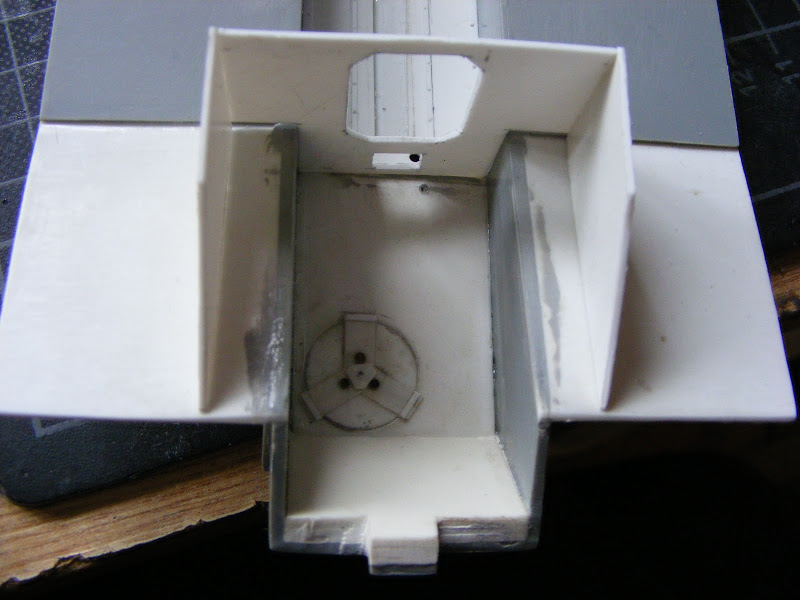
For a Behemoth like this one would have expected a roomier interior...
As you can see the Eduard render of the driver's compartment won't fit between the hull walls as it is too wide and not high enough. There should have been a HUGE door/access panel for servicing the engine in the middle of the rear bulkhead and that is nowhere to be seen!
The thing should have looked more like this:
For a Behemoth like this one would have expected a roomier interior...
FlorinM
Joined: August 01, 2011
KitMaker: 385 posts
Armorama: 211 posts
Posted: Tuesday, December 11, 2012 - 10:43 PM UTC
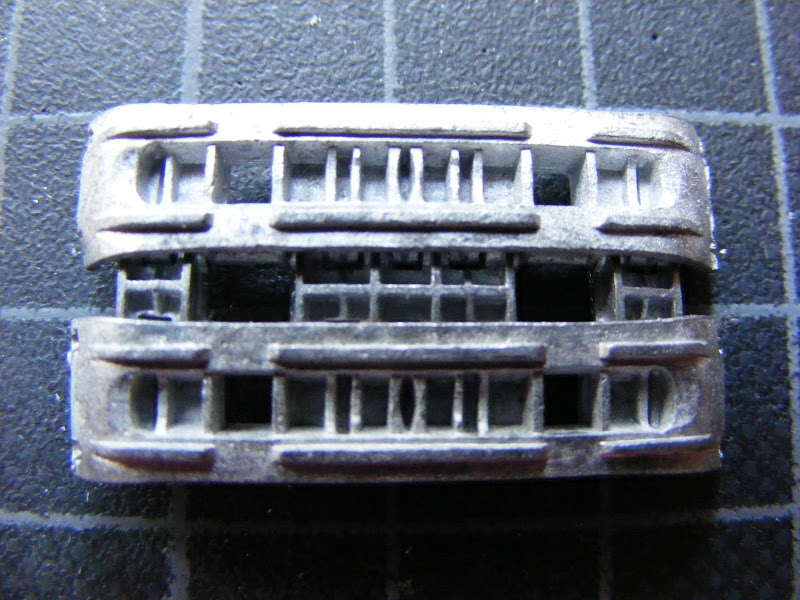
One area of the kit that is showing its age are the tracks. Not a problem anymore, because the Spade Ace metal tracks have finally arrived! And they are great! Little to no cleanup necessary, each and everyone is drilled through...
Braille
#135
Joined: August 05, 2007
KitMaker: 1,501 posts
Armorama: 1,485 posts
Posted: Thursday, December 13, 2012 - 07:42 PM UTC
@FlorinM Florin,
Yes, these tracks are very well detailed and will add that much more to the overall look of the finished model. Could you possibly post a side-by-side comparison photograph of both the kit provided tracks and the Spade Ace pieces for those that may be interested in making a similar purchase?
~ Eddy
Yes, these tracks are very well detailed and will add that much more to the overall look of the finished model. Could you possibly post a side-by-side comparison photograph of both the kit provided tracks and the Spade Ace pieces for those that may be interested in making a similar purchase?
~ Eddy
FlorinM
Joined: August 01, 2011
KitMaker: 385 posts
Armorama: 211 posts
Posted: Thursday, December 13, 2012 - 08:02 PM UTC
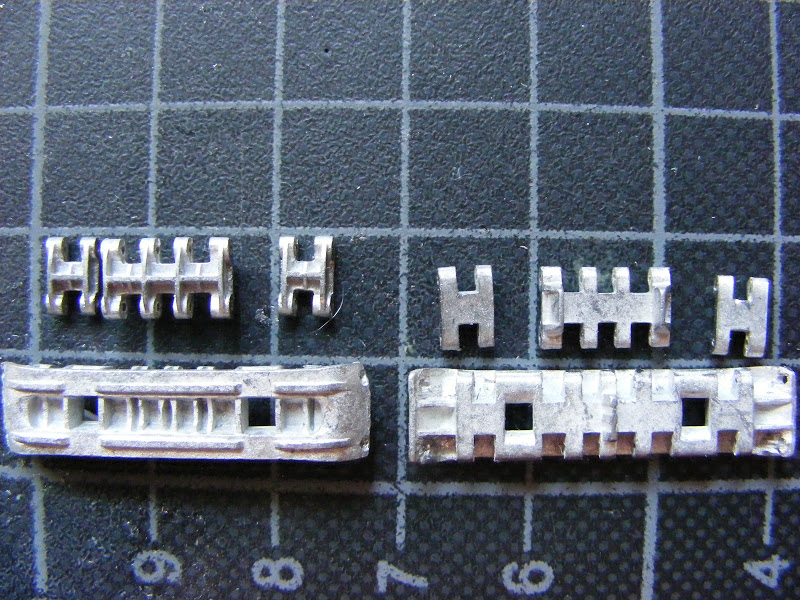
It ain't fair! One cannot compare 1992 plastic against metal tracks, but as requested here it is:

FlorinM
Joined: August 01, 2011
KitMaker: 385 posts
Armorama: 211 posts
Posted: Friday, December 14, 2012 - 02:22 AM UTC
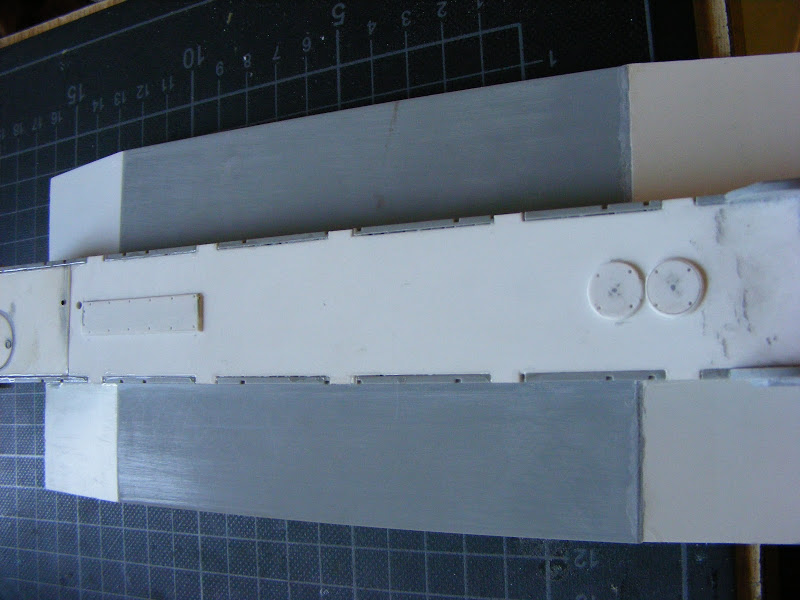
The driver's compartment is now in its place, together with the partitions for the fuel tanks. Note the asymmetrical position.
This is the late configuration, for the enlarged fuel tanks.
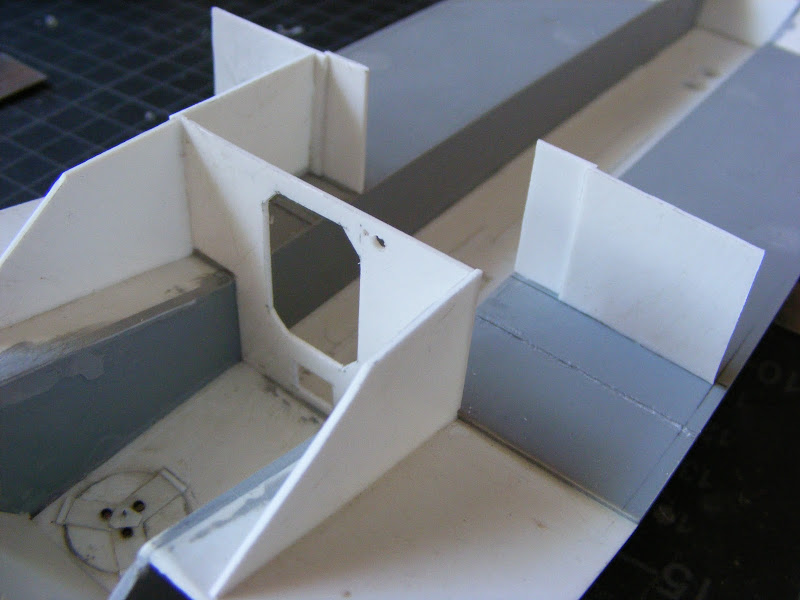
The early configuration, shared with V1 and the other incomplete hulls is reflected by the faintly visible weld marks on the pencil lines.
This is the late configuration, for the enlarged fuel tanks.
The early configuration, shared with V1 and the other incomplete hulls is reflected by the faintly visible weld marks on the pencil lines.

jrutman
Joined: April 10, 2011
KitMaker: 7,941 posts
Armorama: 7,934 posts
Posted: Friday, December 14, 2012 - 02:43 AM UTC
I still love this build. Very entertaining and informative.
J
J
FlorinM
Joined: August 01, 2011
KitMaker: 385 posts
Armorama: 211 posts
Posted: Friday, December 14, 2012 - 04:10 AM UTC
Thank You Sire for the kind words! It really means a lot to me that a living legend of the modeling world has found a few moments to grace this build log with his presence!
Braille
#135
Joined: August 05, 2007
KitMaker: 1,501 posts
Armorama: 1,485 posts
Posted: Friday, December 14, 2012 - 09:52 AM UTC
@FlorinM Florin,
Thanks, your response is much appreciated. The metal tracks are very well detailed compared to the original kit tracks, I imagine that they match up to the scale drawings?
You are making good progress on the hulls interior; Im judging from the bulkheads that you are going to add the entire chassis interior from bumper to bumper. Too cool!
~ Eddy
FlorinM
Joined: August 01, 2011
KitMaker: 385 posts
Armorama: 211 posts
Posted: Friday, December 14, 2012 - 05:36 PM UTC
The metal tracks are indeed spot on the drawings from PANZER TRACTS No. 6-3. By the way, the Atelier Infinite ones are not accurate at all, so Spade Ace is the only way to go, so far they are the best in 1:35th scale. You should know that an alternative track design with lightened face cleats was tested on the V2 but these couldn't take the weight of the vehicle and have broken.
Yes, this Mouse will be as complete as possible.
Yes, this Mouse will be as complete as possible.

CmdrCody
Joined: June 19, 2005
KitMaker: 152 posts
Armorama: 129 posts
Posted: Saturday, February 09, 2013 - 01:17 AM UTC
Just wondering if you have made any progress. Your build has been quite the inspiration. I am starting my Maus soon for the Super Heavies Campaign. I doubt that I go to the extreme that you have, but you have given a lot of good detail pointers to dress this kit up. DonM.
jrutman
Joined: April 10, 2011
KitMaker: 7,941 posts
Armorama: 7,934 posts
Posted: Saturday, February 09, 2013 - 03:46 AM UTC
This is just an awesome amount of work and done so well. My question is:where did you find this kind of detailed reference material on such an enigmatic vehicle?
They only completed how many of these? 2....3? Outstanding work,
J
They only completed how many of these? 2....3? Outstanding work,
J
FlorinM
Joined: August 01, 2011
KitMaker: 385 posts
Armorama: 211 posts
Posted: Saturday, February 09, 2013 - 11:58 PM UTC
@Jrutman I have the Panzer Tracts 6-3, Panzer Wrecks 5, Panzerkampfwagen Maus from Podzun Pallas Verlag, Waffen Revue numbers 17, 19 and 20, Maus supertank Doktora Porshe 1996, German secret panzer projects Trojka 2005, some numbers from Bronia 2009, Special number 3/2012 of Historia Tehnika Wojskowa, plus bits and pieces gathered from the net, such as a french intelligence document that not only confirms the existence of a third complete Maus, but mentions that it was built in October of 1944 in Stuttgart and was sent to a museum in Berlin.
@CmdrCody I'm working on the bulkhead between the driver's and the engine compartment, having scrapped two versions so far. I'll post an update when I'm satisfied with the result.
@CmdrCody I'm working on the bulkhead between the driver's and the engine compartment, having scrapped two versions so far. I'll post an update when I'm satisfied with the result.

lespauljames

Joined: January 06, 2007
KitMaker: 3,661 posts
Armorama: 2,764 posts

Posted: Sunday, February 10, 2013 - 12:08 AM UTC
really nice work! such a monster project!


NAM_Biohazard

Joined: January 16, 2013
KitMaker: 1 posts
Armorama: 1 posts
Posted: Saturday, February 16, 2013 - 09:24 AM UTC
this will be a great model when ur done
I'm impressed with all the detail your adding for such little info on the actual tanks
GREAT WORK
I'm impressed with all the detail your adding for such little info on the actual tanks
GREAT WORK
Removed by original poster on 02/18/13 - 07:52:31 (GMT).
FlorinM
Joined: August 01, 2011
KitMaker: 385 posts
Armorama: 211 posts
Posted: Sunday, February 17, 2013 - 10:25 PM UTC
I am no longer wanted on the Kit Maker Network. I got my IP banned as a result of rightfully remarking Mr. Starkweather's ineptitude in one of his "cracking the box" videos. I got banned for daring to suggest him to remove the sprues from the bags before shooting the video and to do a little prior research in order to improve the quality of his videos, for daring to say that he should up his game since so many are watching and might find something actually useful... As such posting has become complicated. Those interested in my quest to depict the first historically accurate Maus V2 in 1:35th scale will find it on PlanetArmor, the build log is called Porsche Typ 205 Maus: http://www.planetarmor.com/forums/showthread.php?t=8506

staff_Jim

Joined: December 15, 2001
KitMaker: 12,571 posts
Armorama: 6,599 posts

Posted: Thursday, February 21, 2013 - 12:54 PM UTC
Dear mr. moldovan,
Yes and saying mean things on YouTube and expecting no kind of repercussions is pretty much in a microcosm what is wrong with the world. However to show that I am the bigger man here I will un-ban the IP you used to make disparaging remarks about a kit 'preview' that I did for the site.
I will give you another chance if you want it. If not, have fun on PlanetArmor.
Cheers,
Jim
FlorinM
Joined: August 01, 2011
KitMaker: 385 posts
Armorama: 211 posts
Posted: Friday, February 22, 2013 - 02:05 AM UTC
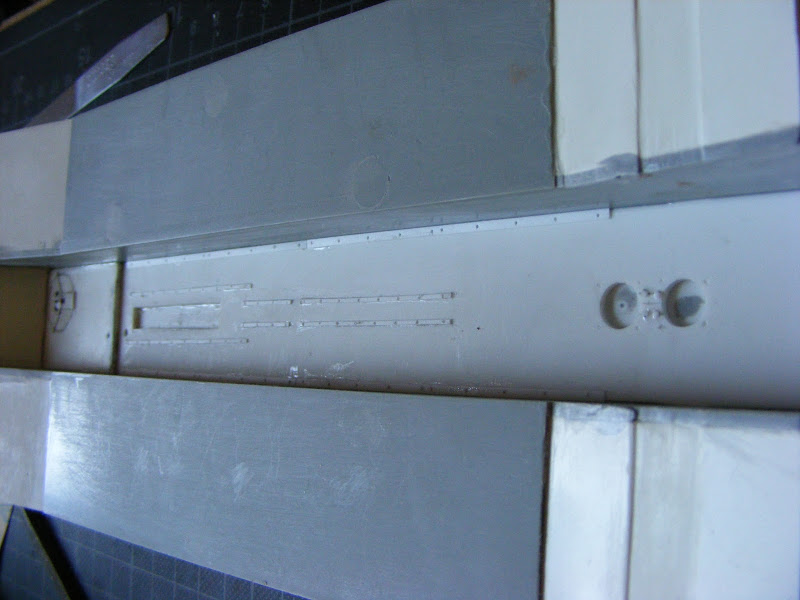
Thin styrene sheet was added to the lateral towing eyes, that are now in scale thickness. Note the rectangular shape and position of the base for the central one as supplied by Dragon.
This is the correct location, and the shape of the weld is circular. It is also flush with the armor plate.
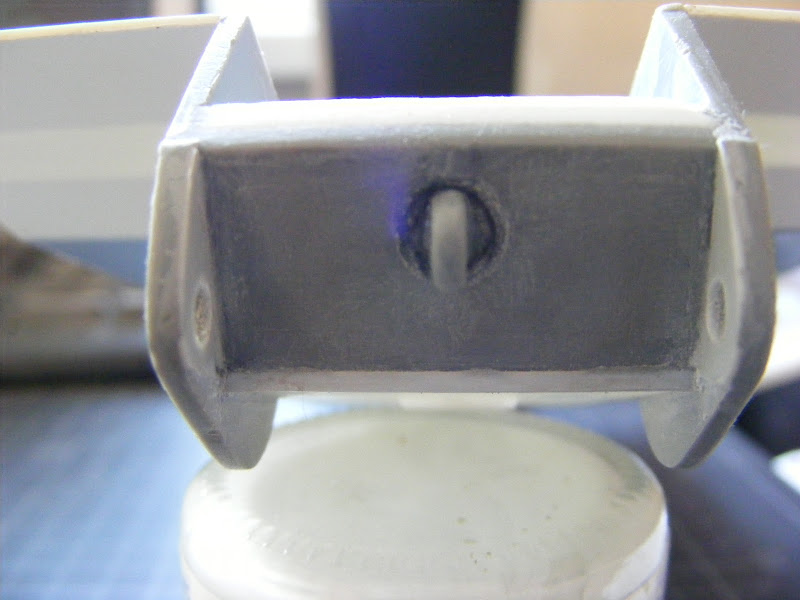
This is the correct location, and the shape of the weld is circular. It is also flush with the armor plate.
FlorinM
Joined: August 01, 2011
KitMaker: 385 posts
Armorama: 211 posts
Posted: Monday, March 04, 2013 - 02:16 AM UTC
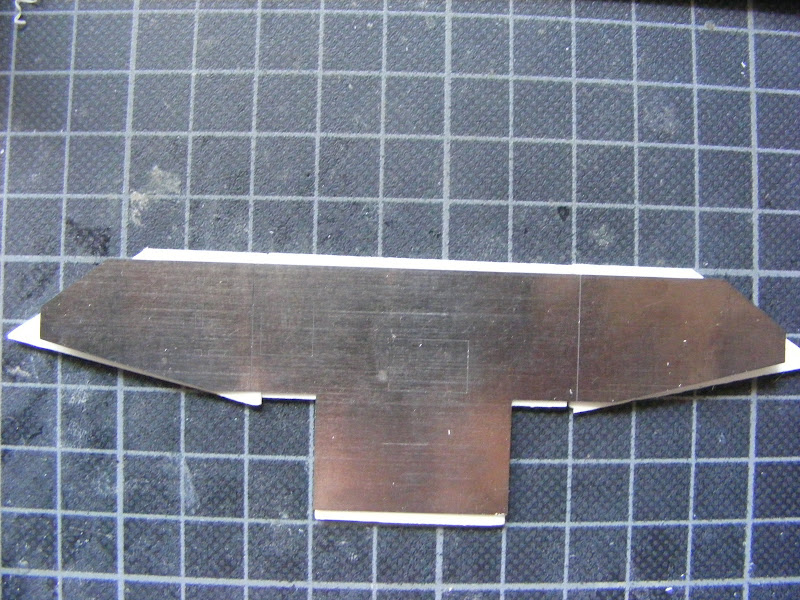
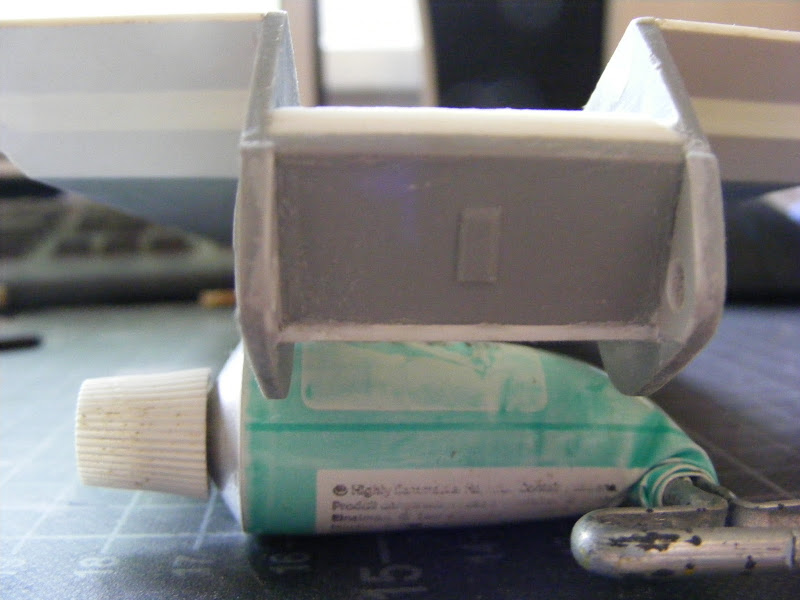
This is the old version of the bulkhead that separated the driver's and the engine compartment. Pretty much symmetrical. And wrong.

Took me some time to come up with a better, more accurate version:
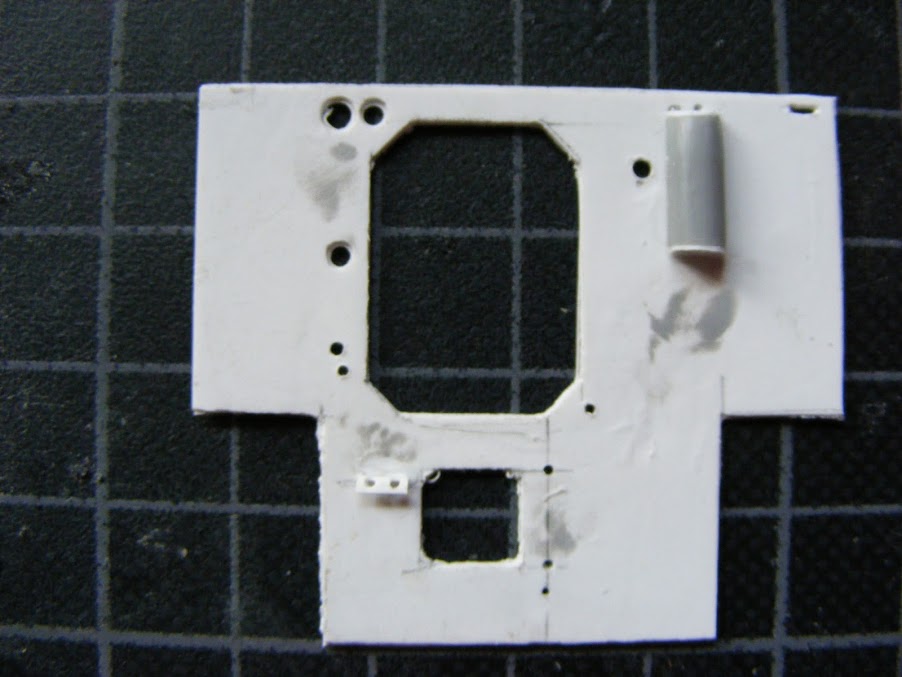
Took me some time to come up with a better, more accurate version:
Peelou75

Joined: April 09, 2009
KitMaker: 140 posts
Armorama: 138 posts

Posted: Monday, March 04, 2013 - 03:02 AM UTC
Keep it up Domnule! It is a very inspiring build.
FlorinM
Joined: August 01, 2011
KitMaker: 385 posts
Armorama: 211 posts
Posted: Monday, March 04, 2013 - 07:17 PM UTC
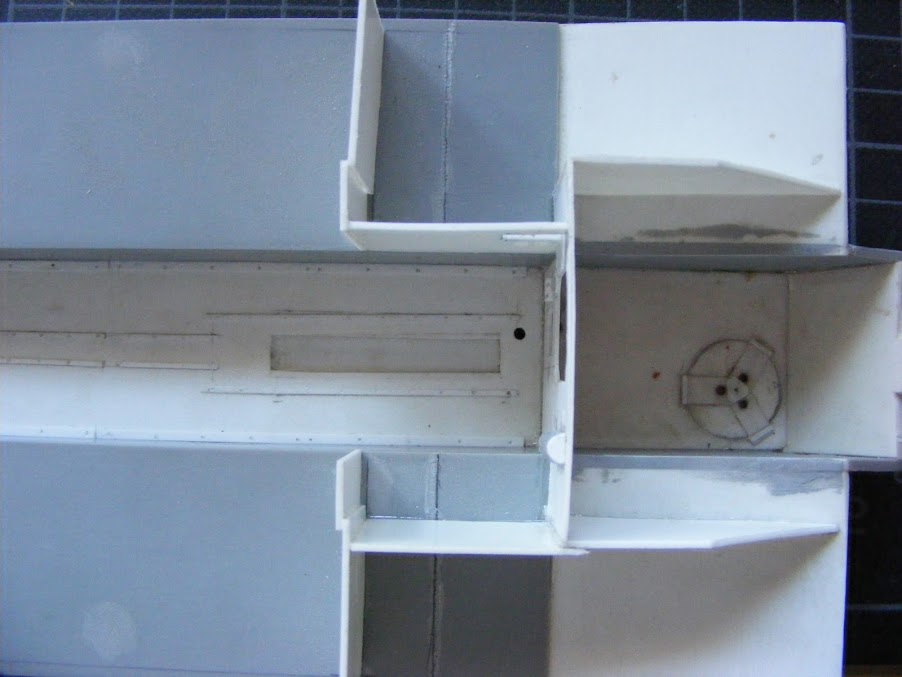
Thank you! Bulkhead is now in place. The (updated) asymmetrical configuration for the fuel tank partitions can be clearly seen.

FlorinM
Joined: August 01, 2011
KitMaker: 385 posts
Armorama: 211 posts
Posted: Monday, March 04, 2013 - 07:27 PM UTC
...and a view from above
 |

WEB HOSTING BY


Copyright ©2021 Armorama and Kitmaker Network, a subsidiary of Silver Star Enterprises
All Rights Reserved. Please read our Conditions of Use and Privacy Policy.
All Rights Reserved. Please read our Conditions of Use and Privacy Policy.