_GOTOBOTTOM
Armor/AFV: Allied - WWII
Armor and ground forces of the Allied forces during World War II.
Hosted by Darren Baker
Riich Models Universal Carrier
bill_c
Staff MemberCampaigns Administrator
MODEL SHIPWRIGHTS
Visit this Community
New Jersey, United States
Joined: January 09, 2008
KitMaker: 10,553 posts
Armorama: 8,109 posts
Posted: Sunday, September 01, 2013 - 07:17 AM UTC

Darren Baker was kind enough to provide a review sample of this kit he received from Riich Models, and so here goes.

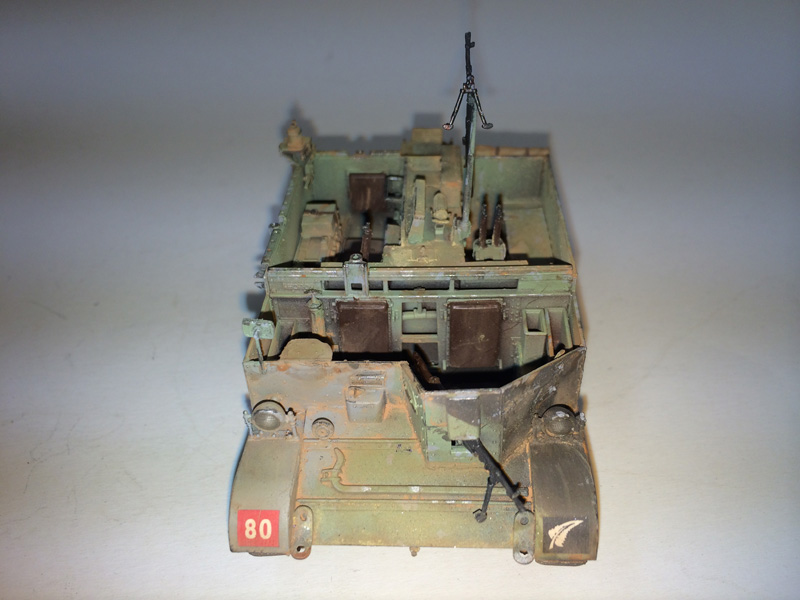
Let's start with some observations. In the interest of full disclosure, I am not the expert on the Universal Carrier that my esteemed colleague Alan McNeilly is, but I have so far built two of the Tamiya ones with Resicast resin upgrades. The Tamiya kits are cheap, easy-to-build and generally lacking in detail or else just wrong.

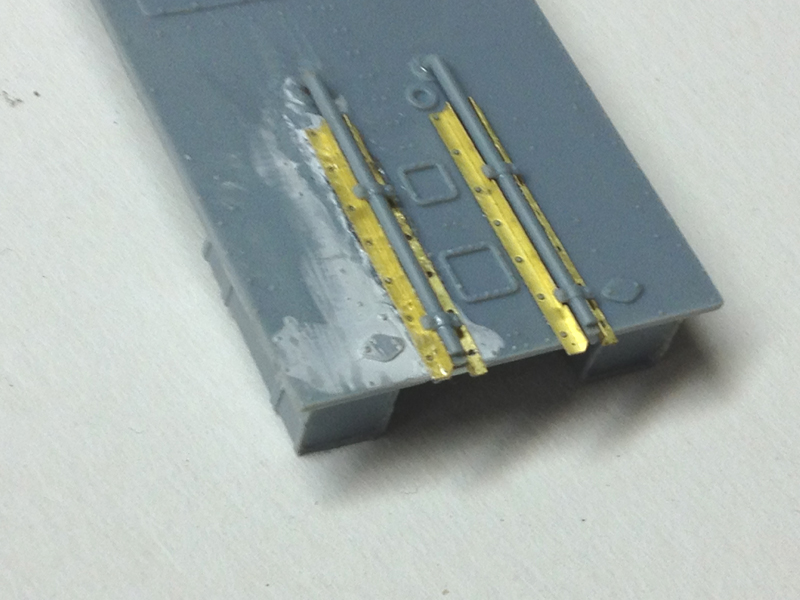
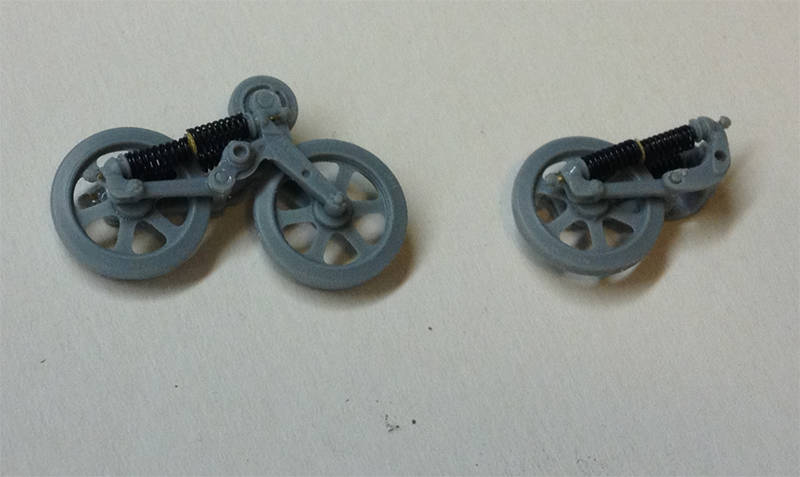
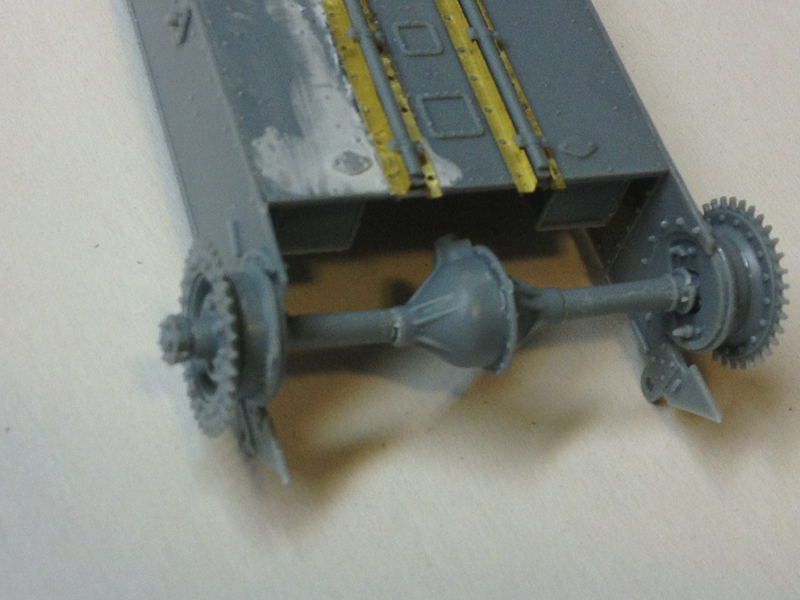
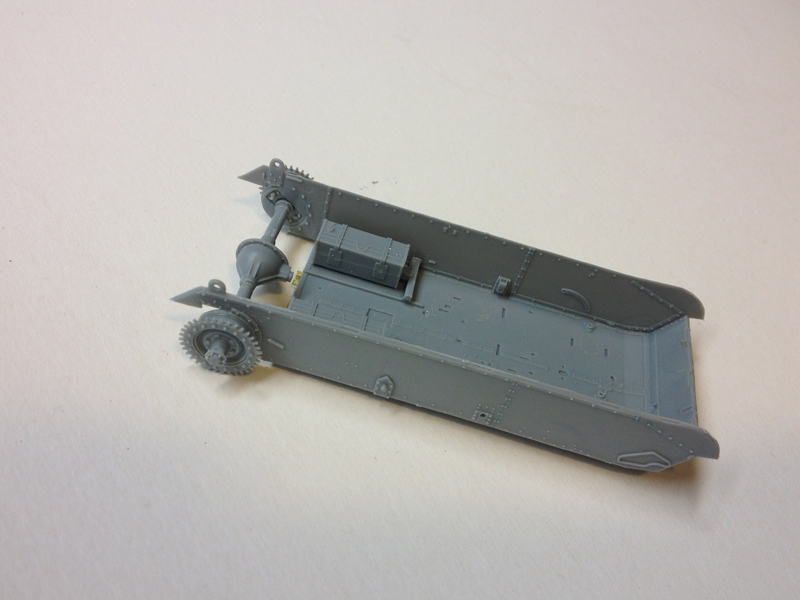
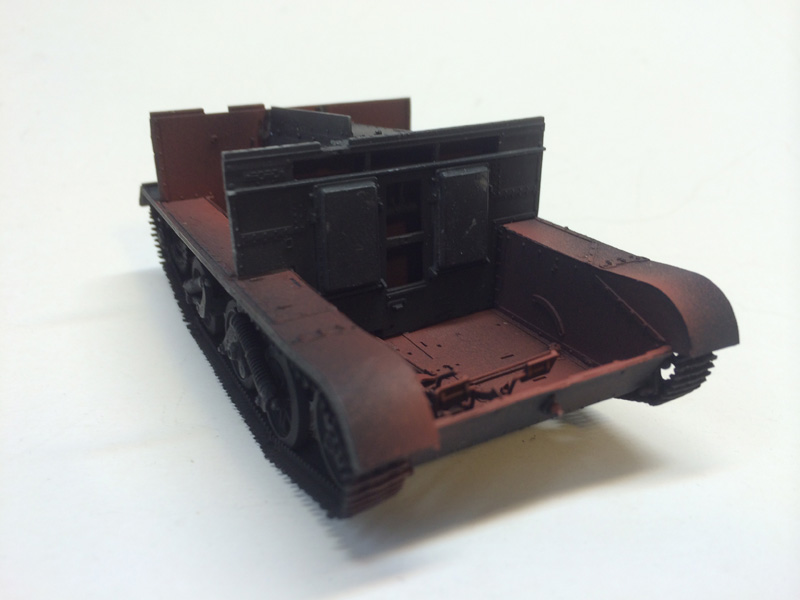
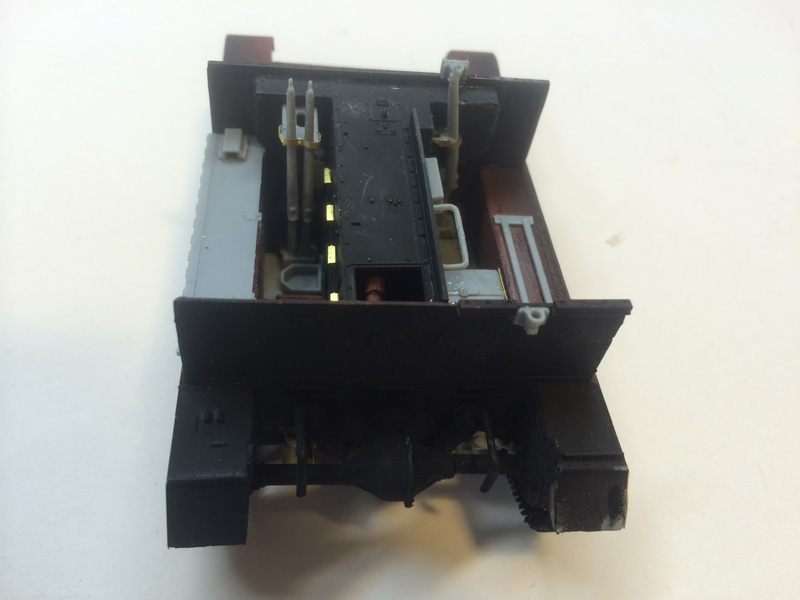
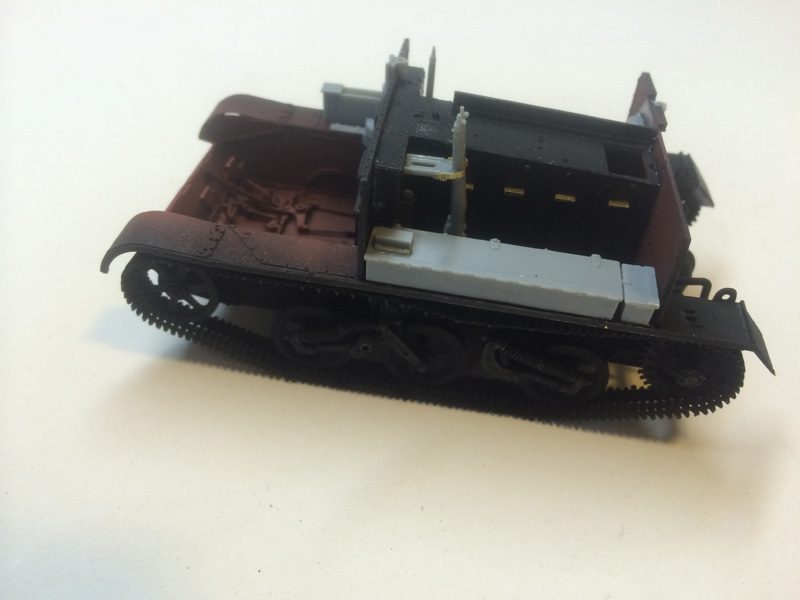
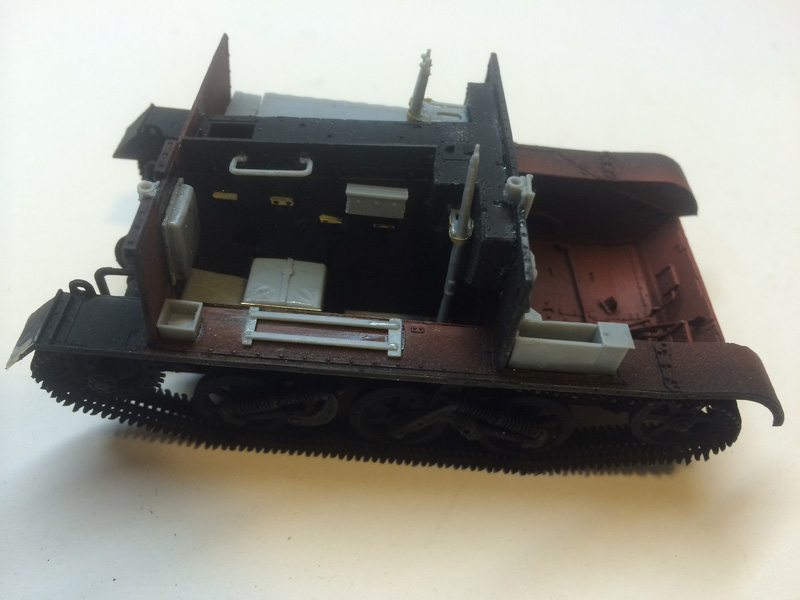
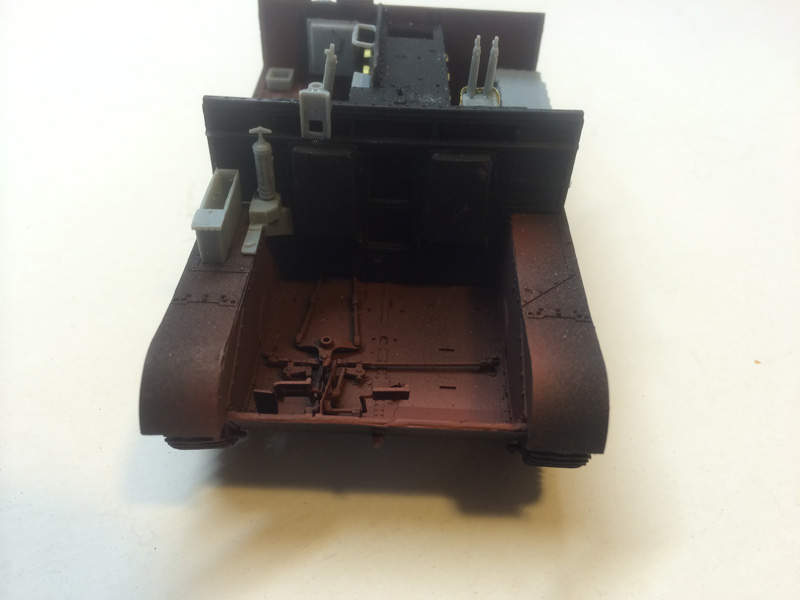
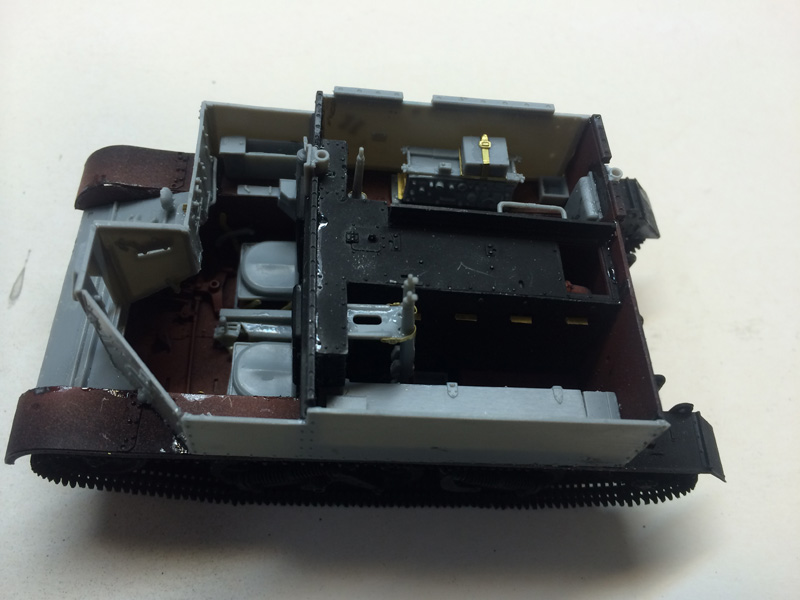
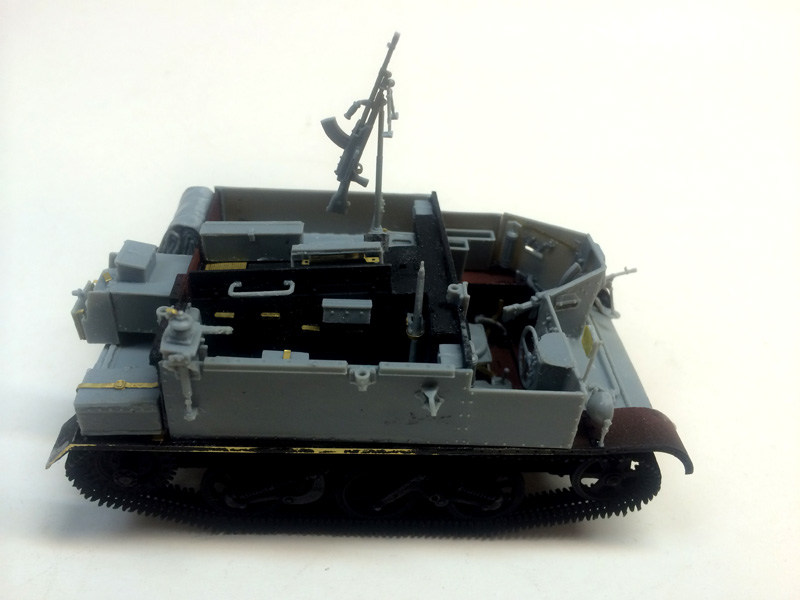
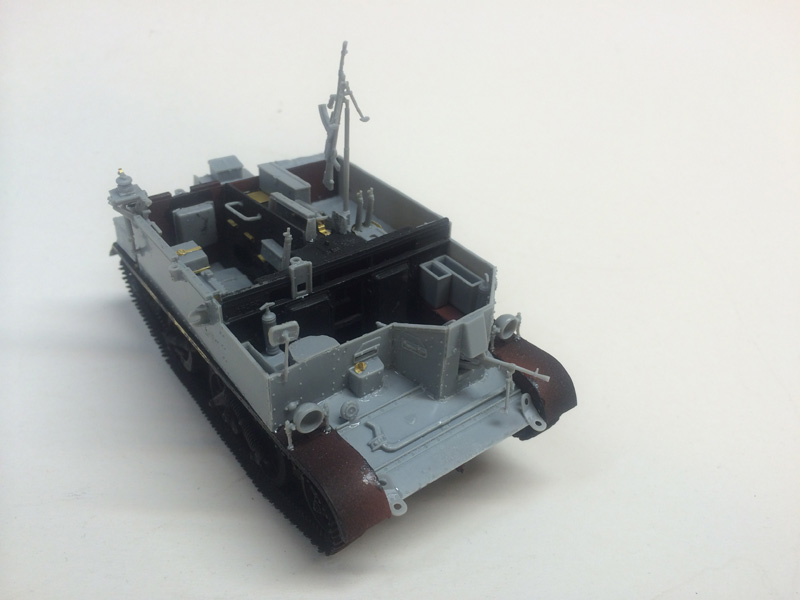
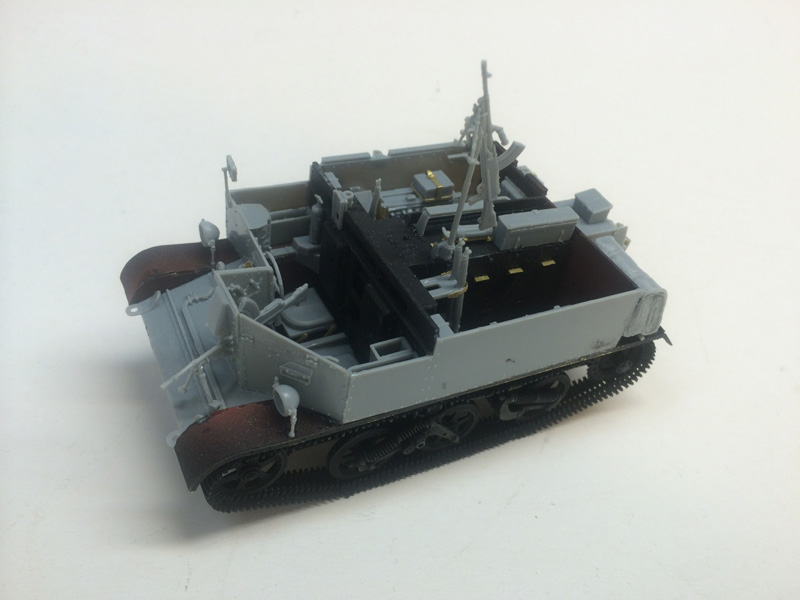
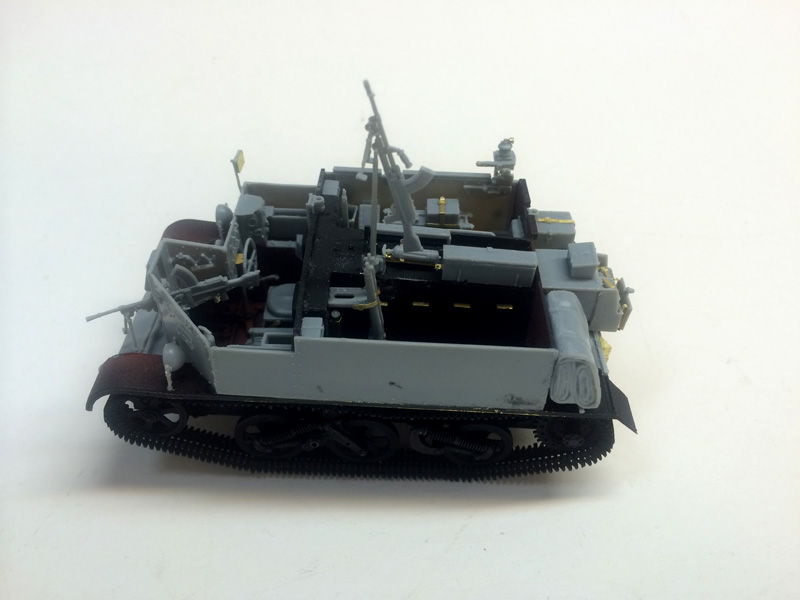
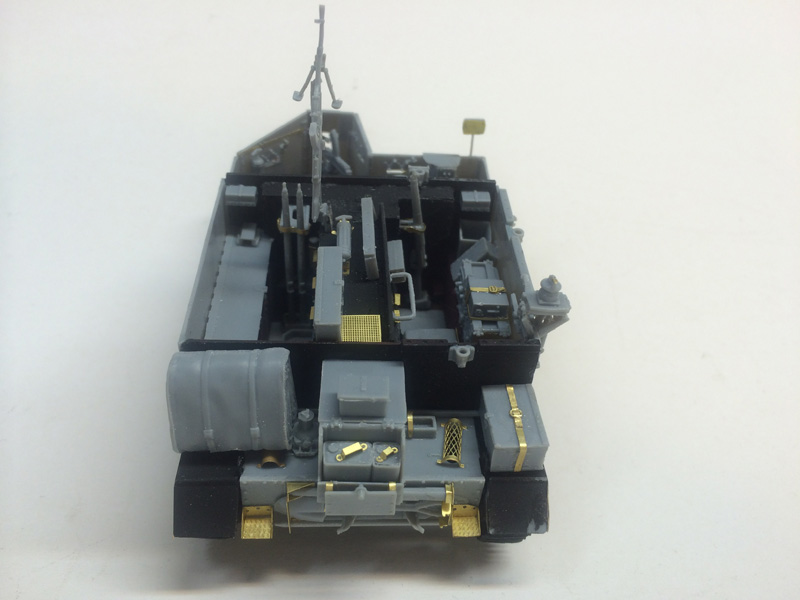
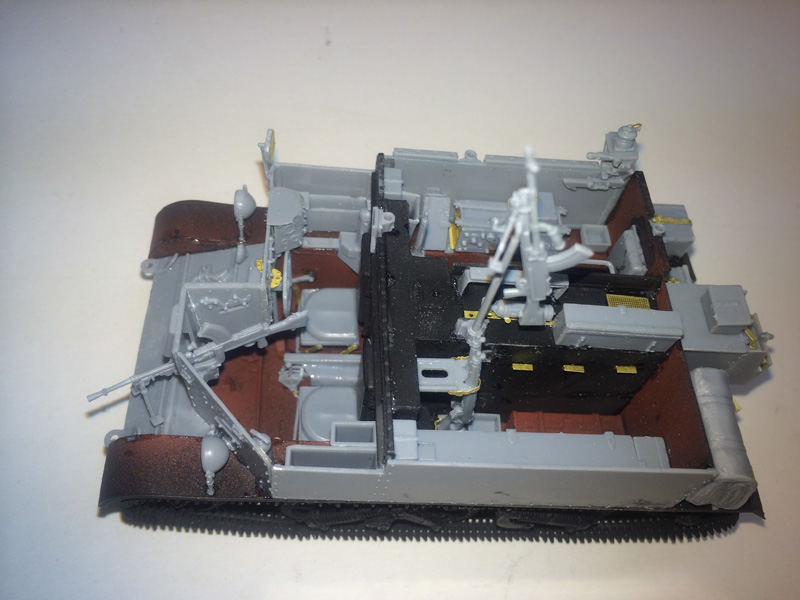
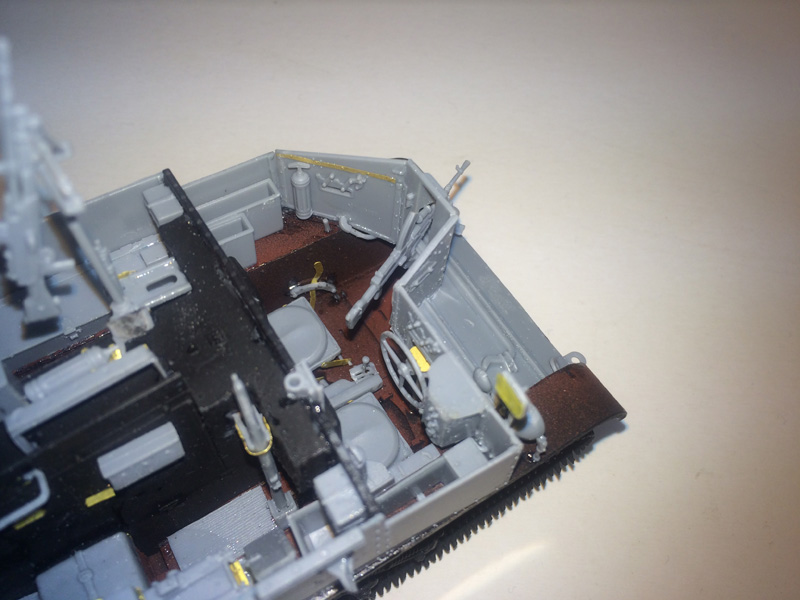
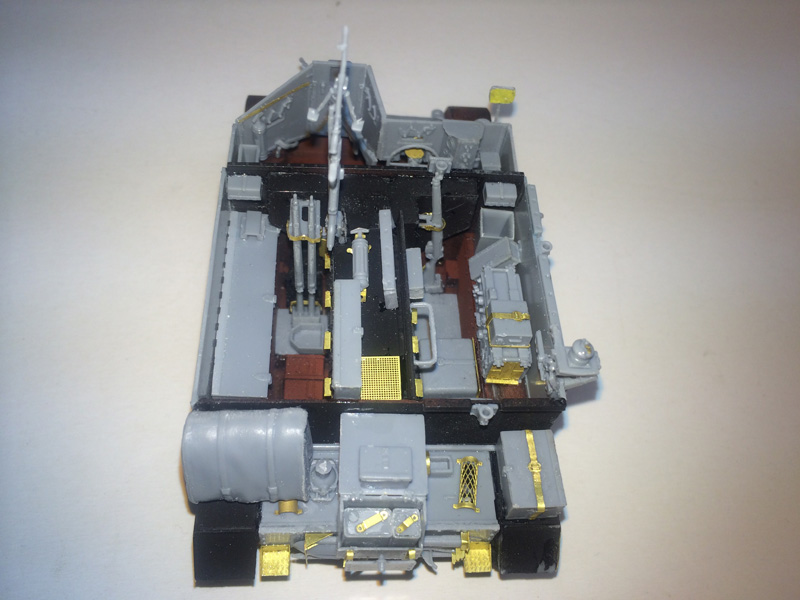
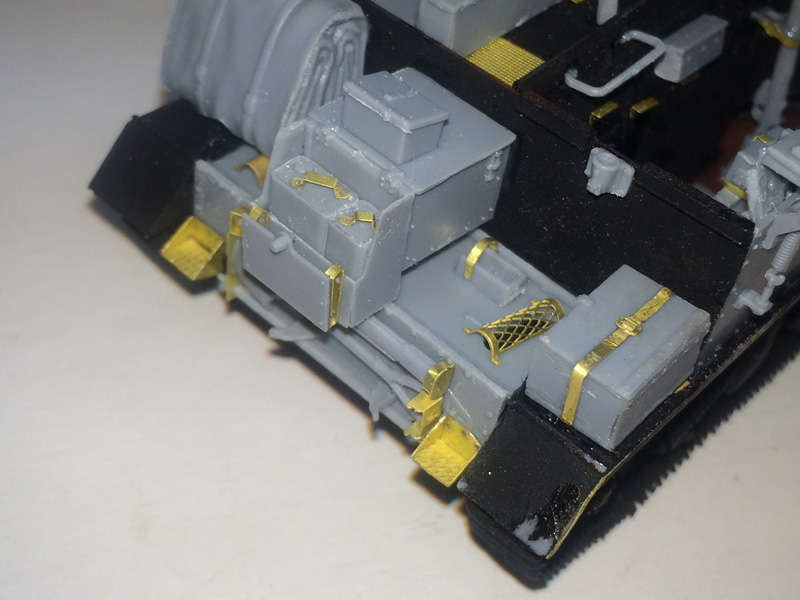
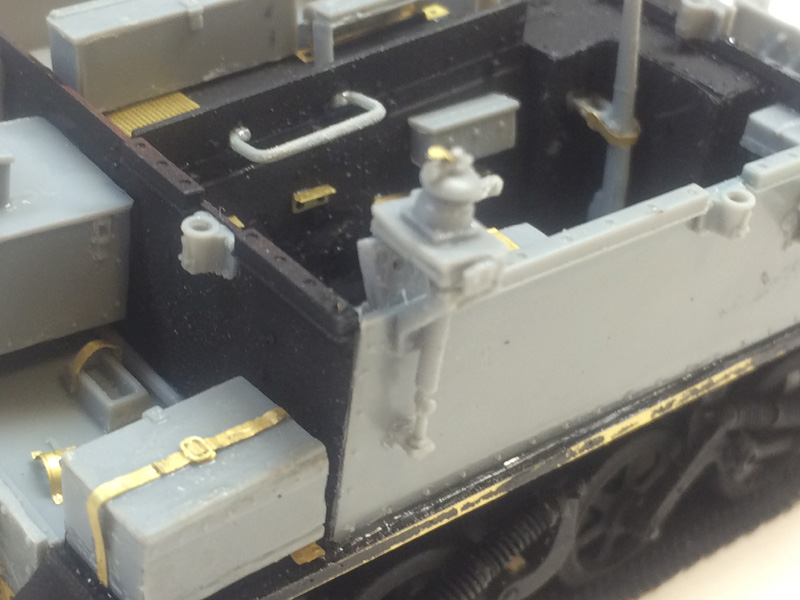
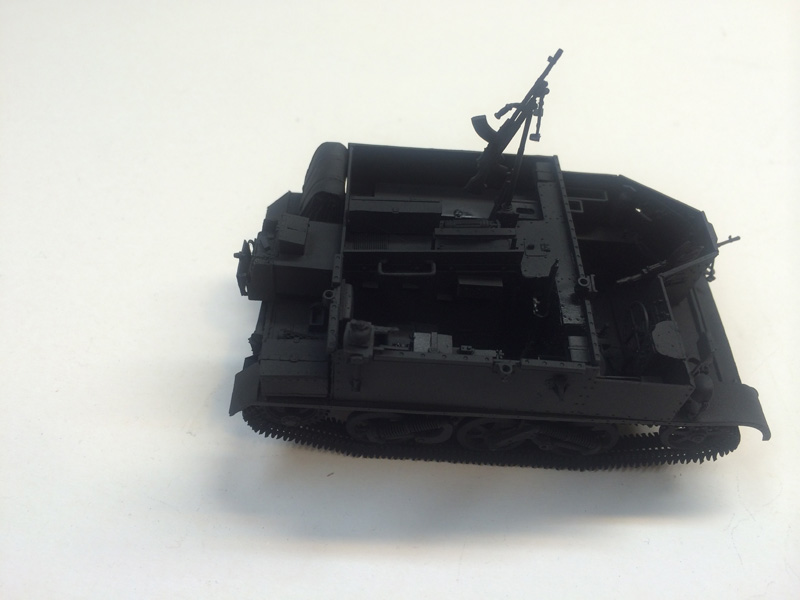
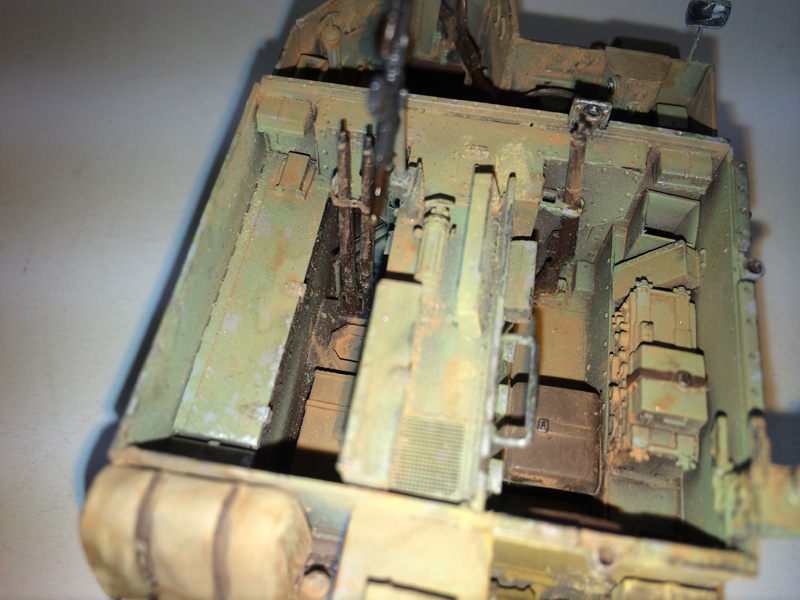
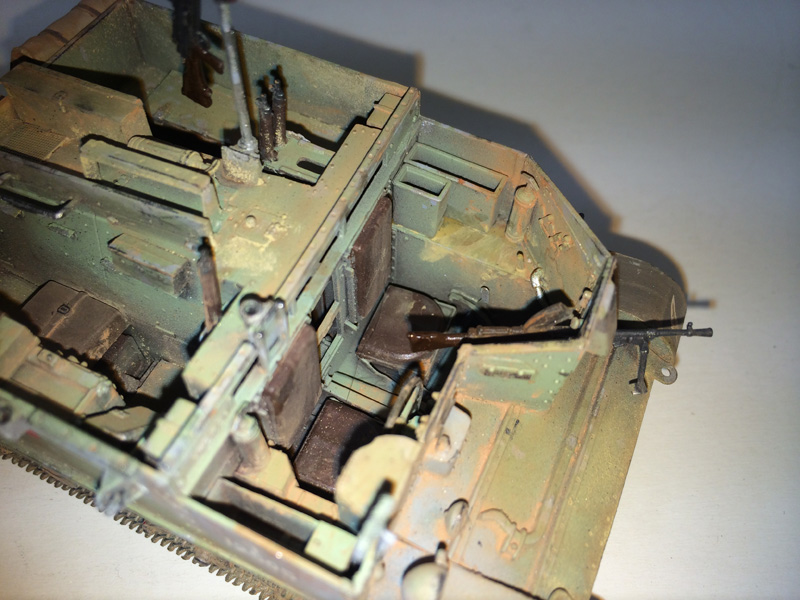
Riich Models has perhaps gone to the other extreme: I'm not really sure what photoetch AM manufacturers could add to this kit: there are many, many "fiddly bits" in plastic, and quite a bit in PE. In some cases (like the springs), you have the option of going whole hog with the PE or a simpler version mixing in styrene. But this is not a kit for someone who wants a casual build; its price is commensurate with the level of detail and added value in the kit, and will please most of today's modelers.

Now, let's get started.

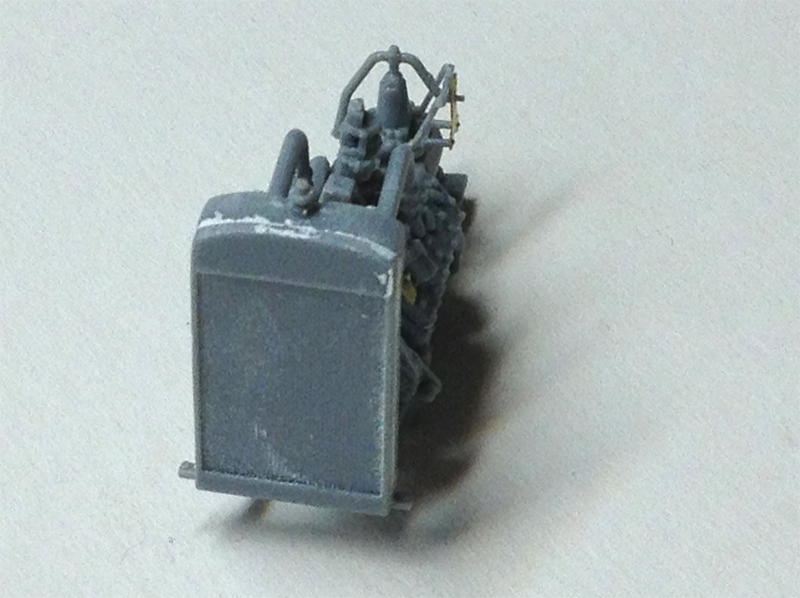
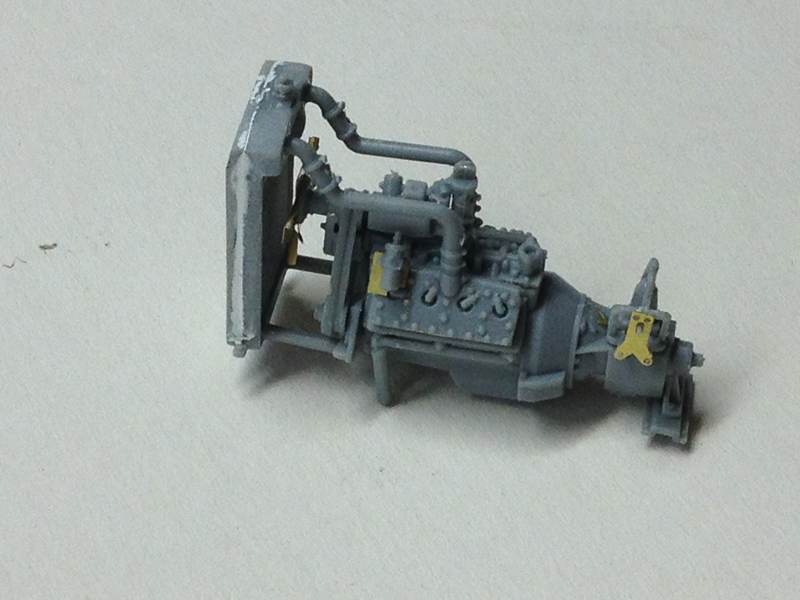
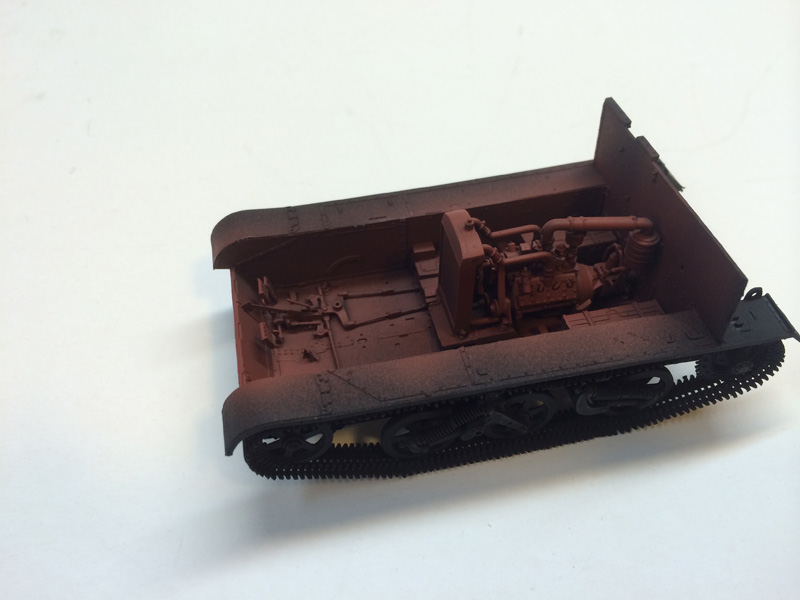
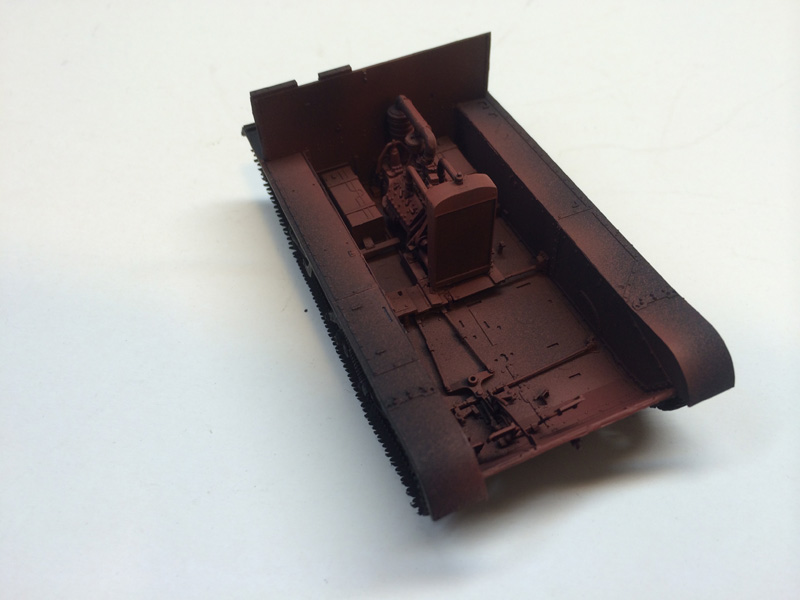
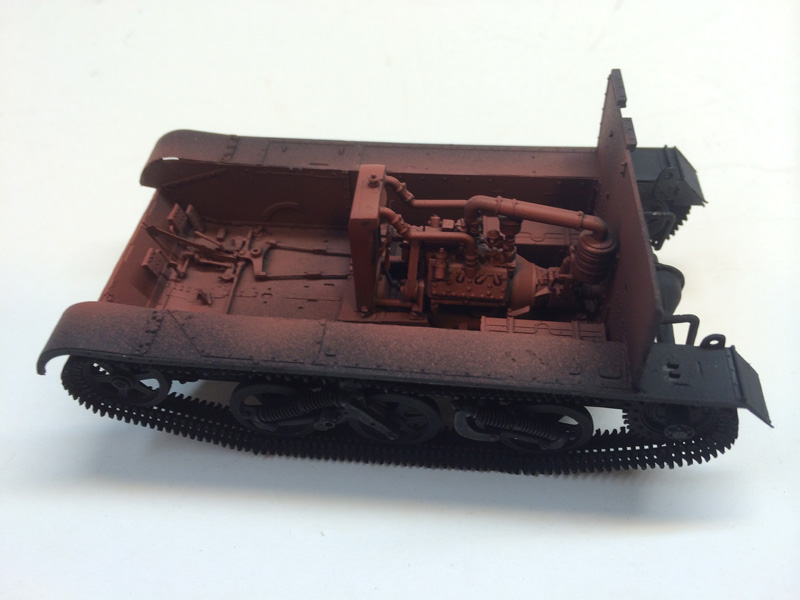
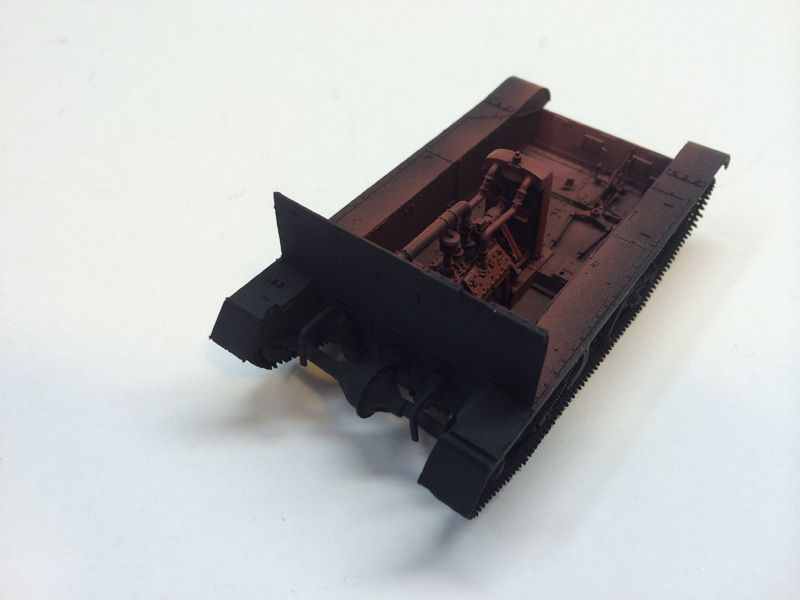
The first assembly is the engine, a masterful rendering that unfortunately will be 99% invisible when the kit is built!


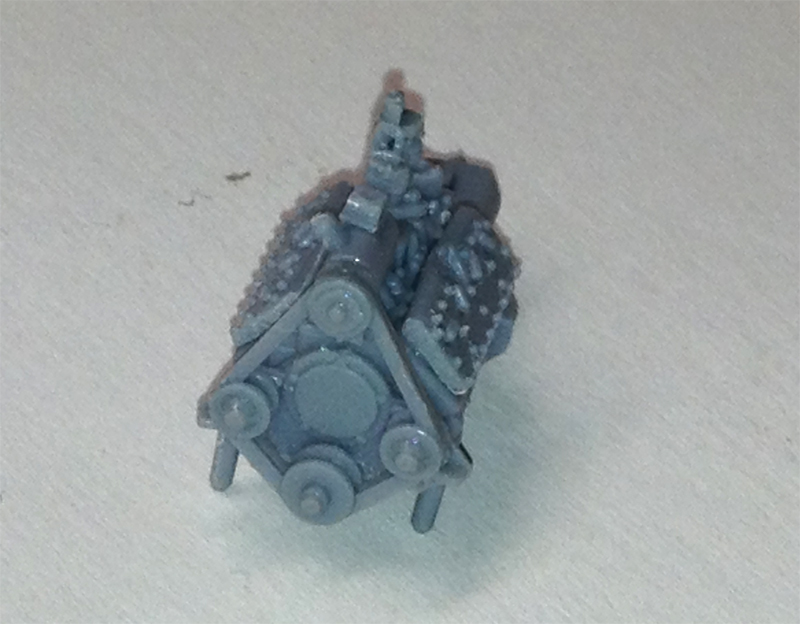
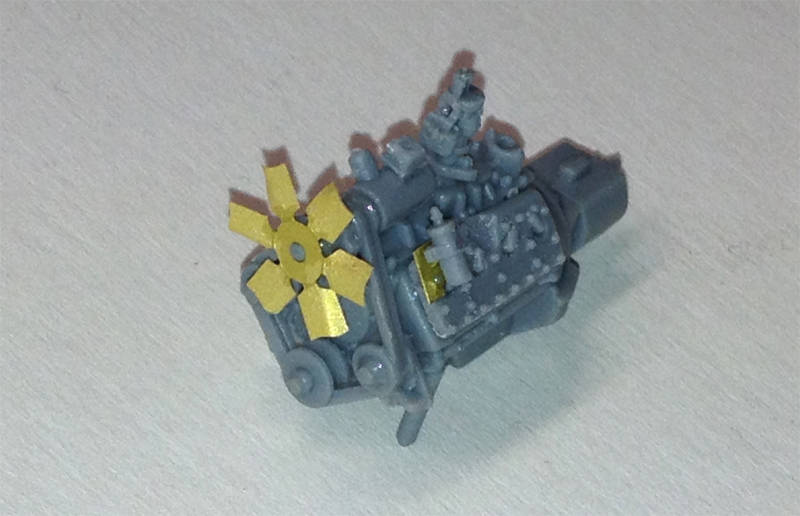
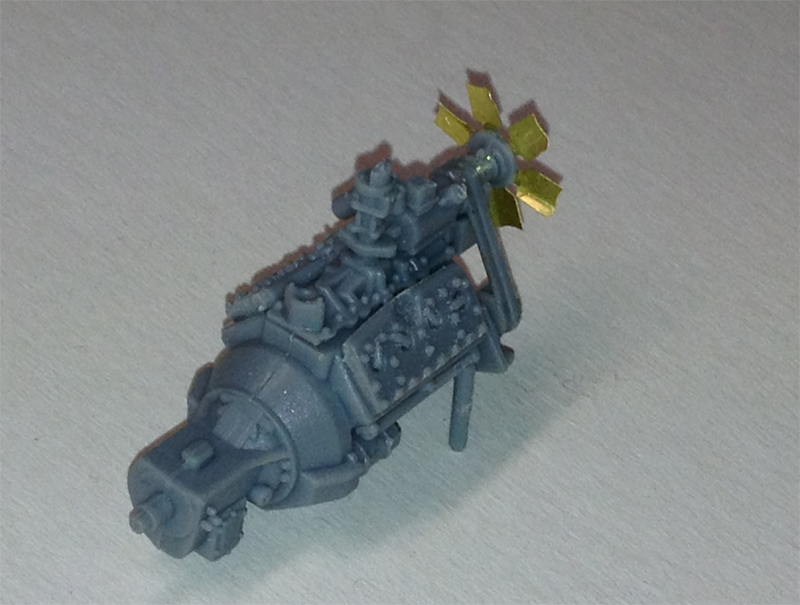
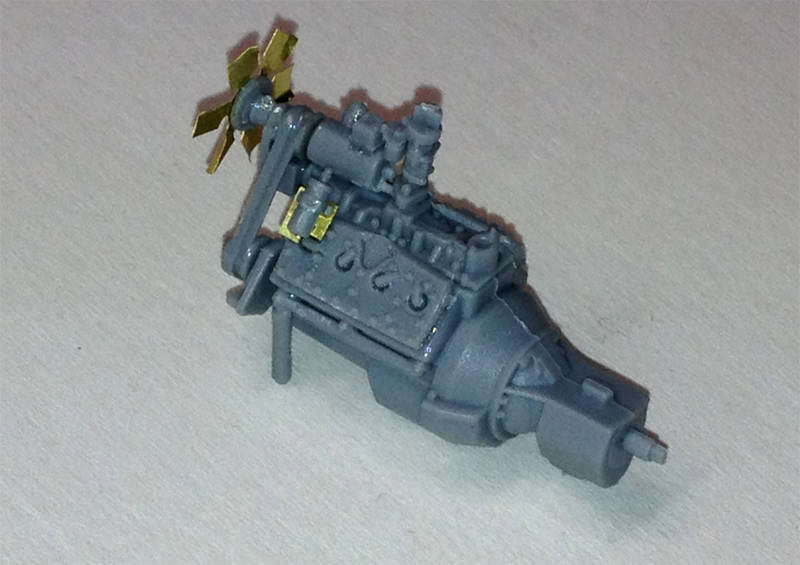
The pieces fit together well, though the locator pins are often lacking or very tiny. Take care when cementing together. The directions are also a bit confusing in places, so it helps to look ahead. The starter motor, for example, goes along the bottom right-hand side of the engine block, though this is NOT apparent from the instructions.

The detailing is a nice blend of styrene with some PE for parts that could not be done otherwise. A little bit of wiring for the plugs, solenoid, etc. and you could have a very nifty repair diorama if you open up the engine bonnet.
bill_c
Staff MemberCampaigns Administrator
MODEL SHIPWRIGHTS
Visit this Community
New Jersey, United States
Joined: January 09, 2008
KitMaker: 10,553 posts
Armorama: 8,109 posts
Posted: Sunday, September 01, 2013 - 08:04 AM UTC
Here are additional images of the further building of the engine:


I have chosen not to finish the engine, as the air filter hangs off the assembly, and invites mischief between now and the relatively late stage where the engine is added to the vehicle.
SdAufKla
Visit this Community
South Carolina, United States
Joined: May 07, 2010
KitMaker: 2,238 posts
Armorama: 2,158 posts
Posted: Sunday, September 01, 2013 - 10:14 AM UTC
It's a fun little kit, Bill.

Enjoy the ride! I know I am.

Happy modeling!
bill_c
Staff MemberCampaigns Administrator
MODEL SHIPWRIGHTS
Visit this Community
New Jersey, United States
Joined: January 09, 2008
KitMaker: 10,553 posts
Armorama: 8,109 posts
Posted: Monday, September 02, 2013 - 06:21 AM UTC
Thanks, Mike, matching the level of detail and excellence of execution in your build will be a major goal (and failure, haha!).

Moving on with the build, the second assembly is the floor: the fuel tanks are in four pieces, and are mounted on styrene versions of metal "feet." Great detailing, though it will be lost when finished, alas. Still, it's a fine way to familiarize modelers with the vehicle, a sort of educational tour of the UC.


The challenge is adding the exhaust pipes and their support racks. The PE racks fit nicely in the rivets of the bottom, but the instructions don't tell you the rails stick out about 1/8" beyond the floor.


I'm not at all happy with the way it turned out: I had to use CA glue softener to move the rails, and it tends to etch styrene. The good news: this part of the vehicle will be invisible when finished (except for you IPMS judges with your dental mirrors, haha!)
CMOT
Staff MemberEditor-in-Chief
ARMORAMA
Visit this Community
England - South West, United Kingdom
Joined: May 14, 2006
KitMaker: 10,954 posts
Armorama: 8,571 posts
Posted: Monday, September 02, 2013 - 07:01 AM UTC
promising start Bill and a build is not a build unless you cock something up and have to do it again.
bill_c
Staff MemberCampaigns Administrator
MODEL SHIPWRIGHTS
Visit this Community
New Jersey, United States
Joined: January 09, 2008
KitMaker: 10,553 posts
Armorama: 8,109 posts
Posted: Monday, September 02, 2013 - 01:18 PM UTC

Quoted Text

... a build is not a build unless you cock something up and have to do it again.


Well, hopefully my cock-ups will help prevent it from happening to others, haha.
bill_c
Staff MemberCampaigns Administrator
MODEL SHIPWRIGHTS
Visit this Community
New Jersey, United States
Joined: January 09, 2008
KitMaker: 10,553 posts
Armorama: 8,109 posts
Posted: Saturday, September 07, 2013 - 07:55 AM UTC
Moving right along are the wheels & bogies. Riich has topped even Resicast for detailing by breaking down the bogey springs into their actual parts: two springs fit one inside the other along a sliding metal rod that is held inside bushings in the two parts of the rocker arm:


The kit gives modelers the opportunity of using a styrene version of the spring traverse rod, but I chose the more-complicated but "cleaner" metal version.

The one down side to that route is that you must snip off the hex nut styrene ends and glue them atop the metal rods with CA glue. It's a major PITA, and I would love to know some way to drill out the nuts before placing them on the rods.

Not in this lifetime!

Next are the sides to the vehicle and adding the drive shaft and universal assembly:


The challenge is to align the walls properly and make sure they are "true" (square). I found the drive mechanism did not line up correctly, either, and had to be "persuaded" with some effort. The result, however, is tolerable as you can see.
jrutman
Visit this Community
Pennsylvania, United States
Joined: April 10, 2011
KitMaker: 7,941 posts
Armorama: 7,934 posts
Posted: Saturday, September 07, 2013 - 07:58 AM UTC
Just found this one Bill.
Good luck as it really seems to have a ton of teeny tiny stuff.
J
bill_c
Staff MemberCampaigns Administrator
MODEL SHIPWRIGHTS
Visit this Community
New Jersey, United States
Joined: January 09, 2008
KitMaker: 10,553 posts
Armorama: 8,109 posts
Posted: Saturday, September 07, 2013 - 08:19 AM UTC

Quoted Text

Good luck as it really seems to have a ton of teeny tiny stuff.
J


Yep.

There ARE some things you can do to cut down on the strain, including using the styrene parts.

The old Tamiya kits are no comparison except that they're much cheaper. Resicast makes some excellent upgrades (assuming you get their current ones and not some of the older ones still kicking around out there). But if you want a really fine UC OOB, this is the way to go.
Dutchy3RTR
Visit this Community
England - South West, United Kingdom
Joined: June 28, 2009
KitMaker: 340 posts
Armorama: 337 posts
Posted: Saturday, September 07, 2013 - 09:08 AM UTC
Looking good so far Bill.

Did you remember to swap the axle halves the right way round?
http://www.perthmilitarymodelling.com/reviews/vehicles/riich_models/rv35011.html
SdAufKla
Visit this Community
South Carolina, United States
Joined: May 07, 2010
KitMaker: 2,238 posts
Armorama: 2,158 posts
Posted: Saturday, September 07, 2013 - 09:16 AM UTC
Coming along nicely, Bill.

I can't tell from your photos, but I assume that you made the change on the axles on either side of the differential.

For those that might have missed the word, here's the poop on the correcttion:

PMMS::Riich Rear Axle Correction

Bill, you're a brave man using the brass and PE parts for the suspension boogies, too. I'm still waffling over that... Your boogies look might fine, though!

Happy modeling!

Ooops.. Ken scooped me on the axles!
bill_c
Staff MemberCampaigns Administrator
MODEL SHIPWRIGHTS
Visit this Community
New Jersey, United States
Joined: January 09, 2008
KitMaker: 10,553 posts
Armorama: 8,109 posts
Posted: Saturday, September 07, 2013 - 12:06 PM UTC
I did NOT get the word about swapping the halves, lol. Ah well, this one is getting cocked-up nicely. I should check that link out to see what other mistakes to avoid. Thanks for the encouragement, guys. I think it will be a fun build when finished.
Keef1648
Visit this Community
South Carolina, United States
Joined: January 23, 2008
KitMaker: 1,240 posts
Armorama: 1,192 posts
Posted: Sunday, September 08, 2013 - 03:36 AM UTC

Quoted Text

Coming along nicely, Bill.

I can't tell from your photos, but I assume that you made the change on the axles on either side of the differential.

For those that might have missed the word, here's the poop on the correcttion:

PMMS::Riich Rear Axle Correction

Bill, you're a brave man using the brass and PE parts for the suspension boogies, too. I'm still waffling over that... Your boogies look might fine, though!

Happy modeling!

Ooops.. Ken scooped me on the axles!


Ah yes, Mike likes to 'Boogie'... I'm certain he meant 'Bogie'

Interesting build and comparison here and nice to see so much help for us who might build this 'wee beastie' in the future.

Keith.
bill_c
Staff MemberCampaigns Administrator
MODEL SHIPWRIGHTS
Visit this Community
New Jersey, United States
Joined: January 09, 2008
KitMaker: 10,553 posts
Armorama: 8,109 posts
Posted: Saturday, November 23, 2013 - 09:01 AM UTC
OK, lots of business travel behind me, but I have been building when home and here's the results:

Here is the chassis and hull tub assembled--

The combination of styrene, PE and metal springs produce an unusual amount of detailing.

The hull tub painted with red oxide.


Now the next phase: adding the upper hull and interior:


bill_c
Staff MemberCampaigns Administrator
MODEL SHIPWRIGHTS
Visit this Community
New Jersey, United States
Joined: January 09, 2008
KitMaker: 10,553 posts
Armorama: 8,109 posts
Posted: Saturday, November 23, 2013 - 09:06 AM UTC
Unlike with the ancient Tamiya UCs, the Riich version has many separate parts, resulting in more detail-- and more "truing" issues. As you can see, I struggled with the front bulkhead, and even when finished, there were fit issues with the side panels.


bill_c
Staff MemberCampaigns Administrator
MODEL SHIPWRIGHTS
Visit this Community
New Jersey, United States
Joined: January 09, 2008
KitMaker: 10,553 posts
Armorama: 8,109 posts
Posted: Saturday, November 23, 2013 - 09:09 AM UTC
This is things pretty much wrapped up except for painting:


And with the Tamiya flat black undershading:

bill_c
Staff MemberCampaigns Administrator
MODEL SHIPWRIGHTS
Visit this Community
New Jersey, United States
Joined: January 09, 2008
KitMaker: 10,553 posts
Armorama: 8,109 posts
Posted: Saturday, November 23, 2013 - 09:13 AM UTC
And lastly, in the colors of the Western Desert, 1941:


Lots of nice details like the included chain:


All in all, an excellent kit that I would recommend very highly. Don't bother with all the Tamiya conversions, etc., the price doesn't justify the extra work. Spend your time doing other fun things, haha!
CMOT
Staff MemberEditor-in-Chief
ARMORAMA
Visit this Community
England - South West, United Kingdom
Joined: May 14, 2006
KitMaker: 10,954 posts
Armorama: 8,571 posts
Posted: Saturday, November 23, 2013 - 09:28 AM UTC
It looks like despite the trial that it came out fine in the end. I know Resicast is re-working on their conversions to work with the Riich Model and I believe halting production of Tamiya conversions.
SdAufKla
Visit this Community
South Carolina, United States
Joined: May 07, 2010
KitMaker: 2,238 posts
Armorama: 2,158 posts
Posted: Saturday, November 23, 2013 - 10:39 AM UTC
Bill, congratulations!

I do believe that is the first one of the Riich carriers that I have seen finished - soup to nuts!

Well done, too. The Caunter scheme certainly makes for an attractive build.

Thanks for catching us up on it.
bill_c
Staff MemberCampaigns Administrator
MODEL SHIPWRIGHTS
Visit this Community
New Jersey, United States
Joined: January 09, 2008
KitMaker: 10,553 posts
Armorama: 8,109 posts
Posted: Monday, November 25, 2013 - 06:06 AM UTC

Quoted Text

It looks like despite the trial that it came out fine in the end. I know Resicast is re-working on their conversions to work with the Riich Model and I believe halting production of Tamiya conversions.


Thanks, Darren, for your support through this. There are some extra parts that look like they would work in a mortar version. I would also like to see Resicast continue their "heavily-loaded" conversion that substitutes a compressed suspension for the "at rest" version in the kit. This would allow for some piled-up loads of supplies, etc. And with the mortar version, the sheer weight of the ammunition would skew the angle towards the rear.

But all in all, a very good kit. You don't need any PE or AM stuff, just glue, paint and powders.

And Mike, I owe any success to your having opened up the beachhead.
 _GOTOTOP