The recent pictures show two sheets glued together with the angled end pieces (not yet attached). That is the INSIDE section. The OUTER section (seen when done) will be just two sheets glued and then cut down to proper length, height, and angles. Once the outer part is traced and cut out, I'll scribe "panel lines." (no way they could've cold rolled or cast a single "sheet" of armor)
Unfortunate side note to Life:
My wife Karin and I are in a bad way with one of our cats. Prickles is about 11 years old now and dying. She's always been a little thing...with long black hair with a few white and some gray hairs (hence Prickles - like a hedgehog). She's also cross-eyed.
 The most she's ever weighed was about 8 pounds...she's now less than 4. Karin, myself, and the Vet have done what we can. She's lived a good life with us; loved deeply. Tomorrow we have to say good bye.
  Hearts are heavy...
Mike ...
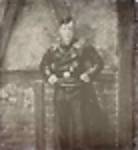
Our Girl...yawning