My first HEMTT - the Italeri LHS

#521
Kentucky, United States
Joined: April 13, 2011
KitMaker: 9,465 posts
Armorama: 8,695 posts
Posted: Wednesday, August 10, 2016 - 01:09 AM UTC
Got to wondering about the many torque rods and lateral stabilizers on the HEMTT ( one each per axle.) Then it dawned on me - my spares box of old CCKW parts. Many useful parts there!
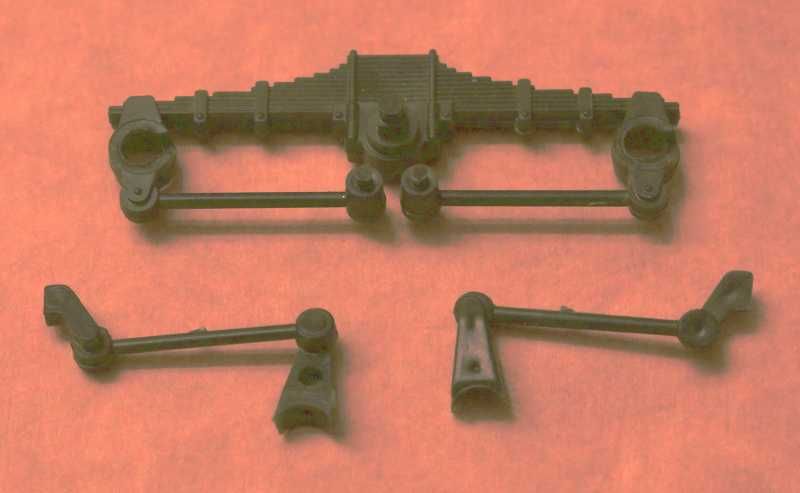
Here are the torque rods and stabilizers from the old Italeri Deuce and a half water truck of which I have many. - Having used their hard cabs to convert many a Tamiya and Hobby Boss Deuce into hard cab trucks.
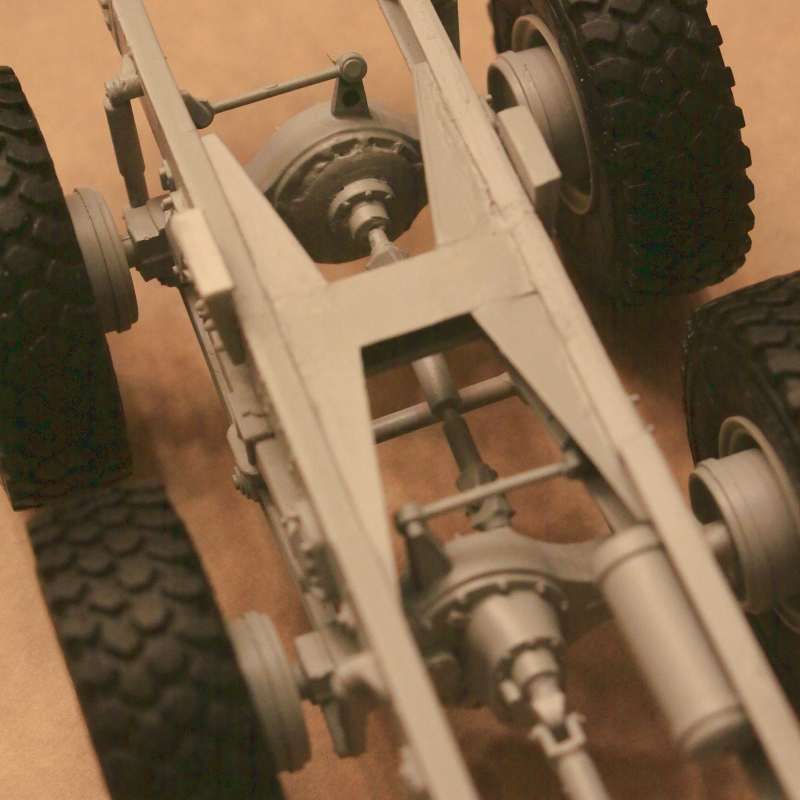
I have not yet fabricated the fore/aft torque rods but here are the lateral stabilizer bars now installed - perfect!
I wish I had a similar trick for fabricating the brake actuator cylinders!
Oklahoma, United States
Joined: September 30, 2015
KitMaker: 2,493 posts
Armorama: 2,344 posts
Posted: Wednesday, August 10, 2016 - 01:18 AM UTC
Great idea Michael. Looking great.
"Only the dead have seen the end of war." - Plato
Texas, United States
Joined: December 22, 2001
KitMaker: 3,586 posts
Armorama: 2,556 posts
Posted: Wednesday, August 10, 2016 - 01:20 AM UTC
Glad I could help Mike. Need any help deciphering all those cables, don't hesitate to ask.
Pete Becerra, Jr. SGT(RET)
HHC, 71st BfSB - TEXAS
HHB, 36th ID DIVARTY -TEXAS
B Co.(-), 949 FSB, 56th BCT, 36th ID - TEXAS
B Co., 324th FSB, 3rd Brigade, 24th INF DIV(MECH)
563rd ORD Co. - GERMANY
Tennessee, United States
Joined: January 10, 2005
KitMaker: 337 posts
Armorama: 332 posts
Posted: Wednesday, August 10, 2016 - 01:37 AM UTC
Quoted Text
Thanks Taylor for backing me up, still I wish I could have done a better job on the face of that simple differential on axle #4.
I still have axle #1 yet to do maybe I will do a better job there. At least the back side of the diff is looking good with all that added bolt head detail, plus the oil check and drain plugs - that is what is really going to show under the front of that cab.
Today's assignment: working on the many torque struts (two per axle) needed for this rig!
I have a pair of M923 axles if you need them. The domes measure 8mm in diameter. If they will allow enough room to add the bolts around them, it would be a cut them off and glue them on your housing deal. Excellent work, btw!
In Memory of Cpl. Cecil T. Nicholson, U.S. Army, 1931-2006
#521
Kentucky, United States
Joined: April 13, 2011
KitMaker: 9,465 posts
Armorama: 8,695 posts
Posted: Wednesday, August 10, 2016 - 02:22 AM UTC
Pete - that would be great! As to the cables and hoses I can't tell much from the TM. Right now the Prime Portal photos are the best reference I have. And that more or less amounts to "OK. this hose disappears behind here and that cable disappears over there . . . ."
Taylor - thanks for the offer but with one differential already done and installed they might as well both match each other for right or wrong.
Florida, United States
Joined: May 16, 2002
KitMaker: 17,694 posts
Armorama: 13,742 posts
Posted: Wednesday, August 10, 2016 - 06:23 AM UTC
Quoted Text
Is that center (extra) axle on the PLS also driven? In my design world it wouldn't be. Hey when you already have an 11 ton capacity 8x8 and need more load capability you probably don't need the extra traction of a 10x10.
Yes it is, just like the middle axle on the M1070 HETS is powered. It does give more traction on rough terrain where one of the other wheels/axles may be off the ground or slipping and not providing any traction. These trucks can go anywhere, and I mean anywhere.
Field Artillery --- The KING of BATTLE!!!
"People sleep peaceably in their beds at night only because rough men stand ready to do violence on their behalf." -- George Orwell
Showcase
#521
Kentucky, United States
Joined: April 13, 2011
KitMaker: 9,465 posts
Armorama: 8,695 posts
Posted: Wednesday, August 10, 2016 - 07:15 AM UTC
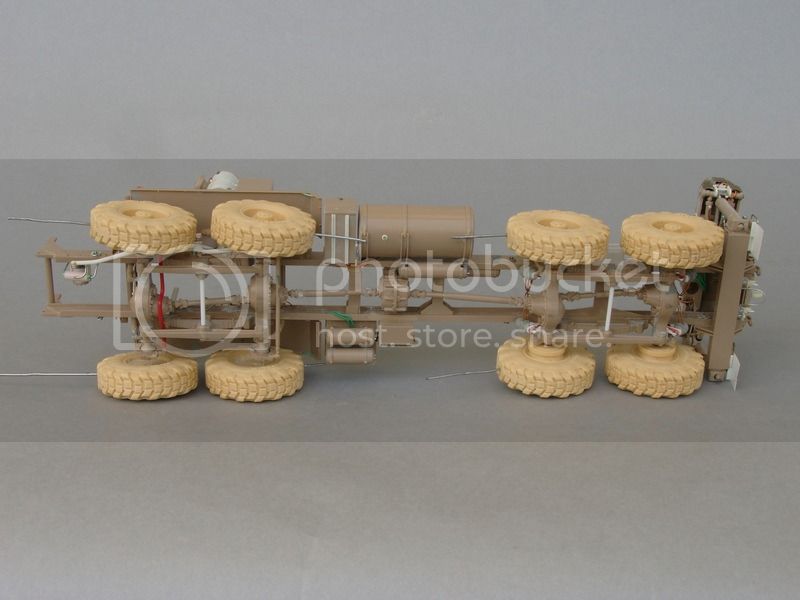
A slight problem (at least for me):
We are looking here at the rear end of the LHS sub-frame.
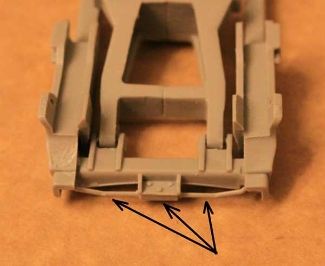
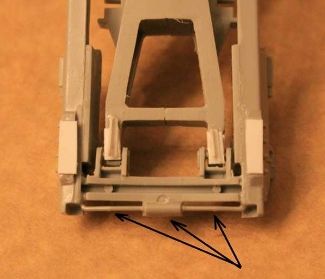
. . . . . . . . . . . . . TOP VIEW . . . . . . . . . . . . . . . . . . . . . . . . . . . BOTTOM VIEW . . . . . . . . . . . . .
There was confusion in the instruction sheet (or I thought so anyway) as to just where part #14 E was supposed to go. I held off gluing it on until I saw the real device installed in one of the Prime Portal reference photos.
Link to reference photo:
http://data4.primeportal.net/hemtt2/dieter_krause/m1120_lhs/images/m1120_lhs_12_of_92.jpg#521
Kentucky, United States
Joined: April 13, 2011
KitMaker: 9,465 posts
Armorama: 8,695 posts
Posted: Wednesday, August 10, 2016 - 10:00 AM UTC
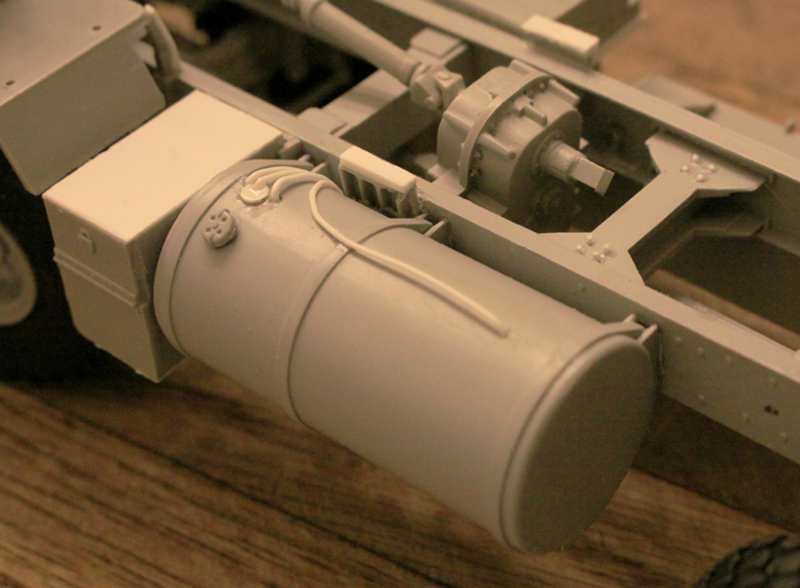
A little bit more progress tonight:
I just followed the reference photos you guys have helped provide but I am really enjoying how this fuel tank turned out. Put some serious work into removing that center seam line in the tank. A lot of sanding and many coats of primer.
#521
Kentucky, United States
Joined: April 13, 2011
KitMaker: 9,465 posts
Armorama: 8,695 posts
Posted: Wednesday, August 10, 2016 - 10:36 AM UTC
In modern CAD design systems there is a sub-routine called something like "interference notification" that tells the operator whenever one part in a design overlaps or intrudes into the space or volume of another part.
As Gino was saying earlier the original HEMTT truck model was done some twenty years ago. Whatever CAD software they were using then (if any) doesn't play well with the modern CAD technology - as in no interference notification.
I know this because I had to grind off most of that beautiful LHS mounting bracket casting that runs down behind the gas tank to finally get the tank brackets to mount solidly against the frame as intended.
Just pointing out a construction problem that everyone else is going to encounter. That bracket doesn't show behind the gas tank and you have three others to enjoy anyway.
Tennessee, United States
Joined: January 10, 2005
KitMaker: 337 posts
Armorama: 332 posts
Posted: Wednesday, August 10, 2016 - 02:53 PM UTC
Have you got anything figured out for the brake chambers yet?
In Memory of Cpl. Cecil T. Nicholson, U.S. Army, 1931-2006
#521
Kentucky, United States
Joined: April 13, 2011
KitMaker: 9,465 posts
Armorama: 8,695 posts
Posted: Wednesday, August 10, 2016 - 03:36 PM UTC
Nope!
That question is sort of the 5000 pound elephant in the room!
Rather unusual shape in my experience.
Build up several layers using plastic tube to make a solid rod, wrap two thin strips of plastic sheet around them and sand to final shape????????????
It's a puzzler!
One set of resin tires comes with the brake actuators I think - I could always buy the tires to get the brakes!
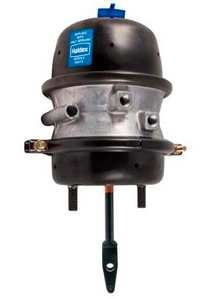
HALDEX heavy truck, air over hydraulic brake actuator.
Kinda ugly sucker, ain't it?
#521
Kentucky, United States
Joined: April 13, 2011
KitMaker: 9,465 posts
Armorama: 8,695 posts
Posted: Wednesday, August 10, 2016 - 04:04 PM UTC
And of course whatever I do I get to do it EIGHT times!
Tennessee, United States
Joined: January 10, 2005
KitMaker: 337 posts
Armorama: 332 posts
Posted: Wednesday, August 10, 2016 - 04:05 PM UTC
Sounds like the way to go. A file should make fast work of the indention around the center of the body. Good luck!
In Memory of Cpl. Cecil T. Nicholson, U.S. Army, 1931-2006
#521
Kentucky, United States
Joined: April 13, 2011
KitMaker: 9,465 posts
Armorama: 8,695 posts
Posted: Wednesday, August 10, 2016 - 04:31 PM UTC
OK Folks! Anybody else want to put brakes on their Italeri HEMTTs?
If I could get something done digitally who else would be interested?
The part is sort of small and eight on a sheet should not be too expensive from Shapeways.
Show of hands, who's with me?????????
Florida, United States
Joined: May 16, 2002
KitMaker: 17,694 posts
Armorama: 13,742 posts
Posted: Wednesday, August 10, 2016 - 04:33 PM UTC
The brake cylinders are perfect candidates for 3D printing. All you have to do is draw up the CAD or have it drawn up and submit to Shapeways or Click2Detail to have them printed. A few here offer CAD services,
Michael "MikeyBugs95" Goldberg for one. He has drawn up a few things for me and always does great work.
Another option would be to make one as a master and make an RTV mold of it. You can then cast as many as you want/need in resin.
Either way is easier than trying to make eight identical brake cylinders.
Field Artillery --- The KING of BATTLE!!!
"People sleep peaceably in their beds at night only because rough men stand ready to do violence on their behalf." -- George Orwell
Showcase
#521
Kentucky, United States
Joined: April 13, 2011
KitMaker: 9,465 posts
Armorama: 8,695 posts
Posted: Wednesday, August 10, 2016 - 05:24 PM UTC
Gino, that is what I am trying to do - gauge the market interest in getting them done digitally. Are you up for a few sets? Retro fit some of your older Italeri HEMTTs?
I won't be doing the work. Nor will I get anything out of it other than having the availability of the parts. But if others want them too then I can better sell to idea to the designer much more easily!
Regards
Mike
Brakes now available on Shapeways at:
https://www.shapeways.com/product/UWGL7XN6U/1-35-hemtt-brake-cylinders-msp35-027?optionId=61301053&li=marketplaceTennessee, United States
Joined: January 10, 2005
KitMaker: 337 posts
Armorama: 332 posts
Posted: Wednesday, August 10, 2016 - 05:36 PM UTC
I'm looking to bash the Trumpeter Kit with the LHS from Italeri. If I remember, Trumpeter does'nt include brakes for the front??? If that's the case, then I'm in for a set.
In Memory of Cpl. Cecil T. Nicholson, U.S. Army, 1931-2006
Florida, United States
Joined: May 16, 2002
KitMaker: 17,694 posts
Armorama: 13,742 posts
Posted: Wednesday, August 10, 2016 - 05:42 PM UTC
Yes, I'd buy a few sets. Actually, that is the beauty of Shapeways or other 3D printing services and what Mike is doing. He will design them for free since he is using it to build his CAD skills. There is no overhead. He loads the design to Shapeways and each person who wants them orders them and pays for only what he orders. You don't have to worry about interest or how many people will buy. I had Mike make a few designs for a crew shell that I built for my daughter (she's a HS rower). I was the only one who needed/wanted the parts and it was not an issue. Moral of the story, contact Mike and get them designed and loaded onto Shapeways. We'll buy them.
Field Artillery --- The KING of BATTLE!!!
"People sleep peaceably in their beds at night only because rough men stand ready to do violence on their behalf." -- George Orwell
Showcase
Torino, Italy
Joined: March 19, 2010
KitMaker: 50 posts
Armorama: 43 posts
Posted: Wednesday, August 10, 2016 - 06:14 PM UTC
Mike unfortunately I didn't take many photos during the built so I can add only those three that you didn't seen.
Dario

#521
Kentucky, United States
Joined: April 13, 2011
KitMaker: 9,465 posts
Armorama: 8,695 posts
Posted: Wednesday, August 10, 2016 - 06:20 PM UTC
Dario, thanks very much for the extra photos. (I just sent you an IM with a question.)
Cheers
Mike
#521
Kentucky, United States
Joined: April 13, 2011
KitMaker: 9,465 posts
Armorama: 8,695 posts
Posted: Wednesday, August 10, 2016 - 09:05 PM UTC
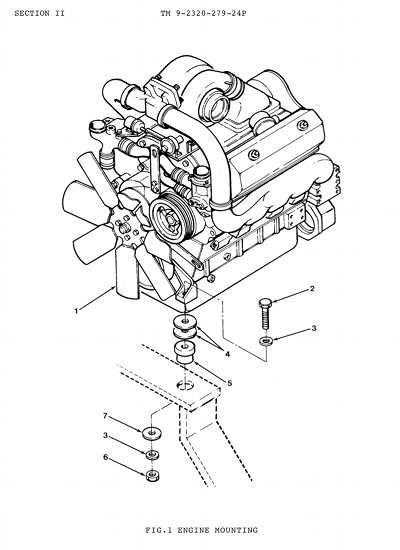
Thanks to Frenchy I how have a better Tech Manual on the HEMTT but there are still questions to find answers to, in that the manual is a mere 1459 pages!
#521
Kentucky, United States
Joined: April 13, 2011
KitMaker: 9,465 posts
Armorama: 8,695 posts
Posted: Wednesday, August 10, 2016 - 09:34 PM UTC
A few minor details found in the TM:
Somehow I didn't think that massive spare tire was secured by bolting it to the flimsy sheet metal engine cover as shown on the model. In reality there is a square tubing metal bar that spans between those two upright retainer walls framing the spare tire,
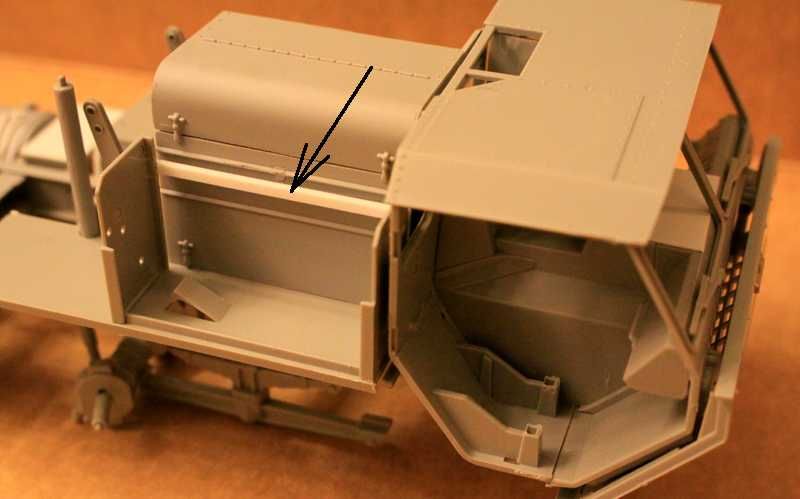
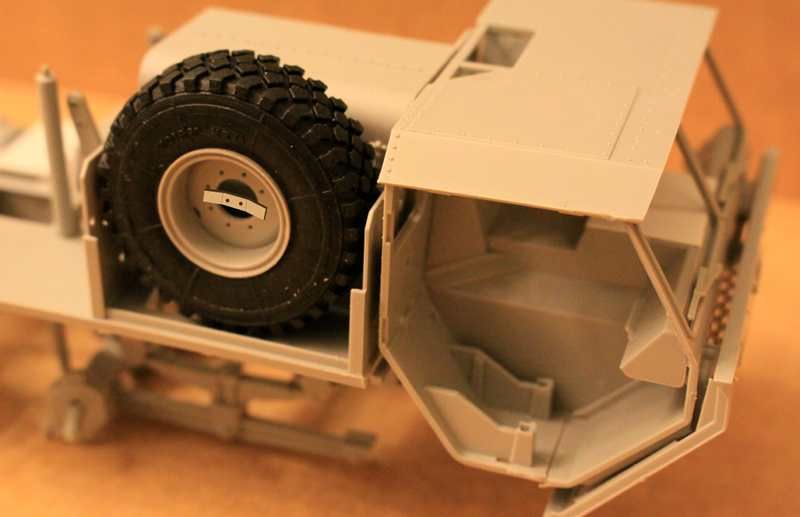
Also a smaller cross bar in front of the tire that bolts to the retainer bar to lock down the spare. The model makes it look as though there is some sort of sports car spinner that retains the spare.
#521
Kentucky, United States
Joined: April 13, 2011
KitMaker: 9,465 posts
Armorama: 8,695 posts
Posted: Wednesday, August 10, 2016 - 09:46 PM UTC
Then I also found missing a number of smaller fender braces and a major forward frame I-beam cross member.
(Without this I-beam cross bar I would not have anything to tie my stabilizer and torque control rods to. Also it is just WRONG to leave such a major frame member out of the model just because it is under the engine and does not show much. Heck this member provides the front mounts for the engine. Oh, that's right they did not include the front of the engine. Well that must explain it!)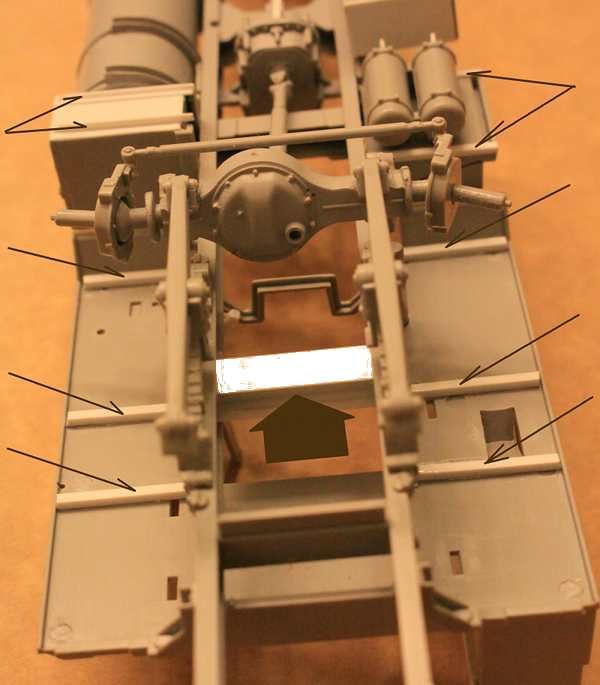
#521
Kentucky, United States
Joined: April 13, 2011
KitMaker: 9,465 posts
Armorama: 8,695 posts
Posted: Thursday, August 11, 2016 - 04:11 AM UTC
Re: All these "extra" and sometimes nearly invisible added details:
Ever build a Sherman and you get to the point where you just have the unadorned tank body with no surface detail added yet? I have been struck before with the feeling that this is such a plain jane tank why am I doing this?" But then you start adding the surface details such as tools and stowage and all the sudden the tank comes alive! I takes on a very 3D quality that just seems to jump out at you.
Well that is my philosophy about detailing in general - the extra depth the detail adds can give a model that extra layer of "something".
#521
Kentucky, United States
Joined: April 13, 2011
KitMaker: 9,465 posts
Armorama: 8,695 posts
Posted: Thursday, August 11, 2016 - 04:34 AM UTC
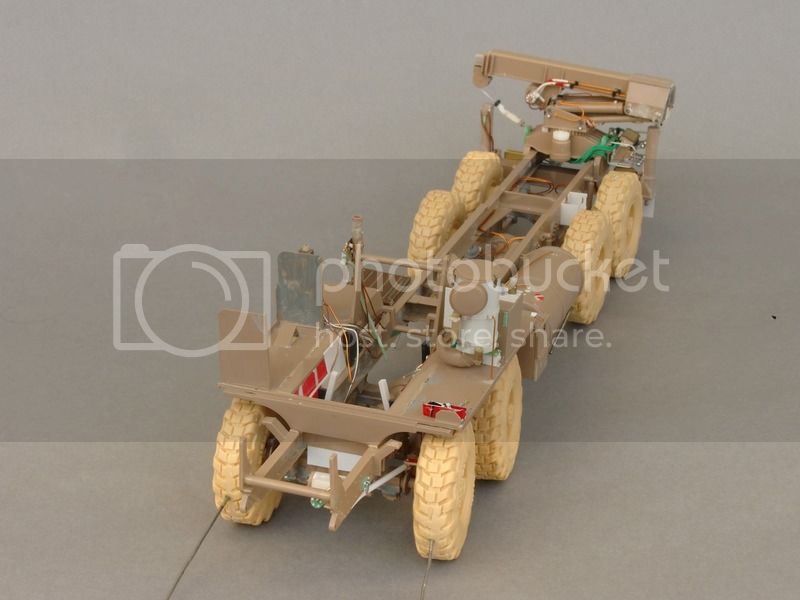
The HEMTT has two hydraulic power steering gearboxes; the main one forward under the cab and a secondary (larger) slave unit between the first and second axles that minicks the actions of the forward steering gearbox.
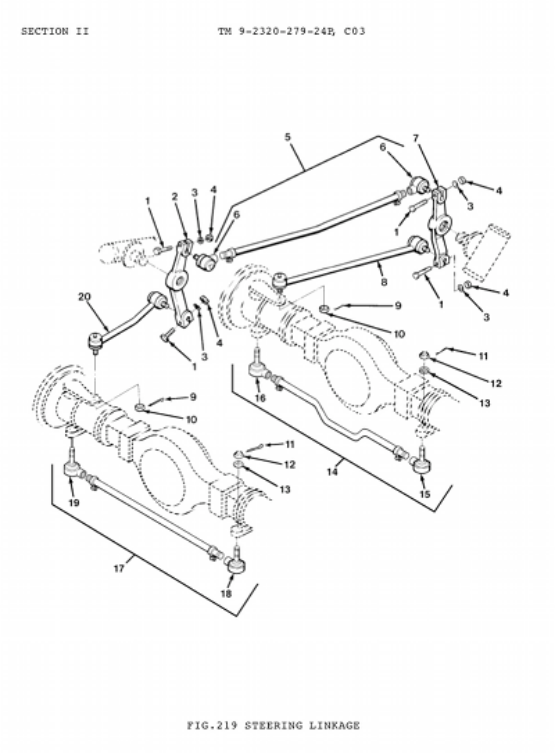
Note; the steering cross arm linkage on the #1 axle is BEHIND the axle in a protected position and not in front of it as represented in the model.


