_GOTOBOTTOM
Dioramas
Do you love dioramas & vignettes? We sure do.
Wacht am Rhein
SandersCreative
Visit this Community
Florida, United States
Joined: September 24, 2016
KitMaker: 12 posts
Armorama: 12 posts
Posted: Friday, October 06, 2017 - 10:38 PM UTC
Hey everyone,

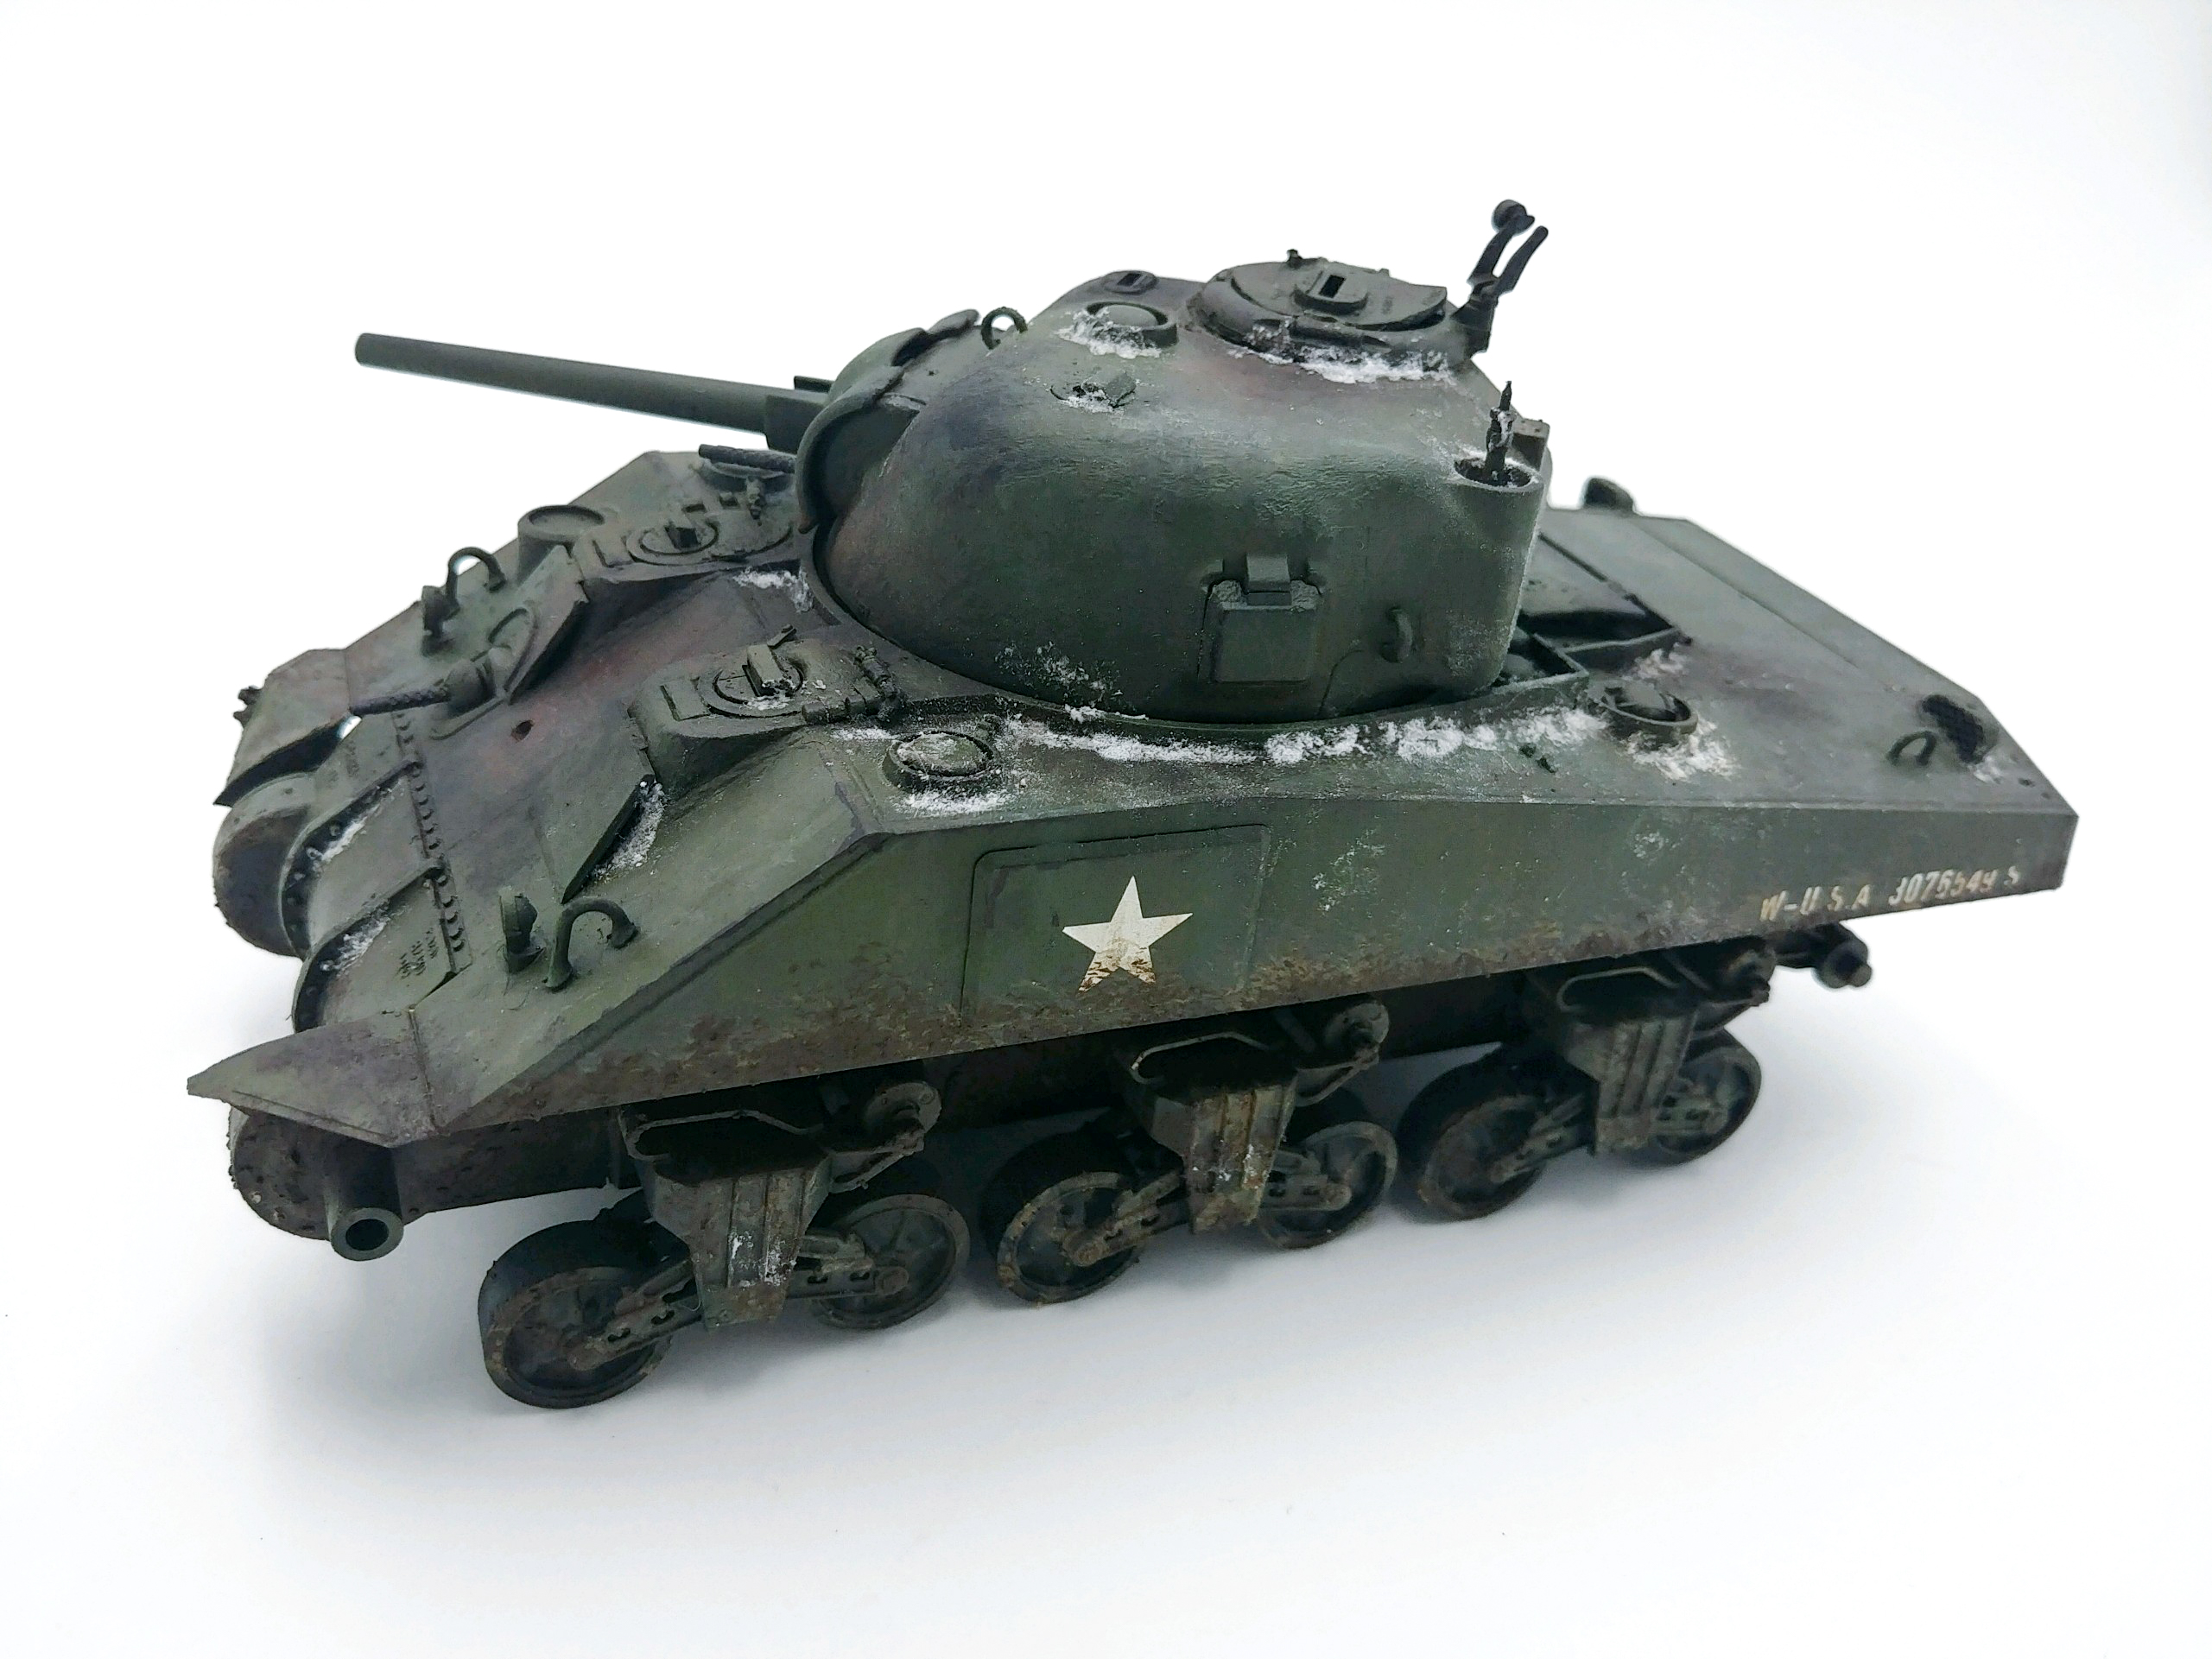
I've started quite a large project. I'm a Visual Arts senior in a Bachelors of Fine Arts program, and my theme for my senior show is a dichotomy much like my experiences. "Of Whimsy and War" will showcase more carefree artistic pieces as well as more serious military ones. While most of my military pieces stem from my Army experience or that of people I've served with, part of what I want to do for the War aspect is a large diorama to give the audience pause to think about the Battle of Bulge and what hung in the balance. It will be the sole WWII piece and only 3D construction among 2D art dealing with contemporary military issues.

My idea for Wacht am Rhein is a depiction early in the offensive toward the rear of Kampfgruppe Peiper's column. Officers discuss plans, grenadiers continue the march forward, and Belgian civilians look on as U.S. POWs are escorted past.


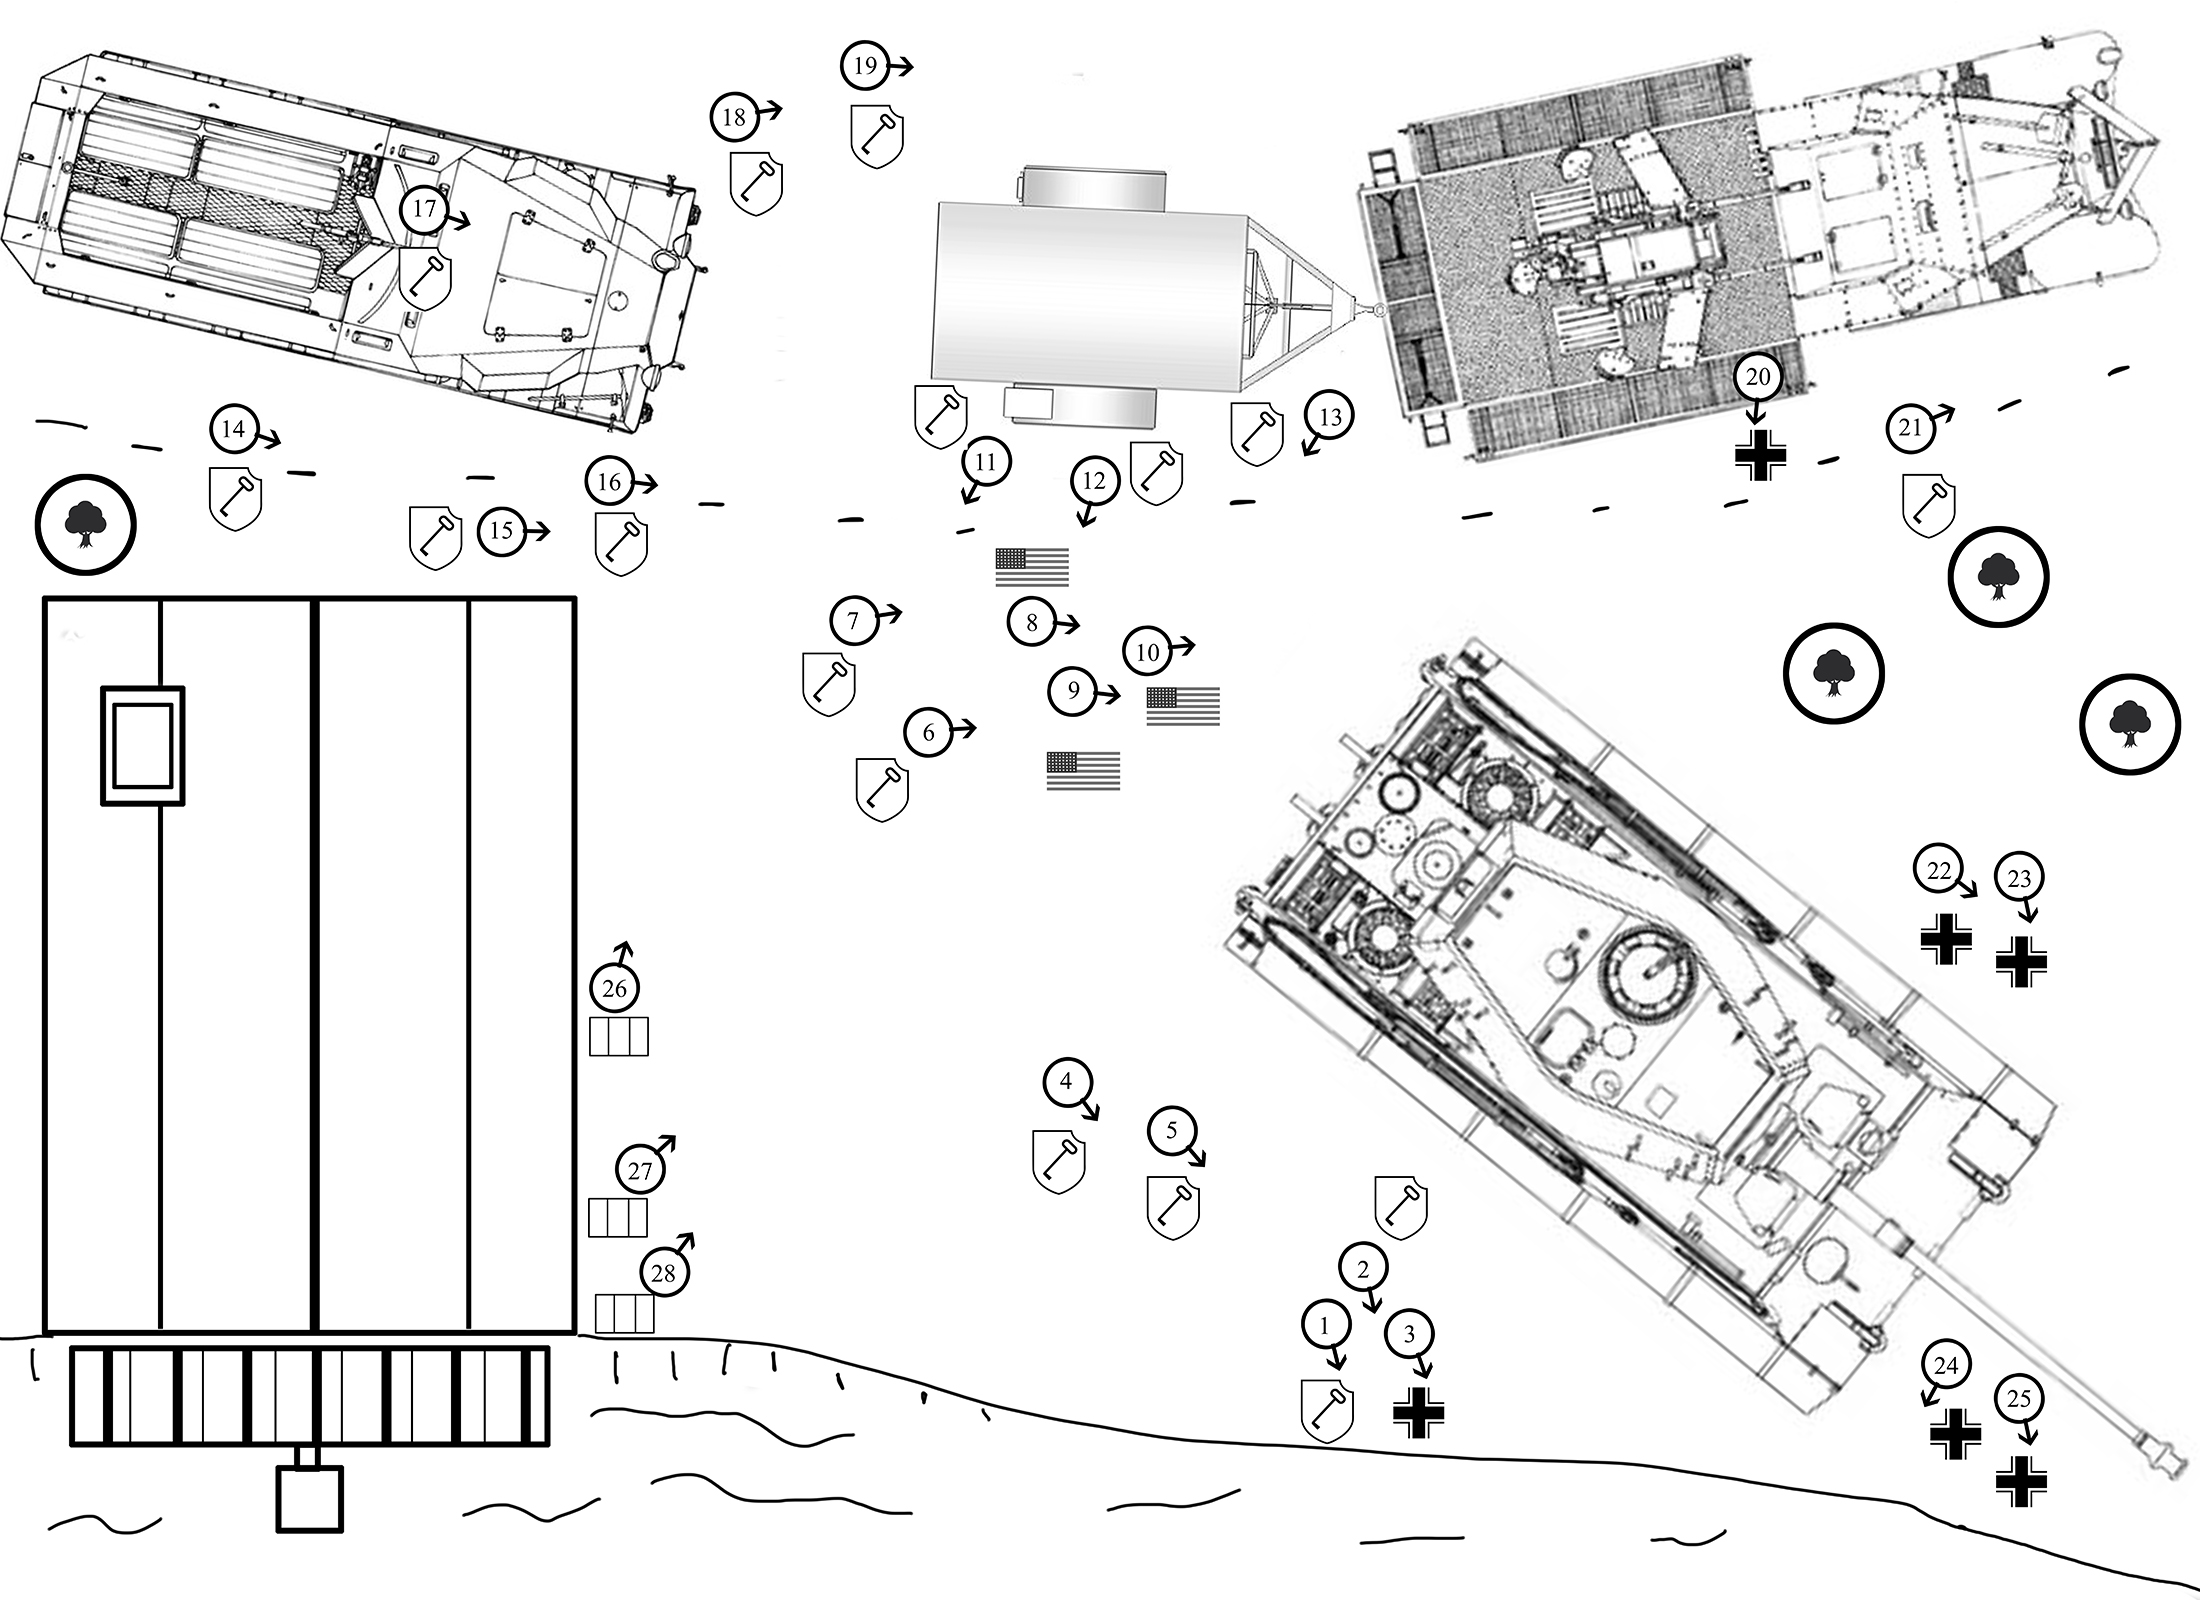
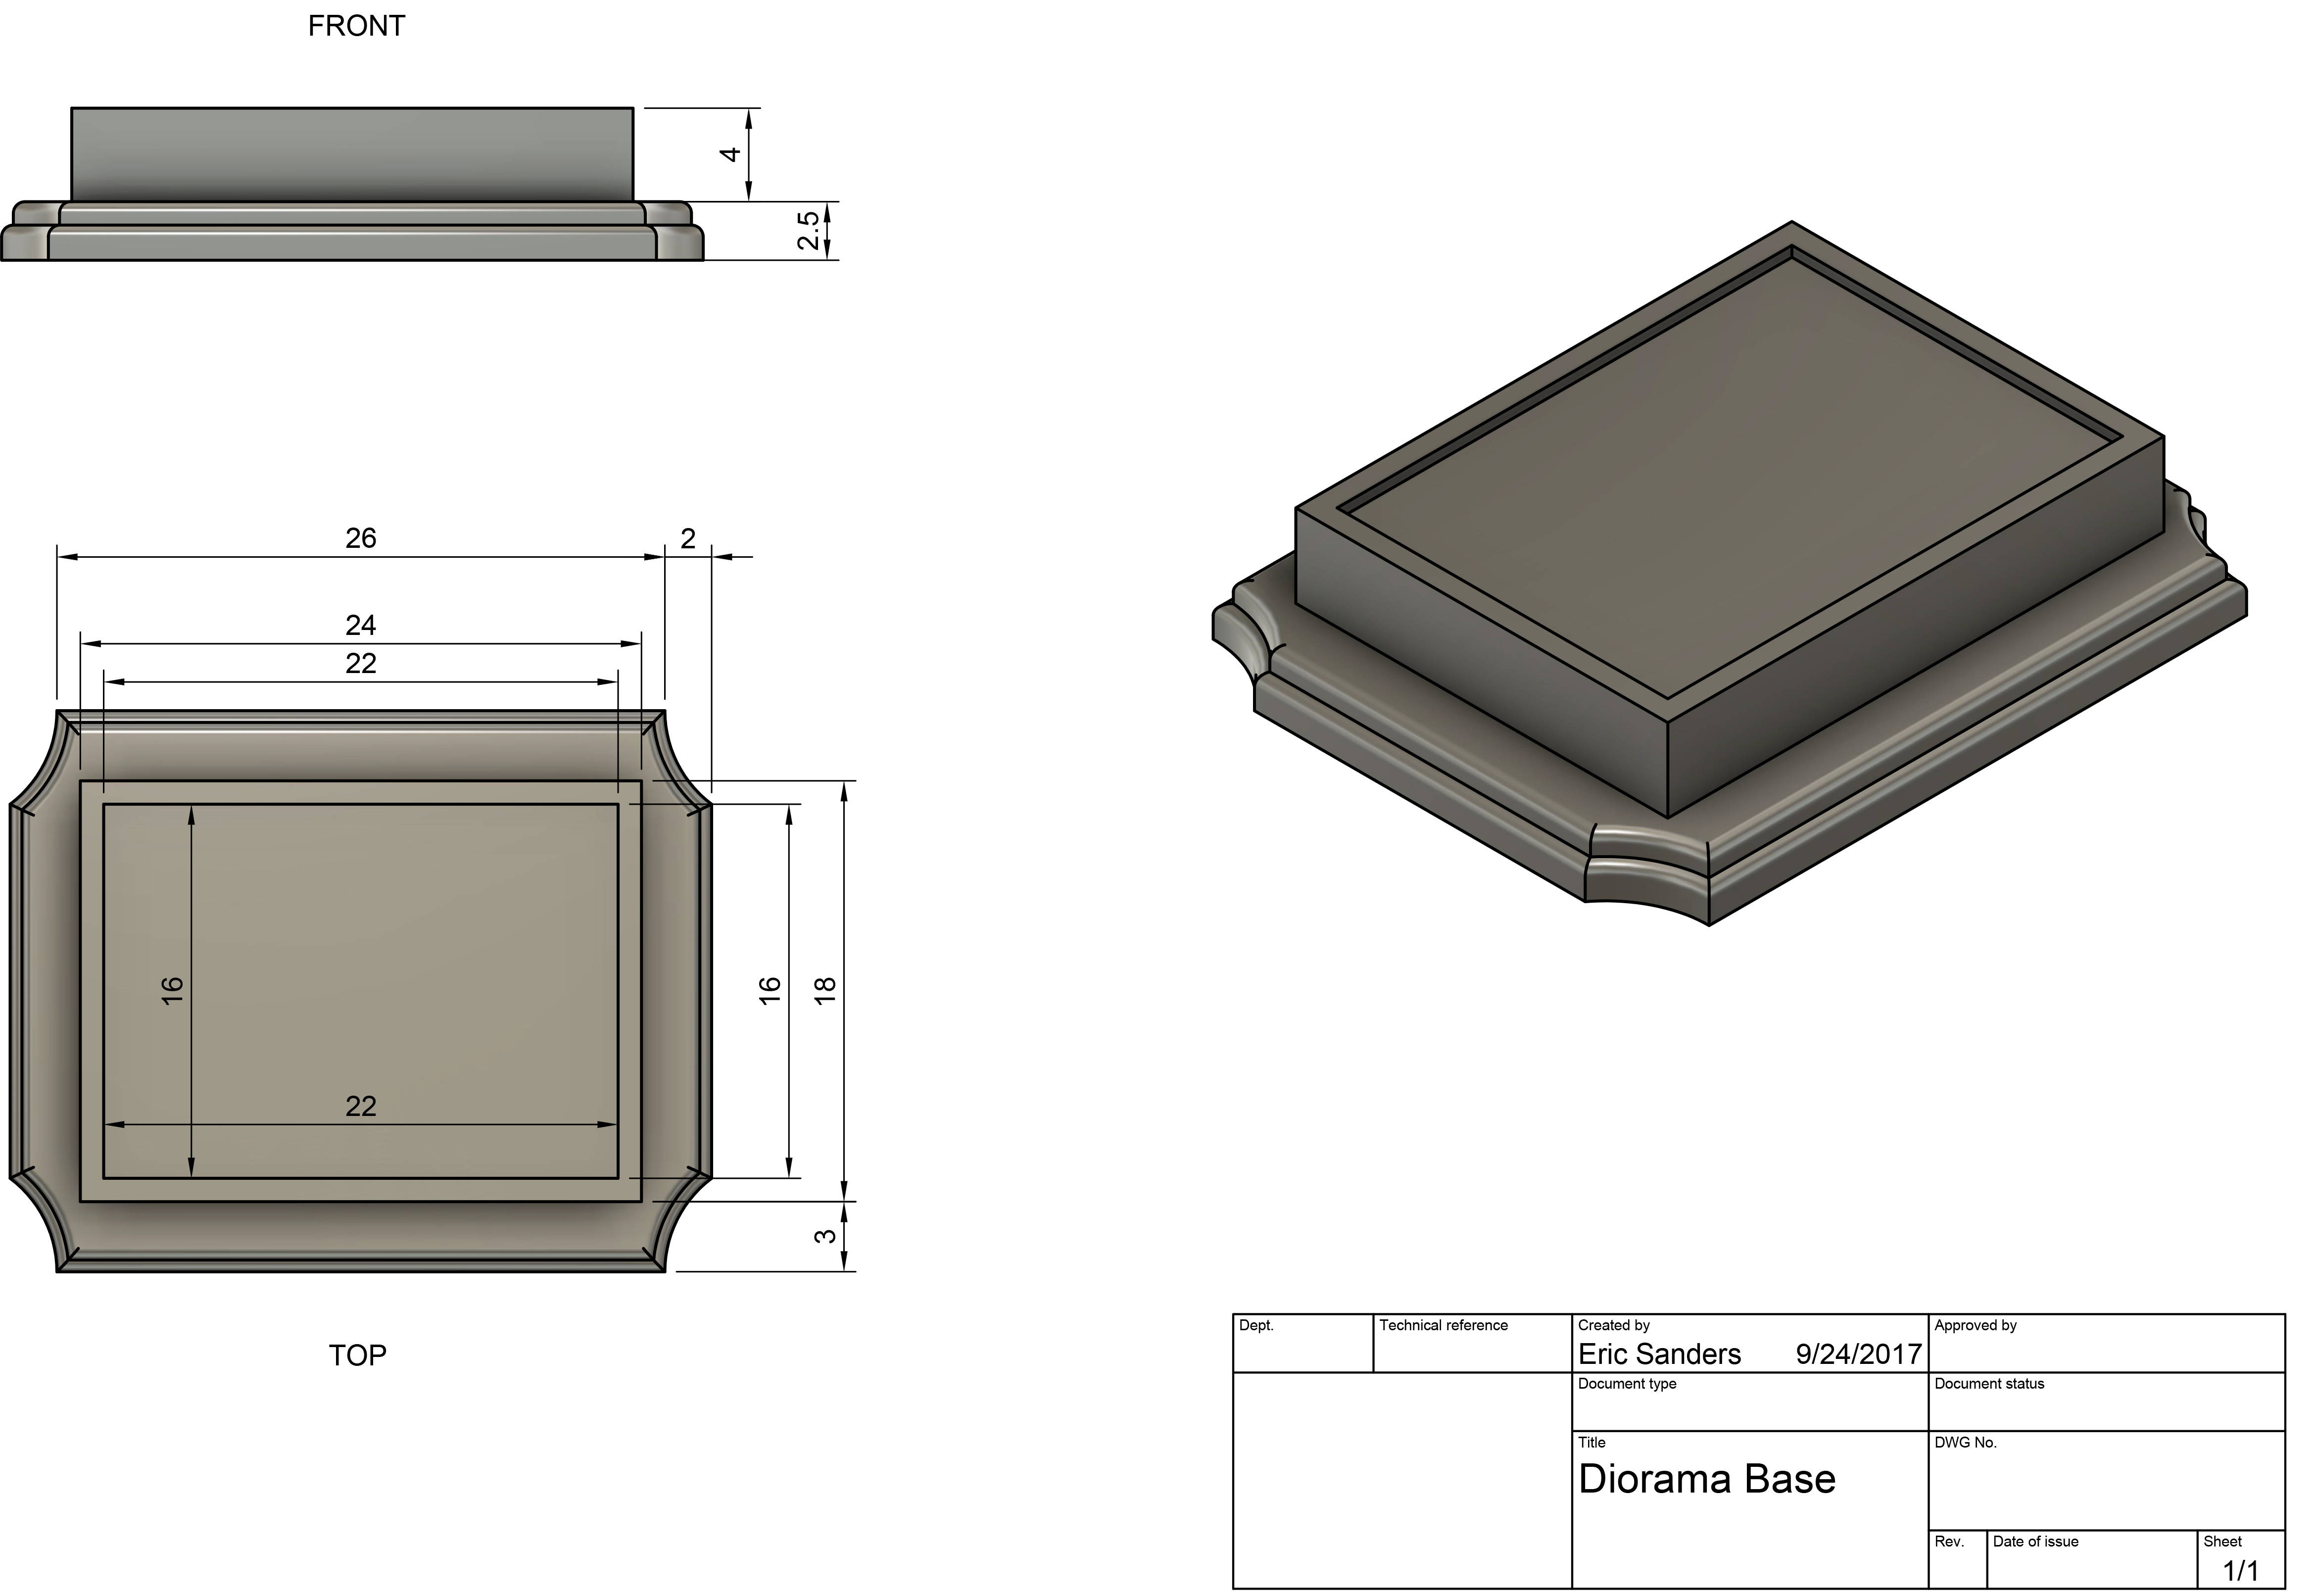
I've drafted some preliminary ideas on the structure of the base as well, but honestly it's all subject to change.


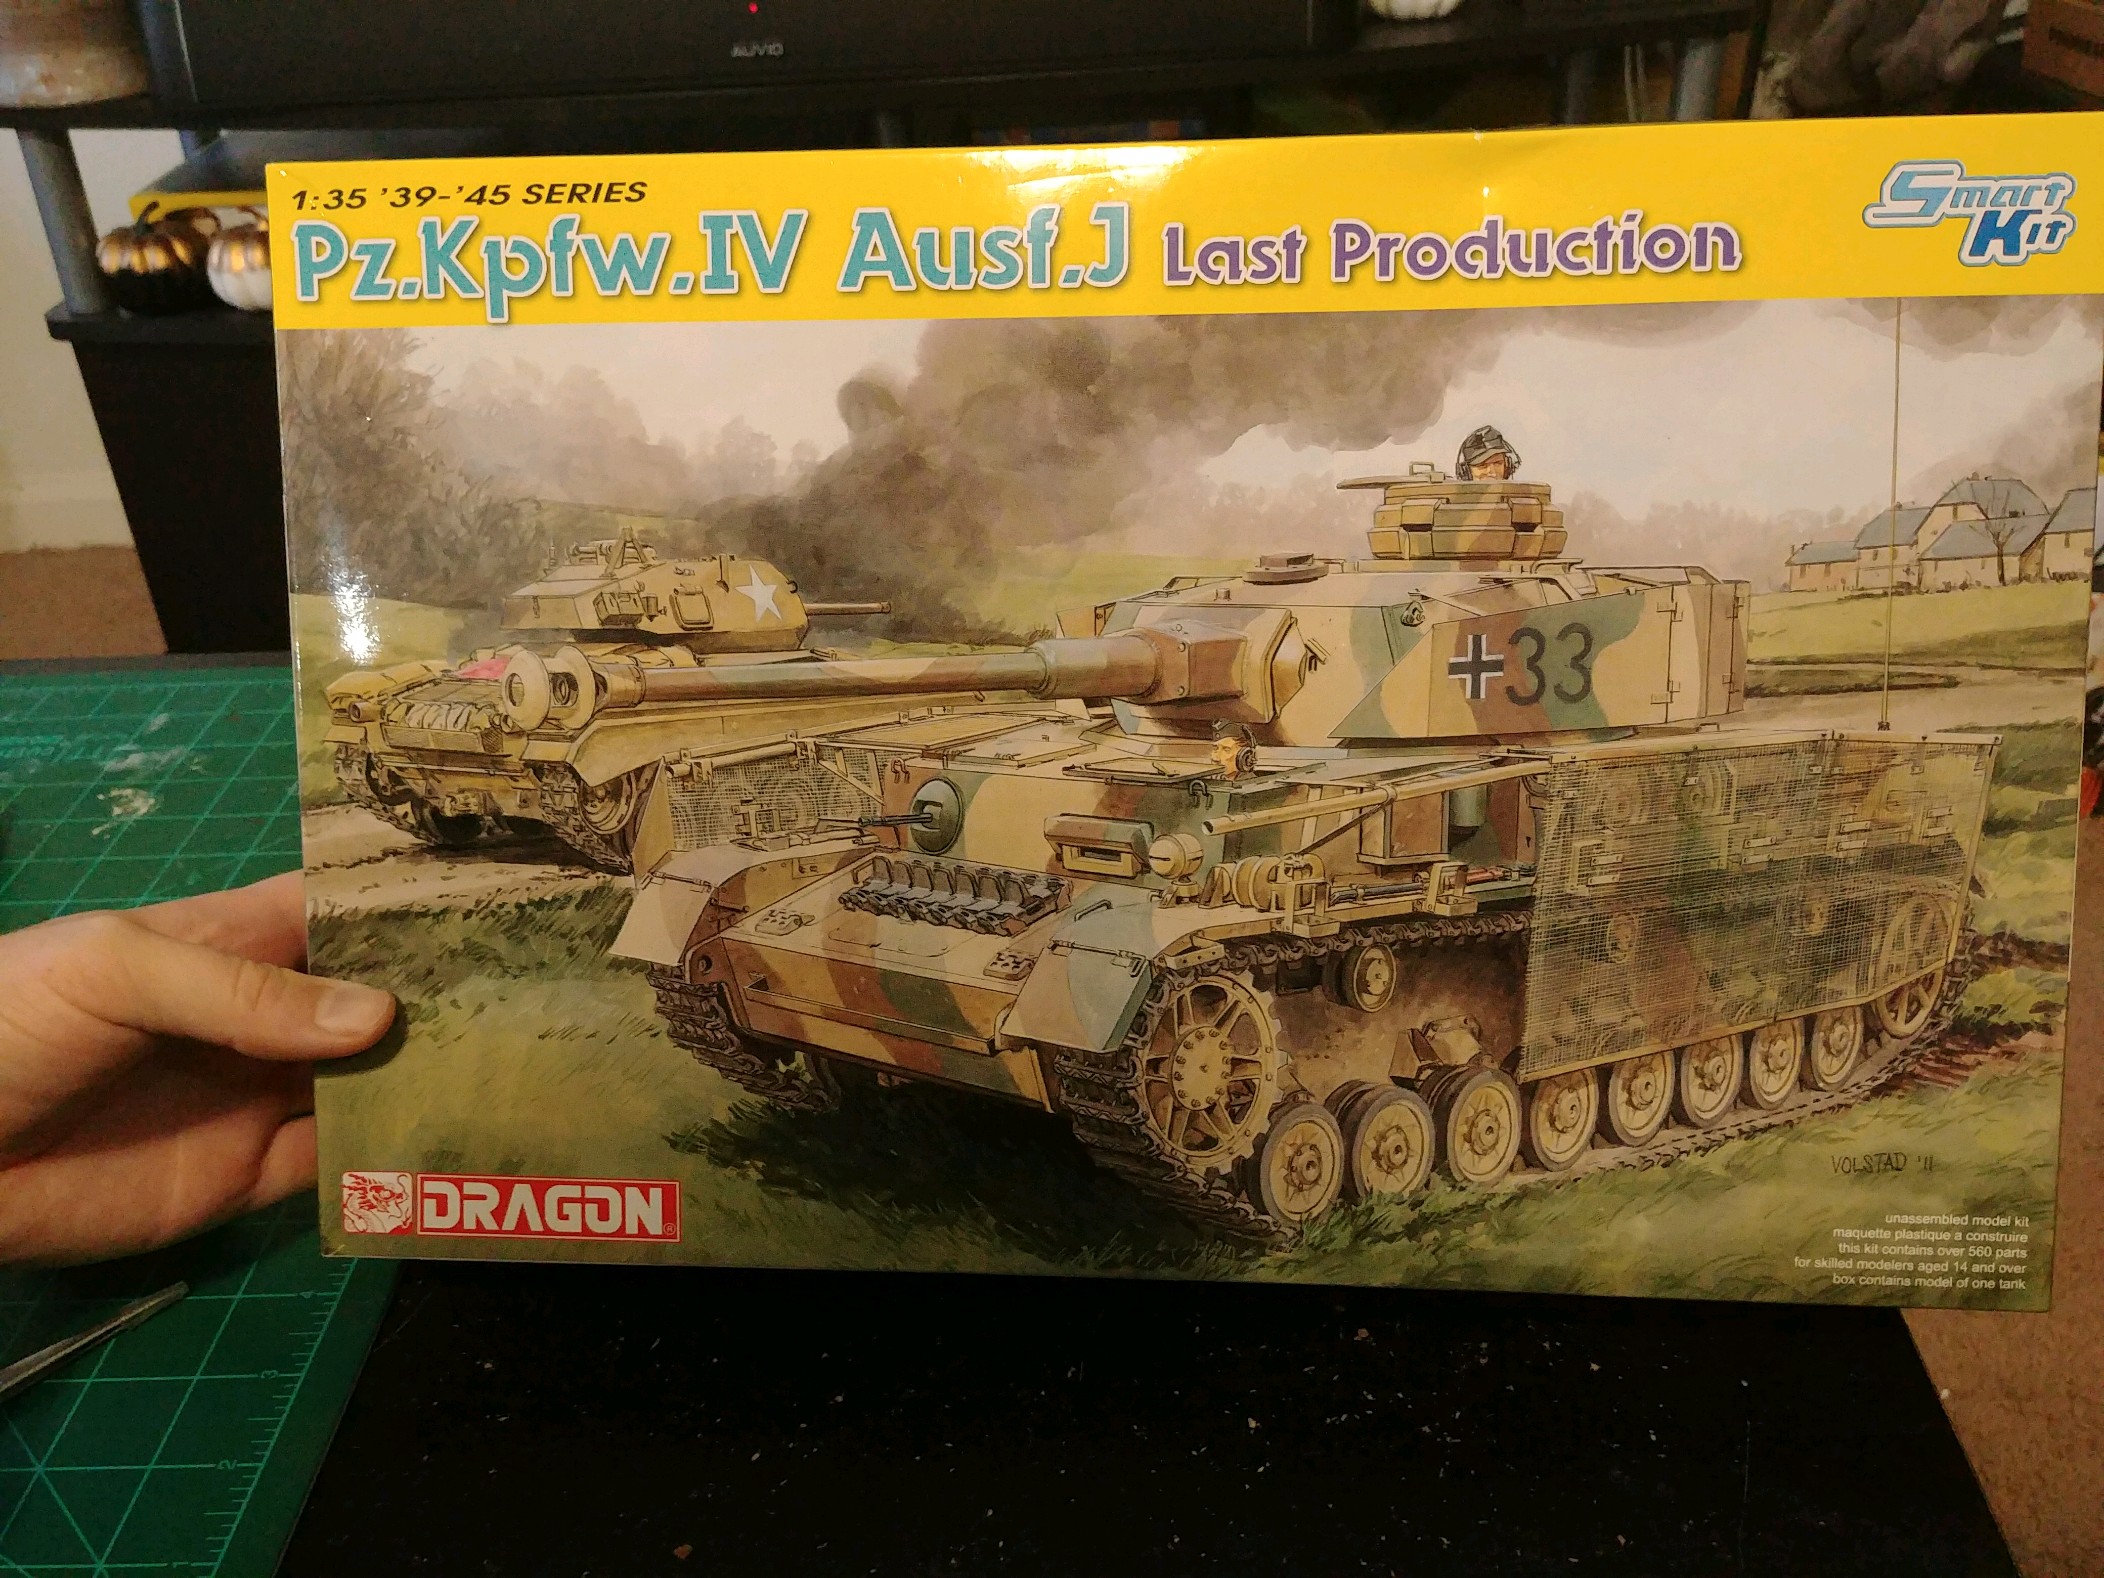
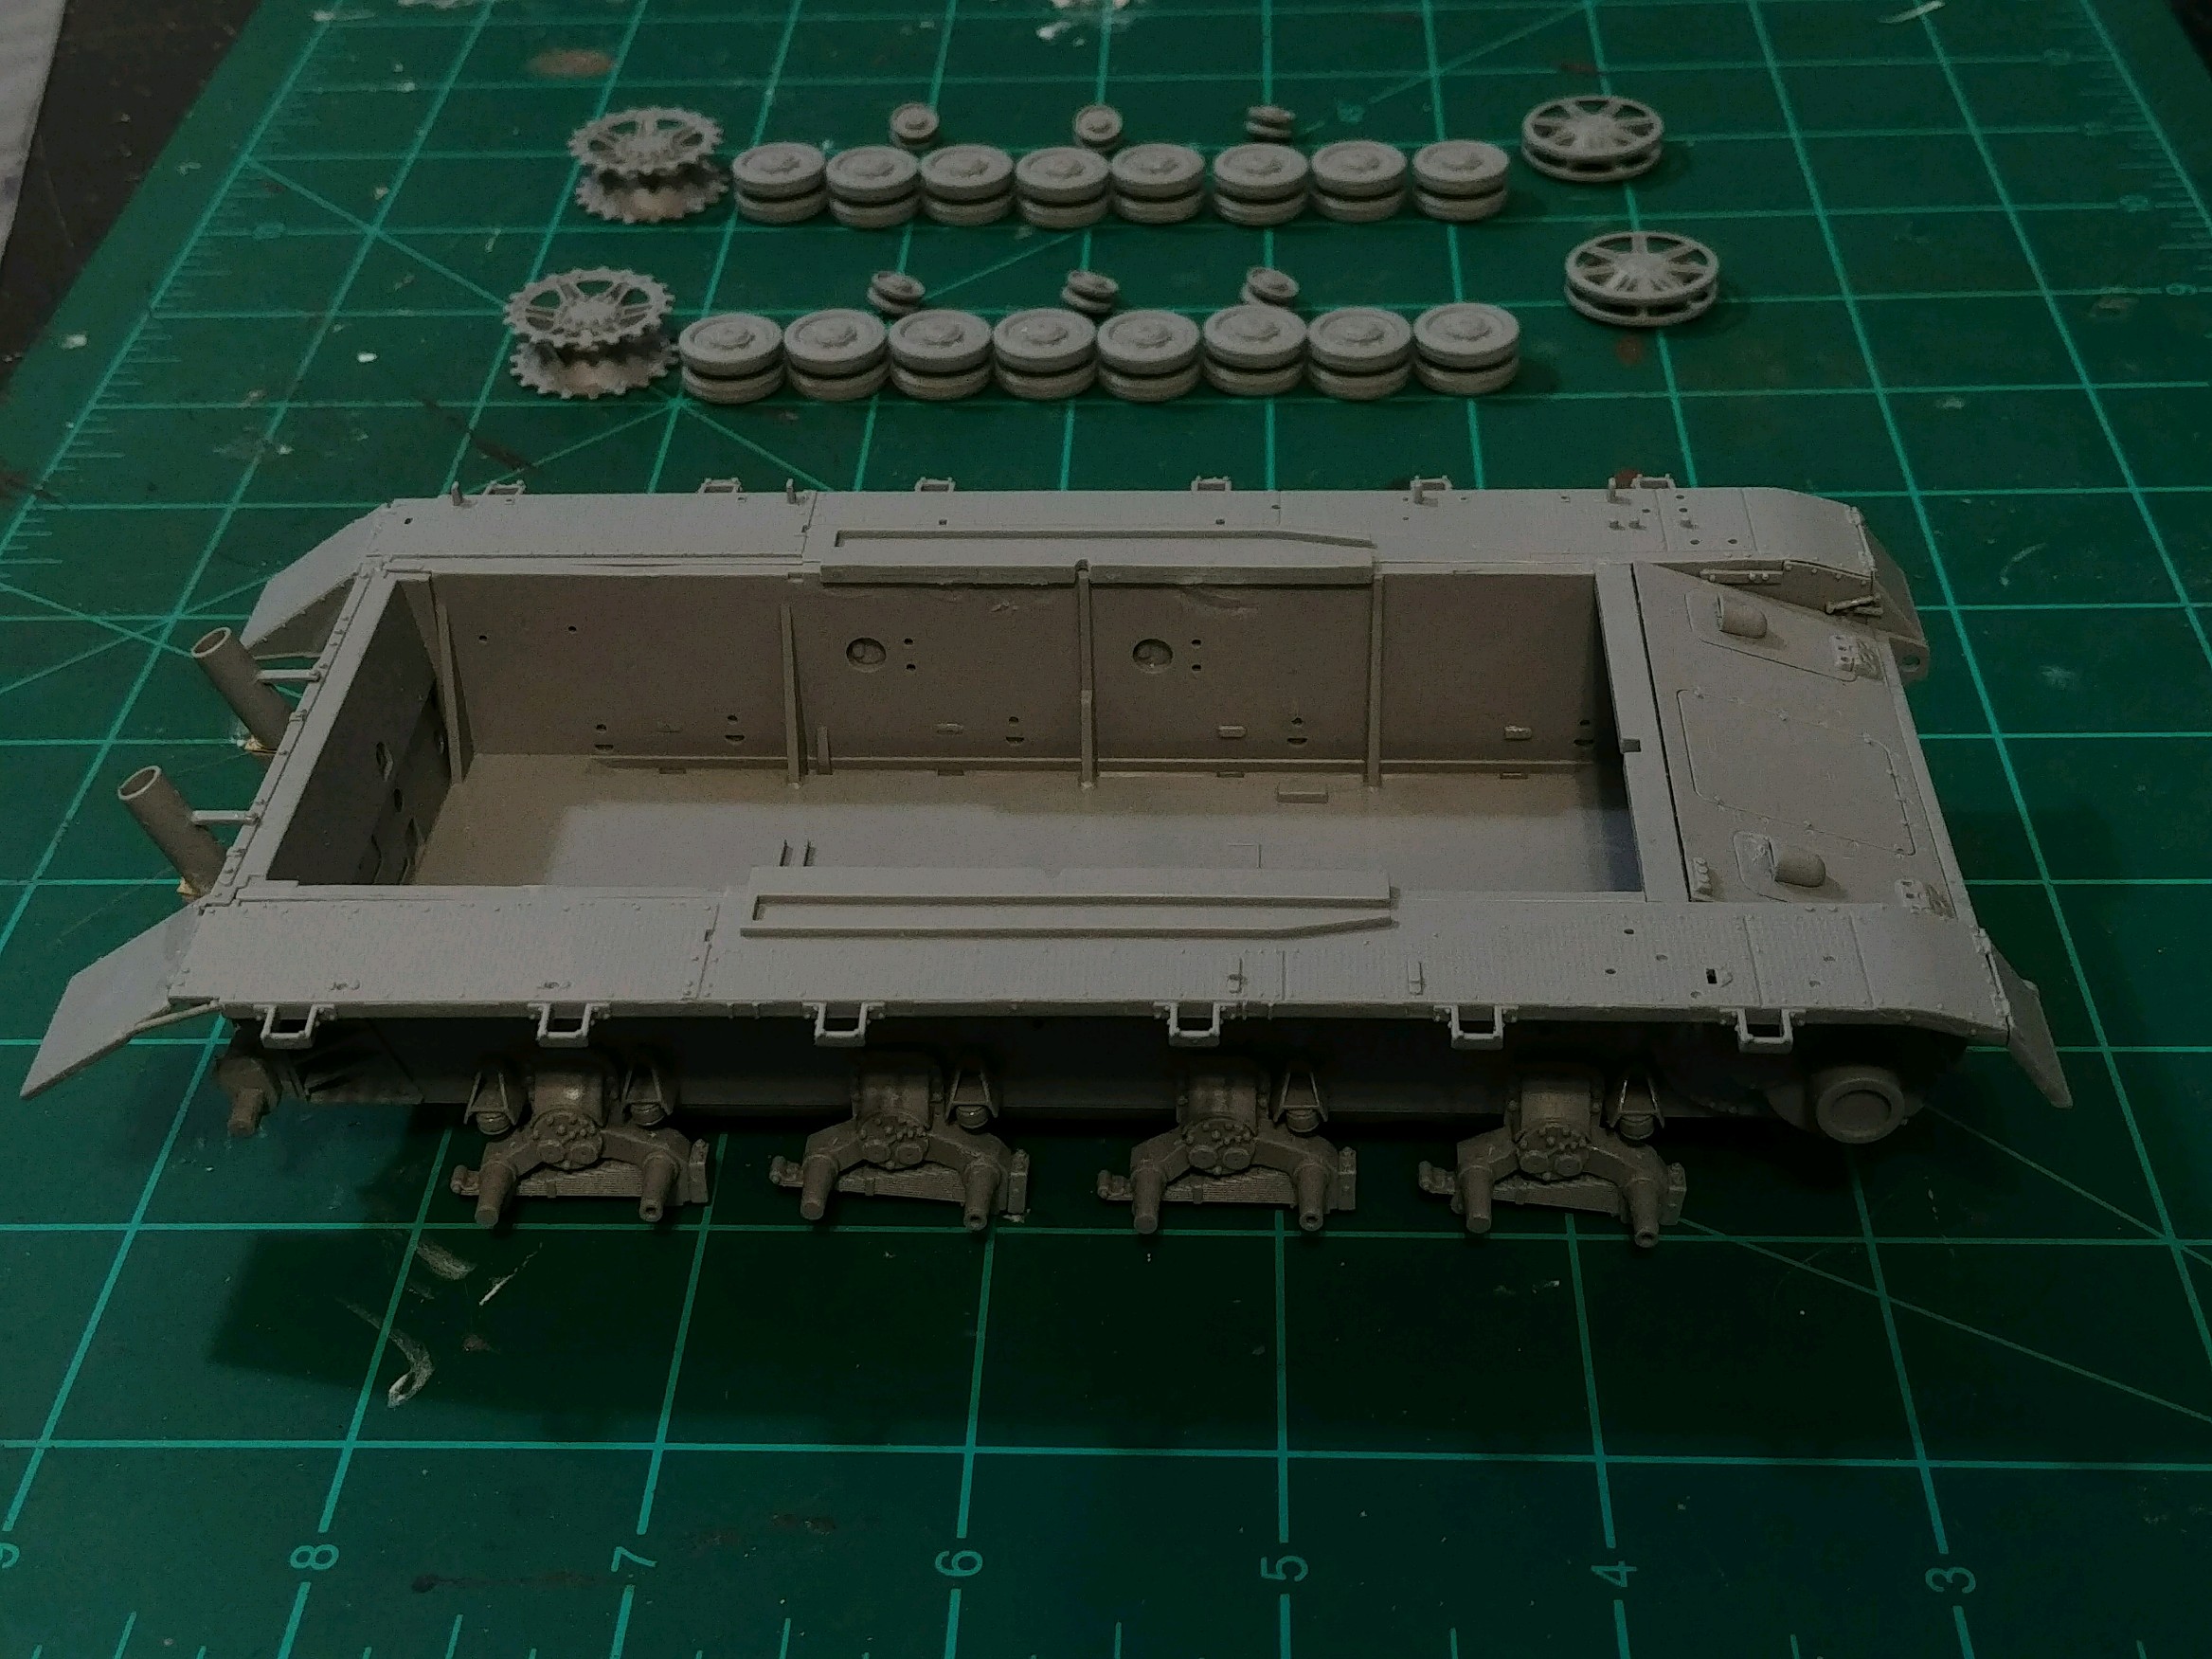
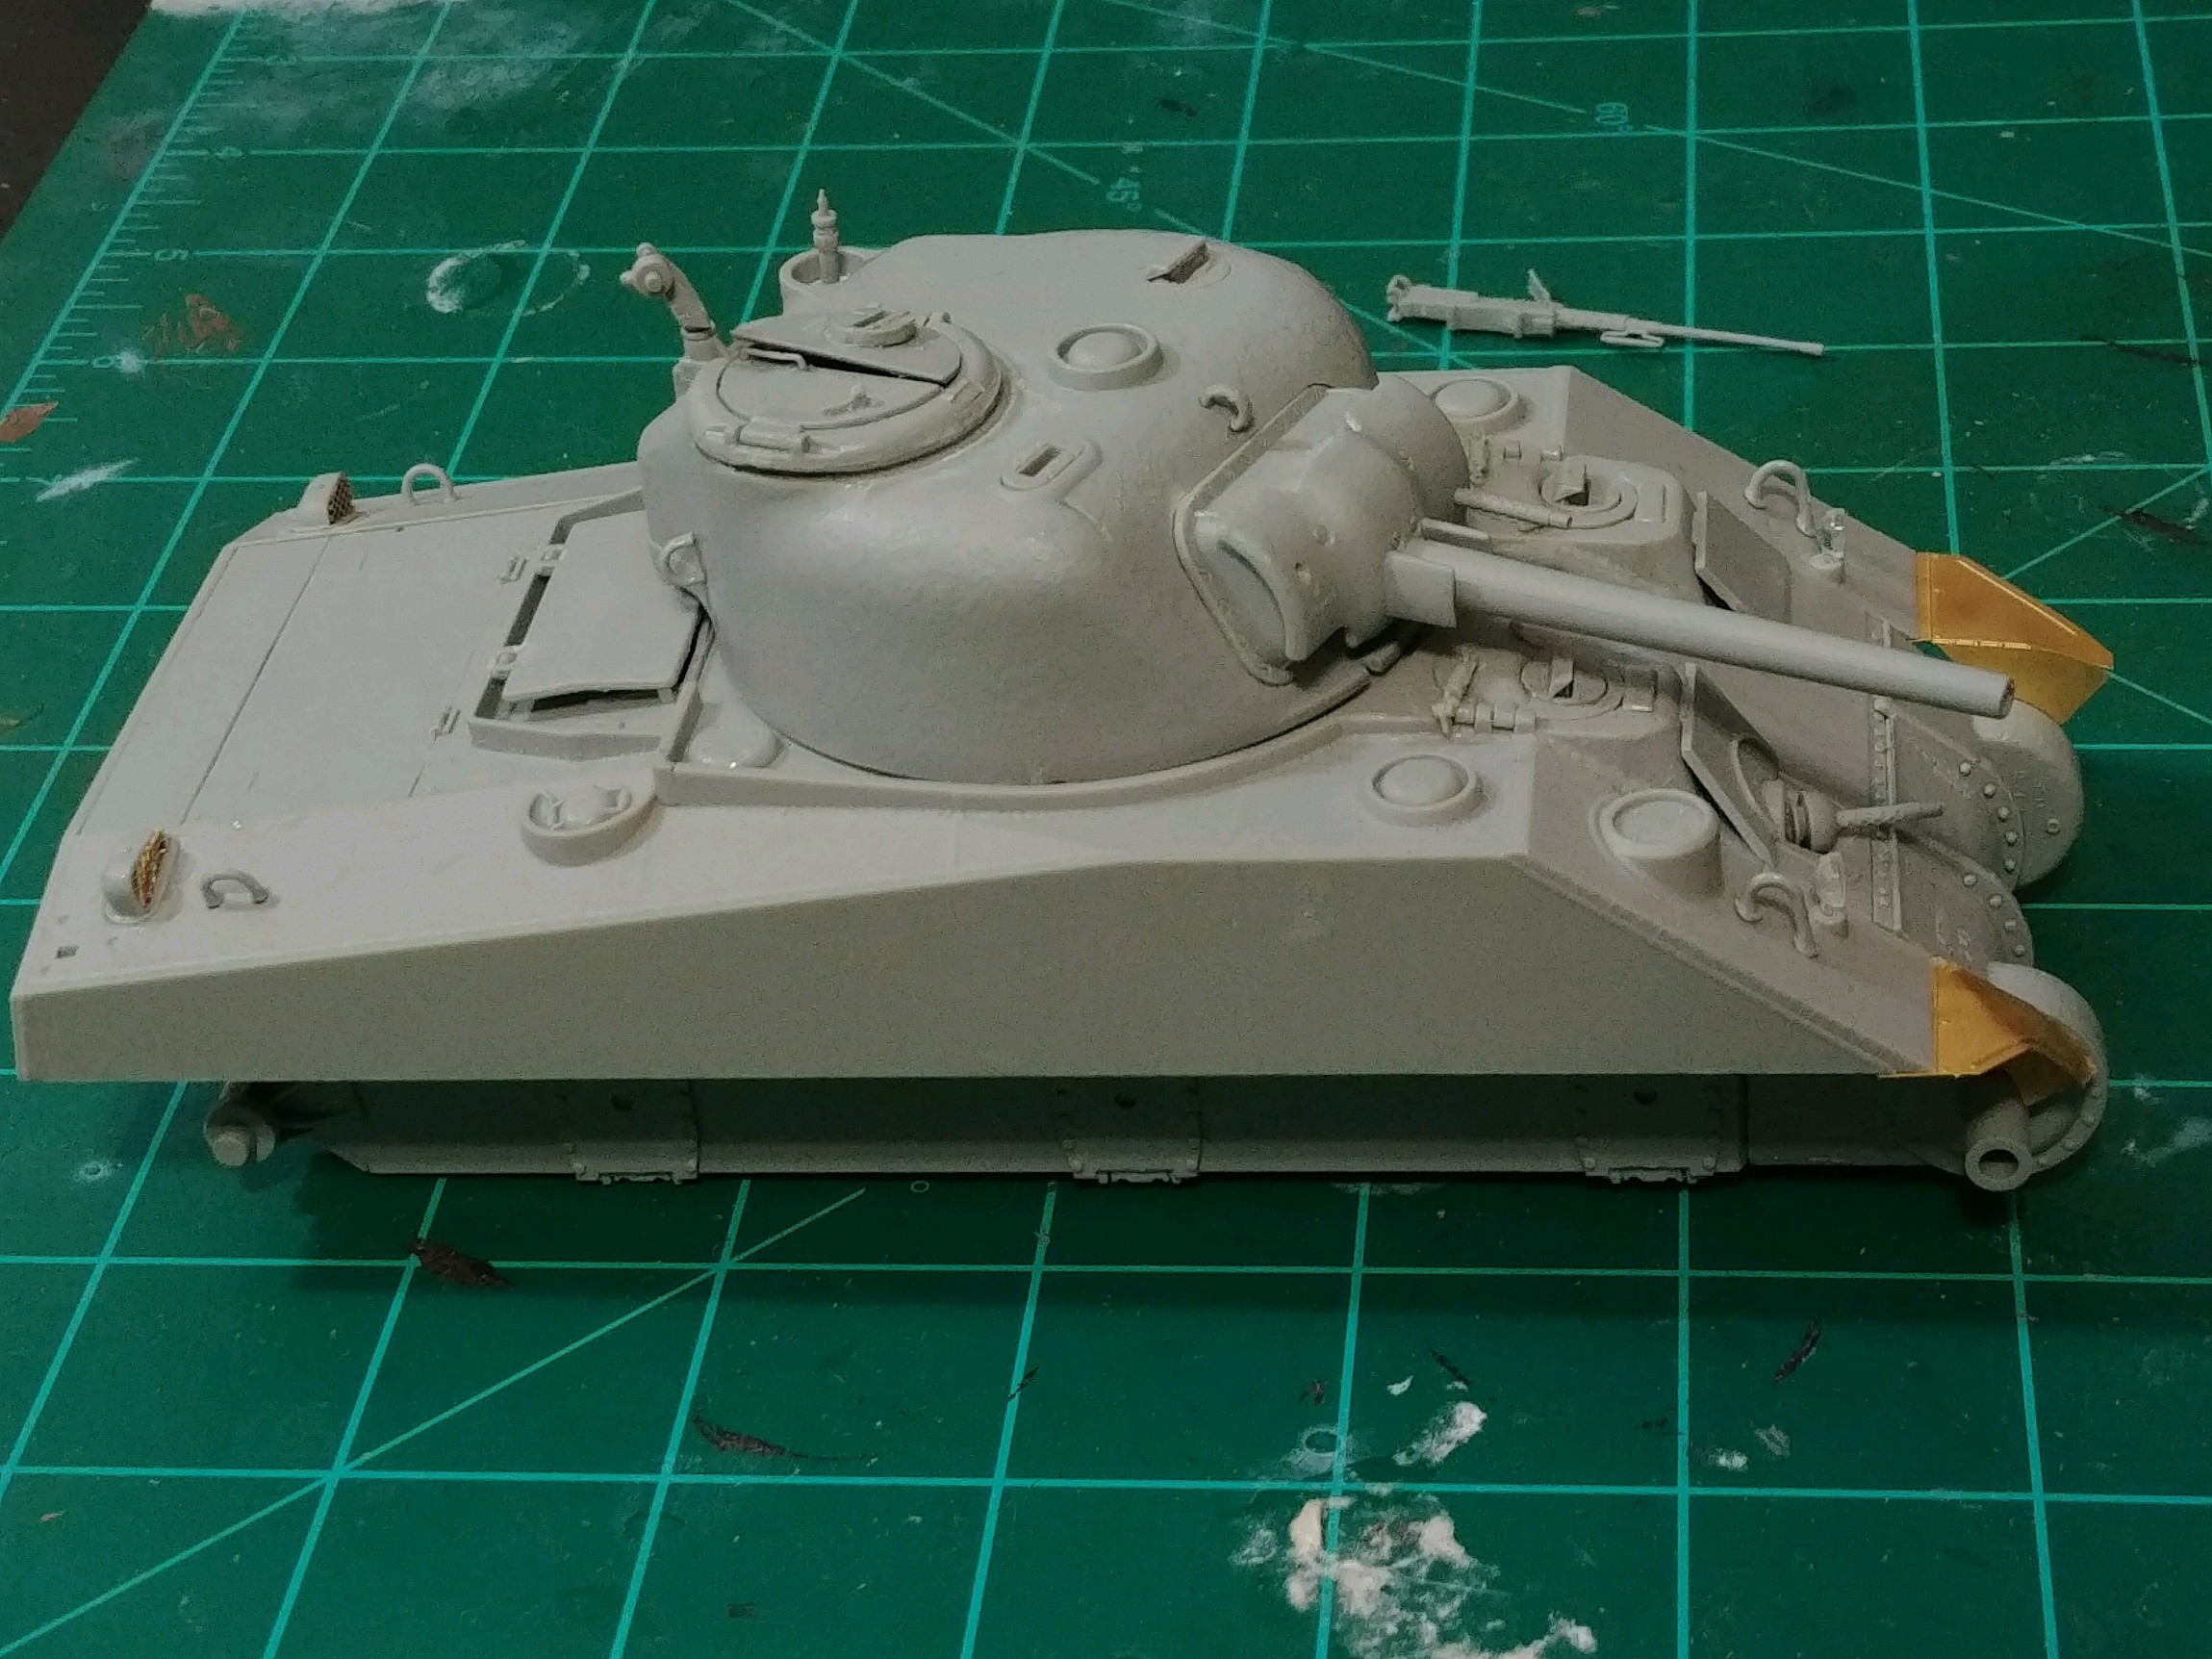
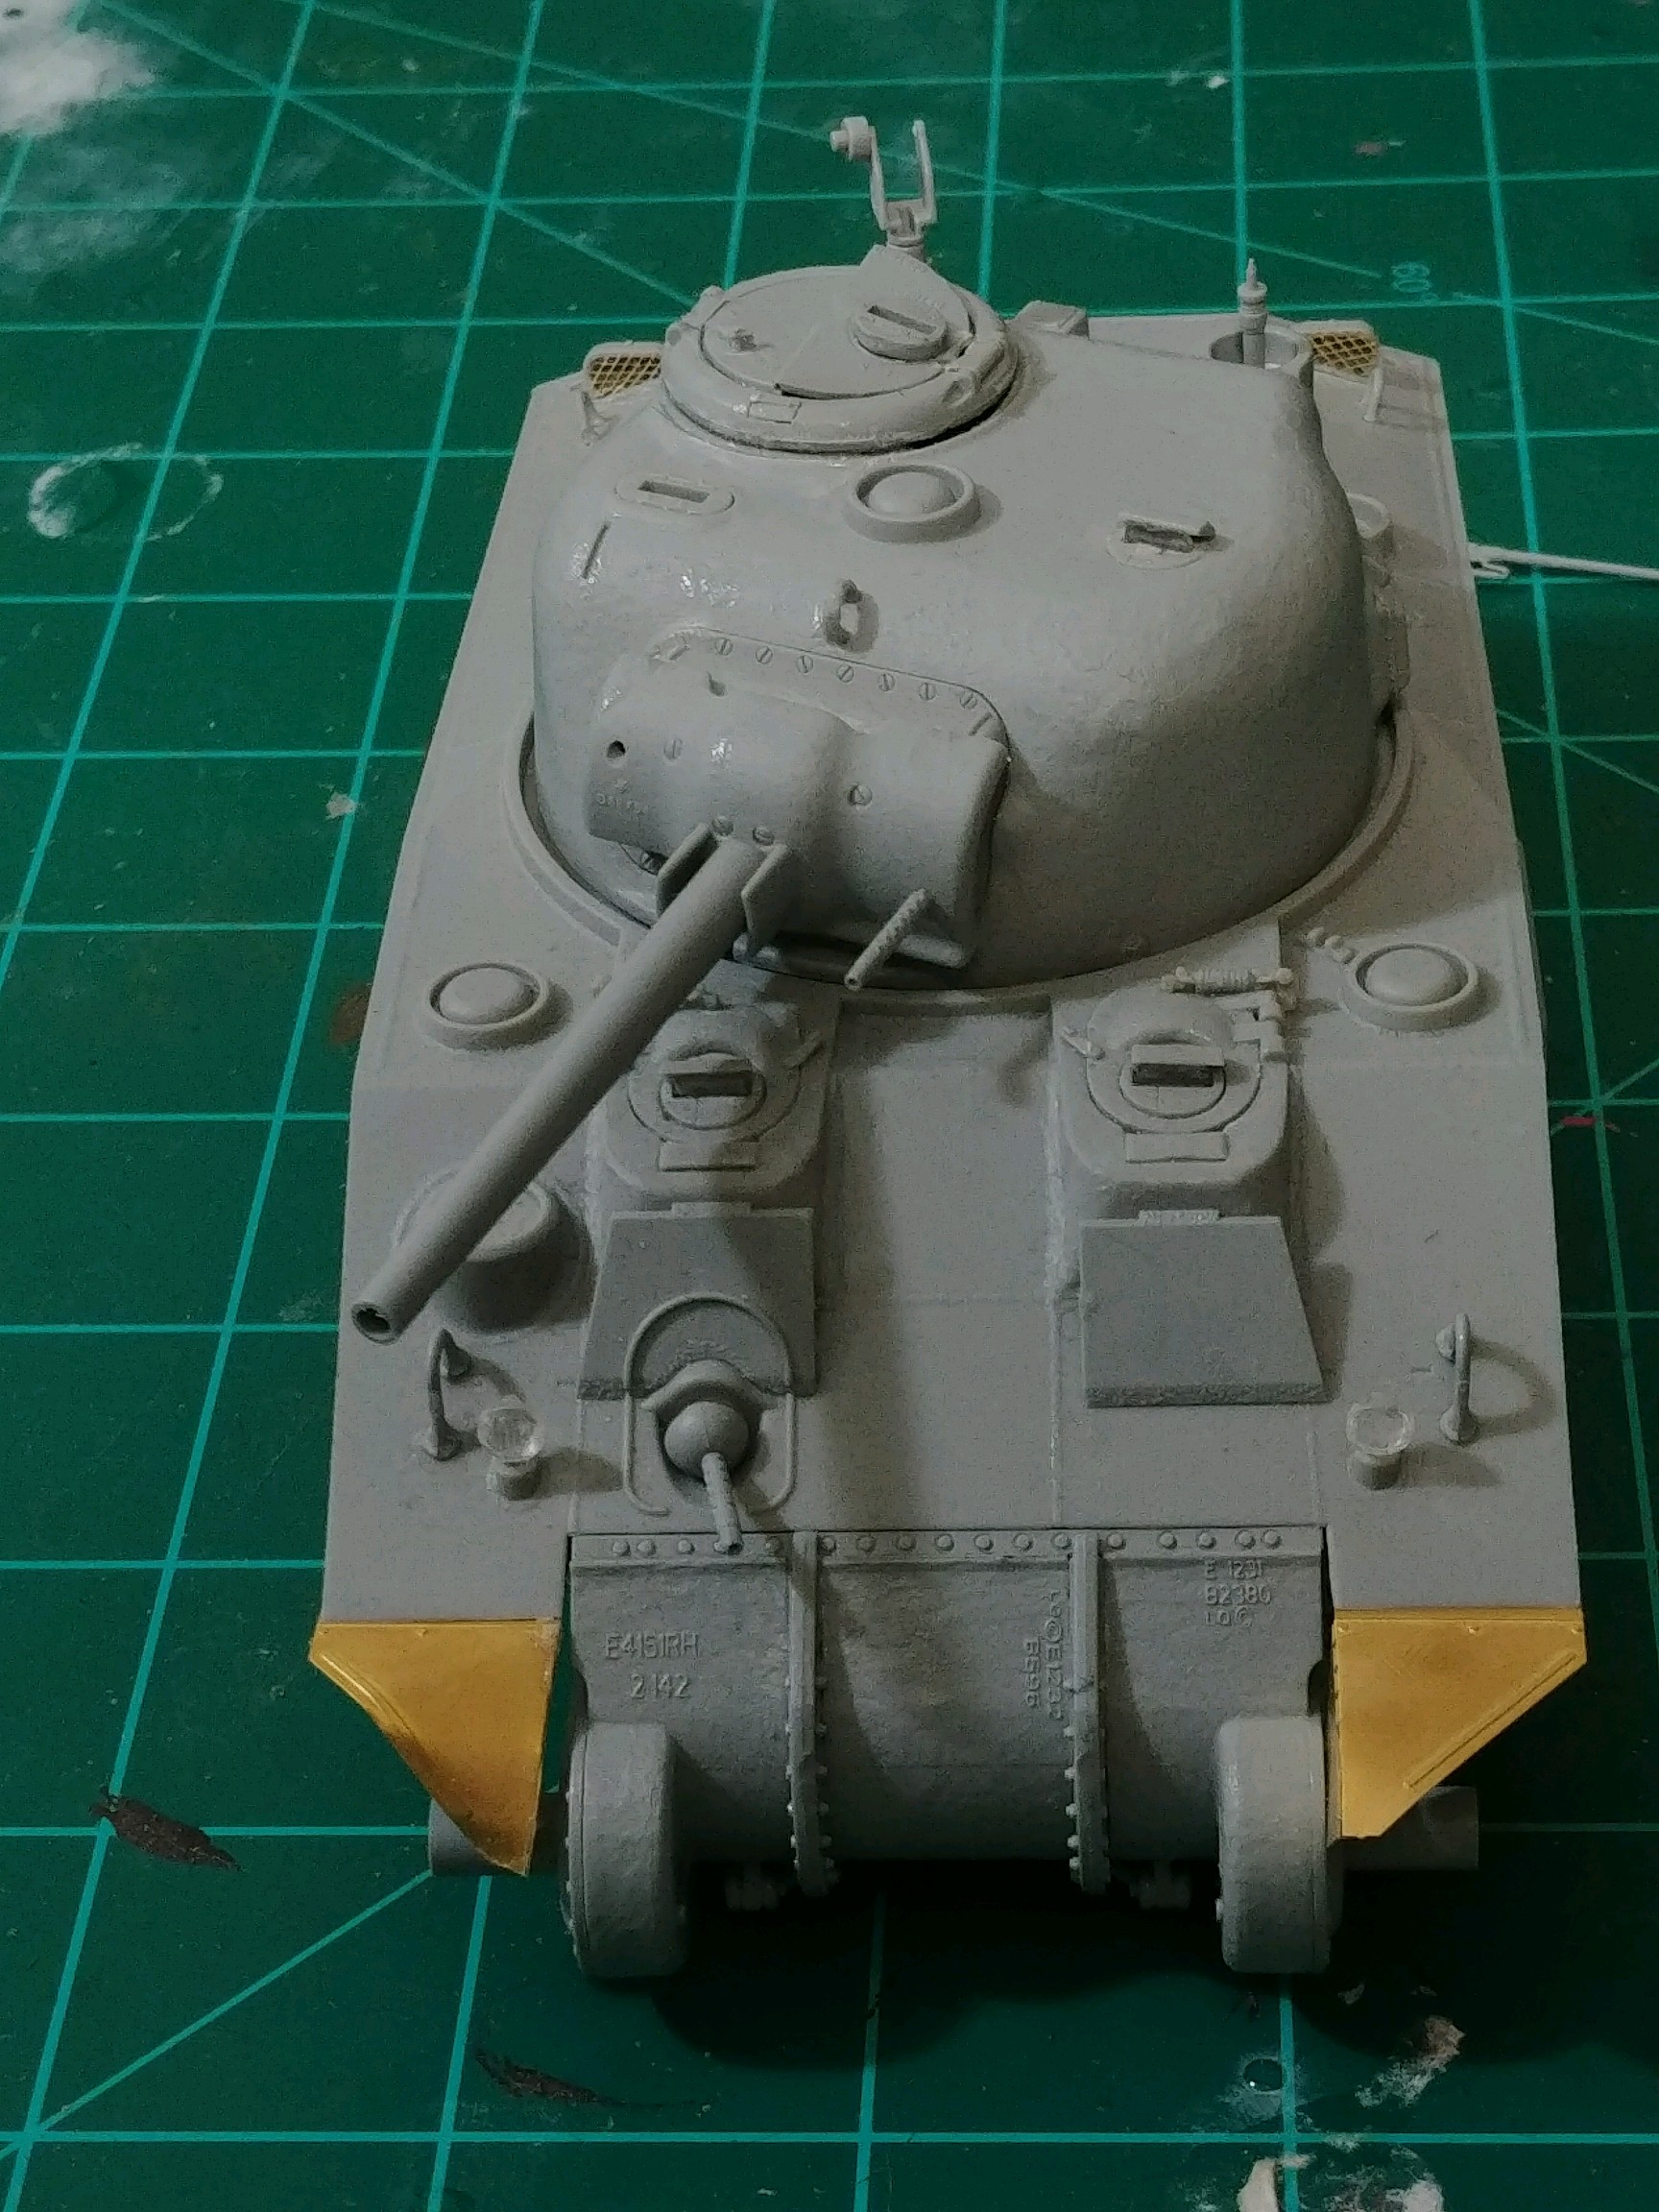
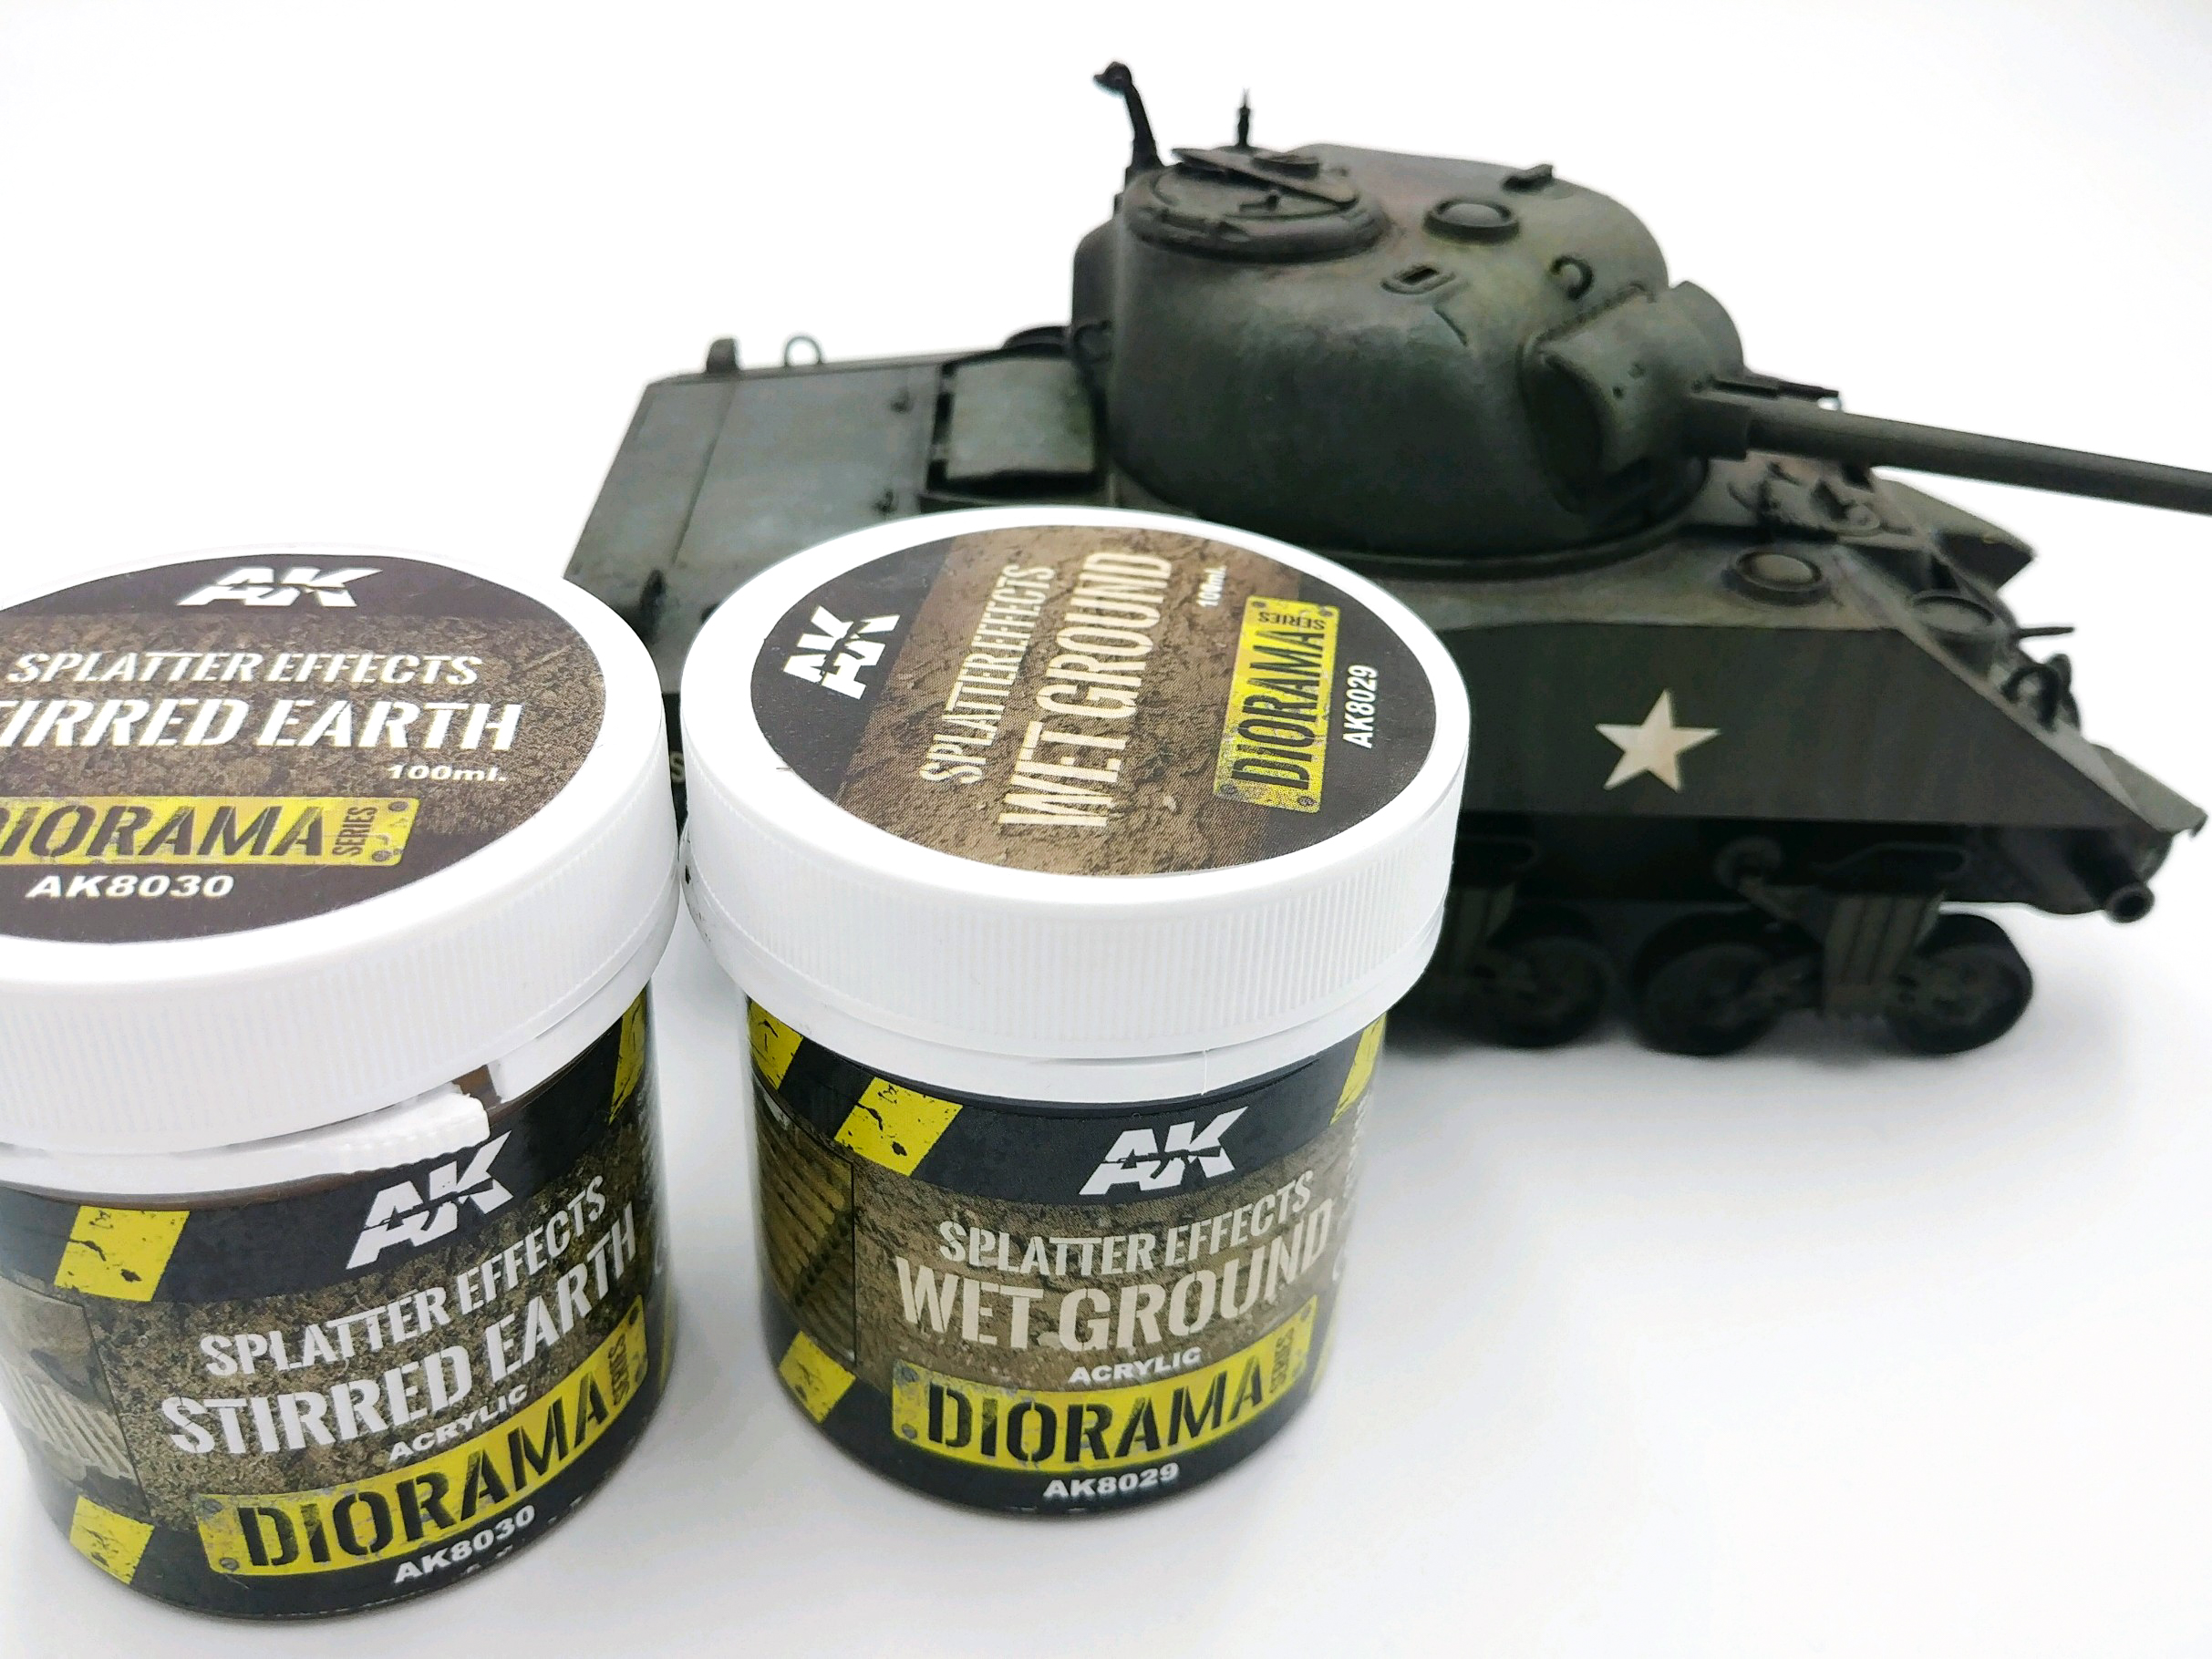
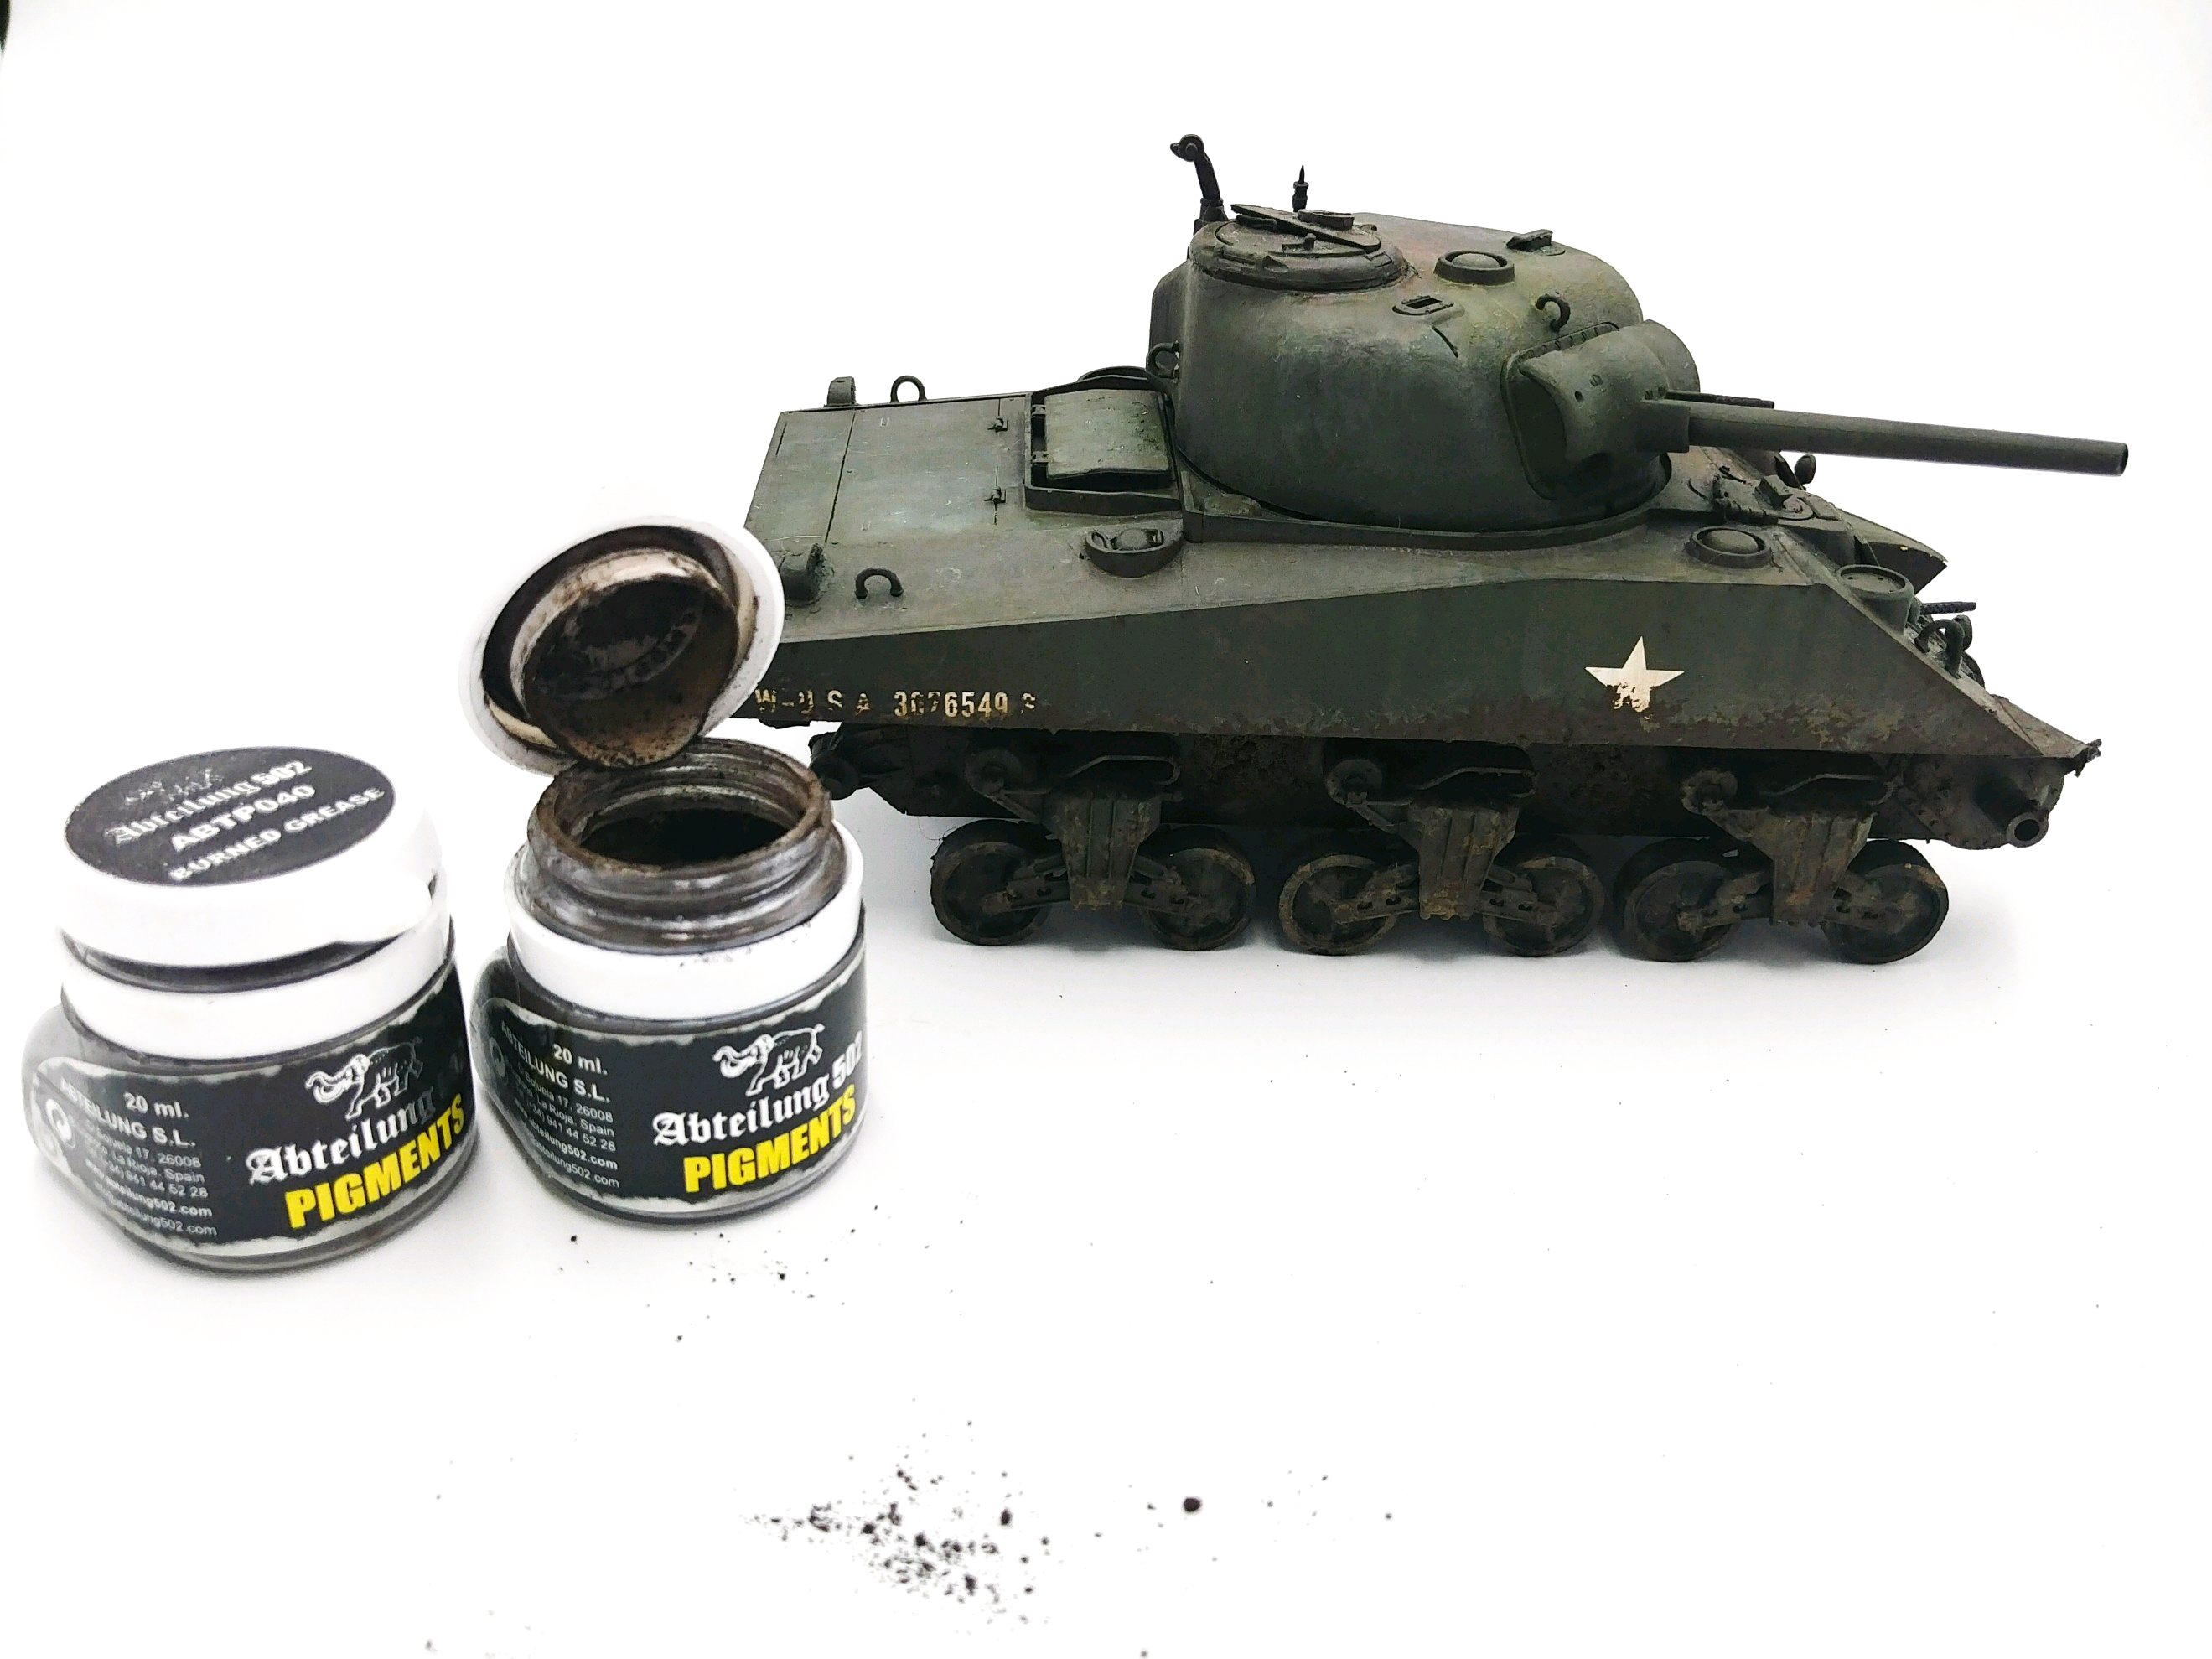
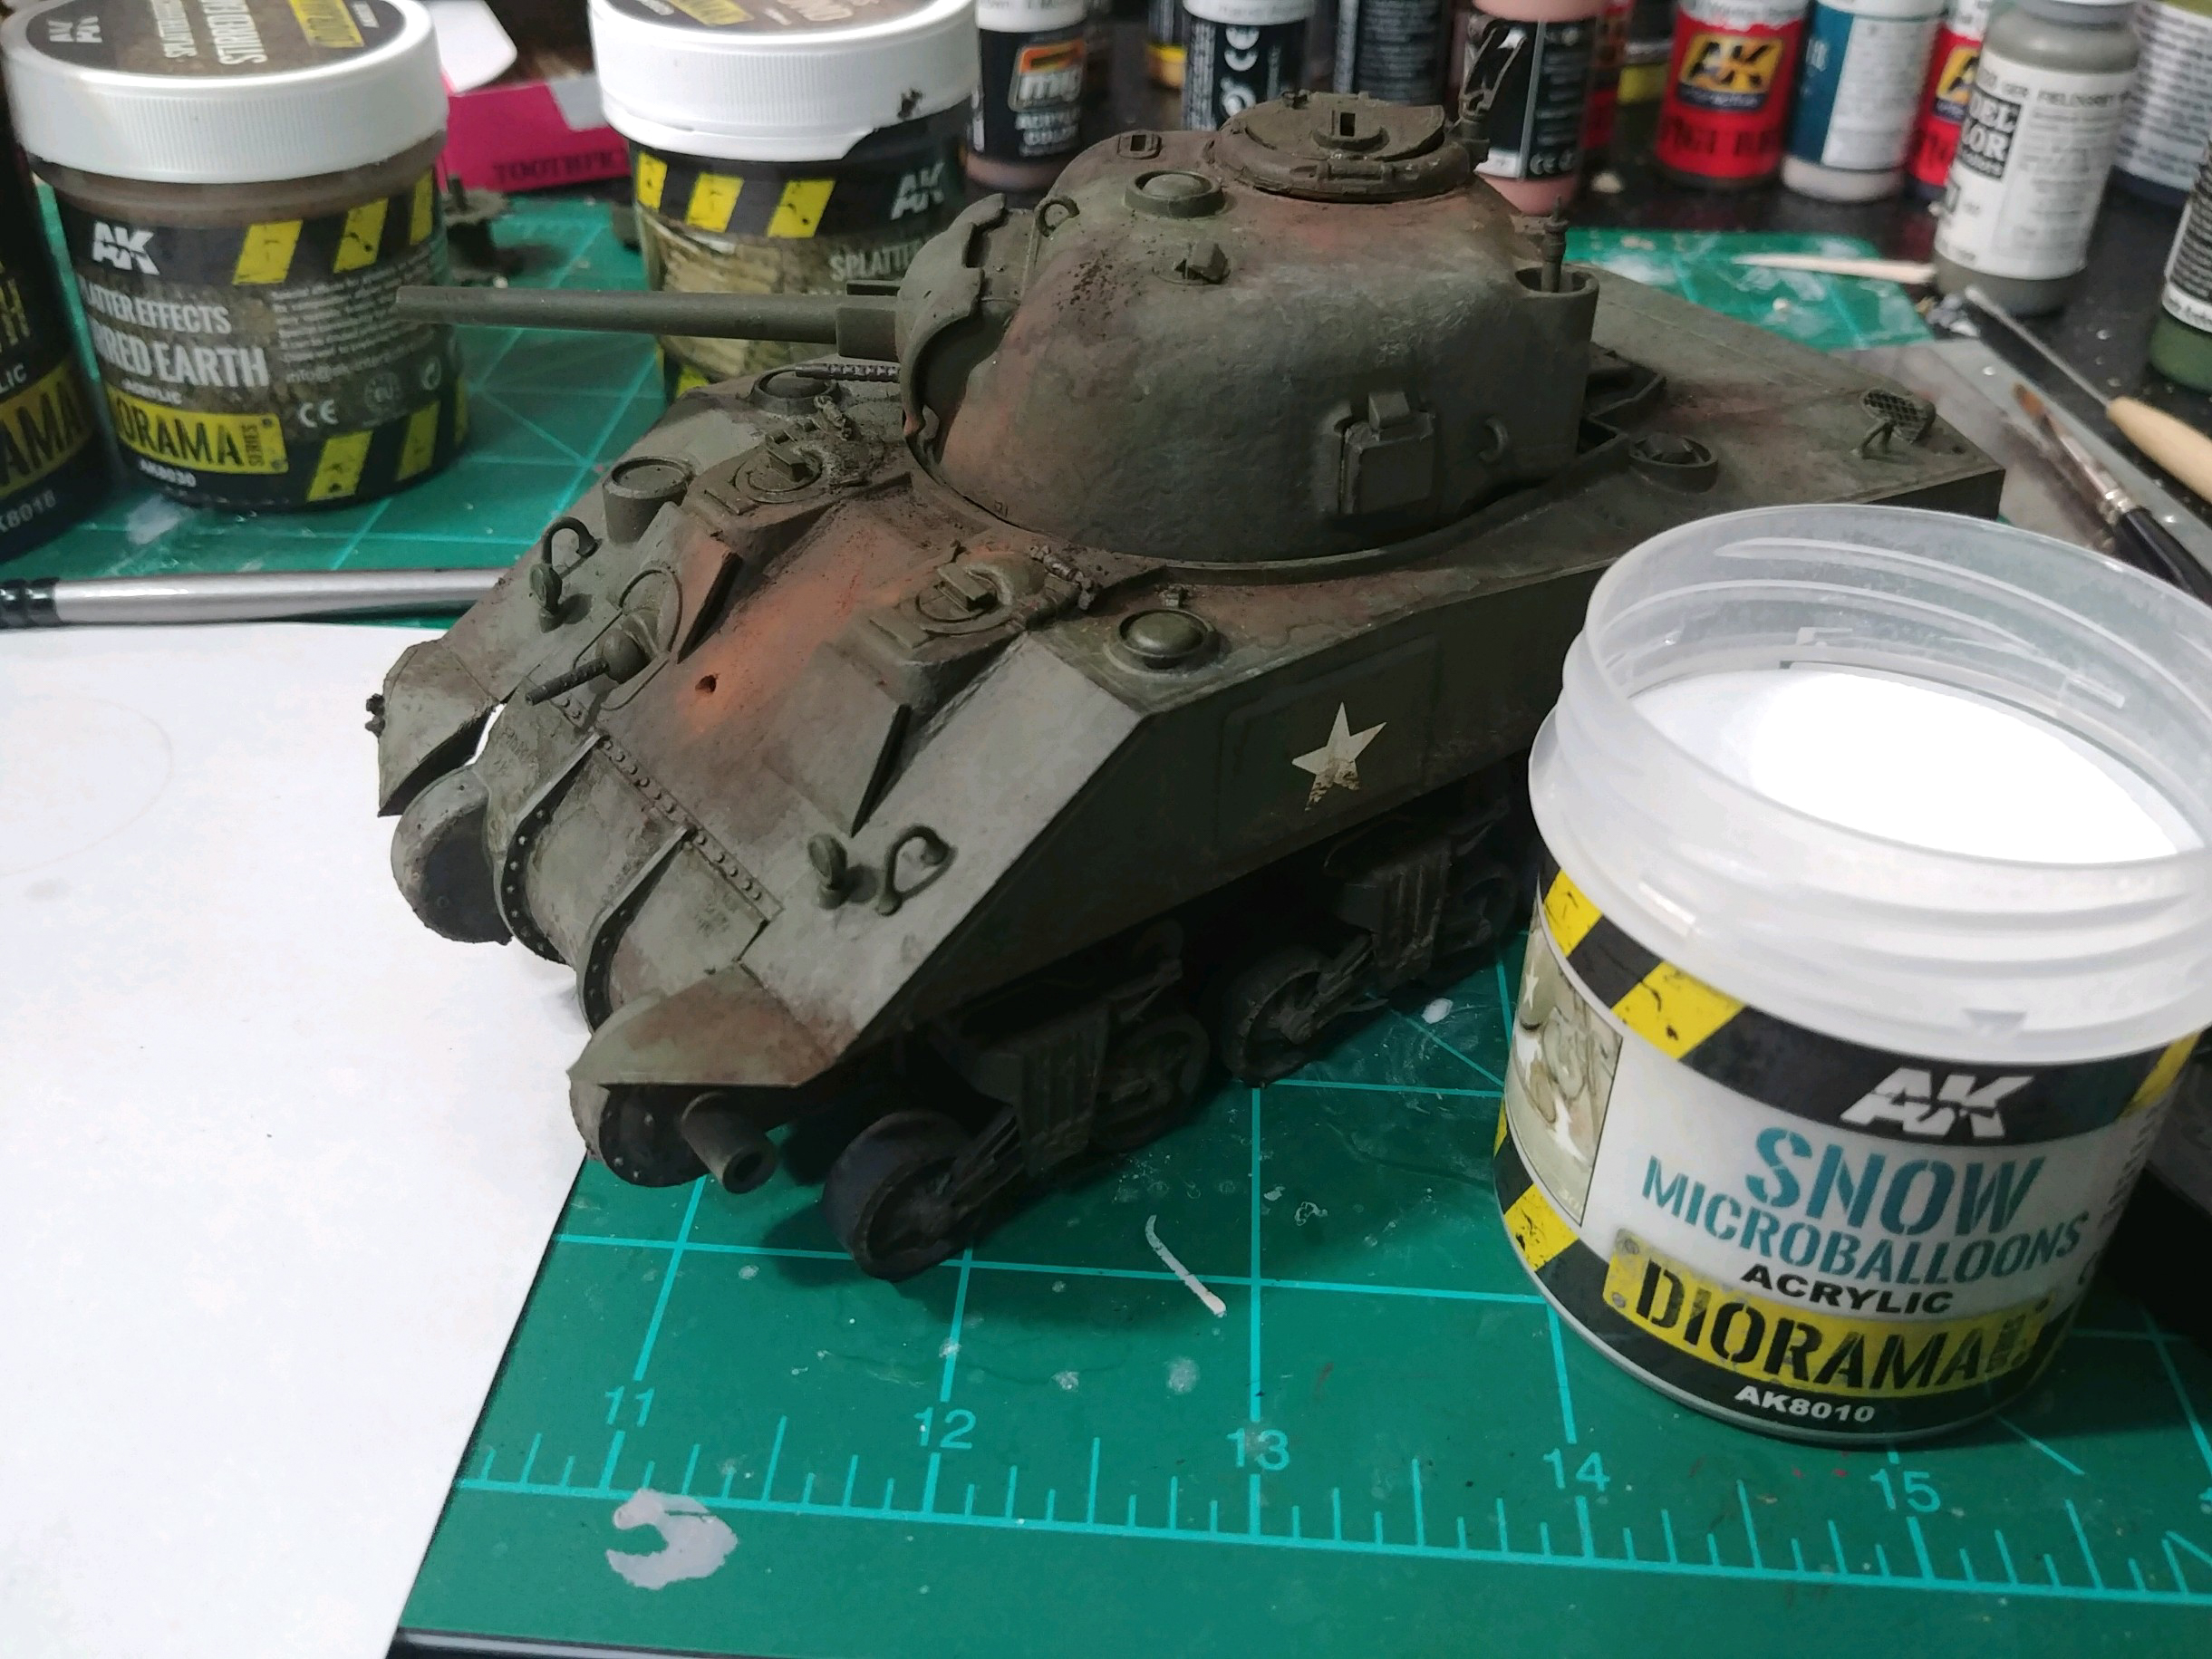
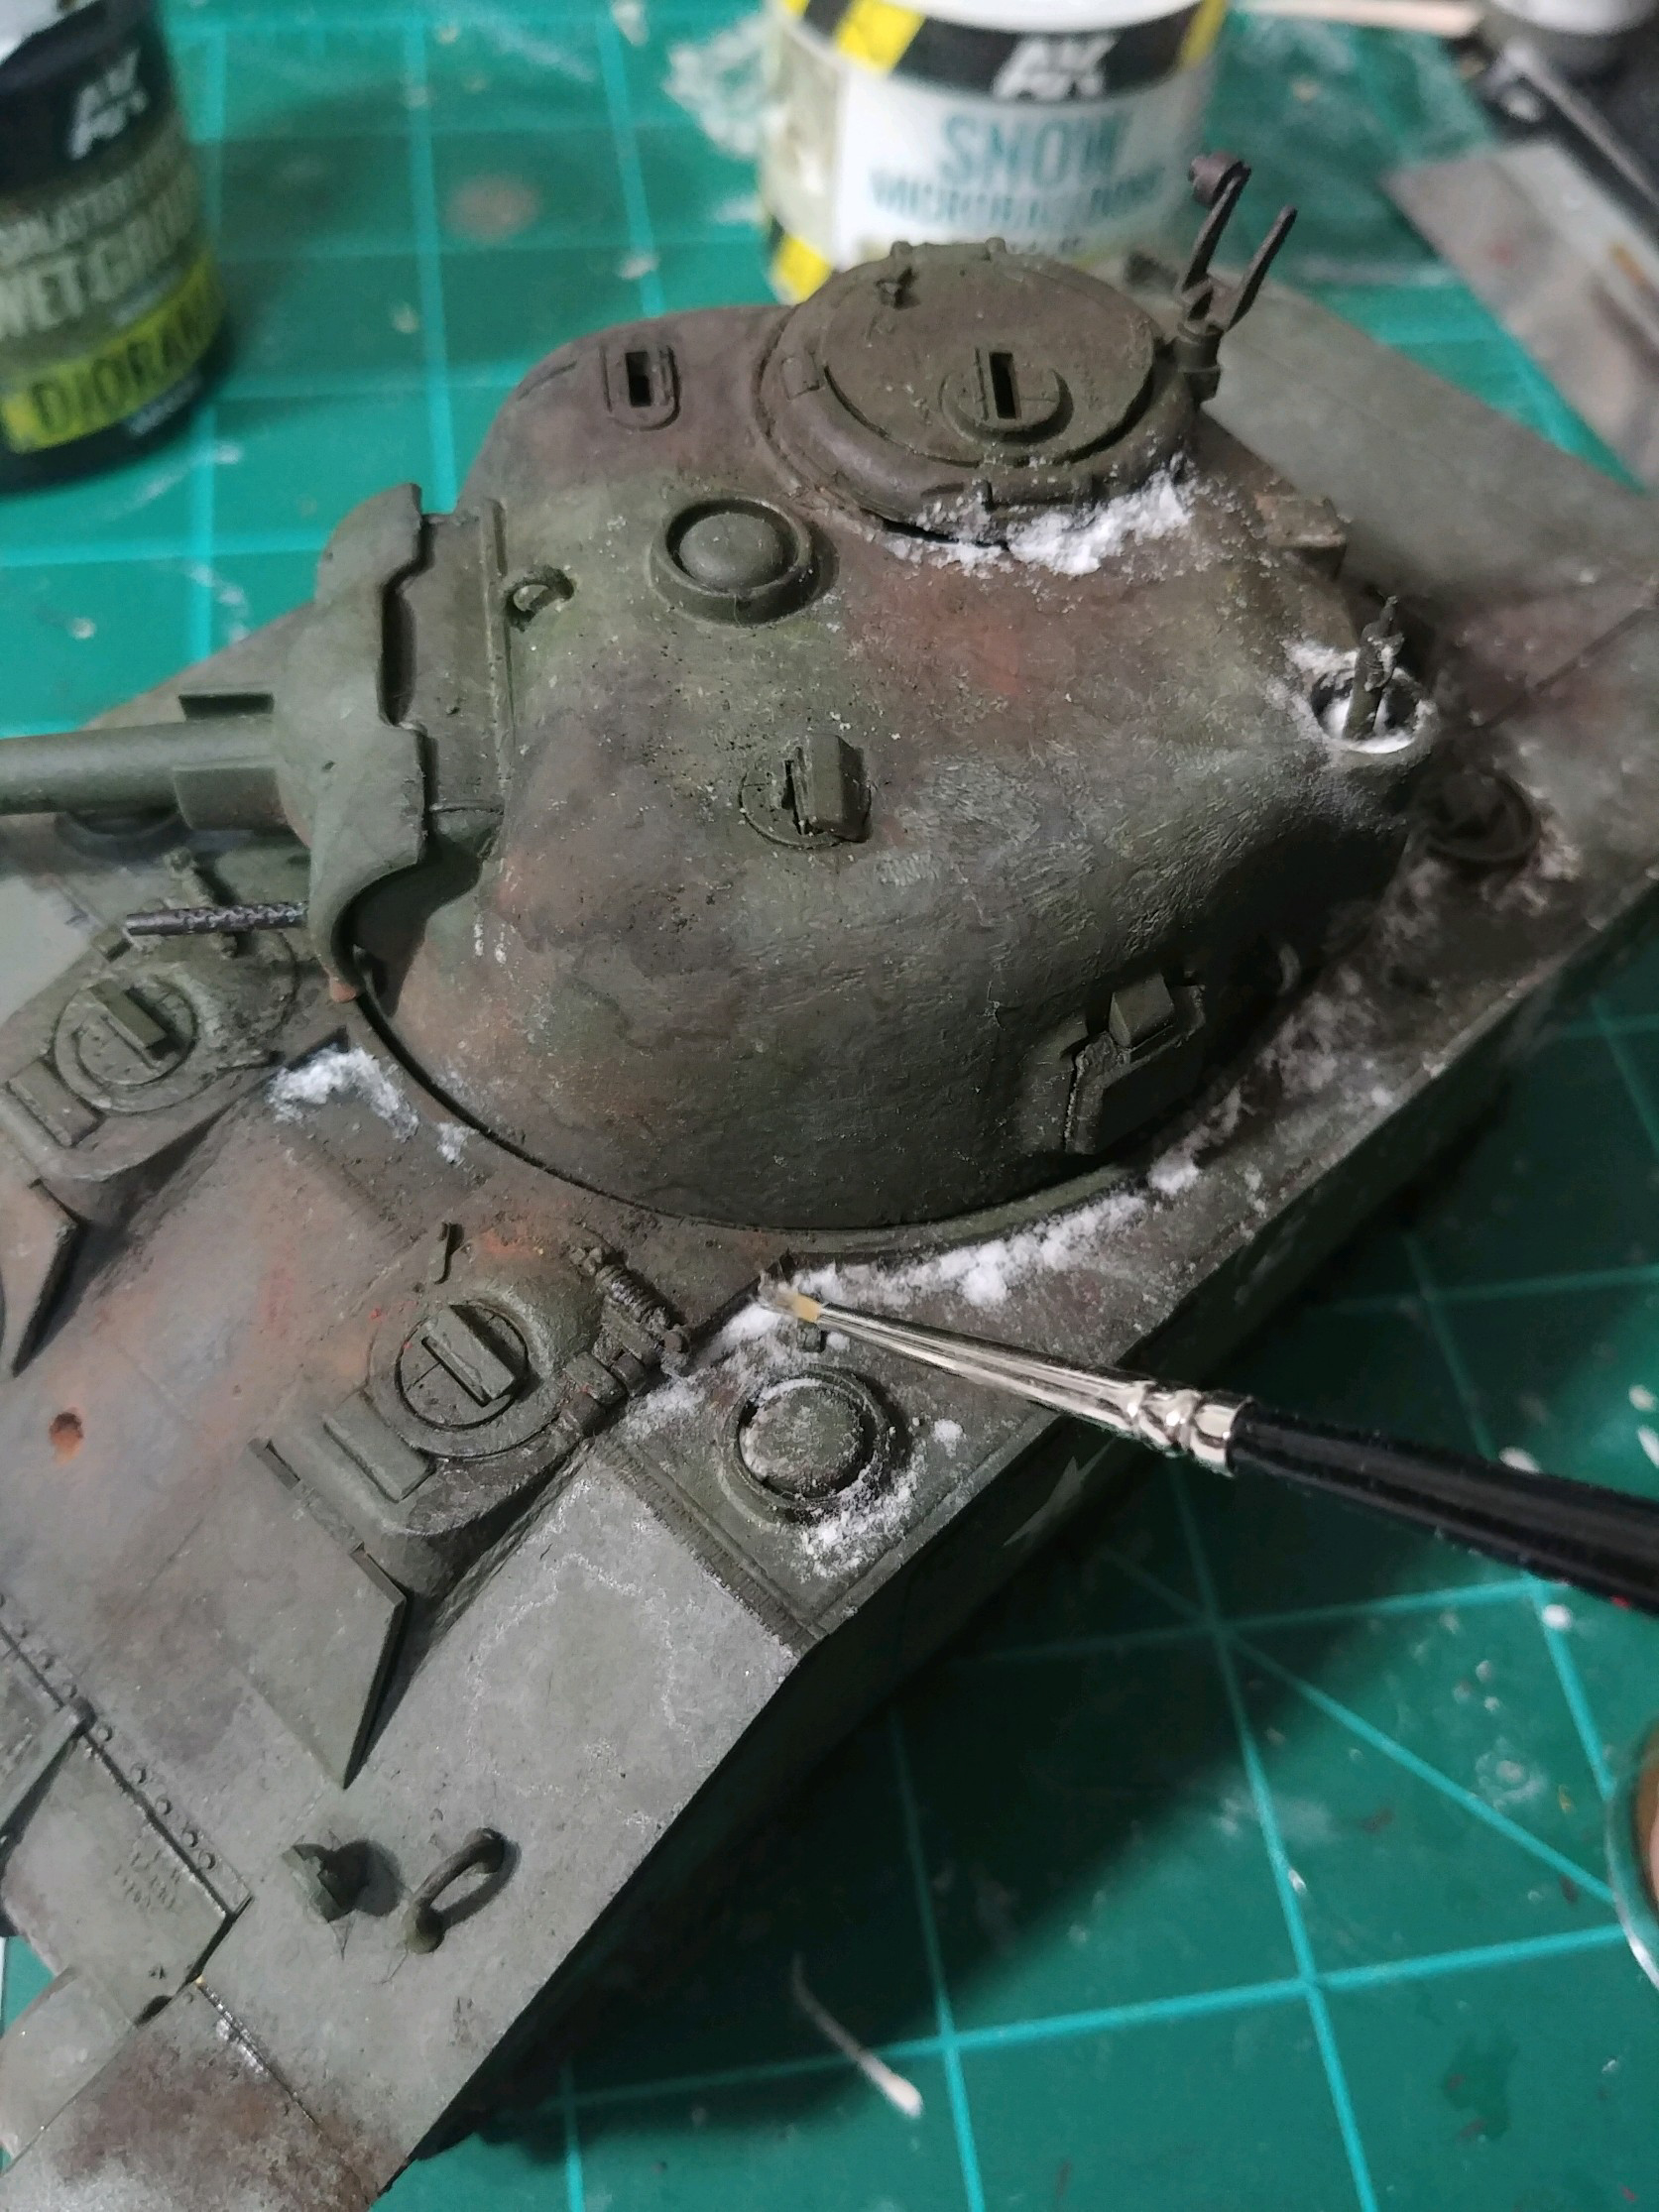
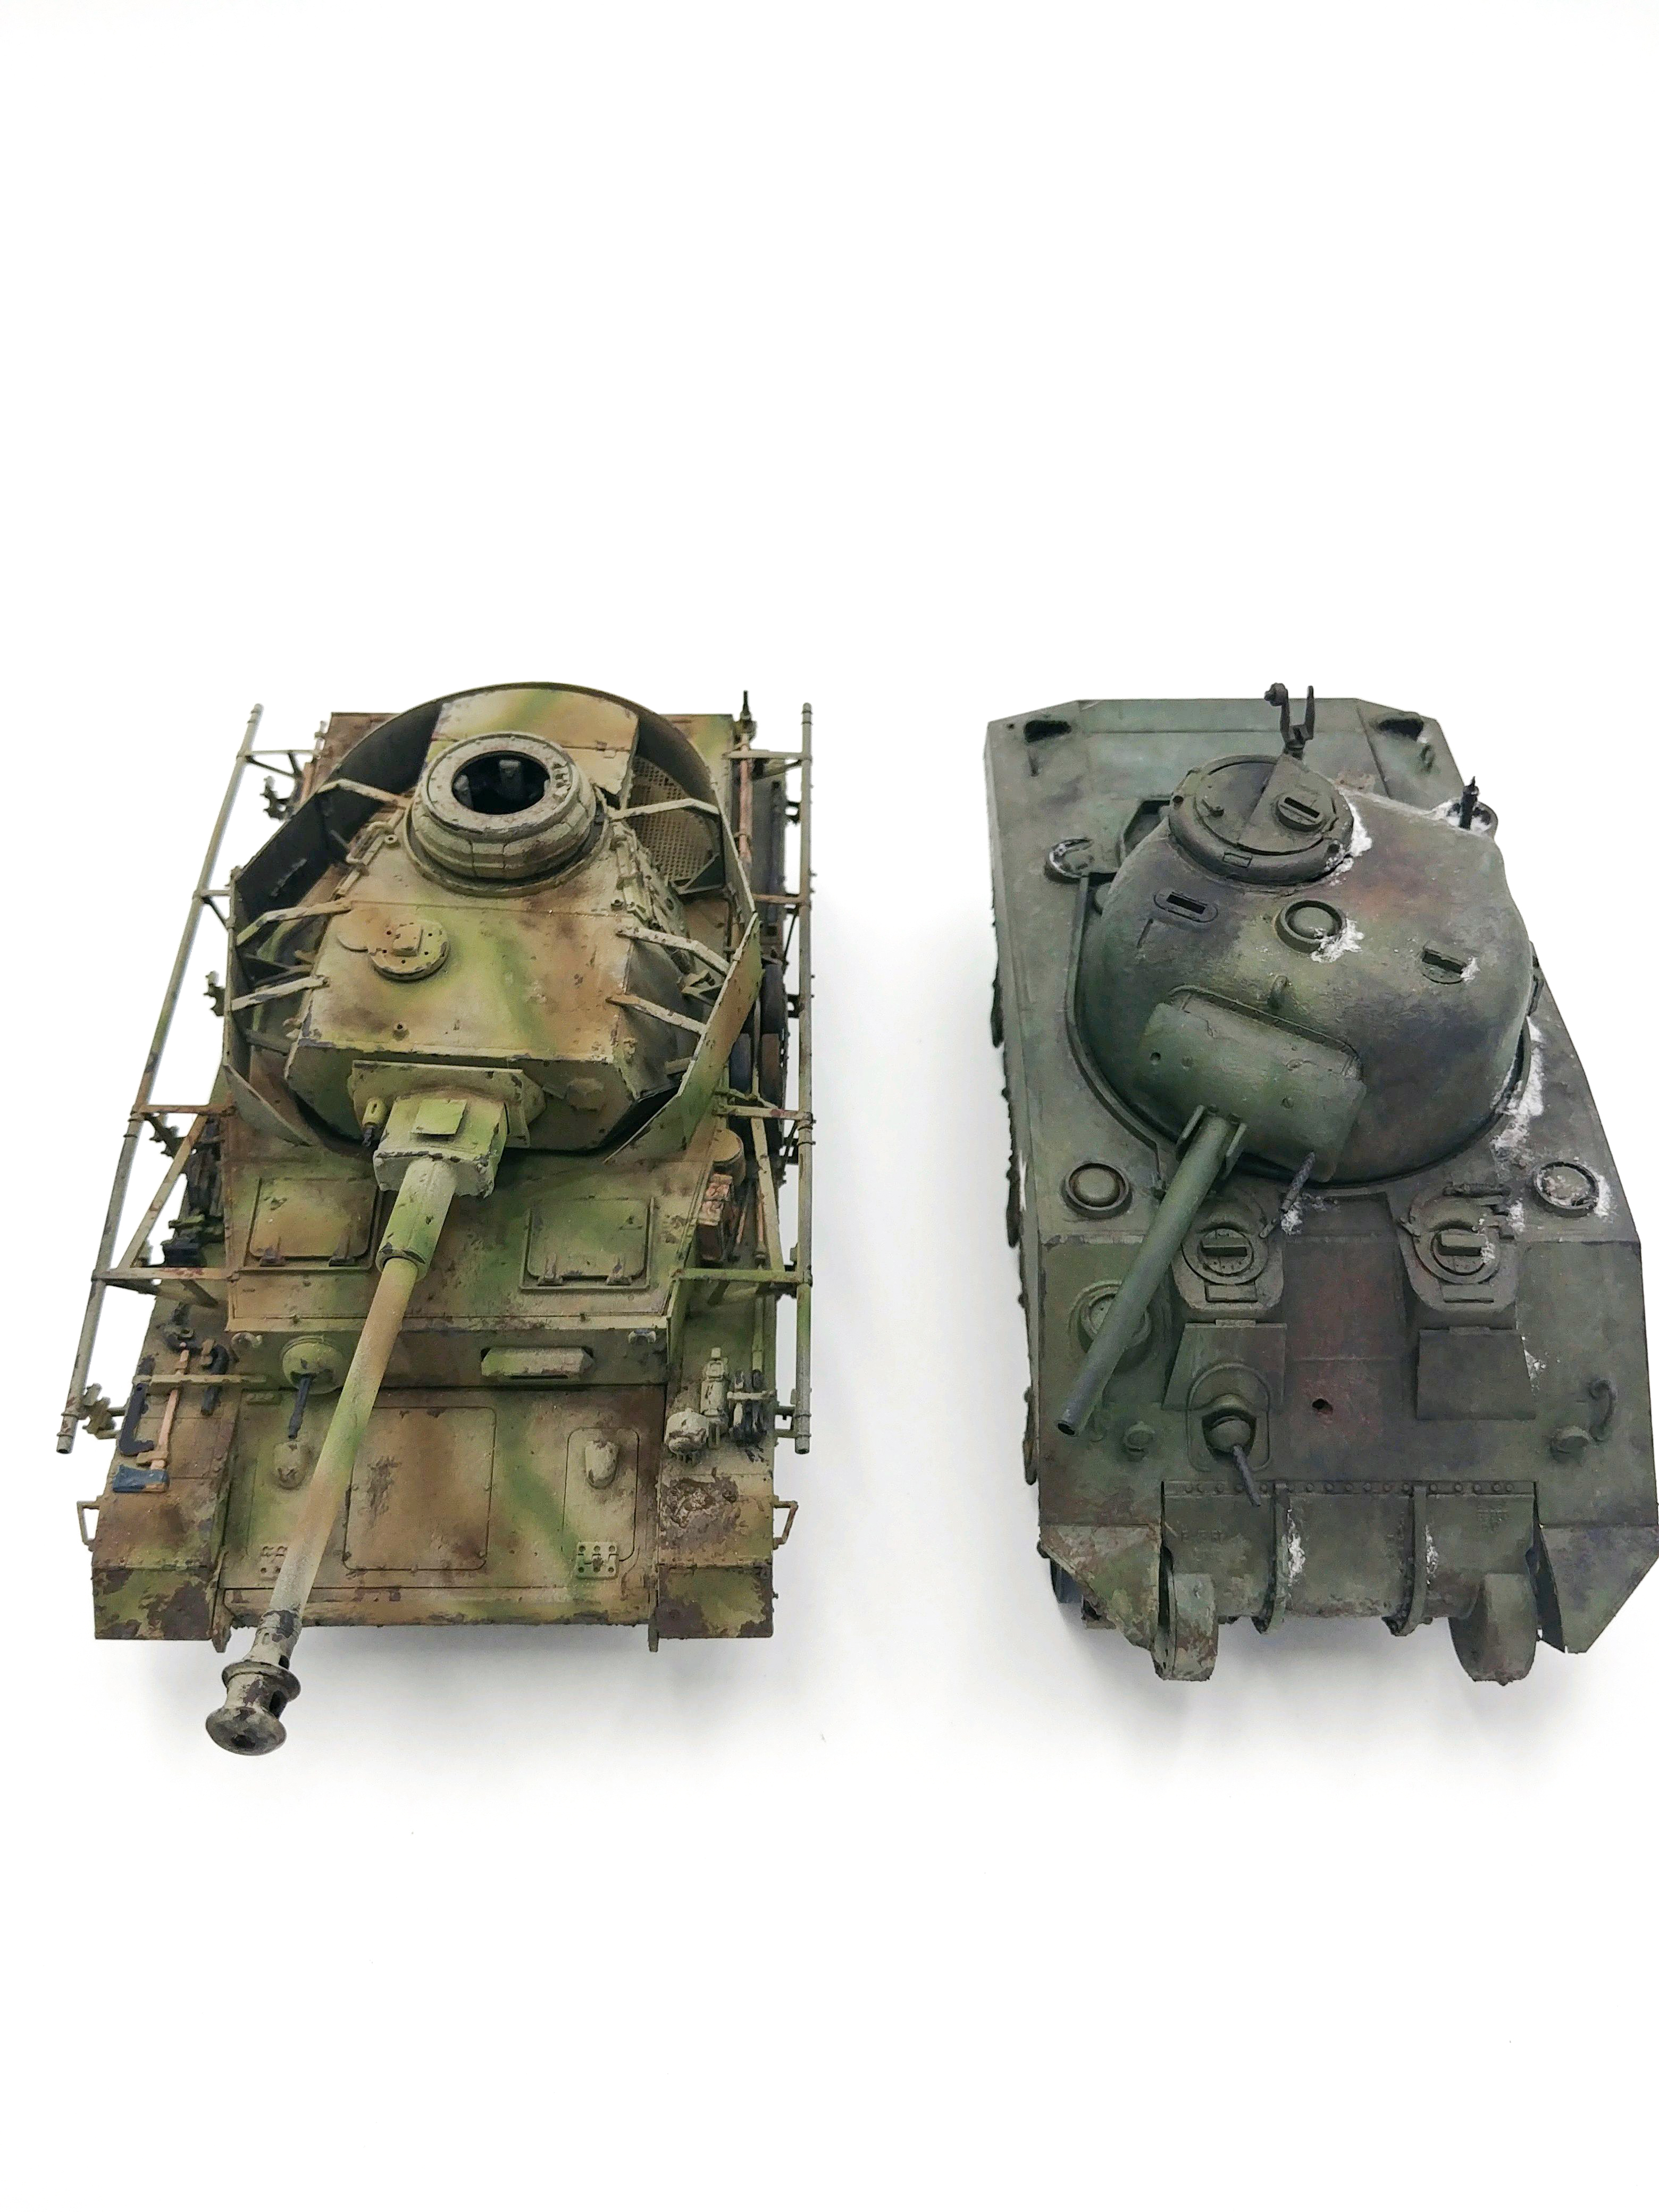
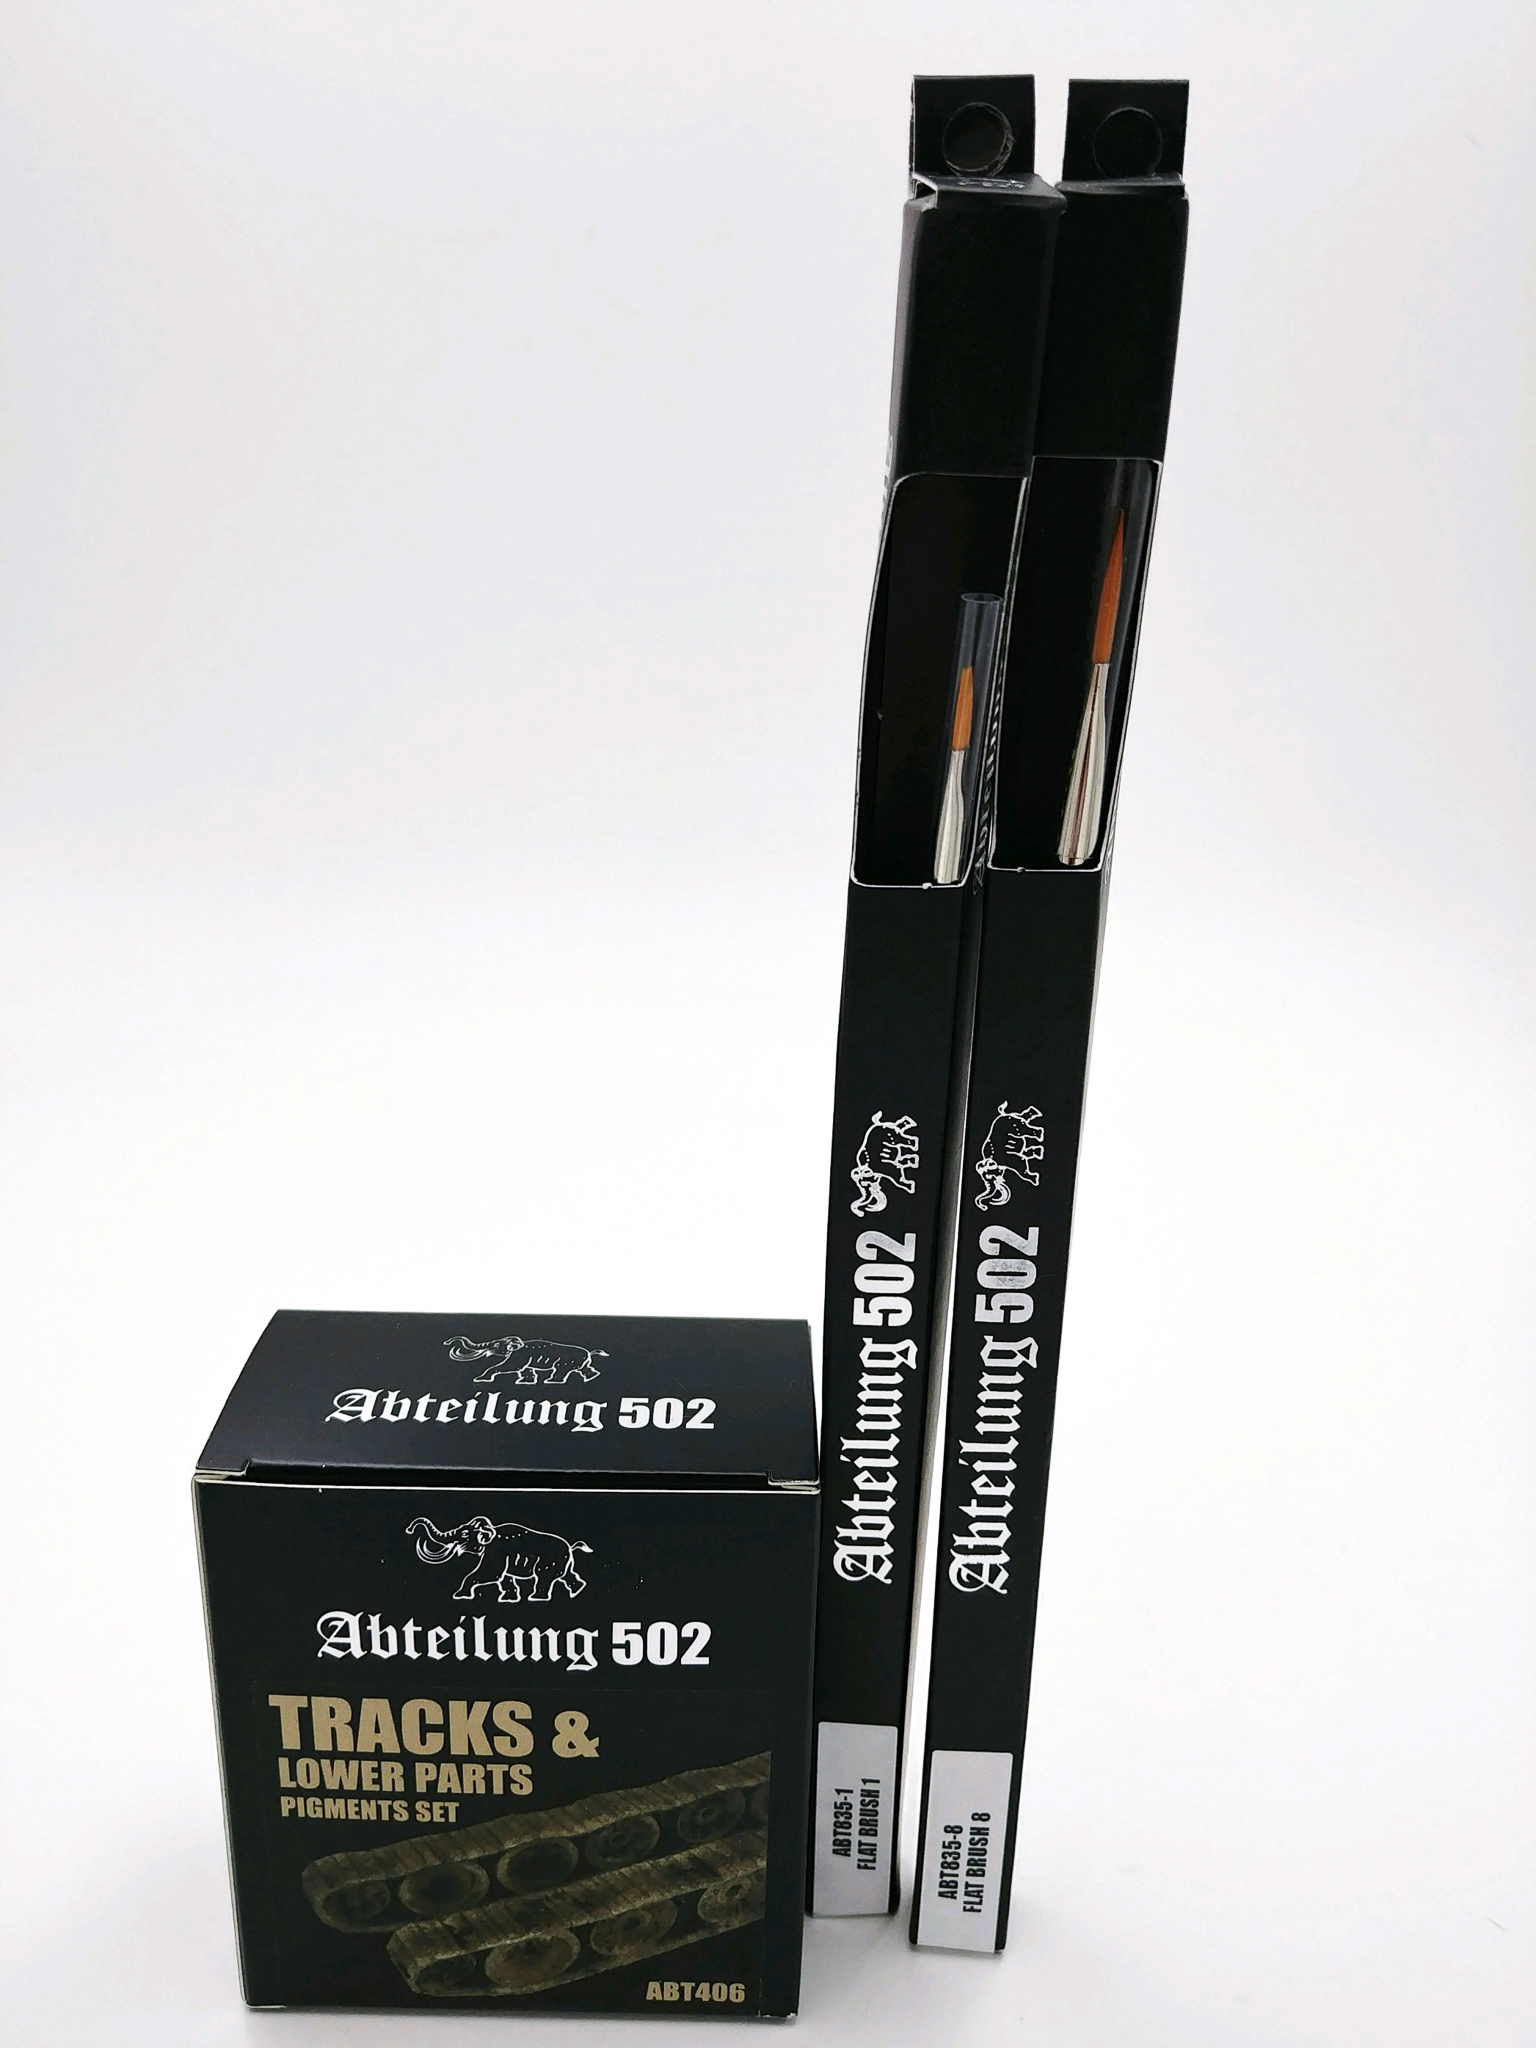
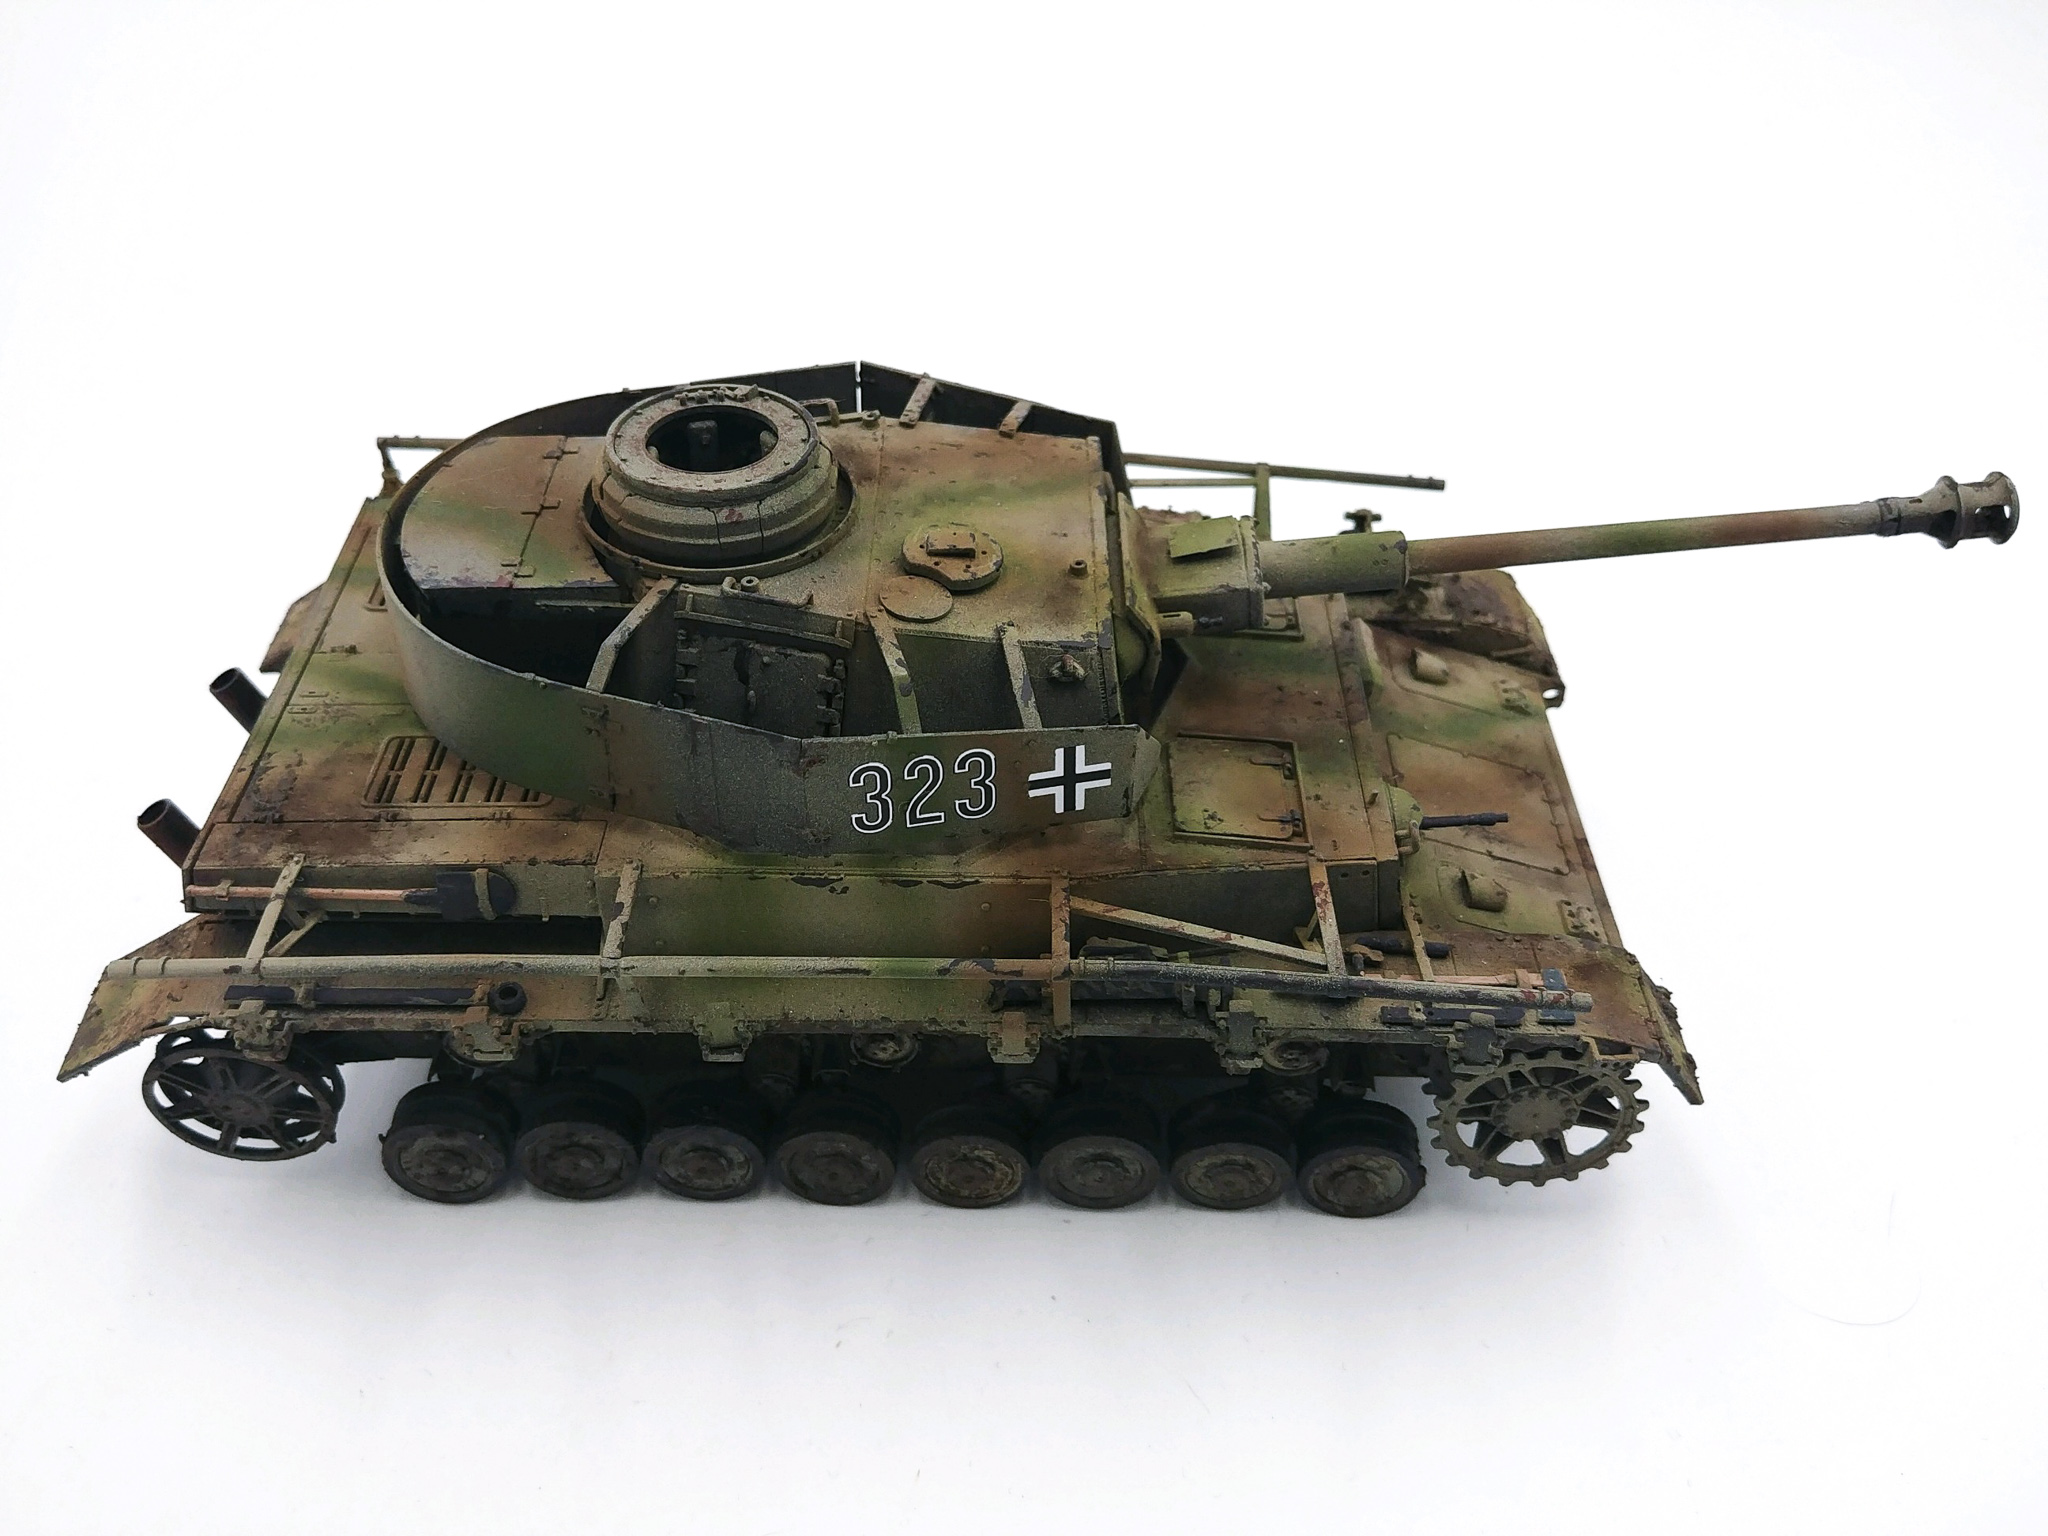
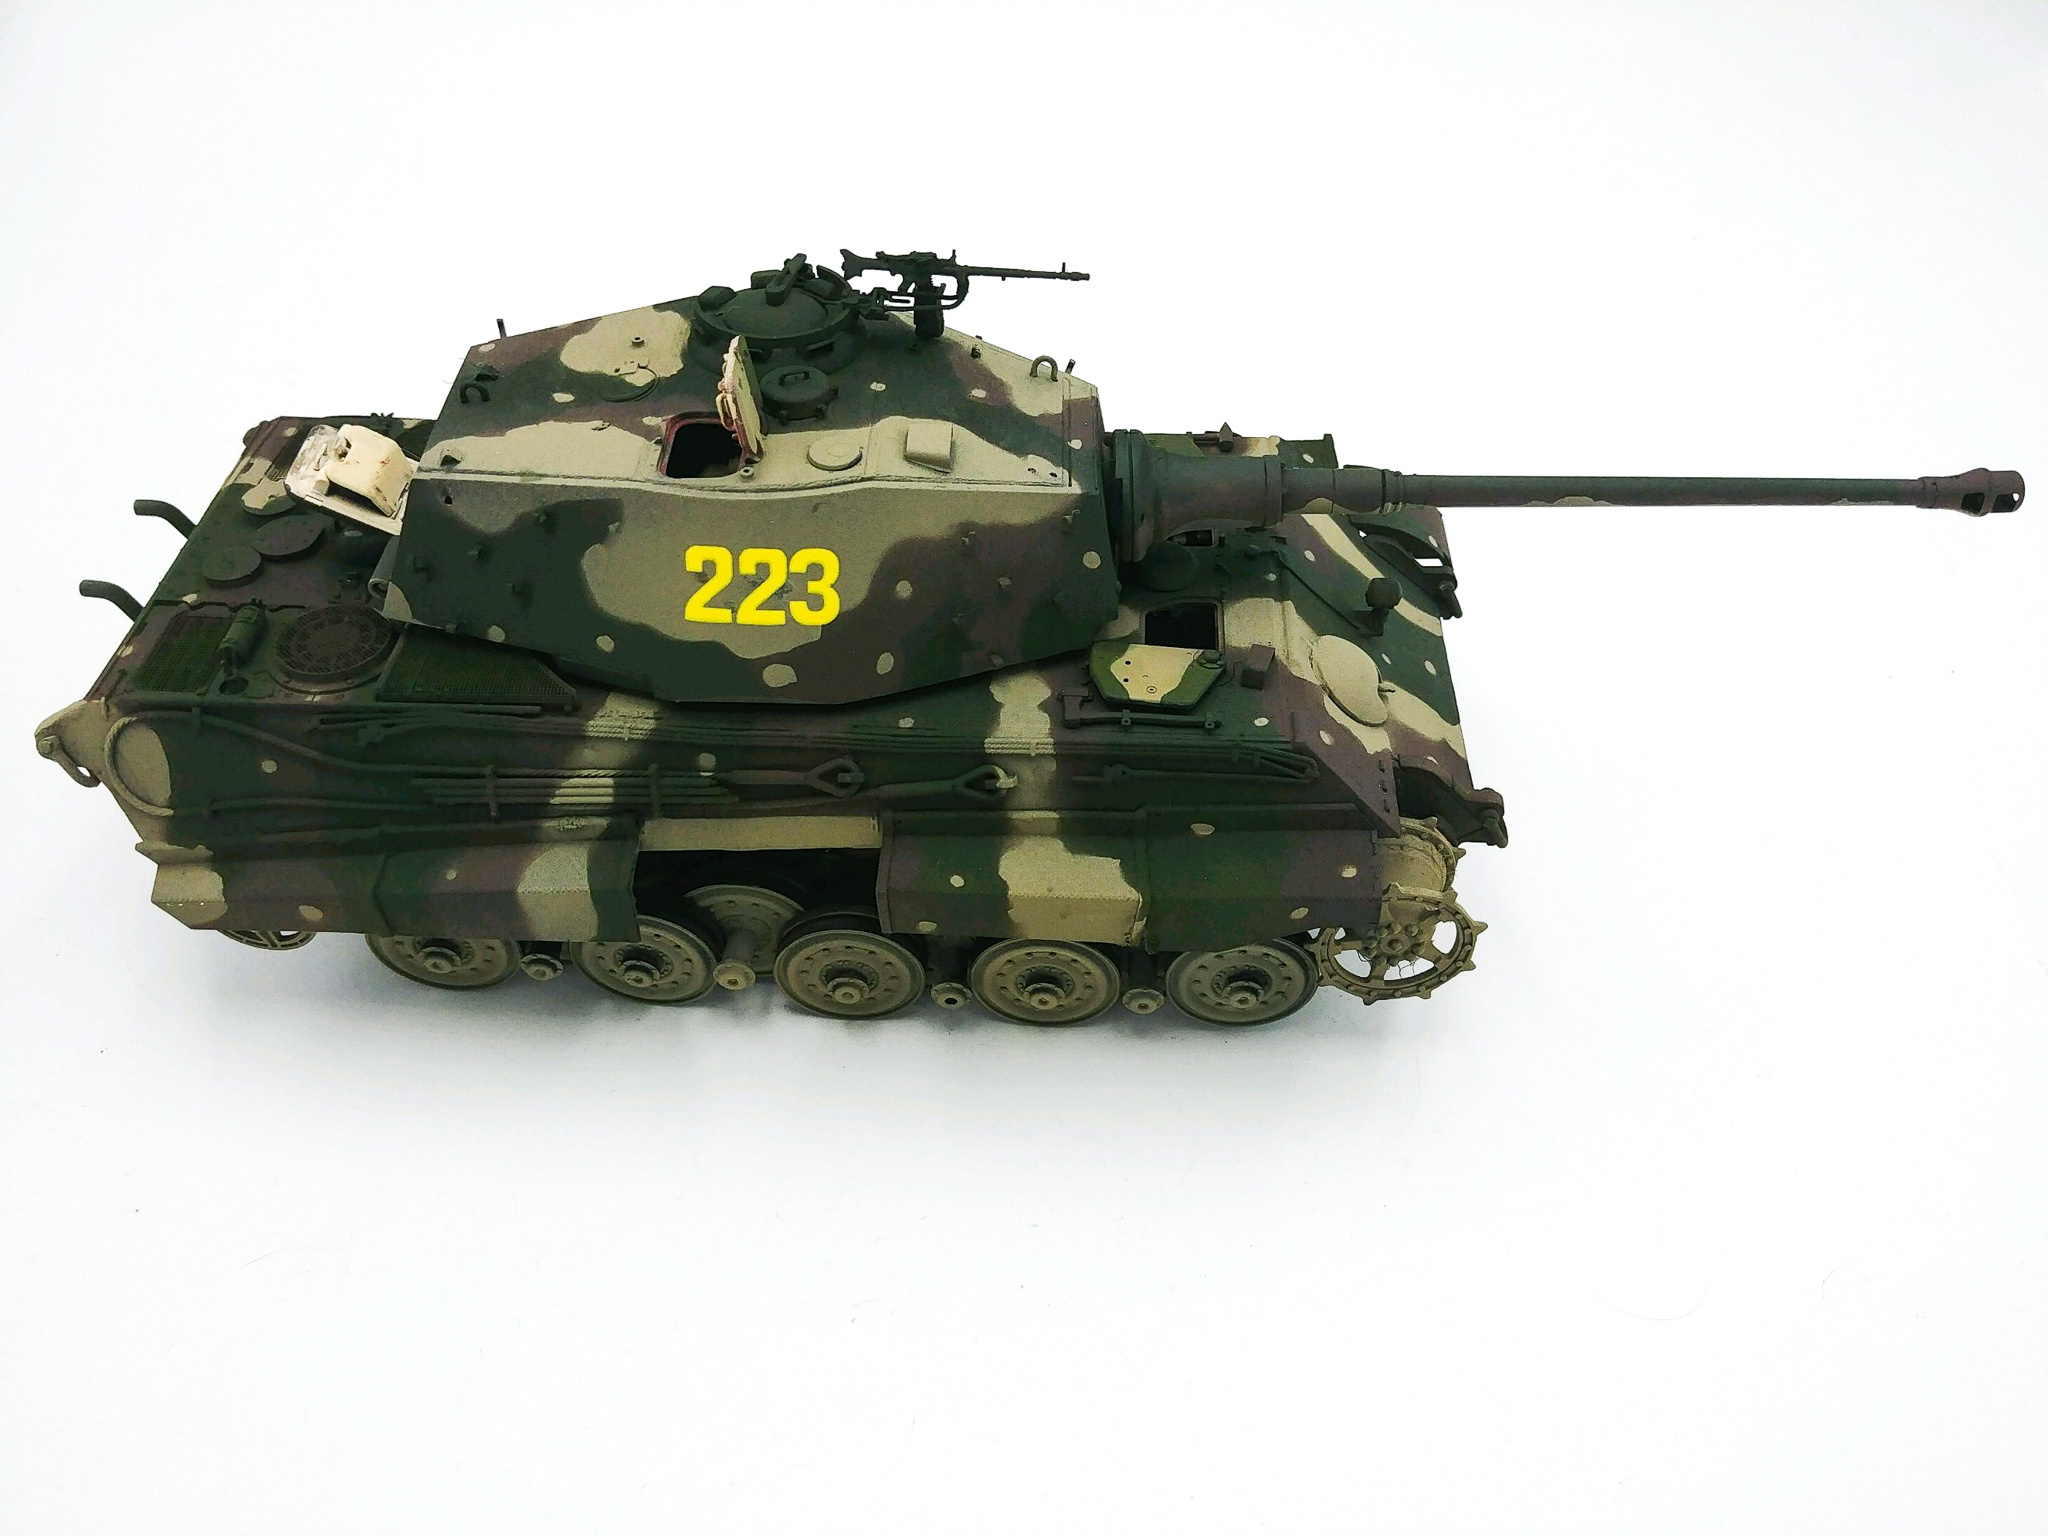
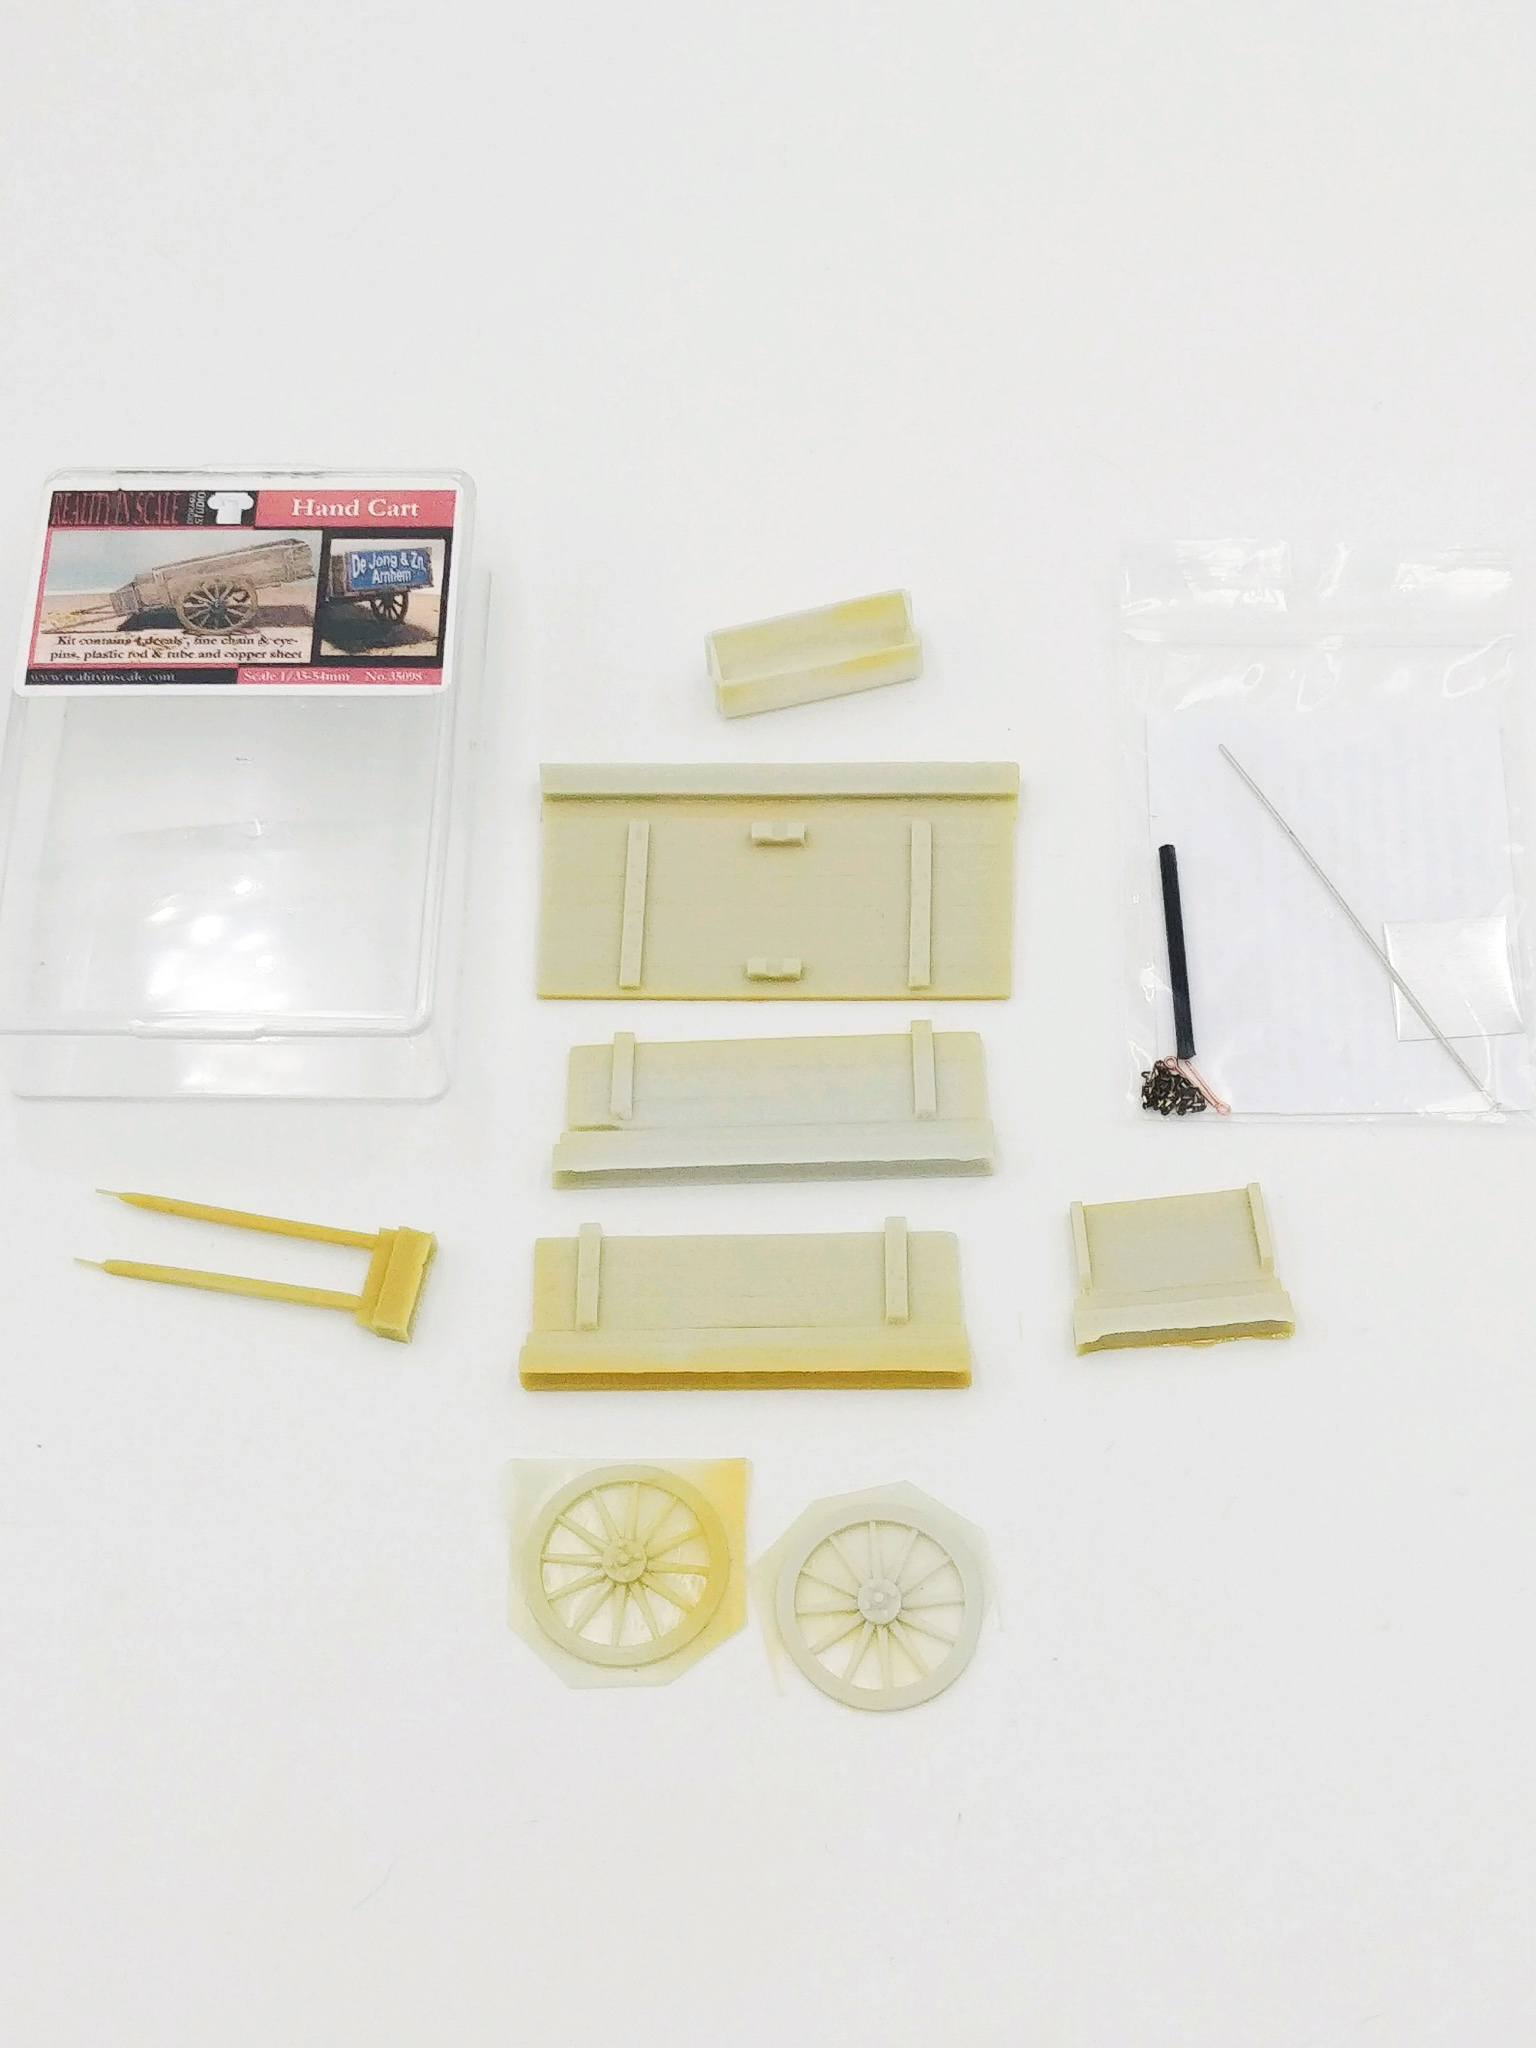
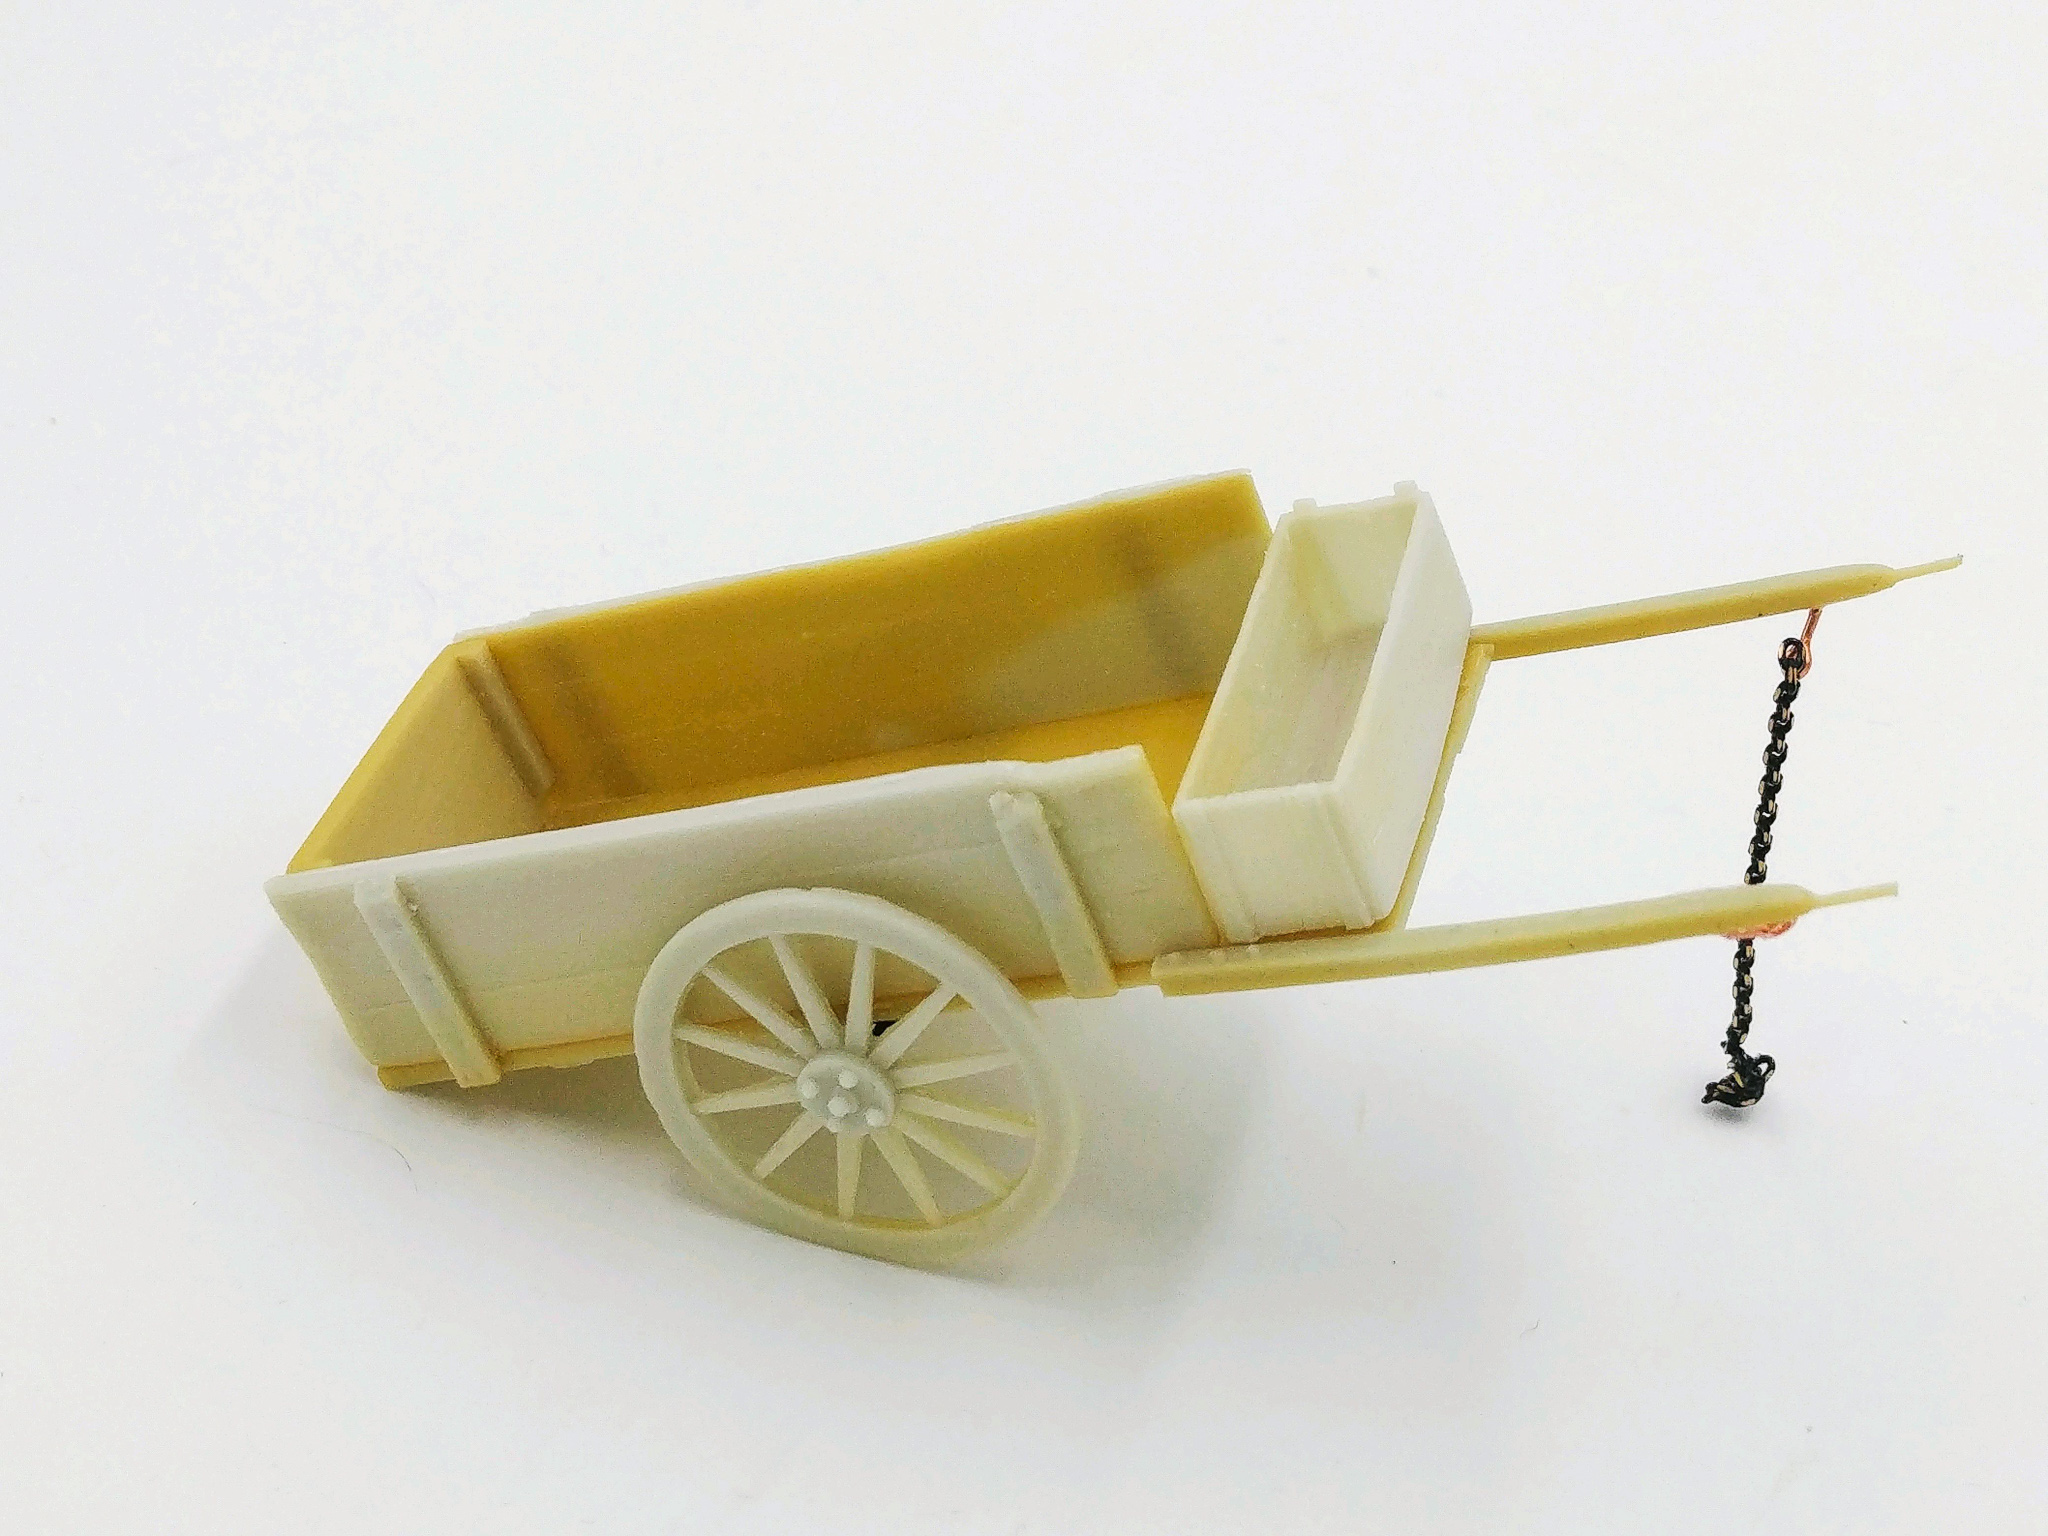
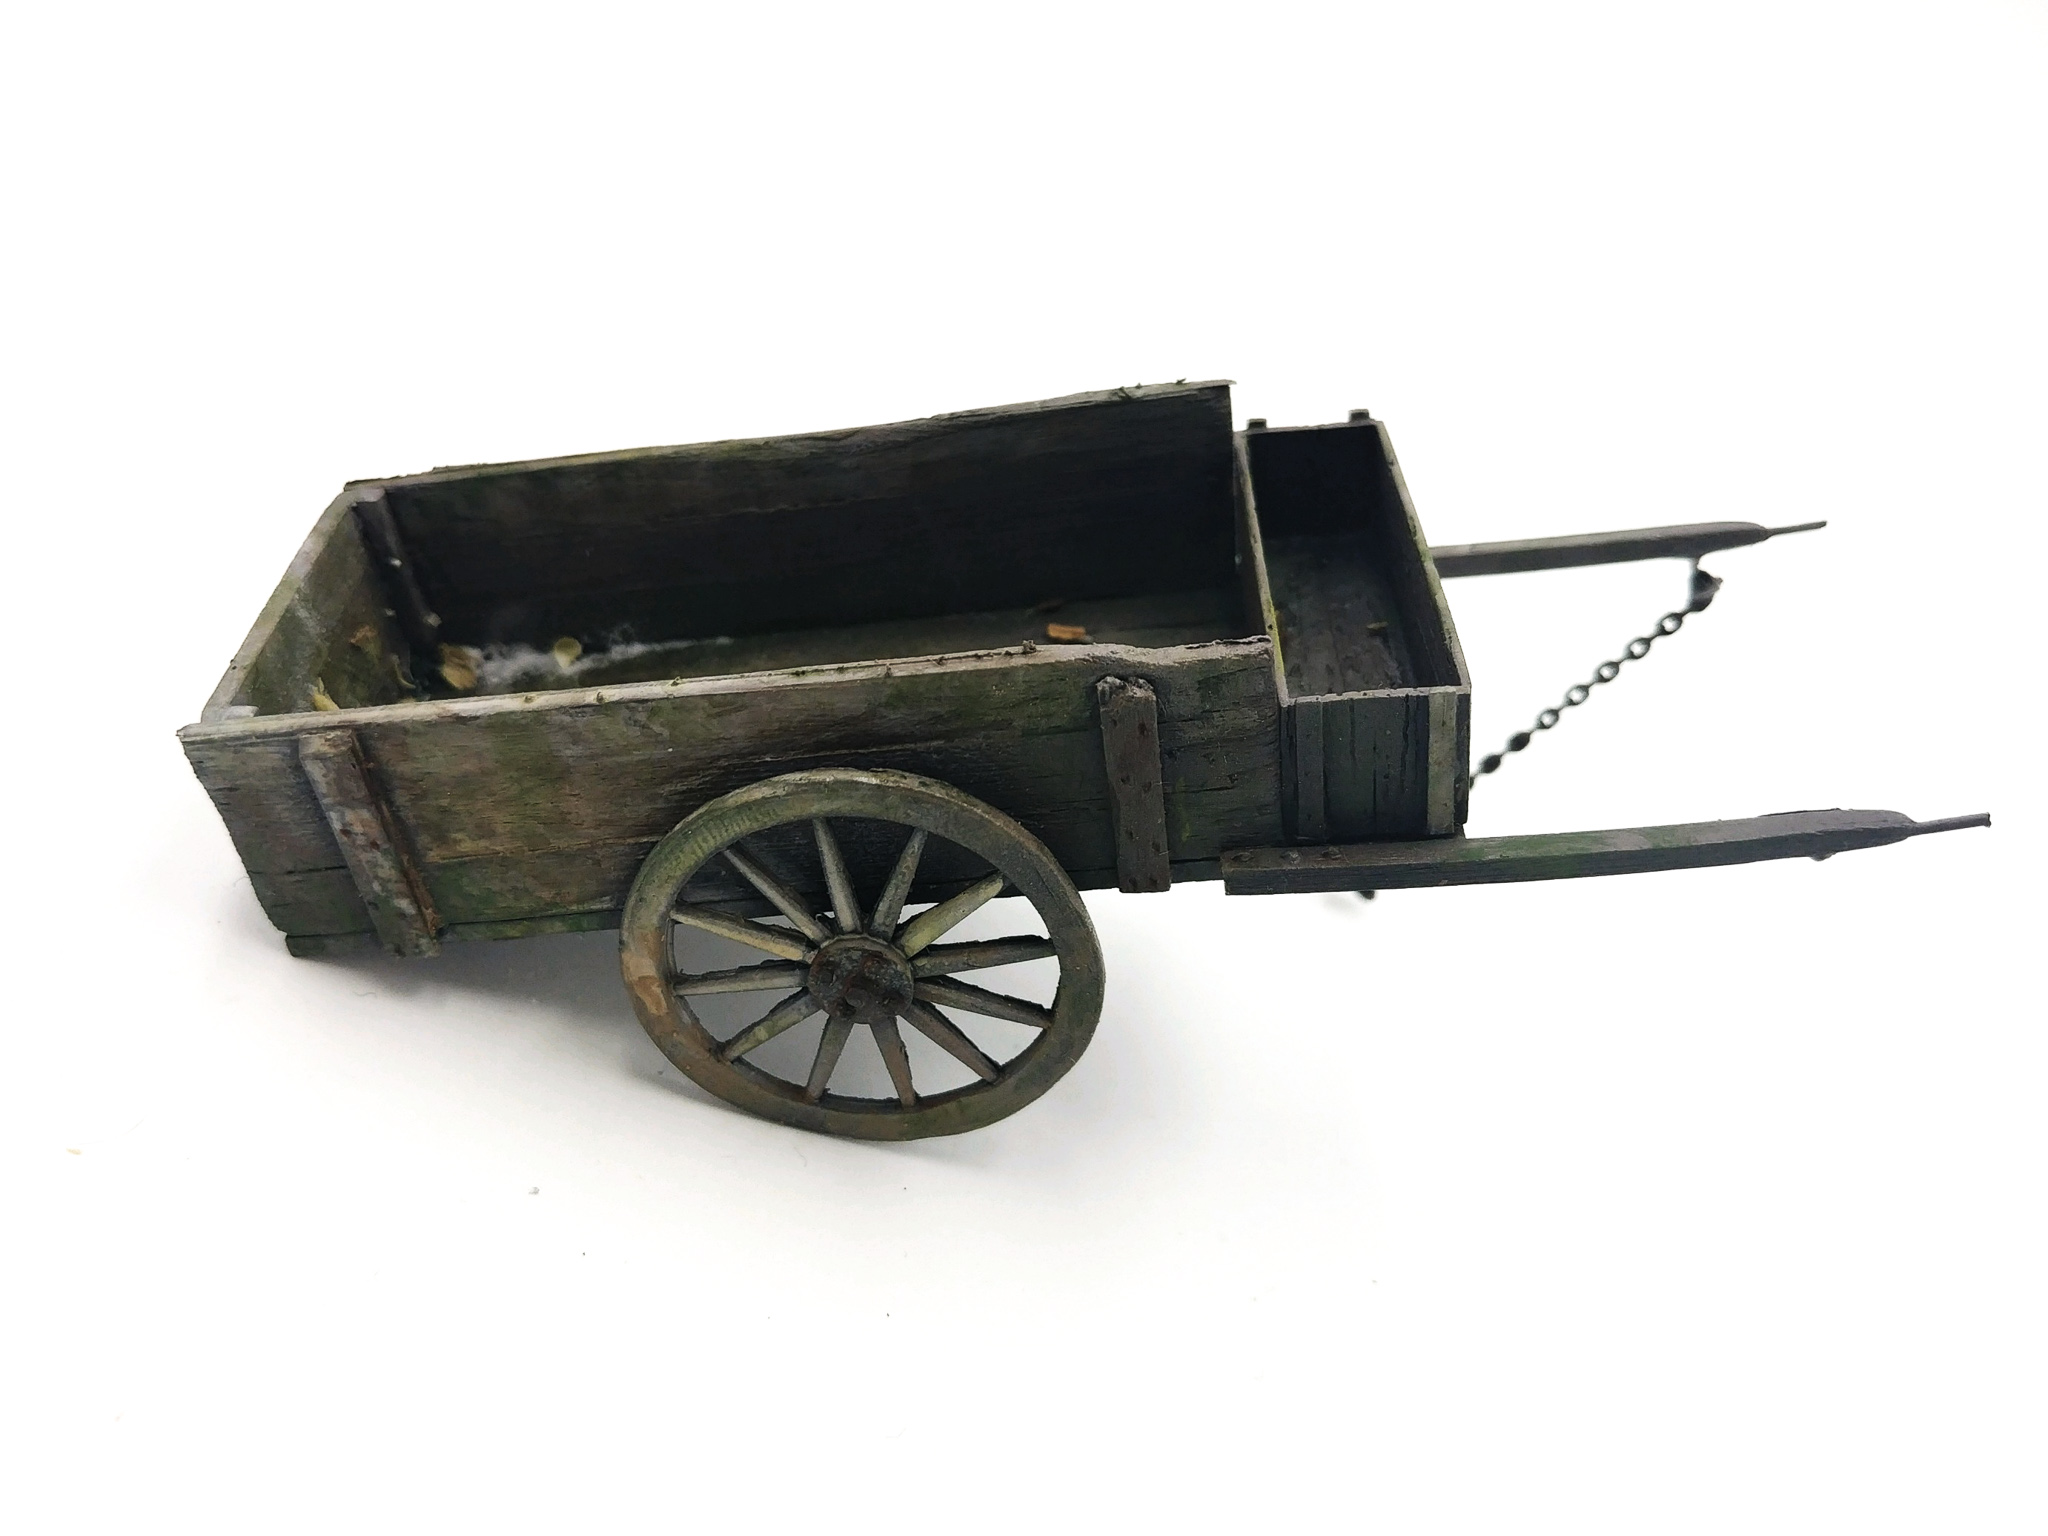
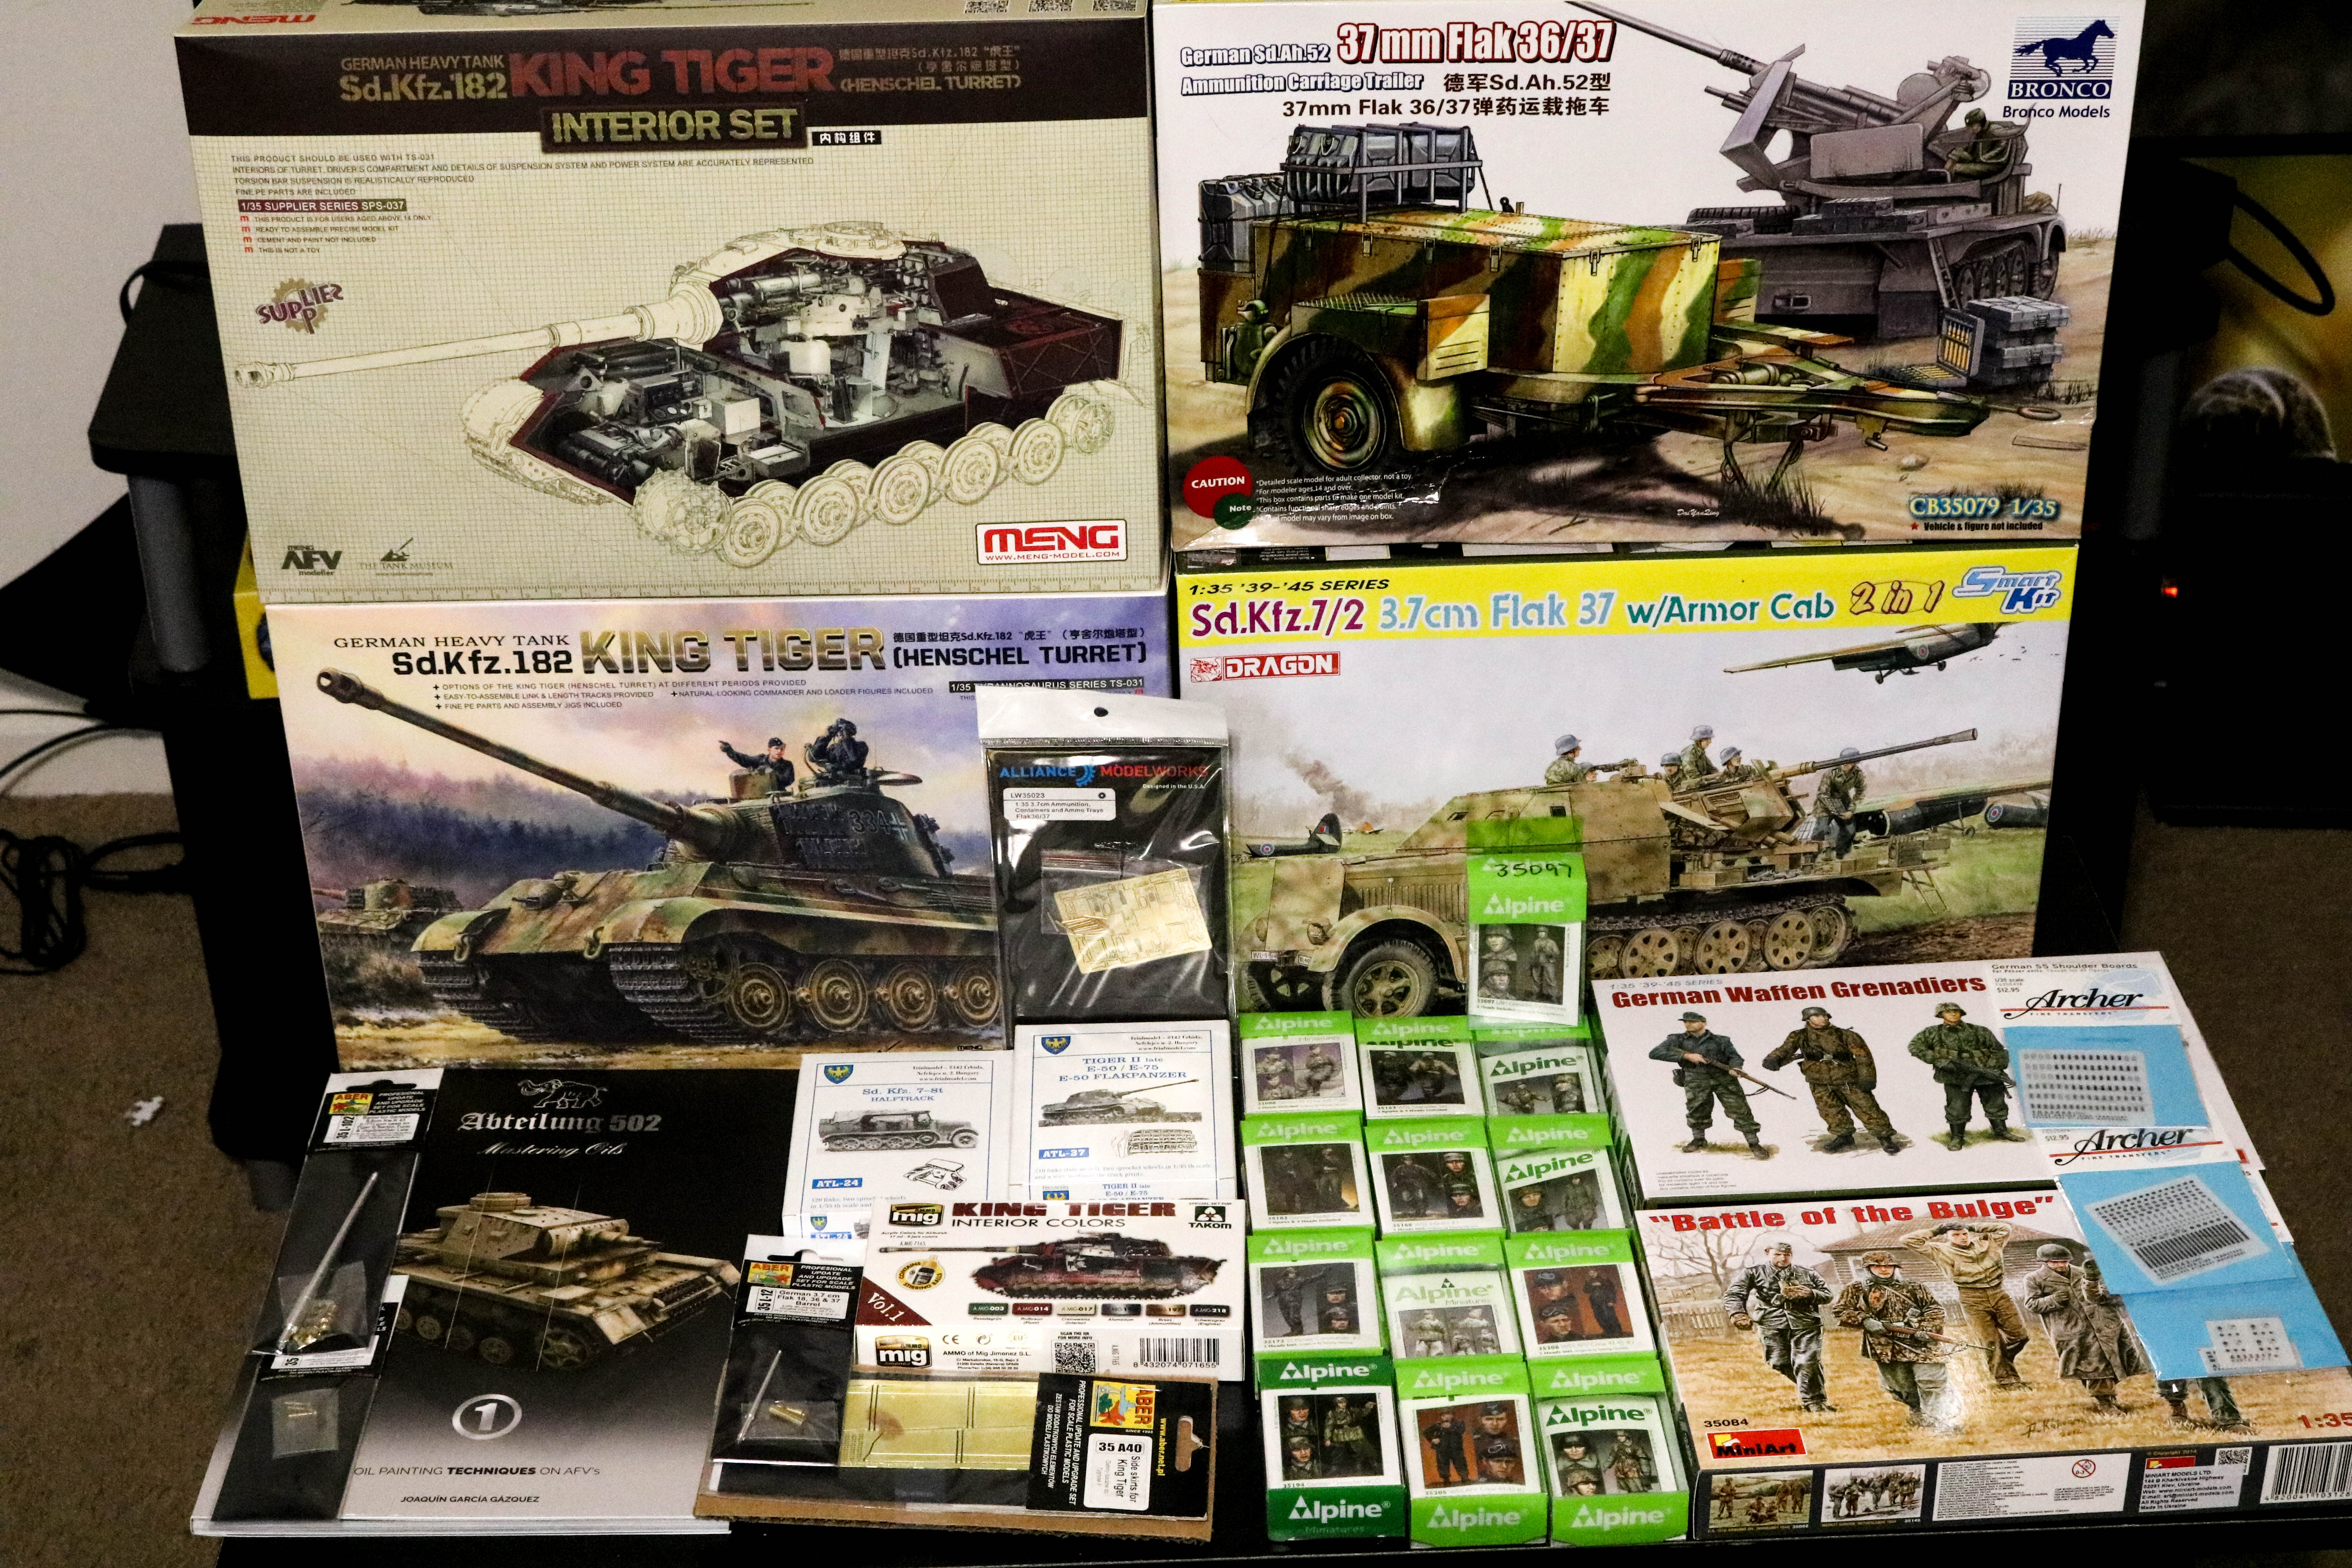
So I've received a bulk of the components that I'm going to be using. As I'm sure you can imagine, getting the mail for this project was like Christmas. I completed a Tiger I recently which was my first model in nearly a decade, so jumping to working on a project his ambitious is as exciting as it is daunting.


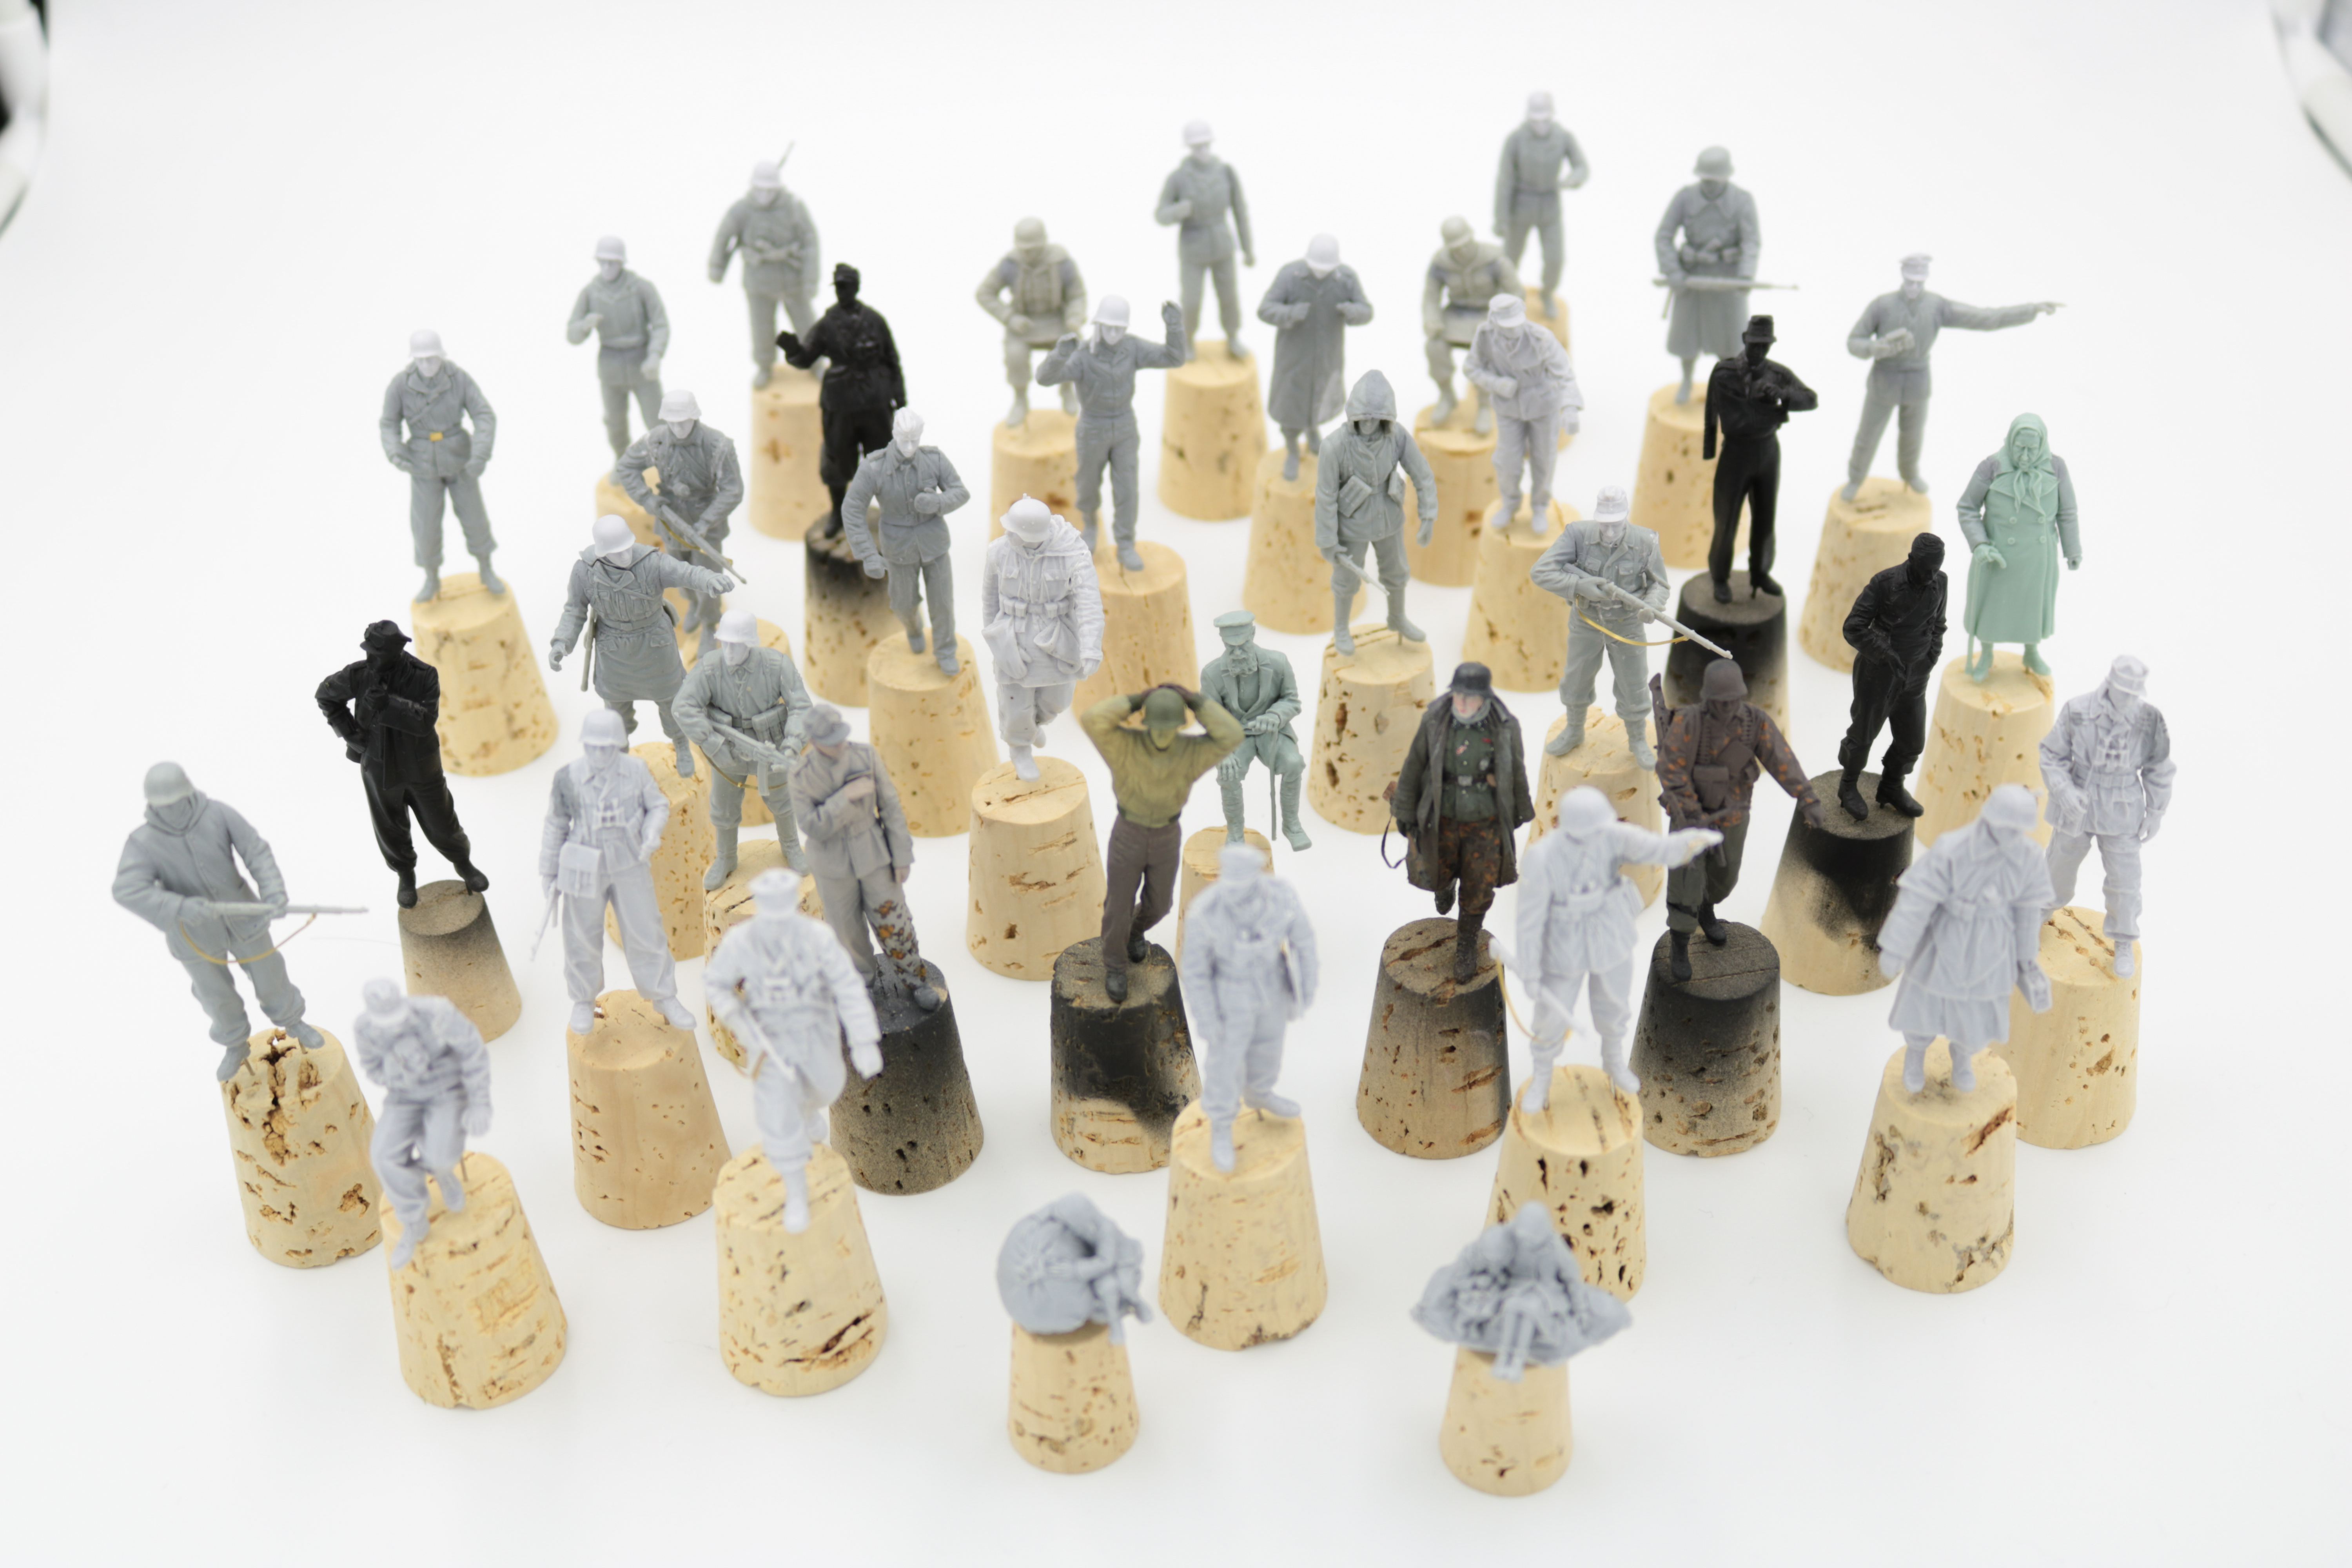
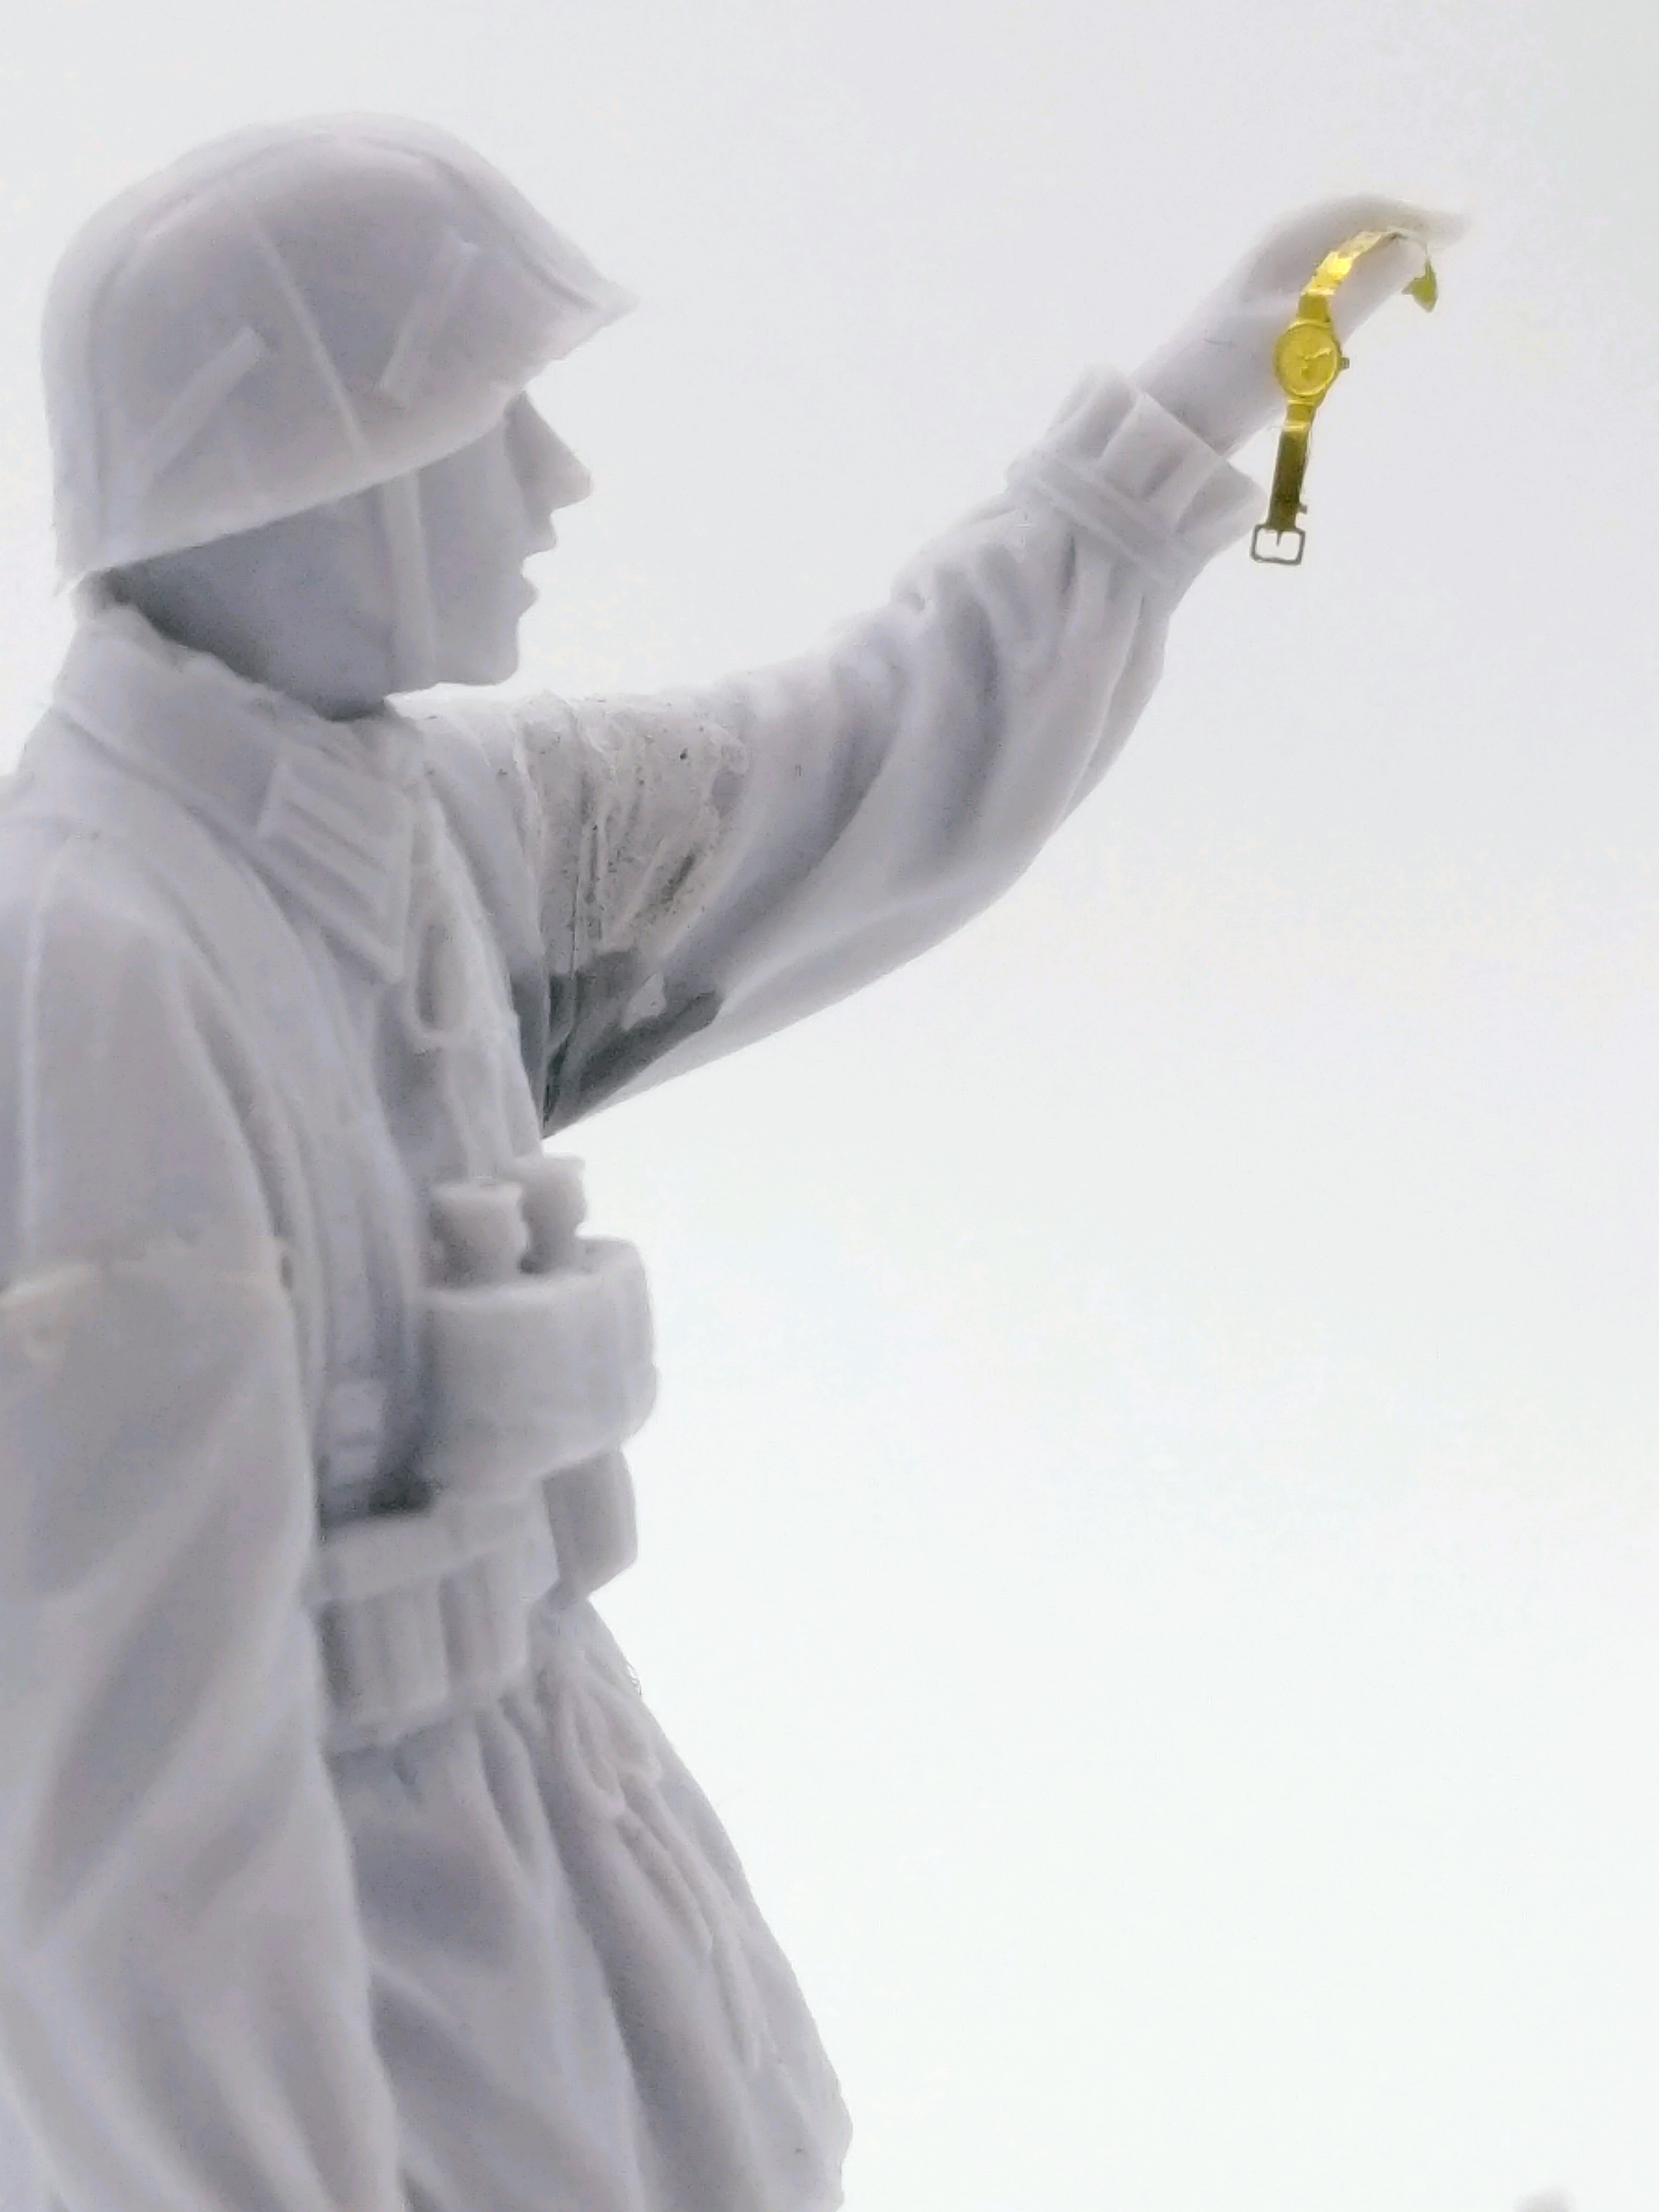
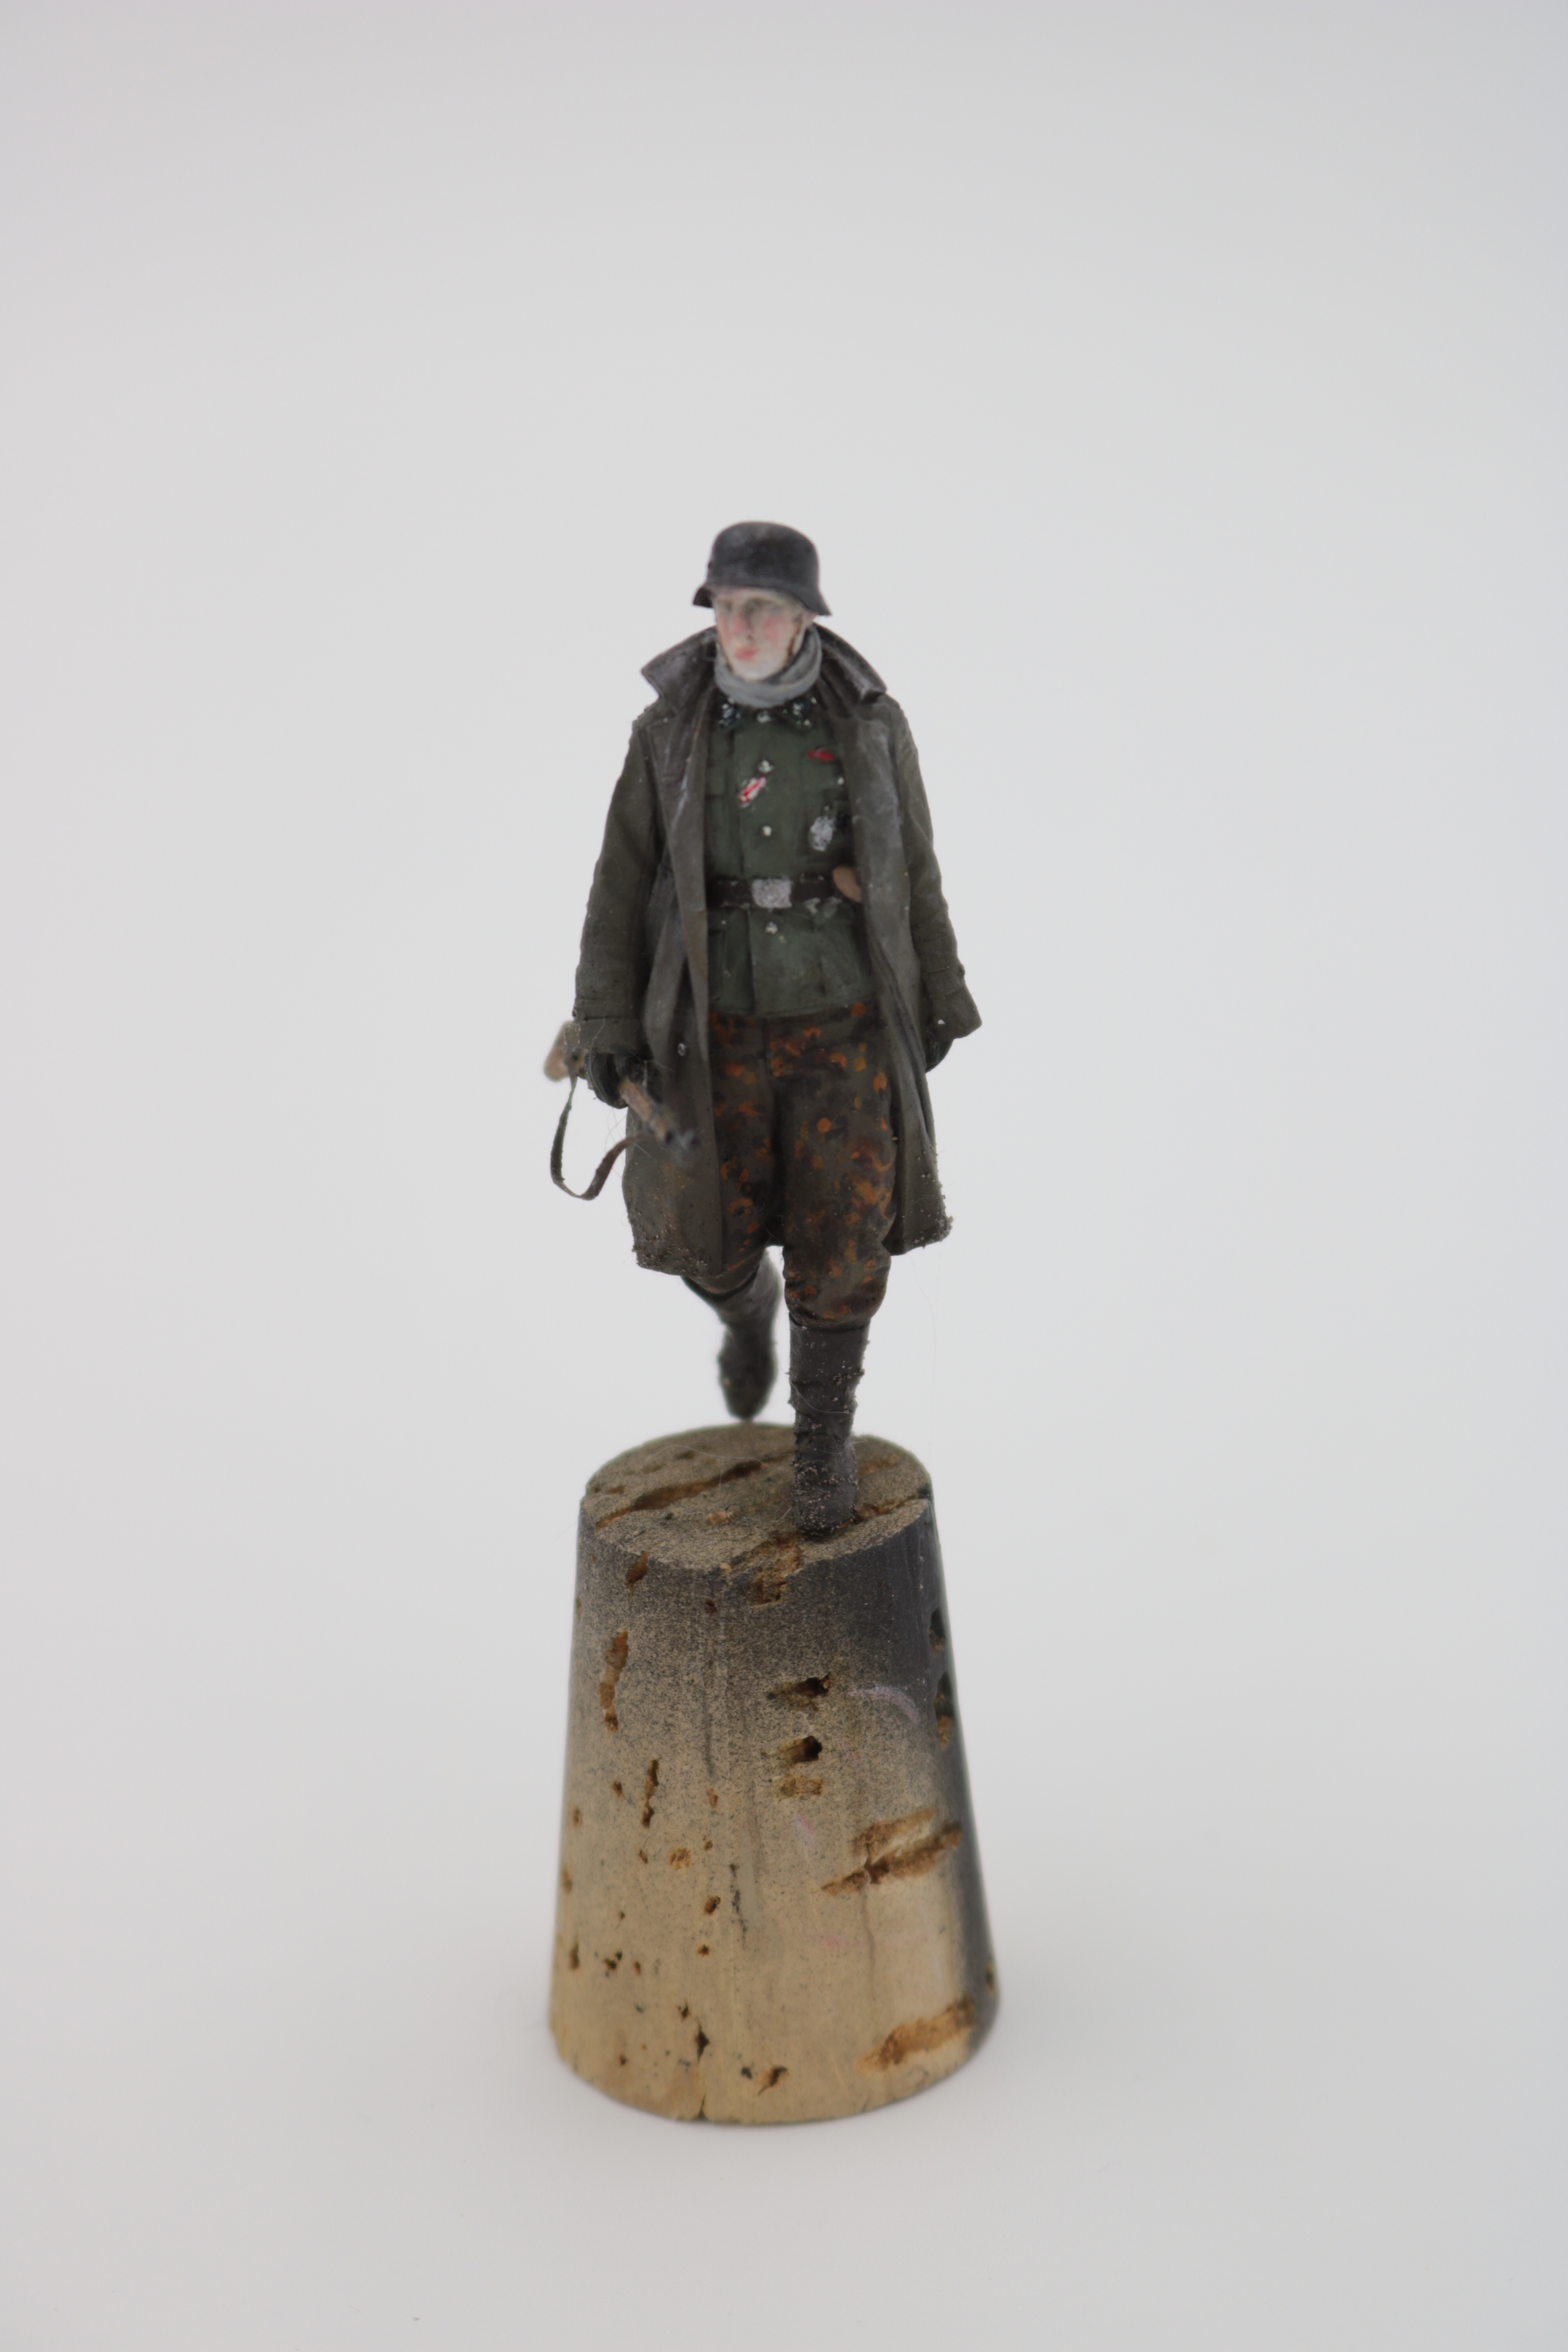
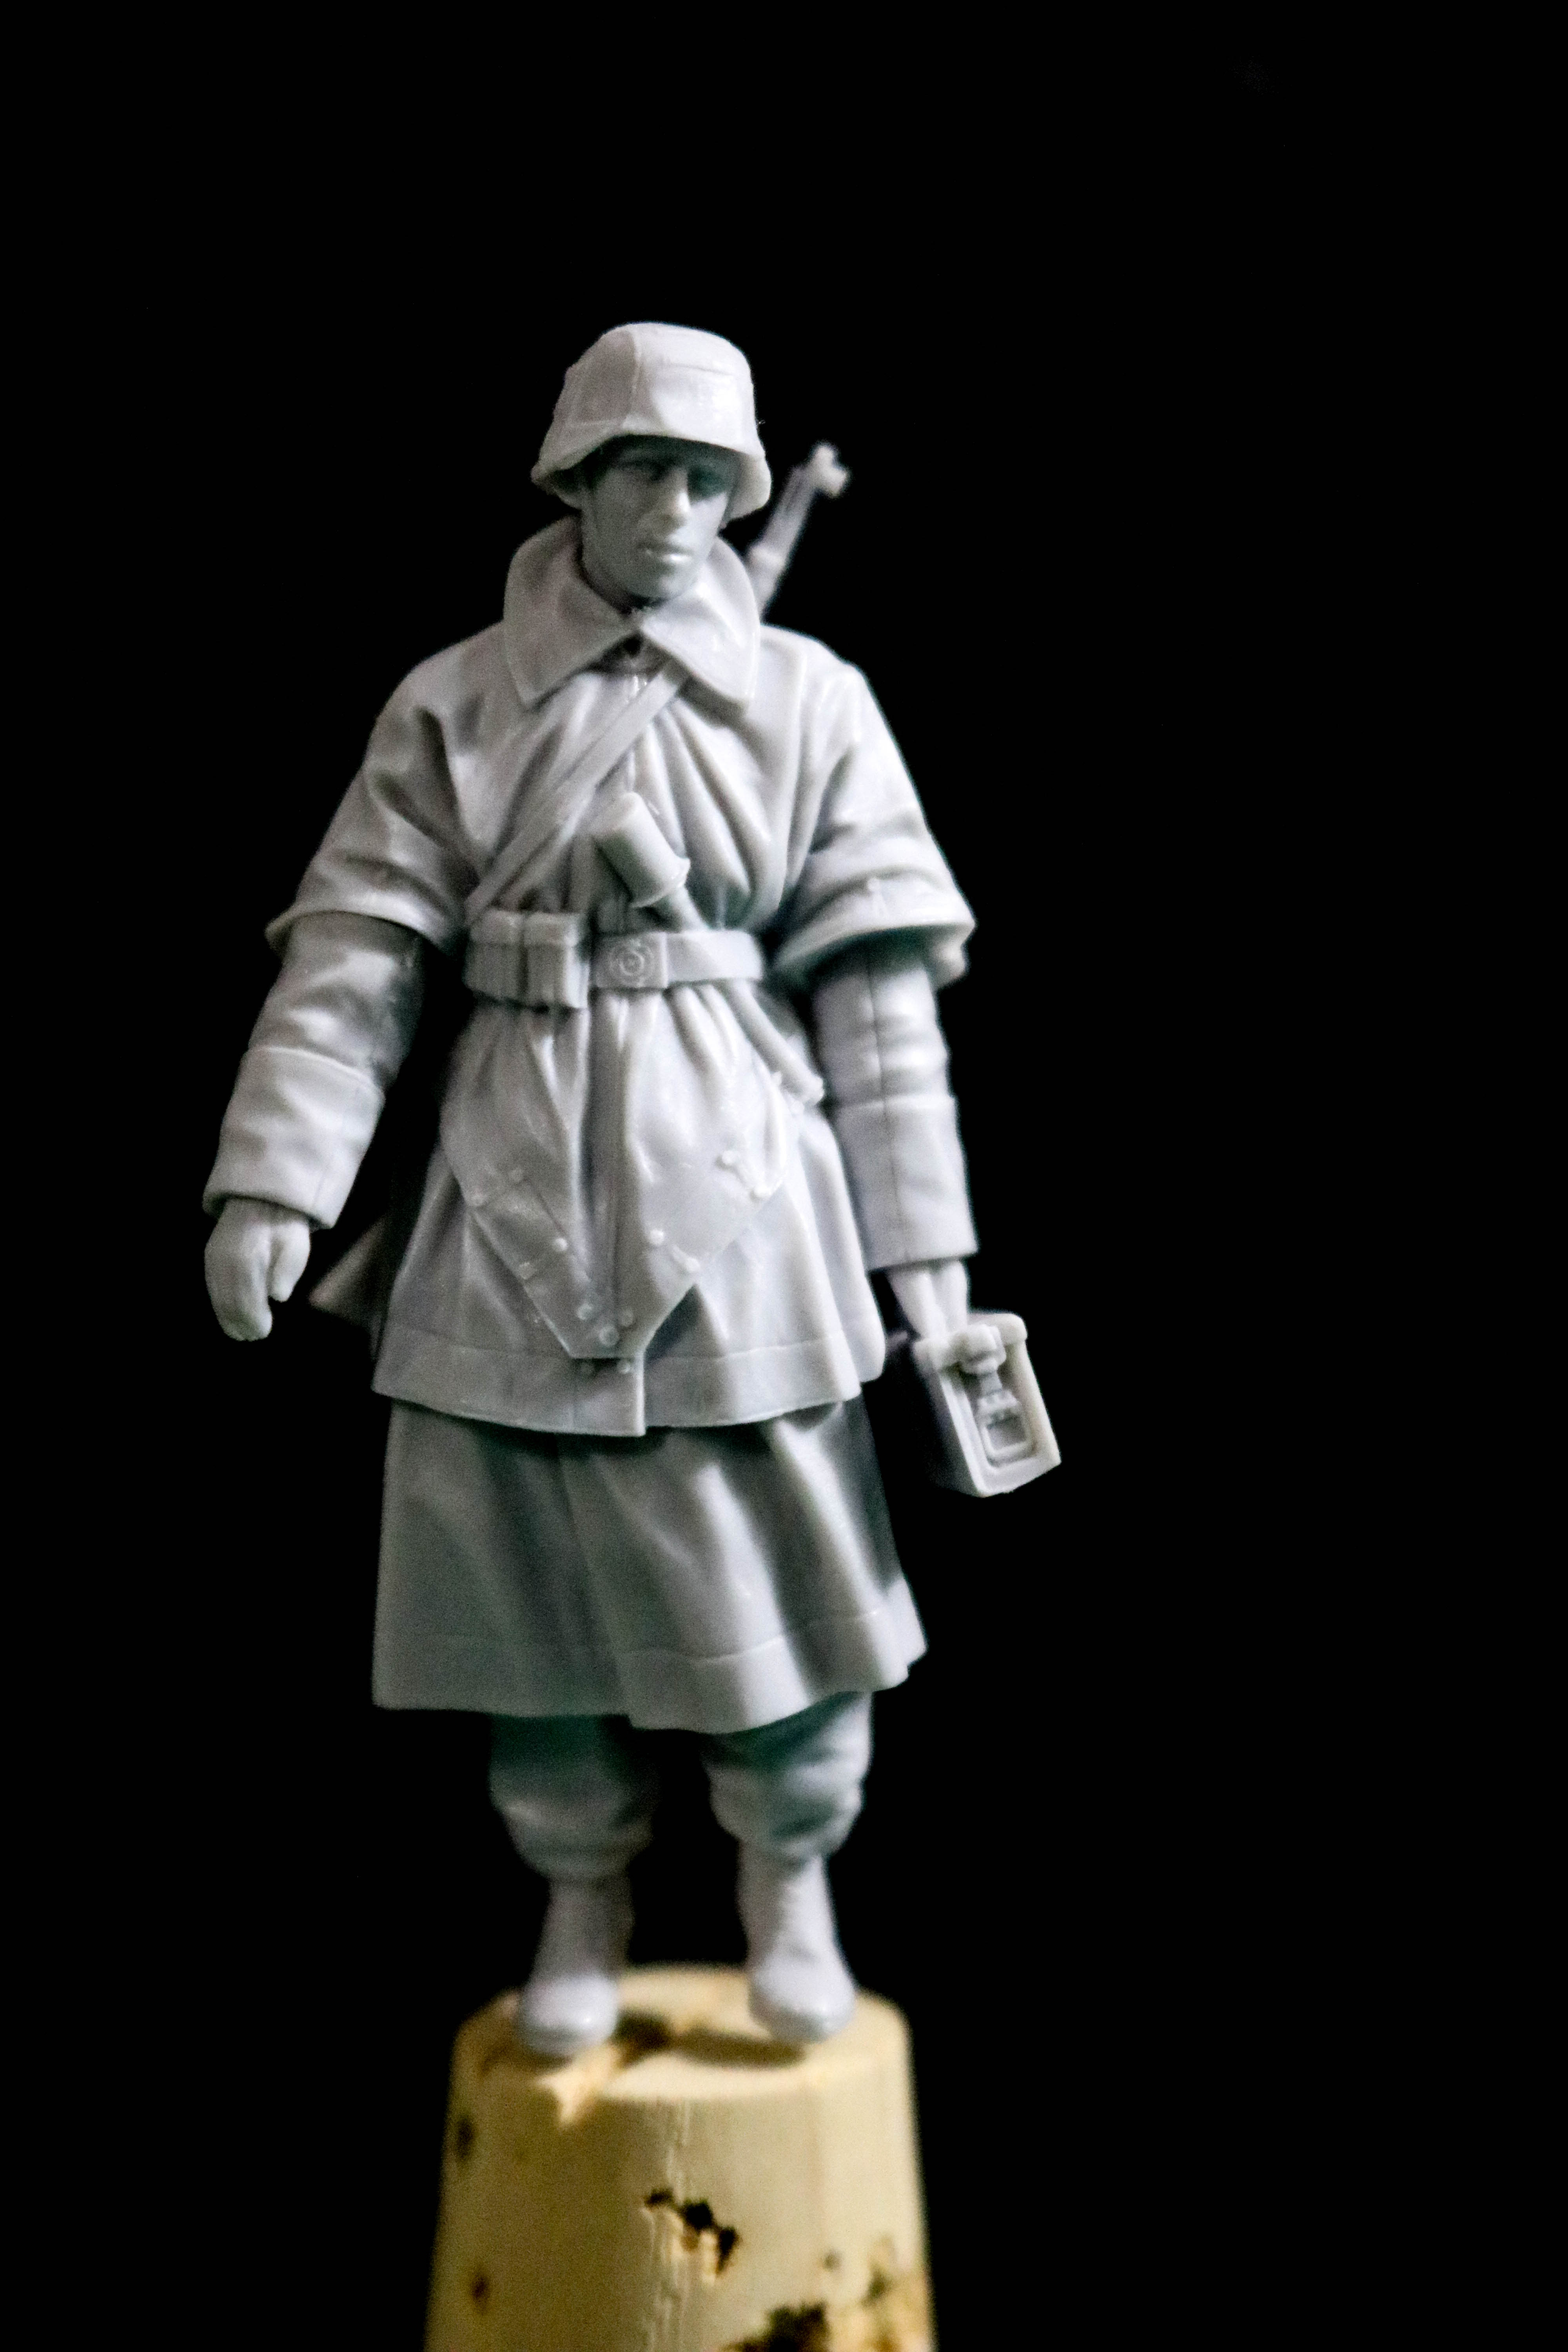
I started with construction of a few of the Alpine figures. The quality of the details and casting on them is exceptional. The poses seem believable as well in comparison to some of the plastic figures I've built before. There's a more human quality to them.


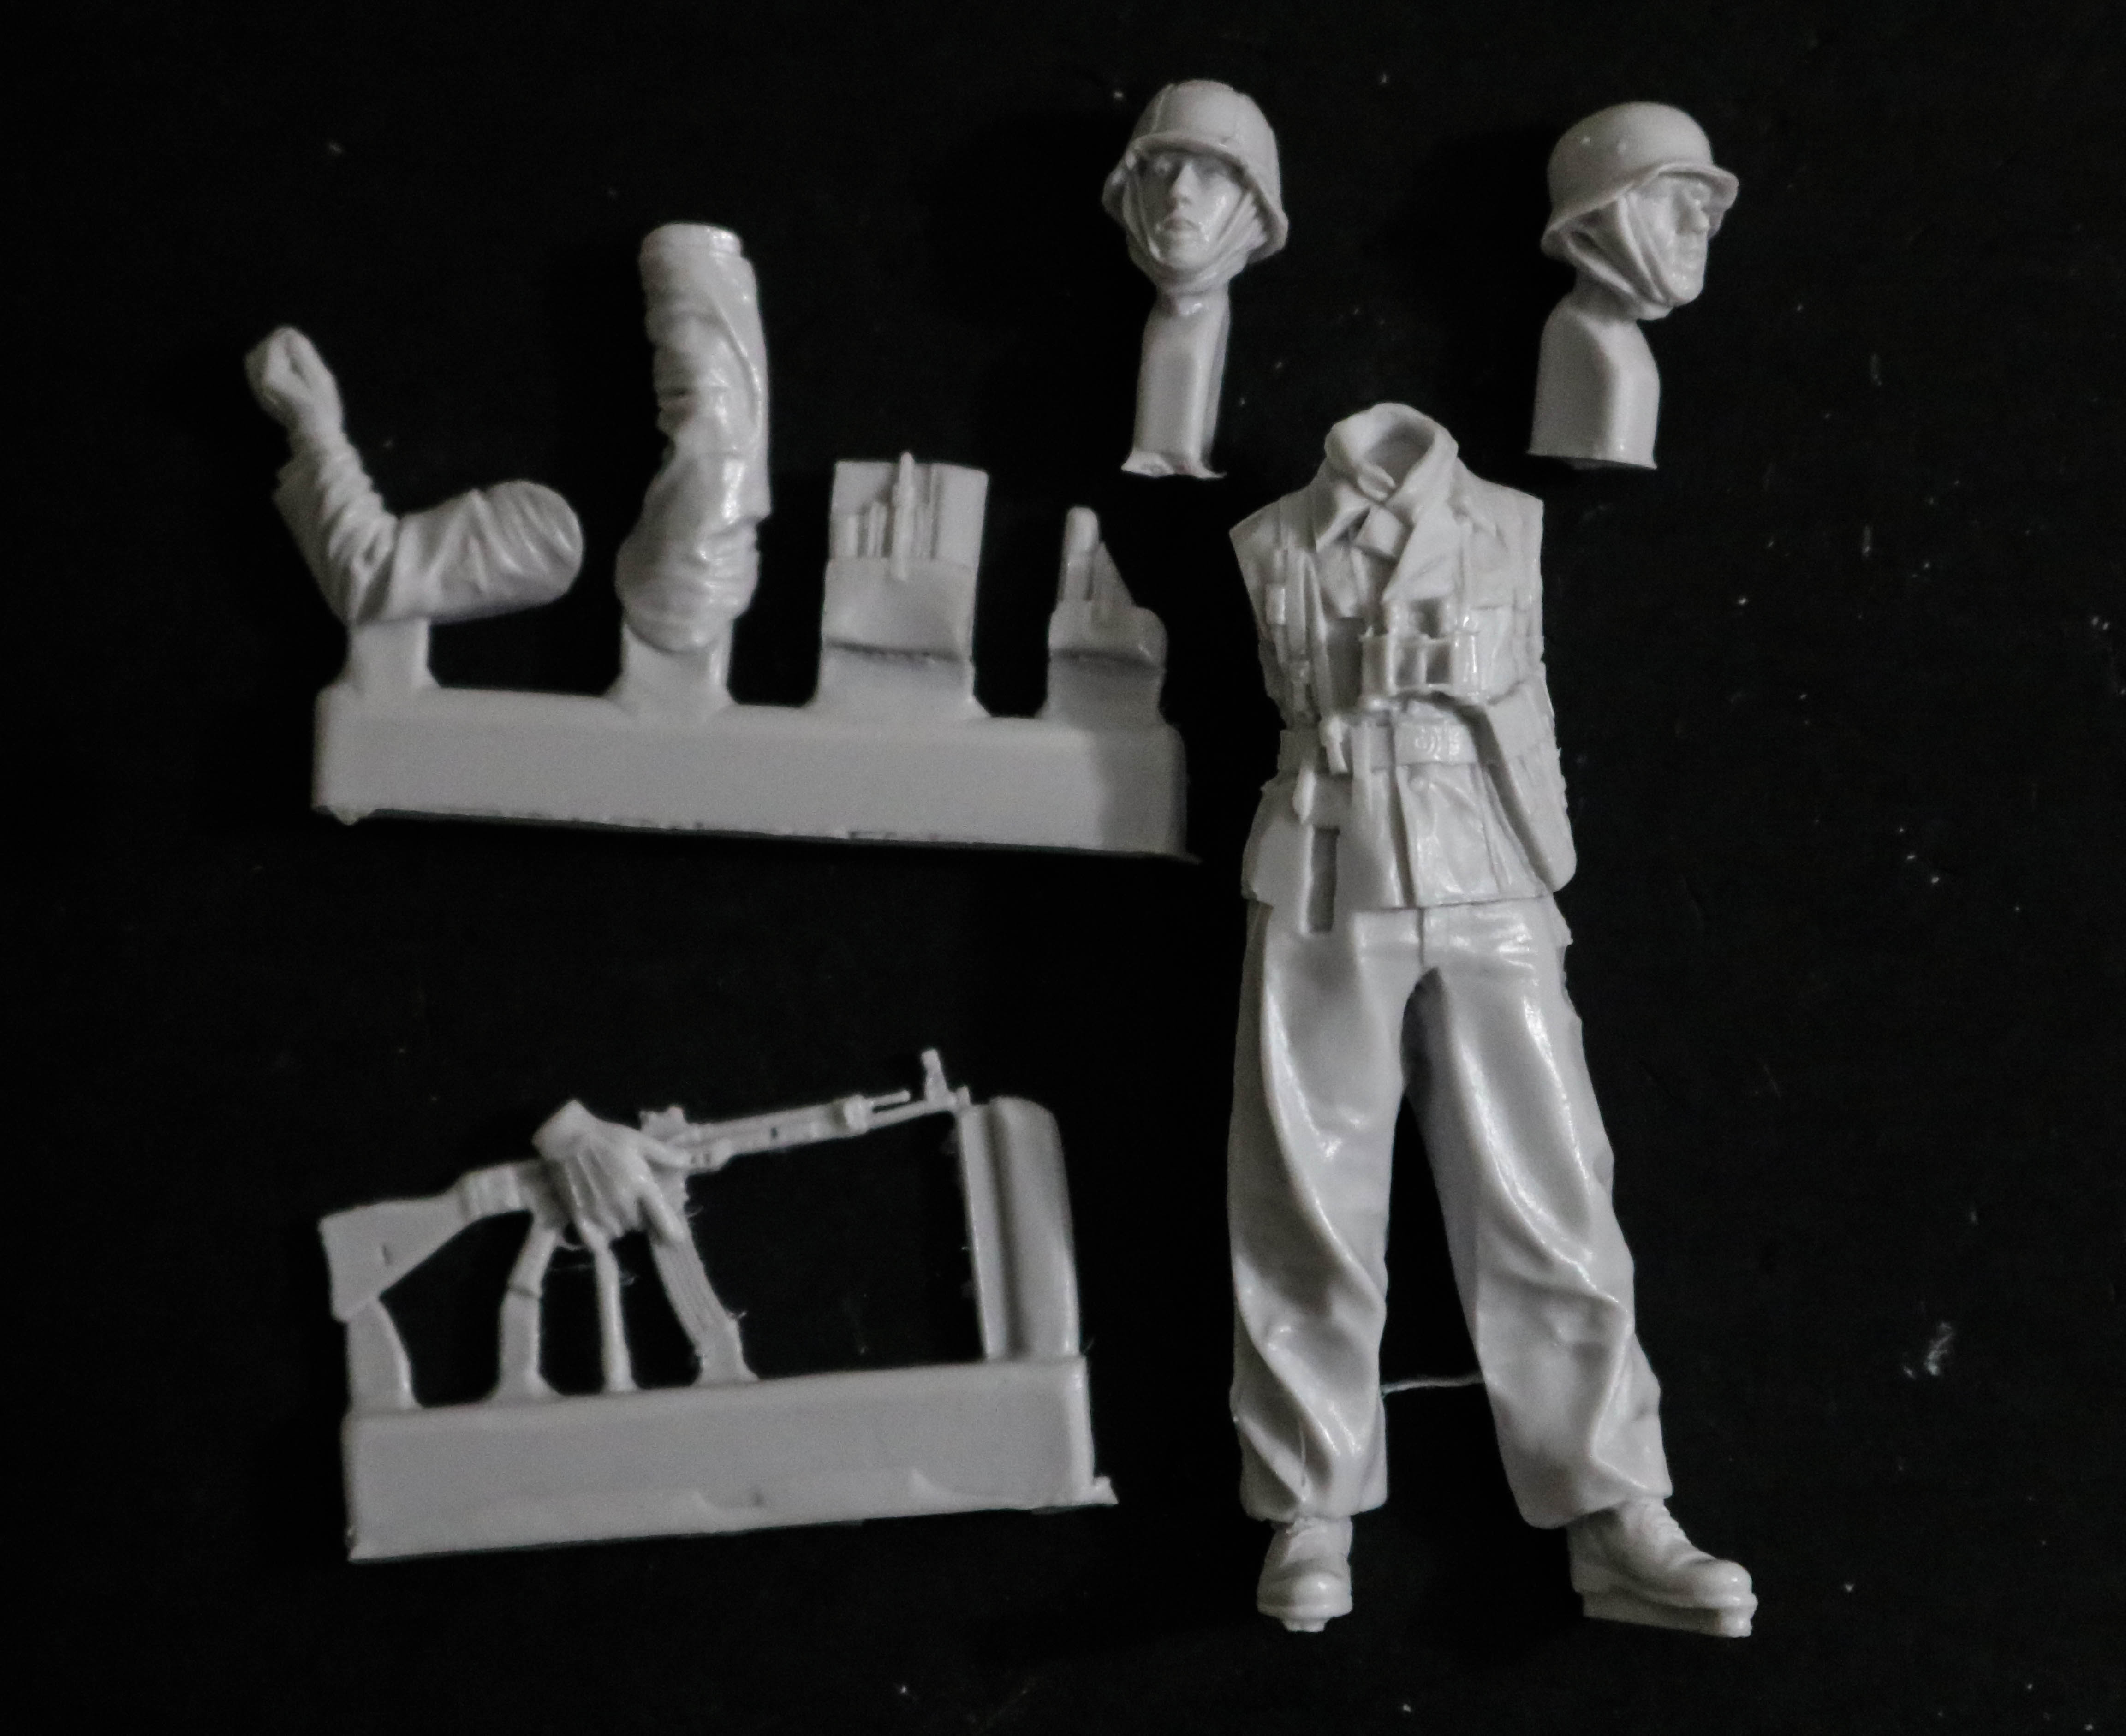
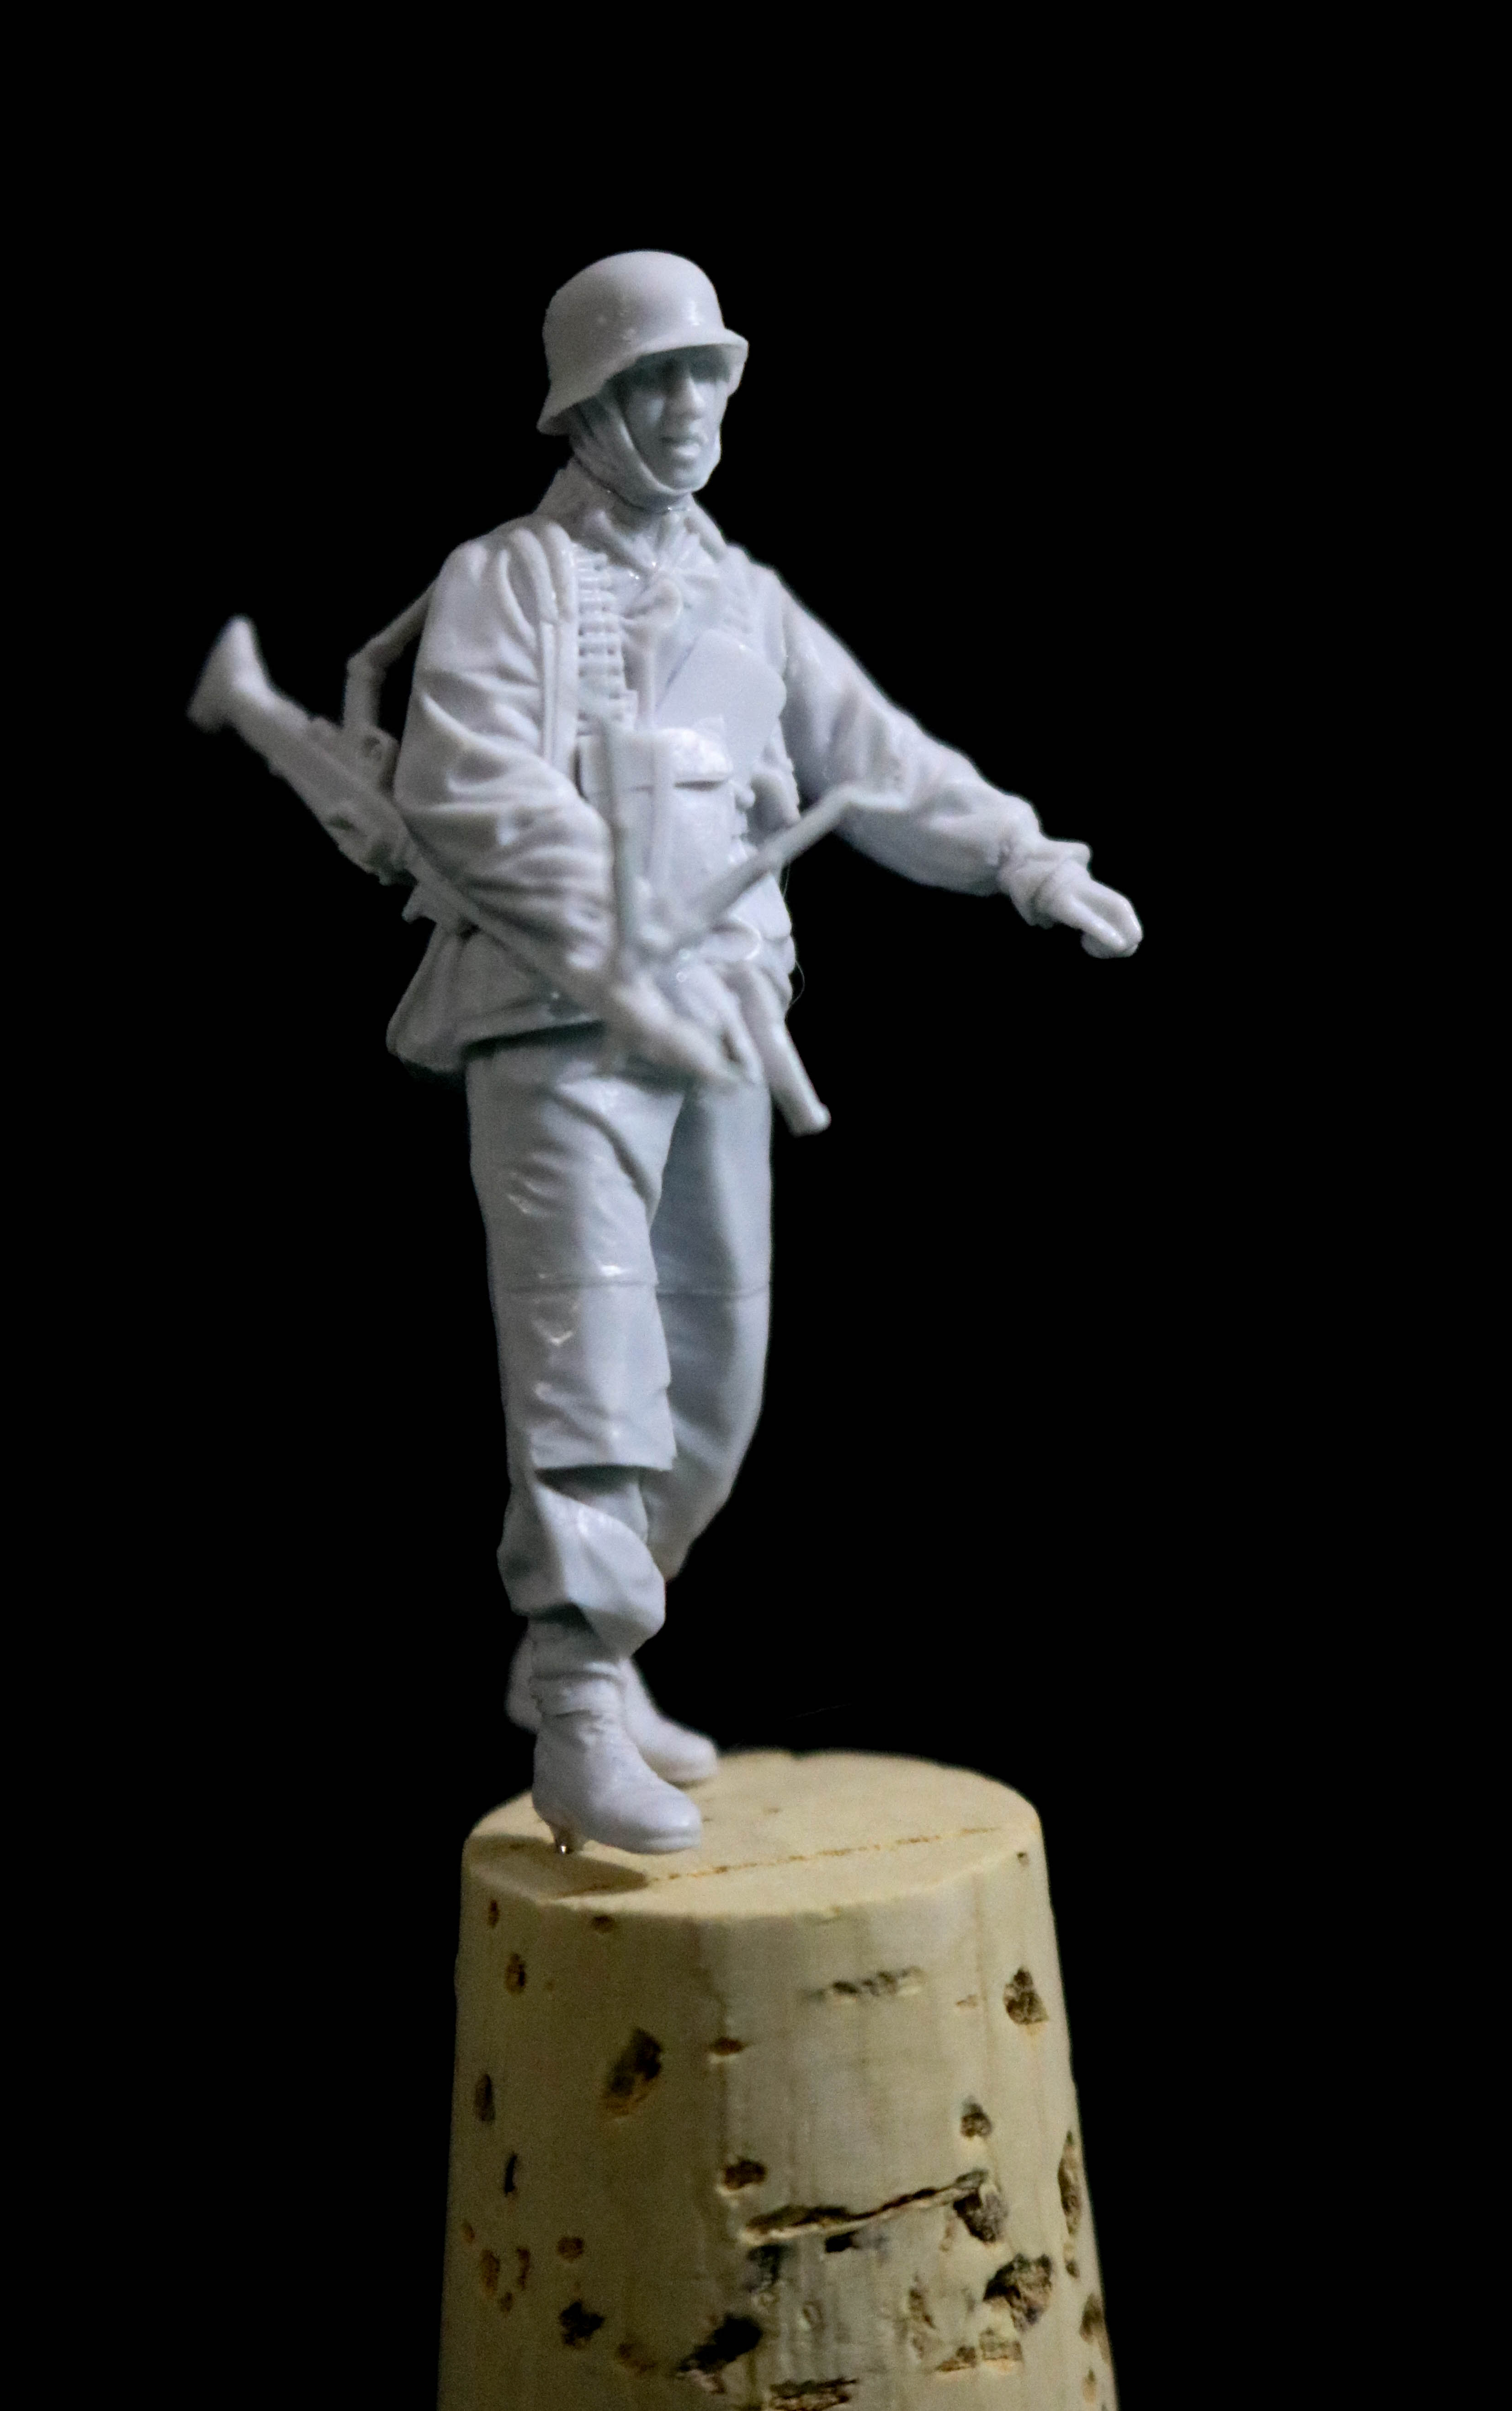
I've assembled many of the Alpine figures and started on the MiniArt and Dragon figures (whose heads I replaced with Alpine). It's come to my attention that the ones carrying their weapons in their hands are going to need slings. I'm not quite sure how I'm going to solve that particular obstacle just yet.


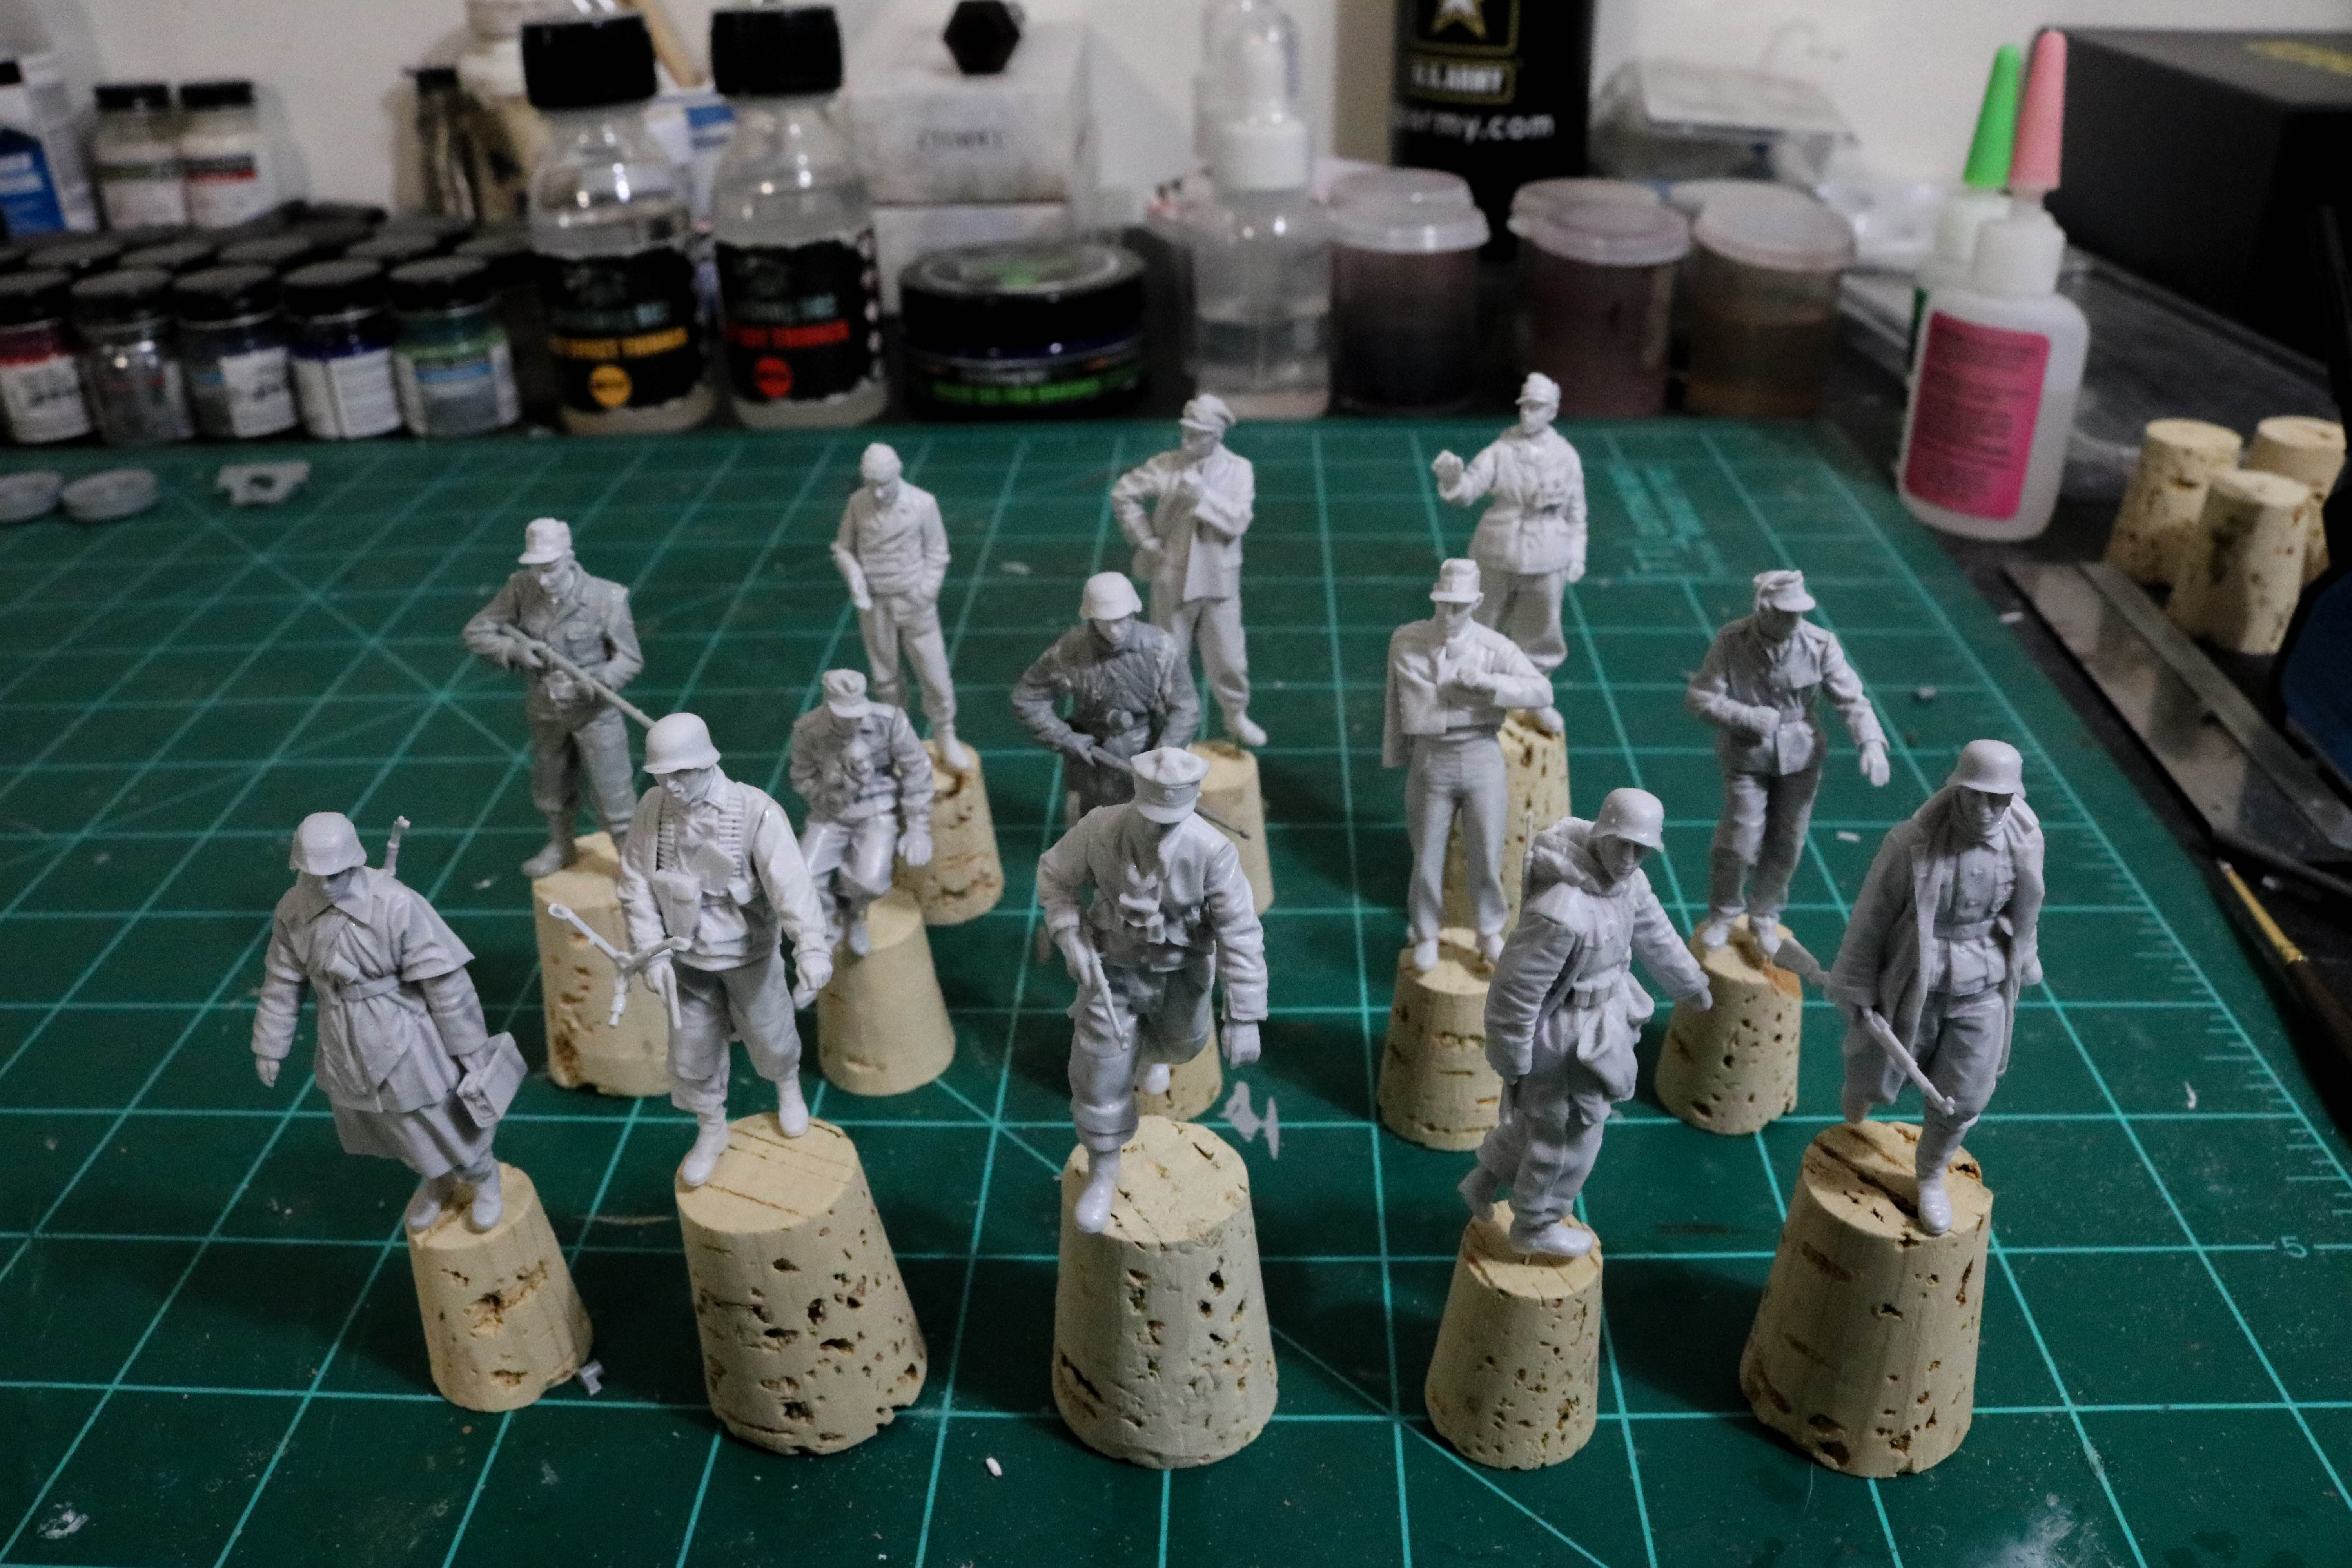
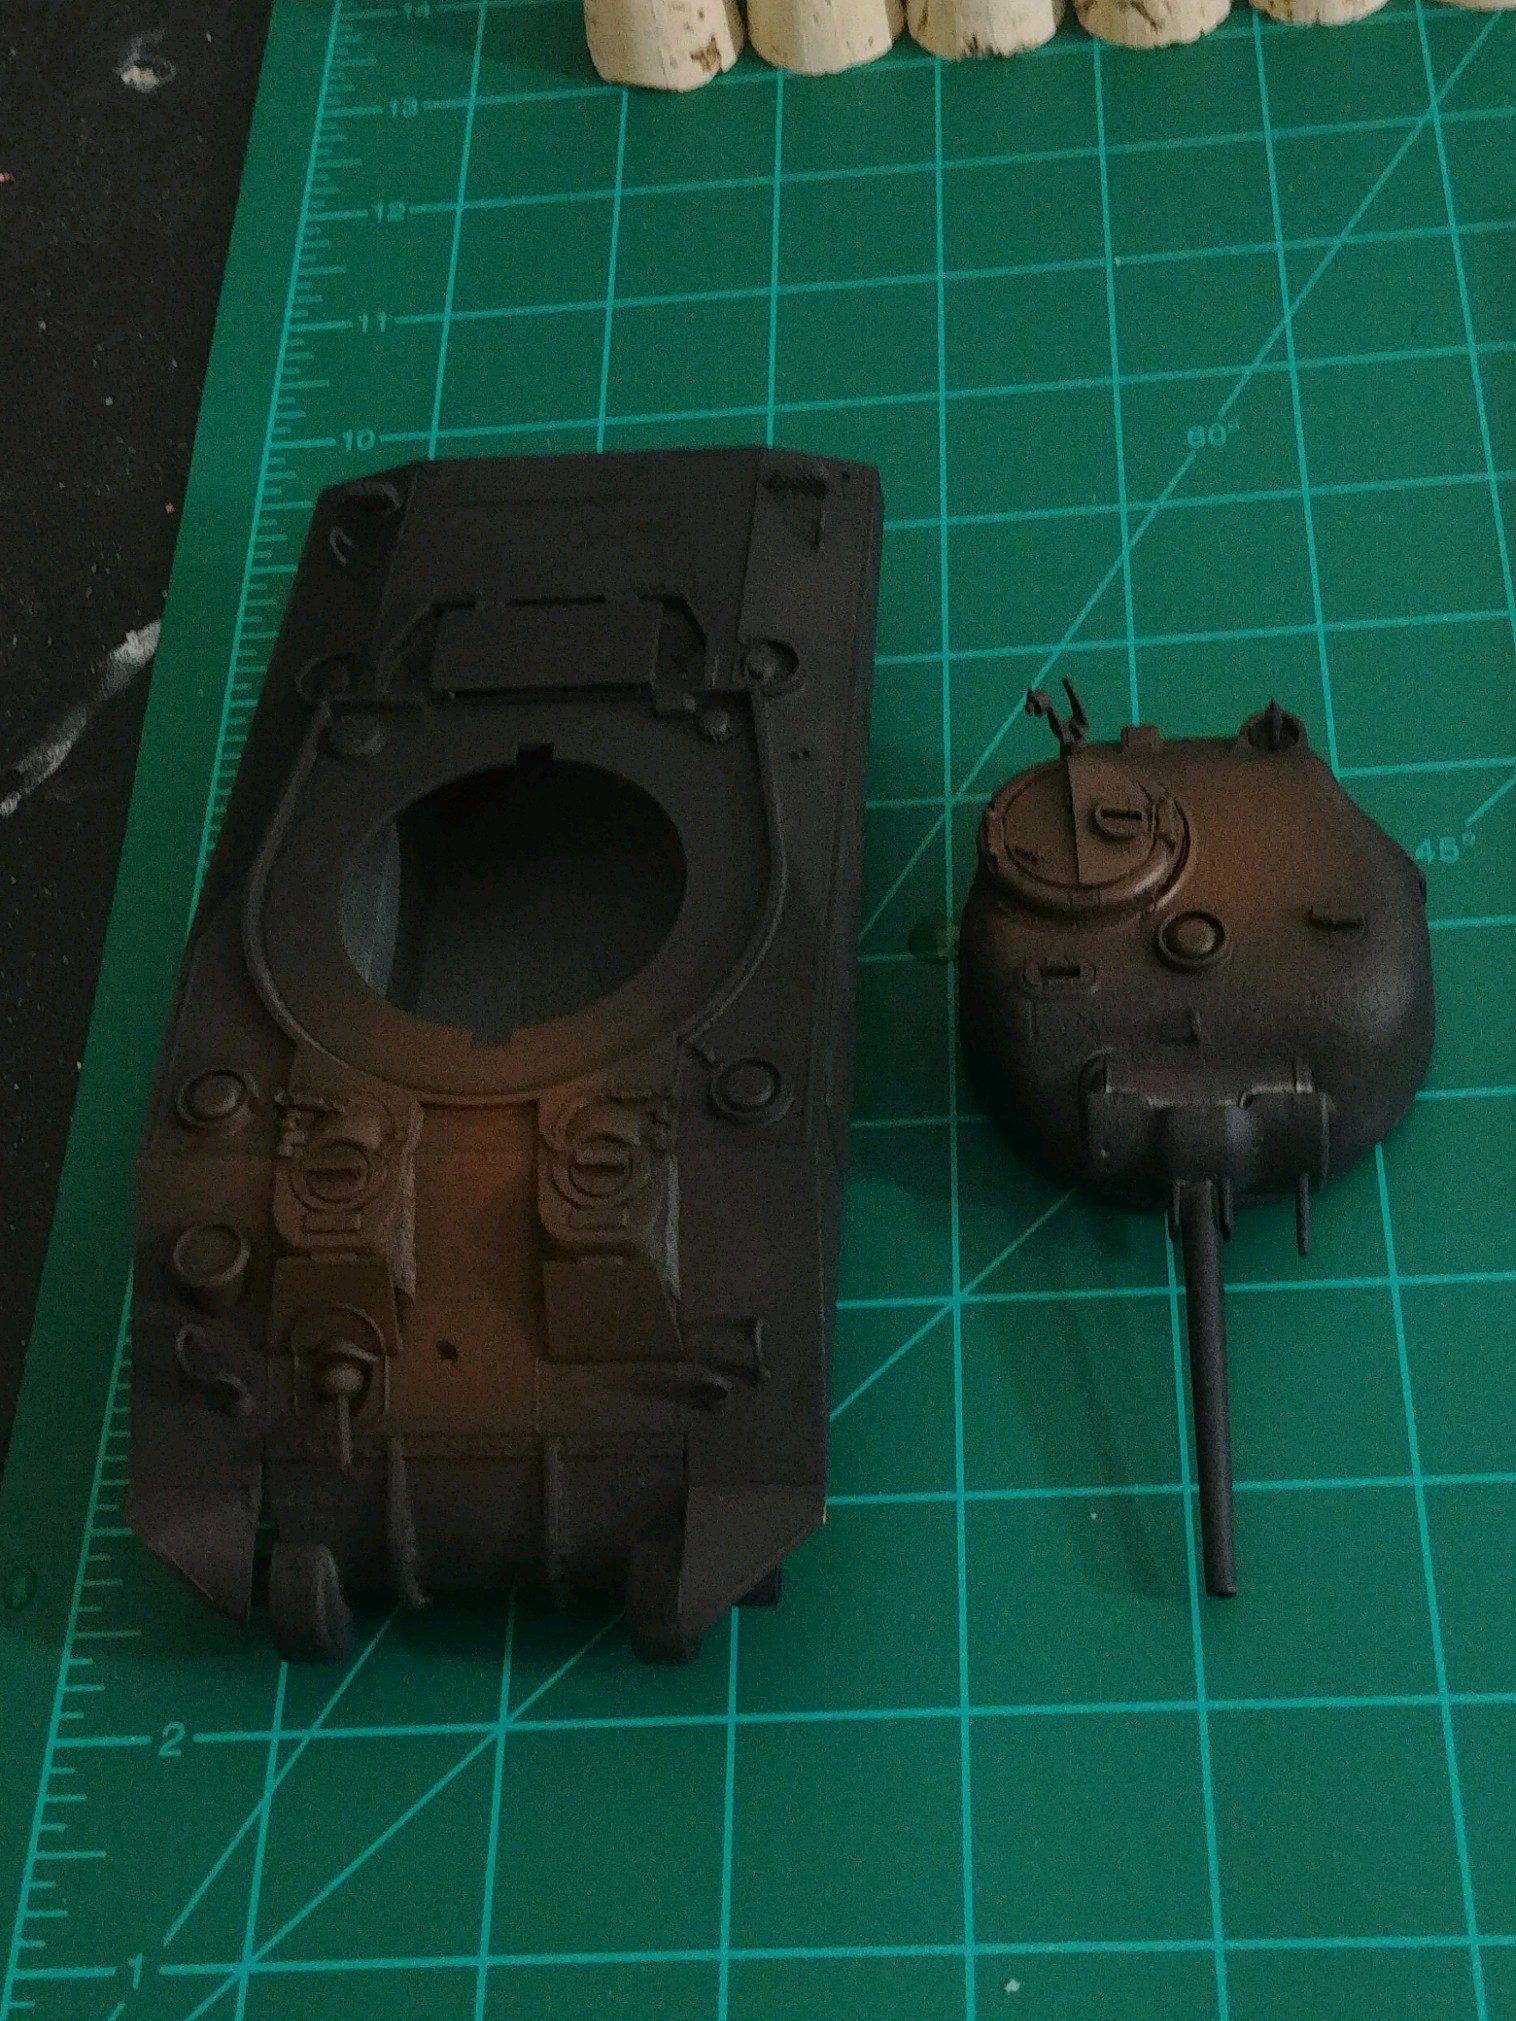
Still have a number of figures to construct and then start filling in gaps.

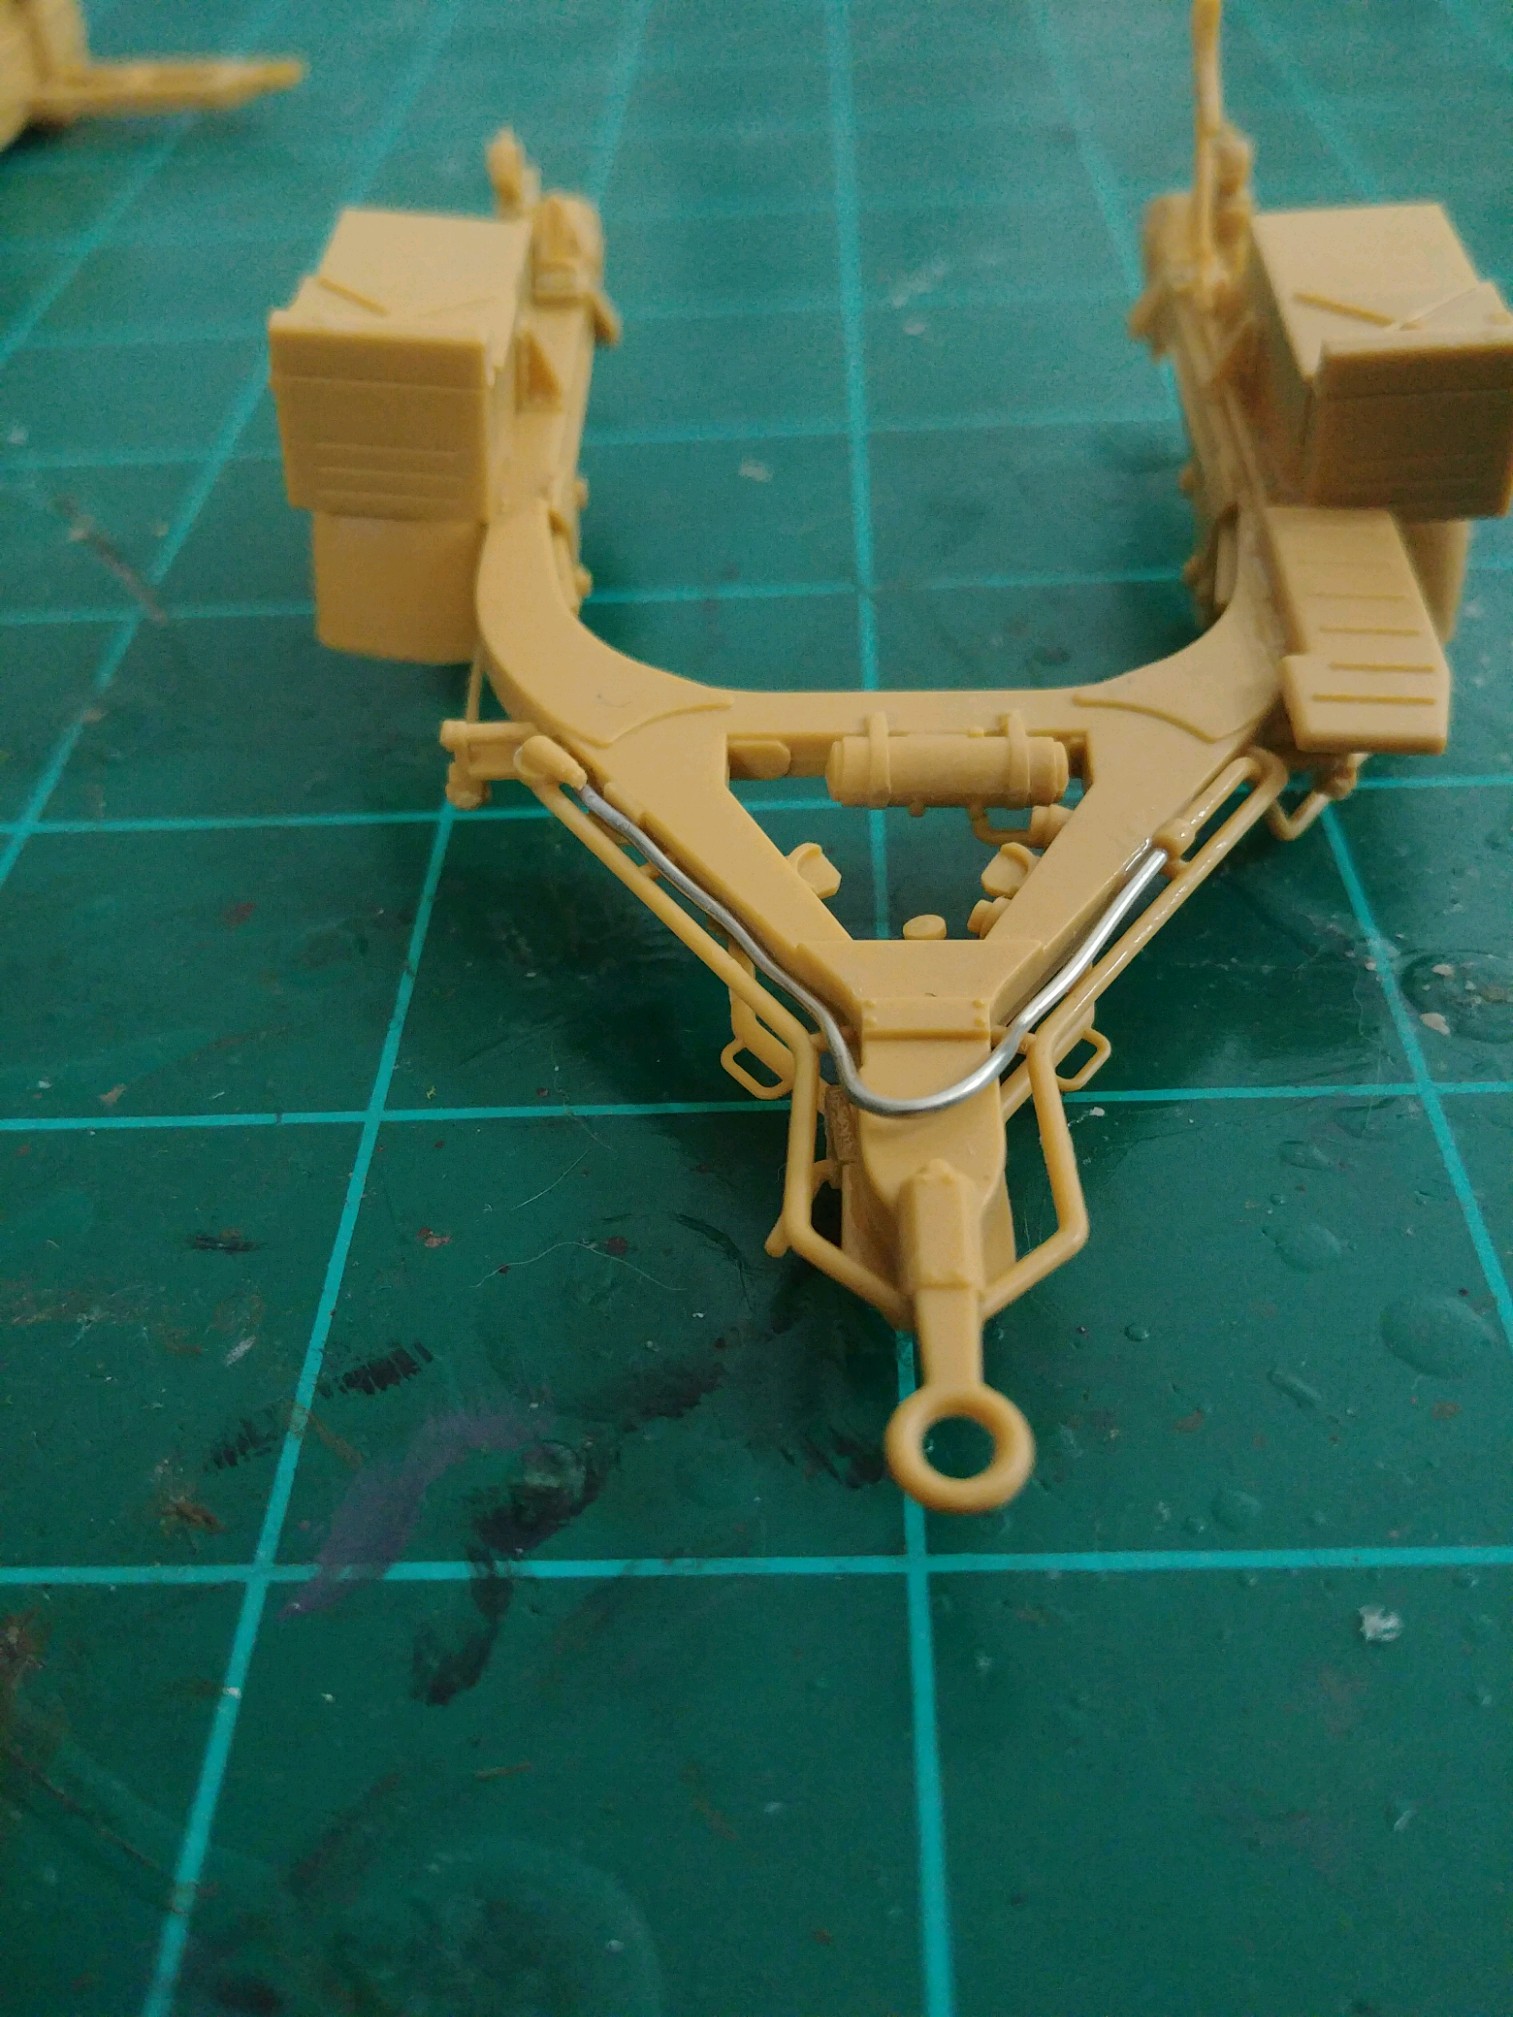
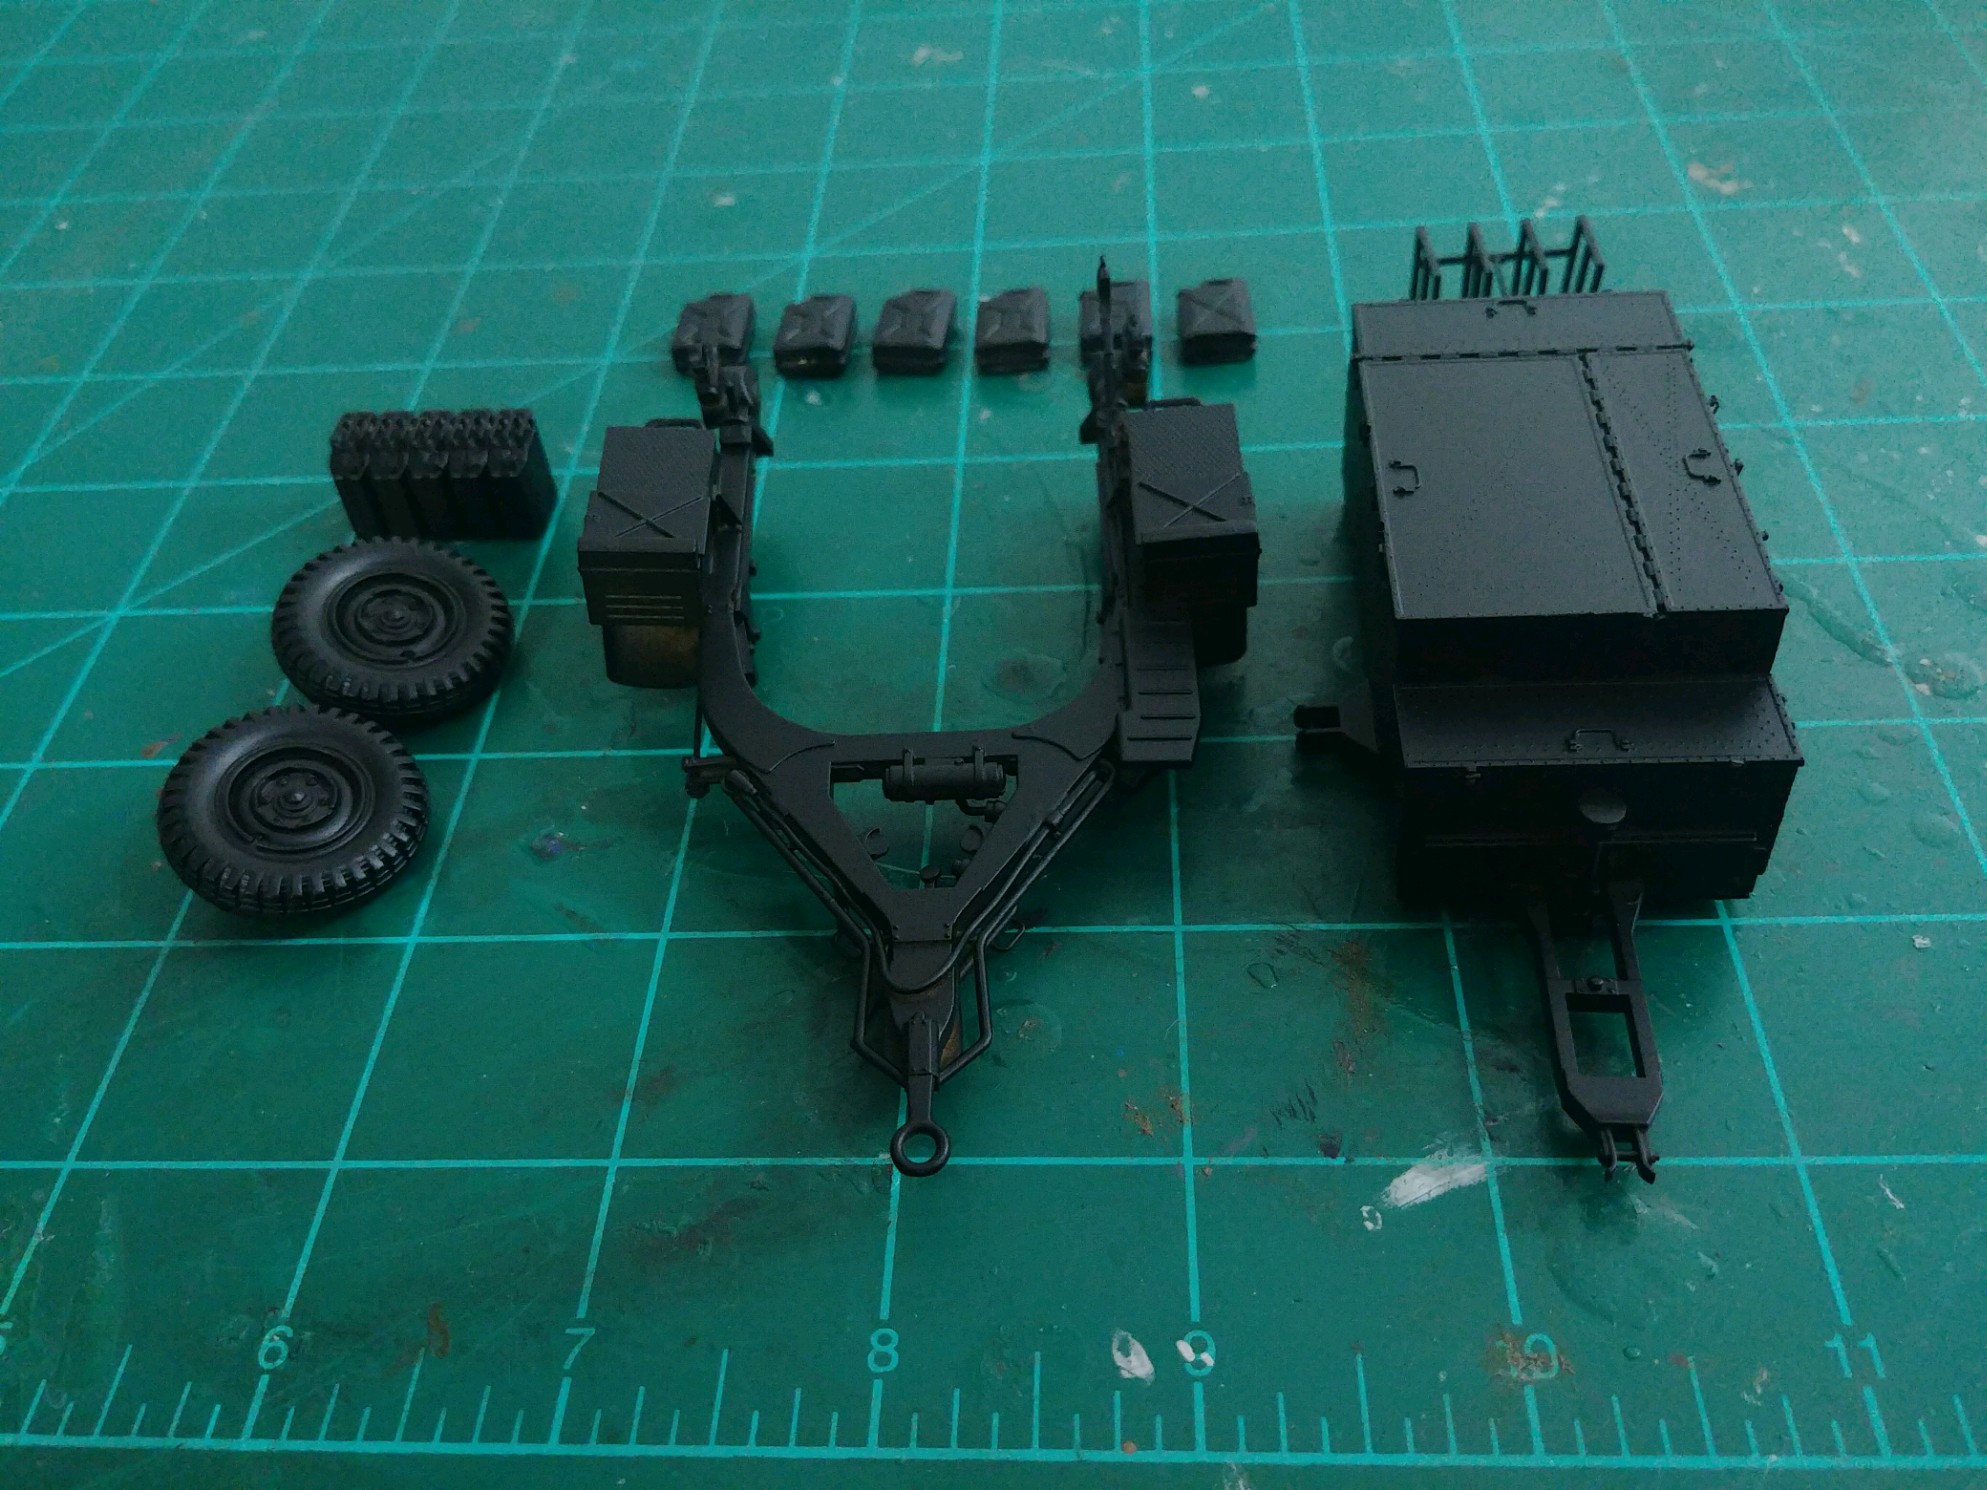
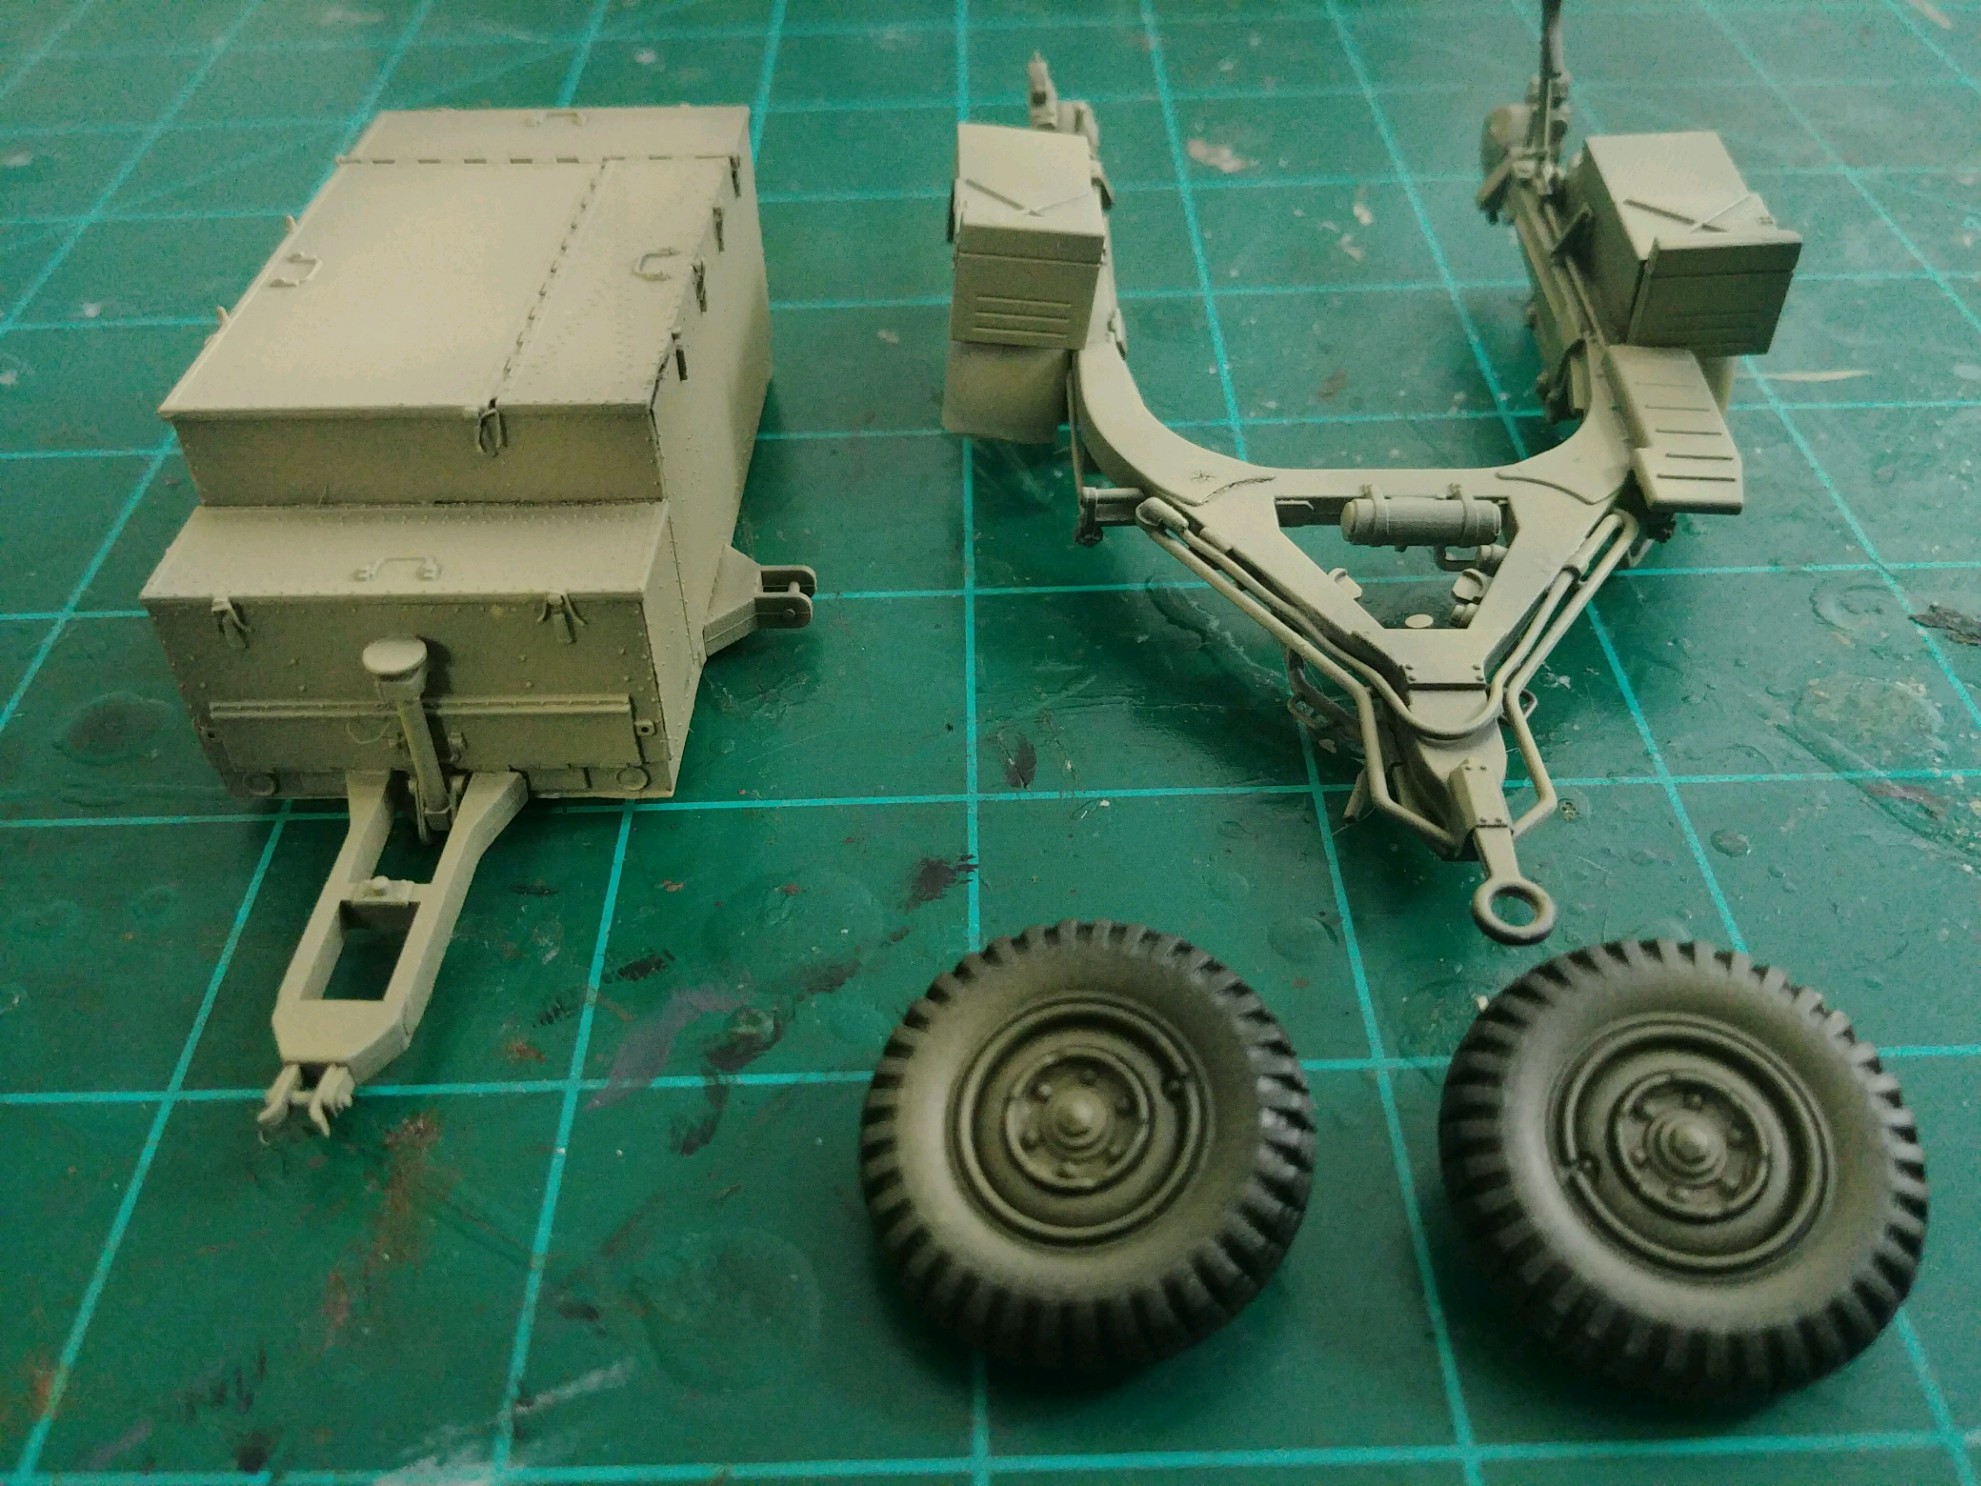
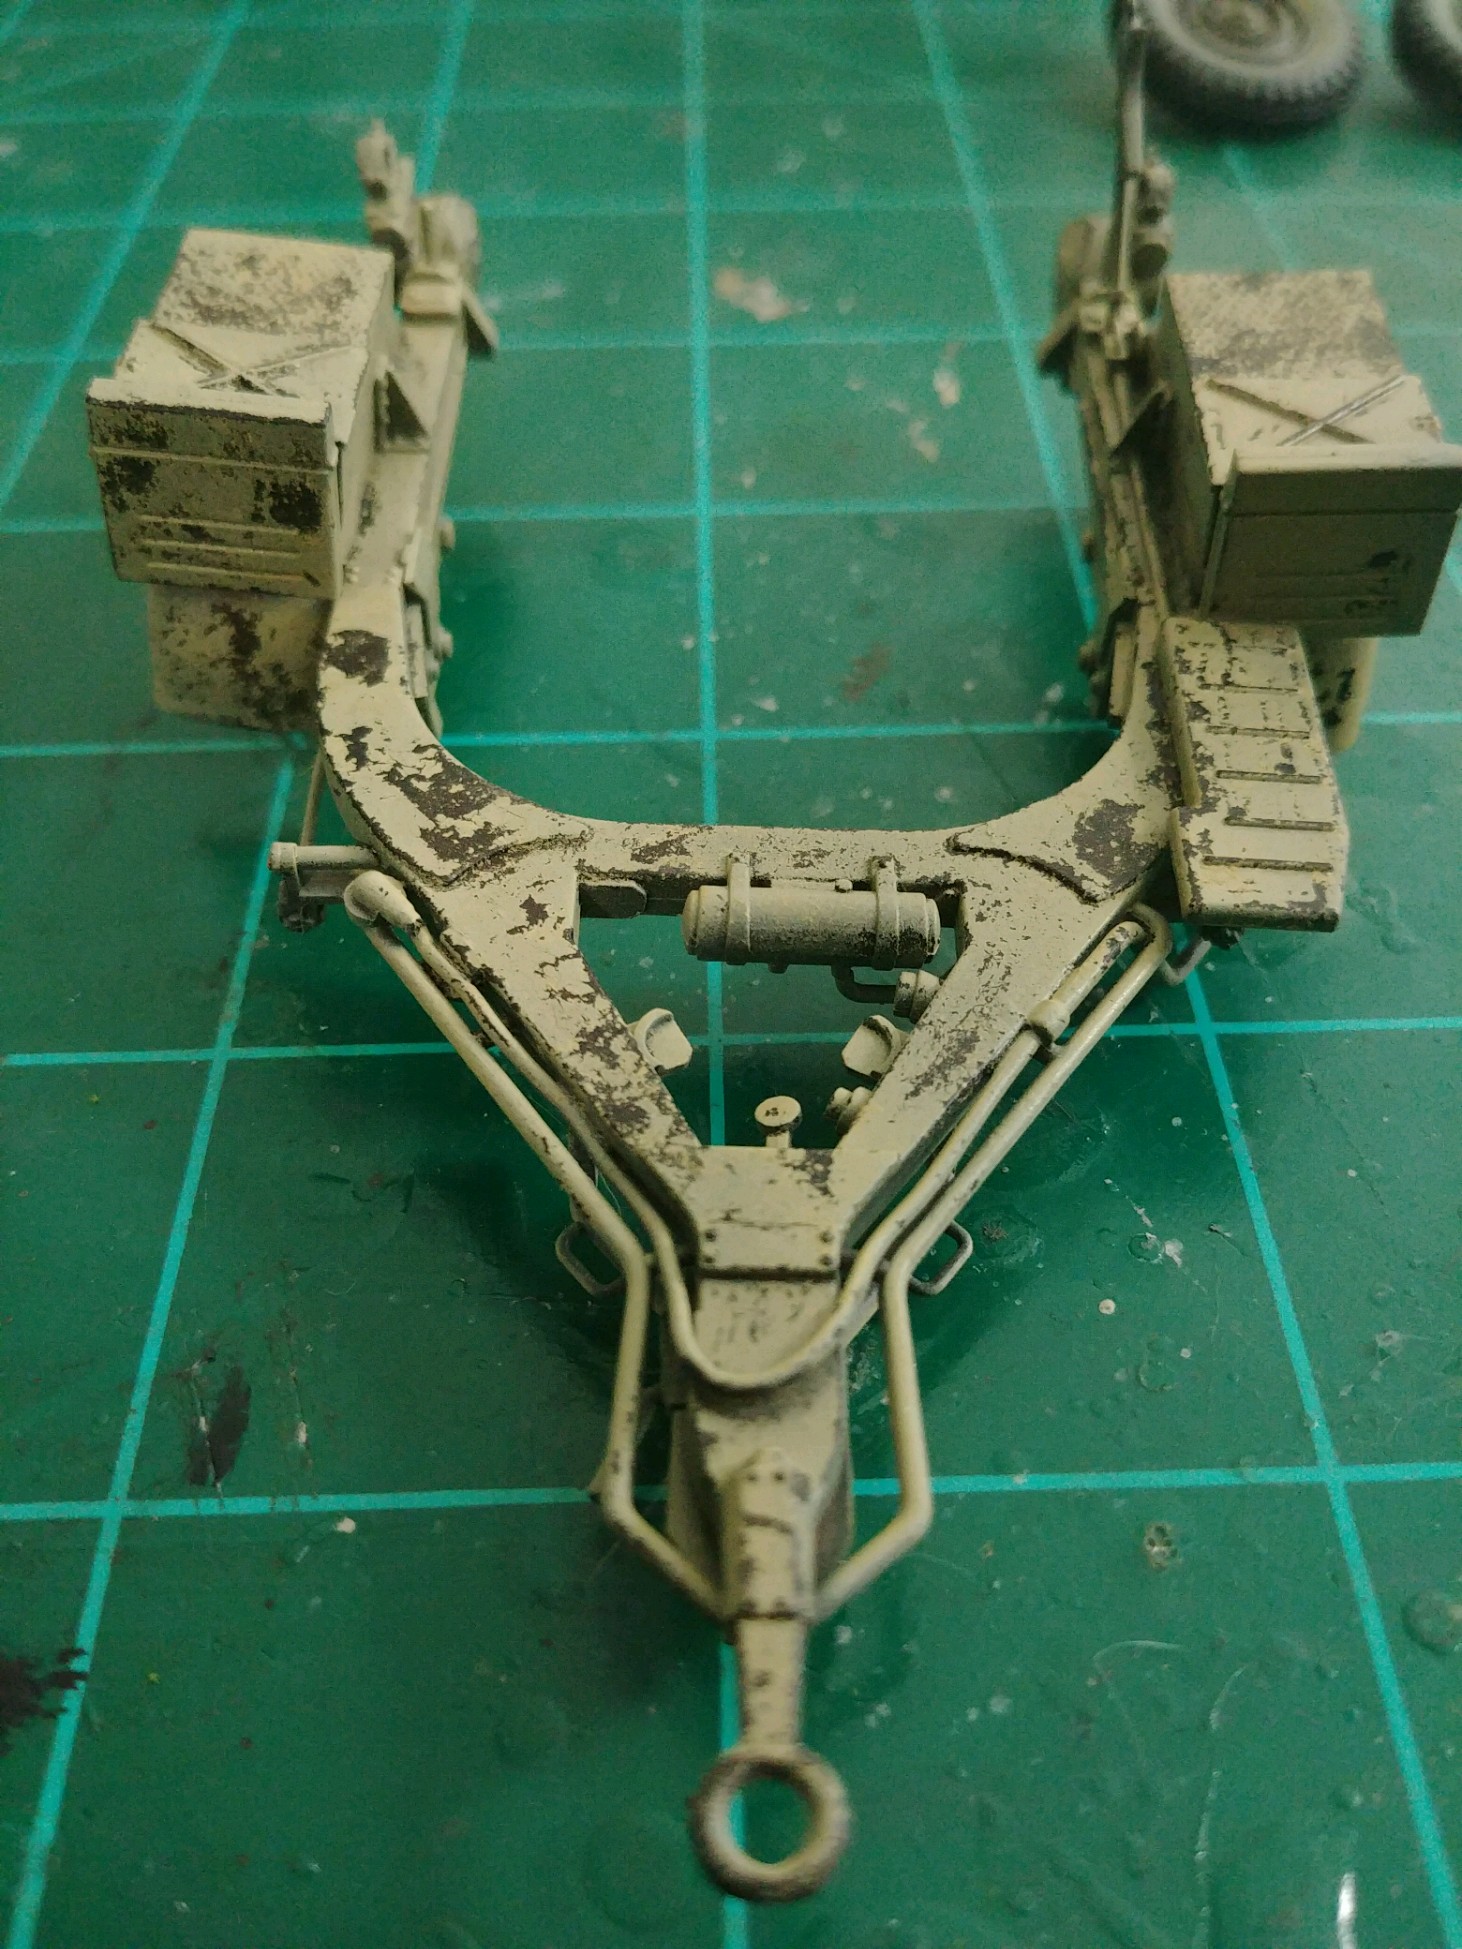
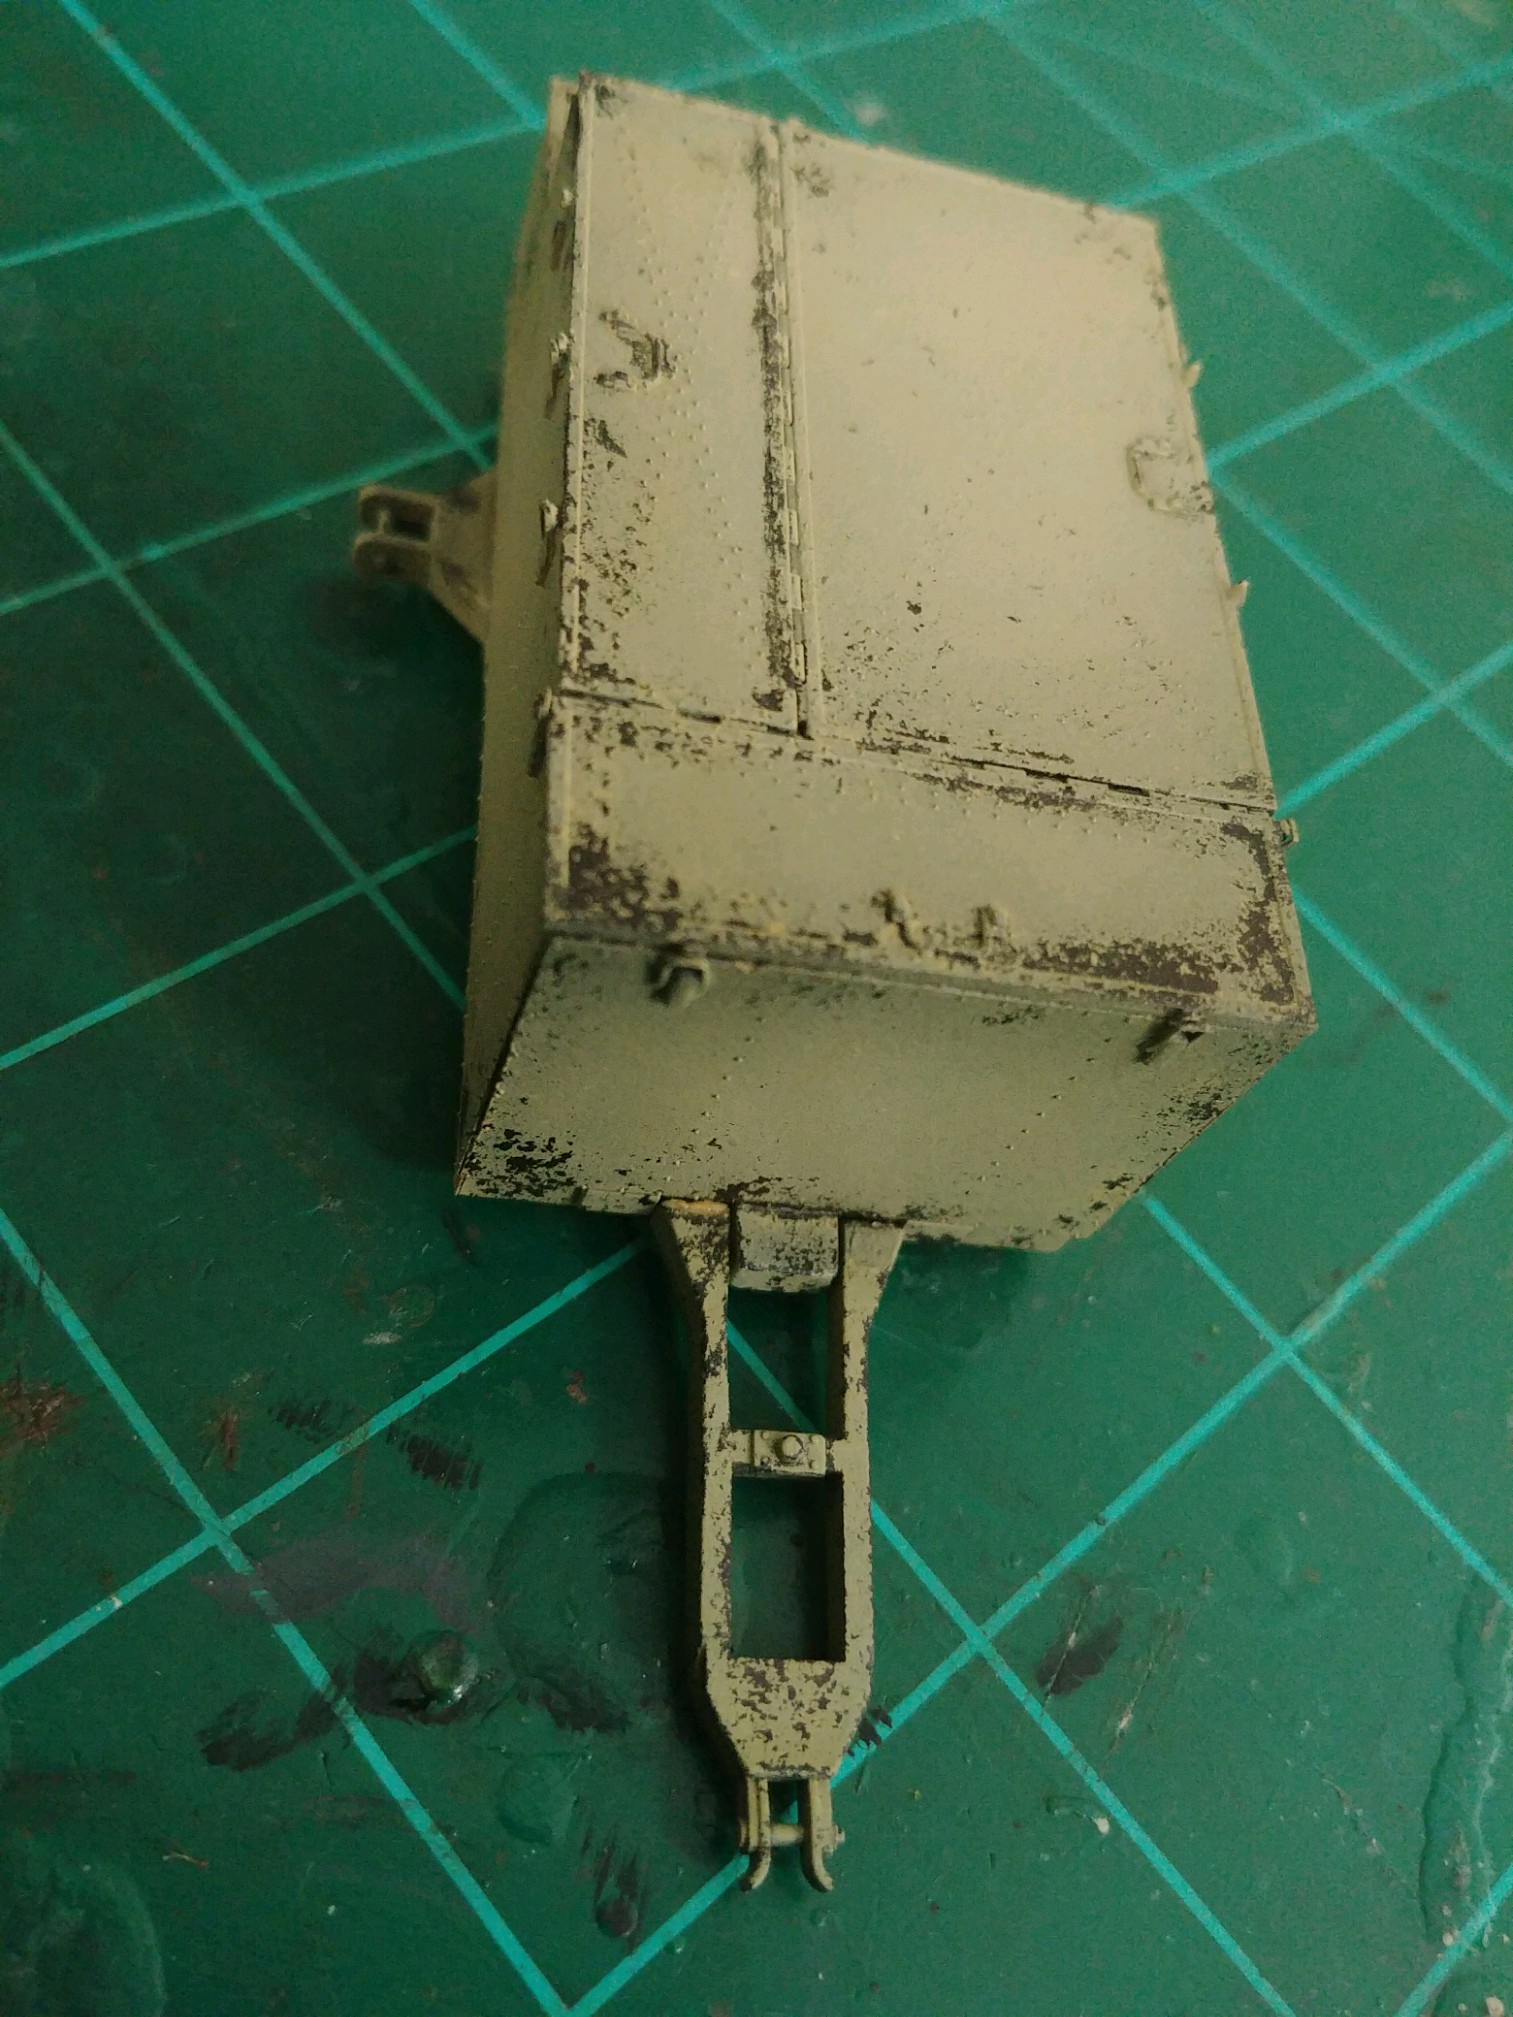
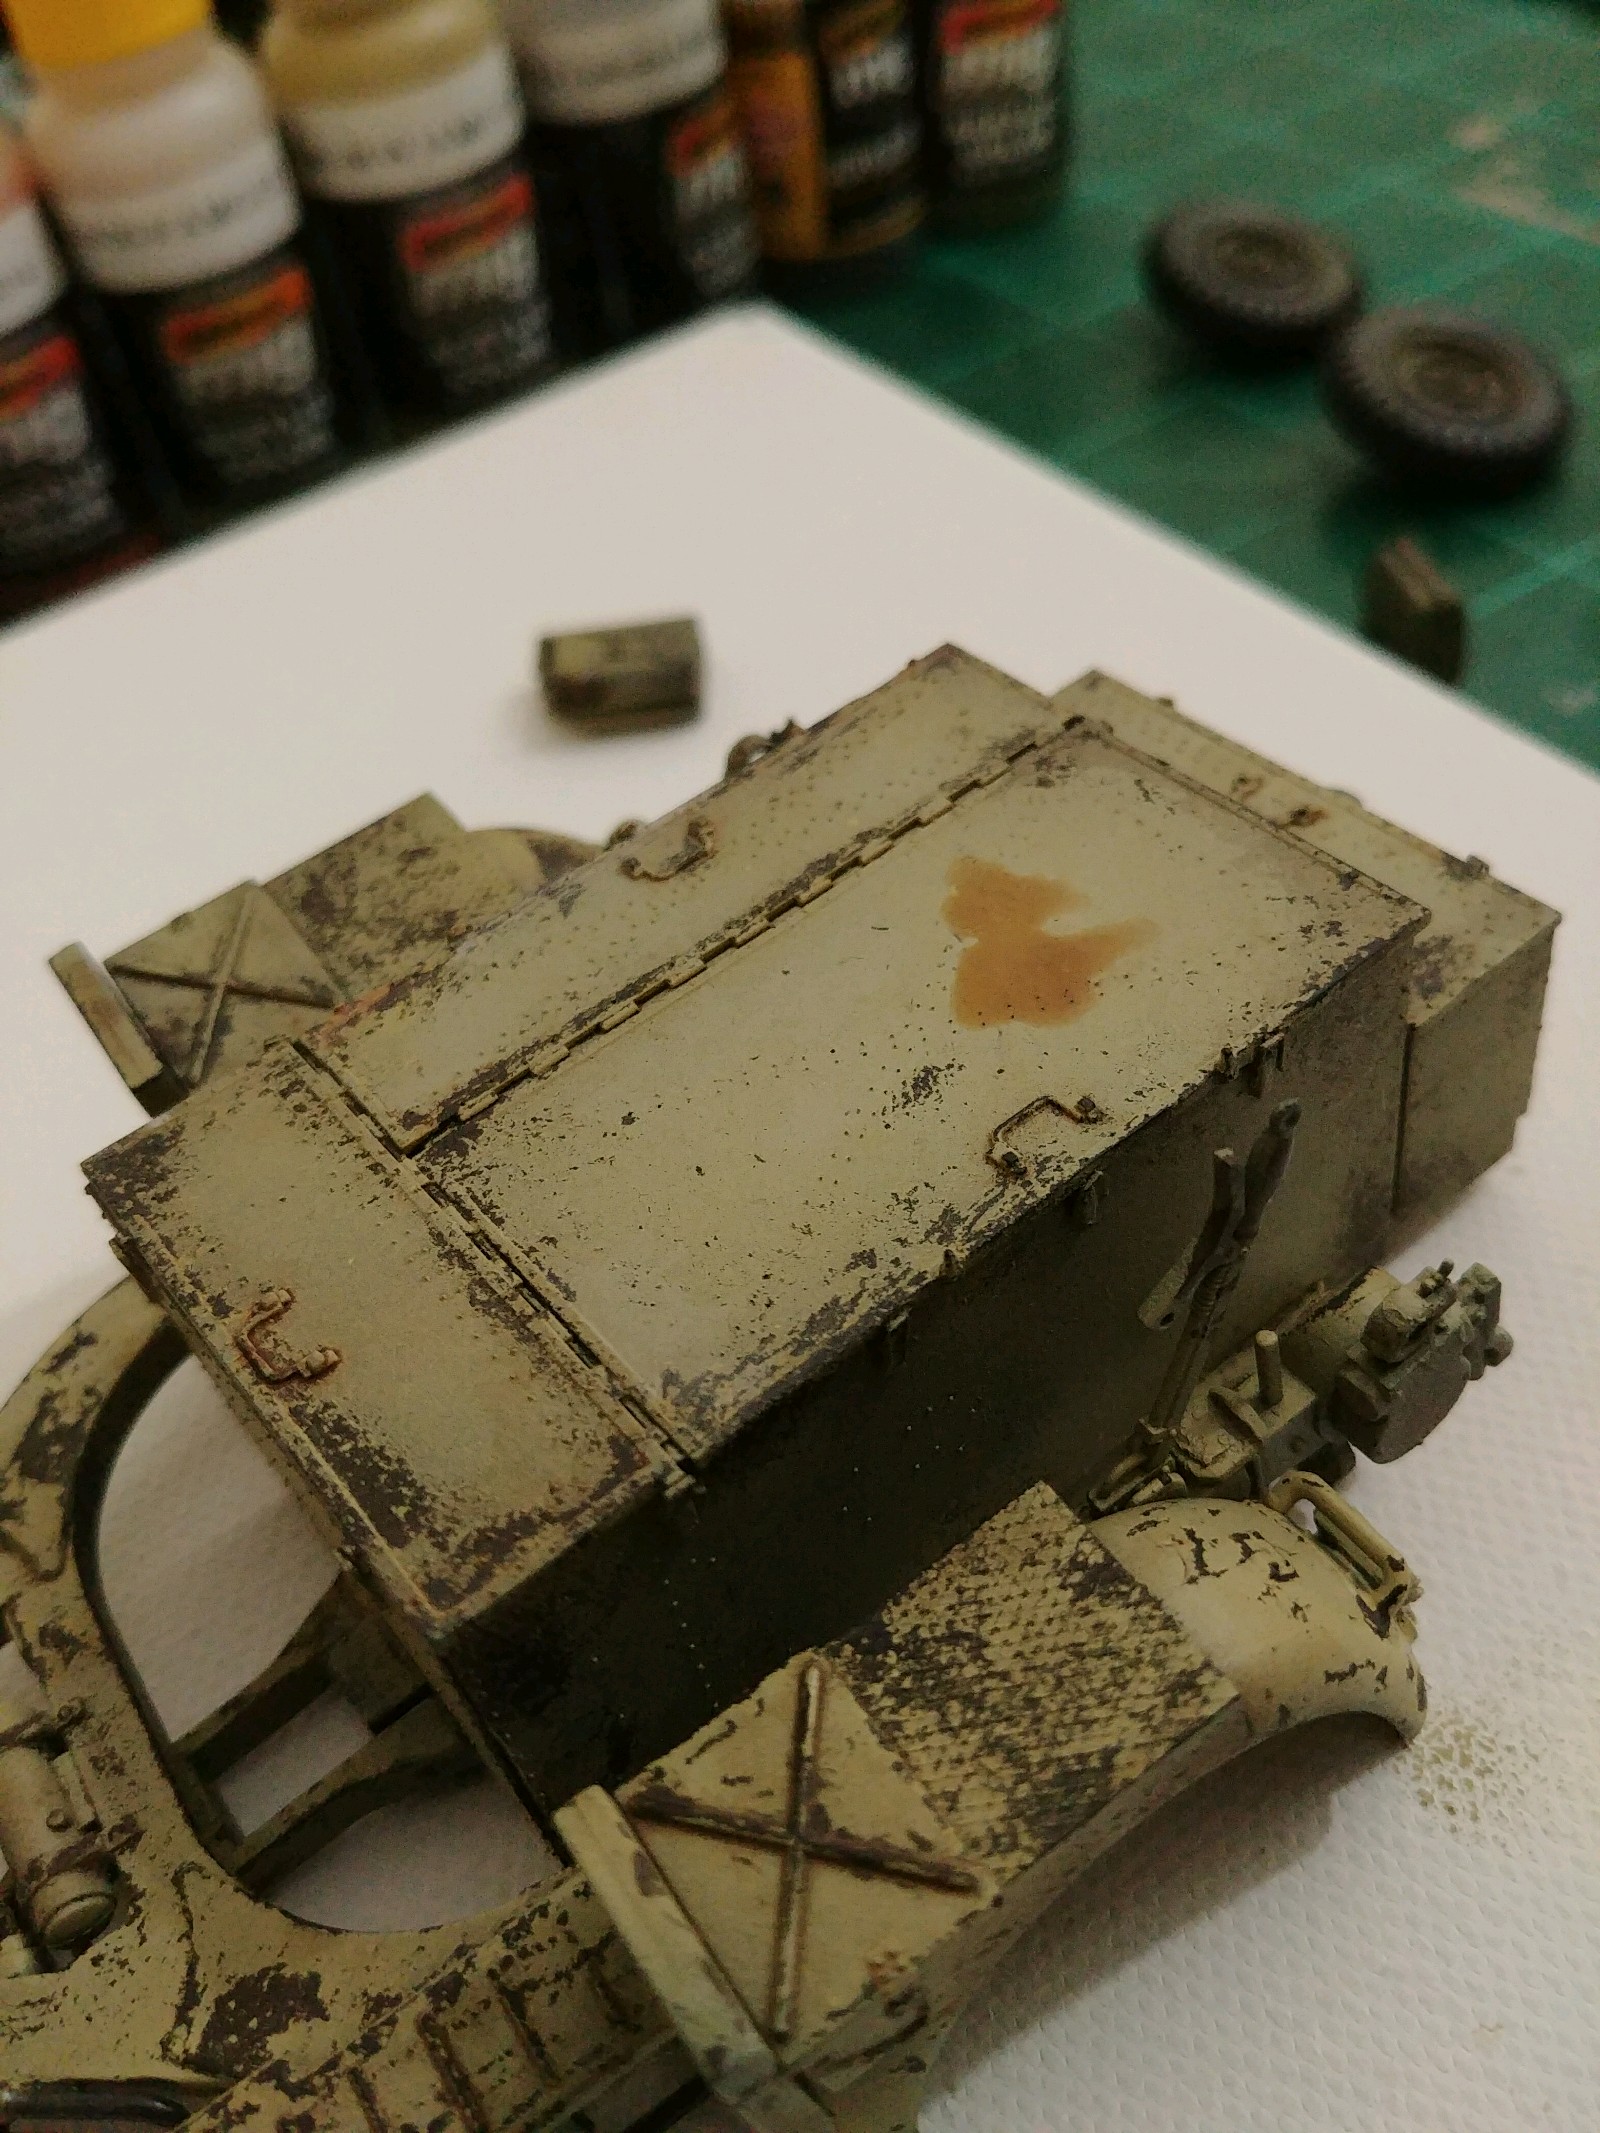
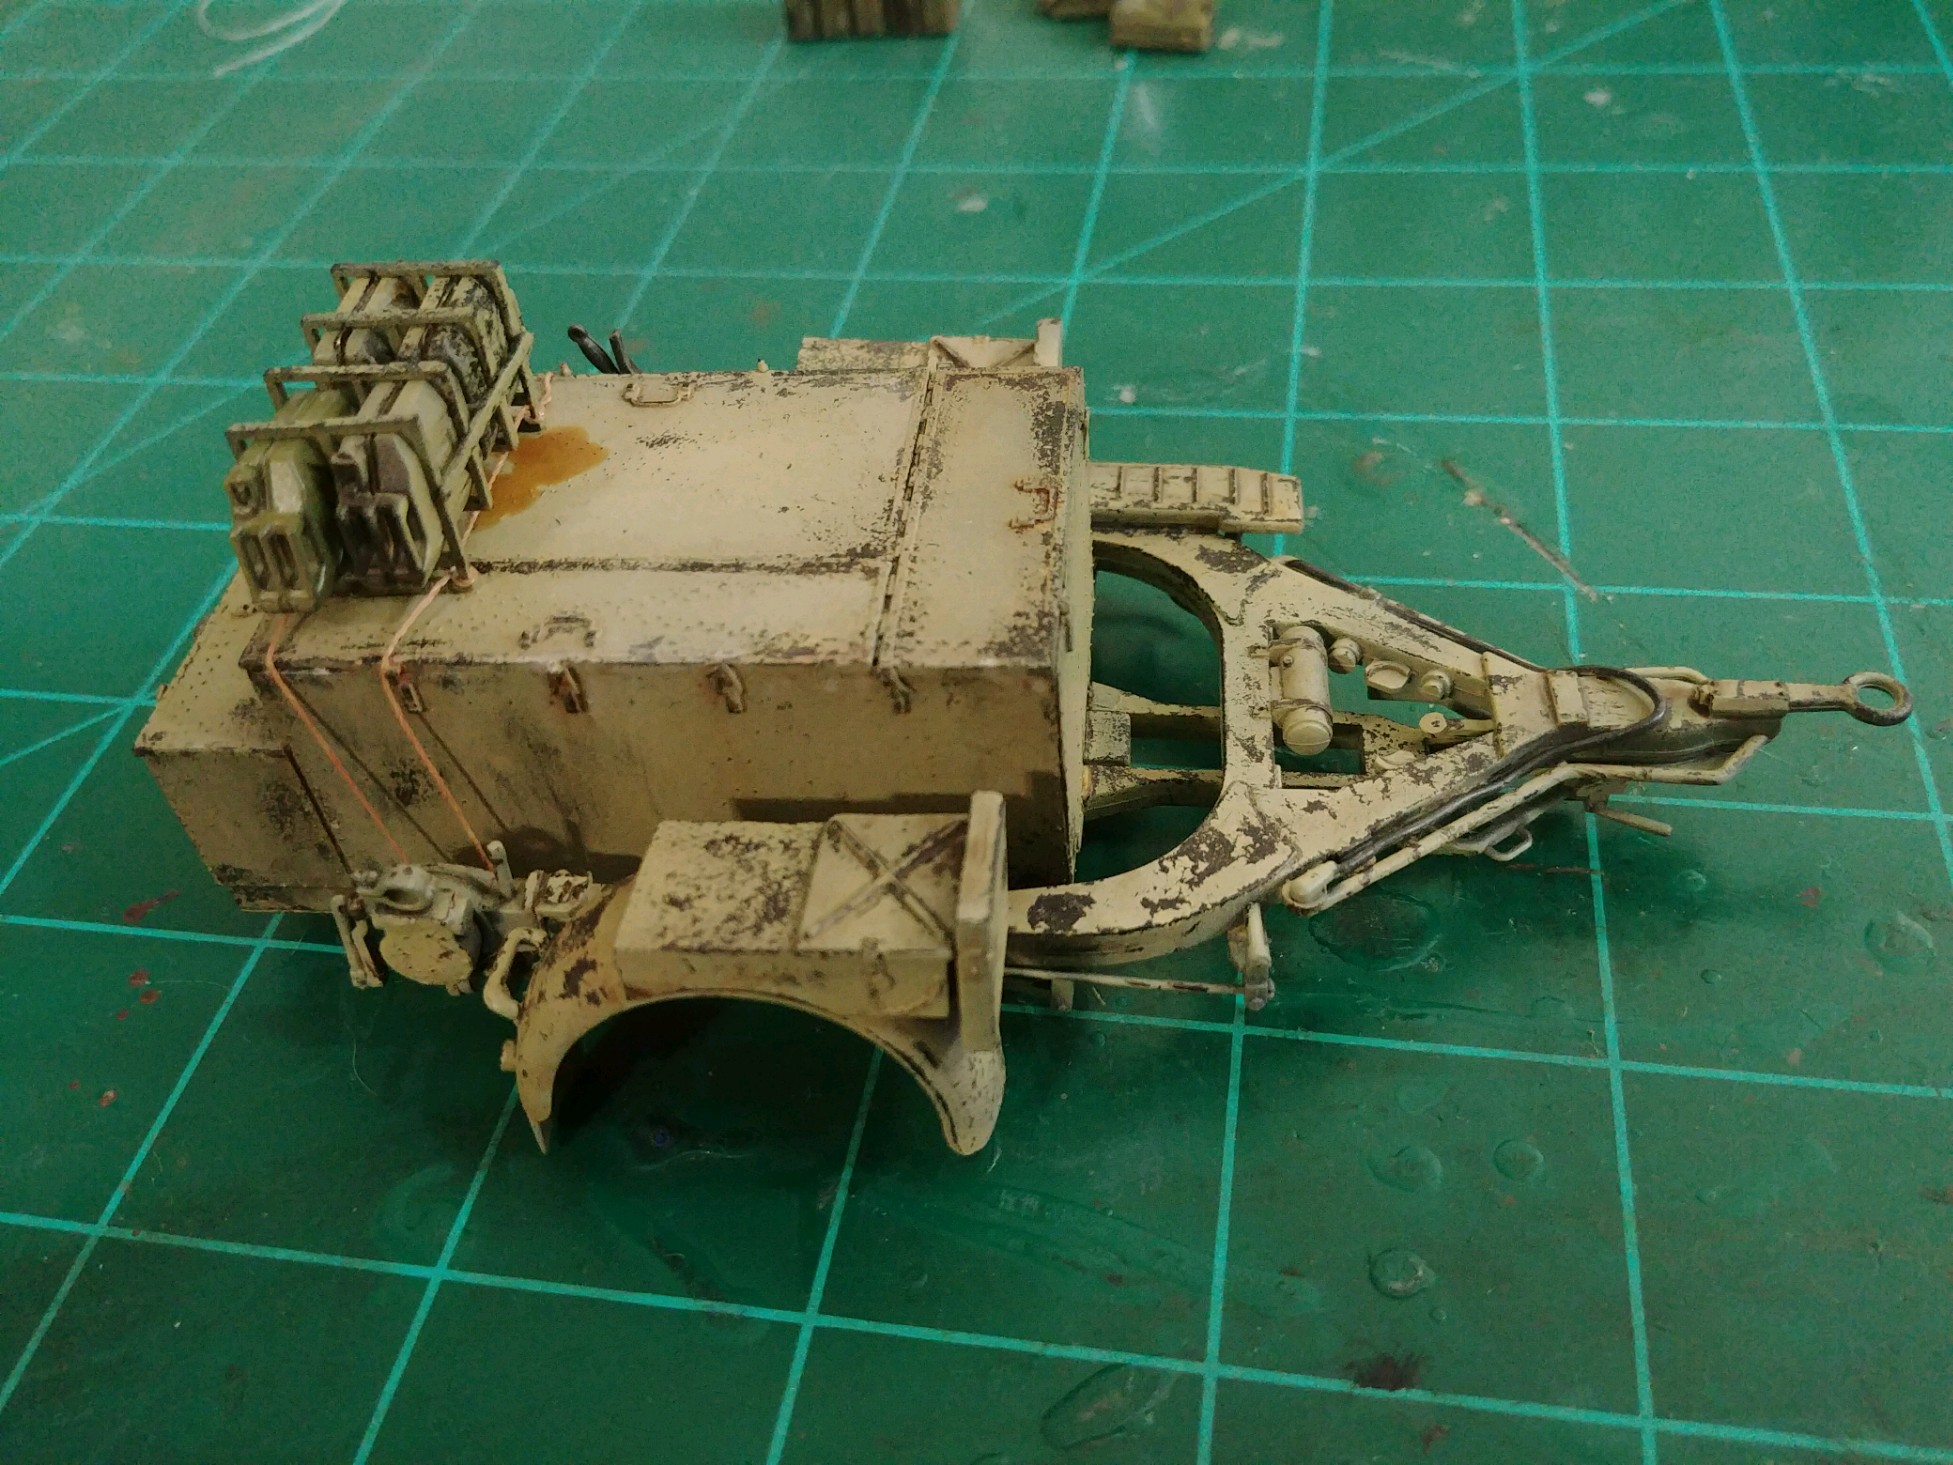
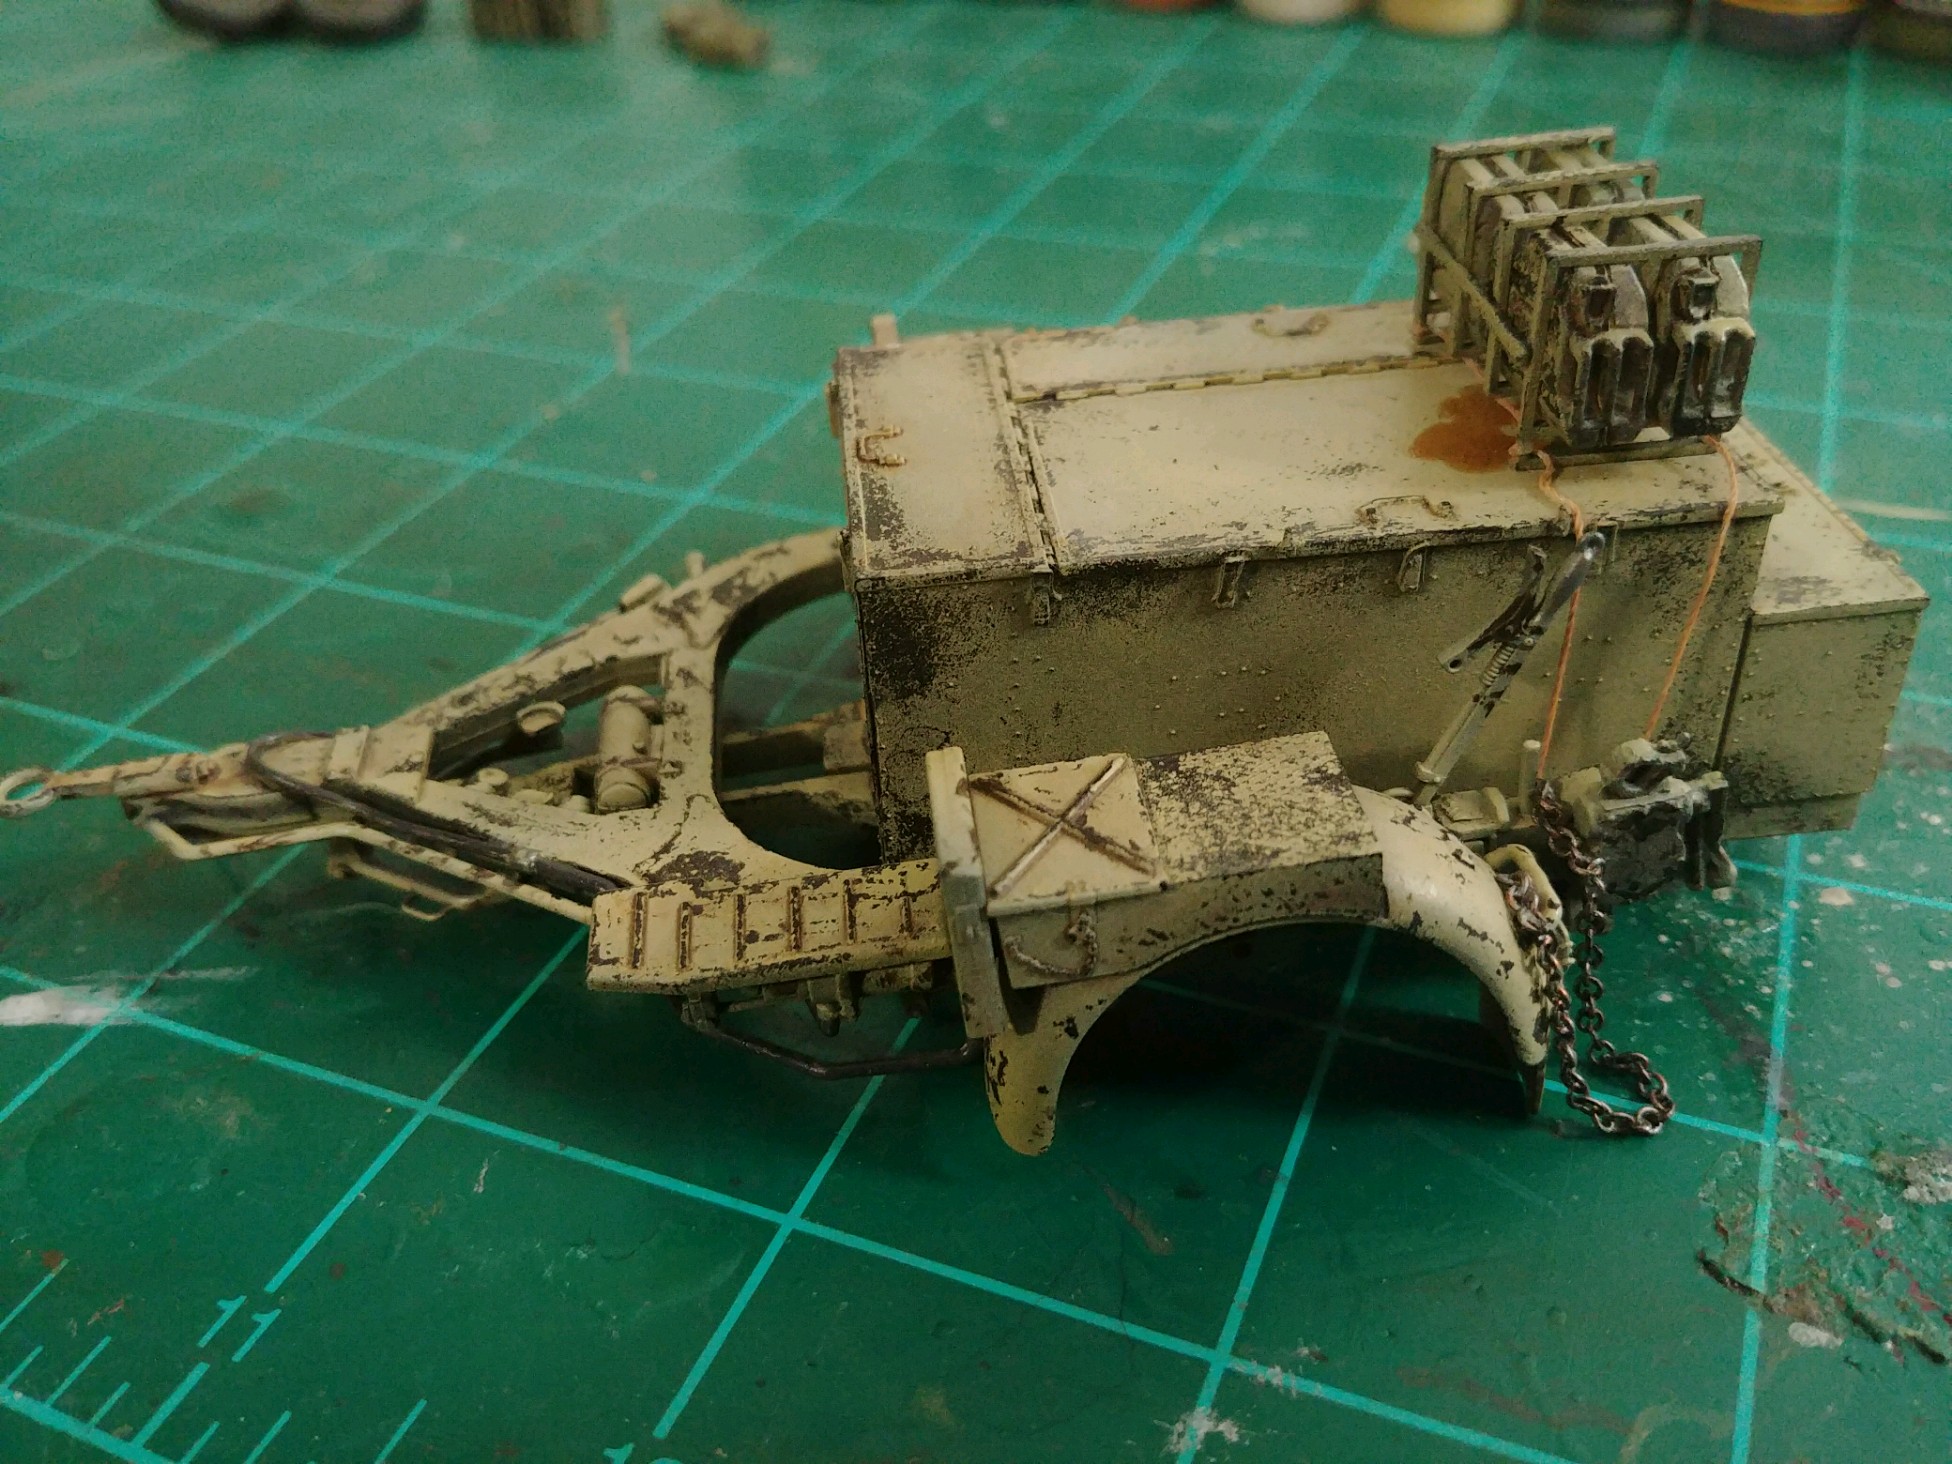
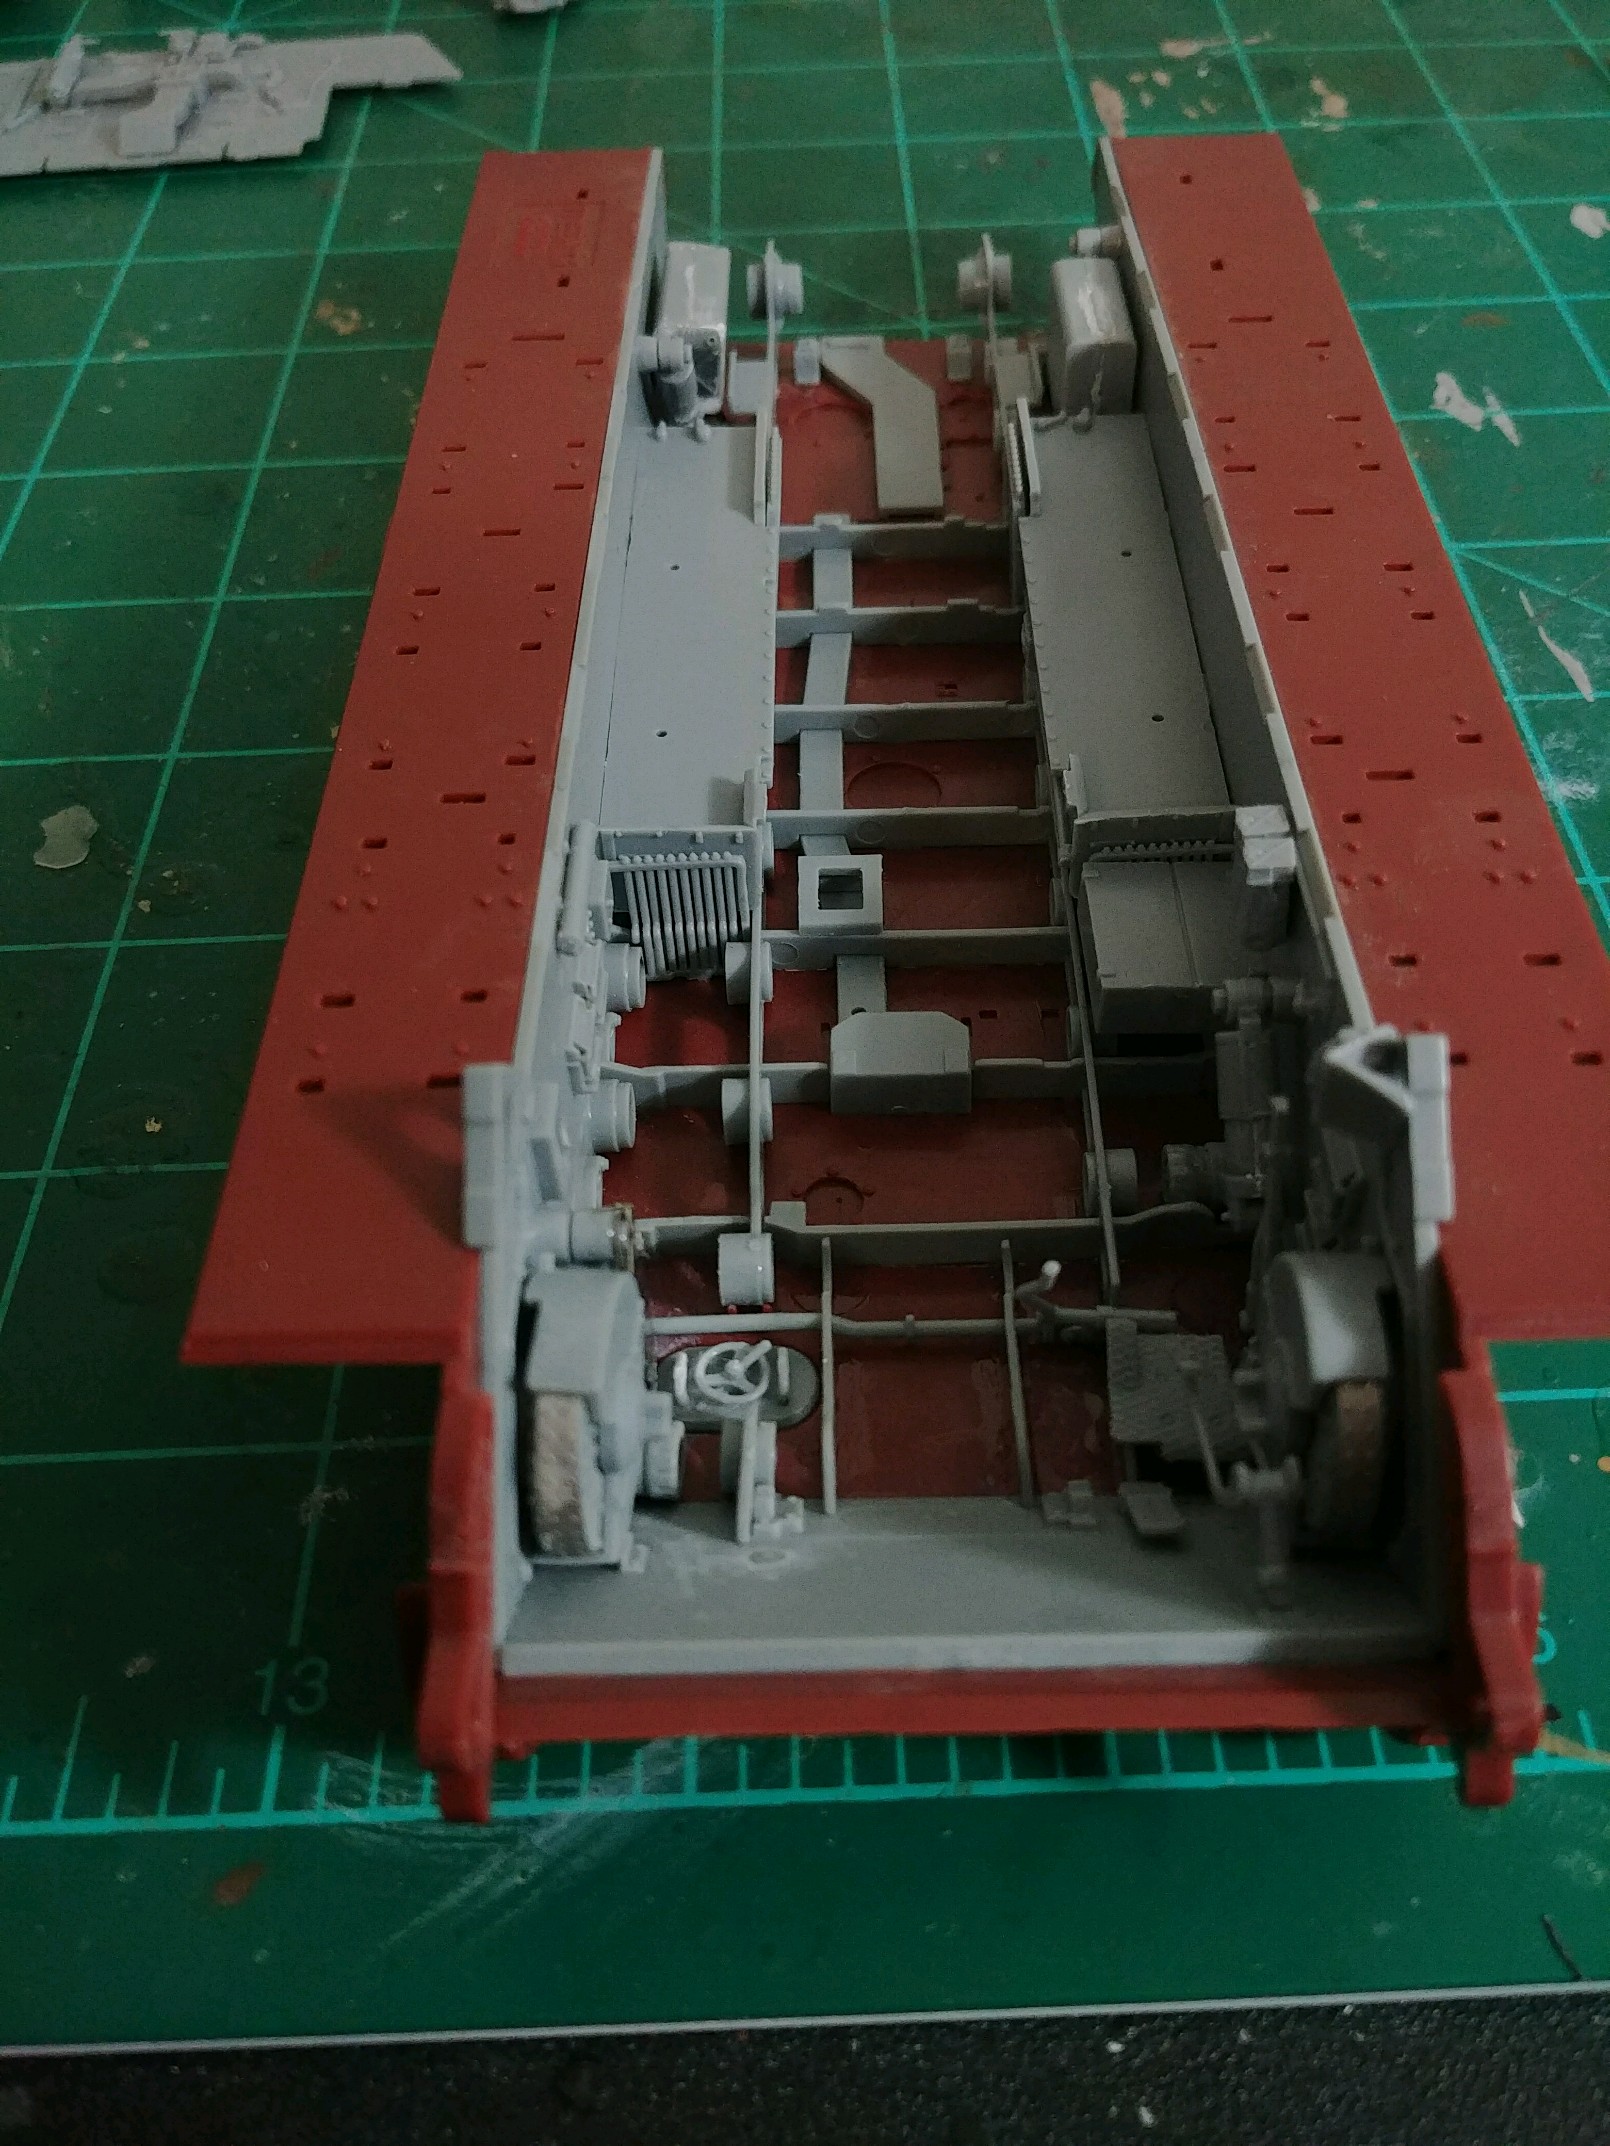
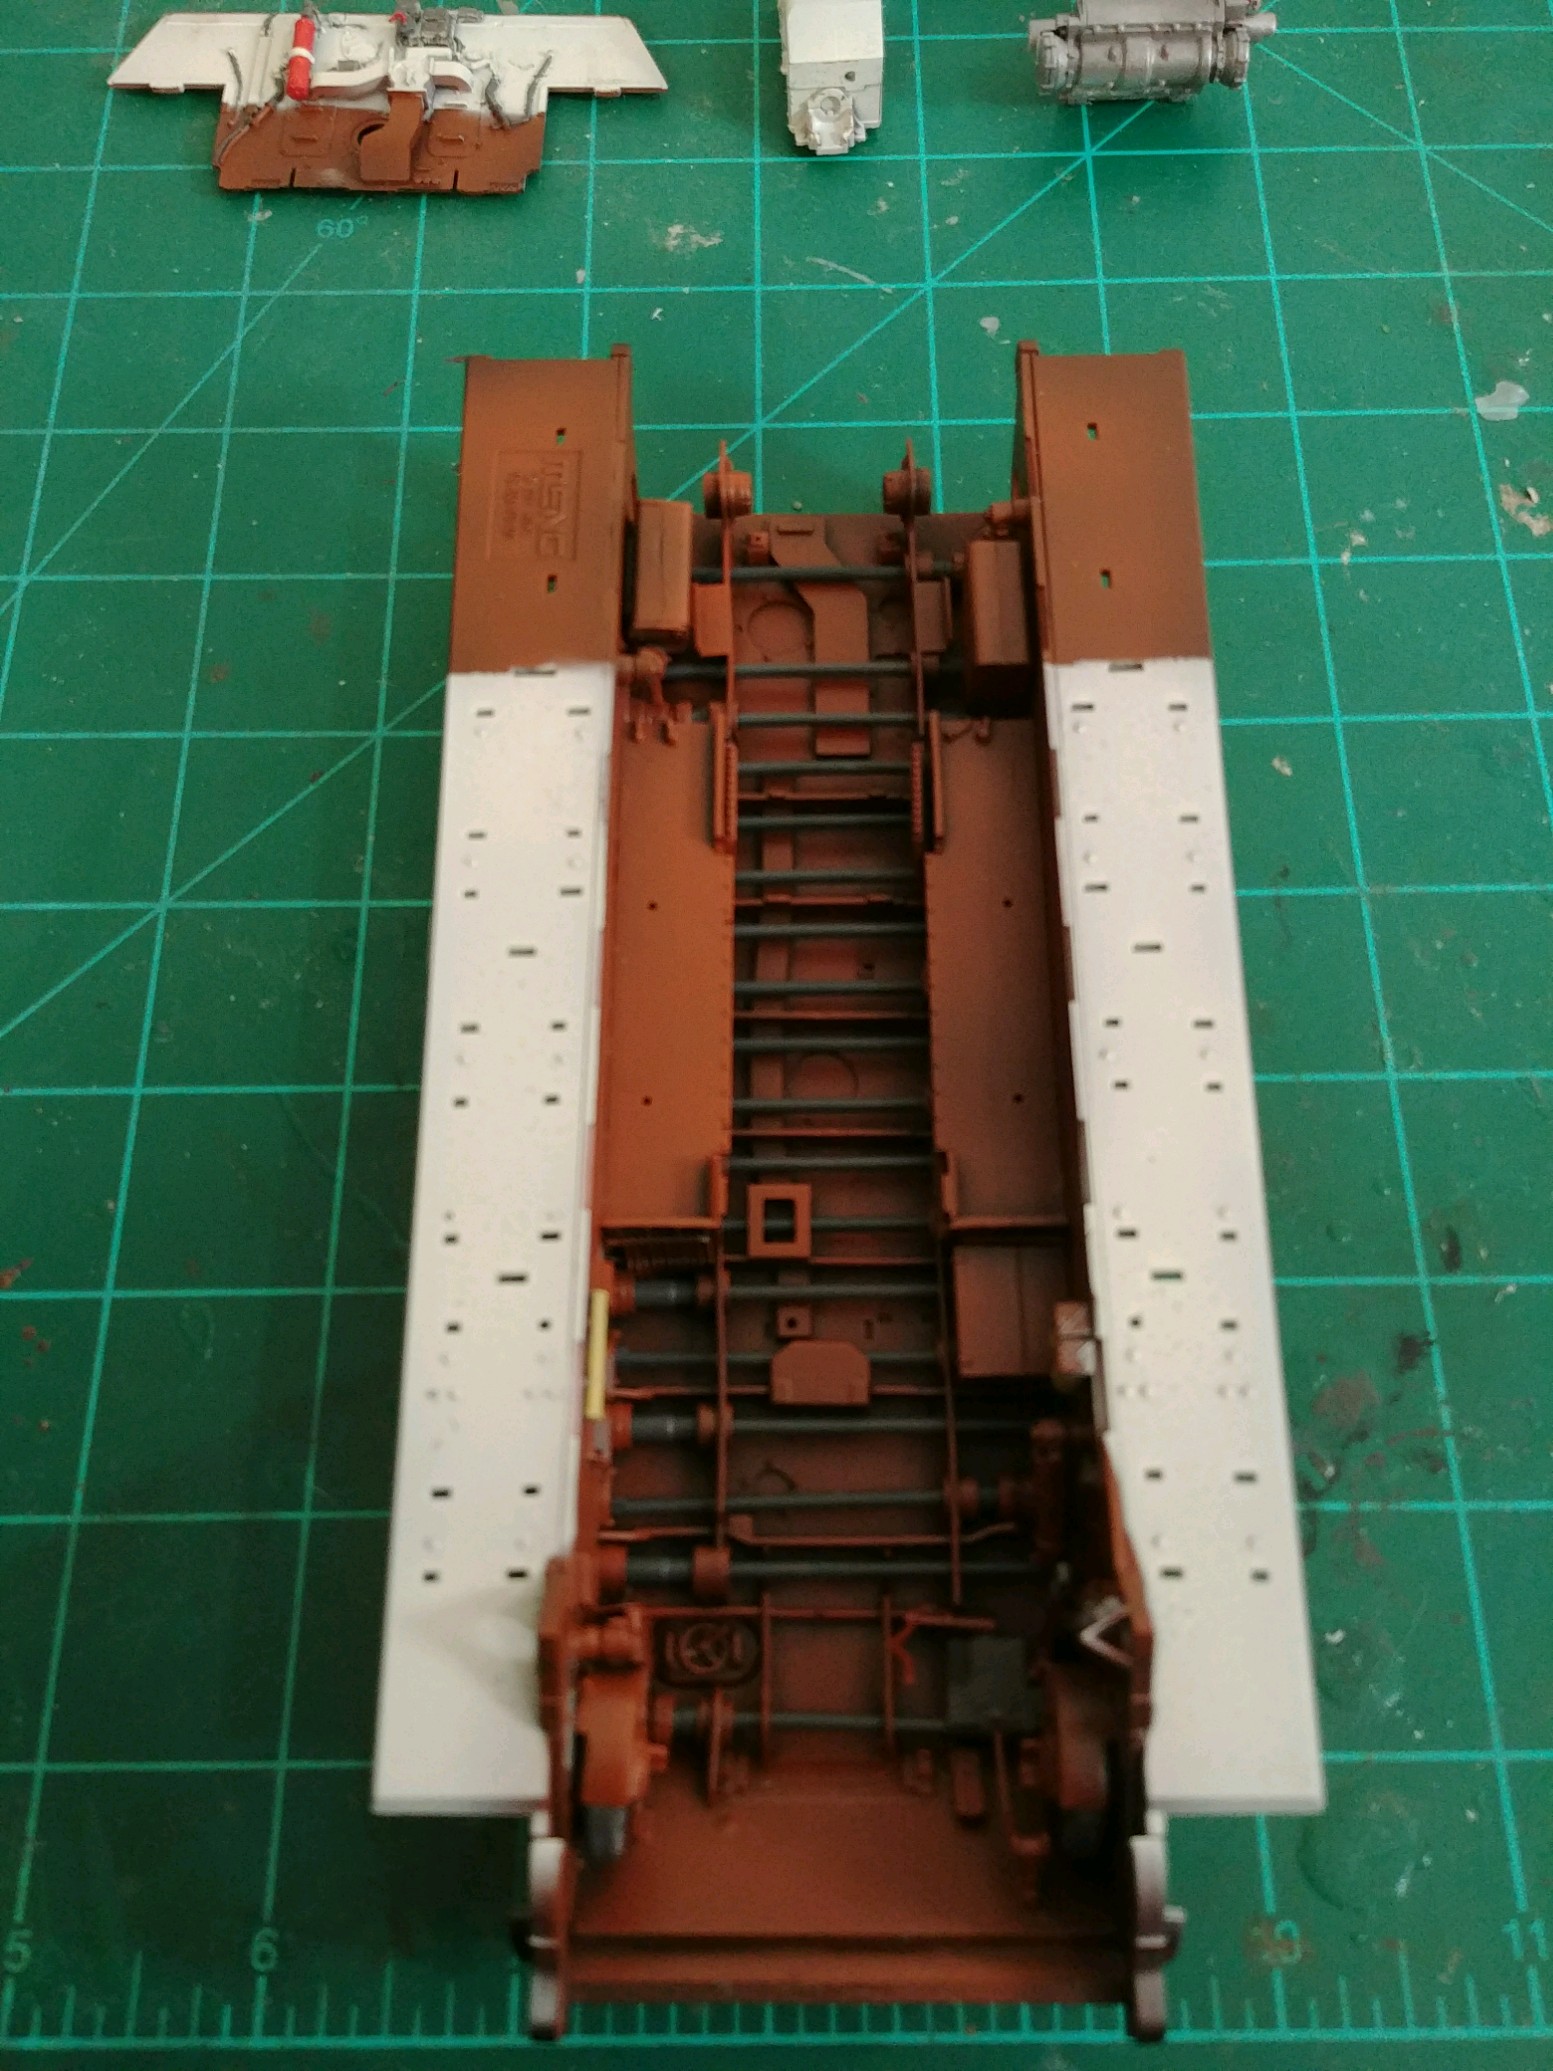
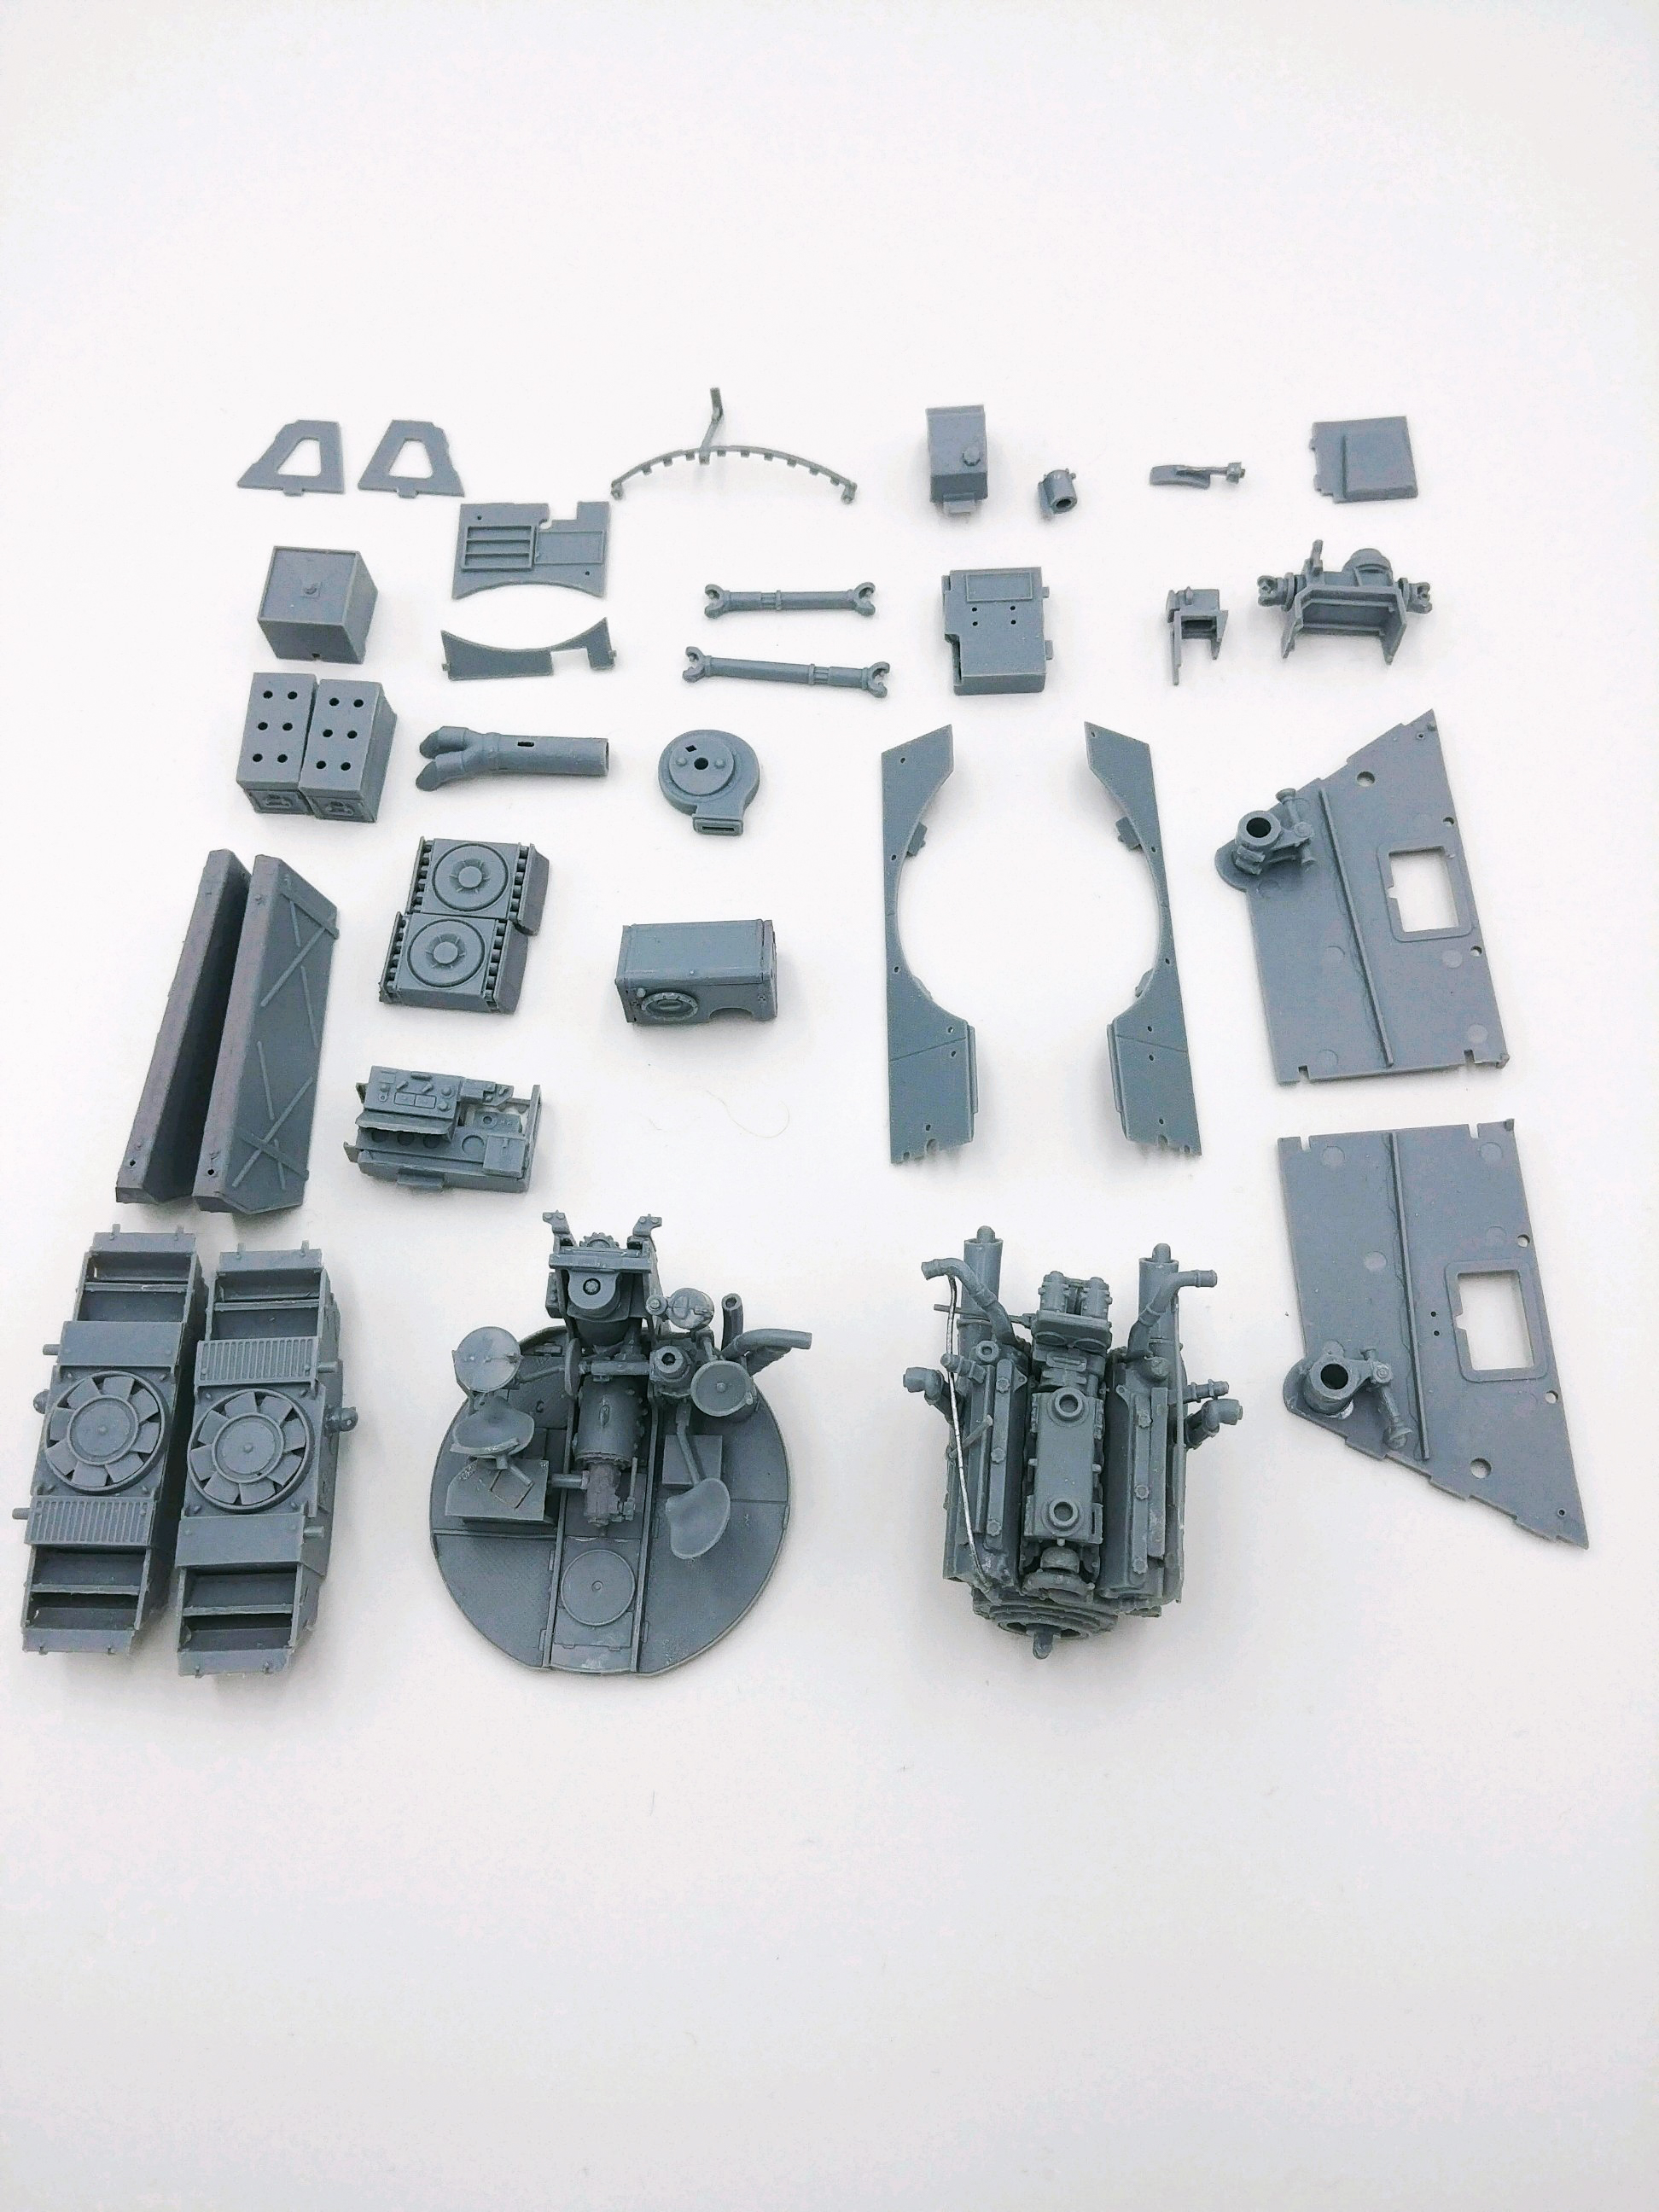
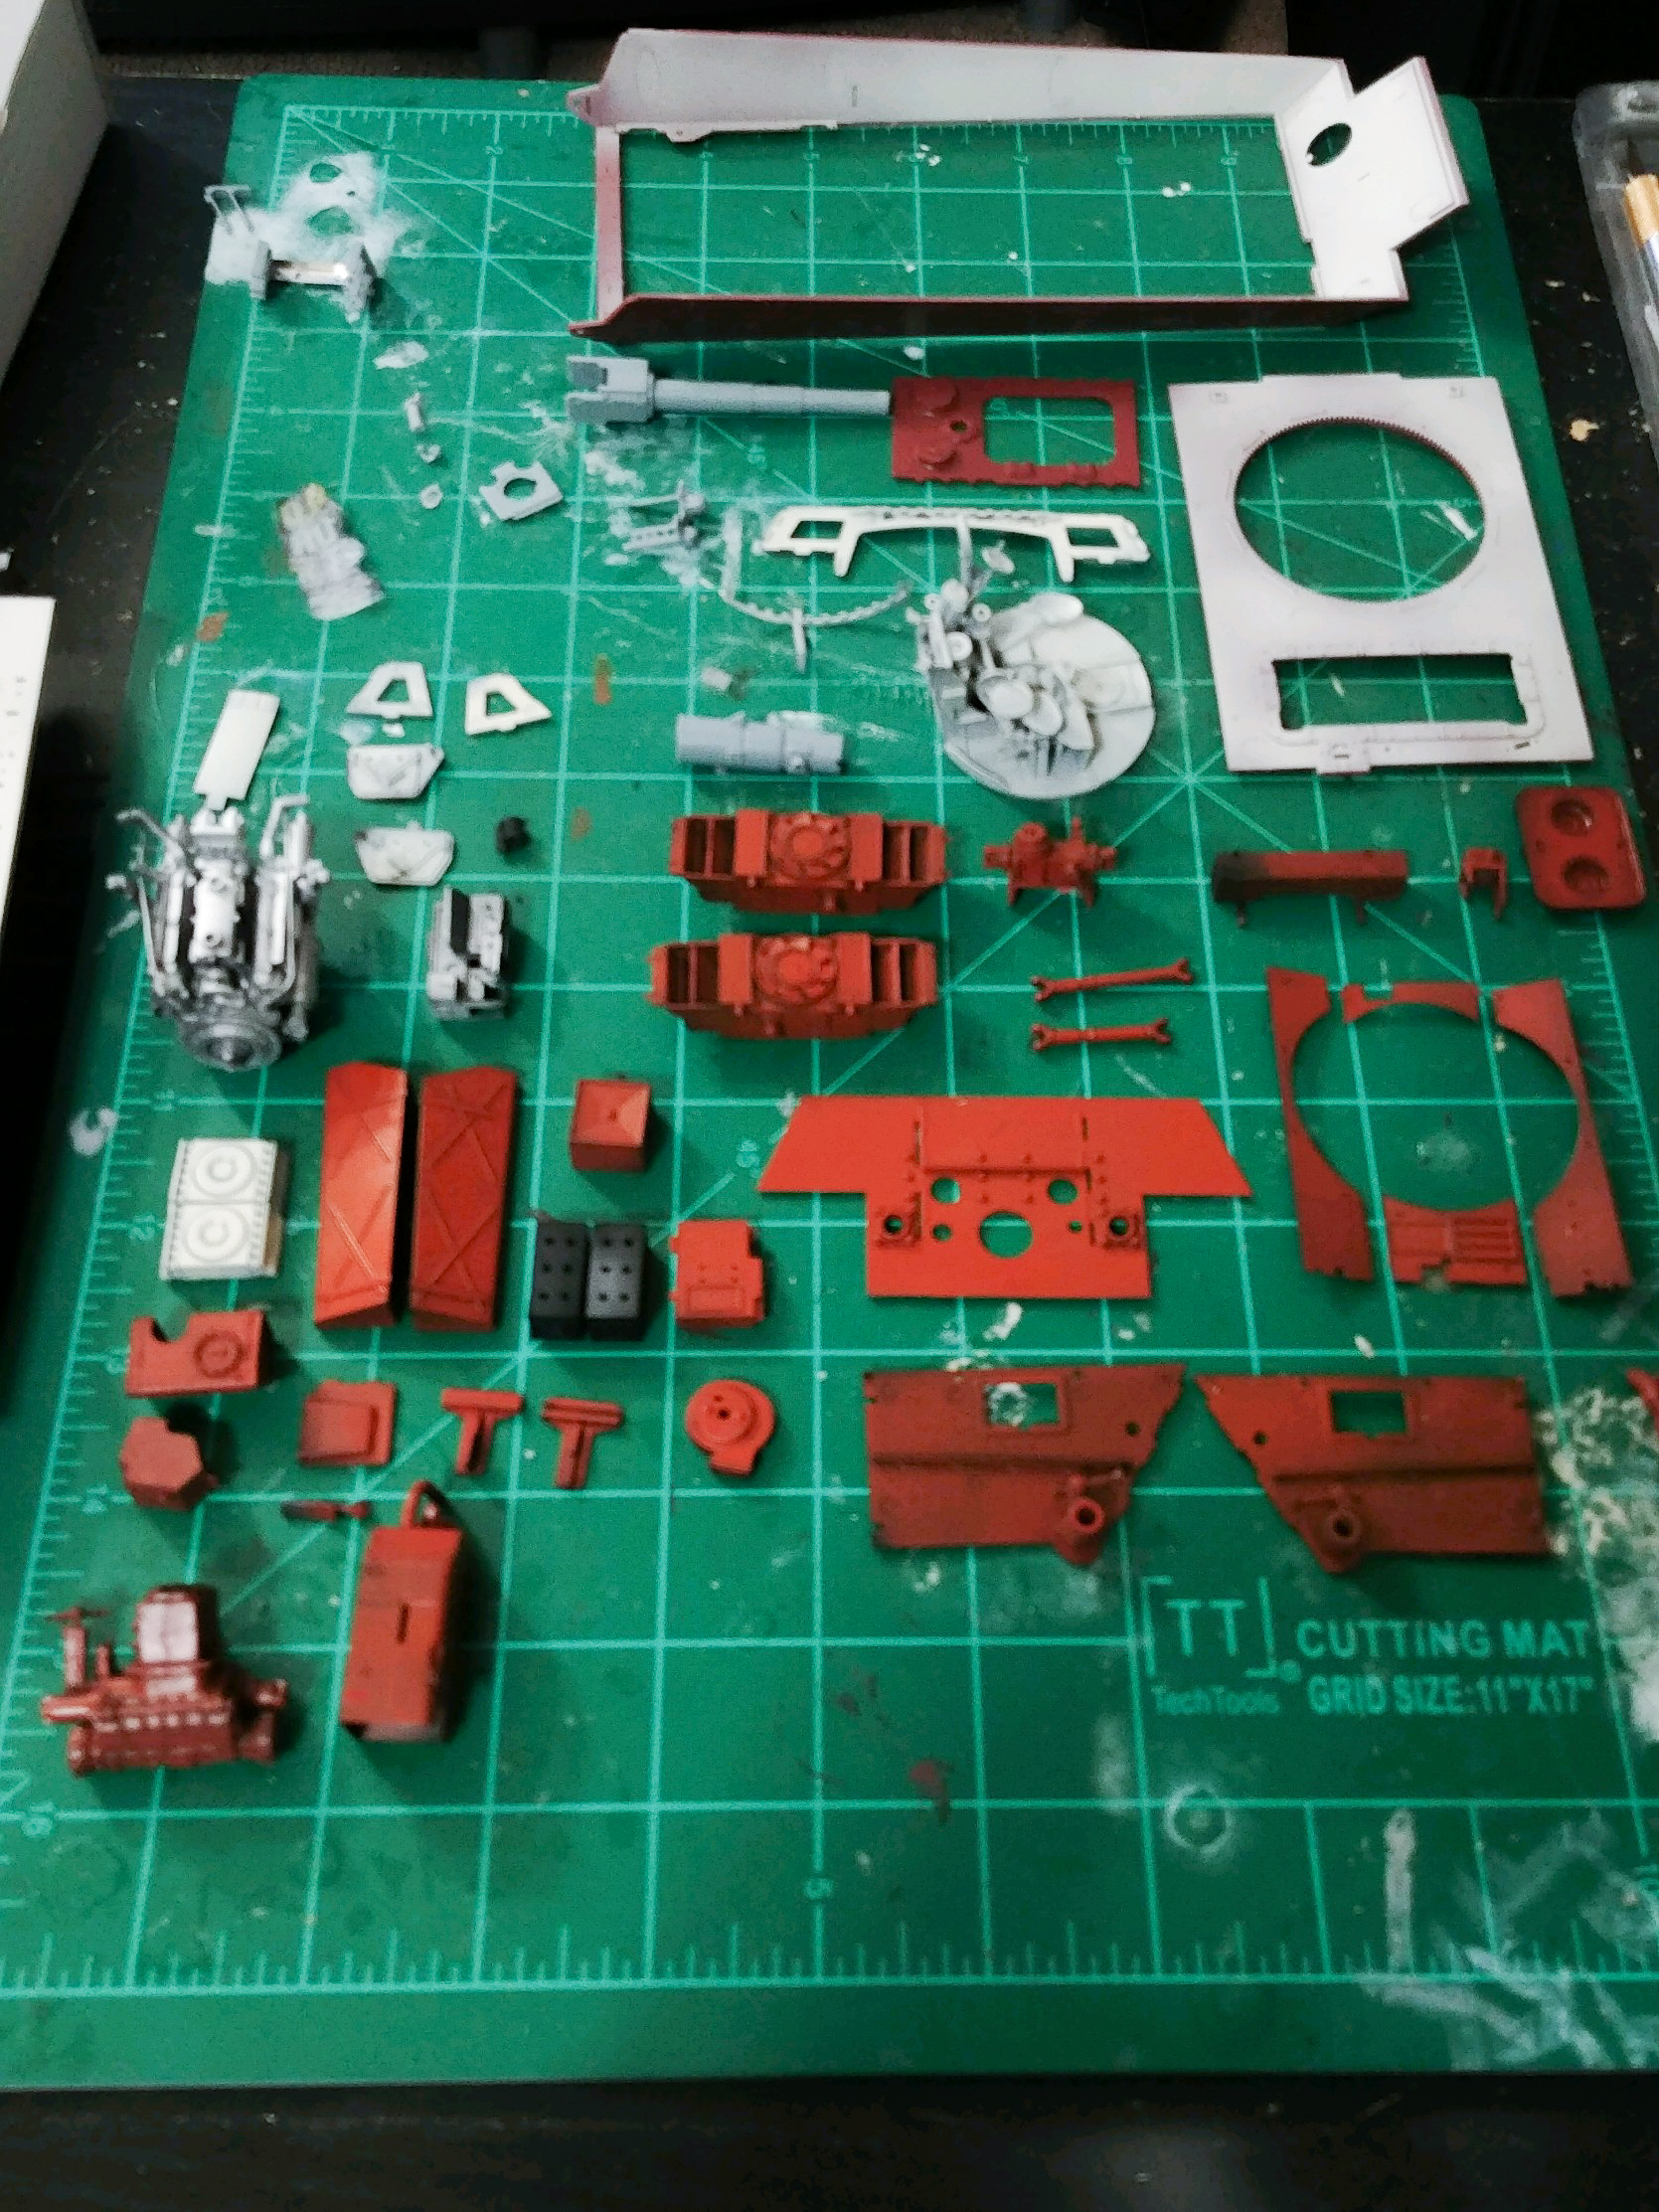
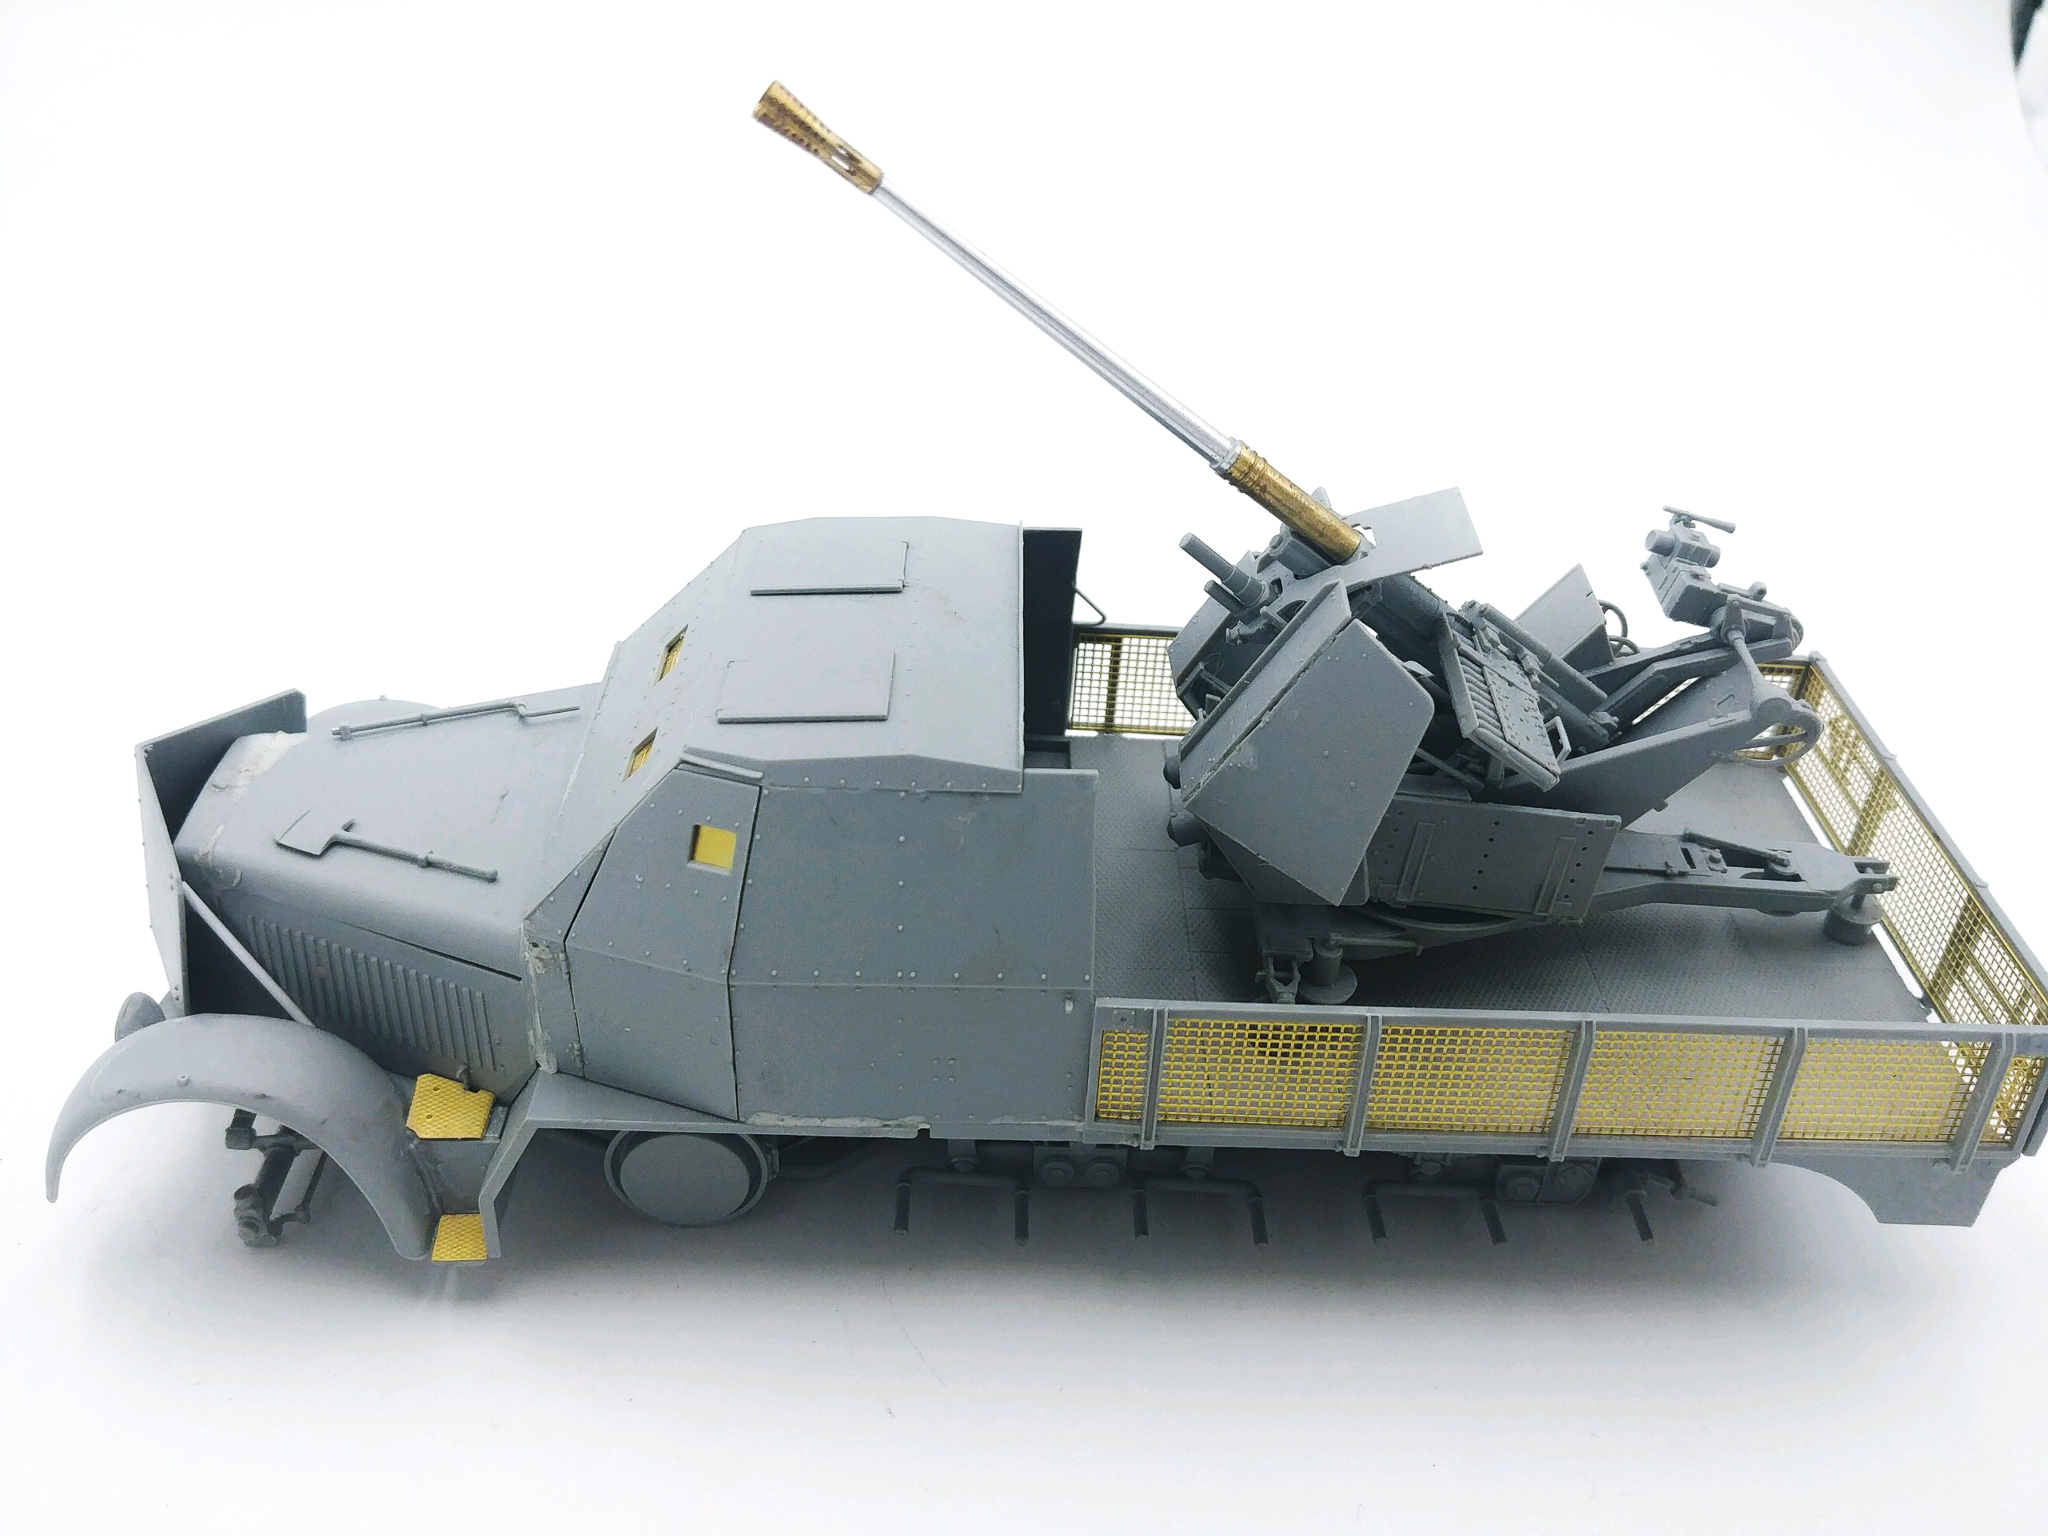
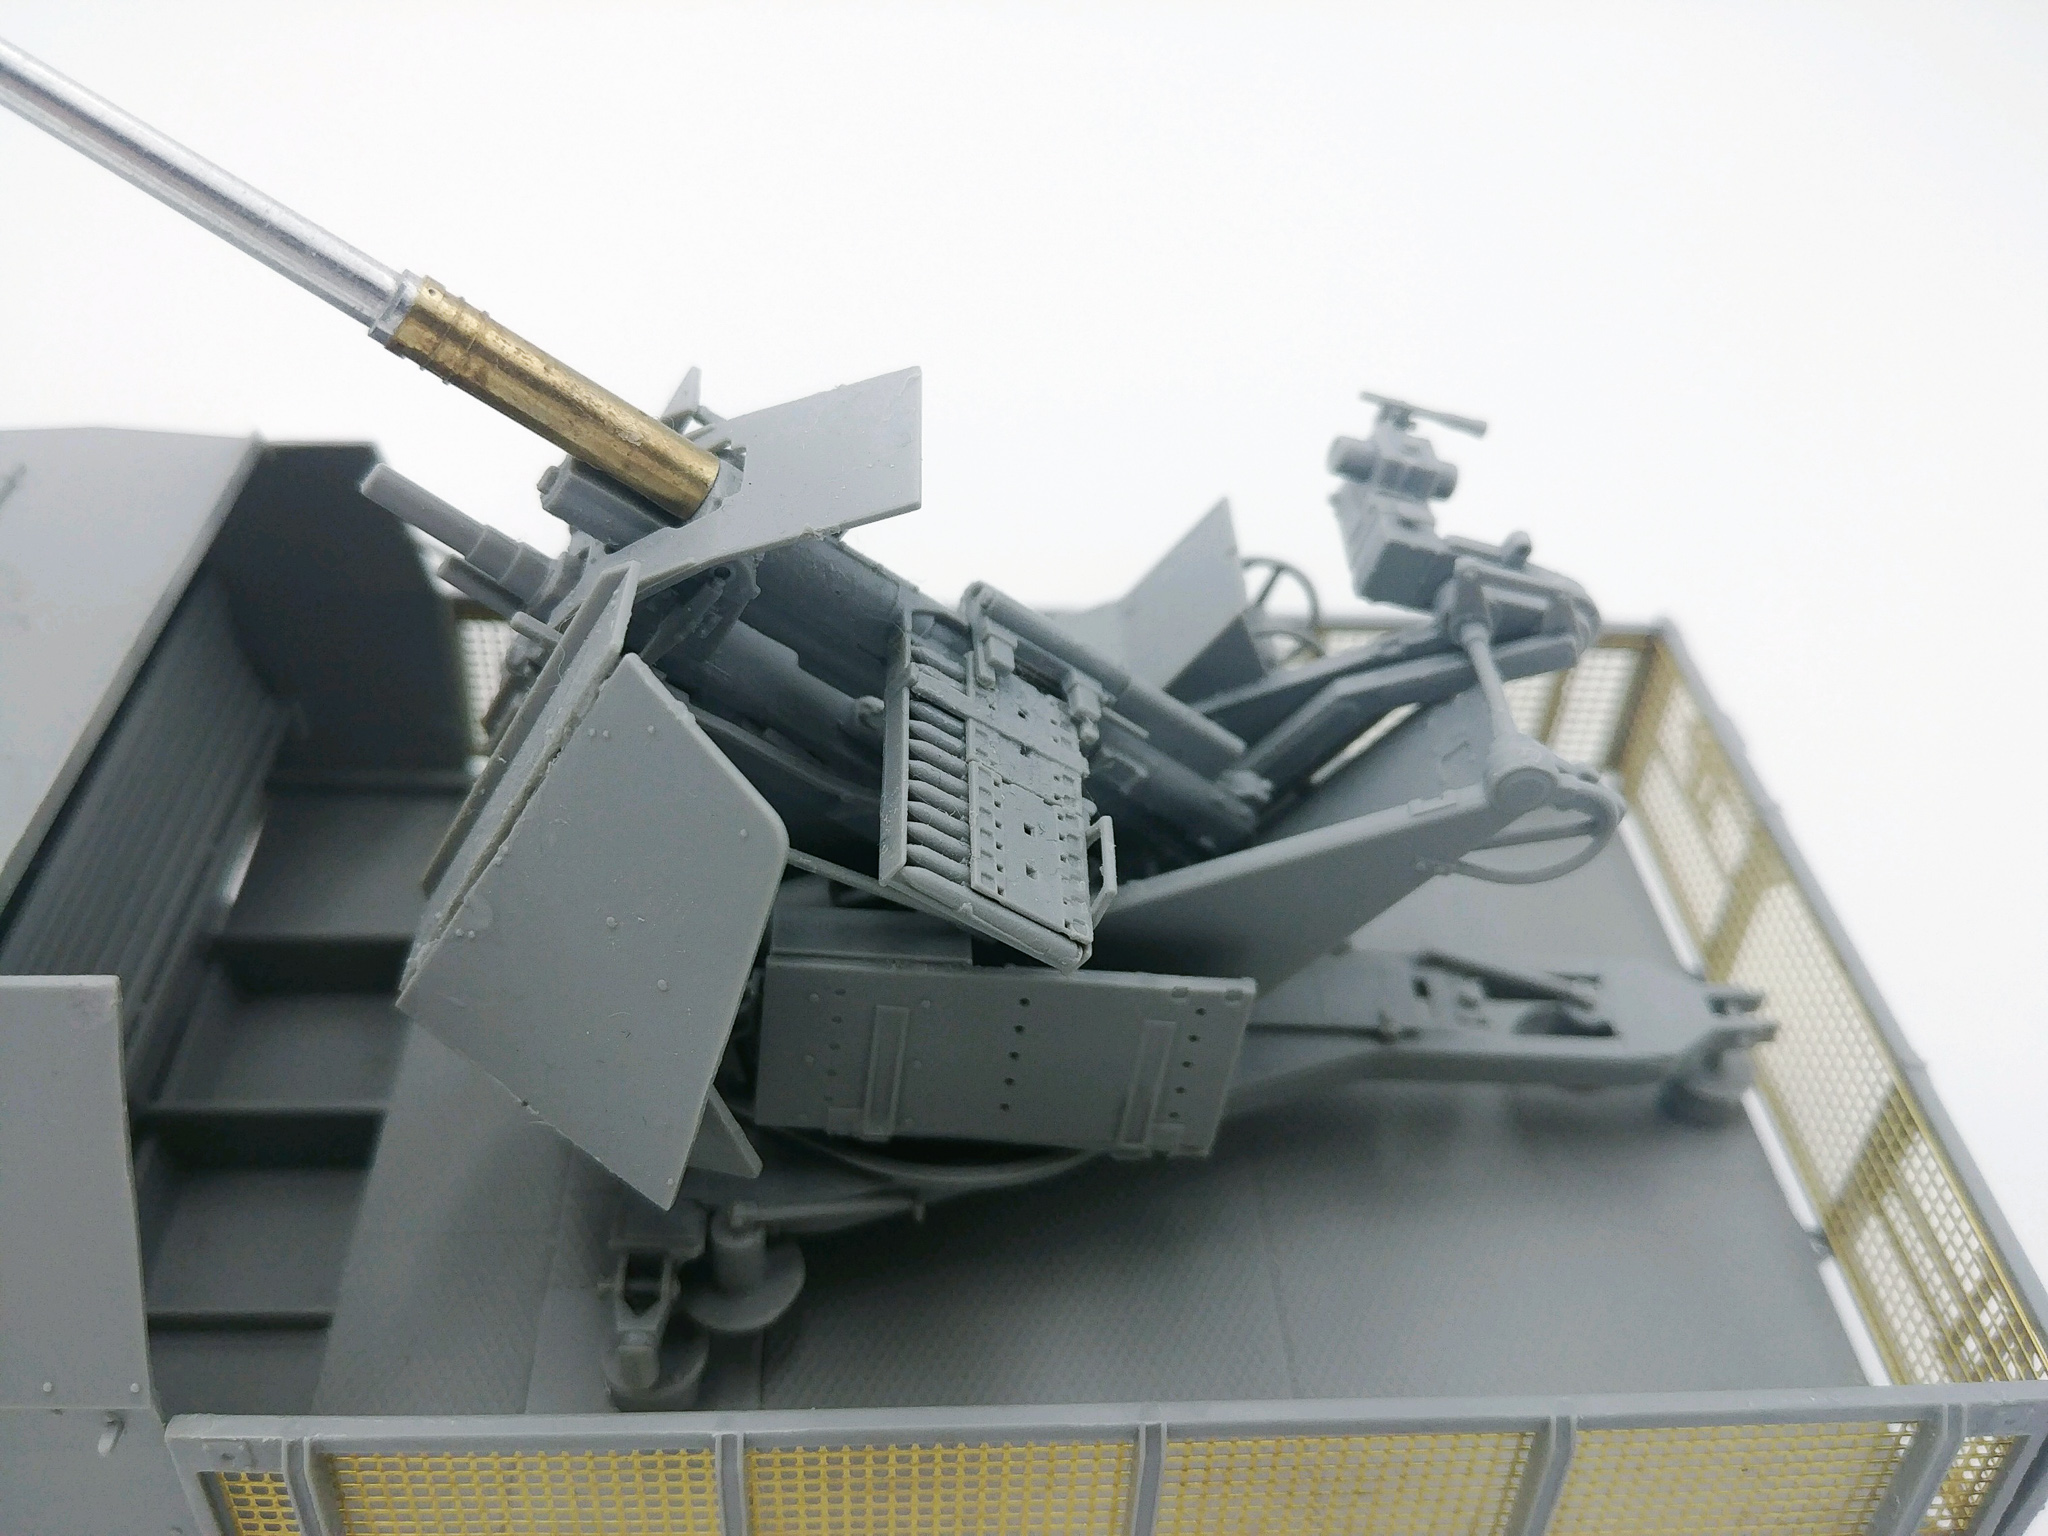
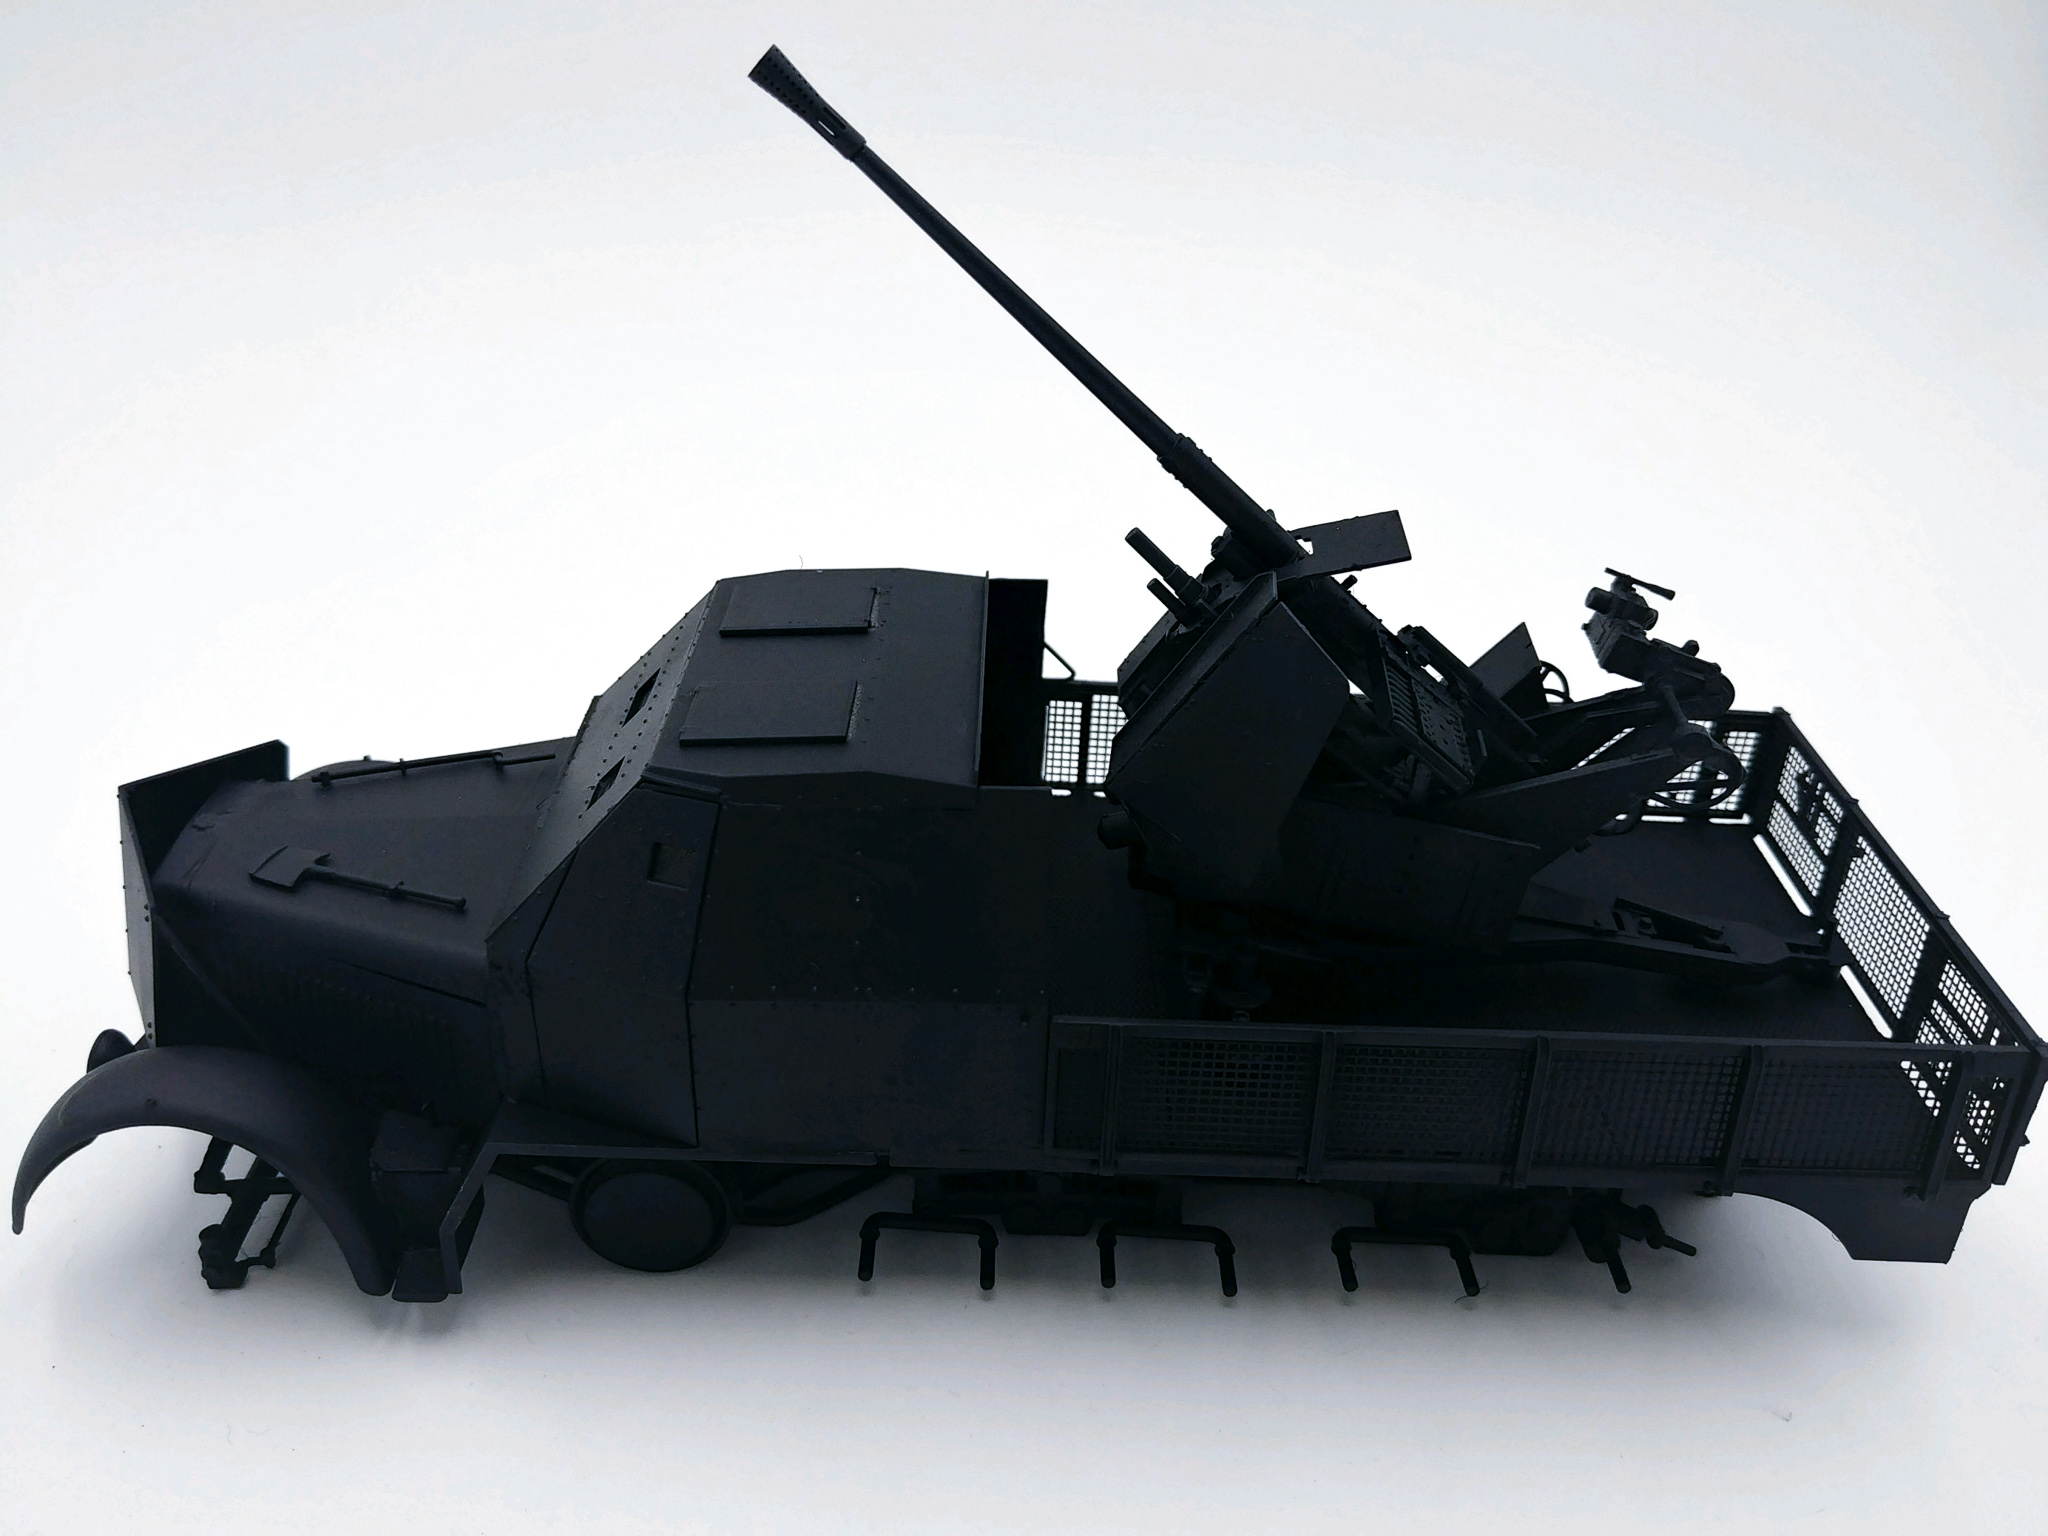
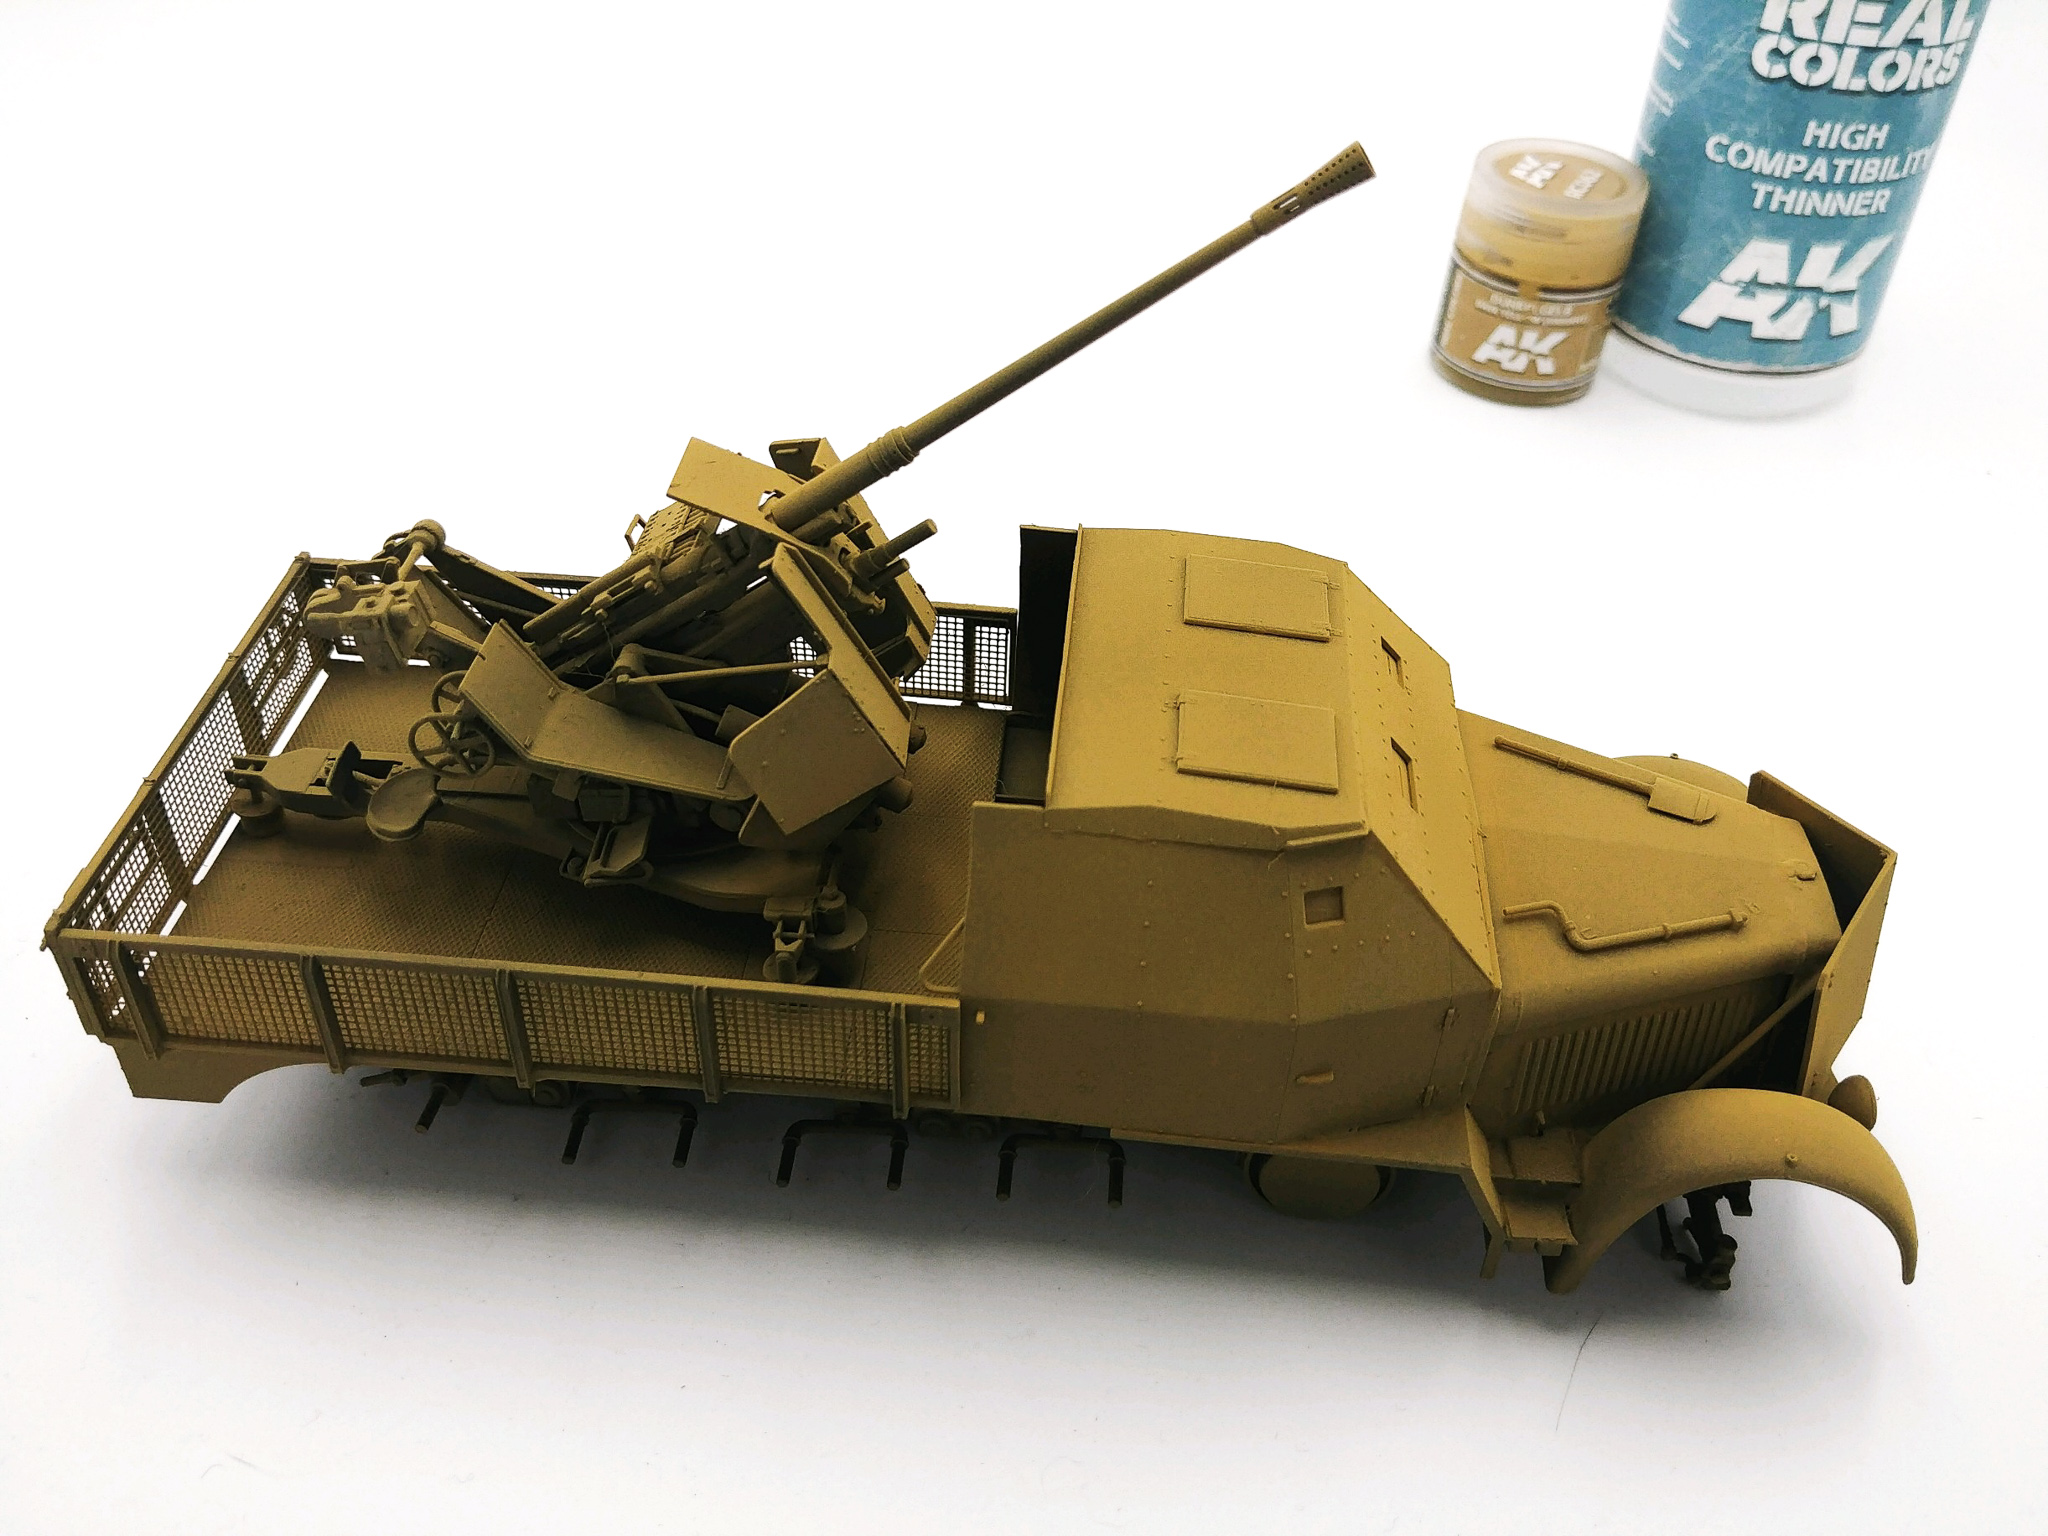
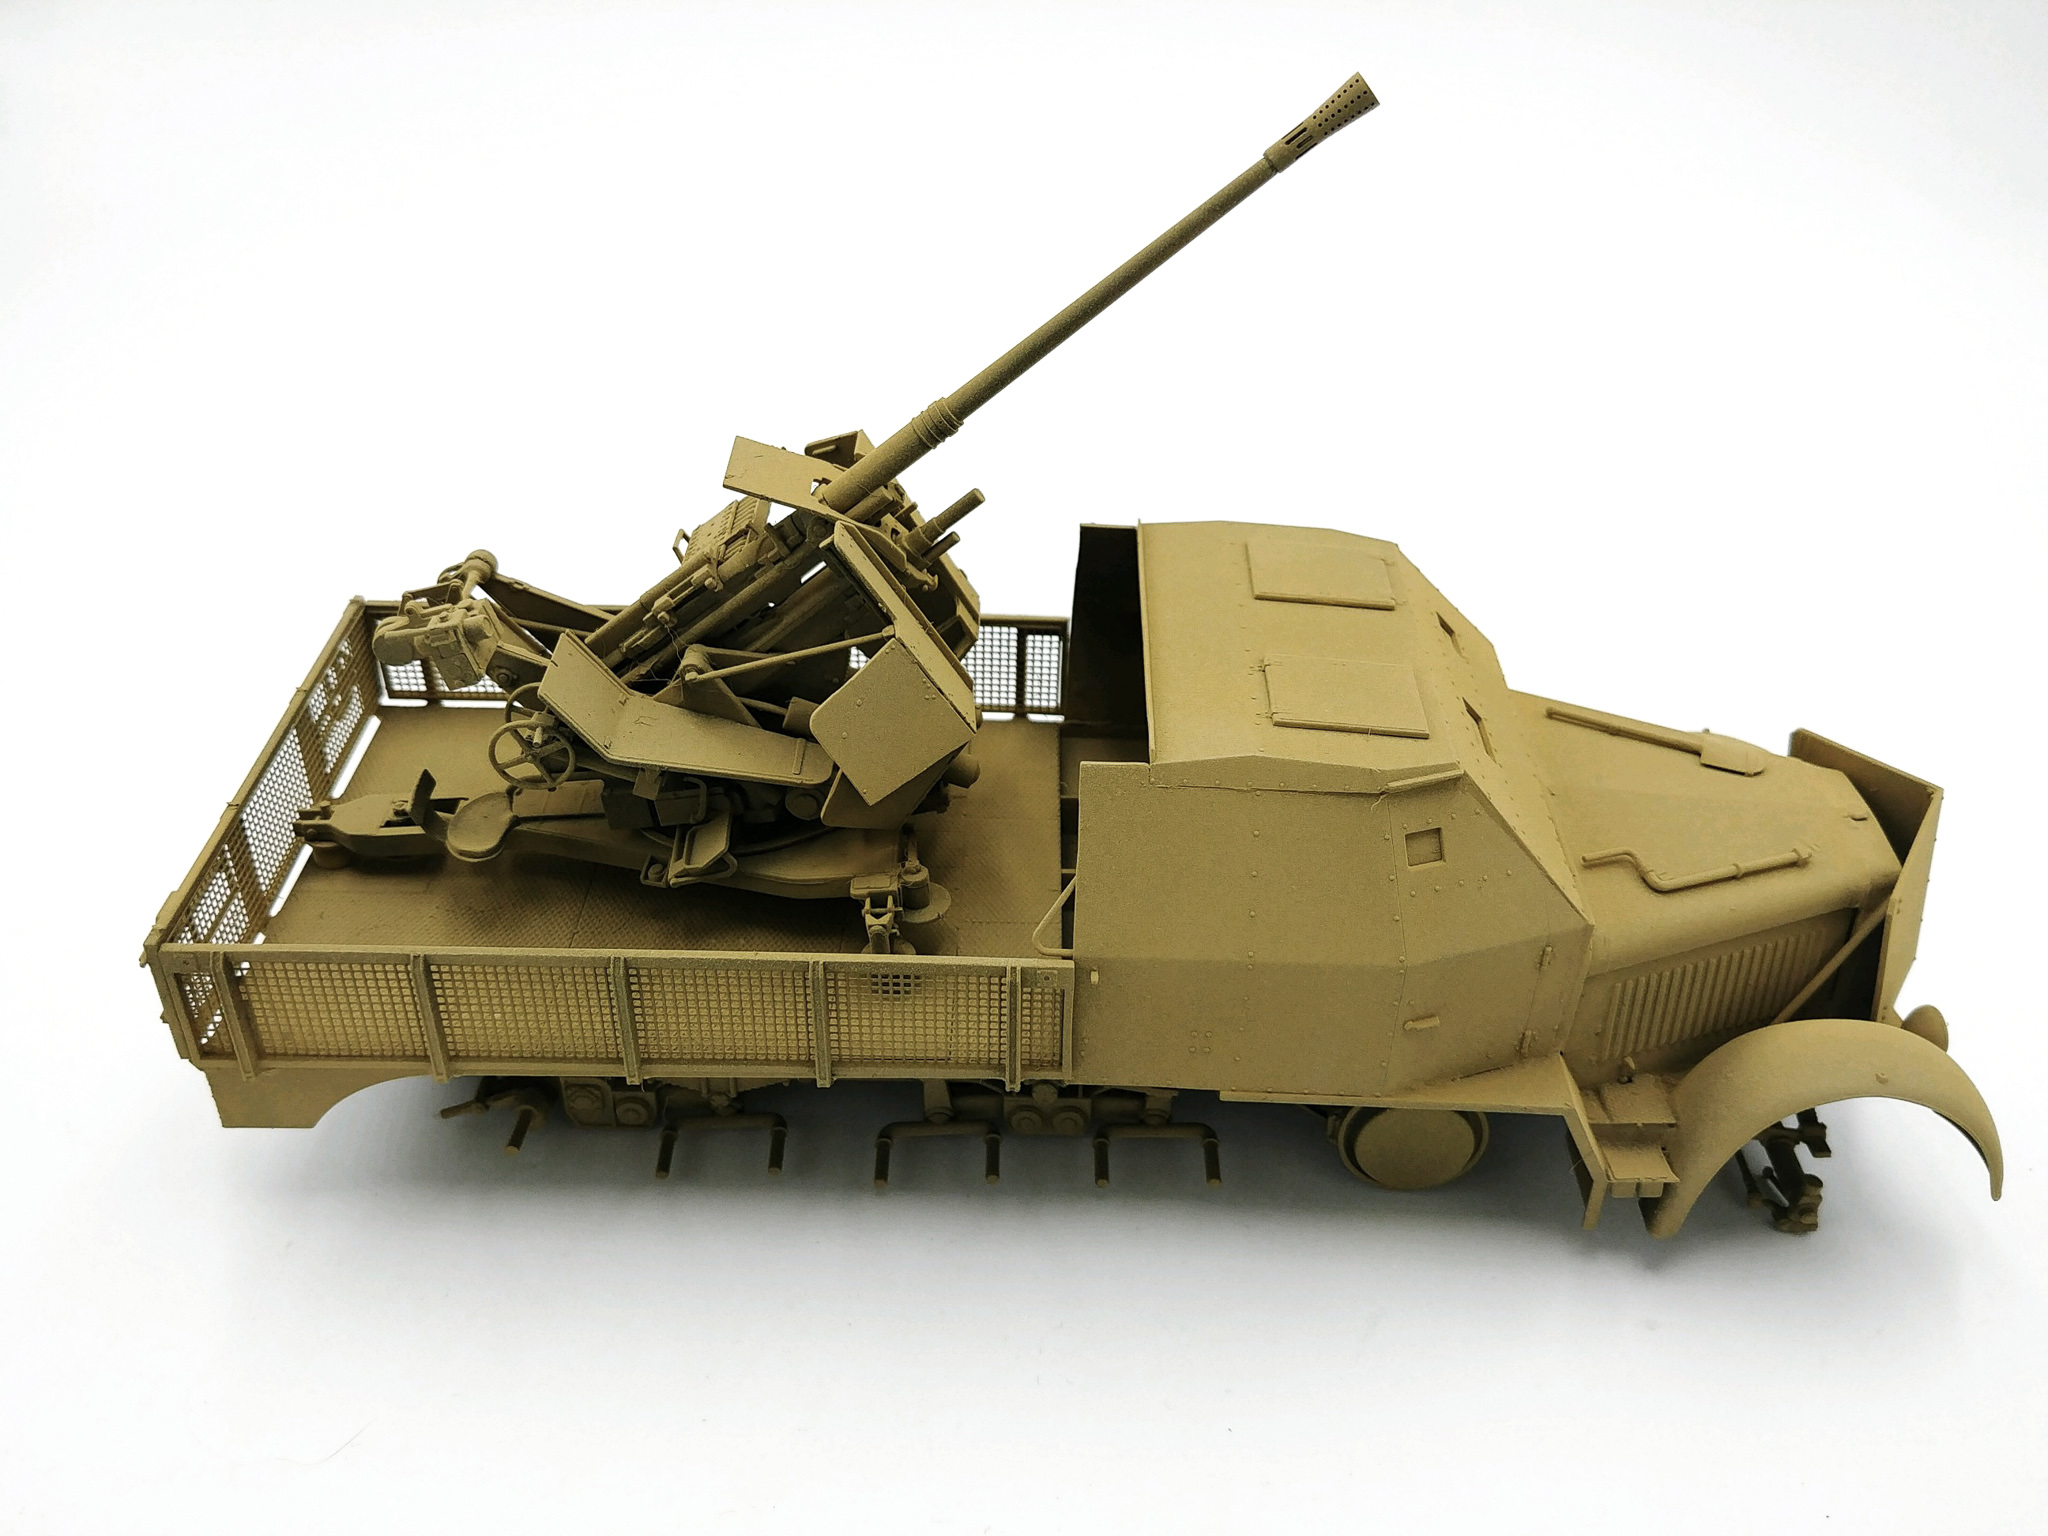
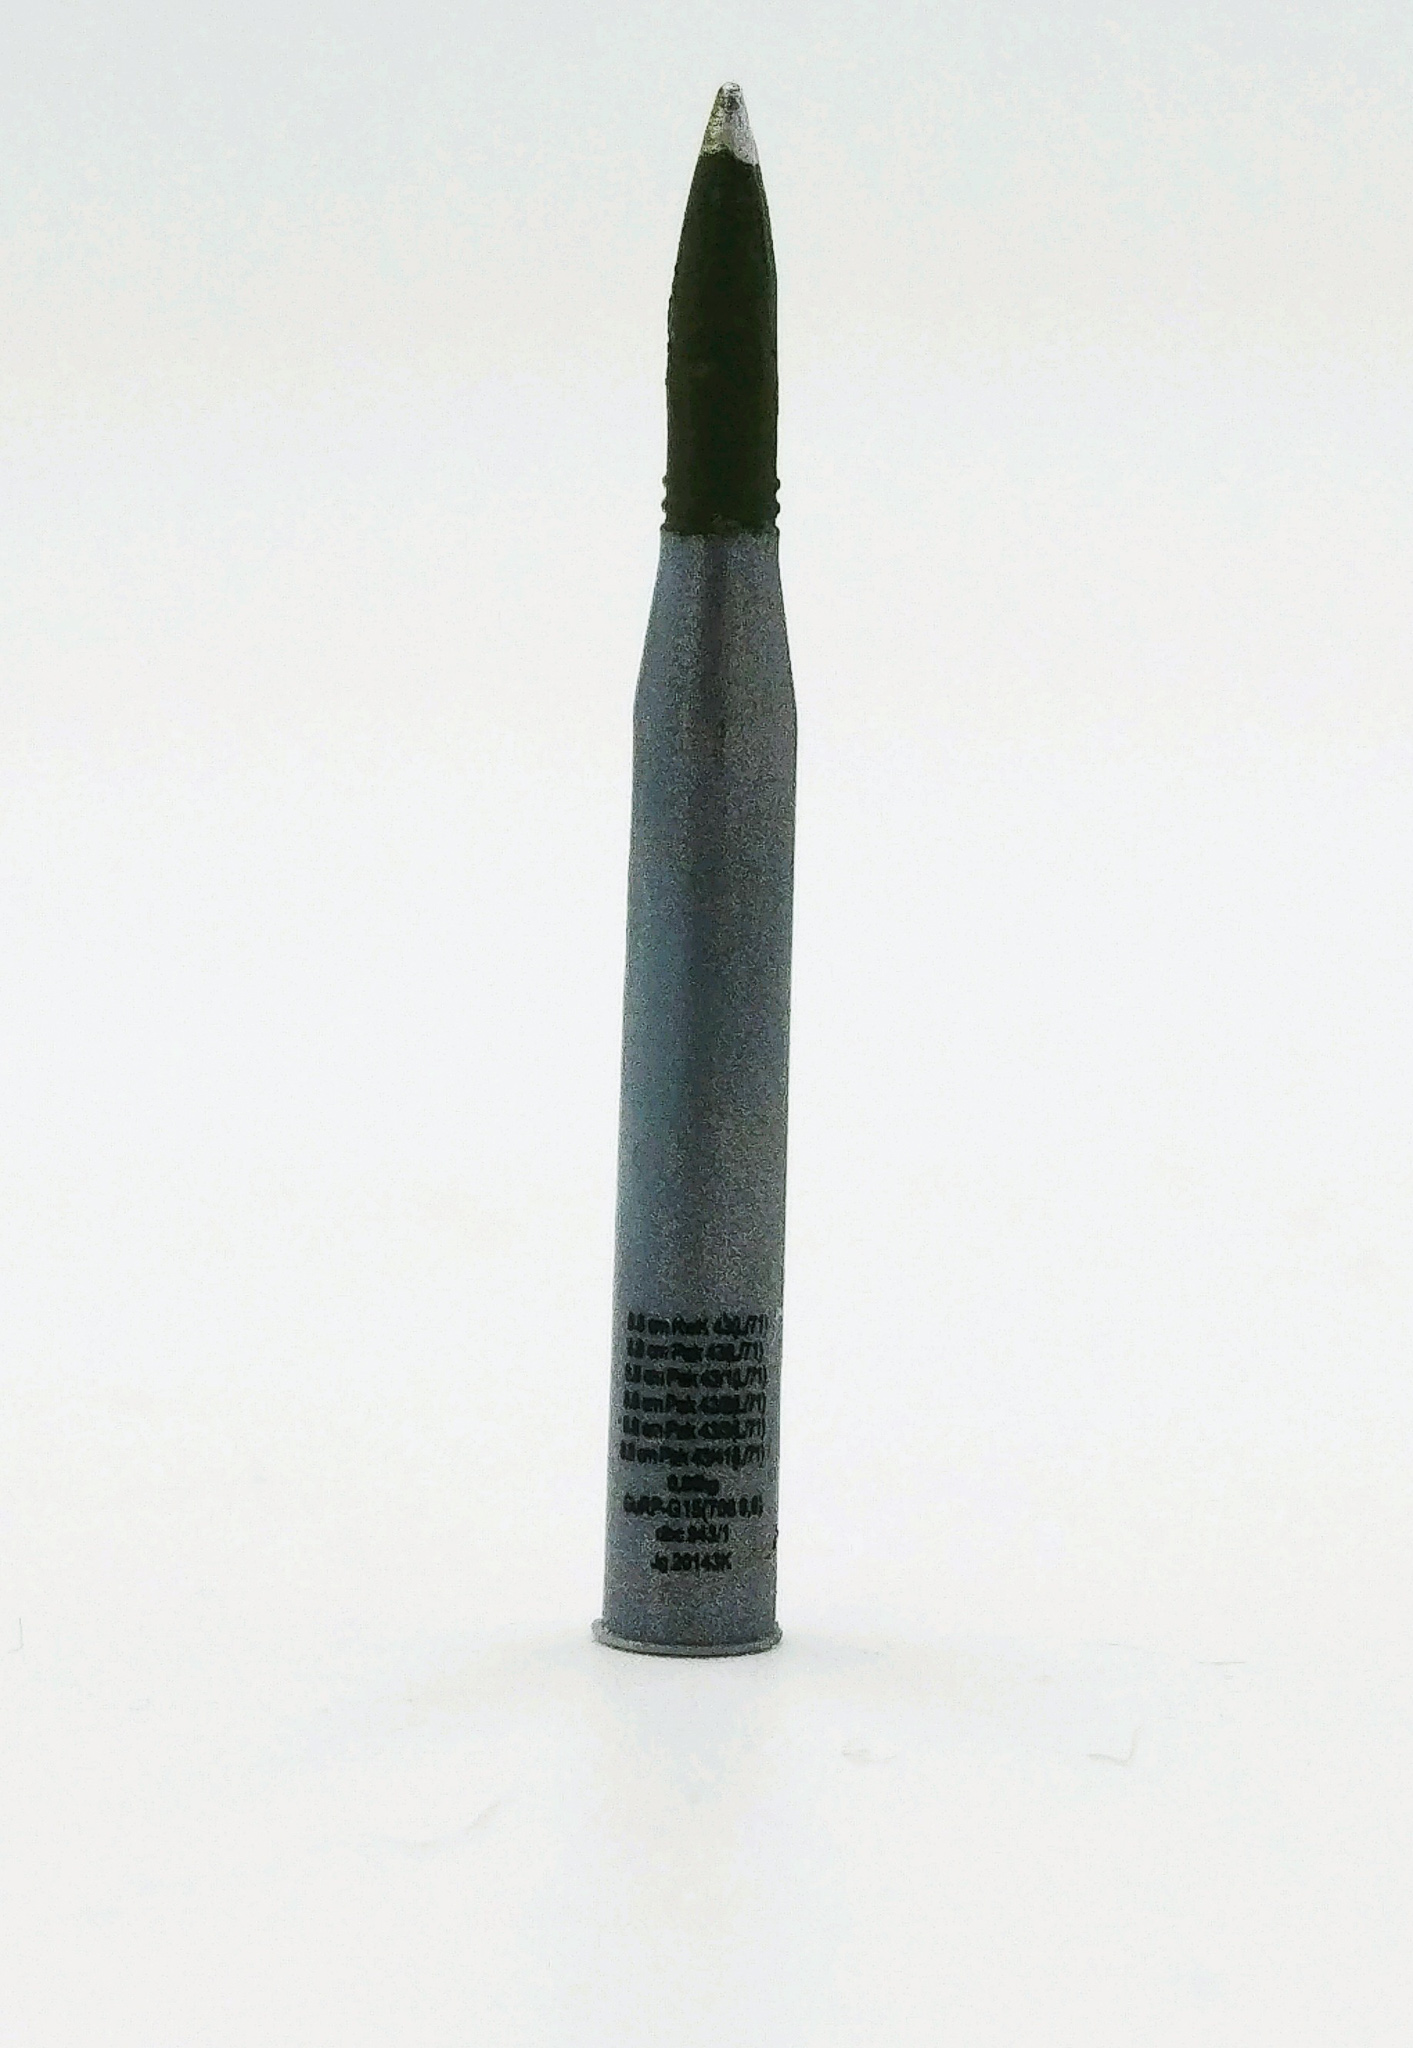
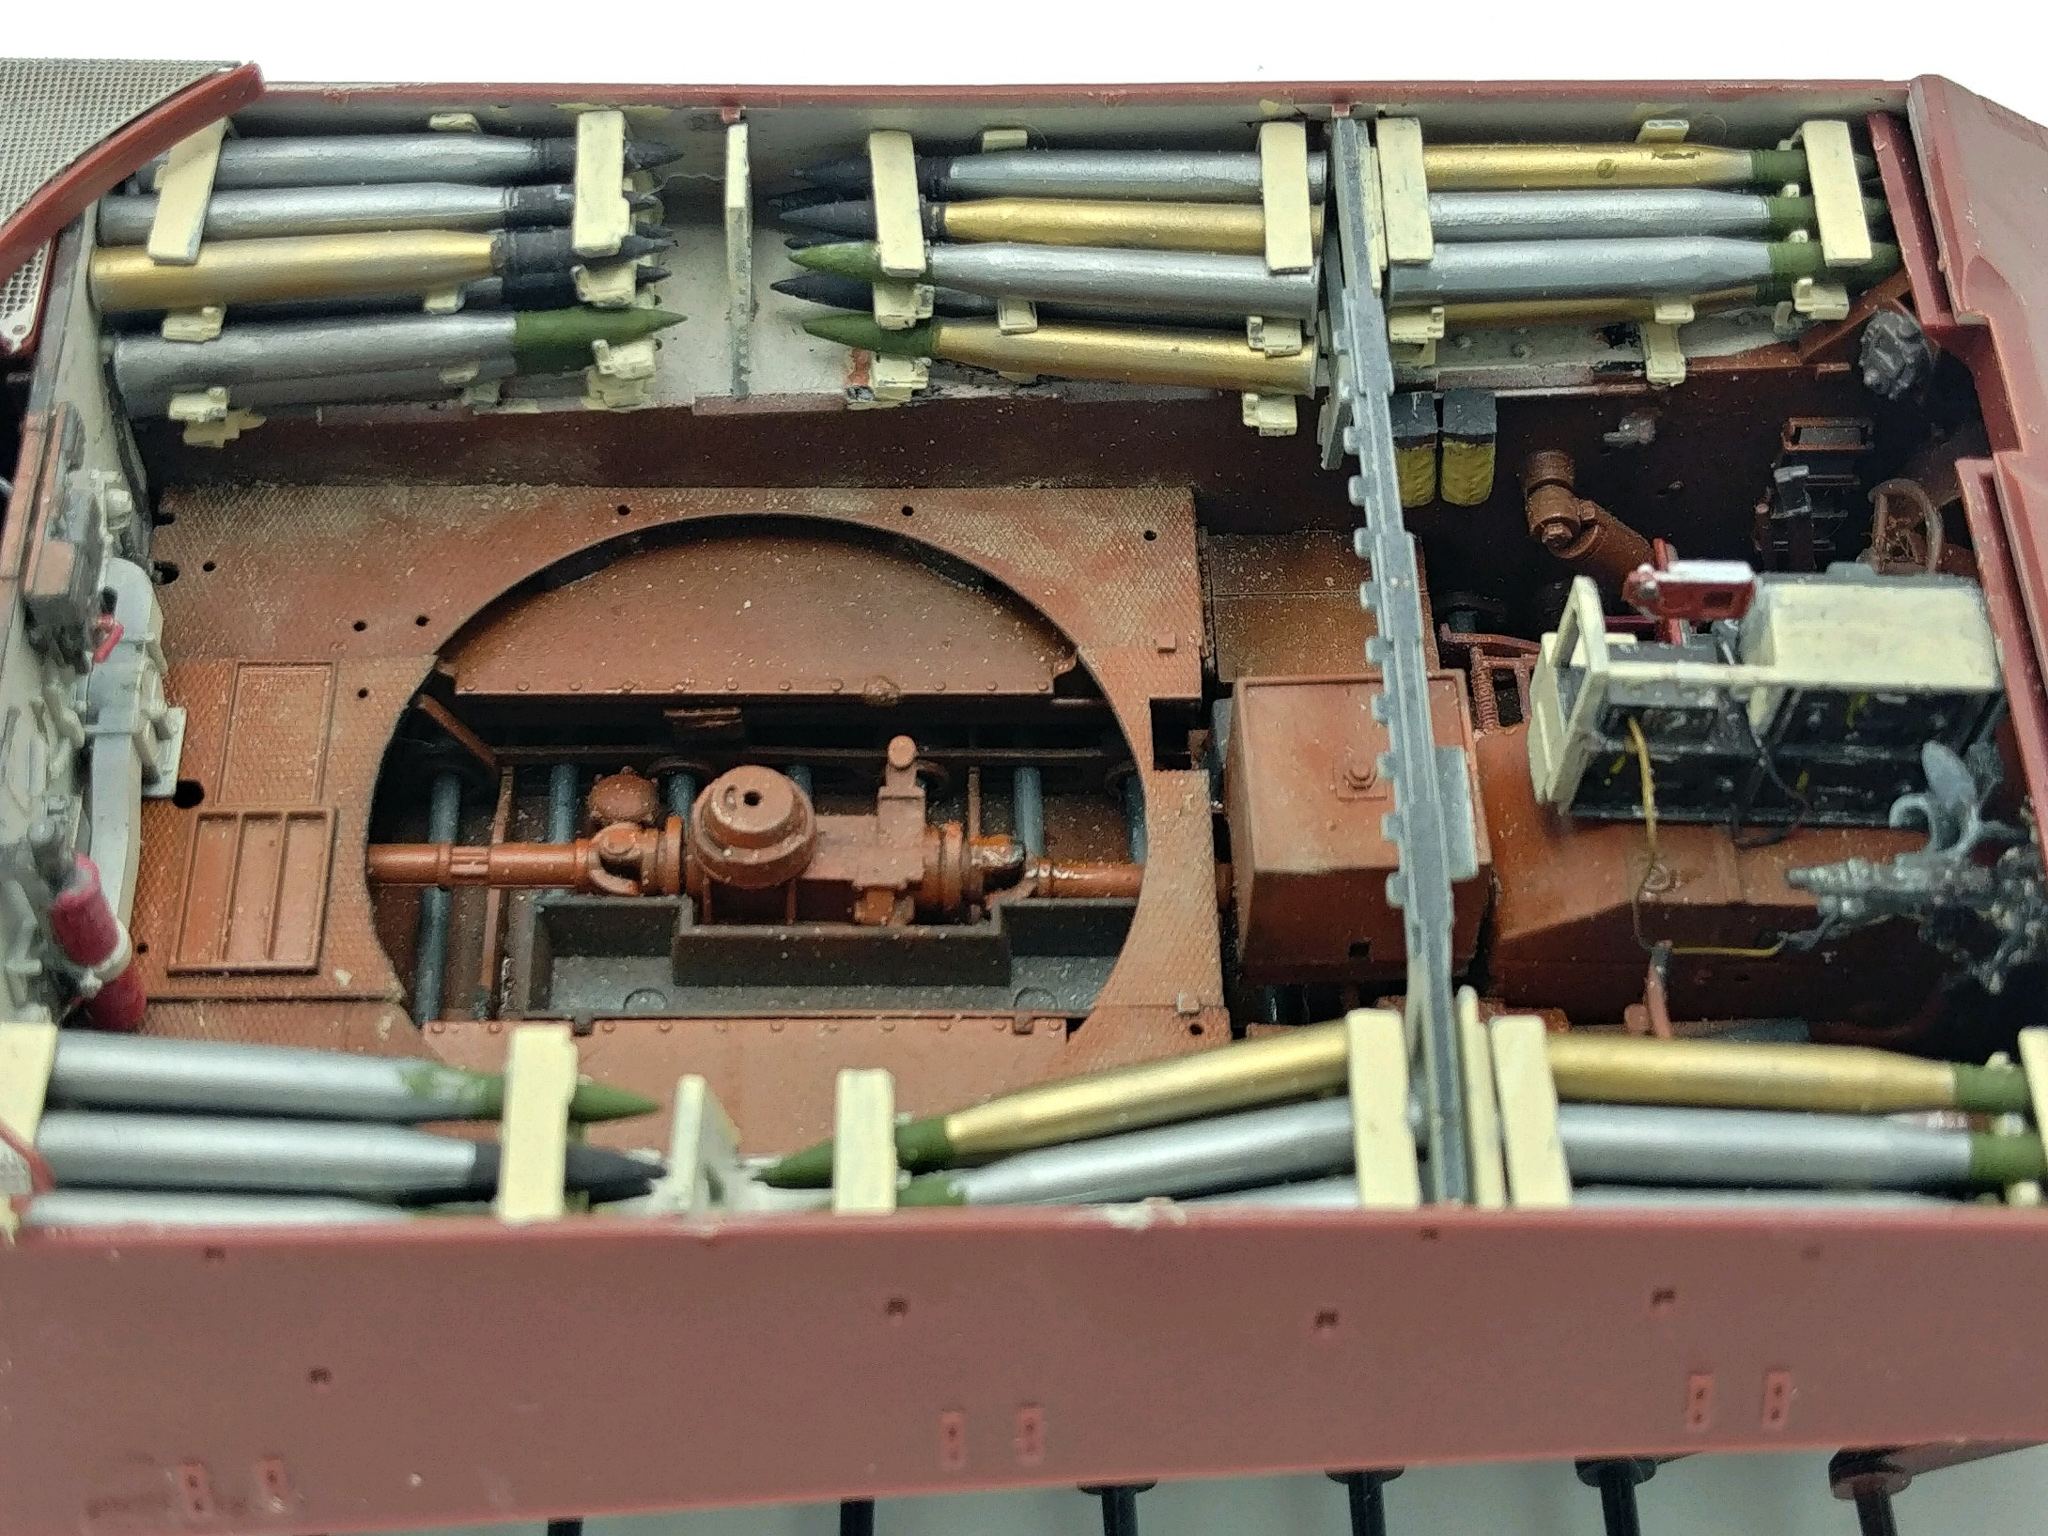
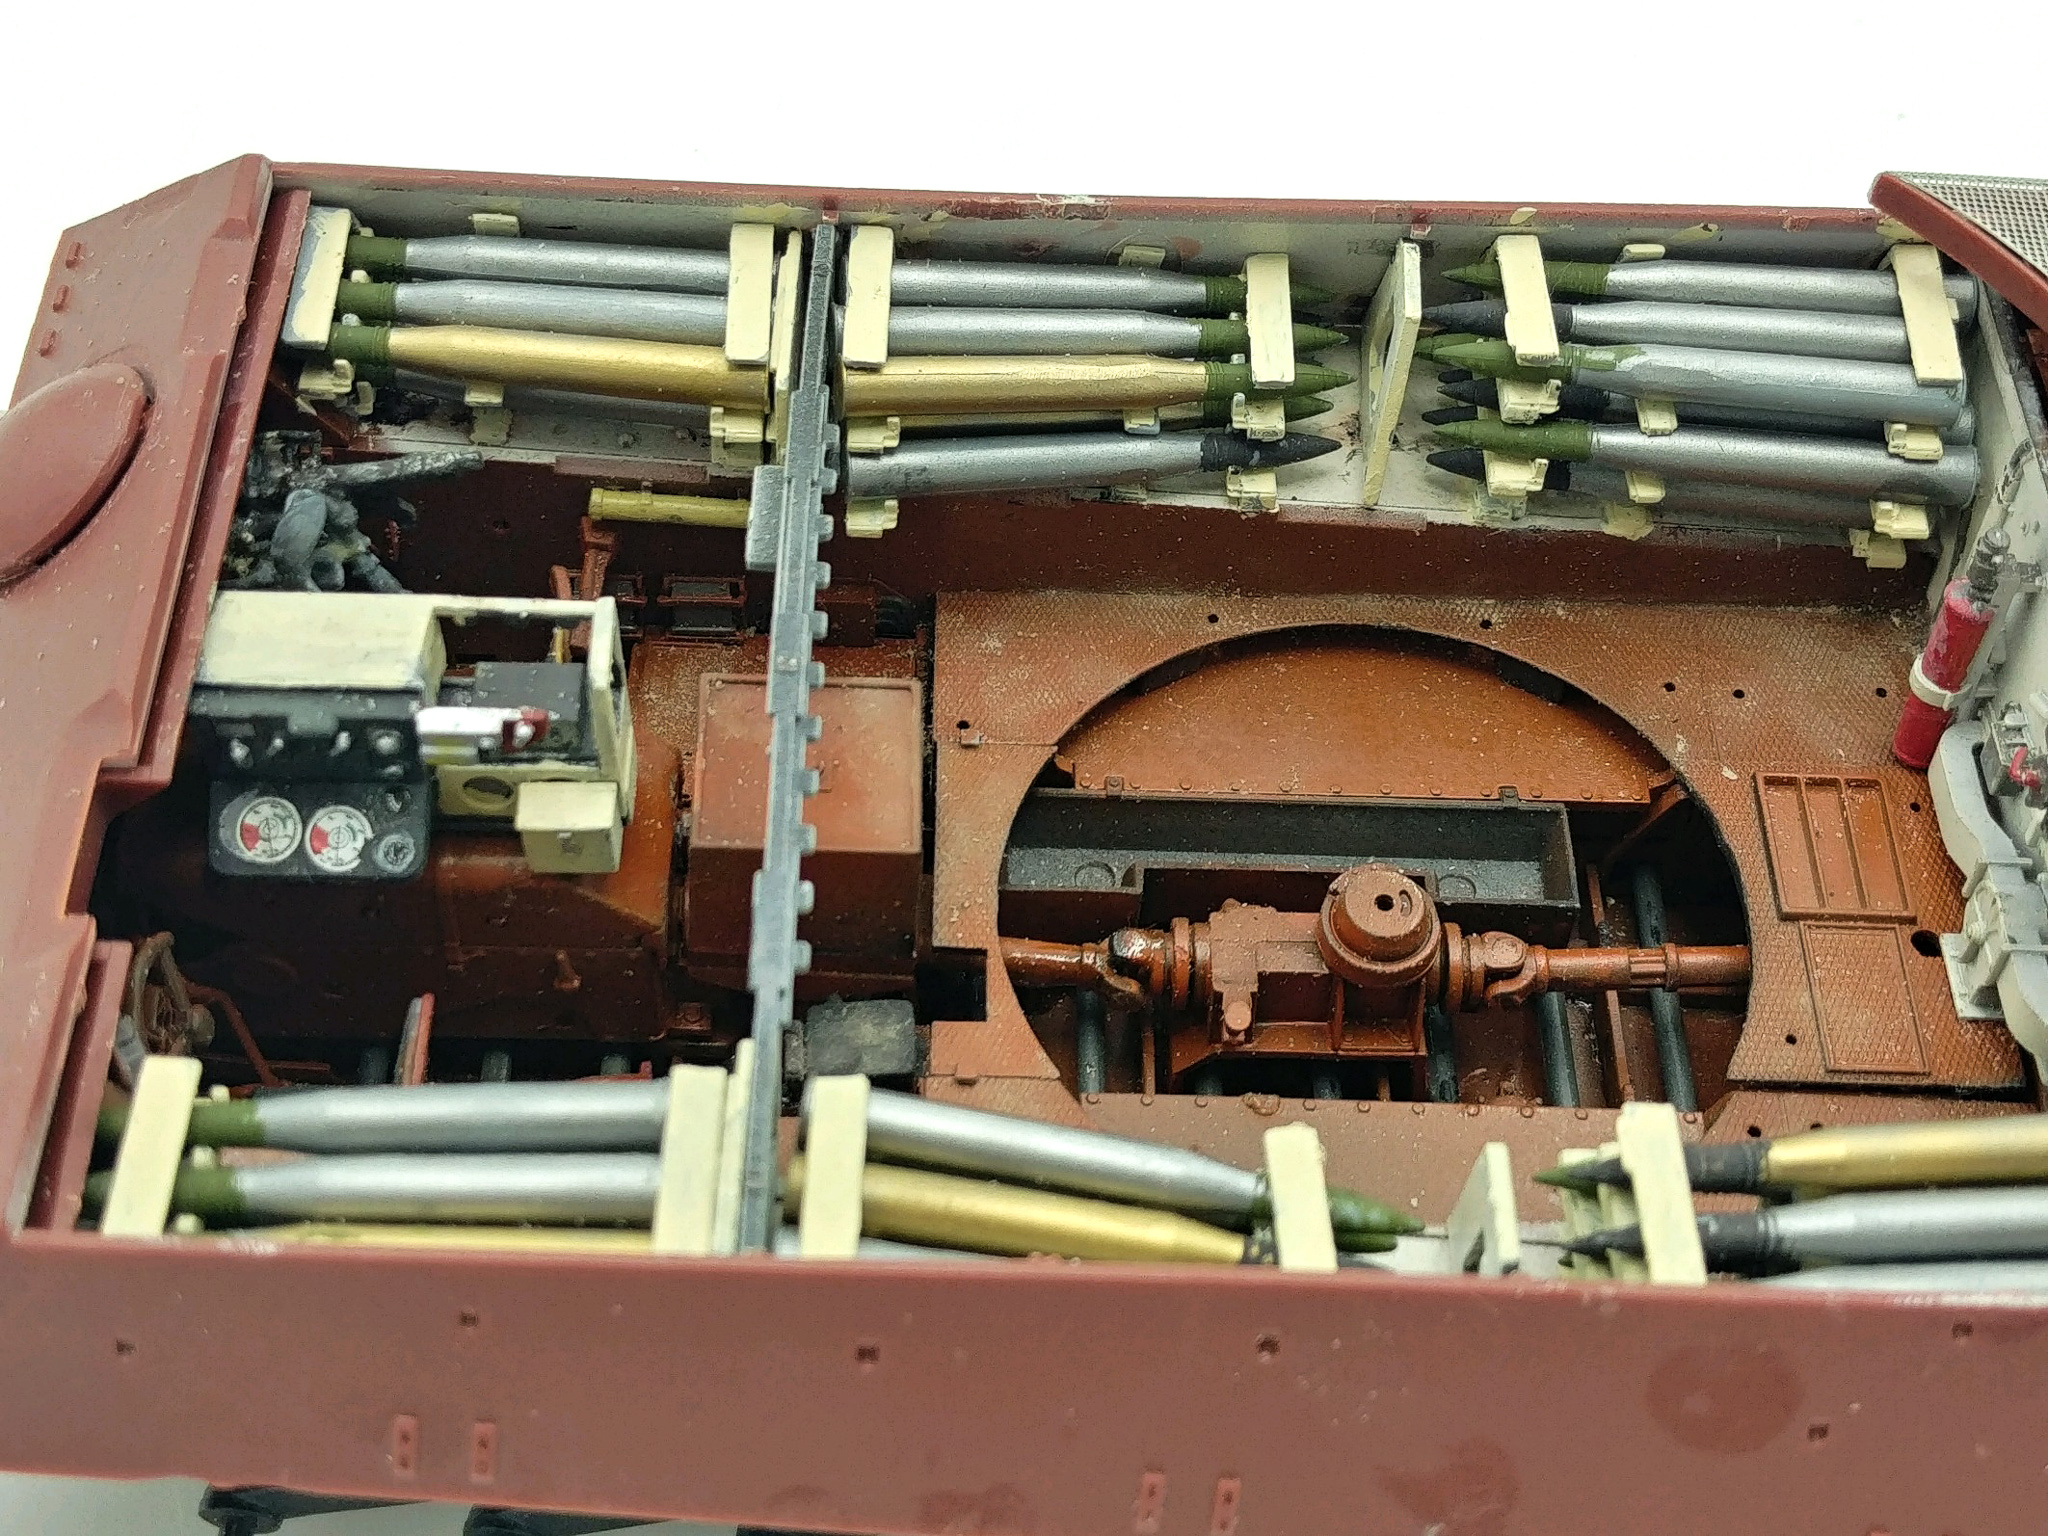
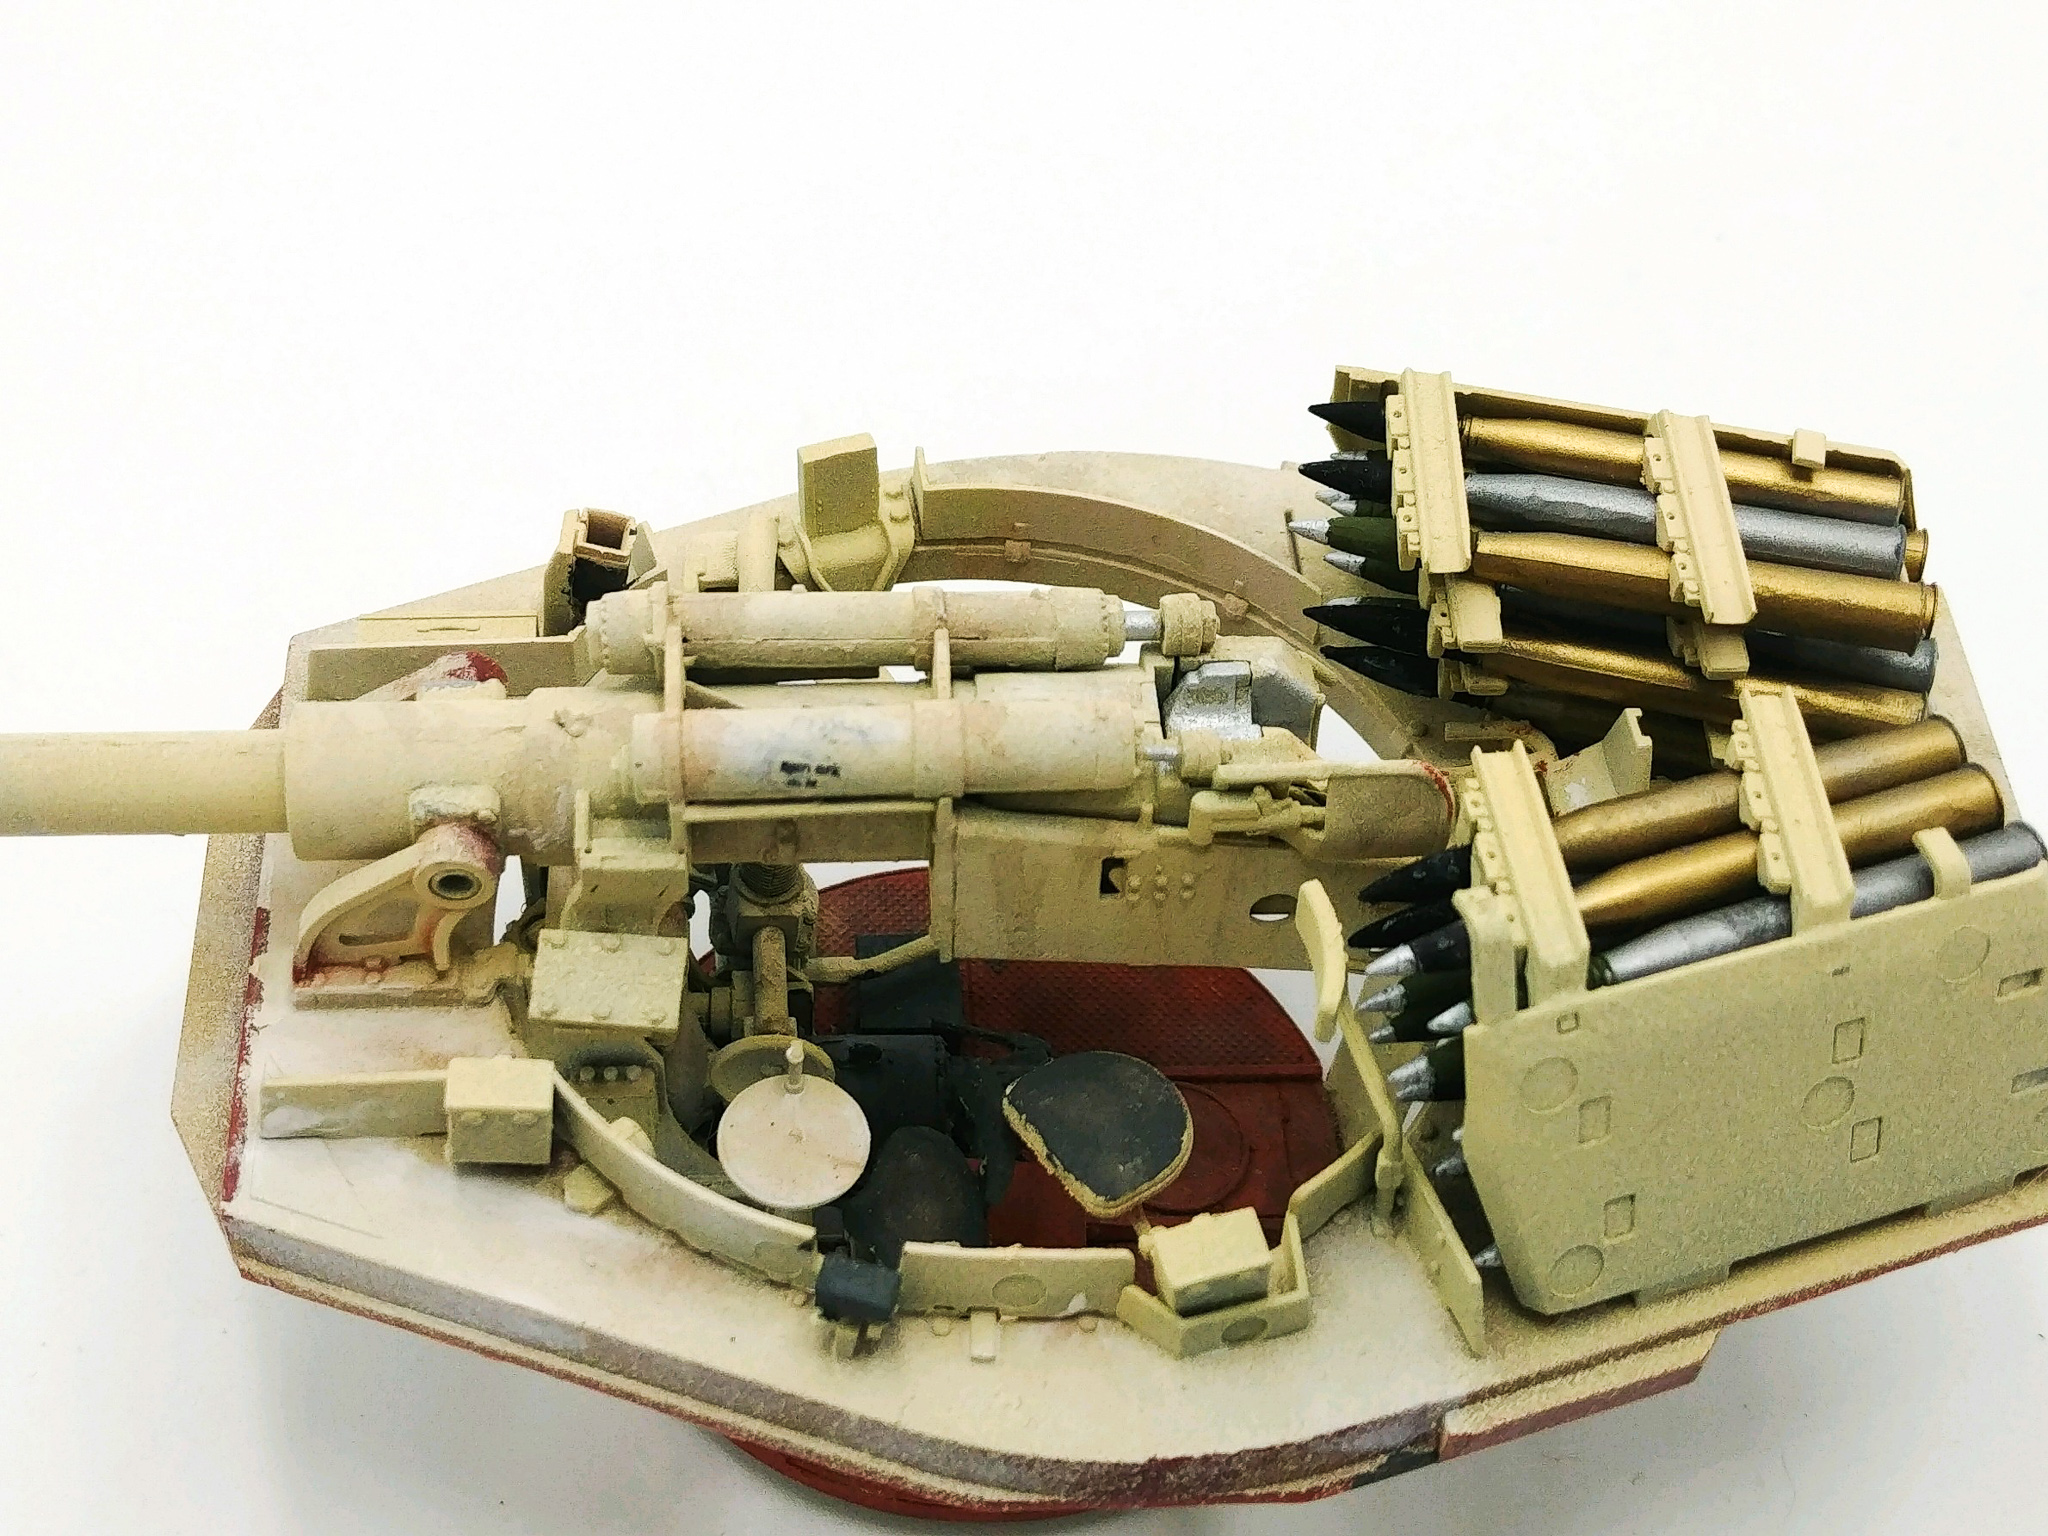
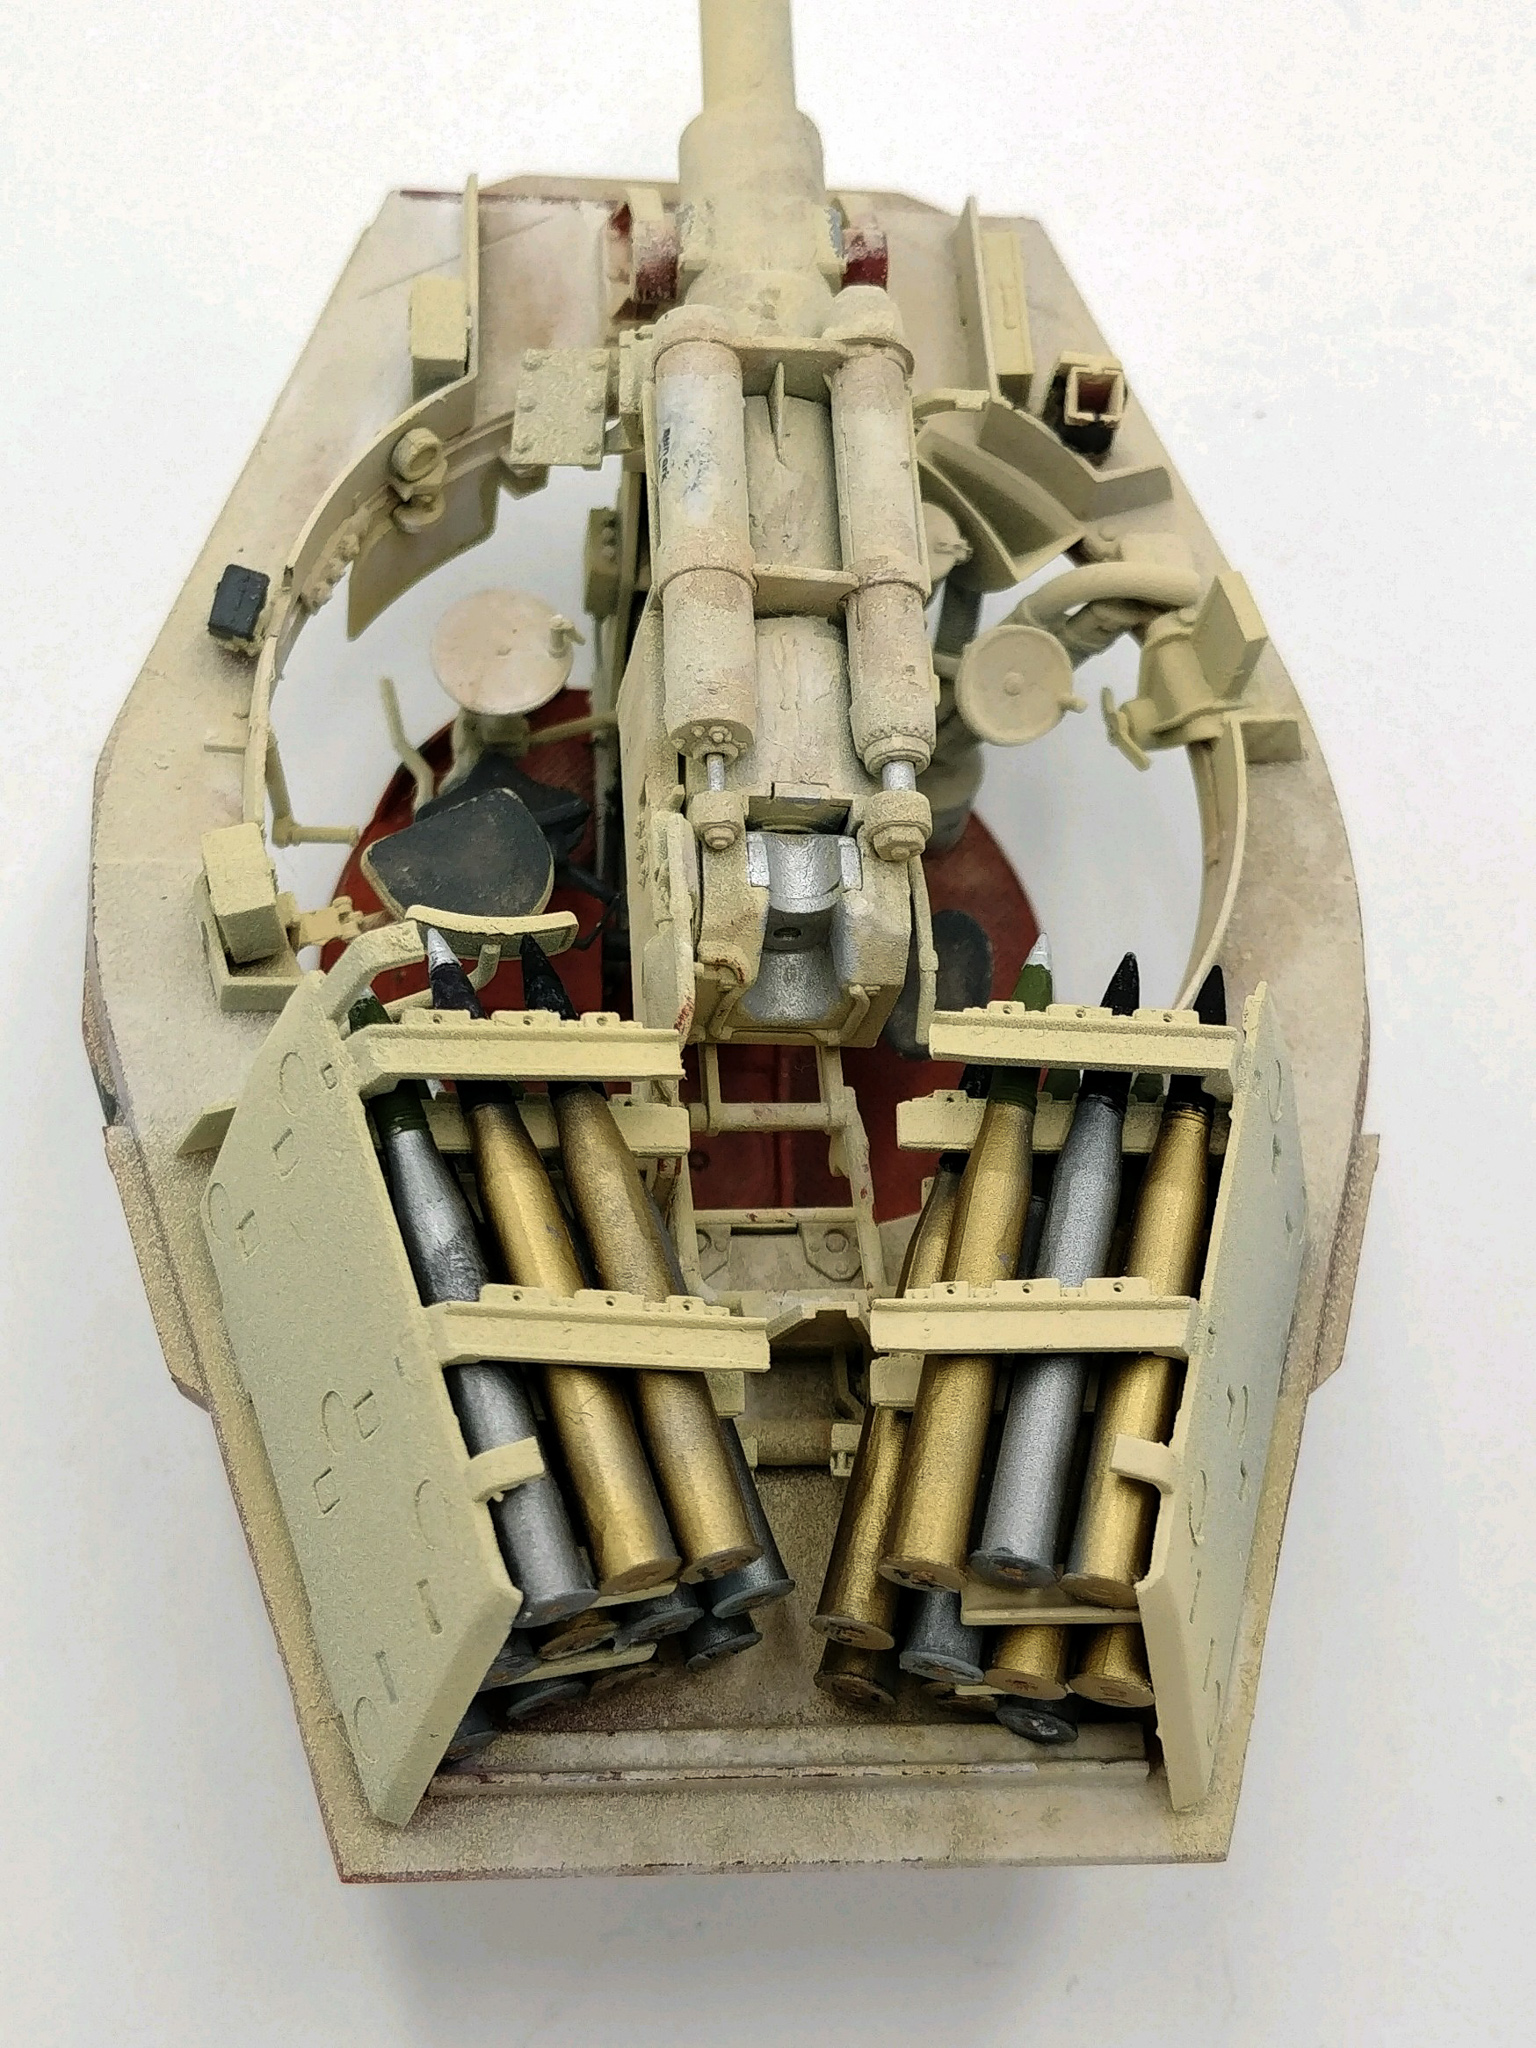
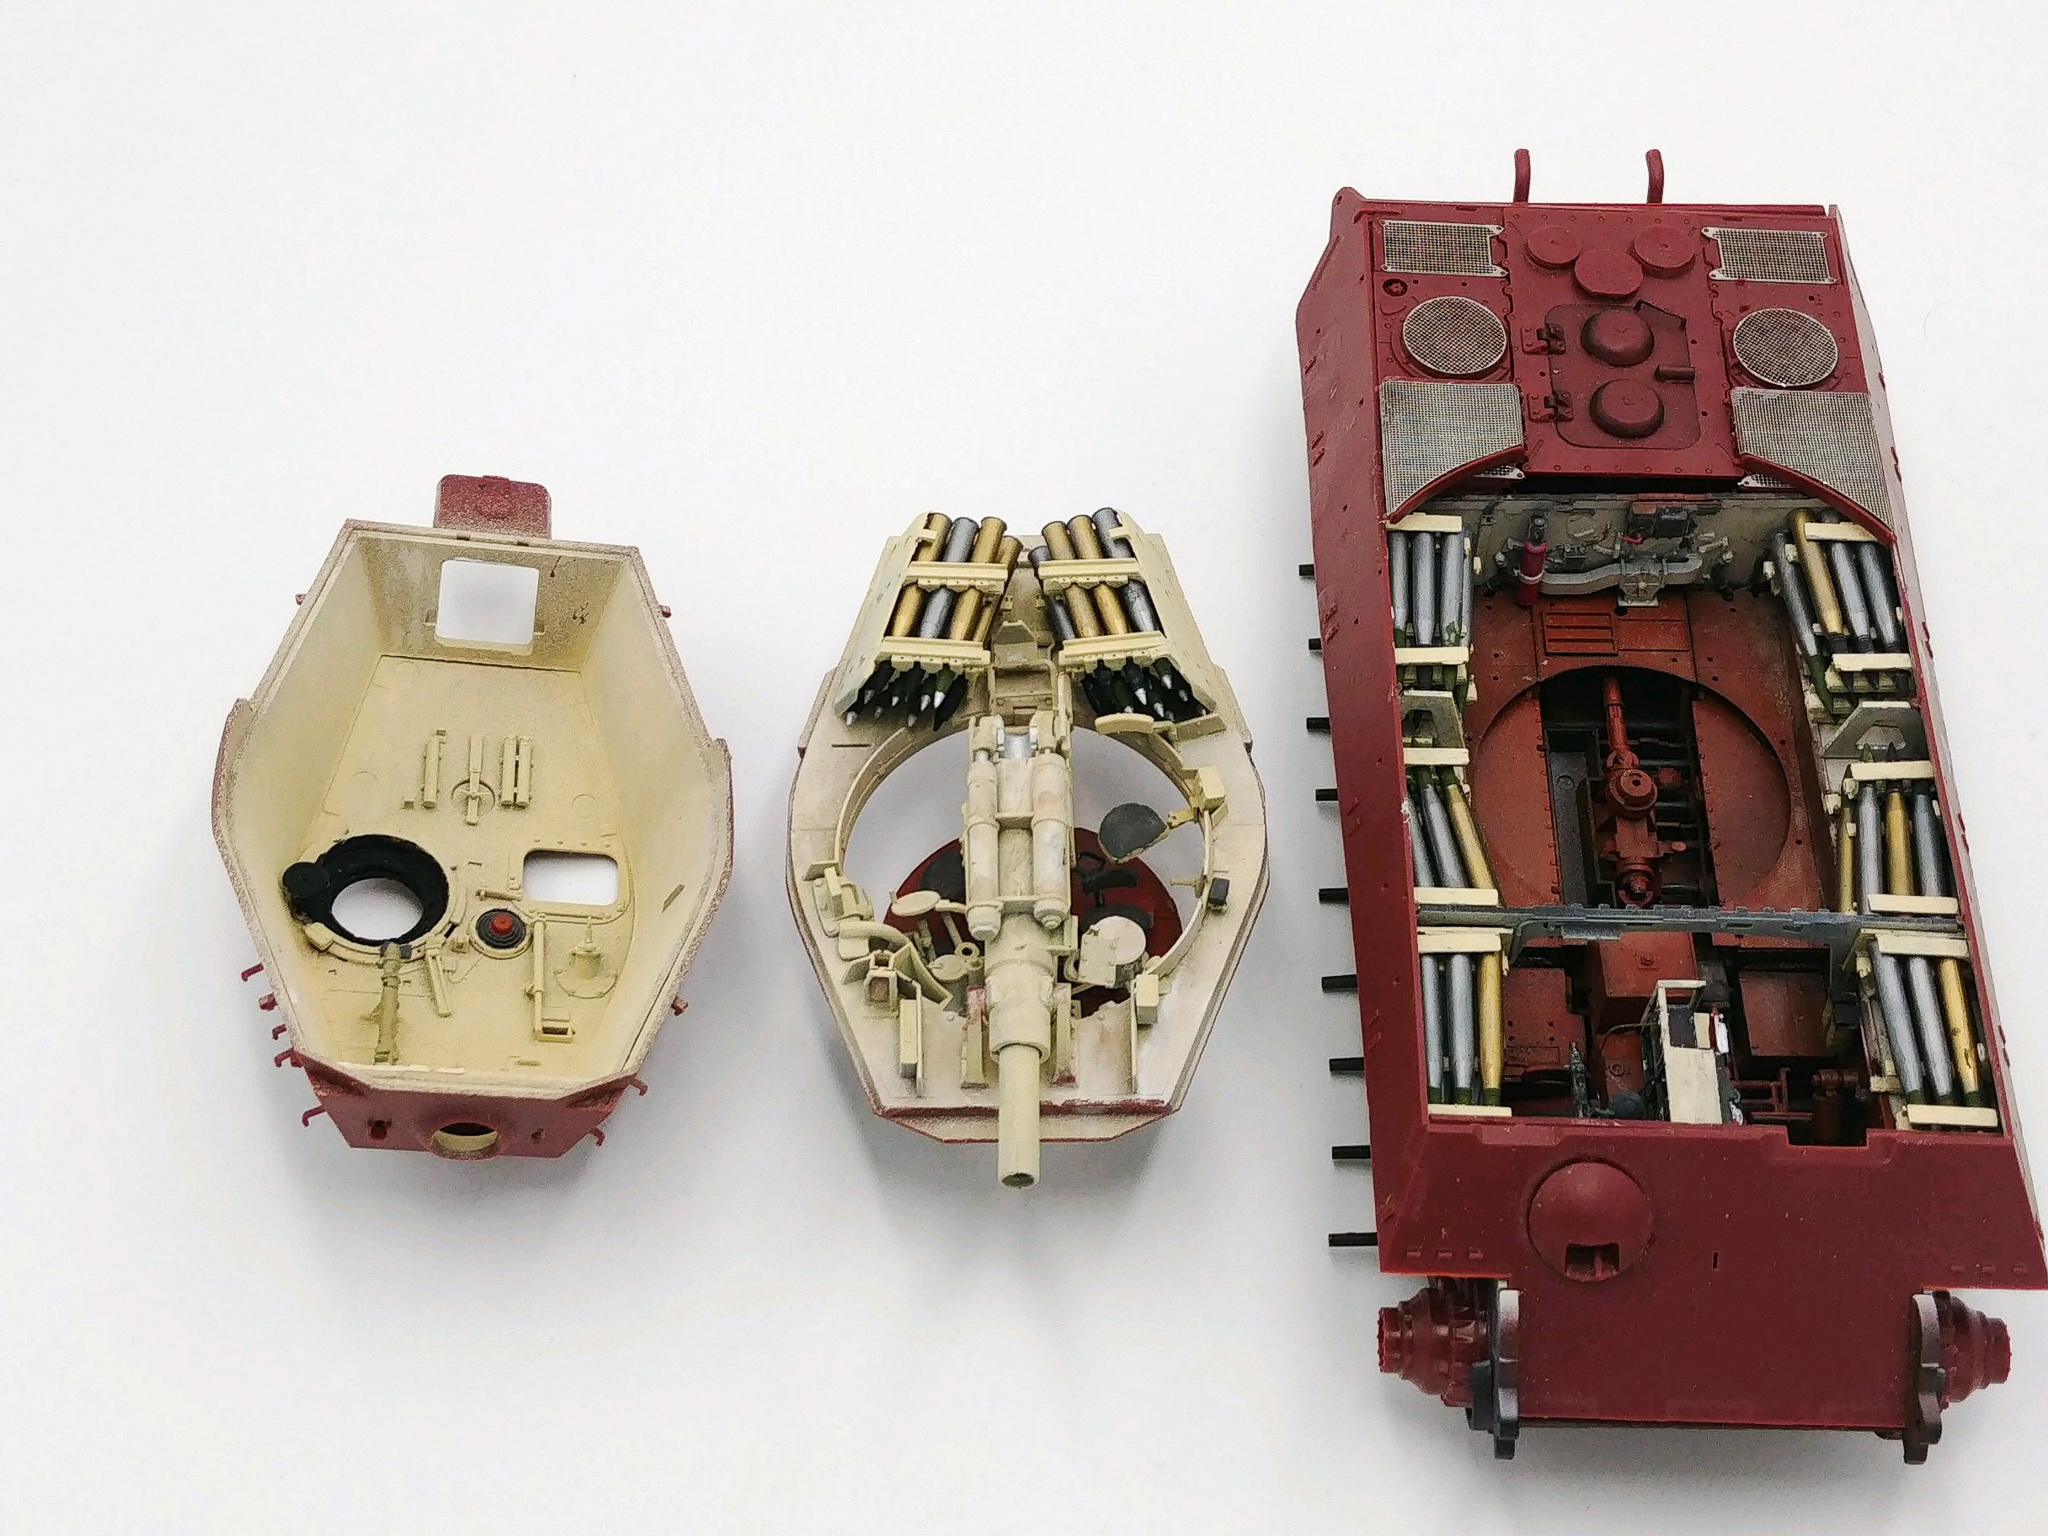
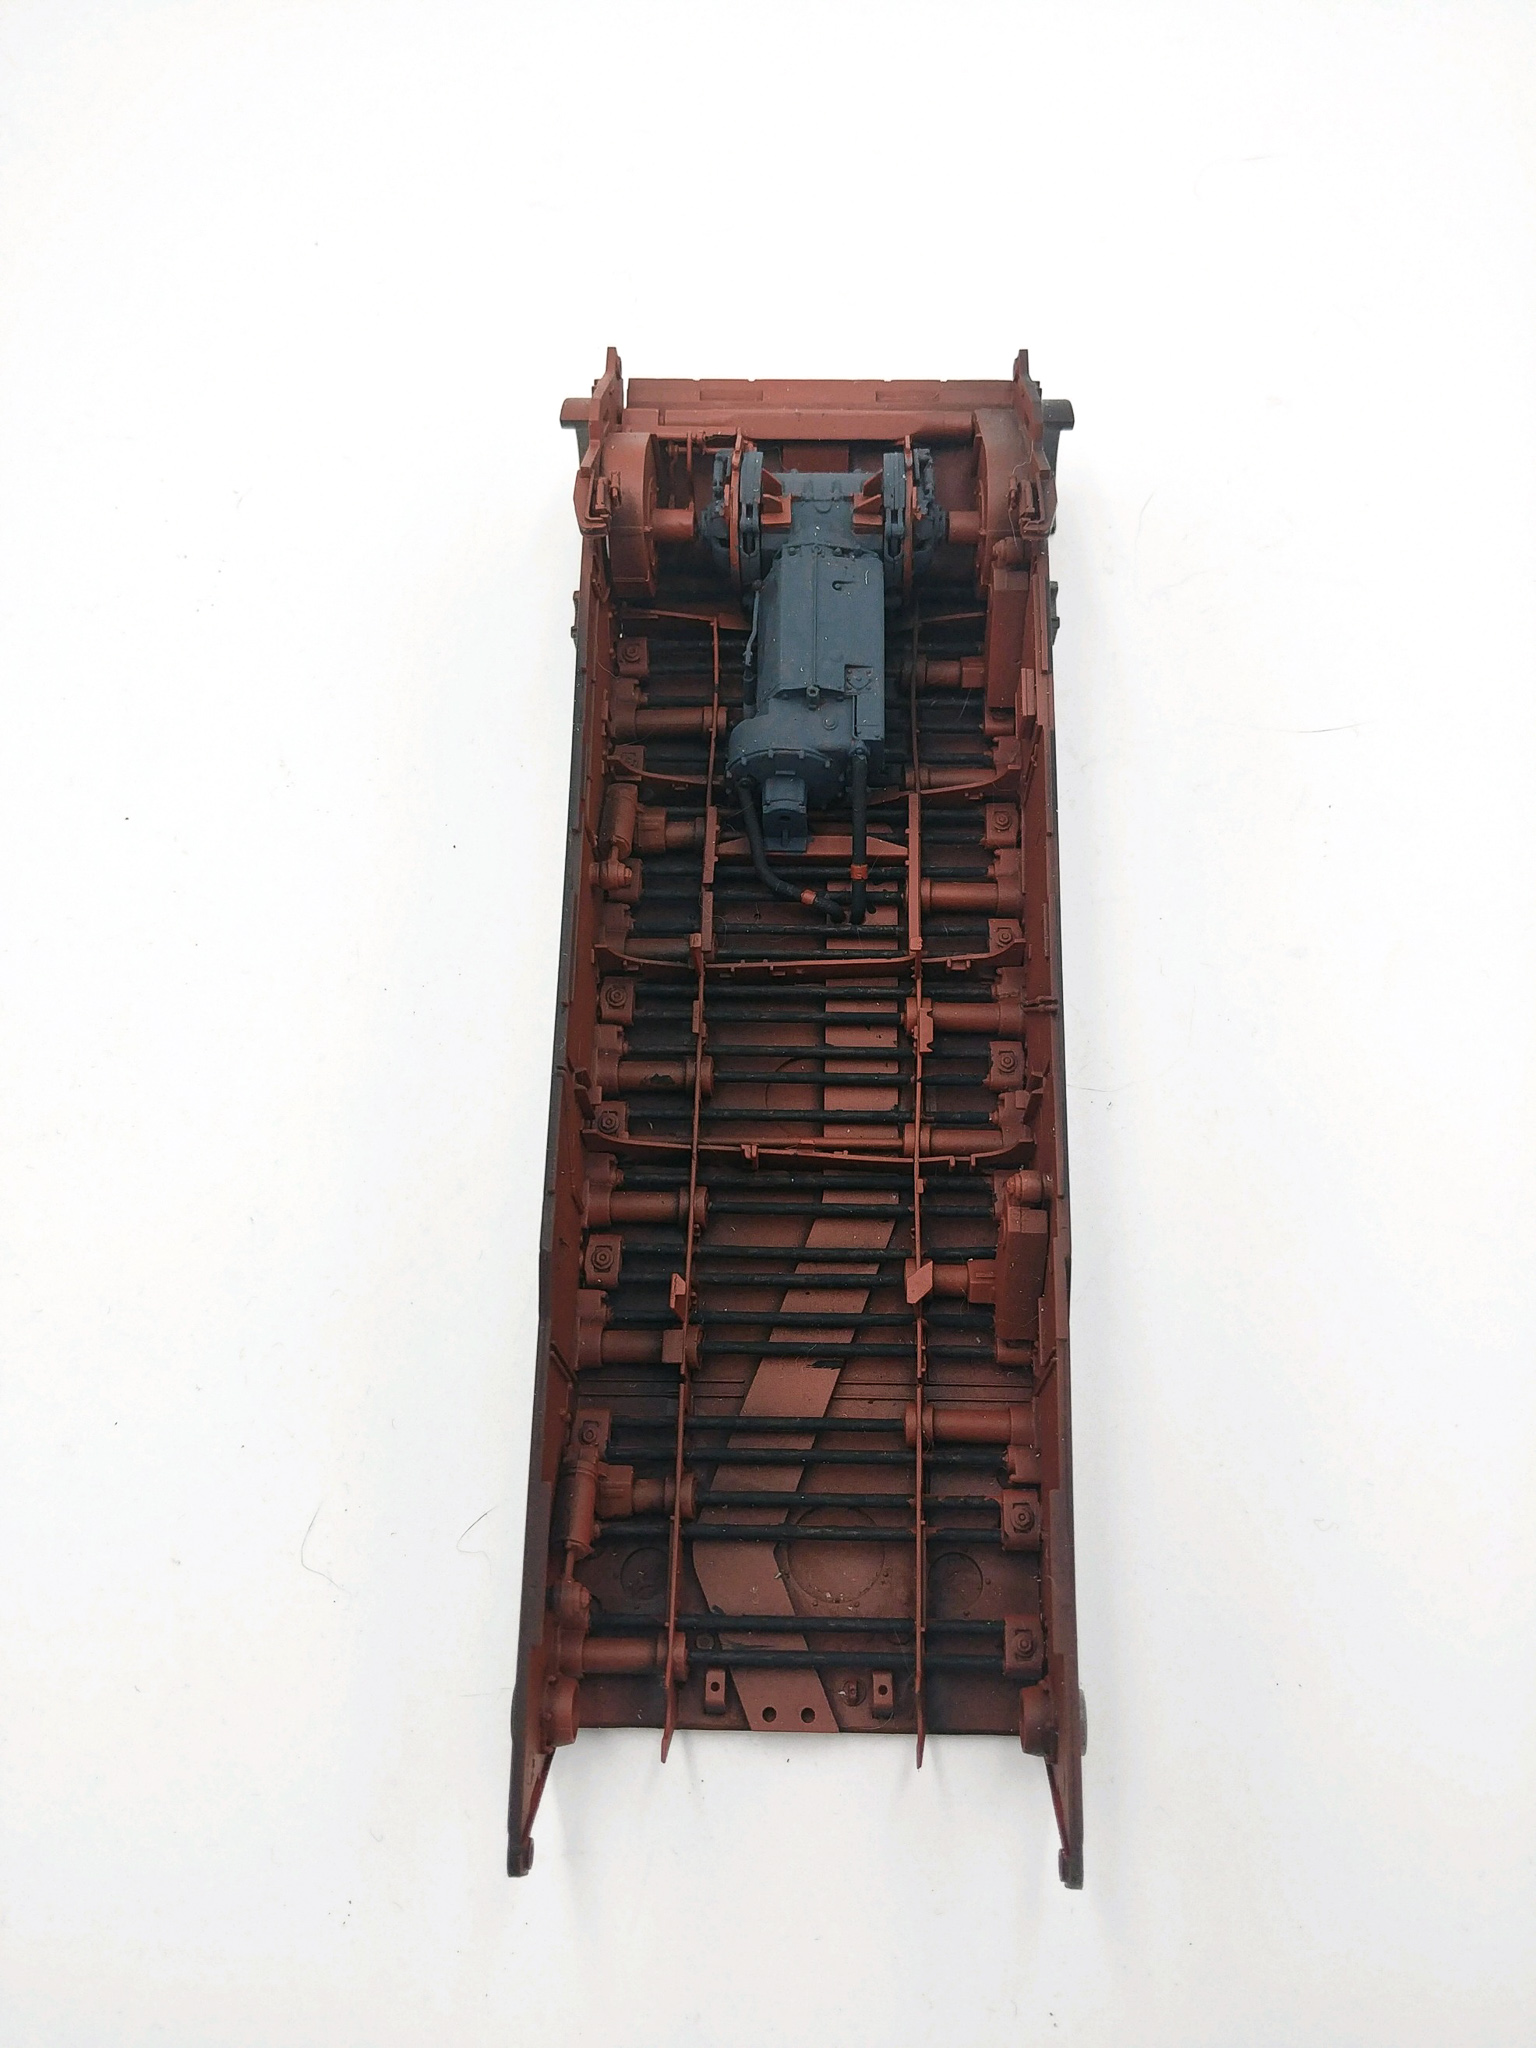
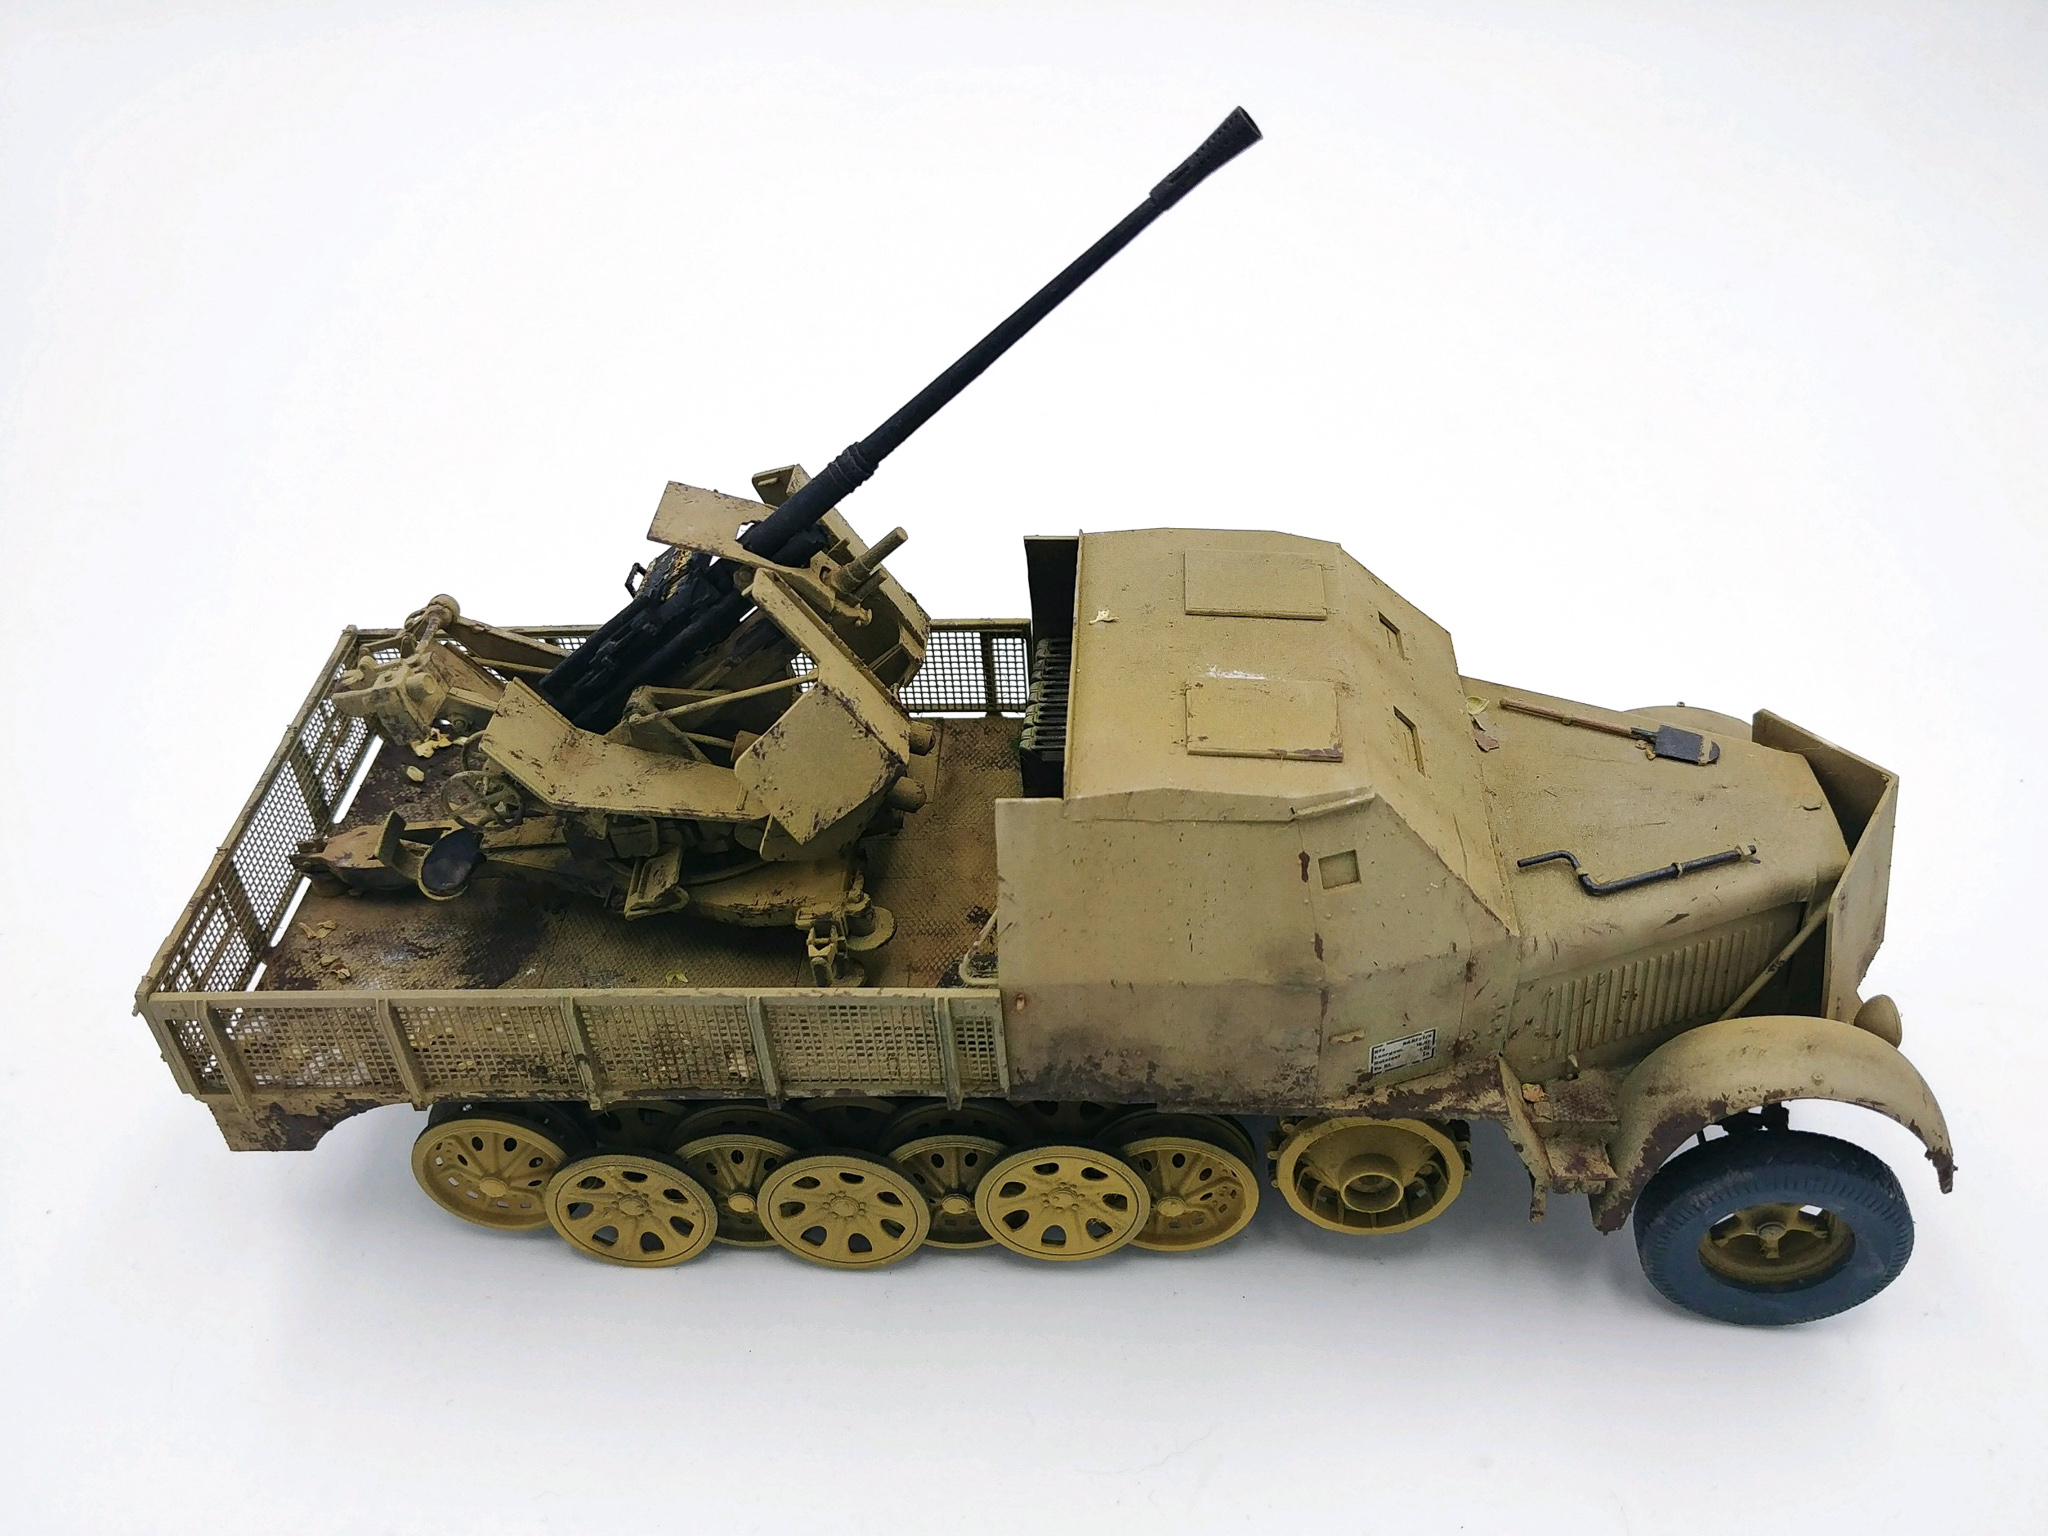
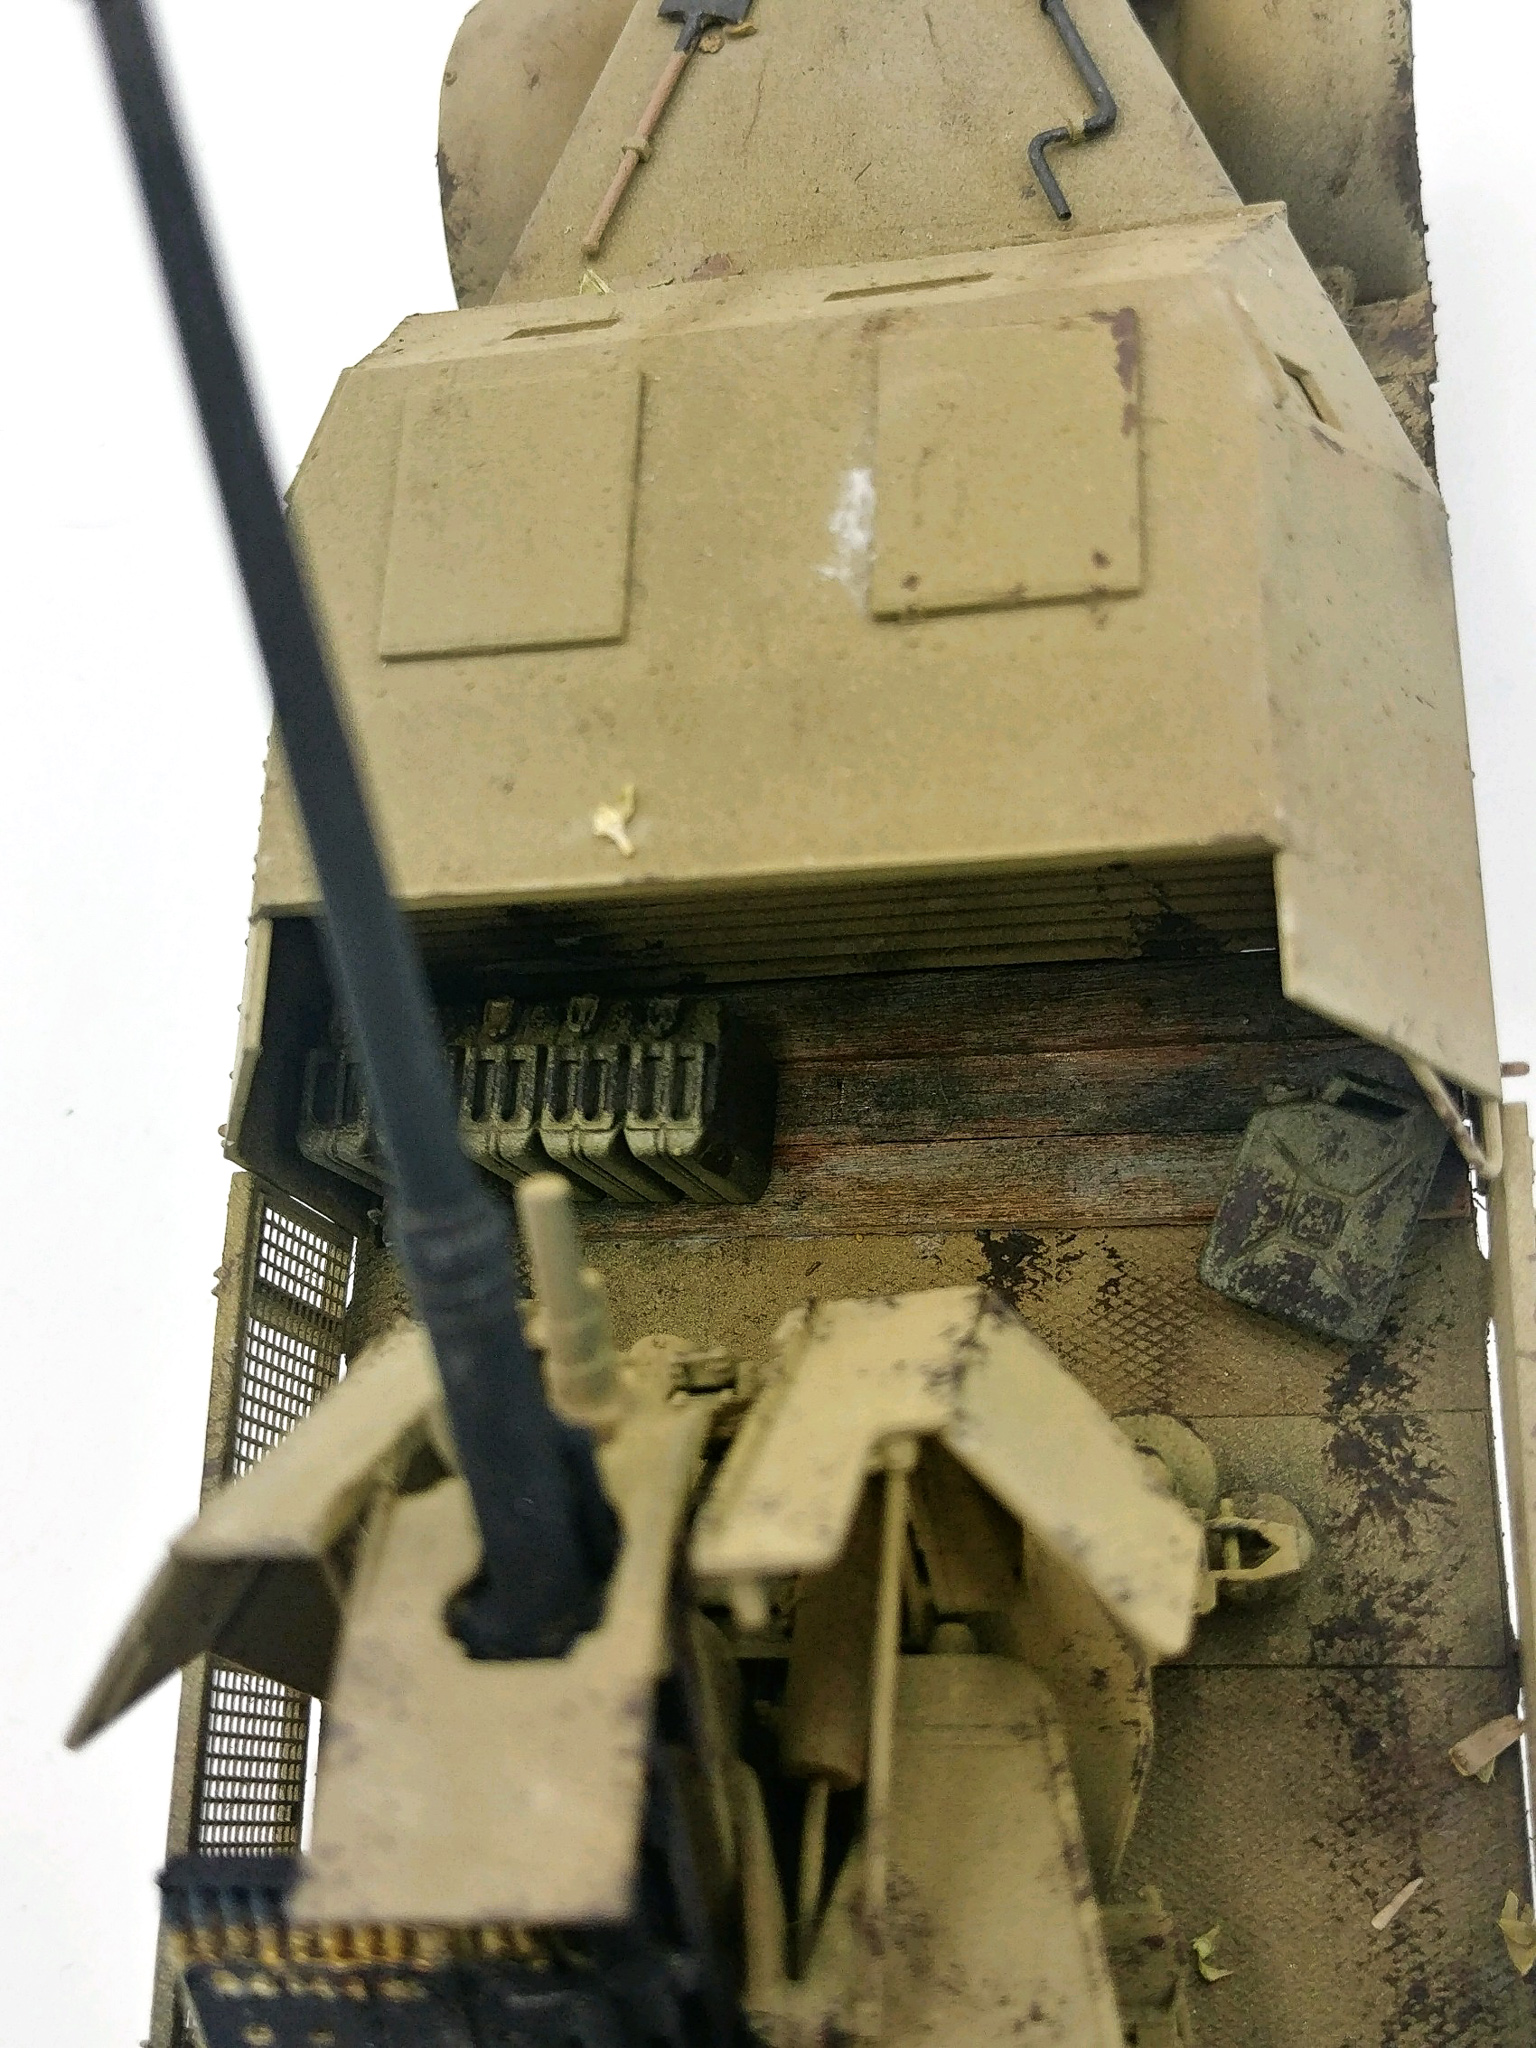
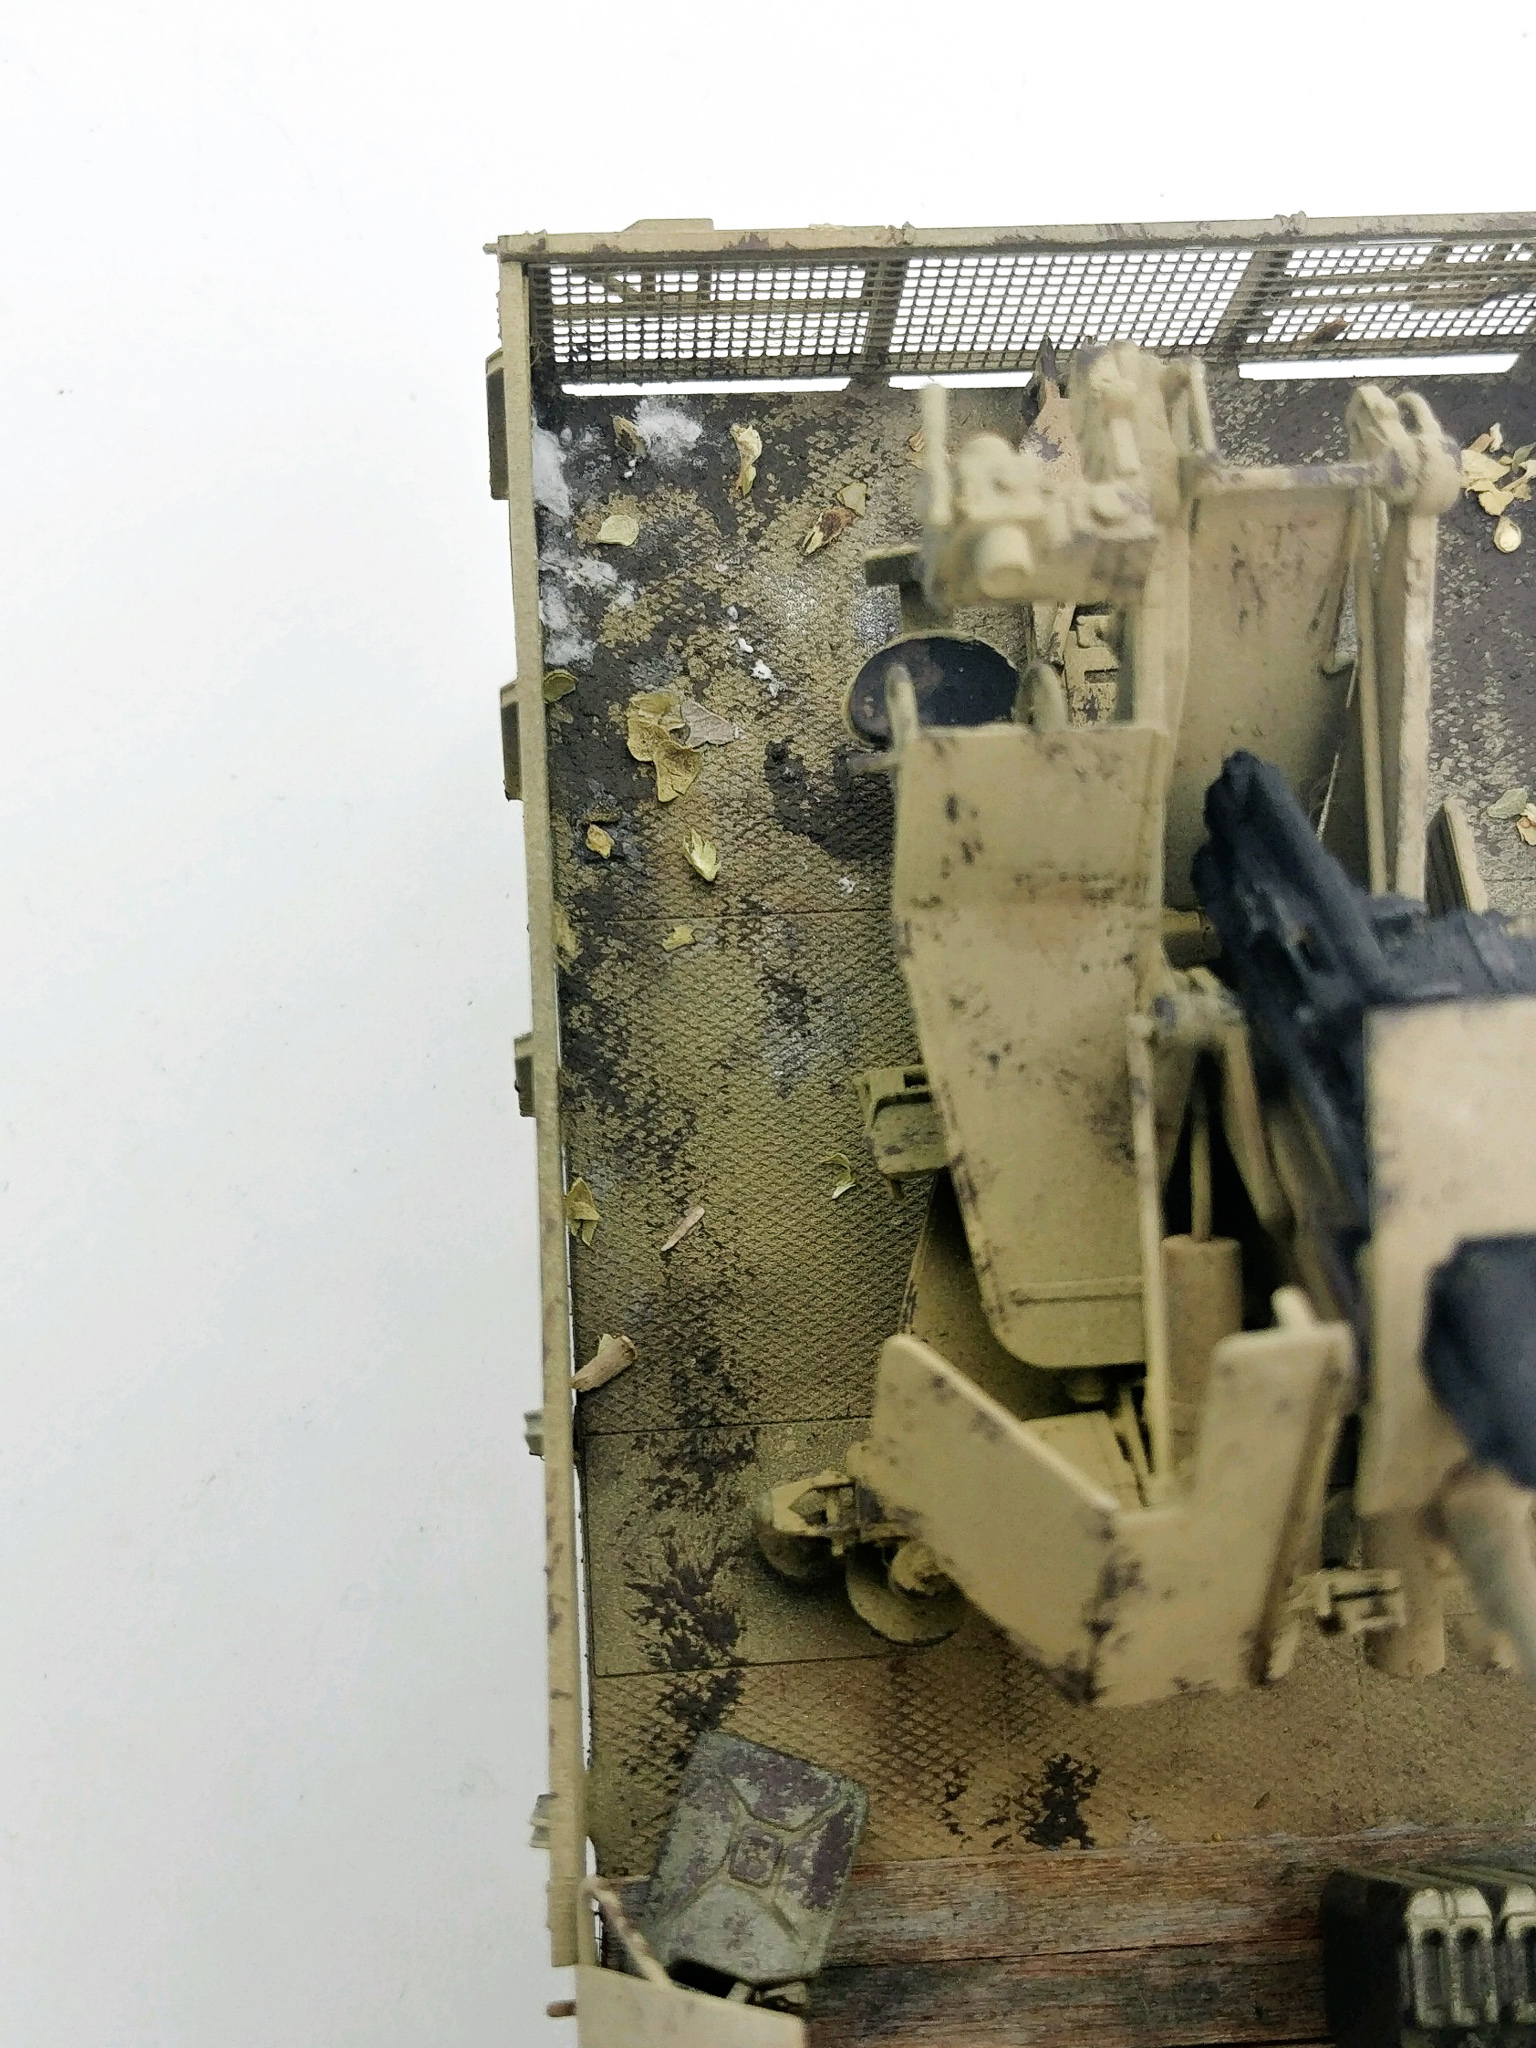
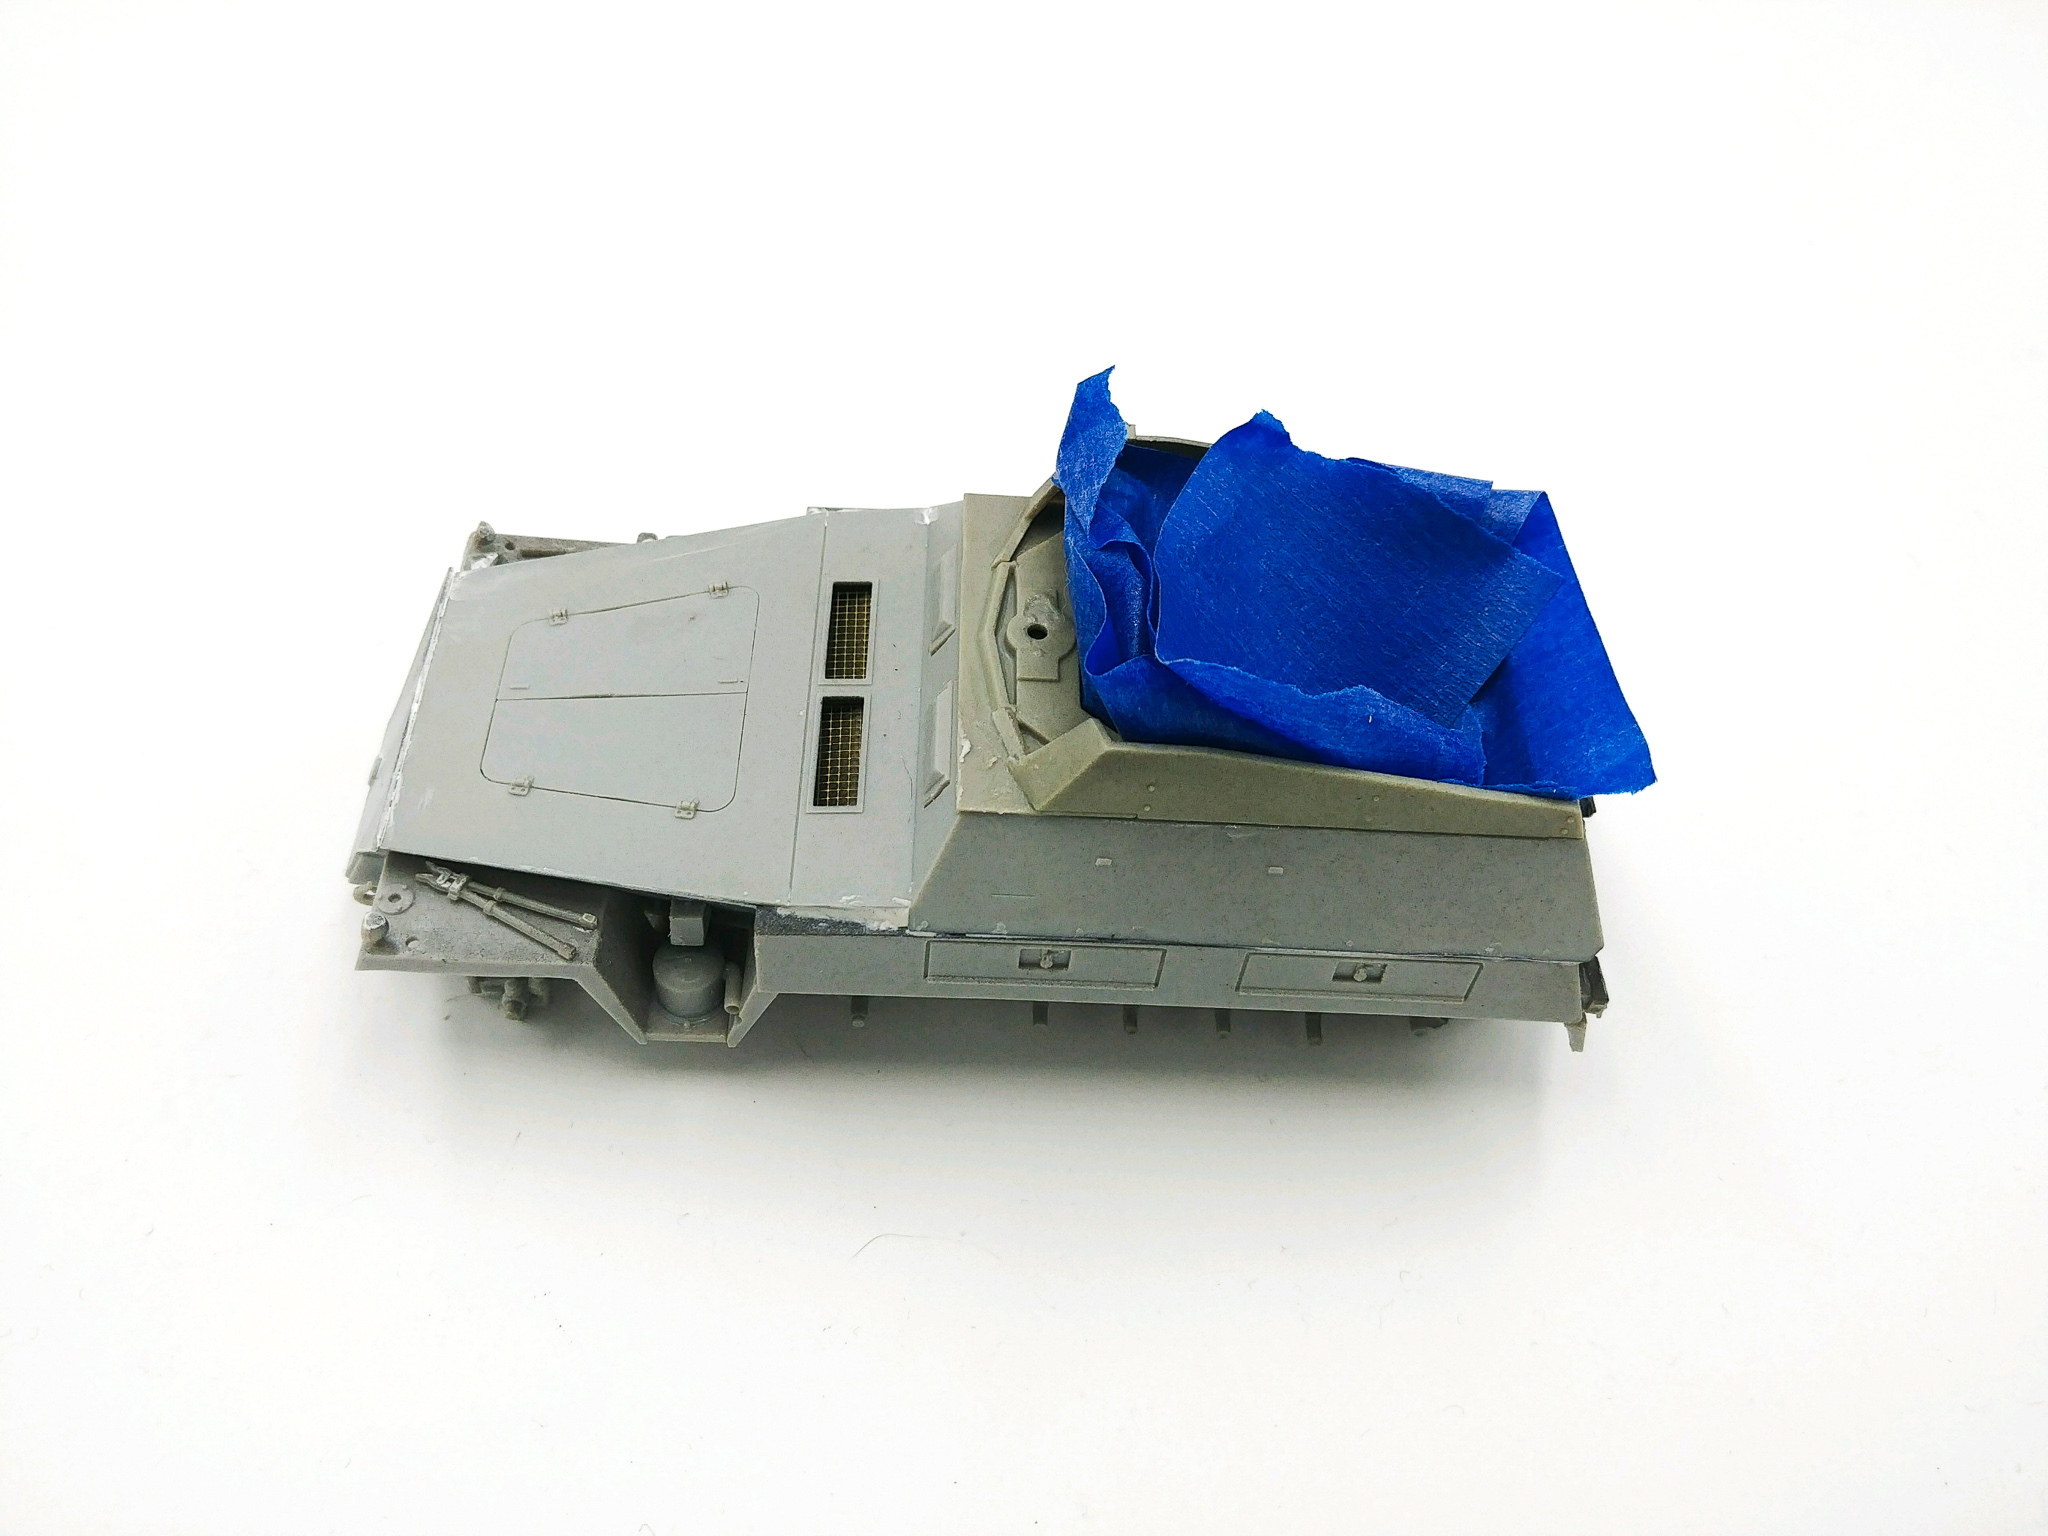
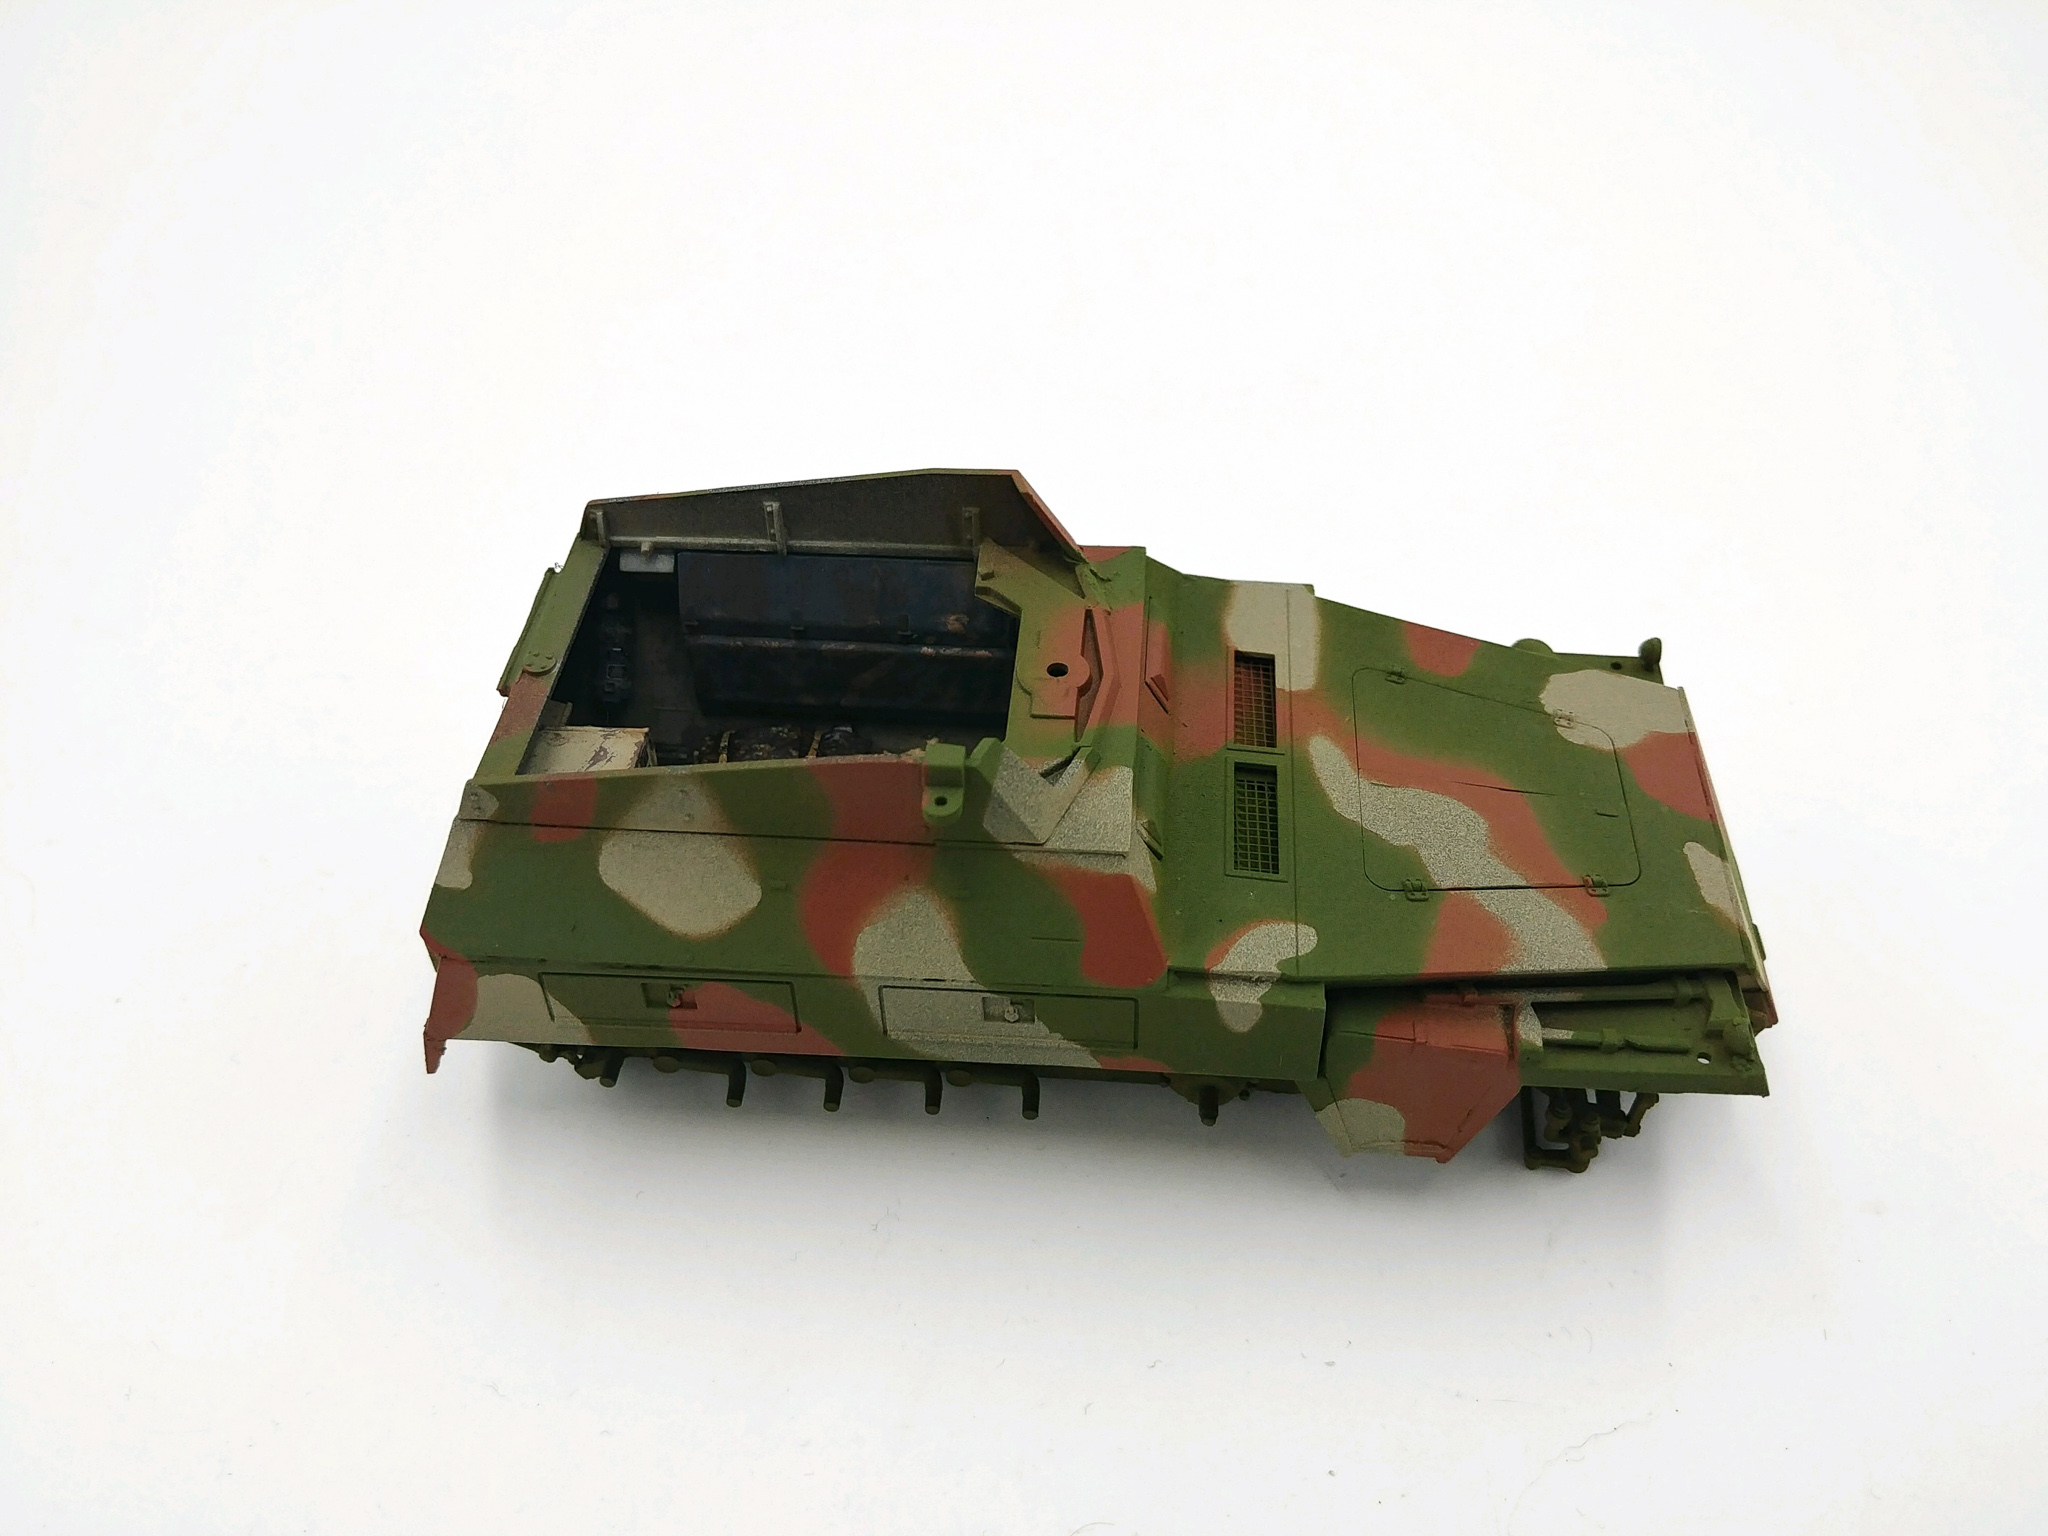
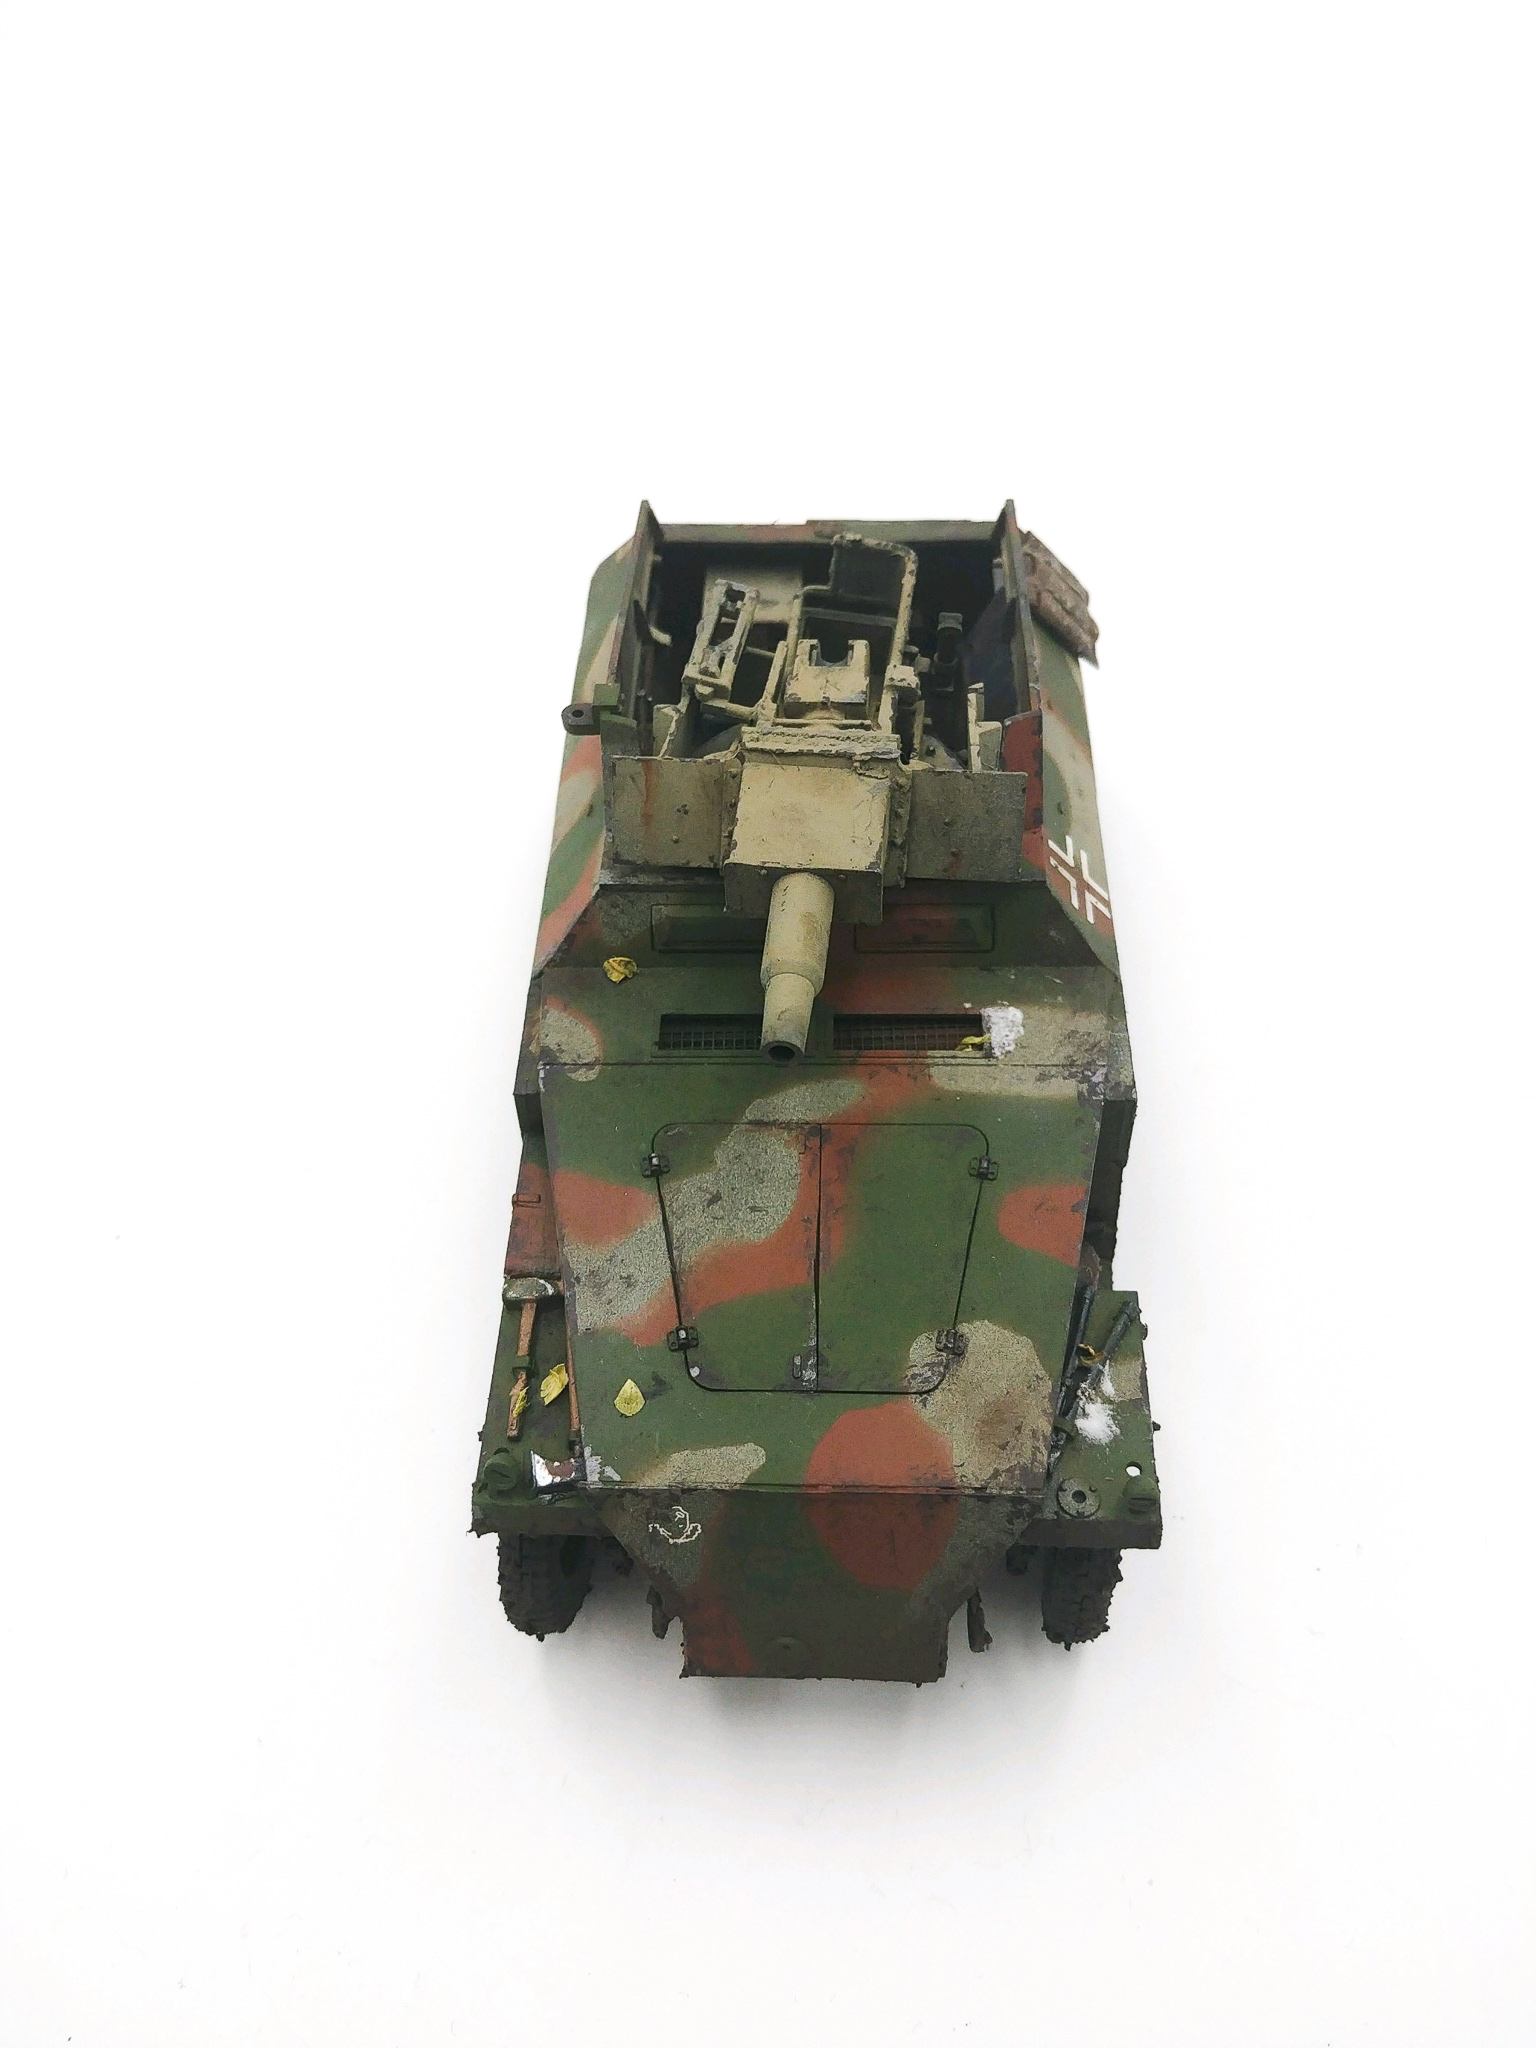
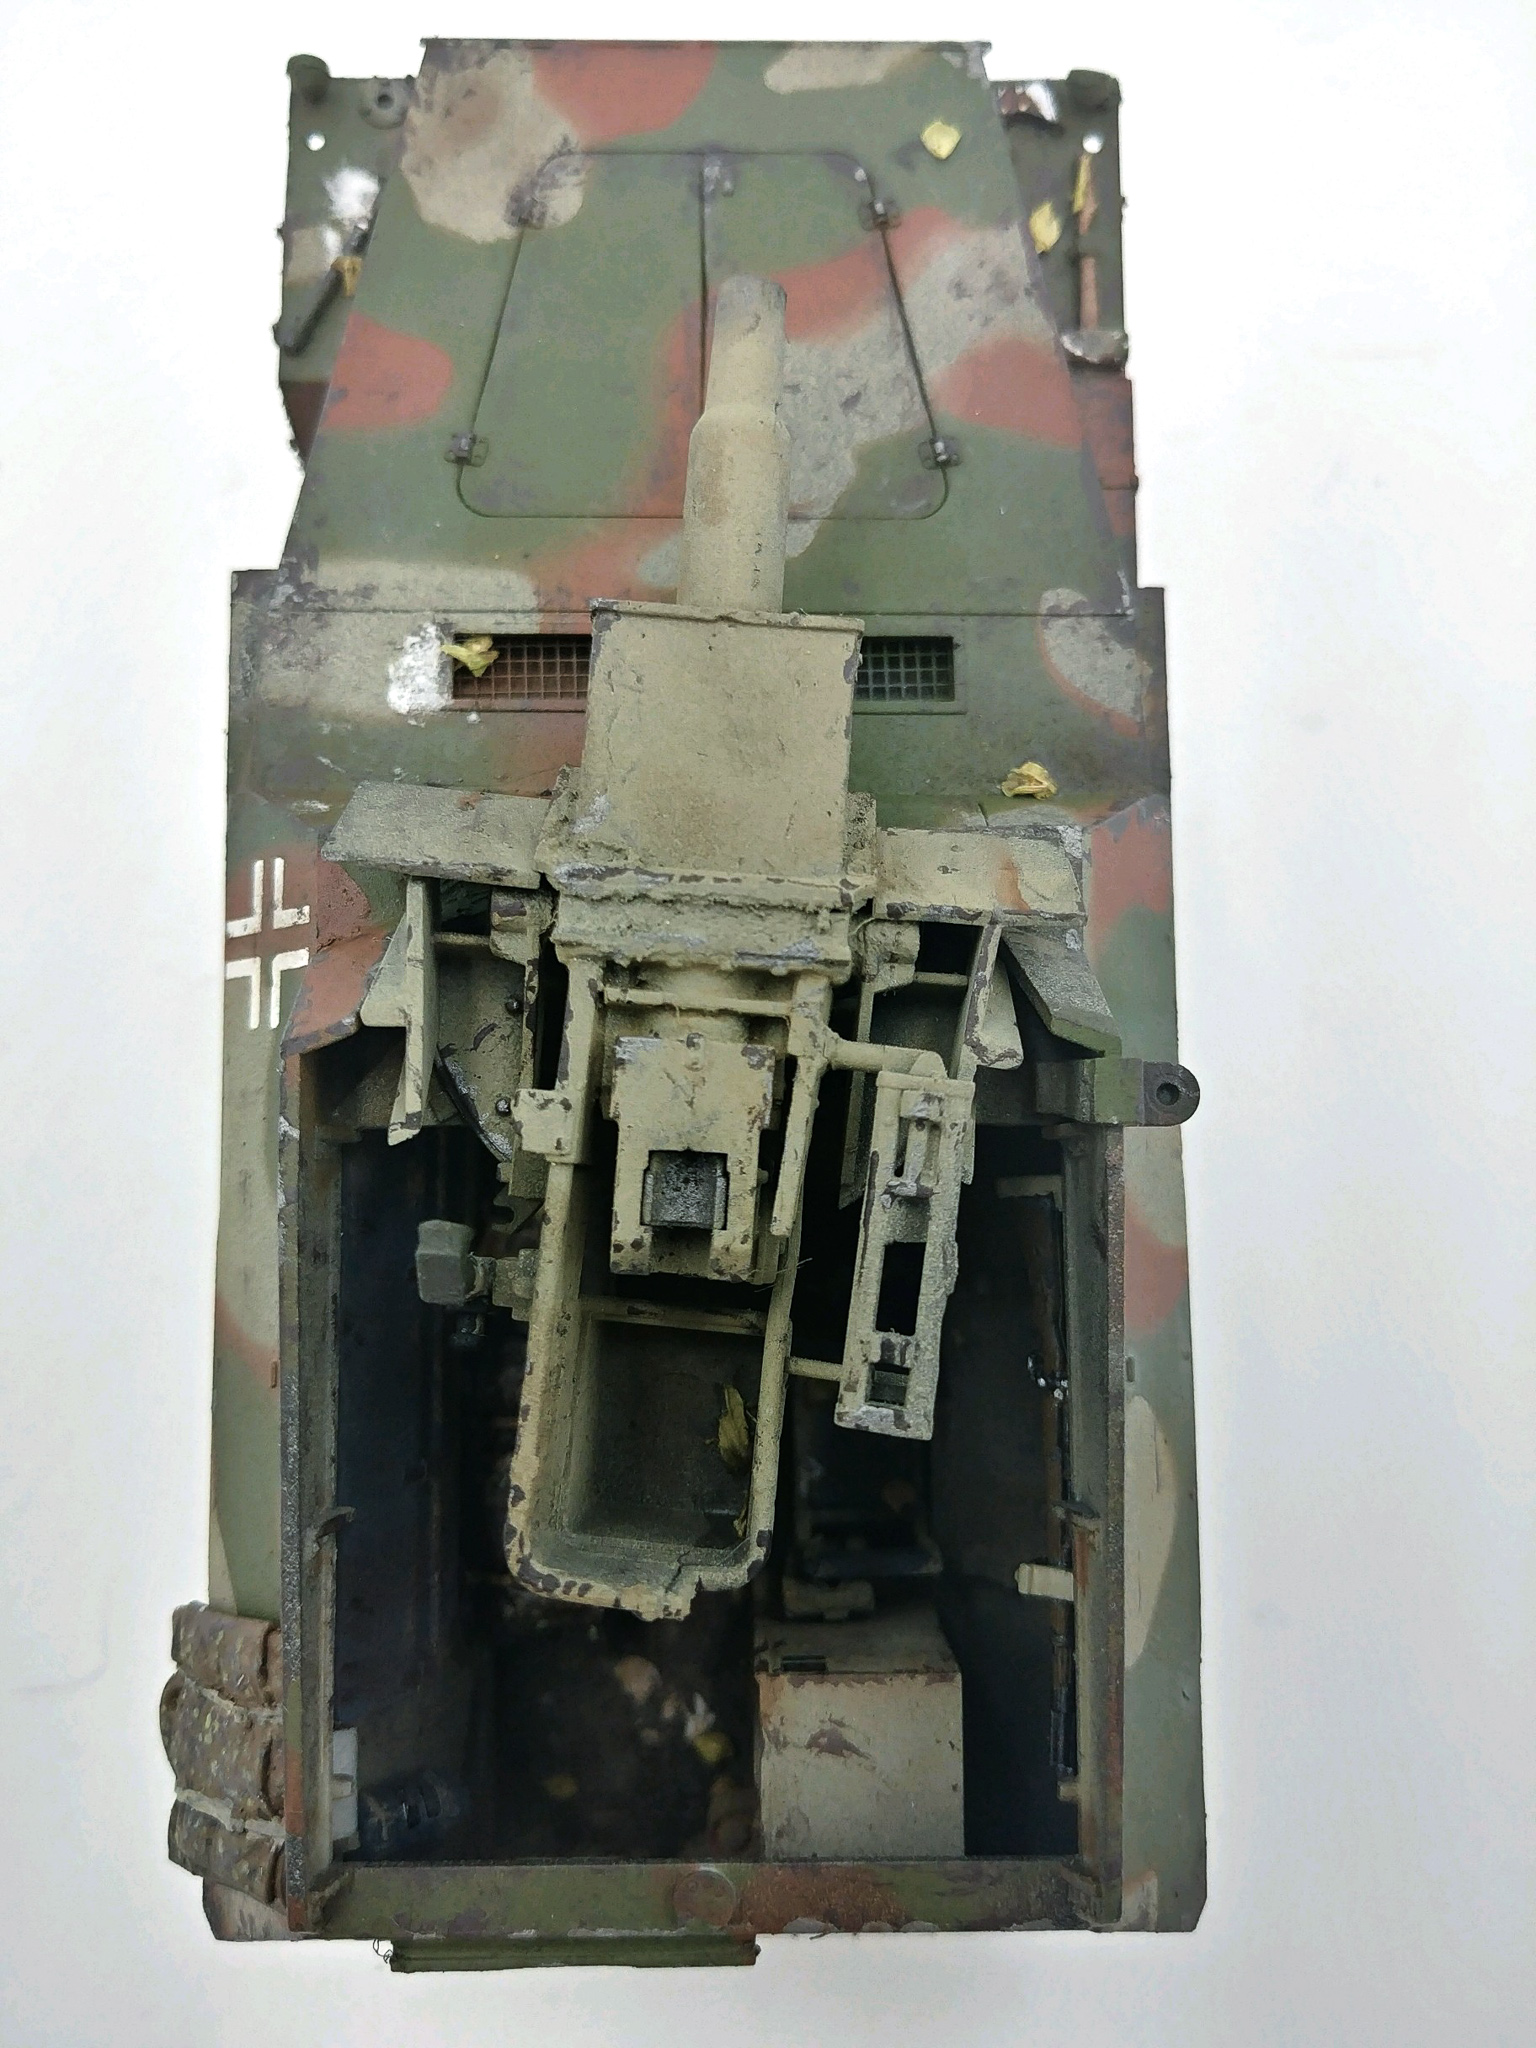
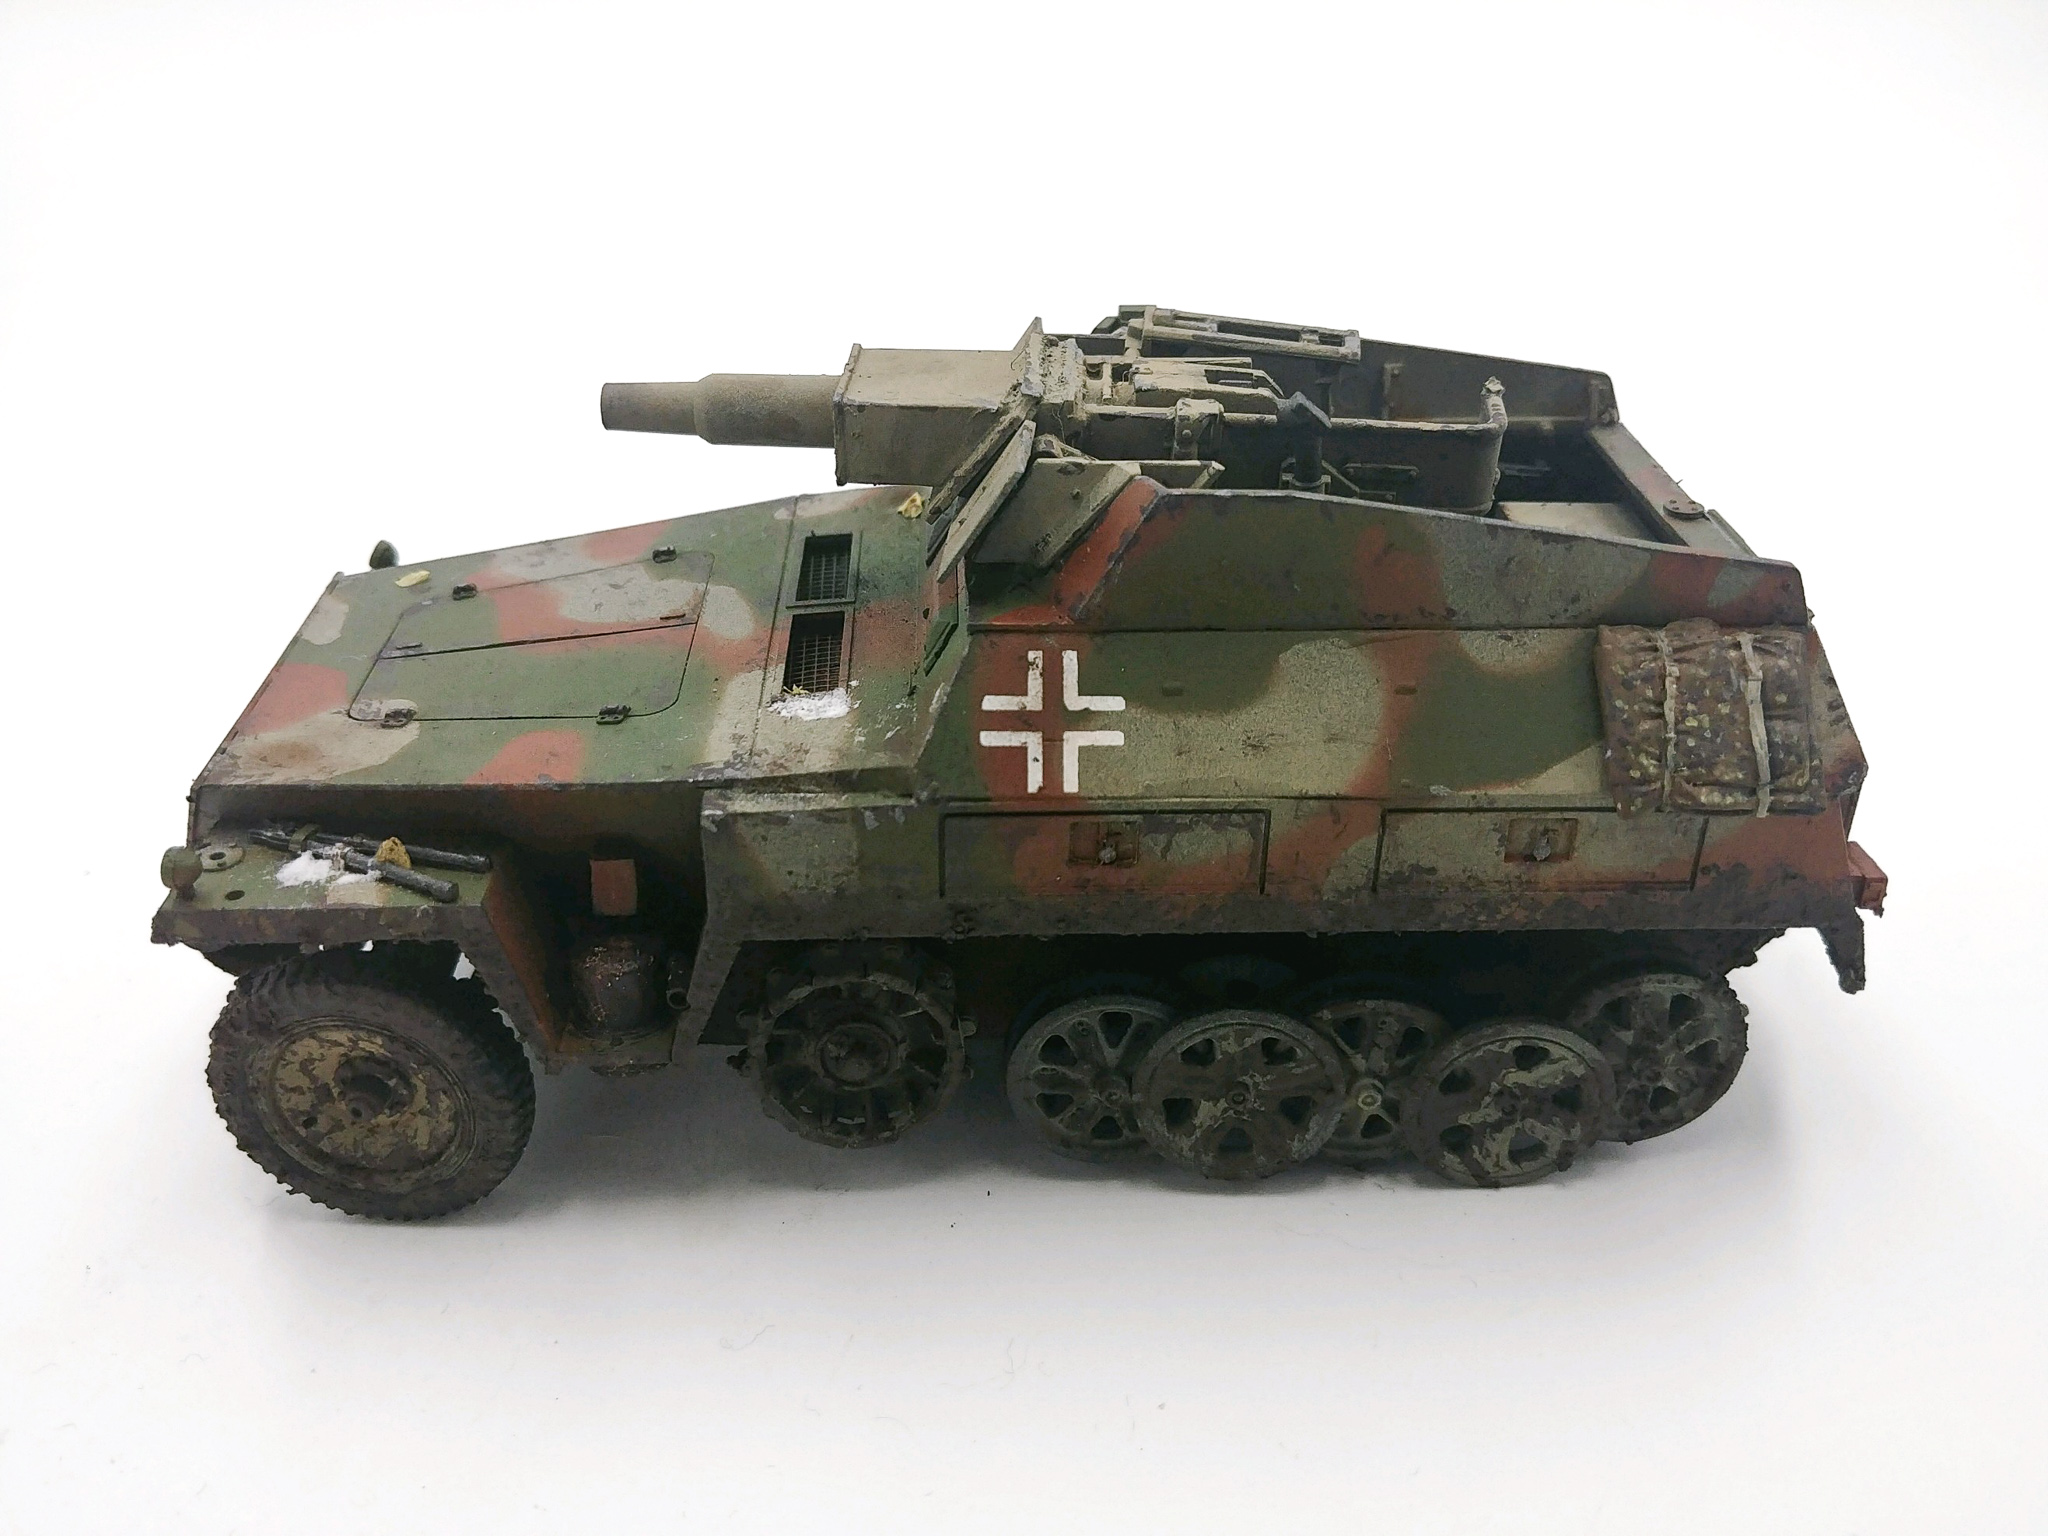
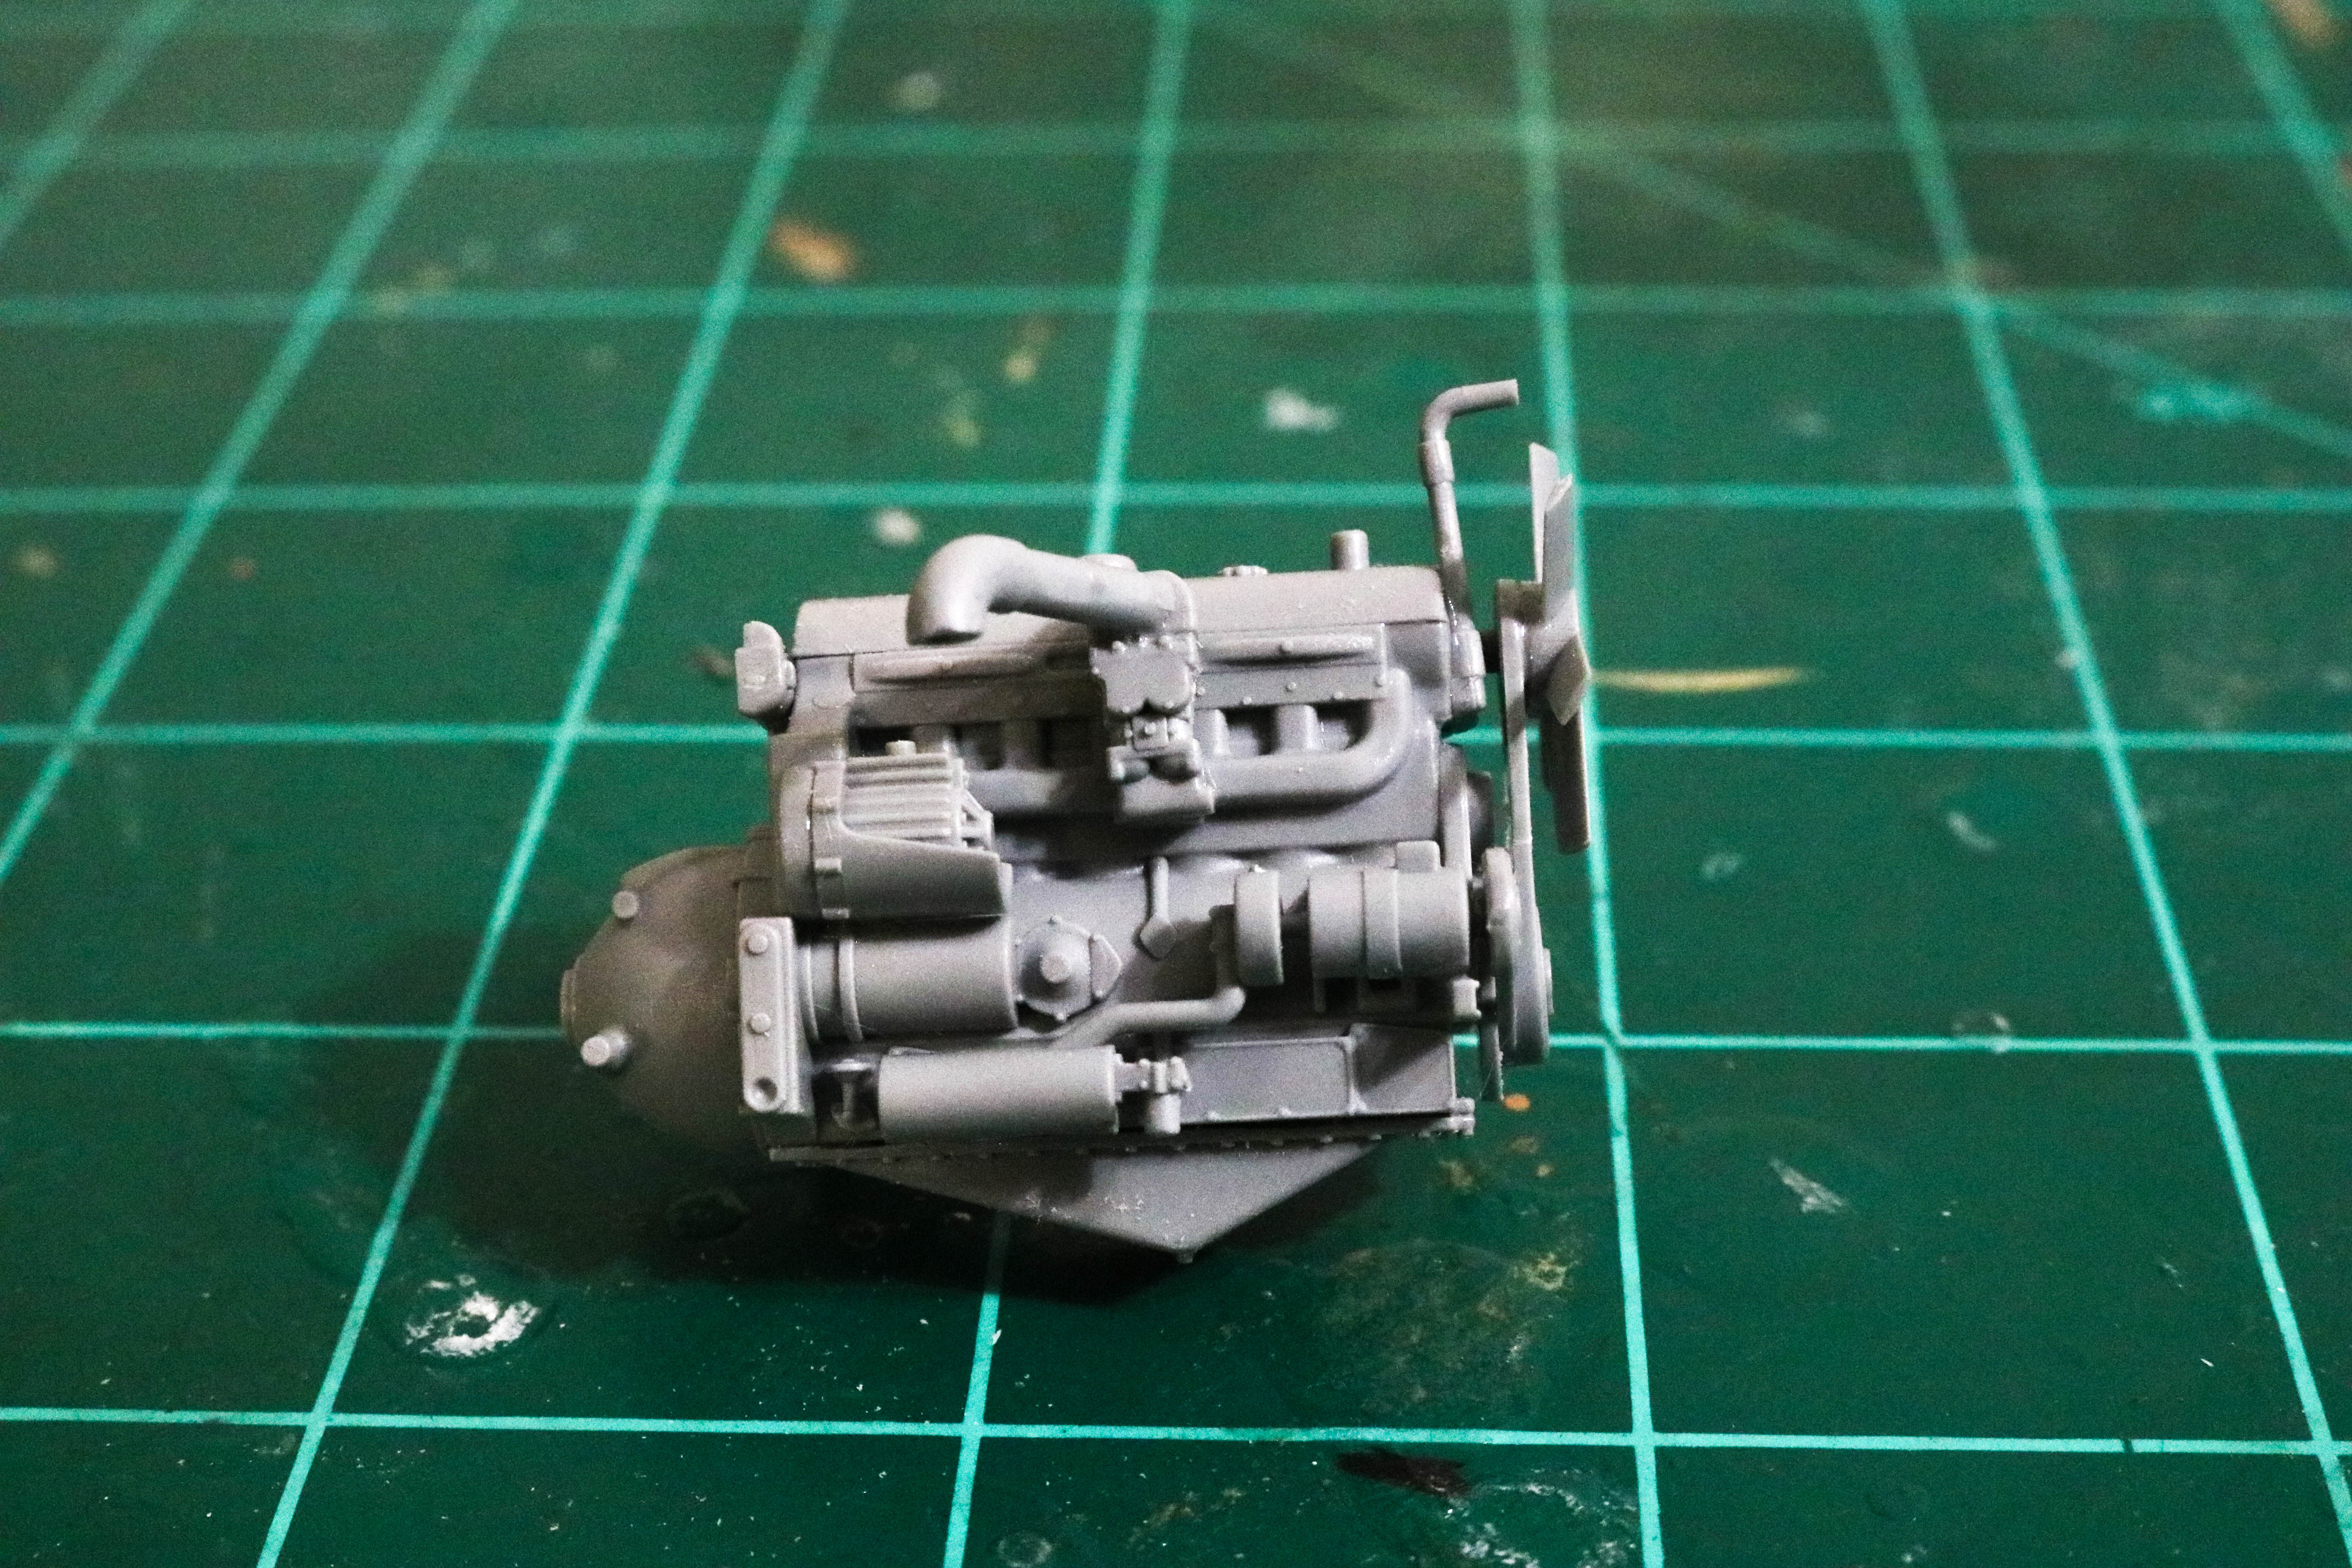
I was warned that the Dragon Sd.Kfz 7/2 was a hell of a project, and so far it lives up to that expectation. It's been a fun challenge and the detail is incredible. I certainly hope I'm not the only one who feels nervous when cleaning those small fragile bits.


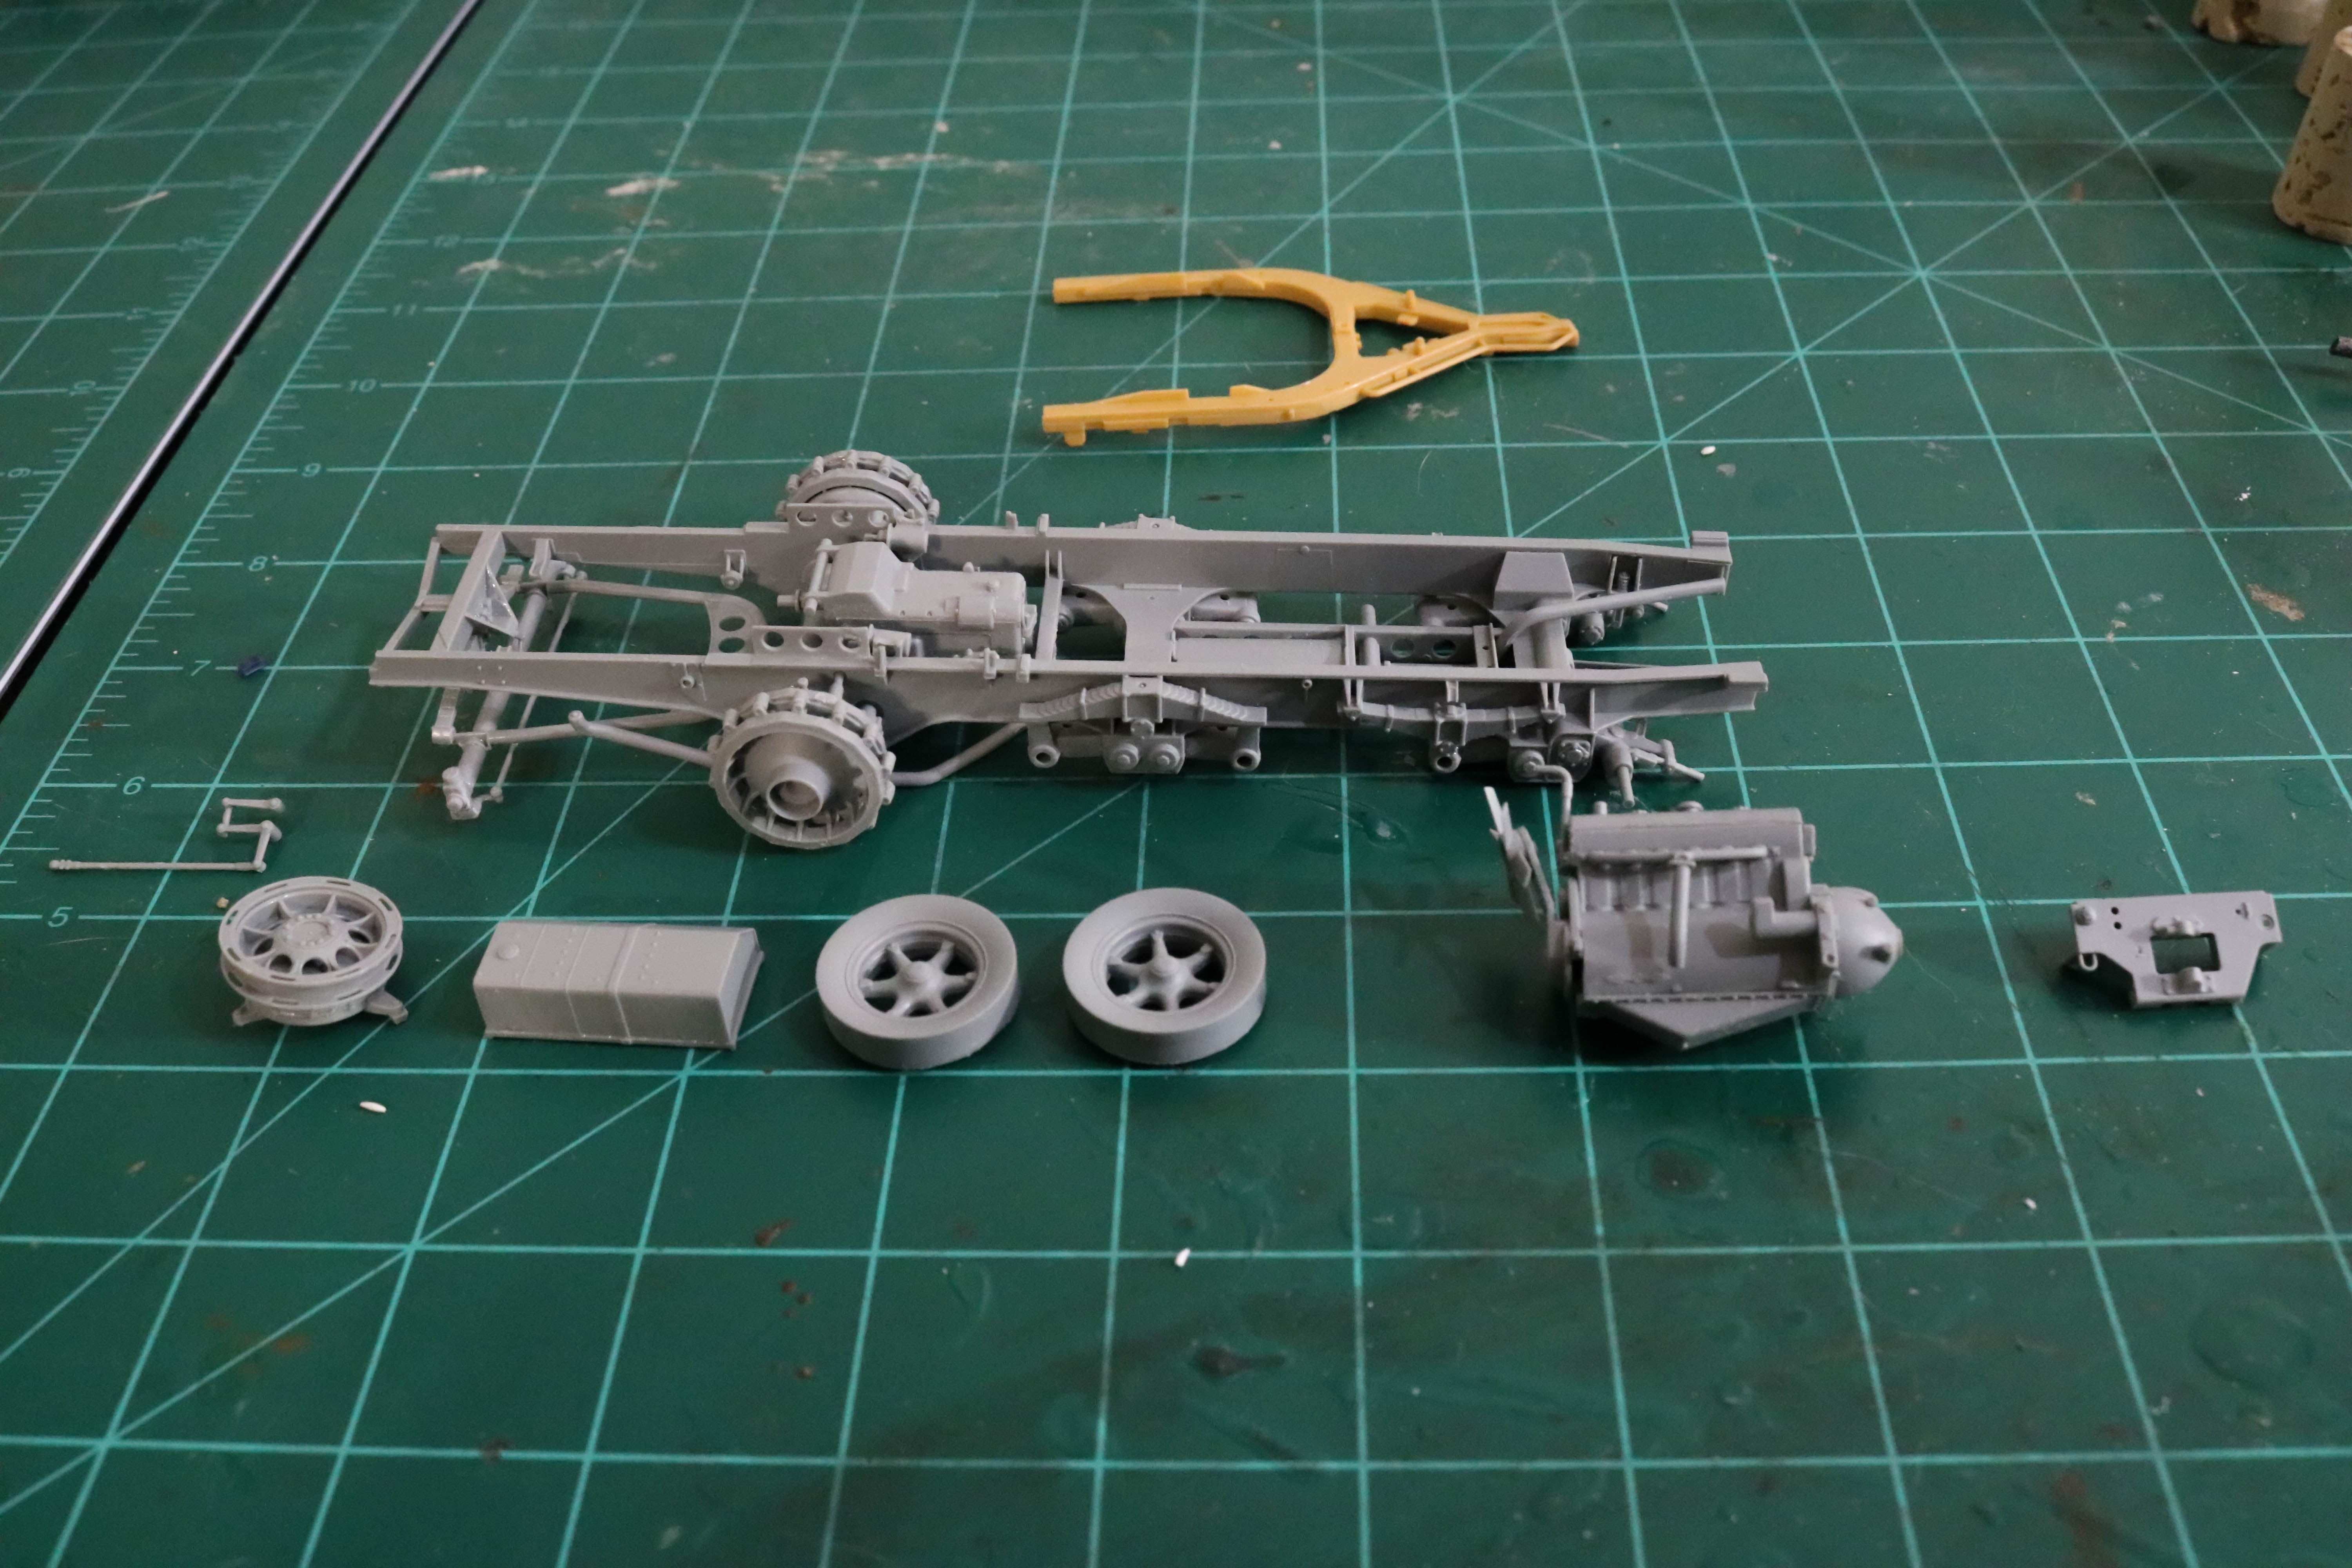
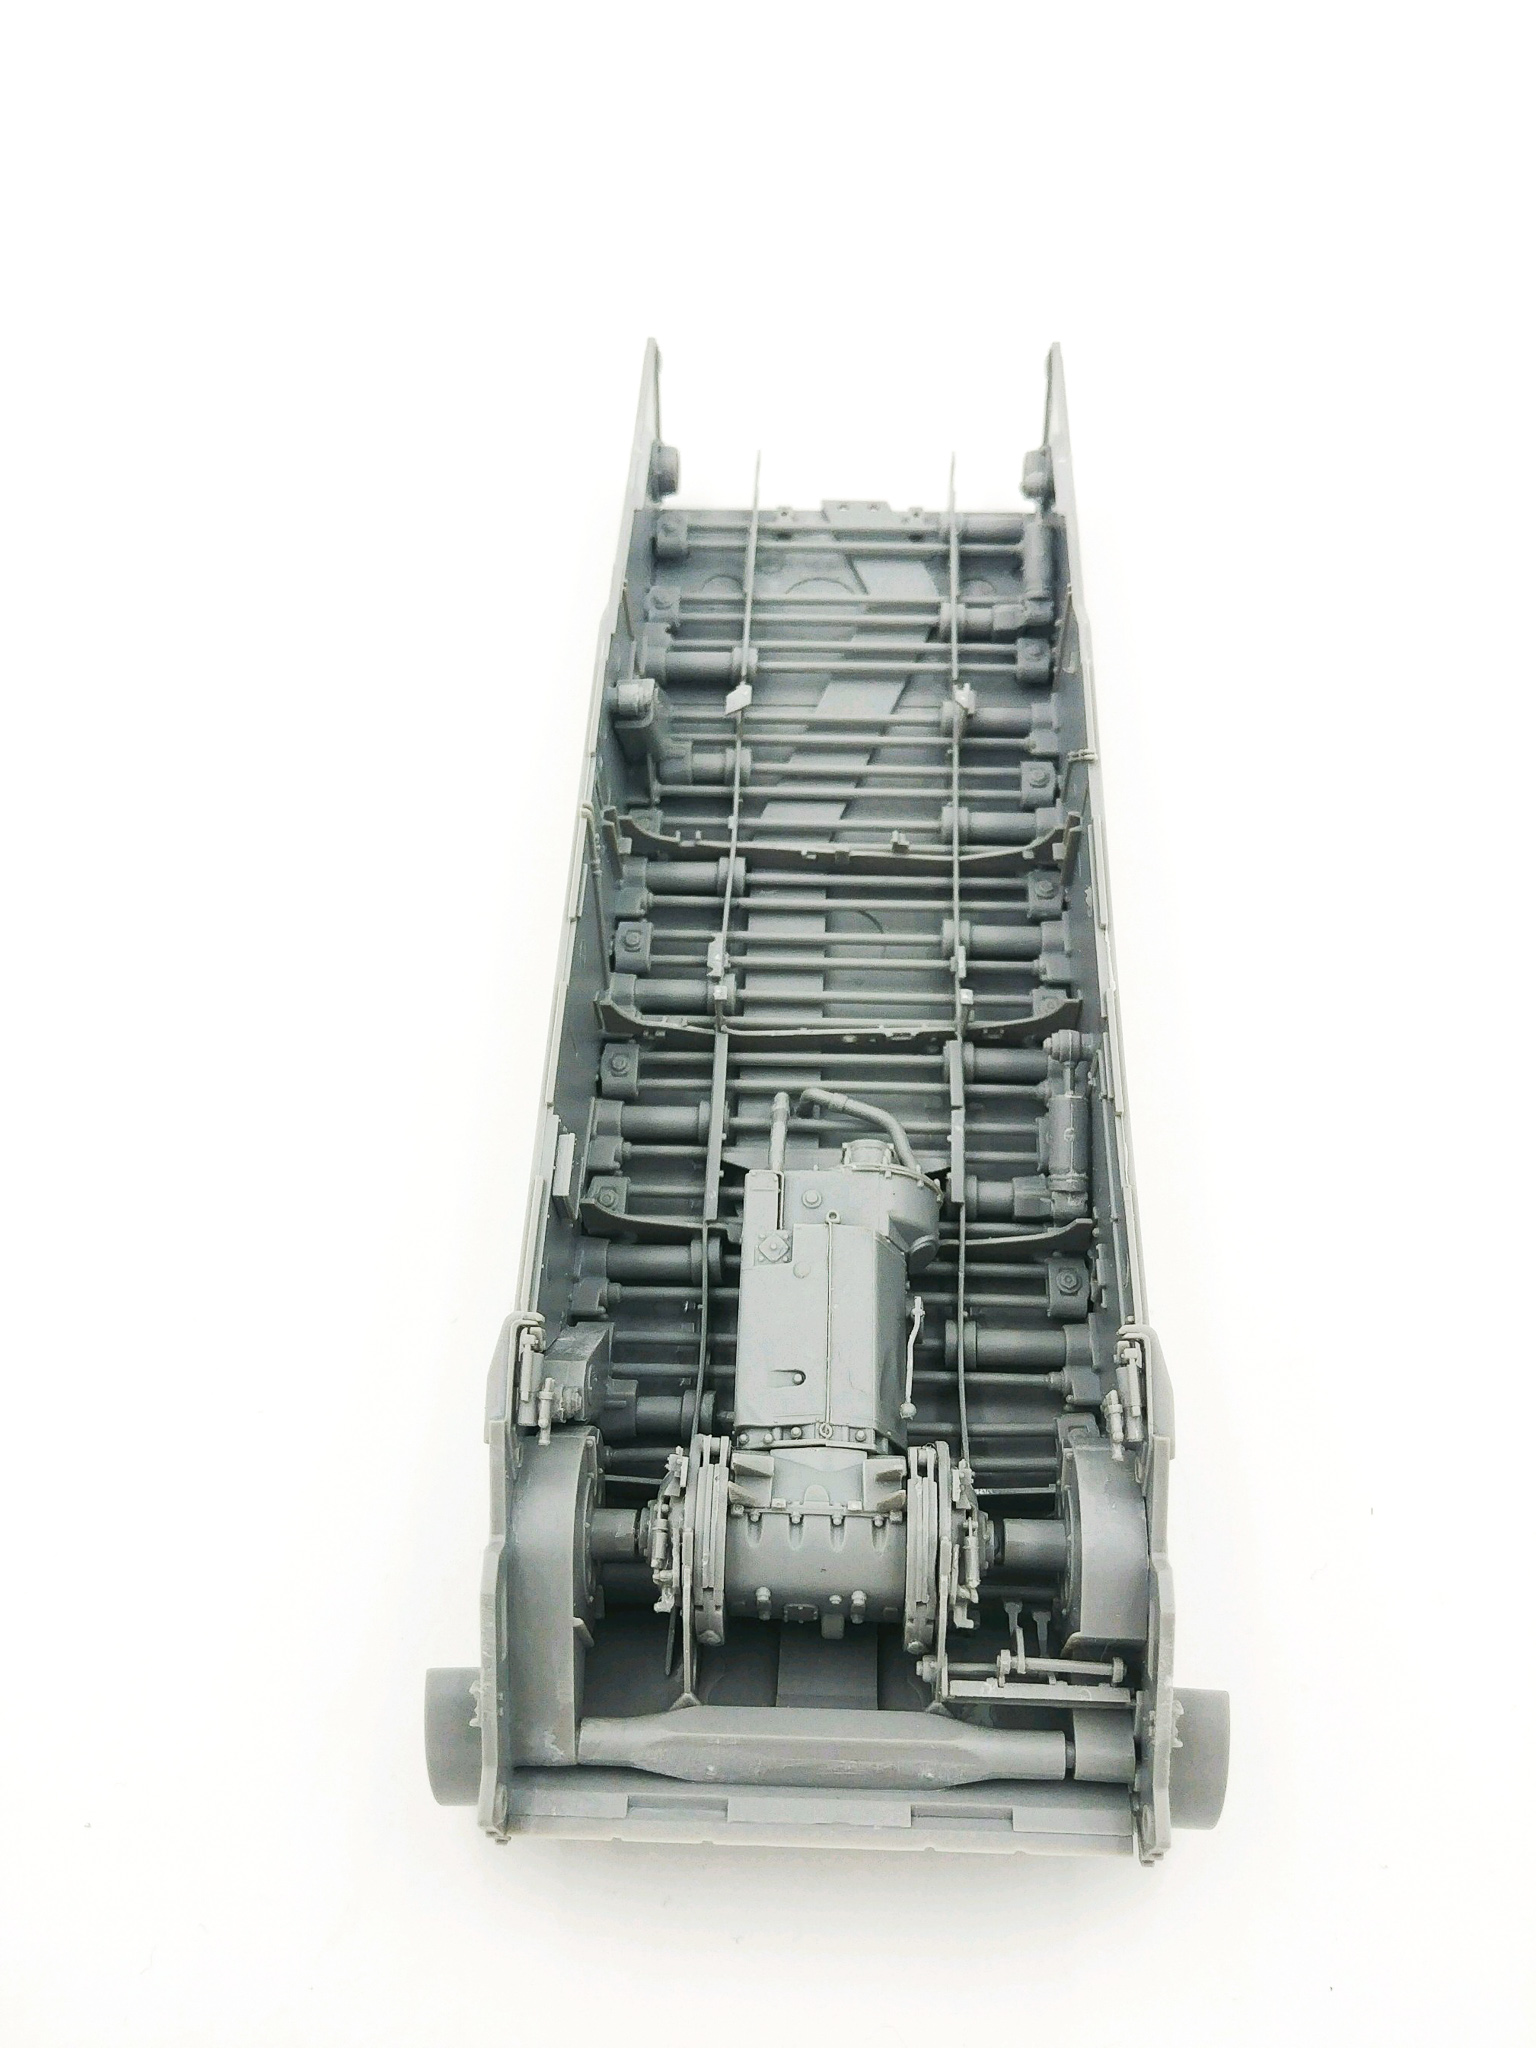
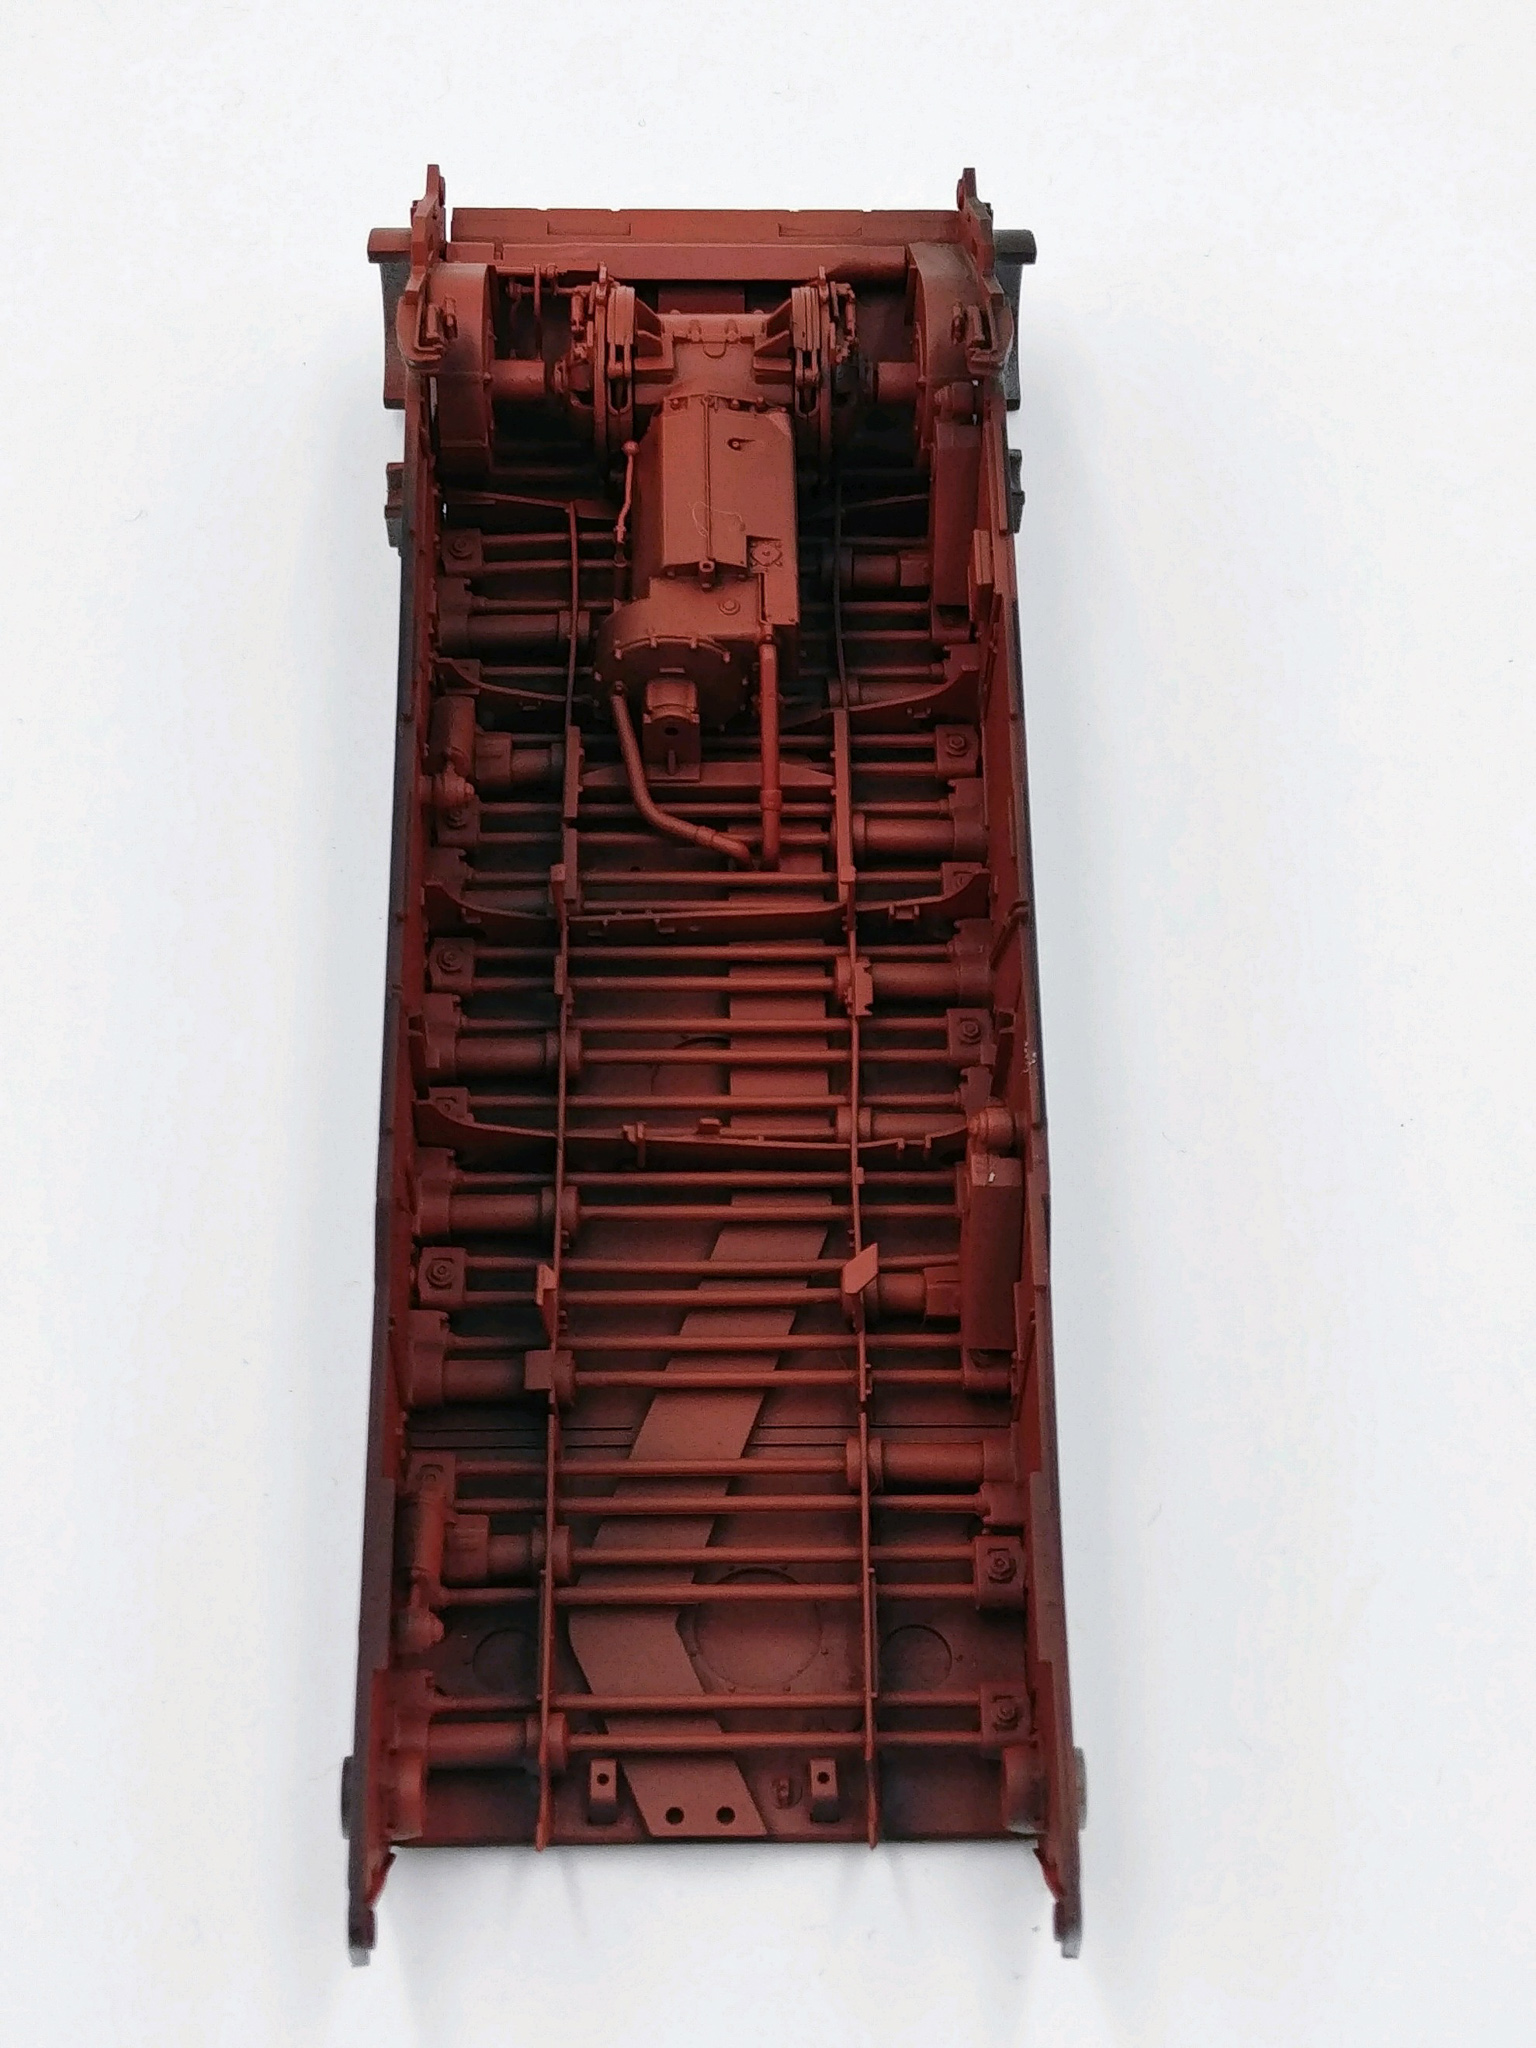
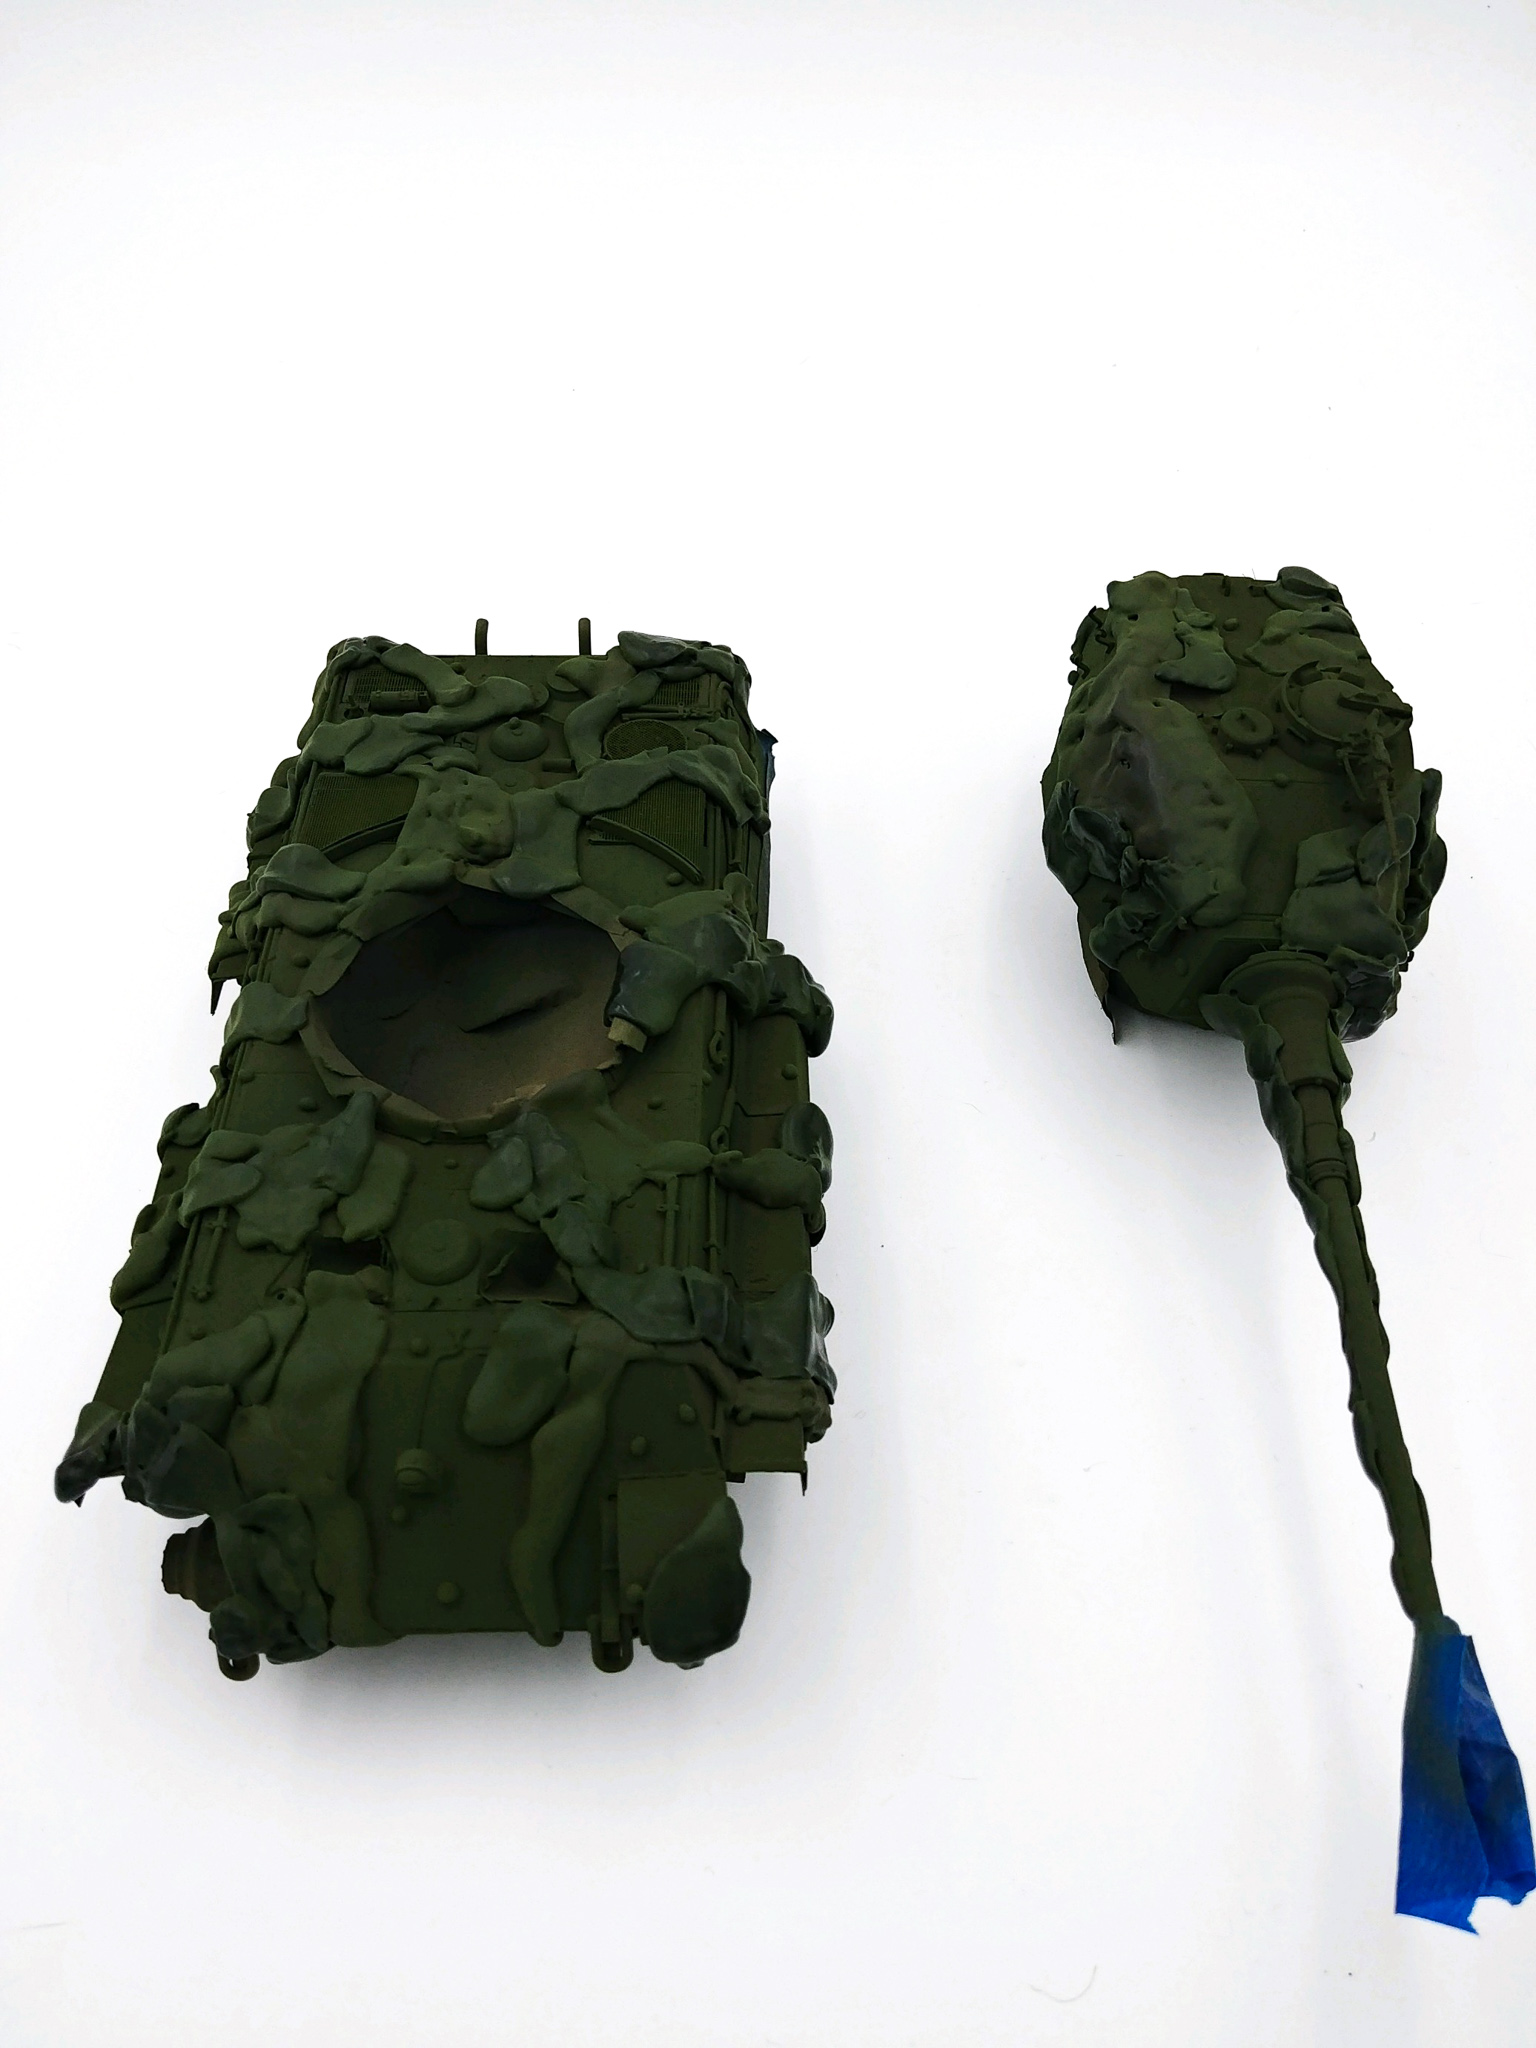
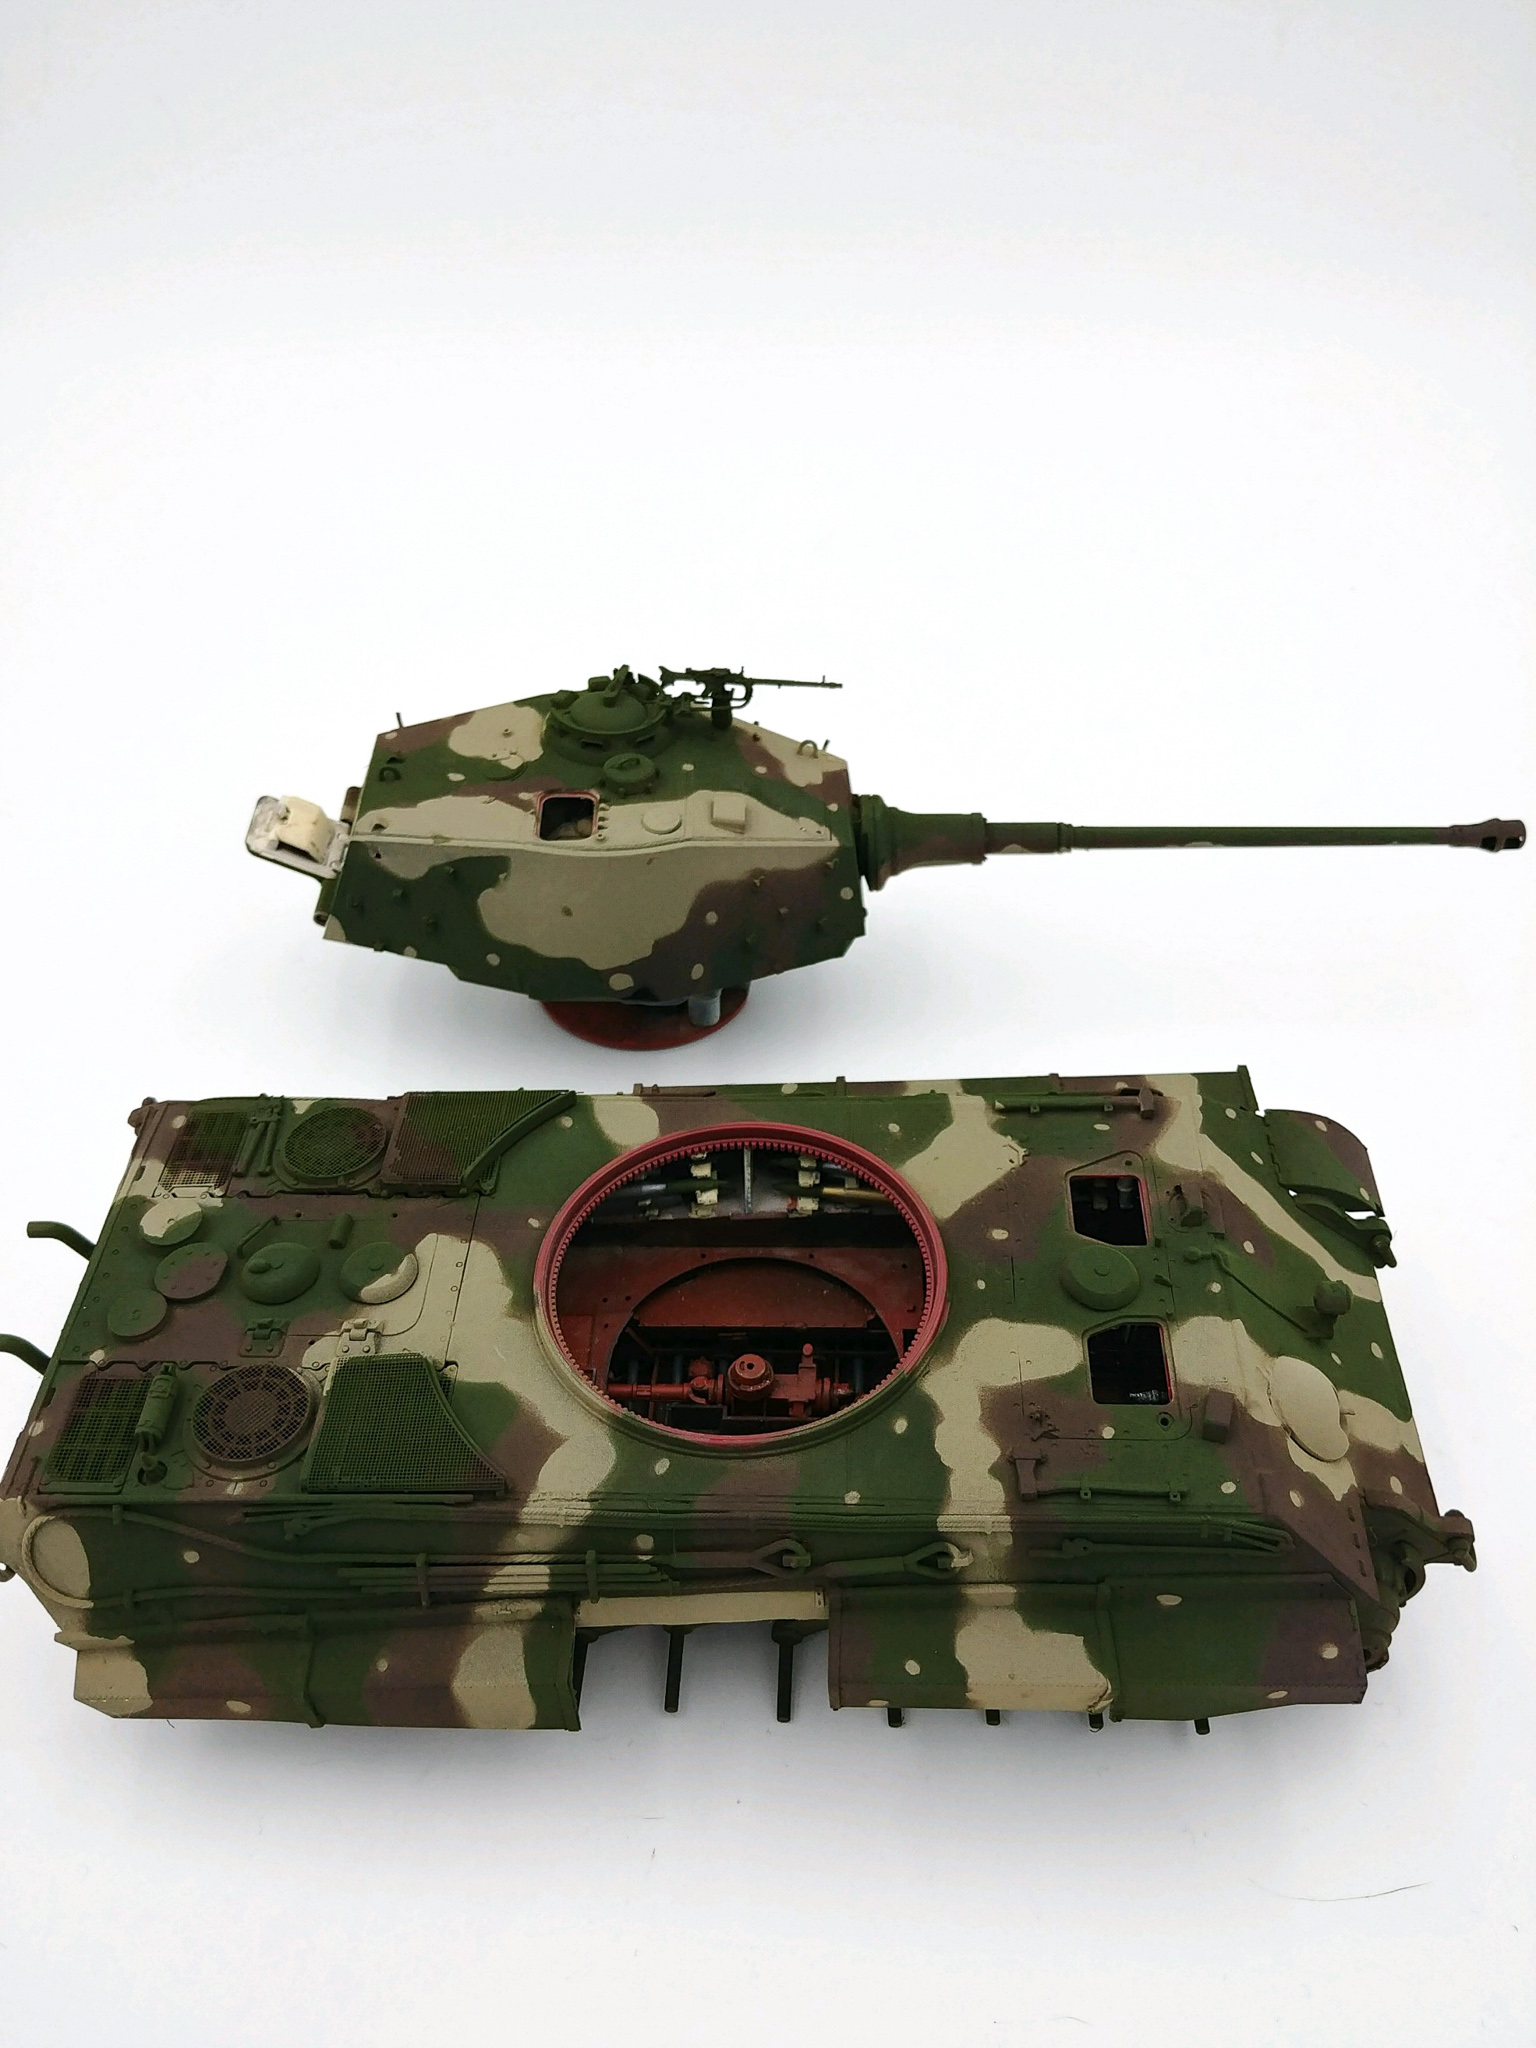
I'm working with ideas on how to not waste this engine. It's too interesting to just cover up in the final product.


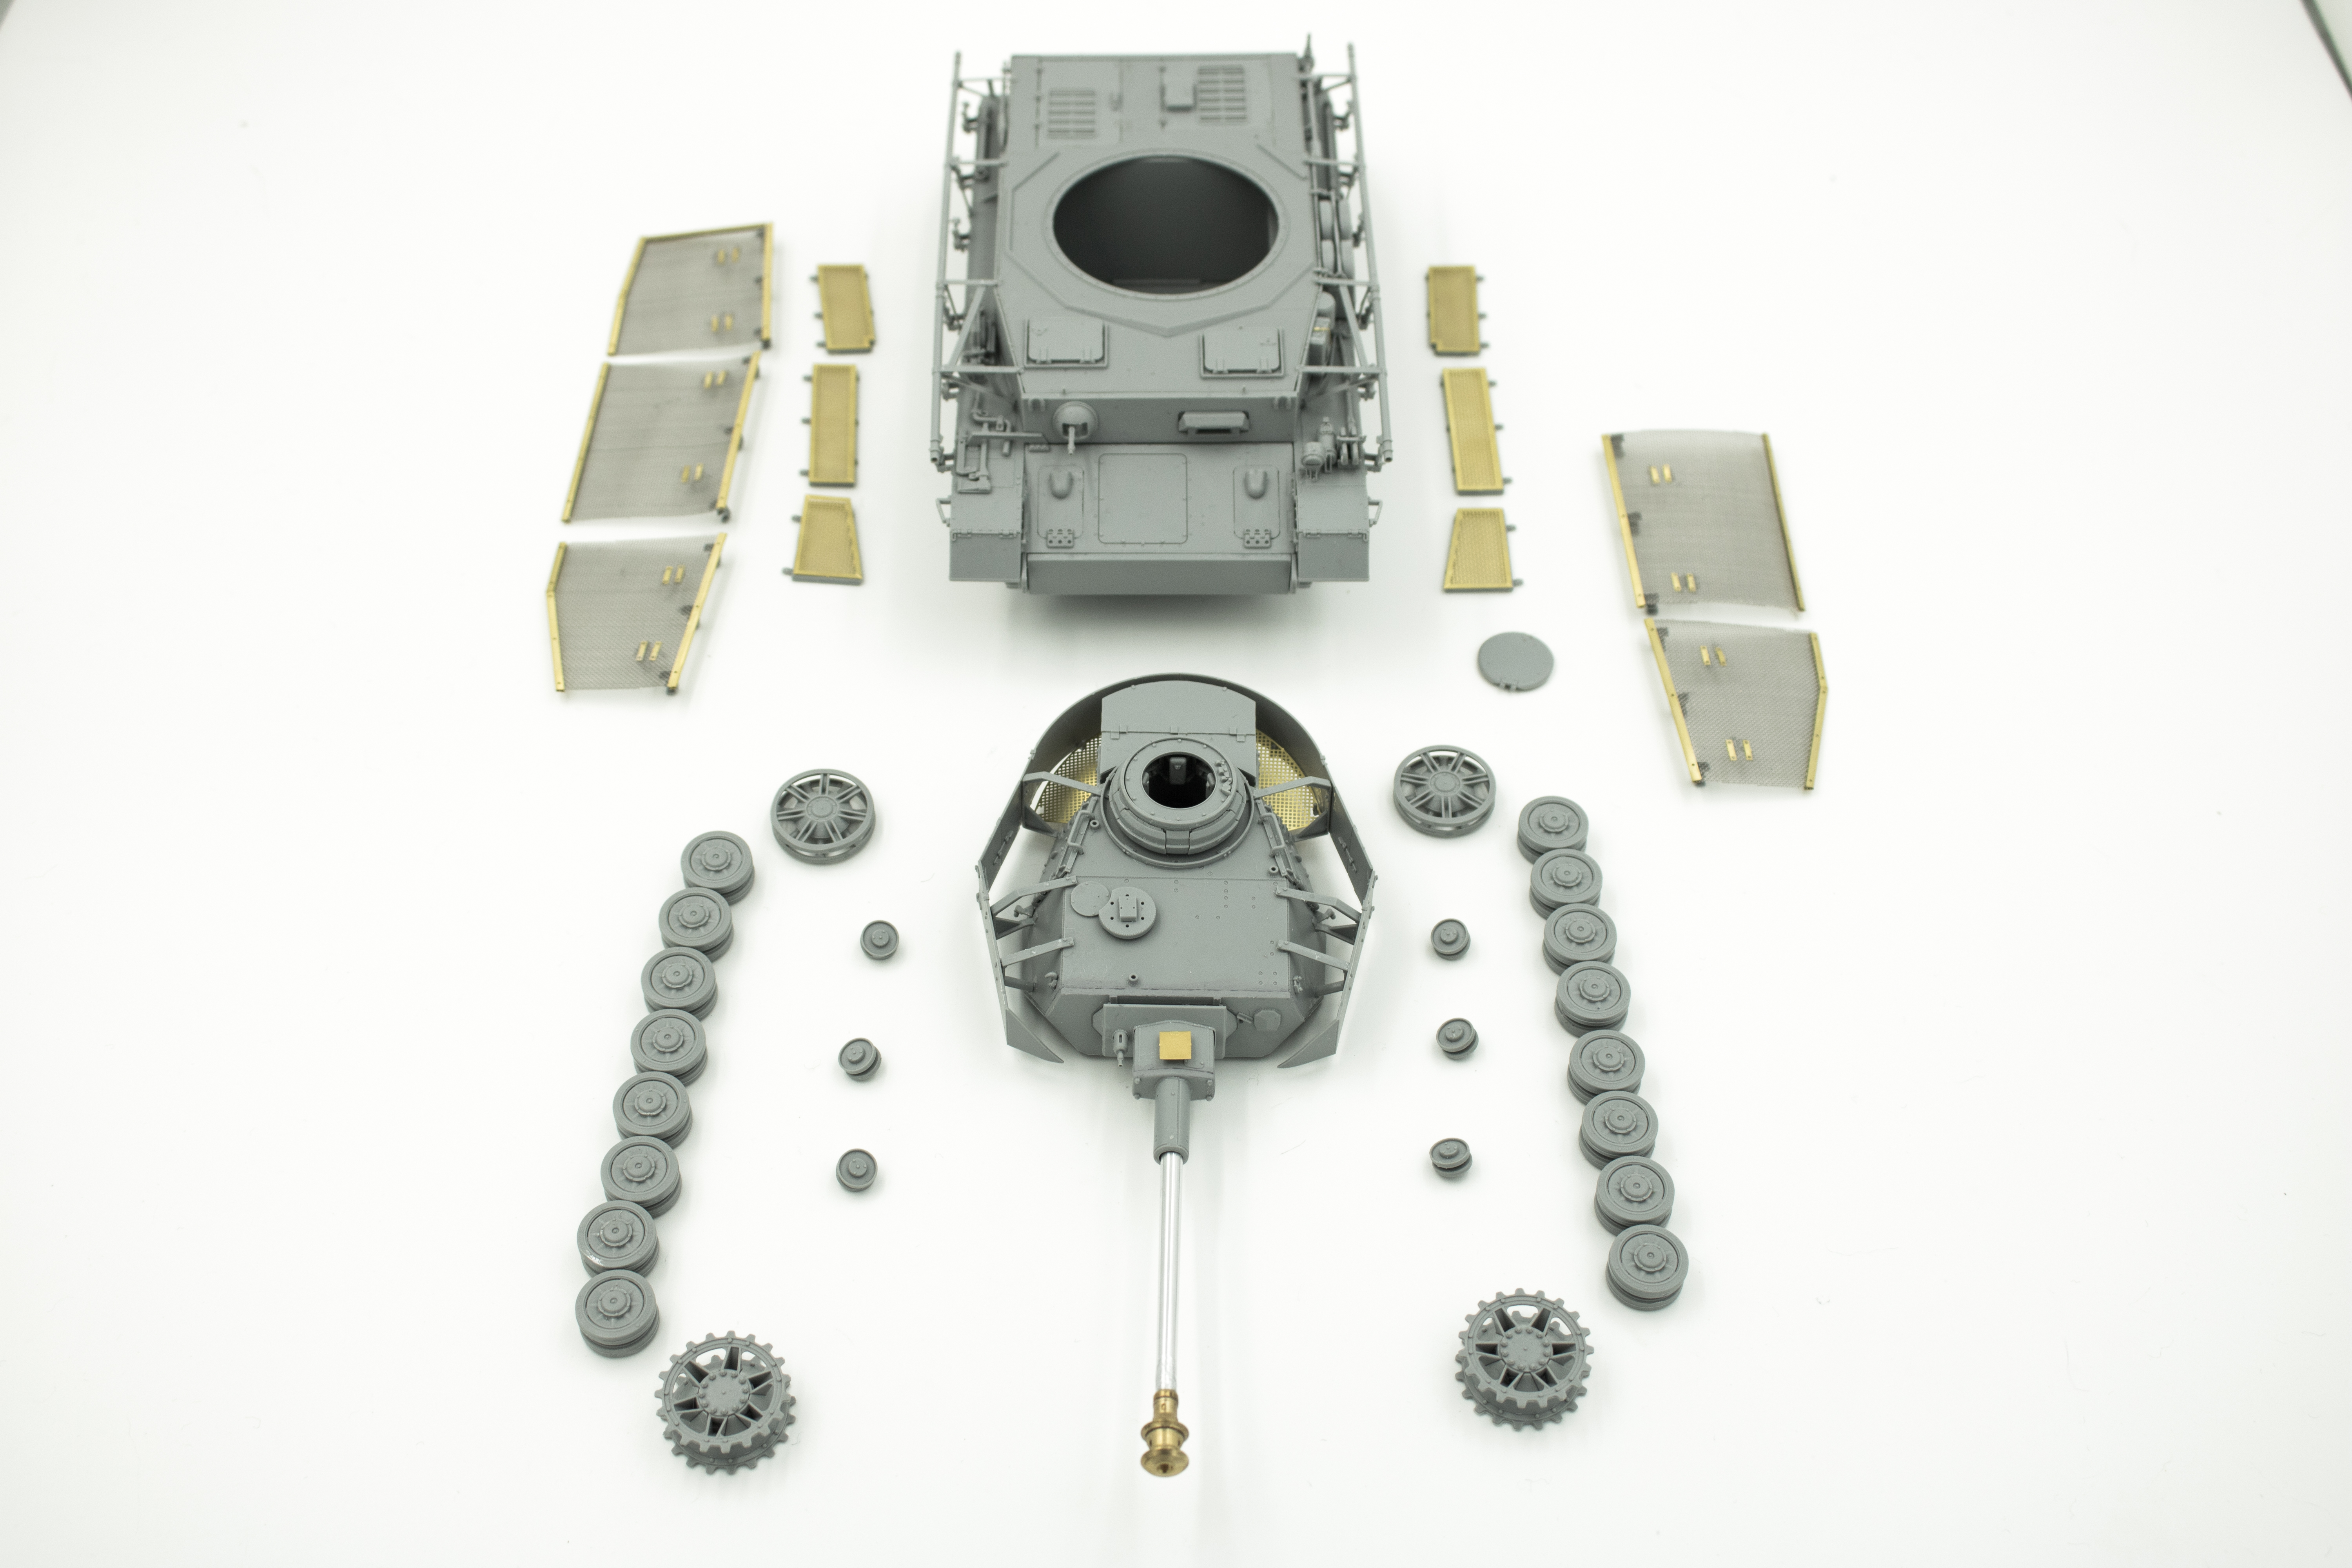
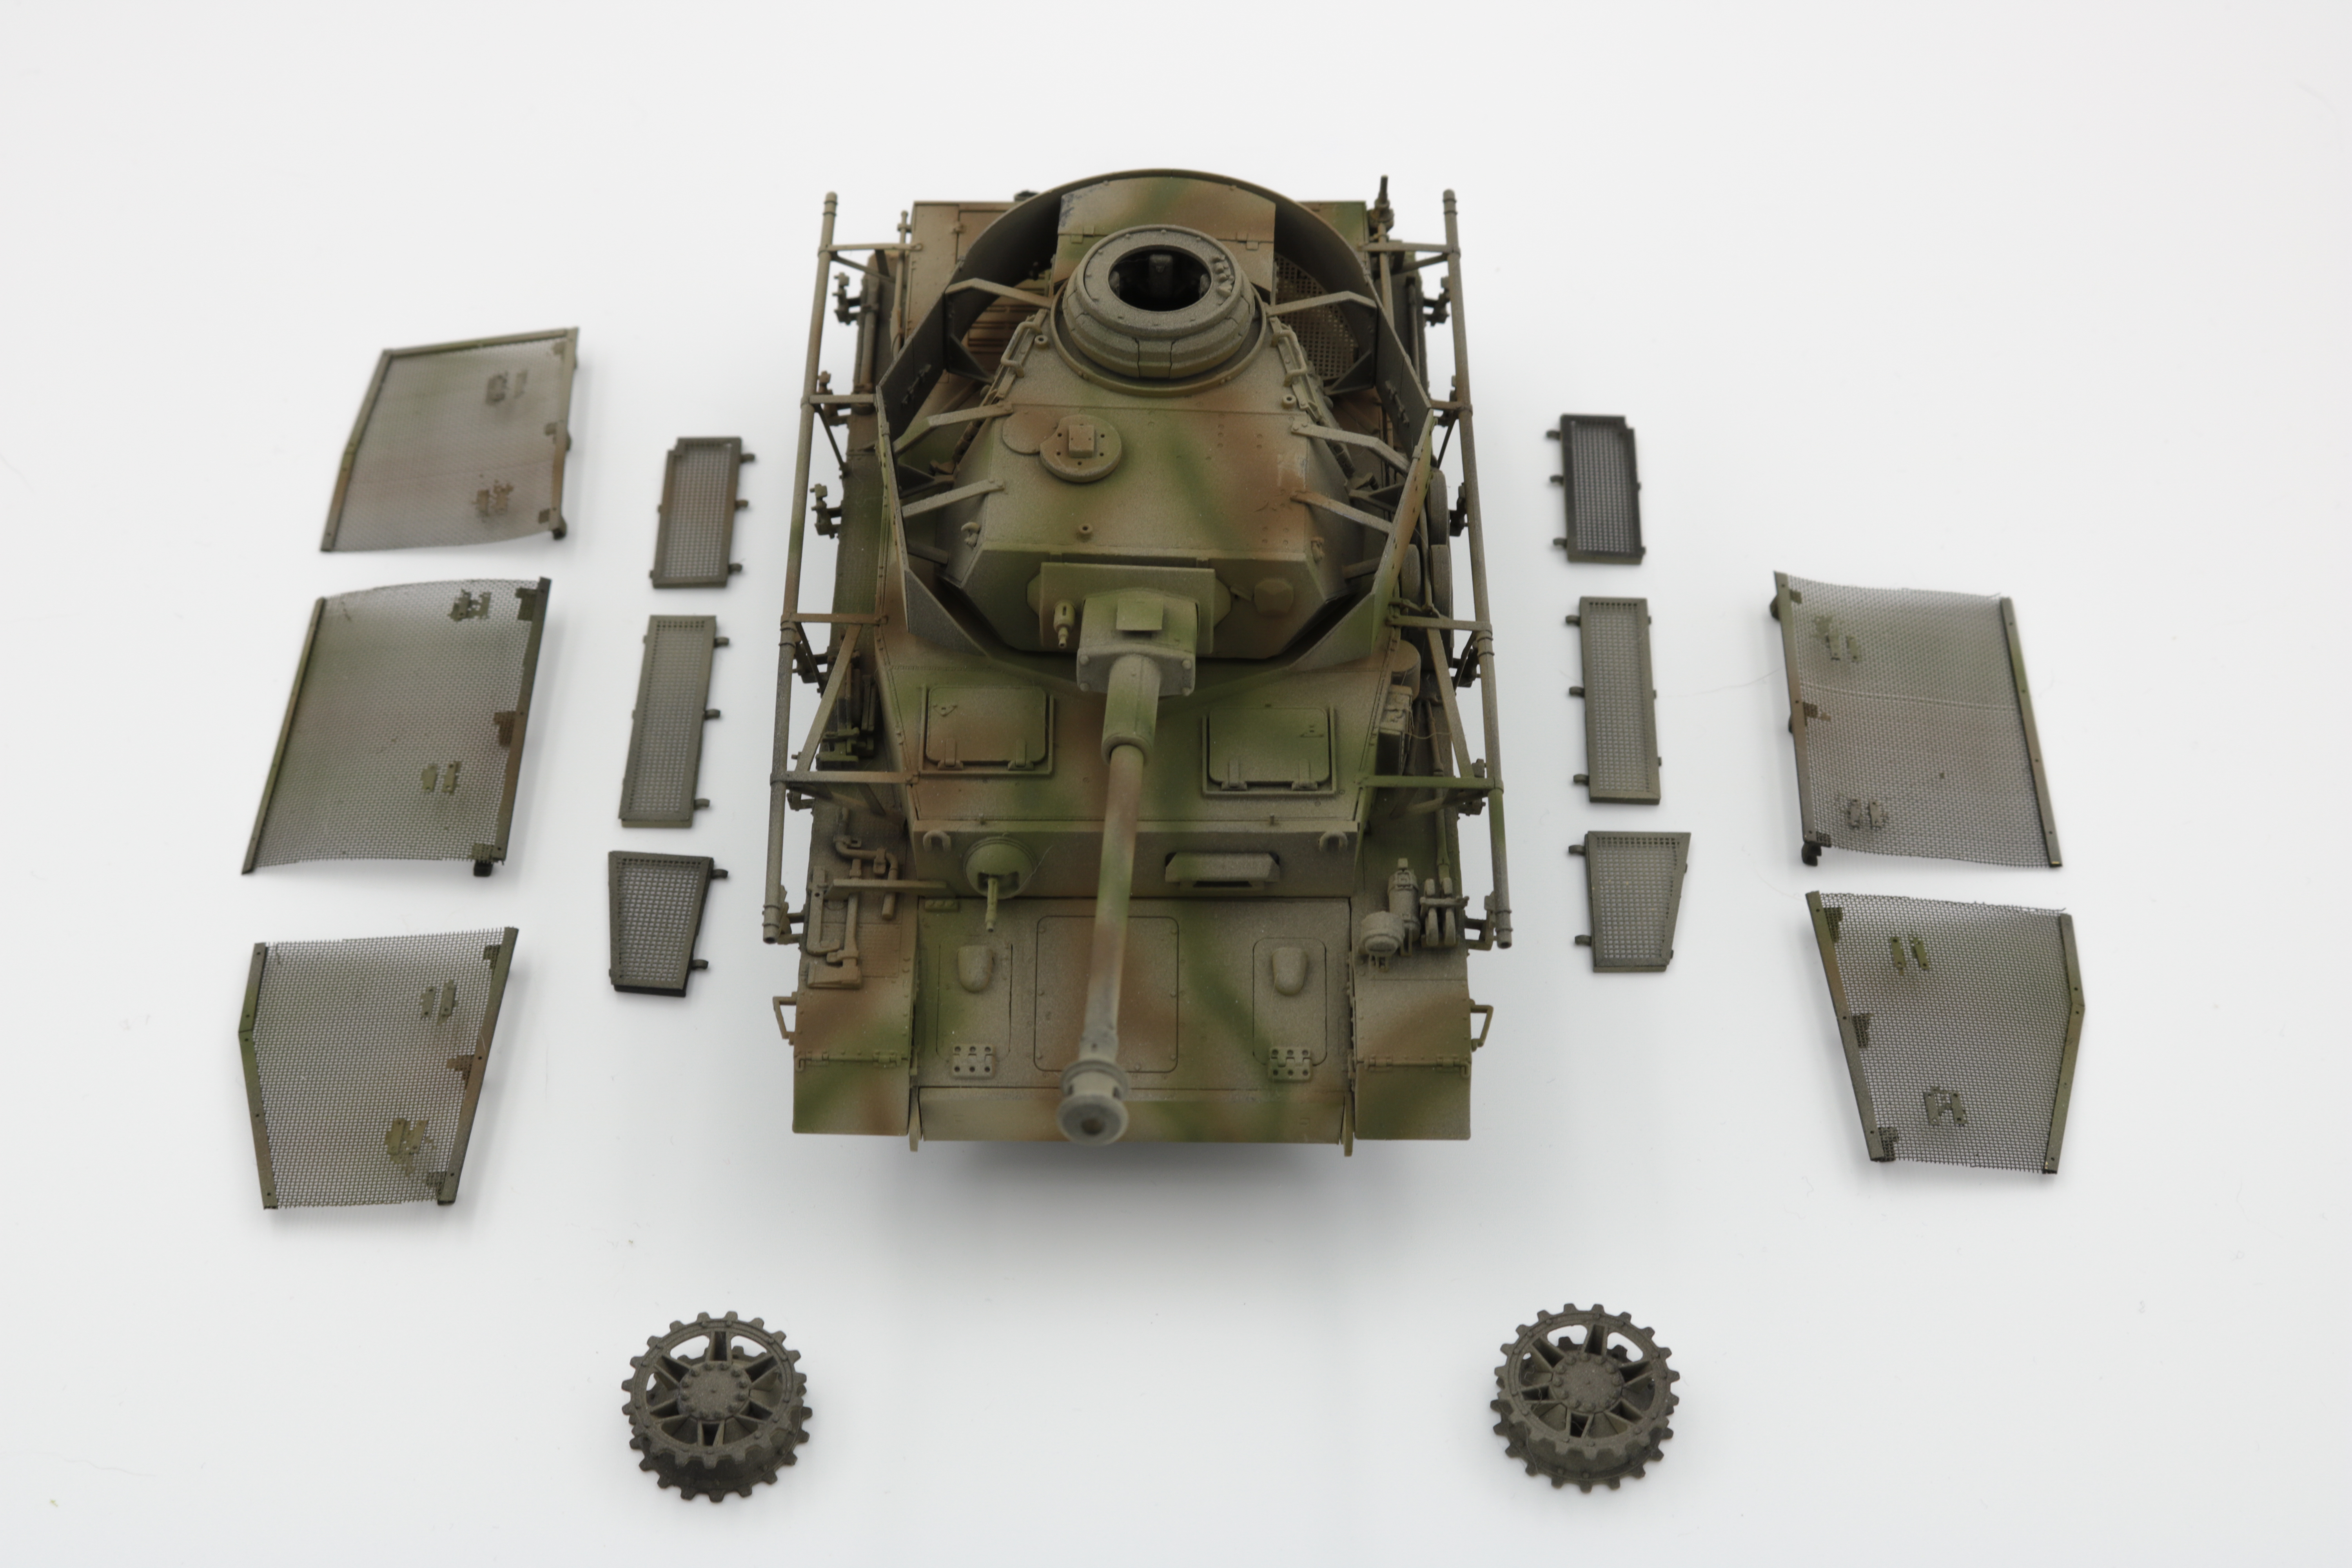
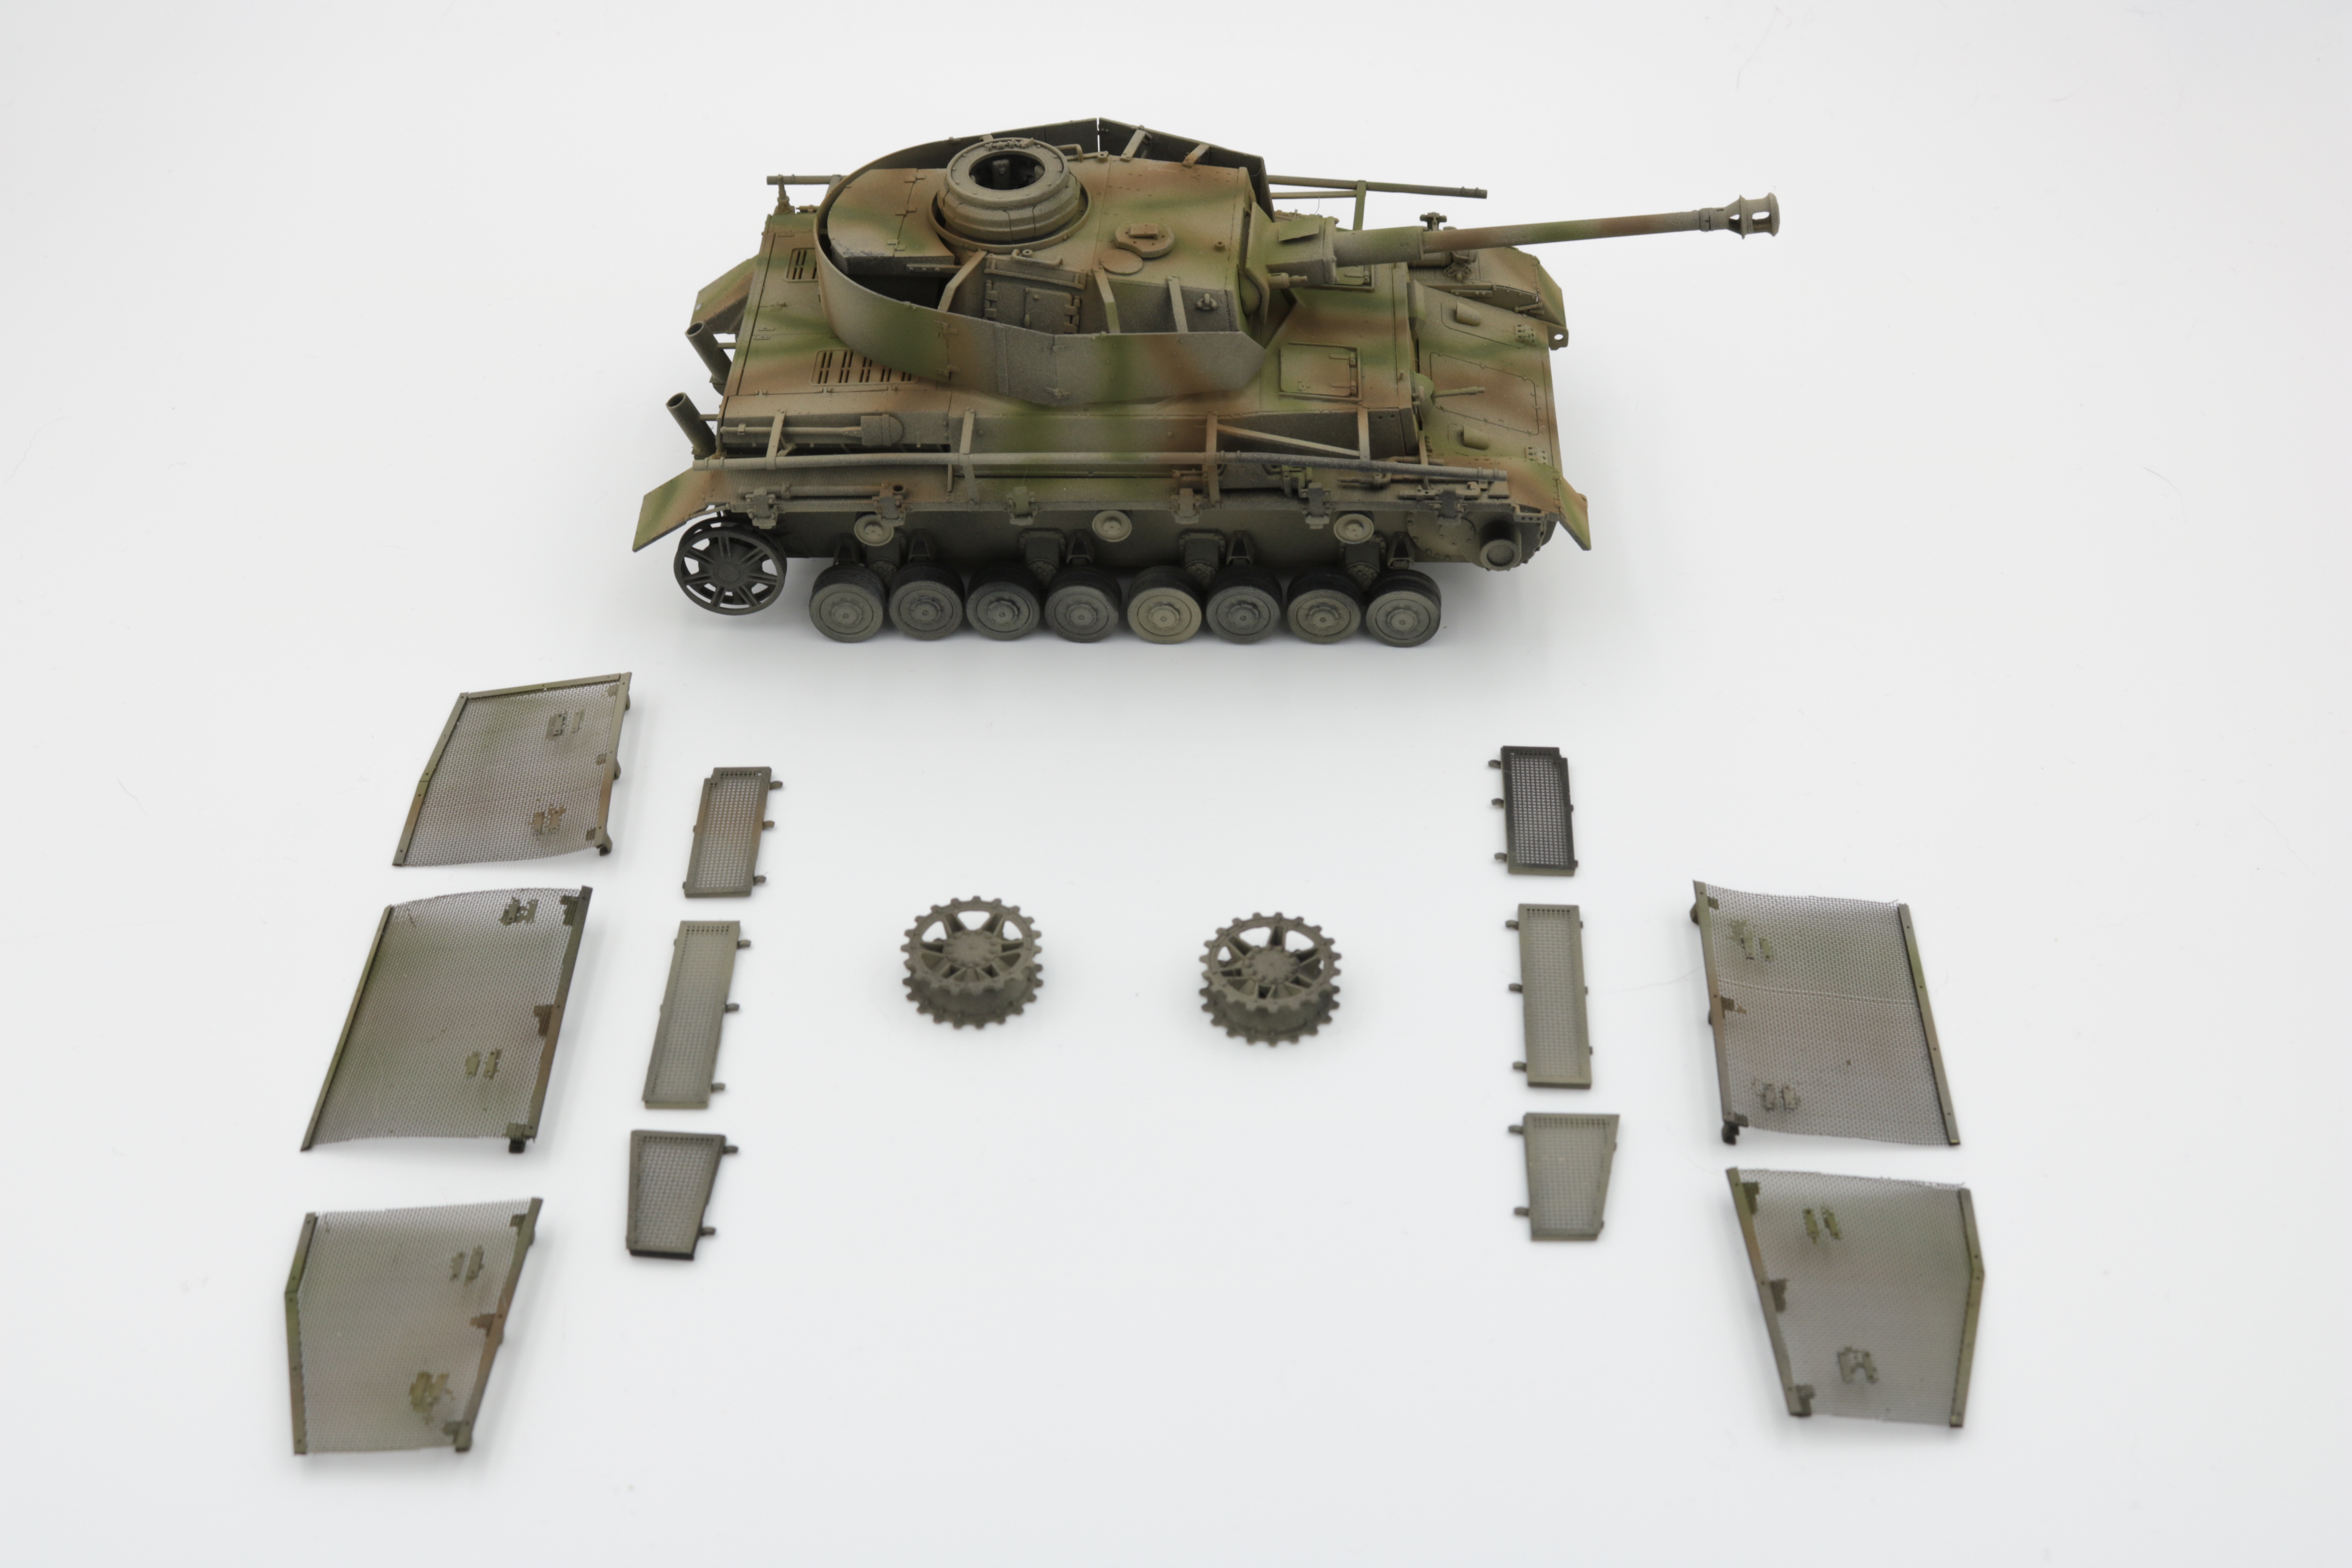
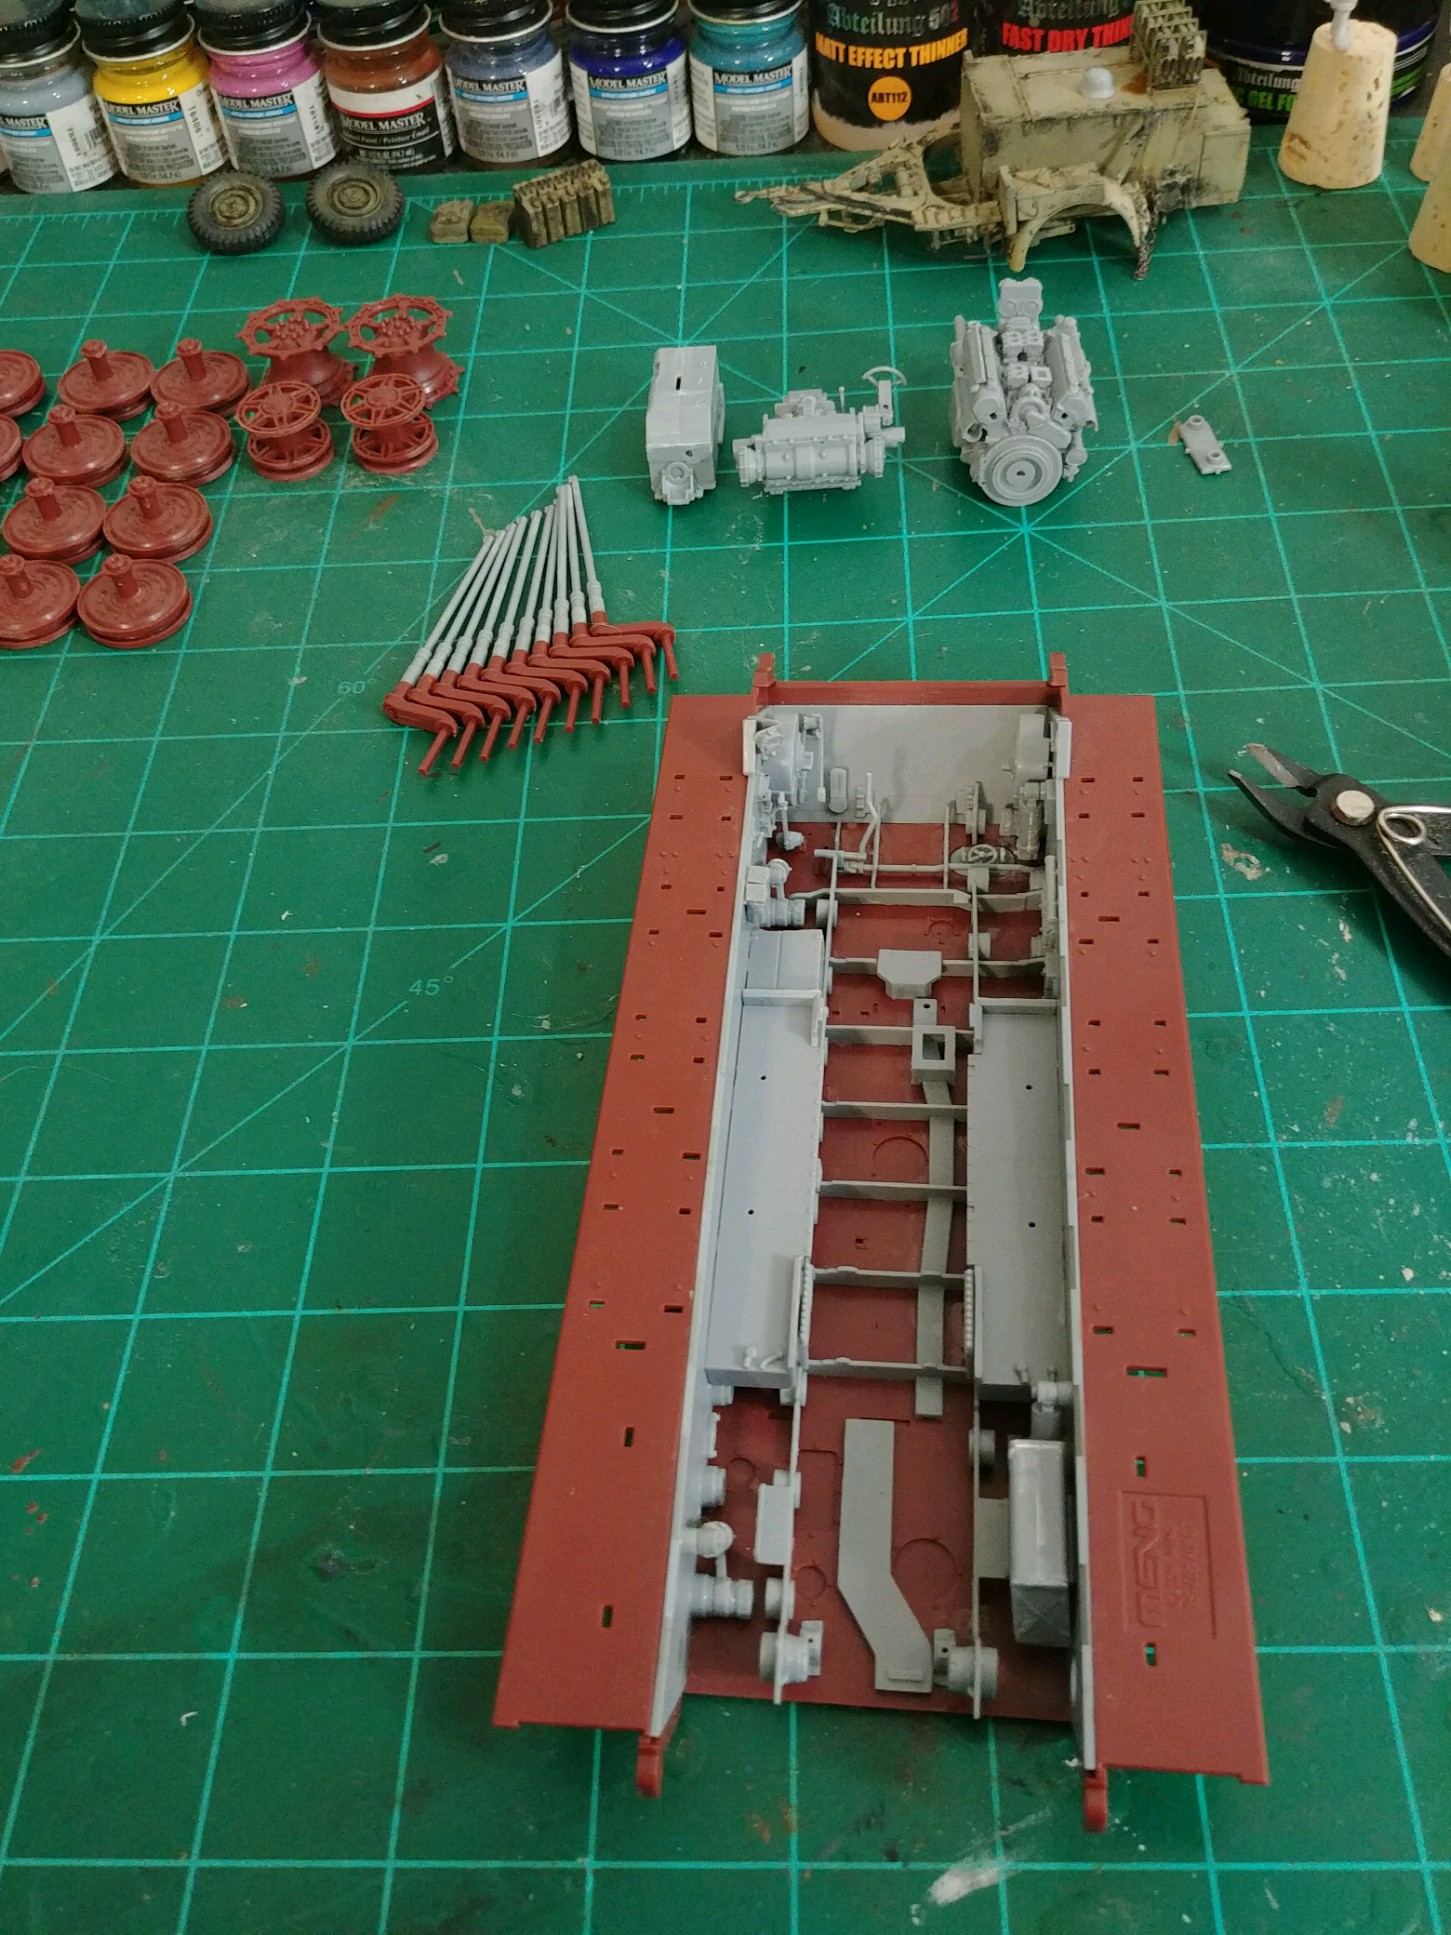
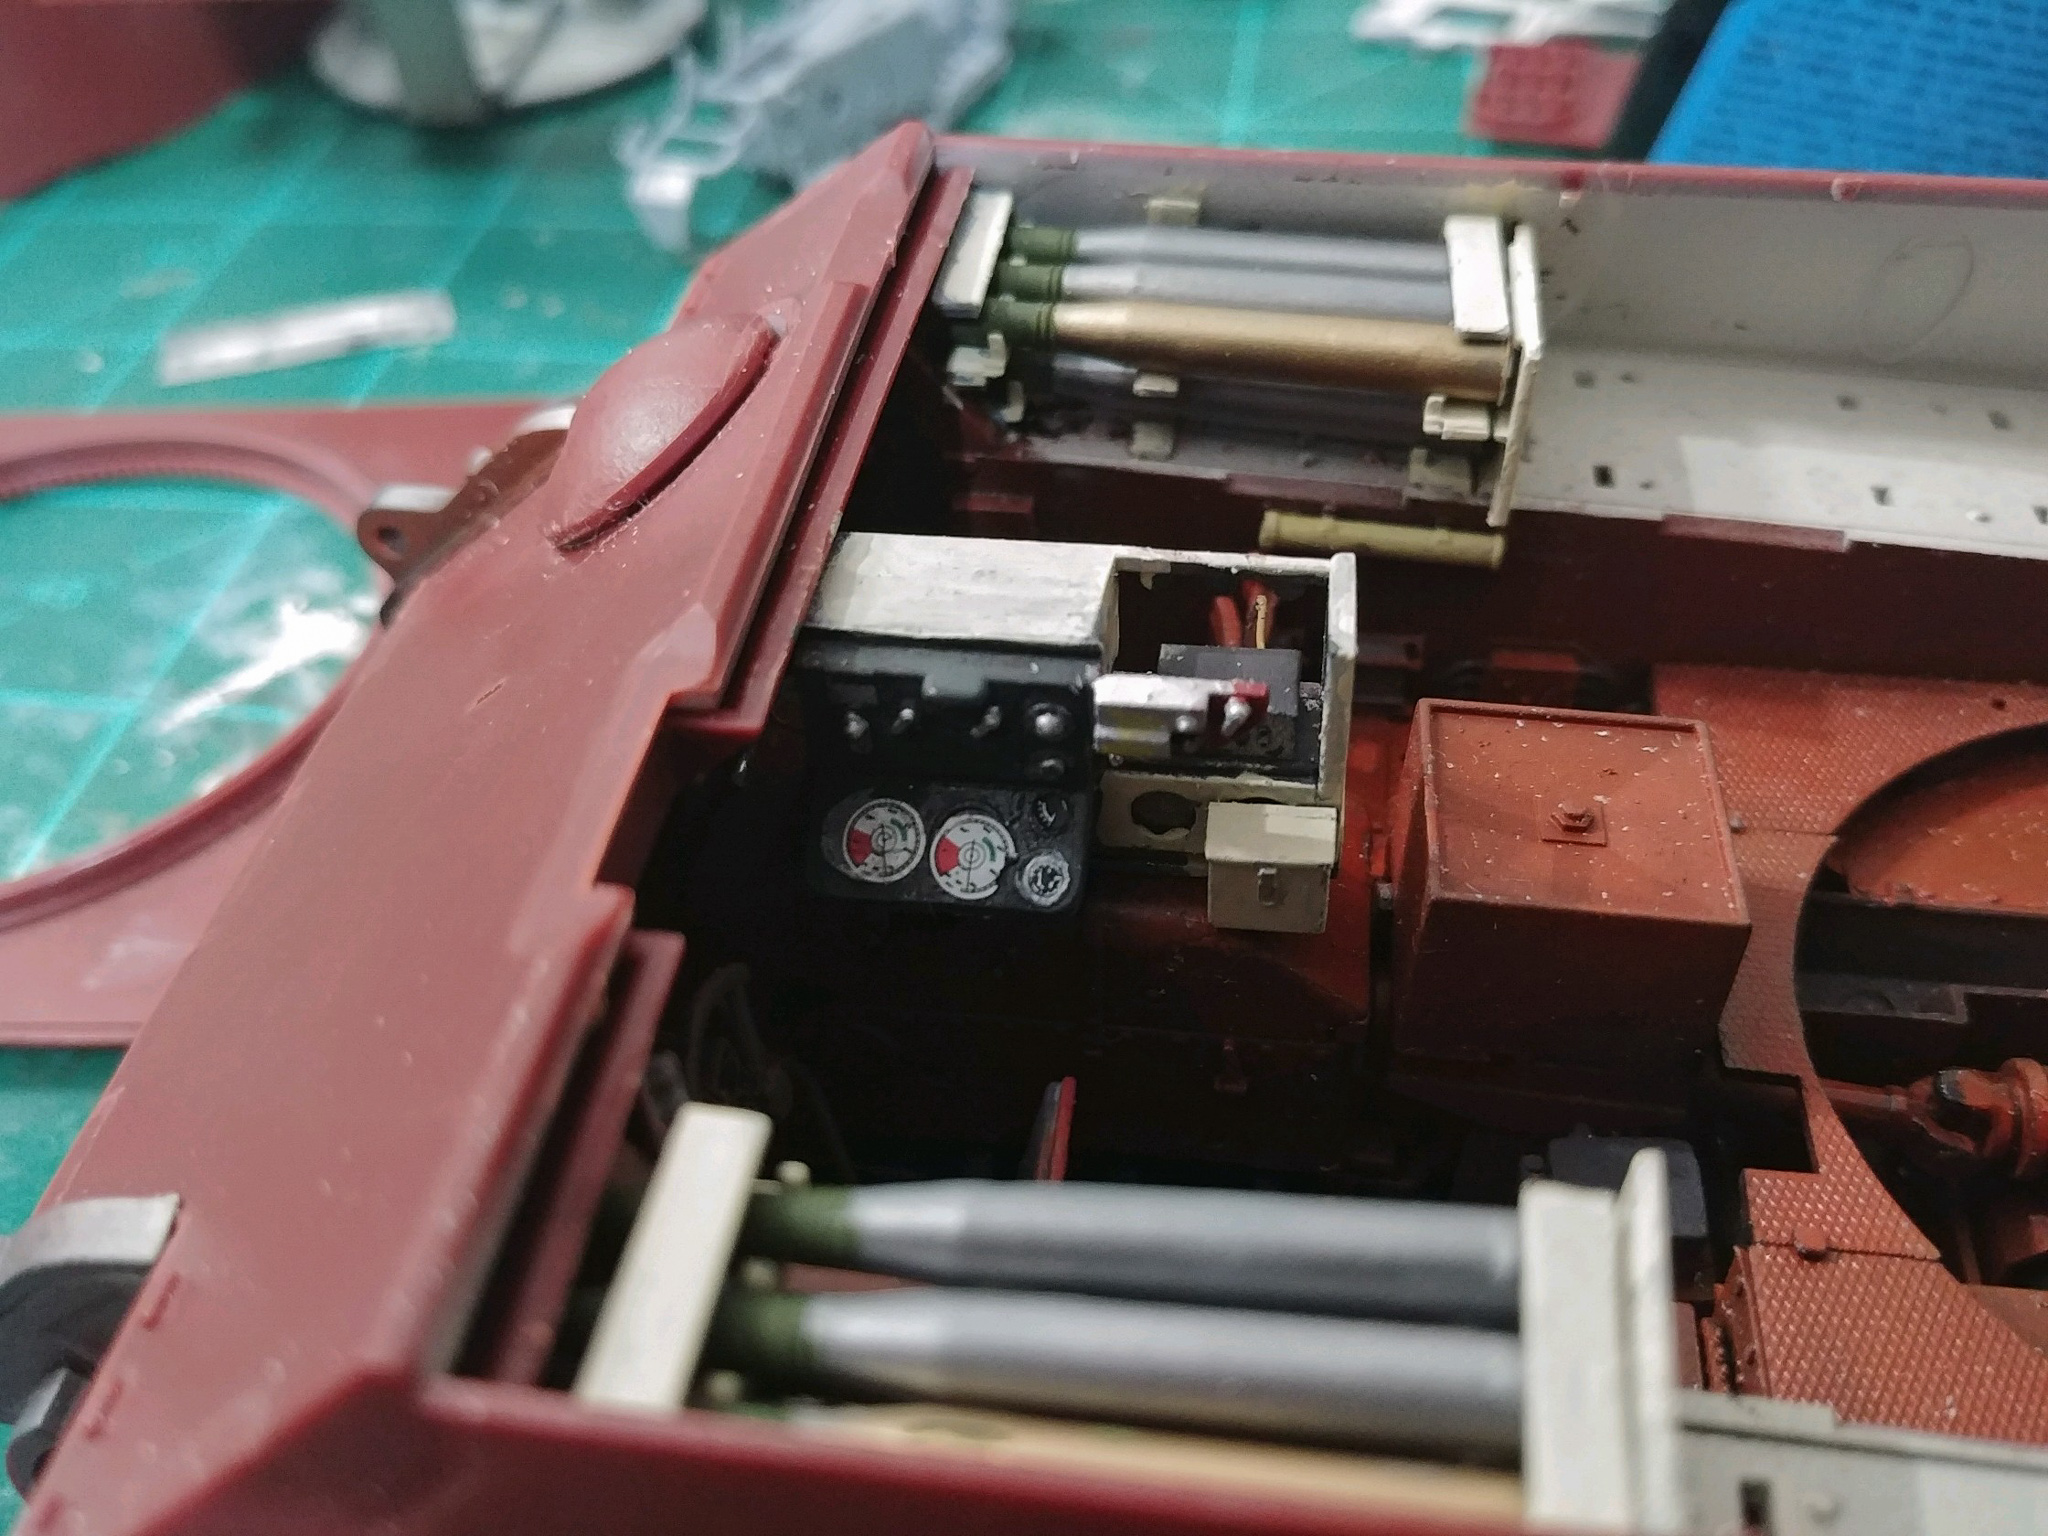
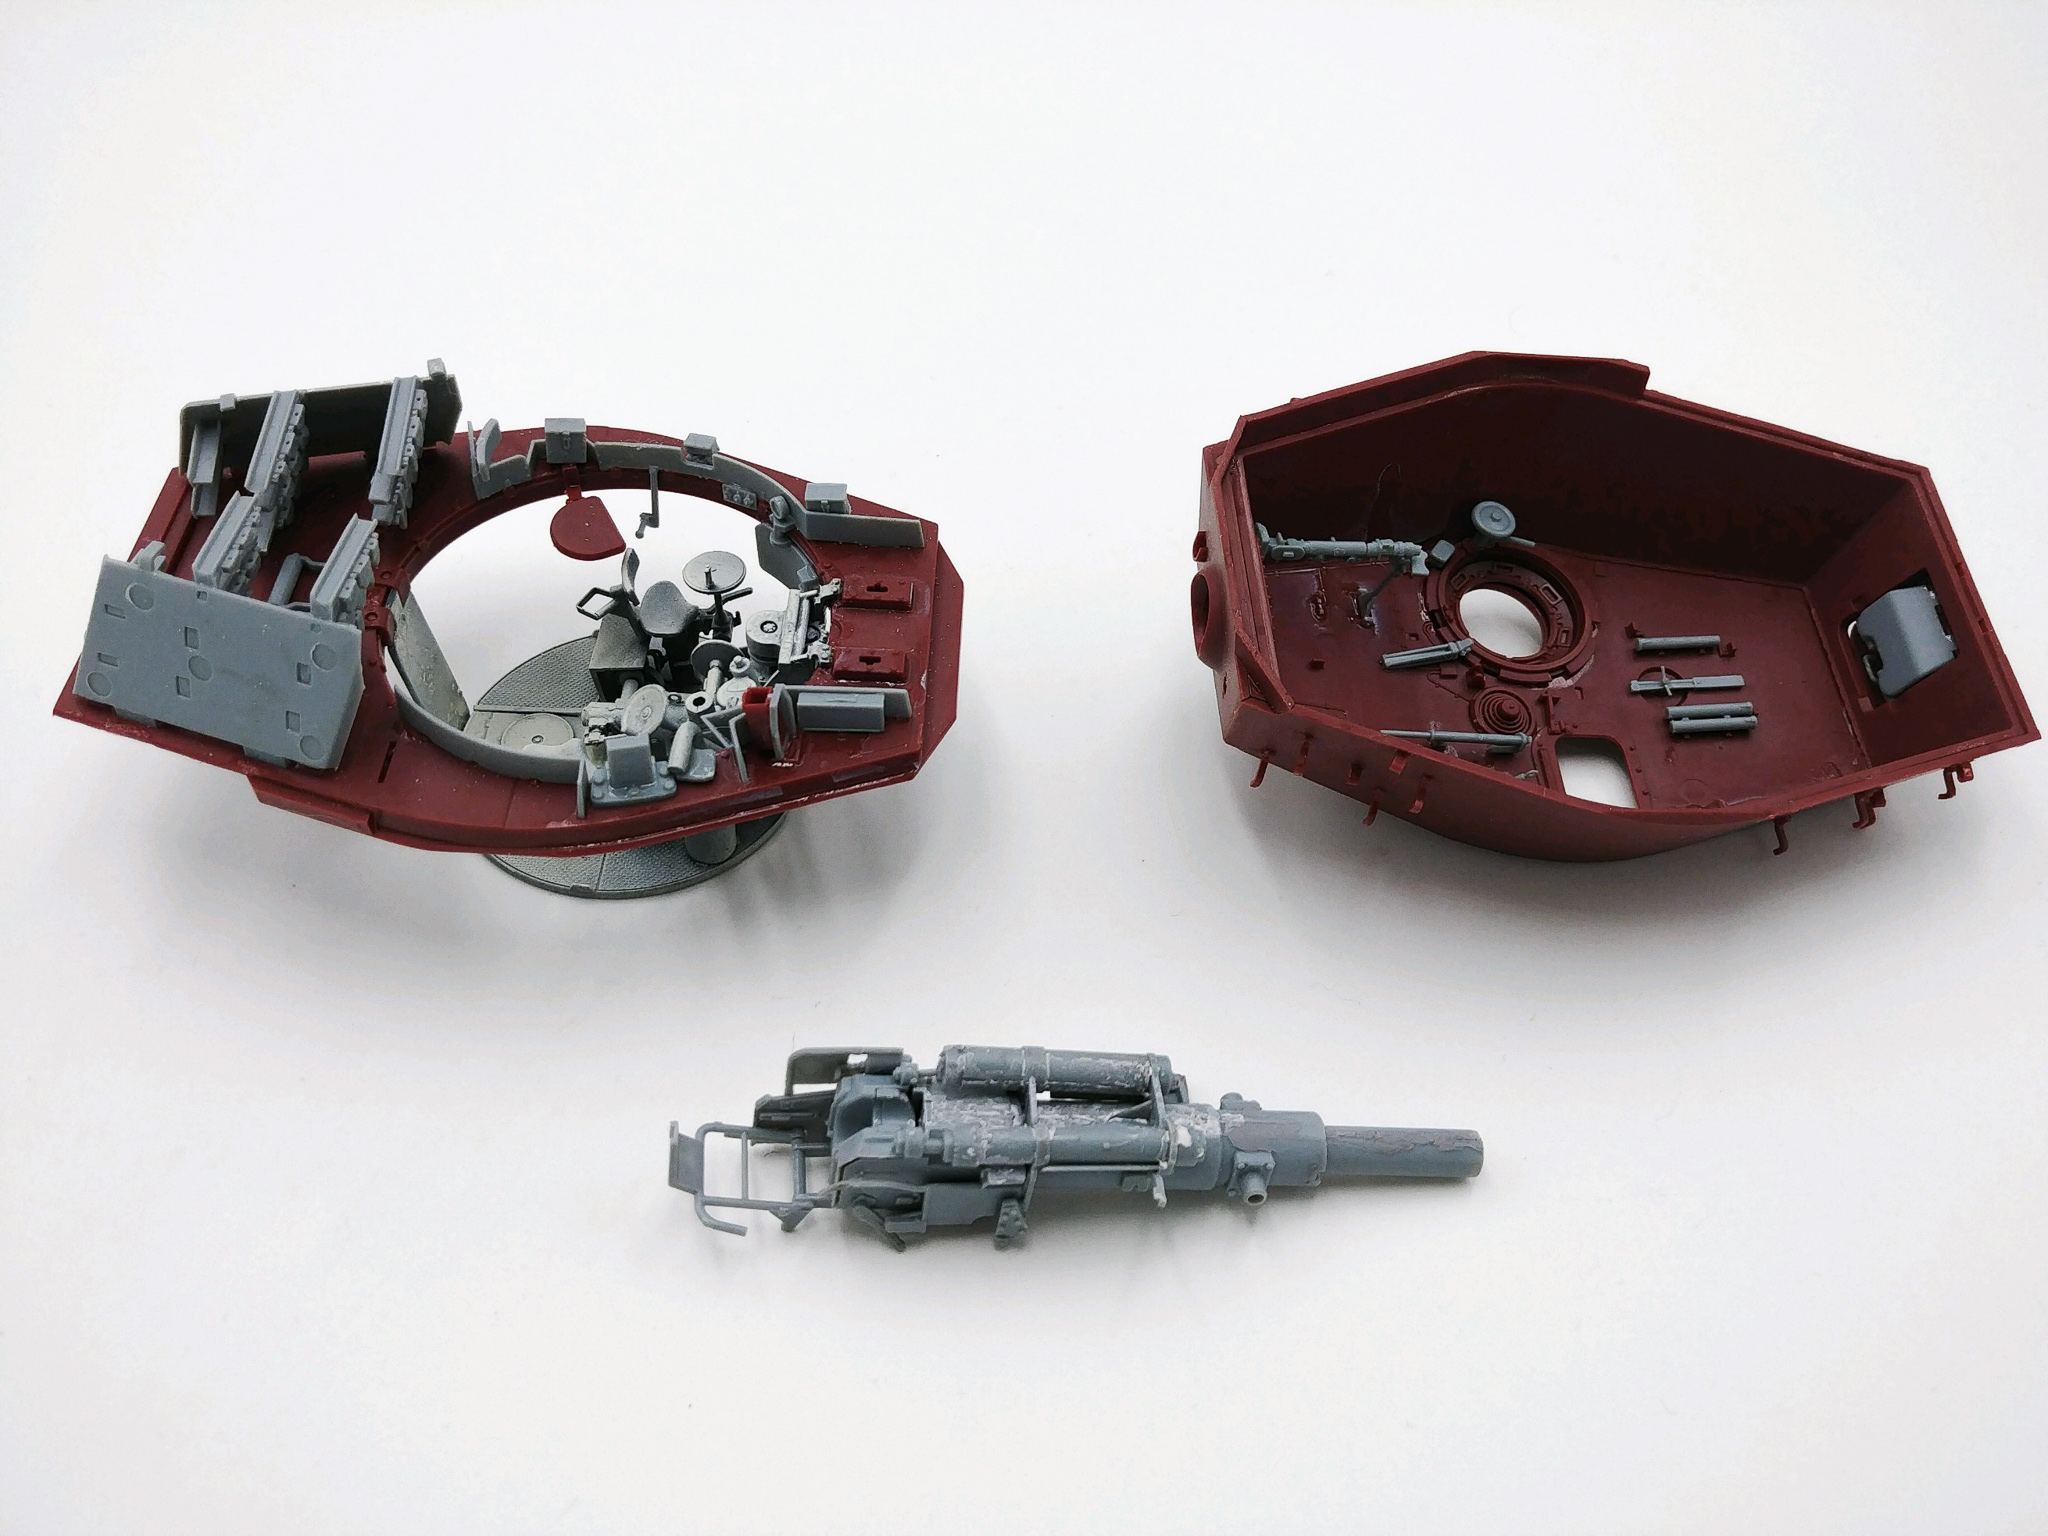
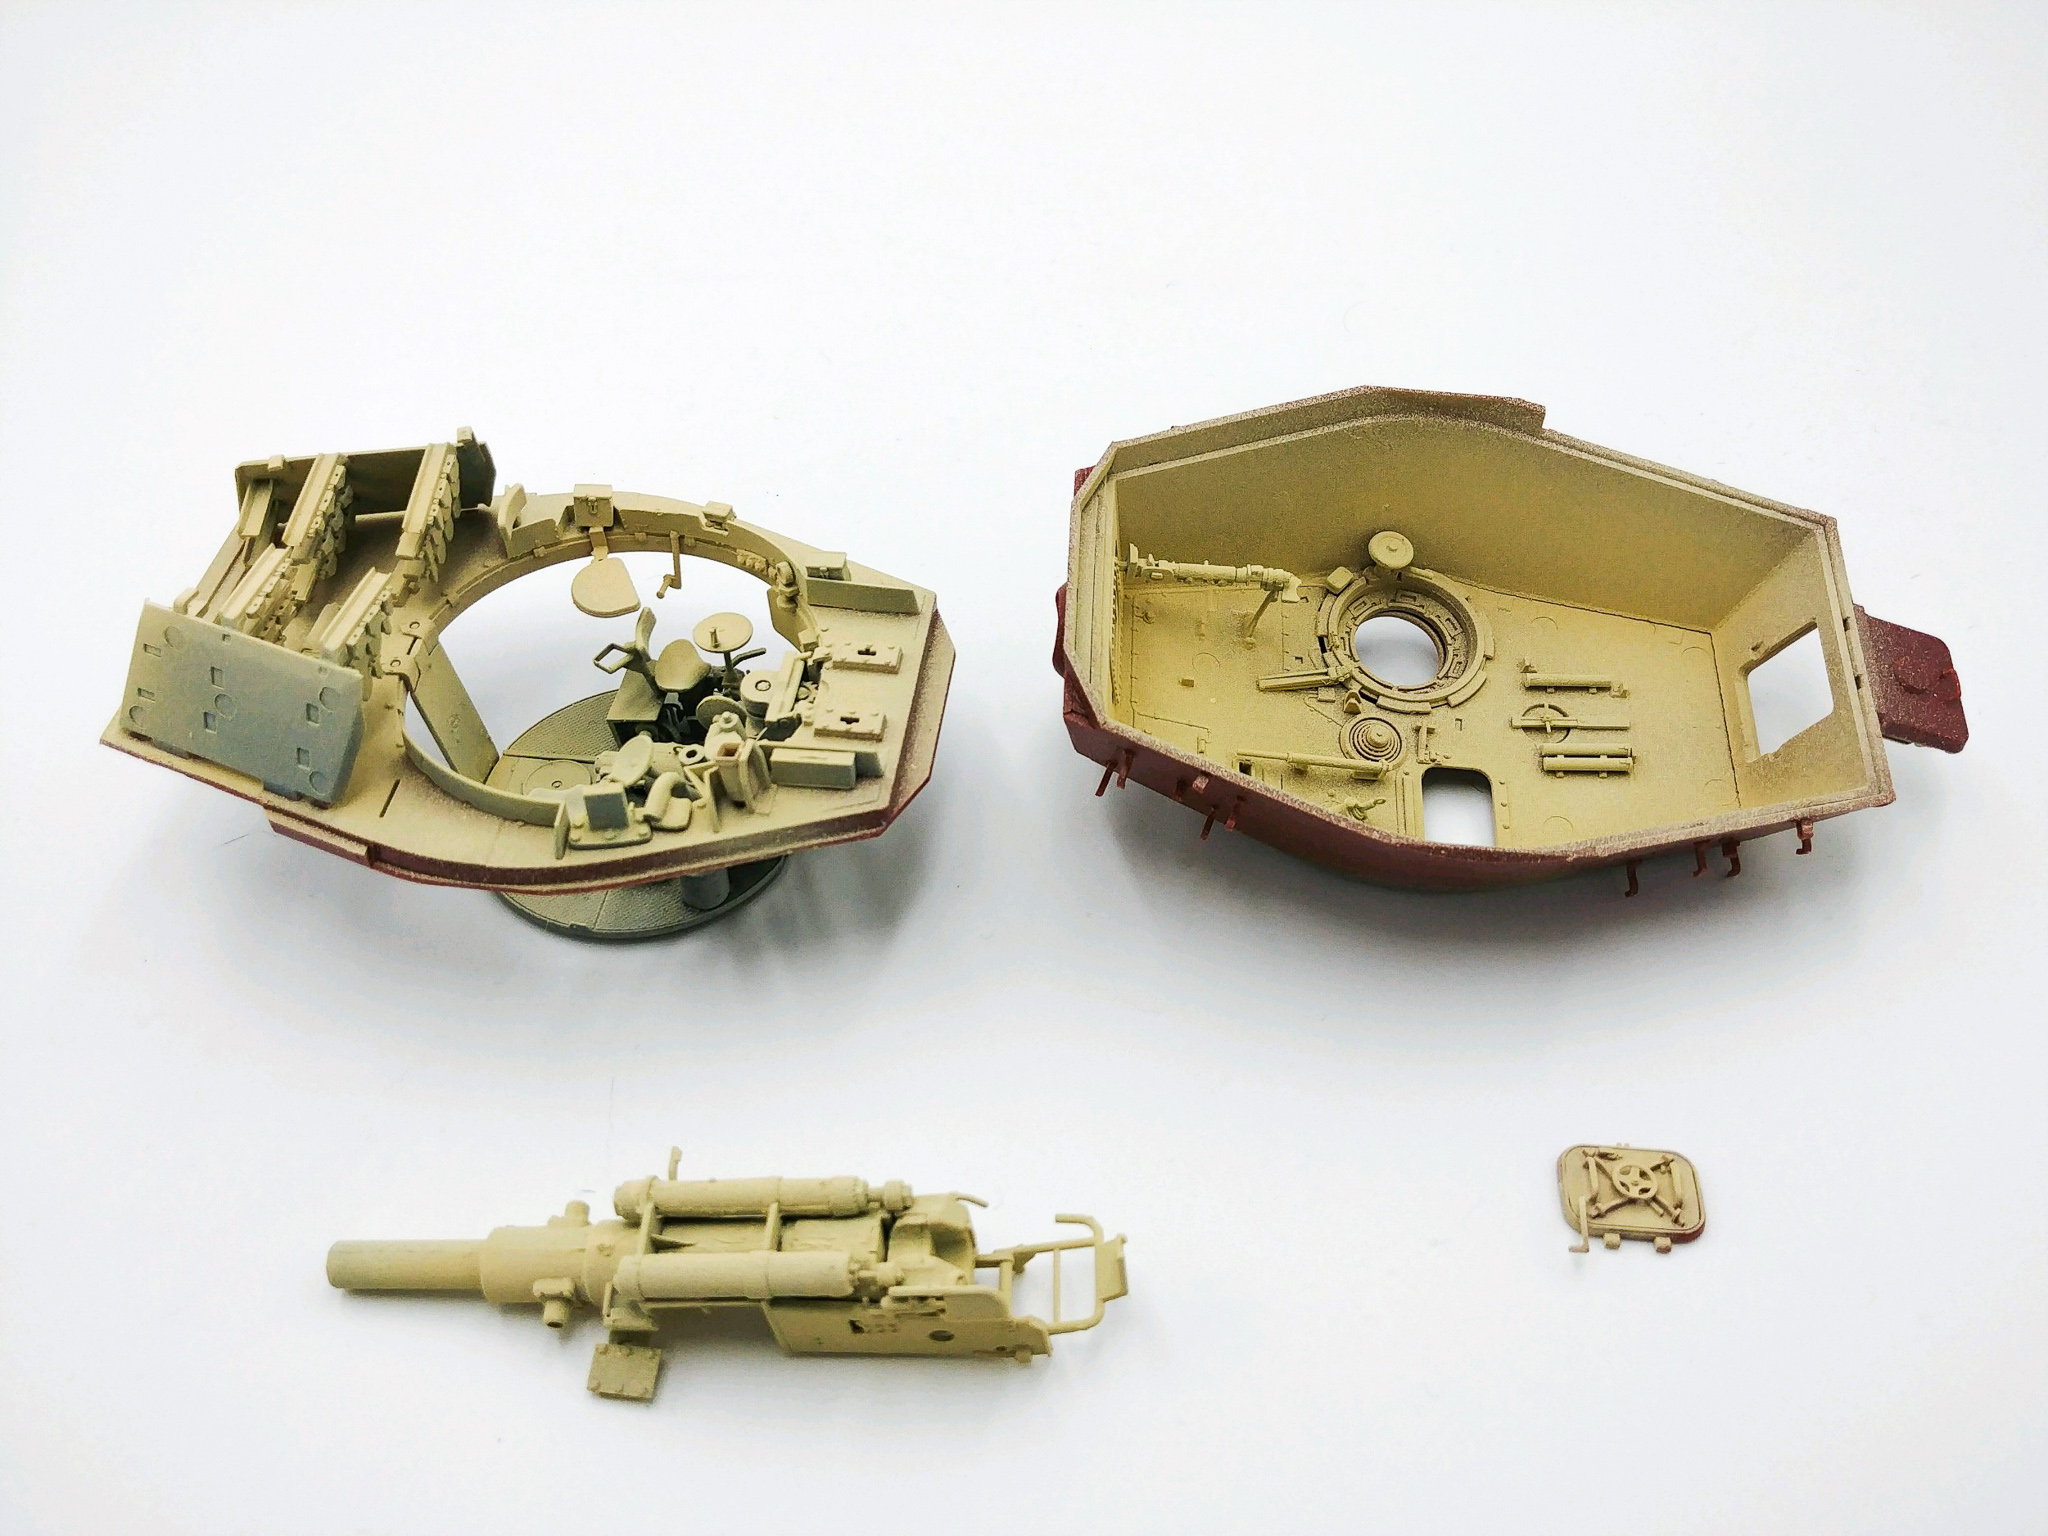
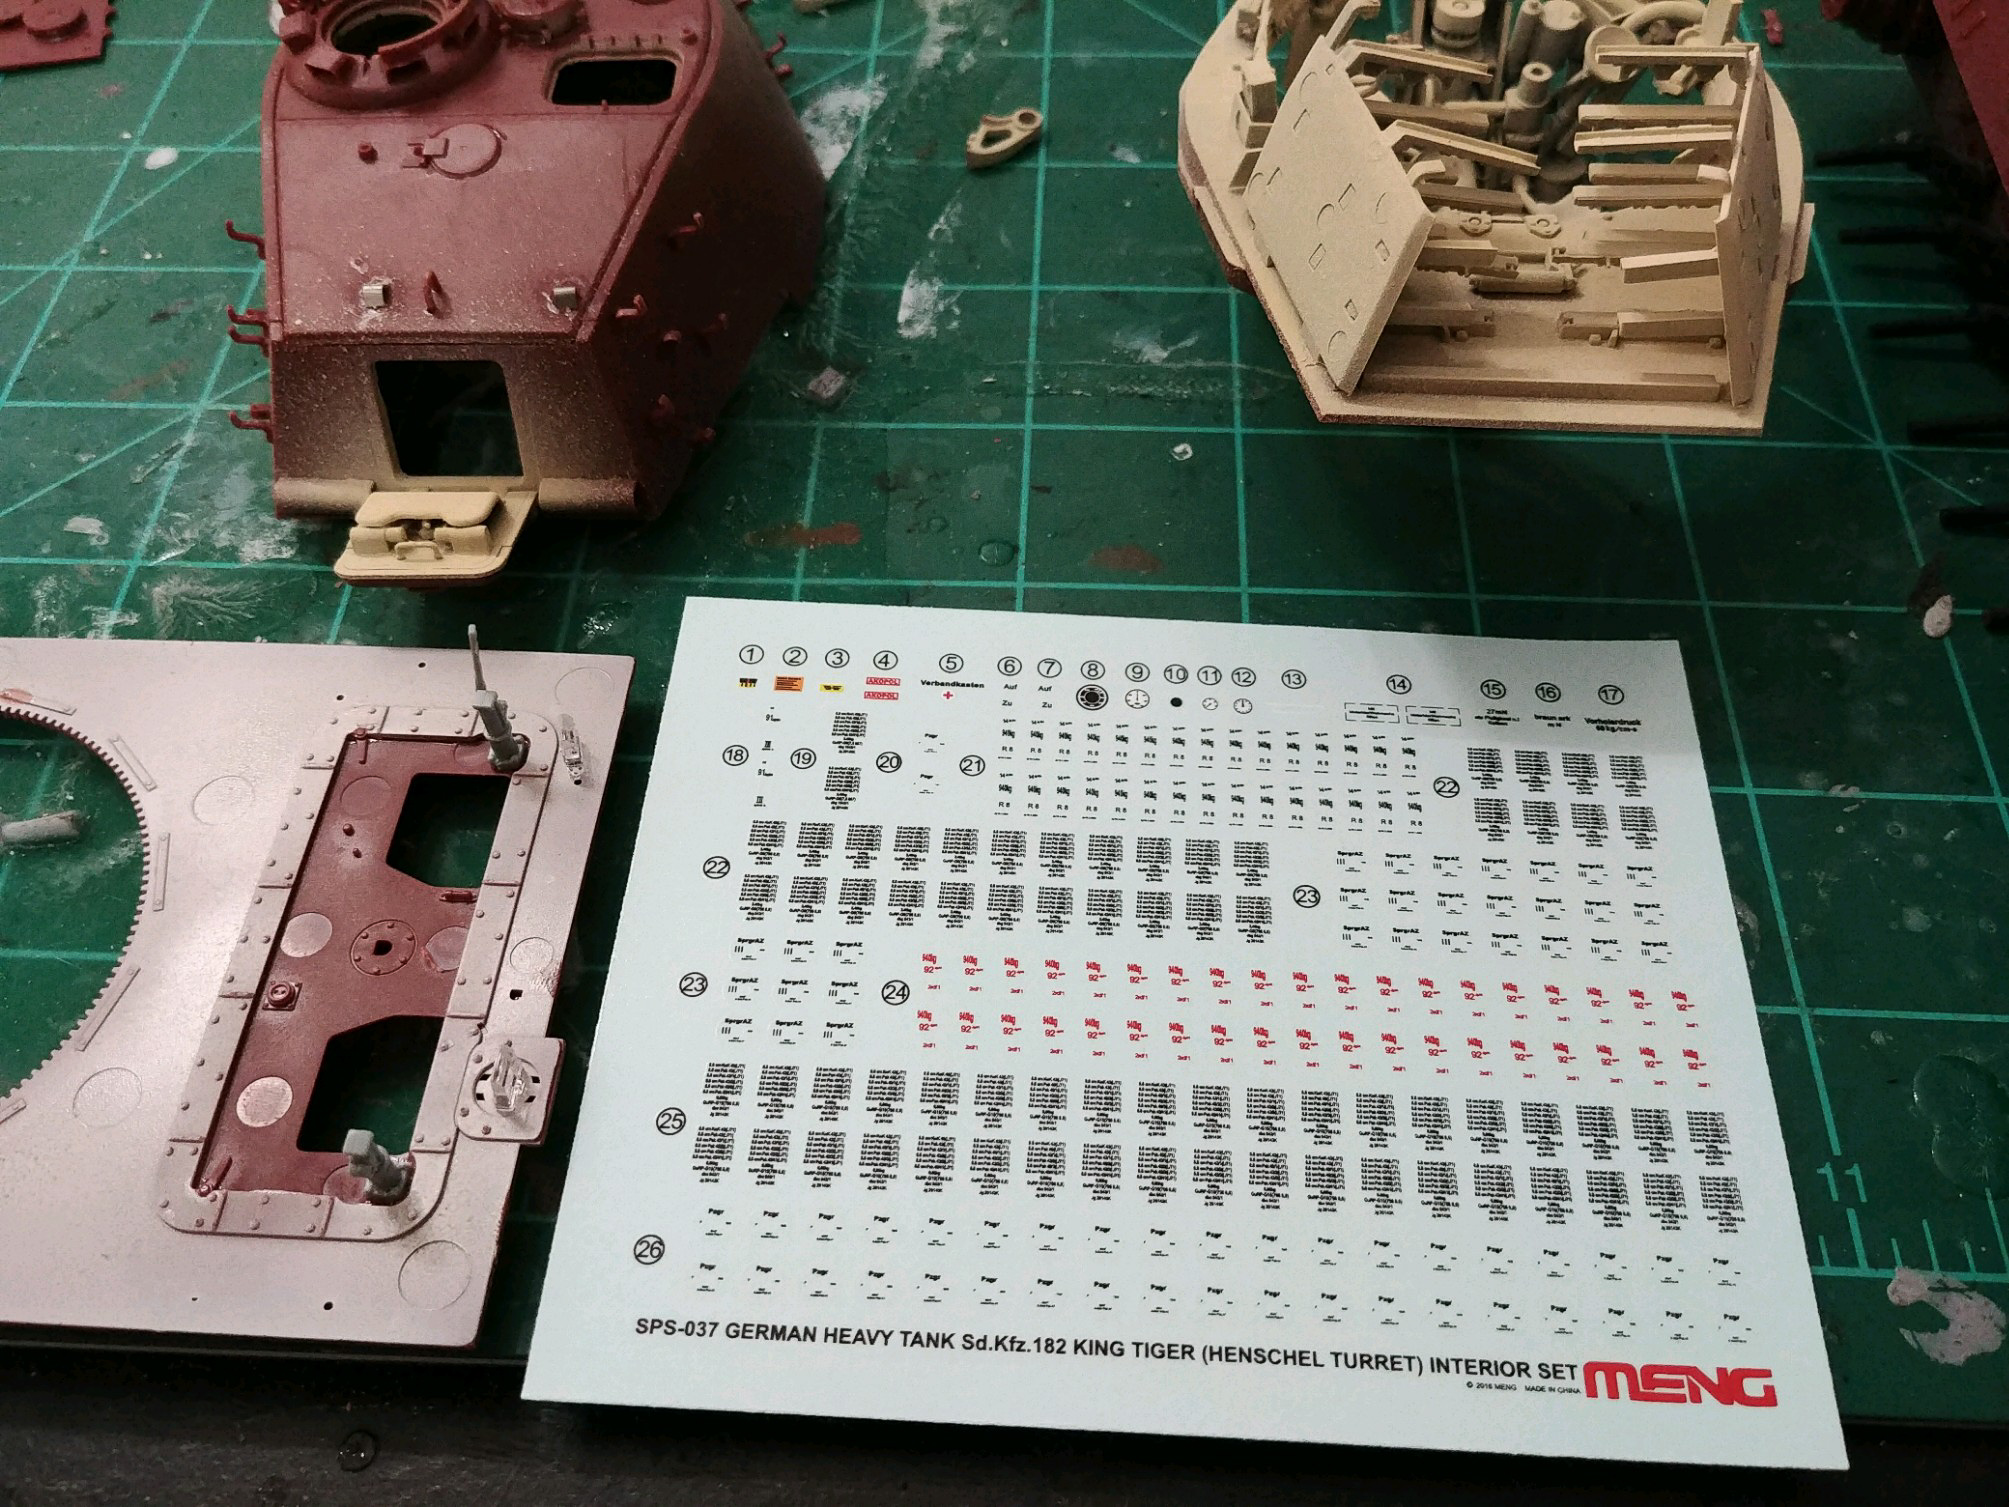
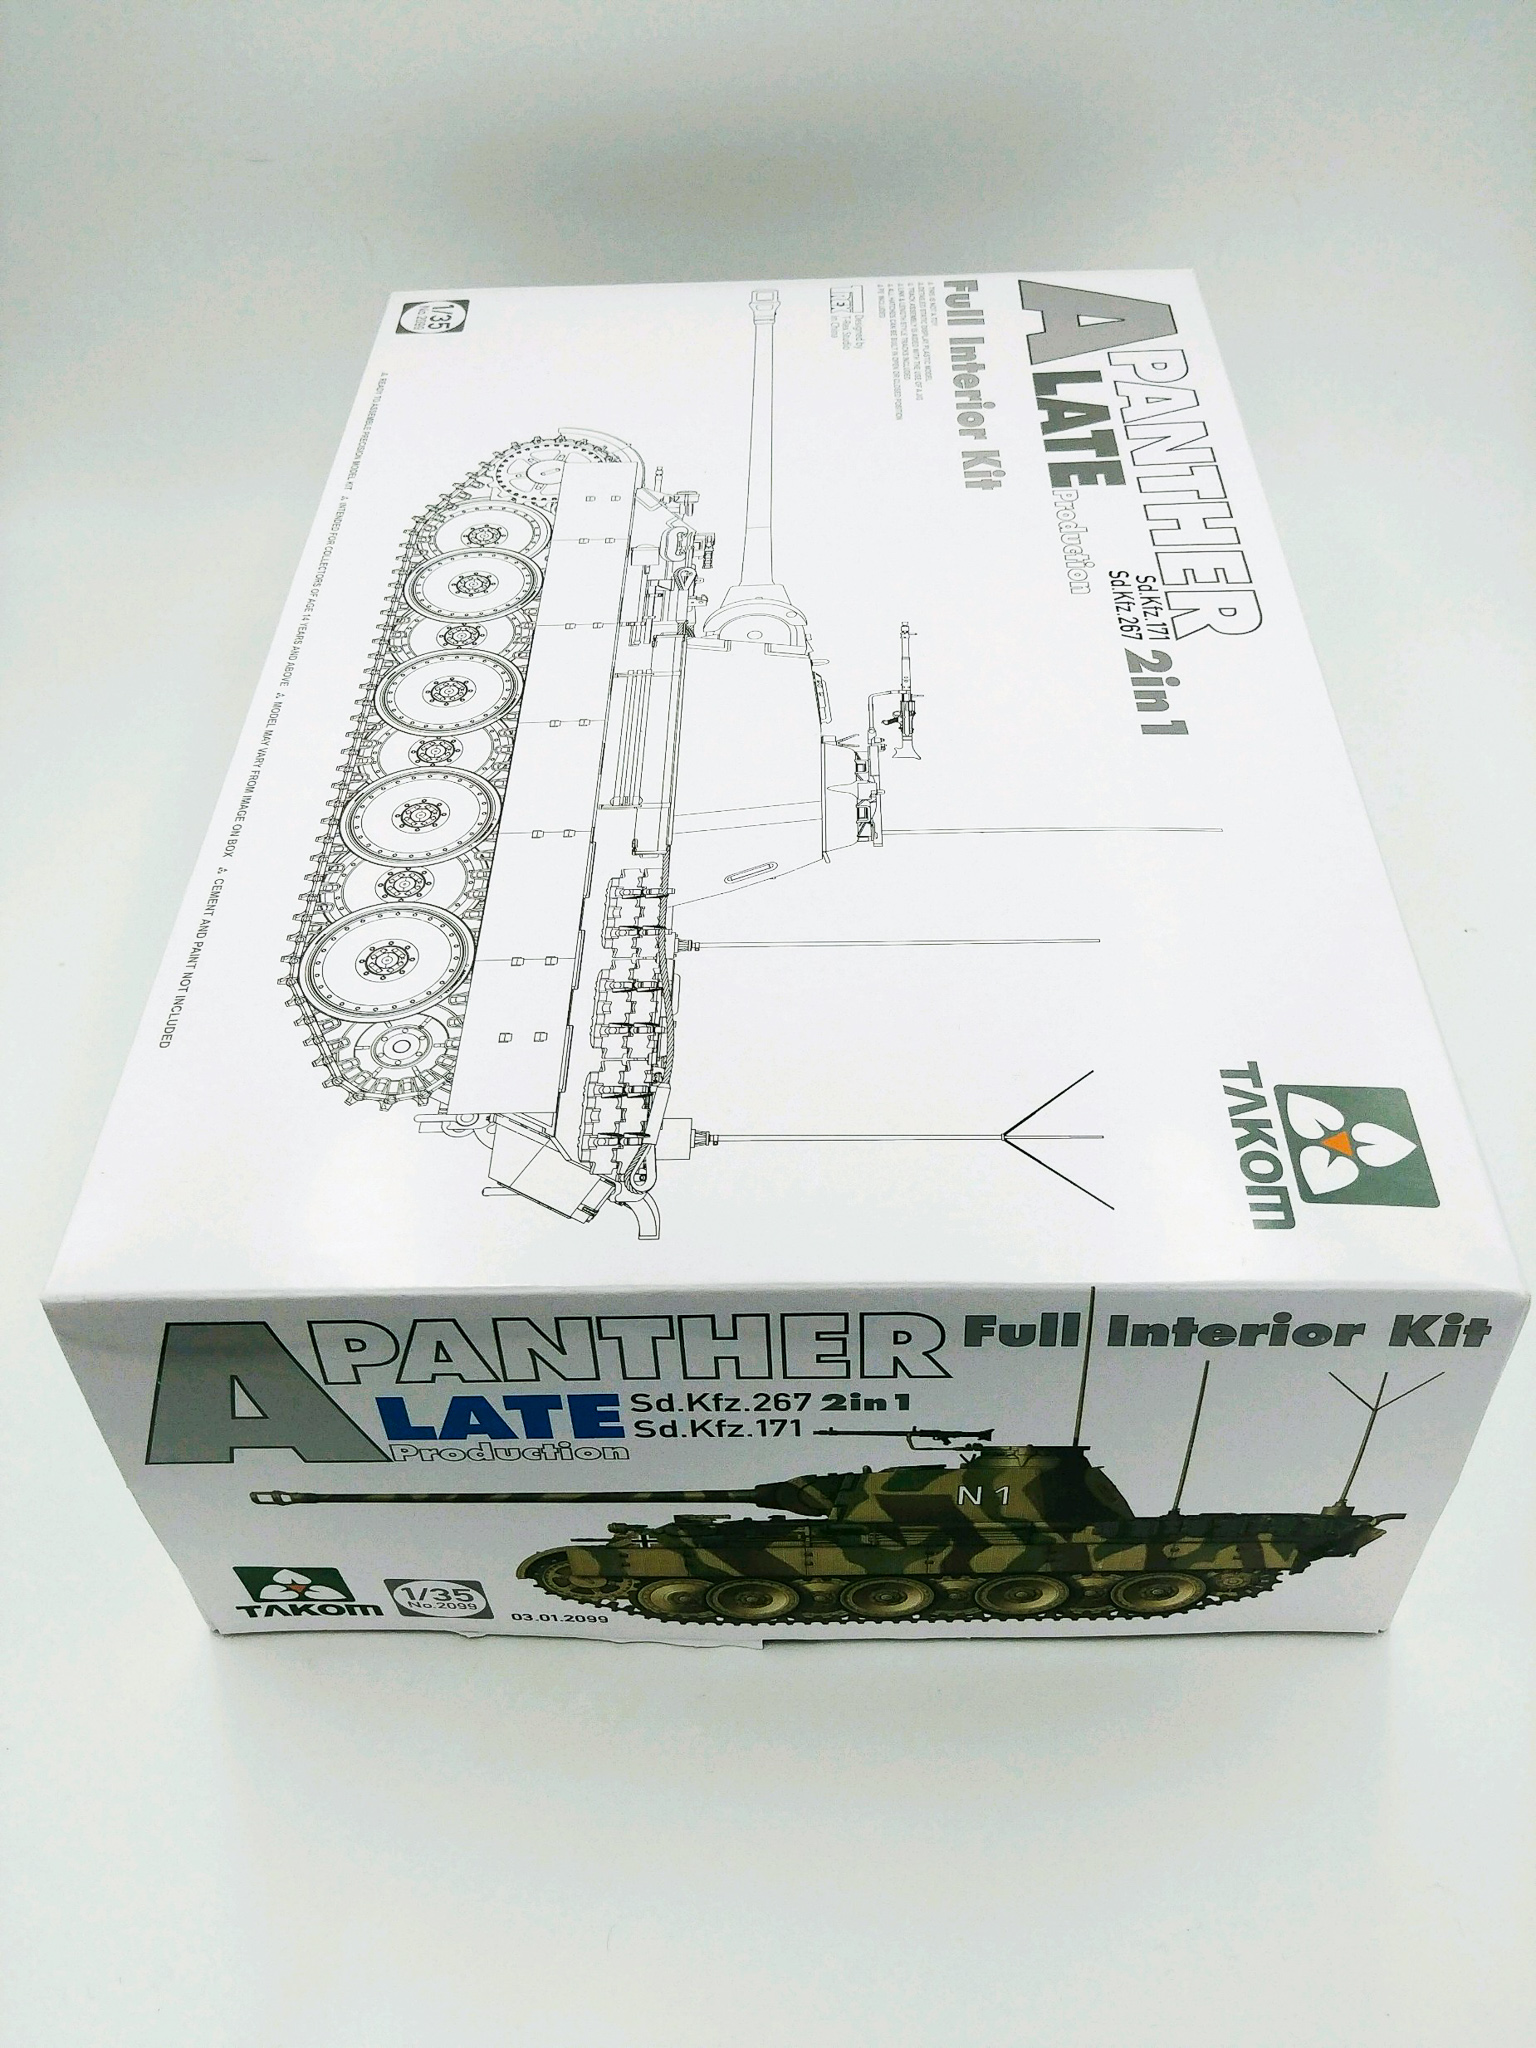
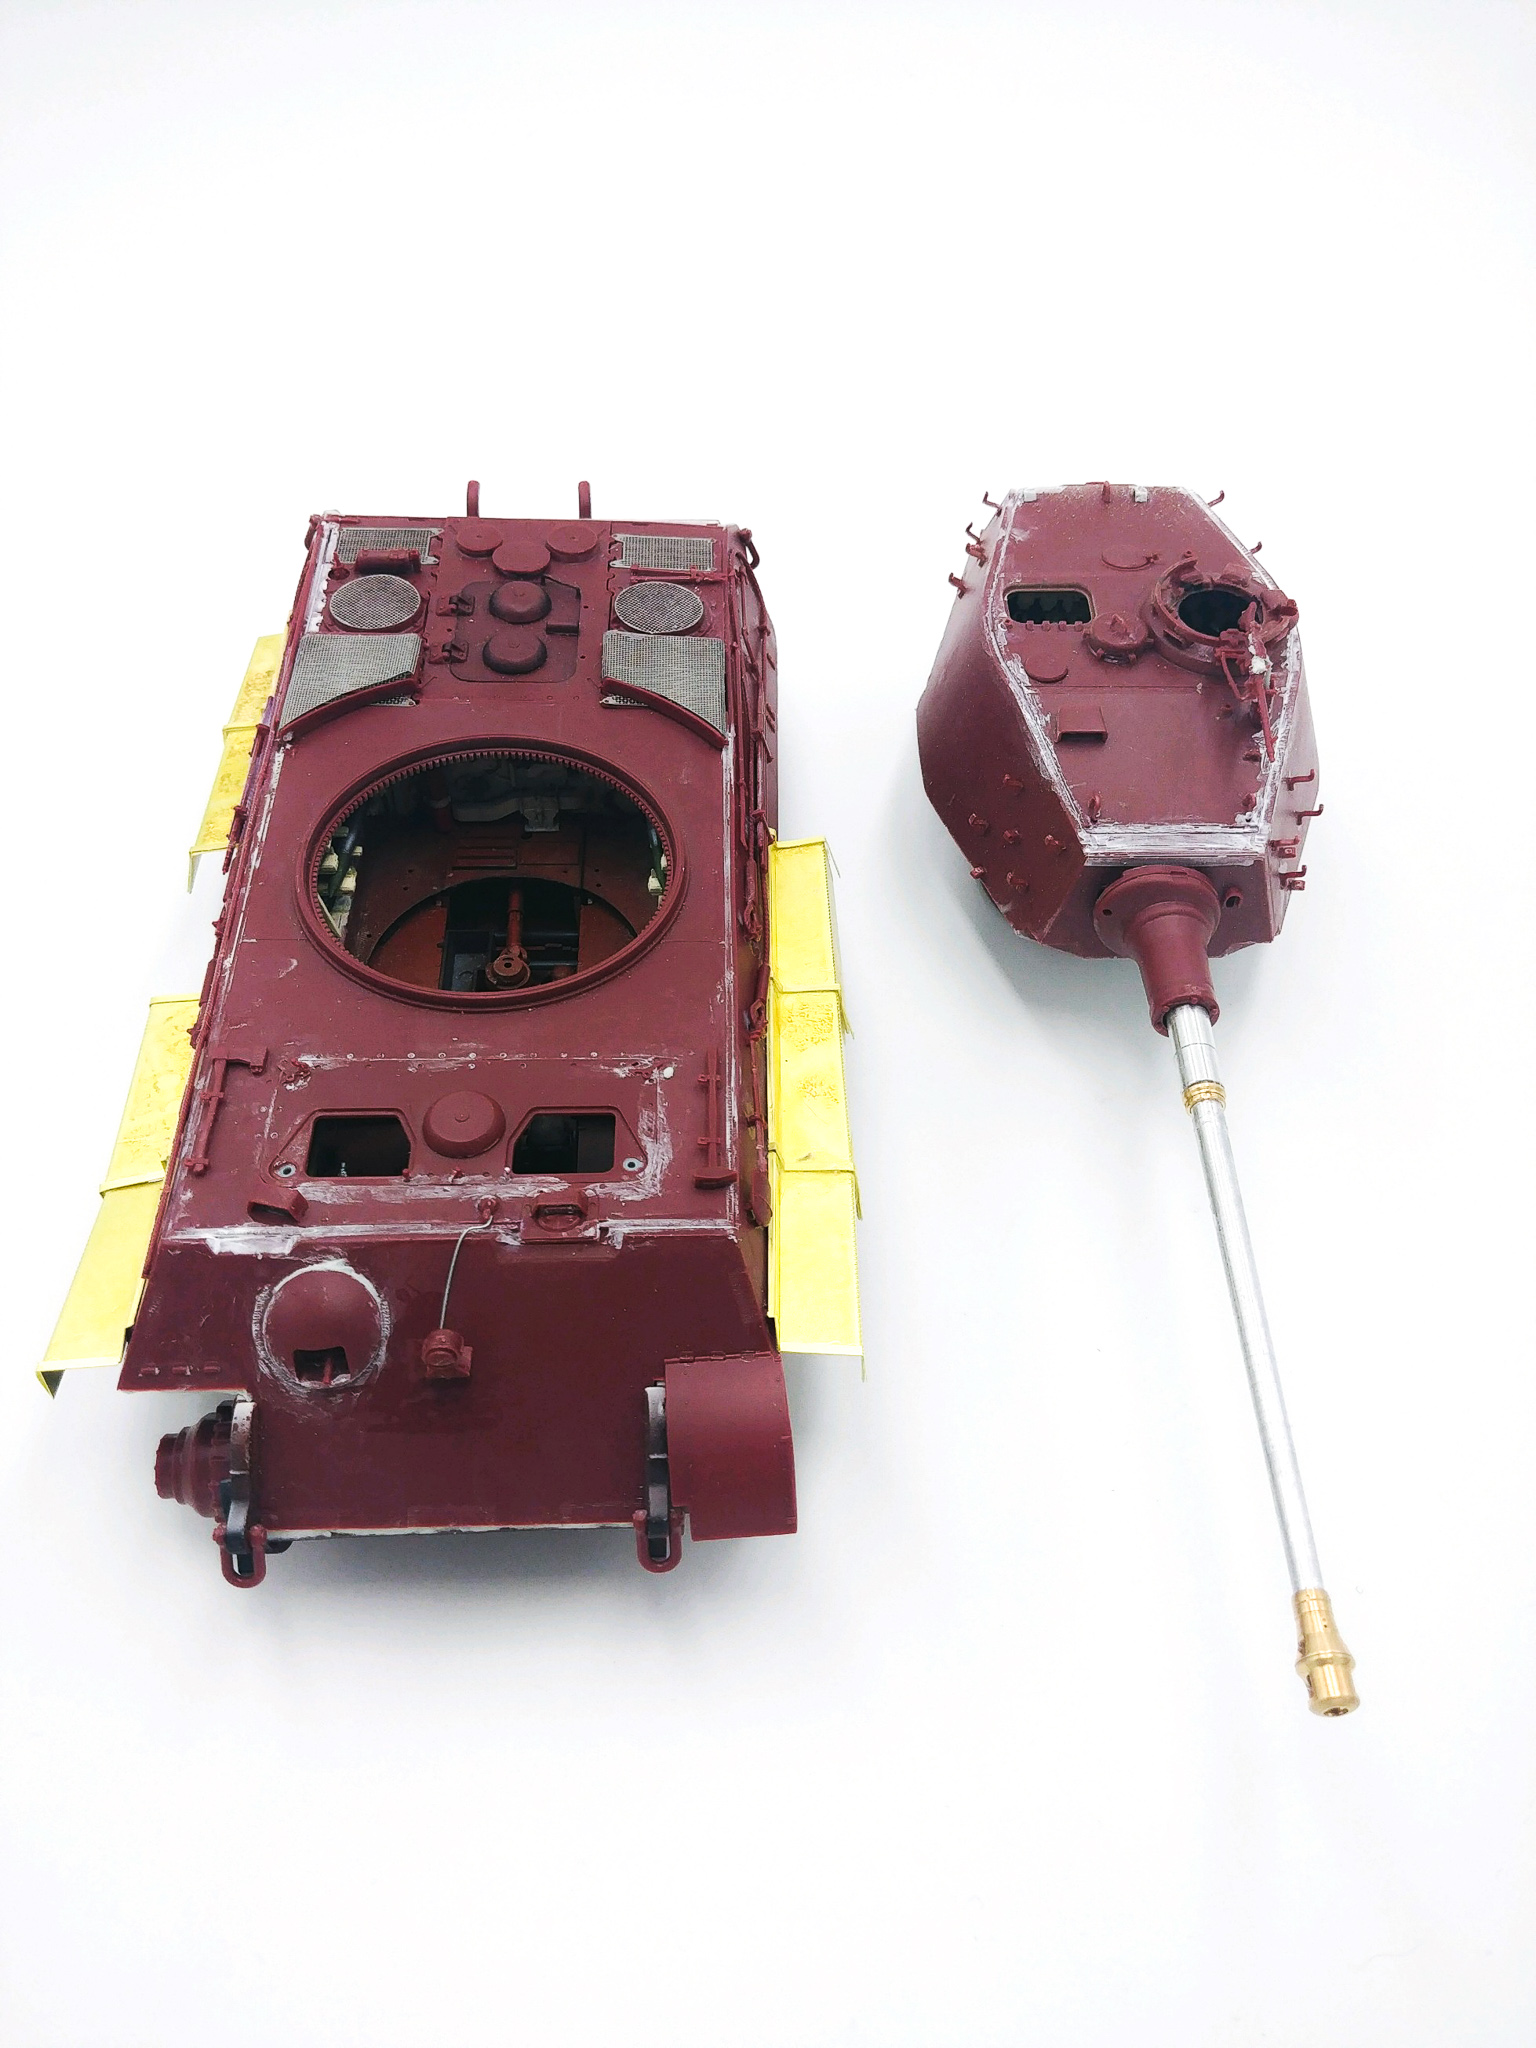
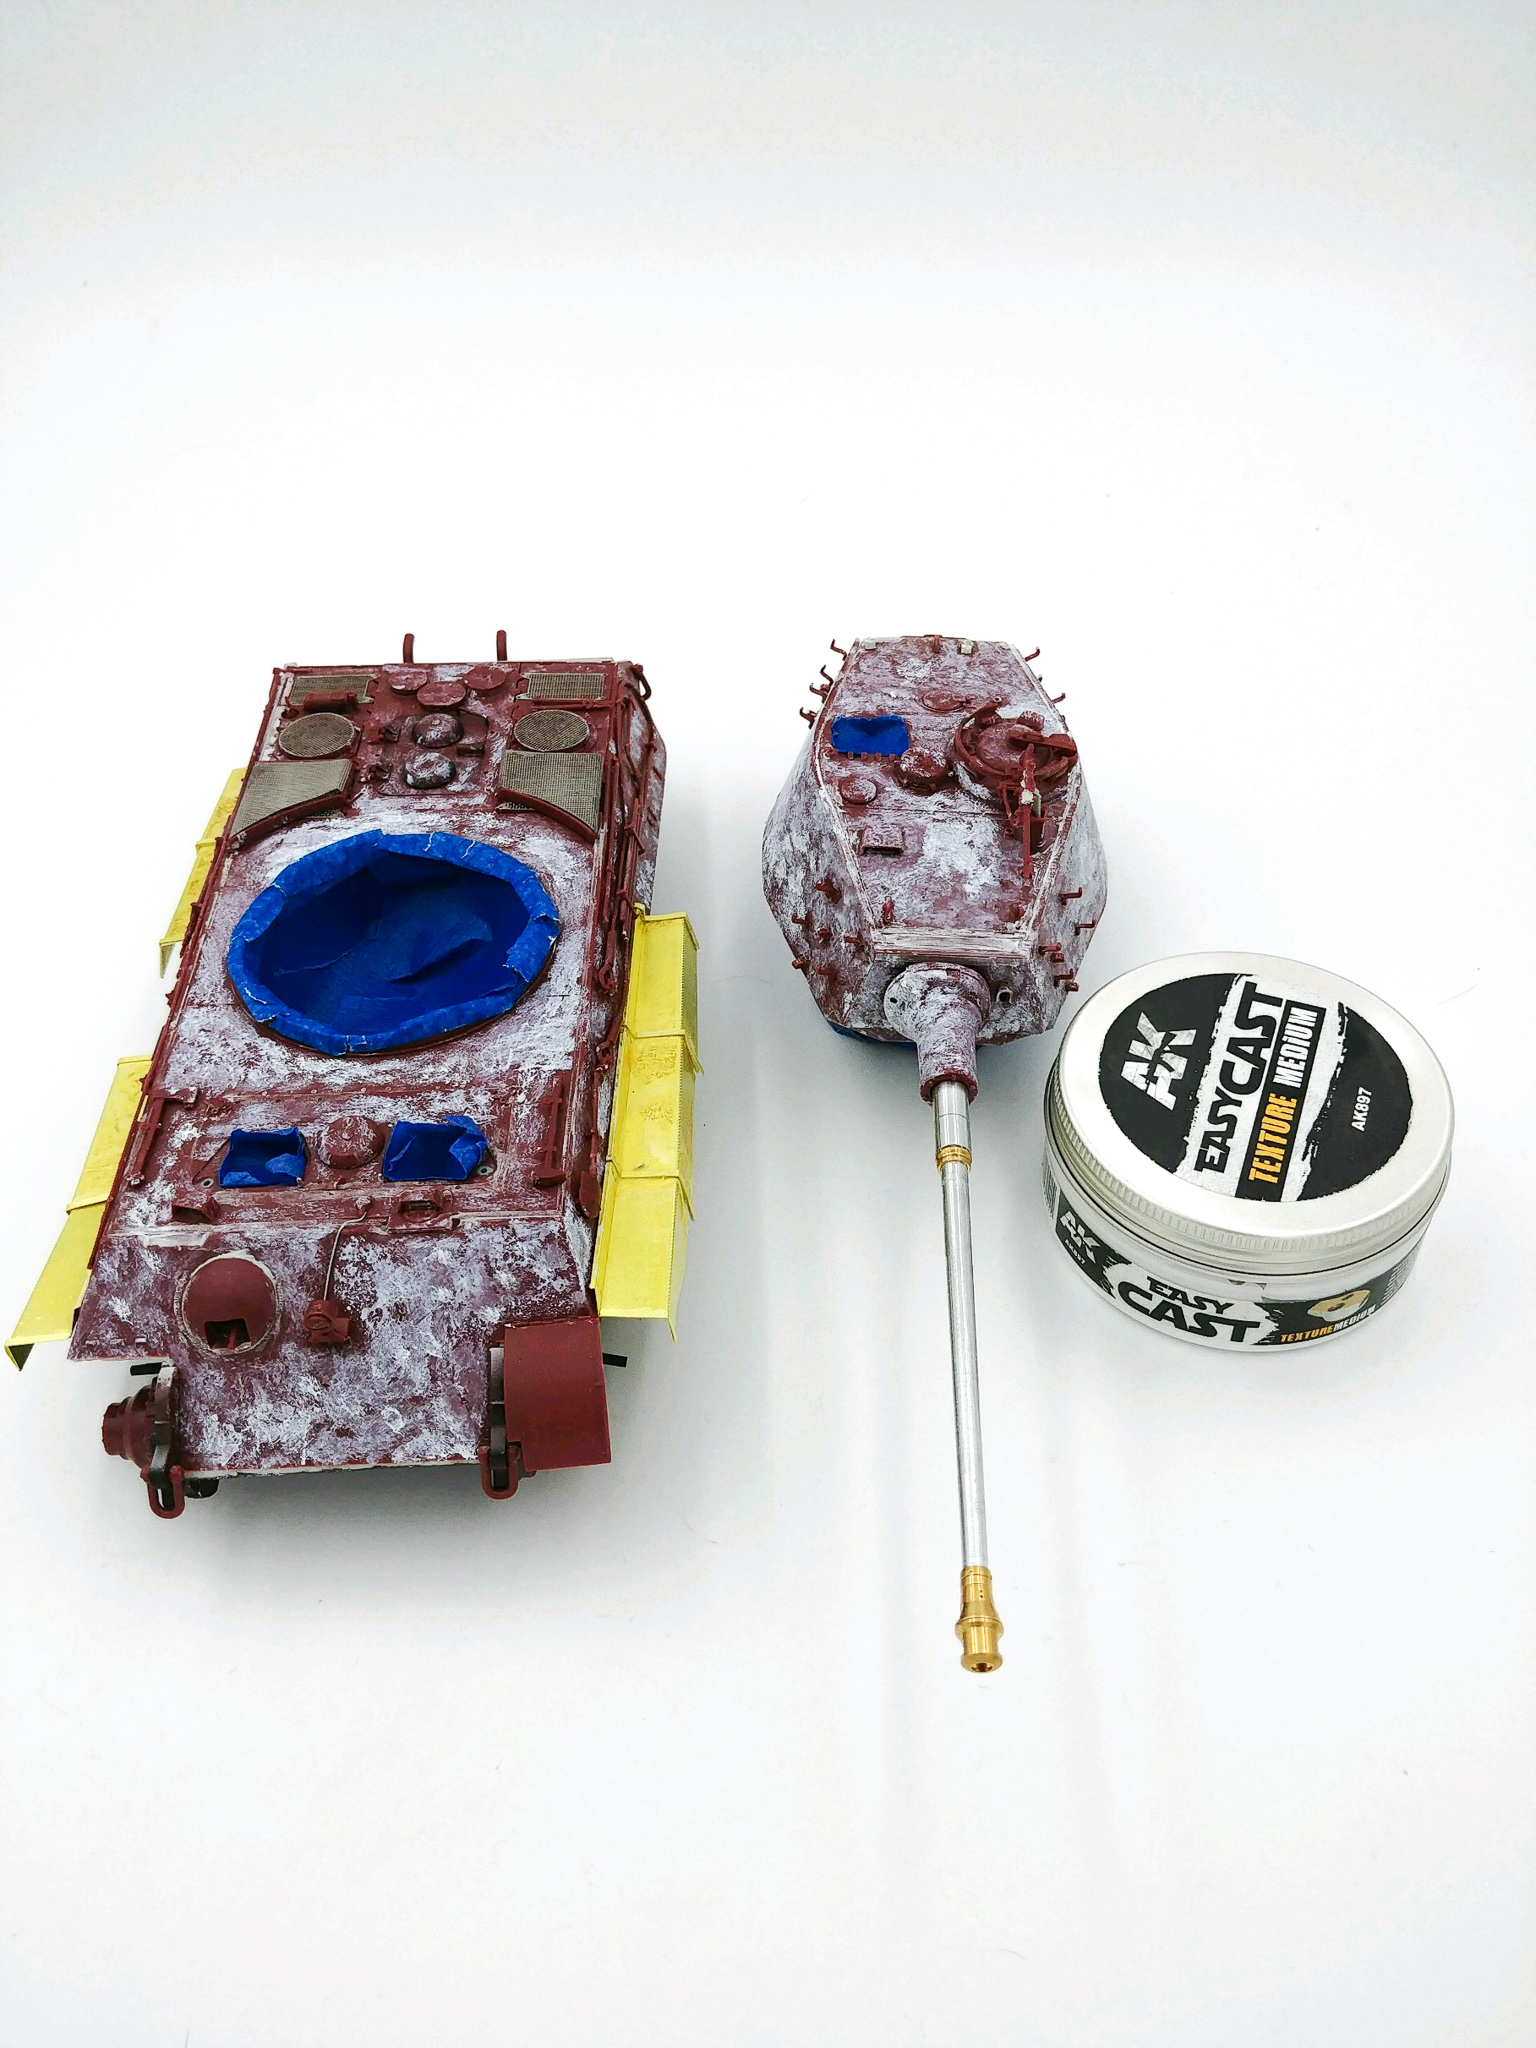
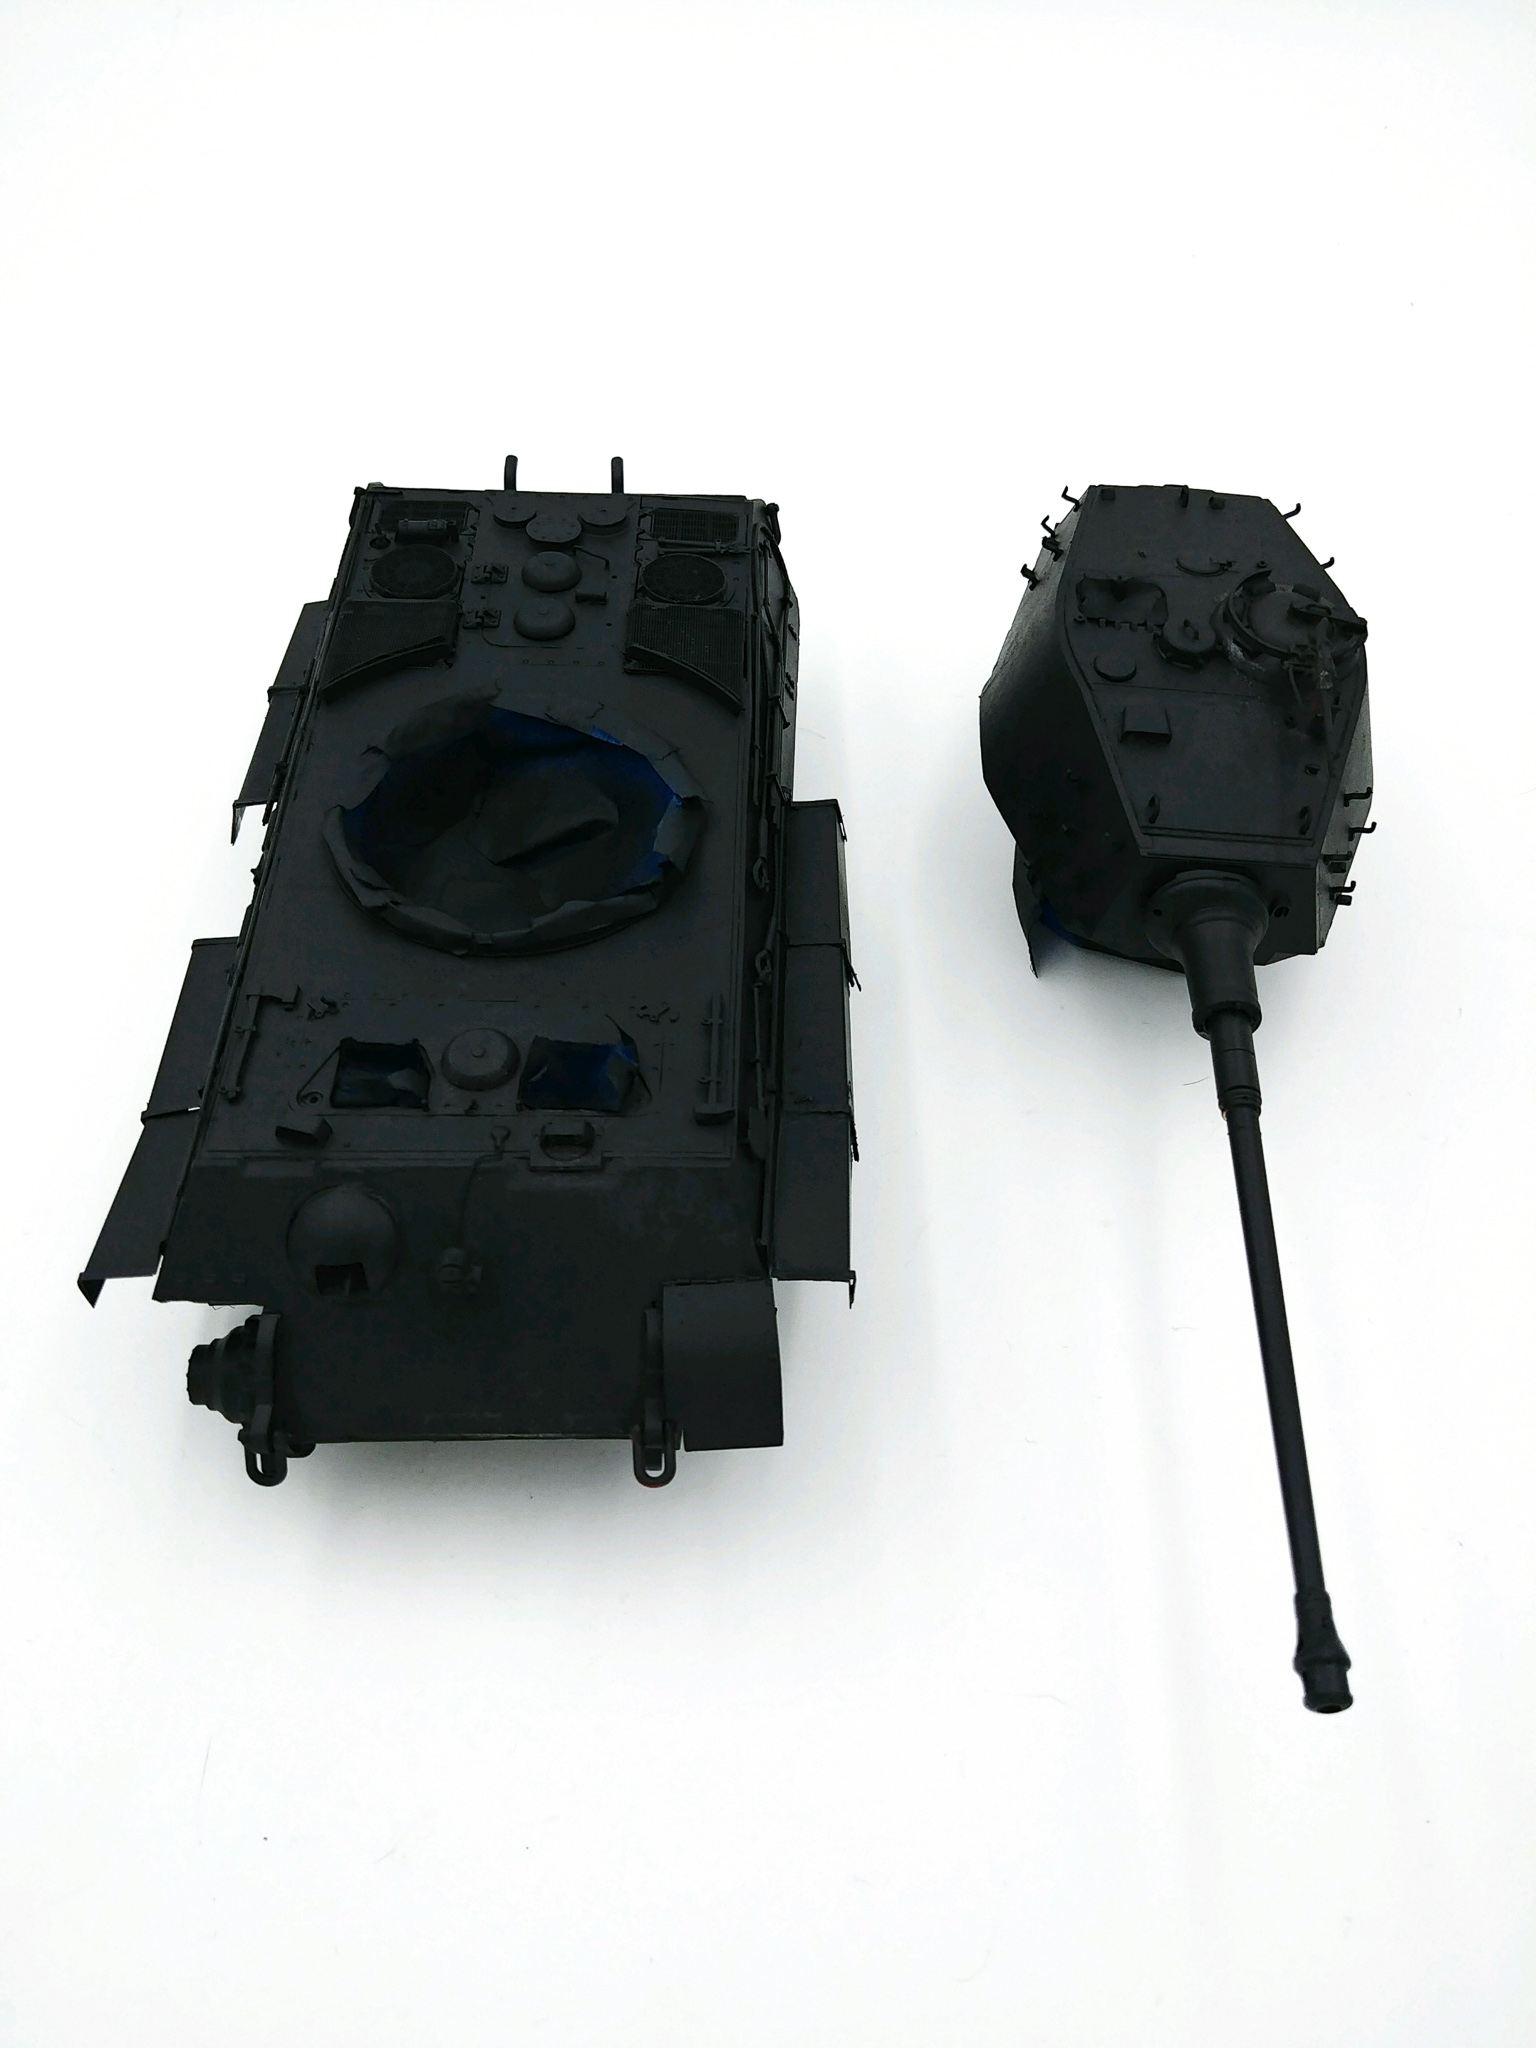
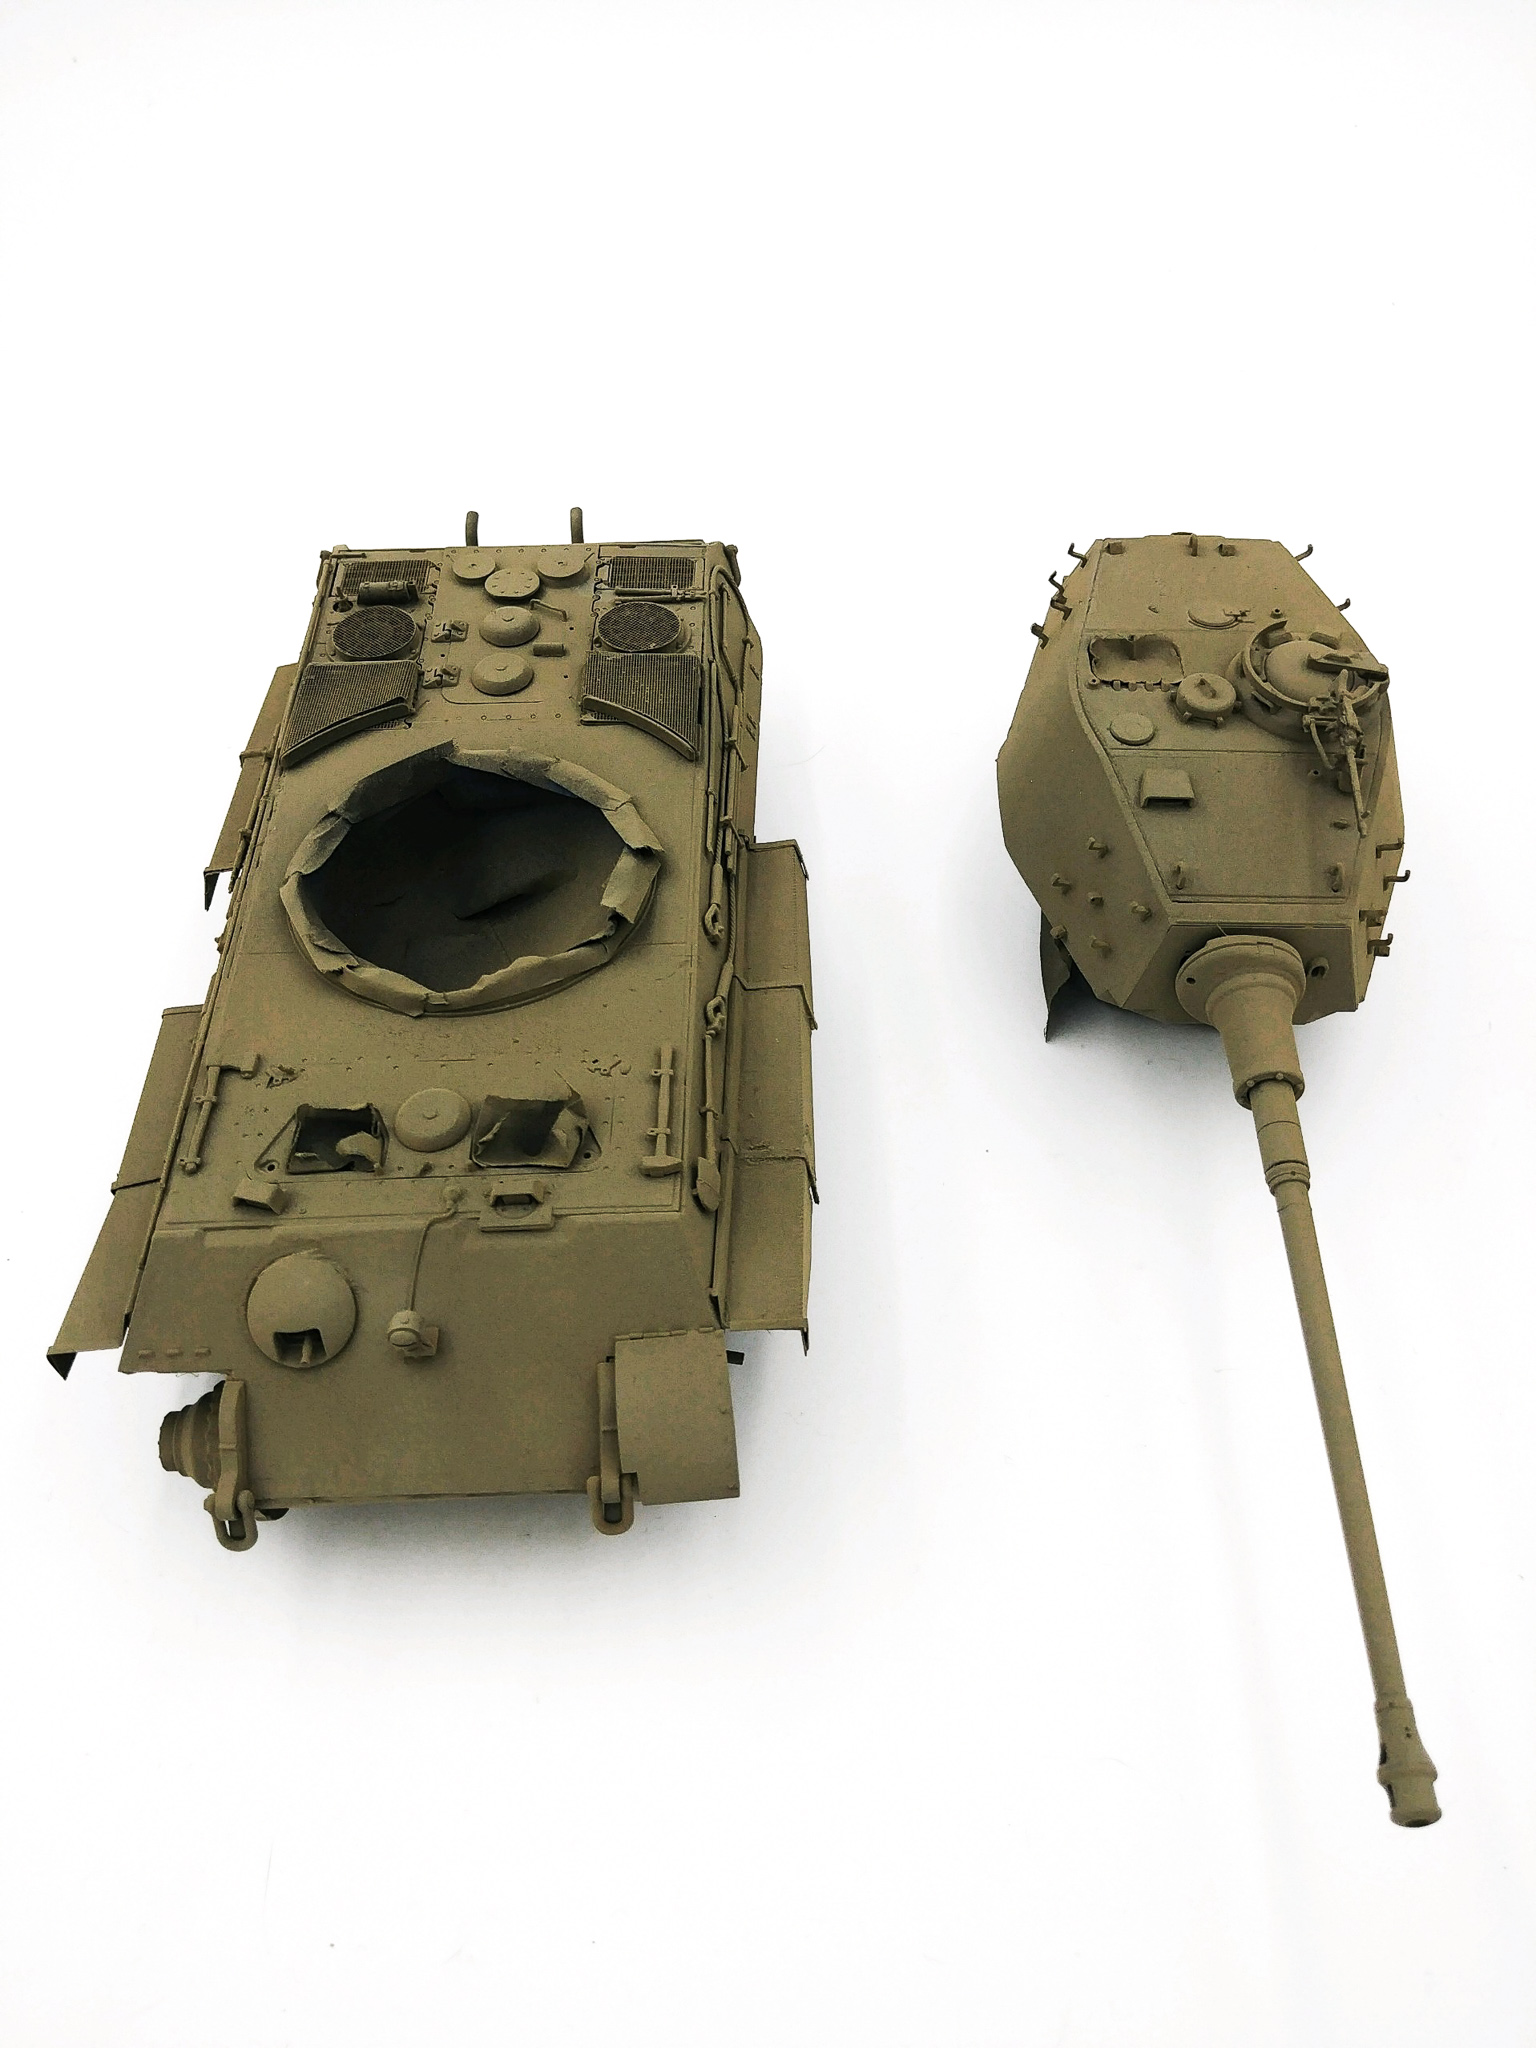
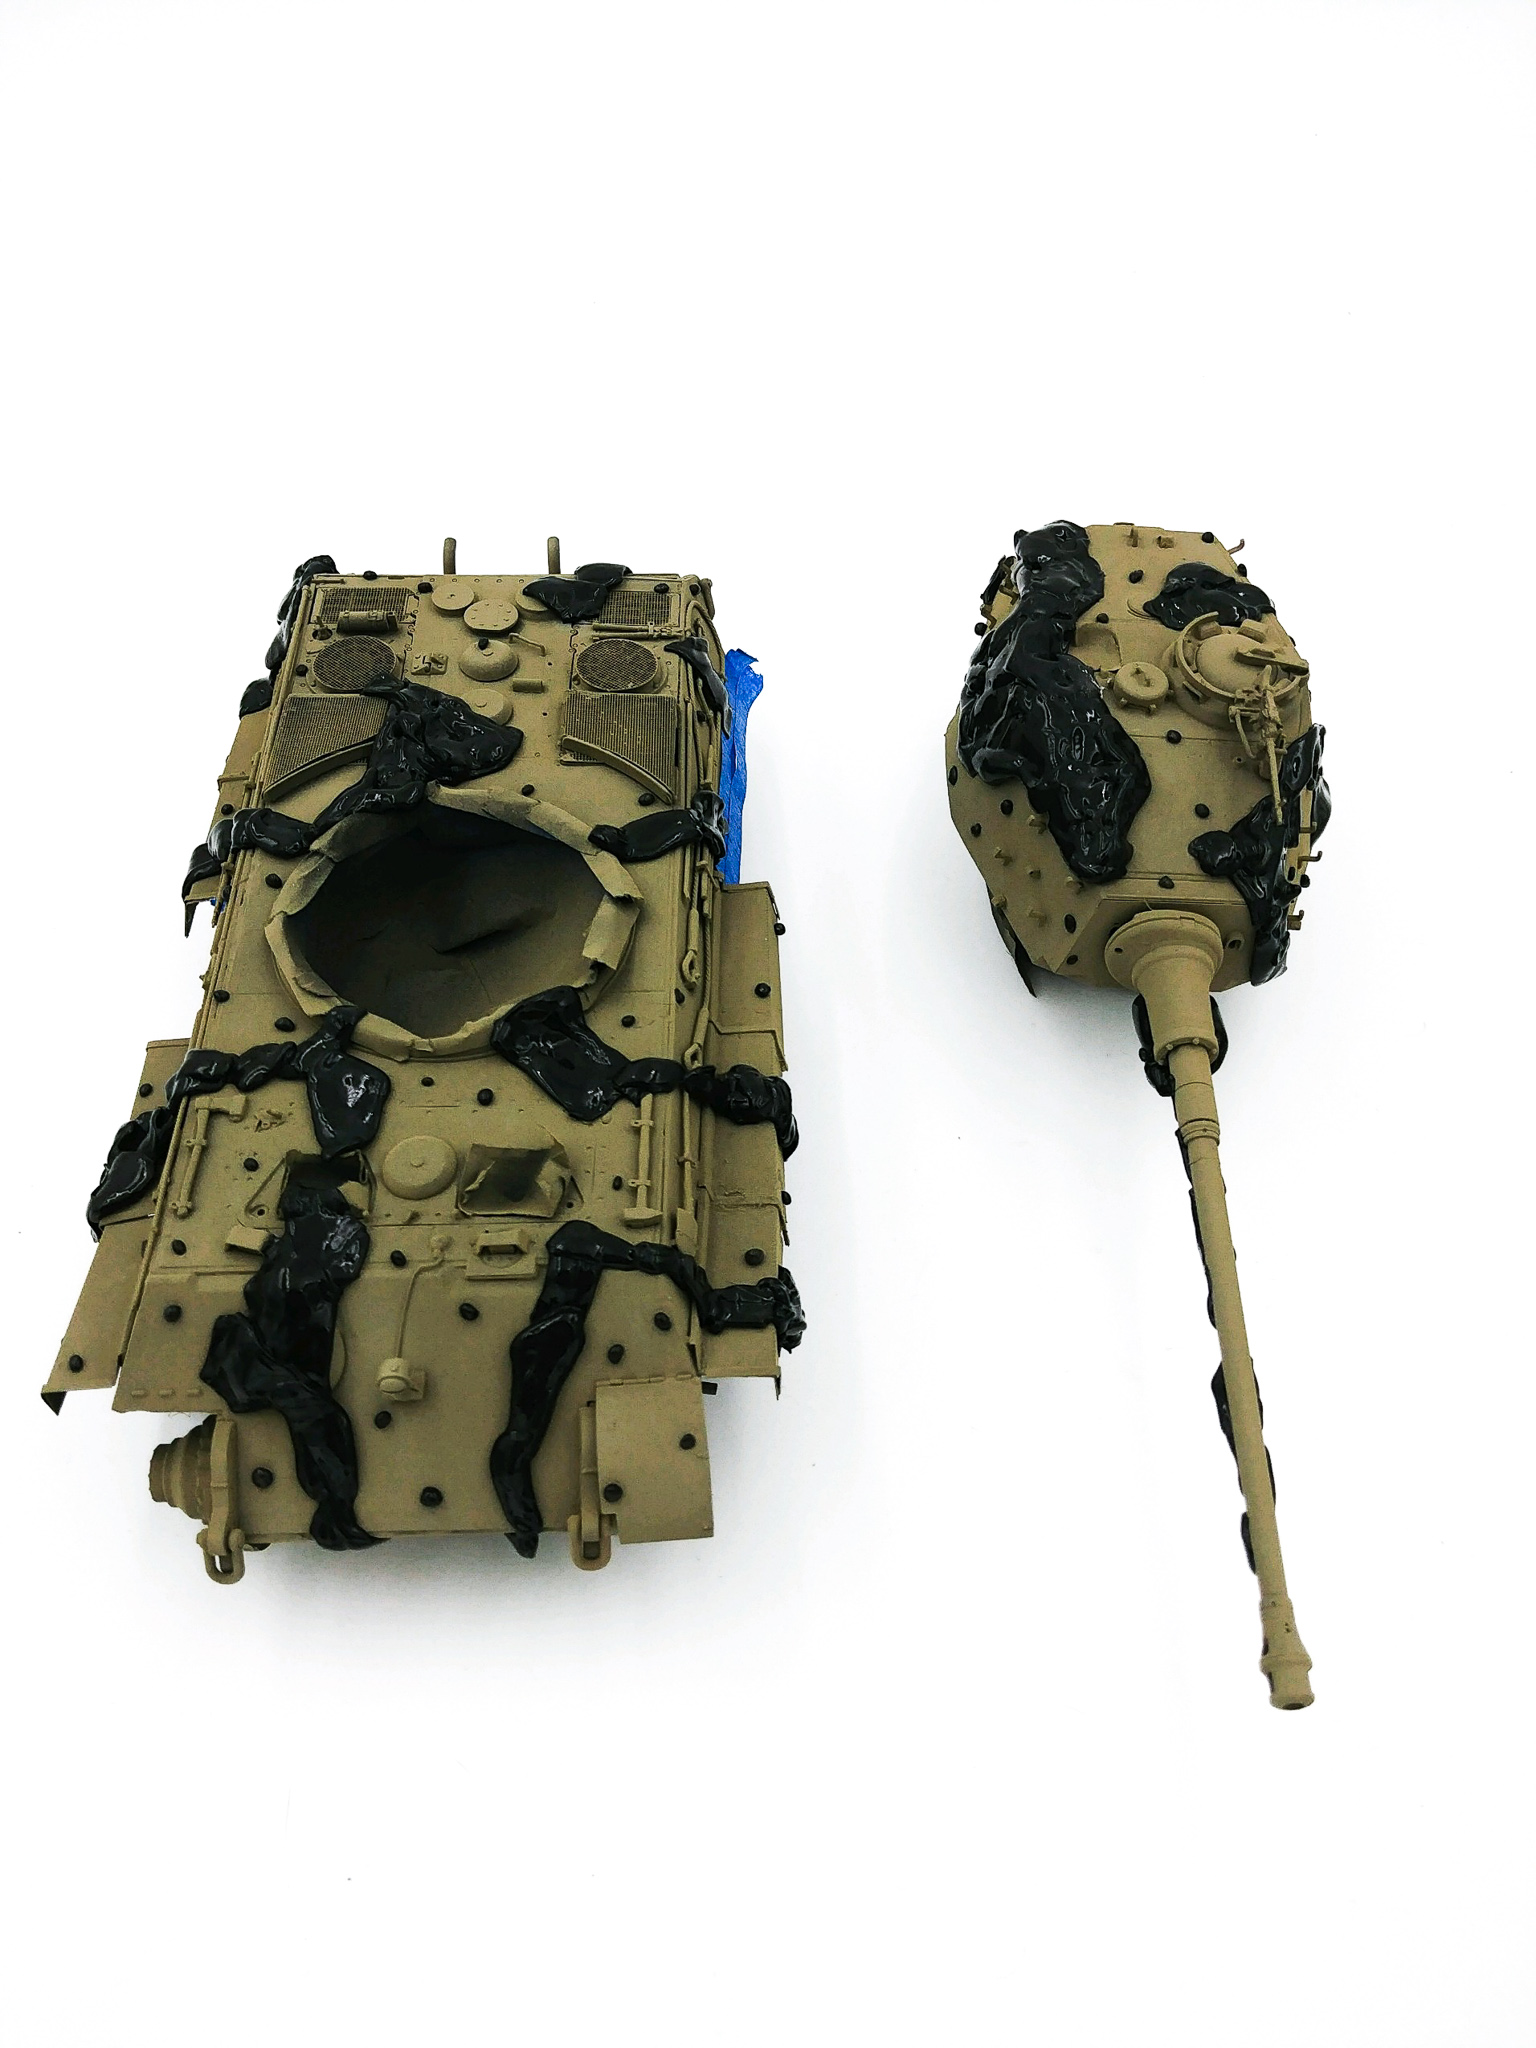
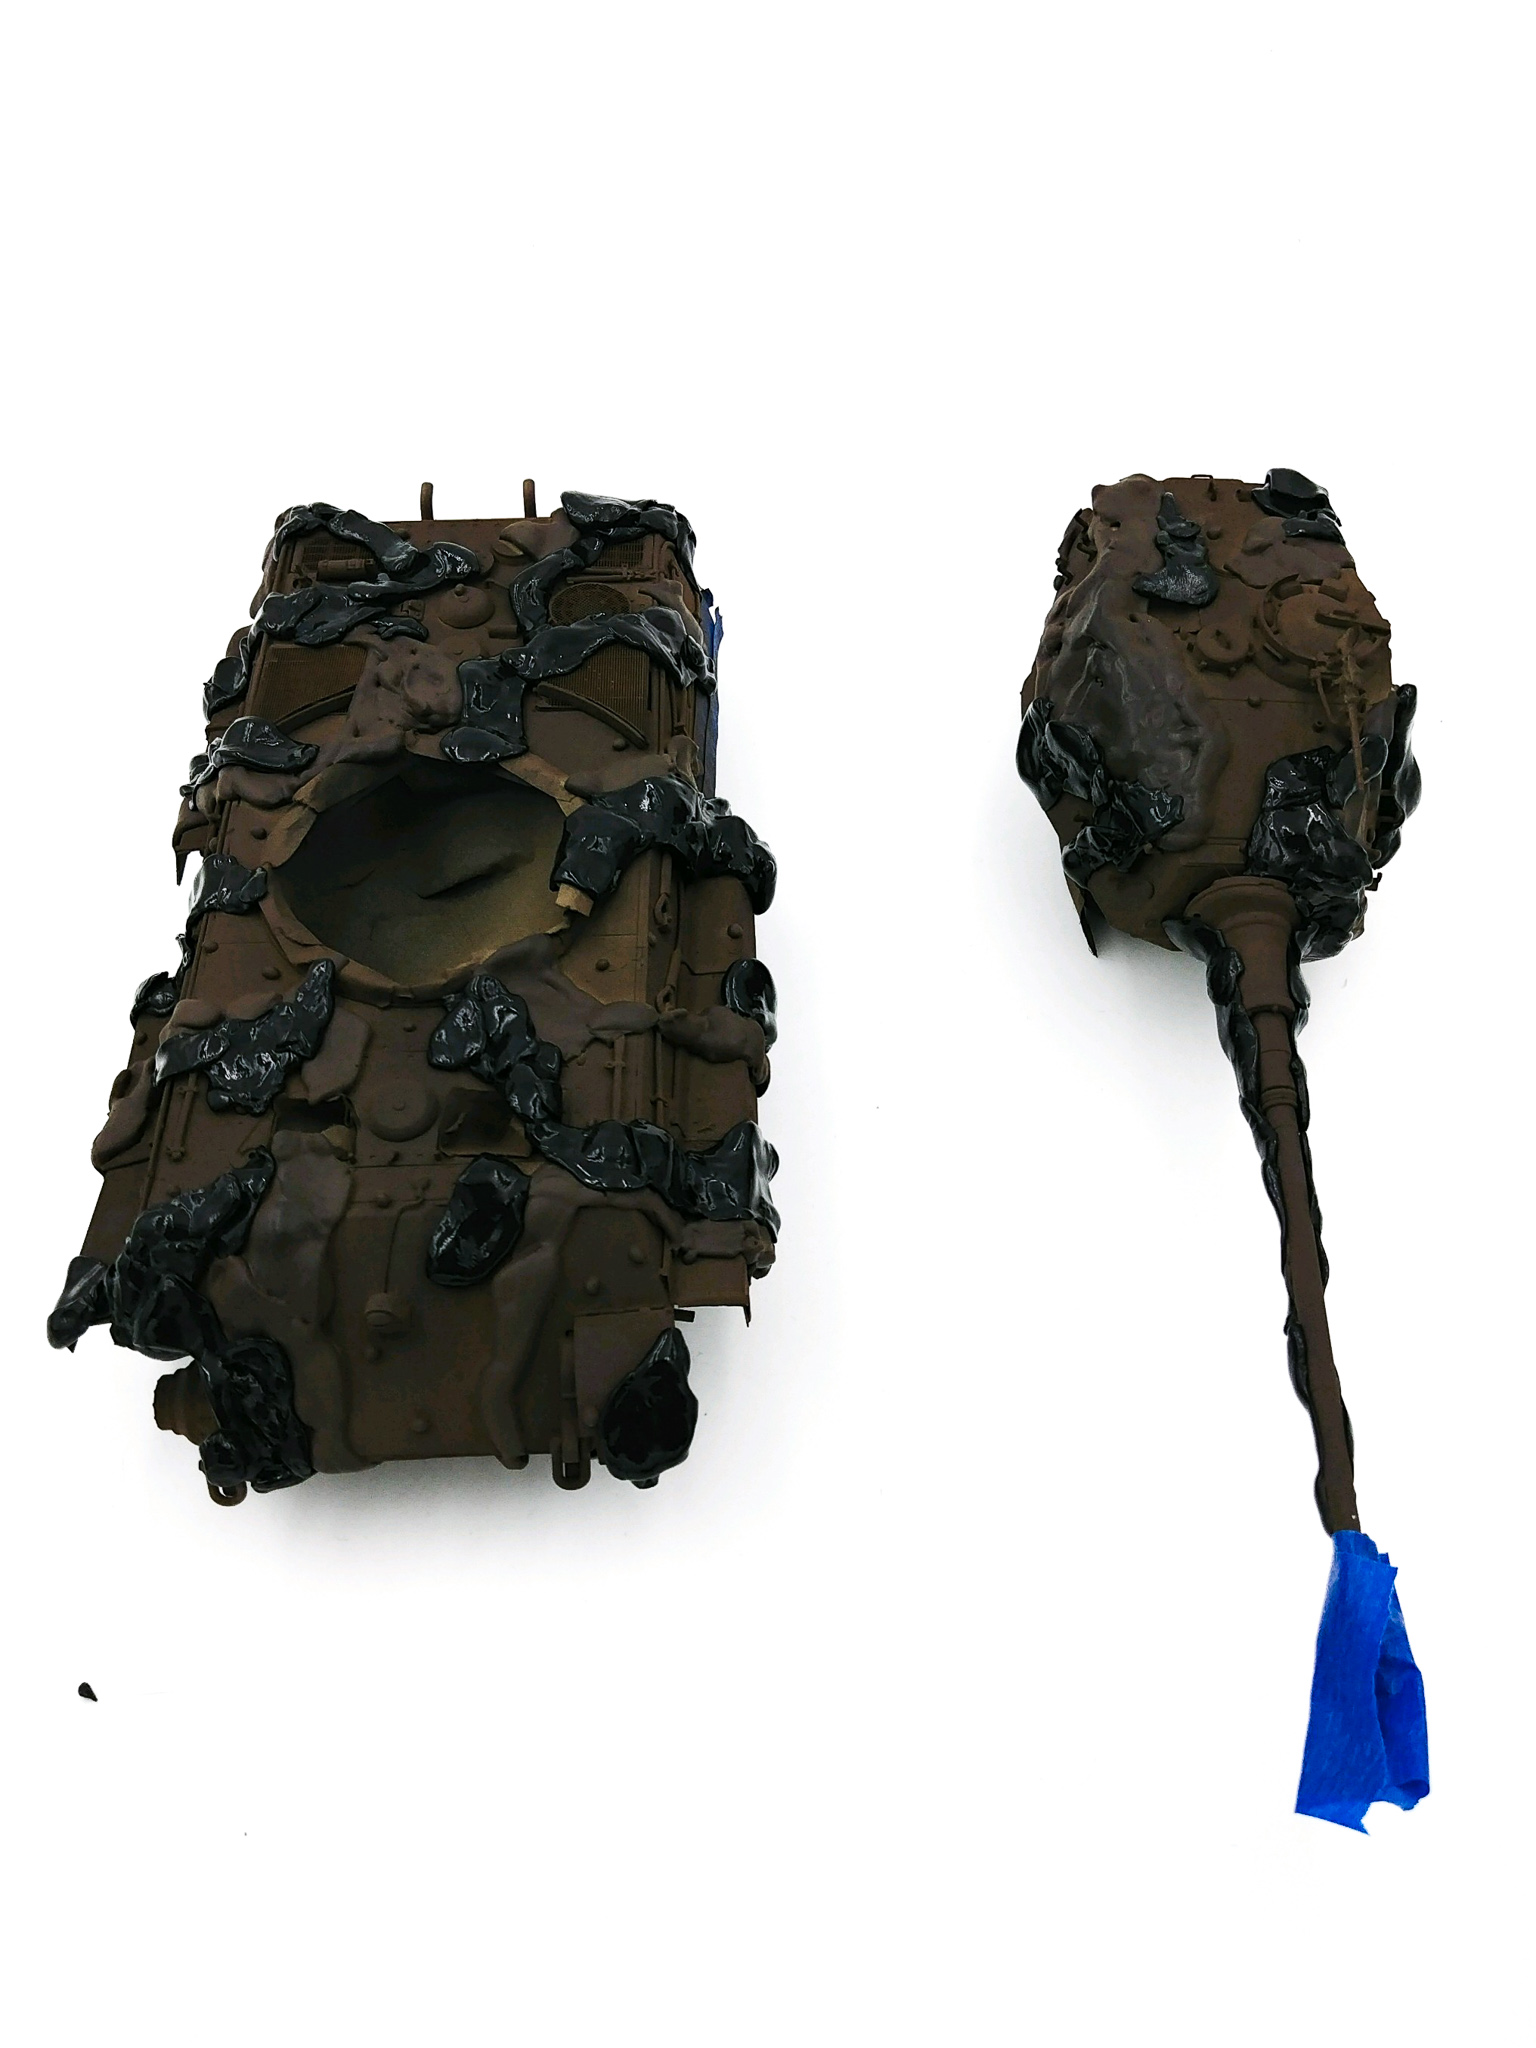
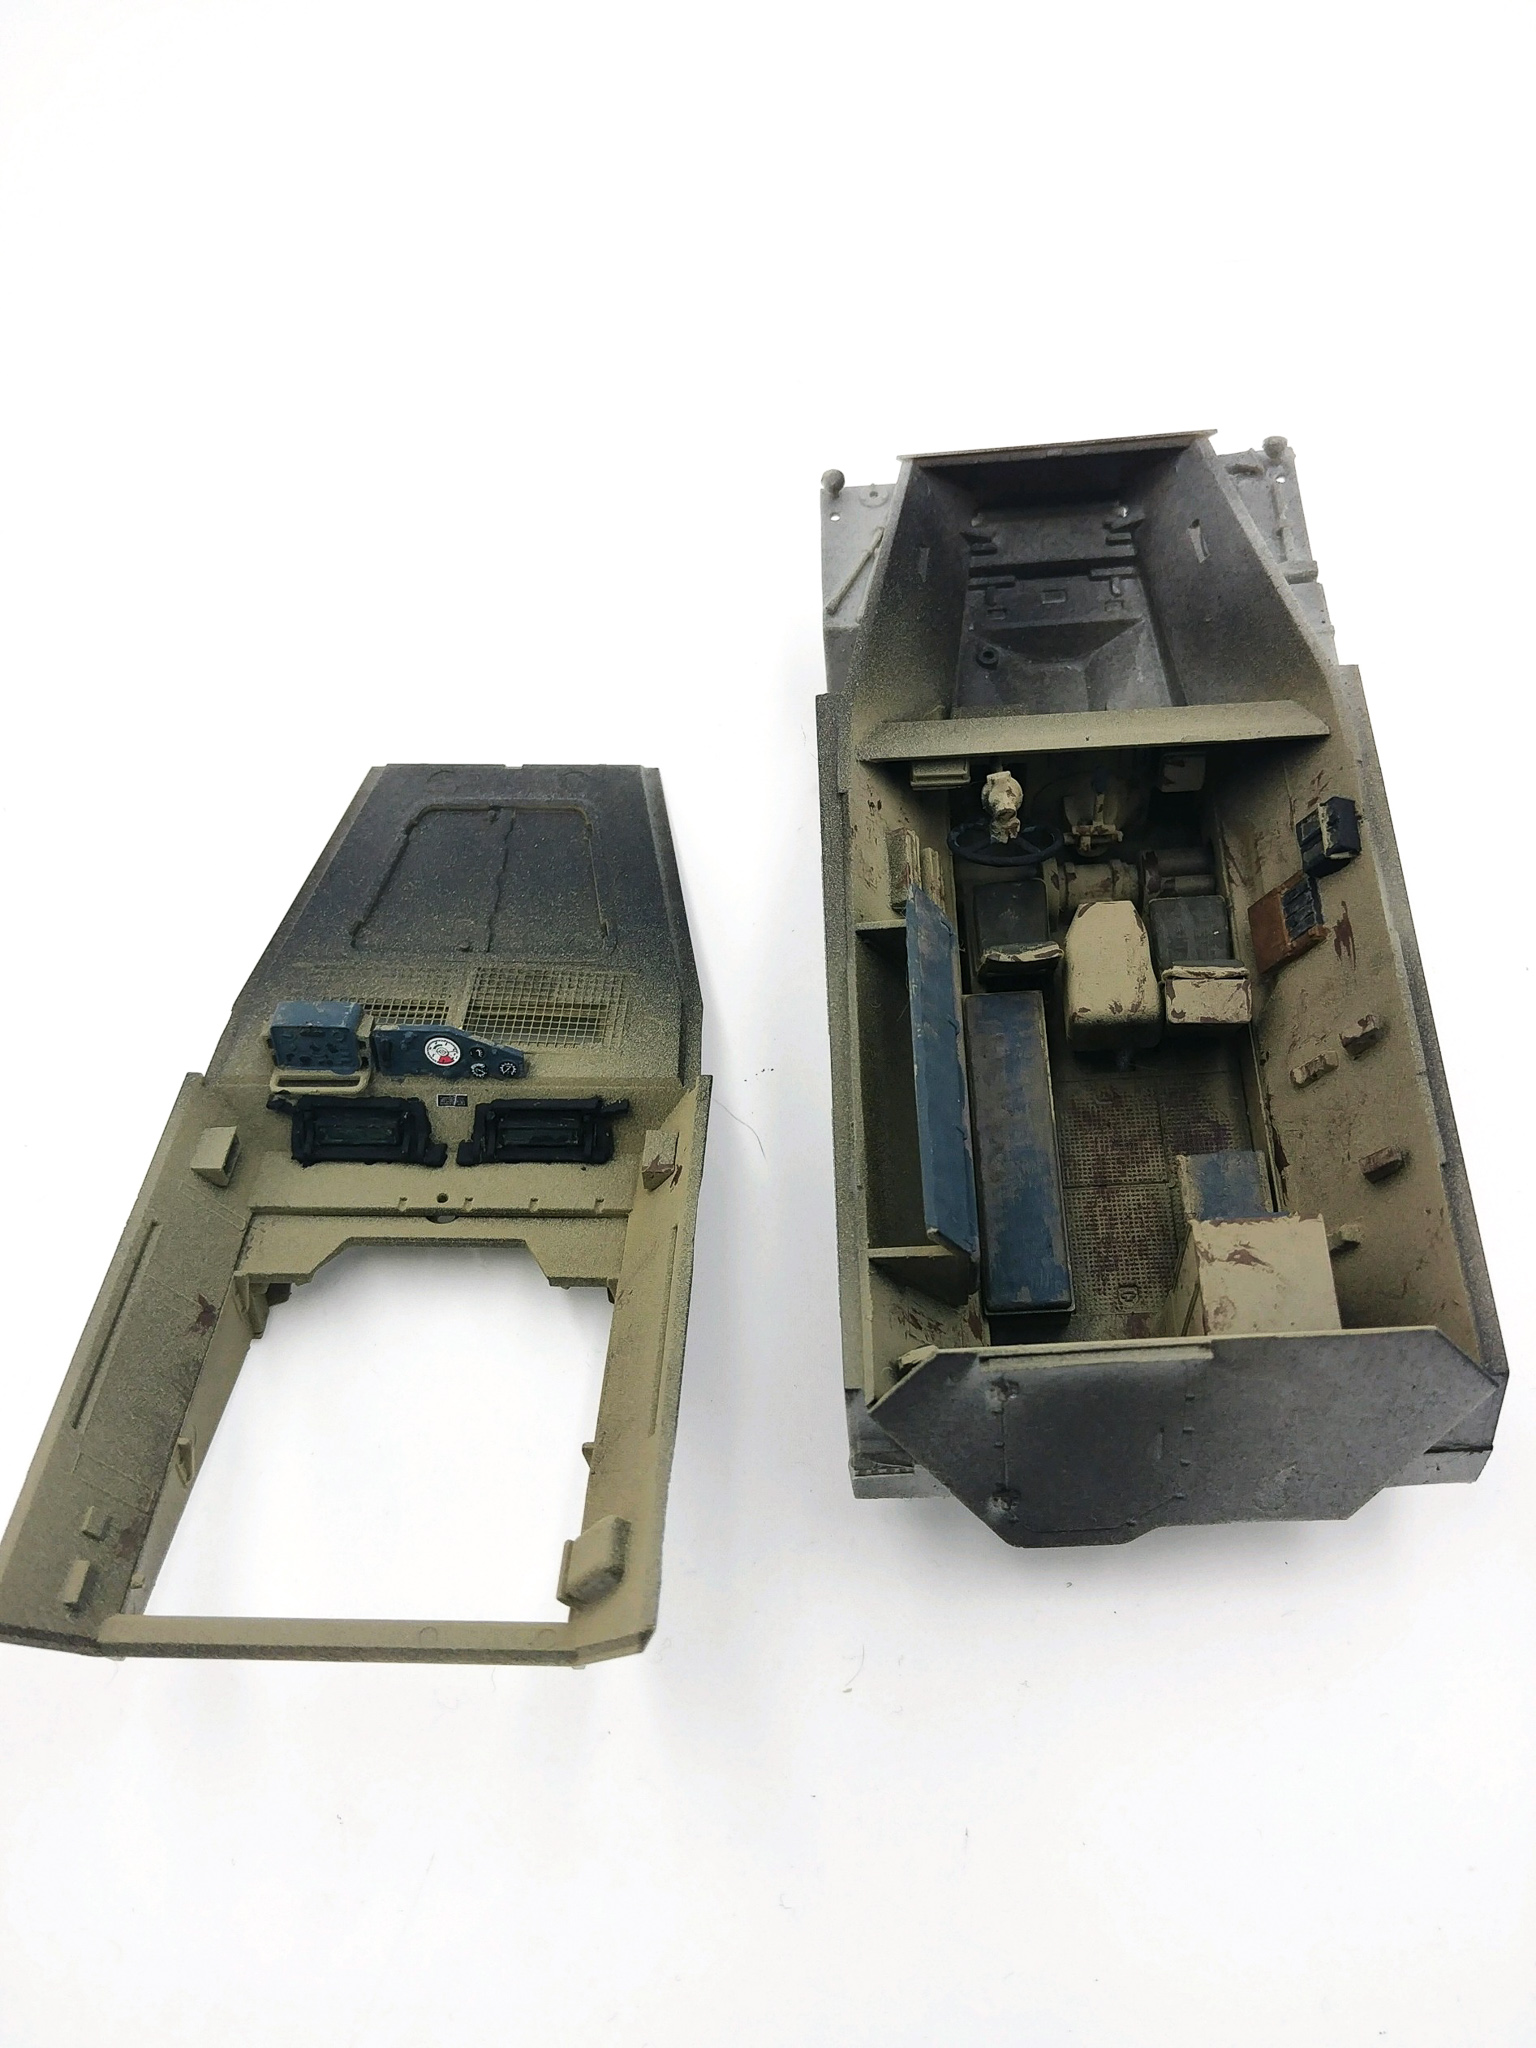
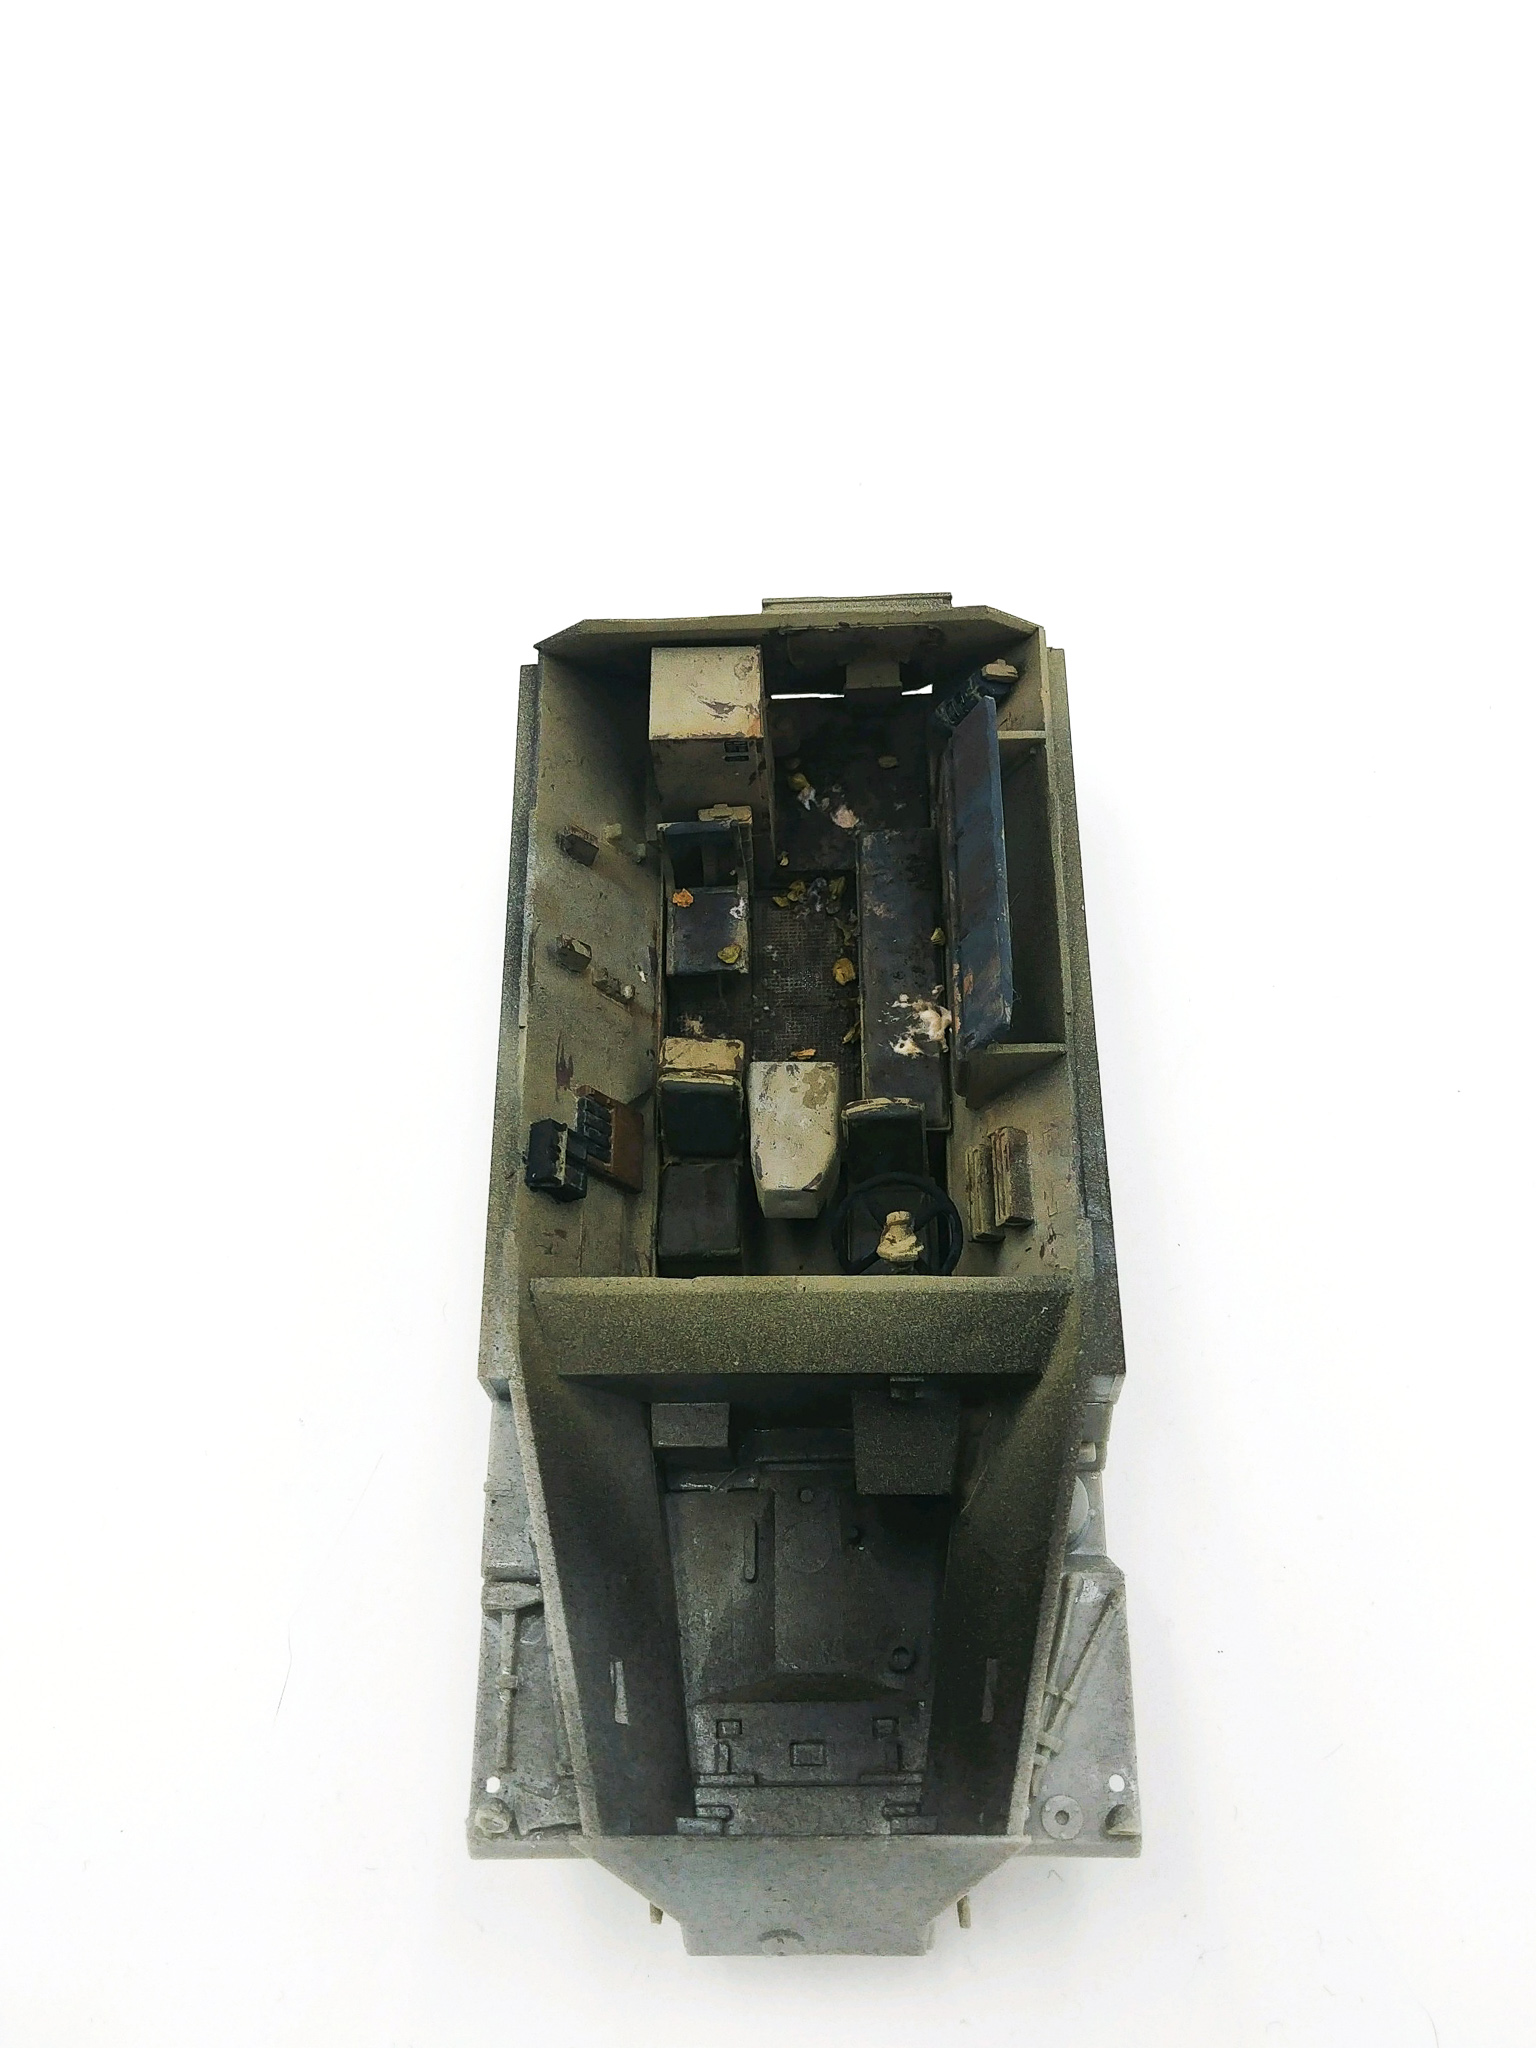
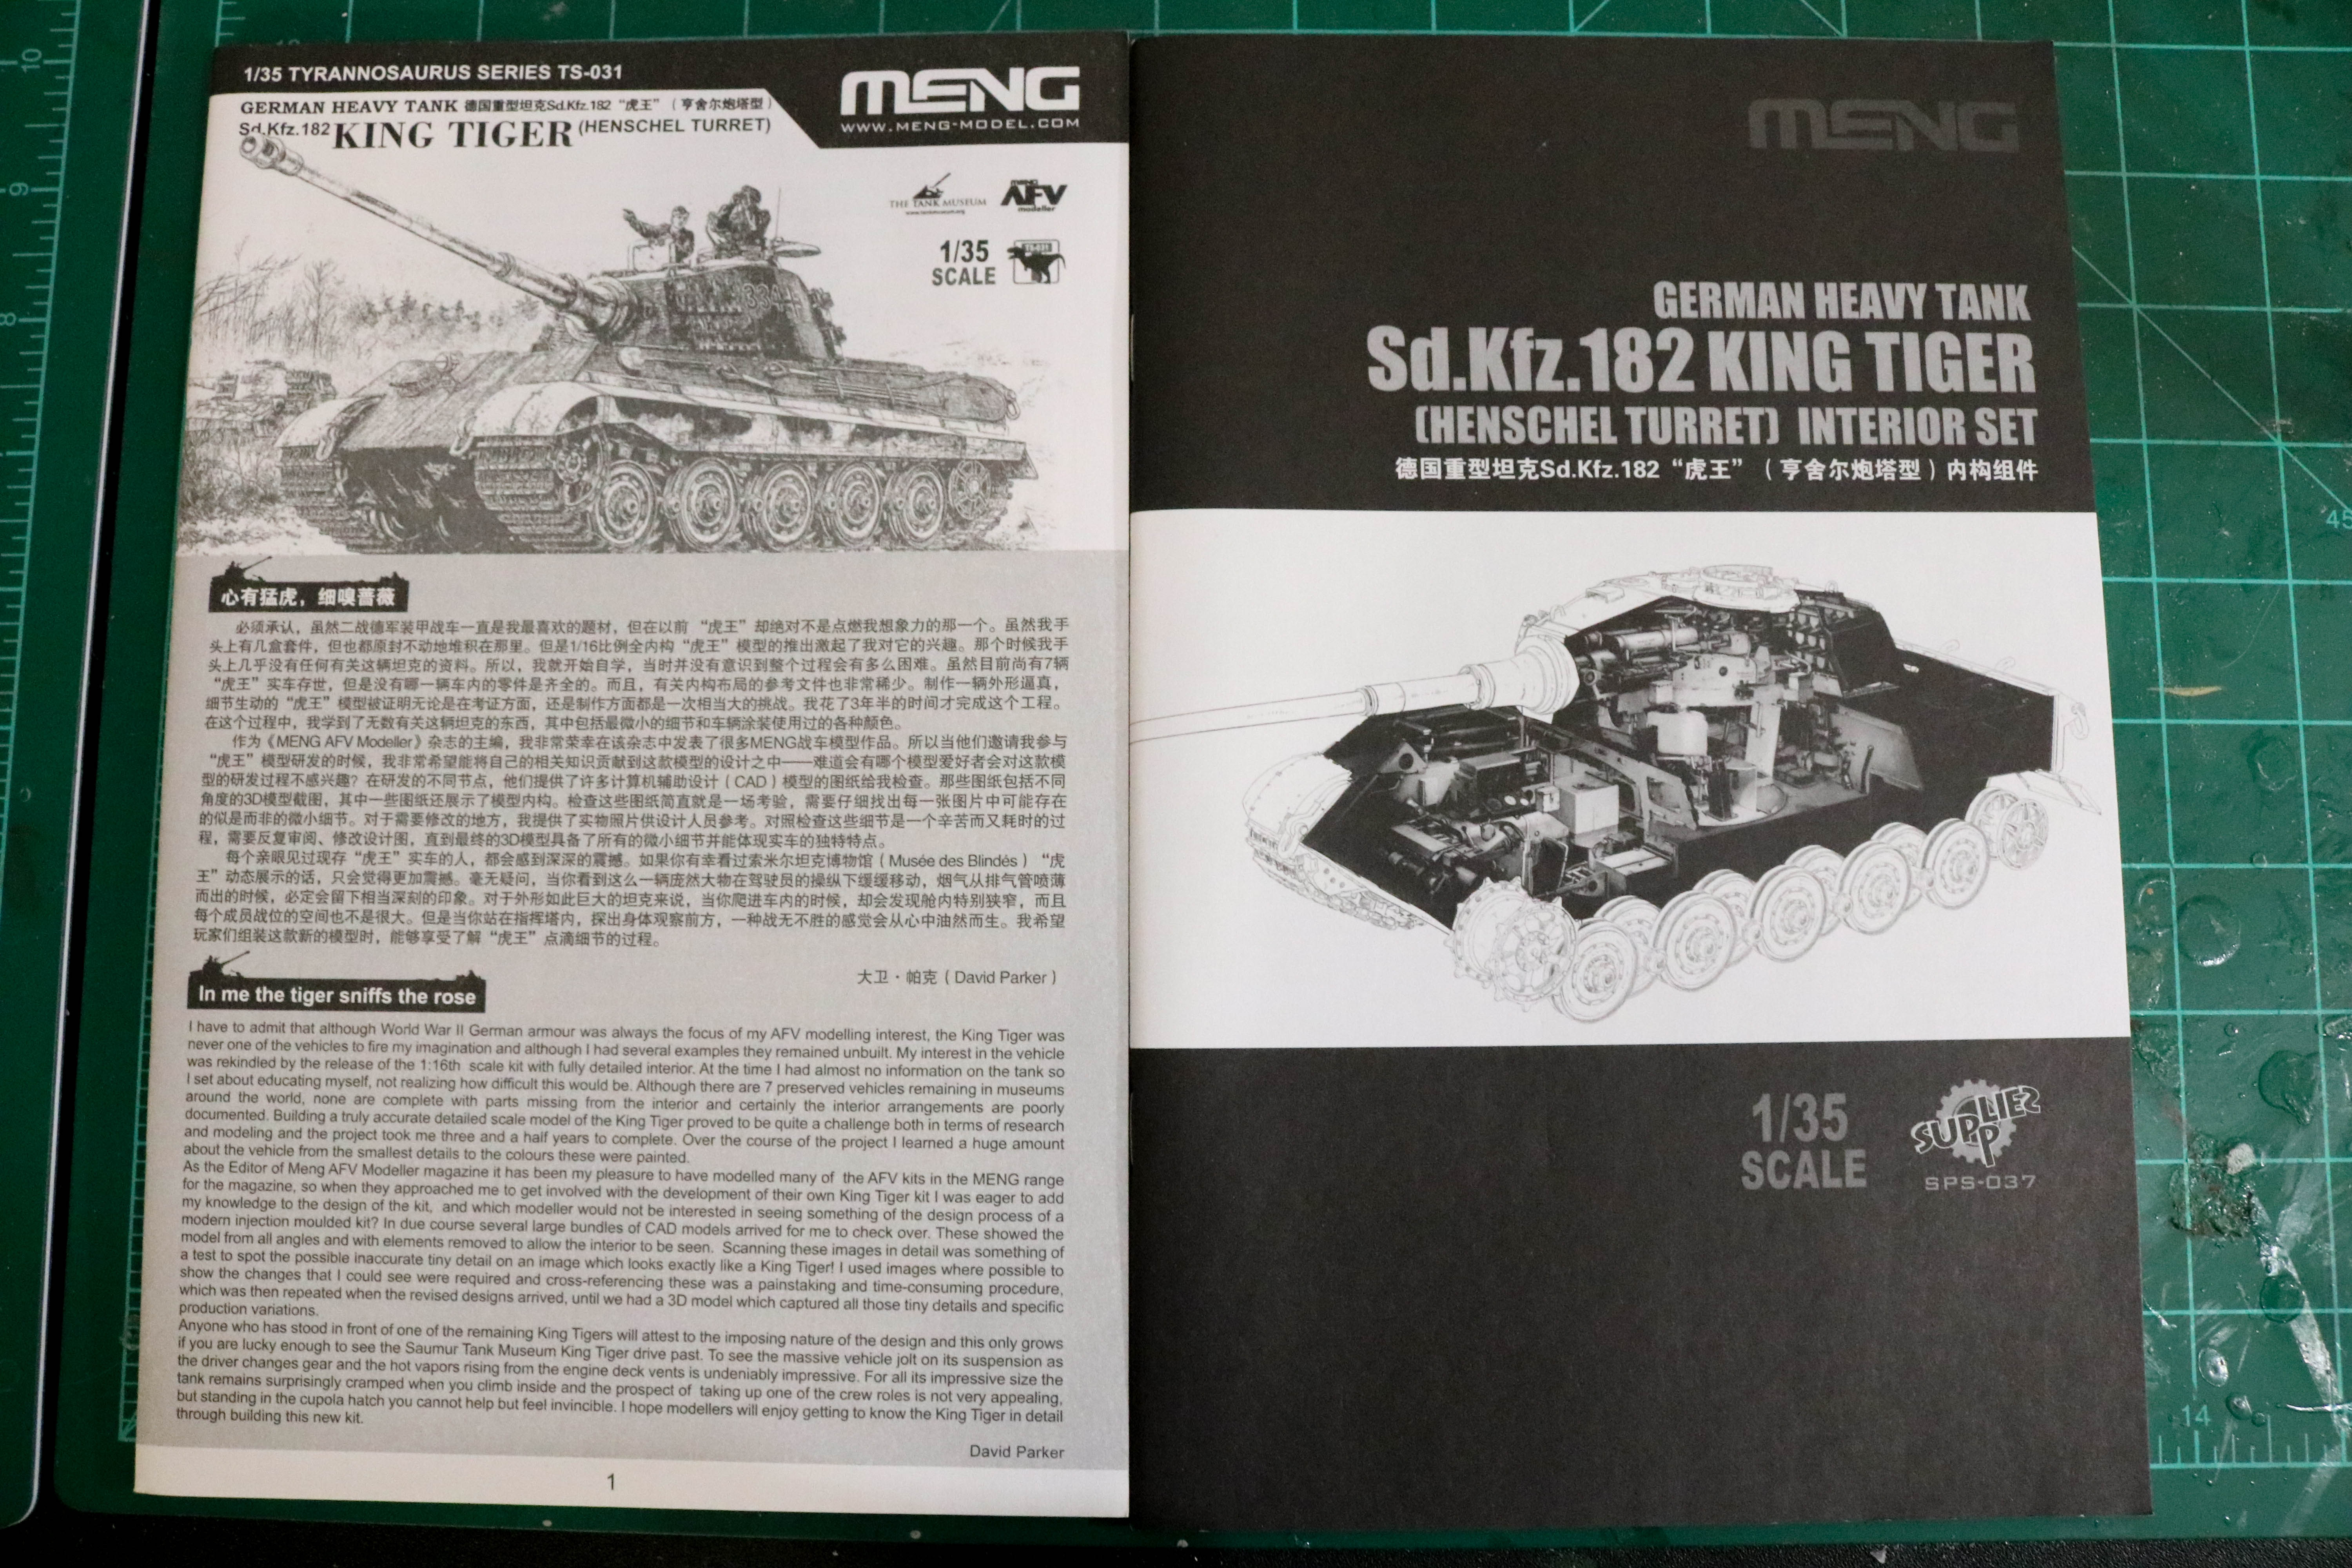
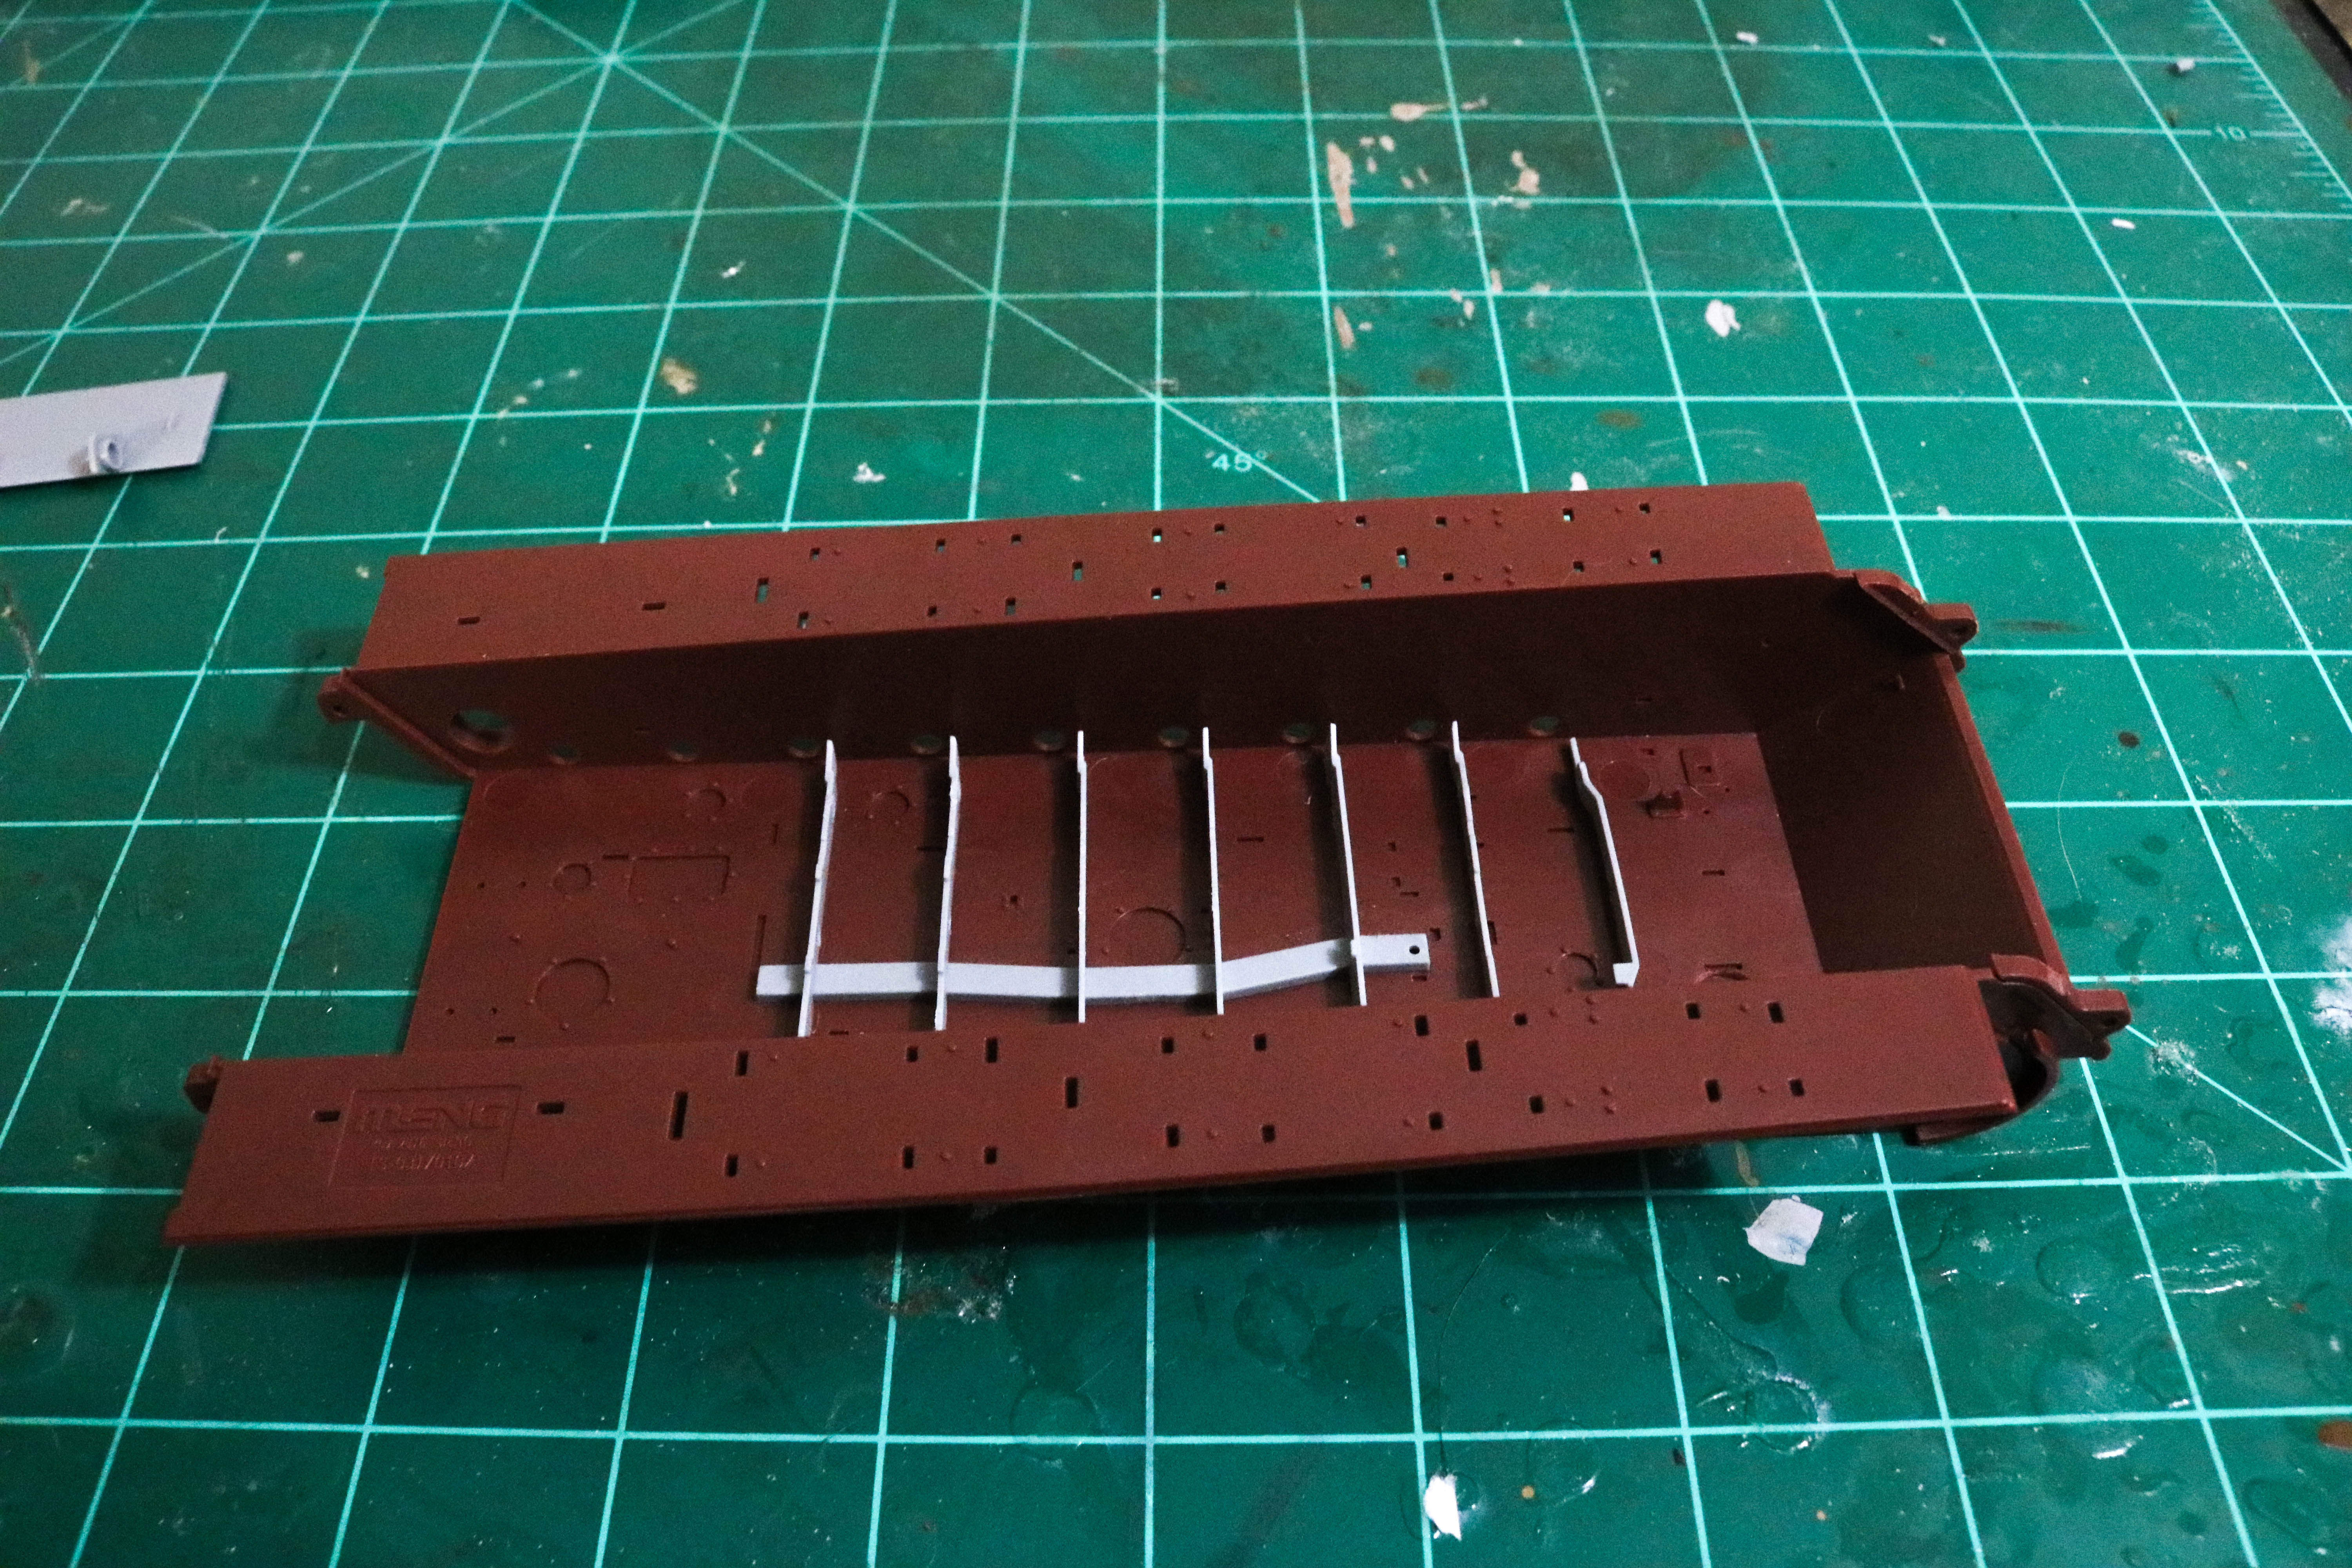
As for the Meng King Tiger, I think working off two instruction books simultaneously will put my concentration to the test. I'm sure that's where Takom gets a leg up but according to many (passionate) people, the Meng kit was the way to go. I've been checking and rechecking placement and how it relates to further parts so progress won't be as rapid as the other kits.


Thanks for checking out my build, I'm very excited to continue working. If you have any suggestions about modeling techniques, historical considerations, or anything I'd be very grateful to hear. Like I said, I'm still very much new to this - particularly doing any model in a serious way - and input is very appreciated.
jrutman
Visit this Community
Pennsylvania, United States
Joined: April 10, 2011
KitMaker: 7,941 posts
Armorama: 7,934 posts
Posted: Friday, October 06, 2017 - 11:32 PM UTC
Like you said,an ambitious project ! I look forward to following your progress. As far as your question regarding weapon slings,I always use lead foil from wine bottle tops,cut into strips and I sometimes add buckles or adjuster slides out of photo etch.
Th Alpine figures are all little gems to be sure and I enjoy them as they are ready to paint with no additional detail needed. I don't know how historically accurate you want to be but I have studied this particular battle group for decades now and no pics have surfaced of any of Peipers or Diefenthals' men wearing the winter reversible combat suits. The LAH generally didn't get issued these until they went to Hungary later on.
J
erichvon
Visit this Community
England - East Midlands, United Kingdom
Joined: January 17, 2006
KitMaker: 1,694 posts
Armorama: 1,584 posts
Posted: Saturday, October 07, 2017 - 12:13 AM UTC
This has all the makings of a superb diorama so will be watching attentively. Nice mix of vehicles and figures and the activity evenly spread so no dead areas. An ambitious project plus an interesting one. Good luck with it!
kurnuy
Visit this Community
West-Vlaaderen, Belgium
Joined: August 22, 2009
KitMaker: 1,491 posts
Armorama: 997 posts
Posted: Saturday, October 07, 2017 - 01:41 PM UTC
Hi ,

nice and very interesting project for sure however i agree what Jerry mentioned about the reversible combat suit .

You're also planning to put civilians on the scene , to be honest the Belgians didn't welcome the Germans and the fact that the Wss was advancing through their hometowns and villages for the second time was extremely frightning for them. To make a long story short you would find the most of them in their cellars with the doors locked hoping for the best . I know some cases where civilians hide Gi's to prevent them from taking prisoner or worse .

Anyways it's your build and as said before it has everything to look awesome . Take your time and a lot of succes.

Kurt
SandersCreative
Visit this Community
Florida, United States
Joined: September 24, 2016
KitMaker: 12 posts
Armorama: 12 posts
Posted: Thursday, January 11, 2018 - 11:09 PM UTC
Happy New Year, and thank you for the advice and encouragement! I've done some research into the issues mentioned that would impact historical accuracy, and I've decided that I'm going to take a little more artistic liberty than I initially planned.

For the reversible winter combat suits, I'm going to keep them in to add visual diversity for the German troops, particularly because the end product will be seen an audience unfamiliar with the subject matter.

As for the civilians, I agree it is almost completely improbable that any would remain, and that most fled at the first whisper of a German advance. However, for the sake of narrative and incorporating an element of the war that stretches beyond the purely military, I've elected to continue with my plan for civilians.

For the build progress, I've been very much focused on the Sd. Ah. 52 ammo trailer. The Bronco model was fairly involved and had a few tricky components (though not nearly as much as a Dragon model).

Trailer 1

Finding references for German trailers, particularly this one, was tough. What little I did find didn't lend much in the way of functional uses. I'm not entirely sure, but I'm curious if this wire and end piece are actually the electrical connector that would be hooked to the truck. I know with modern army trailers, we have the cable attachment to allow the trailer to slave electricity from the truck for brake lights, etc.

Trailer 2

I primed it all with a spray can of Chaos Black that my friend showed me. He uses it for Warhammer, but I prefer it other primers I've used. It preserves all the details and dries within a minute or so.

Trailer 6

For airbrushing, I'm pretty partial to Ammo by Mig. It sprays evenly and doesn't clog my airbrush. The first layer sprayed was Burnt Iron. Once that dried, I sprayed heavy chipping fluid over it. That took probably close to a half hour to completely dry.

Trailer 7

Once the chipping fluid was dry, I airbrushed two thin layers of Dunkelgelb.

Trailer 9

To get the chipping fluid to work, I wet a small brush and lightly scraped over areas that would wear like edges and handles. I was surprised how effortlessly the paint chipped. I have to say, I'm a believer in the chipping fluid now. It achieved results I could never dream of accomplishing with a brush or a sponge.

Trailer 10

Trailer 12

I'm sure some of you noticed that I'm a dingus and had the cargo box tongue attached to the wrong side. I realized that during a test fitting and felt incredibly dumb. Thankfully, an X-acto knife and superglue were able to remedy the blunder and painting could go on.

I used 502 Abteilung oils lightly to create small tonal variations but didn't want to do anything too crazy just yet. I'm waiting until I have a better idea of the terrain before I commit to final weathering.

Trailer 13

Also, I experimented with Vallejo Environments Fuel Stains enamel. The entire bottle is very frothy and hard to see where the fluid actually is, so I got a little more than I wanted, but I'm okay with it.

Trailer 14

I strapped in the jerrycans with the string included in the kit and painted it with Vallejo Pale Brown. There's an area where it's not quite as taut as I want, but I might place a helmet or something over it to hide it. We'll see. I added a chain which was also included in the kit.

Trailer 15

Trailer 17

Overall, I've enjoyed the trailer. It was a good build and made me realize I need to pay more attention when constructing. There's still a bit more I need to do with finishing, such as more oil washes, adding dirt and mud splatters and accumulations, and more storage cargo on top.

Now, however, the Sdkfz 7 is staring me down. My goal is to get it to a similar level of completion as the trailer before the end of the month. That way I can focus my efforts on the King Tiger and figures, which I know will demand a lot more time and effort.

I appreciate the feedback and welcome any advice or knowledge you all have. I definitely feel like I'm flying blind in the reference department for pretty much everything except the King Tiger.

kurnuy
Visit this Community
West-Vlaaderen, Belgium
Joined: August 22, 2009
KitMaker: 1,491 posts
Armorama: 997 posts
Posted: Friday, January 12, 2018 - 12:21 AM UTC
Awesome work on the trailer , very realistic look . Looking forward to see more but again take your time .
SandersCreative
Visit this Community
Florida, United States
Joined: September 24, 2016
KitMaker: 12 posts
Armorama: 12 posts
Posted: Sunday, May 13, 2018 - 11:57 PM UTC
I have been chipping away at this project, and progress has been steady. As I've worked, the composition has evolved slightly. I've decided to incorporate a Panzer IV as well as a knocked out Sherman with additional figures.

Box

The Panzer IV J came together initially without any real headache, which was a welcome change after my constant battle with the Sdkfz. 7.

Panzer_IV_1

The only challenging component I struggled with a bit were the side skirts. However, Dragon provided an essential tool for bending the structural components that encase the wire screens.

Panzer_IV

Once assembled, the entire vehicle was primed and airbrushed with AK Interactive's Real Colors. I used Dunklegelb Ausgabe '44 (RC061), Braun (RC065), and Olivgun (RC047). It was my first time using AK's, as I typically airbrush with Ammo of Mig's line, but I found the Real Color series to be a little better in coverage and leveling.

Panzer_IV_initial_paint

Panzer_IV_initial_paint_2

I will begin chipping, detailing, and weathering on the Panzer IV soon.

The Sherman went together without many issues as well. That doesn't mean it was perfect, but this time it was operator error. I glued the cupola ring backwards and had to do a little surgery to get it in the correct position.

Sherman_Initial_Paint

Sherman_Unpainted

It was also primed, dusted with some 502 Abteilung rust pigment, and then airbrushed.

Sherman_Basecoat

Archer decals were added for the serial and registration markings on the flanks and rear of the tank. I'm not entirely certain that the numerical conventions are 100% accurate how I placed them, but it gets the point across.

Sherman_Initial_Paint_1_1_of_1

Sherman_Initial_Paint_2_1_of_1

I did a little bit of oil weathering but plan to spend quite a bit more time on the Sherman before adding the tangible mud textures and tracks.

The Meng King Tiger is also coming together, but incorporating an interior makes it much slower going than the other vehicles. I'm enjoying this build the most though, as it's my first attempt at an interior and really offers insight to the inner workings of the beast.

King_Tiger_Interior_2

King_Tiger_Interior_3

King_Tiger_Interior_4

This boat had a few metal hooks to serve as oar guides that needed holes drilled into the resin. Other than a little clean up, it was pretty much ready for paint right outside the packaging.

Boat_Unpainted

Boat_Painted

As for figures, most have been assembled, gaps have been filled, photoetch details such as belt buckles and slings have been added, and now most are ready for priming and painting.

Figures_Progress

Children_1

Soldier_with_watch_1_of_1

As I have never made a serious attempt at figures before, this has been a daunting task. Particularly in rendering the faces. I have been airbrushing a very light base over the flesh and then using highly diluted 502 oils to build layers as I would on a canvas painting. It's certainly a learning process.

German_Soldier

Well, that's the update on my work so far. I'm working in tandem on a 1/16 King Tiger that will be identical to the one depicted in this diorama as they will be displayed together.

Thanks, as always, for checking out my work, offering great input, and of course, the support.

maartenboersma
Visit this Community
Noord-Holland, Netherlands
Joined: October 10, 2010
KitMaker: 764 posts
Armorama: 742 posts
Posted: Monday, May 14, 2018 - 04:41 AM UTC
Dioramartin
Visit this Community
New South Wales, Australia
Joined: May 04, 2016
KitMaker: 1,476 posts
Armorama: 1,463 posts
Posted: Monday, May 14, 2018 - 04:11 PM UTC
There you are! I was wondering what happened, very pleased to see this - you're a quiet achiever, this is looking ever more special. Great work
parrot
Visit this Community
Ontario, Canada
Joined: March 01, 2002
KitMaker: 1,607 posts
Armorama: 1,581 posts
Posted: Tuesday, May 15, 2018 - 10:51 PM UTC
Great work.
I thought I had some crowds in some of my dios,but this is one big crowd.

Tom
ivanhoe6
Visit this Community
Wisconsin, United States
Joined: April 05, 2007
KitMaker: 2,023 posts
Armorama: 1,234 posts
Posted: Tuesday, May 15, 2018 - 11:11 PM UTC
WOW!! What a great start ! Thanks for sharing.
A suggestion for the engine, Make a crate to fit it with semi-open sides and use it for cargo in a truck. Just a thought.....
Thanks for sharing and PLEASE post more progress photos>
Tom
SandersCreative
Visit this Community
Florida, United States
Joined: September 24, 2016
KitMaker: 12 posts
Armorama: 12 posts
Posted: Friday, August 24, 2018 - 02:48 PM UTC
I'd like to first thank everyone who has been following this and responding, it's encouraging and appreciated!

I'm getting down to the wire for my goal to have this project completed by November for my senior exhibition, and I've been able to chip away at it. However, some of my other pieces (chiefly a 6 foot tall oil painting), have demanded a vast majority of my time. The good news is, I have finished most of my pieces and am able to focus much more effort on this diorama.

The Meng King Tiger admittedly has me a bit dejected. The interior is so beautiful and so intricate, yet almost all of the detail is going to end up covered and unseen. As such, I'm deliberately not investing quite the same amount of time on the interior as the exterior.

King_Tiger_Interior_Components_1_of_1

After getting the sub assemblies together, I airbrushed them cremeweiss and rotbraun respectively.

King Tiger Interior Components 2 1 of 1

My initial plan was to have the engine cover lifted and a few crew inspecting the engine, however there was a fit issue between the walls and several small hoses and pieces of the engine snapped and disappeared. So the engine, regrettably, had to be put to the side. I don't think I will have anything beyond the firewall visible at this point, at least for this vehicle. I am considering adding a Takom Panther if time permits, and I'll be sure to have the engine visible on that vehicle if I go that route.

I also did some work on my Sherman. I started with an oil wash with a handful of Abteilung 502 colors. Once that dried, I experimented with AK Interactive's diorama line. The mud textures came out well, though my one complaint is they dry almost completely matte, despite advertising as "wet mud." I'll have to hit it with some gloss once fully dry.

Sherman_Mud_1_of_1

After mud textures to set a baseline of how I envisioned the vehicle, I transitioned to pigments for subtle hue shifts, dirt, and general weathering.

Sherman_Pigments_1_of_1

That's when I really hit some uncharted territory. AK's Snow Microballoons come as a super fine, dry powder that even in the jar looks very much like powdered snow. Using some basic PVA glue, I applied the snow to raised edges where it would have accumulated with this knocked out vehicle being at a slight angle. I'm pretty happy with the result, I have to give props to AK. So far, their diorama products are pretty outstanding.

Sherman_Snow_1_of_1

Sherman_Snow_2_1_of_1

Sherman_Snow_3_1_of_1

After today's work, the Sherman and Panzer IV are nearing completion. Both vehicles still need their tracks, which are fruilmodel for all my vehicles and I plan to assembly line that tedious endeavor all at once. The Panzer IV's mesh skirts will go on after the tracks are on and finishing touches - footprints, stowage, etc - will go on after that. The Sherman's burnt-out quality is going to get a little tweaking as well, likely tomorrow once the dullcoat has dried.

Sherman_and_Panzer_IV_1_of_1

Thanks for checking out my progress! I know my updates have been sparse and spaced out until this point, but between now and the beginning of November, expect plenty more updates and images as I close in on the finish line.

Dioramartin
Visit this Community
New South Wales, Australia
Joined: May 04, 2016
KitMaker: 1,476 posts
Armorama: 1,463 posts
Posted: Friday, August 24, 2018 - 04:27 PM UTC
Well after looking at these exceptional images of exceptional work I’m spaced out too…in fact I need some time to put my brain back in my skull. Phenomenal, you should turn professional immediately
Hohenstaufen
Visit this Community
England - South East, United Kingdom
Joined: December 13, 2004
KitMaker: 2,192 posts
Armorama: 1,615 posts
Posted: Friday, August 24, 2018 - 11:29 PM UTC
I'm totally impressed by your output and the effects you are getting. I would make one comment though. If it were me I wouldn't go too over the top with the chipping on the German vehicles. They were all virtually brand new in December 1944. Nearly all the older issued tanks etc had been lost in France and Belgium and the SS units, in particular, had all been re-equipped. If you look at Ron Volstad's box top art for the Pz IV, you will see the paintwork is pretty clean looking, although naturally there would be mud and dirt thrown up from the awful Ardennes "roads". The newness of this equipment would make a nice contrast with the beaten up Sherman.
jrutman
Visit this Community
Pennsylvania, United States
Joined: April 10, 2011
KitMaker: 7,941 posts
Armorama: 7,934 posts
Posted: Saturday, August 25, 2018 - 01:20 AM UTC

Quoted Text

I'm totally impressed by your output and the effects you are getting. I would make one comment though. If it were me I wouldn't go too over the top with the chipping on the German vehicles. They were all virtually brand new in December 1944. Nearly all the older issued tanks etc had been lost in France and Belgium and the SS units, in particular, had all been re-equipped. If you look at Ron Volstad's box top art for the Pz IV, you will see the paintwork is pretty clean looking, although naturally there would be mud and dirt thrown up from the awful Ardennes "roads". The newness of this equipment would make a nice contrast with the beaten up Sherman.


Thoroughly agree. The PzIV also would have the corresponding late war factory applied hard edges cammo pattern. But the OP has decided he is not so much concerned with historical accuracy but rather with telling the story to a more uninitiated audience.
So we should respect his wishes.
J
shermadude
Visit this Community
United States
Joined: December 03, 2007
KitMaker: 161 posts
Armorama: 53 posts
Posted: Saturday, August 25, 2018 - 06:36 AM UTC
Hi,
I'm enjoying your work so far,but I have a couple of comments on the Sherman. The barrel on the co-ax thirty cal. is sticking way to far out of the mantlet. Only the tip of the barrel(about four scale inches)should be visible on the M34A1 mount you have on the tank. The earlier M34 mount had a lot more of the barrel visible,almost as much as you show. Also the periscope mount on the commander's hatch should be flush with the hatch. By the way the commander's hatch ring was rotatable 360 degrees. There is no 'wrong' position for it to be in,only preferred positions!
Hope this helps and keep up the good work.
Regards,Bob
SandersCreative
Visit this Community
Florida, United States
Joined: September 24, 2016
KitMaker: 12 posts
Armorama: 12 posts
Posted: Friday, August 31, 2018 - 11:53 PM UTC
Hey, everyone. I appreciate the words of encouragement and certainly the information. I can easily scale back the chipping, though I didn't realize late war vehicles all utilized the hard-edged schemes. I'll incorporate that into the King Tiger and Panther, for sure. That's also some great info on the Sherman, and it's all things I will fix in my next Sherman build. I'm a bit bummed that I can't adjust it on the current model, but it is what it is.

I really appreciate the feedback. It's pretty great presenting work to such a knowledgeable community that can offer valuable insight versus more traditional art groups whose input amounts to "Yup, that's a tank."

If I had to a identify any kit as being my problem child, it would certainly be the Sdkfz. 7. The instructions were cluttered, some of the pieces did not want to fit together at all, and some fragile components were broken on the sprue before I even had an opportunity to break them myself. I did however, with much swearing and contemplation of smashing, finally get it assembled.

Sdkfz_7_Built

Sdkfz_7_Build_Detail

I primed it and gave it a coat of Dunkelgelb Variant from AK's Real Color range. Something I do have to say, and I've come to realize this is somewhat of a controversial topic, but I'm now quite a big fan of Mig's AirCobra. I've had several airbrushes, which have all offered me varying degrees of grief. I haven't had a single issue with this airbrush, so props to the wife who got it for me last Christmas.

Sdkfz_7_Primed

Sdkfz_7_Dunkelgelb_variant

The Dunkelgelb Variant seemed a bit too garish for me. Something about the color felt like it would stand out negatively with the other pieces. So I went back over it with a very thin coat of standard Dunkelgelb and it quieted the color down wonderfully.

Sdkfz_7_Dunkelgelb_Coat

With the Sdkfz. 7 base coat applied, I turned my attention back to building the King Tiger. As the interior came together, I began to really lament the fact that most of it would end up hidden away. I frequently would dry fit the roof to get a better idea of what would be most visible through the open hatches. The driver and radio operator areas were easily the areas that would get the most attention from anyone who peeks inside. So while almost all of the interior received only the most basic paint job, I put some extra care into those areas.

Now, I'm not sure how I did this, but I somehow spaced on the fact that Meng offered a great decal sheet with their interior kit. Because I forgot that existed, I used the Sdkfz. Instrument panel from Archer to give the impression of the dials if not an accurate depiction. When I found the Meng decal sheet in the box, I felt like a dingus.

Radio_Decals

Radio_Detail

After adding some wires to the radio, I finished constructing the turret's interior and gave it a coat of Elfenbein.

Turret_Built

Turret_Base_Paint

It was at this point that I found the Meng decals and applied some of ammunition decals along the casing sides and bottoms for rounds that would be easily visible - like those through the rear turret hatch. These were very fiddly and all I can say is I'm grateful I only had to do a few.

Interior_Decals

Ammo_Decal

After seeing a better view of the ammunition in the light box for this picture, I went back and did a quick touch up on some of the paint to create a more even separation of color.

As if they knew, I received some mail precisely when I wanted to do some light weathering. Using pigments and oils from Abteilung 502, I gave the interior a bit of use. I tried to keep it rather subtle, since I know these Tigers were delivered to the heavy panzer battalions shortly before the offensive.

Pigments

Hull_Detail_2

Hull_Detail_1

Turret_Detail_1

Turret_Detail_2

Complete_Interior


It's bittersweet to begin closing all this work into the vehicle, but it's exciting to see a King Tiger actually begin to take form. Particularly because of the countdown clock incessantly ticking in my head.

Thanks for checking out my work and please feel free to educate me on any historical or technical blunders, I'm always receptive to learning more.

cheyenne
Visit this Community
New Jersey, United States
Joined: January 05, 2005
KitMaker: 2,185 posts
Armorama: 1,813 posts
Posted: Saturday, September 01, 2018 - 12:38 AM UTC
Very nice work , love the derelict Sherman , beauty job .
Everything else is also inspiring and I am looking forward to more of your build .
Now get back to it ..............
sweaver
Visit this Community
Kentucky, United States
Joined: April 19, 2007
KitMaker: 759 posts
Armorama: 410 posts
Posted: Wednesday, September 05, 2018 - 01:12 PM UTC
So after almost 10 years away I pop in here and this is the first thing I see. Wow.

Keep it up.
HansBouwmeester
Visit this Community
Namibia
Joined: March 30, 2015
KitMaker: 346 posts
Armorama: 343 posts
Posted: Wednesday, September 05, 2018 - 10:20 PM UTC
Your paintwork is superb!! I can practice for the next 10 years and I know I will not even get close so I did the only thing left to do ;
For Sale : Airbrush and lots of paint. Just send a PM
And how I recognized this ; I really appreciate the feedback. It's pretty great presenting work to such a knowledgeable community that can offer valuable insight versus more traditional art groups whose input amounts to "Yup, that's a tank."
In Holland there is one spot where you might be able to take pictures of sea-eagles.
Went there a dozen times, waited 100+ hours before I finally had a picture of one.
I proudly showed it to one of my boys. His comment....yep, that's a bird....
SandersCreative
Visit this Community
Florida, United States
Joined: September 24, 2016
KitMaker: 12 posts
Armorama: 12 posts
Posted: Saturday, September 08, 2018 - 07:24 AM UTC
Hey, everyone. I've been gathering quite a bit of momentum, and as ever it's very encouraging to return here for feedback. Also, to you Hans, I completely understand - it seems to be a perpetual struggle with artistic creation.

So I happened upon an old Dragon Halftrack for less than $10, so I picked it up. It was a quick build, only a few hours or so with a few trouble spots but after the Sdkfz 7, it felt like a breeze.

Half_Track_Built

I also picked up a Panther A from Takom with interior. Before I get too much flak, I'd like to acknowledge that I'm aware that the Panther A's were covered in zimmerit, something I will be omitting and that during the Ardennes Offensive, the Germans were using Panther Gs. The issue I had to resolve was that I wanted the interior visible through the hatches, and the Takom Panther A was available and the Rye Field G was not. I'm closing in on 5 weeks before this 3 foot by 4 foot diorama needs to be ready to go into the gallery, so time necessitated I sacrifice some more accuracy.

Panther_Box

The box is indeed quite massive. My experience in building so far has been positive, though. The Meng interior for the King Tiger did not have so flawless a fit as this Takom Panther. Honestly, the only aspect that really got touchy was lining up all the torsion bars into their respective slots as I fit the hull sides onto the base.

Hull_Built_1

After studying the instructions, I realized my best course of action to effectively represent the interior was to build and paint intermittently. I primed with Chaos Black, followed by Mig RotBraun (I'm finding the AK Real Color Rotbraun to be closer to red-purple than red-brown). My next target for this model is to hand paint the transmission gearbox, brake pads, and torsion bars before continuing the build.

Hull_Paint_1

The most progress I've made these past few days is on the external construction of the King Tiger. A majority of said effort was delicately removing the flash and connection points on fragile tow ropes and tools. The commander's machine gun was also a pain. Using sculpting epoxy, super glue, and tweezers, I finally was able to connect a belt of ammunition into the weapon and drape it into an ammo bag, all while on one of the flimsiest styrene pieces I've ever worked with. The Aber side skirts were bent using a photoetch bending tool. They did not take to the solder I have, so I had to turn to super glue. I managed to attach the skirts to the model and the metal brackets to the skirts, but afterwards my fingertips were pretty much one giant dried bit of crust.

King_Tiger_Built_1

King_Tiger_Built_1

The turret basket and hatch openings were then masked with painter's tape. Using AK's Easy Cast Texture, I stippled a cast metal texture across the surface. Though striking against the red plastic, it's actually quite diluted and subtle. The only region where I allowed for a bit more obvious texture was across the sides of the turret.

King_Tiger_Cast_Texture

Primer came next.

King_Tiger_Primed

Once dry, I airbrushed two coats of AK Real Color Dunkelgelb Aus 44. It dried very quickly to a nice, matte finish.

King_Tiger_Dunkelgelb

Now came uncharted territory for me - hard edge camo. I studied up on King Tiger patterns, profiles of specific vehicles, and German stylistic inclinations of the period. I used a can of Mig Masking Putty, and I have to say it's pretty remarkable stuff. It breaks apart with force, yet stretched easily when pulled lightly. It wasn't difficult to create desired masking shapes and there was no residue on my hands or the model.

King_Tiger_Putty_1

I sprayed the entire thing once more with Dunkelbraun from Real Colors.

King_Tiger_Putty_2

With the initial putty still in place, I set new putty to protect the brown from the next coat. I used Real Color Grun followed by a light misting of Real Color Olivgrun.

King_Tiger_Putty_3

I was definitely apprehensive when I started to remove the putty, I really had no idea what to expect. It was a pretty cool experience to see how well the putty had done its job as I peeled away the layers. For my first attempt at hard edged camo, I'm pretty satisfied with the result but I also see the areas on which I need to practice more for the next hard edge attempt.

King_Tiger_Camo

I've also assembled another 20 resin figures, though those will likely be touched on in my next post. Thanks for checking out my work. I can see the light at the end of the tunnel. It's very small - but it's finally in the distance.
SandersCreative
Visit this Community
Florida, United States
Joined: September 24, 2016
KitMaker: 12 posts
Armorama: 12 posts
Posted: Monday, September 17, 2018 - 11:49 PM UTC
Hey, everyone. I'm happy to say progress is continuing to be made.

The King Tiger and Panzer IV received their decals and road wheels.

Panzer_IV_decal

King_Tiger_Decal

The torsion bars and transmission gearbox for the Panther were painted using a mix of flat black and grey.

Hull_Paint_2

The Sdkfz 7 had a few decals added and some weathering done to much of the vehicle. I'm holding off on the wheels until I get the track ready.

Sdkfz_7_weathered_1

I cut down a small balsa strip to create planks which were painted in acrylics and washed with oils and finally brushed with pigments. AK Dark Earth was stippled for a textured mud. Snow microballoons and oregano leaves were placed with a bit of white glue.

Sdkfz_7_weathered_2

Sdkfz_7_weathered_3

A resin cart from Reality in Scale was also on my to-do list. Removing the pieces from the casting block was relatively easy. After a quick filing, the cart went together without any issues.

Cart_1

Cart_2

I primed the cream colored resin with black then airbrushed a dark brown over the entire model. Using a stiff brush, I built up a few layers of brown-grey and light grey over the planks. A dark oil wash followed. After sealing it with Dullcoat, I used Abteilung 502 moss and dark earth pigments on some of the lower areas of the cart. AK splatter effects, Microballoons, and oregano leaves were again used as finishing touches.

Cart_3

Cart_4

A similar process was used for all the stumps and shattered tree trunks which were also from Reality in Scale.

Tree_Stumps

For the halftrack, I added some of the leftover Sdkfz 7 instrument panel decals. As most of the interior compartment would be hidden, I didn't linger too long on the painting of some of these areas.

Half_Track_Interior_Painted

I used Ammo of Mig chipping color with Abteilung 502 stainless alloy pigment on the tread patterned floor. A tarp from Reality in Scale was painted and placed on the seat and mud, dirty snow, and leaves were added.

Half_Track_Interior_Weathered

With the two halves together, I used Apoxie Sculpt and Perfect Plastic Putty diluted in water to fix the gaps. The pieces did not fit well together so some areas needed quite a substantial bit of putty. The interior compartment was protected with painter's tape before priming and airbrushing.

Halftrack_mask

The painting process was identical to that I did on the King Tiger. Priming was done in black, followed by AK Real Colors Dunkelgelb Aus 44. Ammo of Mig Shadow Rust was used after applying masking putty, and AK Real Color Olivgrun was last.

Half_Track_painted

The acrylic weather pass consisted of using Ammo chipping color and burnt iron. In extreme corners or areas of chipping, I added a small amount of dark steel. I wanted an older, more beat up vehicle to contrast against the newer-looking King Tiger. So I was a bit more heavy handed with the oils and pigments. A few leaves were placed, and I may add more depending on the final overall composition. A bit of snow was placed by the vents with AK Wet Effects around it running down the side to imply the melting of that snow.

Half_Track_weathered_1

Half_Track_weathered_3

Half_Track_weathered_2

Additionally, a few props such as ducks, radio, weapons, drum barrels, and tarps are being worked on. Out of a total of over sixty figures, only three more need to be assembled and about a dozen still need putty and details such as weapon slings.

Thanks for checking out my progress!


Dioramartin
Visit this Community
New South Wales, Australia
Joined: May 04, 2016
KitMaker: 1,476 posts
Armorama: 1,463 posts
Posted: Tuesday, September 18, 2018 - 01:18 AM UTC
Stunning painting particularly the weathering, fading, scratching, staining…exceptional & the more I look the more I see. Then there’s the meticulous construction. I don’t know if the camo’s “authentic” – hopefully it is – but I like how much you’re dialling down the tones, looks just right & presumably the KT will get similar treatment. Of all the riches here I have to say – perversely perhaps, in view of how much metalwork you’ve done – that hand-cart is a work of Art.
timcc2008
Visit this Community
United States
Joined: May 12, 2010
KitMaker: 139 posts
Armorama: 135 posts
Posted: Tuesday, September 18, 2018 - 02:16 AM UTC
Amazing work. I just happened upon this post today. I cannot wait to see the final reveal. 60 figures? Wow! That in itself is a major undertaking. Keep up the great work.

vr

Tim
oldbean
Visit this Community
Virginia, United States
Joined: July 05, 2004
KitMaker: 769 posts
Armorama: 461 posts
Posted: Tuesday, September 18, 2018 - 05:31 AM UTC

Quoted Text

Hi,
I'm enjoying your work so far,but I have a couple of comments on the Sherman. The barrel on the co-ax thirty cal. is sticking way to far out of the mantlet. Only the tip of the barrel(about four scale inches)should be visible on the M34A1 mount you have on the tank. The earlier M34 mount had a lot more of the barrel visible,almost as much as you show. Also the periscope mount on the commander's hatch should be flush with the hatch. By the way the commander's hatch ring was rotatable 360 degrees. There is no 'wrong' position for it to be in,only preferred positions!
Hope this helps and keep up the good work.
Regards,Bob


Actually, you have the commanders hatches on upside down. You have the bottom (inside surface) of the hatch showing. Flip them over and it will look great. Fantastic build so far.

Jesse
 _GOTOTOP