Quoted Text
Hi Brian,
You know me too well,  .
.
You might be right about a bigger base, but I will explore the challenge of the A4 option, it might focus the mind and allow me to come up with a nice solution,  .
.
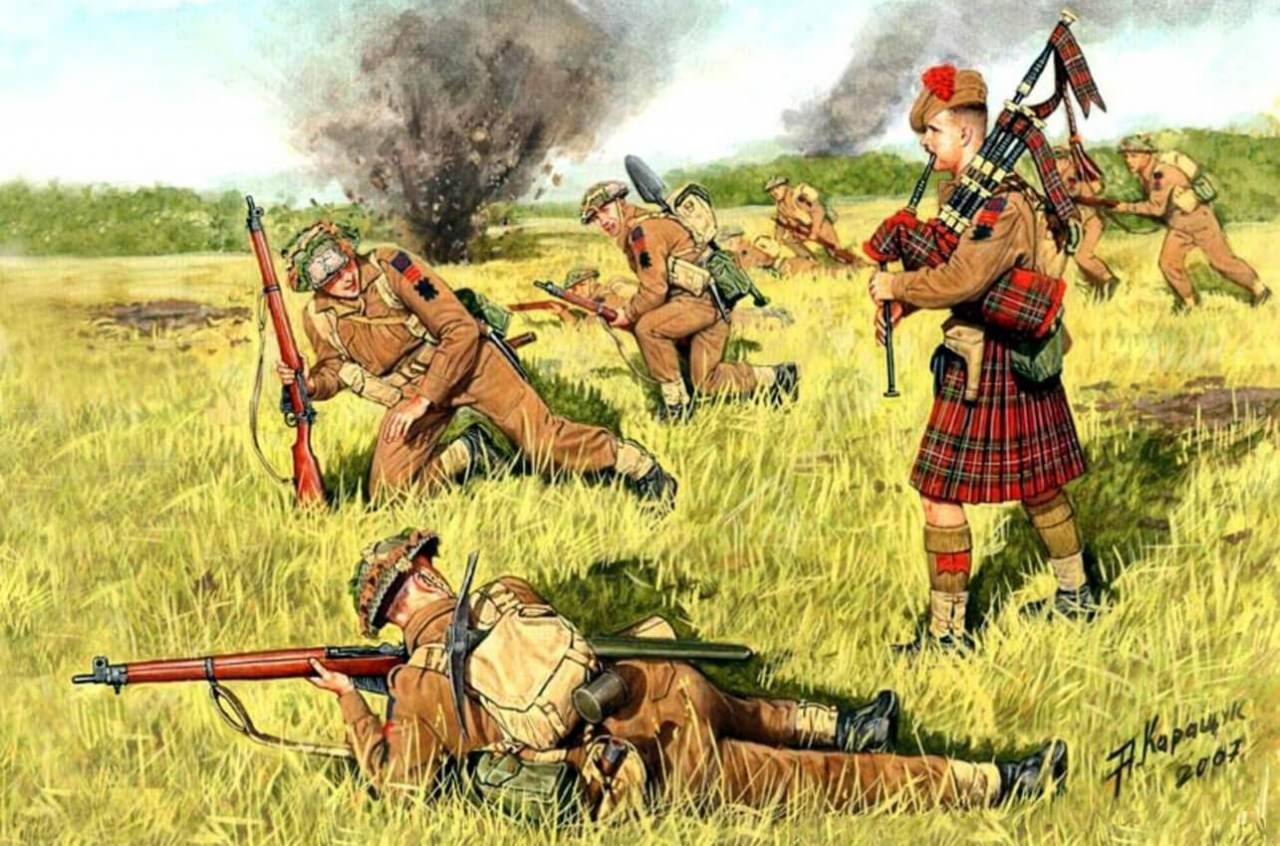
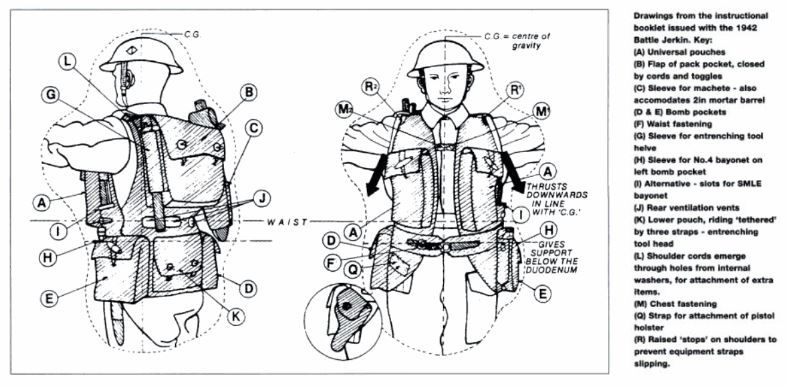
As to the jerkin, I need to look into this further, I'd always thought that variations of such a garment had been in use since WW1, though I could well be wrong...it has often been known,  .
.
If anyone else has information relating to the use and period of such an item please feel free to chip in.
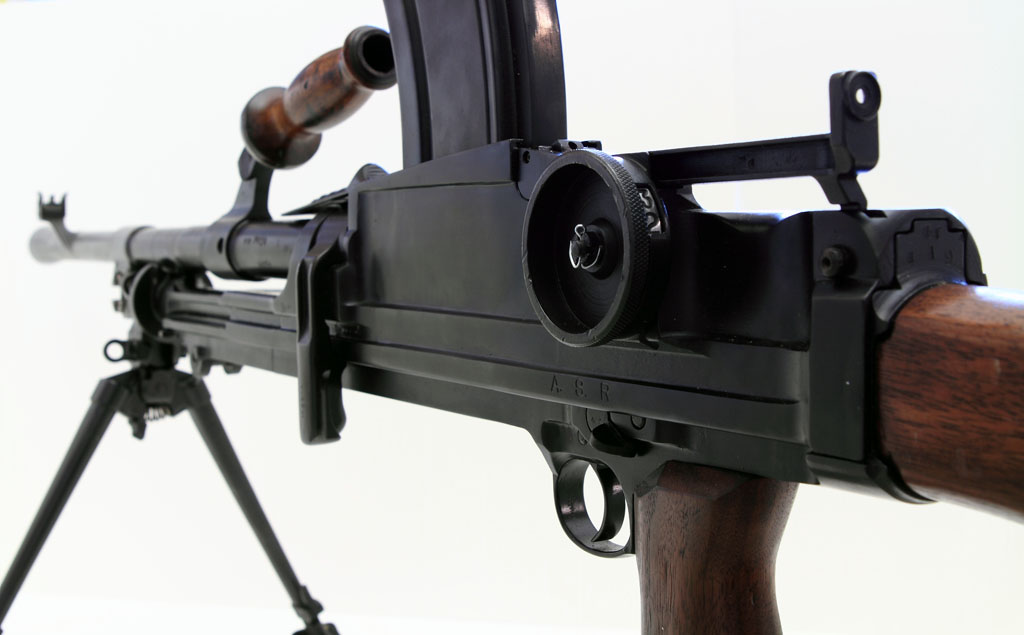
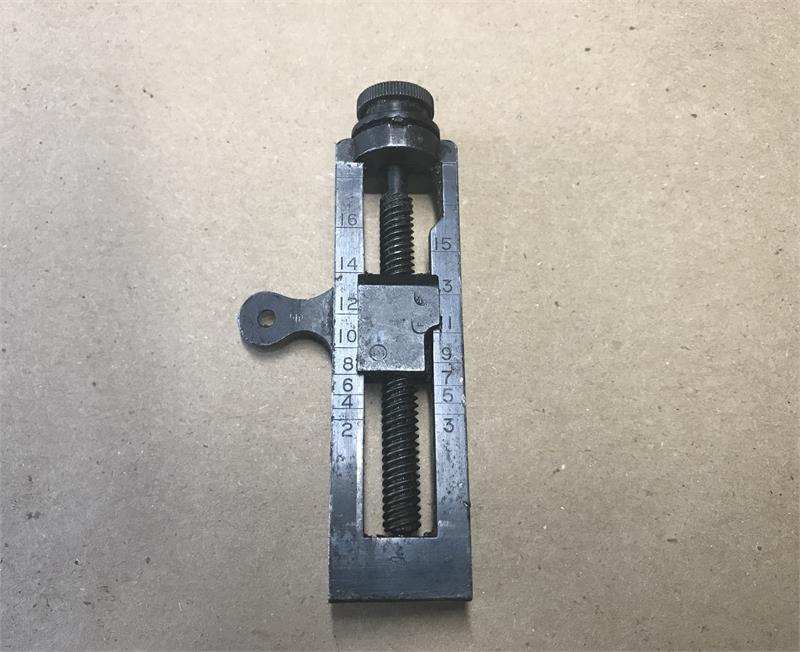
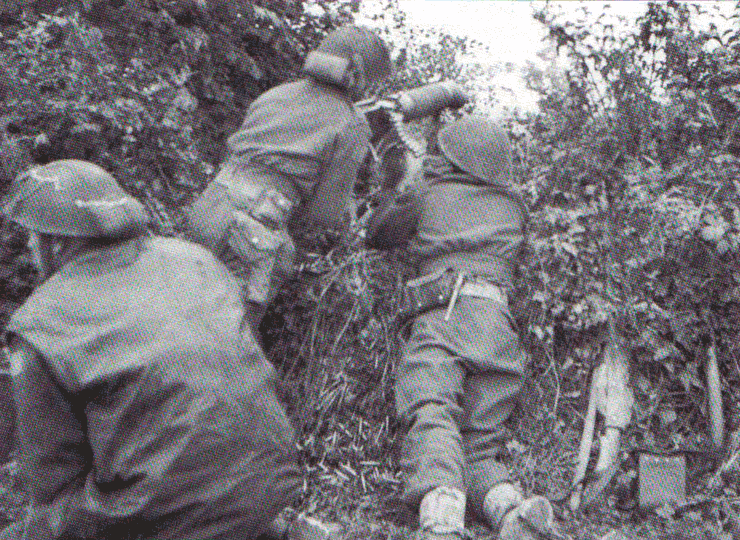
Also, how common was the use of netting on the helmets, both with and without additional scrim, any advice would be greatly appreciated.
Cheers,  .
.
G
Hi, Gareth!

You opened this thread with the statement that you want to improve your figure-painting skills, especially their eyes. Didn't you read my suggestions which I posted for you in your "Conqueror" dio/build..? OK, having mentioned that, I would very much like to suggest an EXCELLENT book for you, which will definitely help you to improve your figure-building efforts:
"Bill Horan's MILITARY MODELLING MASTERCLASS", which is published by Windrow & Greene Publishing.
(This book is published in the U.K., which will probably be easier for you to obtain than it is here in the 'States...)
This book is not only highly instructive and LOADED with color "how-to" photography, but it makes for some pleasurable reading, as well. It is a work that one should read from front to back, in its entirety. It is a GREAT book which you can keep on your workbench, as you can refer back to it during any stage in your figure's completion from start-to-finish. This book will even show you how to MAKE YOUR OWN figures!

Some advice: You've taken on a HUGE project with all of those figures, and my advice is this:
DON'T try to do everything at once!!! That's THE QUICKEST way to get sick of IT and YOURSELF for having taken on such an ambitious endeavor. Take your time and practice your techniques on a "dummy-figure" first. Develop your highlighting, shading and blending skills BEFORE you apply them to the actual figures in your work- Doing this will pay dividends for you in the end...
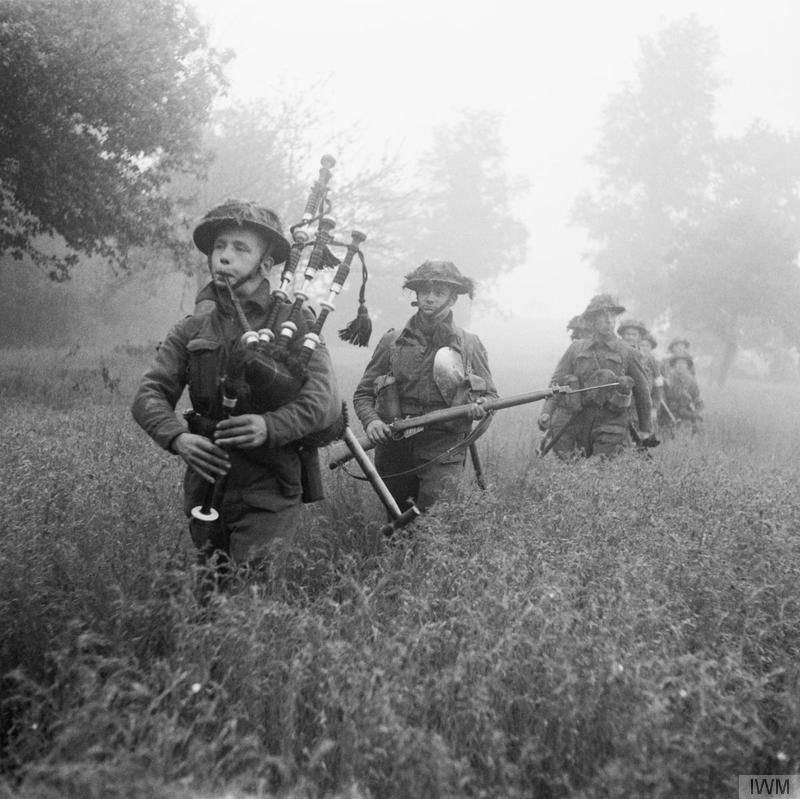
I applaud your pluck in deciding to take on such a great "Tommy-project"!!! I wish you GOOD LUCK in your figure-construction and painting- You may even find that you've grown to enjoy modeling figures more than building the actual vehicle kits that you bought in the first place! That's what happened with me!!!

As to the Helmet-netting: I wouldn't go nuts with it- Just as many Tommies (and GIs) had netting as not, so "bare" Helmets are just as realistic in a WWII dio as the "netted" ones. Might I suggest some HORNET heads for you as well? The British and Commonwealth Heads are very finely represented with wonderful facial expressions an a multitude of British-style Head-gear to choose from. The HORNET Heads are much better than any plastic heads from any model manufacturer- Their facial features are much better in definition and detail, which WILL ALSO AID YOU IN PAINTING your figures' eyes, nostrils, lips and mouths. You will also be more able to define your figures' cheekbones, chins, etc. Quite simply, just adding a HORNET head to your figure will improve it by 100%!! The Heads come 5 to a package, so it's a very good investment for you... I might also suggest getting a few sets of the British Heads with the Mk.III Helmets- I've seen MANY of these Helmets in photos of British Troops during and after the D-Day Invasion, and right up to VE-Day in May of 1945...
PS- I wouldn't sweat over the TAMIYA U/C kit as being inferior; a nice PE set, some resin "stowage", ass some camo netting, AND DEFINITELY purchase a nice set of after-market tracks. All of these things can make the little TAMIYA Carrier sing a happy song all of its own!!!
"Scrim" can also be duplicated by cutting tiny, narrow strips of thin PAPER. Moisten it with a very thin solution of water, white water-soluble glue, and a tiny drop of dish-washing liquid mixed to the solution. Doing this will chemically make your solution "wetter", and will make your "Scrim" more pliable. This solution should have the consistency of SKIM MILK. Using a pair of tweezers, dip a piece of the "Scrim" in your solution for a few seconds to allow it "soak up the juices". I like to apply a tiny bit of "straight" white-glue to the tip of a wooden toothpick, and then deposit a bit of this glue to strategic points of my subject, so as to be able to "anchor" the "Scrim" to the netting. You can then begin shaping it to the contours and shapes of your figure's Helmet-and-netting, OR your vehicle's camo-netting...
T think that you did just fine with the camo-netting on your Conqueror. If I were in your place though, what I WOULD do is stay away from all of hose "varnishes"- That's what seemed to be slowing you up because of those lengthened "drying-times" and giving you those "glossy finishes", etc on your camo-netting...
Let me know what you think of my suggestions...


 . Having followed a good number of builds on this site it is, imho, the figures that can make or break a finished vehicle and/or diorama...they bring humour, life and scale to a finished article.
 , so at the end of my first build I set myself the following challenge...