RFM Sherman w/ Interior WIP
Croatia Hrvatska
Joined: August 15, 2014
KitMaker: 155 posts
Armorama: 154 posts
Posted: Friday, July 10, 2020 - 11:54 PM UTC
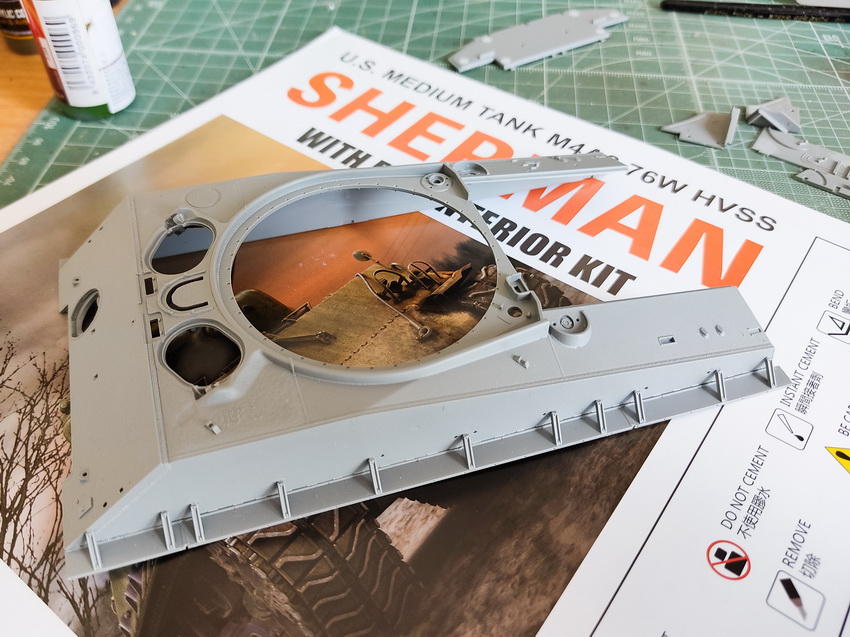
Well, it's here!
The kit arrived yesterday, so naturally I had to cut into plastic and glue something right away.
At first inspection, kit has great details and texture, parts fit reasonably well (some fit great, some need a little bit of liquid putty). On the other hand, some parts need scraping and sanding from excess plastic, but nothing major. Also, there is a lot of pin and sink marks, I am not sure which ones will be visible, so I am taking the safe route and dealing with them all.
Overall, seems like a great fun is in front of me.
Here are 3 pics I took in a hurry with my phone, more to follow when things start to take shape.
New Mexico, United States
Joined: May 19, 2020
KitMaker: 419 posts
Armorama: 217 posts
Posted: Saturday, July 11, 2020 - 01:48 AM UTC
Cool! I will be watching this thread!

Myanmar
Joined: March 05, 2004
KitMaker: 4,011 posts
Armorama: 1,498 posts
Posted: Sunday, July 12, 2020 - 02:59 AM UTC
I'll watch this build. I've recently bought this kit as well.

i watched a scale plastic figure crawl along the edge . . . of an exacto blade . . . that's my dream , it's my nightmare . . . . . . . crawling , slithering . . . . . along the edge . . . . . . of an exacto . . . . . blade . . . . and surviving
Croatia Hrvatska
Joined: August 15, 2014
KitMaker: 155 posts
Armorama: 154 posts
Posted: Saturday, July 18, 2020 - 11:36 PM UTC
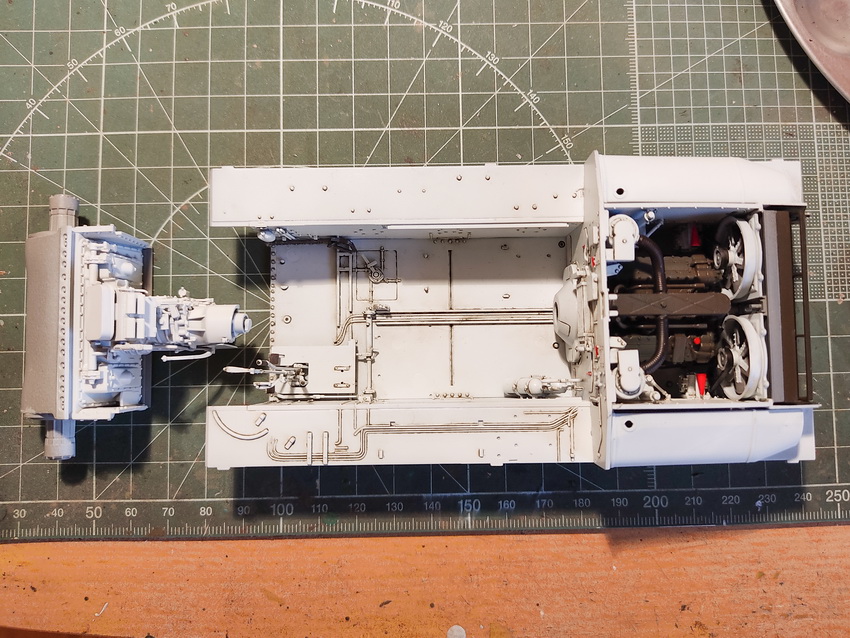
Small progress:
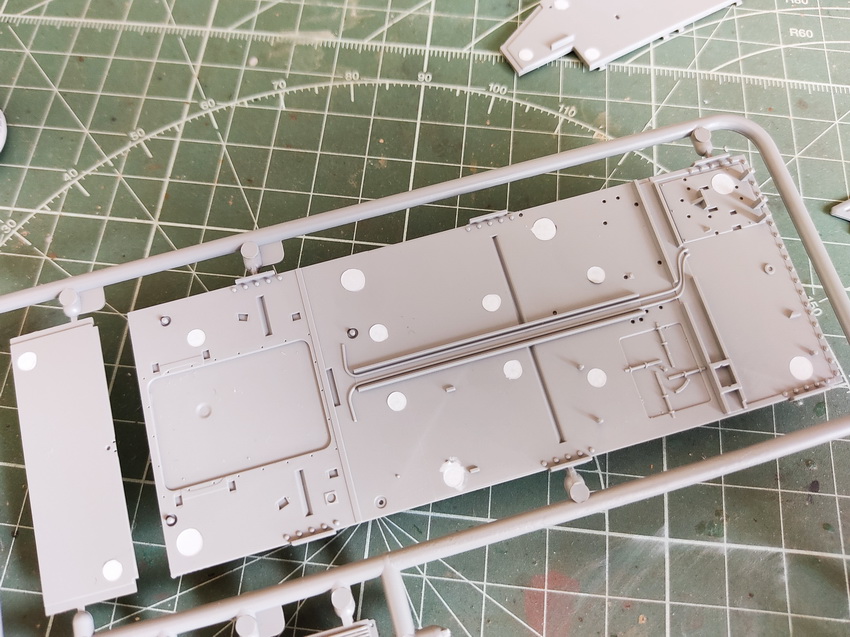
Engine parts need a lot of cleanup. Some parts even needed some surgery to fit. Still have some cosmetic work to do but I don't want to lose my nerves too much because at the end not much will be visible after all.

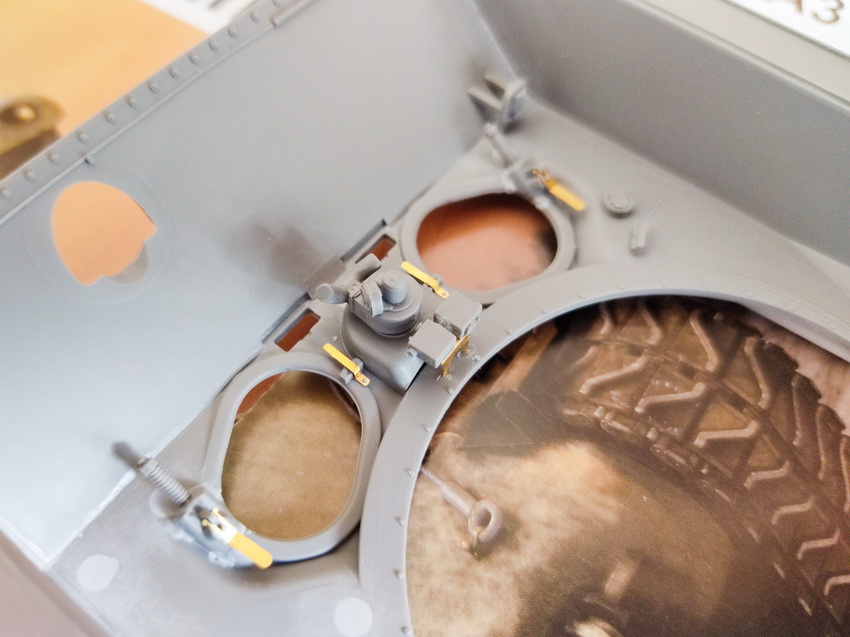
Upper part of the body is mostly done. I managed to break that 3 piece PE protector on the right front so I had to take the plastic one from the old Dragon kit to replace it. Tools wil be fit later in the build, they dont have straps molded on them so I will try to improvise something with masking tape. Maybe.
Starting the work on the interior. Fitting of the parts that assemble the lower part of the tank is overall great, no complaints there.
New Mexico, United States
Joined: May 19, 2020
KitMaker: 419 posts
Armorama: 217 posts
Posted: Sunday, July 19, 2020 - 02:48 AM UTC
Looks great! The engine is a beauty!
Croatia Hrvatska
Joined: August 15, 2014
KitMaker: 155 posts
Armorama: 154 posts
Posted: Monday, July 20, 2020 - 06:57 AM UTC
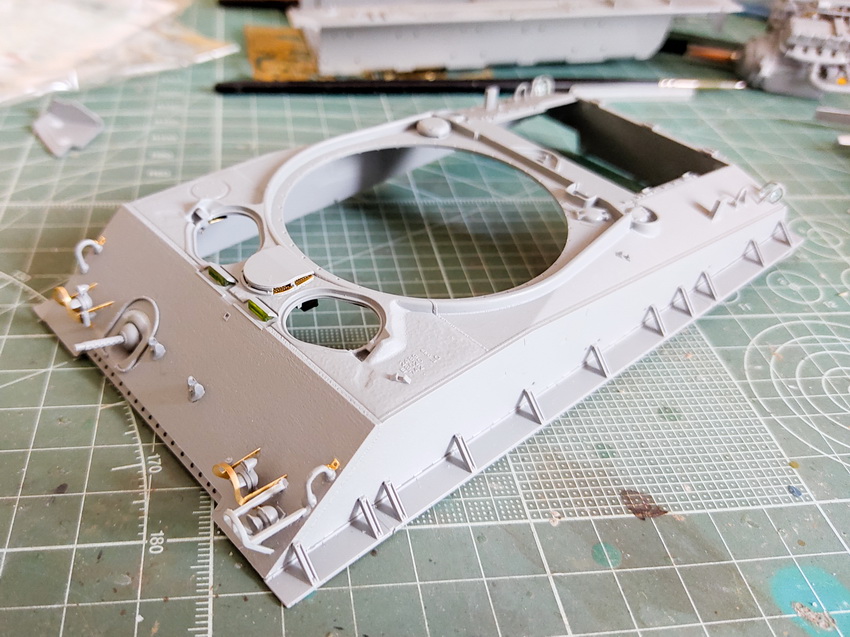
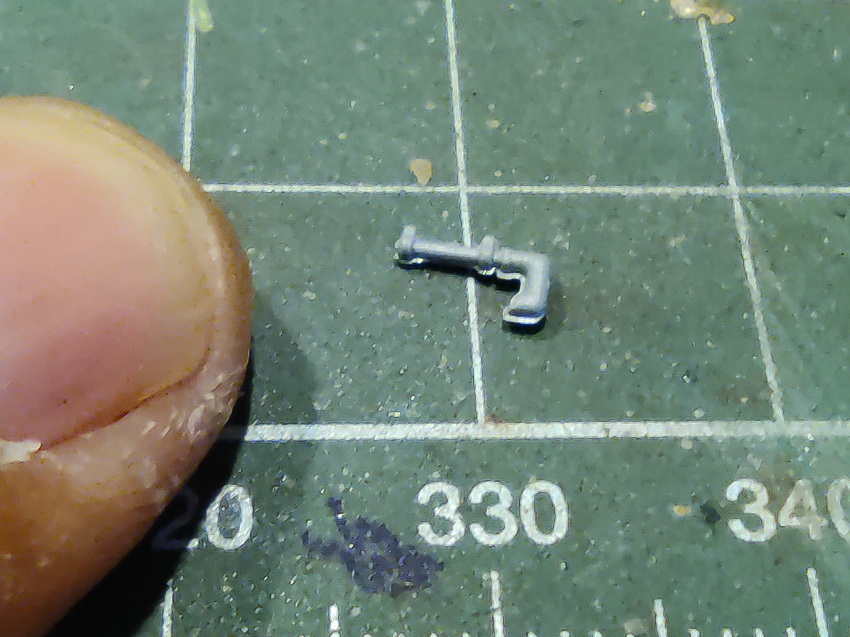
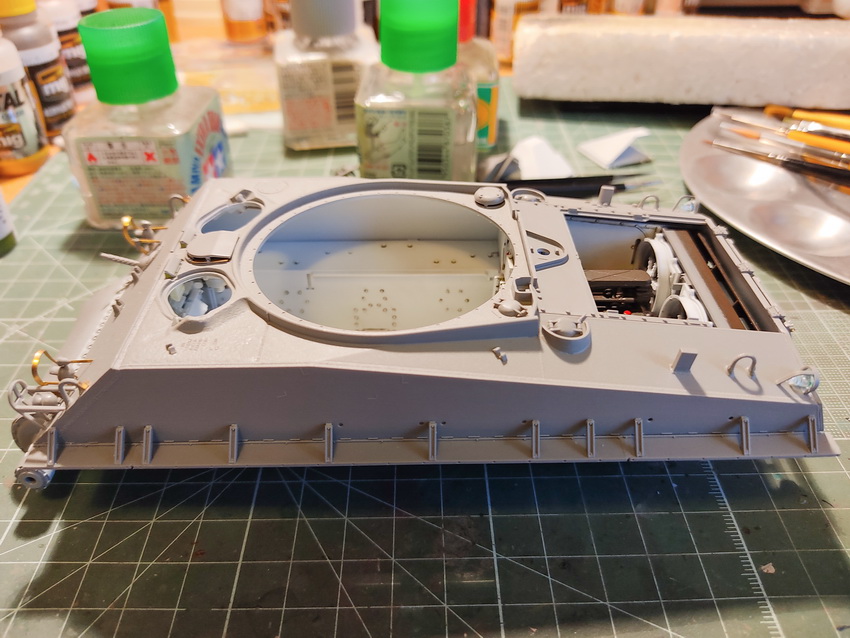
This is an example of flash that you have to deal with on a tiny parts.
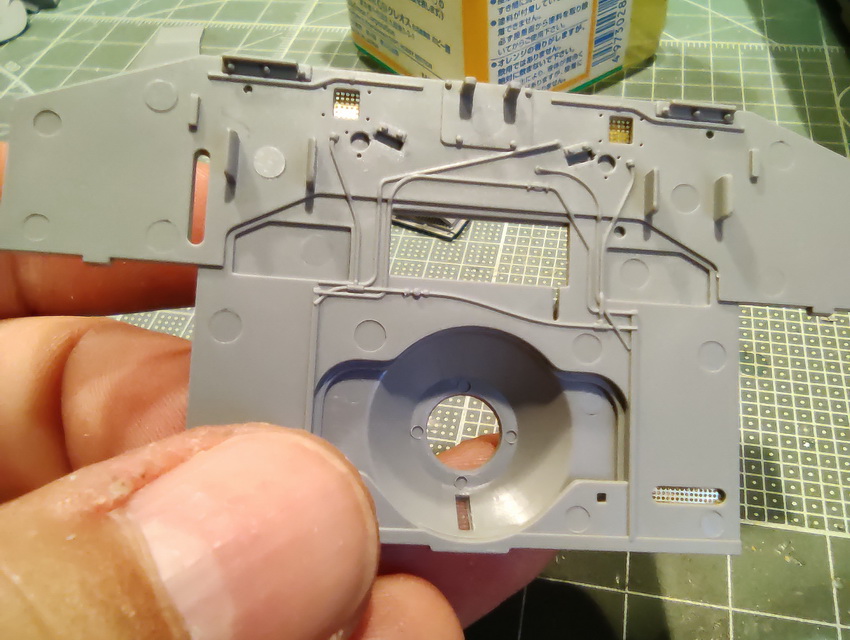
Or take a look at the firewall. The side that goes toward the crew compartment is perfect, but then you turn it and see the sink mark horror on the engine compartment side...
Croatia Hrvatska
Joined: August 15, 2014
KitMaker: 155 posts
Armorama: 154 posts
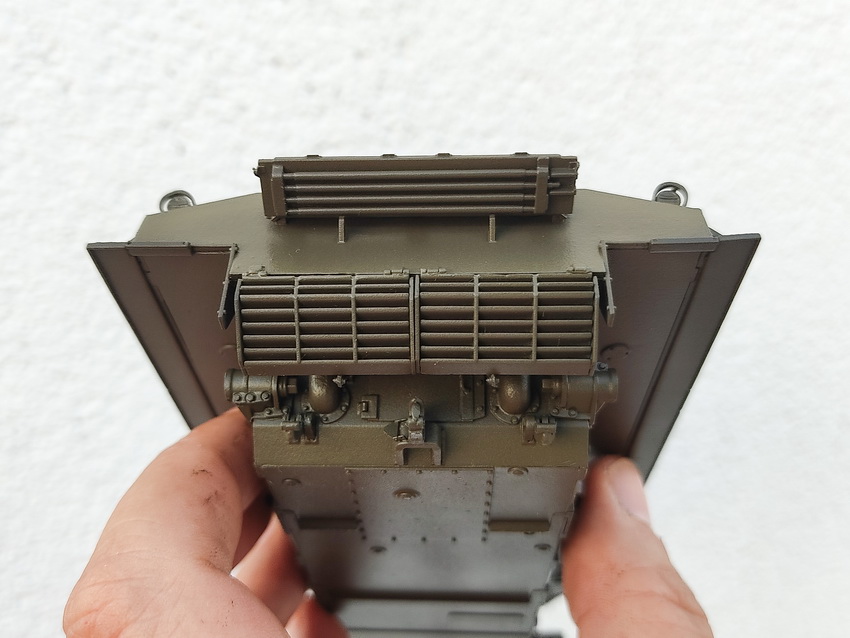
Posted: Thursday, July 23, 2020 - 06:34 AM UTC
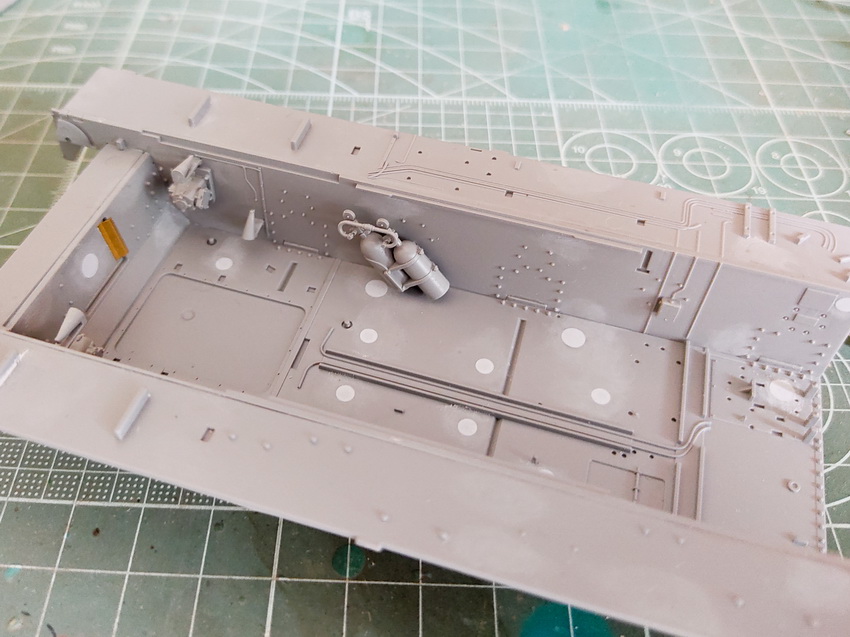
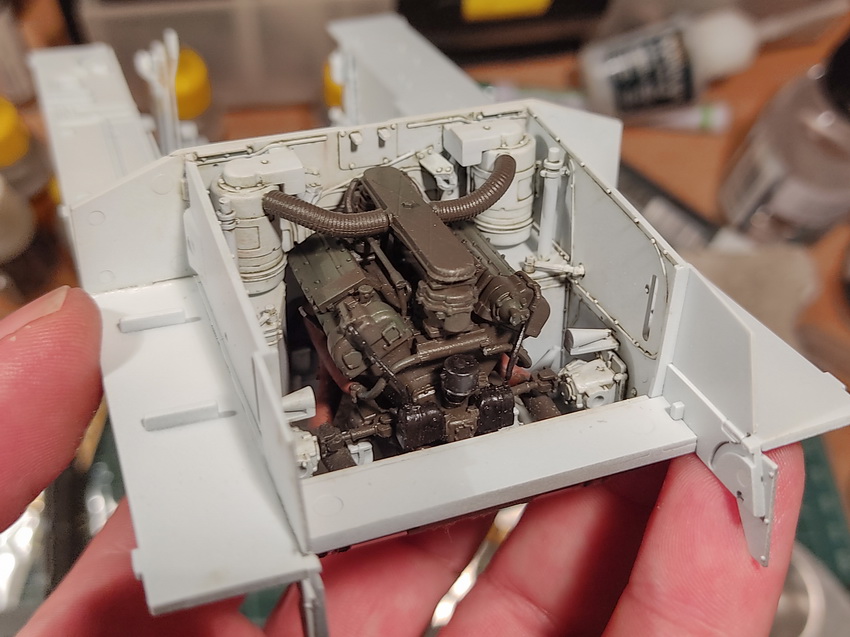
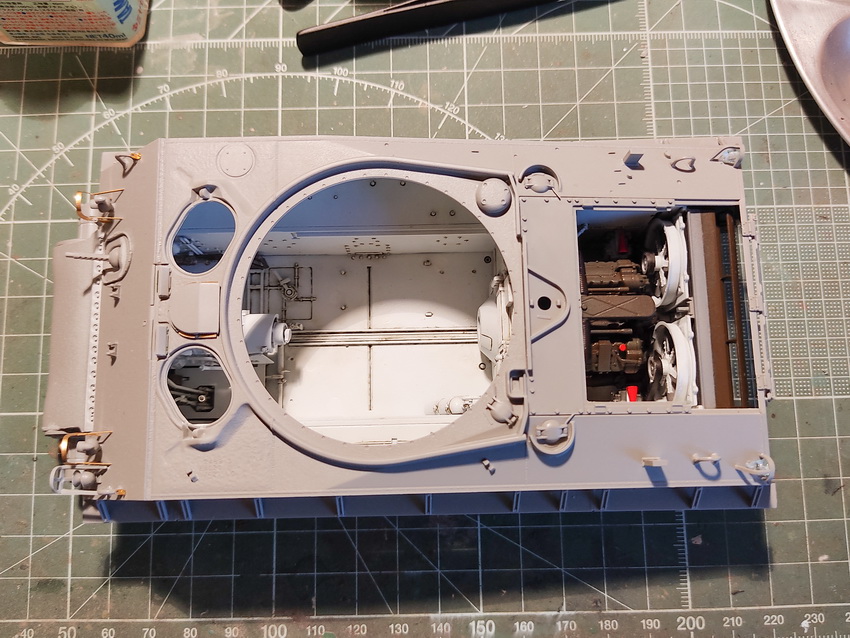
Engine compartment mostly done. Had to sand cca 1mm from the exhaust pipes and firewall didn't want to sit in place so I had to glue it with CA glue for a strong bond. I dryfitted the upper hull and everything seems to fall in place. For now.

New Mexico, United States
Joined: May 19, 2020
KitMaker: 419 posts
Armorama: 217 posts
Posted: Thursday, July 23, 2020 - 07:51 AM UTC
Very nice!

Australia
Joined: November 26, 2011
KitMaker: 25 posts
Armorama: 25 posts
Posted: Thursday, July 23, 2020 - 01:49 PM UTC
I do understand that the ejector pin marks look somewhat horrible. However, in your next photo of the completed engine and firewall, the ejector pin marks appear to be well covered by elements of the engine compartments.
Croatia Hrvatska
Joined: August 15, 2014
KitMaker: 155 posts
Armorama: 154 posts
Posted: Thursday, July 23, 2020 - 06:20 PM UTC
Yes, luckily they are completely covered, so no need to sand them

Joined: March 26, 2007
KitMaker: 314 posts
Armorama: 296 posts
Posted: Thursday, July 23, 2020 - 07:39 PM UTC
I wanted to thank you for this blog, Nice work!
Croatia Hrvatska
Joined: August 15, 2014
KitMaker: 155 posts
Armorama: 154 posts
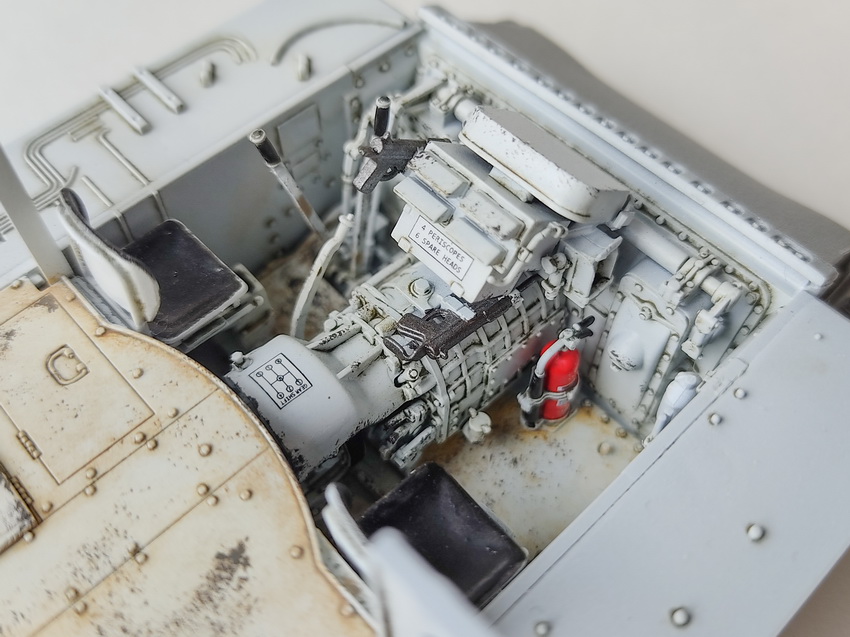
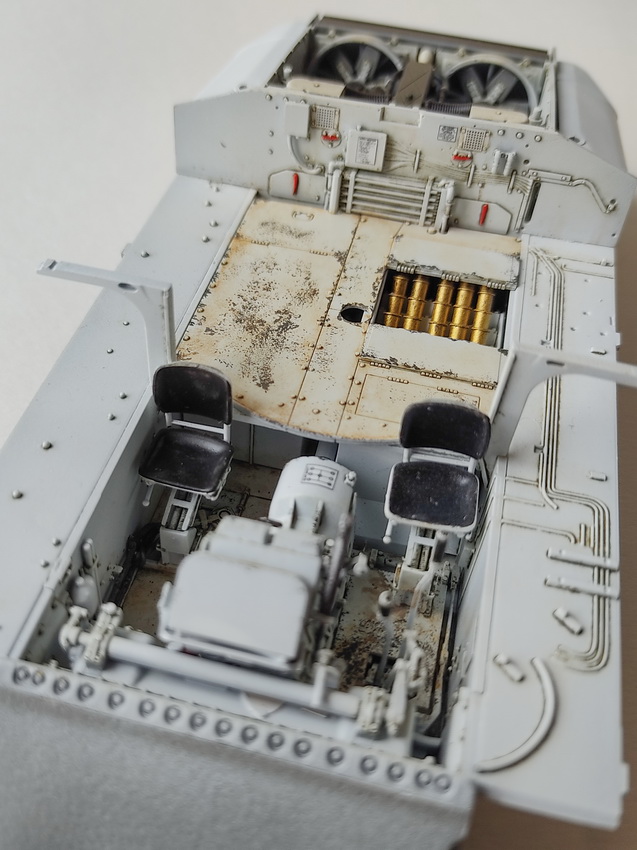
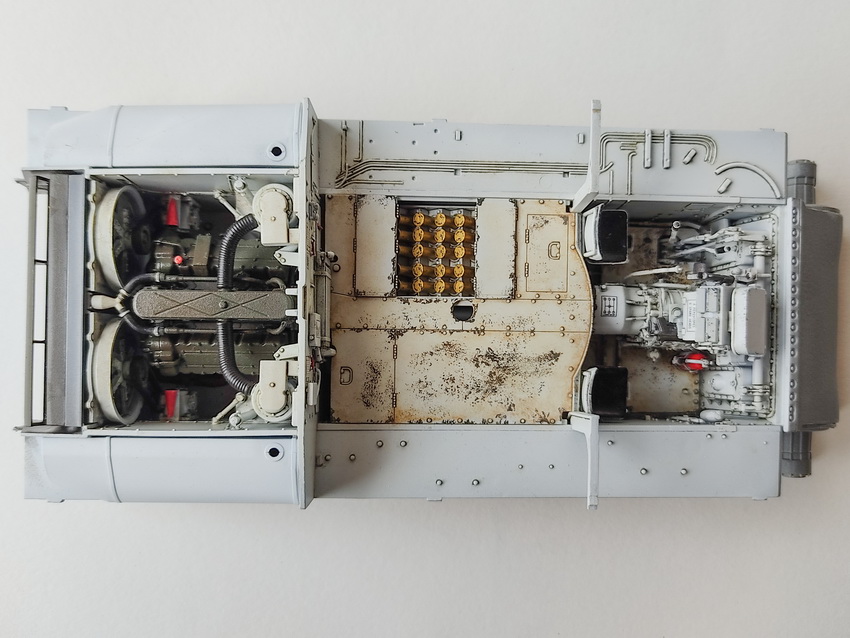
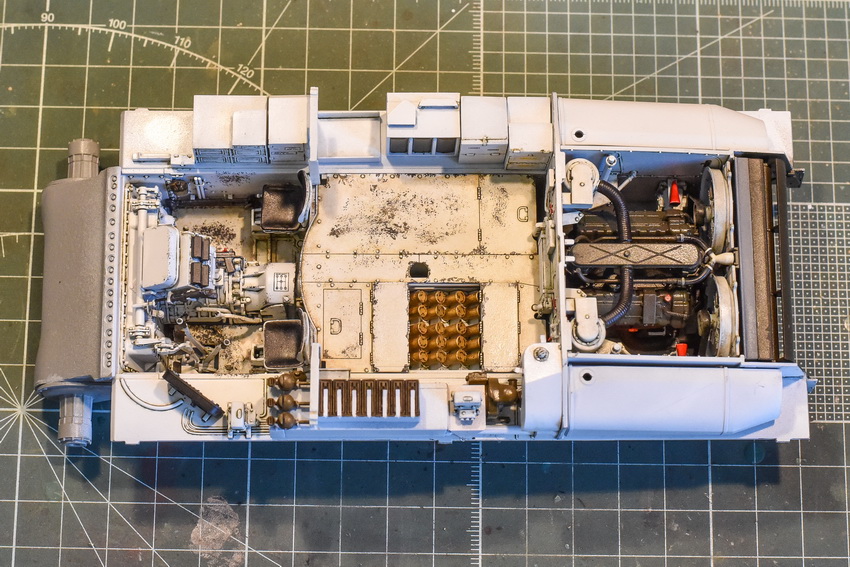
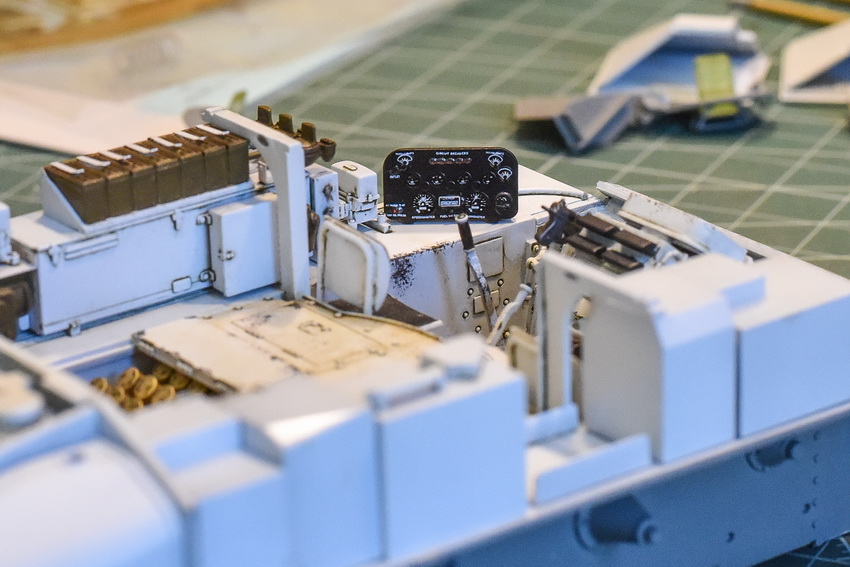
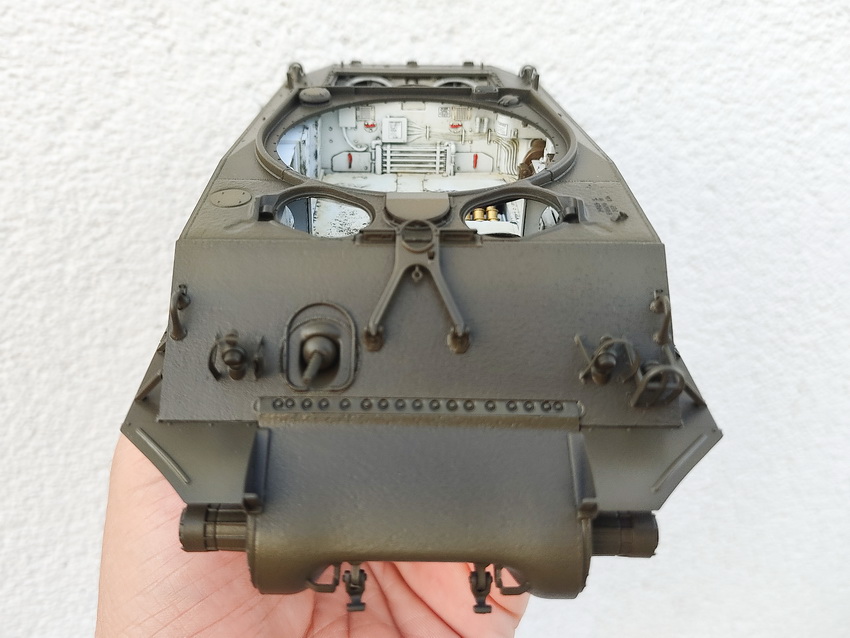
Posted: Tuesday, July 28, 2020 - 06:49 AM UTC
Small update...
Transmision is done, still needs washes when the paint dries. It went together without major issues. Chipping and some dirt on the bottom is next thing to be done before glueing the front part with transmission.
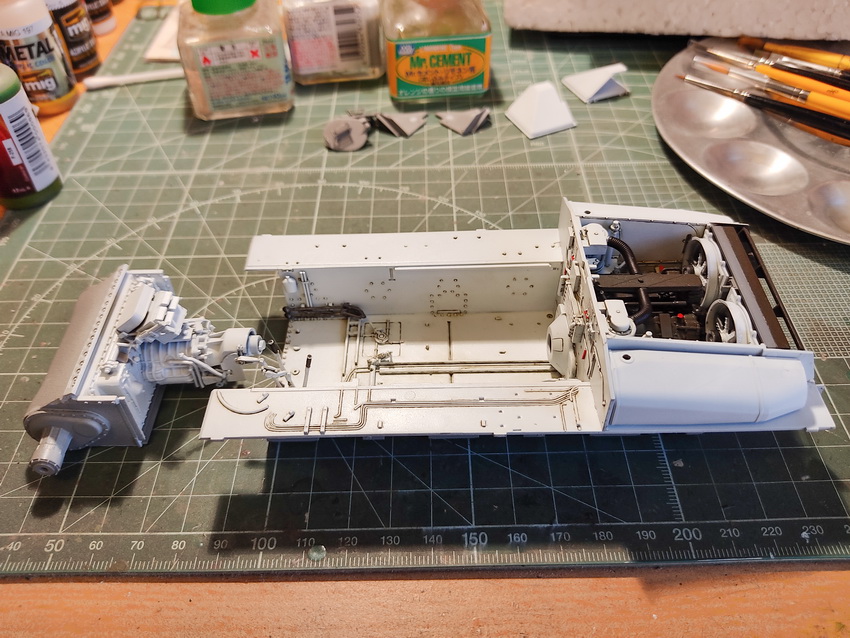
Dryfitting the upper part... Seems that everything fits.
Croatia Hrvatska
Joined: August 15, 2014
KitMaker: 155 posts
Armorama: 154 posts
Posted: Tuesday, August 04, 2020 - 01:02 AM UTC
Alabama, United States
Joined: January 26, 2006
KitMaker: 1,381 posts
Armorama: 1,347 posts
Posted: Tuesday, August 04, 2020 - 05:52 AM UTC
You're doing a lovely job and you're rather selling me on this kit!
Croatia Hrvatska
Joined: August 15, 2014
KitMaker: 155 posts
Armorama: 154 posts
Posted: Friday, August 07, 2020 - 10:16 PM UTC
North Carolina, United States
Joined: January 21, 2004
KitMaker: 803 posts
Armorama: 740 posts
Posted: Saturday, August 08, 2020 - 01:59 AM UTC
Beautiful work!!!!
Is it all OOB?
Minnesota, United States
Joined: July 20, 2004
KitMaker: 1,513 posts
Armorama: 1,449 posts
Posted: Saturday, August 08, 2020 - 02:37 AM UTC
Youre a good salesman for this kit.
Great job!
Looking to meet other MN Armor modellers. I live in Buffalo.
Croatia Hrvatska
Joined: August 15, 2014
KitMaker: 155 posts
Armorama: 154 posts
Posted: Saturday, August 08, 2020 - 03:35 AM UTC
Thanks guys!
Yes, everything is OOB which works for me, but I guess superdetailers could improve it a lot.
California, United States
Joined: January 30, 2013
KitMaker: 537 posts
Armorama: 531 posts
Posted: Saturday, August 08, 2020 - 03:45 AM UTC
Croatia Hrvatska
Joined: August 15, 2014
KitMaker: 155 posts
Armorama: 154 posts
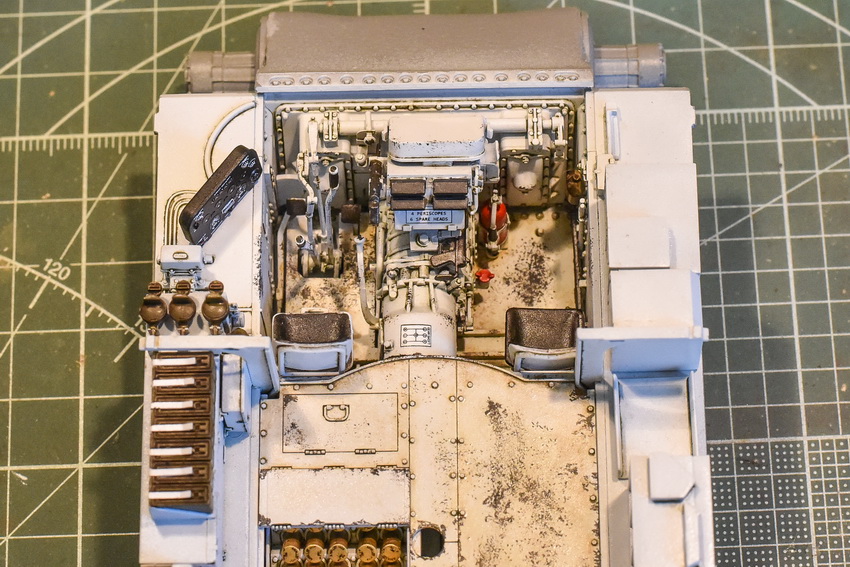
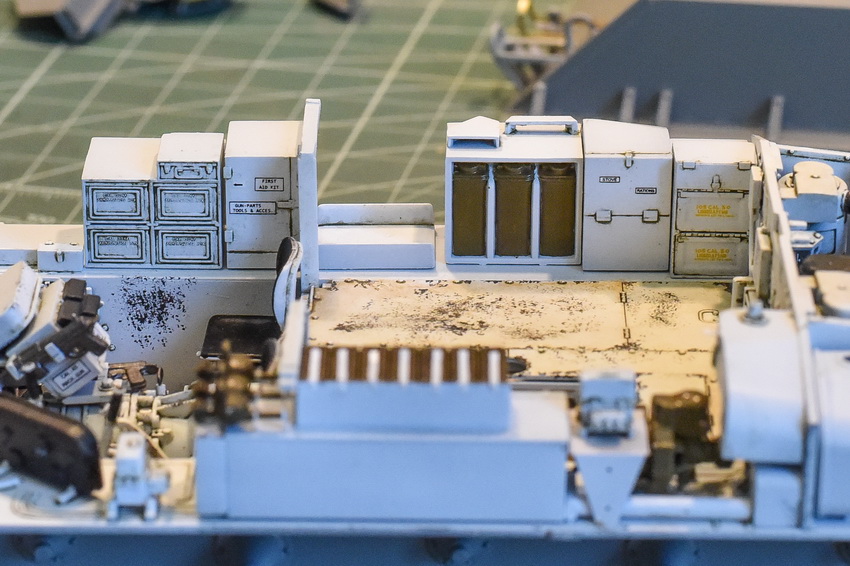
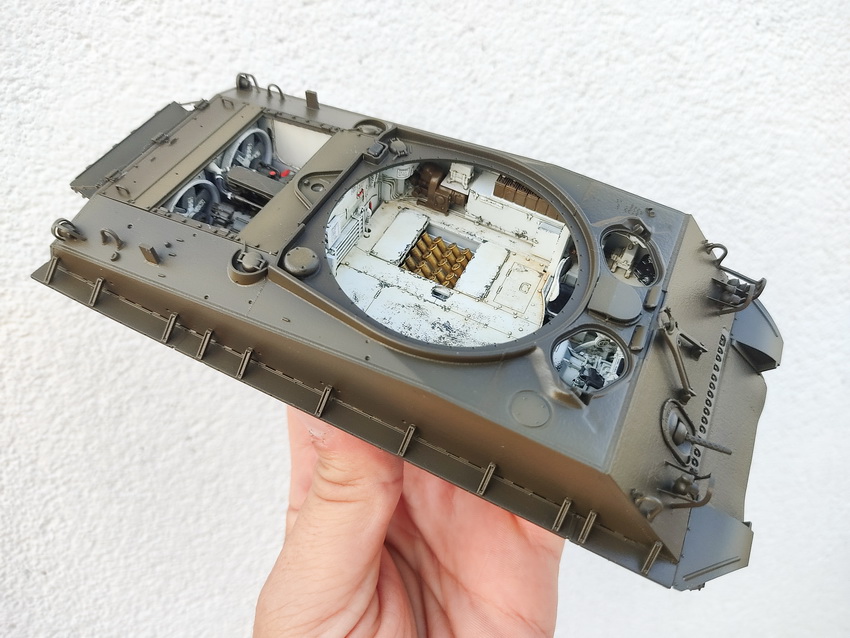
Posted: Wednesday, August 12, 2020 - 05:58 AM UTC
Small progress:
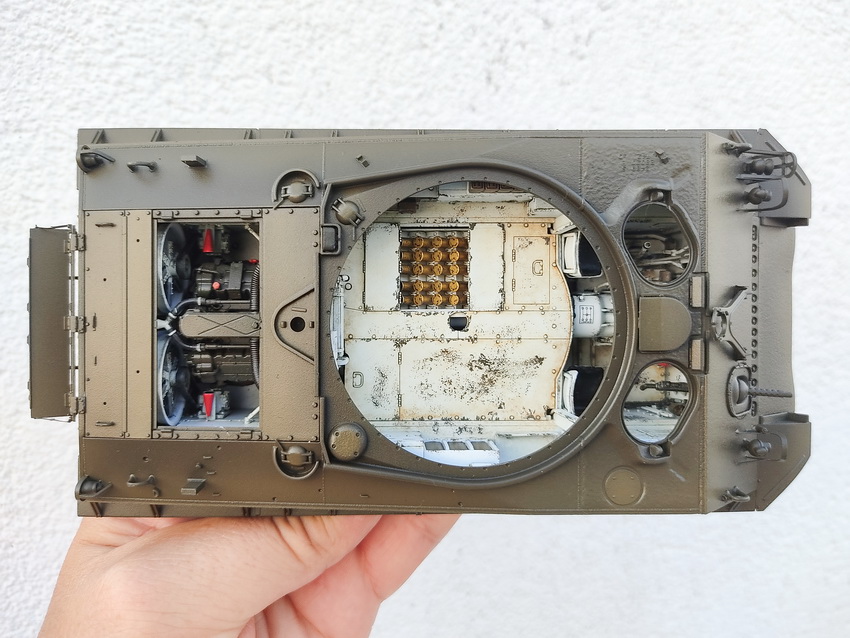
Lower and upper halves of the body glued together, perfect fit.
Black primer, main color Olive Drab Dark, light modulation with Olive Drab Base and satin protection before the weathering steps.
British Columbia, Canada
Joined: January 27, 2017
KitMaker: 147 posts
Armorama: 147 posts
Posted: Wednesday, August 12, 2020 - 10:21 AM UTC
Fantastic kit and inspiring build, thank's for sharing.
Minnesota, United States
Joined: July 20, 2004
KitMaker: 1,513 posts
Armorama: 1,449 posts
Posted: Wednesday, August 12, 2020 - 01:23 PM UTC
Looking to meet other MN Armor modellers. I live in Buffalo.
Croatia Hrvatska
Joined: August 15, 2014
KitMaker: 155 posts
Armorama: 154 posts
Posted: Wednesday, August 12, 2020 - 06:33 PM UTC
Dan, thanks for the link!
Minnesota, United States
Joined: July 20, 2004
KitMaker: 1,513 posts
Armorama: 1,449 posts
Posted: Wednesday, August 12, 2020 - 11:26 PM UTC
Looking to meet other MN Armor modellers. I live in Buffalo.
Virginia, United States
Joined: July 05, 2004
KitMaker: 769 posts
Armorama: 461 posts
Posted: Wednesday, August 12, 2020 - 11:45 PM UTC
An awesome job! My only observation is that it looks like you painted the .30 cal boxes next to the assistant driver white instead of olive drab.
Jesse
Time is a great teacher. Unfortunately, it kills all it's students.