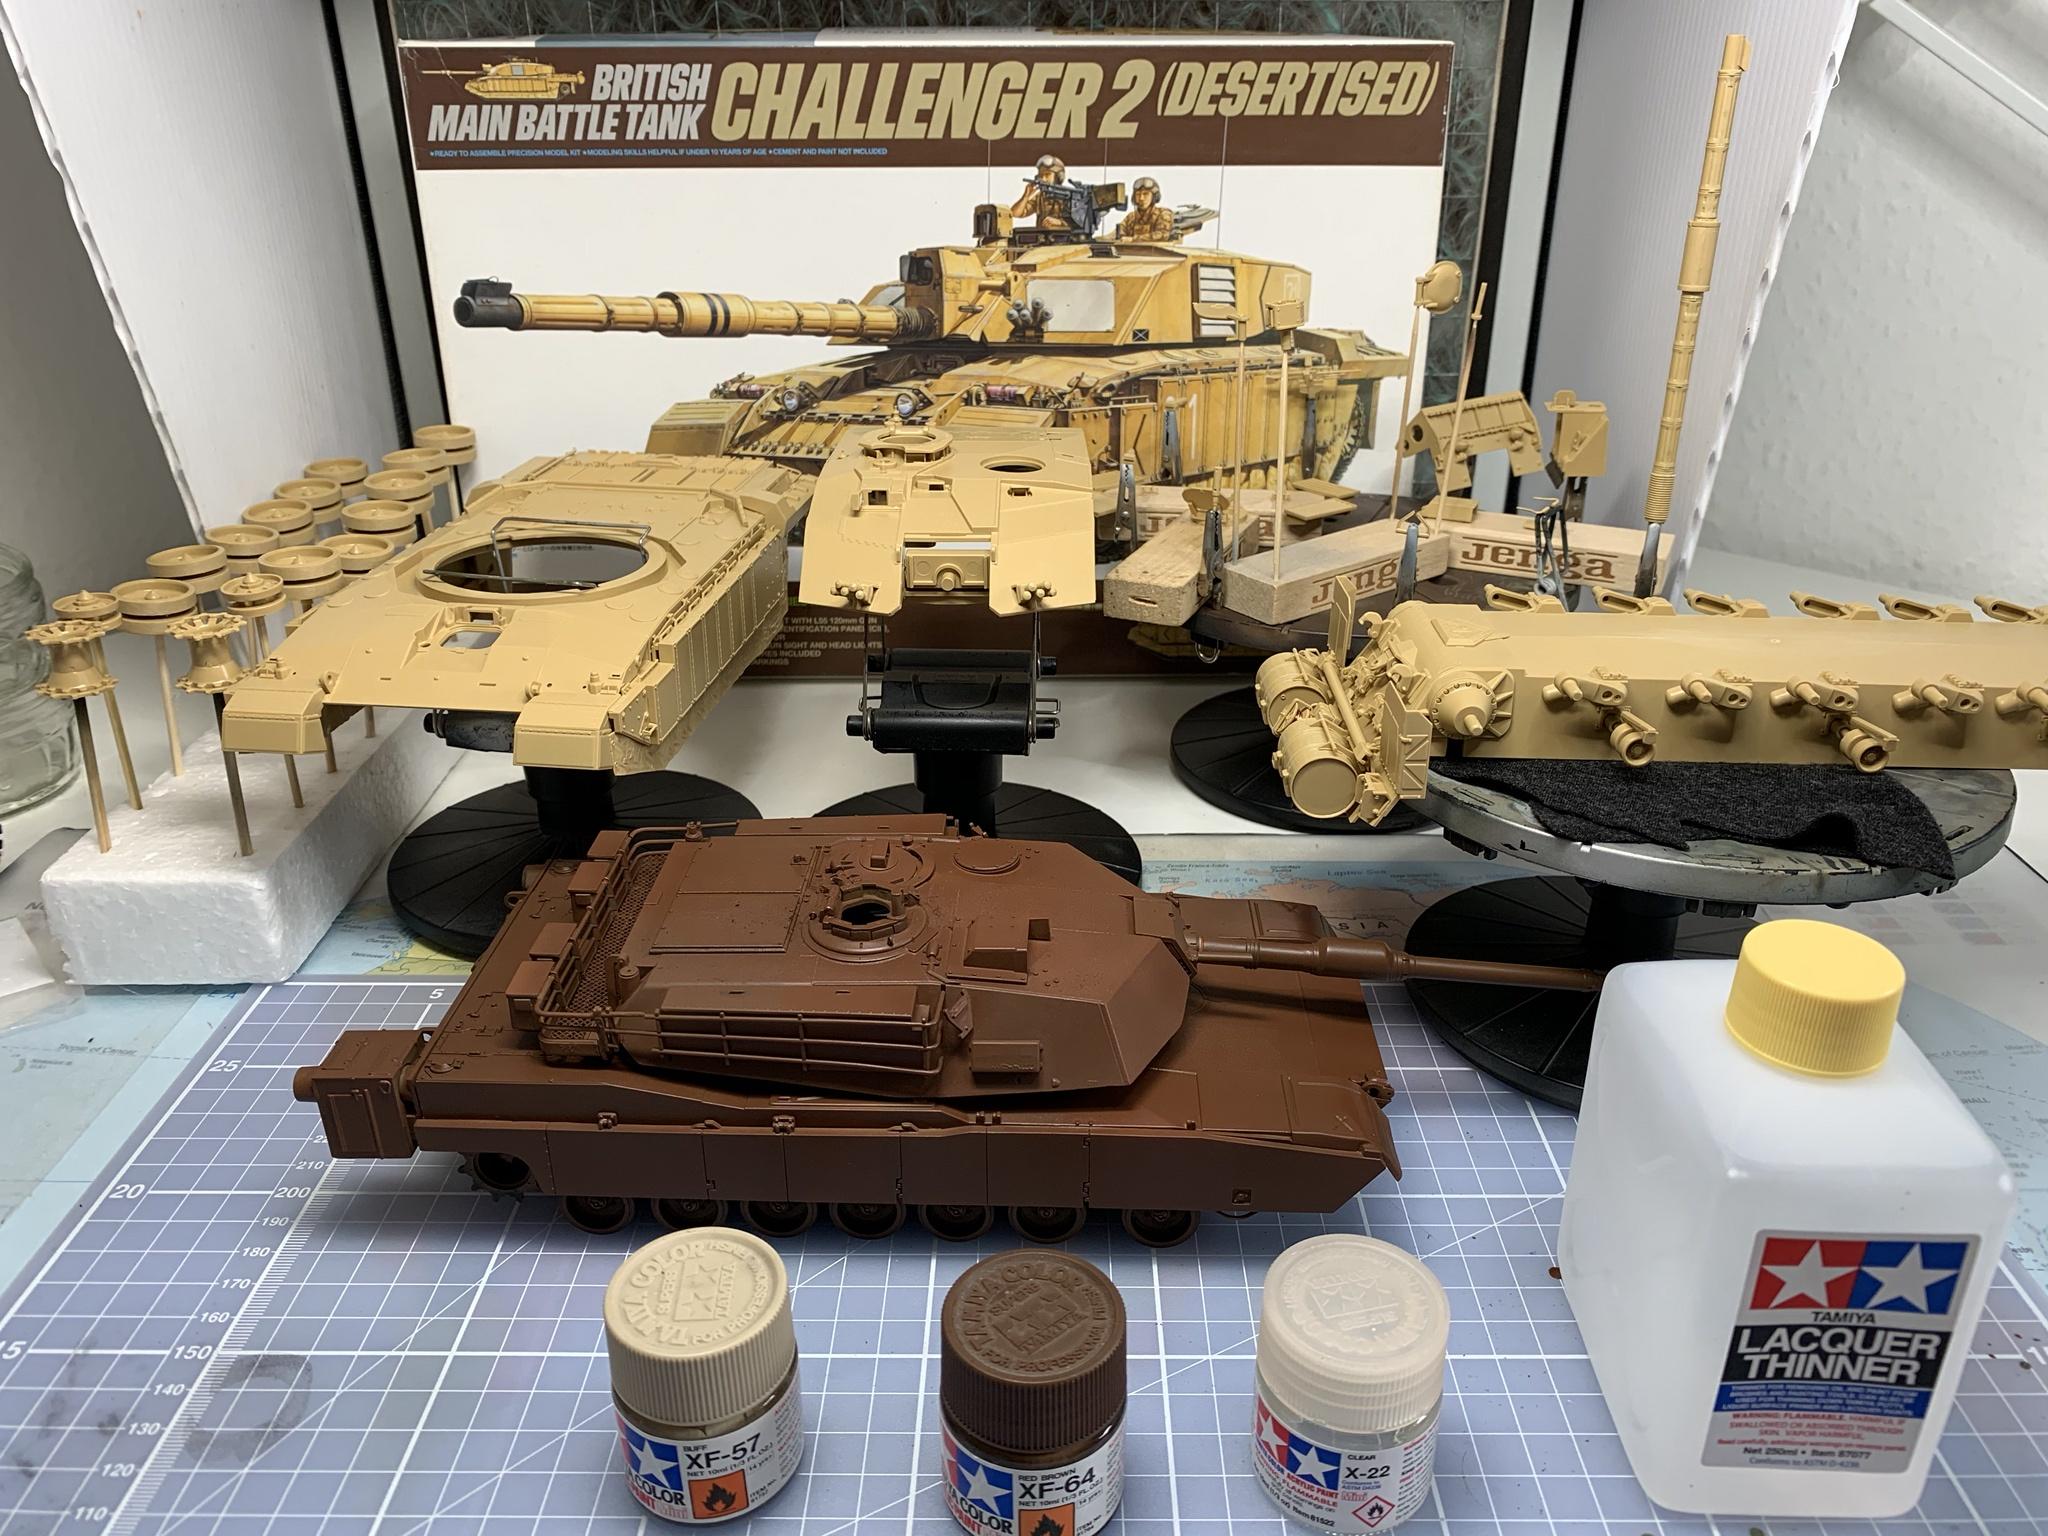
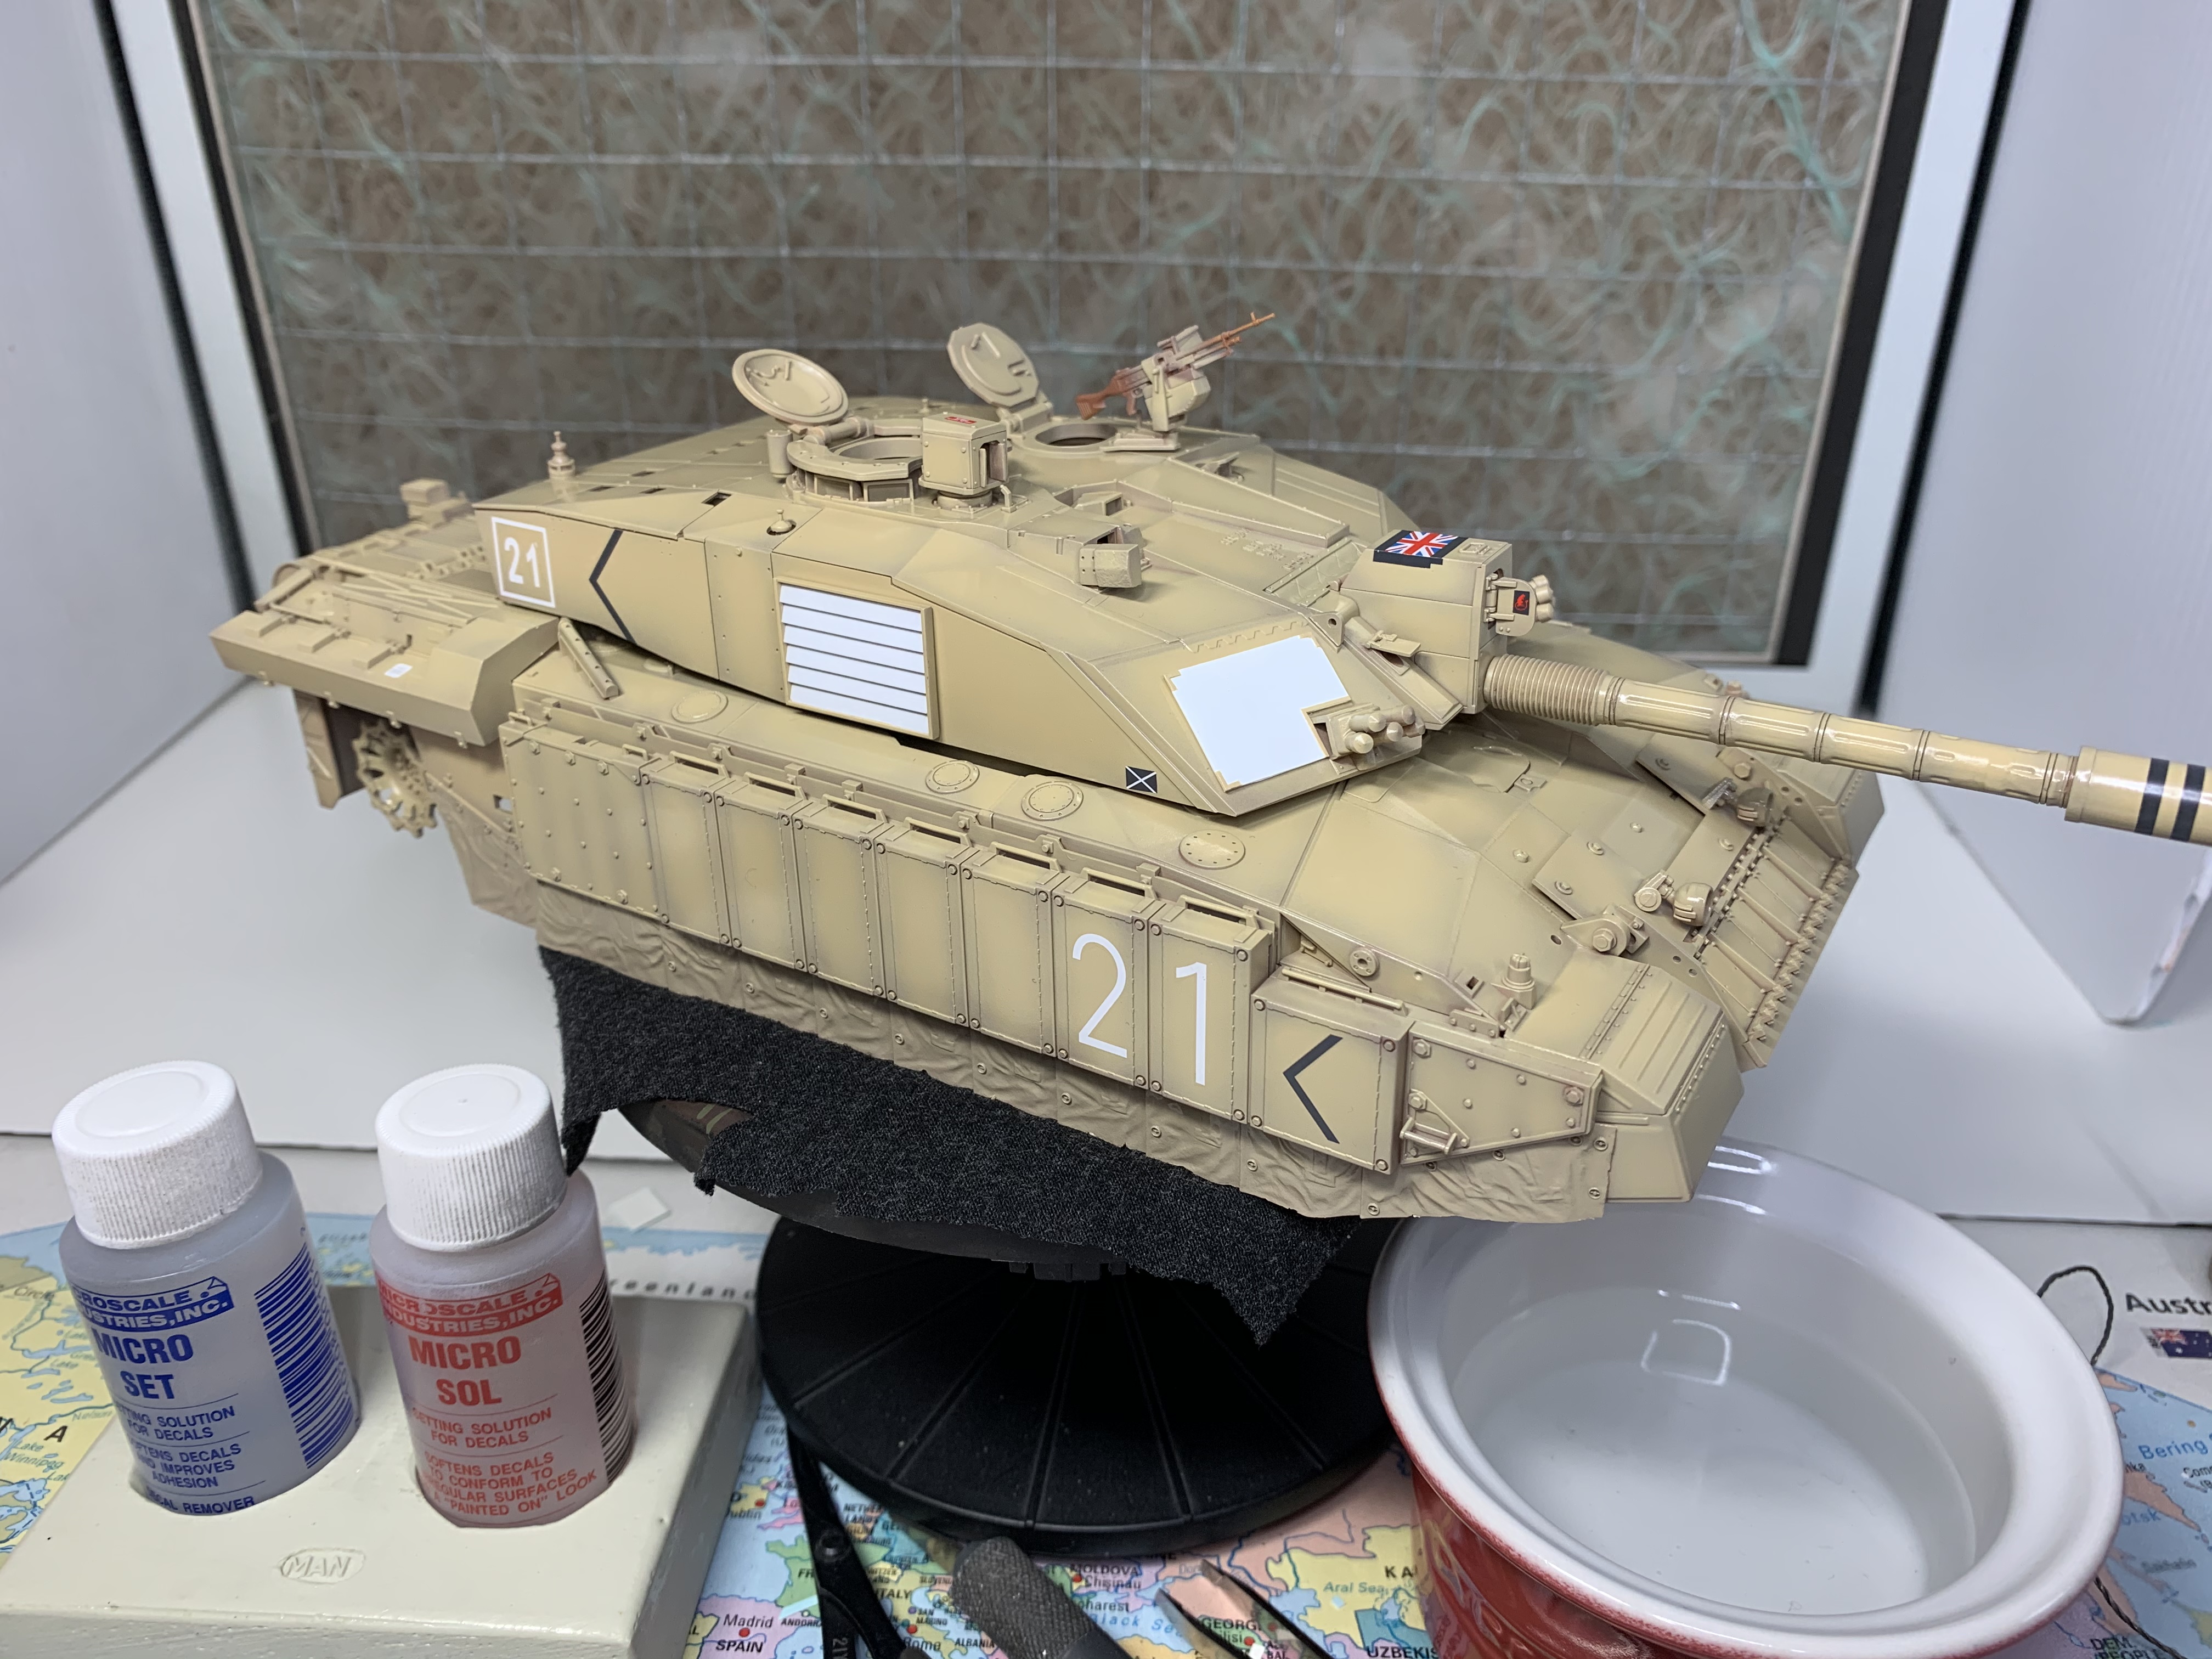
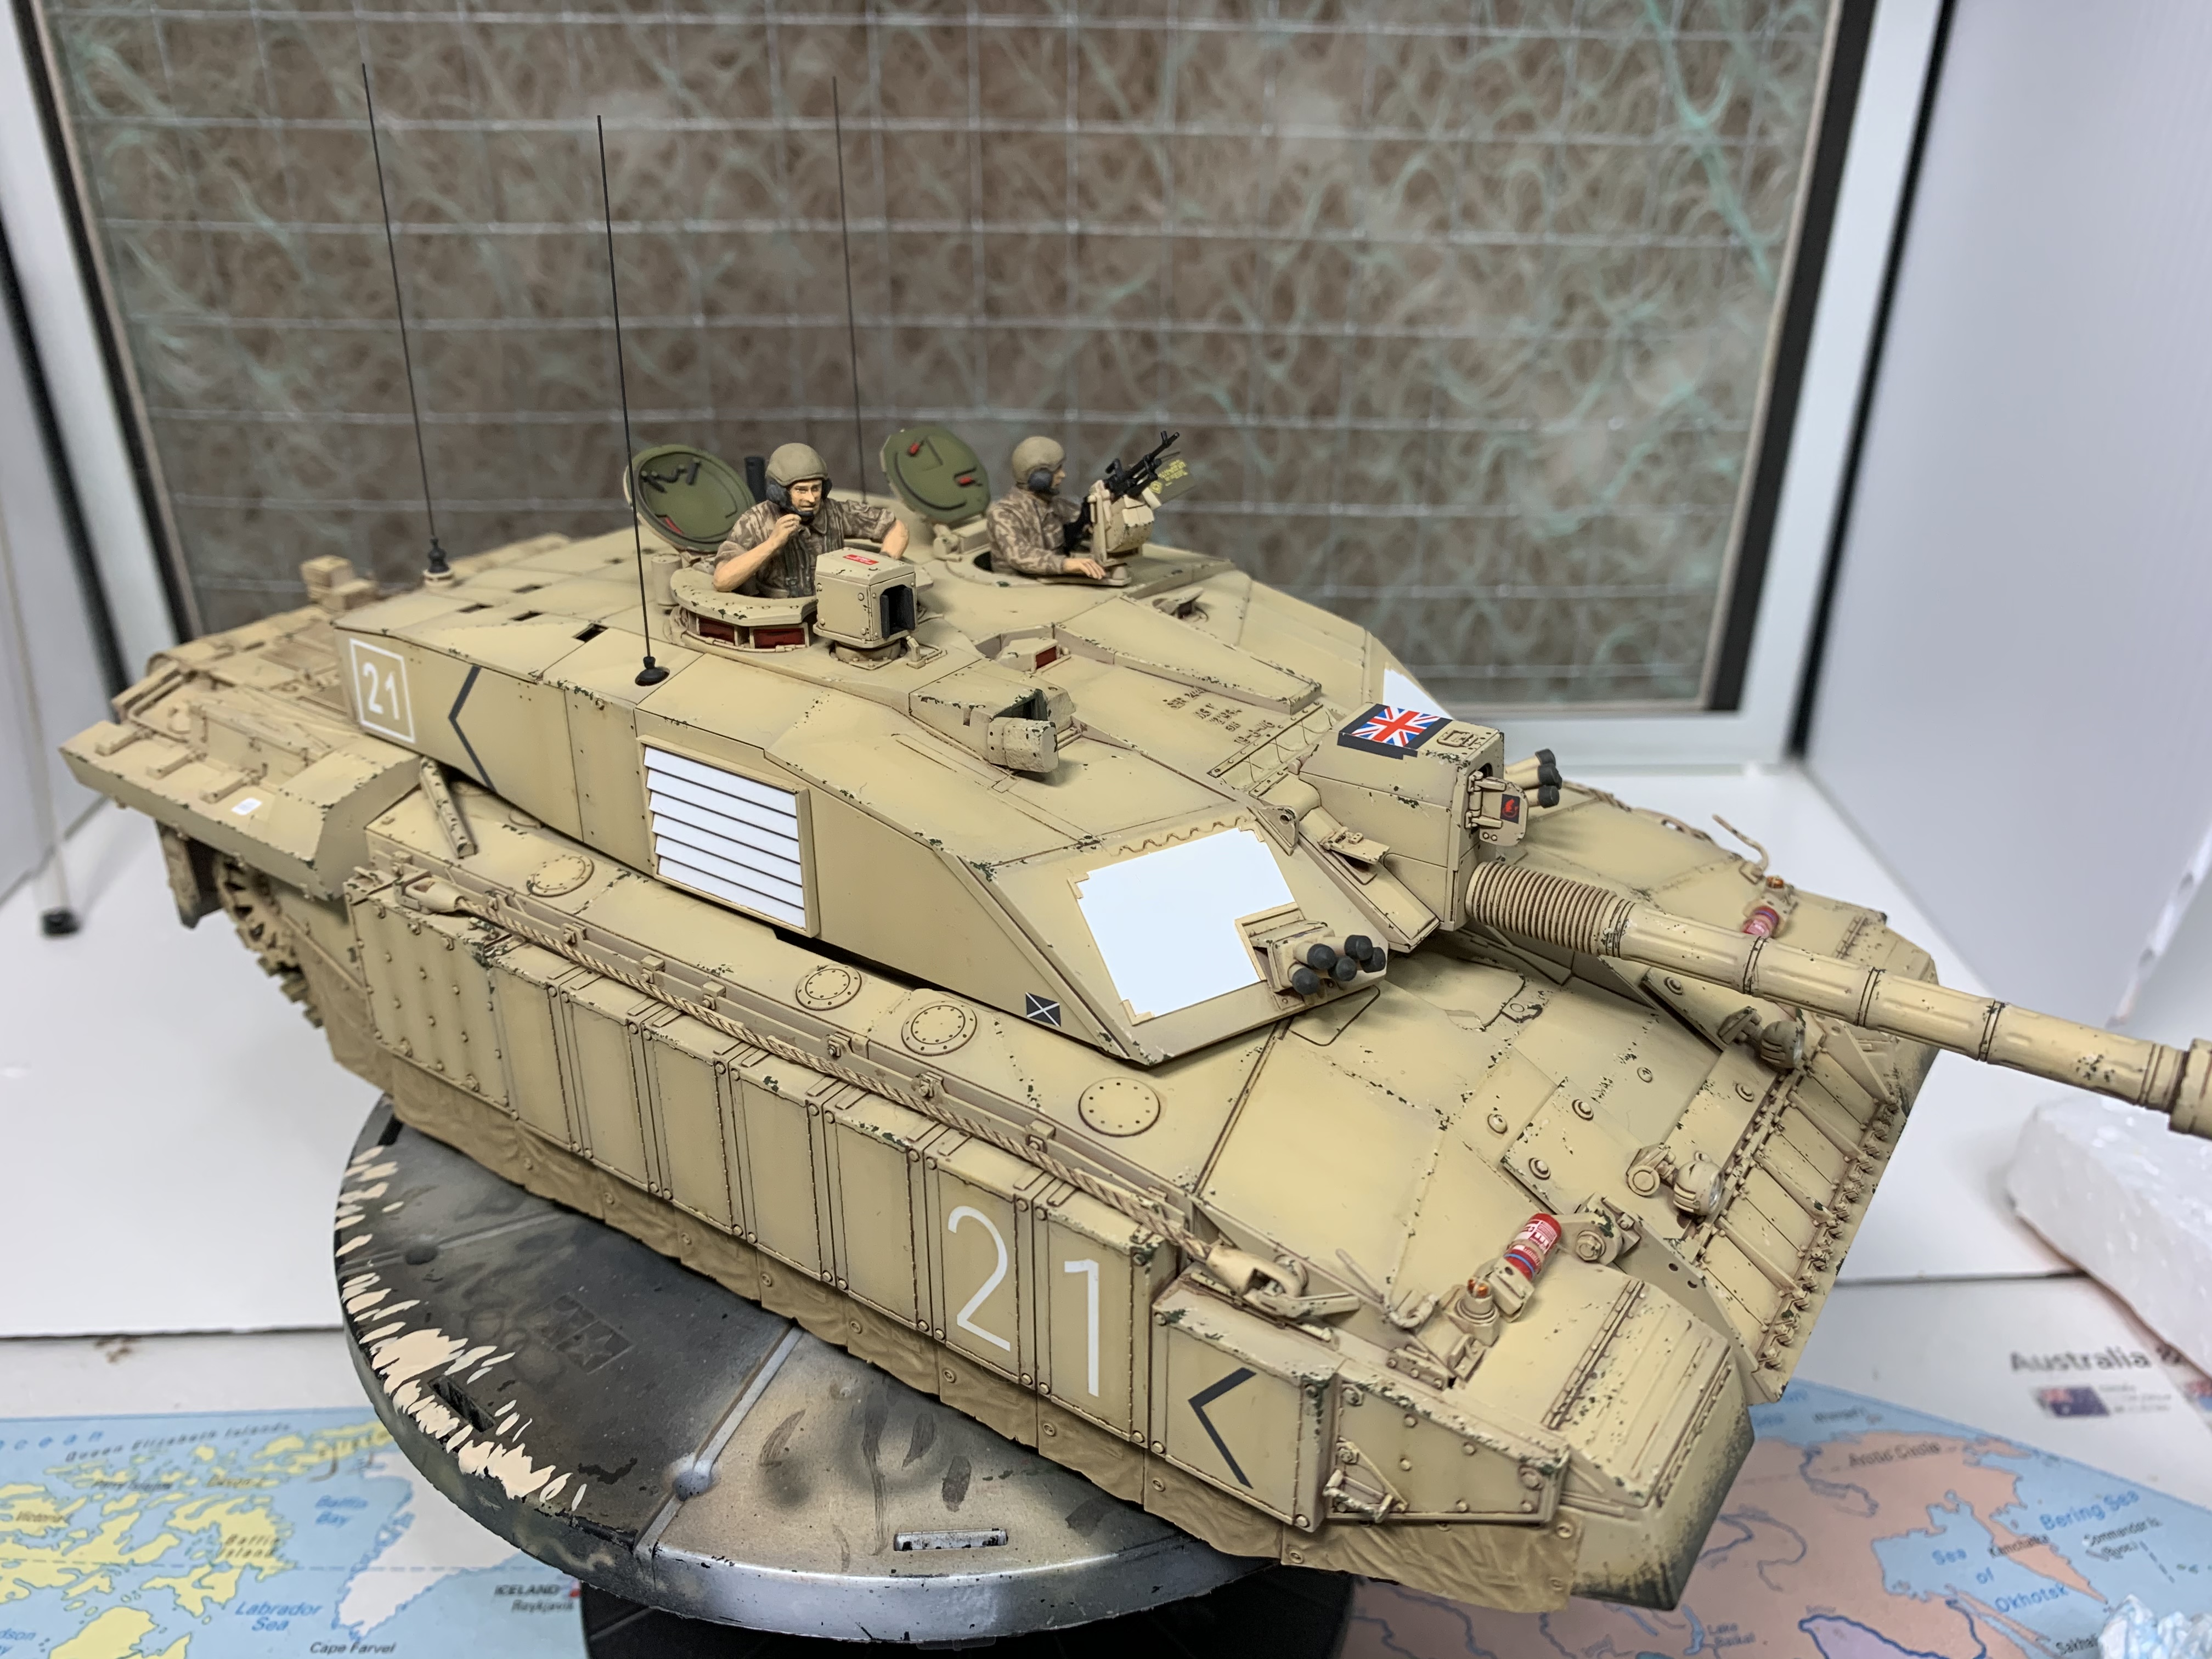
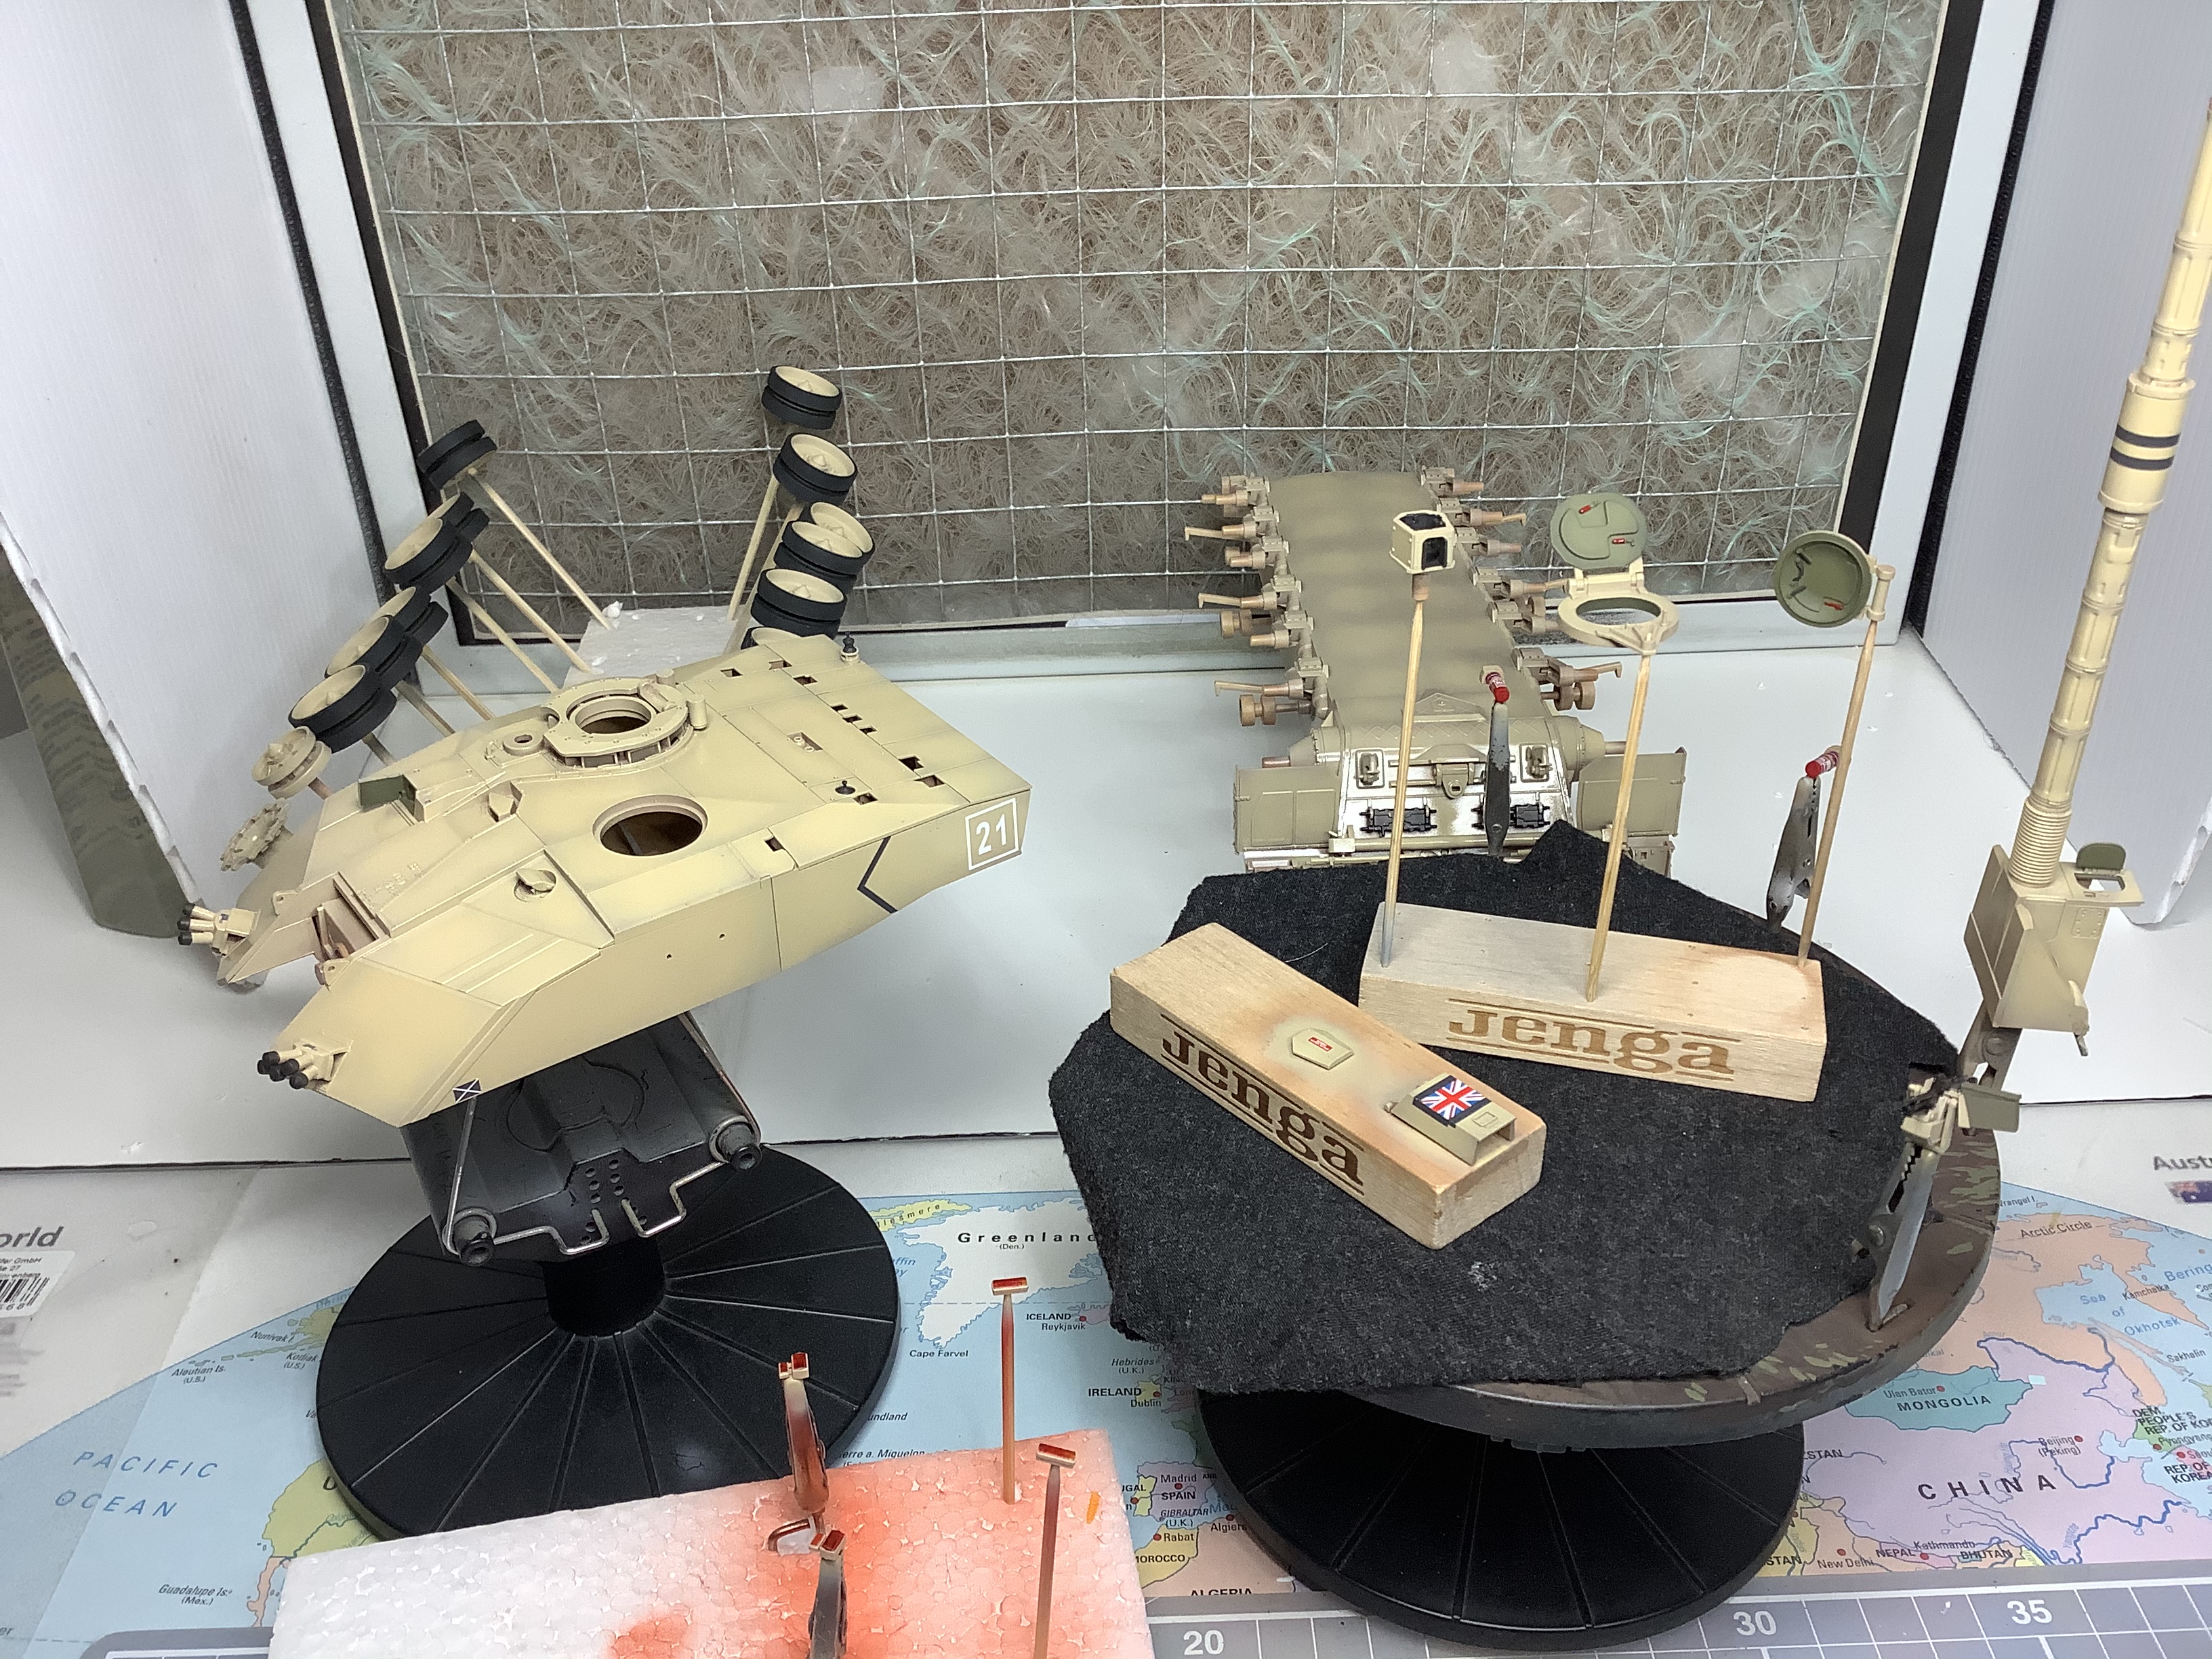
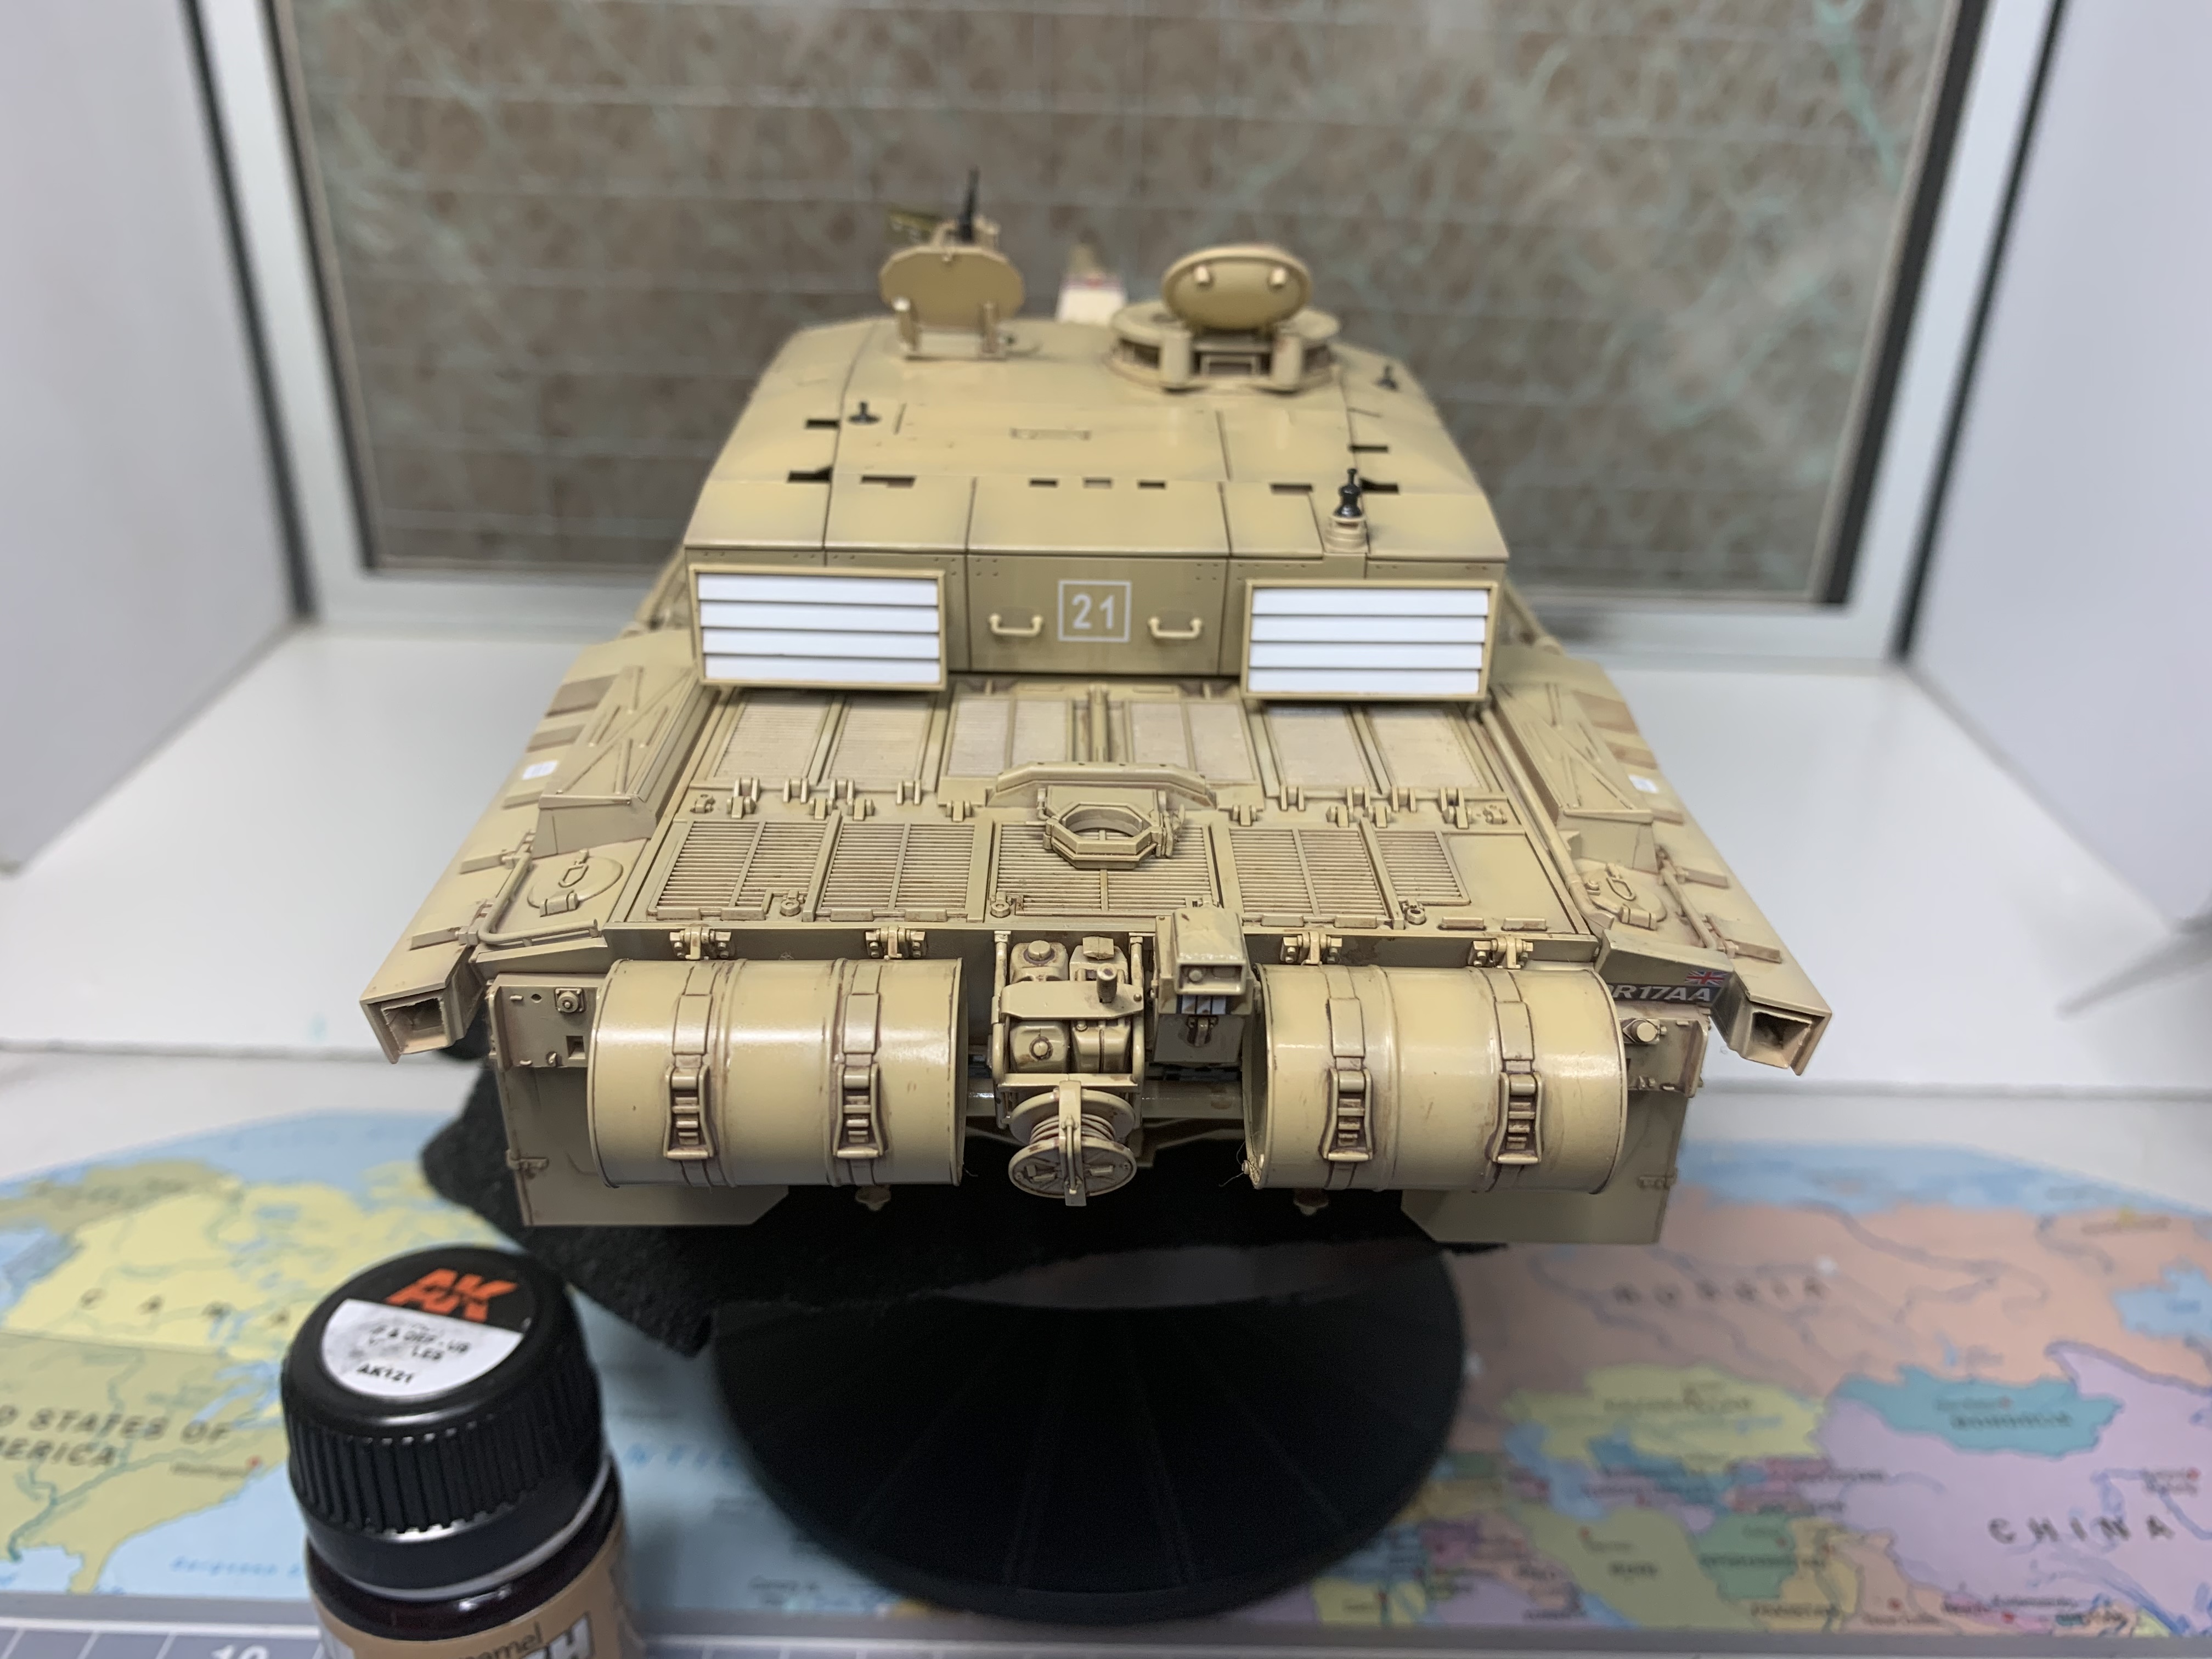
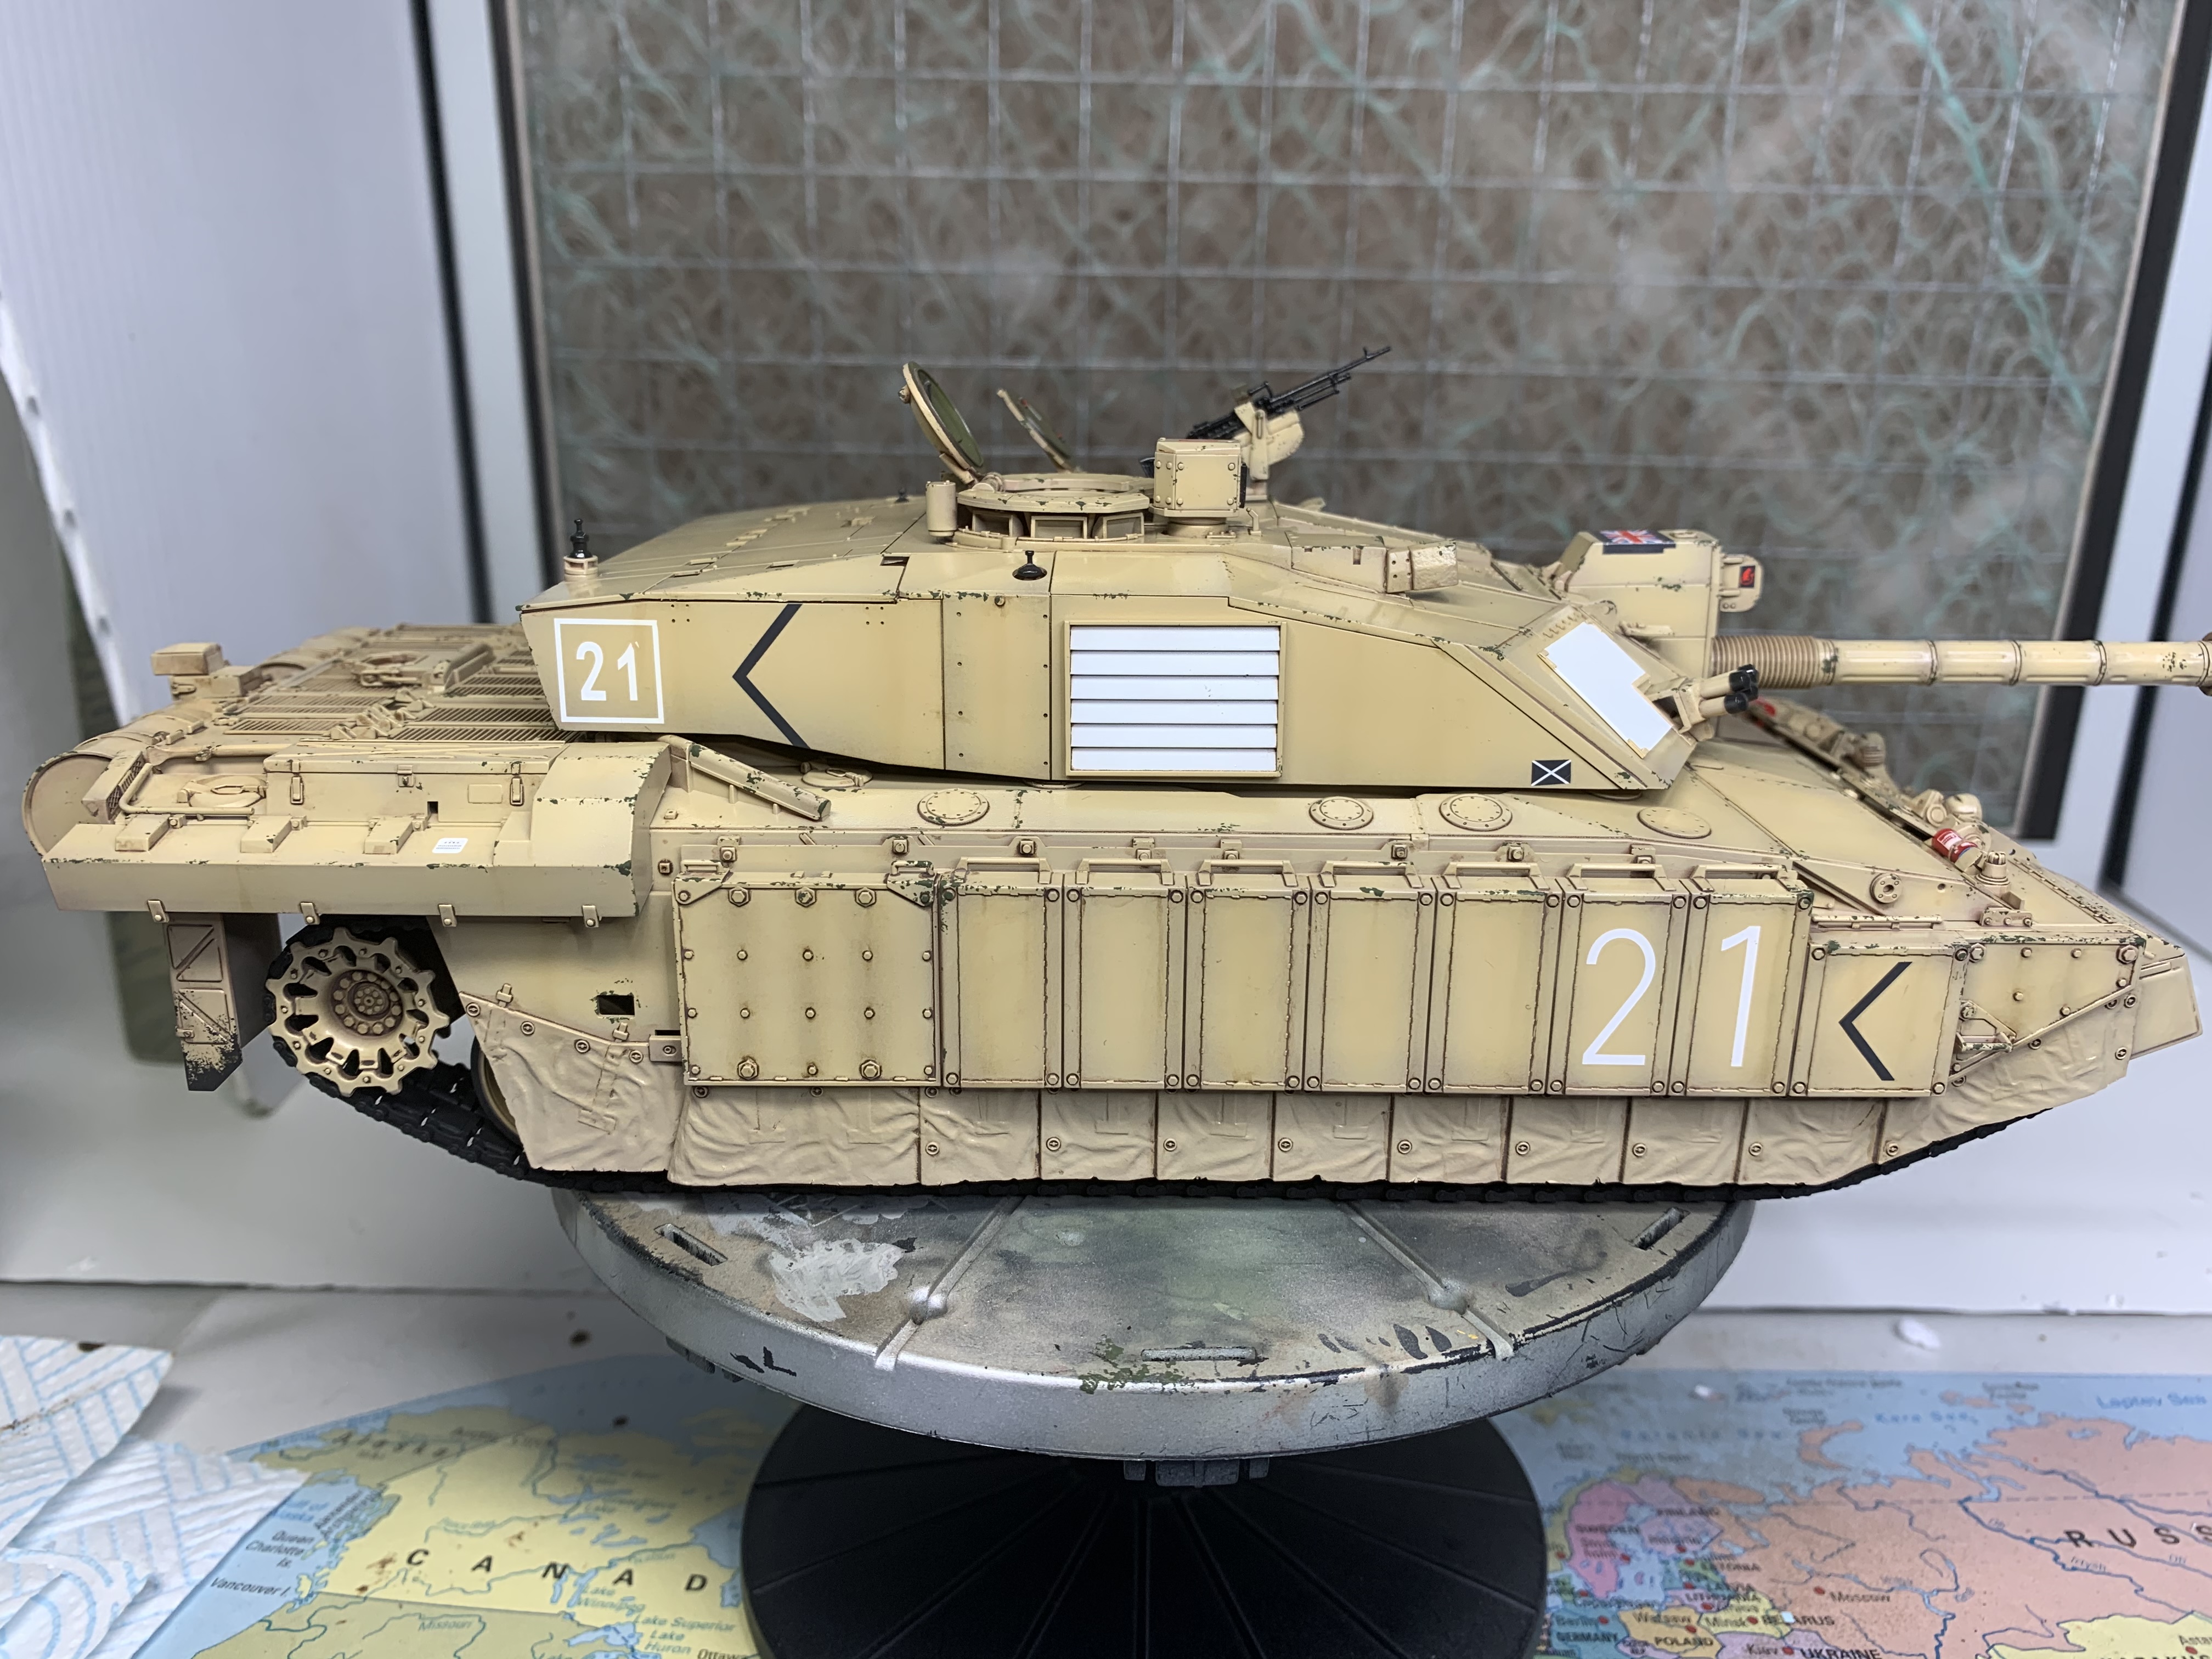
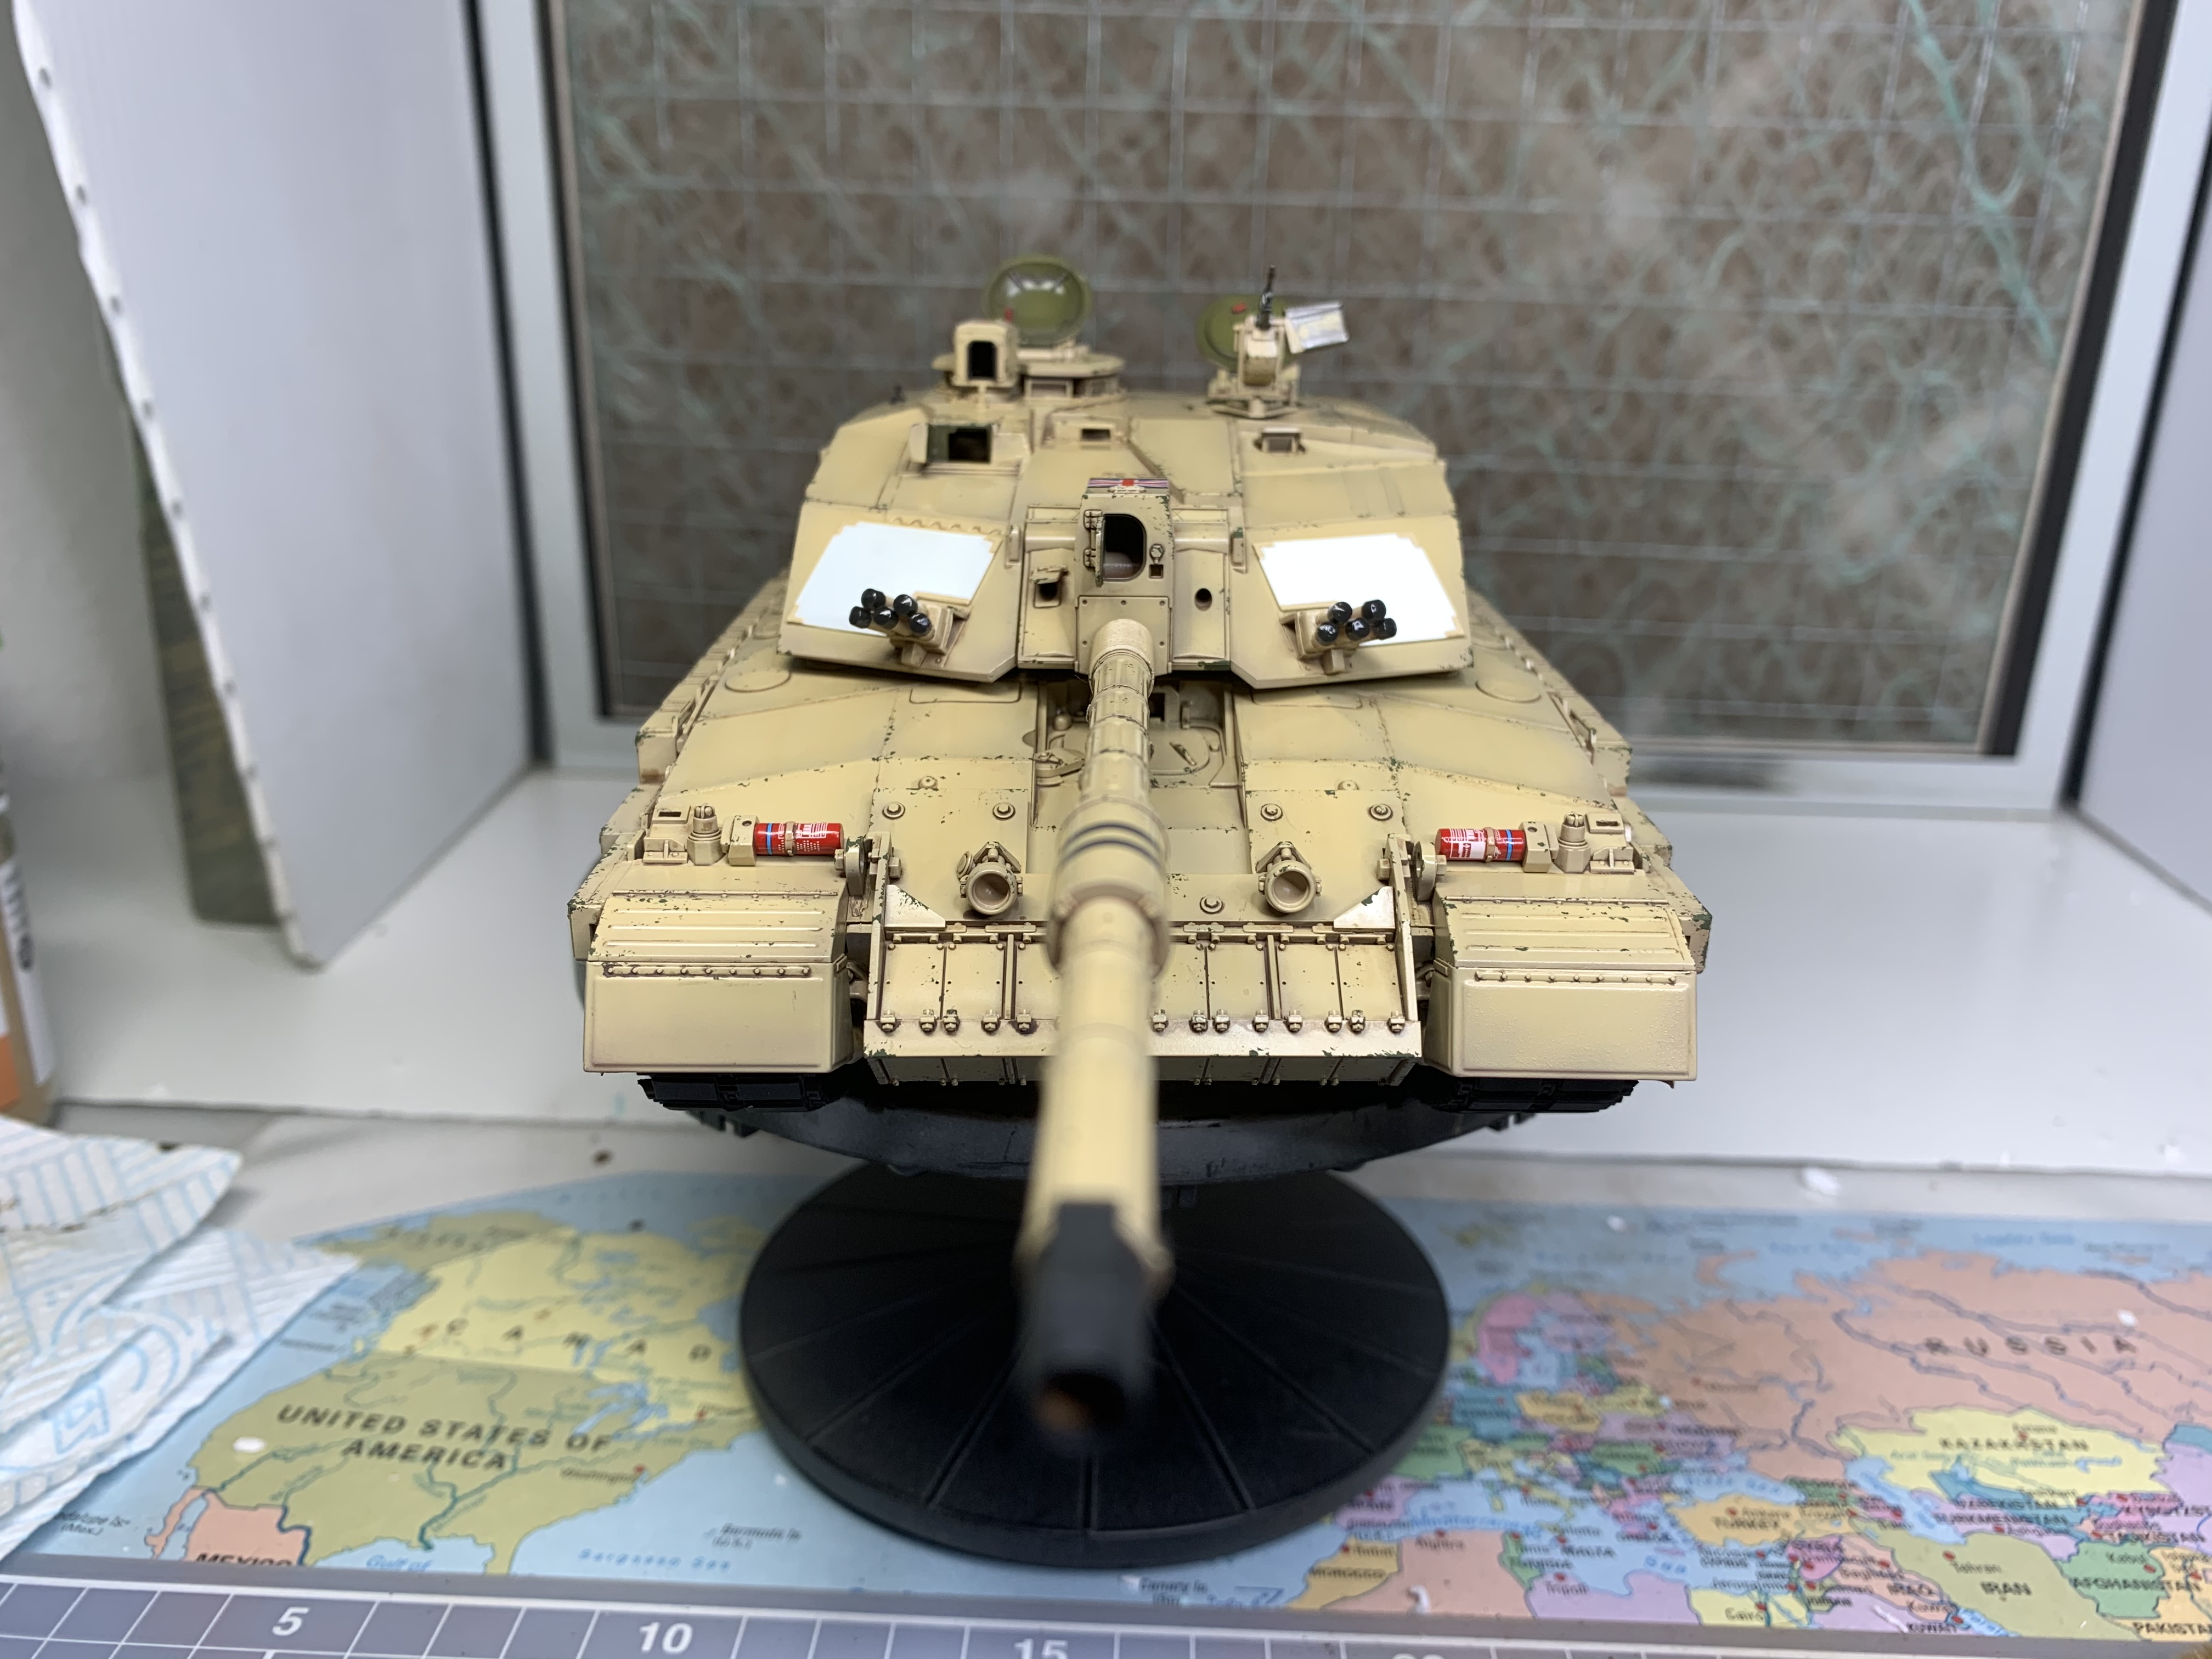
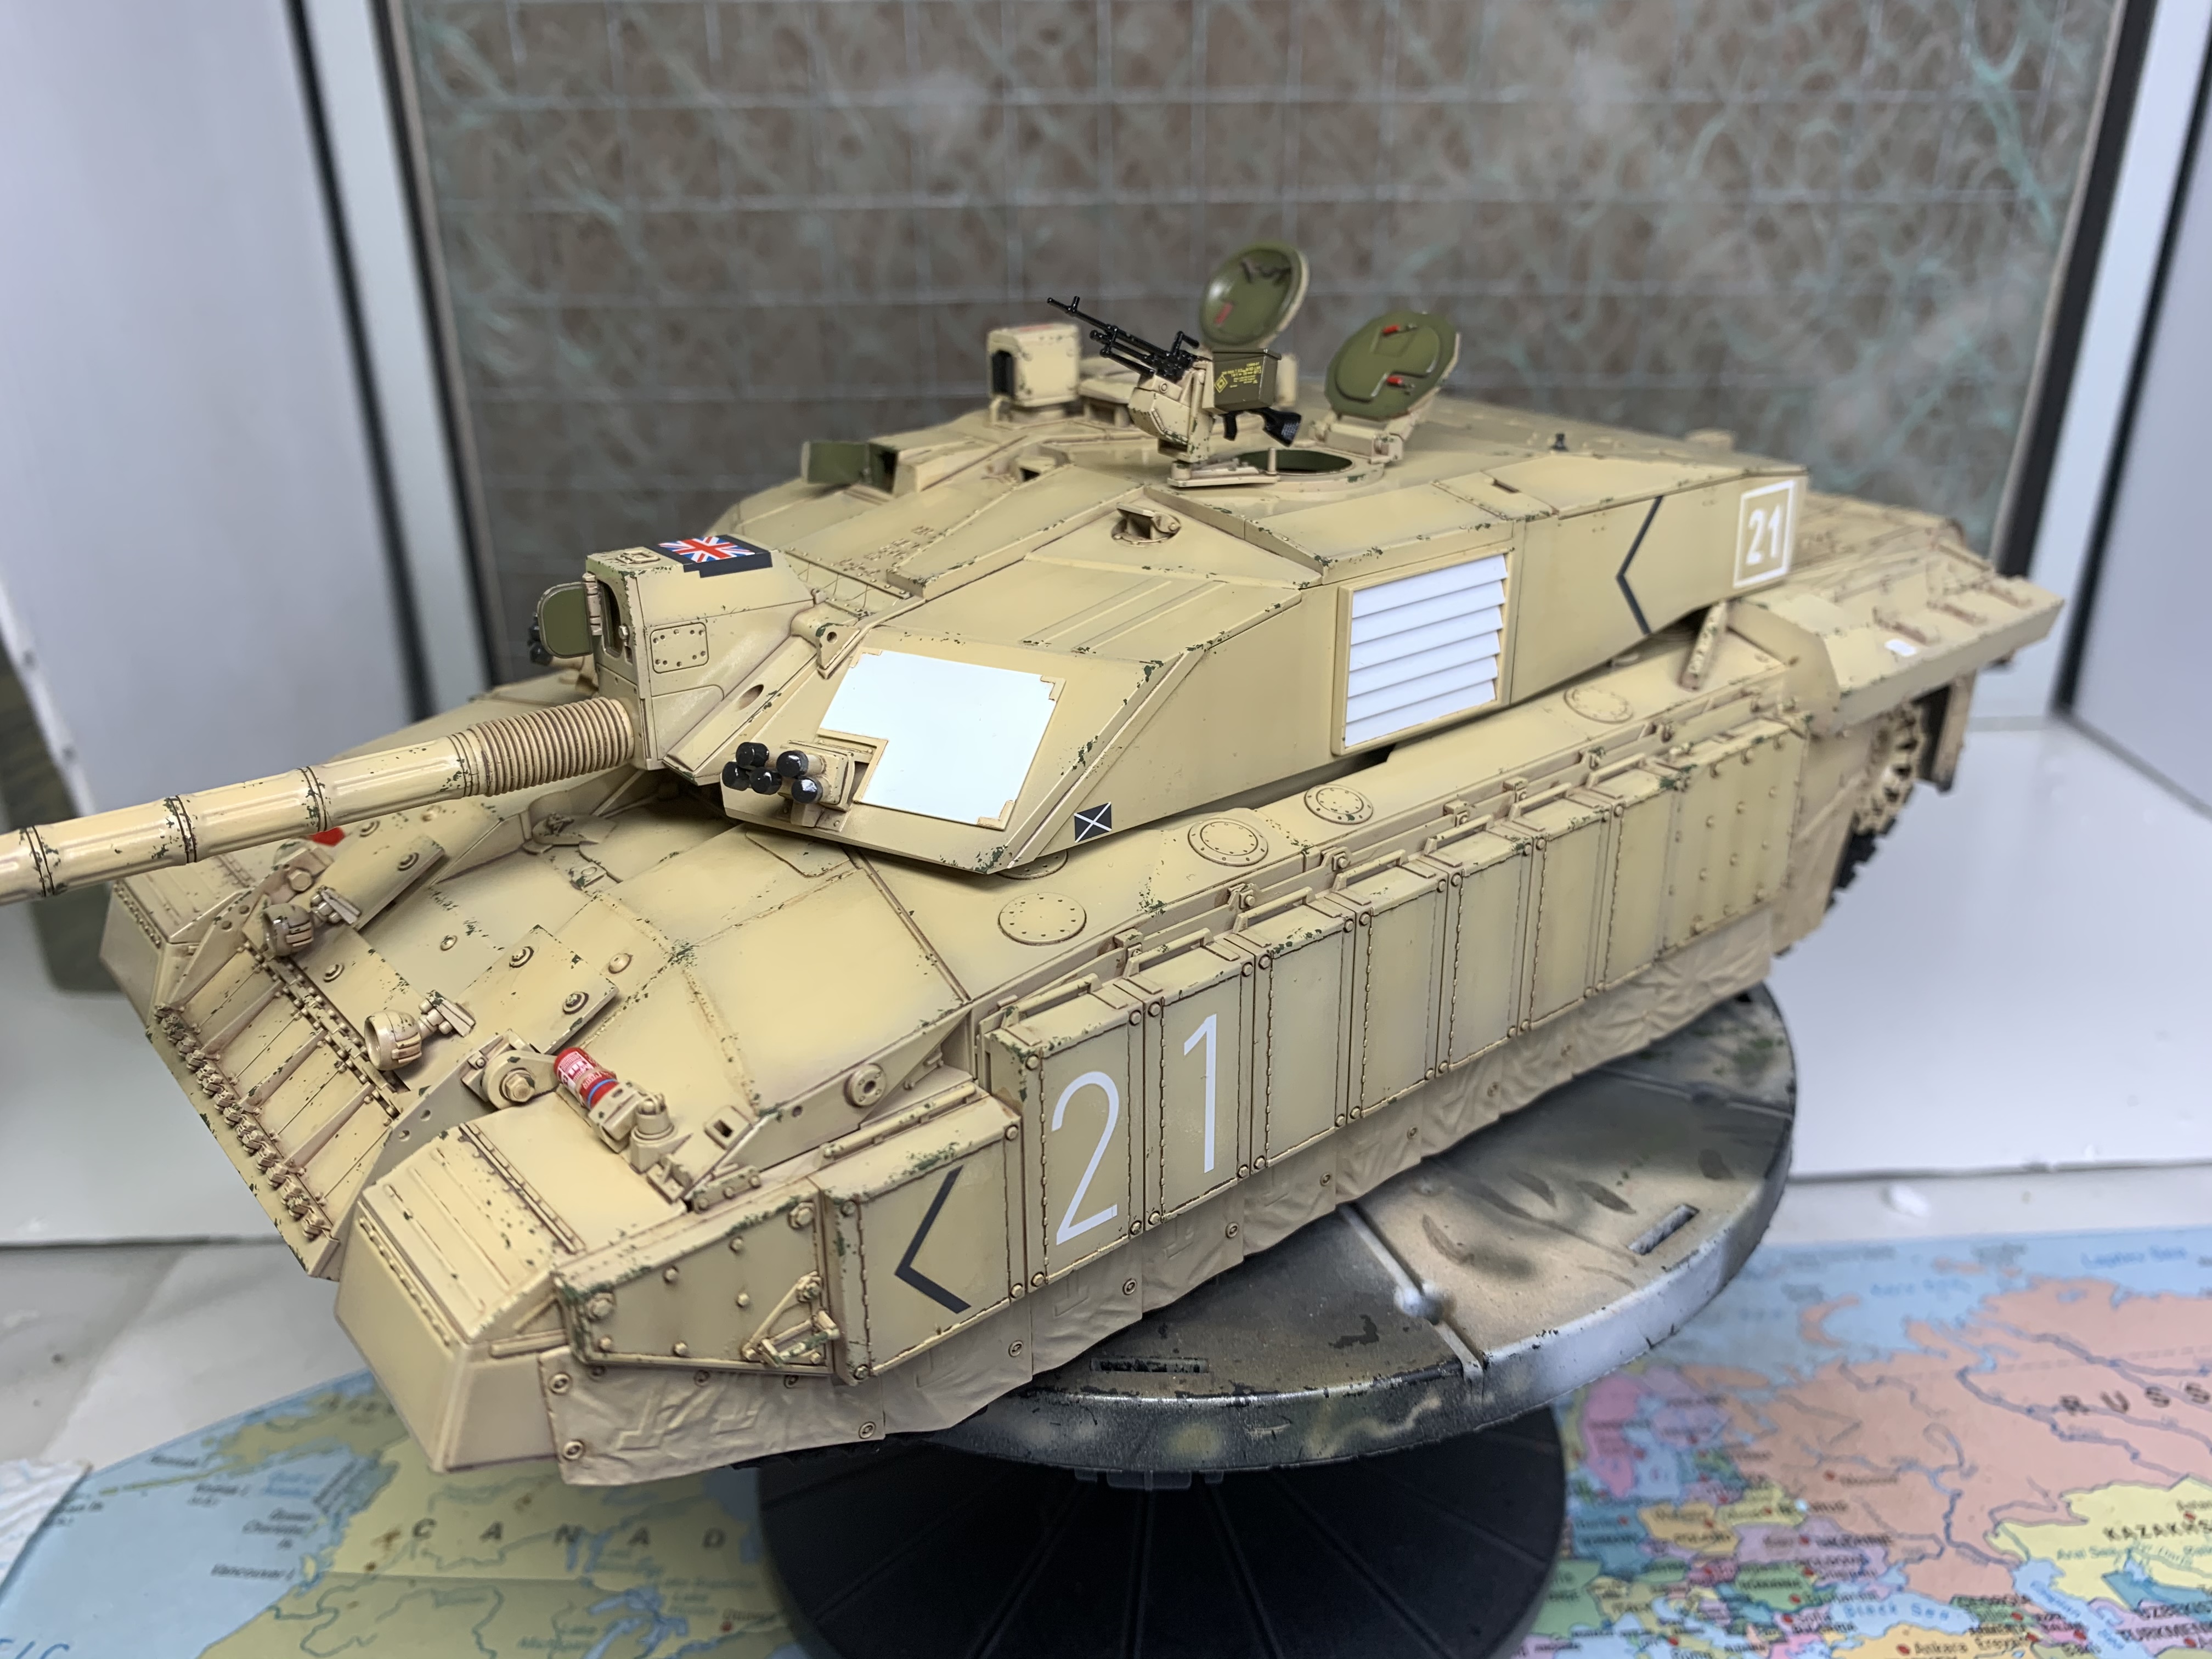
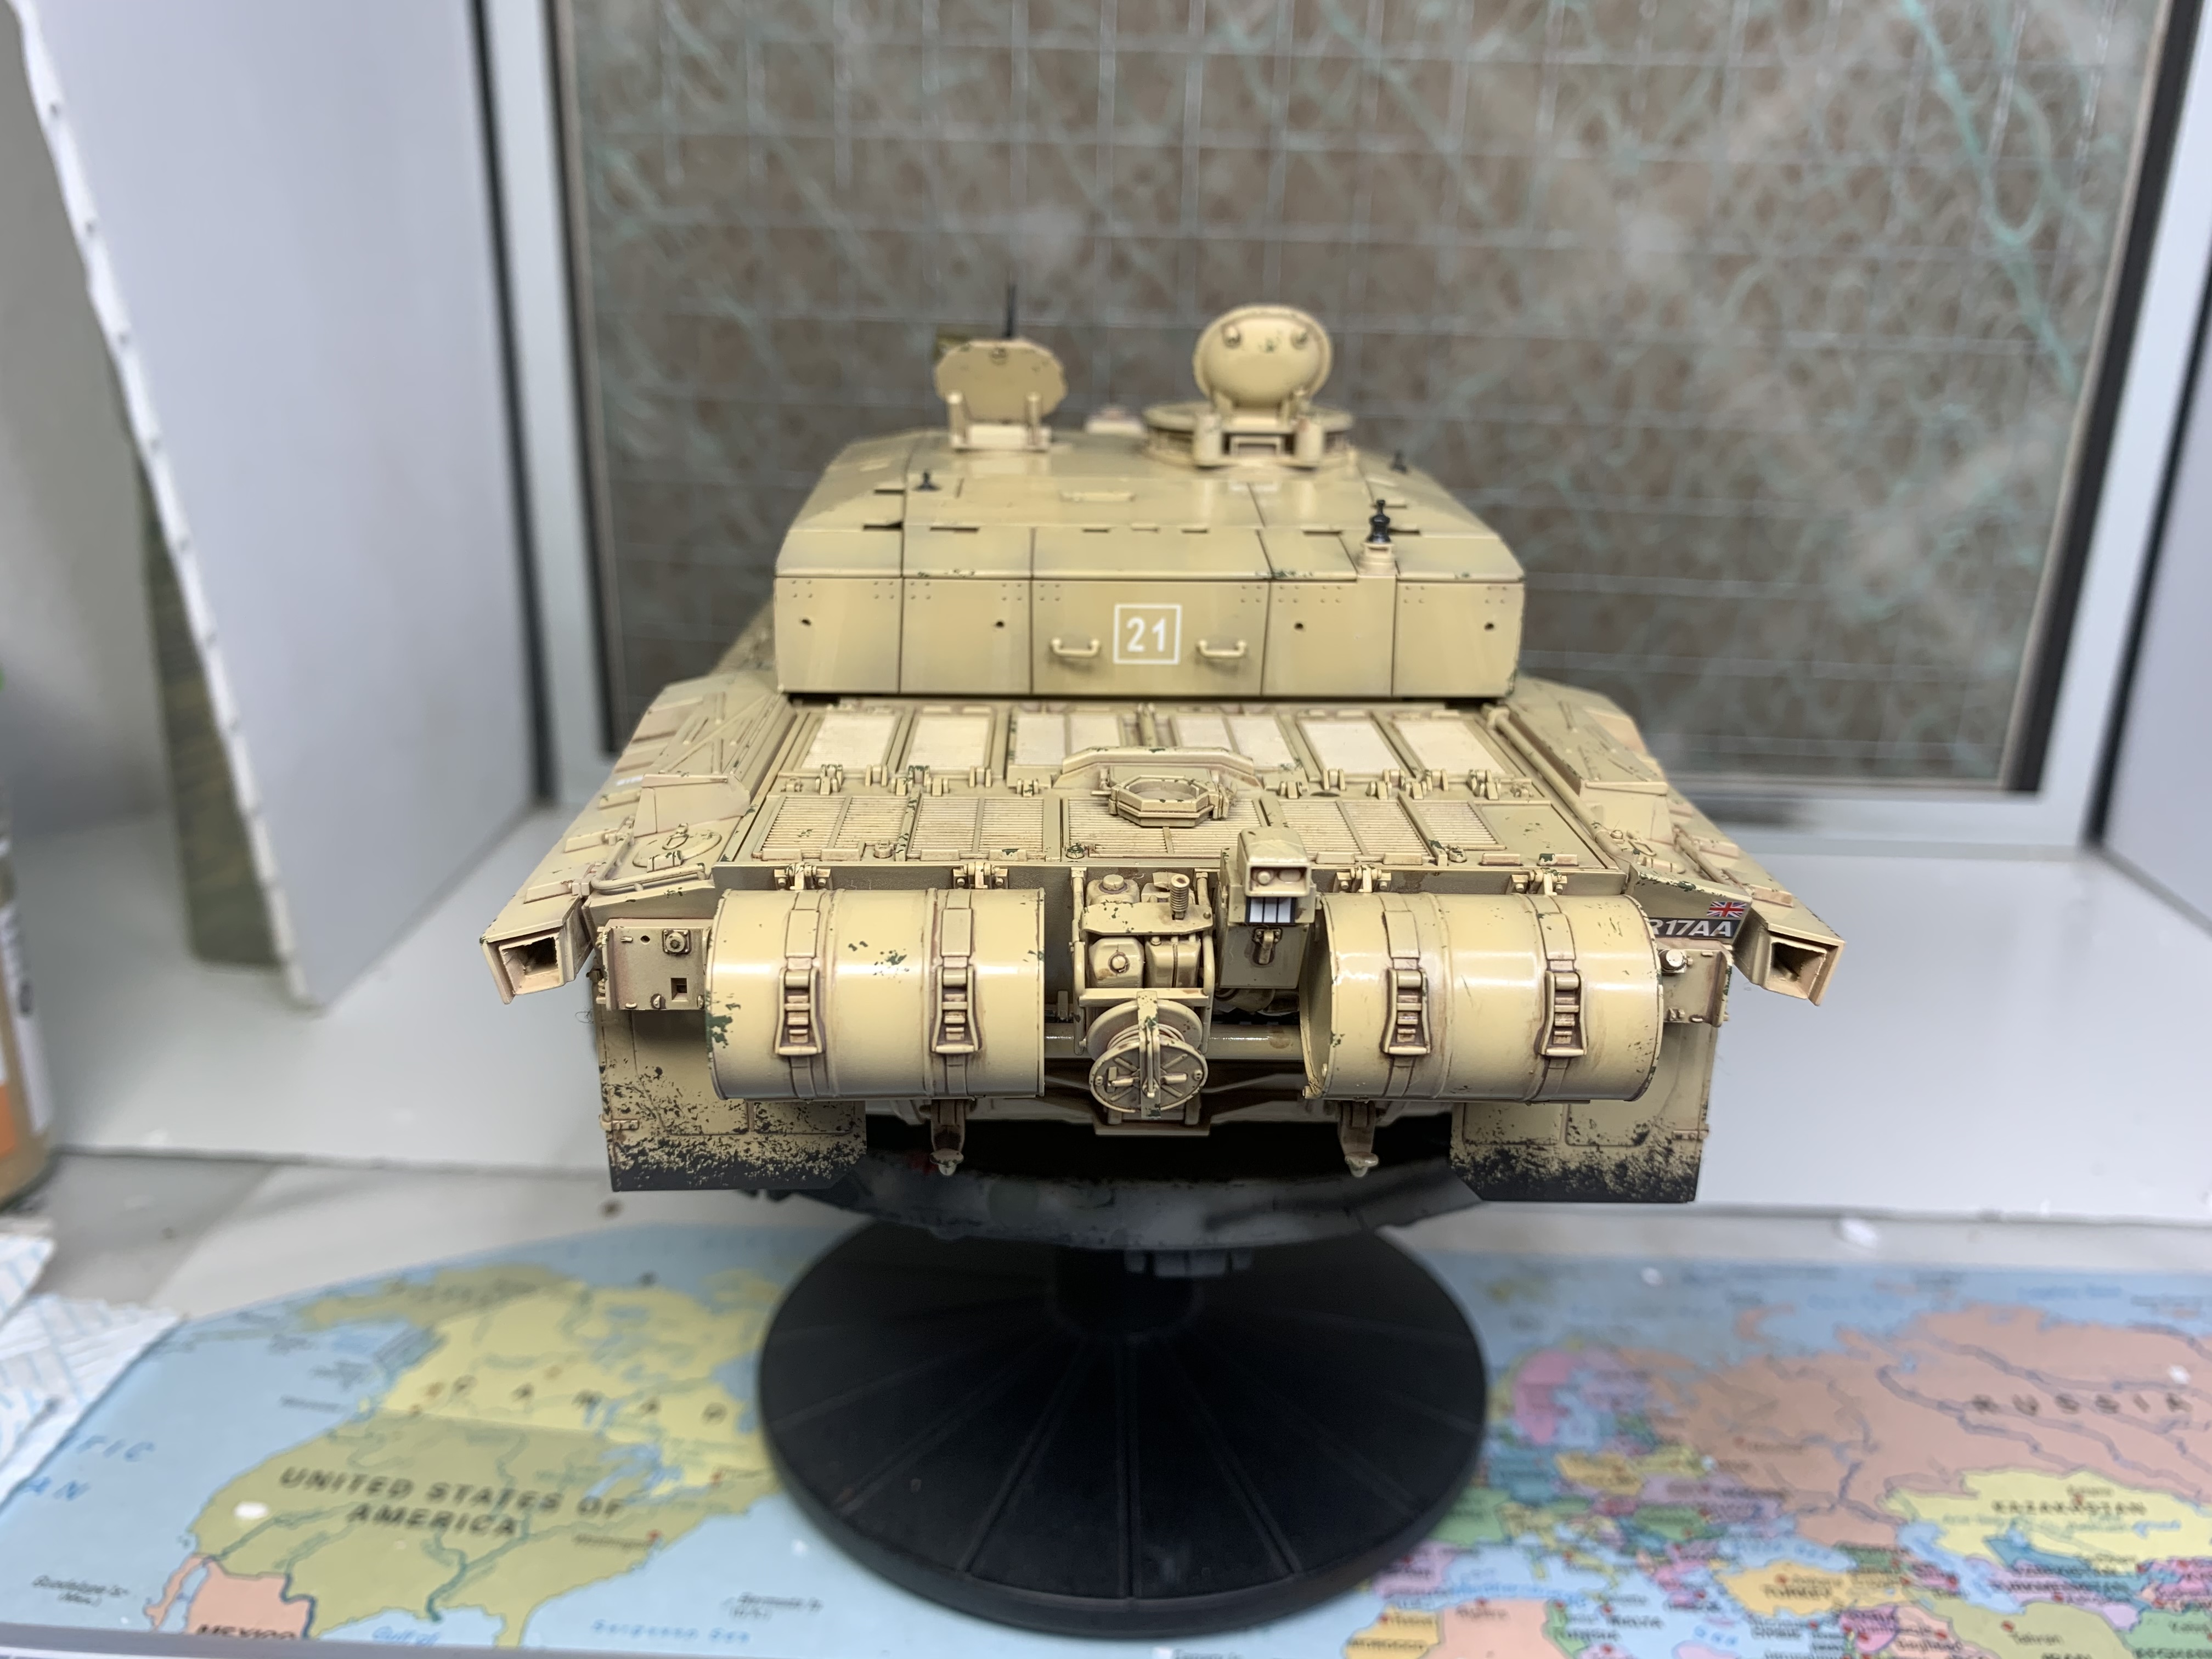
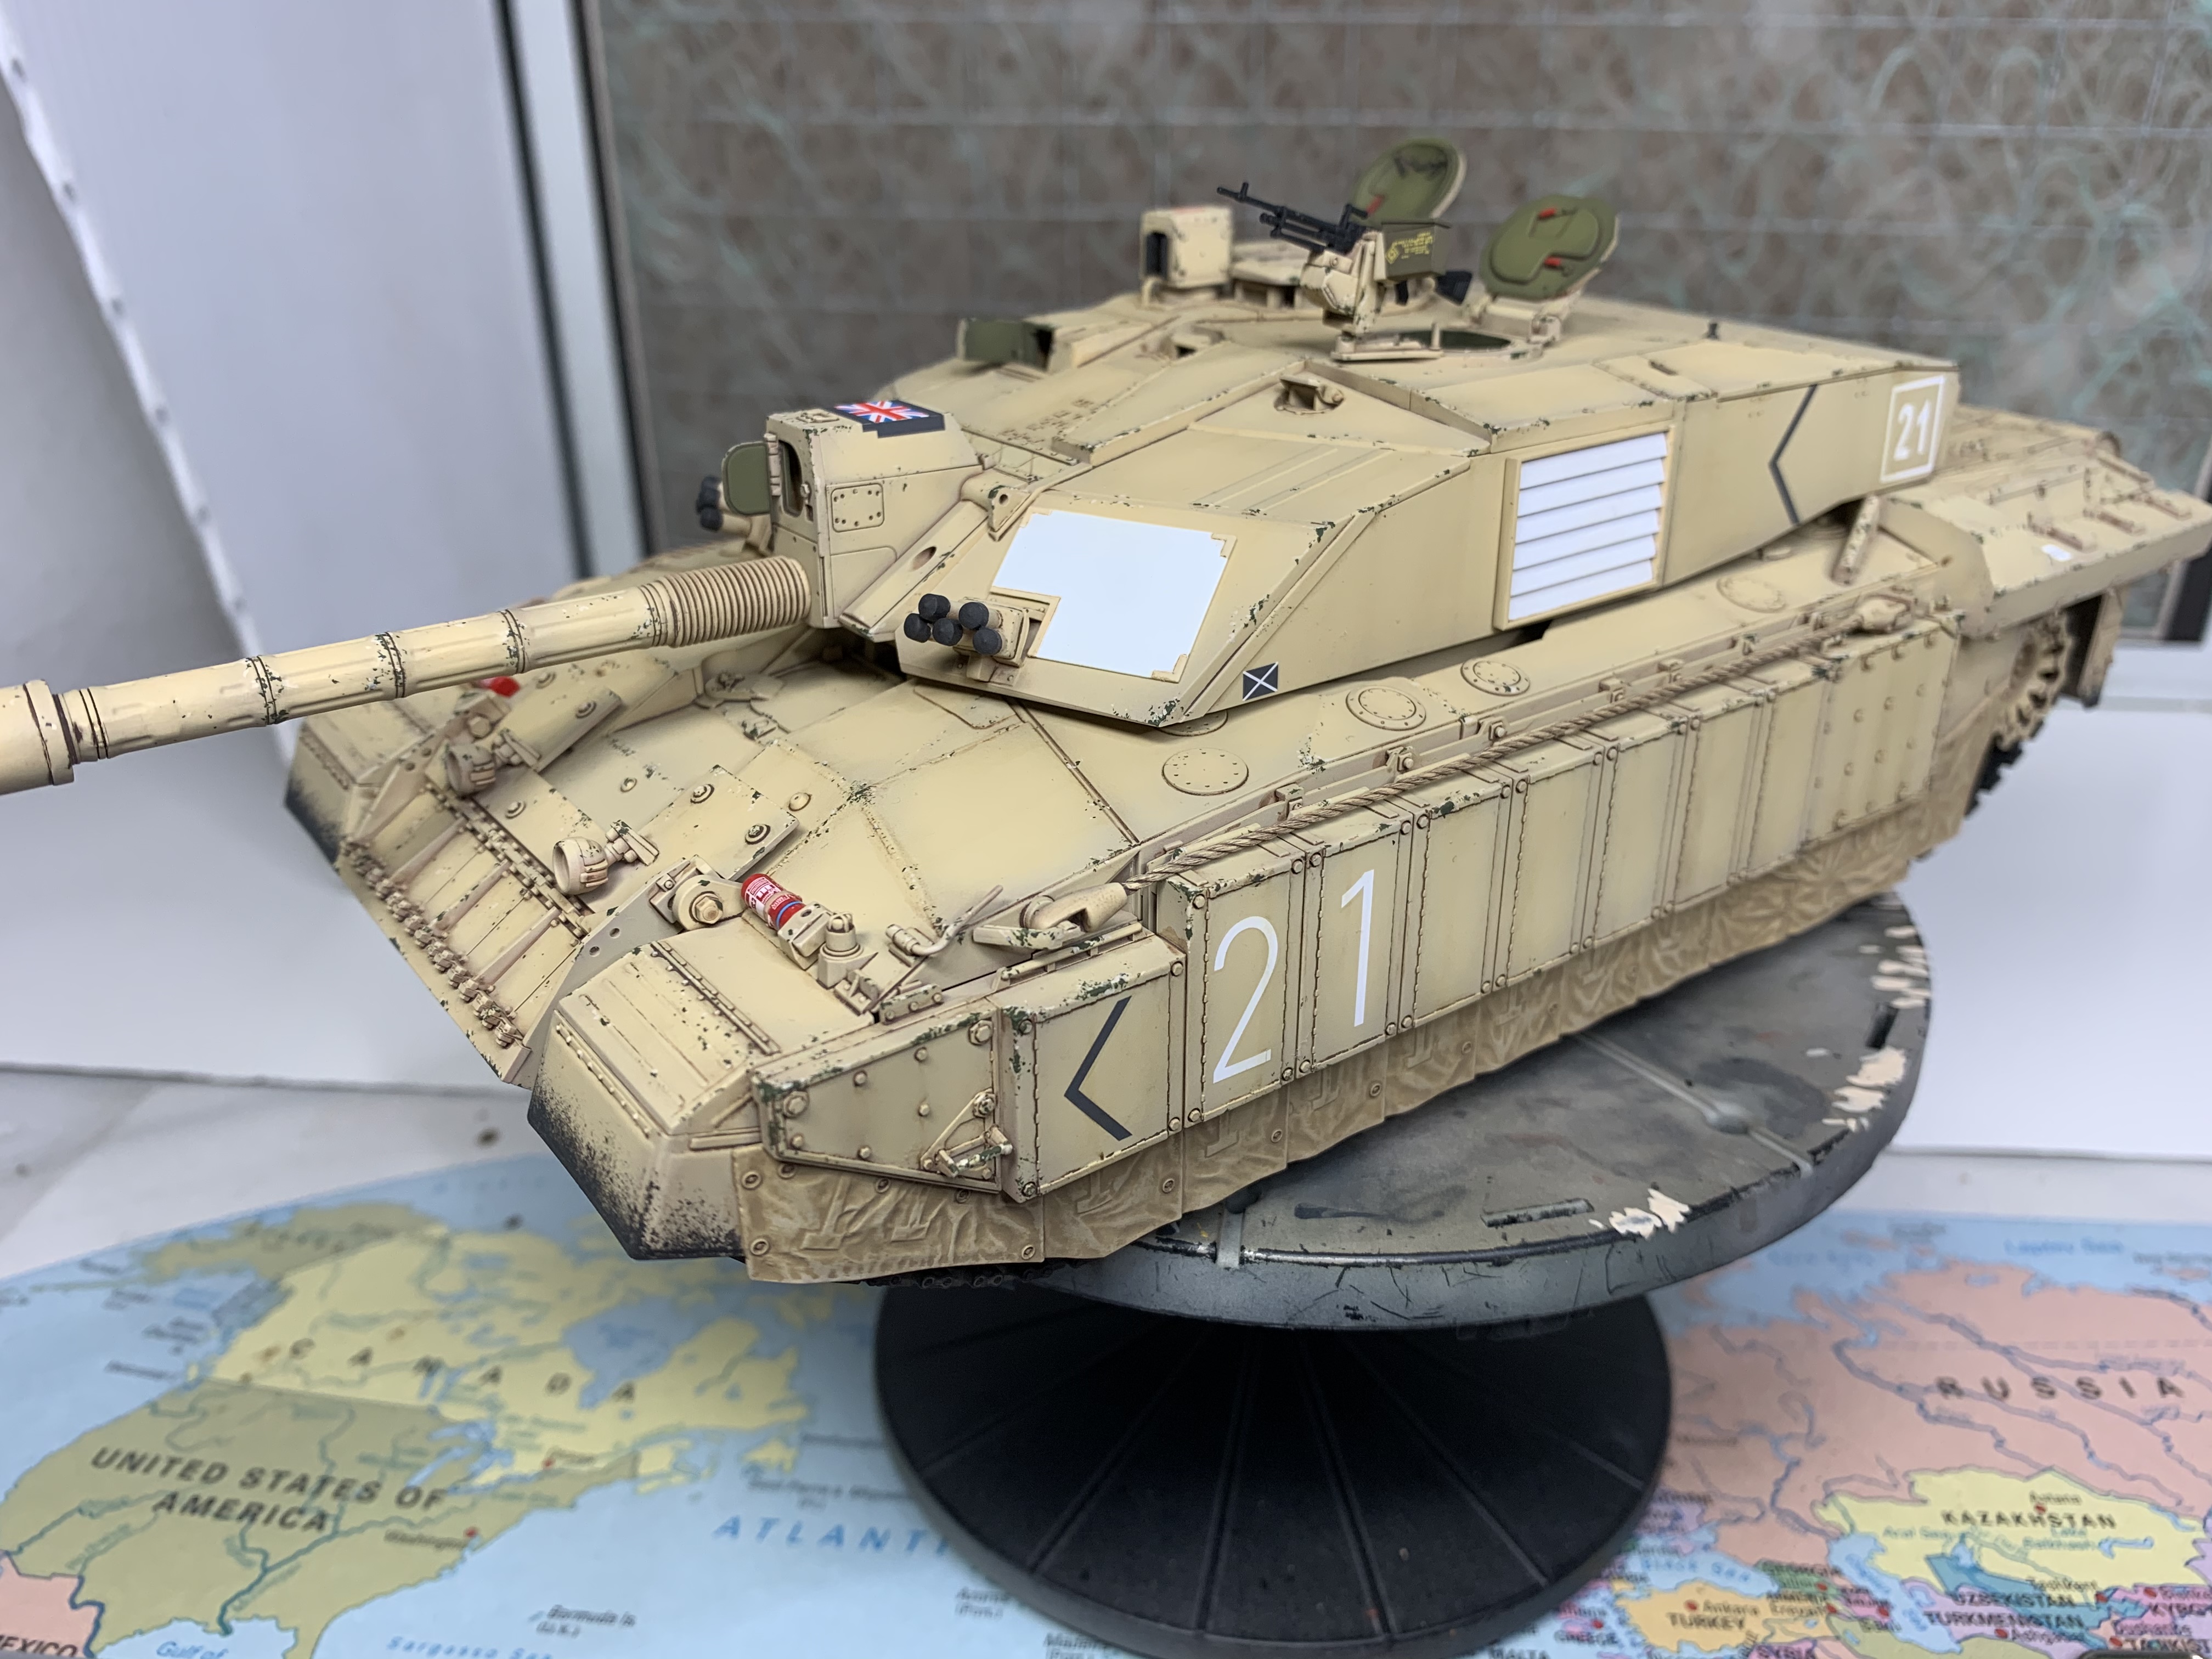
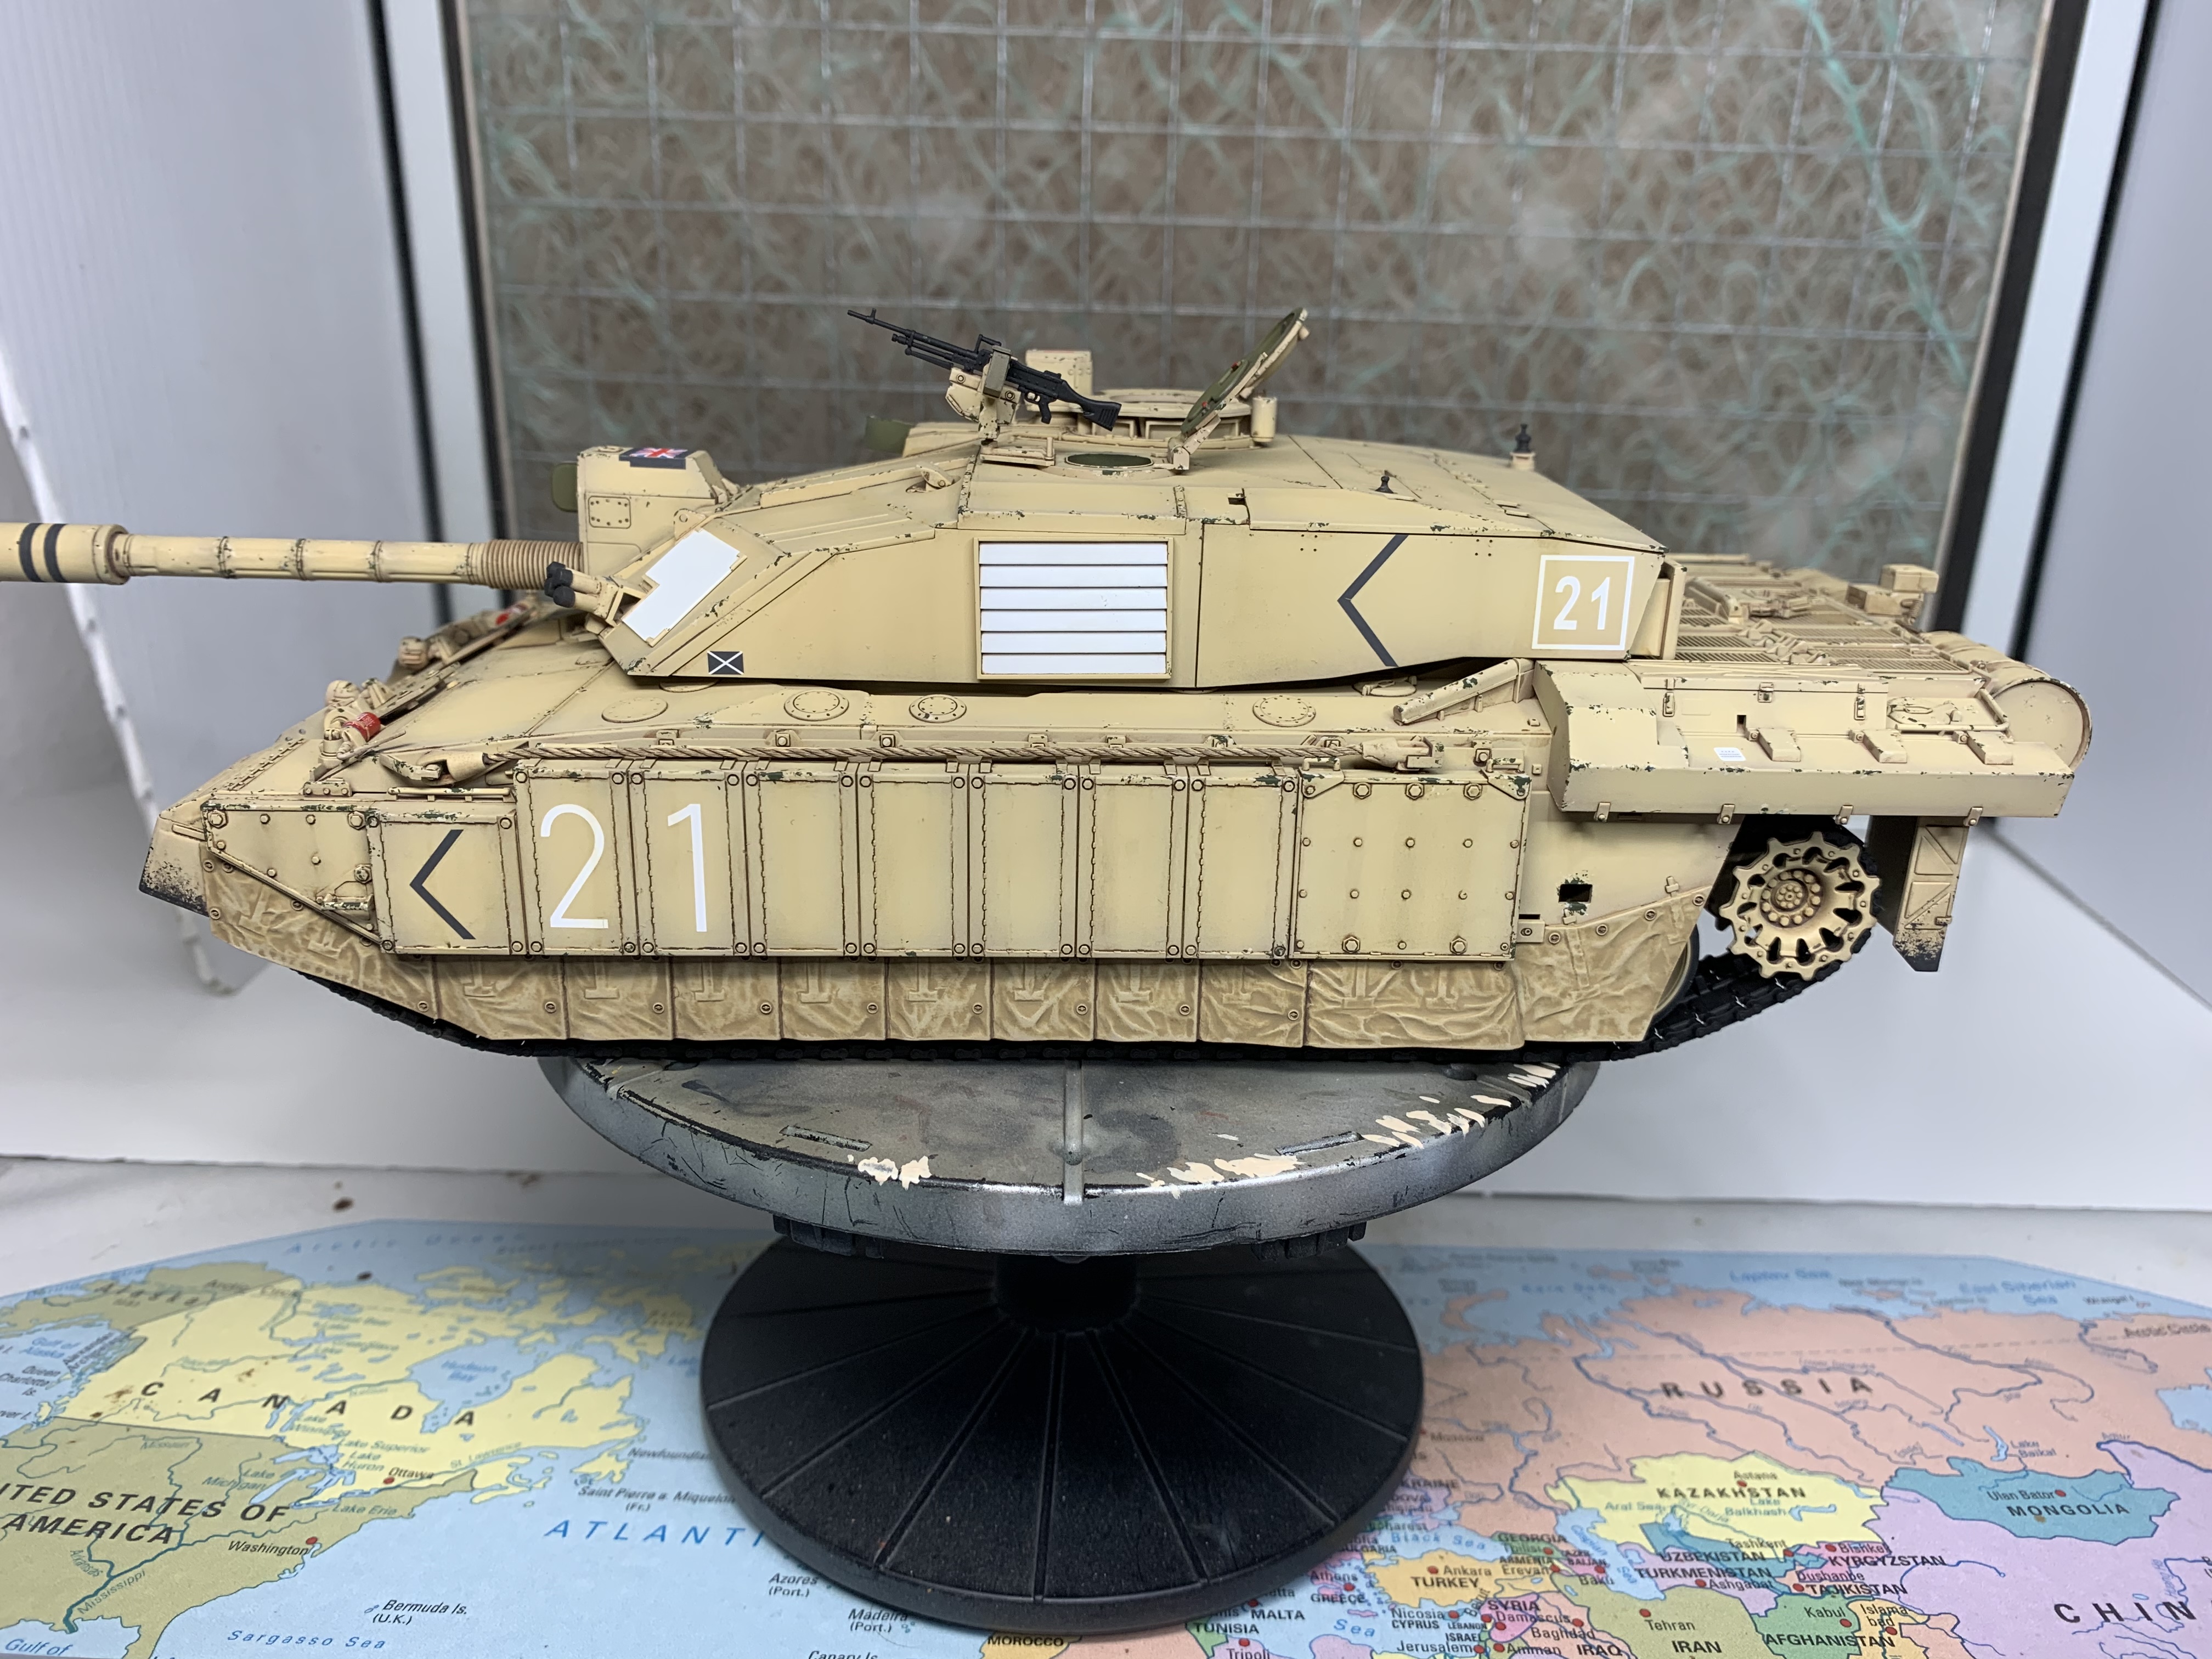
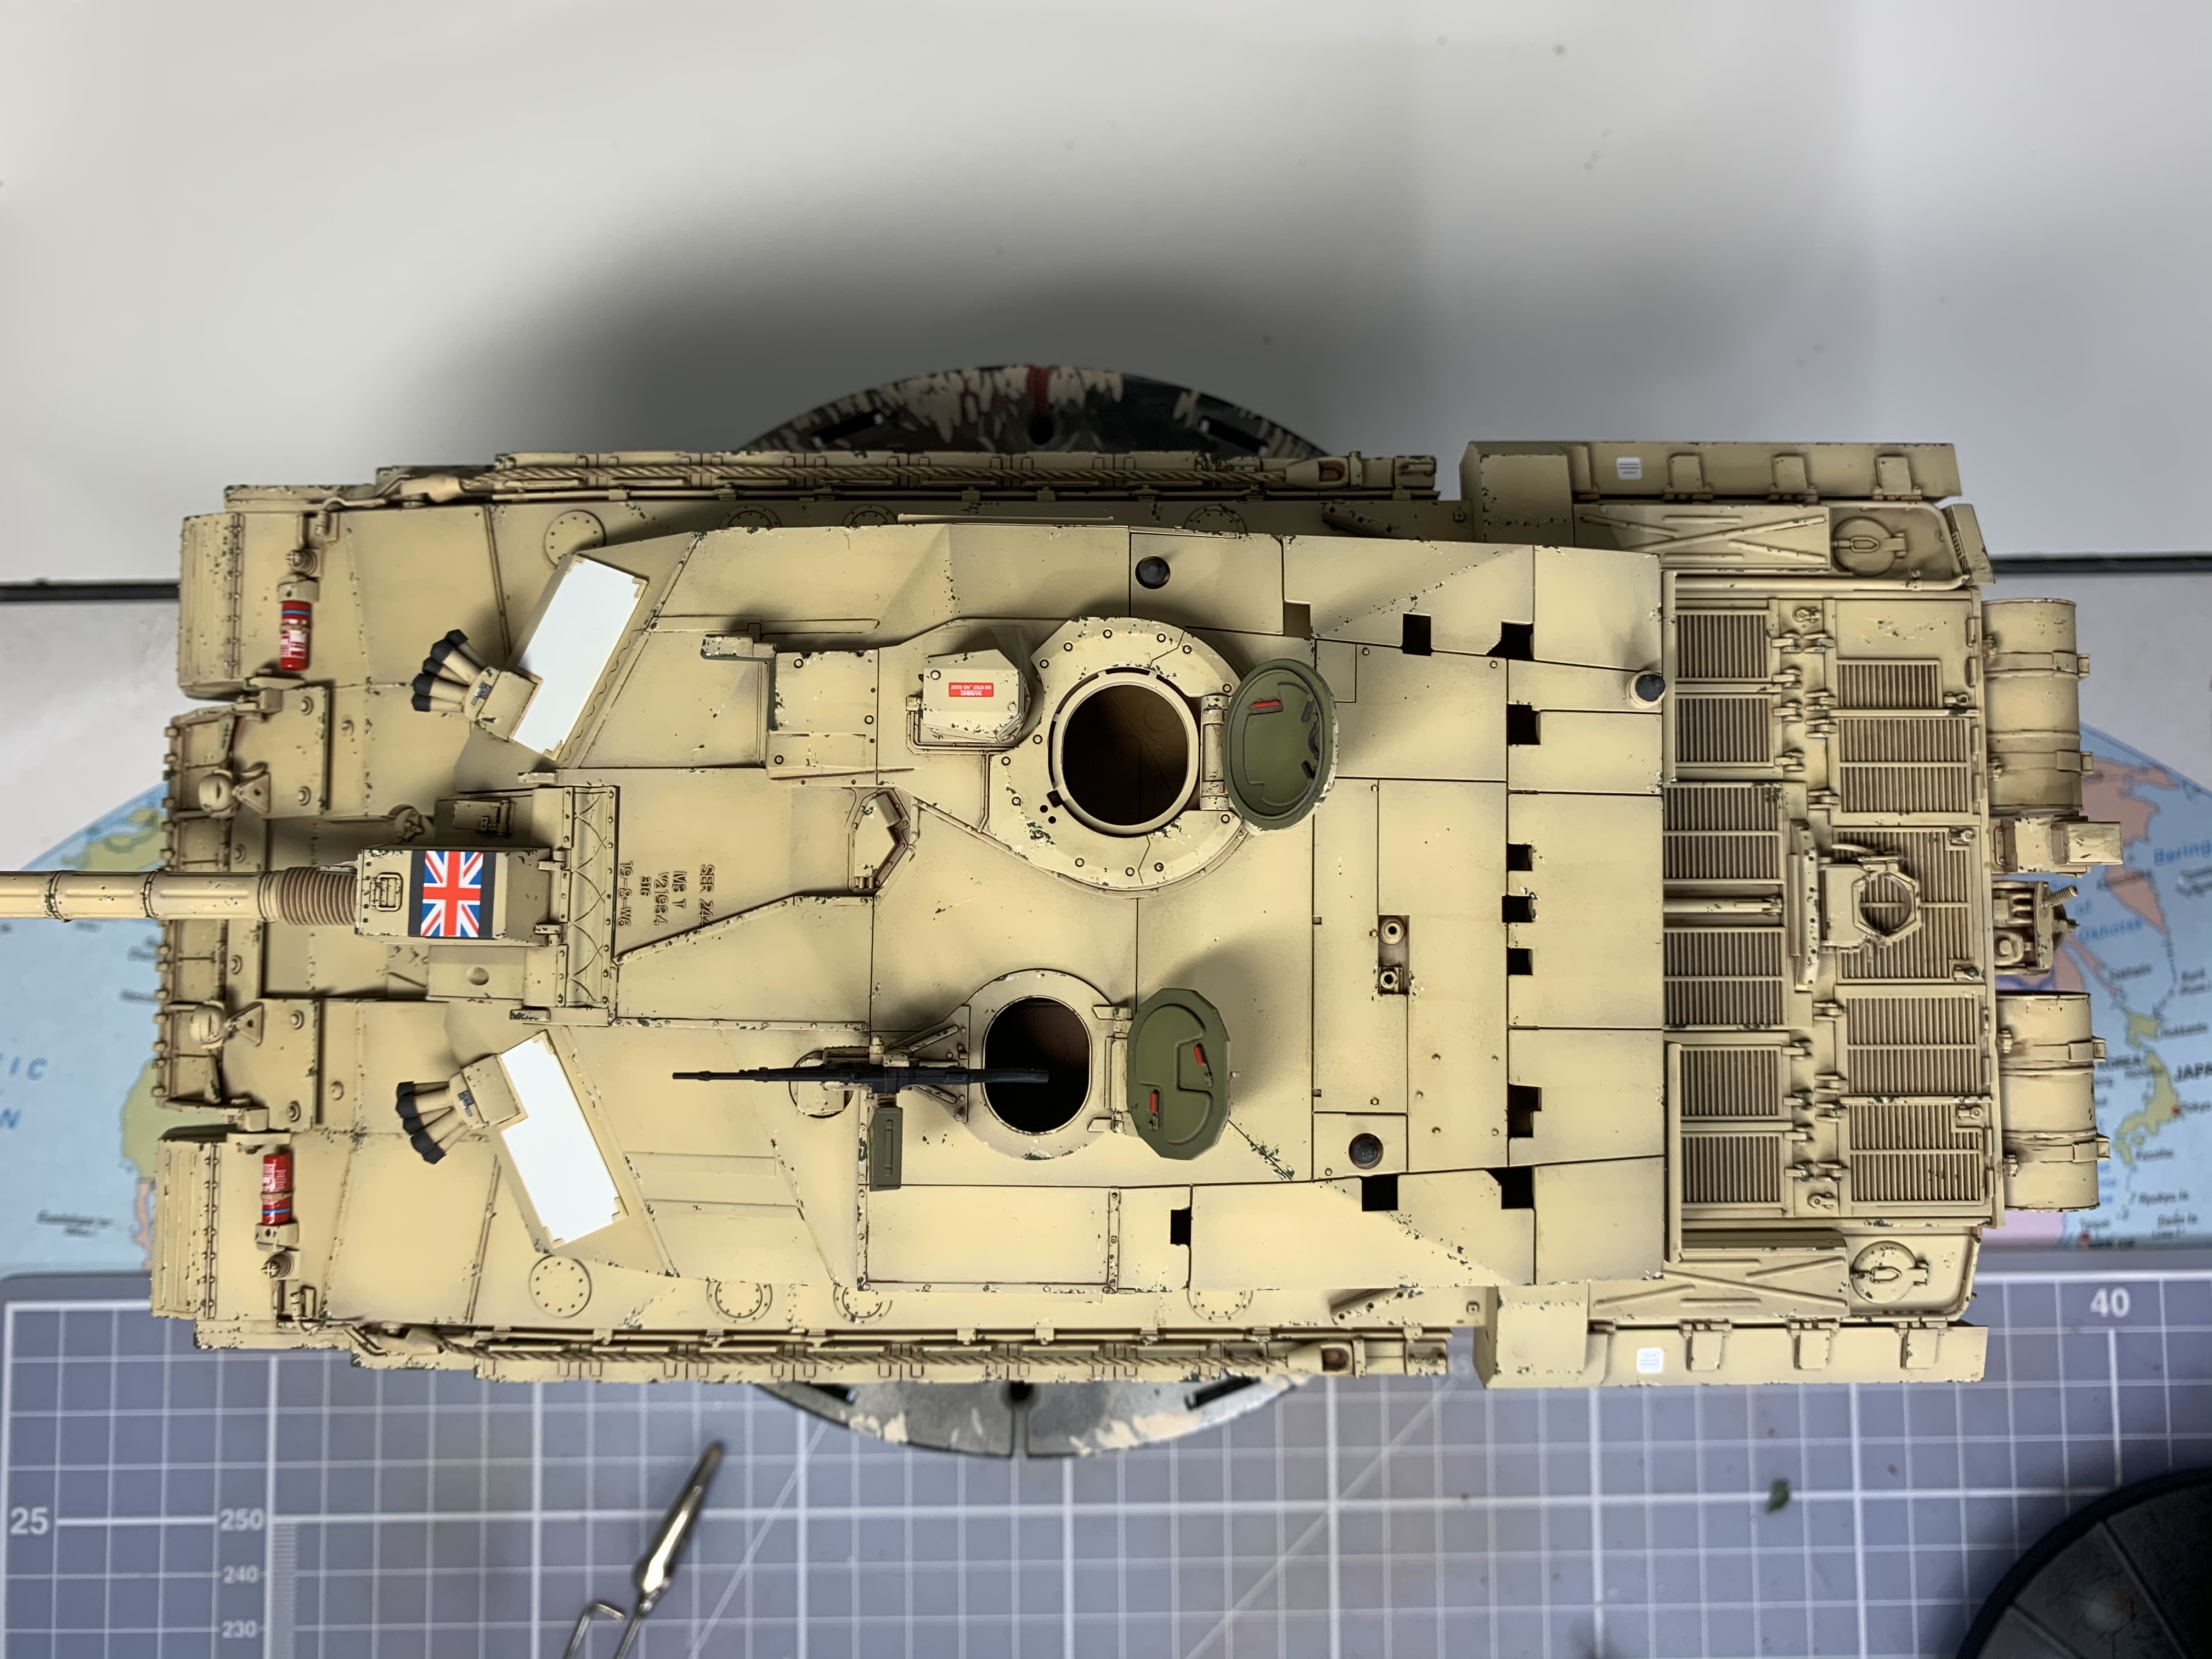
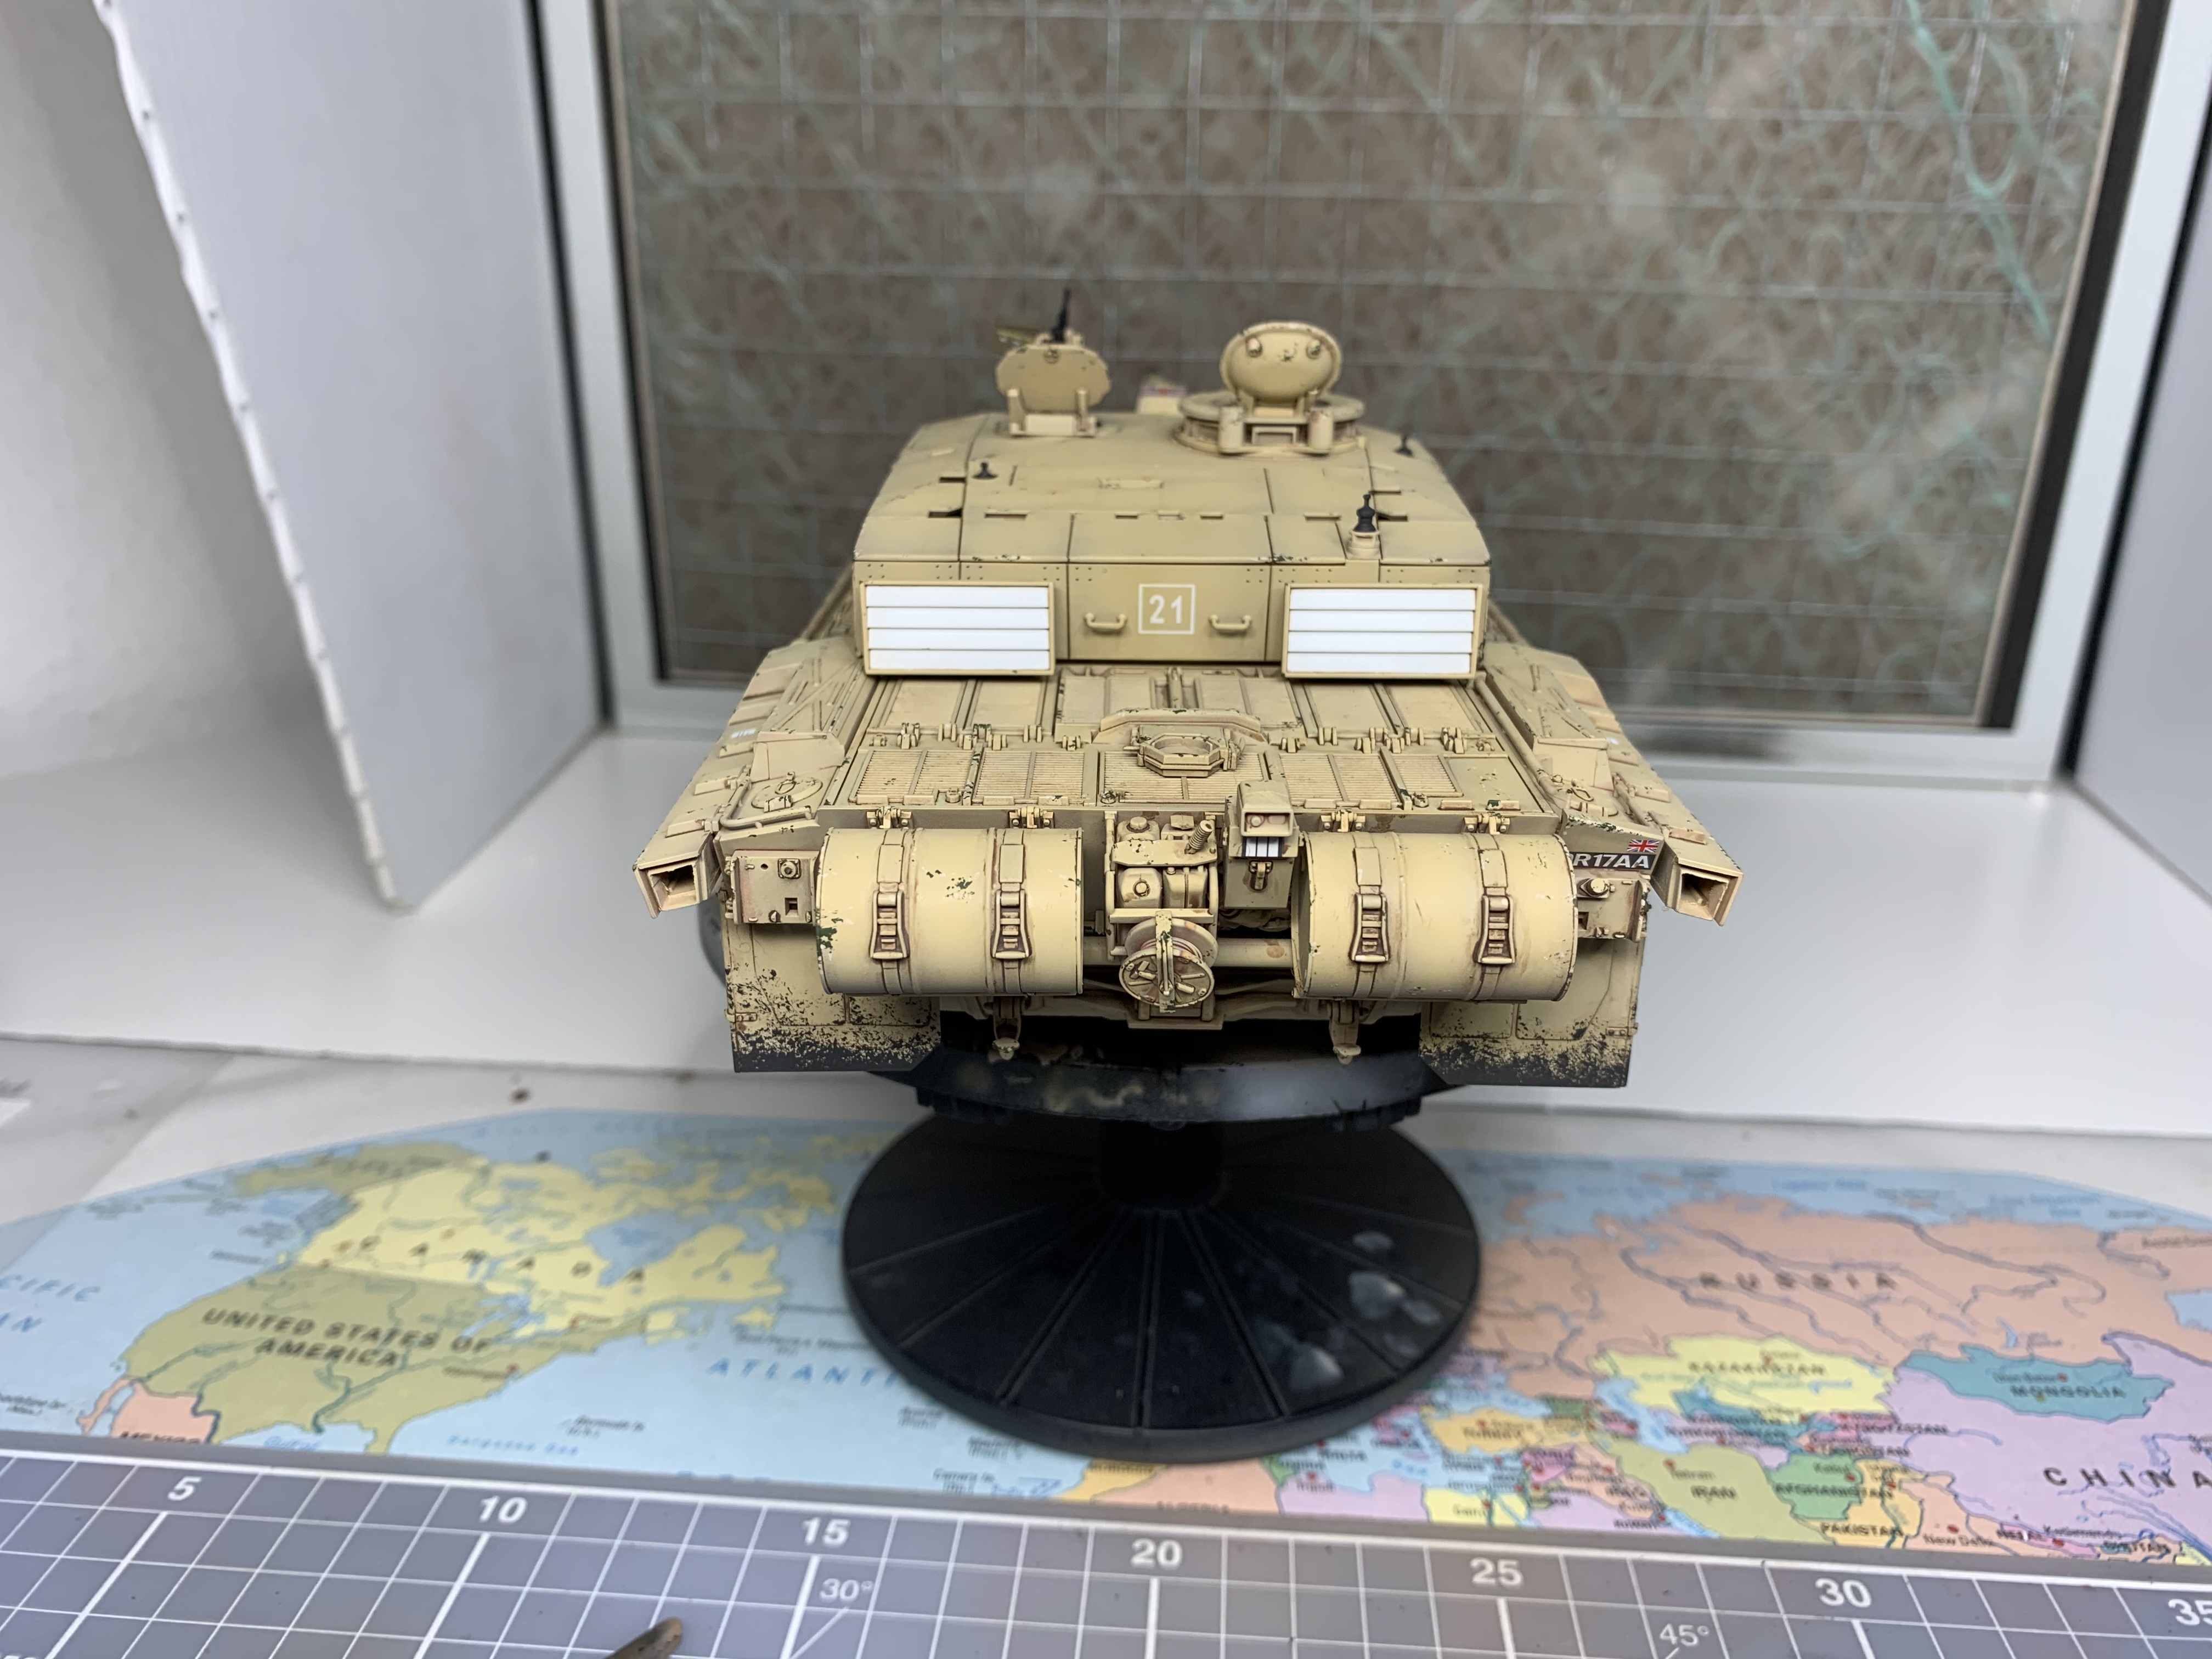
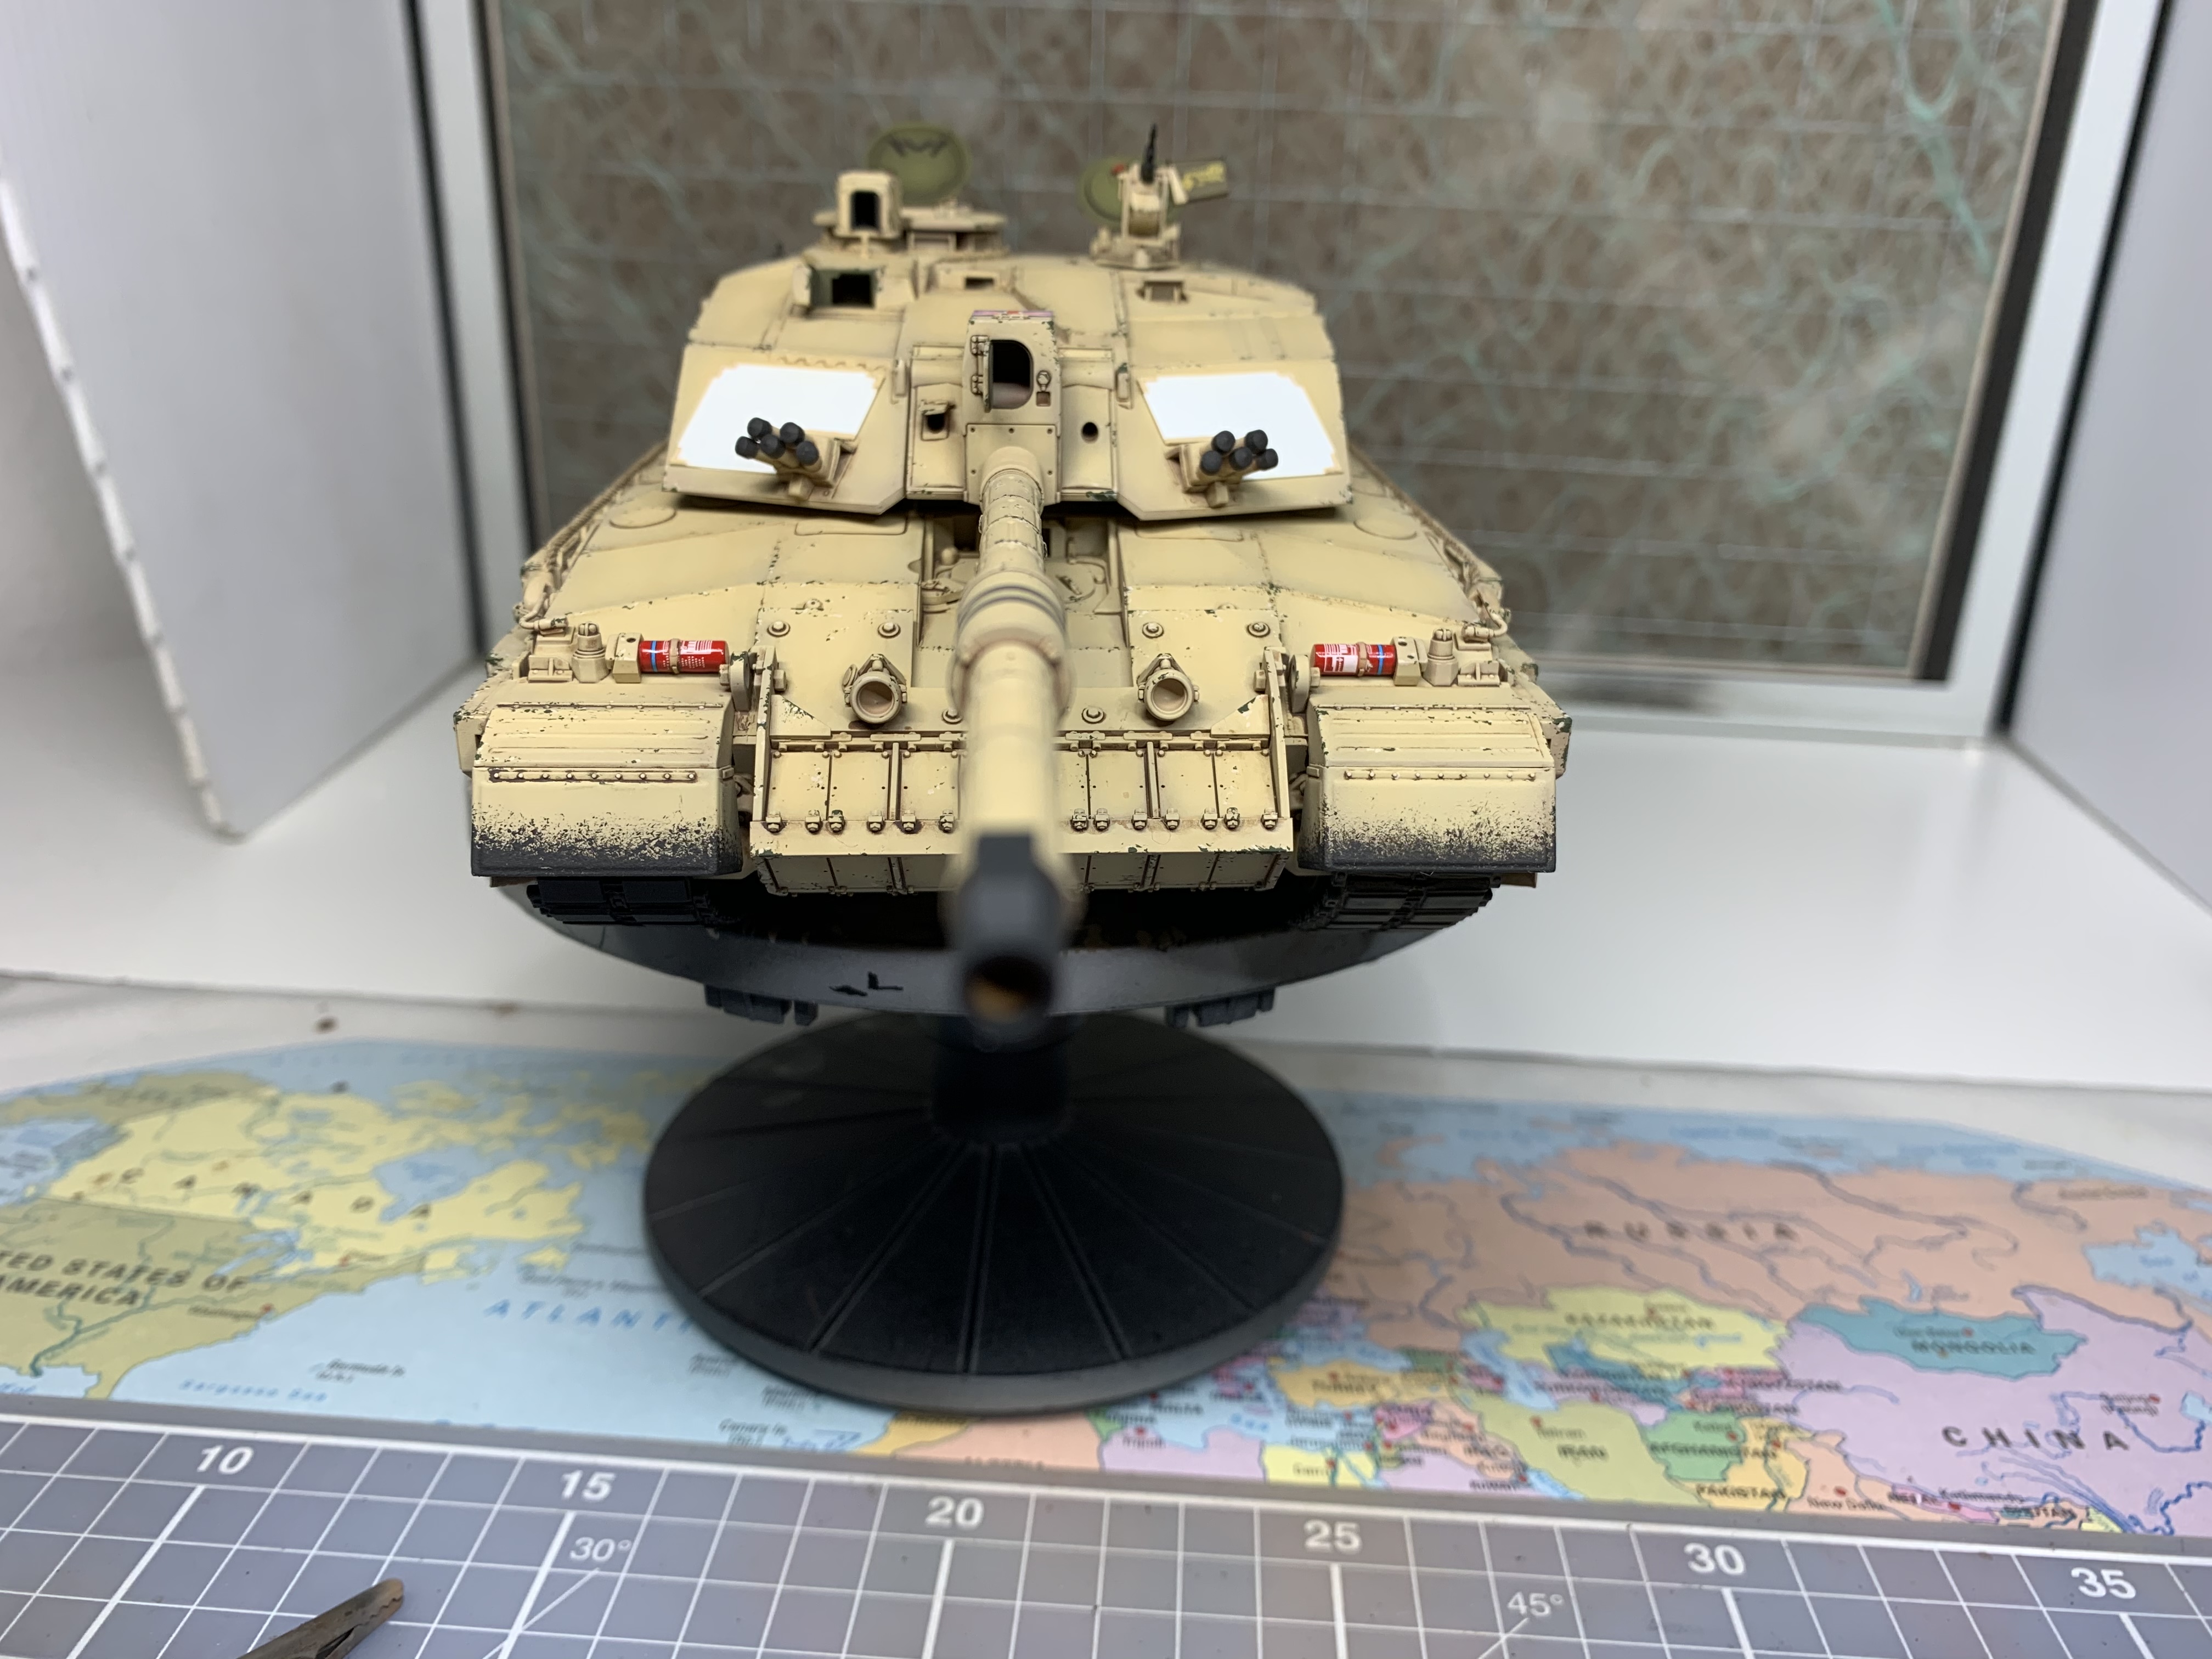
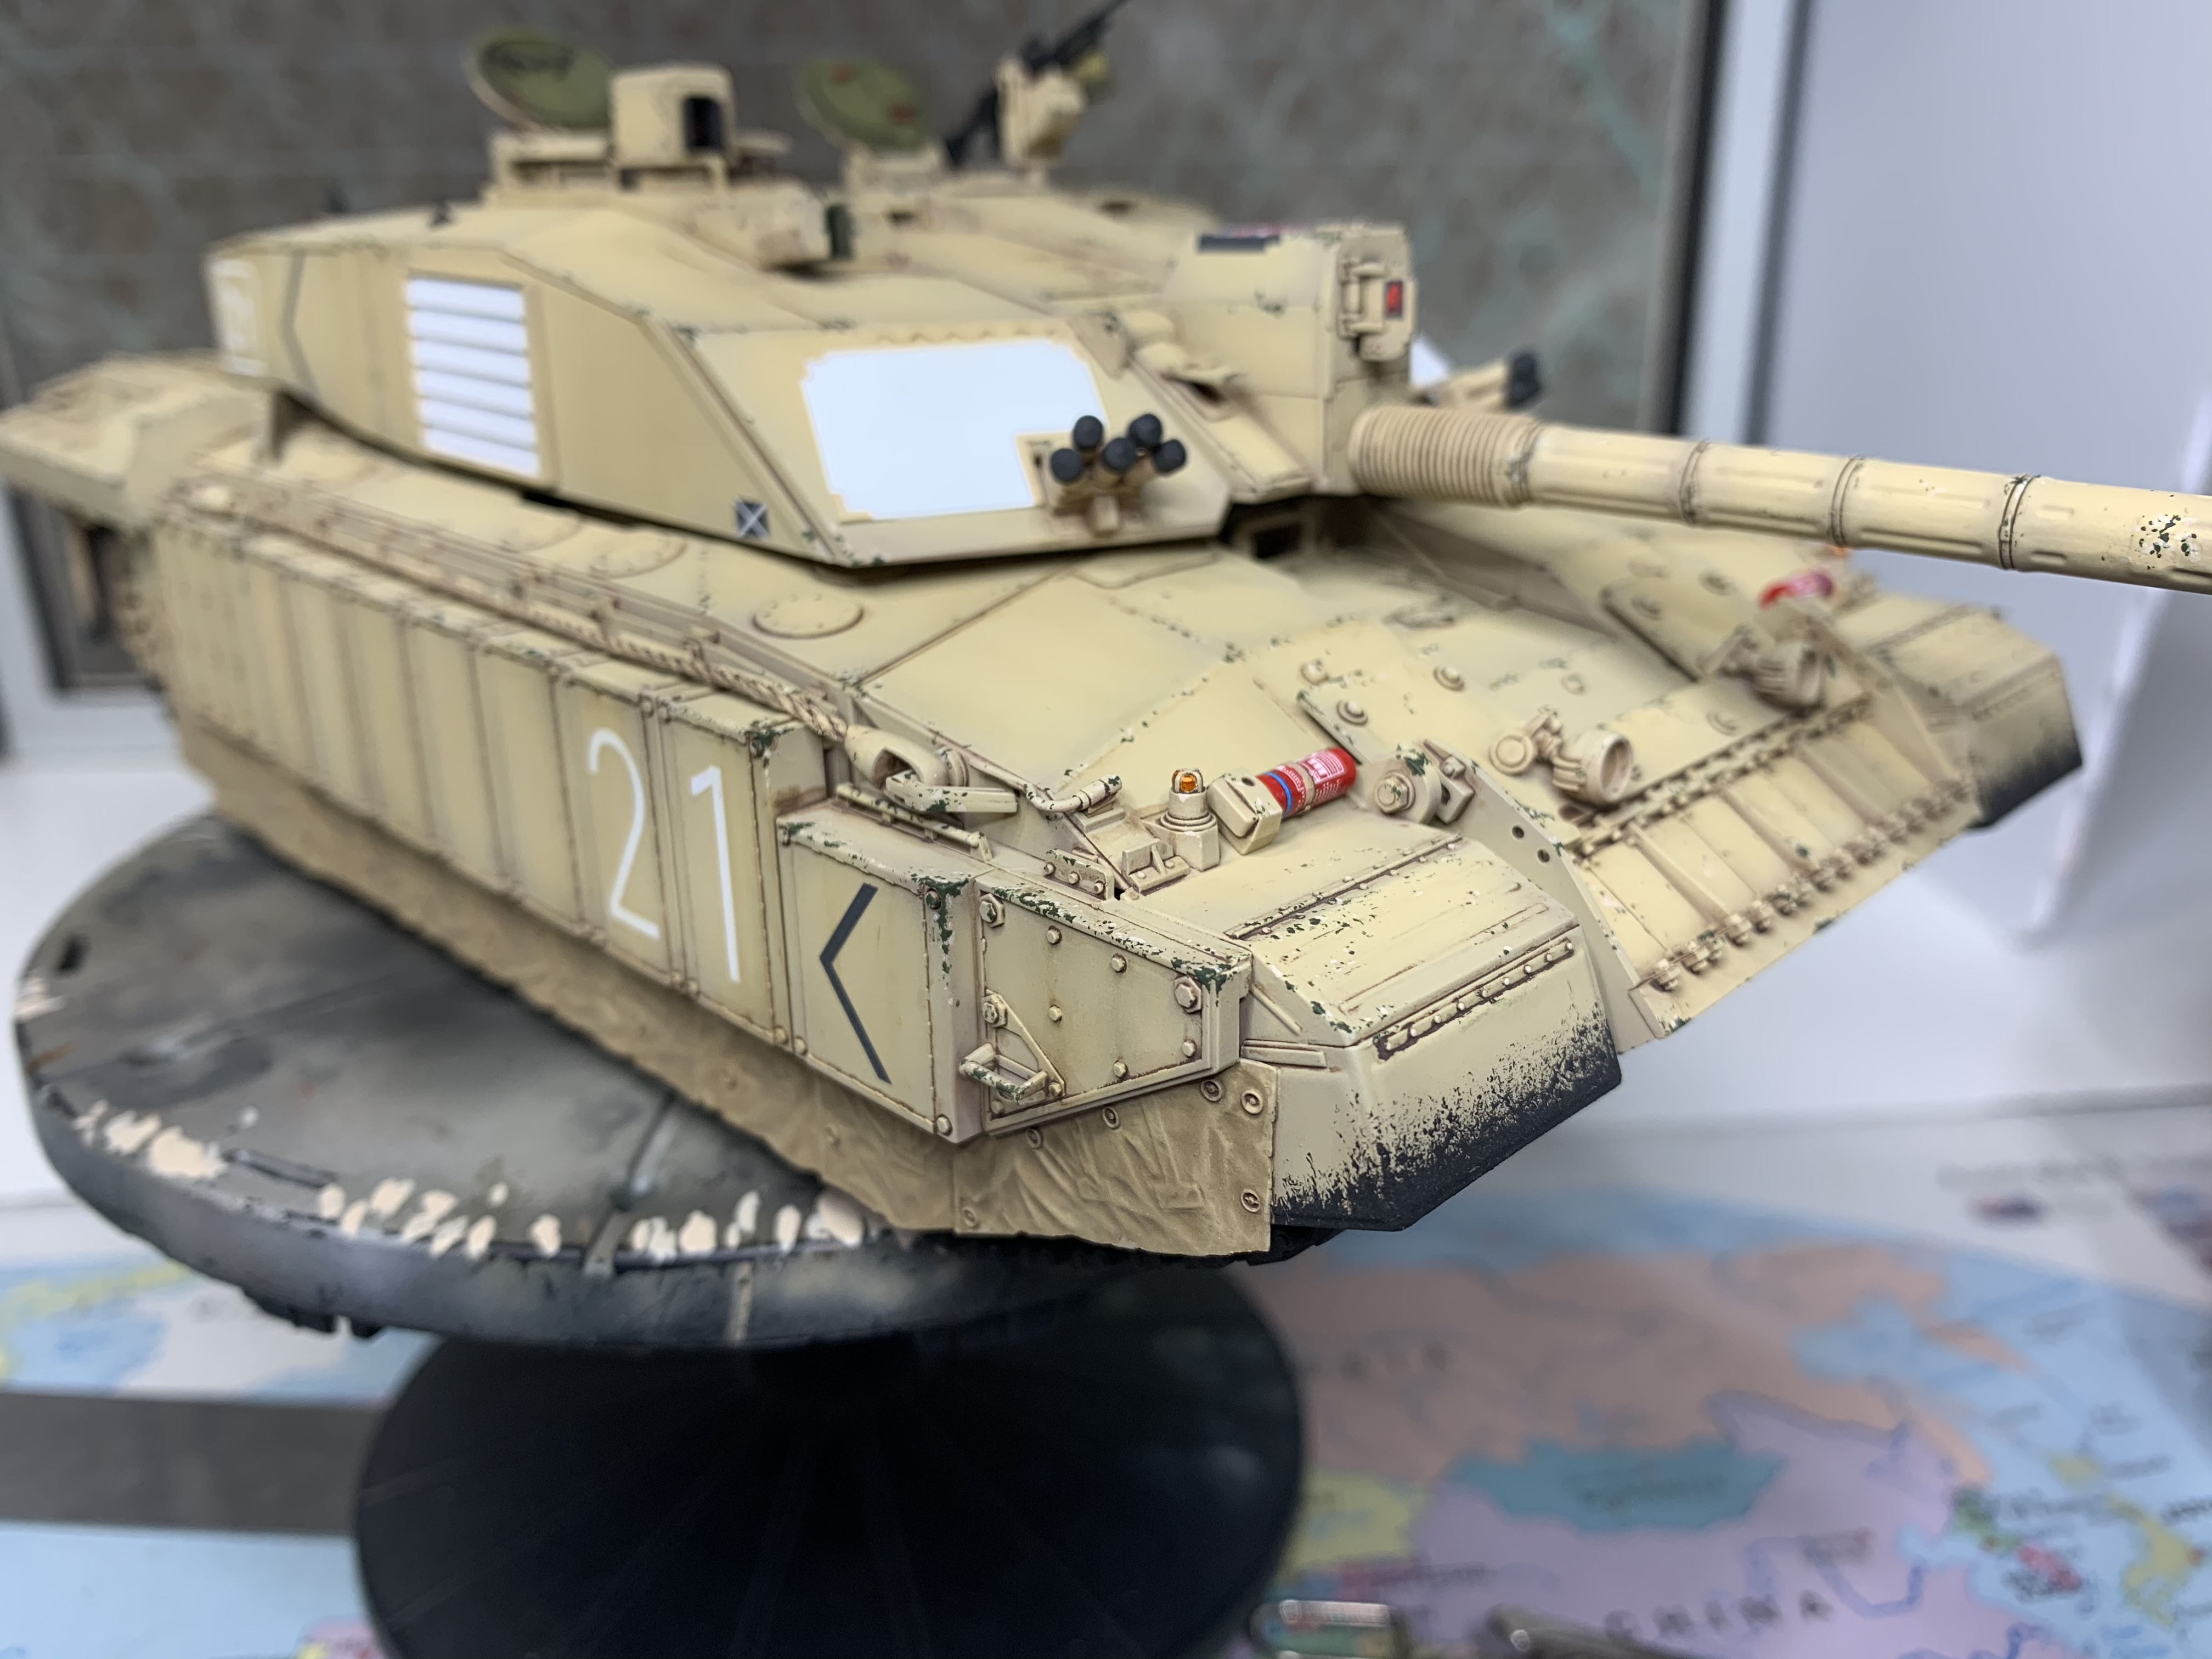
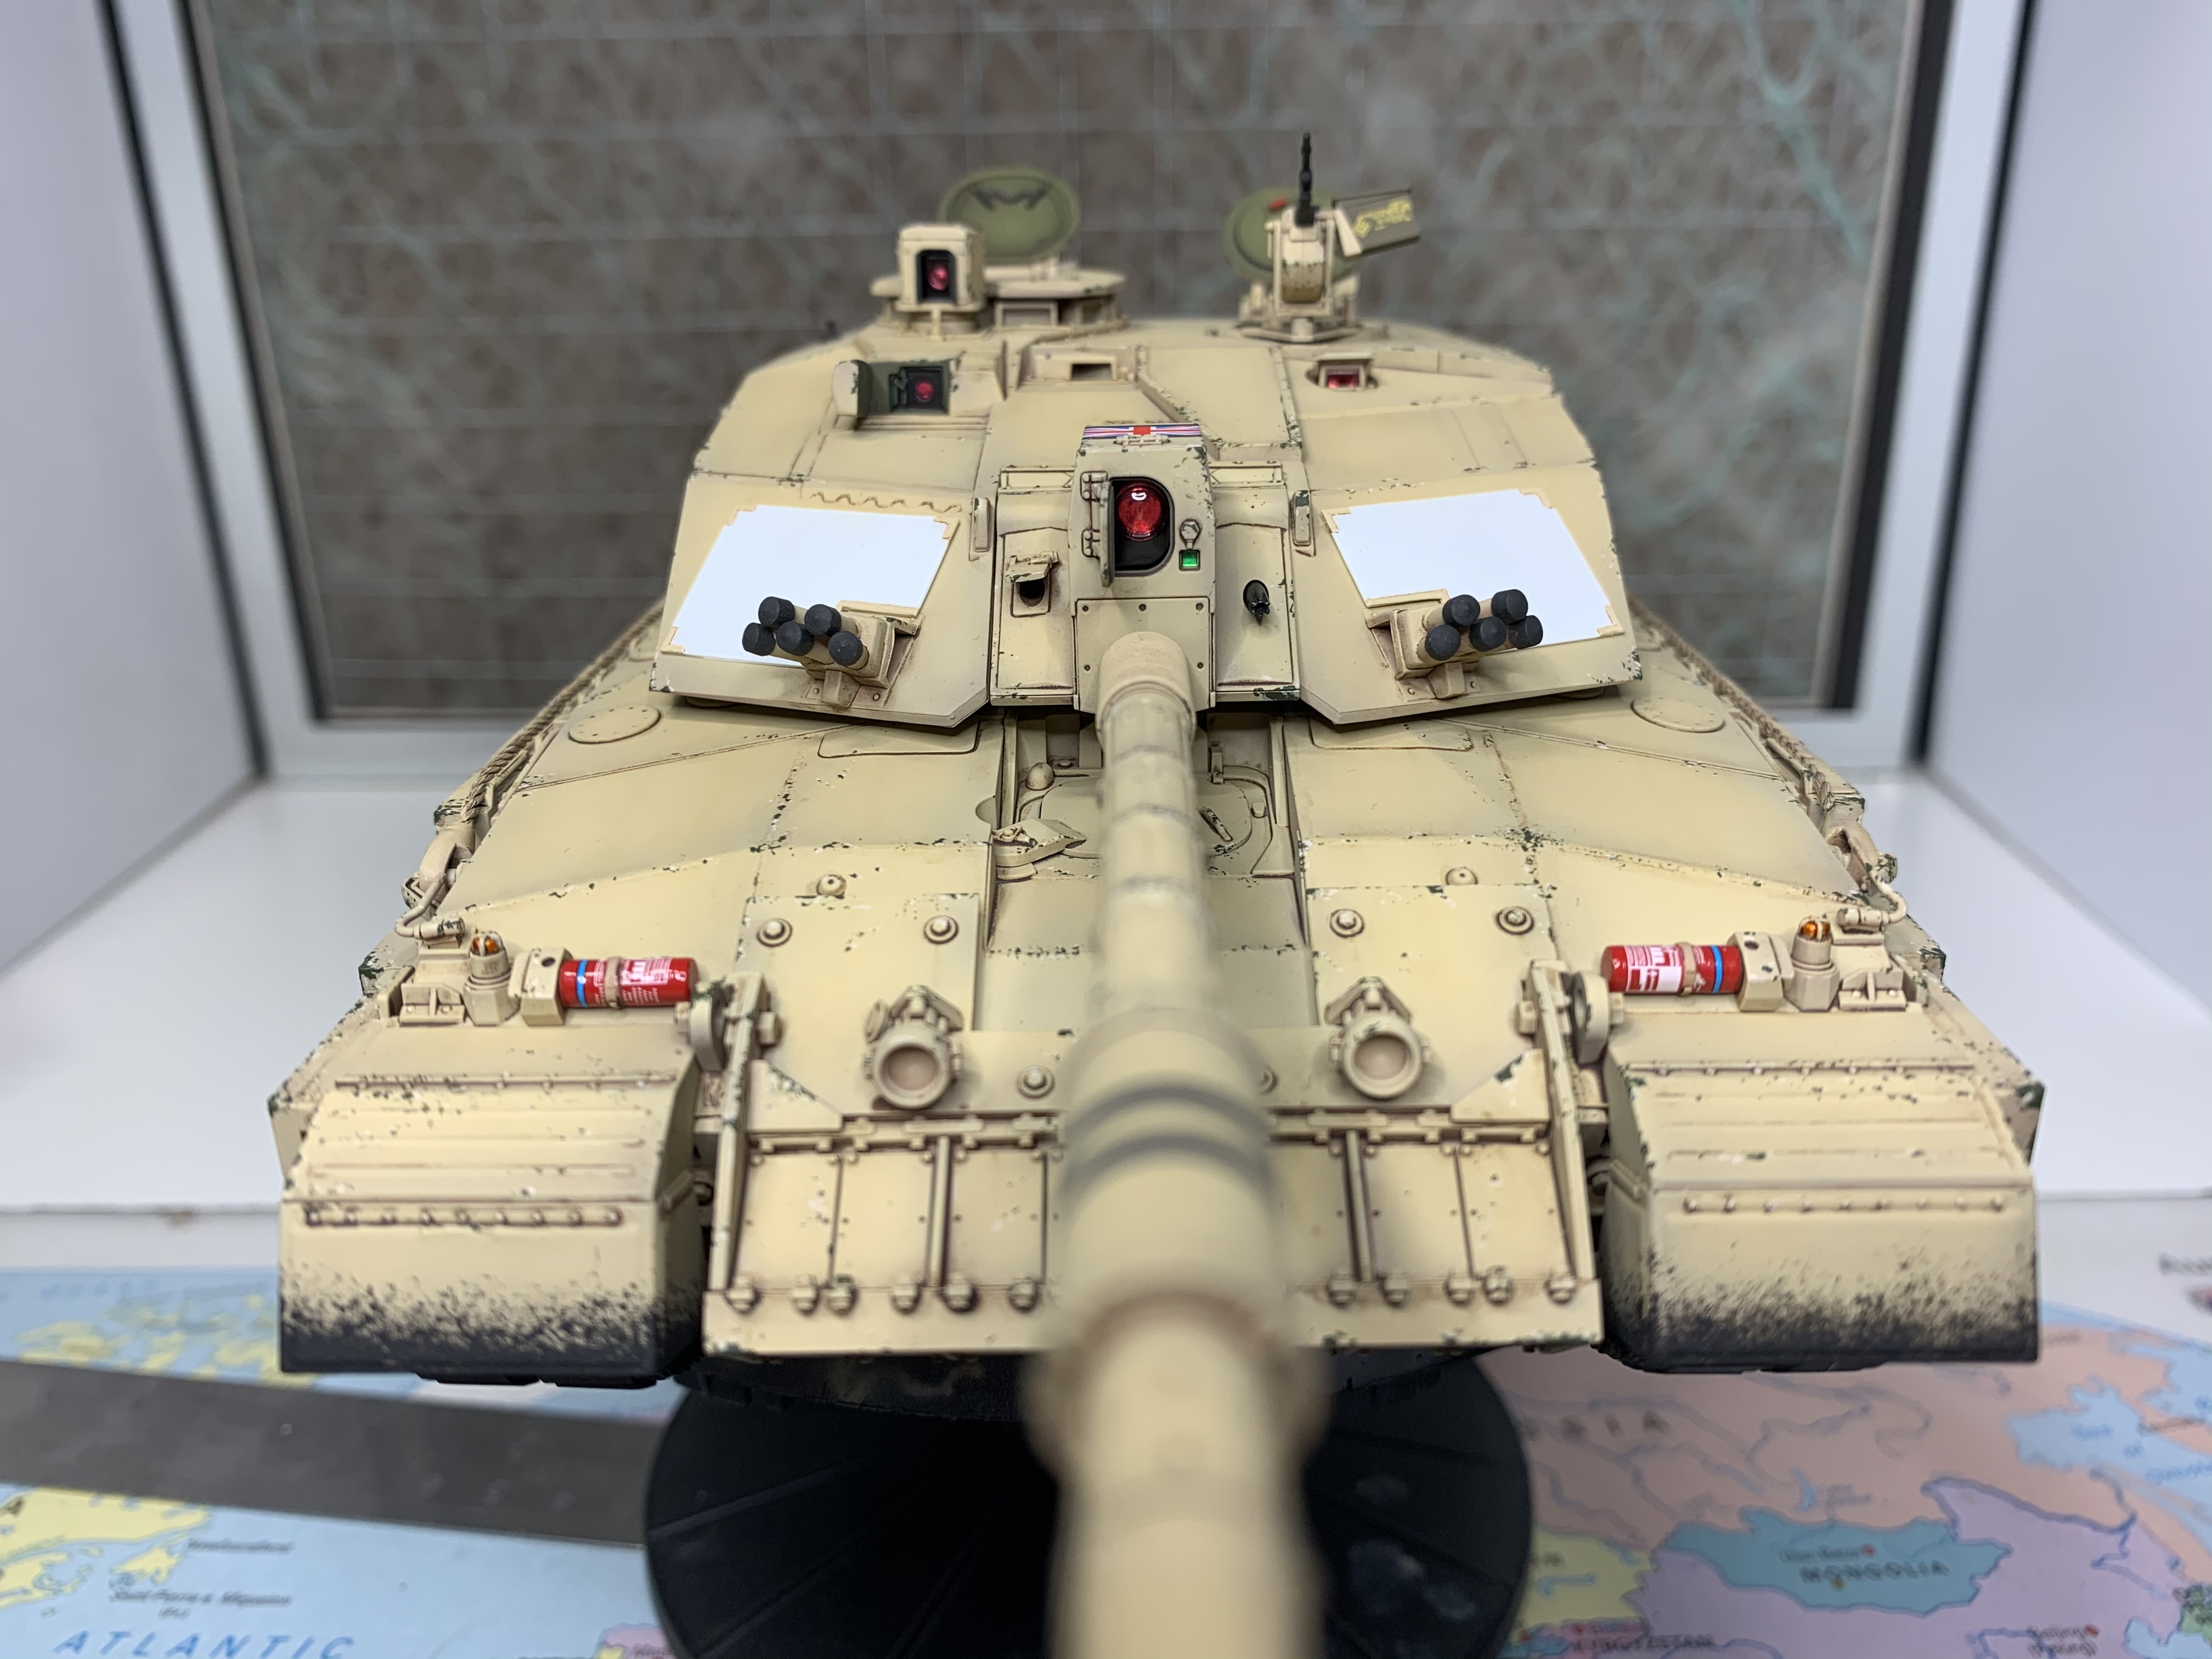
Ok so onto a nice simple single colour paint job after the Berlin Brigade shenanigans.
Tamiya Challenger 2, mostly built, rather badly, almost 15 years ago then boxed up before paint and forgotten. Fished out and resurrected as a test bed for various painting and weathering tequniques.
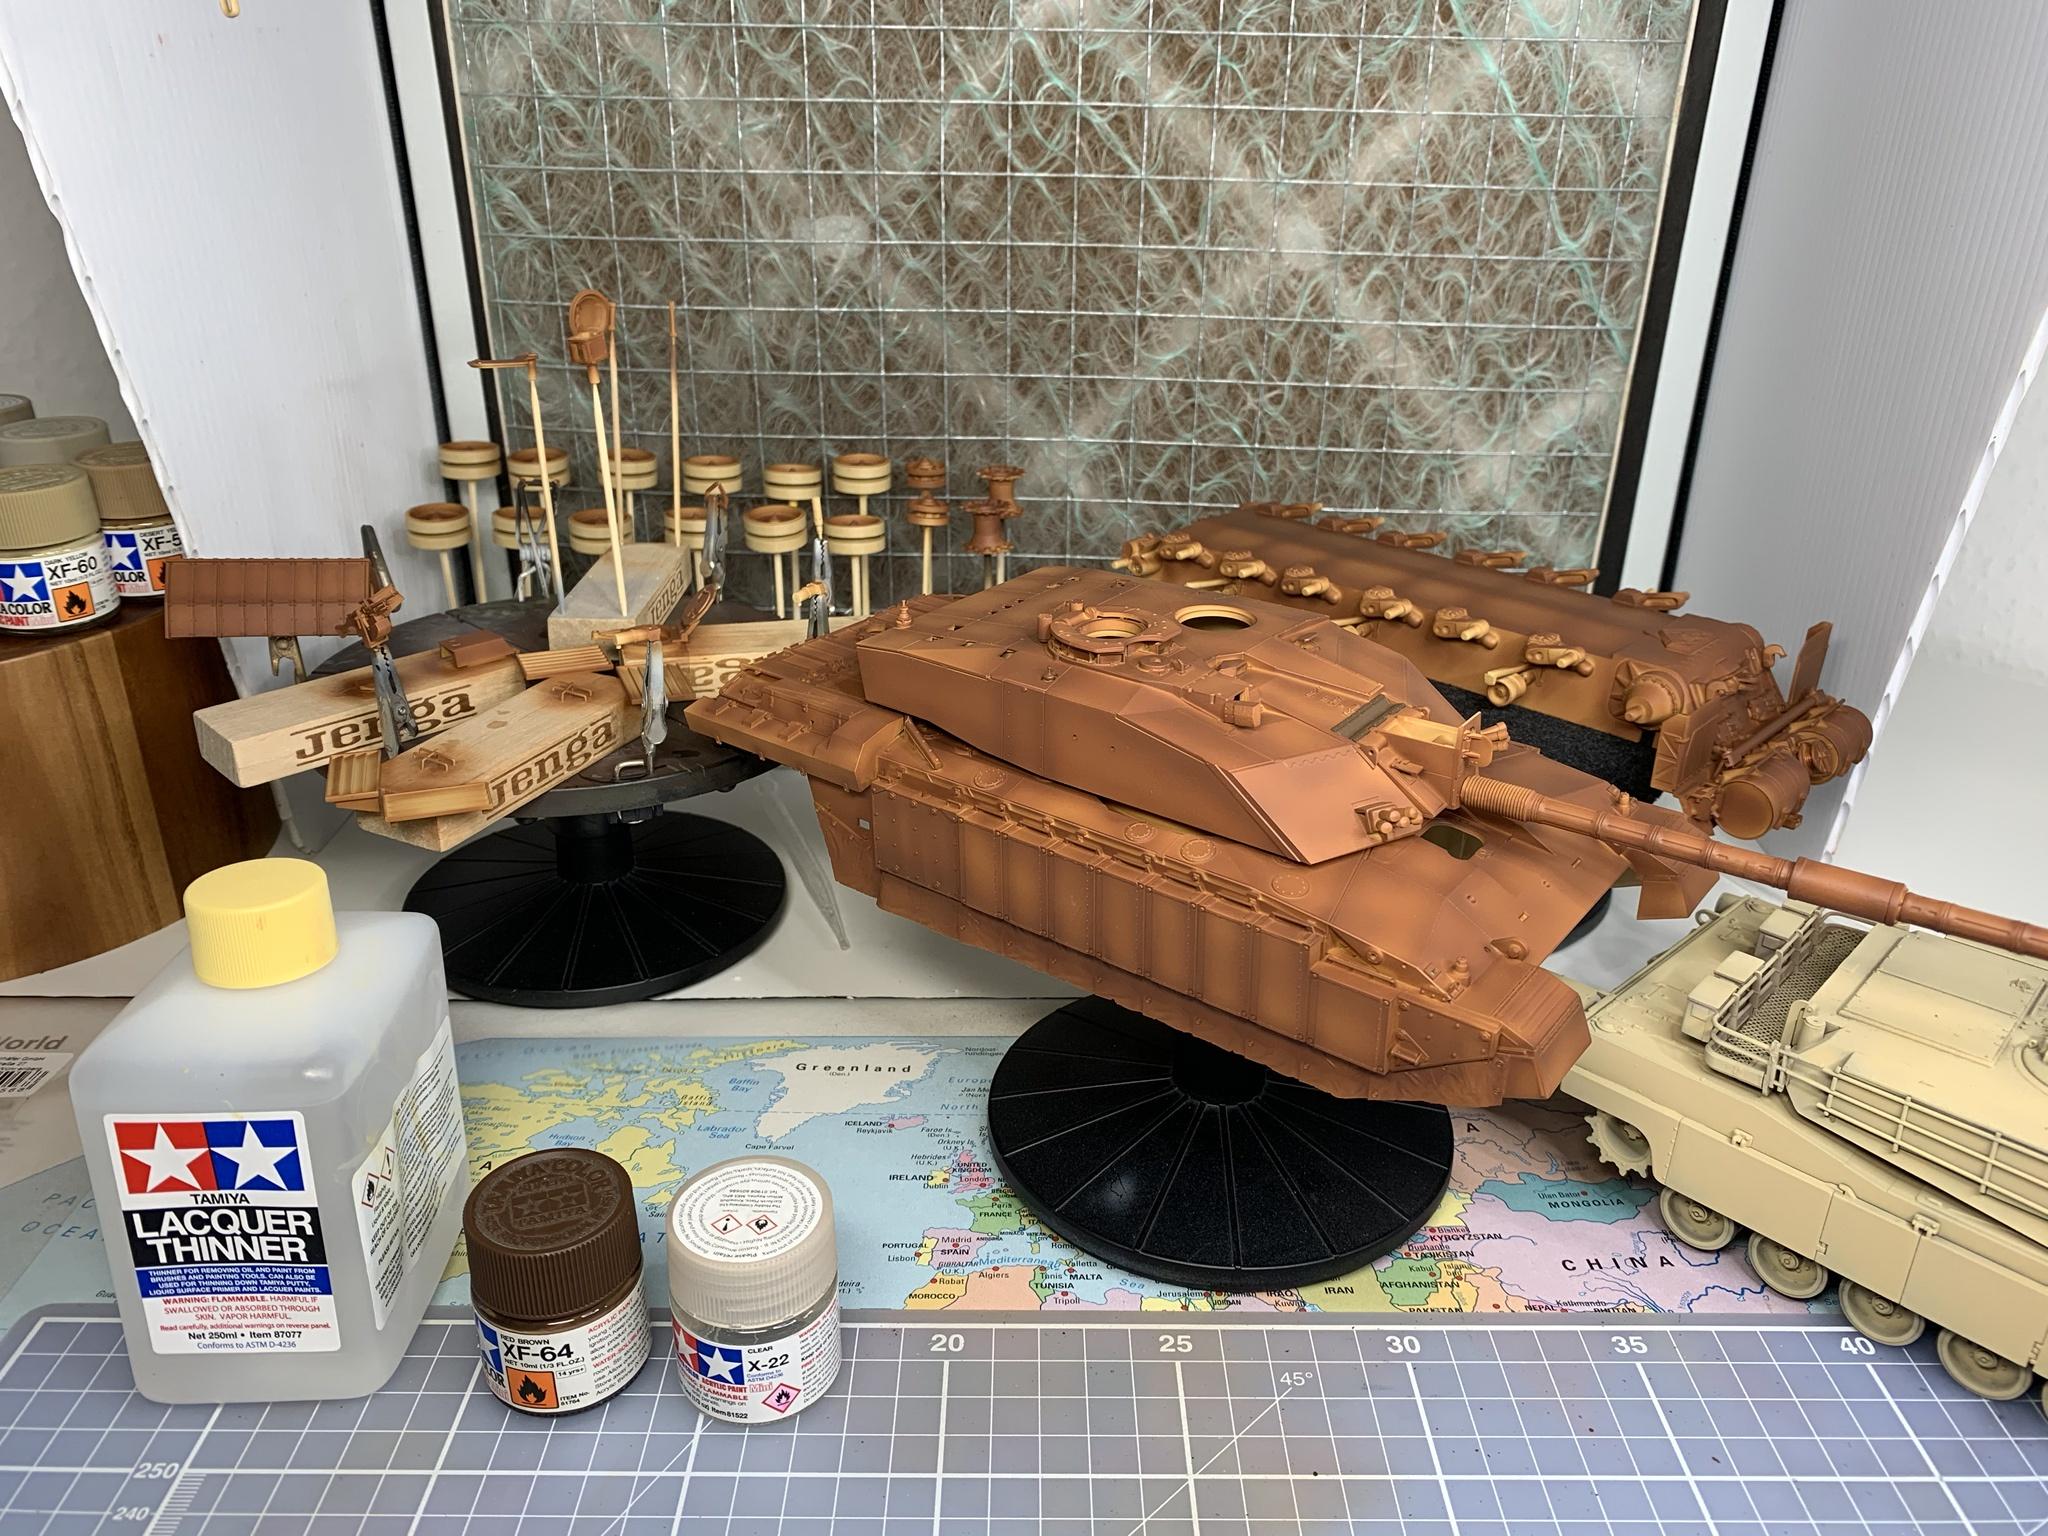
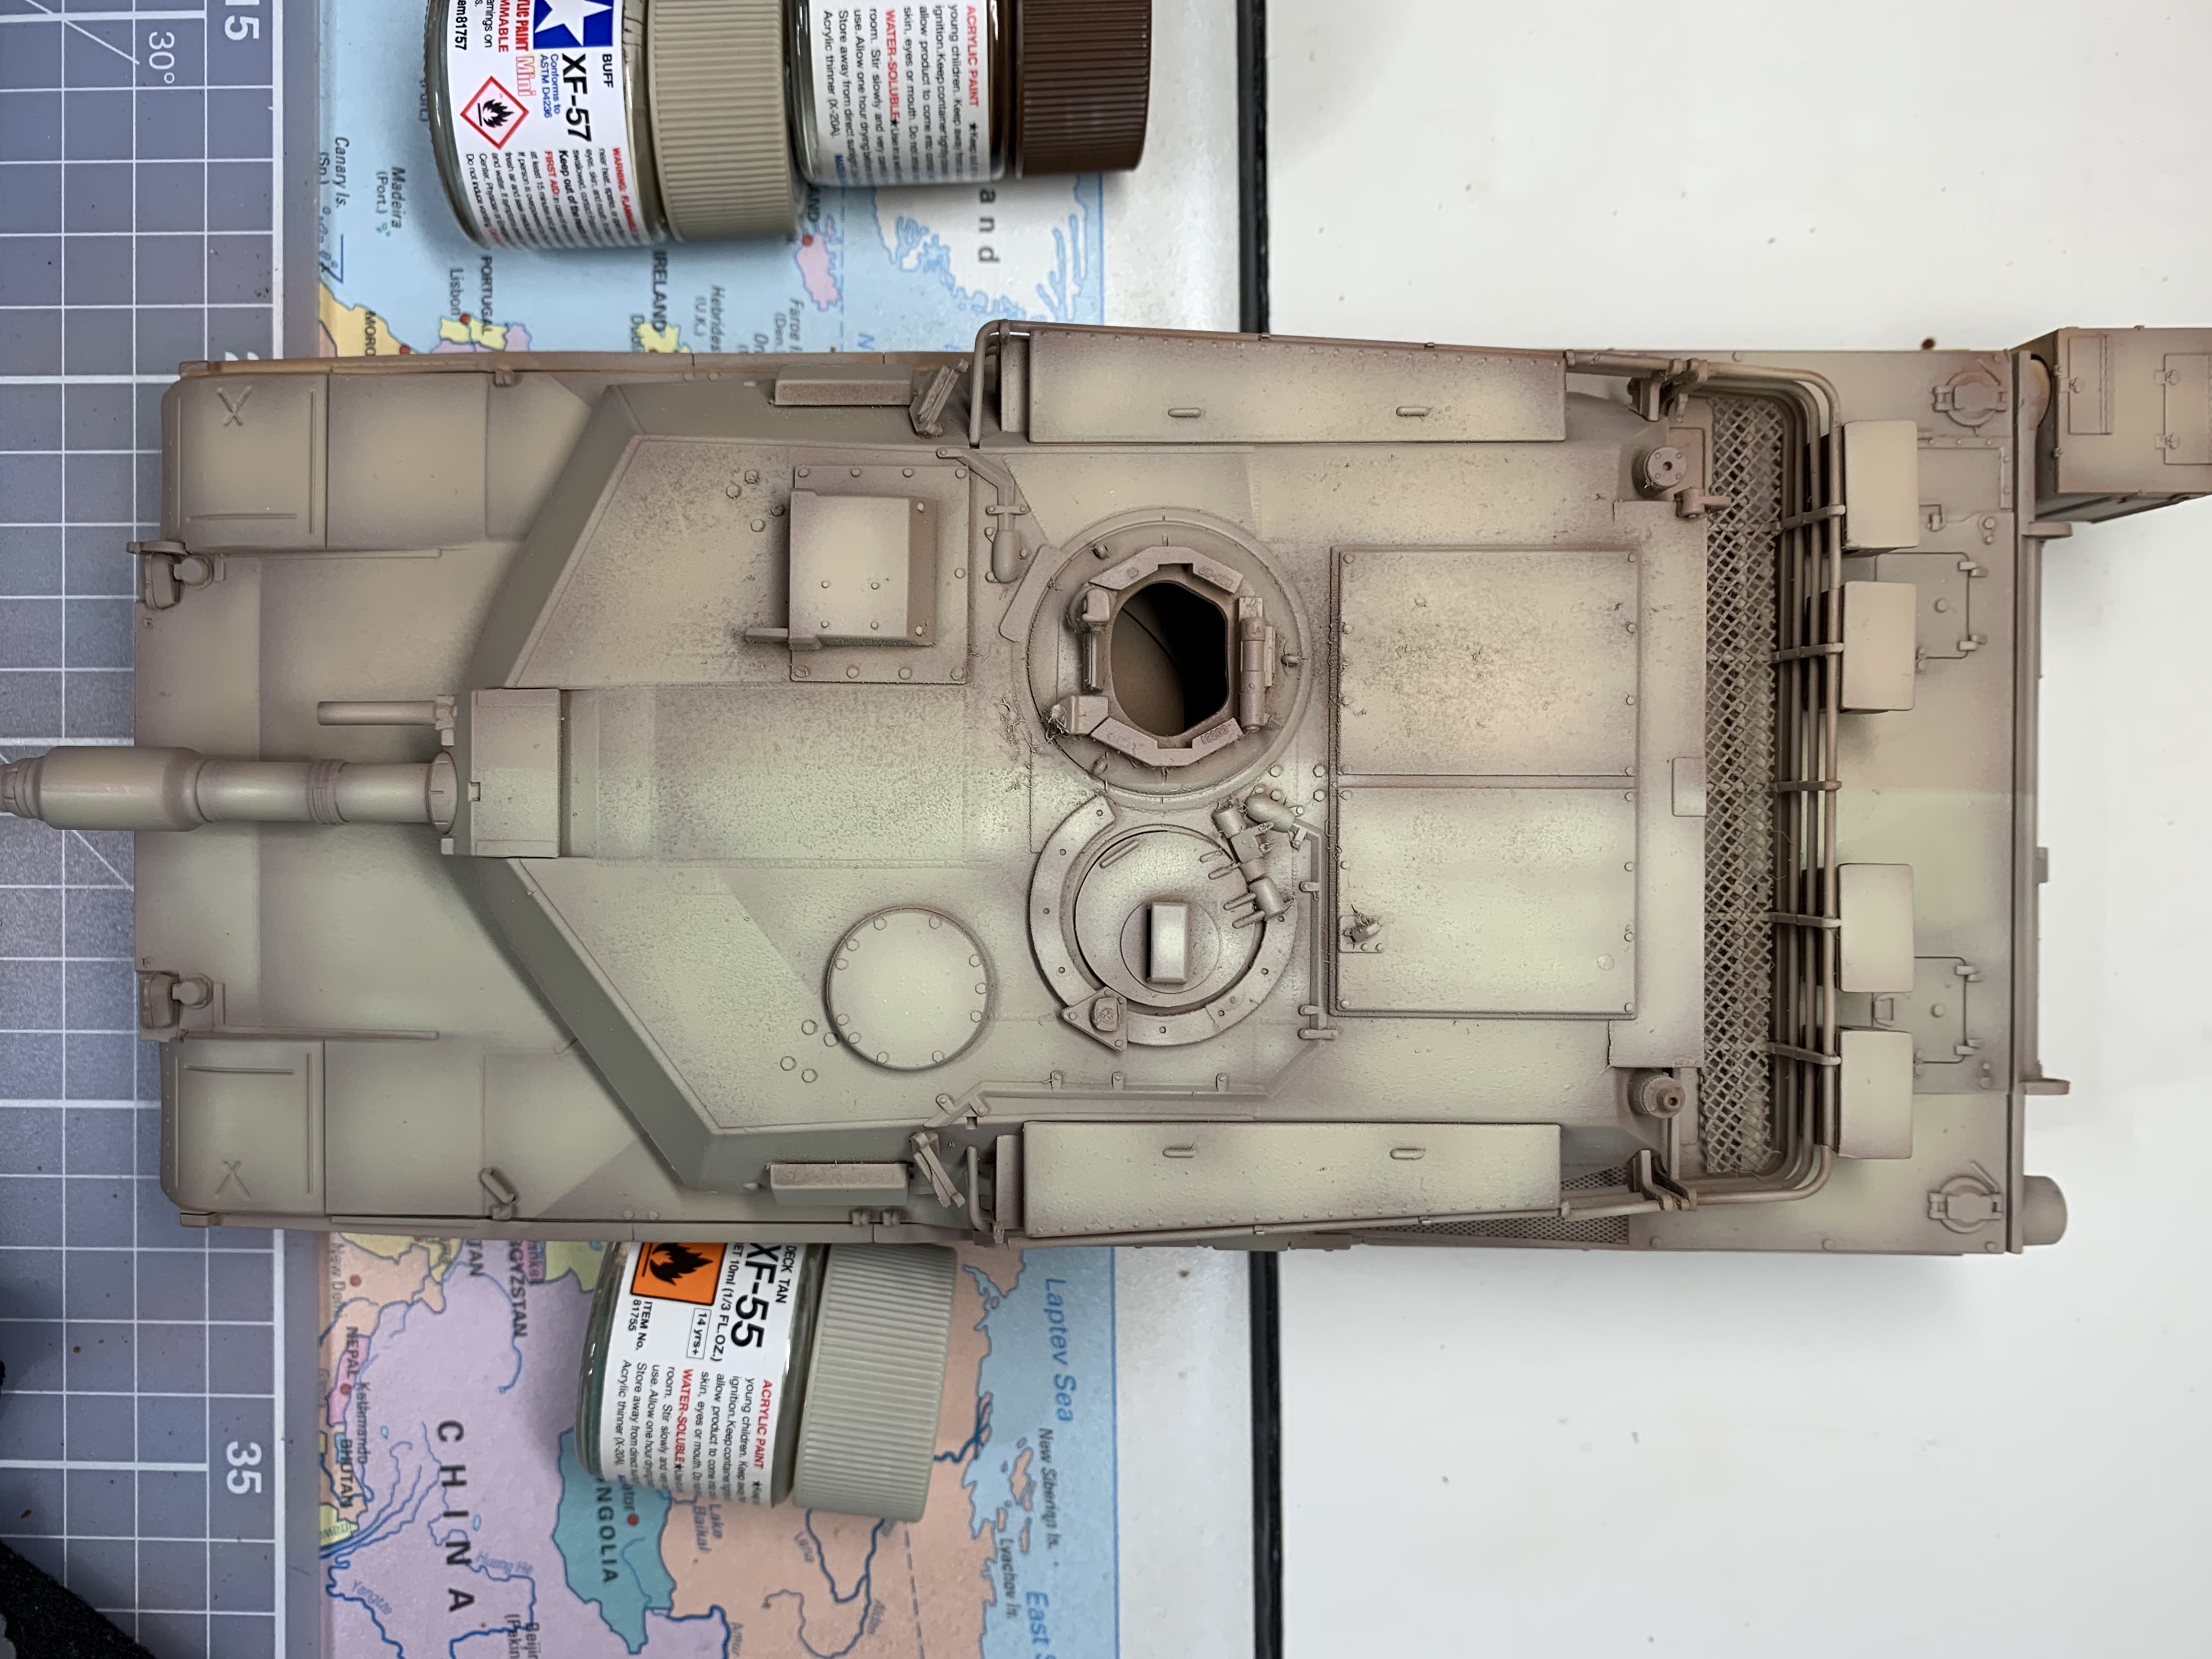
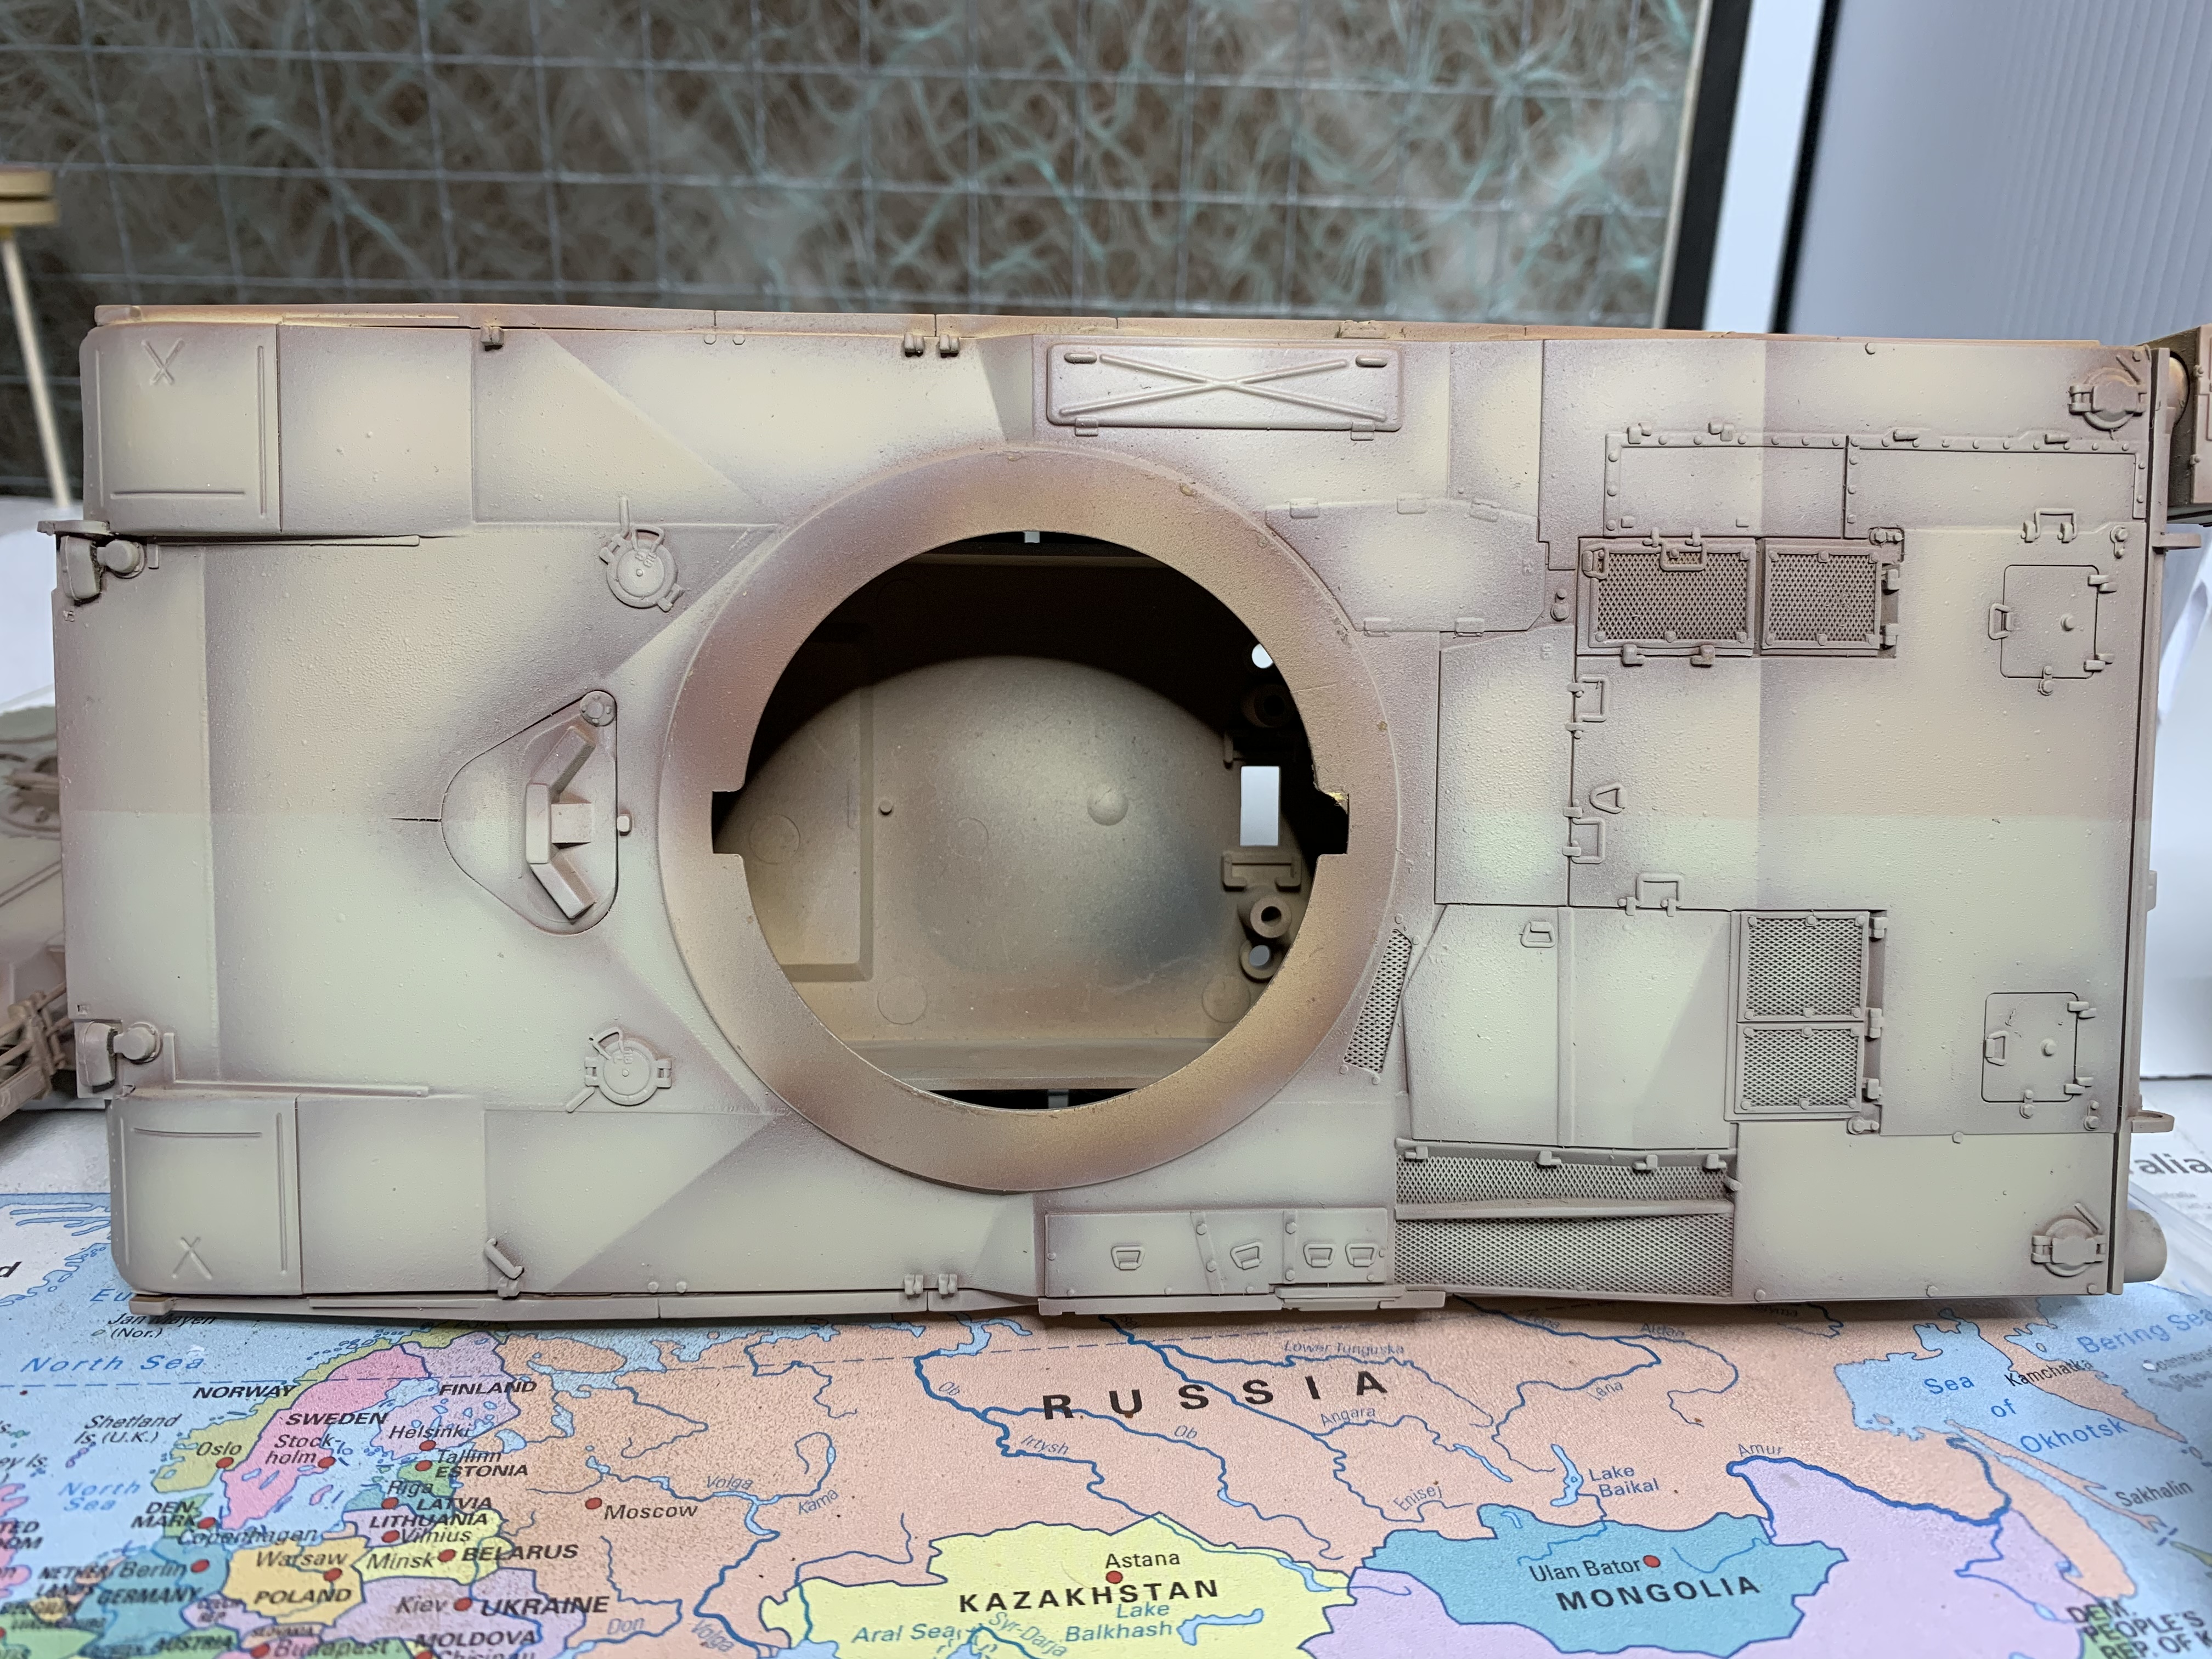
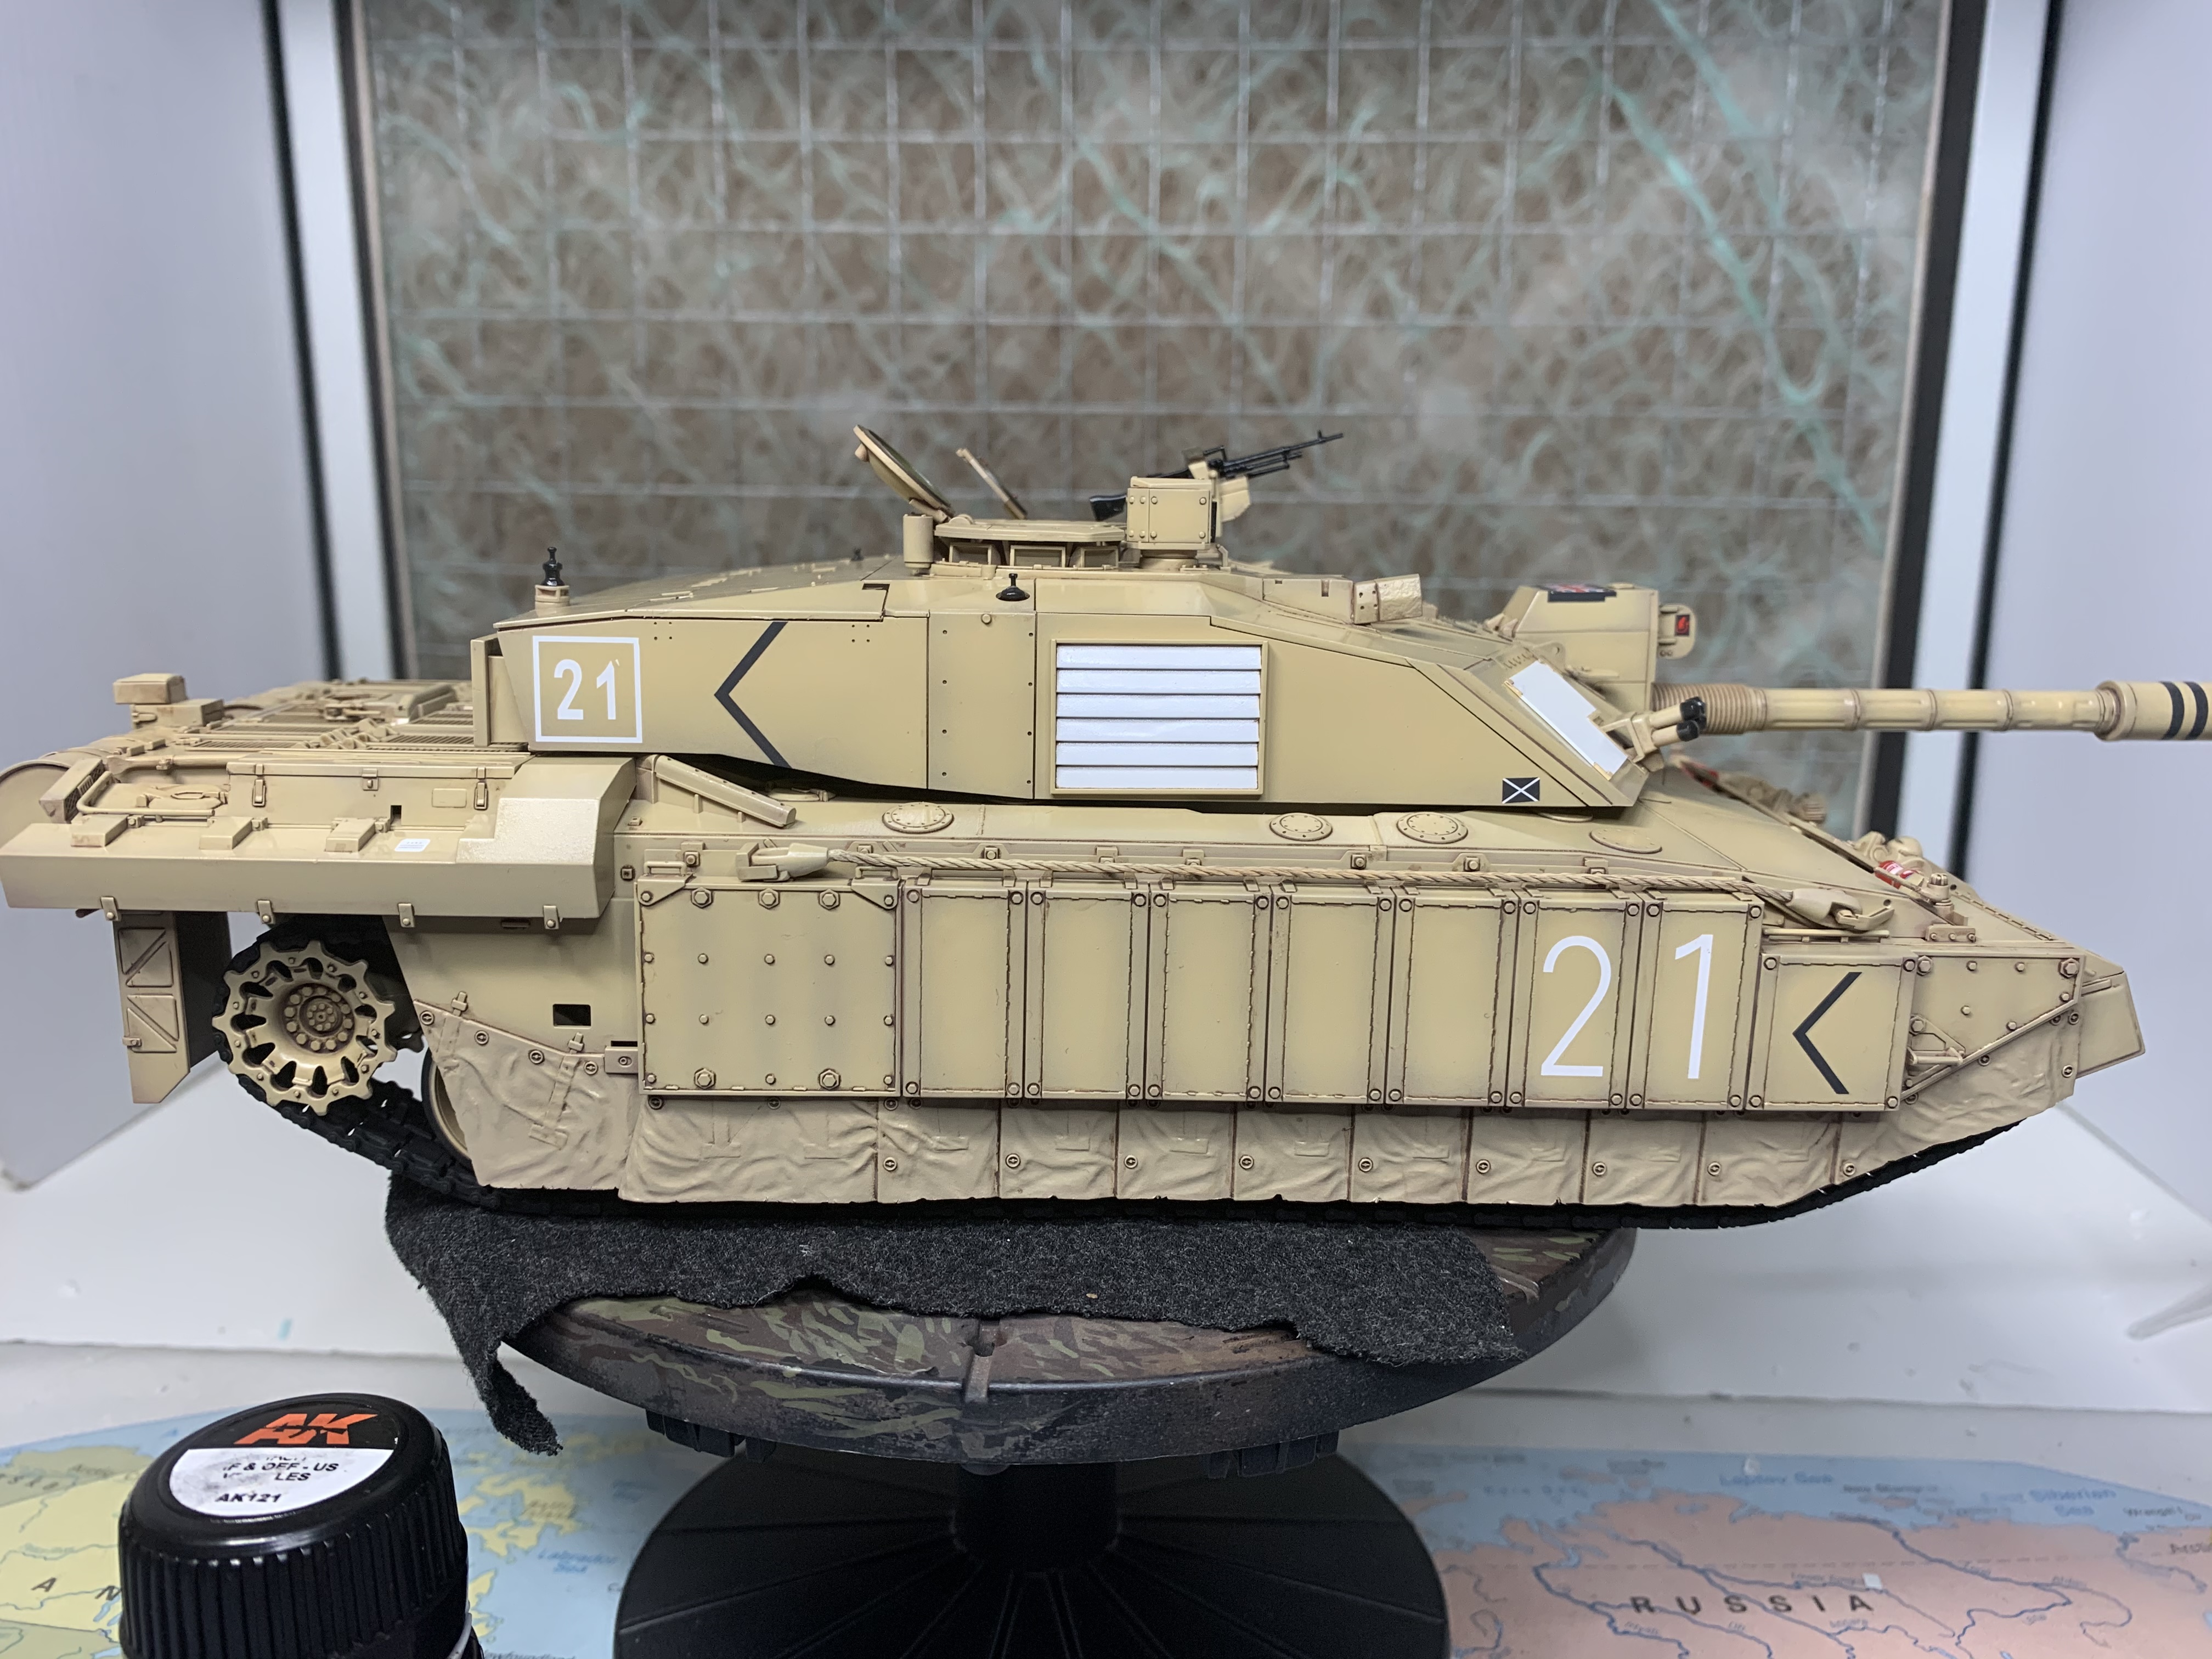
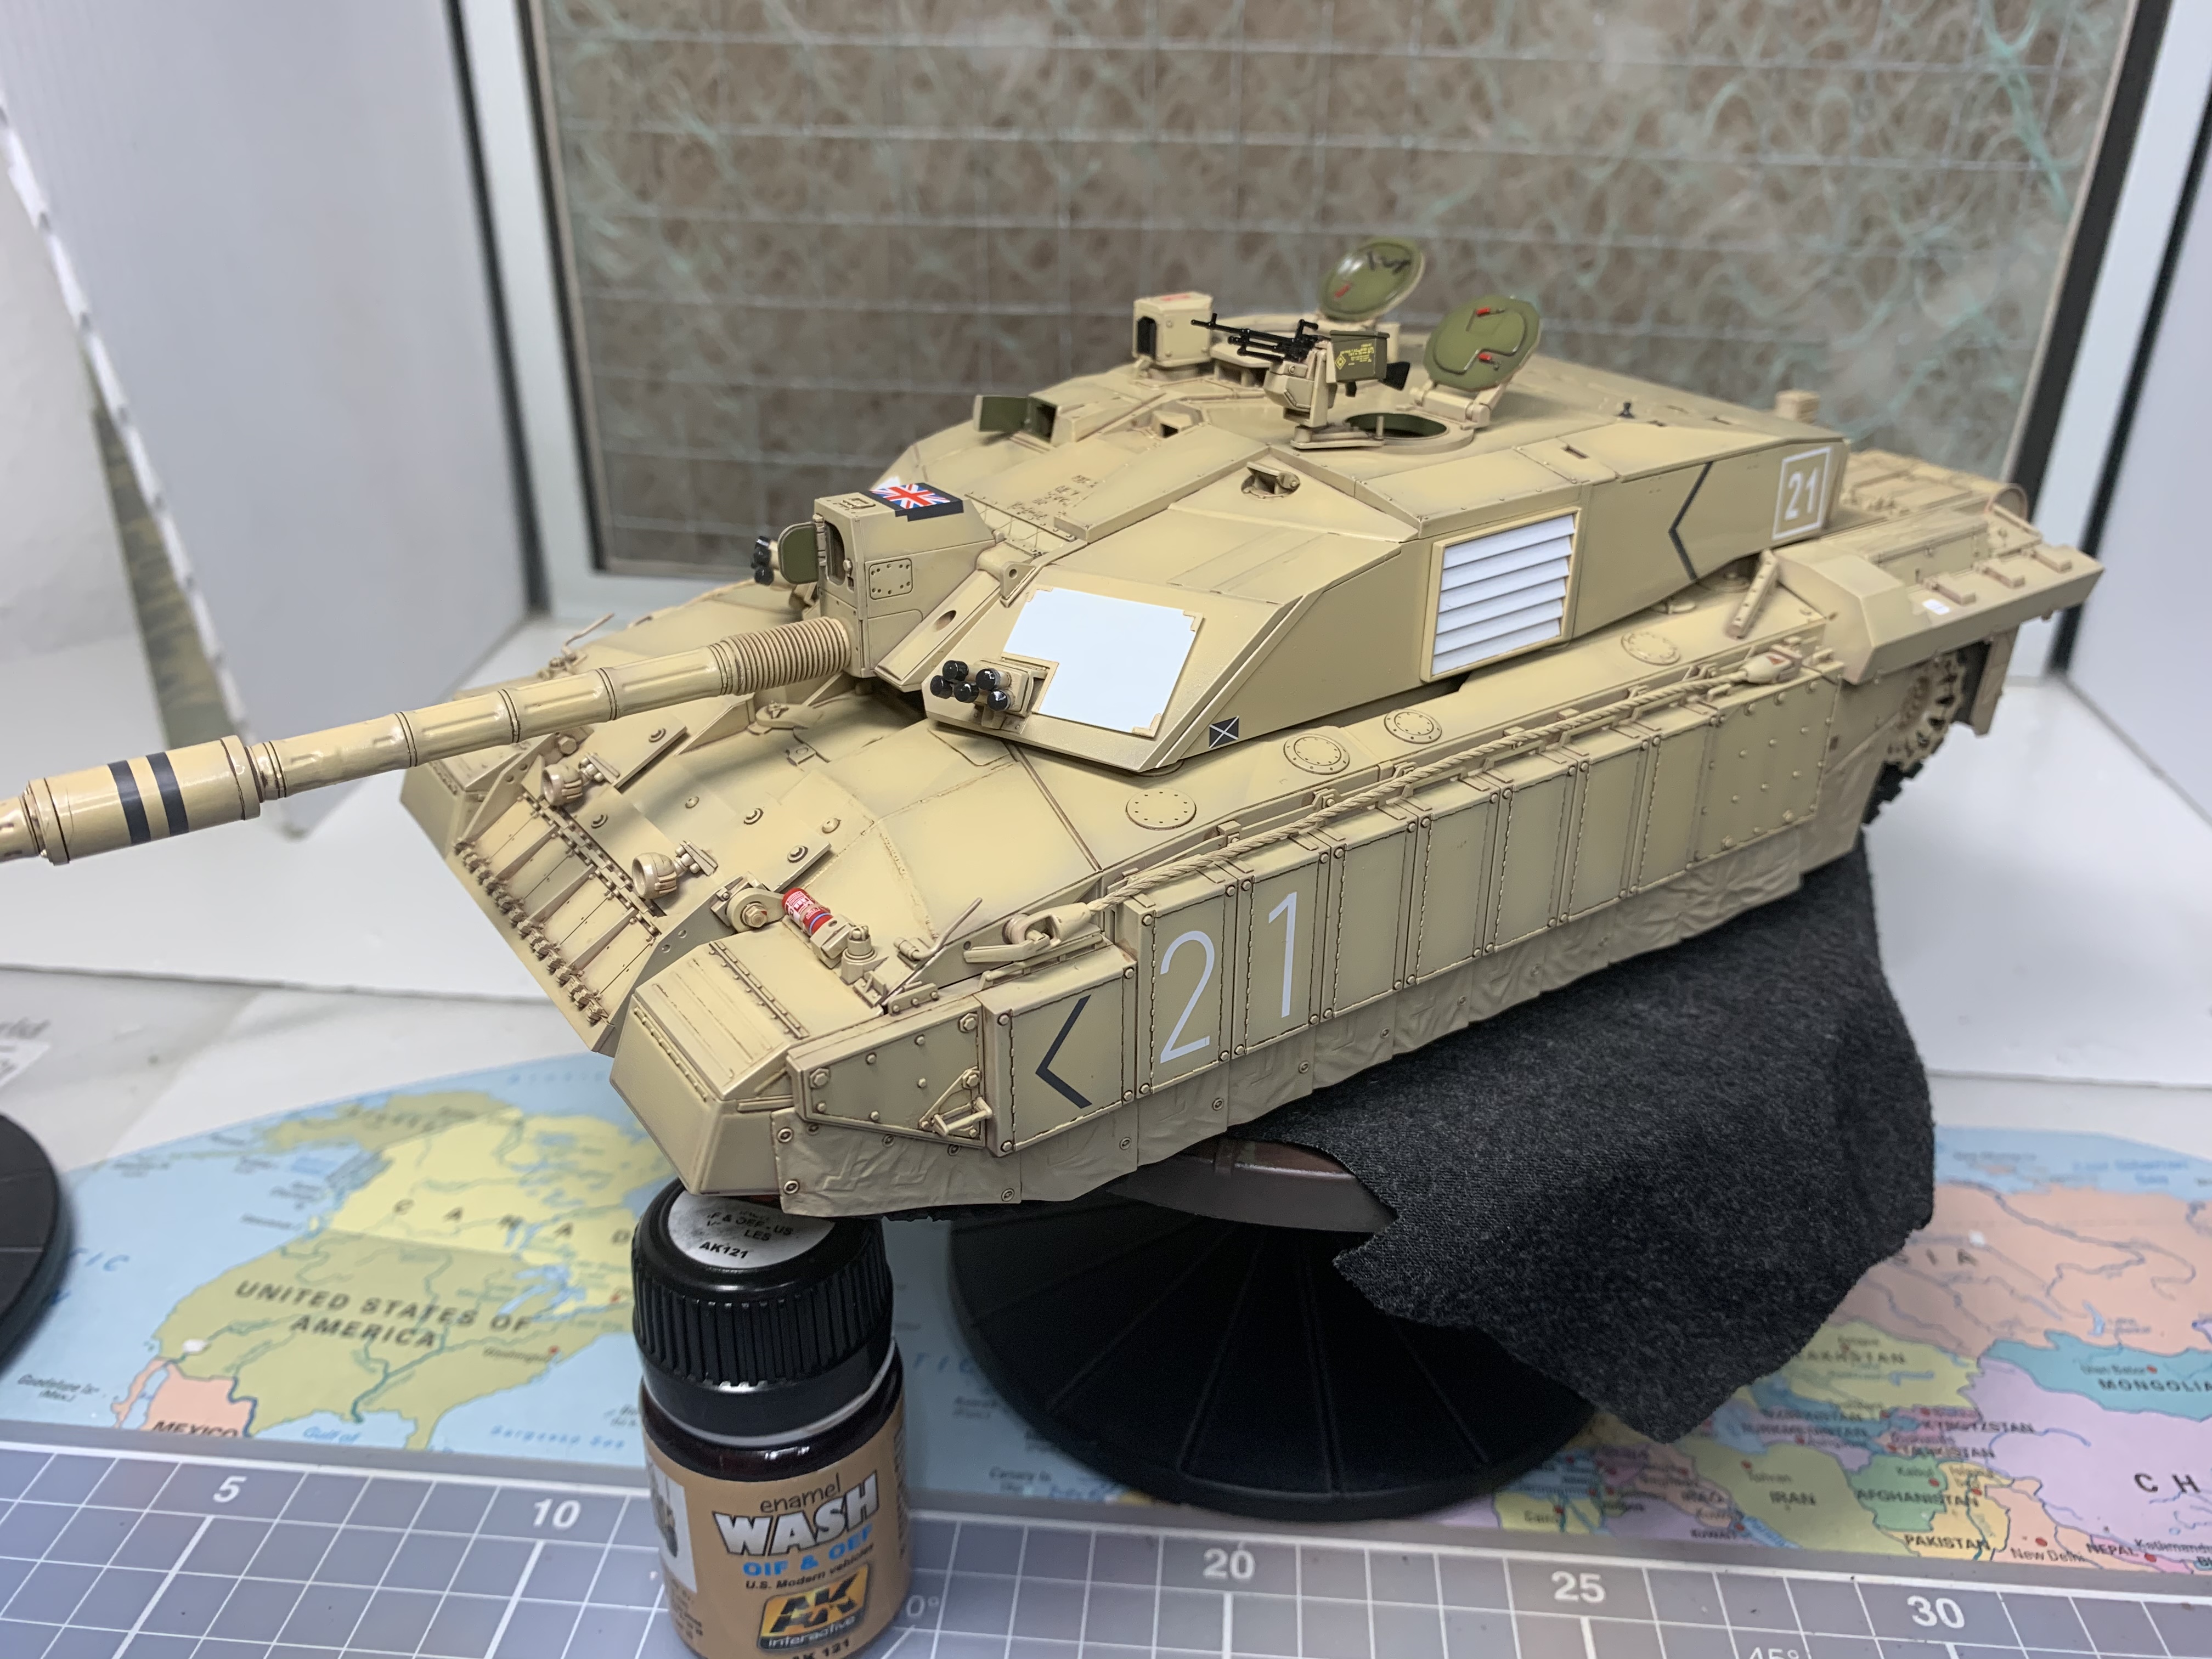
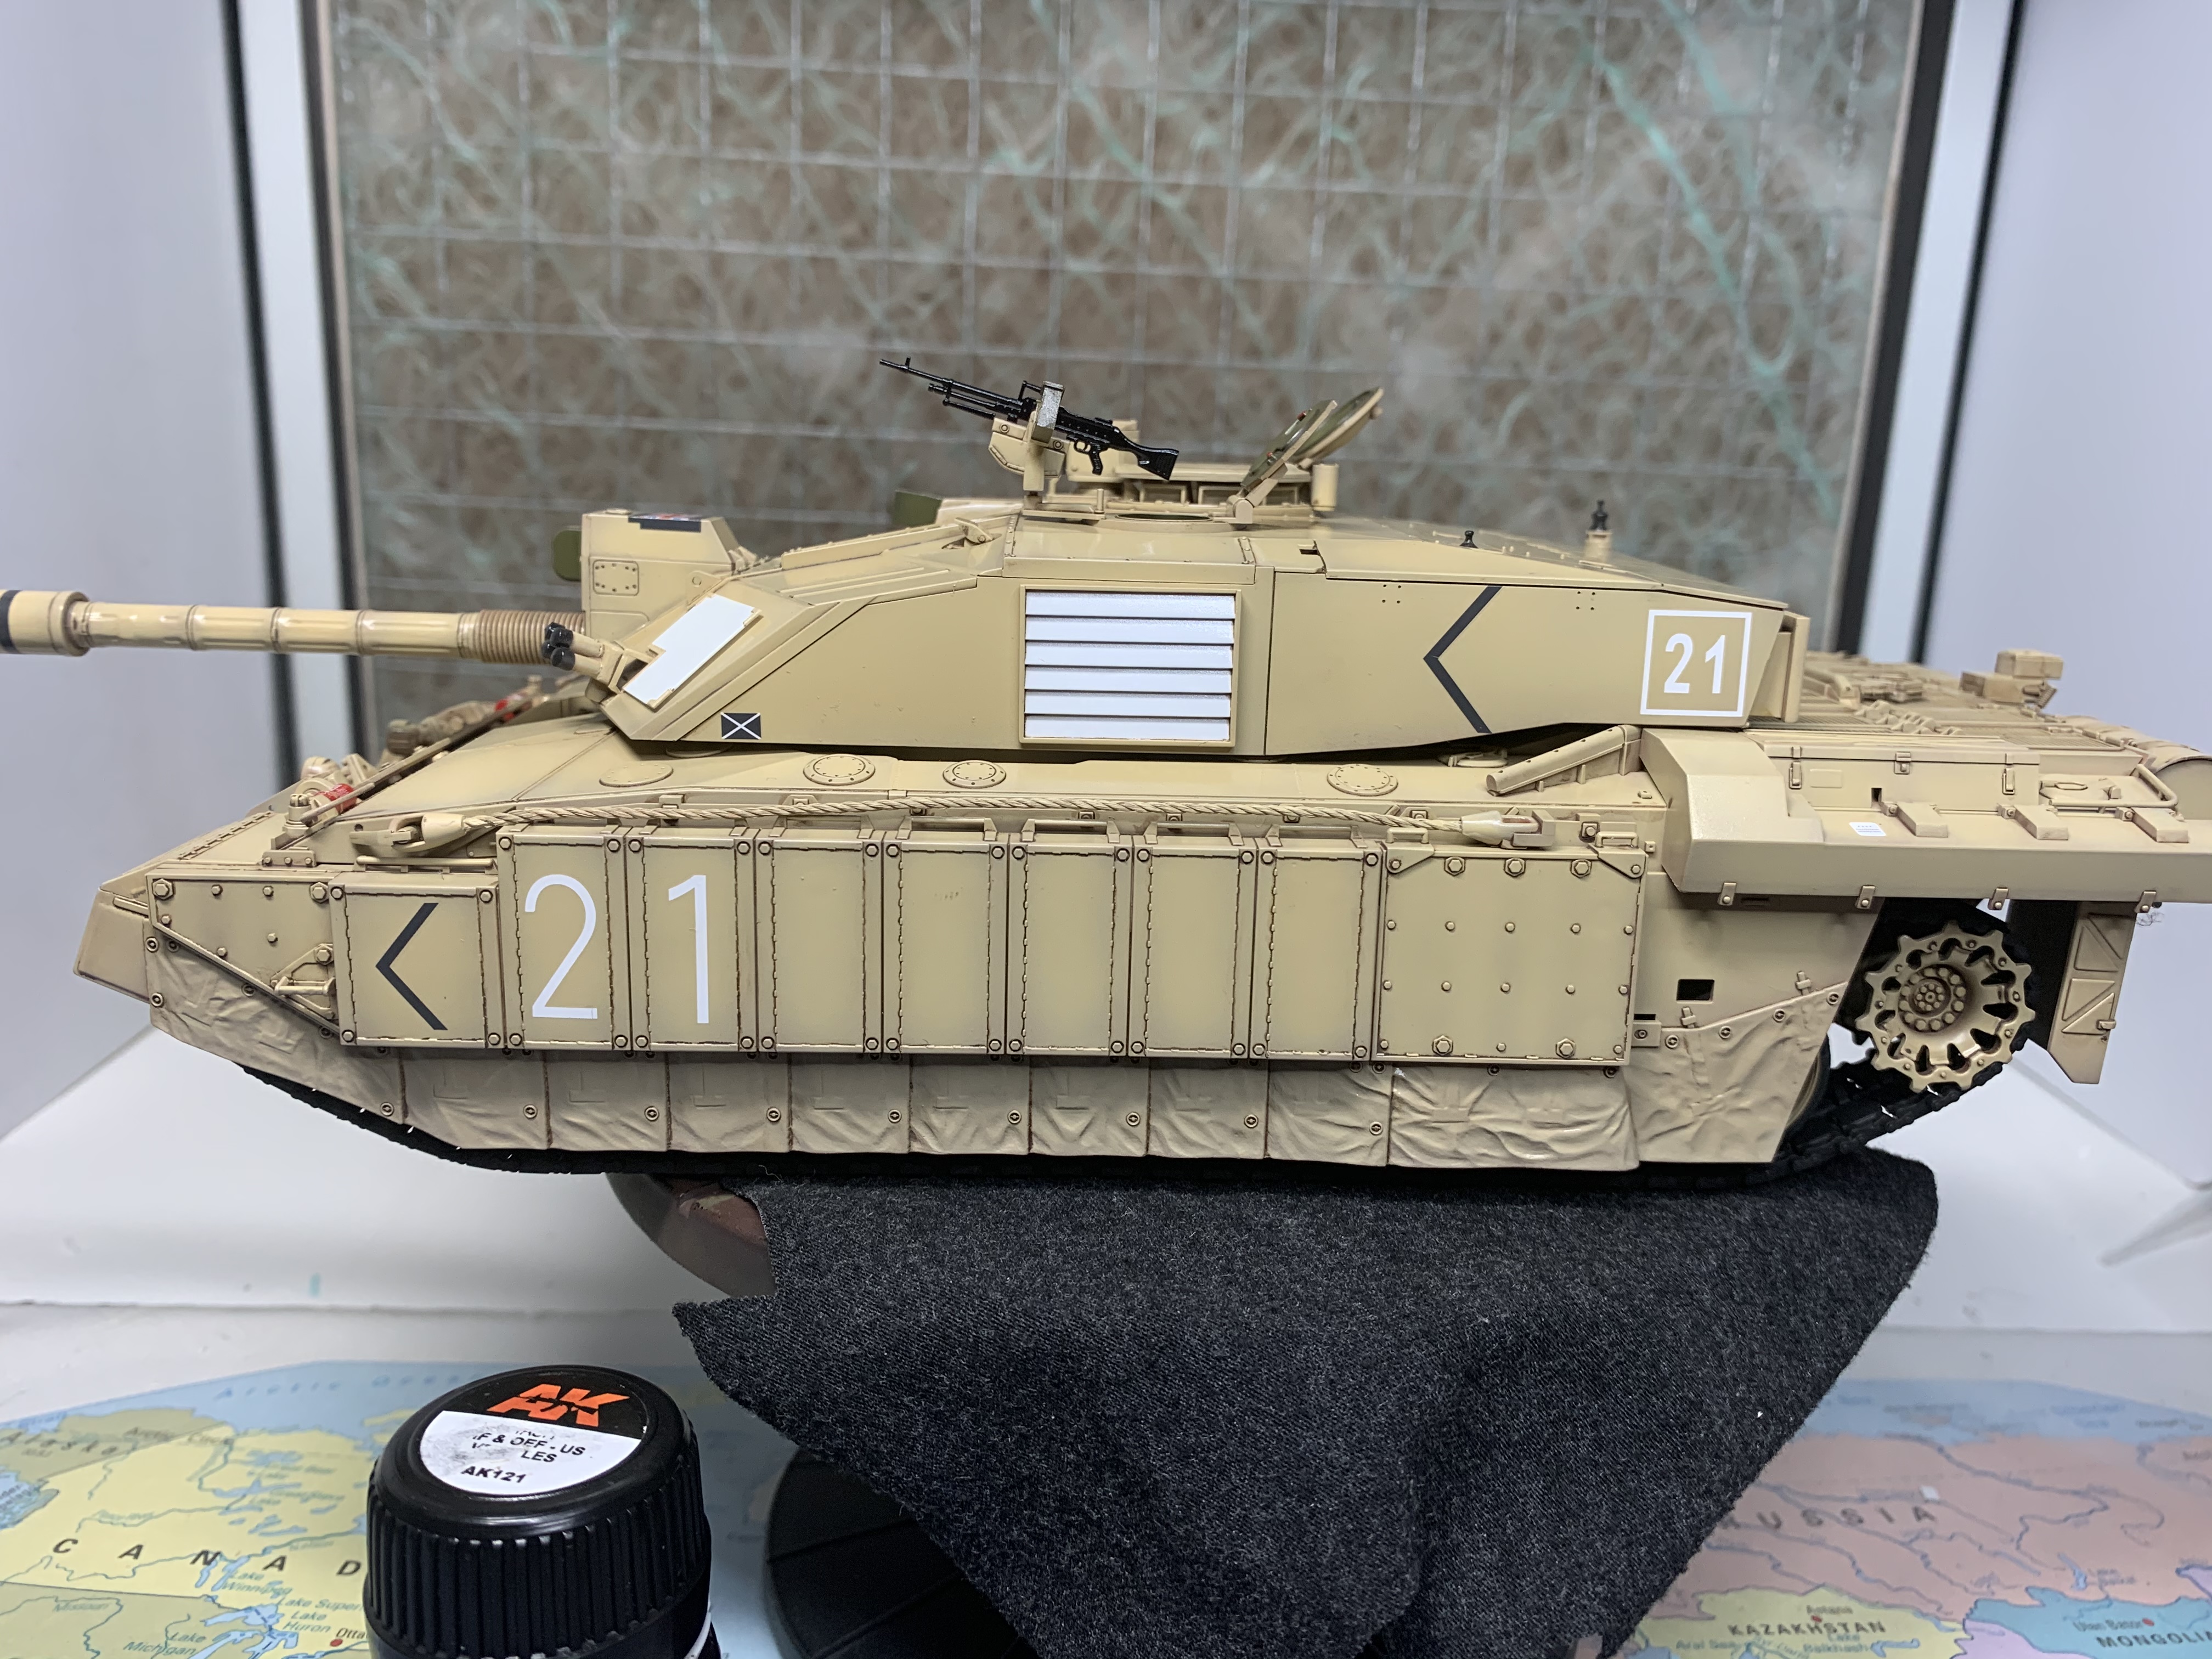
So, I have primed with Tamiya red brown, mixed 50:50 with Tamiya lacquer thinner. Then a highlight coat with Tamiya Buff, 70:30 thinner to paint. Both mixes had some x22 gloss clear added for a more satin finish. Im working on the ratios for the clear, probably using 5 parts paint to 1 part clear at the moment. The reasoning being less gloss needed for clear coat later, as tamiya paint can be very matt.
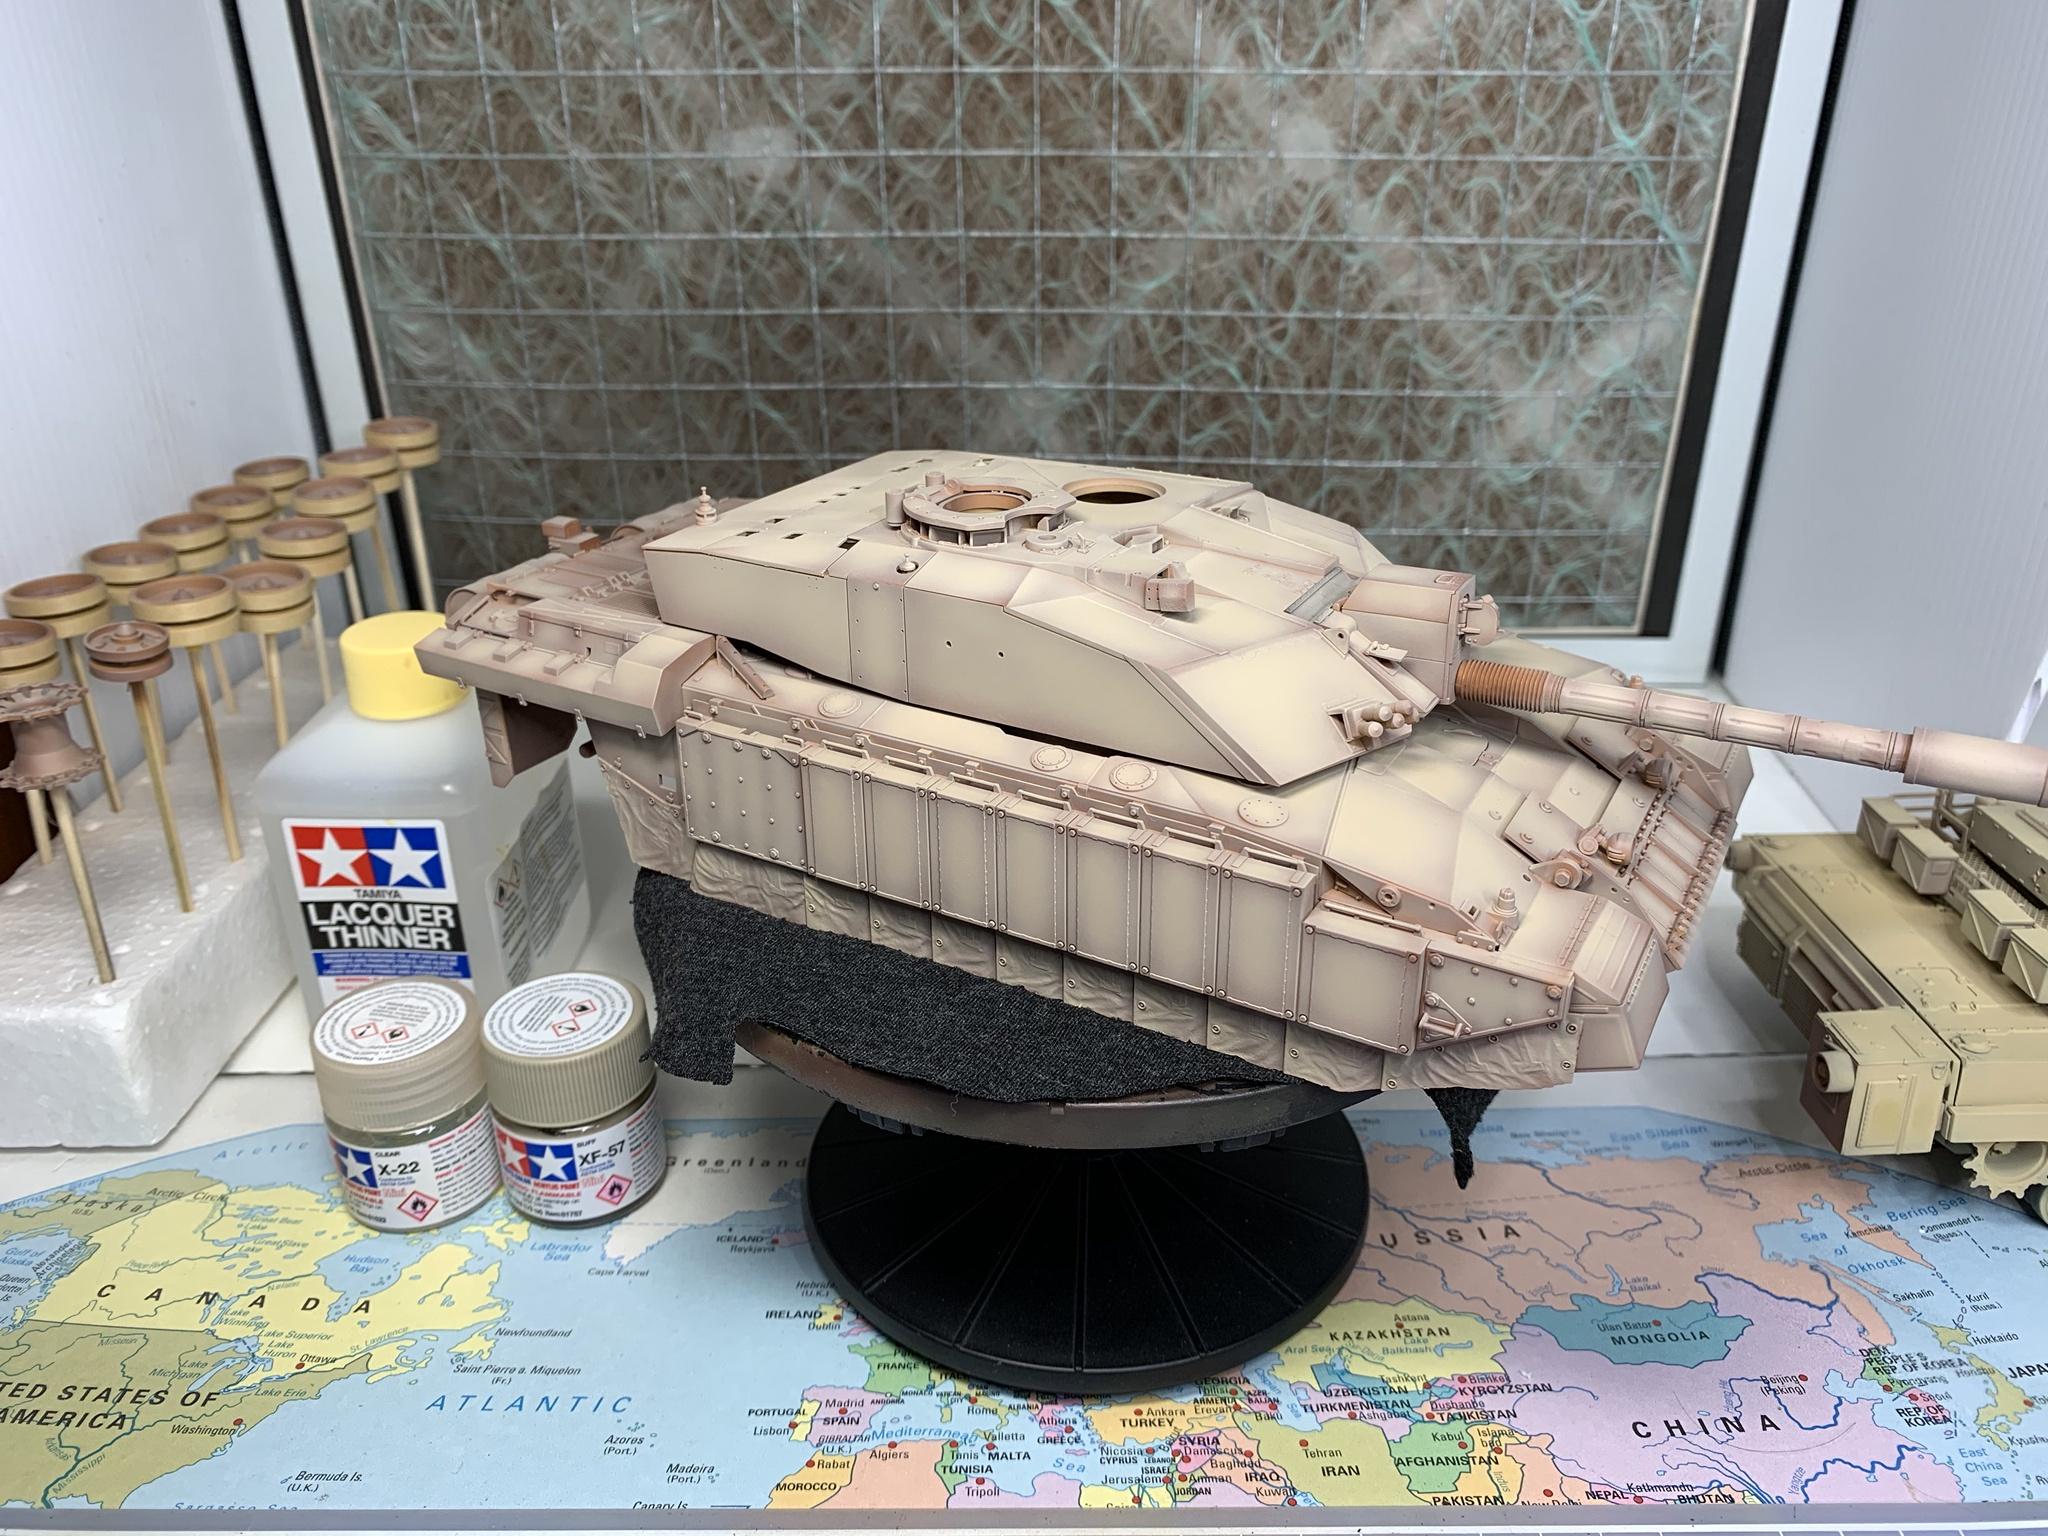
The plan is 25 Tamiya Dark Yellow, 25 Tamiya Desert Yellow, 50 Tamiya White, with the above ratio of x22 gloss clear and thinned at least 70:30 thinner to paint and see if it comes out anything like it does in my head...
I know the correct colour is much debated, but this base colour will change significantly with the weathering, and the pics I have studied go from an almost orange hue through to a very light sand, so Im not too worried about it.
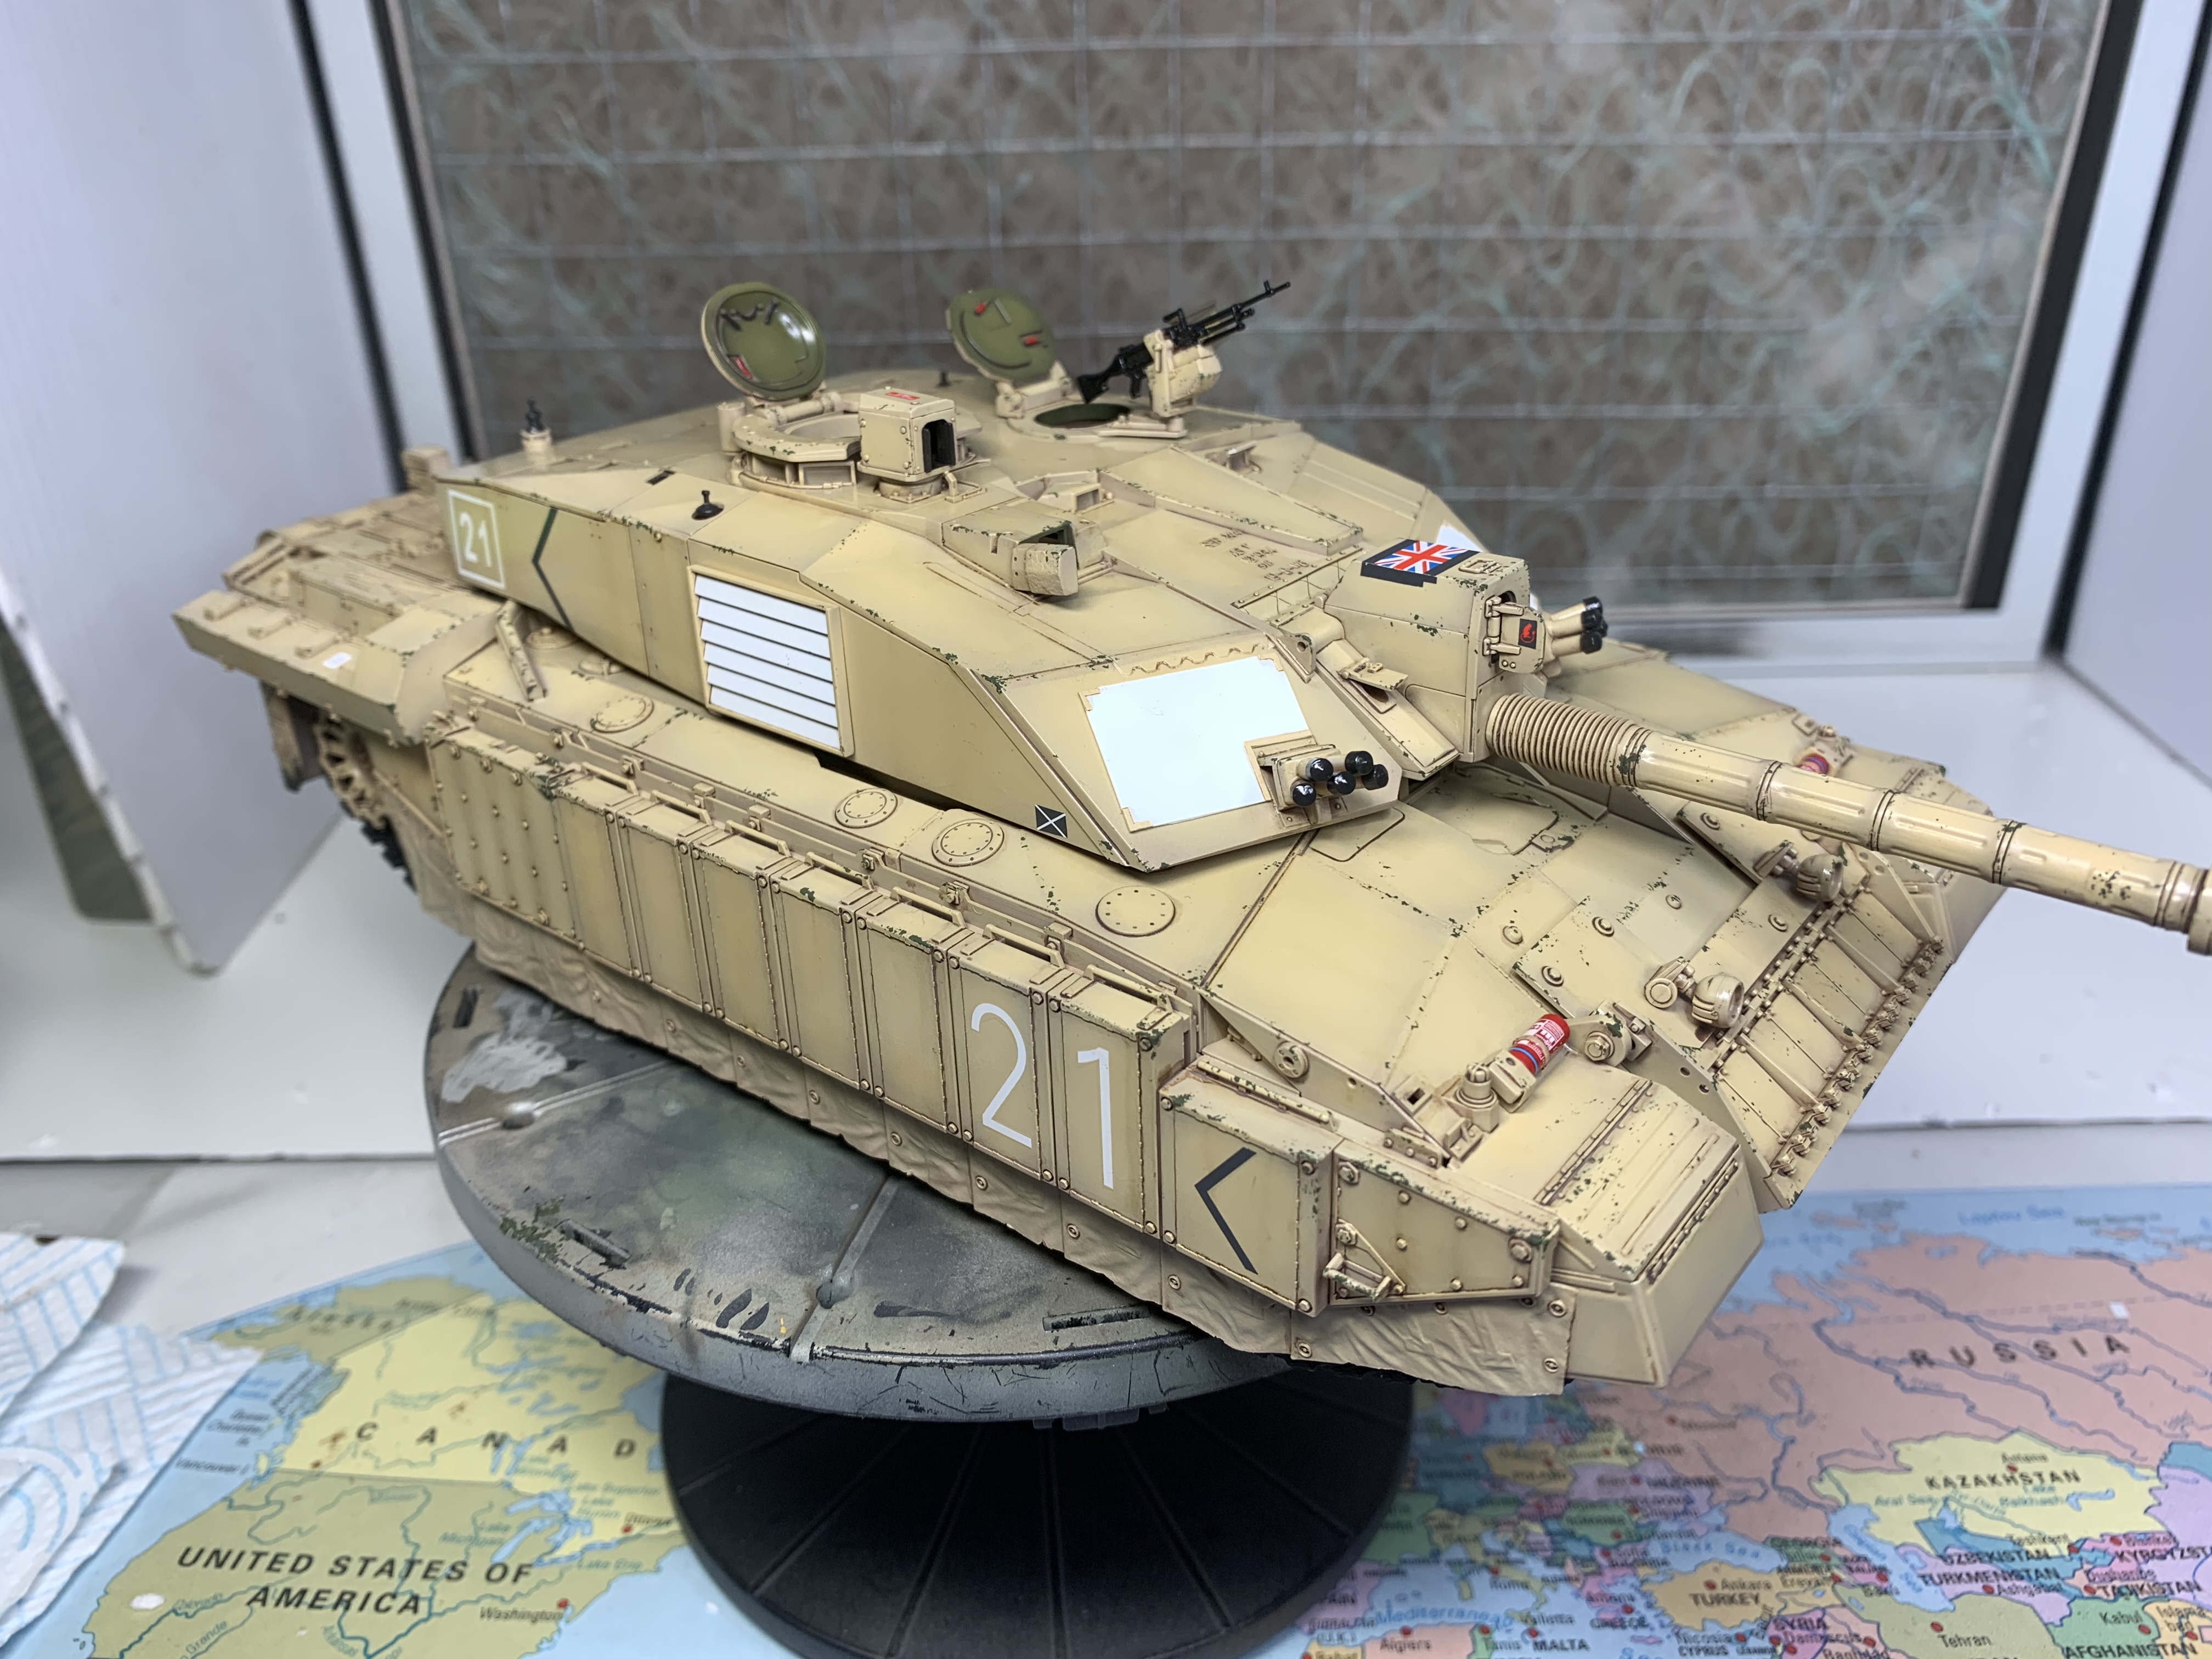
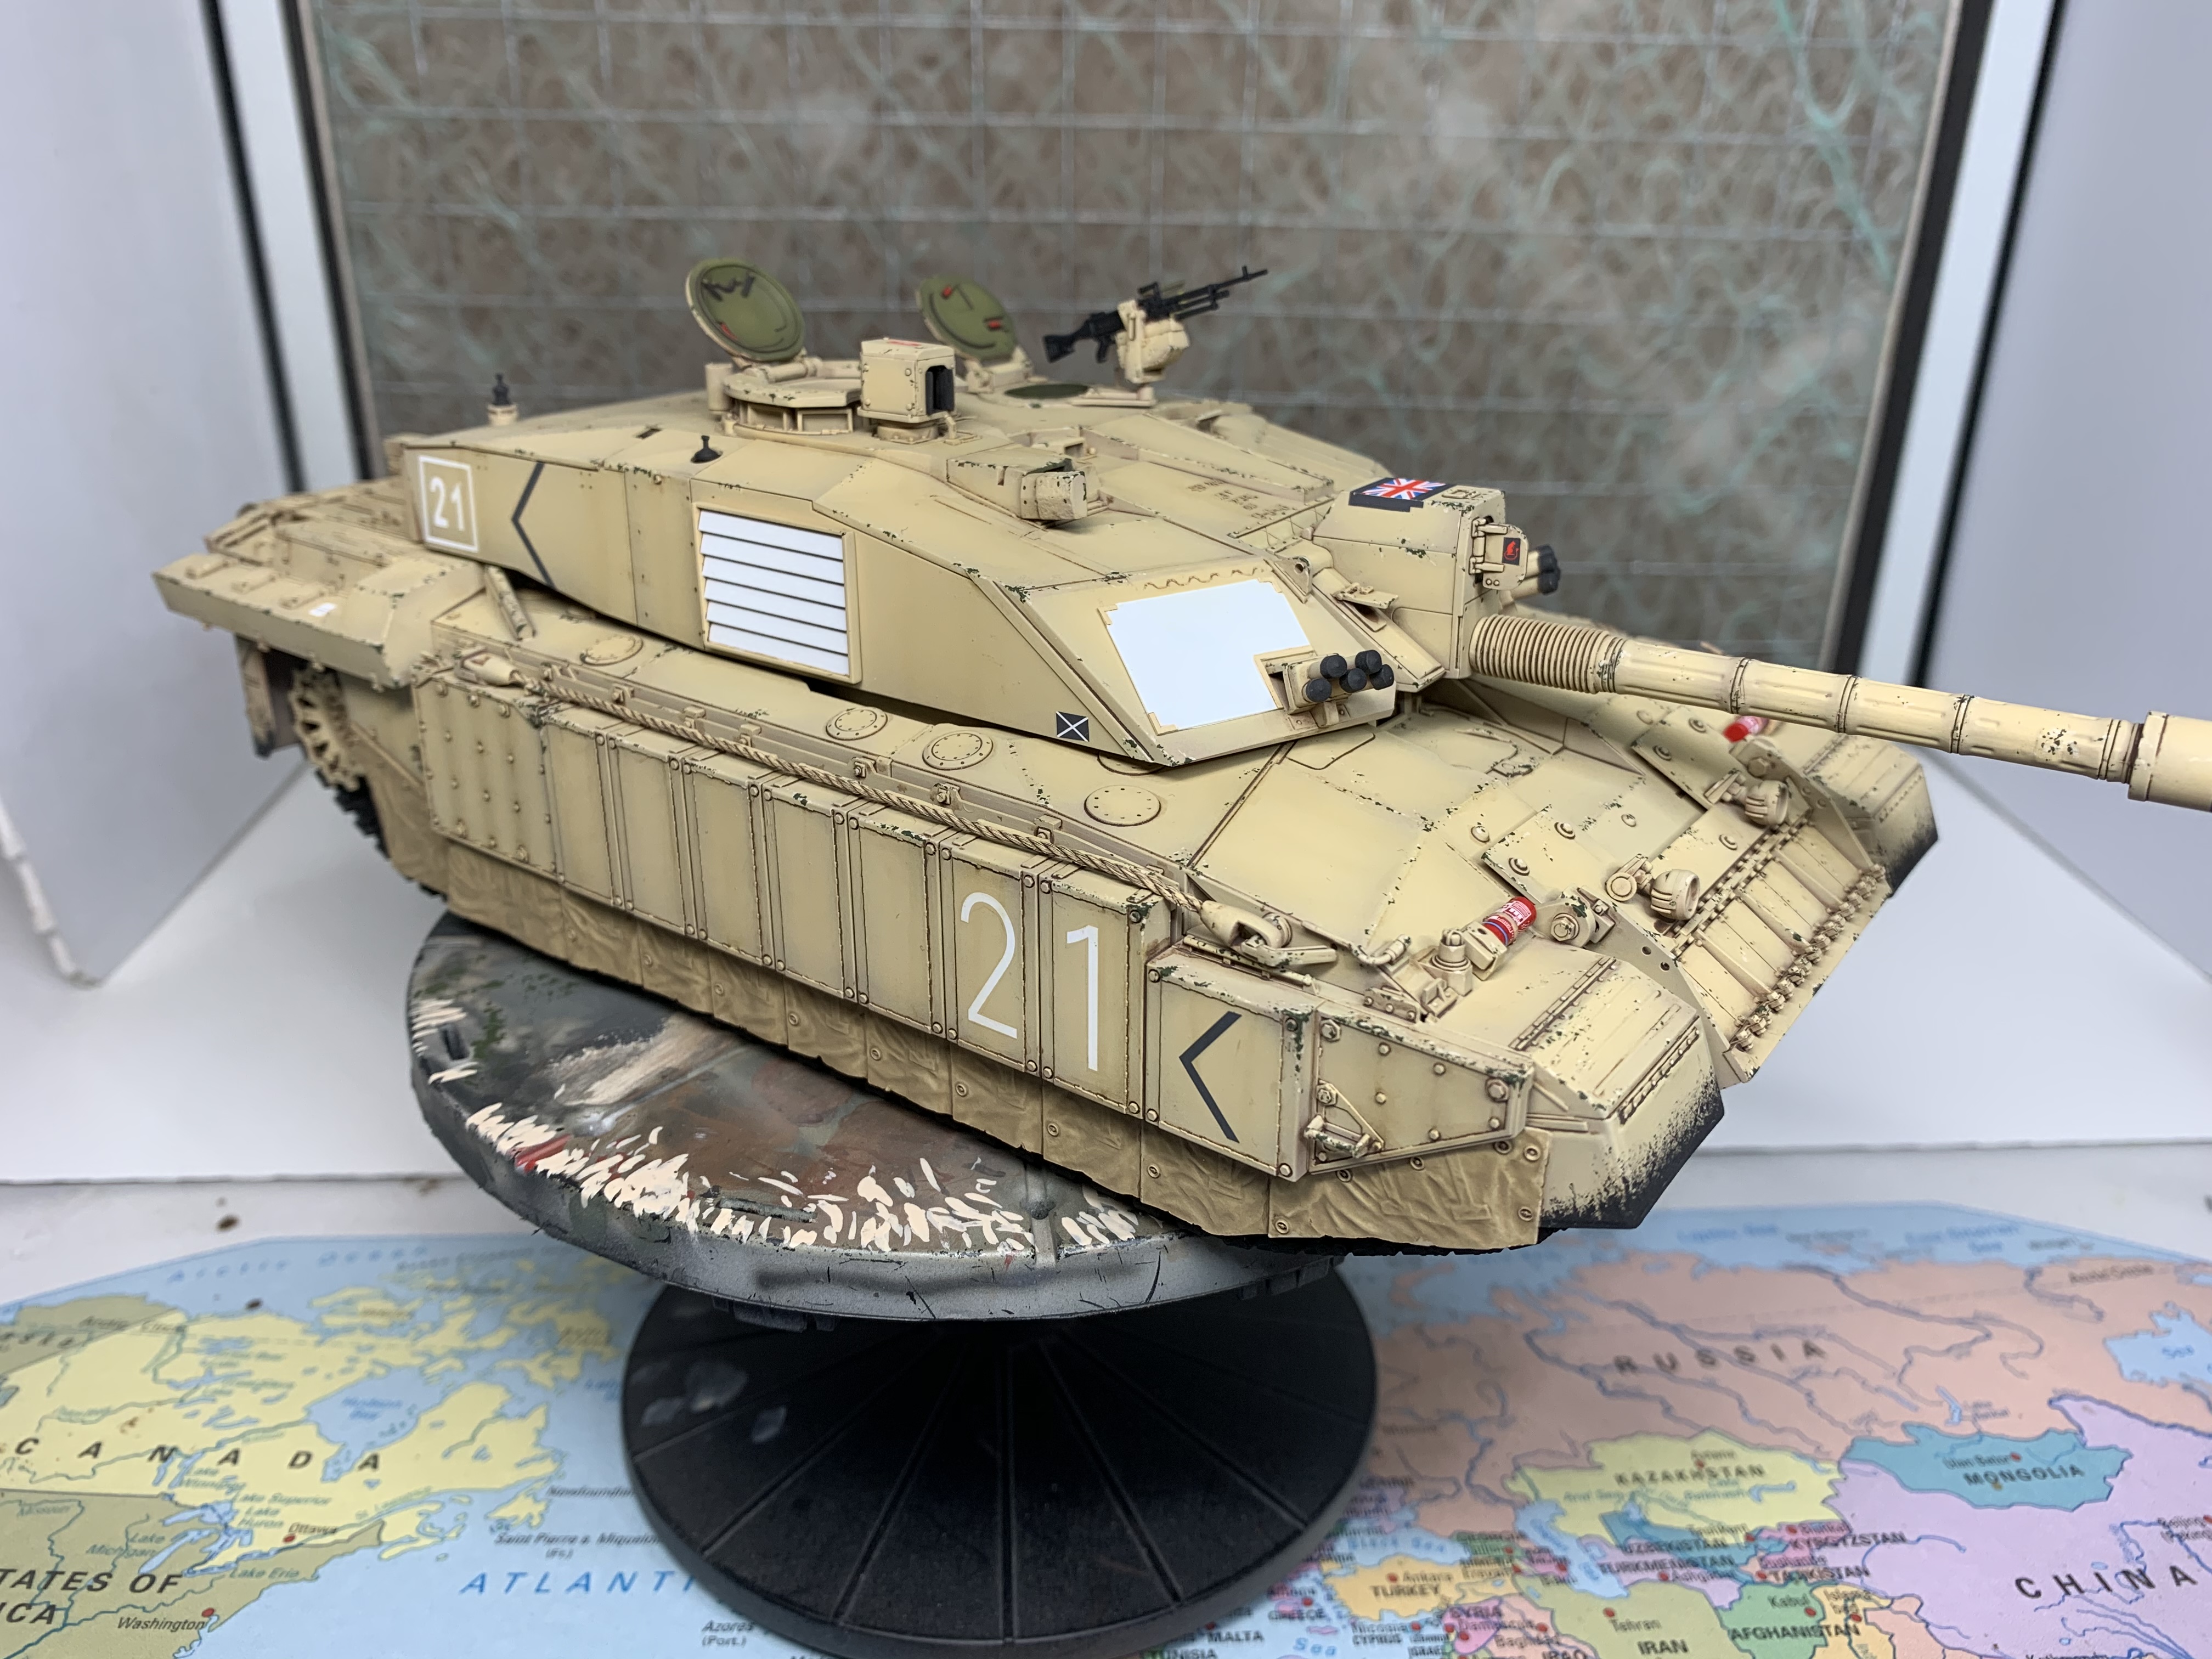
Im just playing around with these techniques and thought some of you may be interested in the process.
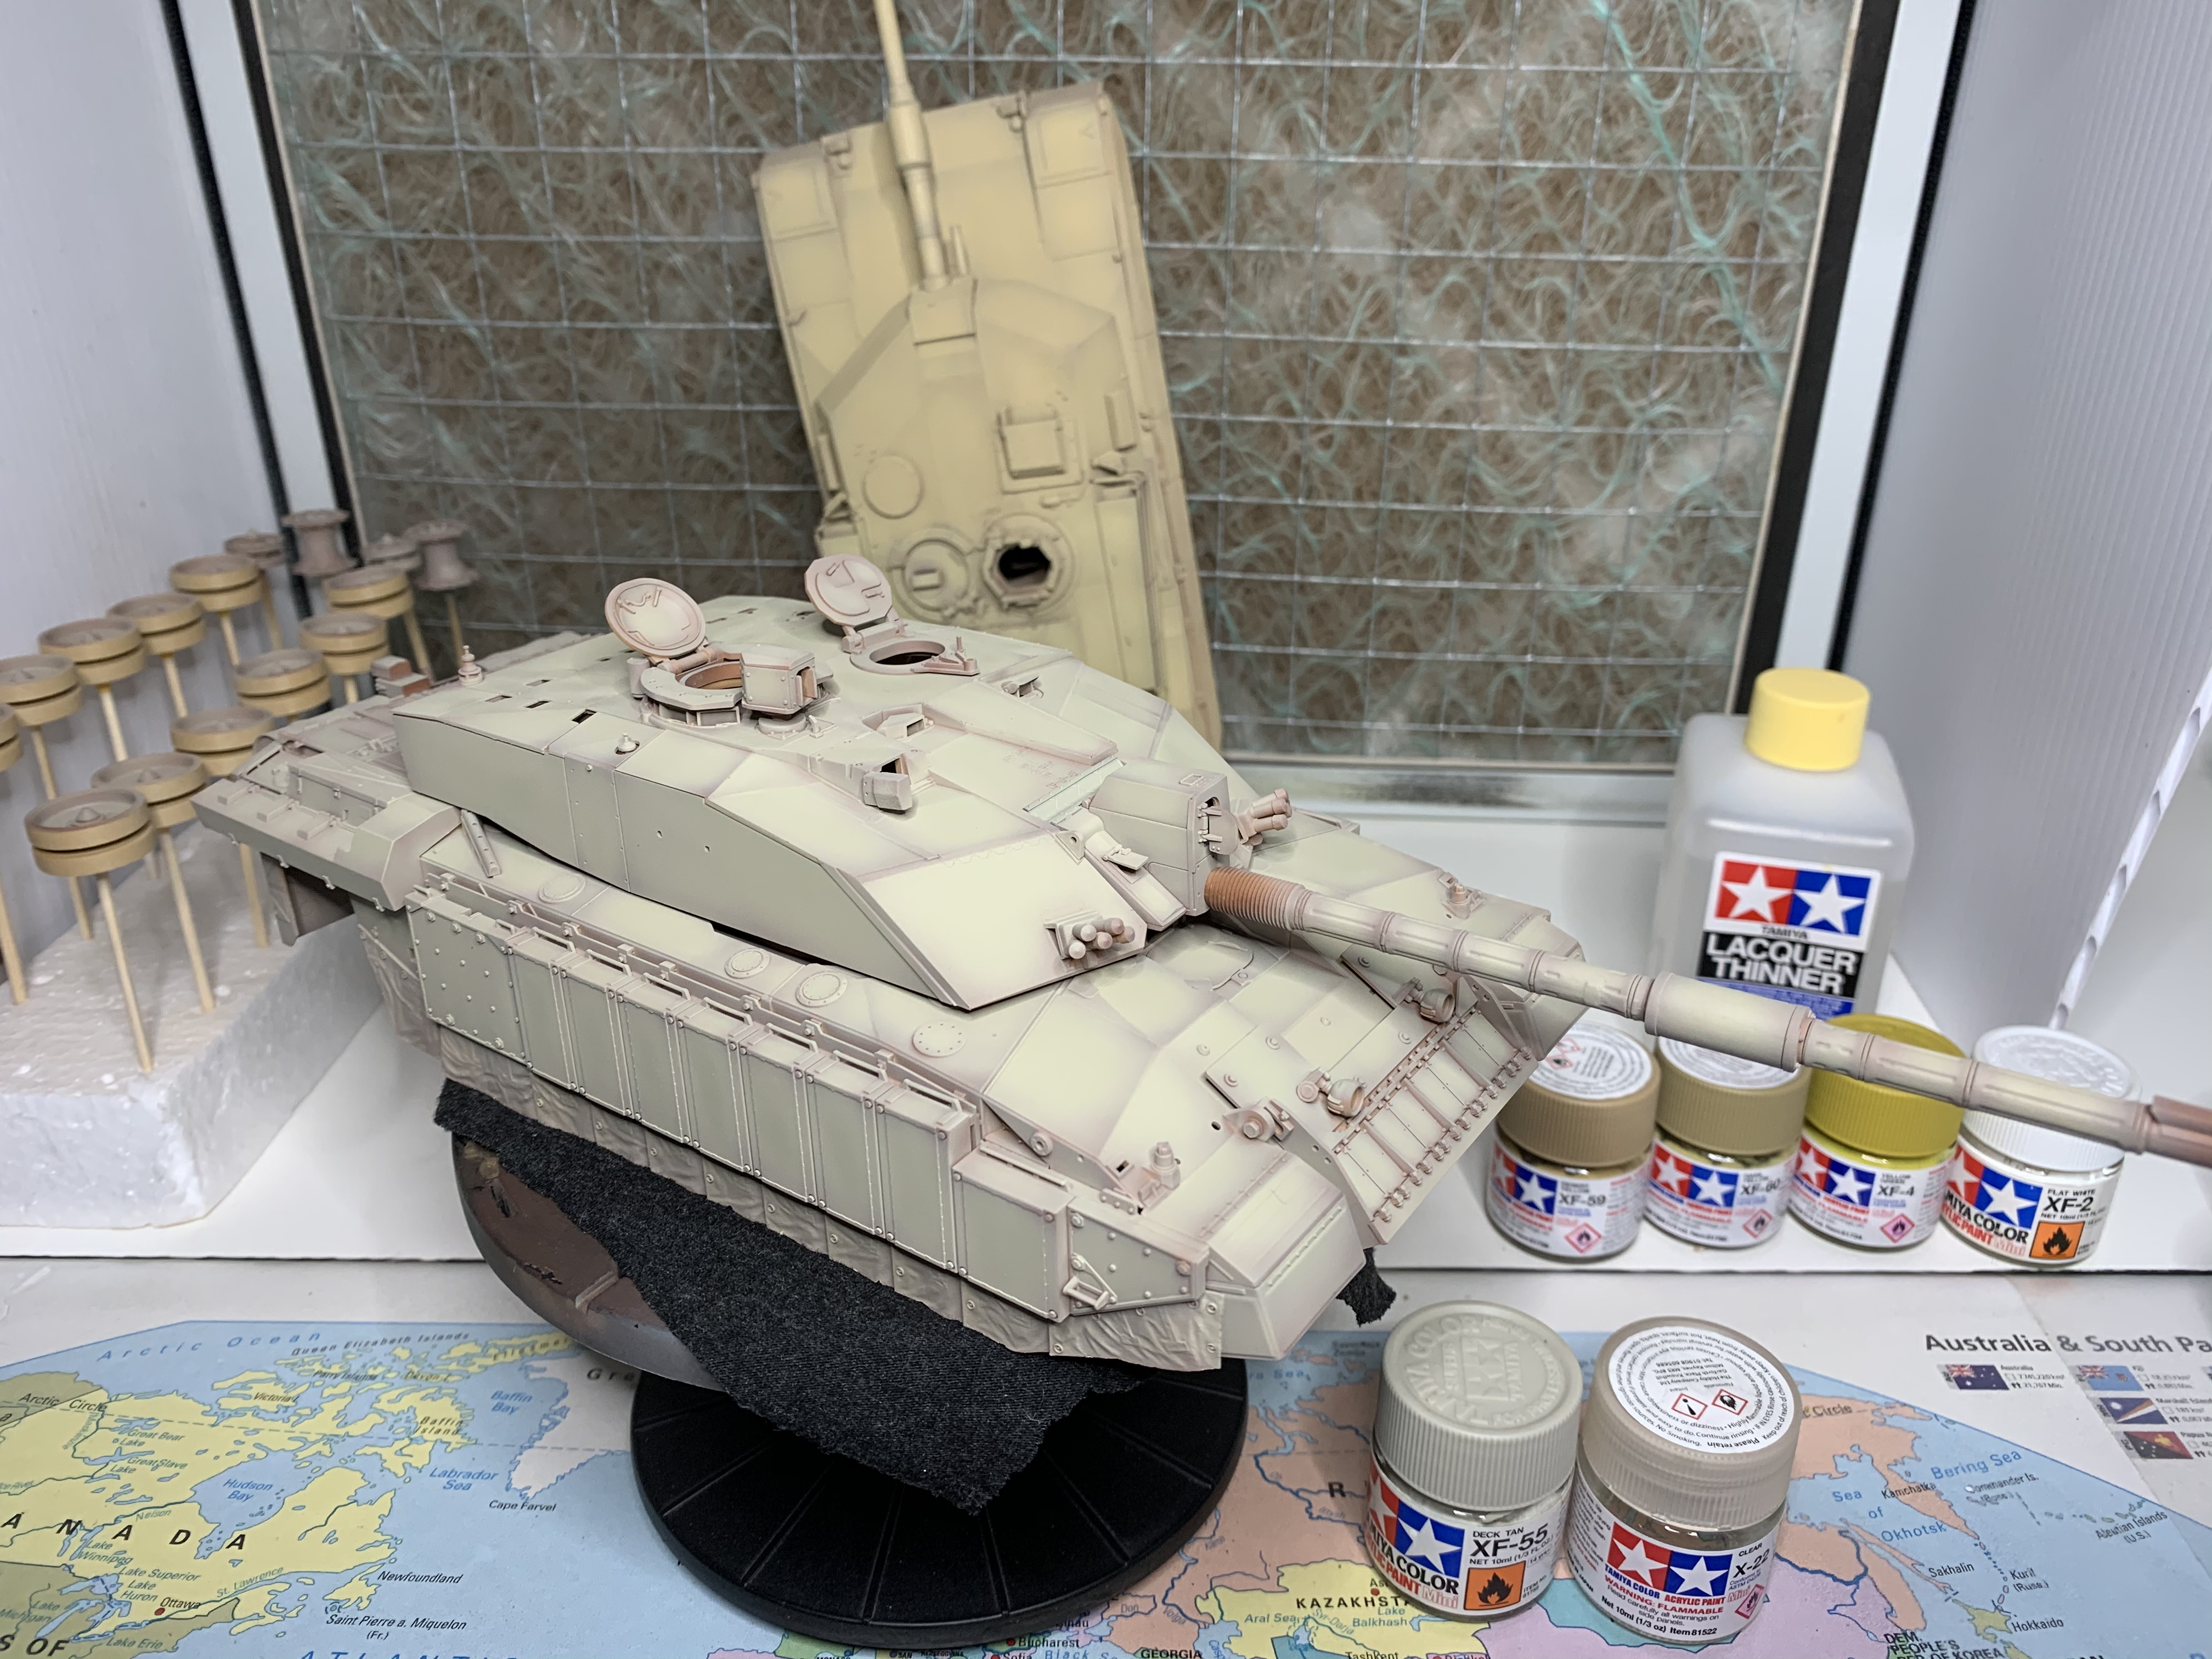
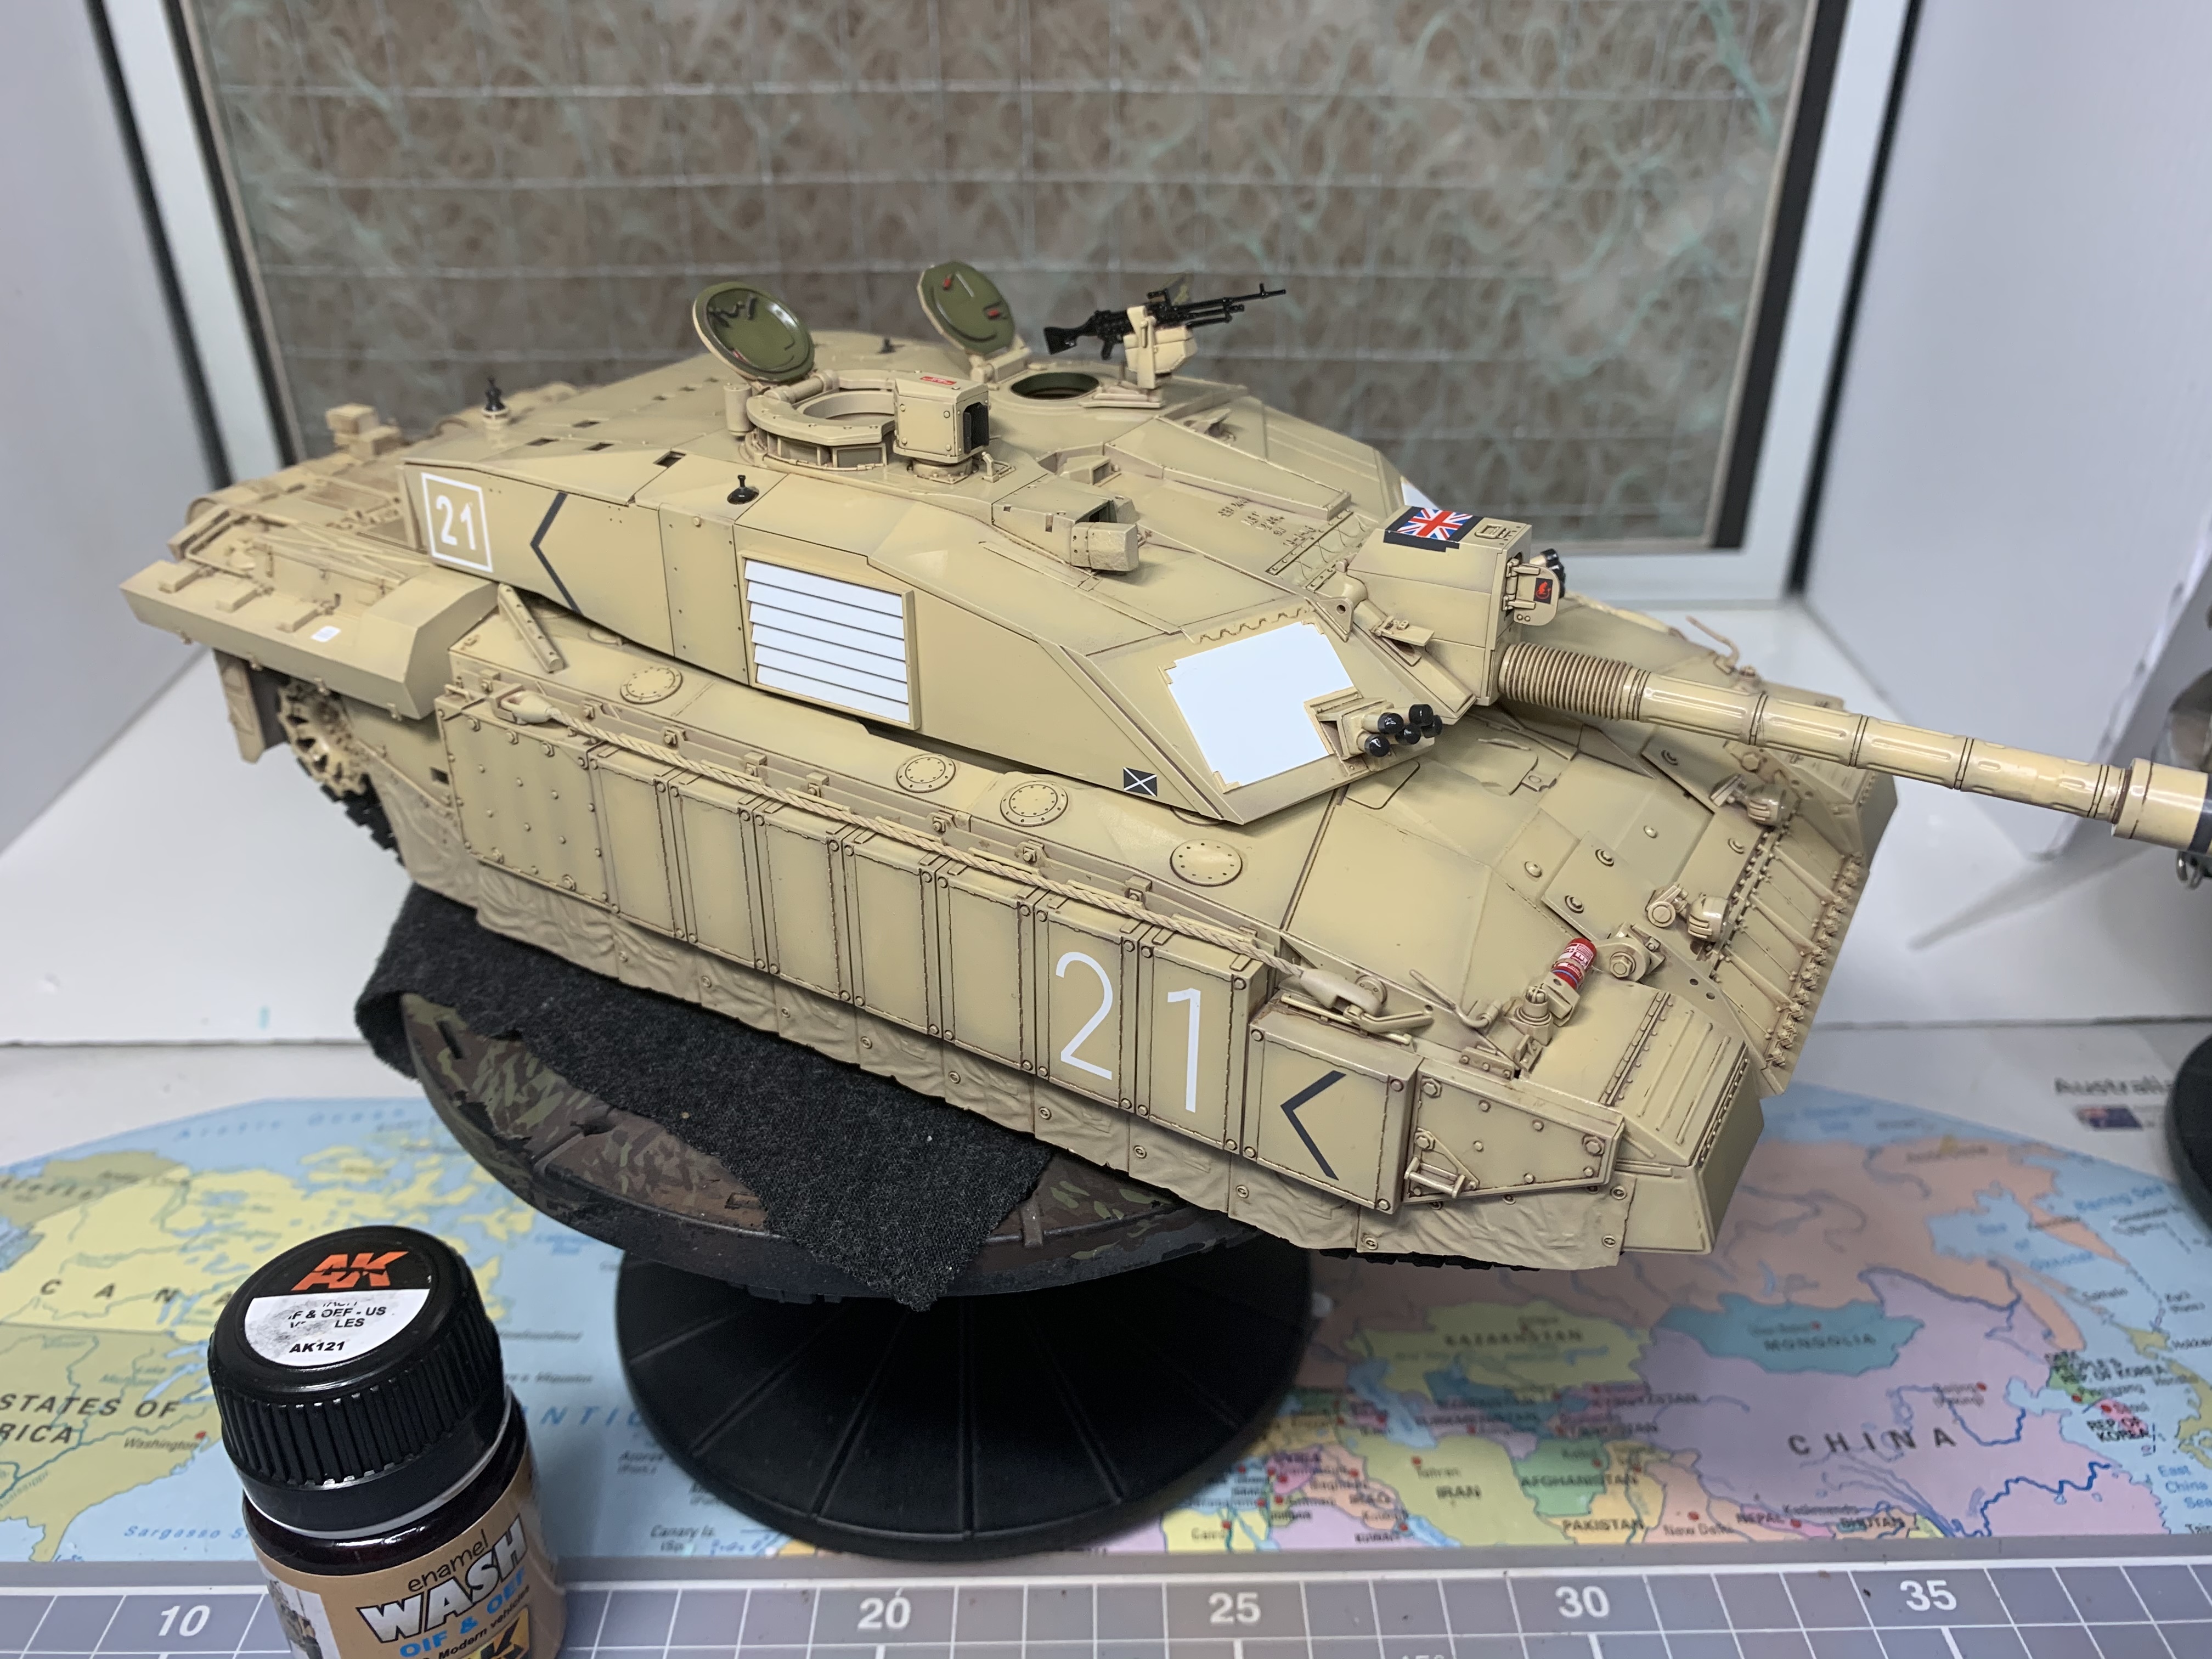
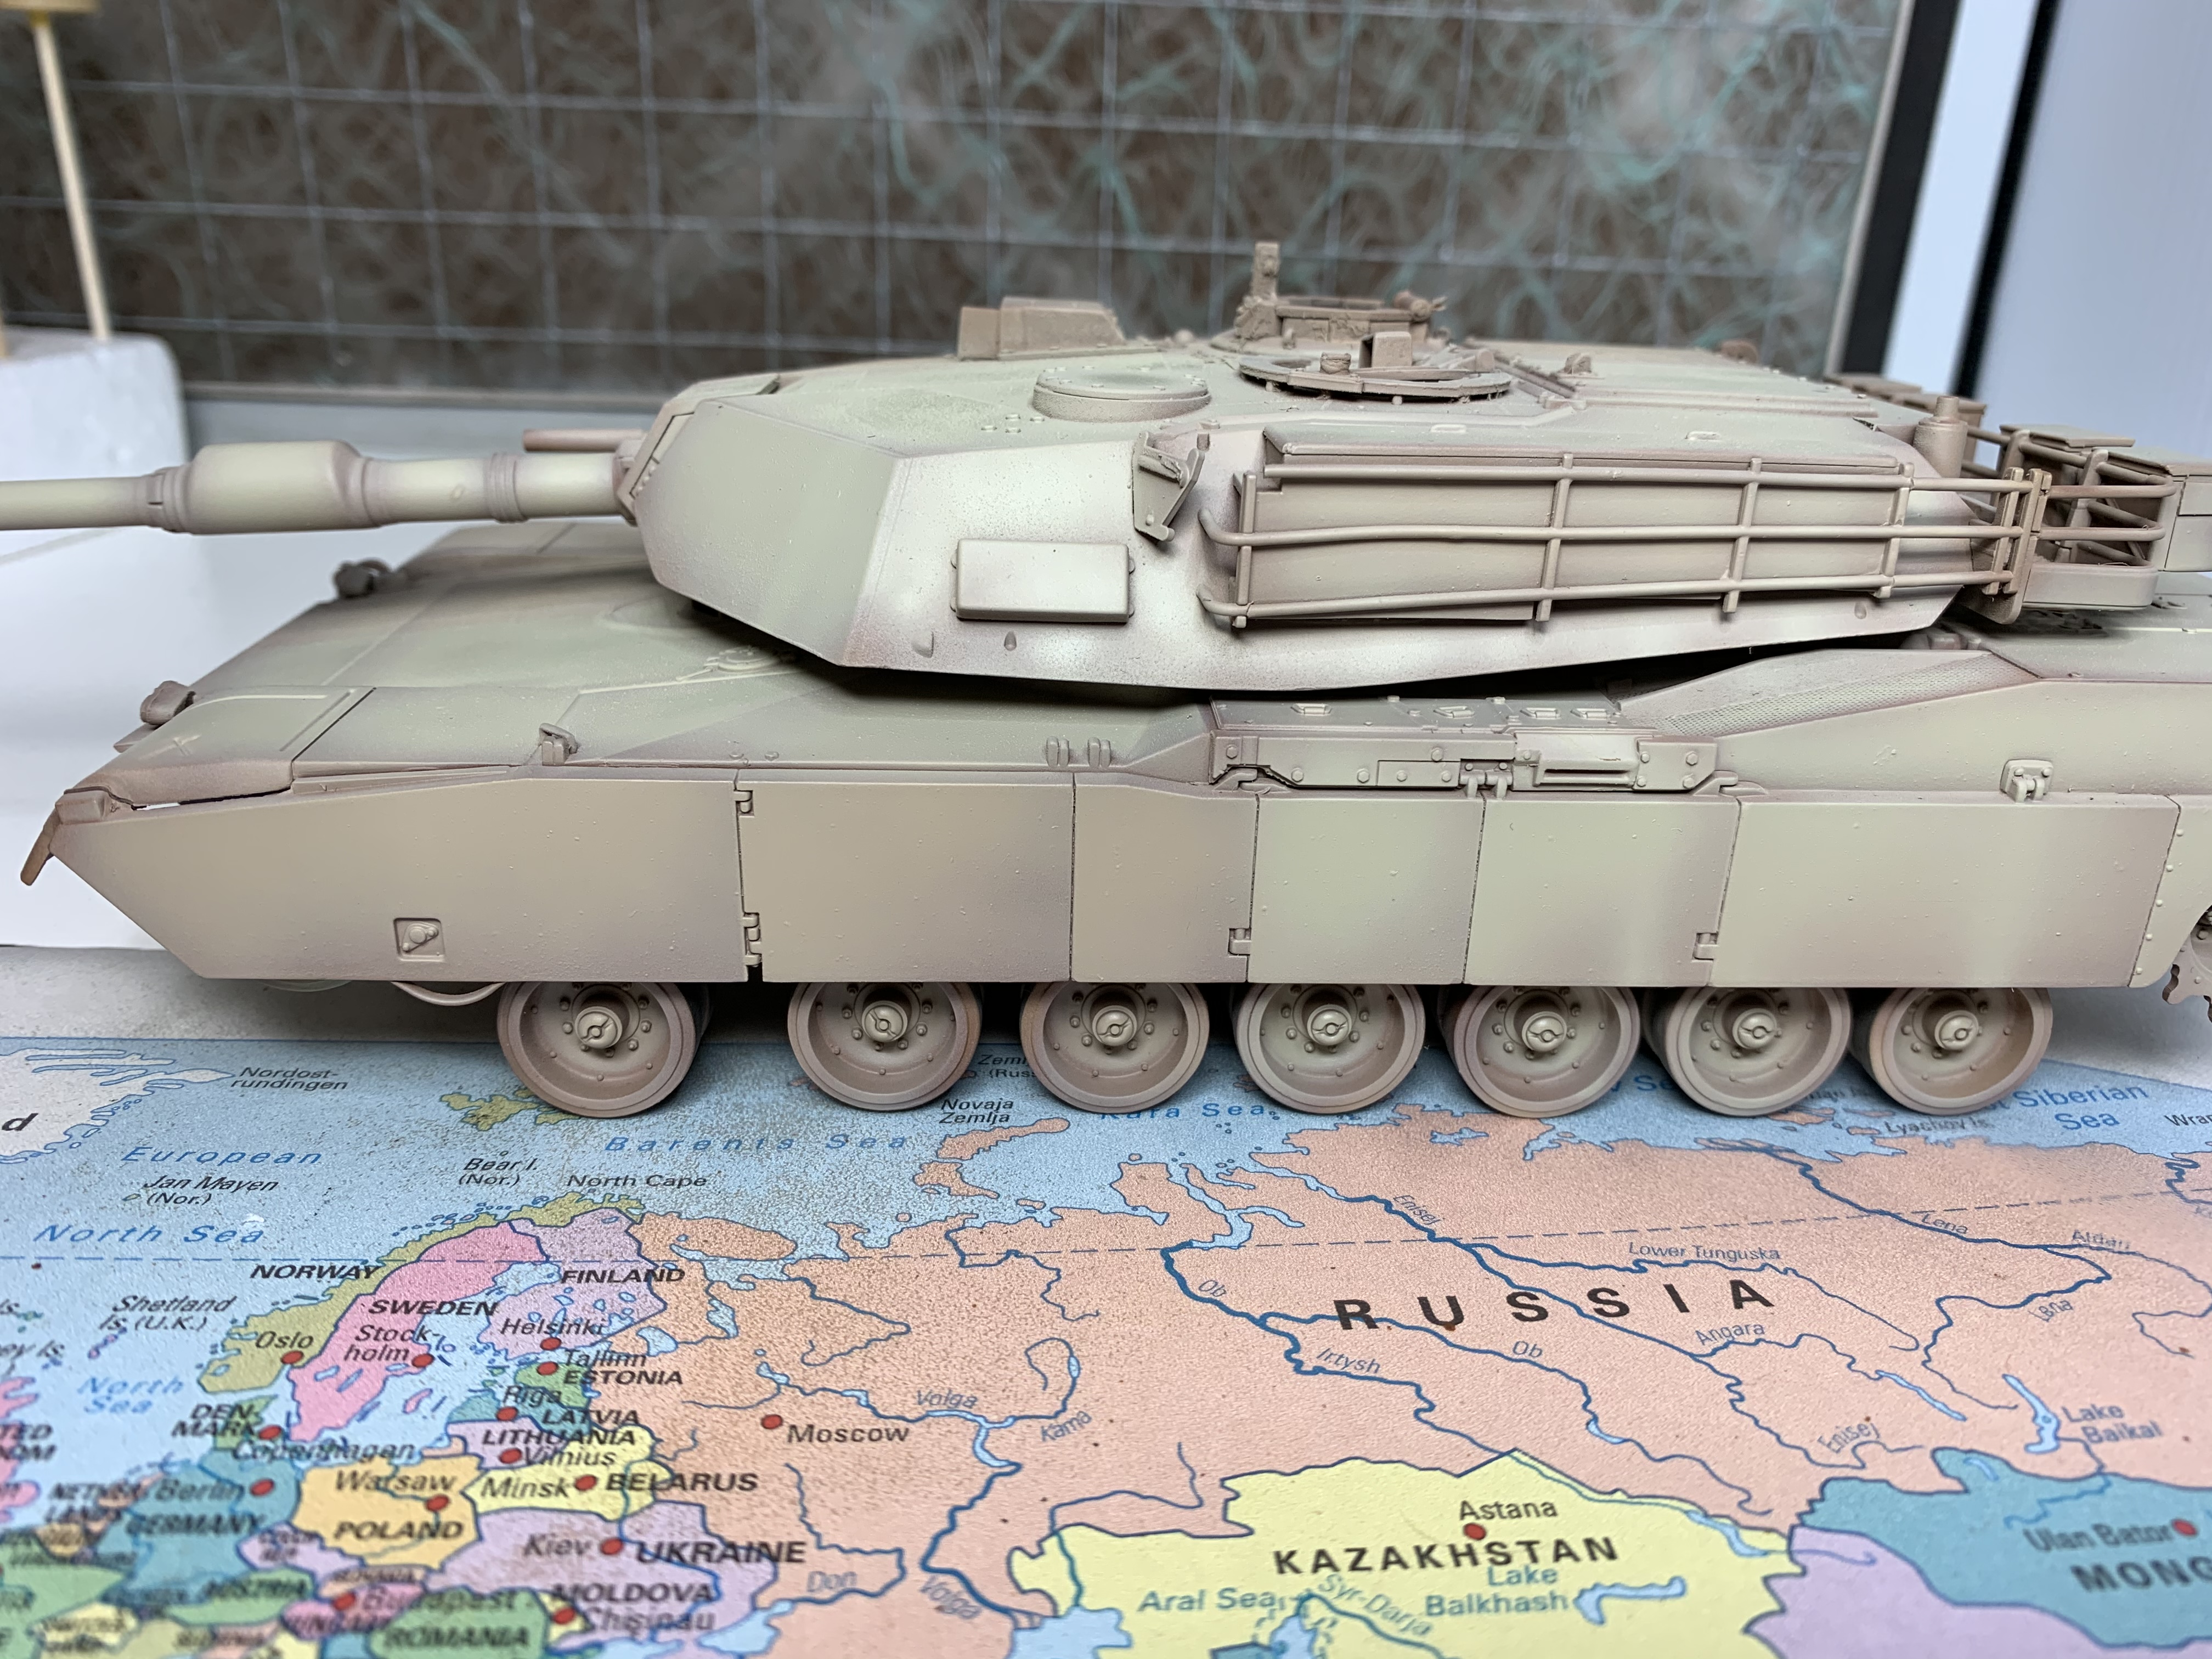
And the old abrams makes another appearance as the test bed for the test bed!
Thanks, Jim.