

1⁄35Karl Geraet Display
28
Comments
BACKGROUND HISTORY
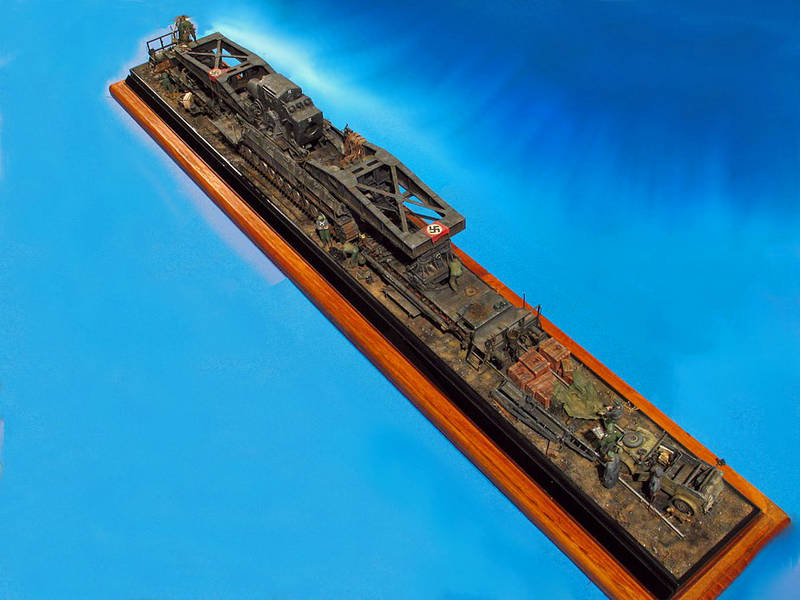
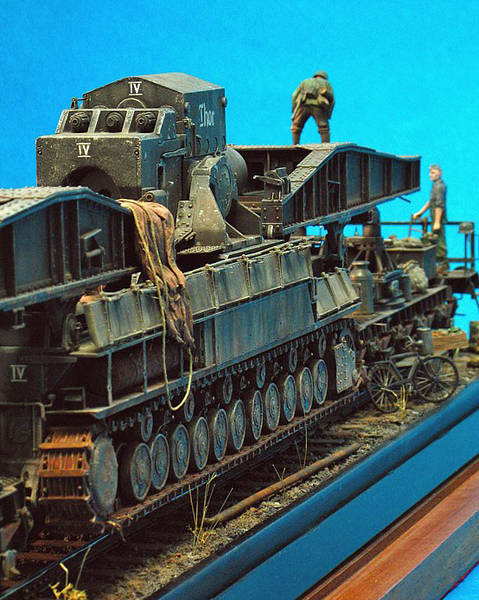
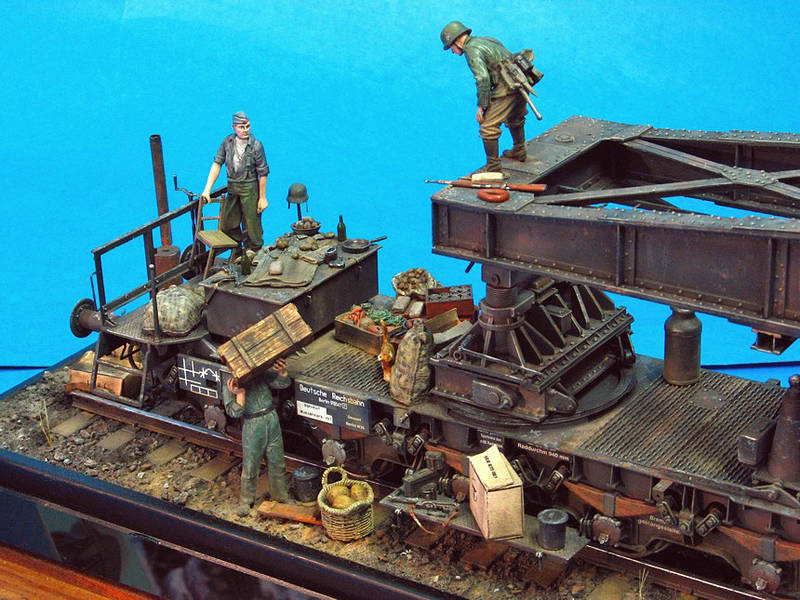
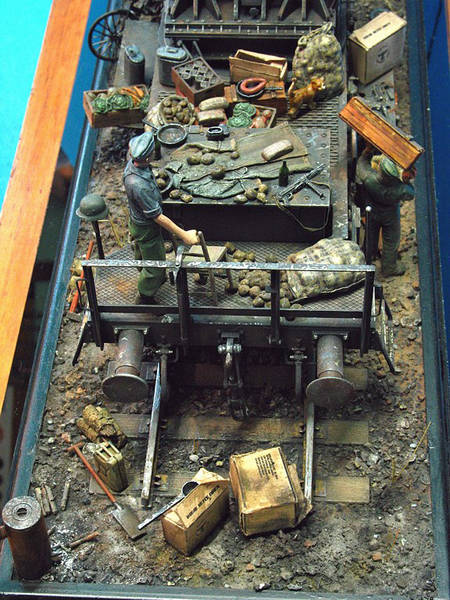
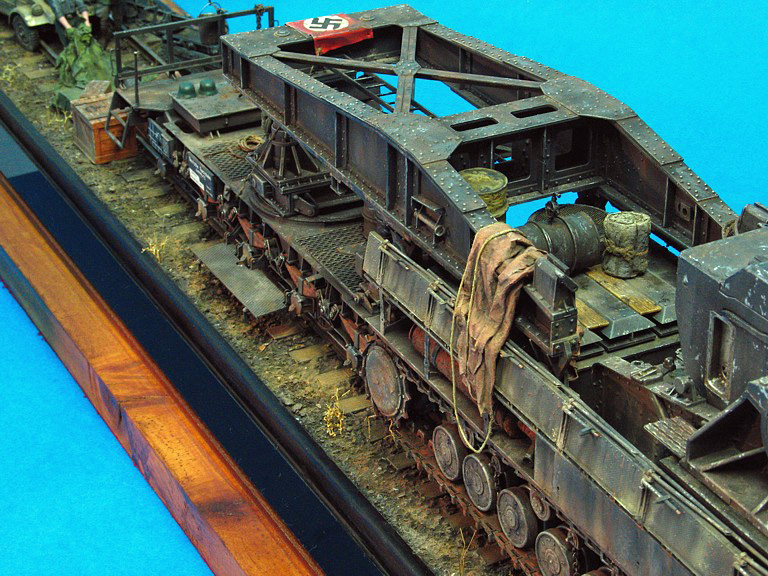
Basically, I wanted to display the Trumpeter model of the Karl 60cm Morser pretty much on its own, still mounted on the rail cars, as this was a new option that had not been offered with any models before. I wanted to make the model interesting without detracting from it or creating a large base, so I settled on a theme that allowed lots of small details that would hopefully enhance what can very easily become a very big , boring piece of grey machinery. I wanted the beast to have seen some action and wear and tear but be in a dusty setting on the Eastern Front. My references show dusty and dirty machines that collected lots of dust during firing due to the violence of the recoil raising dust clouds during the warmer months. According to my references 7 of these machines were built, but only 6 saw combat and the actual vehicle I have depicted is #4, Thor. All vehicles were produced between January and August 1941 and during the opening phase of Barbarossa , vehicles 3 and 4 were in operation together in the Lemberg area. Battery no4 next saw action at Sevastopol in 1942, against the heavy Bunker Maxim Gorki. This is where I come in, as my fictional scene is set after the Sevastopol action with the No4 Battery on route to its next destination possibly a refit to its later form as a longer barreled 54cm in Tri-color camouflage. I hesitate to call this a diorama as I look at it as a display of a Karl Geraet with various details happening to allow a more interesting model and provide weathering opportunities, as well as a longevity of interest for viewing the piece. Please keep in mind that this is but a section of a situation and further detail such as more crew , field kitchens, and the rest of the baggage train would be found just a few more steps to the right or maybe another 100 yards back down the line.SETTING
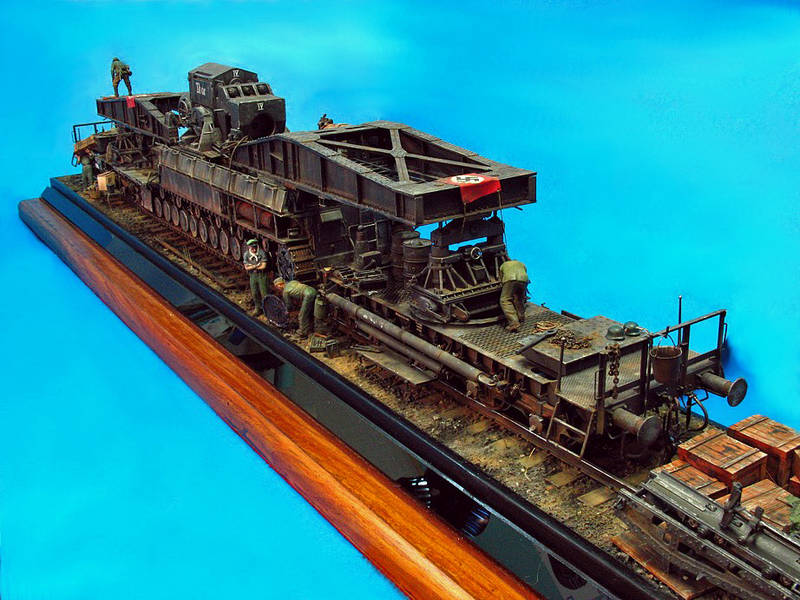
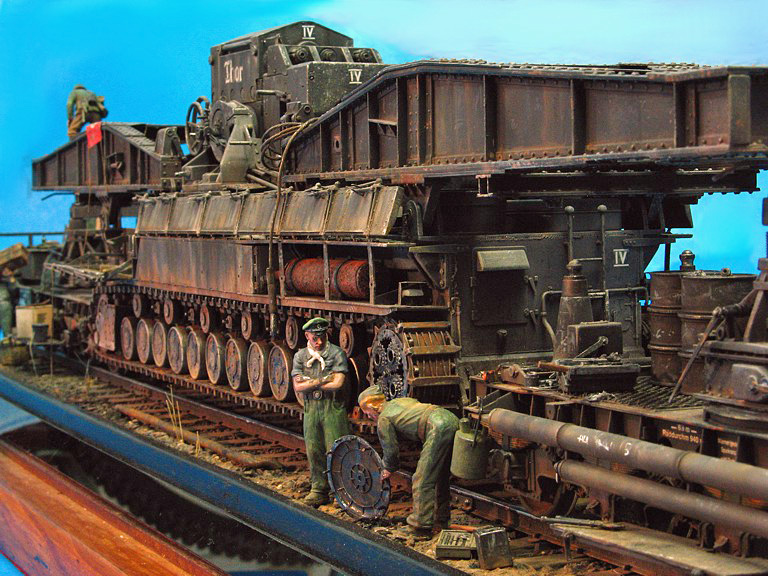
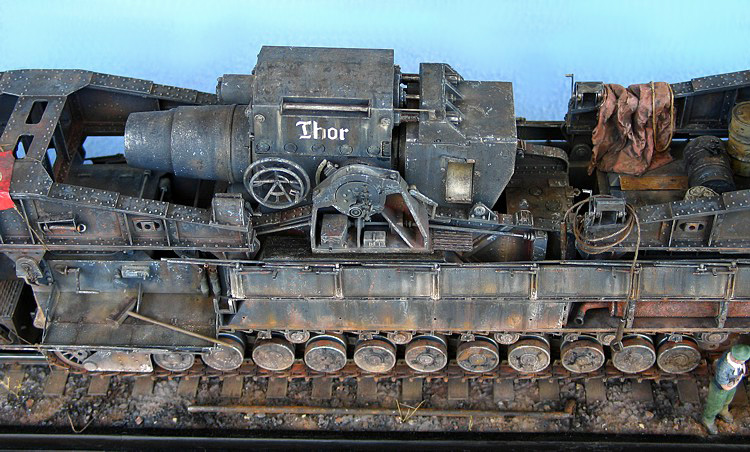
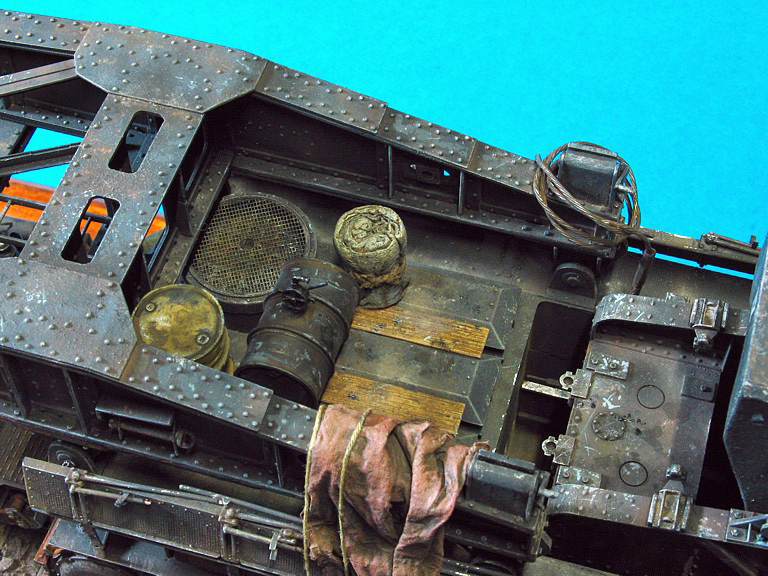
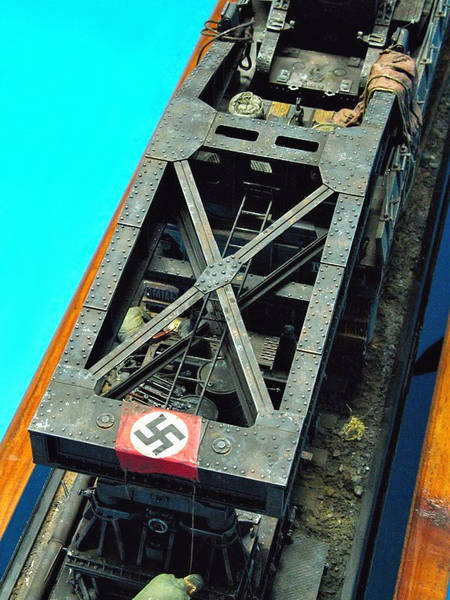
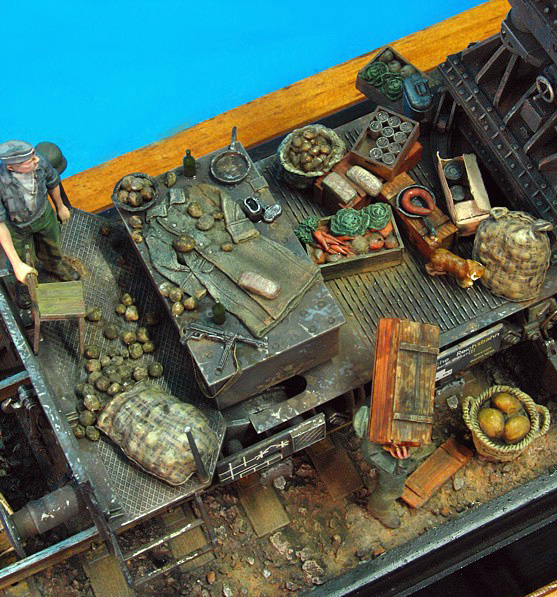
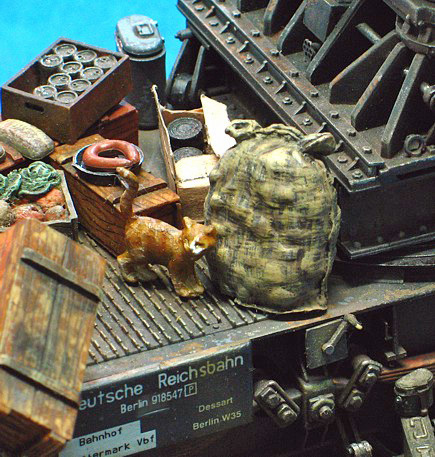
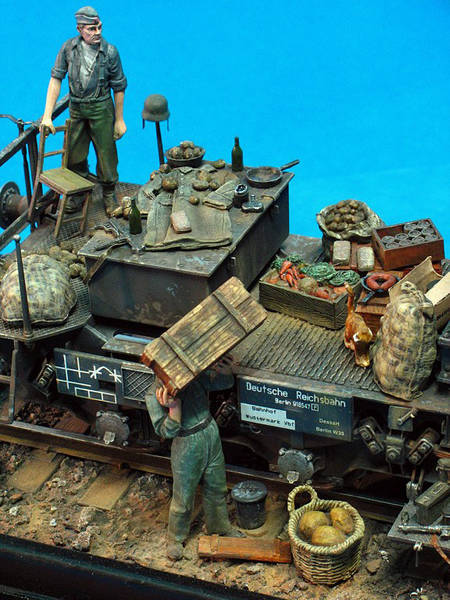
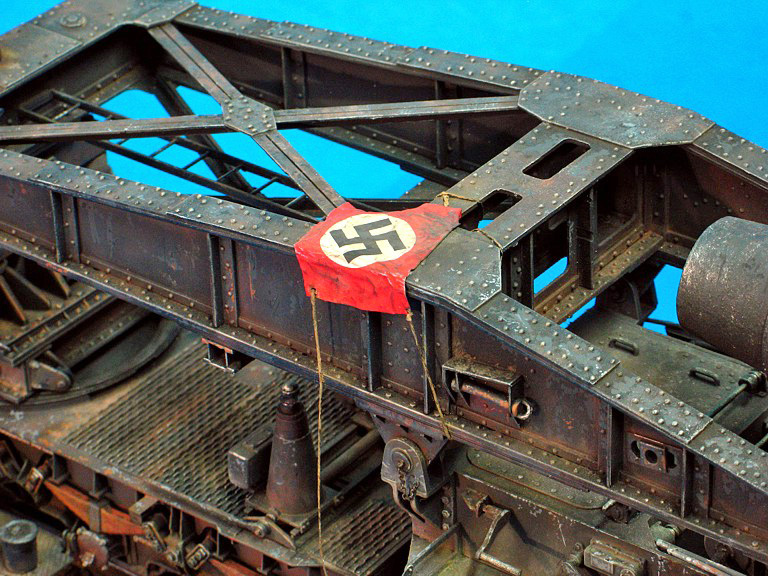
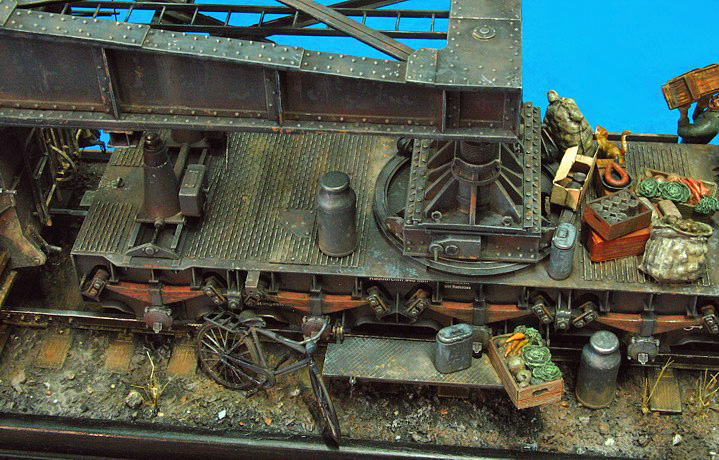
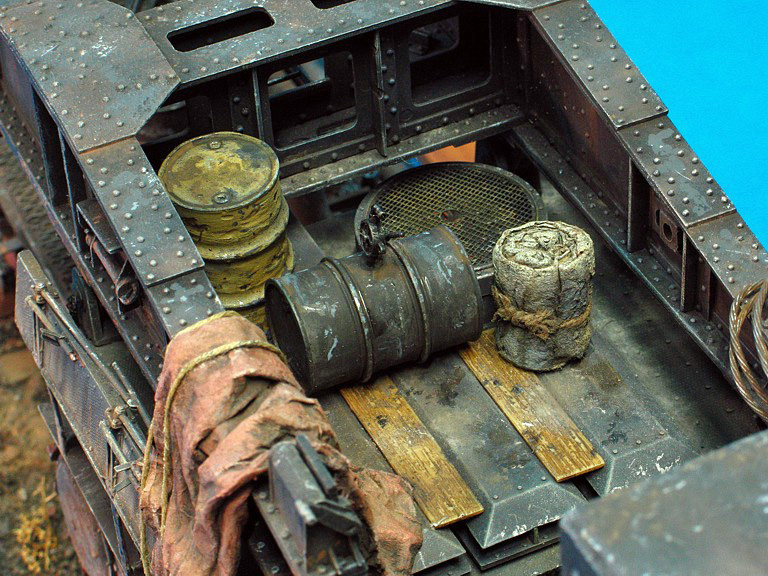
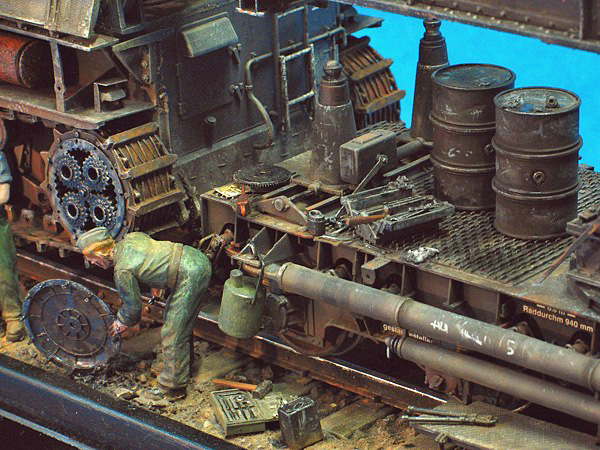
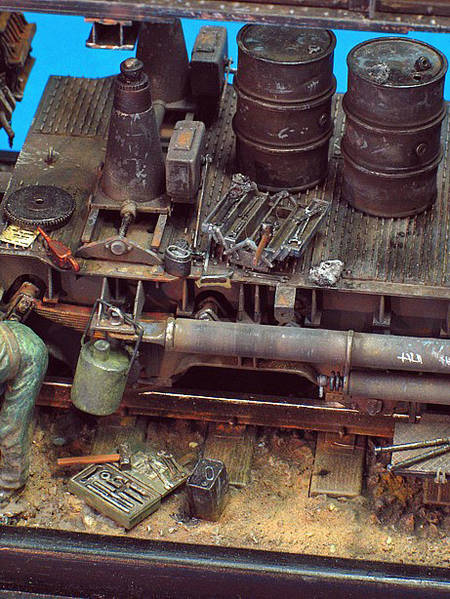
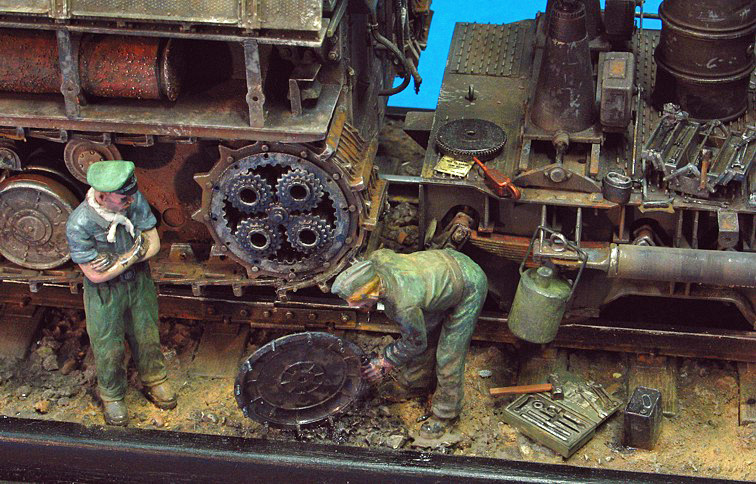
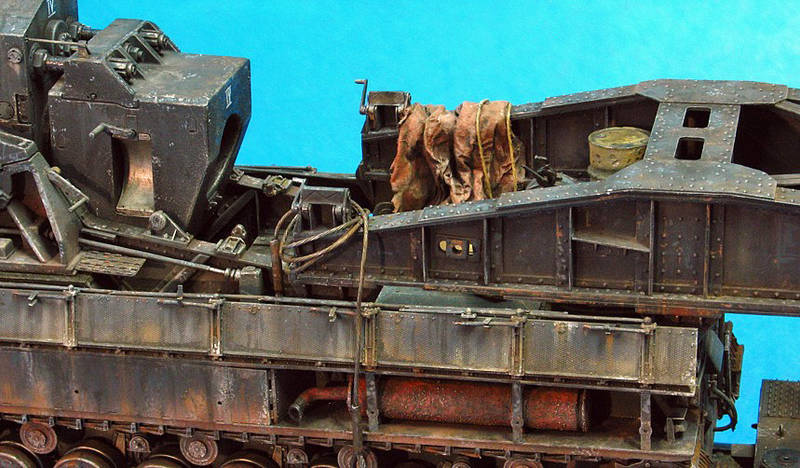
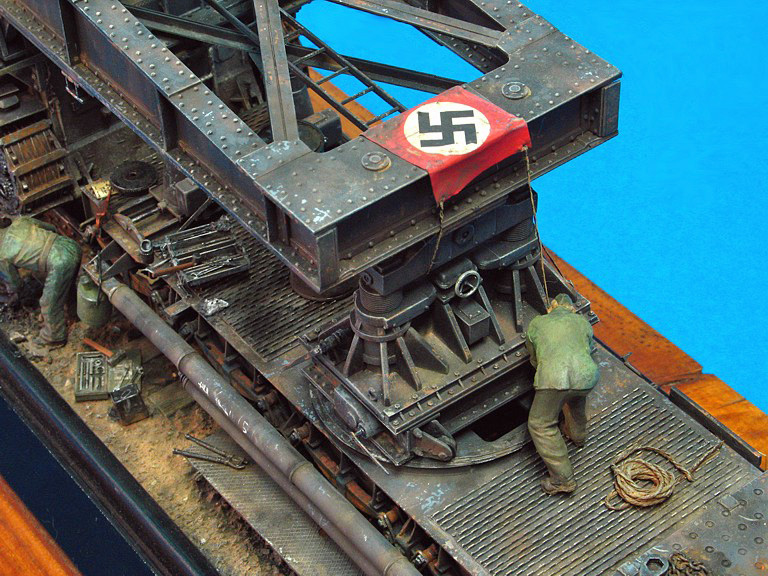
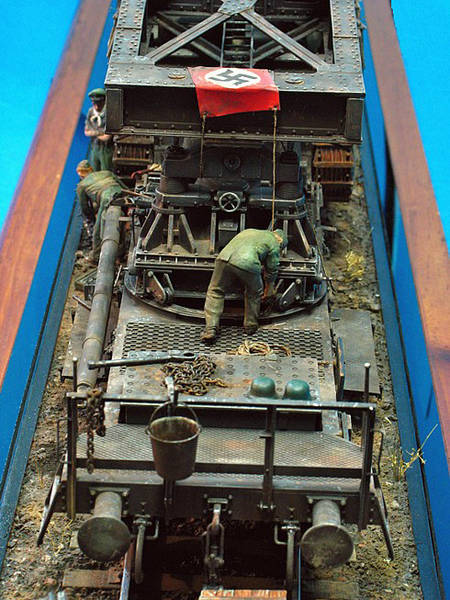
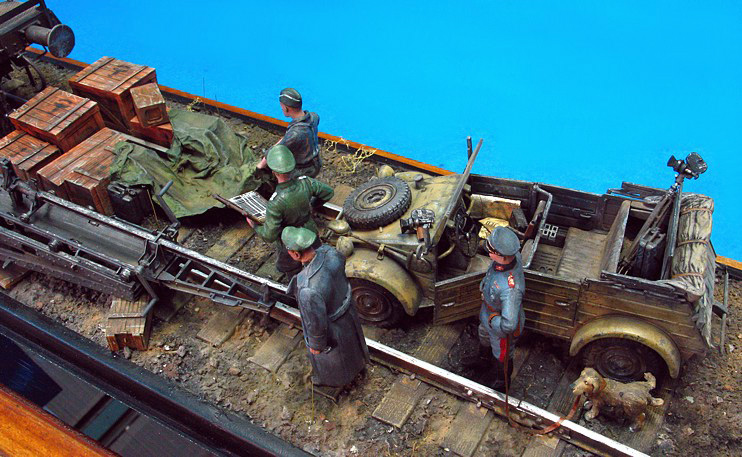
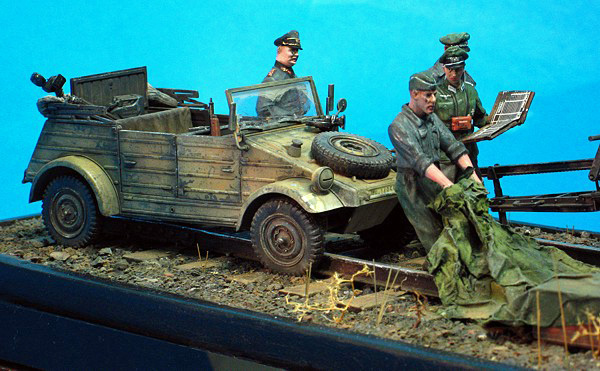
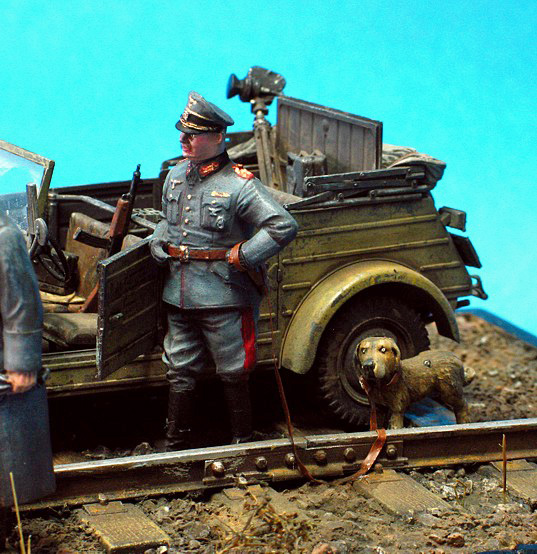
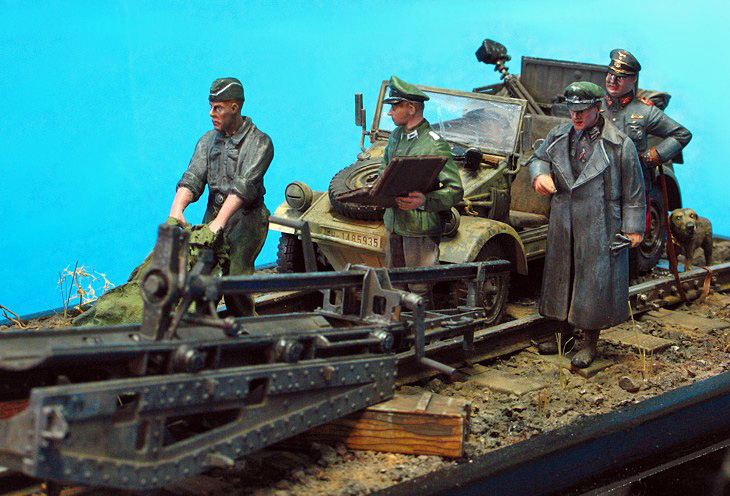
The Karl itself is weathered with a recent combat history in mind and the hot dry Russian summer of 1942. As far as I can tell, the Thor Battery made its way back to Germany after Sevastopol, to be refitted and re-sprayed. I have set my display to be at a time during this journey, but only a week at the most, after the Sevastopol operation. The weather/ environment has left its recent mark on this massive vehicle and the crew have stopped somewhere on the Eastern front to allow a Propaganda photo shoot for Der Spiegel. A couple of Staff officers have come along to witness this engineering wonder dismount from the rails for the camera and some of the crew are desperately trying to get a small feast prepared for the visitors before the event. A young private pulls back the tarp on some extra supplies that have been forwarded to the unit as a gift for making a special effort and allowing the visiting staff officers their own private show. Two other support mechanics check a drive wheel, as it was making some noise on its last journey back to the train. A bike has been left propped against the side of the train as one of the engineer/ cooks arrives back from a quick trip to the field kitchen, further down the long Baggage train of support crew that this vehicle requires. Swastikas serve as Air recognition flags for a Luftwaffe dominated sky at this stage of the war. The Kubel wagon has been over-sprayed in the new Dark Yellow, as has been a fuel drum and a jerry can used for starting the field stove. By the later half of 1942 the Eastern front was starting to see a large mix of grey and yellow with the Yellow becoming more common even before the official change-over order in 1943. A noted case of this being the platoon of Stug Fs supplied to the 24 Panzer Division in Stalingrad in Sept '42 that were base coated from the factory in Dark yellow, even at this early stage. Fuel barrels are at the ready on the rear deck of the Karl and the tarp for the main gun has been removed and hung over the side of the gantry for the time being. First some lunch and then the show will begin.KIT MODIFICATIONS
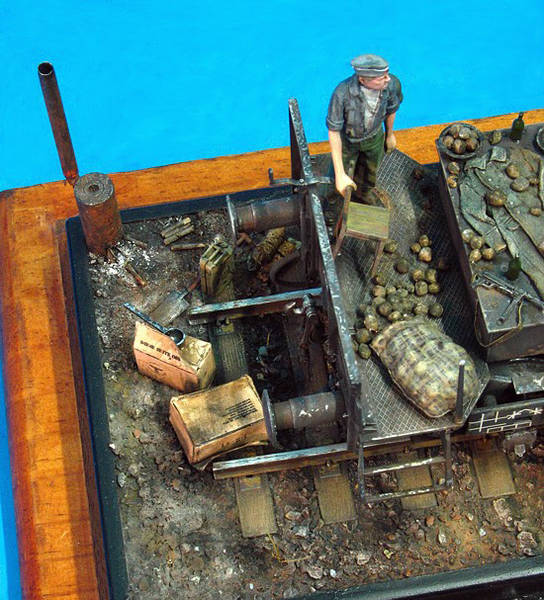
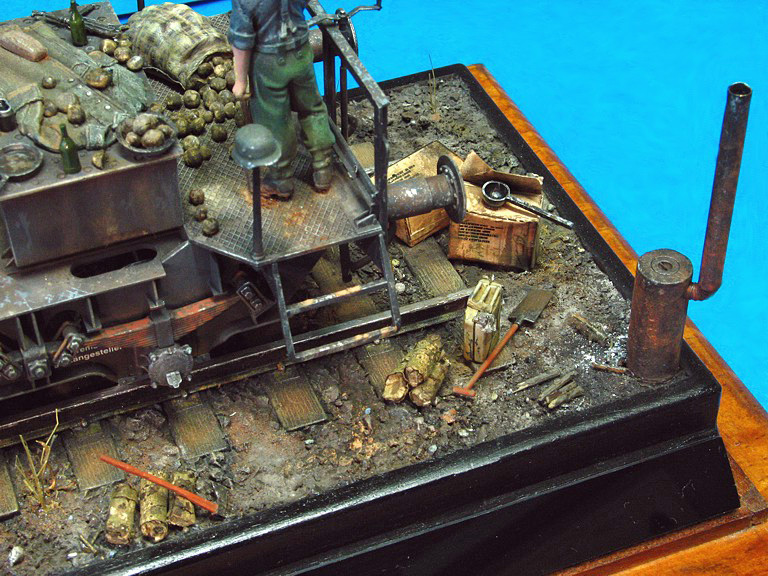
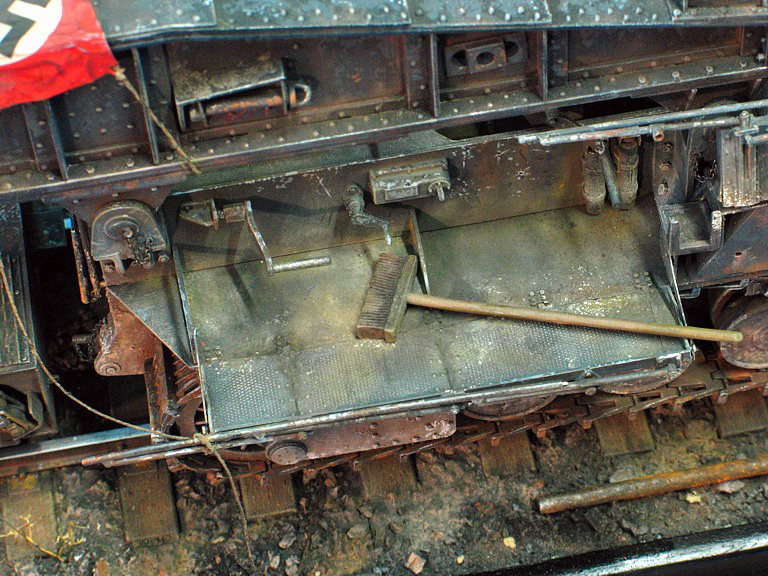
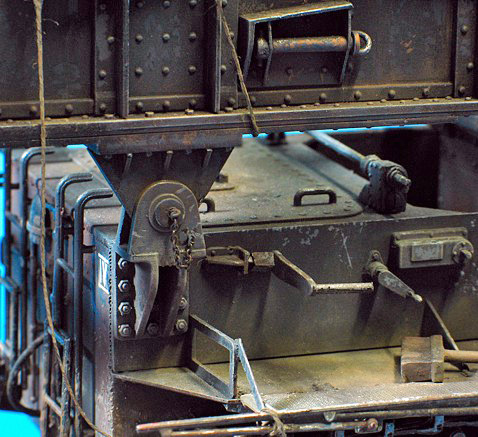
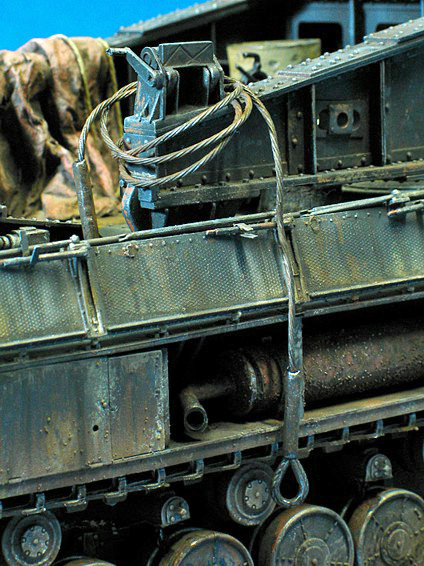
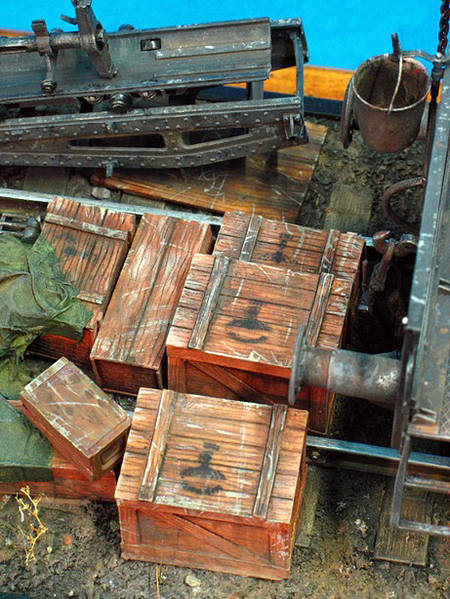
I built the Trumpeter Kit with only a few modifications from the basic build. The kit provides some very nice , accurate detail with a number of options; a very high quality model so I did not need to do much. I added the following details: 1) chains to the securing pins at each end of the vehicle 2) track securing chains x 10 to both sets of tracks 3) casting texture to the upper gun mantlet block 4) texture to the barrel sleeve 5) bolt shafts to the removed drive wheel hub 6) brass tool clamps to replace plastic kit versions molded to the tools and modified the tools to take off the molded clamps. I placed the exhaust pipes on the track next to the vehicle, so as to add a bit more detail. These vehicles used wooden planks placed next to the tracks, to aid dismount, but my scene is set before these are in place basically because I did not want to hide the tracks anymore than necessary. I also placed the loading tray in the scene to add to the detail and to utilize this nicely detailed assembly. These were added to the vehicle rear deck at some stage after the dismount but I wanted mine next to the track to display it. They were winched up on to the back deck by a crane mounted on a modified MK4 chassis, which also doubled as a loader called a Fahrgestell. The tracks for this vehicle were very difficult to apply as they were in molded stiff rubber. I would recommend the Friulmodel tracks as they are metal and hang with a realistic look naturally which is very hard to achieve with the rubber and glue. I created the grass strands from the hairs of an old paint brush, trimming them at different lengths and melting the ends of some to create buds or flowers. Tarps were created from tissue paper cut and folded then dipped in a mix of white glue, water and detergent. I added scratches to the wooden boxes as well as army eagle stamps using a Verlinden Template from set No1286. The box lid that sits under the loading cradle was scratched up as though the cradle had been moved while on it. The potatoes were all hand-made rolled from modeling clay then stained and painted with oils and finished with pigments. The supplies came from just about every set you can think of from resin to plastic. The bike is from Tamiya which I added a brass top bar frame to because I snapped the original modifying the direction of the handle bars. Weapons also had their straps added. This was a great kit to build and I highly recommend it to anyone looking for a break from the familiar armor subjects. Its not as daunting as you think and Trumpeter have done a fine job with fit and instructions.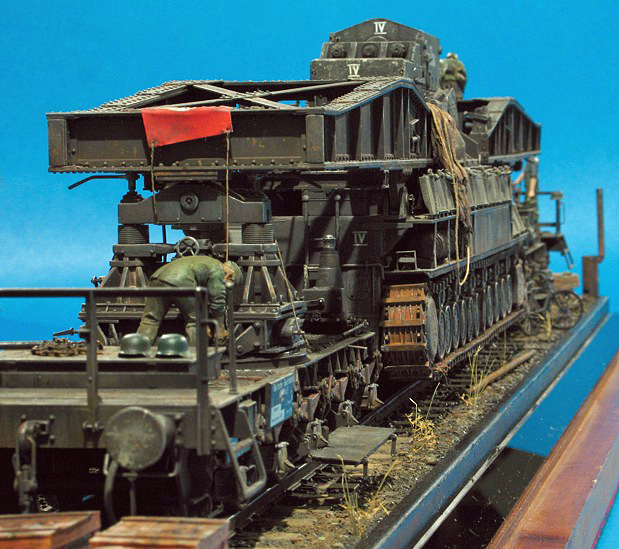


About the Author


FROM: VICTORIA, AUSTRALIA
Whatever project I find myself doing I always try to create something a little 'left' of the typical. I use modelling to add a 3rd dimension to my painting of pictures. Please visit my website at threedbattleart.com
Comments
A fantastic work! So much action going on in such a tight scene! Very well done, in building AND with the motive!
OCT 14, 2007 - 11:48 PM

WOW, an excellent scene. I love the way you've planned the dio around a story, therefore all the extra touches really compliment the finished peice.
A LOT of inspiration for my upcoming panzerjagerwagen dio here for sure!
Great work well done.
James
OCT 15, 2007 - 04:09 AM

Looks like everyone already said it, but I am going to as well. Great job!!
The details are what make every kit and yours certianly did. Thank you for sharing!!
OCT 15, 2007 - 06:57 AM
I've seen some stunning builds on this site - but out of all of them, this has to be my personal favourite so far.
Superb stuff.
OCT 16, 2007 - 10:21 AM

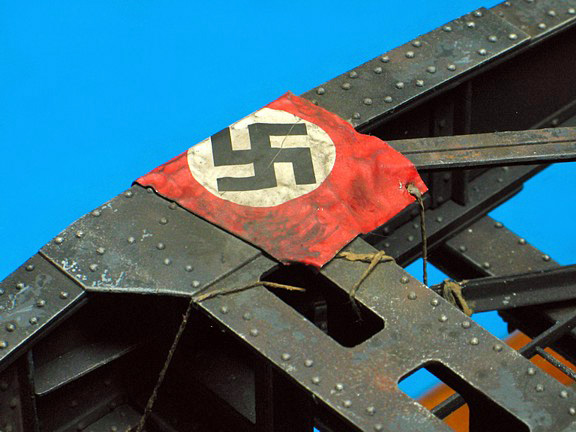
Dung,
thank you. The flags were done with a set from Archer - dry transfers - set no ar35008. These are applied to a thin metal foil and moulded to the contour you wish. They come out double-sided by putting the foil in between two dry decals. Clear instructions are provided with the set. Highly recomended.
And thanks again to everybody for the interest shown and the great feedback - much appreciated.
OCT 17, 2007 - 01:04 AM
Unbelievable! The amount of work and detail is just mind-boggling! I;m truly impressed!
OCT 17, 2007 - 07:02 AM

Outstanding work! This dio is one I would very much like to see up close and personal, so to speak, because everytime I go through the photos I find new and interesting things I missed on the previous pass...
OCT 17, 2007 - 07:42 AM


I was wondering when we were going to see another one of your dioramas...and boy did you deliver here! truly inspirational!!
OCT 21, 2007 - 04:00 AM

Those boys had better be cookin up somthing special for all that Brass. I have looked at this so many times my mouse is worn out. Thanks so much for sharing what an amazing job all around.
OCT 31, 2007 - 07:52 AM
Copyright ©2021 by Ian Hill. Images and/or videos also by copyright holder unless otherwise noted. The views and opinions expressed herein are solely the views and opinions of the authors and/or contributors to this Web site and do not necessarily represent the views and/or opinions of Armorama, KitMaker Network, or Silver Star Enterrpises. All rights reserved. Originally published on: 2007-10-12 00:00:00. Unique Reads: 25068

WEB HOSTING BY


Copyright ©2021 Armorama and Kitmaker Network, a subsidiary of Silver Star Enterprises
All Rights Reserved. Please read our Conditions of Use and Privacy Policy.
All Rights Reserved. Please read our Conditions of Use and Privacy Policy.