

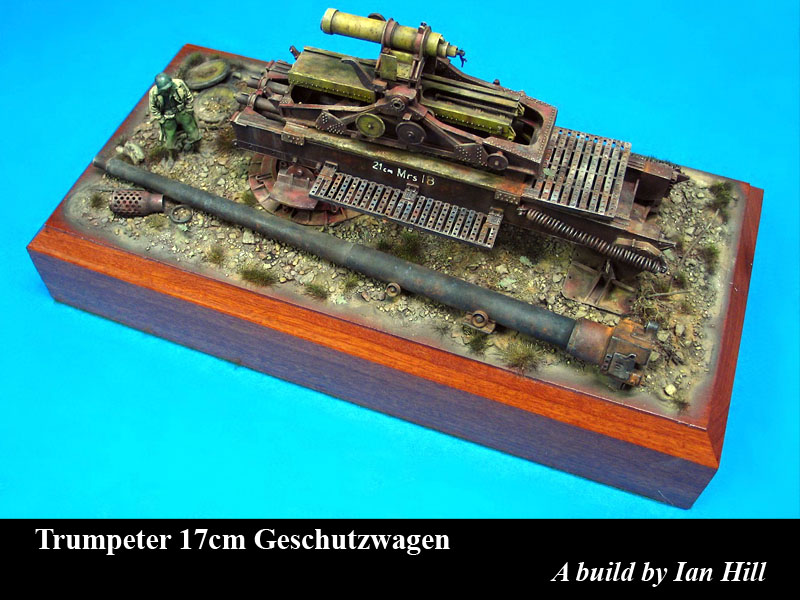
1⁄35Trumpeter 17cm Geschutzwagen
9
Comments
Introduction
Trumpeter 17cm Geschutzwagen (GERAT 809) PART 1 - THE CRADLE SCENE In Purchasing the Trumpeter 17cm Geschutzwagen (GERAT 809) it was always with the intention of building the partly unassembled Gun cradle and Prototype Chassis, found in separate locations at Kruppe (by the Americans) in 1945. As I did not want to waste the detail provided in the kit [let alone the fact that the 2 sub assemblies are about 50 % each], I decided to create 2 separate scenes rather than just do one or the other. The first was the barrel and cradle scene, as found outside on the grounds of the area (Photo 1). I had to use some artistic license with this scene and depict the barrel closer to the cradle, as it would have required a much larger base.CONSTRUCTION
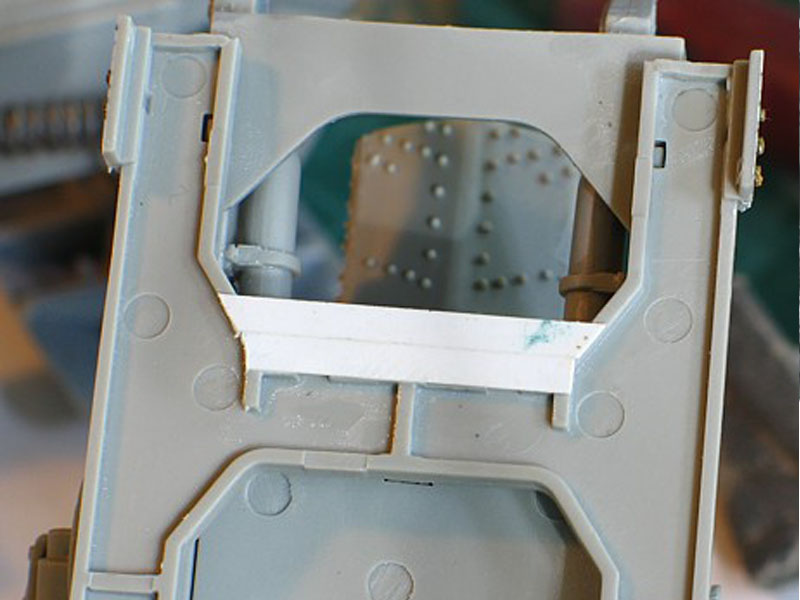
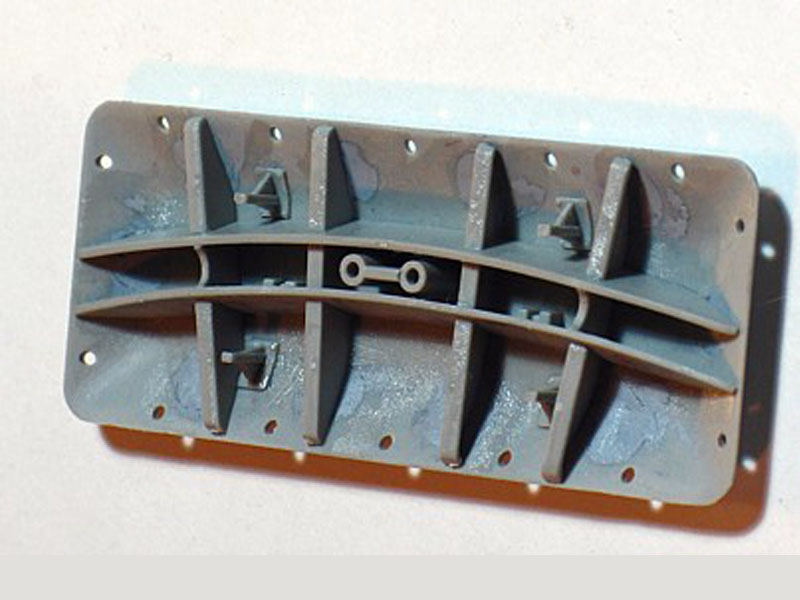
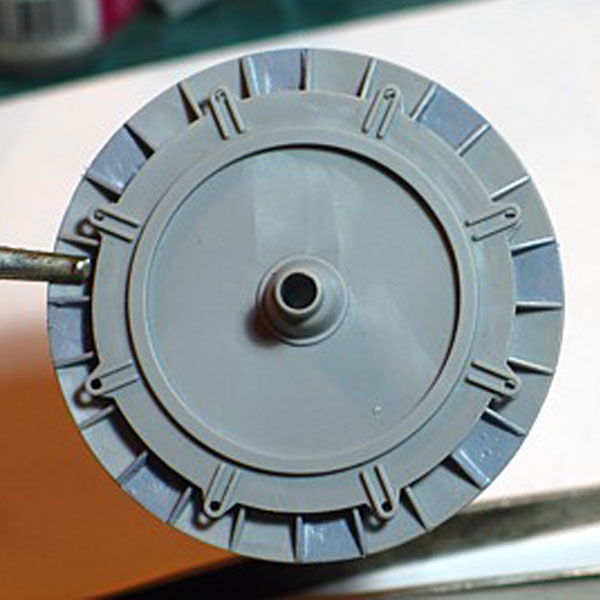
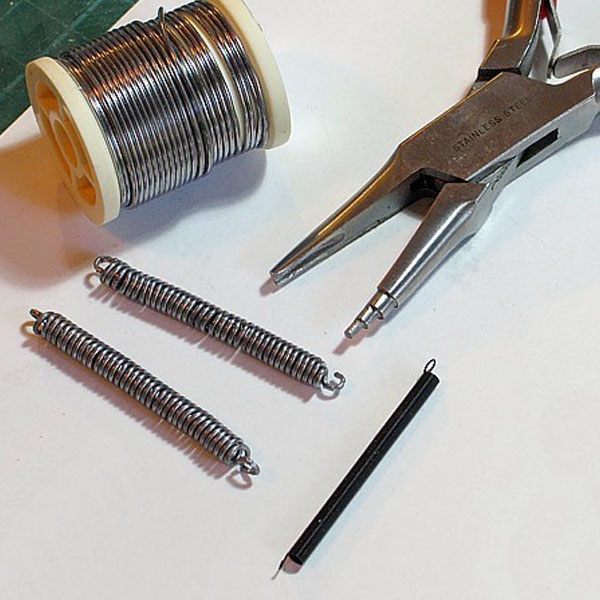
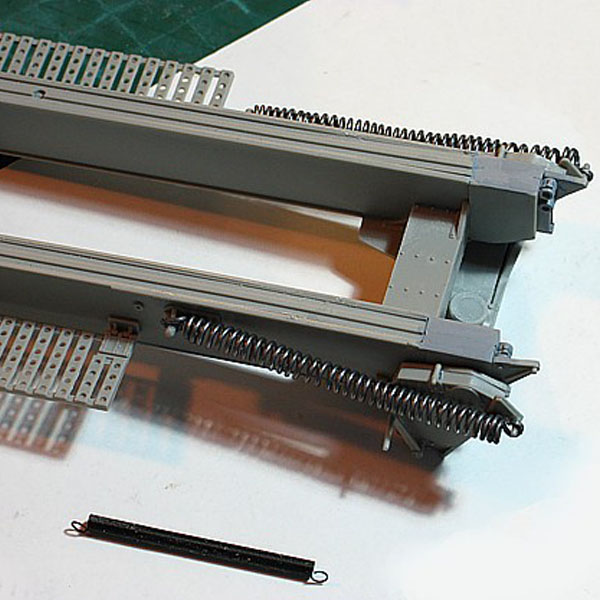
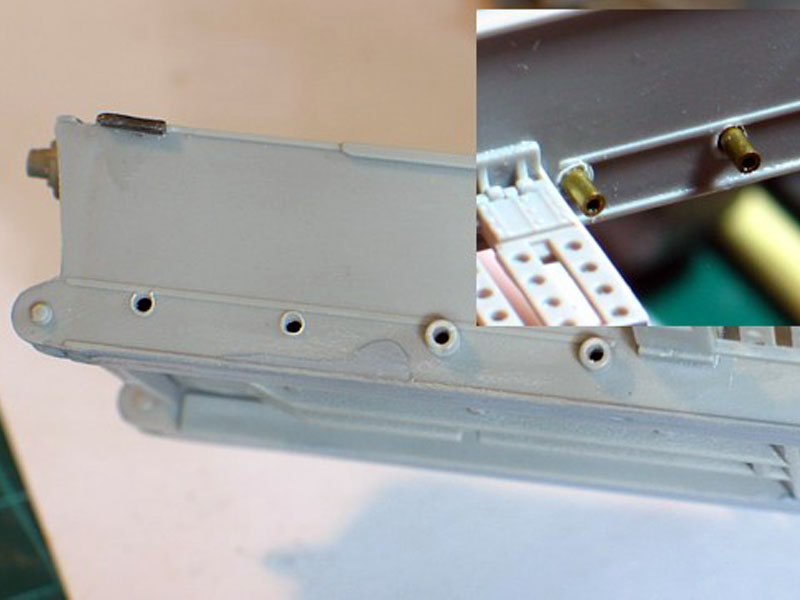
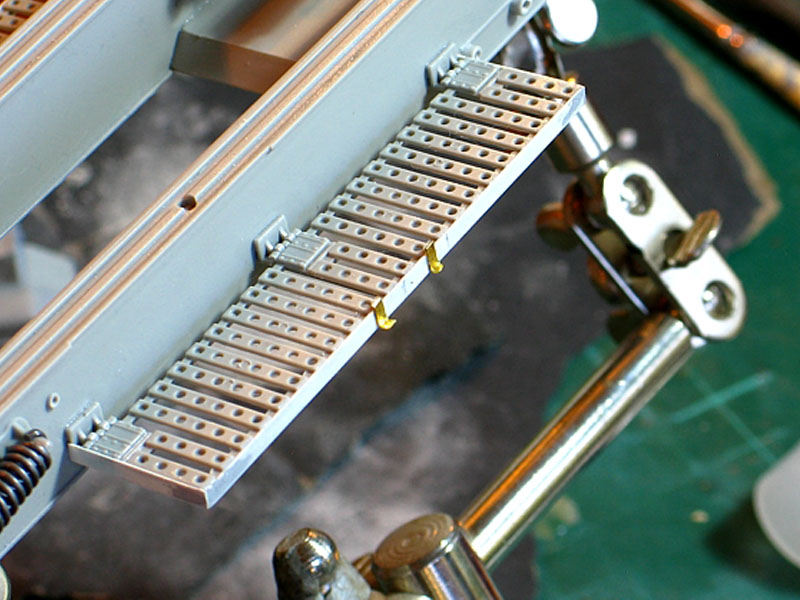
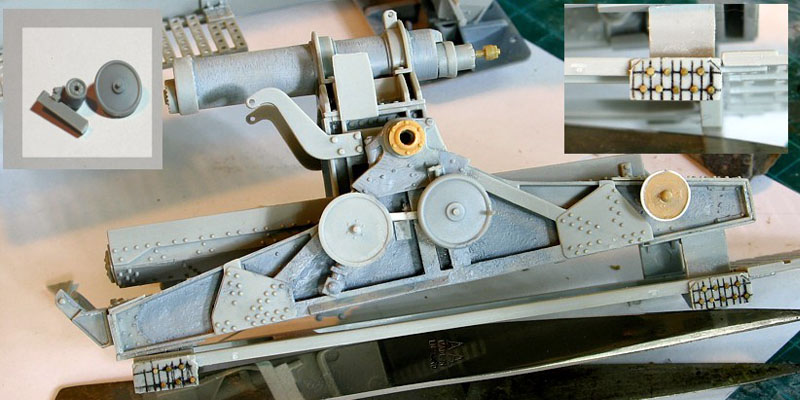
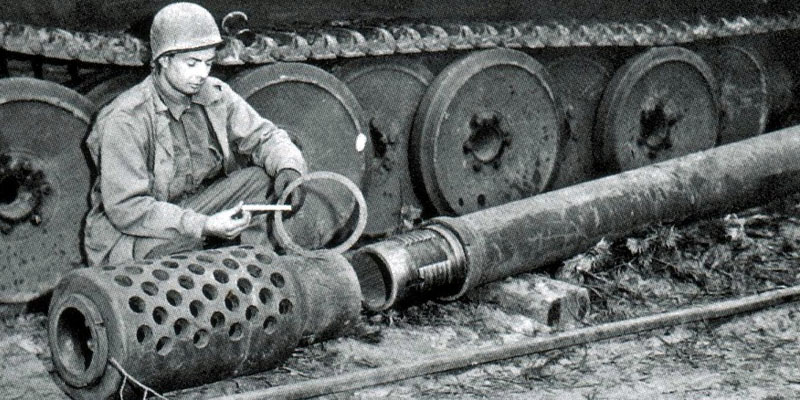
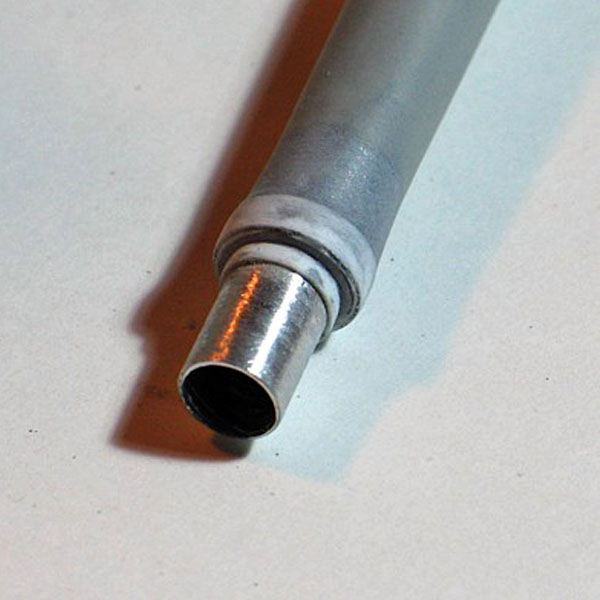
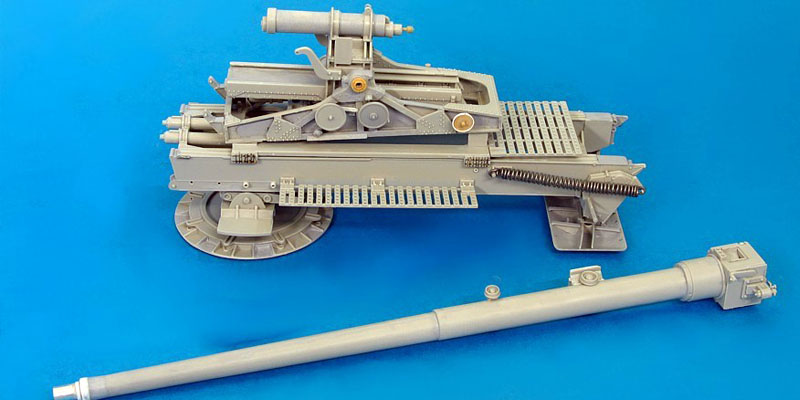
The support platform and pivot base are nicely moulded but the support platform needs some filing of 'flash' between the grates. I also had to add some plastic card to extend the end of the front of the platform because on test fitting I discovered that the recoil re-corporators did not reach the platform, a simple fudge that fills the gap for close observers (Photo 2). The pivot base was next and this has pin marks that need cleaning up as well. I used my file and followed with some Mr Surfacer 500 (Photo 3). Next was the rear pivot base and this was a little more tricky. This actually fitted very well and was reasonably intricate. Watch for the angle as the instructions are a bit vague. The shape of the cross members is completely different to the photo of the found one but without more reference I left it alone (Photo 4). After finishing the rear pivot base, I built the support for it. This assembly is not a great fit and requires a bit of filling and sanding to finish. The large springs at the rear of the Cradle frame were the next feature. The springs were too small and the coils not pronounced enough, as compared with the ones in the photo. I used a pair of loop making pliers for the re-making of the springs (Photo 5 & 6). I then drilled out the required holes in the sides of the platform, according to the photo and added bras tubes (Photo 7). The folding firing platforms attached to the sides of the cradle had a small side face added and some L shaped brackets that must have been for locking in travel mode (Photo 8). Both the bolts on the side mounting support and the traverse wheel mount were modified. I needed to add a wheel (taken from my Hummel kit) and move the mount for the traverse up and forward- according to the photo of the cradle. The bolts for the side mounting support were removed and the correct pattern added. I also took a couple of bolts off of the rear support structure side plates to match the pattern in the reference. The main photo shows the surface texture added to give it a more cast appearance. This also got rid of some very difficult pin marks. The inset photos show the mount I made for the extra wheel (from sprue) and the removed elevation ' sighting device as well as a close up of the new bolt pattern (Photo 9). The barrel support was straight forward and was one of the better fitting sub assemblies. The small locking pin I added to the rear of the recoil cylinder was later deleted and replaced with the more detailed handle lock moulded on to the top of the breach. I also added another smaller traverse wheel and a collar to the pivot point on both sides. These were modified panzer 4 idler wheels from Tamiya. The large Gerat 809 gun had the same muzzle brake as the E-1OO but the one provided in the kit is not correctly shaped. I modified the original with some scratch work to steepen the collar and add the distinctive ring at the front (Photo 10 + 11). The existing holes were also drilled out to make them more defined and get rid of the excess flash. I also added the sleeve to the barrel that the Muzzle brake fits over (photo 12). The barrel was built from the kit without any mods except for adding a flat piece of card for the bottom of the roller wheel plate and removing the locking handle and drilling out the hole. The overall finished construction without the muzzle break and brass tubes on the platform sides. (photo overall construction).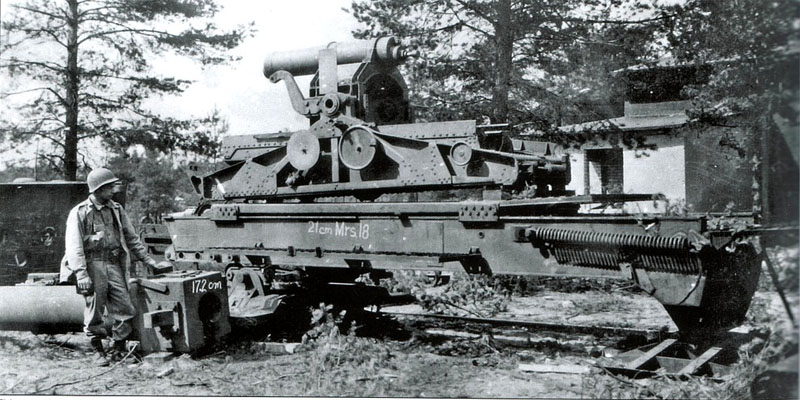

About the Author


FROM: VICTORIA, AUSTRALIA
Whatever project I find myself doing I always try to create something a little 'left' of the typical. I use modelling to add a 3rd dimension to my painting of pictures. Please visit my website at threedbattleart.com
Comments

Excellent modeling of a very interesting subject, Ian. Nicely done!
Rob
OCT 25, 2010 - 01:21 AM
Terrific job, Ian. Something a little bit different.
Really looking forward to seeing Part 2.
- Steve
OCT 25, 2010 - 02:24 AM

That is about the only way to do it, realistically. I saw a friend do the E-100, as found, by the British. Just the hull in a penned off area.
OCT 25, 2010 - 01:25 PM

Thanks for your comments Rob, Steve and Carl. Part 2 is virtually finished so I will send that in shortly. I am glad you like the approach of 2 seperate scenes as it certainly made the kit build a lot of fun.
Ian.
P.S. Carl, i have already been considering an E100 in the factory as I have a photo or 5 of this scene.
OCT 26, 2010 - 02:21 PM
Nice idea about a factory scene. One of the panzerwrecks books shows many Maus hulls at a factory, in stacks.
OCT 27, 2010 - 01:03 PM


I always enjoy your dios, Ian. Your painting skills are first rate my friend. Keep them coming!
OCT 31, 2010 - 03:27 AM
Excellent work and a well chosen subject.
Of the beaten track, definitely!
Well done!
Guido
NOV 02, 2010 - 09:37 PM

Copyright ©2021 by Ian Hill. Images and/or videos also by copyright holder unless otherwise noted. The views and opinions expressed herein are solely the views and opinions of the authors and/or contributors to this Web site and do not necessarily represent the views and/or opinions of Armorama, KitMaker Network, or Silver Star Enterrpises. All rights reserved. Originally published on: 2010-10-25 00:00:00. Unique Reads: 20907

WEB HOSTING BY


Copyright ©2021 Armorama and Kitmaker Network, a subsidiary of Silver Star Enterprises
All Rights Reserved. Please read our Conditions of Use and Privacy Policy.
All Rights Reserved. Please read our Conditions of Use and Privacy Policy.