

1⁄35Dragon Armoured Jeep Build Review
8
Comments

Welcome back to Andy Renshaw who gave us an in-box review of Dragons Armoured Jeep (aka Armored 1/4 Ton 4 x 4 Truck) last year and now returns with Part 2 to finish things off.
Building the Kit
I wont go into an exhaustive, step by step in stage 6 glue part B6 to A13 type build review, but instead give you some overall impressions and thoughts as I assembled and finished the model. I will also point out any modifications and corrections made beyond what is provided in the kit.Chassis
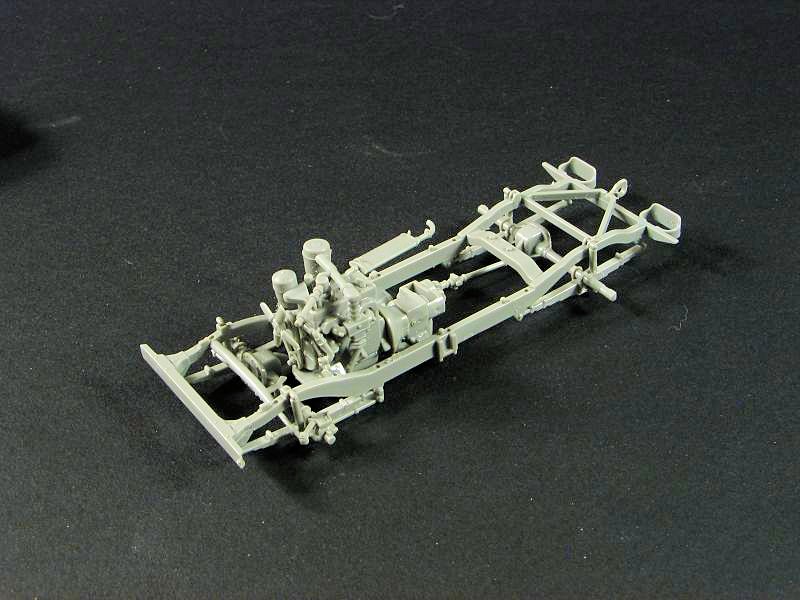
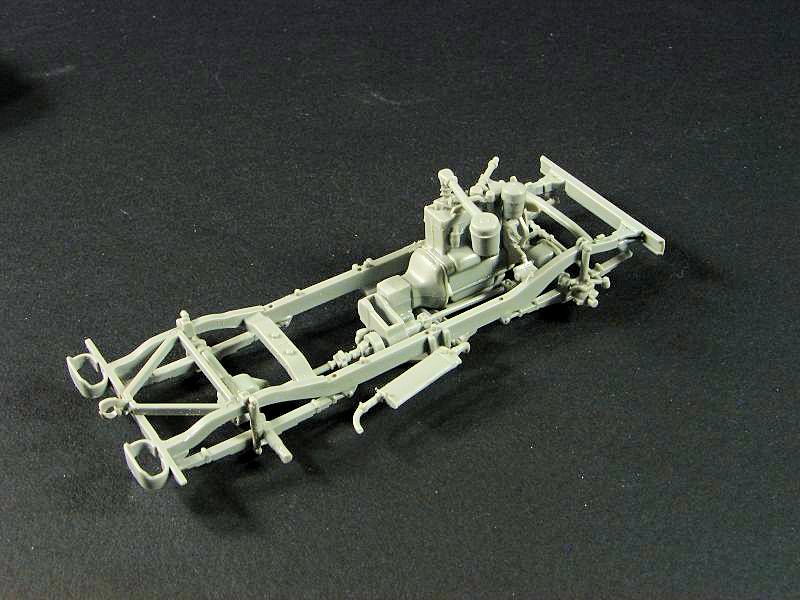
Kit construction starts with the wheels and chassis. The wheels are an easy affair, and assemble much like the Tamiya ones, but with the added detail of a brake drum. The chassis goes together fairly easily, and I didnt run into any of the fit or alignment issues that seemed to plague the first Cyber-hobby release. I guess Dragon cleaned up and modified the molds for a better fit. The springs and axles assemble in a more realistic fashion (the axles rest on the springs) than the Tamiya kit (axles are pegged to the frame). The old Italeri kit was the same way, so just be sure to have a solid join between the axles and springs so that the axles dont pop off under the weight of the model, or, later on during construction. The emergency brake drum is the correct WW2-era type, while the one offered in the Tamiya kit is of the later post-war type thats found on most restorations. With these improvements, building the Dragon chassis takes much longer due to the smaller details and higher parts count. There are also some nasty mold seams on the front bumper which should be removed. One modification needed is to shorten the rear axle ends by about 1mm or so. If this is not done, the rear wheels will stick out a bit too far. Once you shorten the axle, you can extend the keyed notch on the axle so that the wheel will slide back enough, otherwise you could just make the corresponding hole in the wheel circular. The engine is a little jewel, and as mentioned in the original review, it would only need to have the generator added. I ignored that omission, and didnt add any other extra details this time around as I planned on building it with the bonnet secured down.Body
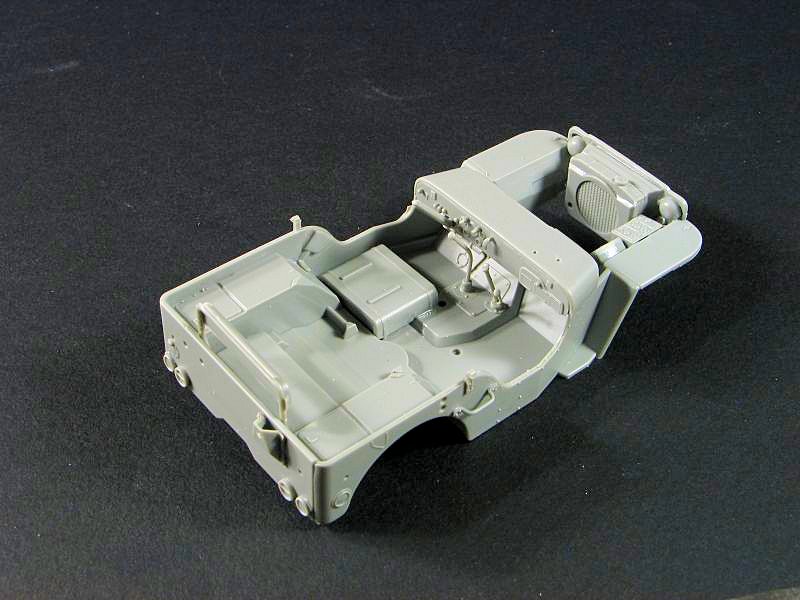
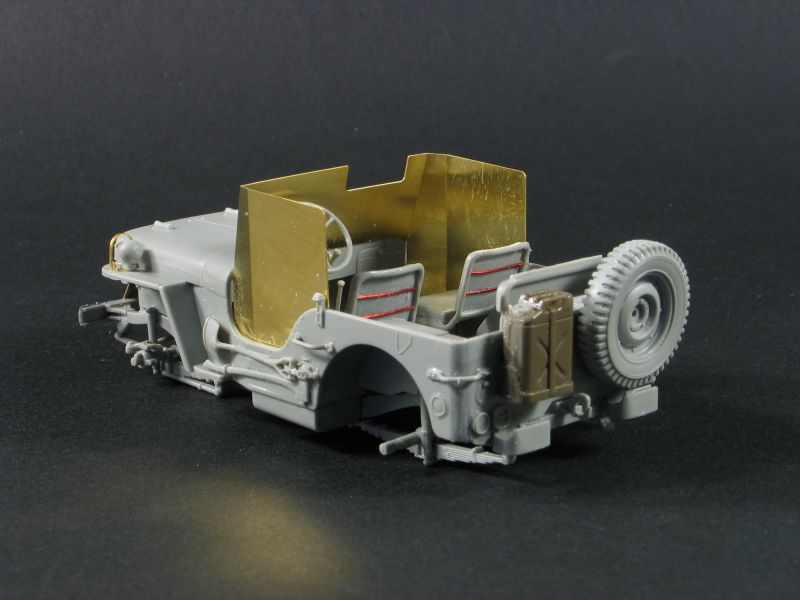
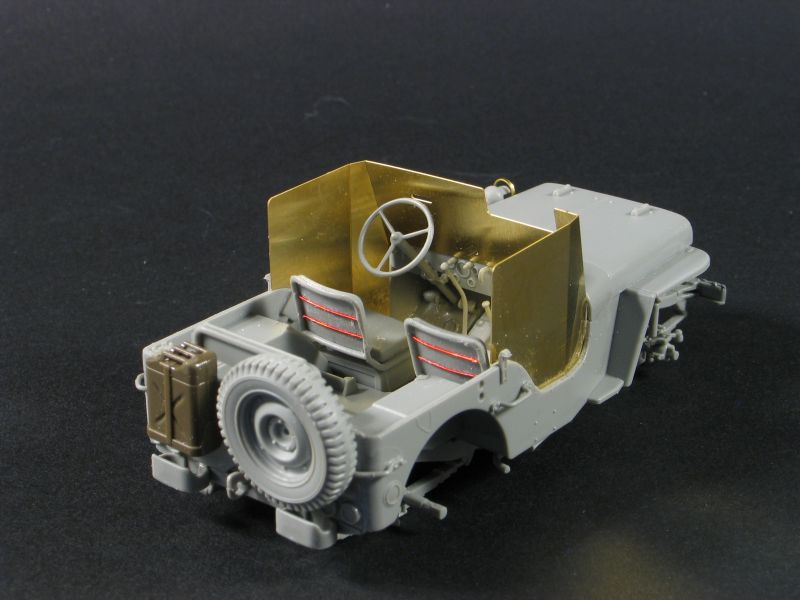
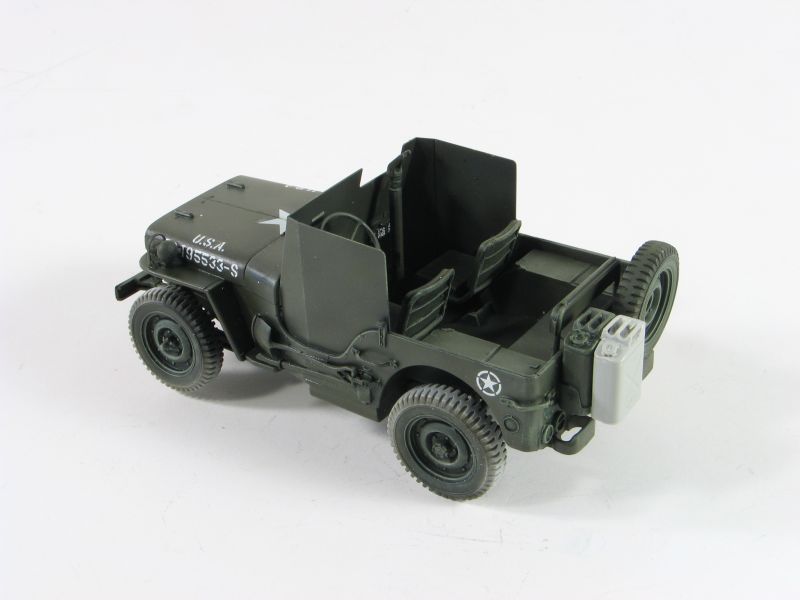
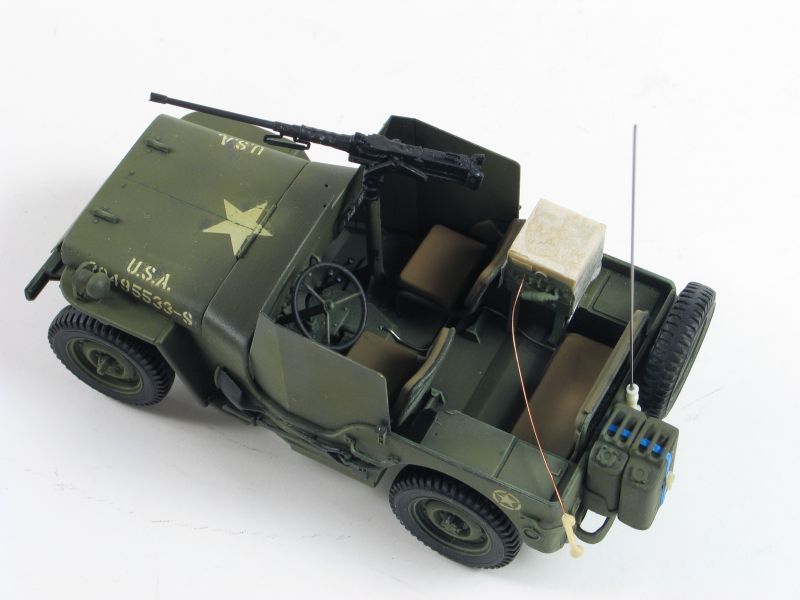
The body has a similar parts breakdown to the Tamiya kit, and assembles in much the same way. Before going too far, I pulled out the cylindrical grinding bit for the Dremel, and removed that offending additional bracing that runs along the floor and outer sidewalls on both the passenger and driver side. Still not sure what Dragon was thinking there! If you choose to ignore it, its not too bad for this release as the armored shields keep you from seeing too much. While you are cleaning up the parts, dont forget to fill the various mounting holes that are left overs from the SAS jeep, and remove the locating guides for the tilt and the others that are on the tool box lids. If you plan on building an earlier Jeep without a radio (such as the SAS version that uses the same mold), you should remove the four bolts that are on the outer side of the body, passenger side. These were the mounting bolts for a power terminal box for Jeeps equipped with a radio. The box would sit under the seat along the body side, and was added to MBs starting with serial number 217543 around March 1943. I did modify the seats. As mentioned in the in-box review, the braces behind the passenger and driver seats are greatly oversized. Luckily the seat cushions are separate from the frame, so before adding the upper cushions, I cut out the offending braces. Once the cushions are glued in place, I then replaced the braces with appropriately sized copper wire glued in place with ACC. A very simple fix that greatly improves the look of the seat backs! Another detail omitted in the kit is the body bracing directly under the dash board, on both the passenger and driver side. These are included in most aftermarket PE sets, so if you have some spares, add them if you wish, or make them up from scrap plastic. Of course, this can only be done IF you remove the molded square bracing mentioned above! While you are working in this area, add a fire extinguisher if you have one in the spares box (a Tamiya part maybe) on the drivers side, directly in front of the body bracing, and a decom bottle behind the passenger seat (a Tamiya part again). Enjoyable positives include the injected plastic straps for the shovel and ax, and the overall treatment of the instrument panel. Both of these items are up to the standards I would expect from a Dragon kit. A quick note on the steering wheel: the neutral (wheels forward) steering position could have the steering wheel mounted with a spoke centered either in the bottom half or the top half. I have seen period photos of the steering wheel in both positions!Armored shields and final details
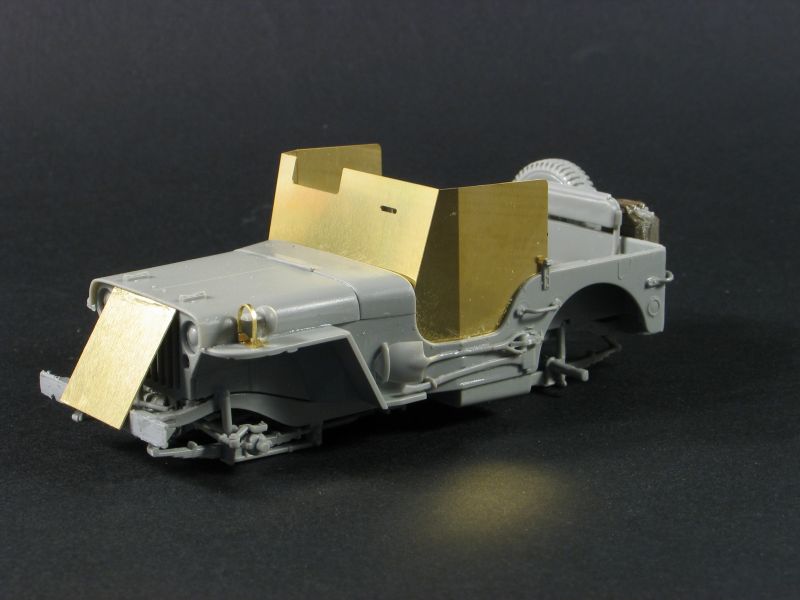
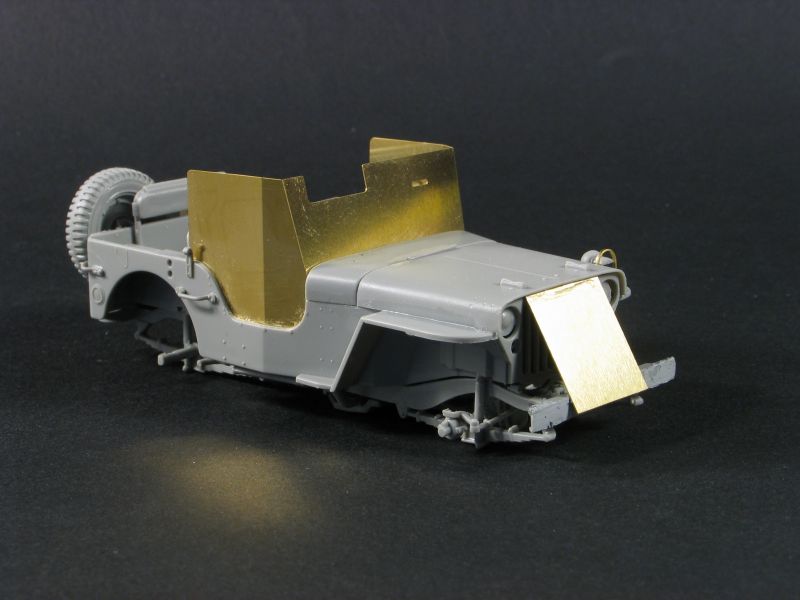
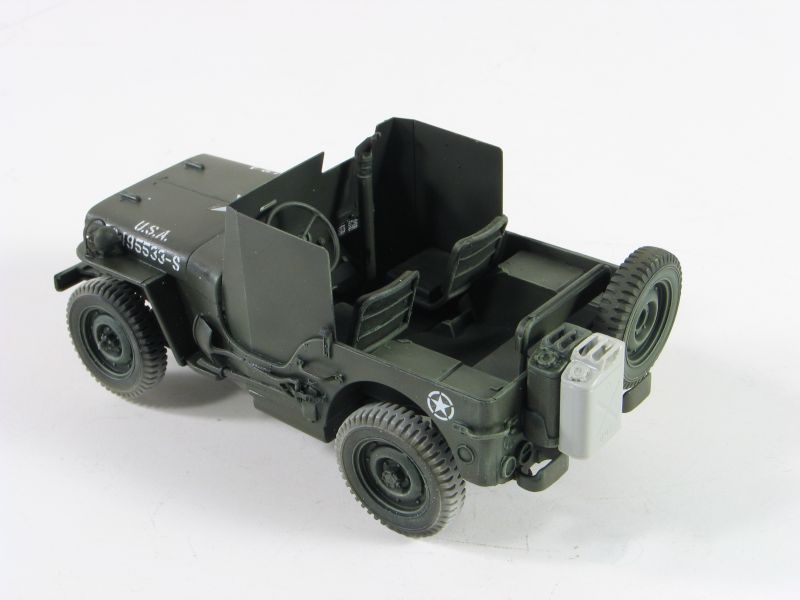
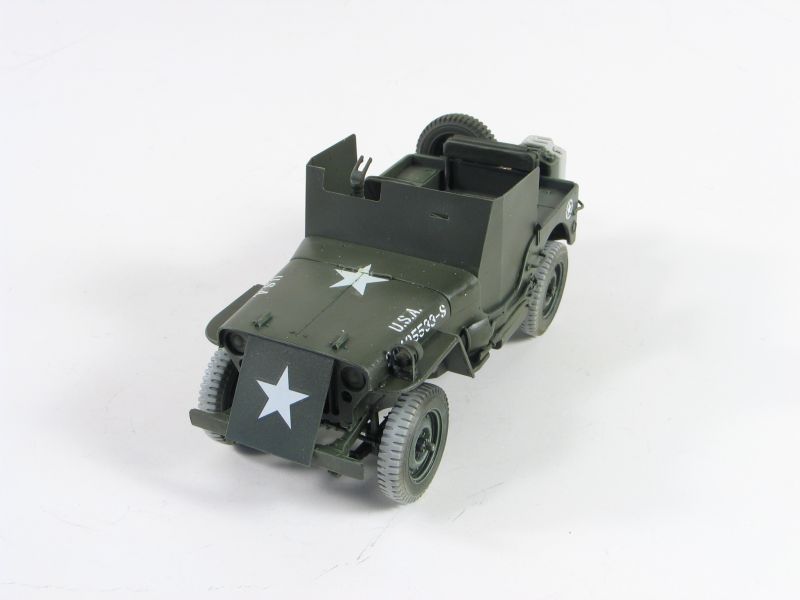
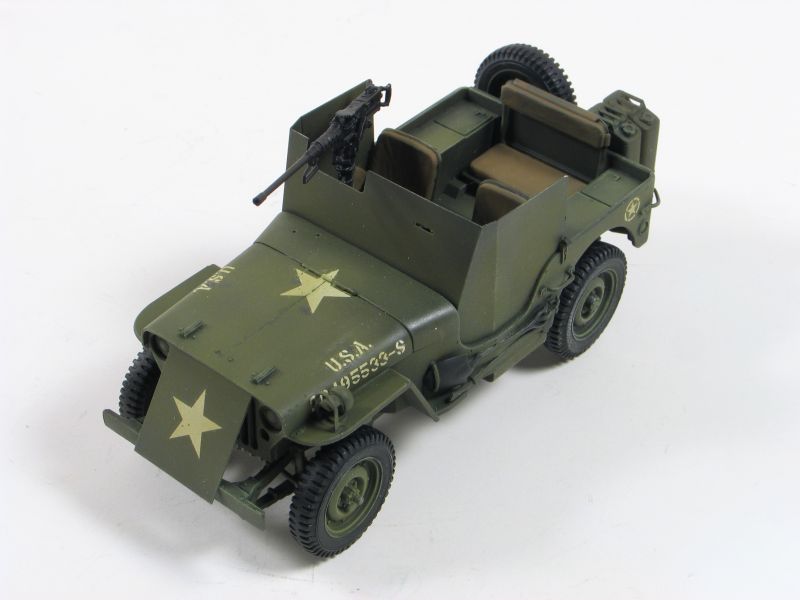
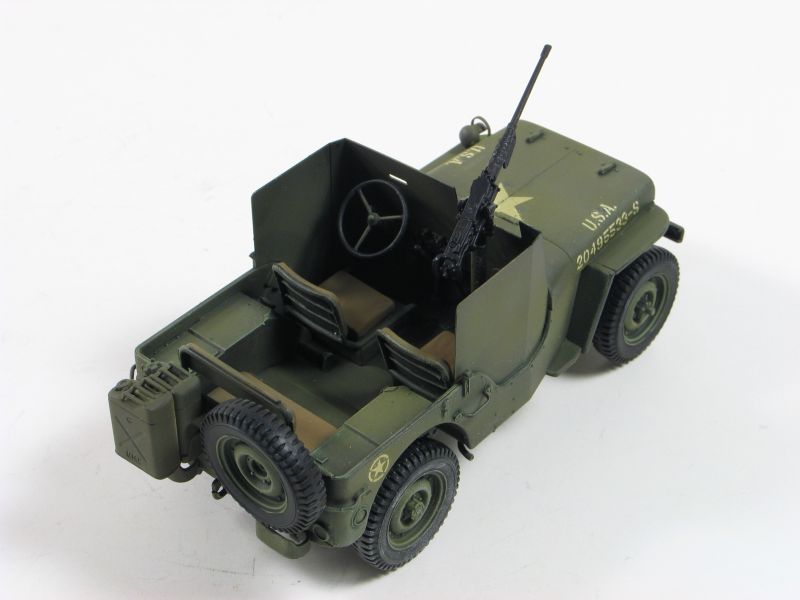
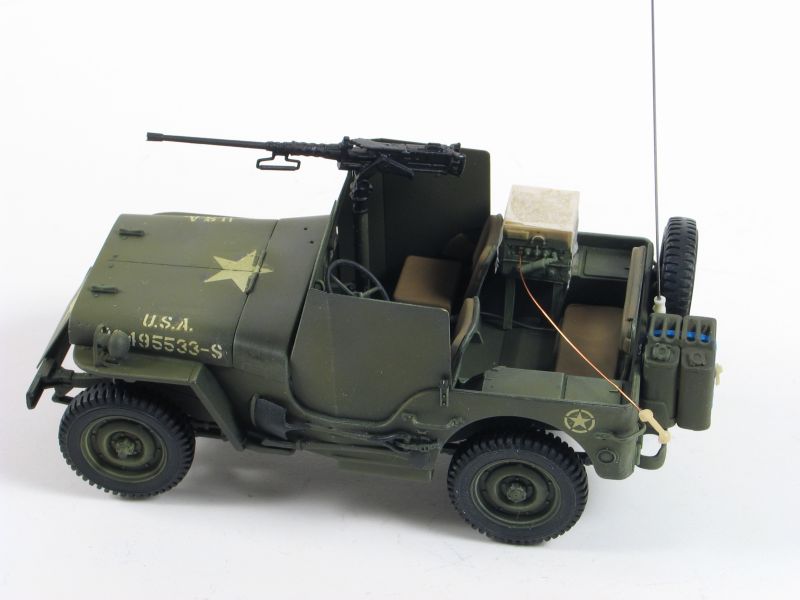
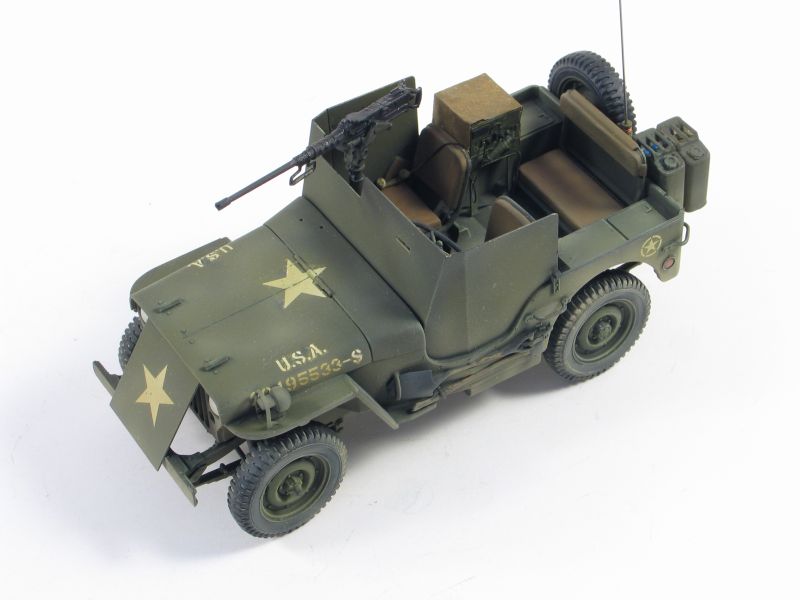
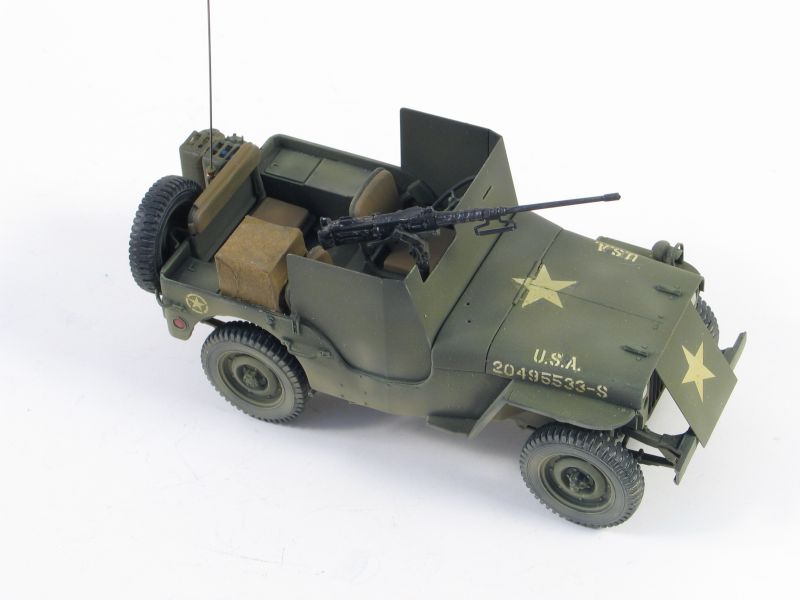
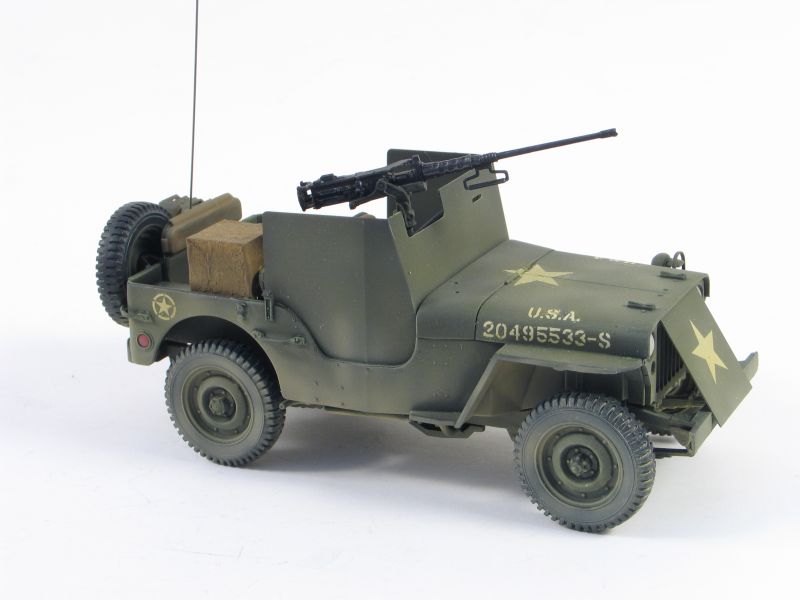
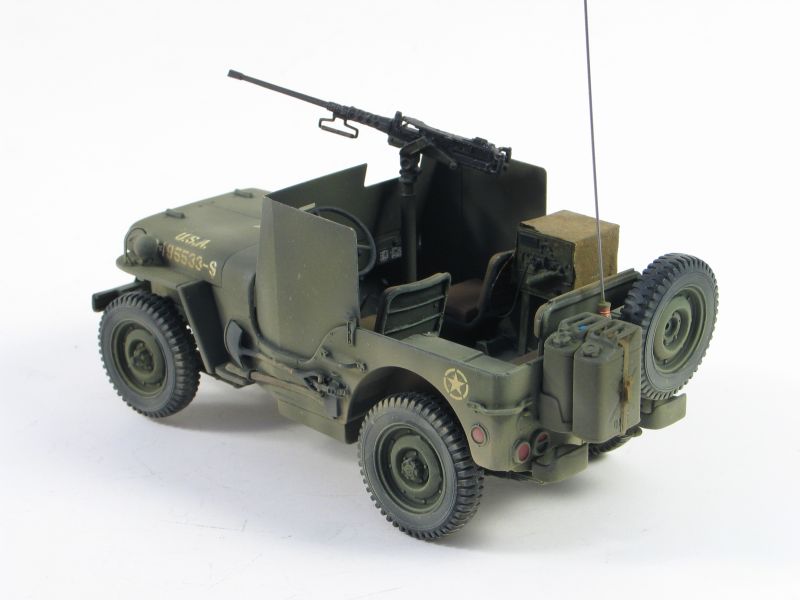
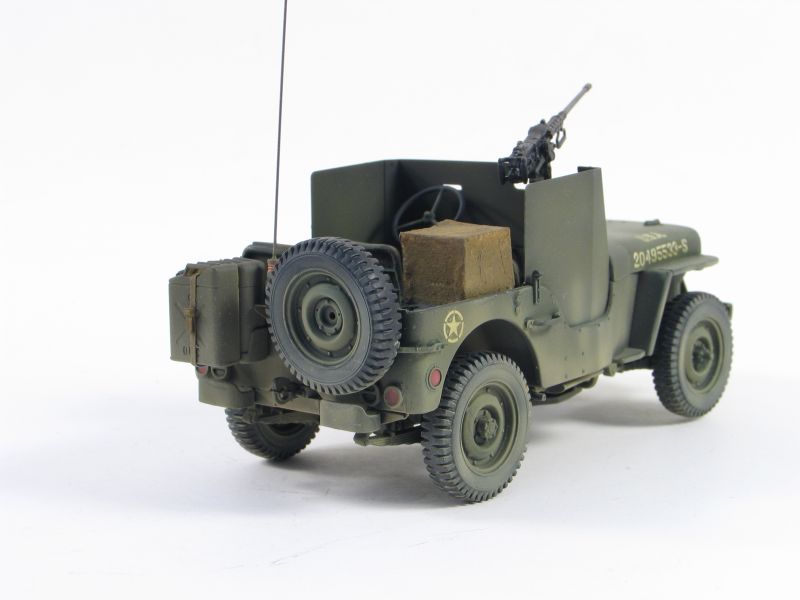
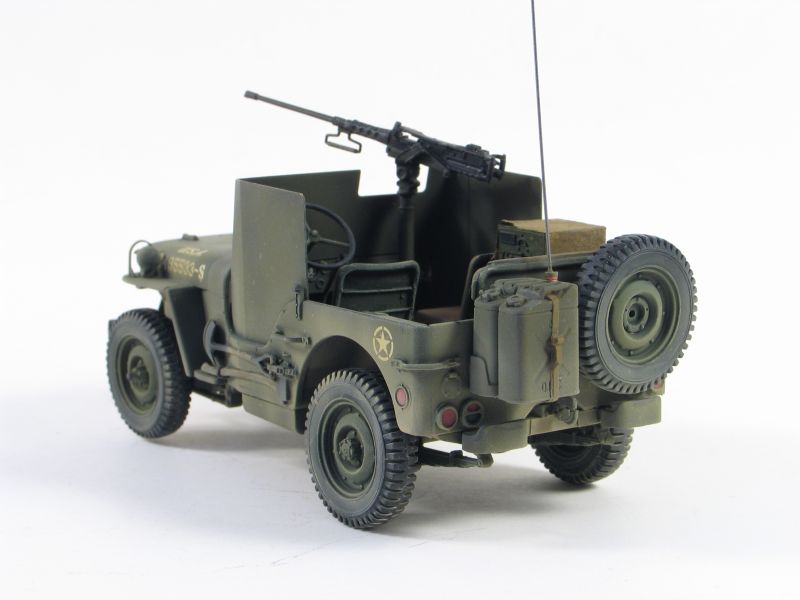
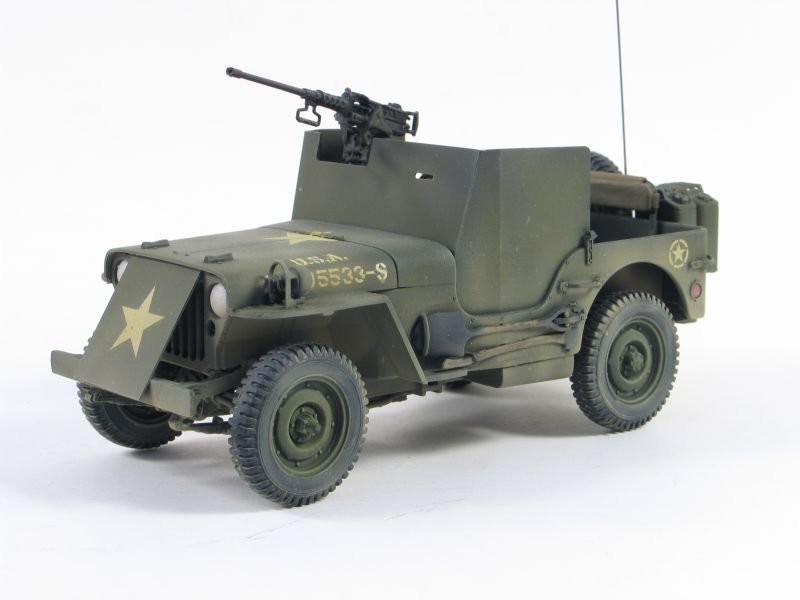
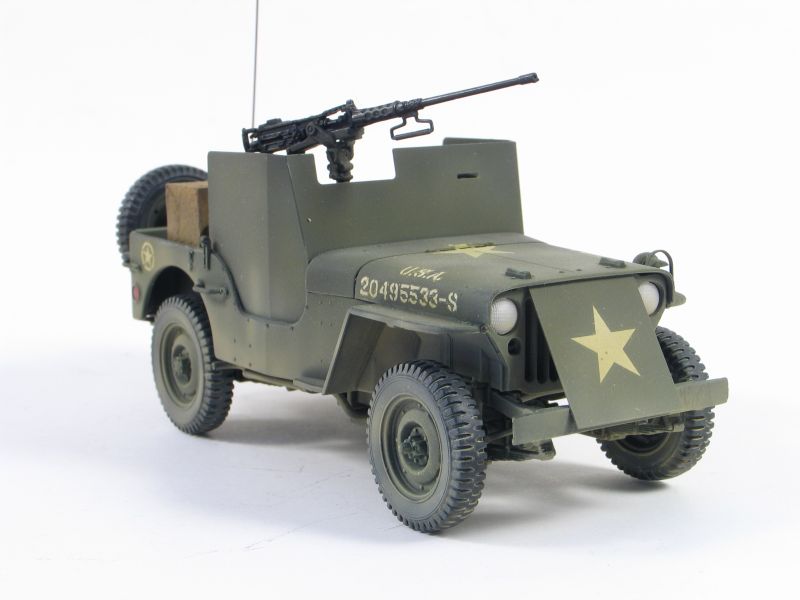
I found the PE brass armored shields to fit beautifully with minimal fuss. Some have commented that the front shield is a tad long, but this just depends on which photos you look at. There seem to me to be some variations on the size of that shield, so I left it alone. Speaking of variations, at this point I had to decide how I was going to finish this Jeep. I wanted to avoid the popular winter version, as that would require finding some chained wheels (maybe a future Cyber-hobby release?) so during a Google session I ran across a grainy photo of a line of these armored Jeeps lined up near some gliders during Operation Market Garden. Could this have been the 82nds first use of the armored Jeeps? The photo was a rear quarter view and shows some interesting details including a double jerry can mount, radio, and an antenna mount centered between the jerry can and spare wheel. I thought this was an interesting but simple variant, so set about adding the necessary details. The radio and antenna mount are from Verlinden, with the radio mounted on a scratchbuilt platform from scrap plastic sheet. To replicate the canvas cover on the radio, I used a tea bag cut to size and glued it on with white glue. An extra jerry can from Italeri was strapped to the existing can using painters tape. A piece of piano wire made up the aerial, while some fine solder was used to wire the radio into the Jeep using a description from a technical manual as a guide.Painting and Weathering
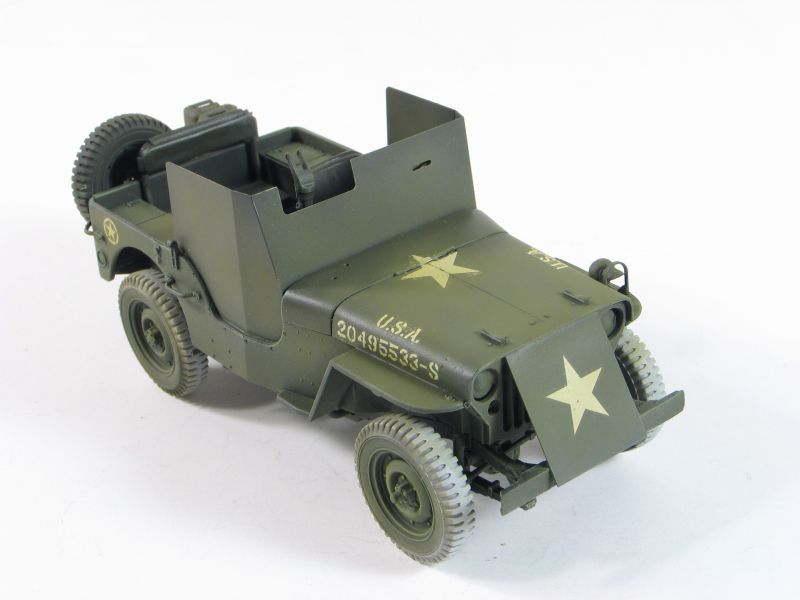
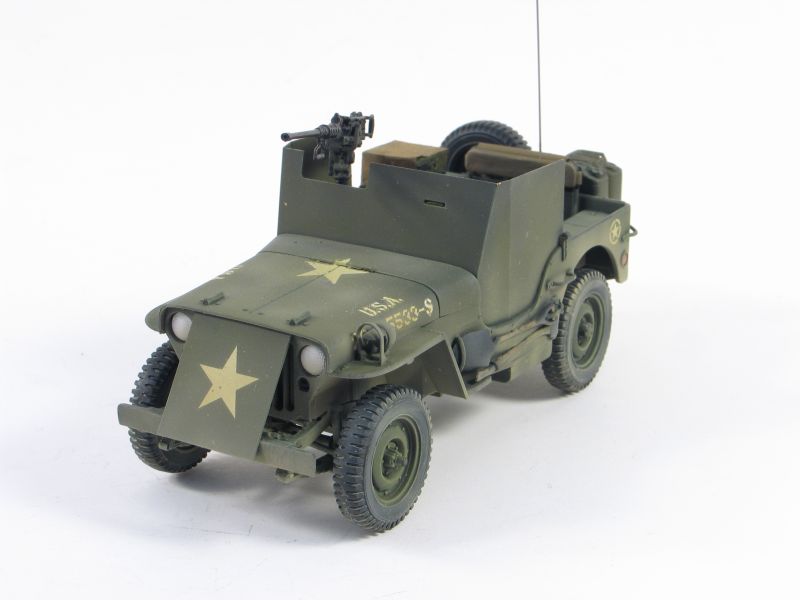
Being over all olive-drab, I started with a pre-shade of very dark black-green in all the crevasses and over any PE parts. The underbody also received a full coat. This was followed by Model Master Green Drab, followed by a dusting coat of Model Master Olive Drab to add some tonal variation. After a coat of Future (aka Pledge w/Future Shine) I applied the decals, sourcing an extra star for the front armor shield from my spare decals. The decals went on fine, with just a few areas silvering and needing correction. Once the decals were dry, I misted on another very light coat of Olive Drab to tone down the stark white decals. On a side note, some additional markings should be provided for the bumper codes, but Dragon failed to do this. I may add them at some point in the future, but for now I moved on. Weathering was done using the standard dark brown and black washes, subtle dry-brushing with oils, and followed with a light overspray of Floquil Foundation on the underside and wheels. Once dry, I then gave the tire treads a wash of Vallejo sand followed by a dry-brushing of weathered black on the tire surfaces. To finish up the painting, the finer details were picked out, such as the reflectors and insulators on the radio mount. The very last item was to install the headlight glass. Dragon chose to mold some pretty heavy pattern into the glass. Although the pattern is there on the real deal, in reality it looks nowhere near as heavy, and from any distance the glass would appear virtually clear. However the Dragon part is so heavy with texture that all you see is a hatch pattern. It does at least cover up the fact that there is zero detail inside the lamp body, and its nothing more than a flat surface with a slight bulge in the middle, but overall, I am not too impressed. I secured the lenses with white glue, and I may find myself later covering them over with some canvas covers made of masking tape in fact, as I type this I am deciding that this is exactly what I am going to do!Conclusions
Overall, I enjoyed this build, although it had its fair share of quirks. In the end, it looks like a Jeep and will sit well in my collection. Its interesting that with almost 15 years between the Tamiya kit and the Dragon version, many of the same details omitted in the Tamiya kit are also missing from the Dragon one! Though there are several refinements, including the engine, terminal box bolts, and other smaller bits, Dragon dropped the ball on adding other details that were missing from their old competitor. Ignoring the Bronco kit for the moment, between the Dragon and Tamiya versions, my heart is still with the Tamiya. However, Dragons does build into a nice looking Jeep, and if you have one in your stash, dont hesitate to get it together!details
- Dragon Models 1/35 39-45 Series, Kit No. 6714
- Armored 1/4 Ton 4 x 4 Truck w/.50 caliber Machine Gun - Smart Kit
- Scale: 1/35
- Media and Contents: 165 parts (136 in grey styrene, 31 etched brass, 4 clear styrene)
- Price: US$31.95

About the Author


FROM: FLORIDA, UNITED STATES
I started modeling around 8 years old when my dad bought me a Monogram 1/48 A-7. We built that together, and after that he turned me loose. Along with armor and figures, I also enjoy building aircraft and trains (model railroading), and tend to cycle between the genres. Recently married, I have...
Comments

Very nice, makes me want to start the one I have to night.
When I start mine I will refer back to you're article .
Dave
MAR 28, 2013 - 03:19 PM

Well done Andy, thanks! This will be a great asset when I get started on mine
MAR 29, 2013 - 01:50 AM

Thanks for the review and build, Andy. This one will definitely help when I start mine.
MAR 30, 2013 - 10:51 AM
You're welcome guys. Hope the notes help. When I get a spare hour or two behind the workbench again, I will probably have a "putty session" and roll out some blankets, tarps etc for a few projects in the works, and add a bit more gear to this build. Need to add a cammo net to the front as well. I will update with more photos when I am able!
I now have the SAS "commando car" in the review pile, so much of the same will apply to it. Thinking of doing a NWE SAS jeep out of it vs. the North Africa version (which I feel like has been done to death of late!)
APR 01, 2013 - 02:46 AM
The why for the bracing along floor and outer wall of Dragons armored Jeep is answered with the release of their SAS Jeep kit number 6745.Looking at the poster for it the two piece body tub could explain it.
With all the releases of SAS Jeeps they all have the bracing removed from the grill, retooling of the molds right, which means added coast to kit right.Wouldn't it been simpler to tell the modeler on the instruction sheet to remove the bracing.
MAY 01, 2013 - 05:21 AM
wow, I looked at the poster, and you are right! well, if the upper and lower are separate, it will make it MUCH easier to remove the bracing.
Still, I have to scratch my head as to why they needed it to begin with. The 1993 Tamiya mold is a single body, with no bracing.
and of course, Dragon STILL forgot the vertical structural braces that ARE found on the real thing just forward of the driver/passenger cutouts.
The figures look nice...
Andy
MAY 01, 2013 - 05:43 AM
Andy Looking back through Dragons releases the SAS patrol commander #6724 released in Nov of 2012 has the two piece body, at that time they could have added the vertical structural braces on the side of the body.
I wonder if the armored Jeep kits will use the old molds of the one piece body or the new molds of the two piece body. Like you said it will make it much easier to remove that bracing on the floor if you want.
Dragon must have been thinking a head thought it would help with the alignment of the two piece body parts.
Dave
MAY 01, 2013 - 12:19 PM
Hi David... I have #6724 and the body is one peice. Maybe those box illustrations ns are not exactly what is in the box.
MAY 01, 2013 - 04:01 PM
Copyright ©2021 by Andy Renshaw. Images and/or videos also by copyright holder unless otherwise noted. The views and opinions expressed herein are solely the views and opinions of the authors and/or contributors to this Web site and do not necessarily represent the views and/or opinions of Armorama, KitMaker Network, or Silver Star Enterrpises. All rights reserved. Originally published on: 2013-03-29 00:03:29. Unique Reads: 13351

WEB HOSTING BY


Copyright ©2021 Armorama and Kitmaker Network, a subsidiary of Silver Star Enterprises
All Rights Reserved. Please read our Conditions of Use and Privacy Policy.
All Rights Reserved. Please read our Conditions of Use and Privacy Policy.