

1⁄35M1A1 AIM
10
Comments
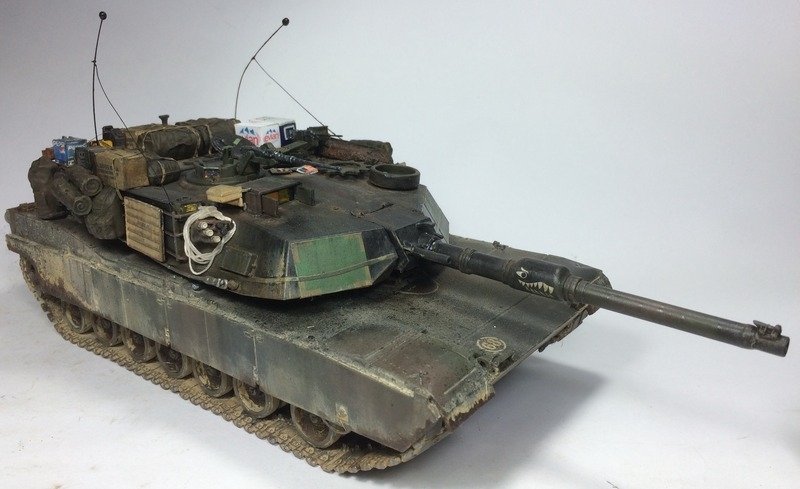
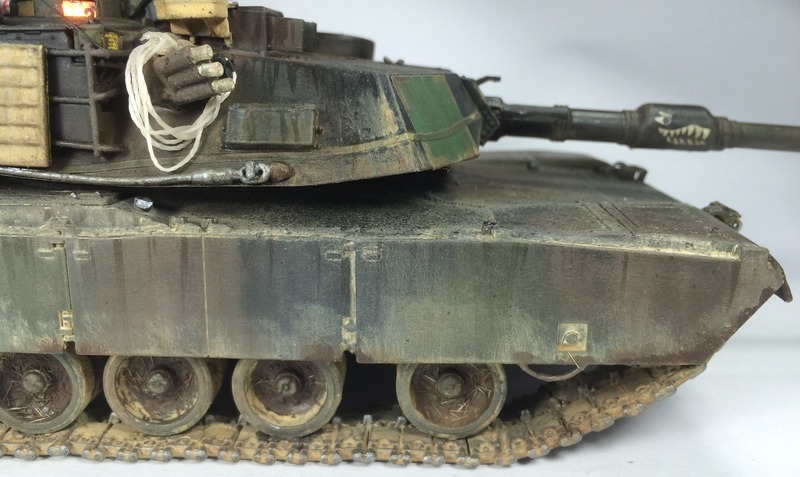
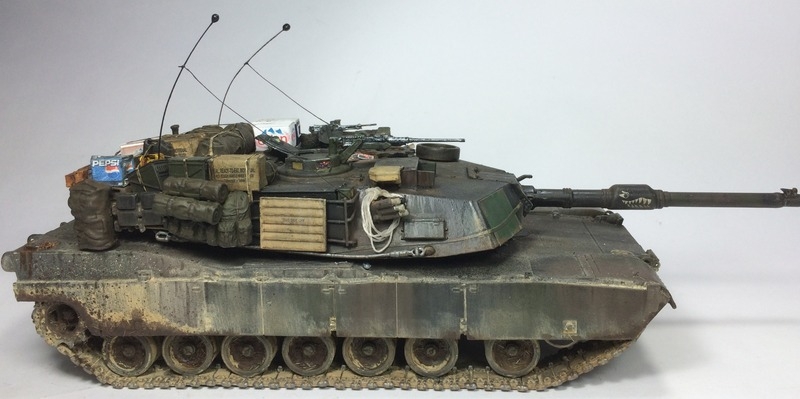
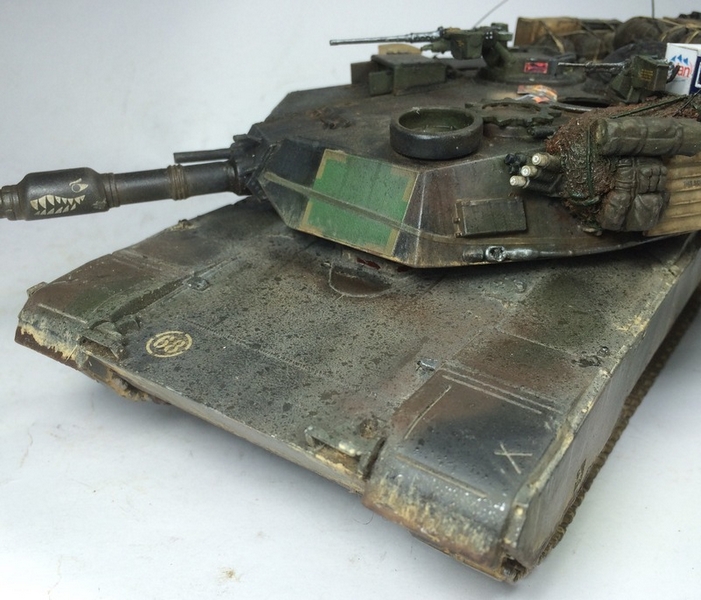
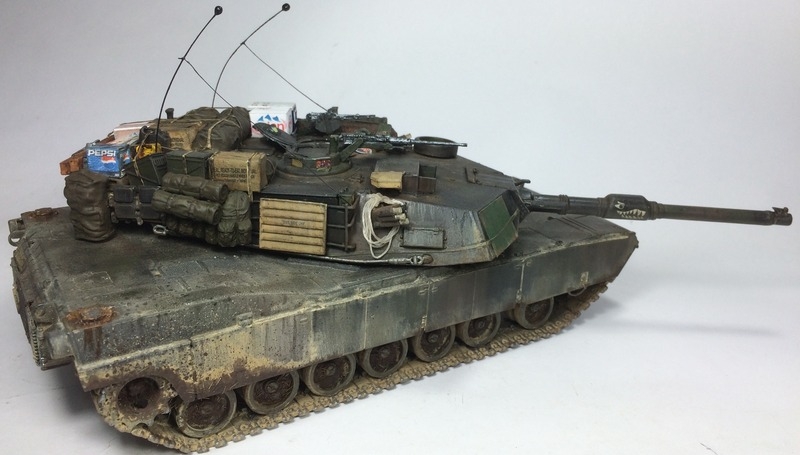
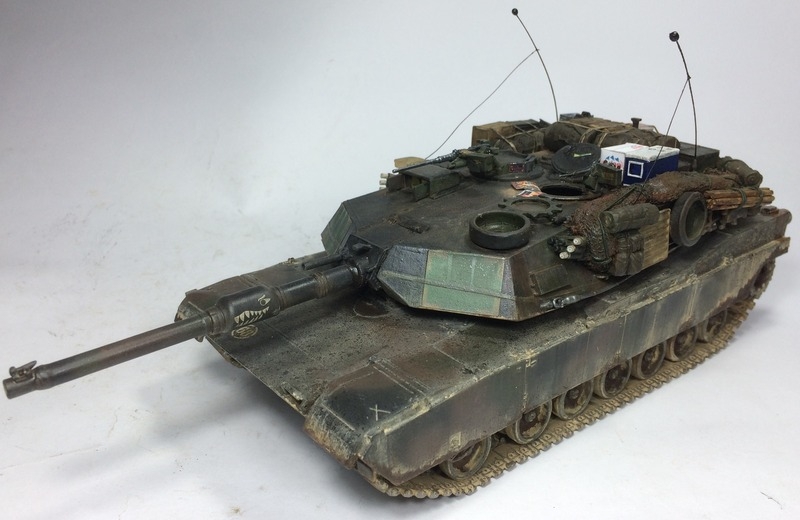
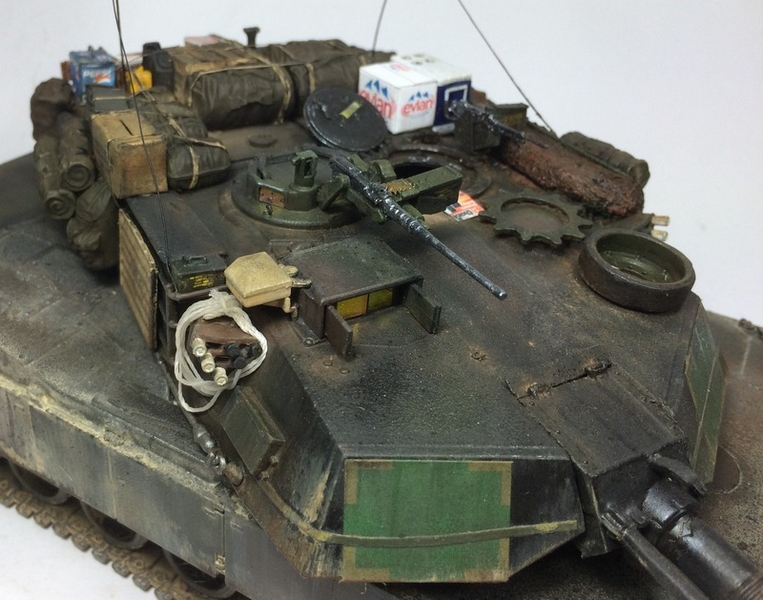
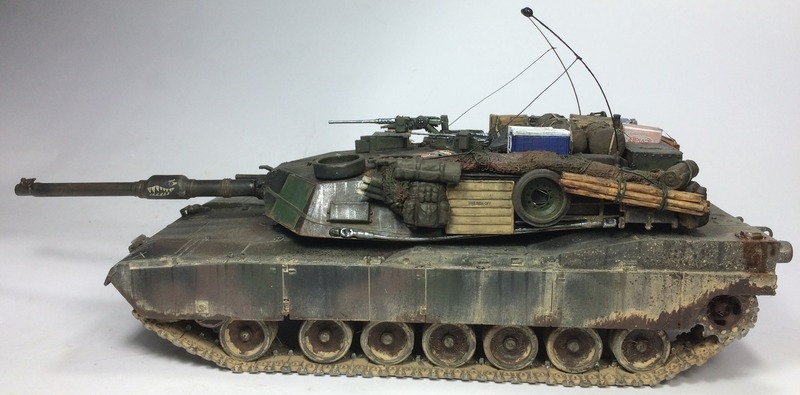
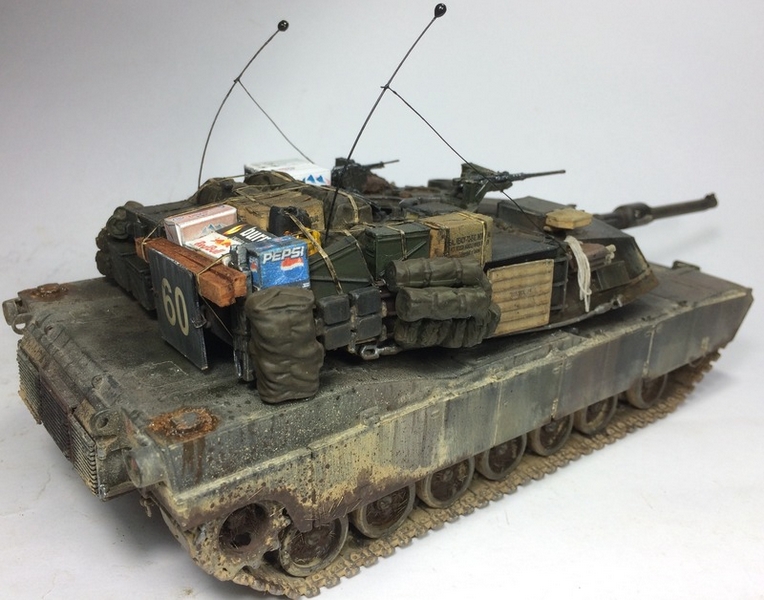
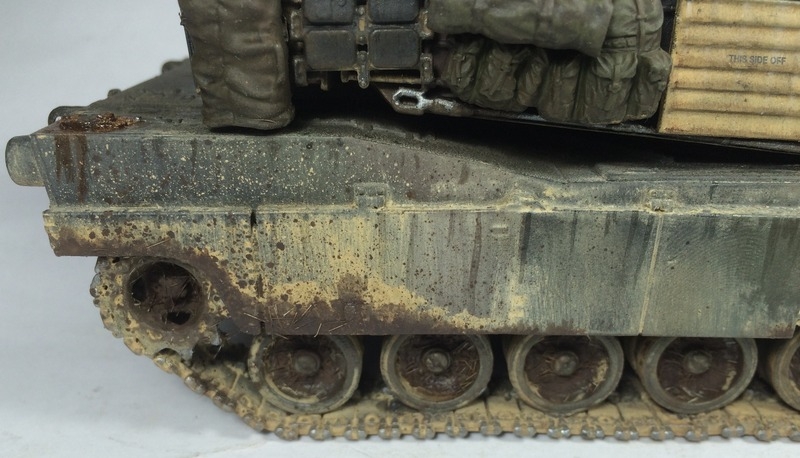
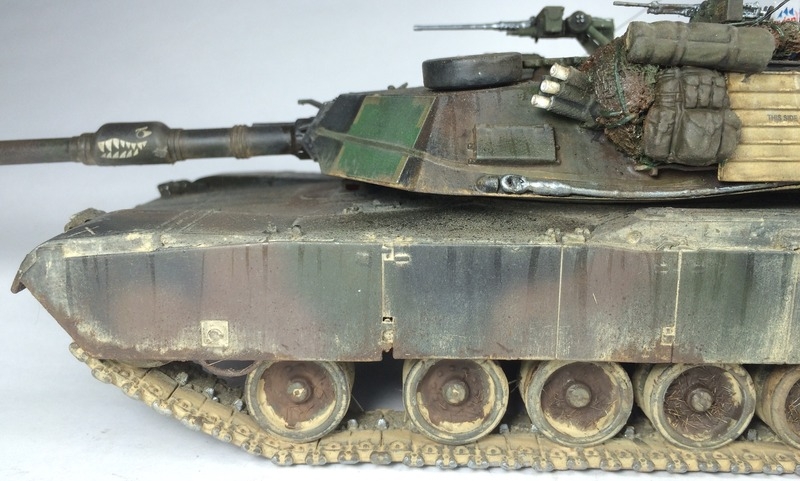
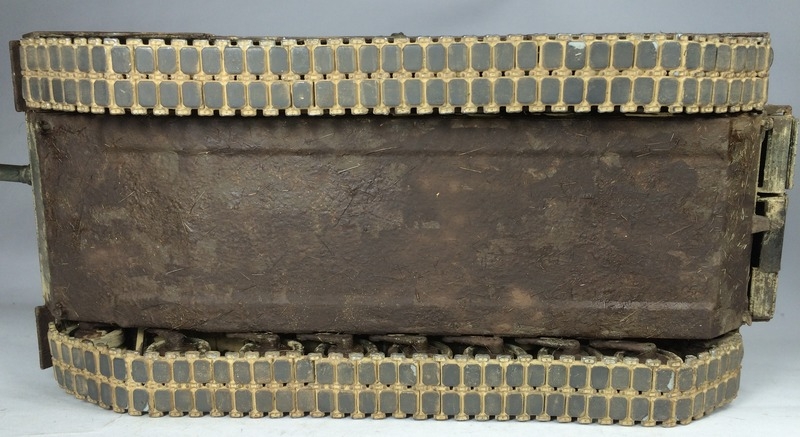
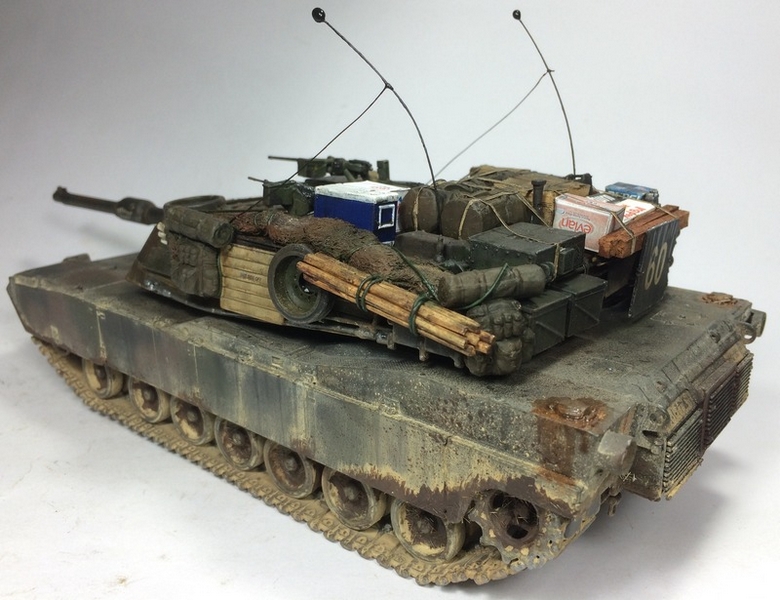
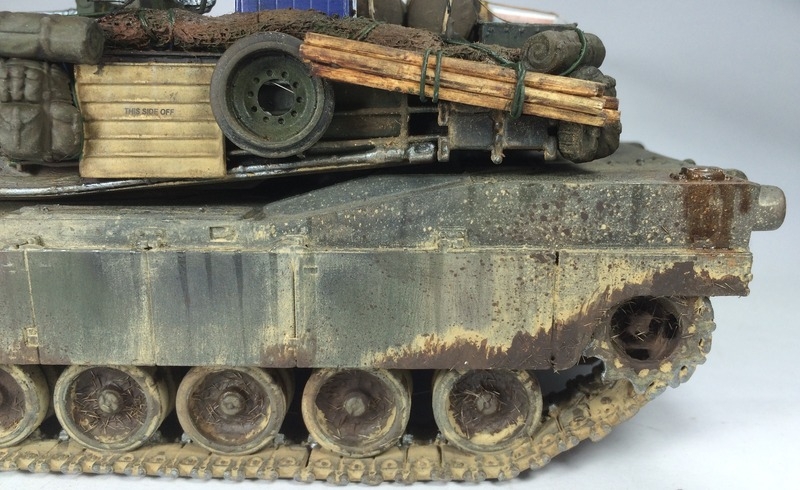
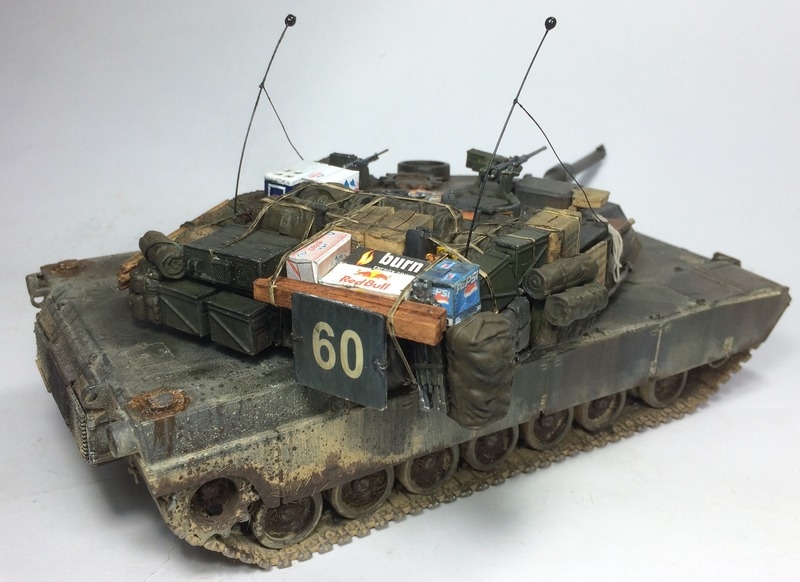
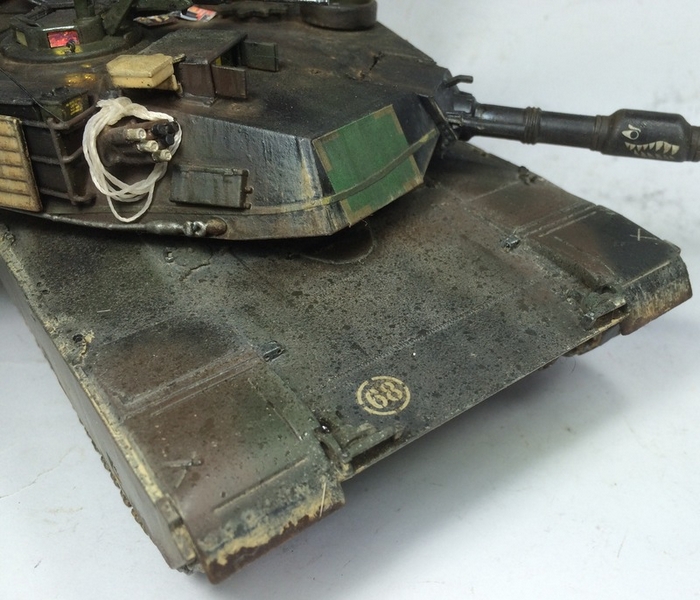
Klaus Eberl shares with us his latest build - an M1A1 AIM where he mated the Dragon M1 Panther II hull with the M1A1 AIM turret since after a small accident at home an Abrams kit was broken but he really wanted to save the turret. Minimal modifications were needed, mainly adapting the rear hull upper plate and also the front fenders from the Panther II to the AIM, the rest was
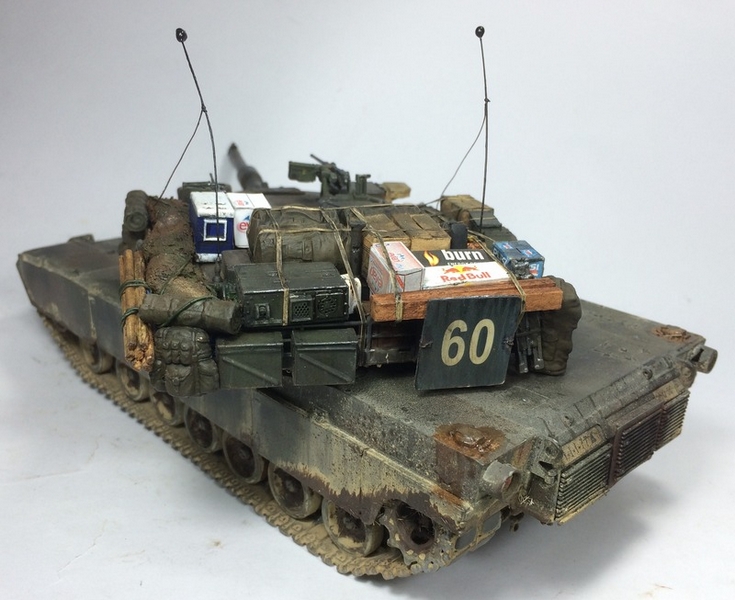
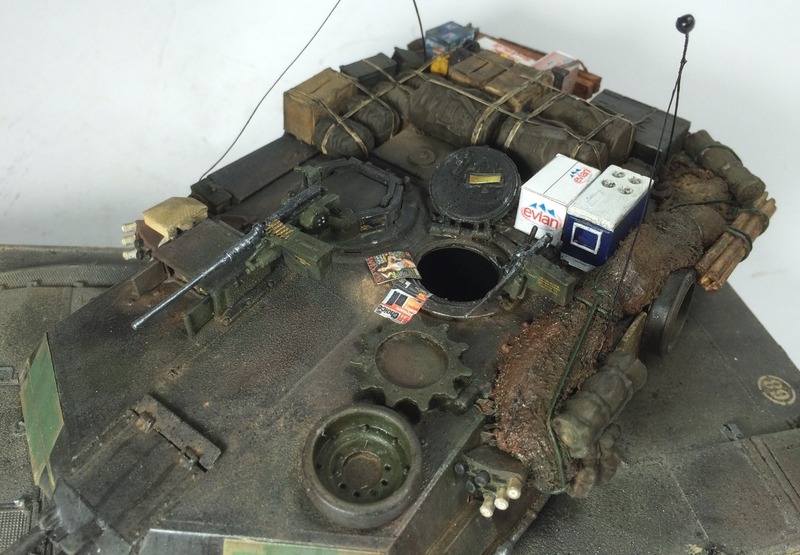
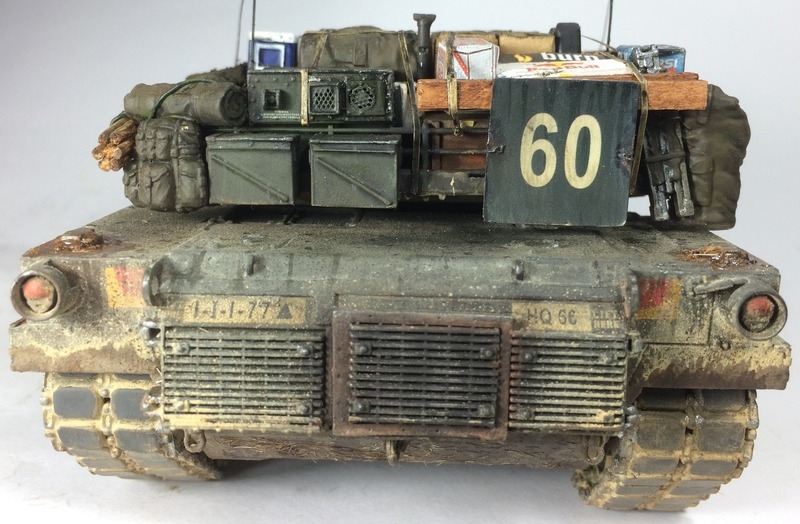
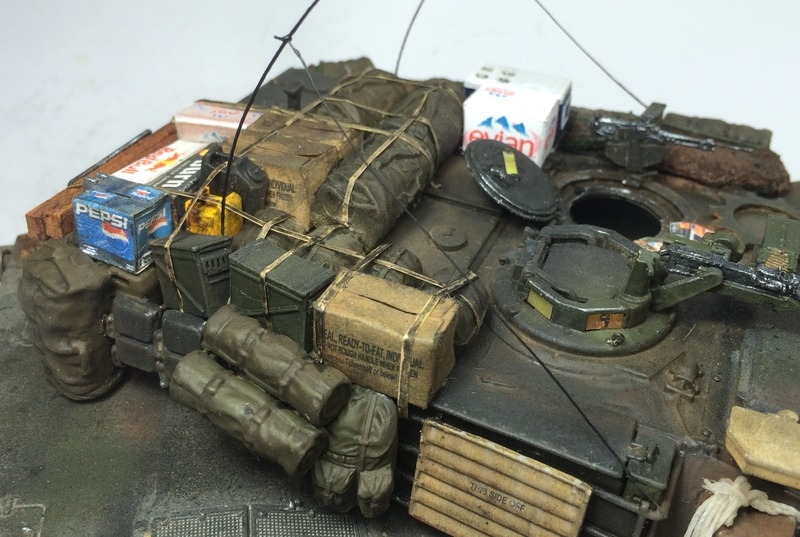
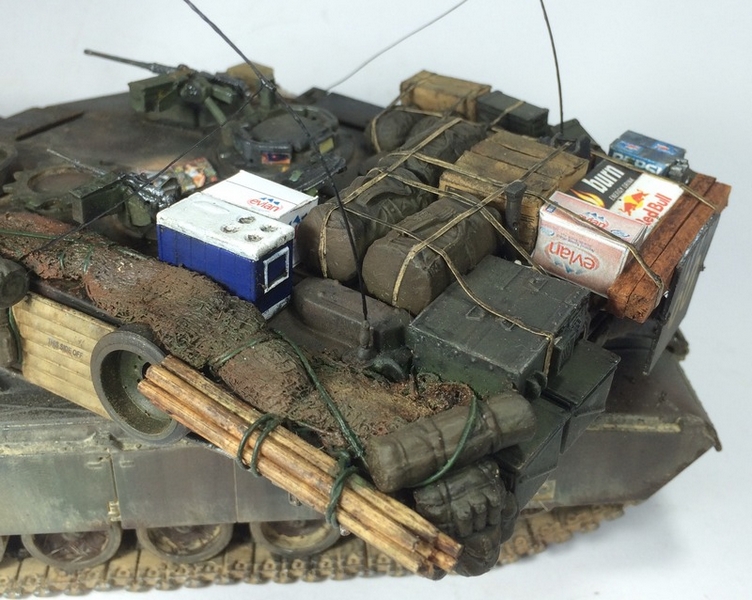
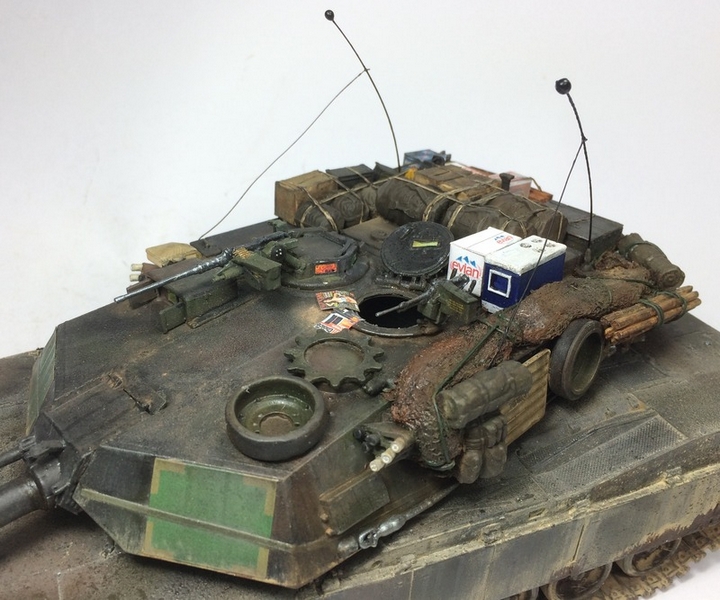
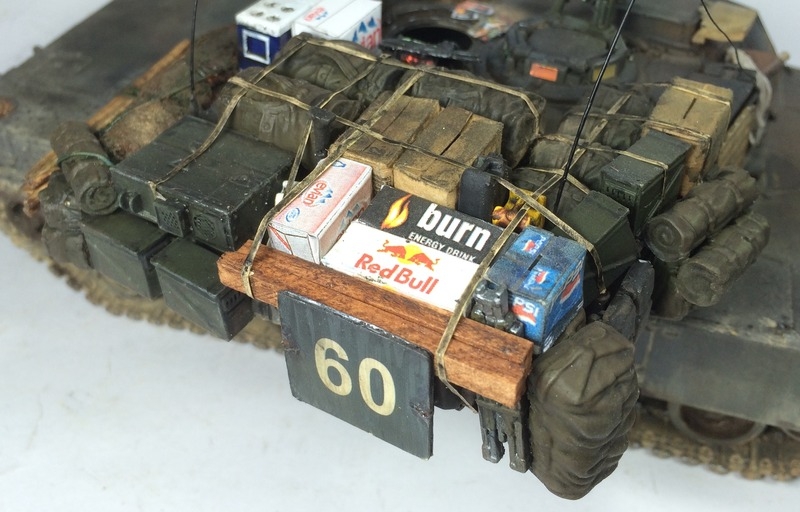
pretty straight forward. Klaus also added metal antennas and stowage from multiple manufacturers. Painting was done with Humbrol enamel as primer, and
Ammo of Mig and AK Interactive acrylics and weathering products.


About the Author

FROM: REGION DE VALPARAISO, CHILE
Active duty Chilean Navy Officer, close to 20 years of service. Happily married and 2 beautiful kids. I´ve been modelling on a regular basis since 1997. Mainly focused in "modern" armor in 1/35, but recently Ive started with WWII subjects as well. Particularly keen on NATO and Chilean Armed Forces ...
Comments

incredible work, and fantastic job on the weathering, the paint work, and the stowage, one of or if not the best M1A1's I have set eyes on.
JUN 23, 2016 - 06:24 PM

Very nice model!
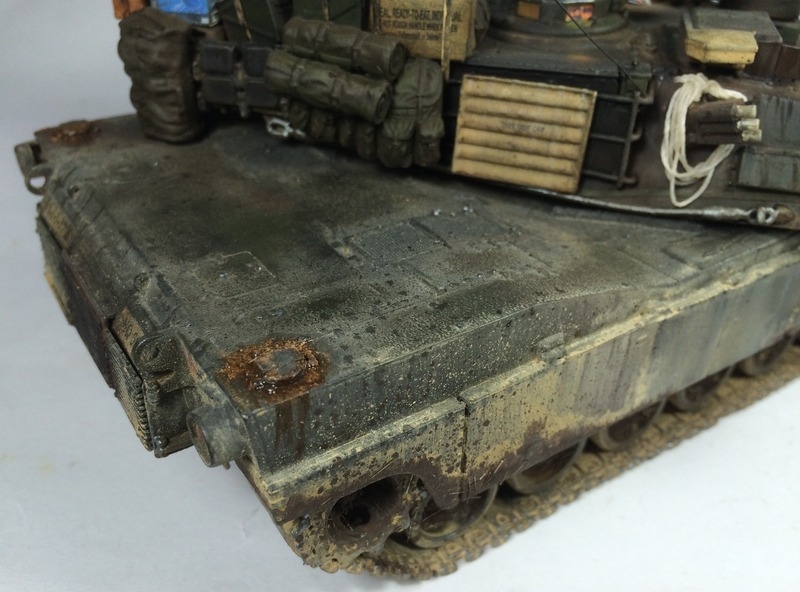
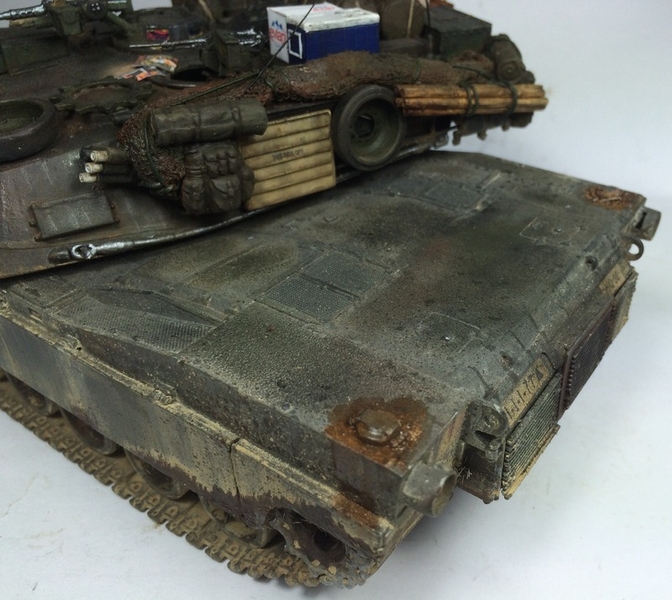
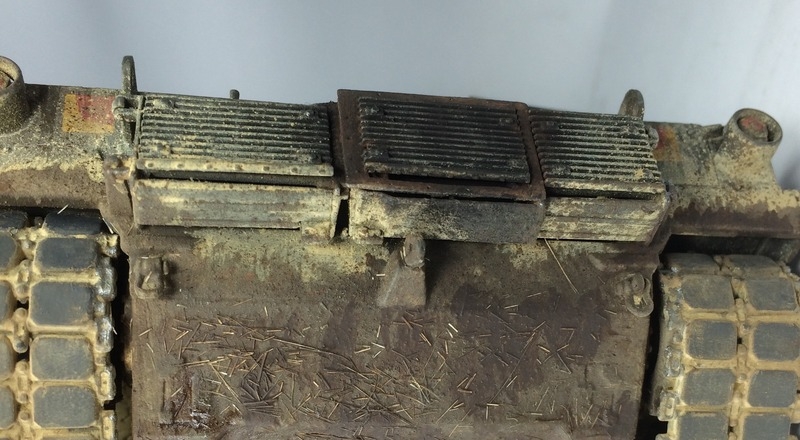
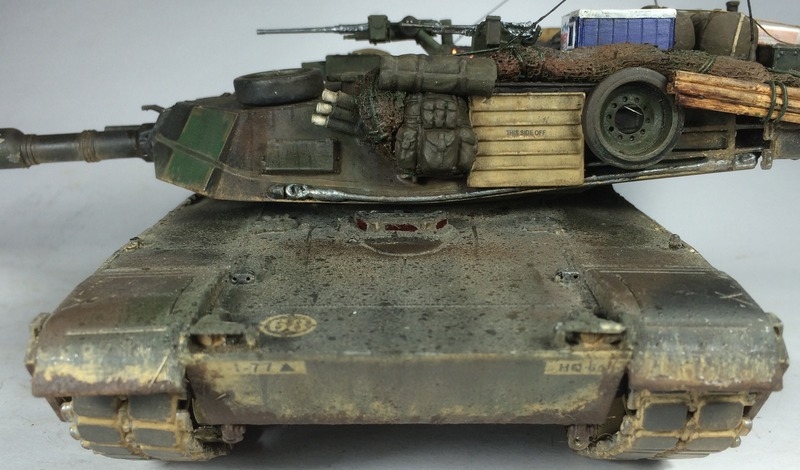
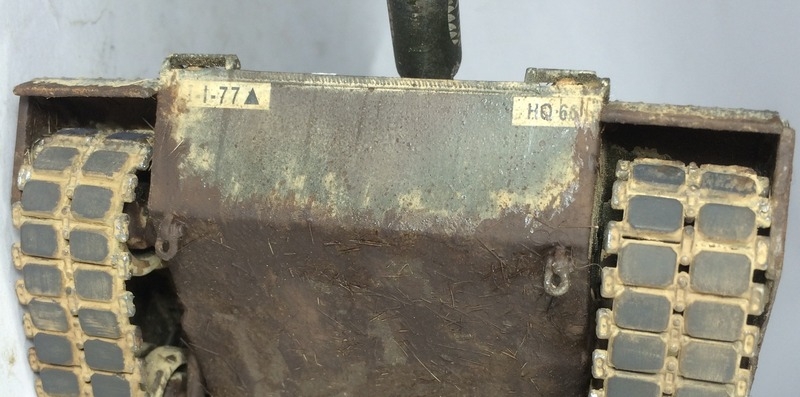
But because the Panther II hull was used without required modifications, it is not M1A1. The biggest difference between M1IP (and M1 Panther II) and M1A1 hull was the addition of the NBC system to the latter - with associated panels on the left side of the hull. Unfortunately this model has the storage box of the Panther II hull there.
JUN 23, 2016 - 10:02 PM
The weathering matches the M1 I served on back in the day. Throw a new 105mm gun on it to solve the lack of the hull mounted overpressure system.
JUN 24, 2016 - 04:58 AM

Thanks for your comments guys.
Sorry if I didn't catch in time the modification needed on the left side of the hull for the NBC system and associated panels, as stated so well by our friend Vodnik. At least paint job ended well though, worked as a test bed for applying the weathering products
Next Abrams will be properly done using a complete kit right from the box.
Cheers!
JUN 24, 2016 - 09:09 AM
Klaus, great NATO 3 color camouflage! I have three kits that will carry the same scheme. How did you mask each color? Best, Bill
JUN 25, 2016 - 12:28 AM
Thanks Bill, NATO 3 tone was done freehand using a 0,3mm airbrush, following the pattern on kit instructions.
Cheers
JUN 25, 2016 - 02:52 AM

Copyright ©2021 by Klaus Eberl. Images and/or videos also by copyright holder unless otherwise noted. The views and opinions expressed herein are solely the views and opinions of the authors and/or contributors to this Web site and do not necessarily represent the views and/or opinions of Armorama, KitMaker Network, or Silver Star Enterrpises. All rights reserved. Originally published on: 2016-06-19 12:30:06. Unique Reads: 7492

WEB HOSTING BY


Copyright ©2021 Armorama and Kitmaker Network, a subsidiary of Silver Star Enterprises
All Rights Reserved. Please read our Conditions of Use and Privacy Policy.
All Rights Reserved. Please read our Conditions of Use and Privacy Policy.