

1⁄35German civilian car
9
Comments
Diopark DP35018 German made civilian car w/living supplies
Build Log
Introduction
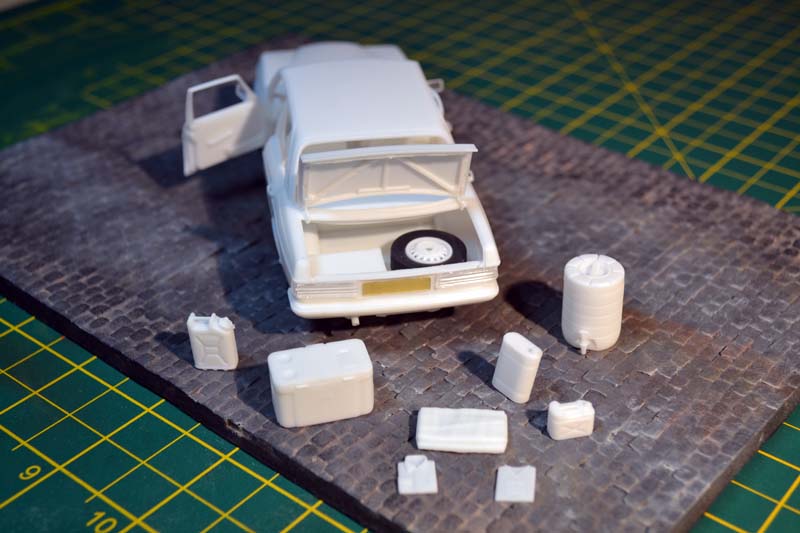
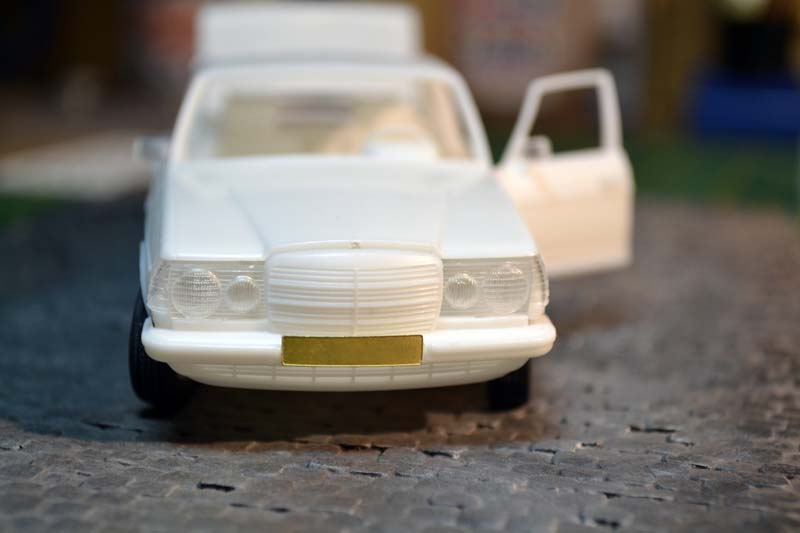
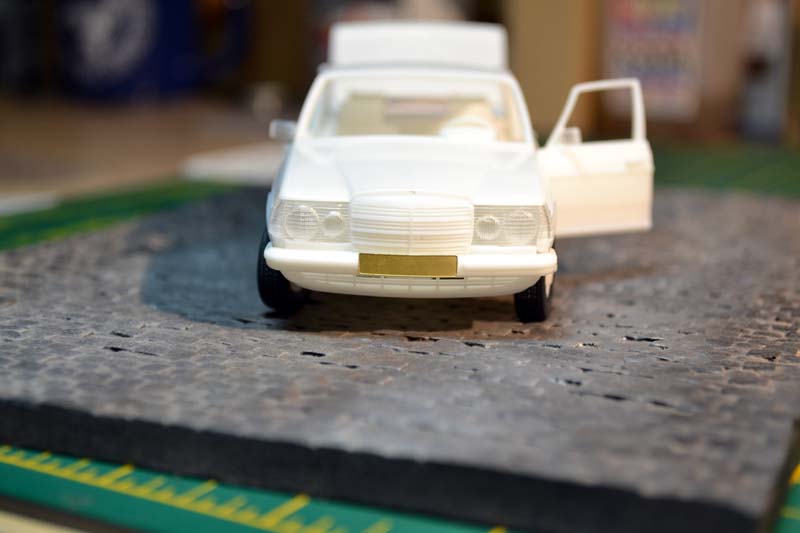
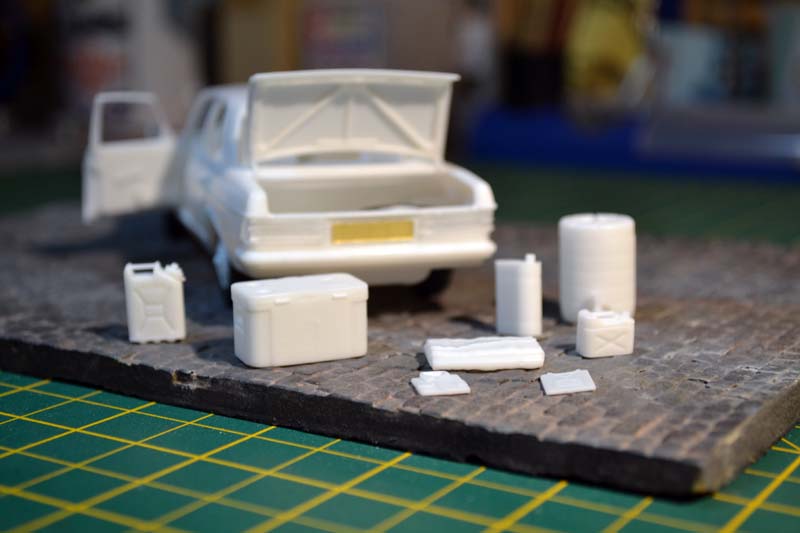
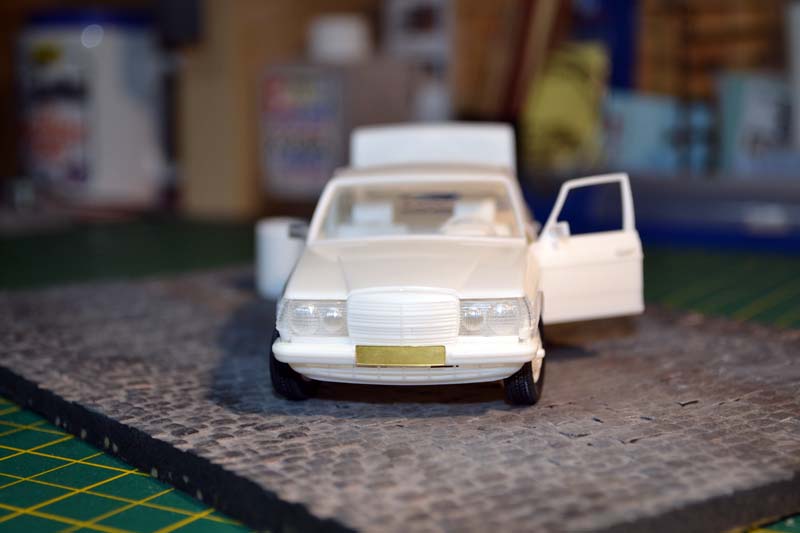
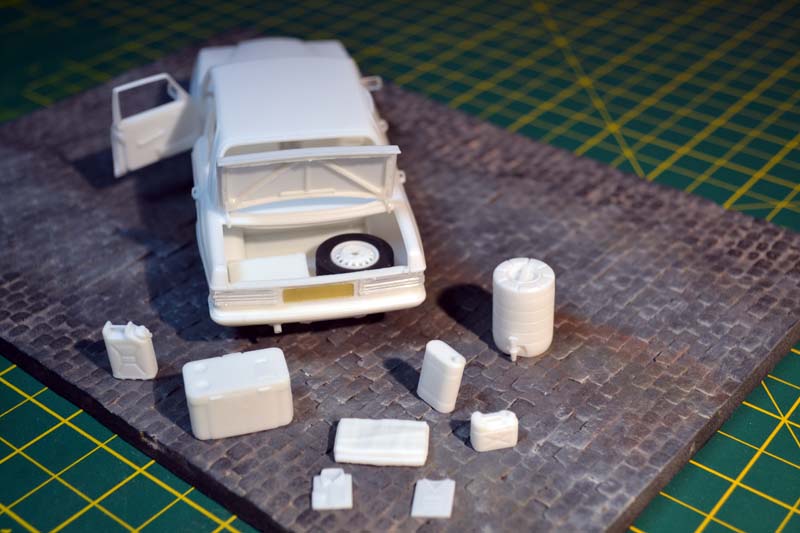
This is the second release of this particular car from Diopark and after a quick search of the internet my research tells me it could be a Mercedes W123 sedan. This time around it comes with living supplies in the guise of a suitcase, 2 shirts, a tarpaulin/rug, jerry can, water can, water bottles, spare wheel, tea urn, fridge box, Pepsi bottles, Coke bottle and a taxi sign if you fancy building it as such.Contents
When you first open the box you are presented with 4 bags, one box, the instruction sheet and a painting guide. The first 3 bags contain 5 sprues moulded in white plastic, one bag containing 2 sprues moulded in clear plastic, the last bag contains the decal sheet and a small etch brass fret. The small box contains a bag of 5 plastic tyres and a lovely slide moulded car body. The instruction sheet is nice and glossy and looks simple to follow. The final item in the box is a double sided glossy painting guide giving you 2 painting options, one with a roof rack full of goodies and the other a taxi.Review
This particular kit from Diopark comes well packed in the box with all the sprues bagged and well protected as is the car body shell in its own box. The artwork on the box looks good and is having a great attempt at convincing the builder that they need to build a diorama to compliment the box contents. After taking a look over the contents I could not foresee any problems apart from one of the door frames being slightly bent and some of the parts being very very fragile. The overall quality of the parts on first look is good with just a little bit of flash here and there to deal with, and just the odd injector pin marks.Assembly
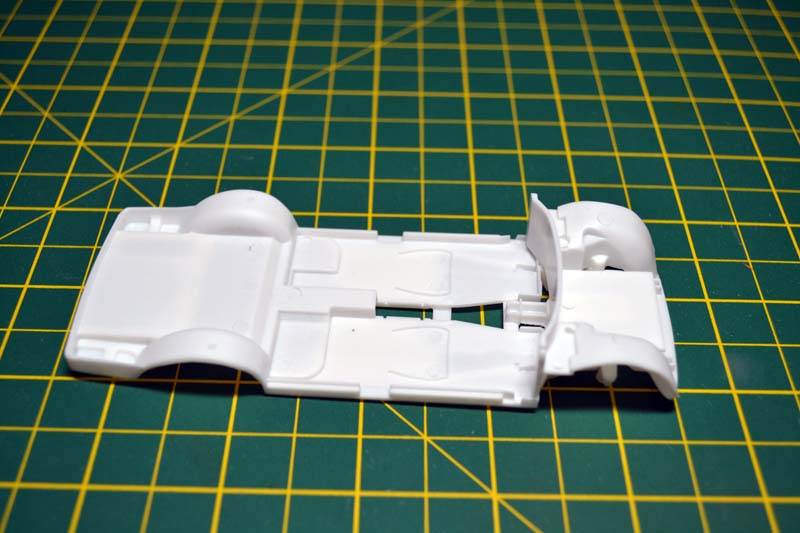
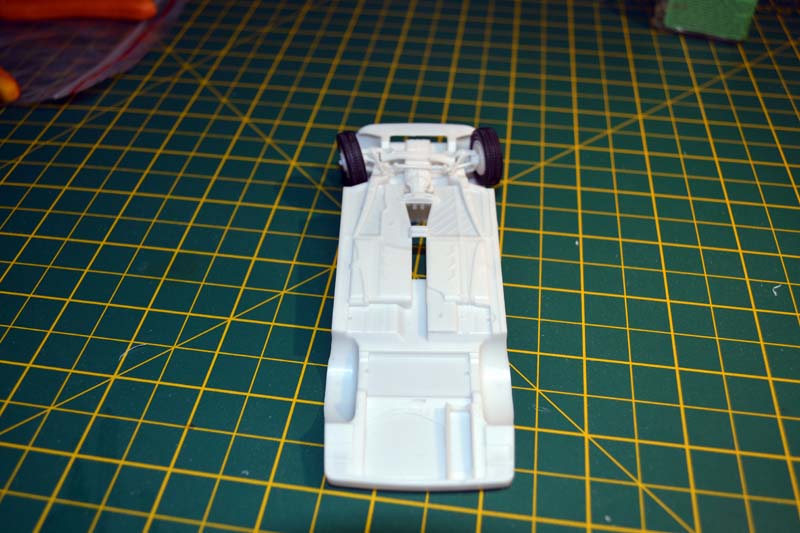
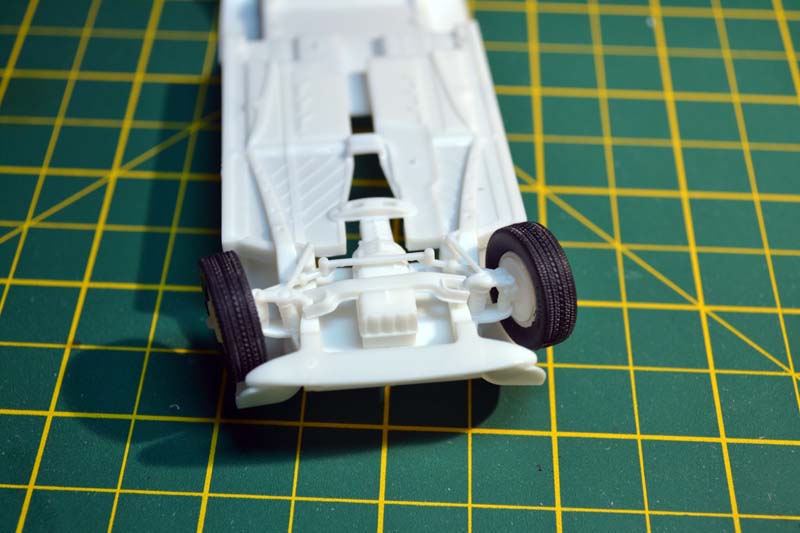
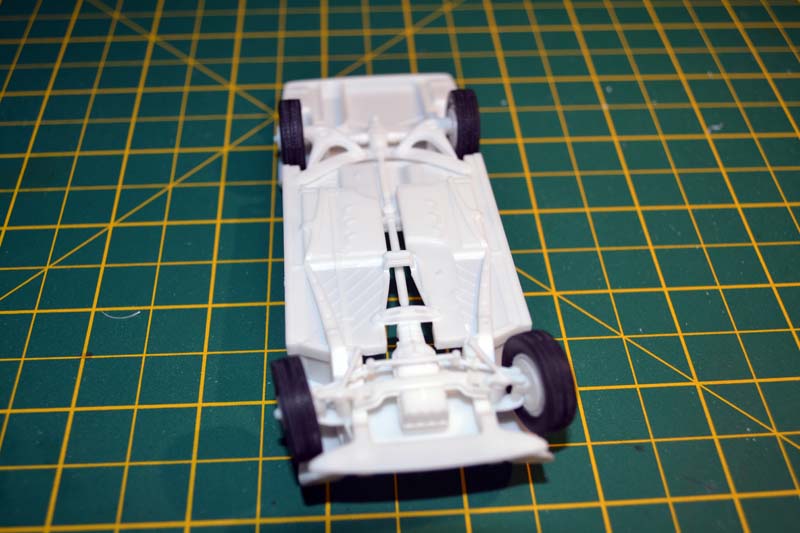
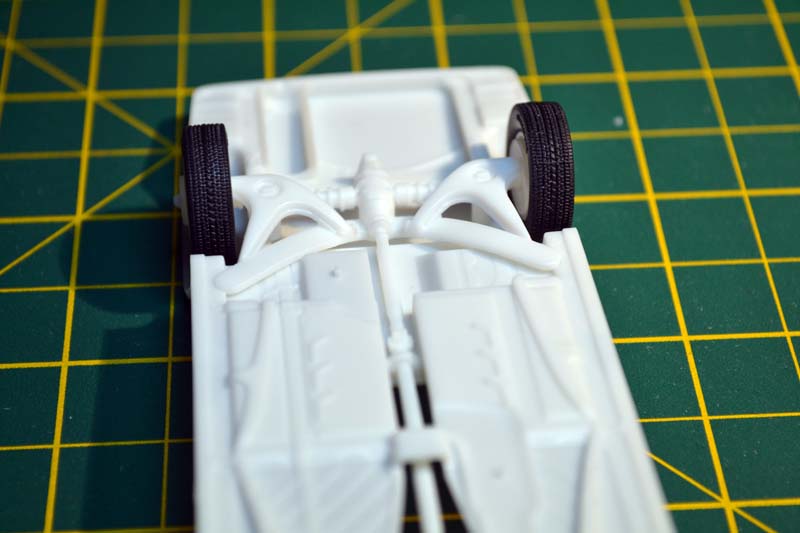
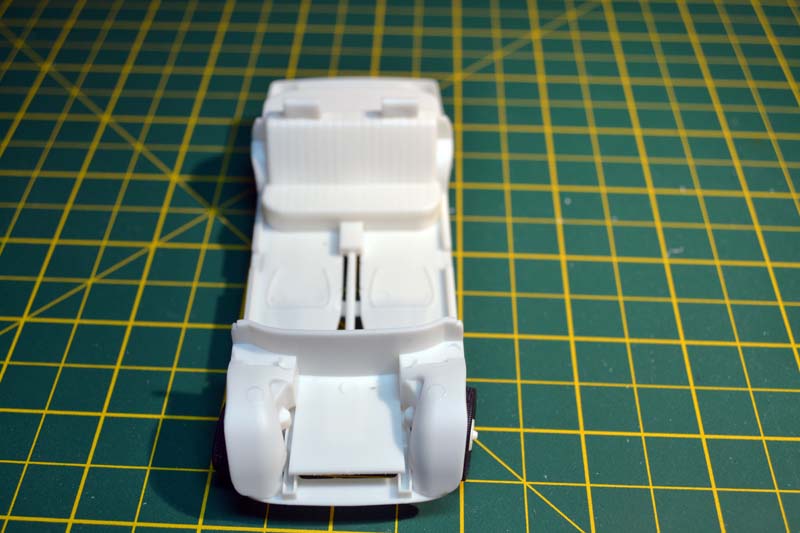
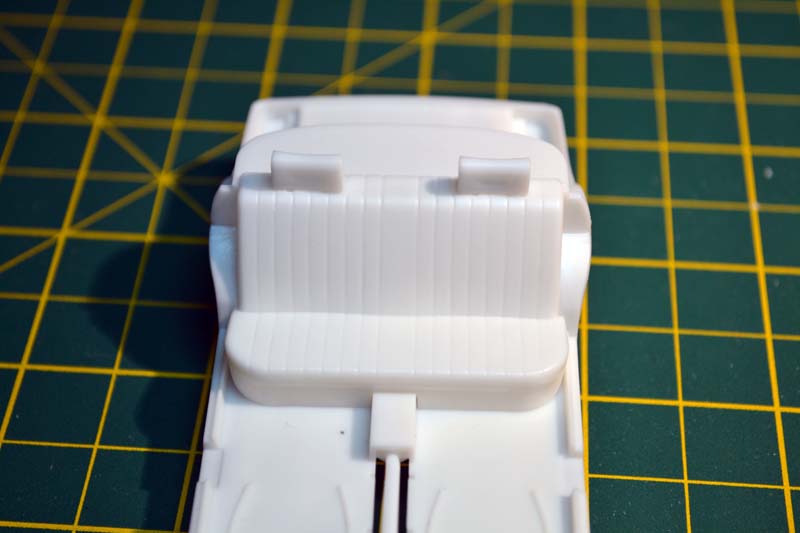
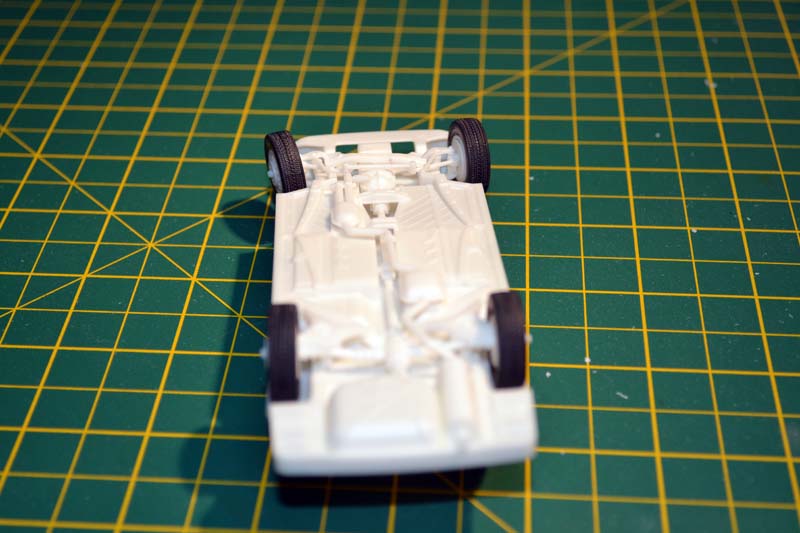
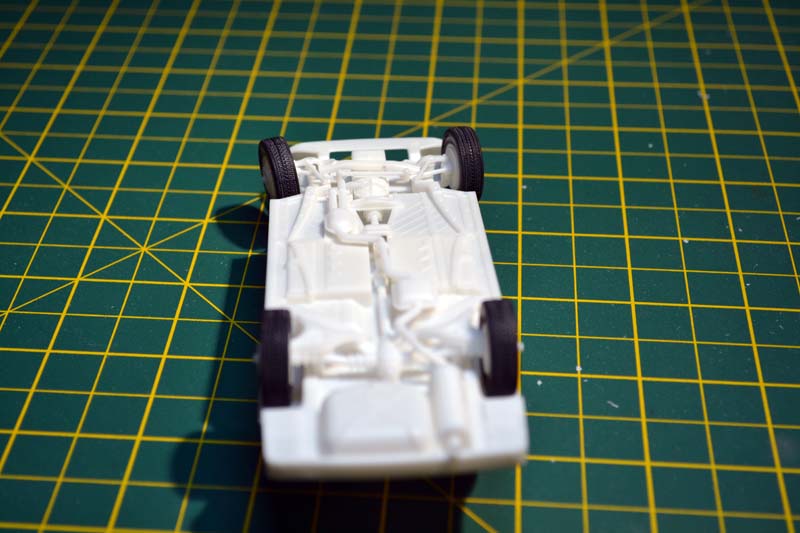
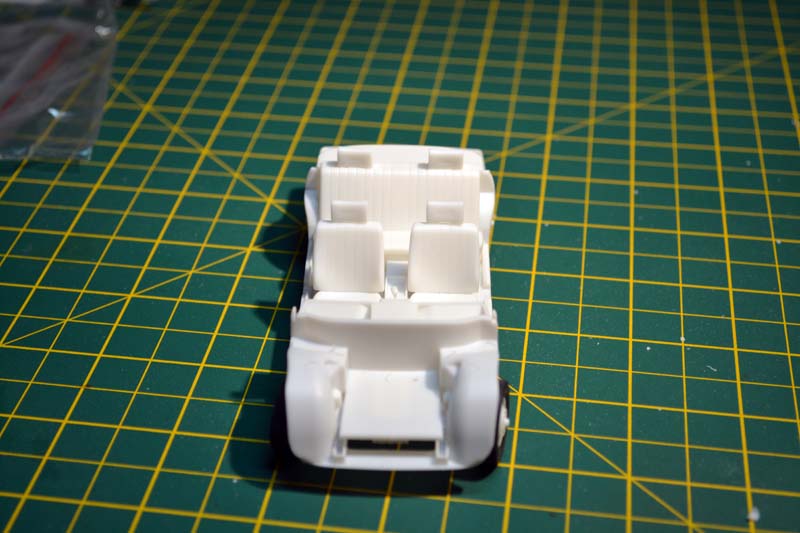
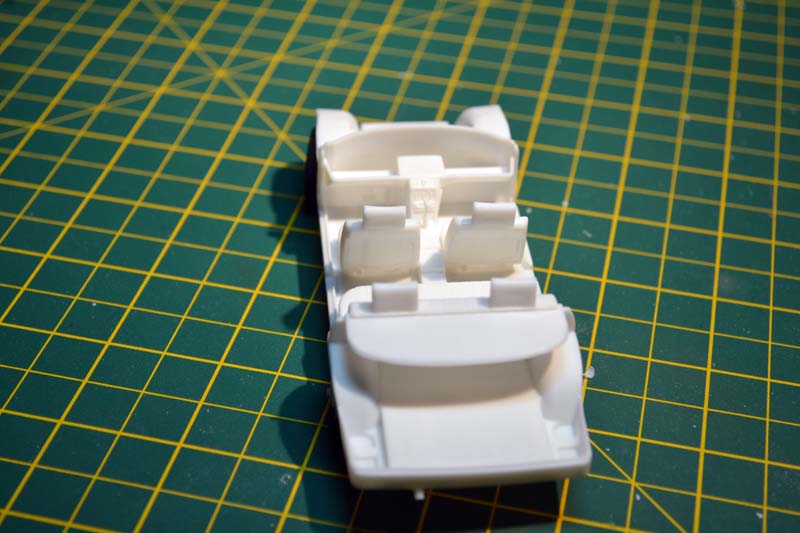
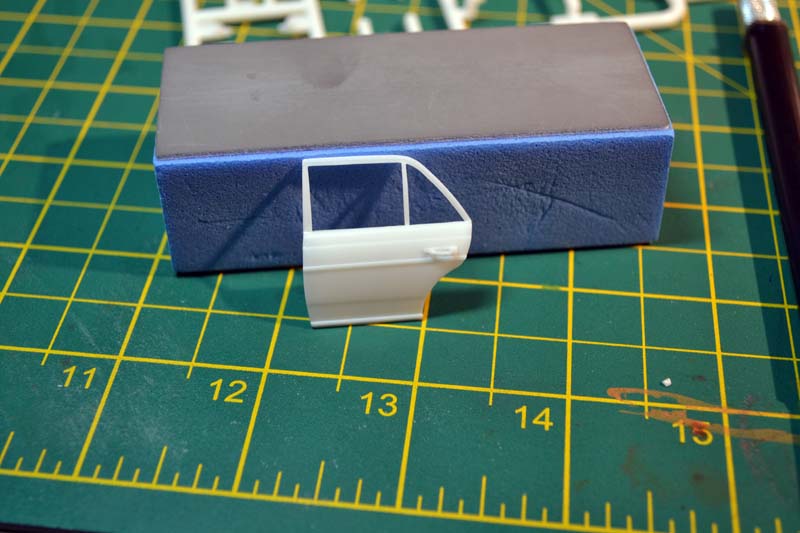
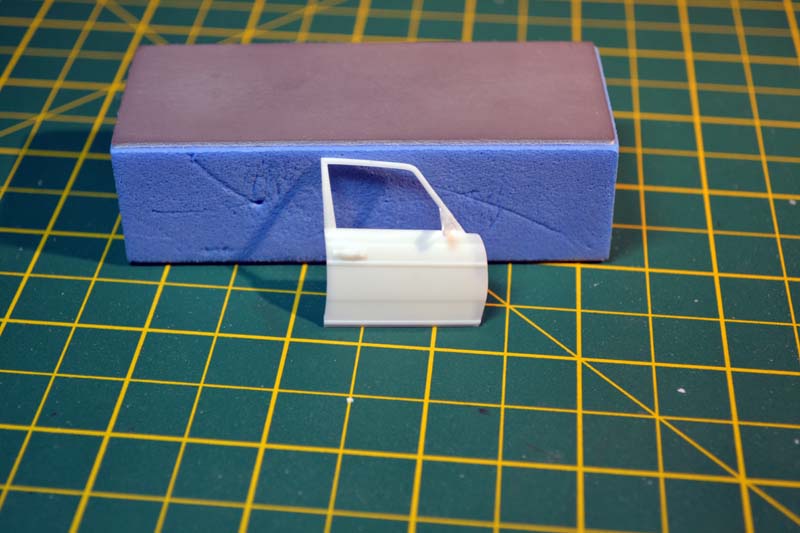
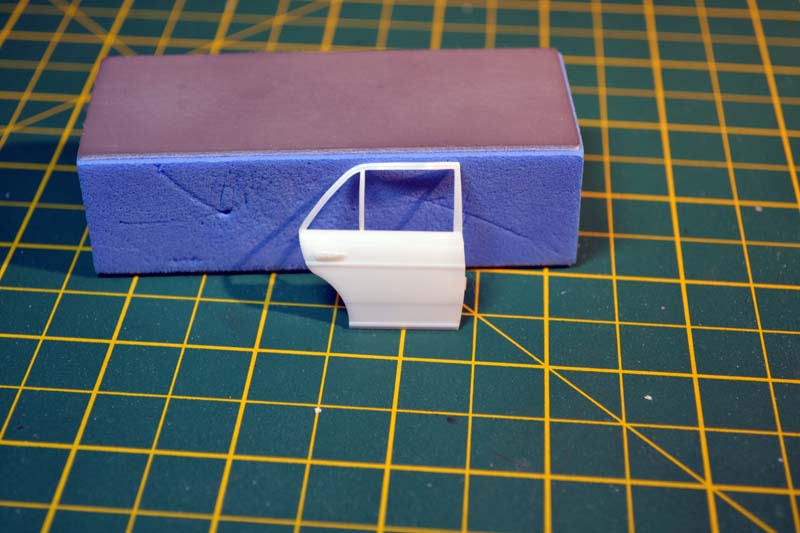
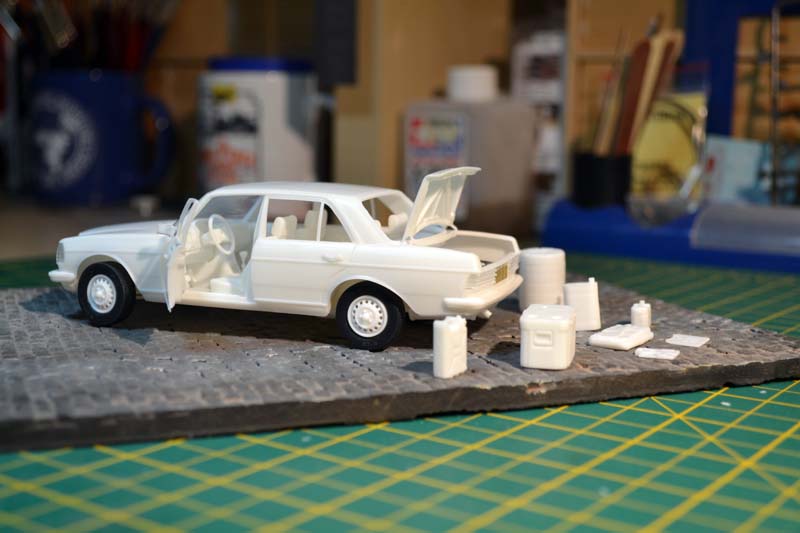
The assembly starts with the lower chassis which is nicely moulded in one piece, front wheel arch, suspension and basic engine parts, the engine looks quite good and although you do not see it on the final model if you pick it up it definitely looks the part from underneath. There are no issues here, fit is very good and the only thing I would like to mention is the white plastic it is moulded in, not much of a fan of it however it does not detract from the quality of moulding. Next you move onto the front wheels and steering, the tyres are nicely moulded in a kind of rubbery plastic and the tread is very nicely done, care needs to be taken when removing the centre sprue tree, I attempted the first one with my trusty zacto however I found it hard going so with the rest of the wheels I used the sidecutters and then cleaned the remainder up with the craft knife and a round sanding stick. The steering is nicely rendered and it enables you to build it with the wheels turned which is a nice touch. The wheels need a little bit of attention as there is a little bit of flash to deal with, I found the wheel hub/break disc assembly a little confusing as component D9 looks like it should be glued the other way round, however with a little bit of time and patience and a quick follow of the instructions it does go together well. As we move onto the next part of the construction we find ourselves dealing with the rear wheel assembly, once again care needs to be taken when cleaning up the tyres as mentioned before, also the wheel hubs need a little bit of attention to clean up a little bit of flash. The rear wheel assembly is really nicely moulded with hardly any seam to clean up, you could leave it without cleaning up as it is not seen once the kit is assembled. Care once again needs to be taken when assembling the wheel hub/break disc assembly keeping an eye on parts D8. Once completed, part B2 with the wheels attached slot nicely in, I added a little weight whilst the glue was drying so that all 4 wheels sit on the ground as they should. We now turn our attention to the back shelf and rear seat, I found no issues here you just need to be careful when cleaning up the headrests (D4) so you do not remove the very small location plugs. I attached the seat and back shelf once the glue on the lower chassis had dried, I found no problems and they glued easily into place. Next comes the petrol tank and exhaust assembly, the petrol tank looks good and glues into place without any fuss, the exhaust however needs a bit more care and attention. All the exhaust components have no flash or seams to clean up and once put together looks really nice, care needs to be taken when attaching the final part (B9) its position is not entirely clear in the instructions and from a personal point of view it could be clearer. The underneath of the car chassis looks really good once completed, it is just a shame that none of this is seen once the model is finished, however it does give scope to a car on its roof within a diorama setting, a little food for thought. We are now close to completing the lower car chassis, the centre console goes together easily with very little clean up, the gear stick needs careful clean up where it detaches from the sprue, care also needs to be taken as it is quite small and could quite easily be lost. As we move onto the lower dashboard care should to be taken when removing from the sprue and the cleaning up the pedals, I lost the brake pedal when it pinged from the tweezers. The front seats are a 4 piece assembly which go together easily, the headrests needs to be cleaned up carefully as mentioned before so you do not remove the small connecting plugs. On a final note the 2 parts that make up the back of the seat could do with a small bit of filler to marry them together. The final parts of the lower chassis are now glued into place and I found no issues here at all, the instructions get you to follow a certain order (A,B,C,D), this works well and once complete the lower chassis looks really good and is ready for some paint, although detail painting within the front foot well needs to be done prior to gluing the centre console and lower dashboard in place as access afterwards is tricky. The next phase is the attachment of the front and rear windows, I decided to leave mine off until the upper car body have been painted. The clear plastic parts are nicely done, and clean up reasonably easily and they fit nicely on a dry fit run. If you are building yours as a Taxi, now is the time to drill the 2 holes in the roof and attach the taxi sign. We now turn our attention to the dashboard and windscreen wipers, this where I encountered the first real issues. The wipers are a 3 part affair, 2 small fragile pieces of plastic and an etch part, unfortunately the first component (A29) broke as I removed it from the sprue so extra care must be taken when removing this part, also you need to very careful when removing the etch parts (P5 and P6) these are small and I managed to lose one. I will need to have a dig around in the spares box to replace these once I have painted the upper car body and glued the windscreen in place. The dashboard and steering wheel are a far more simple affair and go together very easily however there is a very small etch Mercedes sign that goes in the centre of the steering wheel, mine disappeared as I took it off the etch fret, extra care needs to be used here so you do not lose the small badge. Some detail painting and decaling of the dashboard needs to be done at this point, and extra care needs to be taken with what I think is the choke button (A13), it is possibly the smallest piece of plastic I have ever seen and it was lost on the workbench, possibly hiding out amongst the other small shavings of plastic that hide there. The boot cover is next and this looks really nice once the inner framework is glued into place, however I found the boot cover a poor fit so I glued mine in the open position, care is needed when removing the boot hinges from the sprue as these are quite fragile and once in place on the car body a fair amount of glue is needed to keep the boot up and to strengthen the bond. Before I moved onto the next phase, I left the kit for 24 hours to make sure the glue was completely dry and ready to move on. The rear bumper is nicely done and the rear lights attach without any problems, the rear number plate is a nice etch part, they give you 2 choices of etch number plate (one small and one large), I opted for the smaller choice as I thought they looked better. The front bumper and radiator definitely look the part, very much Mercedes in look, the front lights slip in and glue nicely, I use a PVA based glue as it dries clear, ideal for clear parts, once again I used the smaller etch number plate to match the rear one. This is where we would normally glue the upper and lower car parts together, the fit is really good and apart from a slight gap at the front radiator grill you would not know it was not glued, I left mine unglued so I can return and paint at a later date. Moving swiftly on to complete the front lighting section where care is of the essence, the indicators look really nice and need careful clean up however I dropped one of mine and run it over with my chair so careful handling is important. Now that the main body and chassis are complete we move onto the drivers side doors, starting with the inner panel these look really well done and the door storage compartment looks the part once attached, I did find the locating points hard to find on this and the inner handle so some care and a good magnifier is needed. There is a small hinge between the inner and outer parts of the door these are designed not to be glued so you need to be careful when applying the adhesive, you can have the doors either open or closed so this small hinge needs to be moveable. I glued the rear door closed and left the drivers door open to break up the look of the car. There is an odd gap on the rear doors between the inner and outer door which is one of the reasons I glued the rear doors closed. On the front doors there is a small clear wing mirror that needs careful clean up and when painted will look good. The door handles are really nice however they are really difficult to remove from the sprue and are very fragile, I used a small saw to remove mine yet still ended up breaking one, care is definitely of the essence. The passenger side doors go together the same as the drivers side, care needs to be taken when gluing the 2 halves of the door together as not to glue the small hinge, extra care is required when removing the door handles from the sprue as mentioned earlier. I glued both passenger side doors closed gluing them in order as the instructions say, rear door first followed by the front. I did not attach the door windows here however I did do a dry run and the fit is really good and will look really nice once the whole kit is painted. One thing that should be pointed out is that the door frames are quite fragile one of them in my sample kit was bent and curved so you should be mindful of the fragility when removing them from the sprue. Now that the whole car is built and doors attached we now turn to accessorising the car, we start with the front Mercedes badge, now this is a 3 part etch brass ensemble and it gave me more of a headache than any other part of this kit, it may have been easier to clean up if it had been rendered in plastic, I managed to bend and break the circle part of the Mercedes sign so the rest was put into the spares box so you will need to cut the parts as close to the fret as possible to negate the need for clean-up. On my many research journeys on the internet quite a few of the cars I saw had this badge missing so I was not that disappointed that I had cocked up yet another fine piece of etch. Moving onto the living accessories that come with the kit, these are a joy to put together the fridge box jerry can and tea urn are really nicely done and careful painting/weathering will really bring out the detail. Once again with the spare wheel the tyre removal from the internal sprue tree needs to be done carefully, and there is a small amount of flash to clean up on the wheel hub, the suitcase is the only disappointment among the accessories as there are some really irritating ejector pin marks on the inside of the lid so I glued mine shut, it maybe would not have been so bad if they had been on the bottom of the case as there is a shirt and T-shirt that would have covered these up. We now move onto the final construction in the kit, the roof rack. This is the only area of the kit that I found disappointing, the bottom of the rack is nicely done and well moulded, however the 2 sides of it are very very fragile and it is attached to the sprue at 12 different points, why it needed 12 attachment points I am not sure, when I tried to remove the first side (G2) it snapped in 3 places and I left half of it behind, I tried the second side (G3) and had more success and completely removed it however it broke in 2 places whilst I attempted to clean it up so I ended up leaving the roof rack off the kit completely.Conclusion
This is a fine offering of this Mercedes sedan from Diopark. I know that no model is ever perfect and this one has a few problems and the few issues I have mentioned should not cause too many problems to a moderately competent modeller with a little etch brass experience you just need to take a little care and finesse when it comes to removing the very fragile parts from the sprue, some of the etch is very fine and very nicely done. I can see no reason not to buy this model from Diopark as it build up into a good representation of a 1970s Mercedes sedan. The finishing options supplied with this model are: A standard white/off white car, Red and white taxi.References Used
Just the internet.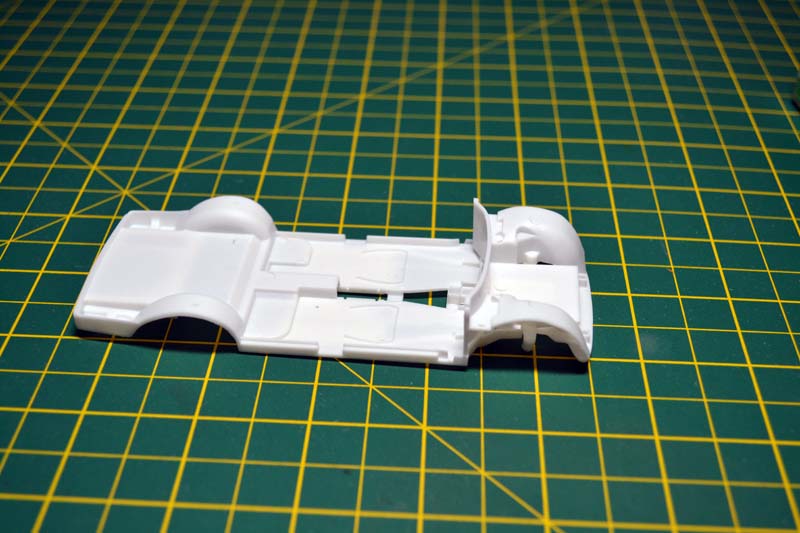


About the Author

FROM: ENGLAND - SOUTH EAST, UNITED KINGDOM
I have been modelling since the winter of 1999 as a bit of a stop gap due to the fact I had just started a new job I was in debt and money was tight so after a visit to a local model shop I bought the Tamiya Sd.kfz 223 which was built badly by myself and my Step Dad and so it began. I started out bu...
Comments

Thank you for the review and build log.
One question: How does the TAXI sign look/build? (Thinking about doing one as a classic german taxi in a REFORGER dio)
And one remark: The W123 was build 1975-1986 and was around in sizeable numbers in Europe well into the 1990s. So it covers a huge time frame. Even today there are > 15.000 in operation (having a licence plate and paying taxes) in germany
FEB 24, 2017 - 06:28 PM

The taxi sign is a one piece affair. just glues on the top via 2 small holes, I think it would look the part once painted up....
FEB 24, 2017 - 09:37 PM

I guess the next question is, is there paint in that ubiquitous German taxi color?
FEB 26, 2017 - 08:05 PM

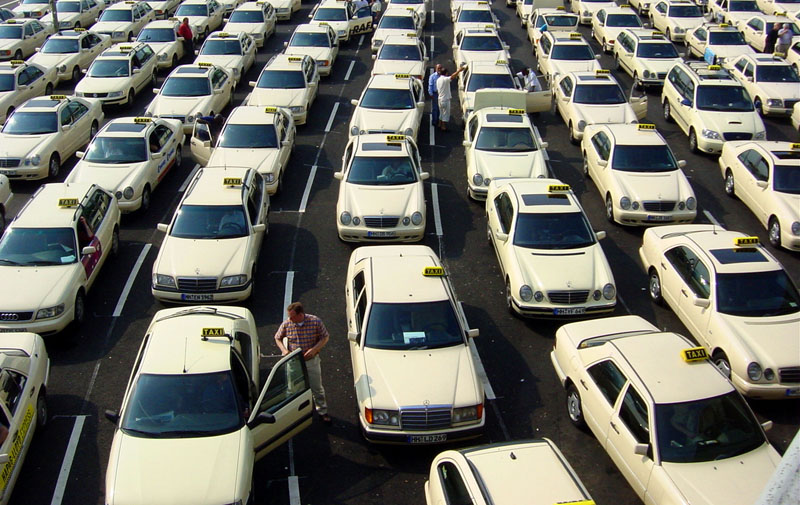
Since 1971, a pale yellow/beige color (RAL 1015) has been the standard.

 Before '71, they were all black.

Before '71, they were all black.
FEB 26, 2017 - 08:25 PM
It looks very nice in the black especially with that front chromed.....
FEB 27, 2017 - 09:16 PM


@ HeavyArty: I see they changed the front lights too. I like better the post '71 one. Indeed, that color is not easy.
Thanks for review - interesting
JUL 28, 2017 - 04:04 AM
The cars in RAL 1015 "Hell-Elfenbein" (Brigh Ivory) and the one in black are different types of vehicles. The black one is
W110
The top one is a
Dash-8
and the middel one (like the kit) is a
123
Both -8 and 123 are relatiely common "youngtimers" in germany since spare parts are cheap and plentyful. AND the cars are easy to maintain - even sports-teachers can handle that.
JUL 29, 2017 - 07:13 PM
Copyright ©2021 by Jason D Bettis. Images and/or videos also by copyright holder unless otherwise noted. The views and opinions expressed herein are solely the views and opinions of the authors and/or contributors to this Web site and do not necessarily represent the views and/or opinions of Armorama, KitMaker Network, or Silver Star Enterrpises. All rights reserved. Originally published on: 2017-02-25 01:58:35. Unique Reads: 19354

WEB HOSTING BY


Copyright ©2021 Armorama and Kitmaker Network, a subsidiary of Silver Star Enterprises
All Rights Reserved. Please read our Conditions of Use and Privacy Policy.
All Rights Reserved. Please read our Conditions of Use and Privacy Policy.