

1⁄35Meng PzH2000 build
6
Comments
Introduction
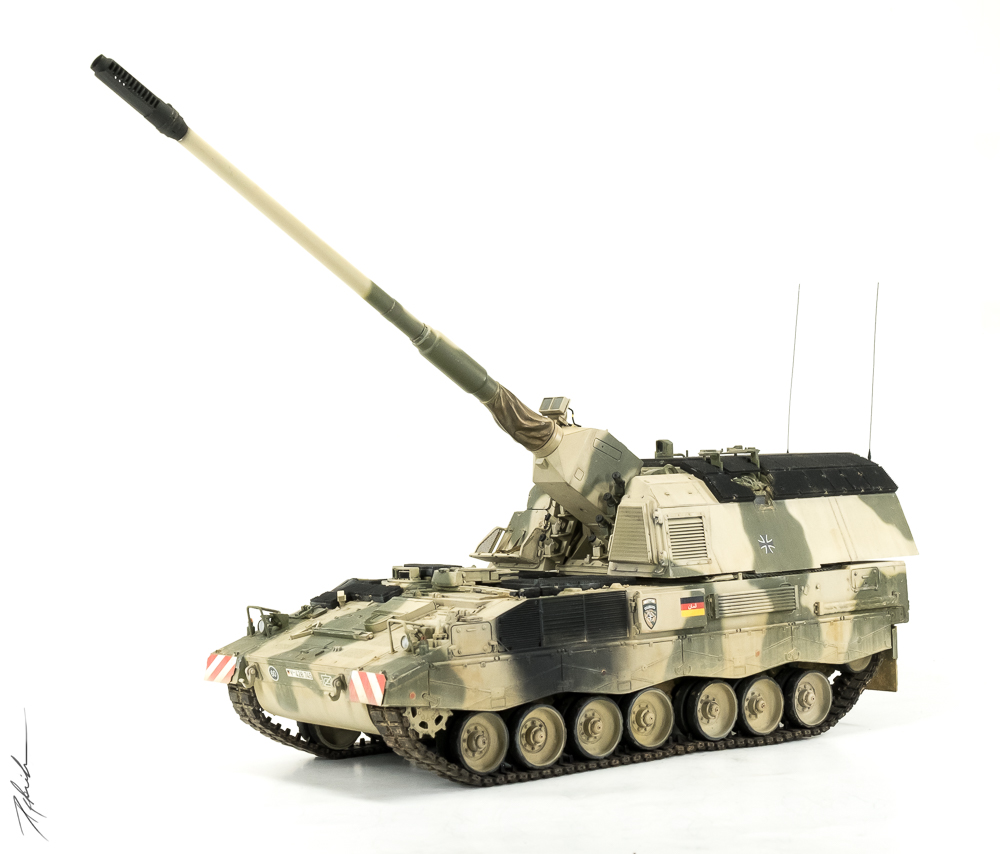
I have heard a lot of positive comments about MENGs new PzH2000 after it was released in 2014. While browsing through the world wide web I found some pictures of a Panzerhaubitze during ISAF-exercise in Afghanistan with a sort of add-on-armor mounted. Seeing this, I thought how nice it would look to build such a vehicle but at this time there was just MENGs "normal" PzH available and I didnt want to scratch this extra armor. So with the release of the PzH2000 with the extra armor in 2015 it was clear that this kit was mine.The Kit
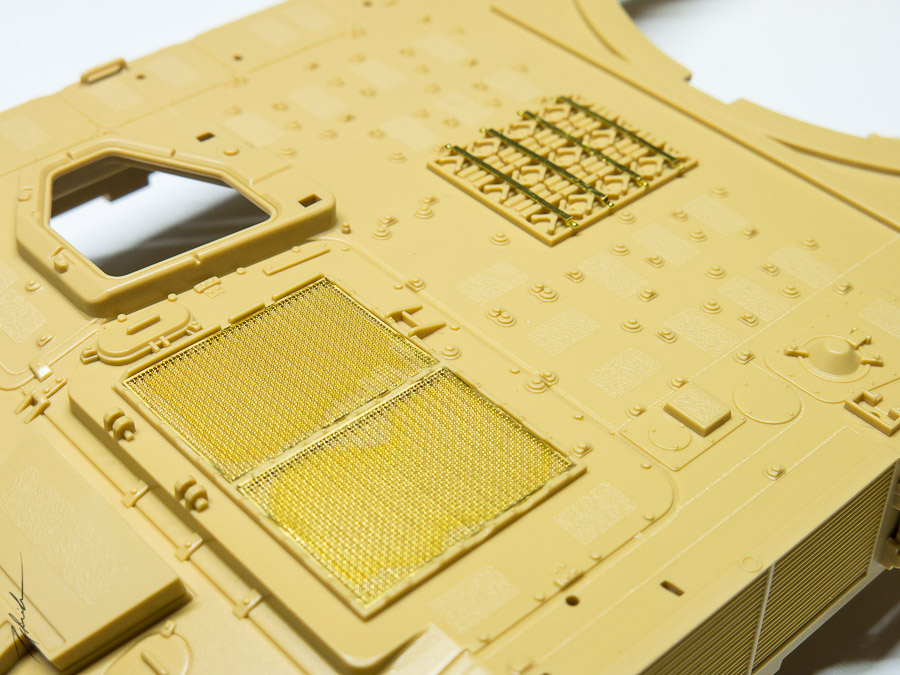
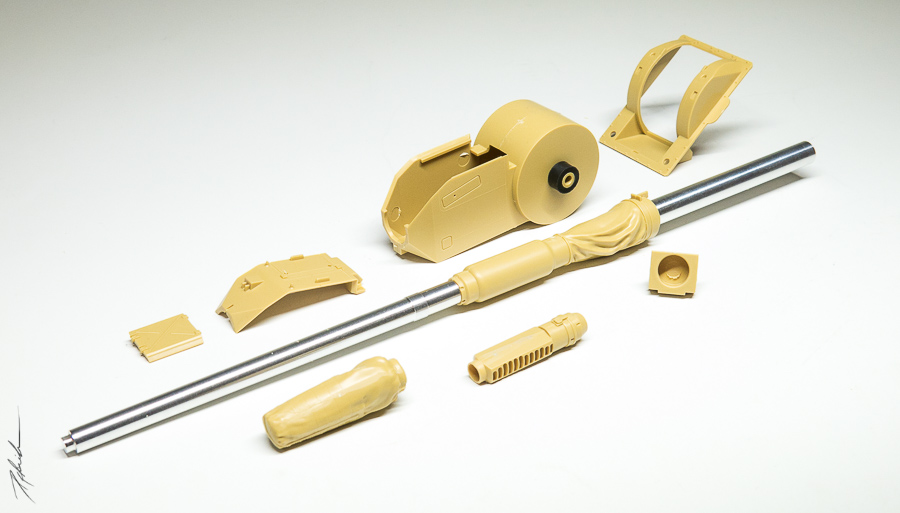
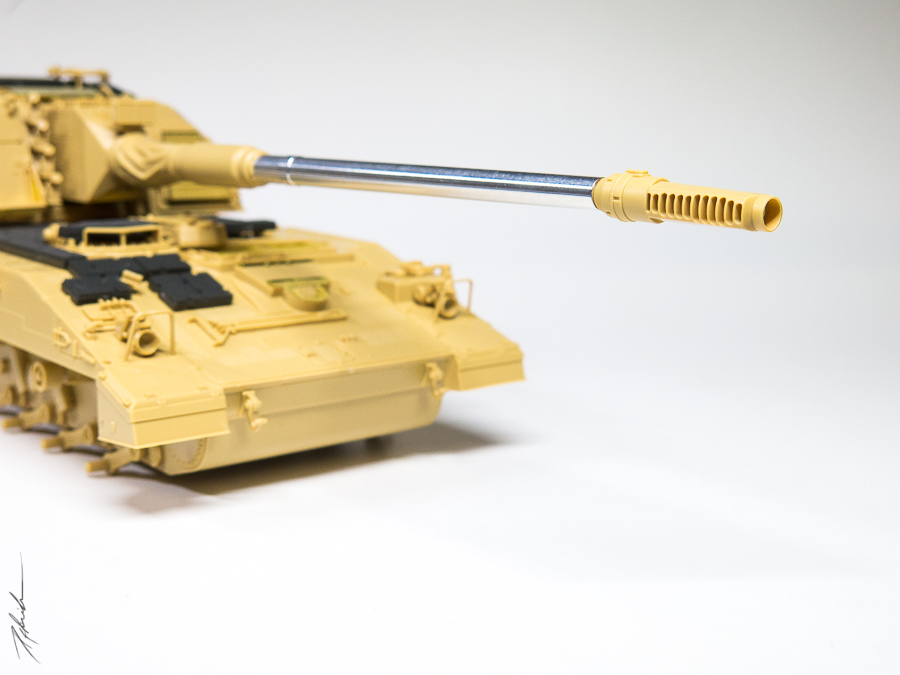
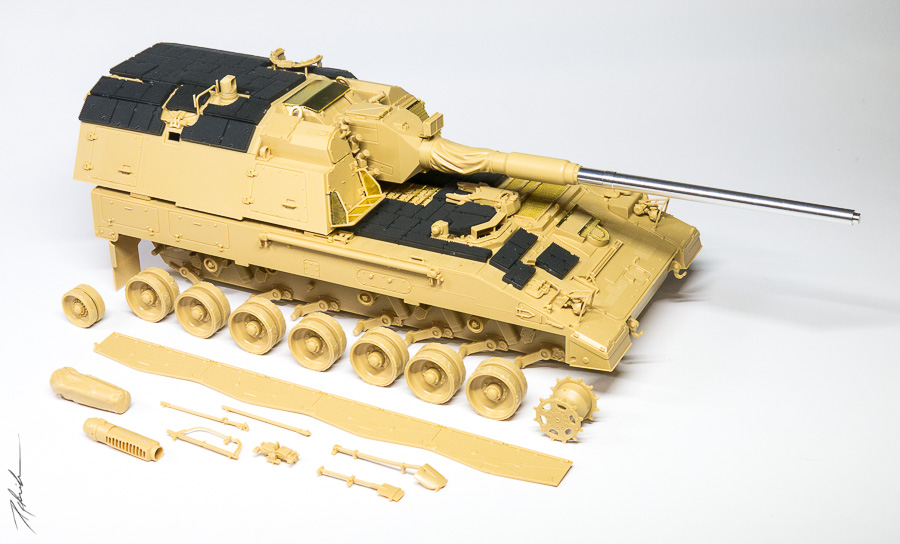
The kit itself is simply overwhelming. Ive built Revells PzH2000 a couple of times before and therefore I was very happy to see the improvement in every area of the model. Nice single-track-links, a nice-looking towing cable, very fine clear parts, fine photo-etched parts and of course a great aluminium gun barrel inside the box. For me the only thing which is missing are some nice-looking metal antennas. And maybe some chains for the smoke launchers.The kit of the PzH with the add-on-armor is basically the same as the standard kit. Meng added an extra sprue with the parts for the add-on armor. A box review with some pictures, showing whats in the box could be found on my website www.replastika.de (the text is in German, so sorry for that).
The Original
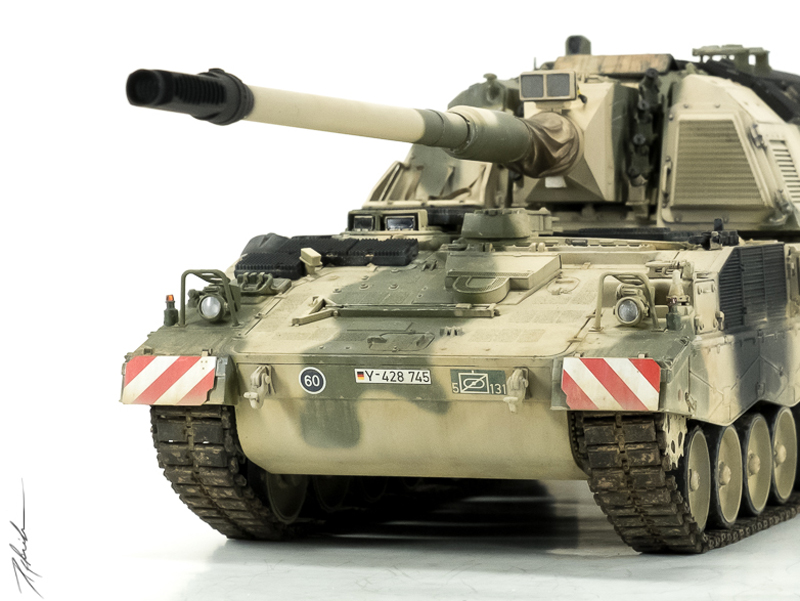
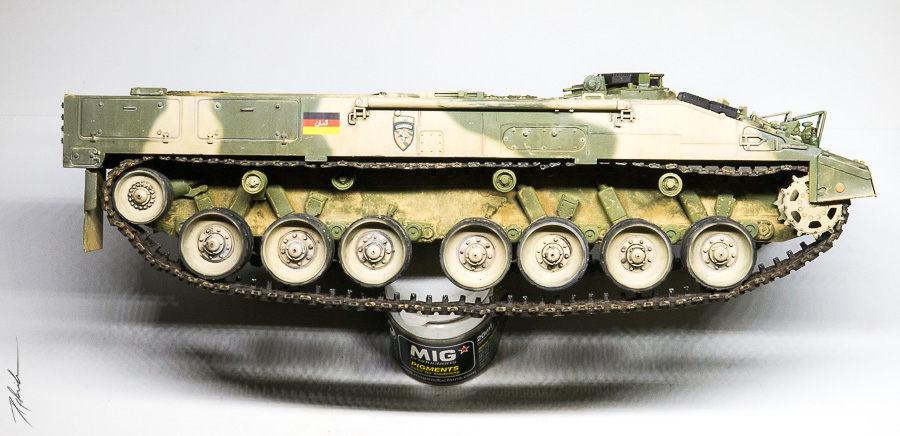
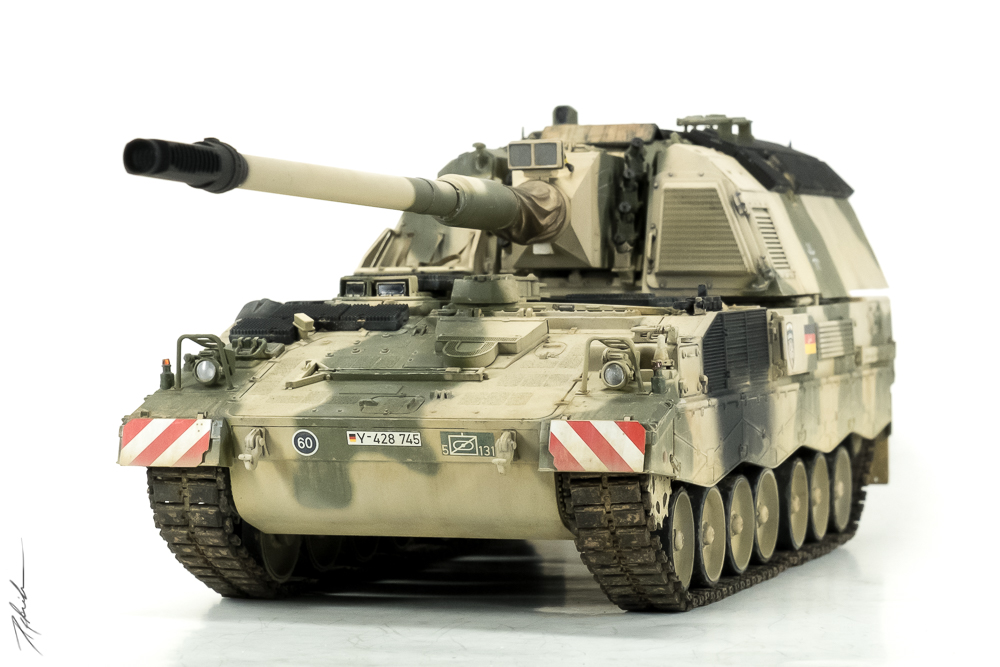
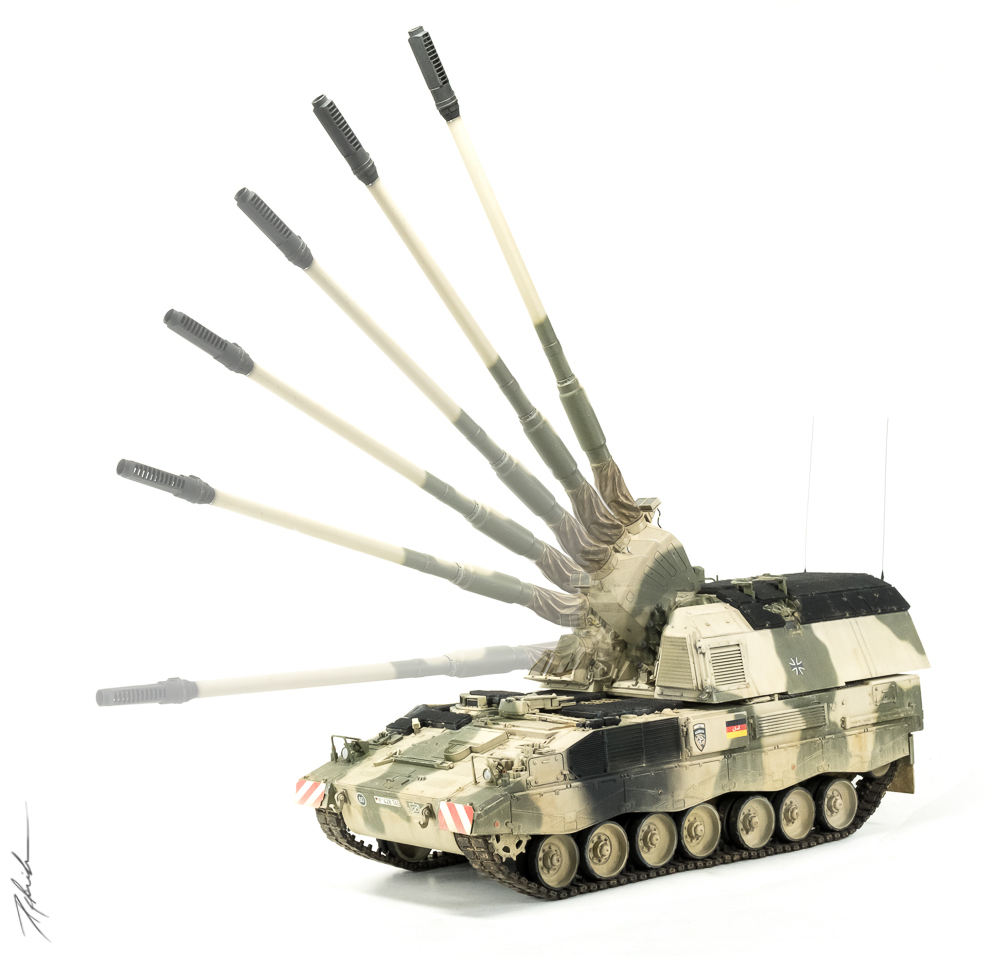
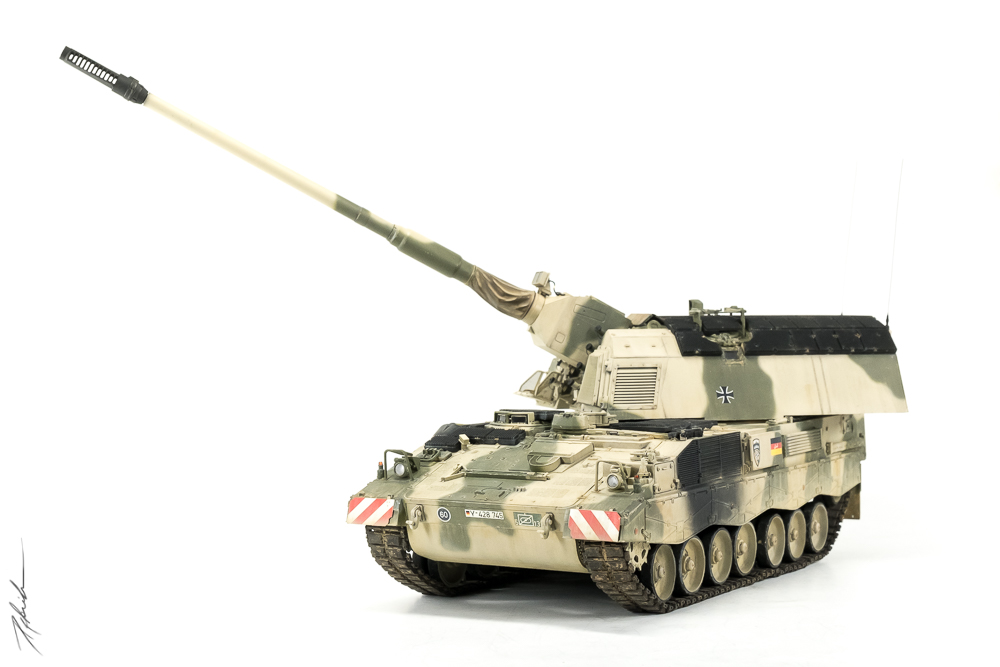
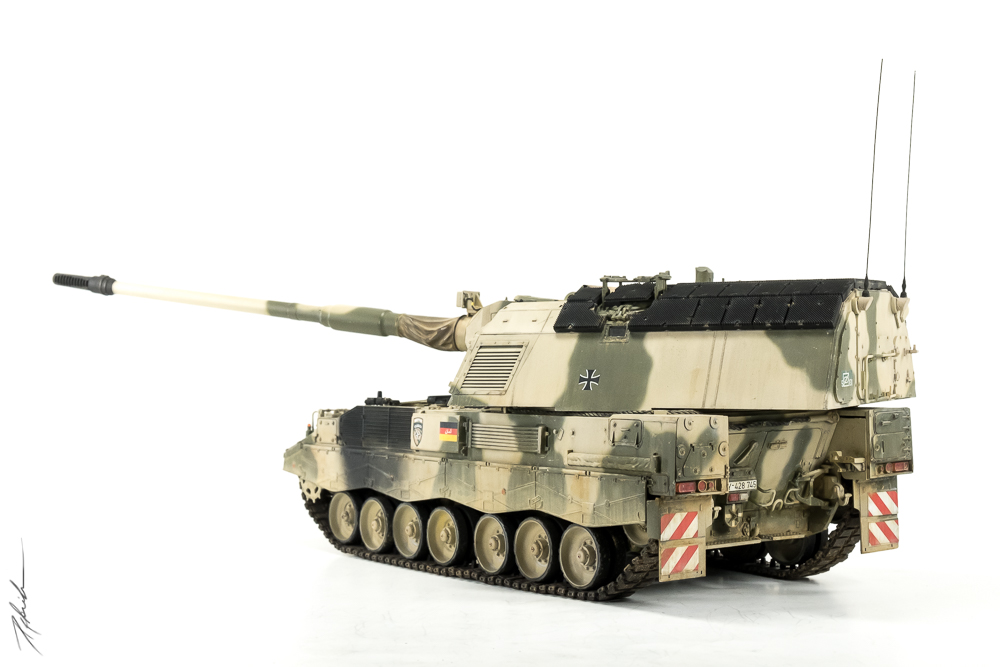
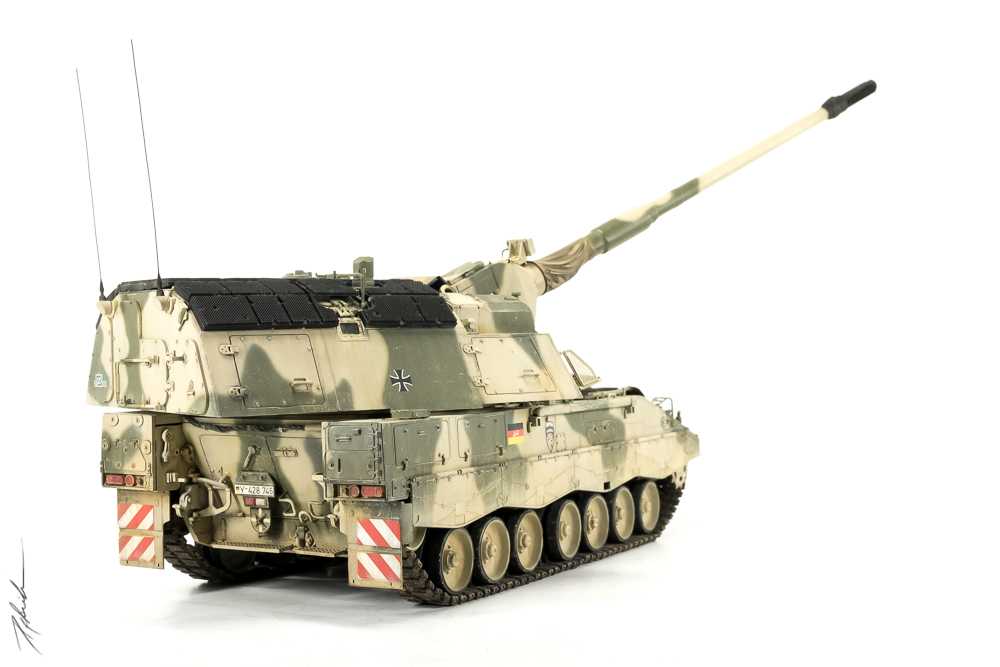
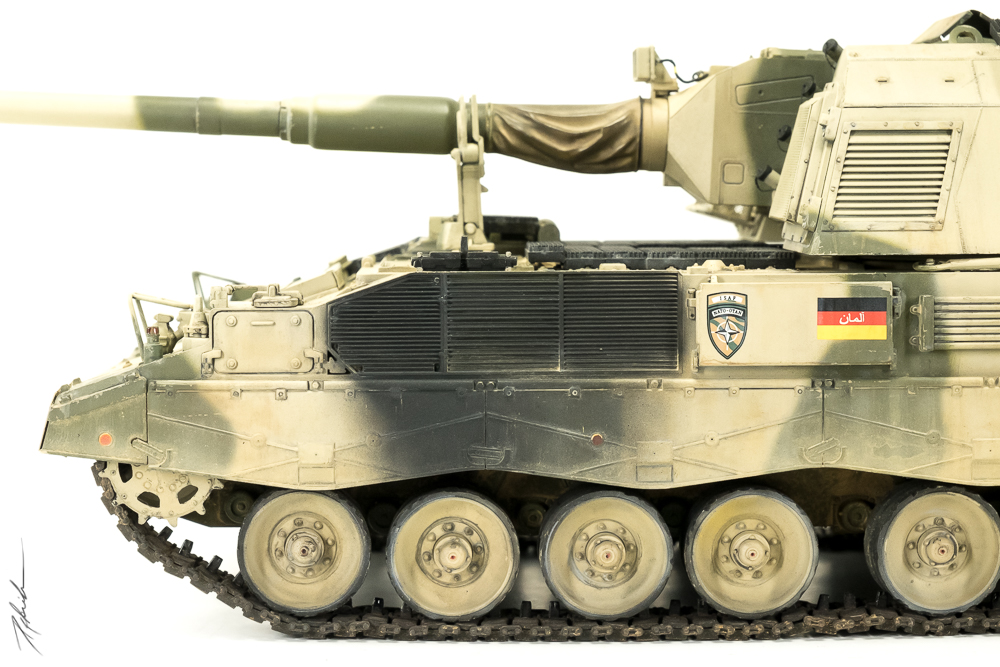
While studying some pictures on the www I decided very early that my PzH should look like a real workhorse with tons of hours in service.Regarding the camo I also defined very early that my PzH would become a desert-green-monster with a lot of dust on it. I must admit that Im a huge fan of desert-camo-vehicles, dusted with pigments all over.
The Build
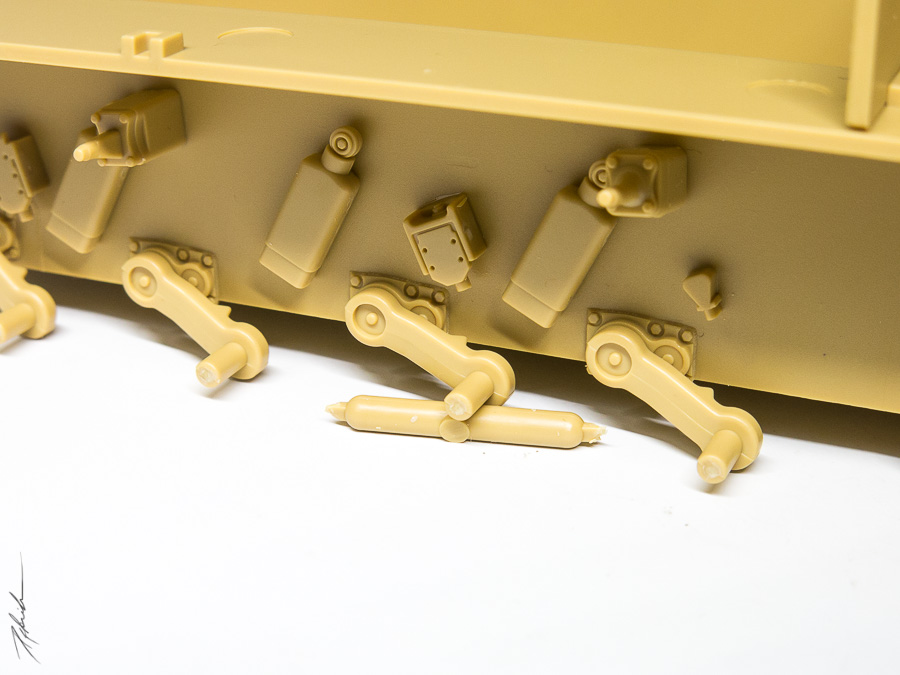
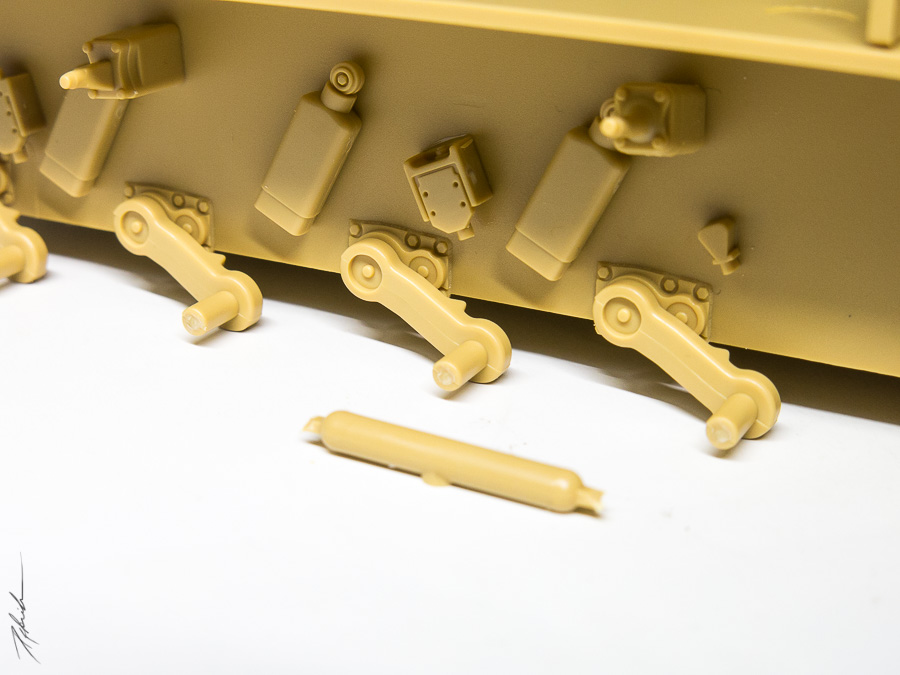
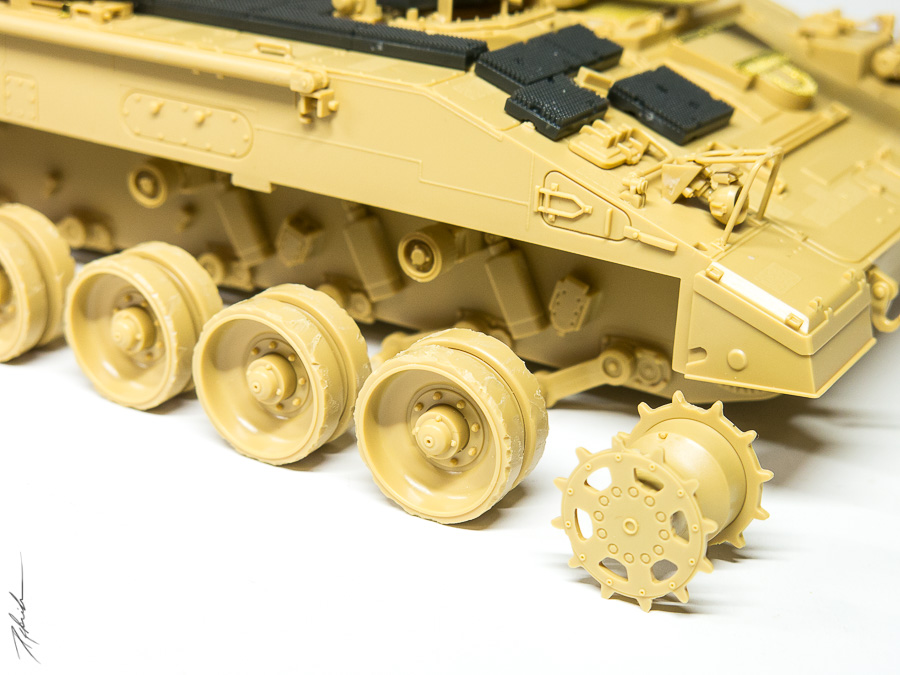
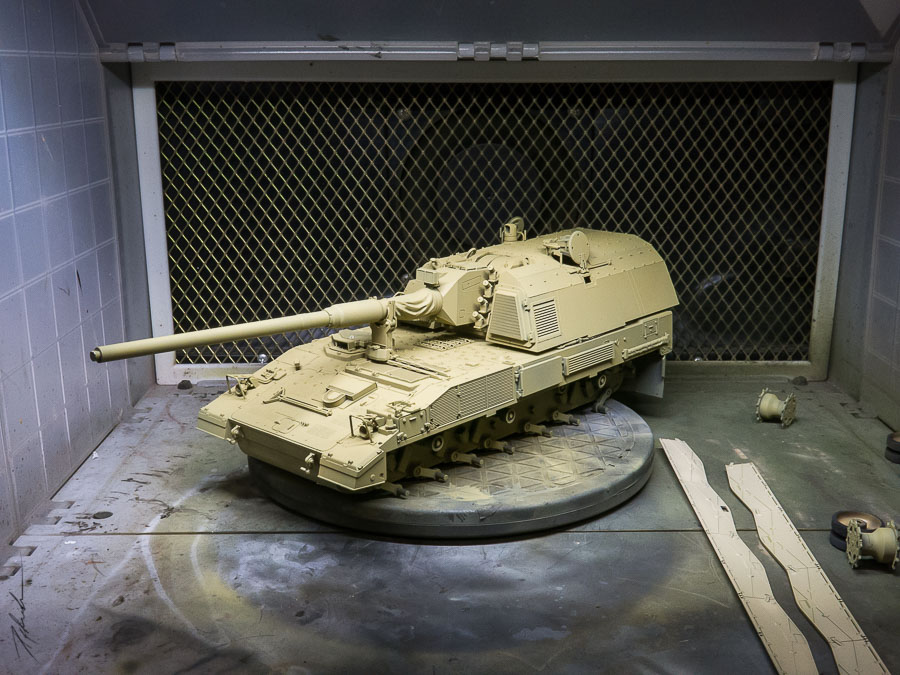
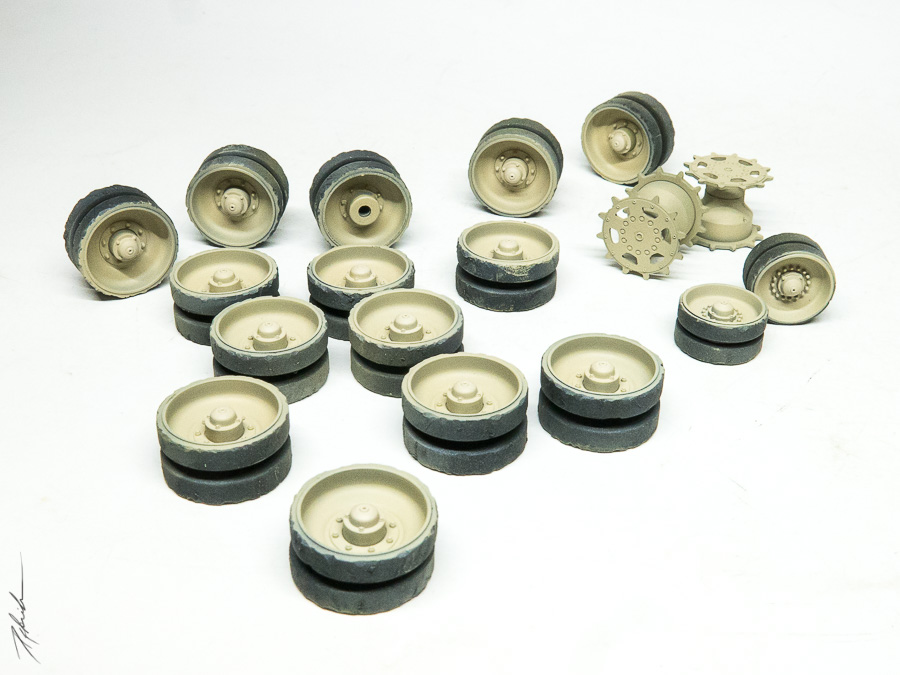
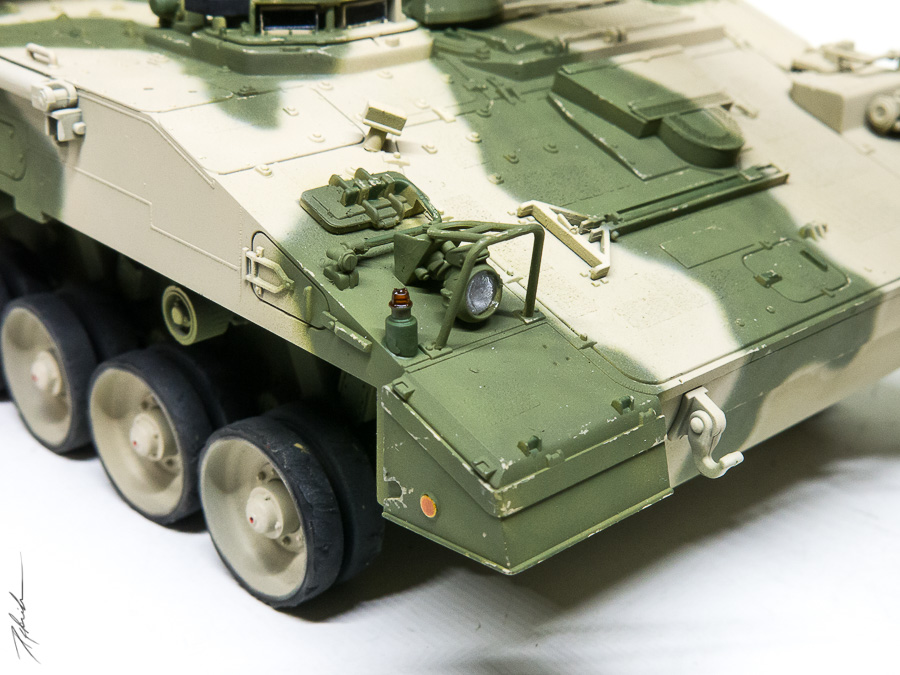
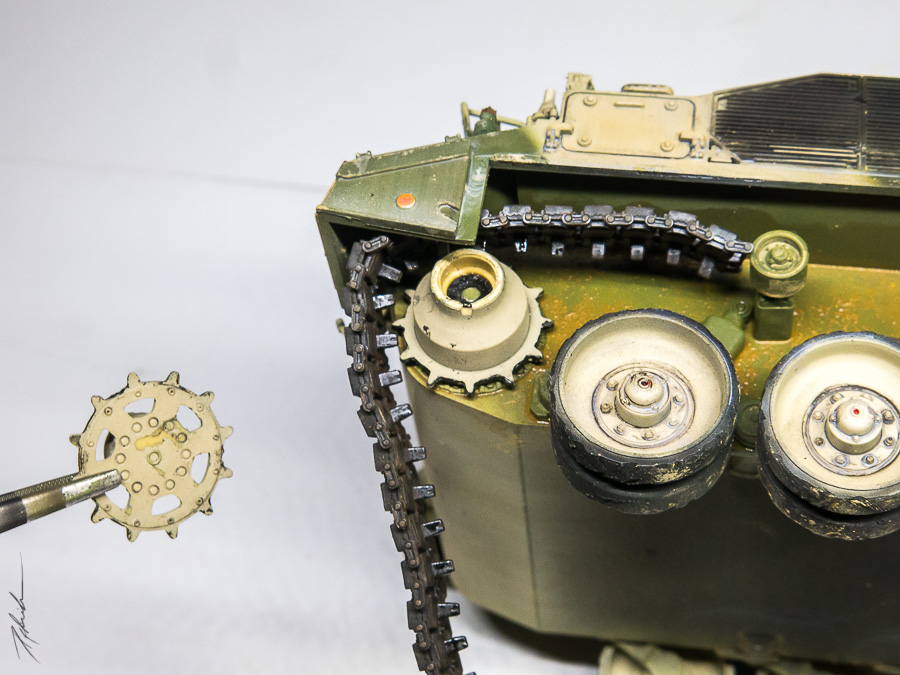
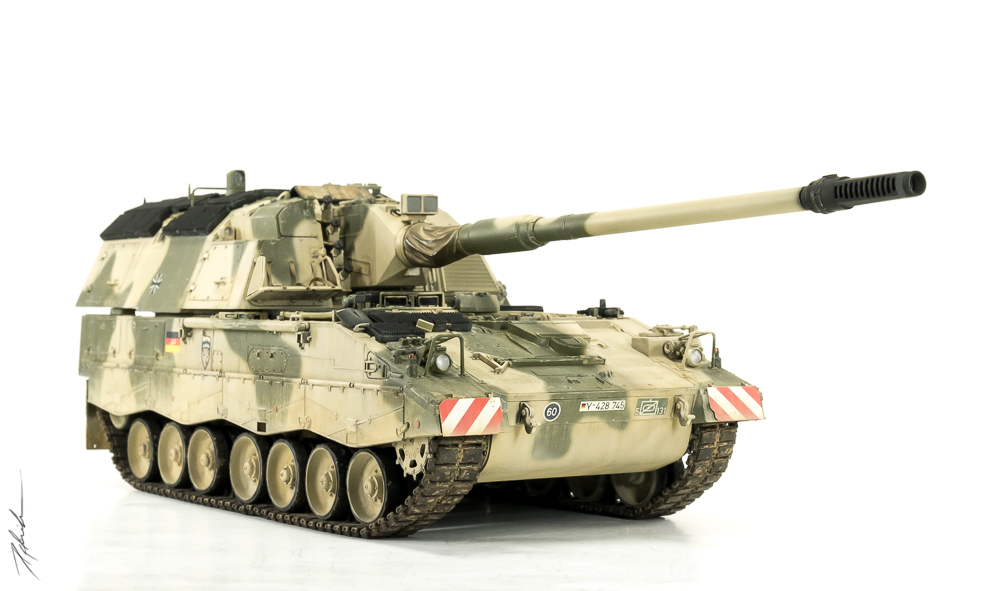
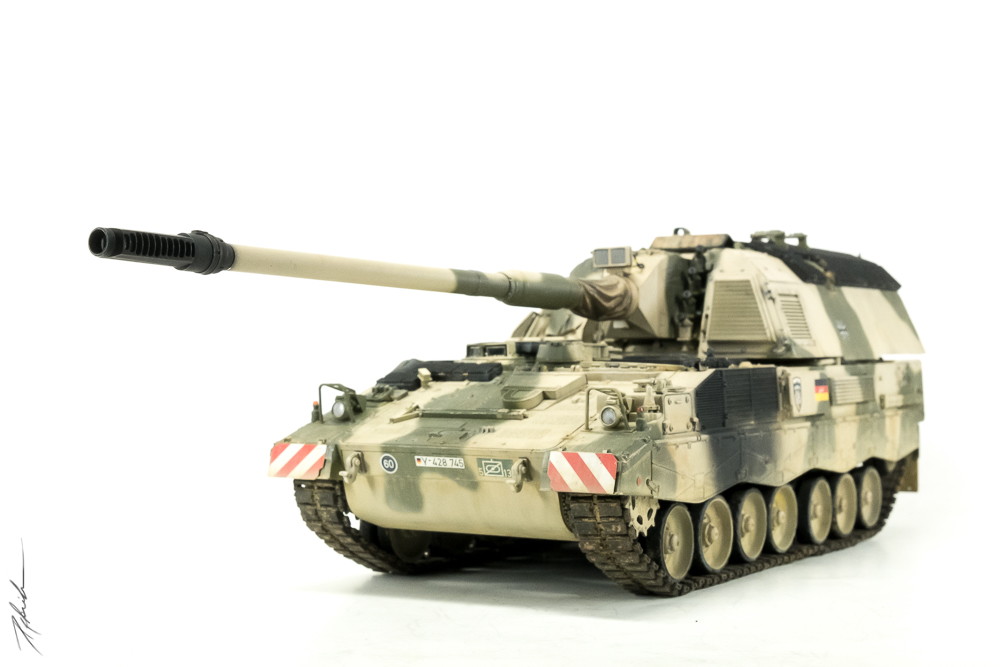
First I started with the suspension and the running gear as described in the instructions. I damaged the wheels, using a Dremel, to give them a used and damaged look. The Afghan-sand is not a very nice friend to those military vehicles out there.I went on, adding some details to the vehicle and of course the suspension is also movable on this kit, like on nearly every MENG kit. Really well done, guys!
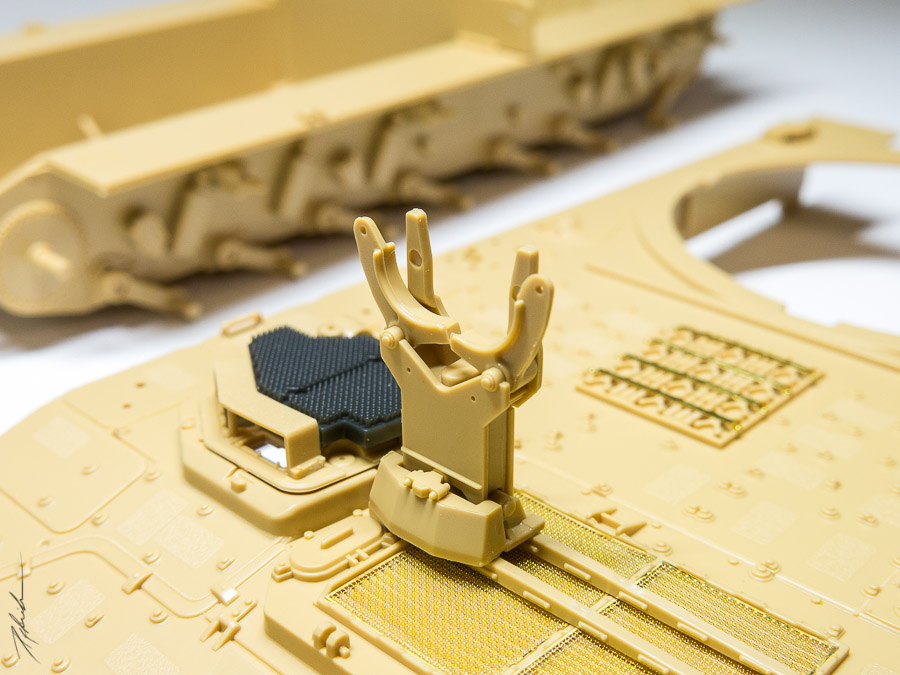
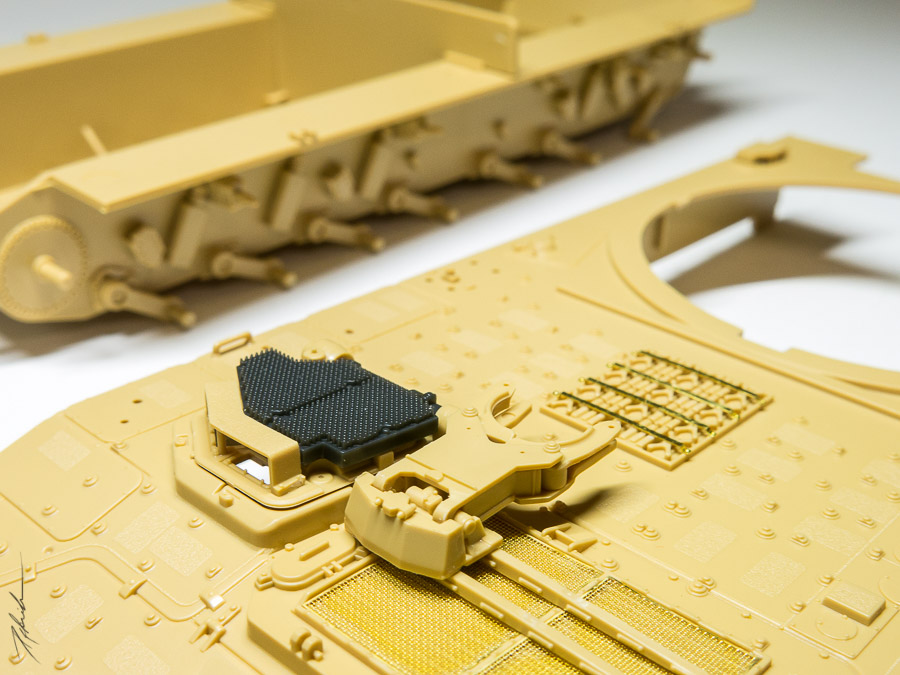
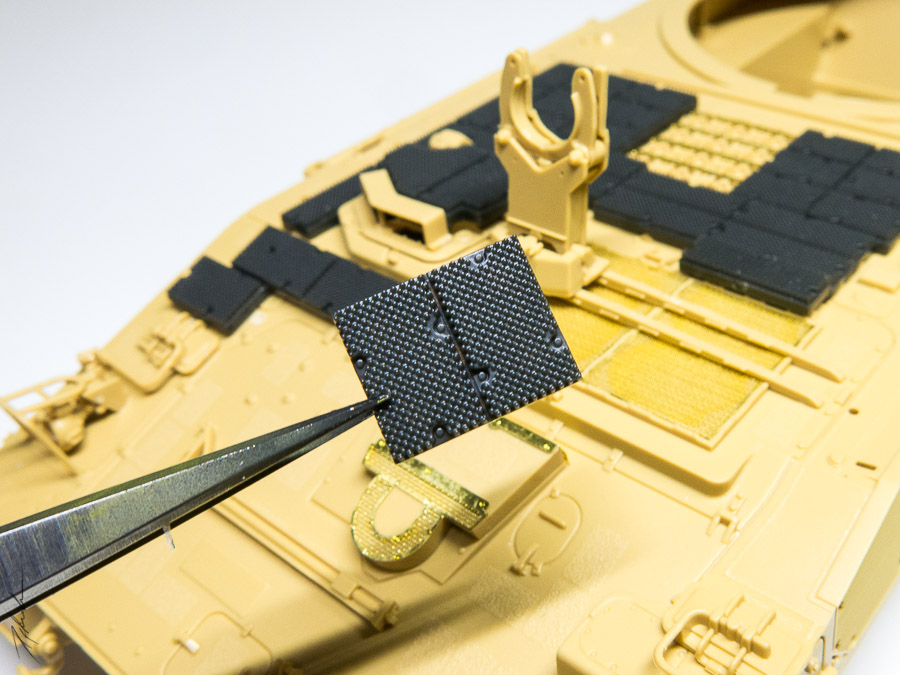
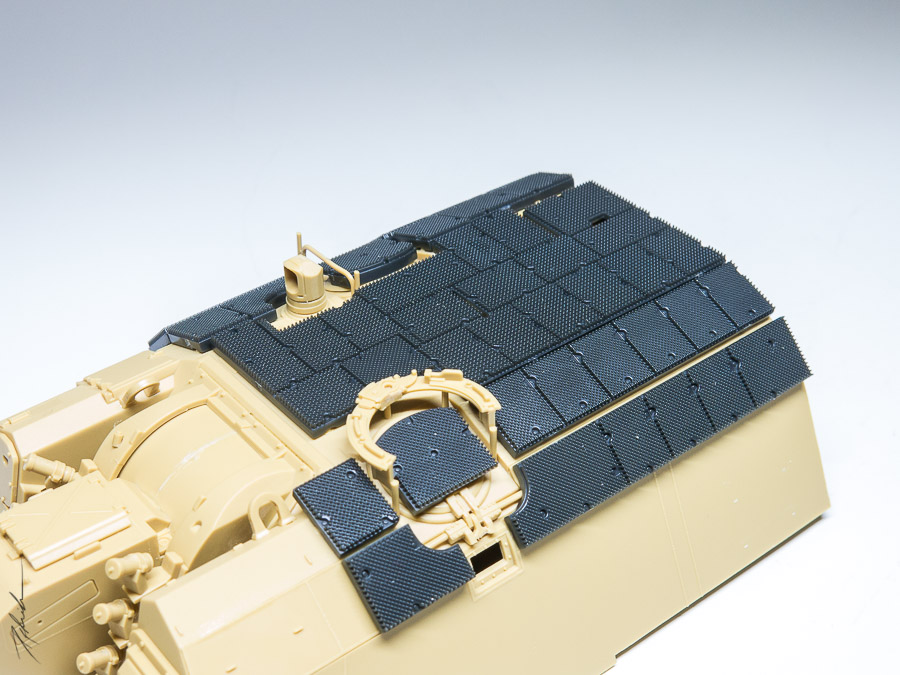
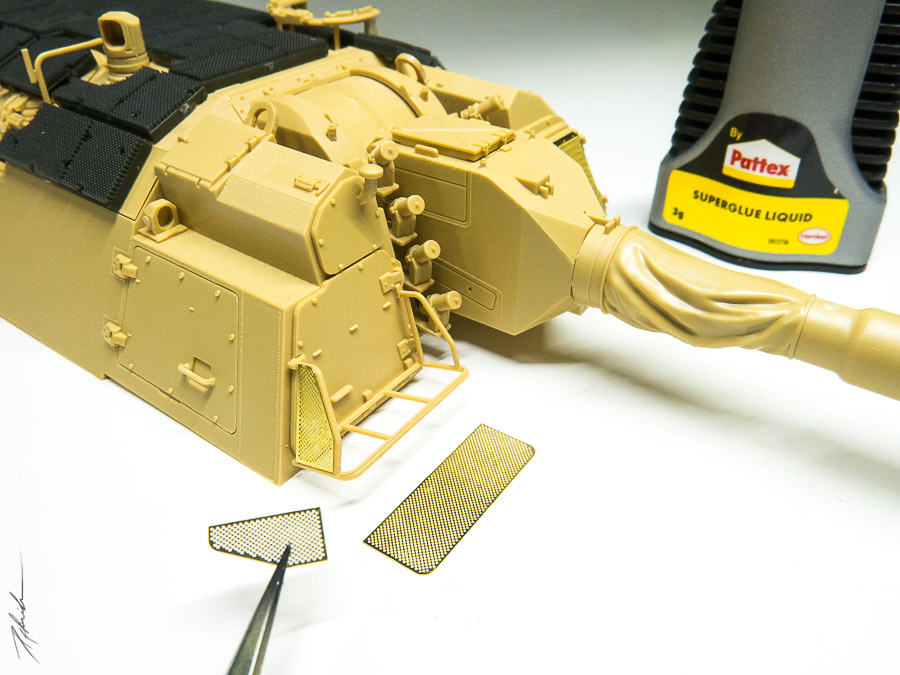
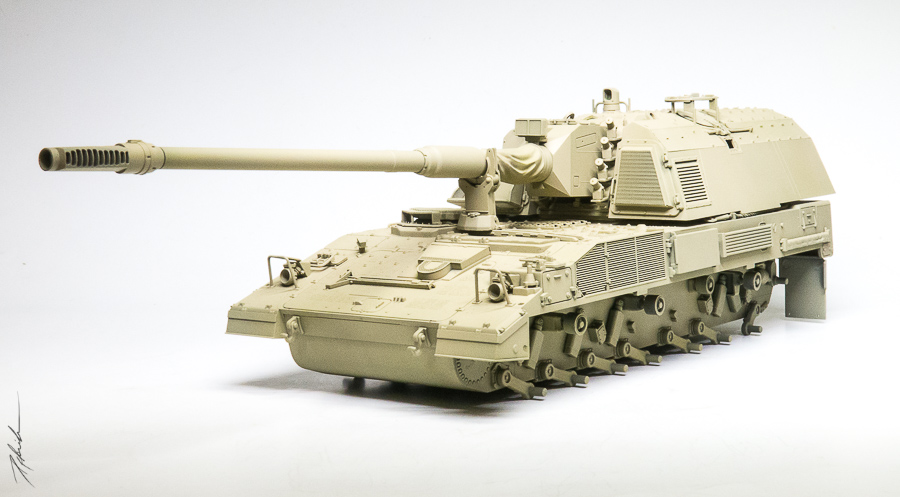
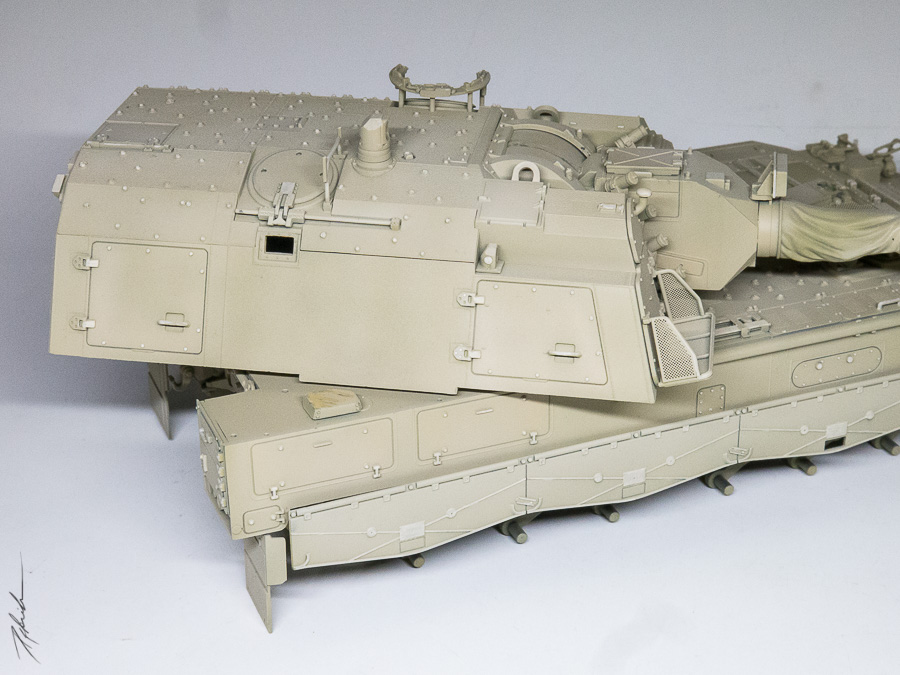
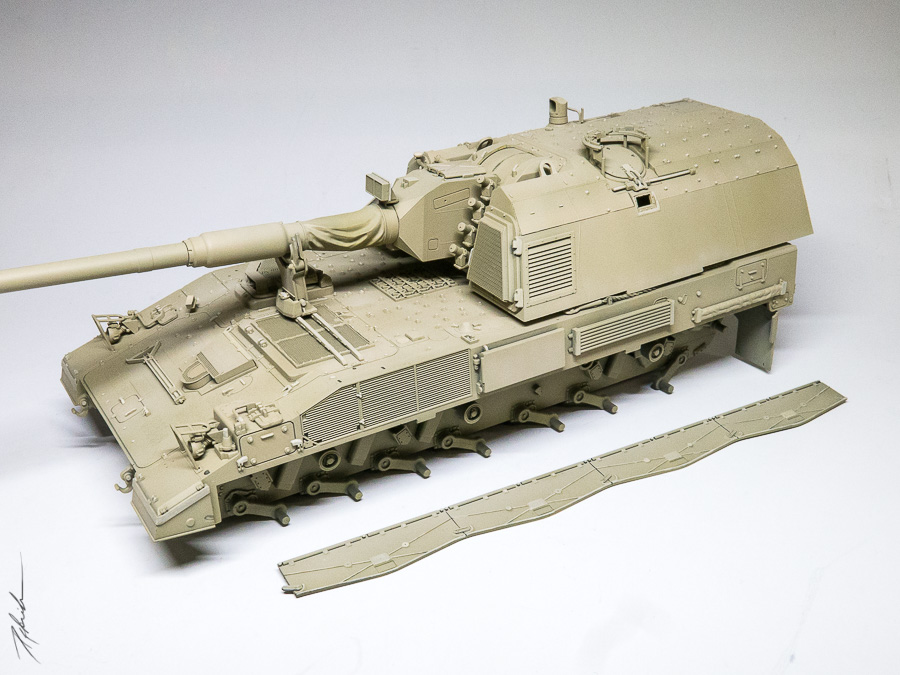
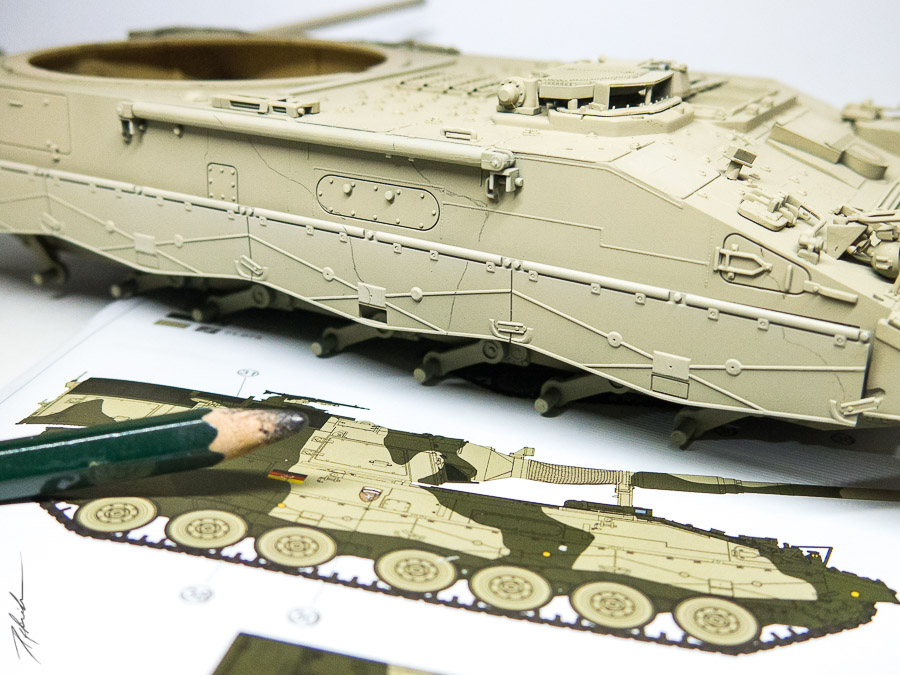
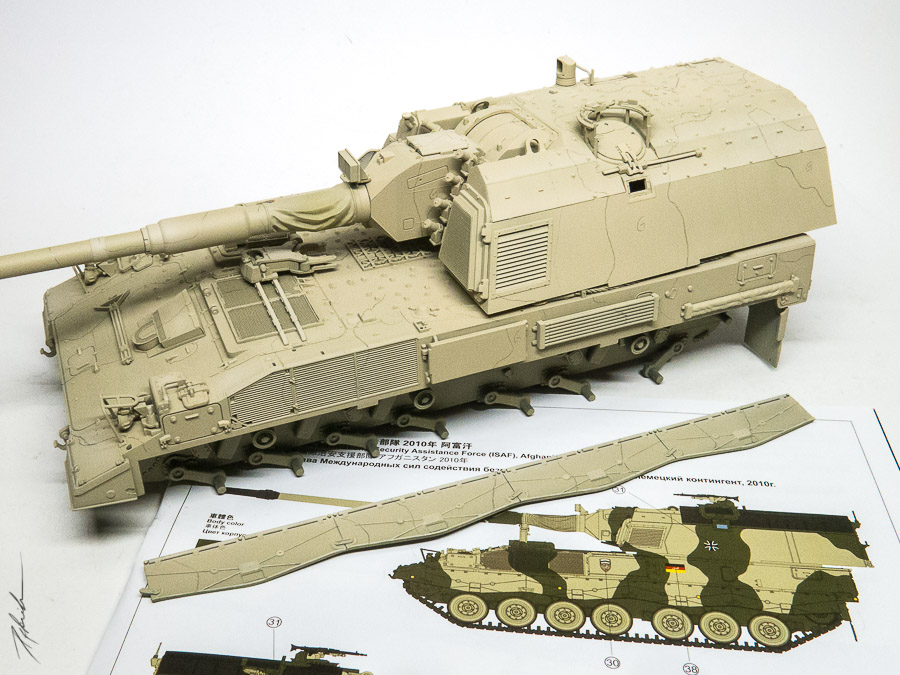
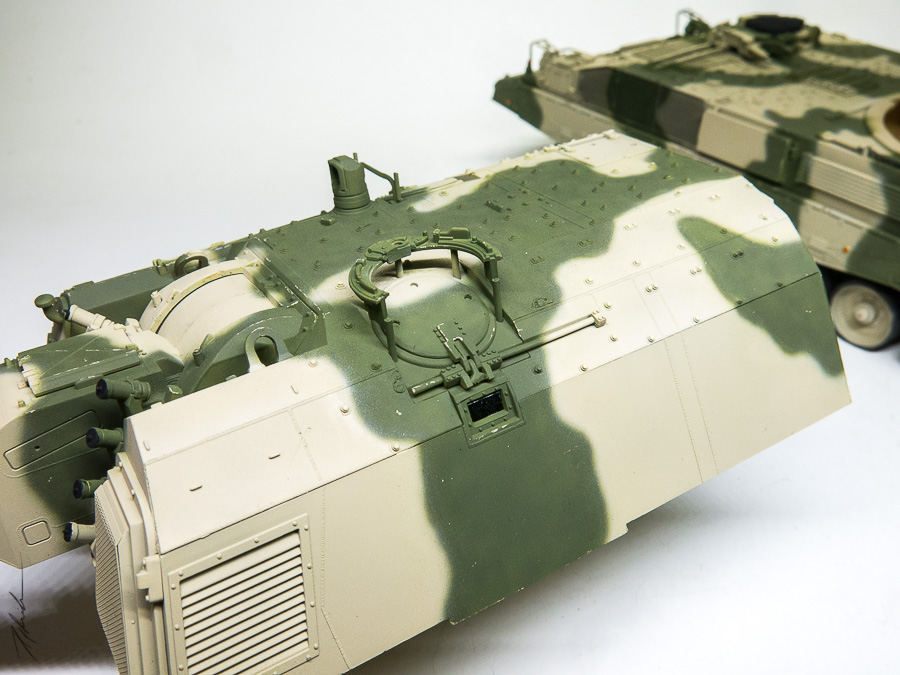
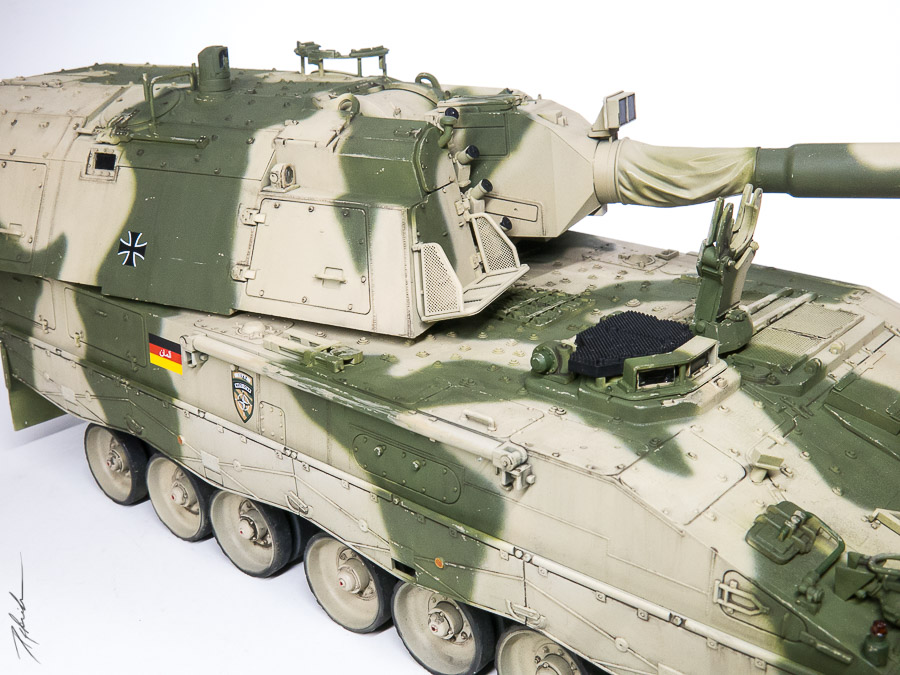
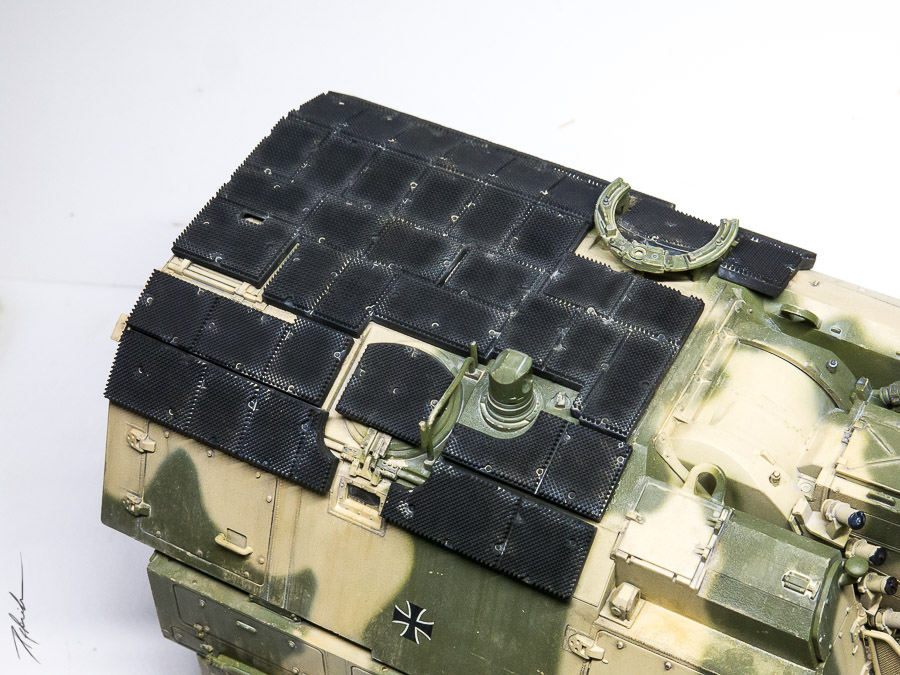
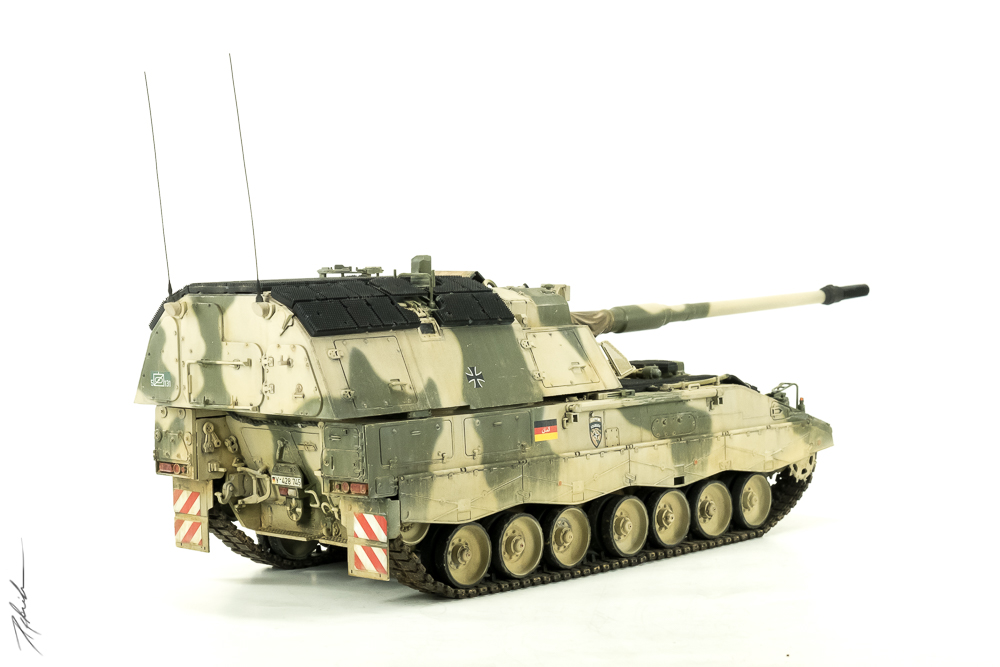
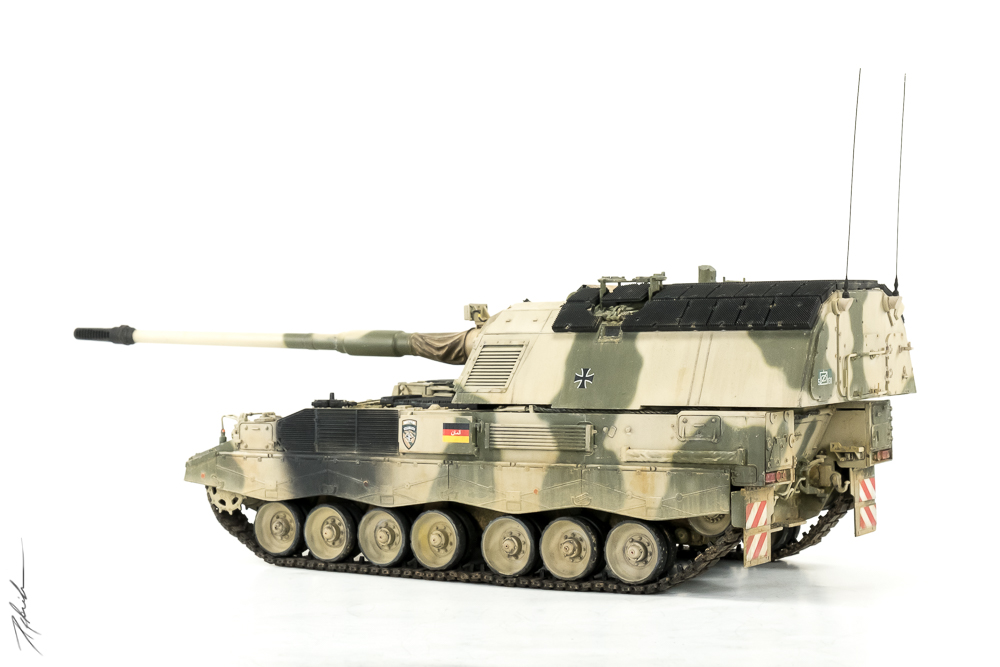
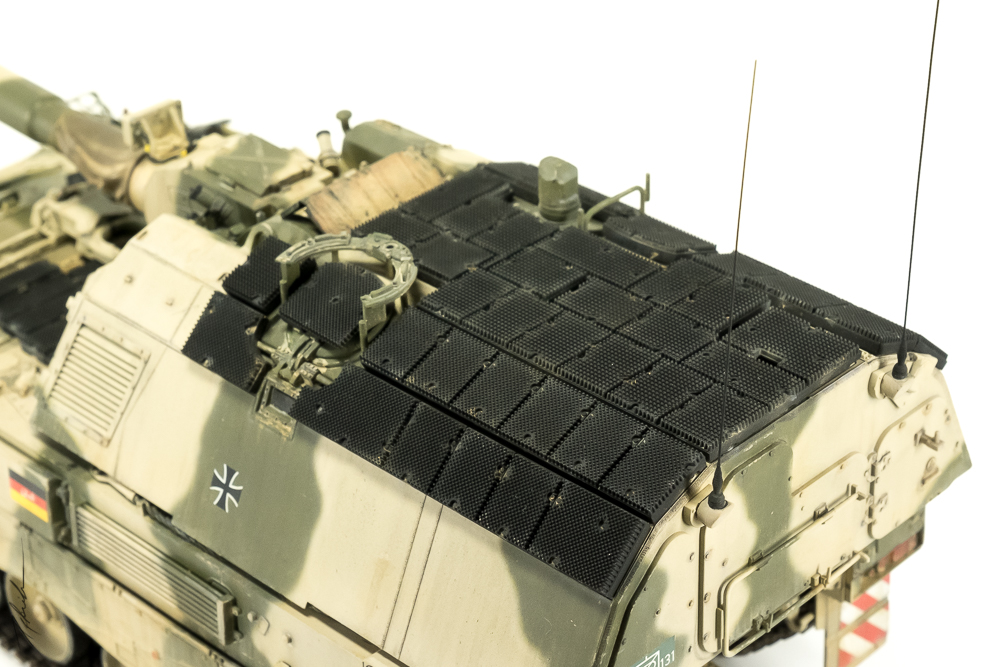
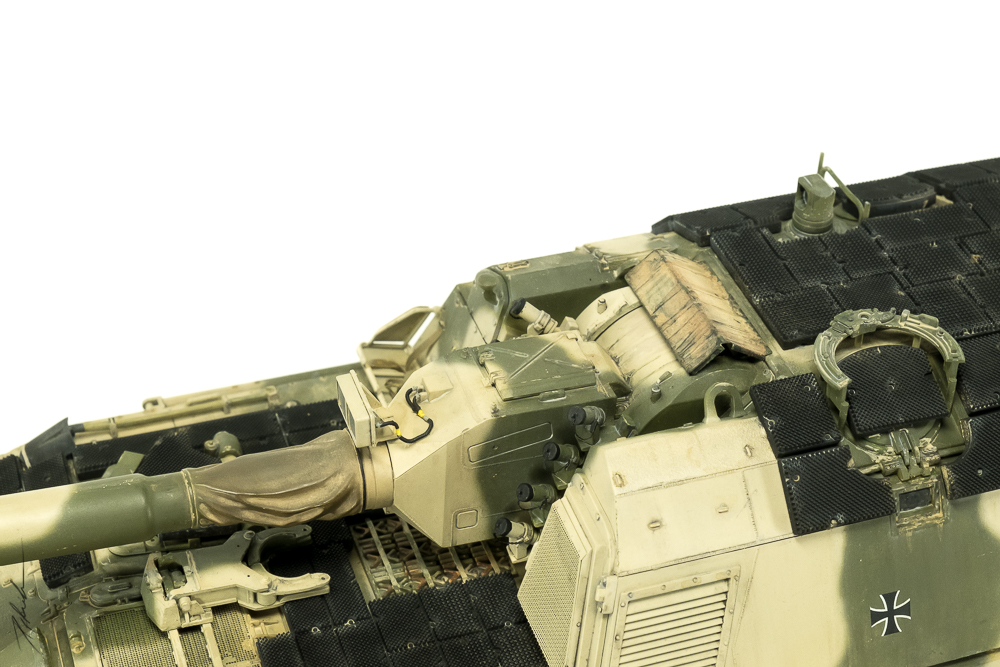
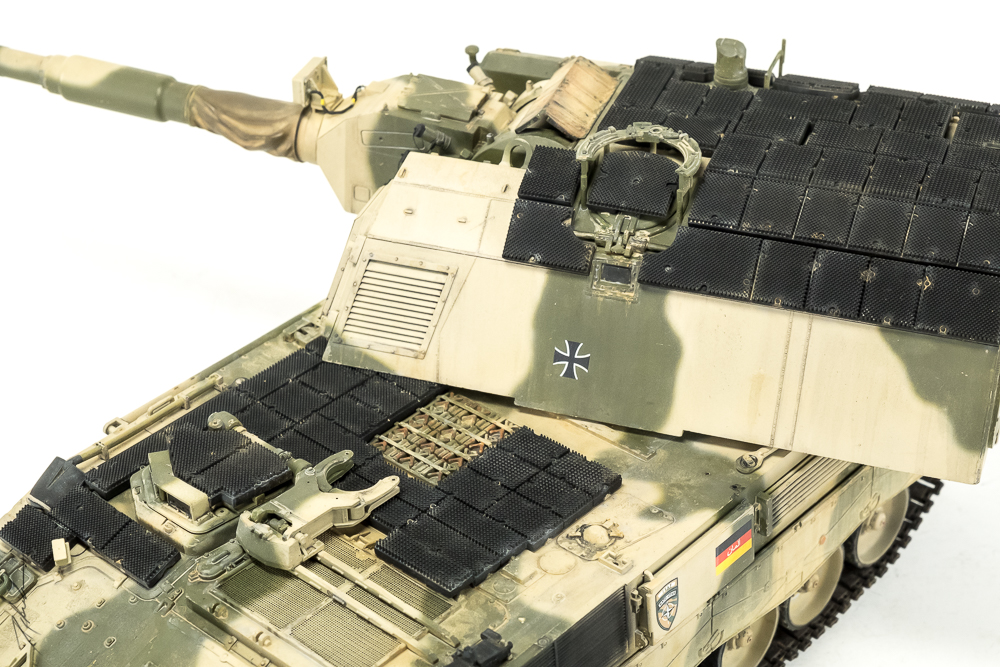
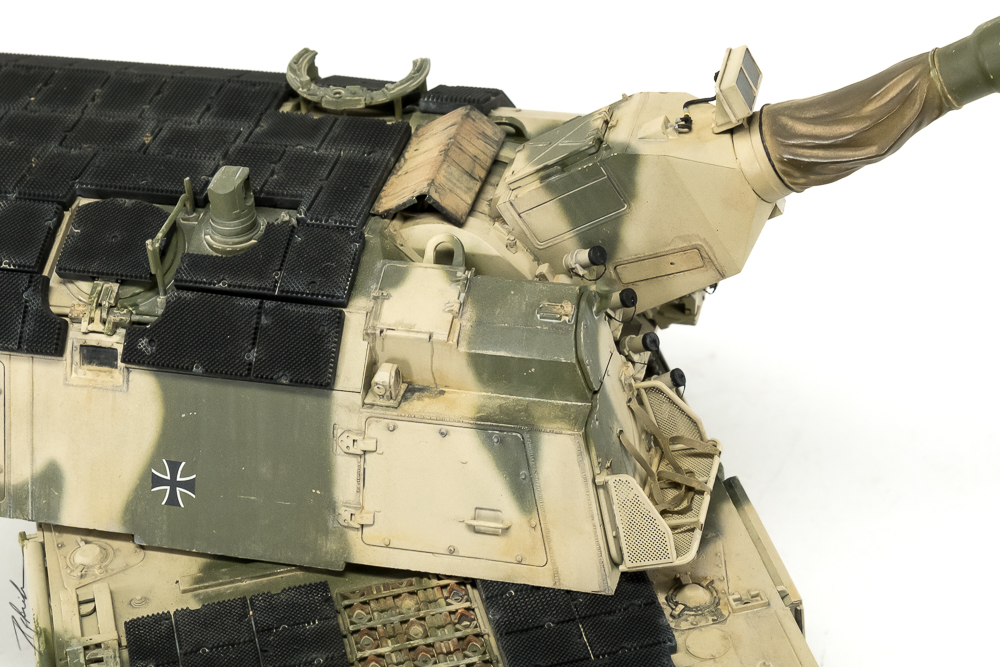
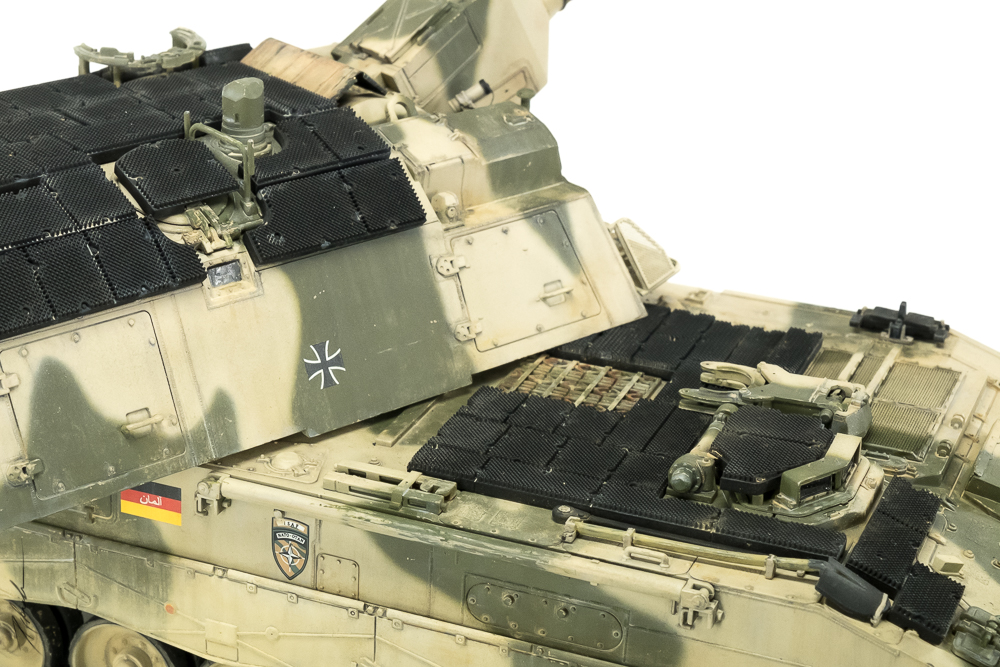
A feature I also love is the barrel-mount of the kit, which can be built in operating- or firing-position. You cant decide which position you like more? Never mind those MENG Guys made it fully movable applause! After finishing the general steps of the lower hull I mounted the add-on-armor to it. I then went on with the steps for the turret. There are some small areas where I needed a bit of Tamiya putty, but hey, look at the anti-skid surface on the top of the turret. Really nice what MENG brought to us.
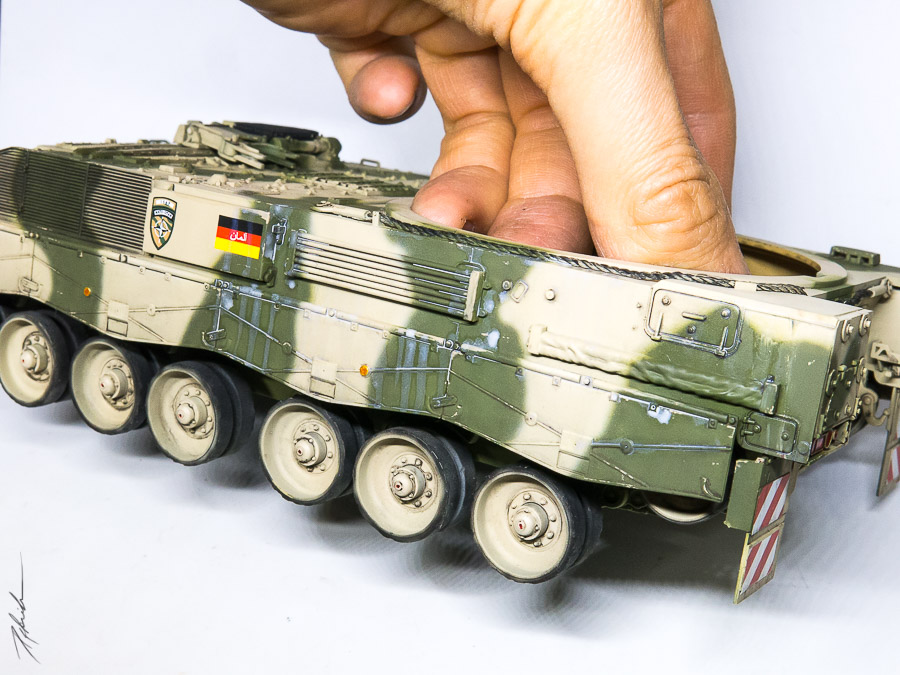
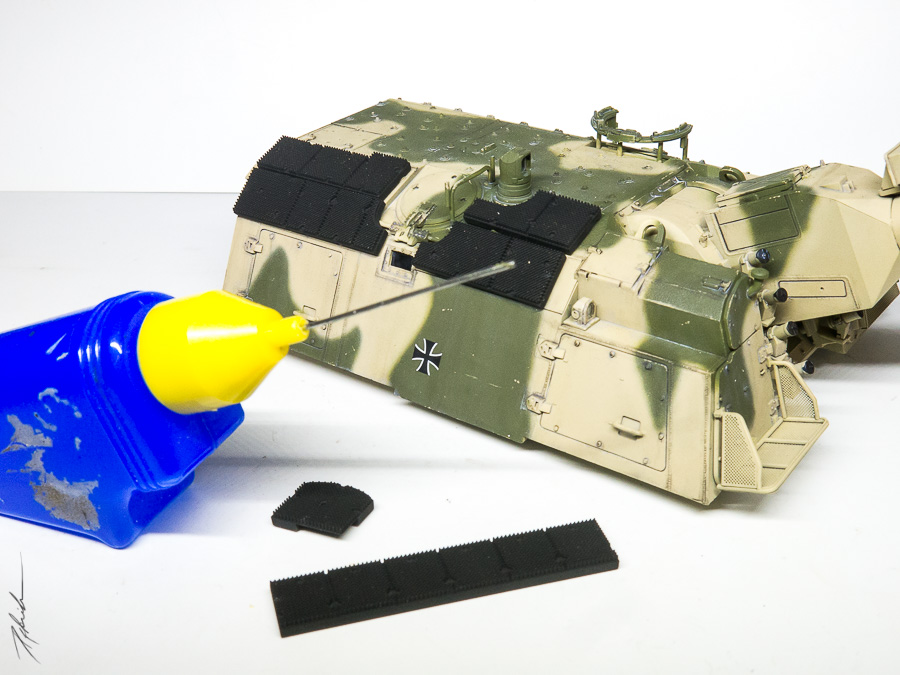
I added some photo-etch parts to the turret and the lower hull and thats basically it.
One thing I want to comment: When the add-on-armor is added to the lower hull it´s really hard, if not, impossible to rotate the mounted turret. I dont know the material of this armor in 1:1, but in 1:35 its not elastic, so turning the turret around is not the best idea. For painting the PzH I had to remove the extra armor anyway.
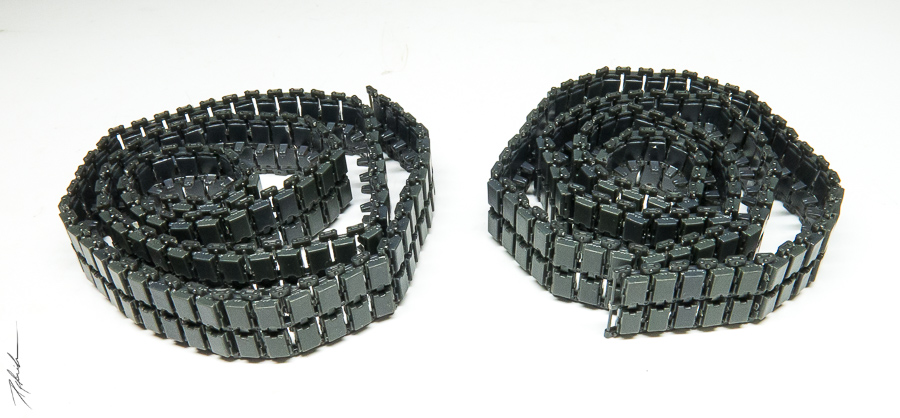
Regarding the tracks, I decided to assemble them at a later stage, because I assembled some for some other kits some days before. Yes, yes, they look great, but yes, they are so horrible and time-consuming to assemble
The Paint
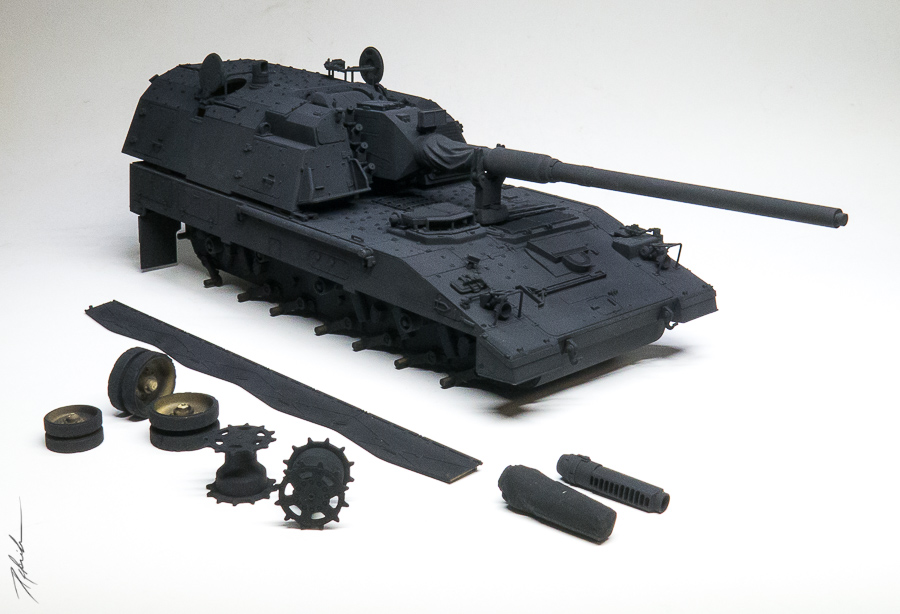
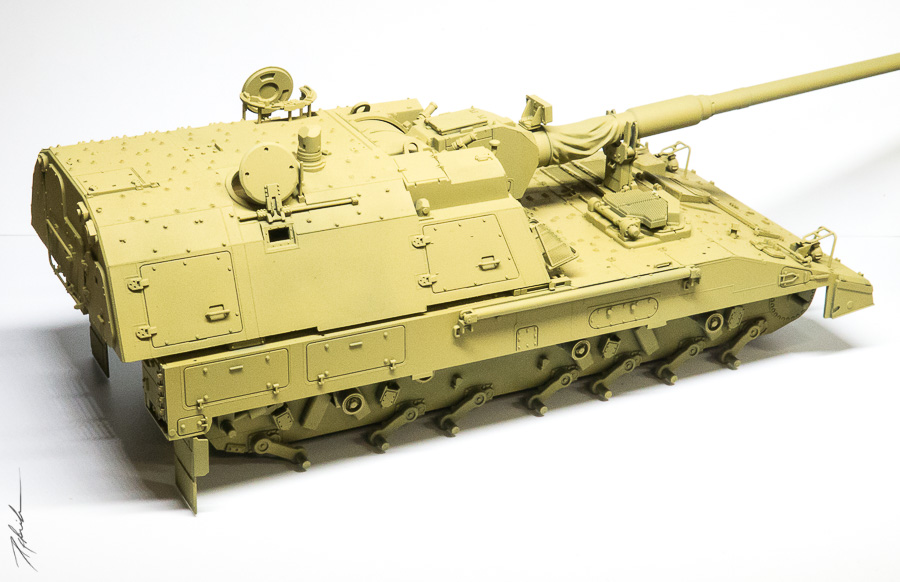
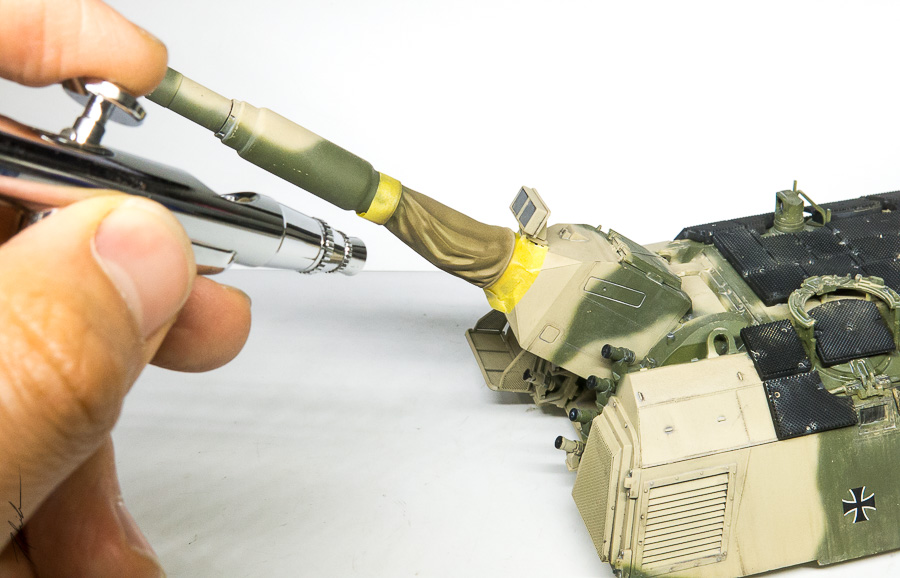
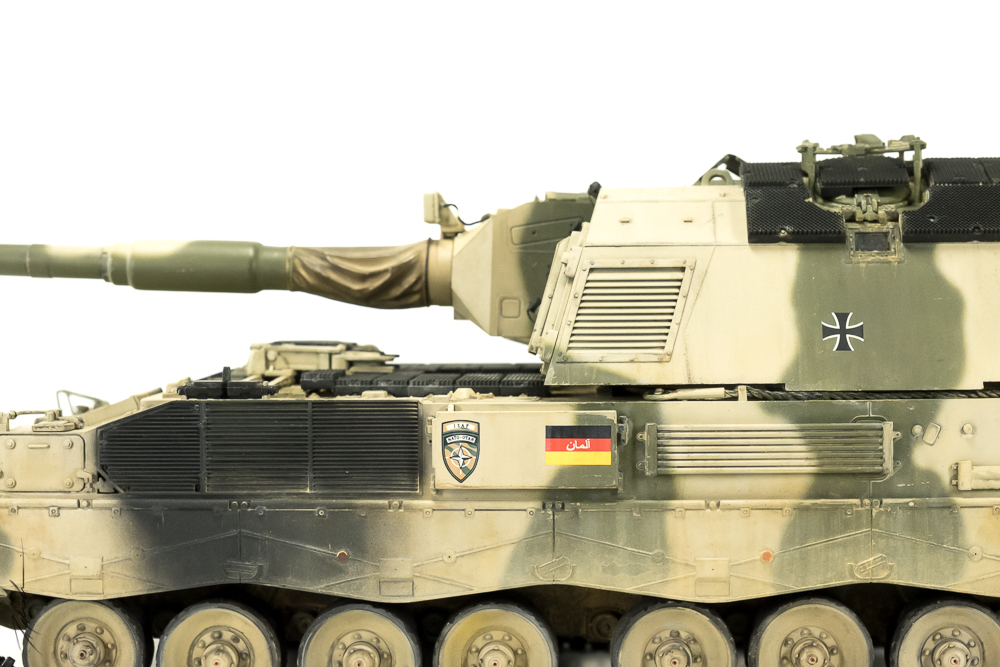
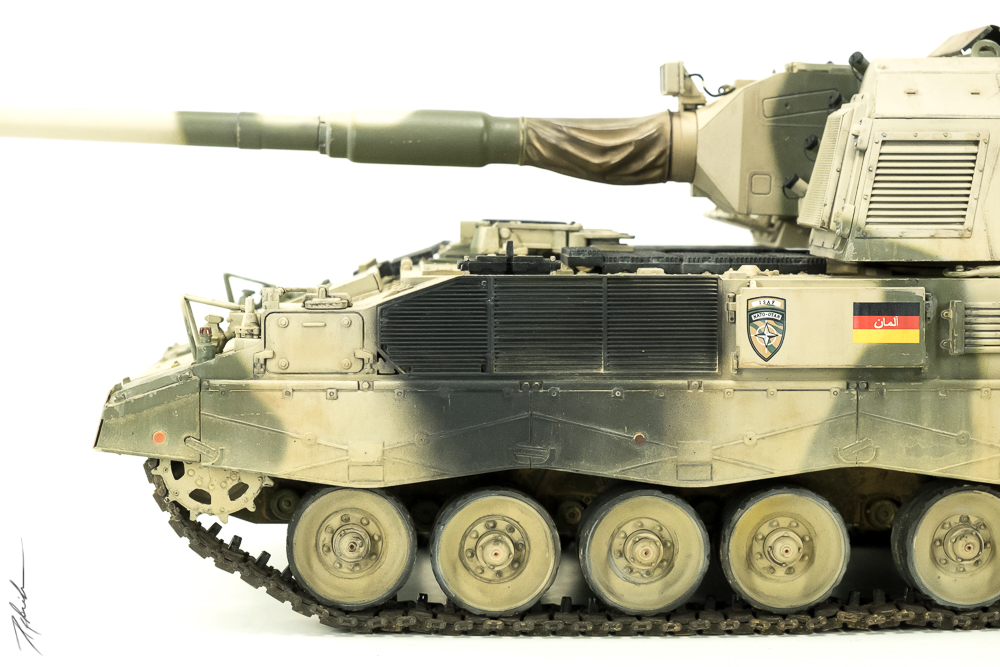
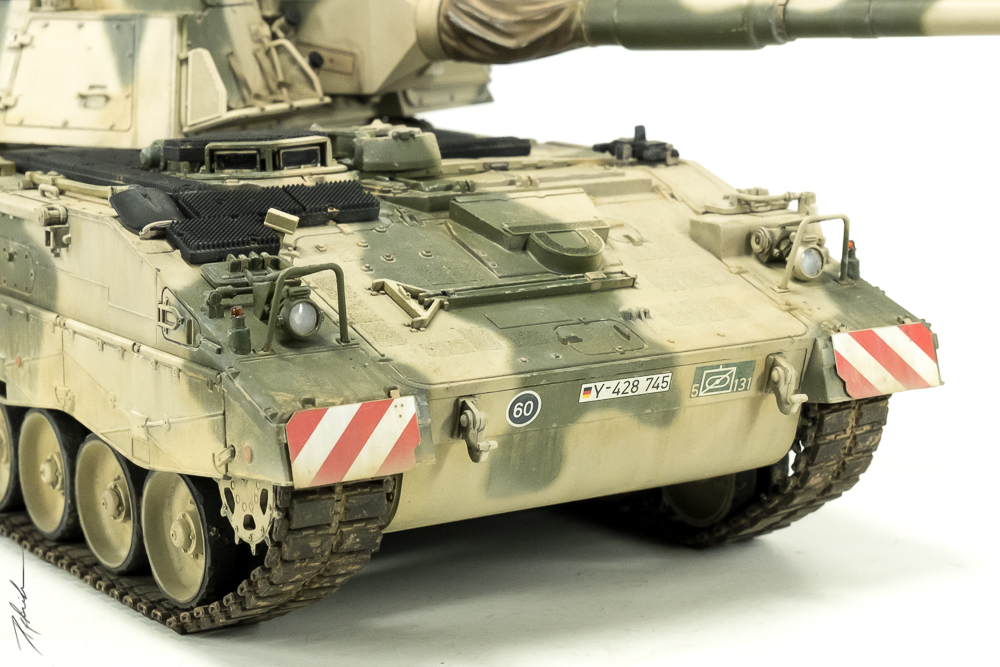
To give the whole vehicle a smooth and homogeneous base-coat, I chose Tamiya XF-1 Matt Black. This step became more and more important, because handling with different sorts of materials (plastic, photo-etched parts, aluminium gun) doesnt create a very uniform overall picture.The second layer of paint was Tamiya XF-59 Dessert Yellow. As I knew already that I wanted to achieve a sort of modulation look (thanks for inspiring us with this technique!), there were some more layers of paint following. The colour I love most when painting desert-camo-vehicles is Tamiya XF-55 Desert Tan mixed with Tamiya XF-57 Buff. So this was the next layer.
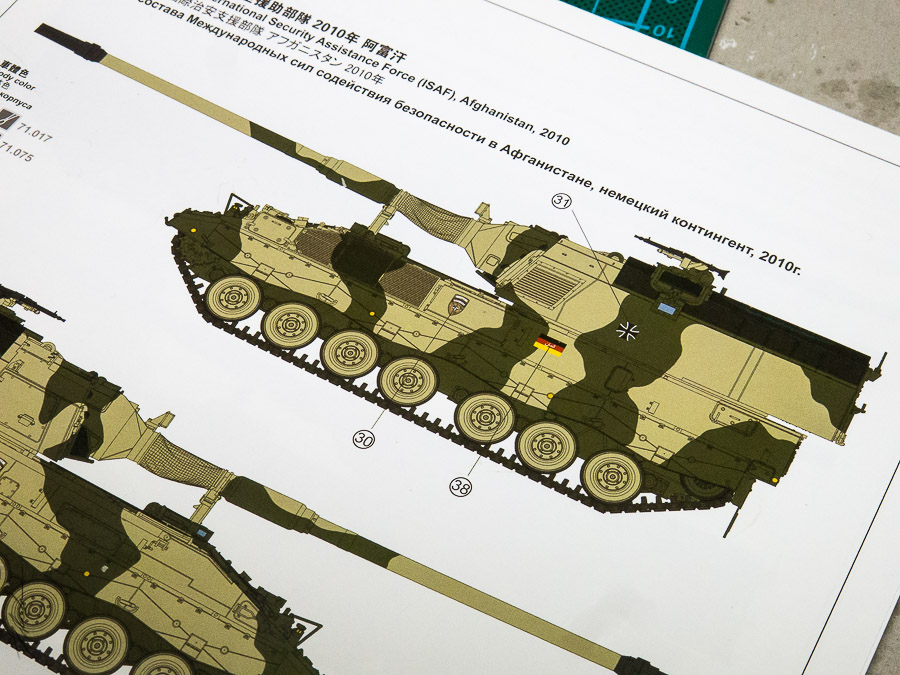
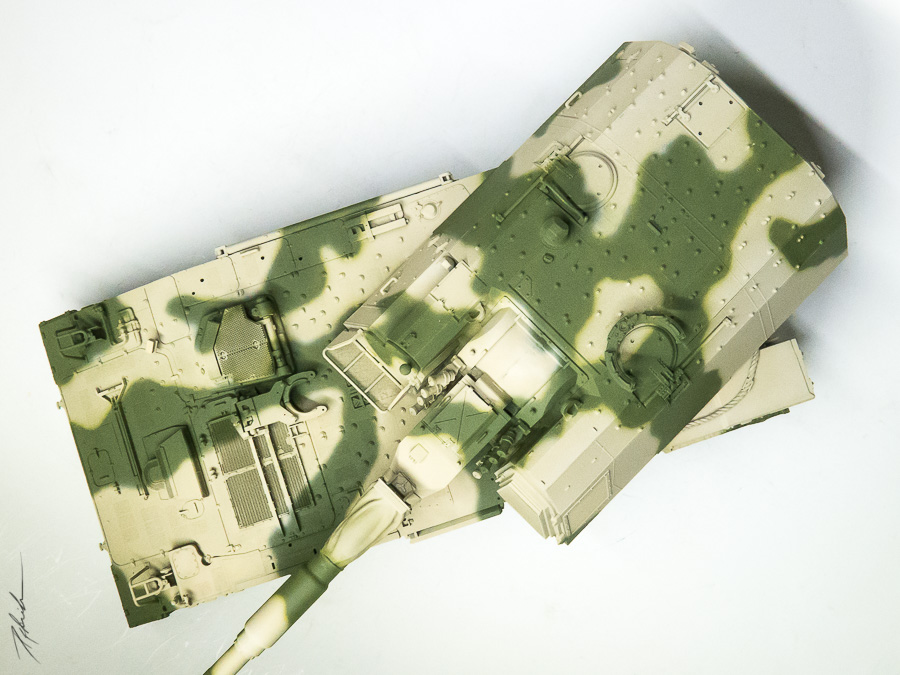
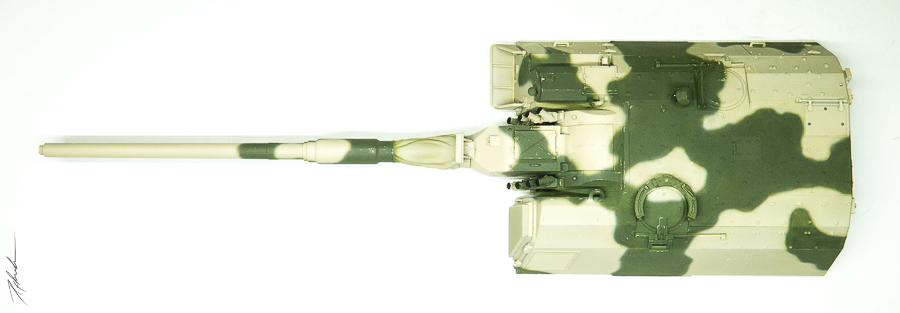
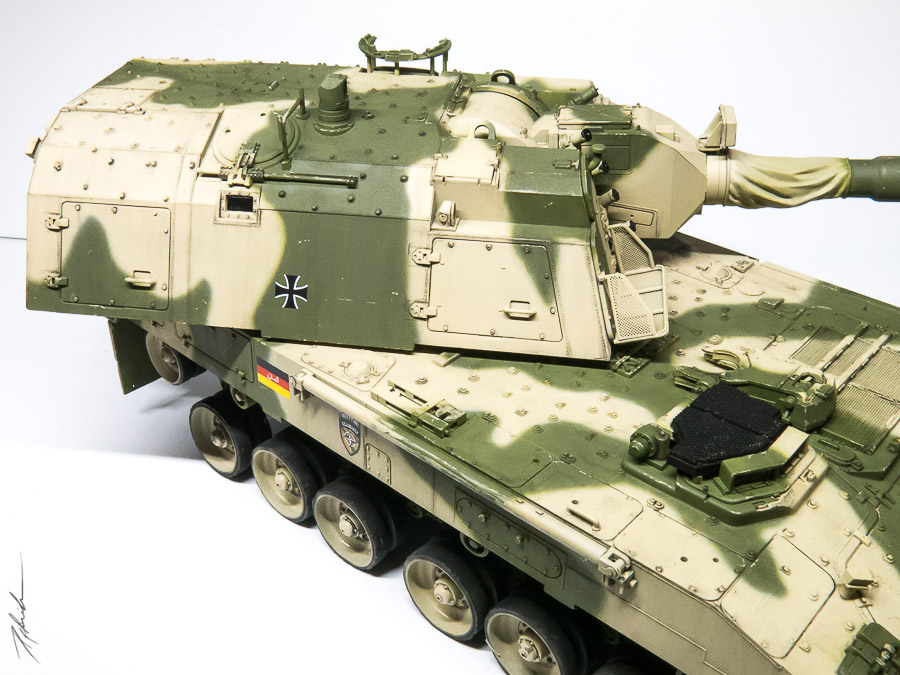
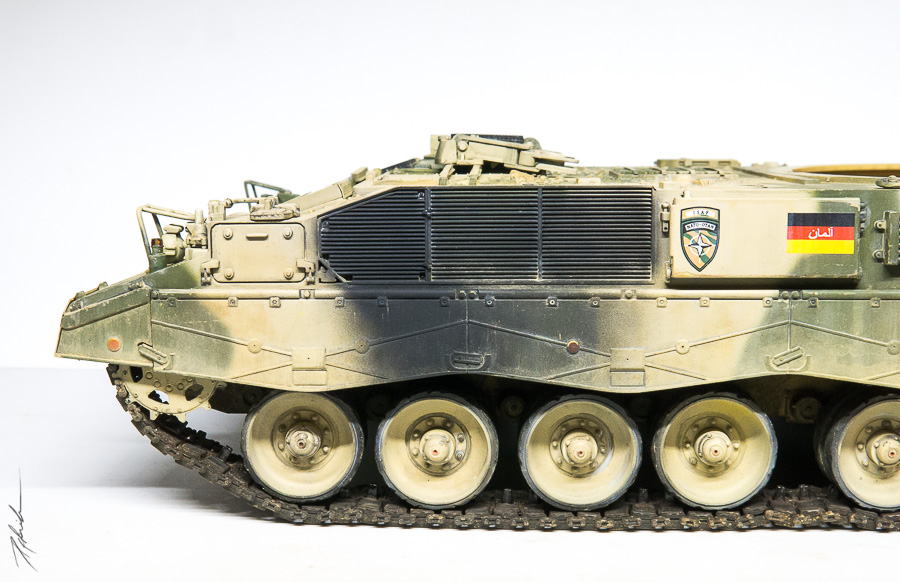
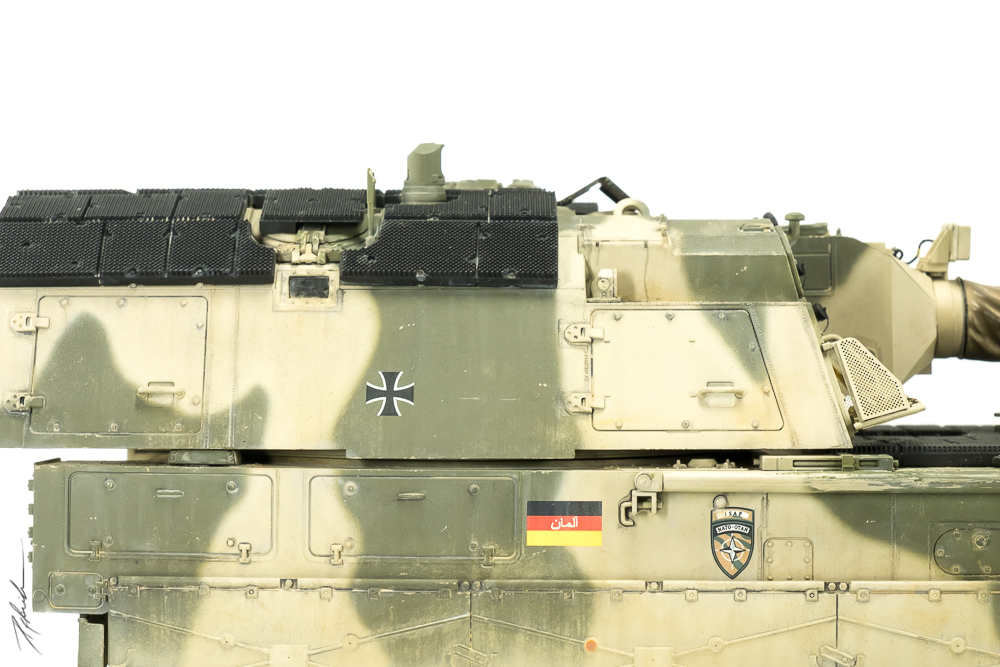
While studying the real vehicle I noticed the very sharp-edged colour change between green and sand. Trying to replicate this effect as best possible, I started to draw fine lines of the camo with a pencil on the model. After that I made a mixture of Tamiya XF-58 and XF-59 (around 9:1 or 8:2) to get this let me call it ISAF green. Starting the compressor, adding the thinned colour to the airbrush and holding the gun very close to the model with very low pressure is mainly the secret if you want to get this sharp-edge style. I know, on the original tank, these edges are much sharper, but for this 1:35-replica Im pretty pleased with the results.
I added some more paints to other areas and its done.
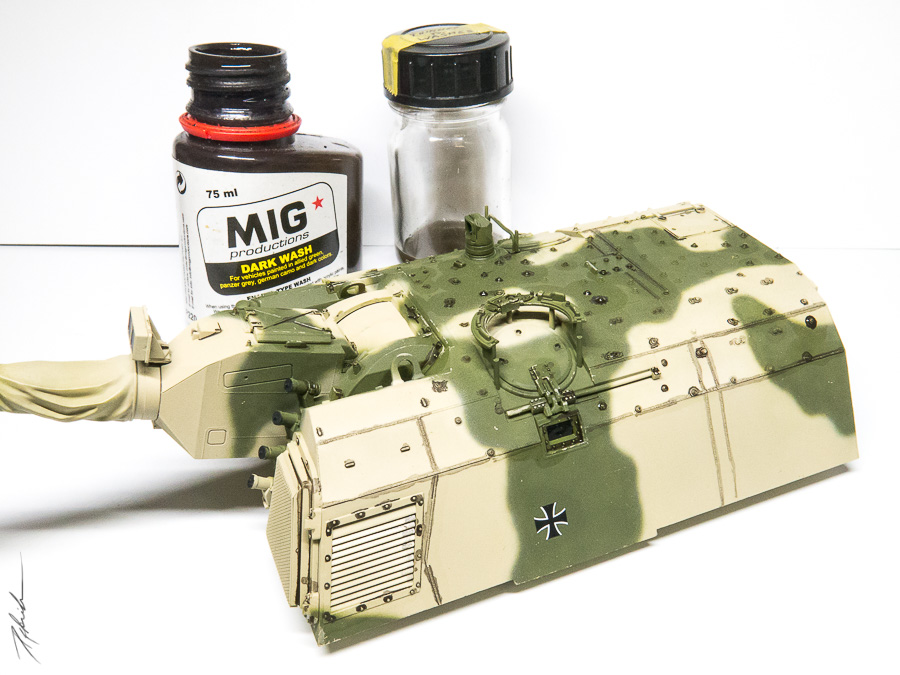
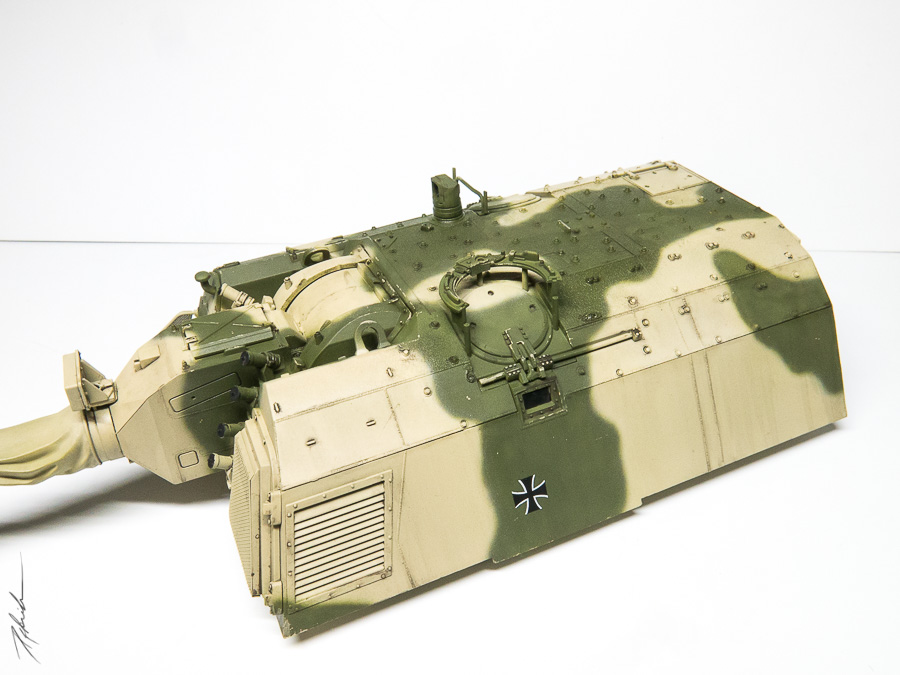
The Weathering
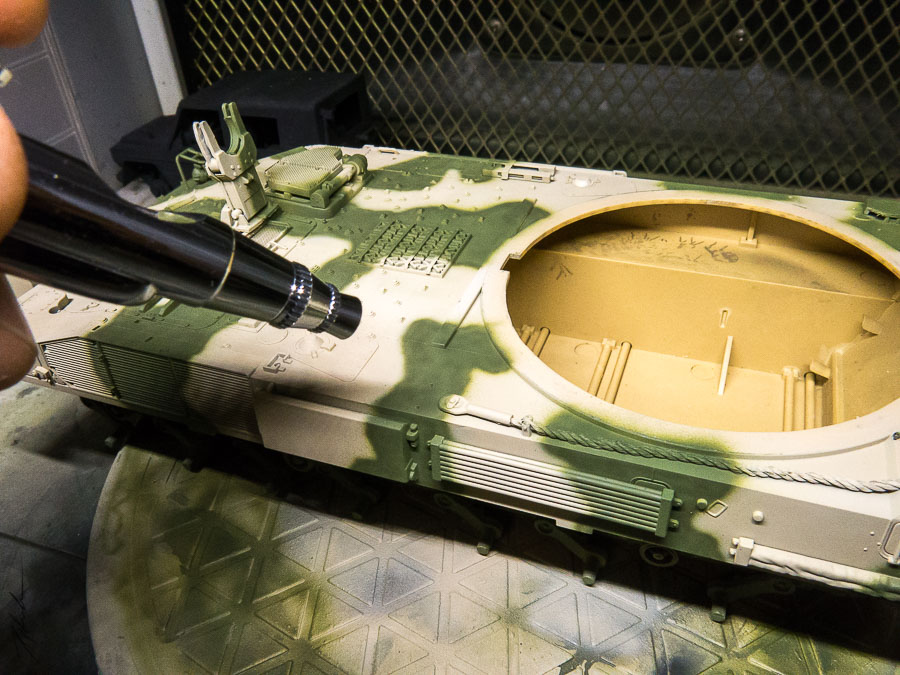
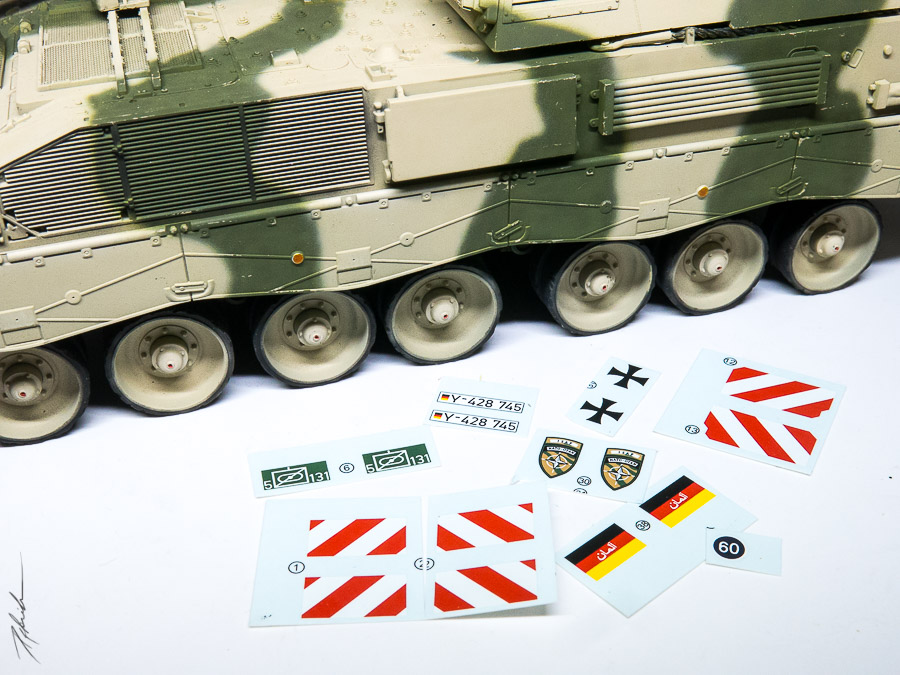
I think the weathering is the part which is loved the most by a lot of modellers. Why? Because you can achieve a totally different look for your model with very little effort. And every time its a bit of a surprise because you actually dont know how the effect will change the look of your model!First step before weathering the model is to apply the decals to the model, to give them also the chance to get a weathered look. Always keep in mind how the original looks. This helps a lot, to answer the question, which step should done before another. Yes every modeller tends to be impatient, but sometimes you have to be patient
Adding some scratches with a fine brush (I think it was a 10/0) is the first step. Where would the crew run around on the tank? Which areas tend to become scratched by whatever? Which not? And how much is too much? Answer yourself these questions and you should know when enough is enough.
Next is to add some brown and dark wash to the whole model, blending it with enough spirits and the model already looks totally deeper. At this time I started to collect several sorts of filters, which were applied next - also blending them with spirits and helping them dry with a bit of air out of my airbrush is a very efficient way to achieve nice-looking results in a short time.
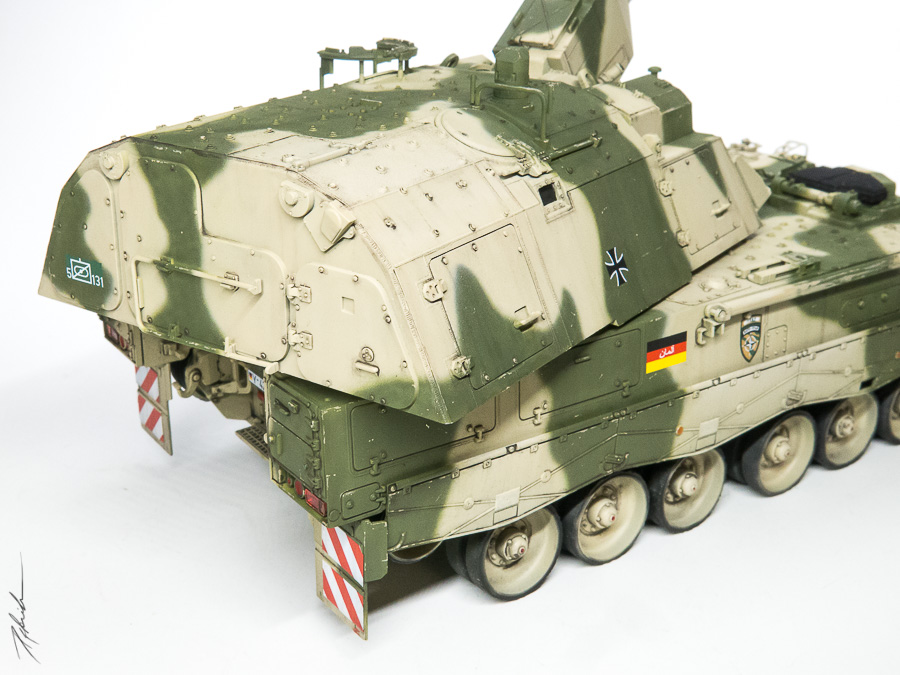
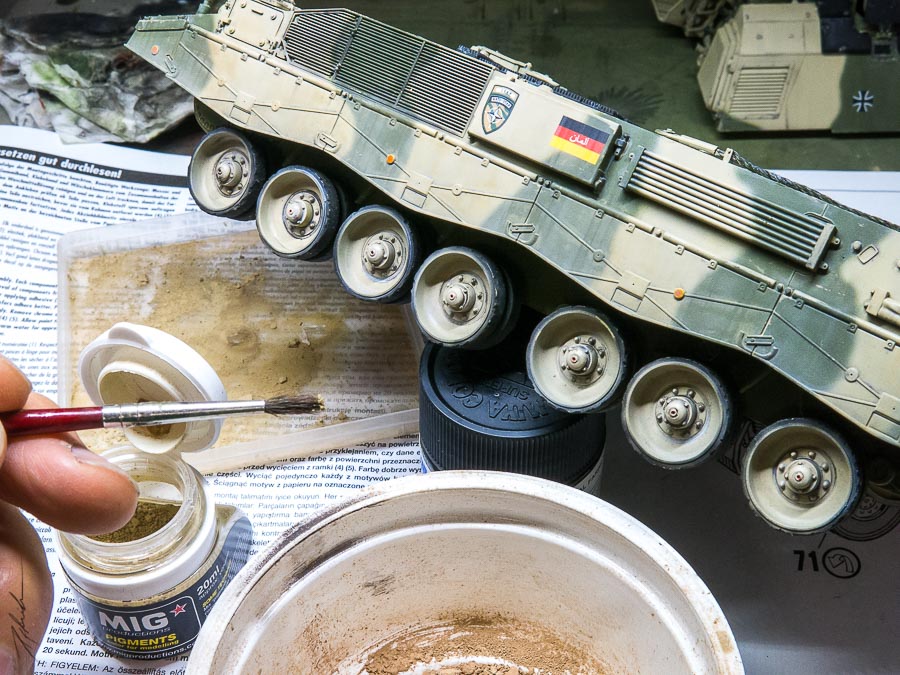
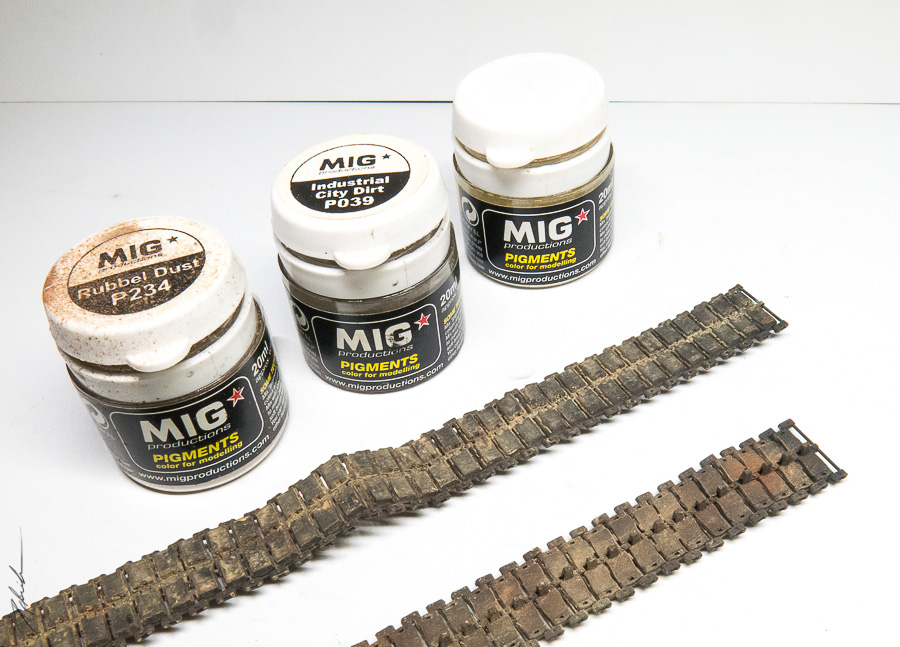
Now its time to add the add-on-plates to the whole model, before applying some pigments. The same rule here: Sometimes less could be more, but dont worry: Most of the pigments can be washed away with some nitro thinner (e.g. Tamiyas is very good for that).
But, wait, something is missing yes the tracks I know. Okay, assemble them, paint them and give them also the pigments they deserve. And please dont forget the area around the tracks and the road-wheels.
If we talk about road-wheels: Please MENG, can you tell me how is it possible to mount the front driving wheel without ruining it? The only way I found was to break it and glue it after assembly not a very nice solution, but I dont know a better one
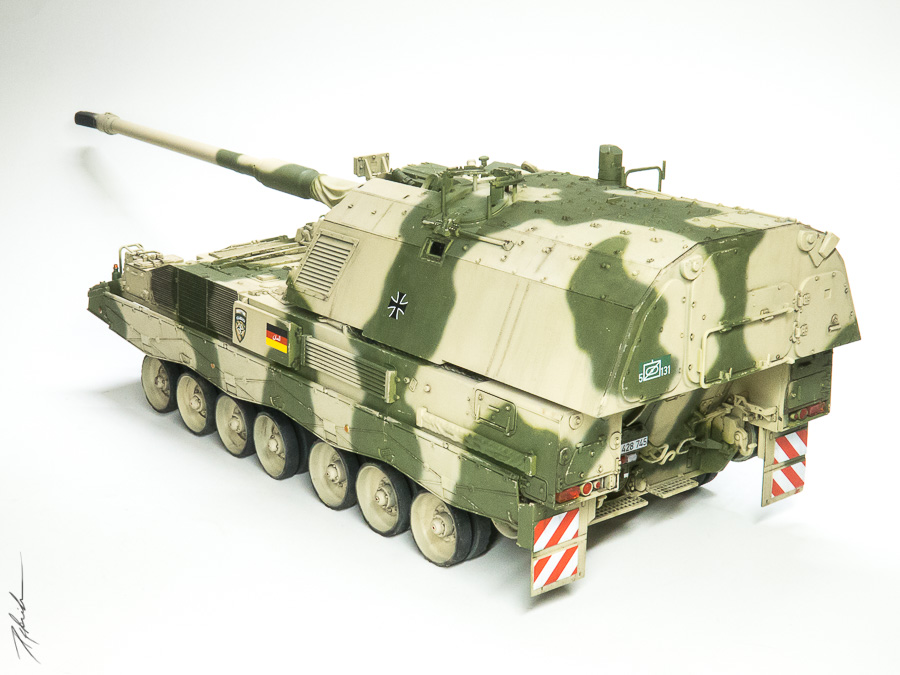
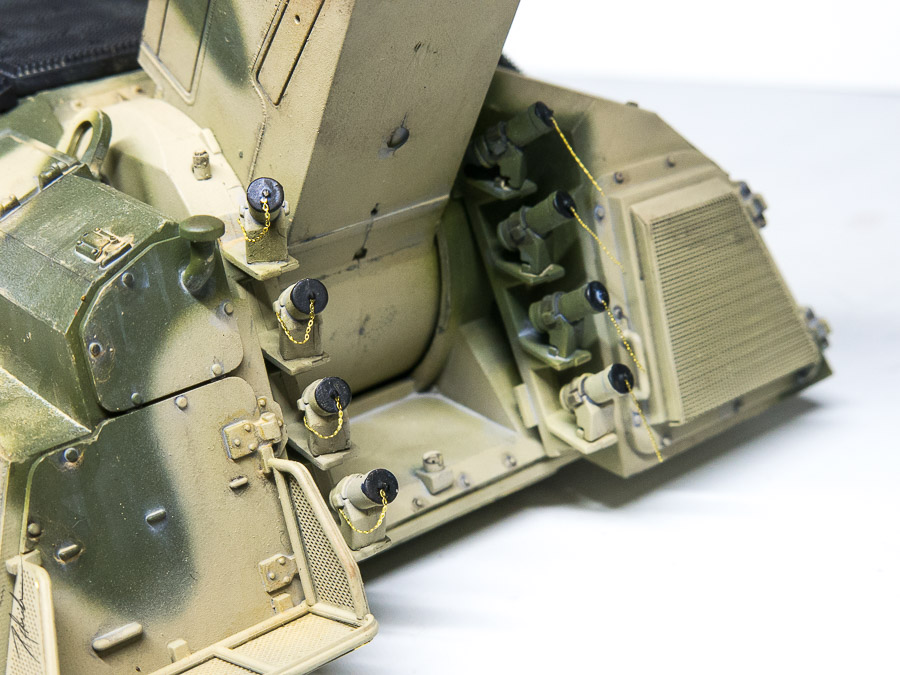
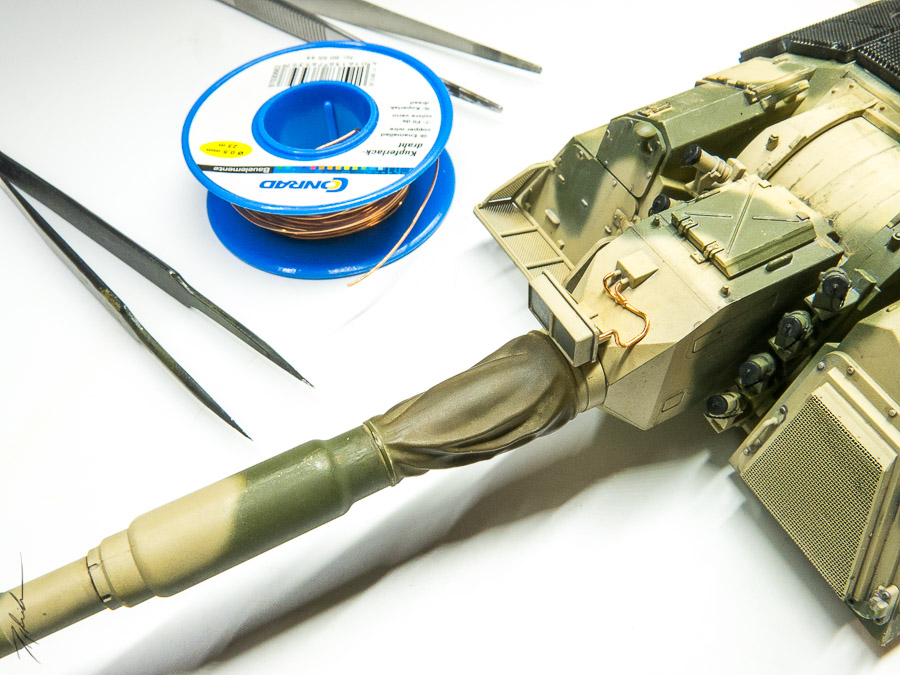
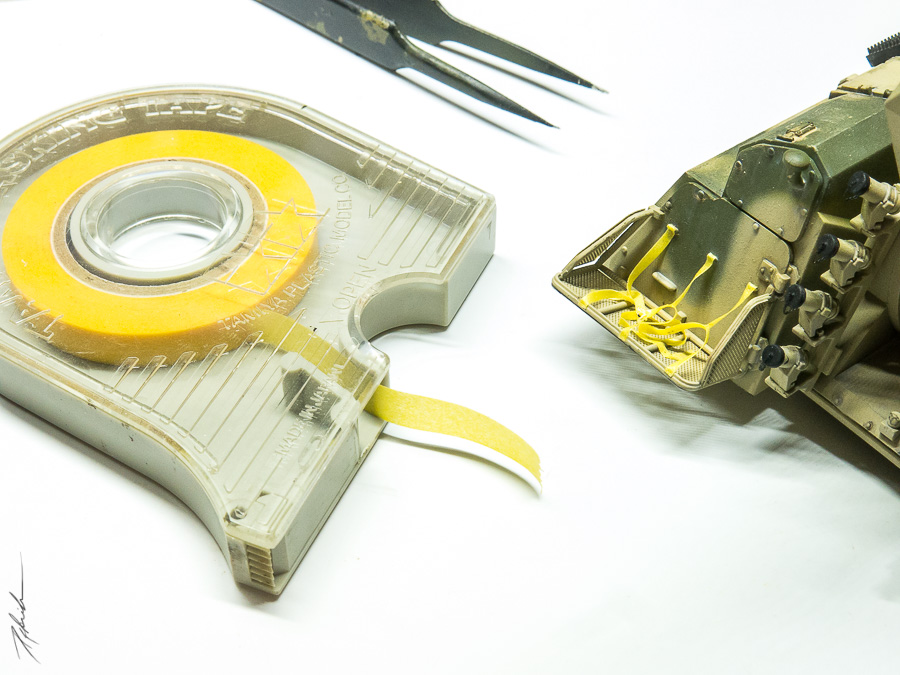
Add the track, place the side-skirts, maybe add some chains to the smoke launchers and dont forget the antennas on the top Ladies and gentlemen, thats it. Enjoy the pictures and happy modelling.
Conclusion
A wonderful Kit by MENG! I see the market for modern military kits growing very strong in the last few years. This is a really pleasant trend. Hows about a M88A2, some MRAPs or more HEMMTT-versions? Feel free to surprise us!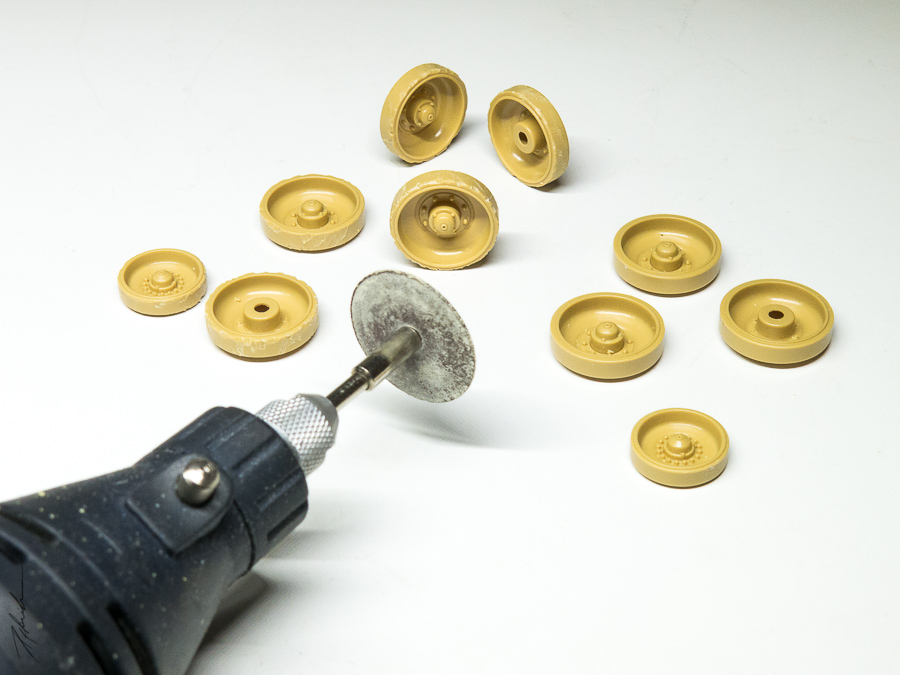


About the Author


Comments

A very nice presentation and a beatiful outcome. The Pzh 2000 makes a standing display, especially in ISAf colors.
Well done
MAR 03, 2018 - 12:04 AM

A beautiful build and informative review! I expected the NATO European scheme so this was a nice change of pace.
MAR 03, 2018 - 03:15 AM

Great work! I did a build blog with with the same vehicle you made. Very well done!
MAR 05, 2018 - 07:46 AM

Very nicely done and in this case it is good to see a desert scheme rather than the European colours. I did enjoy the content on finishing the model.
MAR 05, 2018 - 11:28 AM

Really beautiful model and realistic (not overdone) finish, congratulations!
MAR 05, 2018 - 05:02 PM

Great job and well done
I am working on the very same kit and hope to finish as nicely as you have done
The Meng kit itself is a fun build though a bit soft on some details, I am replacing all the molded on grab handles with wire and ordered a new towing cable. But that's all I am spending on it.
Yeah the tracks are going to be a pain, I have done like 30 so far...
Cheers,
Adam
MAY 19, 2018 - 02:47 PM
Copyright ©2021 by Martin Rauscher. Images and/or videos also by copyright holder unless otherwise noted. The views and opinions expressed herein are solely the views and opinions of the authors and/or contributors to this Web site and do not necessarily represent the views and/or opinions of Armorama, KitMaker Network, or Silver Star Enterrpises. All rights reserved. Originally published on: 2018-03-03 10:22:57. Unique Reads: 19670

WEB HOSTING BY


Copyright ©2021 Armorama and Kitmaker Network, a subsidiary of Silver Star Enterprises
All Rights Reserved. Please read our Conditions of Use and Privacy Policy.
All Rights Reserved. Please read our Conditions of Use and Privacy Policy.