

1⁄35Tamiya Stug IV - An Old Friend
4
Comments
Introduction
I have been making models, primarily military models and figures, on and off for over 40 years now and in that time have assembled plastic kits and painted figures (often for others) in scales from 15mm for wargamers up to 120mm for a display piece.With the recent lack of work and necessity of staying indoors for long hours I went back to building a tank or two, something I had not tackled for over 20 years, and as I browsed the internet I could not help contemplate a question I always asked when modelling AFVs - what is the ultimate aim of what we are doing?
Are we trying to create an exact scale replica of what was in existence in the past or creating something that will tell us more about why that was created or how it would have been used rather than what it exactly looked like? The obvious answer is that we are trying to do both but to what degree?
I see proud modellers offering pictures of they have created to be seen by others with a similar interest and I see what looks to me to be an excellent piece of work; however, this is then followed by comments posted pointing out errors such as the model is incorrect in that the division depicted carried this livery at a time when only the 16 bolt idler wheel was in use yet this model uses the 14 bolt idler wheel. The kits grow more advanced as time passes so that modellers now have skills comparable to that of a watch repairer when trying to use the PE provided, while they slowly grow old as they sit down to assemble the tracks for a single tank out of several hundred separate parts.
Despite the increased detail and accuracy of the kits we now have there is a huge market in After Market products, from fully recreated metal tracks to perfectly reproduced metal guns along with packs of PE options that will enable the modeller to reproduce with an accuracy that would have been inconceivable when I first opened plastic kits with excited hands as a young boy all those years ago.
Then I thought what of the young modellers now and the standards that are being set in terms of historical knowledge of detail let alone assembly of such kits? (By the way, for my part anyone who is able to tell me off the top of their heads how many bolts in a given idler wheel at a certain time on a given vehicle built over 70 years ago needs to be avoided).
Then of course there is the expense. My first model after my long break from AFVs was the Takom WW1 tank (WW1 being of particular interest to me) which I built to recreate the tank Fray Bentos (any who do not know the story behind this it is worth looking up and is a story that I feel would be worth recreating for TV at least).
The Kit
This kit cost me about £55 when I bought it from a small shop I found that sells such models (these are getting fewer and fewer as time passes and need to be supported where possible) but would this be considered a reasonable cost for a young lad or girl on pocket money?I now looked at second world war vehicles and was looking to build a Stug of some variety of which there is a bewildering array of kits and options. If willing one can spend up to £80 or so on the kit; there is a PE pack created for the Stug which on its own is available for a price nearing £80 (though I would be most disappointed having spent that much on the kit if I had to delve far into the after-market area). On top of this for those striving for complete perfection a set of metal tracks can be purchased for up to £40 or so and a company sells premade baggage just for Stugs (and very convincing it is).
All wonderful and fascinating options for the able and imaginative modeller but what of the young among us for whom such creations are financially far out of reach? Or, for that matter, the modeller who has young children and for whom a hobby assembling plastic kits cant be allocated that amount of money; or even to put it more simply - the modeller with the time but not the money?
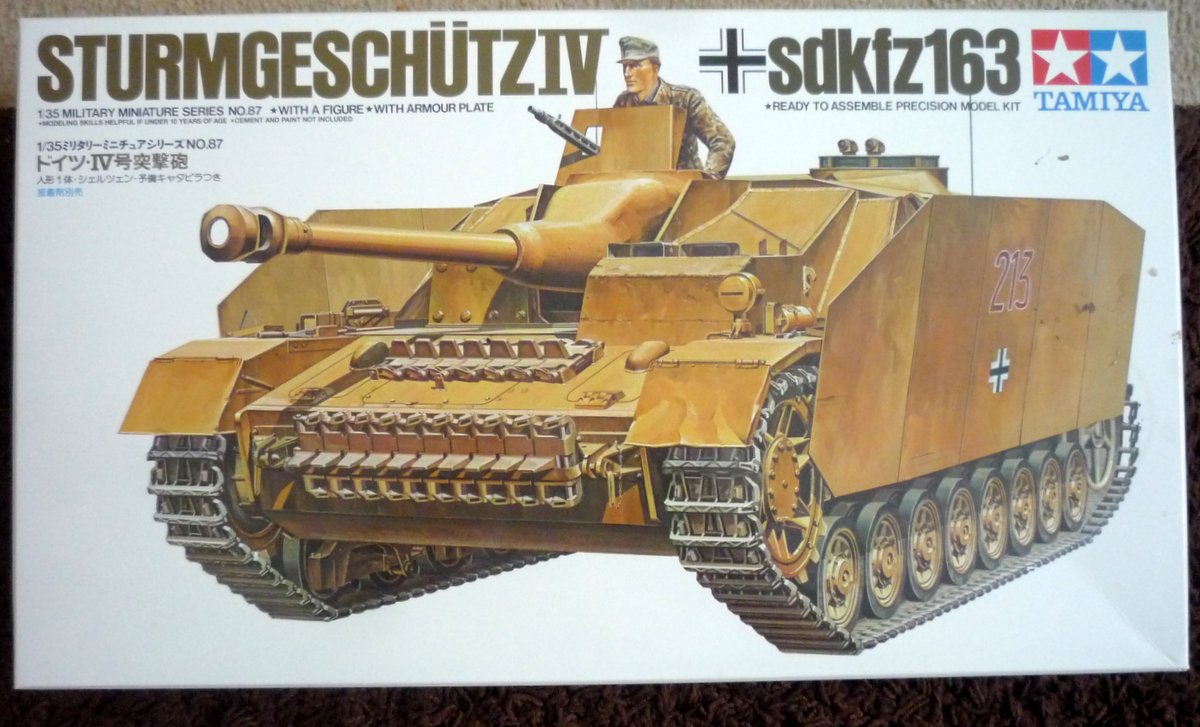
As I looked I then came across a kit I vaguely recalled from my younger days - and dont forget, we are talking even before Margaret Thatcher came to power here. A Tamiya kit which when I looked closer had originated in the 1970s (so it was the one I recalled) and was still around at a very reasonable price. On one forum one modeller was working on this and was enquiring about after-market options and the general response seemed to be to regard this as a waste of time on such an old model.
It was at about this time (or perhaps a little later as I have grown slower as I have grown older) that I decided to buy one of these kits and see what I could make of it with time, effort and modelling skills. I am no expert, I have won no prizes nor been employed by the manufactures to assemble their products to show how good they can be, and apart from a few commissions here and there have built and painted for my own satisfaction. But with a thought for the young lad who hurried home with his new kit over 40 years ago I felt that it was time to reacquaint with an old friend.
Pic 1
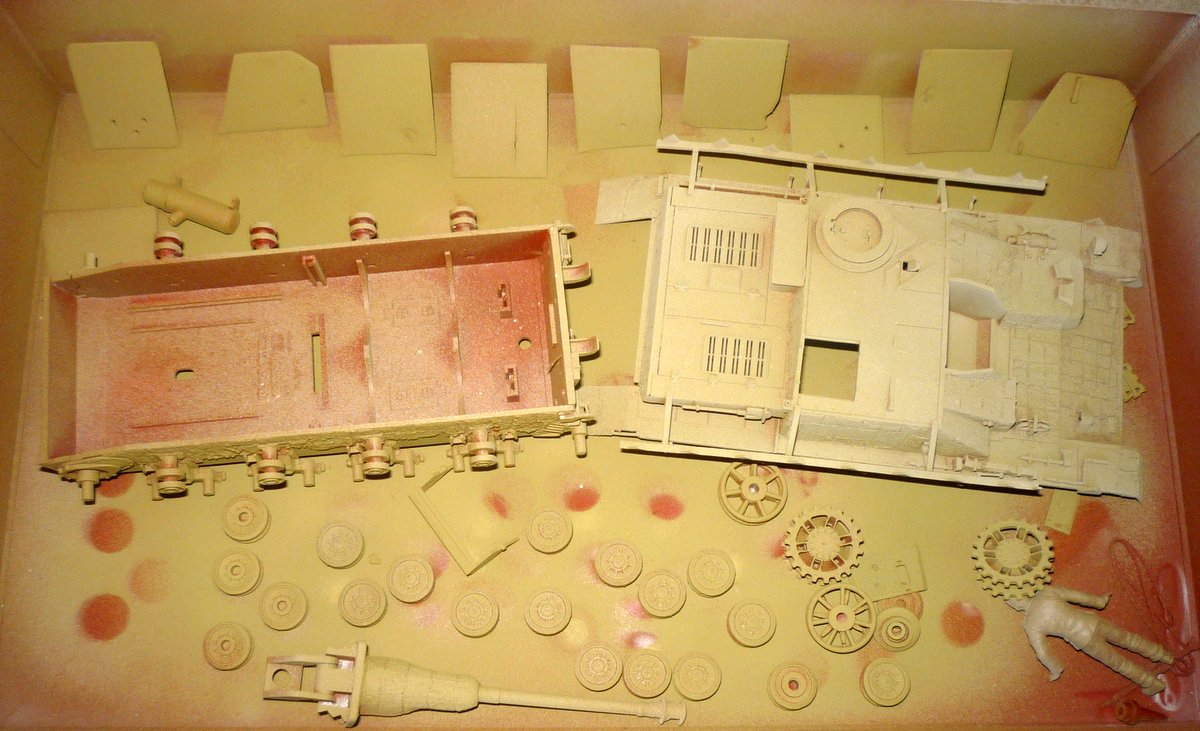
So here it is, the Tamiya Sturmgeschutz IV, probably in production for far longer than any AFV in history and still out there, this one set me back £13.49 on ebay and from what I recall the box at least has not changed.
On unpacking there were 4 sprues, the bathtub, design base of the tank, a set of rubber band tracks and some basic transfers.
Pic 2
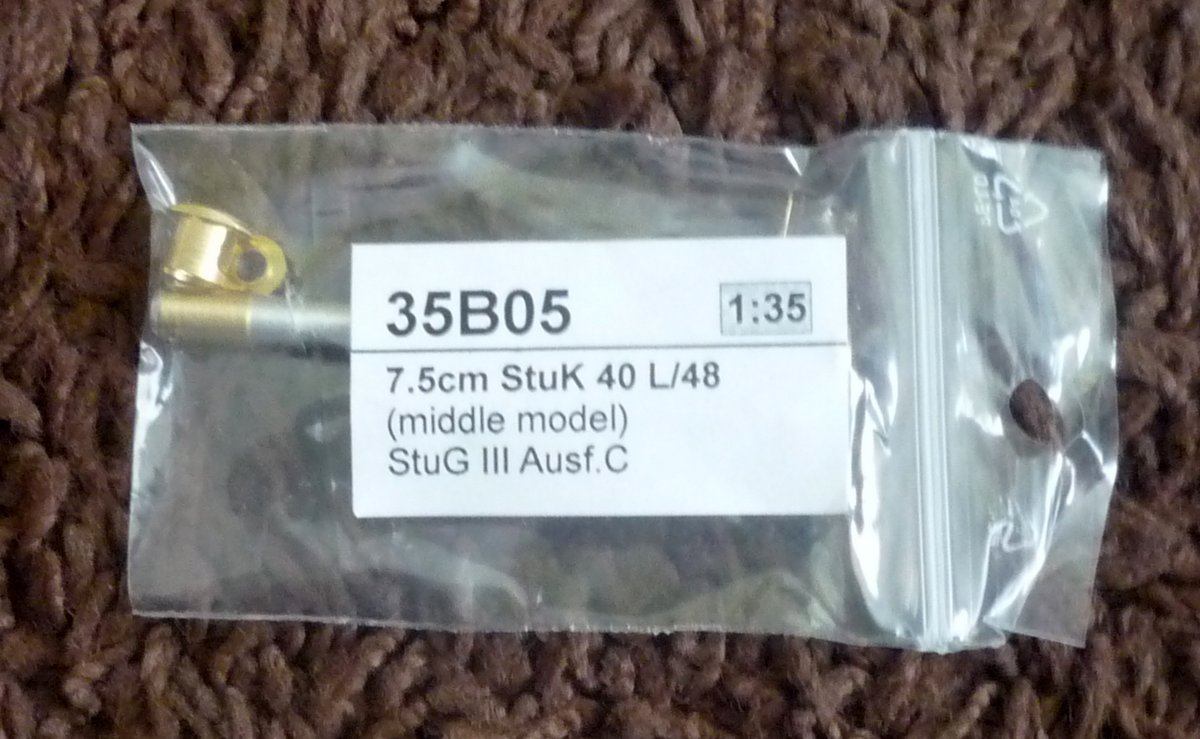
In addition to this, and being weak-willed and unable to avoid temptation, I also purchased one after-market item, a metal gun for the Stug IV at a cost of £6.49. So a total under £20 for the kit and gun (the bag for the gun says Stug III but this gun was apparently used on the Stug IV).
Pic 3
The Build
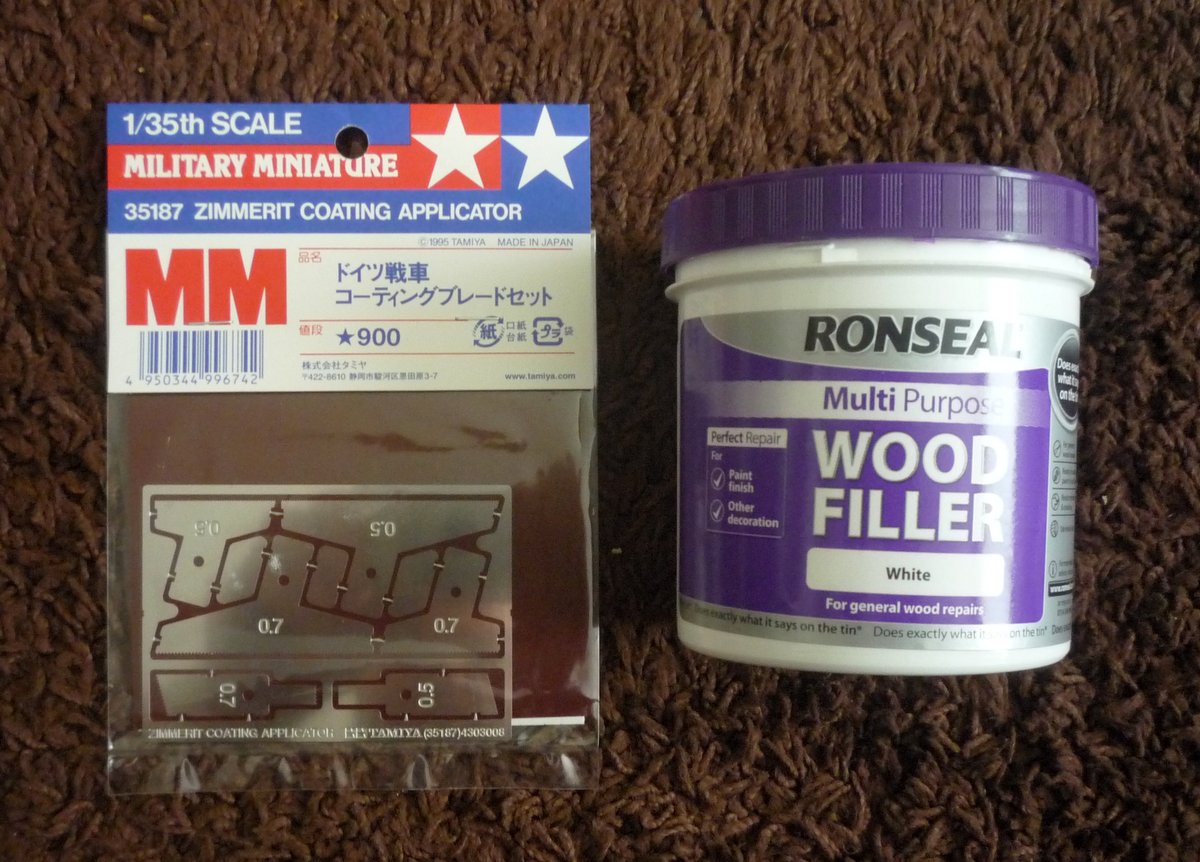
Next I made a decision that my Stug would have been made in around the Spring / Summer of 1944 and would now be battle weary and damaged in late 1944 / early 1945. This meant applying zimmerit and while after-market kits are available I decided to use wood putty from a DIY store and I also used a tool made by Tamiya though the same effect can apparently also be made using a section of hacksaw blade or an old-fashioned steady and patient hand using a sharp edge. (There are numerous Youtube tutorials on this).Pic 4
I was under no illusion that having not applied zimmerit before mine would not be good but as it was battle-weary that should be no bad thing. (I found it best to apply with the tool and spread thin rather than layer it on and mark it afterwards though I have seen better results than mine doing the latter).
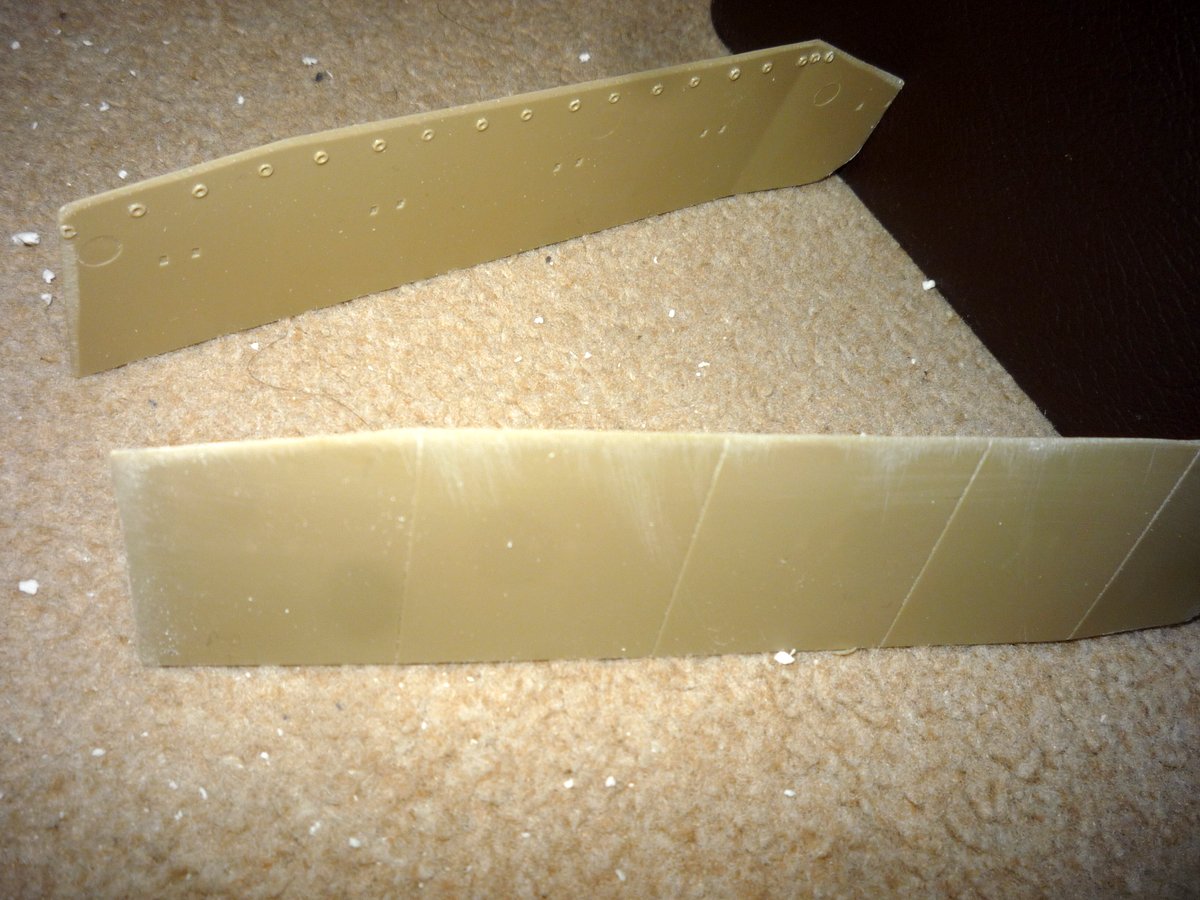
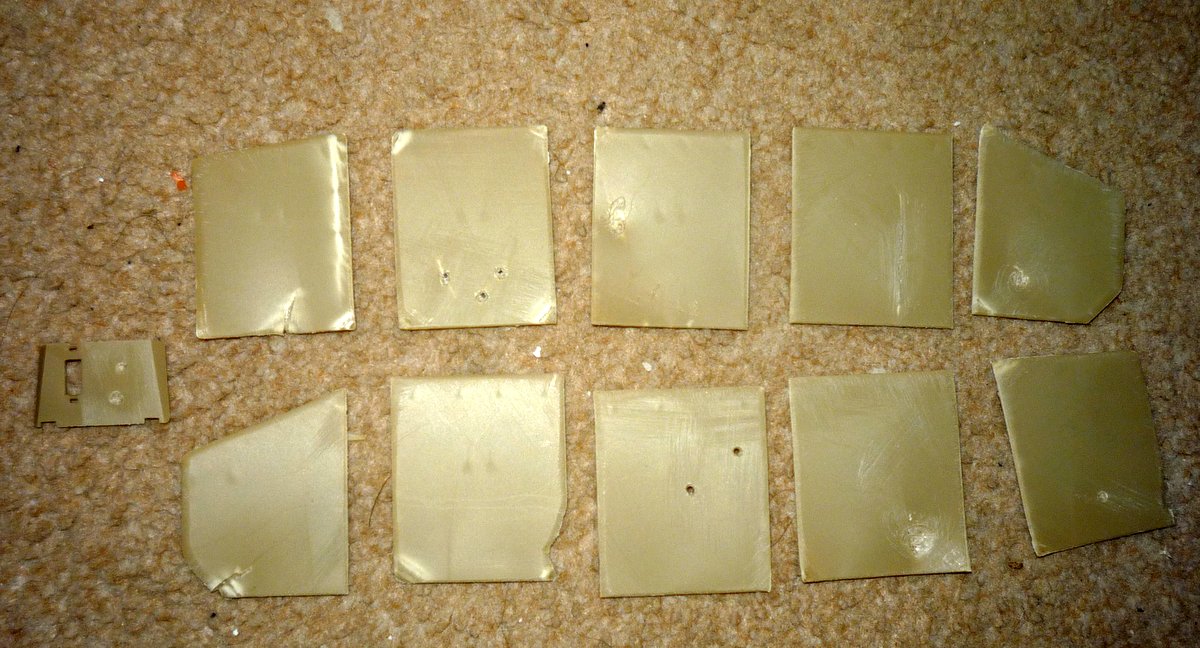
Next it was to try and make some adjustments so that the kit would be more realistic. I sanded down the edges of the schurzen (skirts) so that would not appear as thick as the plastic actually is and cut them into their sections to be separate panels (which they were) and applied damage. These sections would not all be used but at this stage but I would make them all and then have the choice of which to put on the kit. I also decided to use the figure provided and surround it with moulded putty and put it into a winter overcoat as this Stug would be fighting in the snow.
Pic 5
The shurtzen sanded at the edges and then divided and the corners bent with bullet holes and cracks applied.
Pic 6
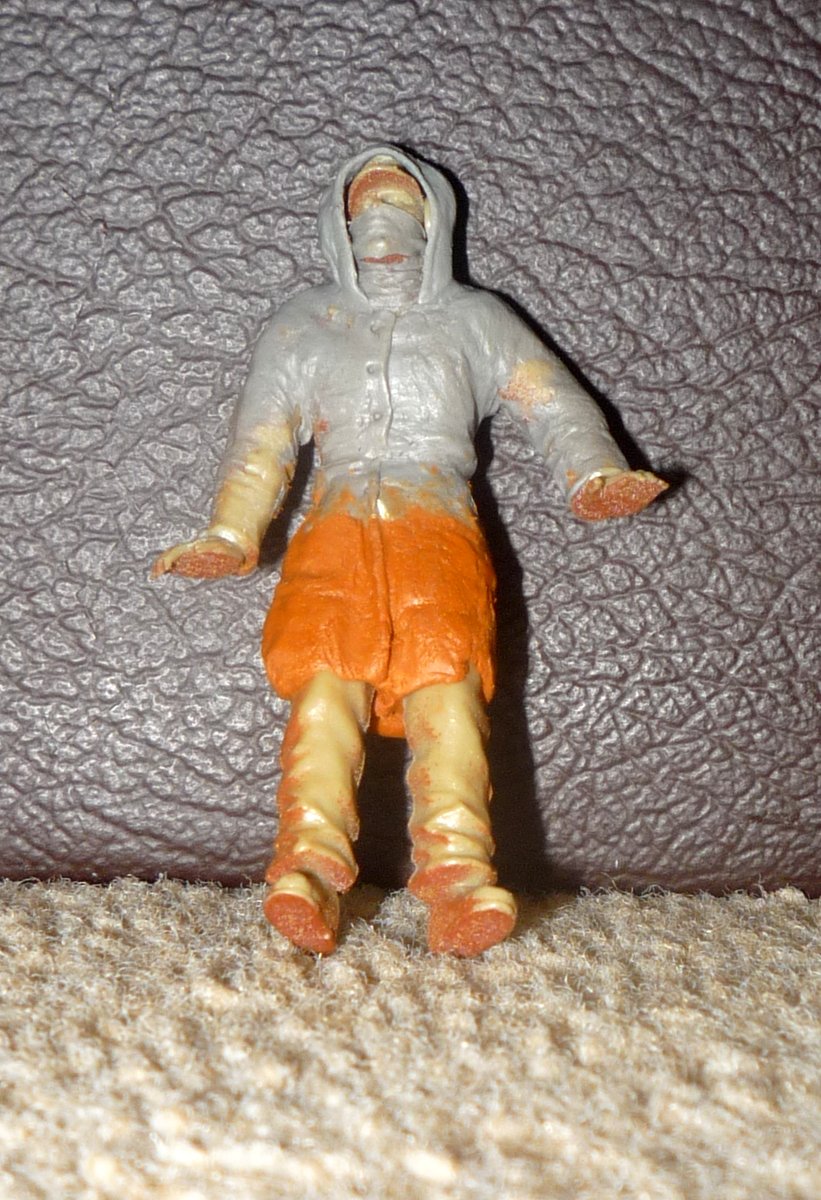
The figure with putty moulded on leave the inner arms and under the arms so that the original model clothing creases can be used. I also put a face scarf on the lower area of face as 1/35 scale faces I have never found easy and wearing such a scarf would be expected in freezing temperatures. (Do not stress over how the lower half looks as this will be barely visible).
Pic 7
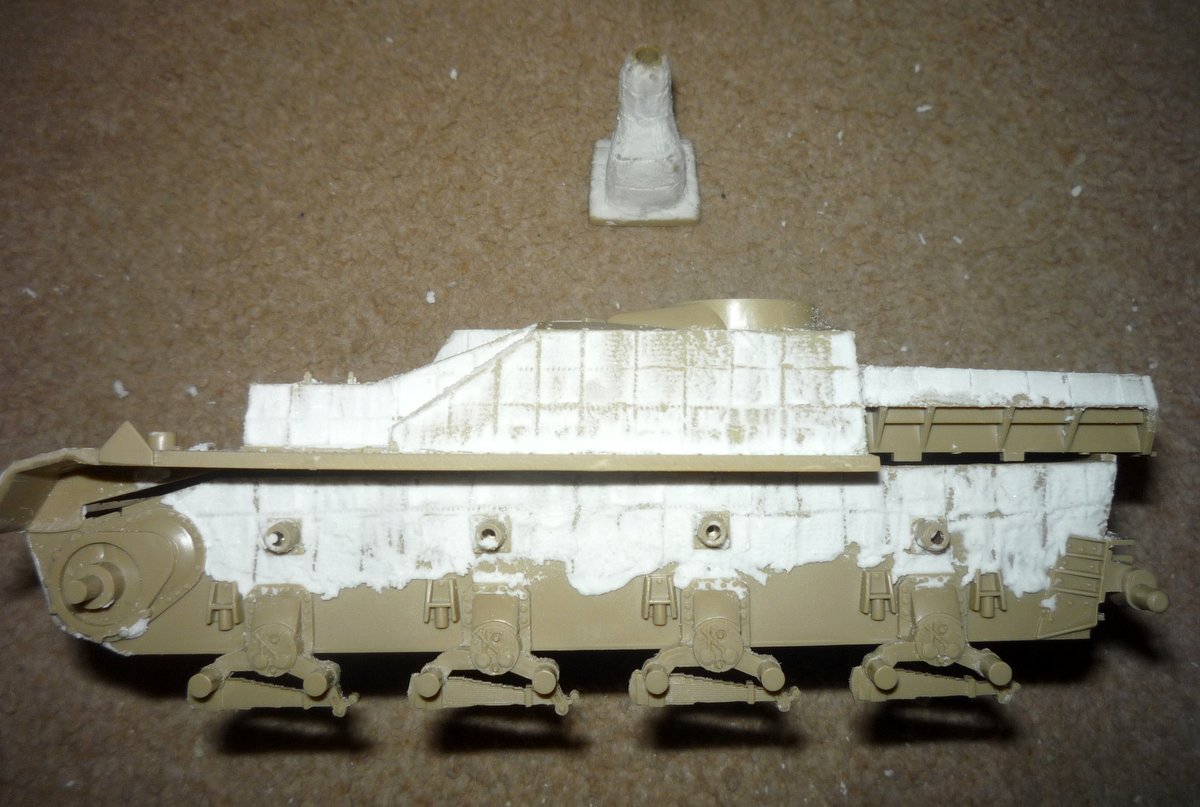
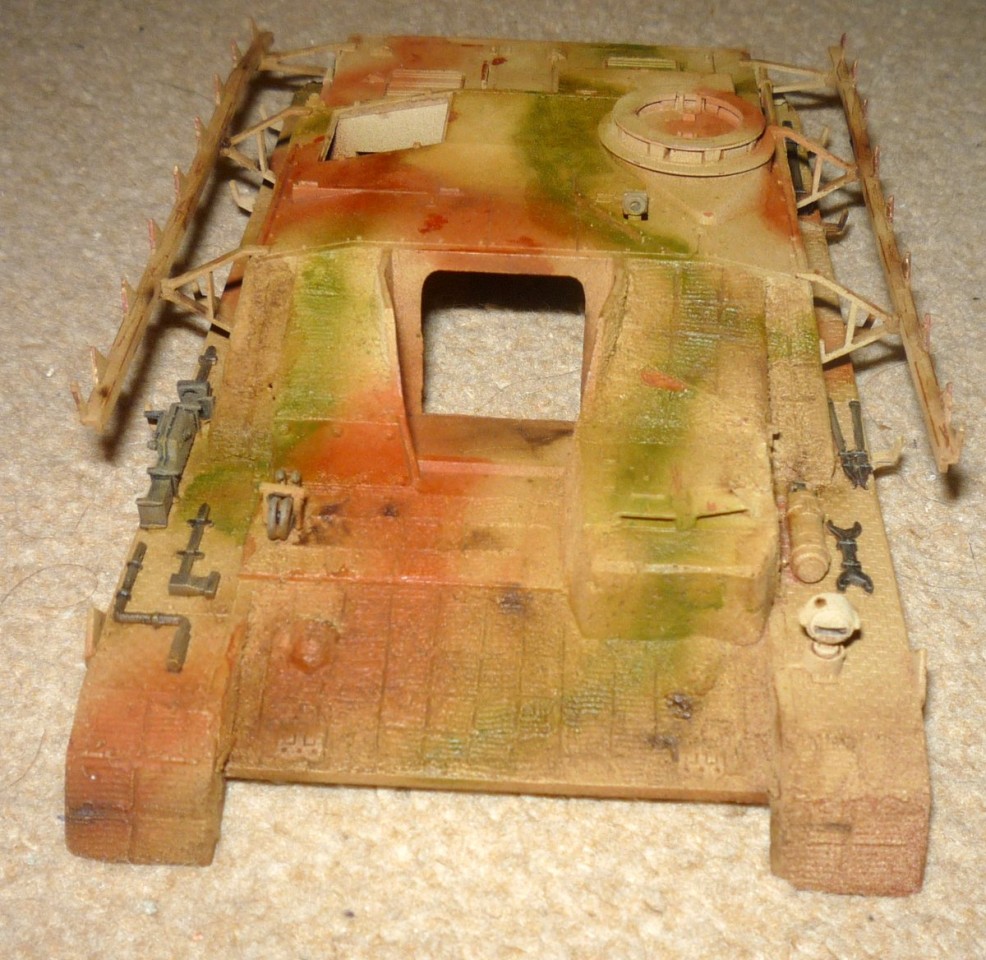
Now I applied zimmerit, or wood putty using a zimmerit tool to be more accurate, and this is harder than it looks on youtube and on looking at the results I realised that this would definitely be a battle-weary vehicle.
Pic 8 & 9
I did not work on the lower half of the bottom section as this would be covered with snow / slush when the time came.
I now put on the majority of the tools and equipment on the tank body but not hatches which will keep being knocked off by any as clumsy as I am and they can go on later.
As a side-note here in many kits of all shapes and sizes the makers seem determined to finish a section completely with the result that you will find yourself wrestling together two large parts which have all the outer details already attached. Have a good look and make your own mind up on the order for some of these parts.
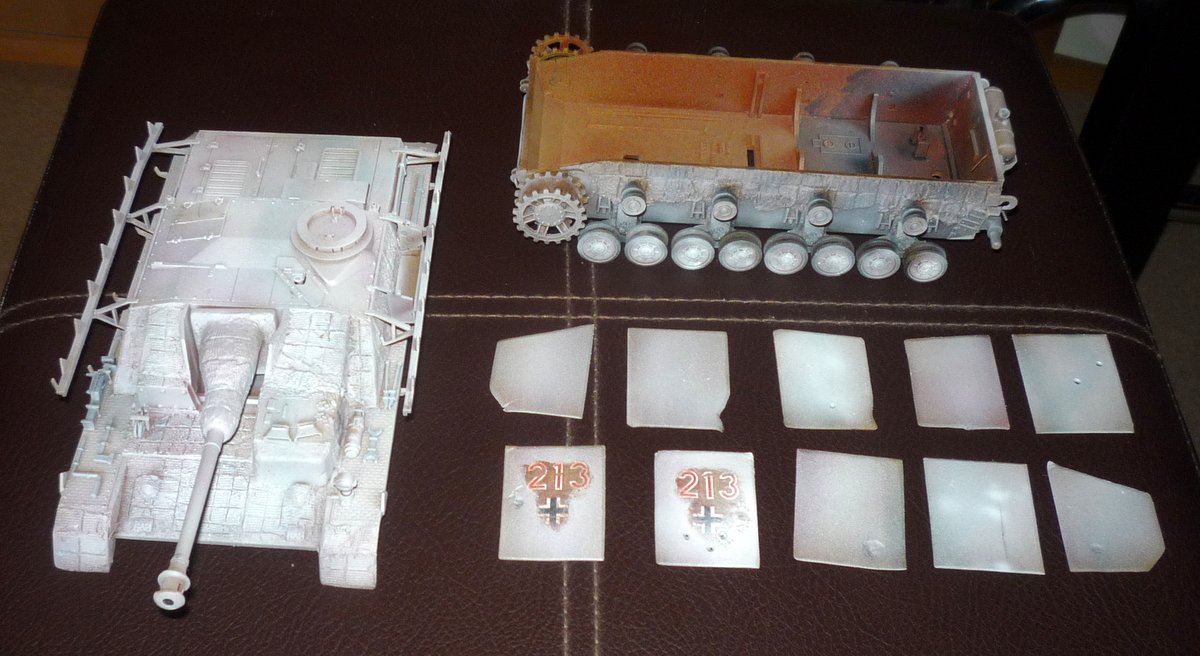
Next it was time to spray and I first used a dark red primer (originally bought from B & Q), a couple of coats of hairspray and then dark German tank yellow, originally bought for painting some Flames of War tanks for a game player and I had just enough left over for this project. (Given this model will be weathered and then put under winter camouflage and weathered again then at this stage any dark yellow colour should suffice). Finally a light spray of sand yellow for highlights though this could be applied with a brush. The hairspray will separate the two coats so that when scratches and damage are applied the red primer will show through, which is as it would have been. (A tip here from a man who has been married for over 20 years: whether it is the wifes, girlfriends, sisters or mothers hairspray they really do not need to know and what they dont know cant cause them to object. Take my word for it, they wont notice the difference in the can.)
Pic 10 & 11
This is the Stug starting to take shape and I now applied the camouflage. I used a spray gun (mine is one of the cheaper available used more for time-saving than any great unparalleled effect) but I have also done this in the past using brushes and paint. I also now gave a basic colour to the tools attached to the tank hull.
Pic 12 & 13
At this point I will say that I use acrylics for my painting work and oils for weathering effects. There are many fine brands available but I have found little disadvantage in using those that are freely and cheaply available in hobby stores and online in set packs with most of the colours youll need. Using the correct thinners can help and I would say that when fine details are required then I am afraid that cheap brushes are a false economy though do not wreck your precious sable brush stabbing on weathering or camouflage. Cheap throw-away brushes do have some uses.
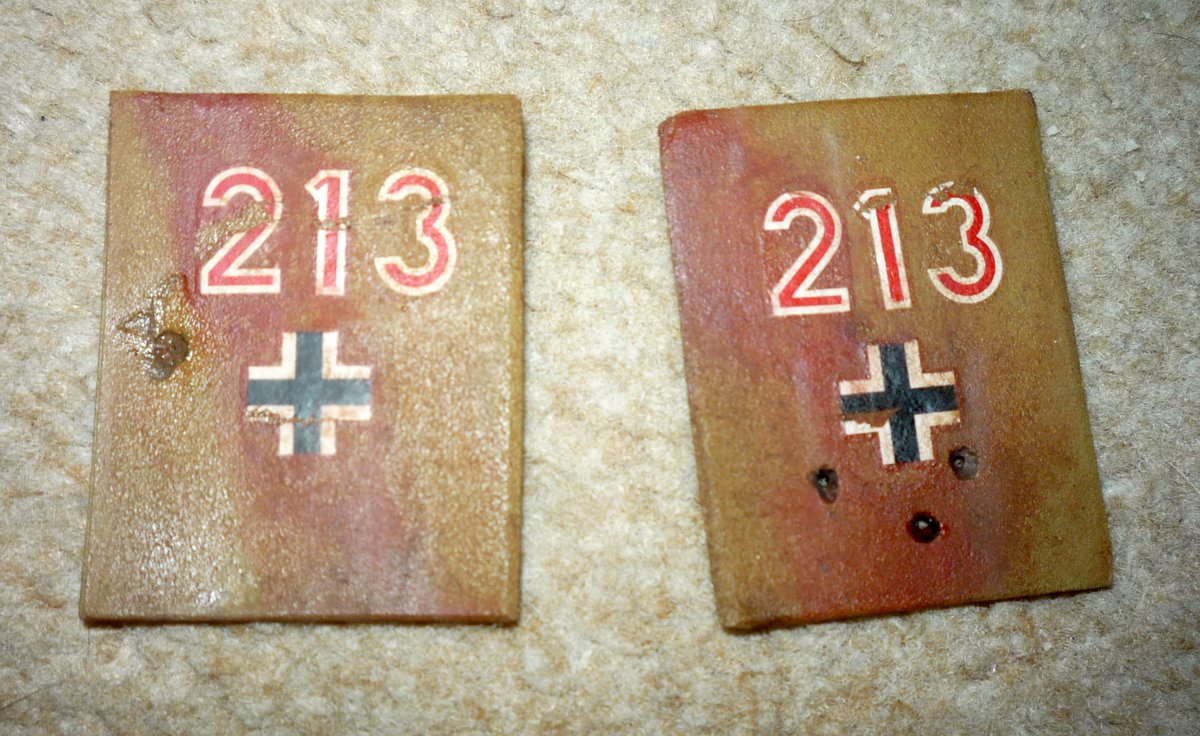
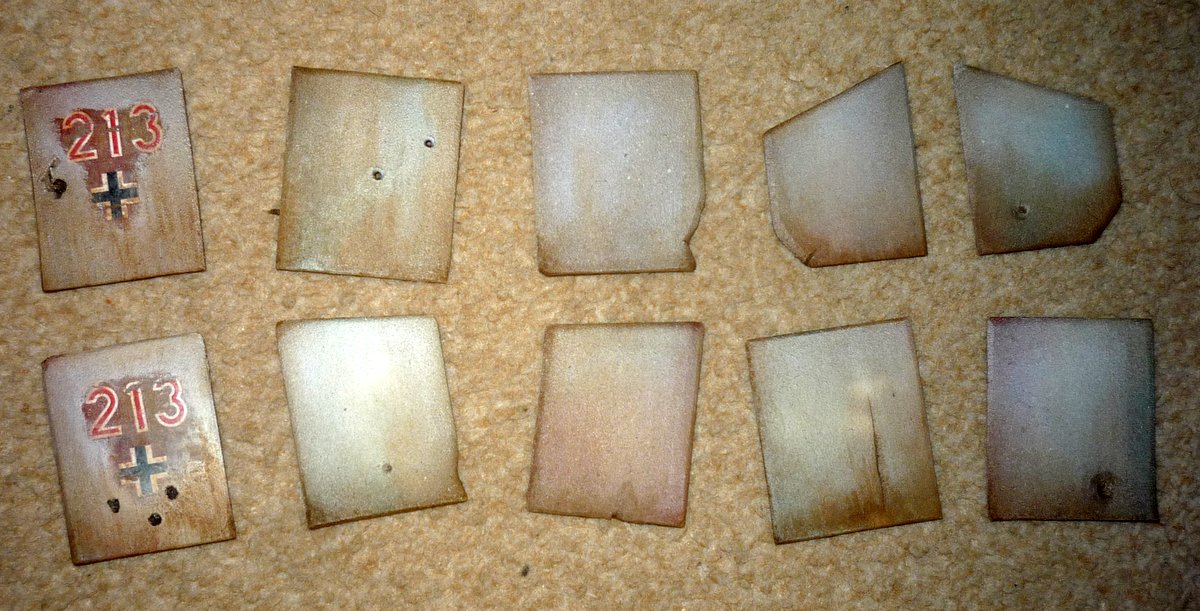
I now applied the transfers. Many save this as the last step but I prefer now for two reasons. We are building this up as it would have been made, primer, colour, camouflage, markings and so on and the markings would have been on before this tank was weathered or damaged. Also transfers (particularly old-fashioned transfers) show up as having clear, hard-to-hide edges. When on now the weathering and winter camouflage should help to cover these.
Pic 14
The scratches on the transfers are intentional and would be consistent with how the rest of the model should eventually look.
I did not apply divisional markings for two reasons: firstly, Stugs could be attached to infantry, panzergrenadier or panzer divisions and few German military formations failed to use them and I have seen many WWII photos of German AFVs that carried no divisional insignia. Secondly, on the Eastern front late 1944 / early 1945, after the destruction of Army Group Centre, the situation was desperate and remnants of divisions were frequently simply attached to others. This is a Stug IV of that time and German markings are sufficient.
I now applied a thin coat of white allowing the camouflage shapes to be seen through it, this is the basis for the winter camouflage. I sprayed this on but the crew would often use brushes to put this on so dont be afraid of doing so. I wiped away the white paint from the transfers as the crew would have done to show the German markings (or they would have painted around them).
I also put the wheels on, these have been sanded around the outside to indicate wear and had been painted black around the edges and will be given a wash later to redefine them.
Pic 15 & 16
Now I weathered the winter camouflage. I did this using a thin oil wash of burnt umber and allowed it flow along the cracks and joins and wiped it away when necessary or when I felt the effect would help. I also edged the missing zimmerit which is now battle-hardened and worn and as we have earlier seen, was not applied that well anyway. I also repainted the wheel rims with a dark wash and put silver points on the drive wheel teeth which would have been in contact with the metal tracks.
Pic 17, 18 & 19
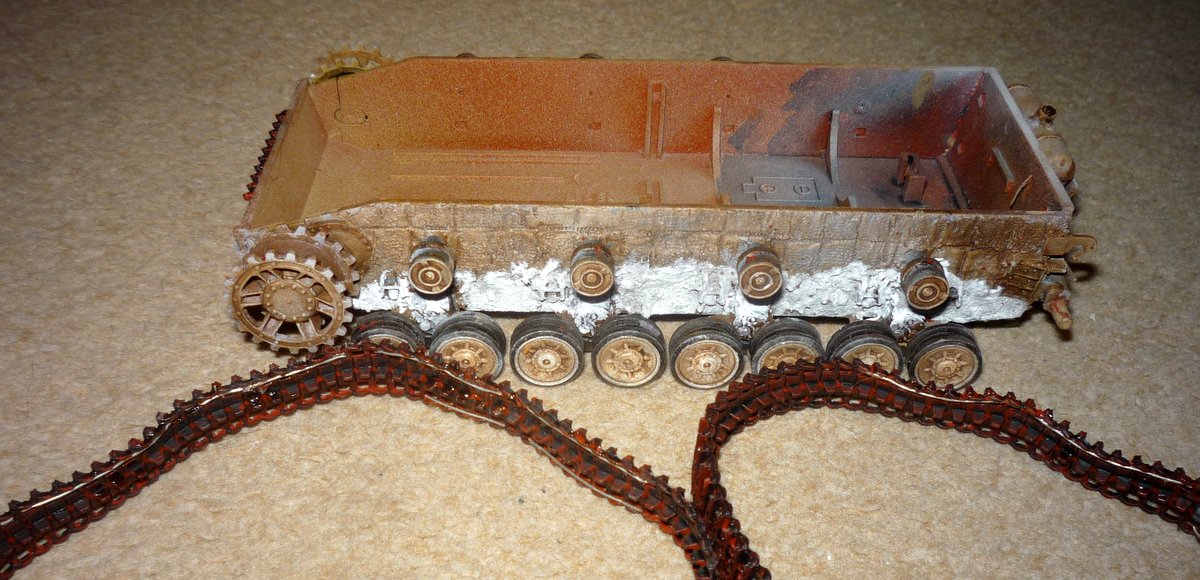
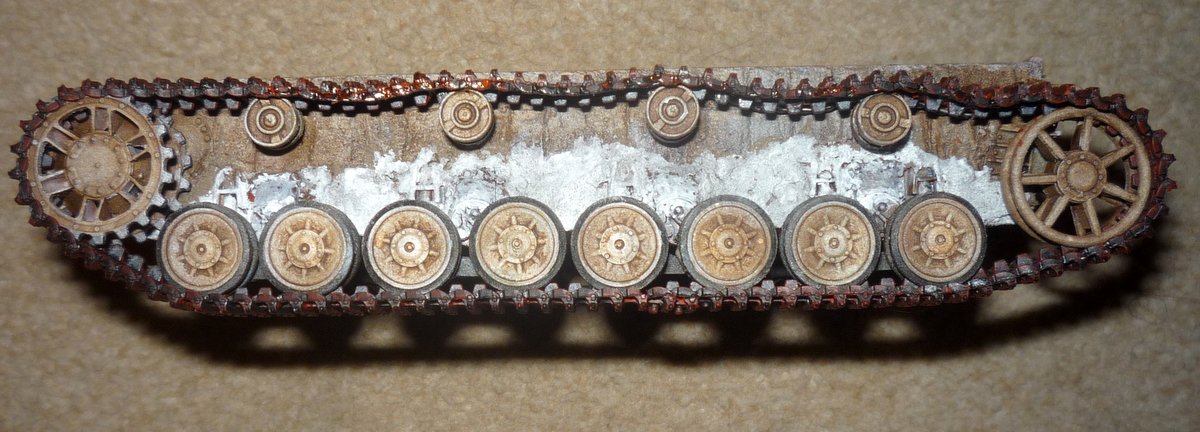
We now are about to put on the dreaded rubber-band tracks. The Stug tracks would have sagged when on the vehicle but rubber tracks wont sag. Many have suggested an answer but I opted to apply short sections of wire (I used 15amp fuse wire) between the wheels glued to the inside of the track and then bent to the required shape (given the freedom that would be left in the track after fitting). For painting the tracks I sprayed a dark red primer over them followed by a black acrylic wash. Any further details / weathering will be applied after they are on and when I know which sections are visible (and when they will not be handled anymore).
Before putting on tracks I applied the snow / slush effect on the hull behind the wheels. This was done using a mud effect paint which I do use frequently though I have also used plain old-fashioned filler for the same effect. This is then given a white wash with white highlights on the upper areas.
Pic 20 & 21
In handling the tracks you will find where the black wash rubs off (inevitable on rubber tracks) this reveals the red primer which at this stage is a suitable effect. With the tracks in place I applied some light silver to the outer edges and ridges on the track though the visible ridges at front and rear will also be covered by the snow / slush effects. I had not put any winter camouflage on the lower area as snow effects will be enough.
I now also put some snow on the wheels and upper hull and also decided to put some baggage on the rear of the tank. Some Stug kits provide a kind of wooden fencing for this but not here so this is simply tied on with strands of twine twisted together and painted. The baggage is from the bits box though my bits box has many items bought just to sit in there 1/35 scale baggage is freely and cheaply available on ebay or other model sellers or use any filler and mould a tarpaulin cover to conceal the details beneath. Or simply do not put this on if not wanted. I also put the tow cable on the rear right area rather than have it suspended in mid-air at the rear and I ignored the spare track on the upper front until I can mould suitable clasps as this is again balancing on the front of the tank in this kit. Looking at WWII pictures these sections of track seemed to be in all manner of positions so feel free to use your imagination.
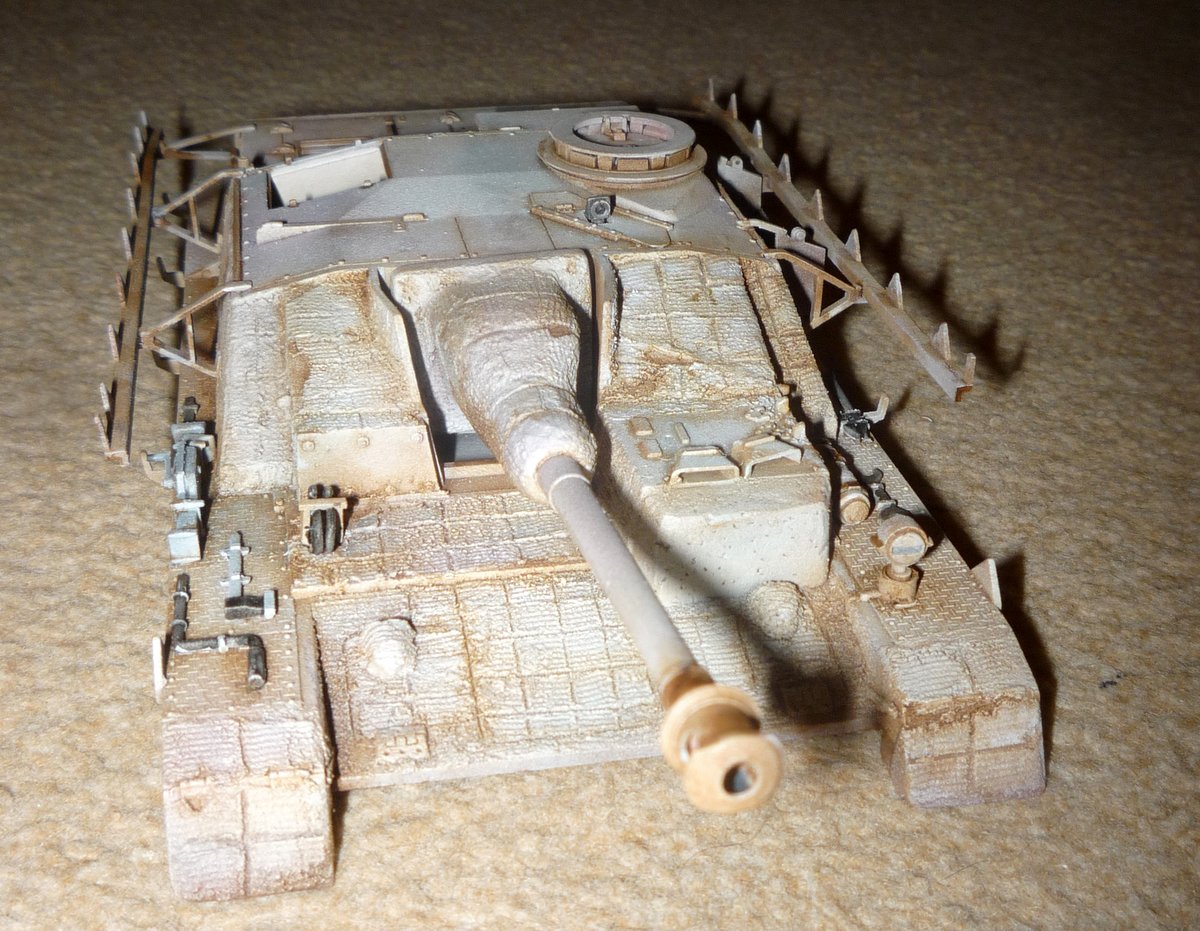
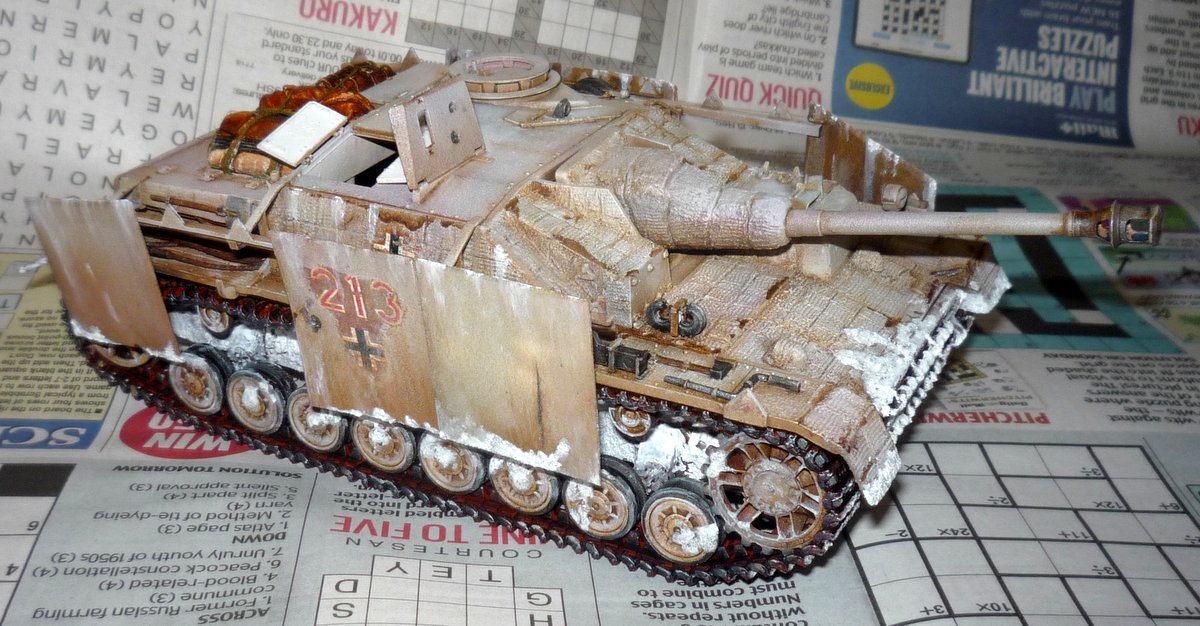
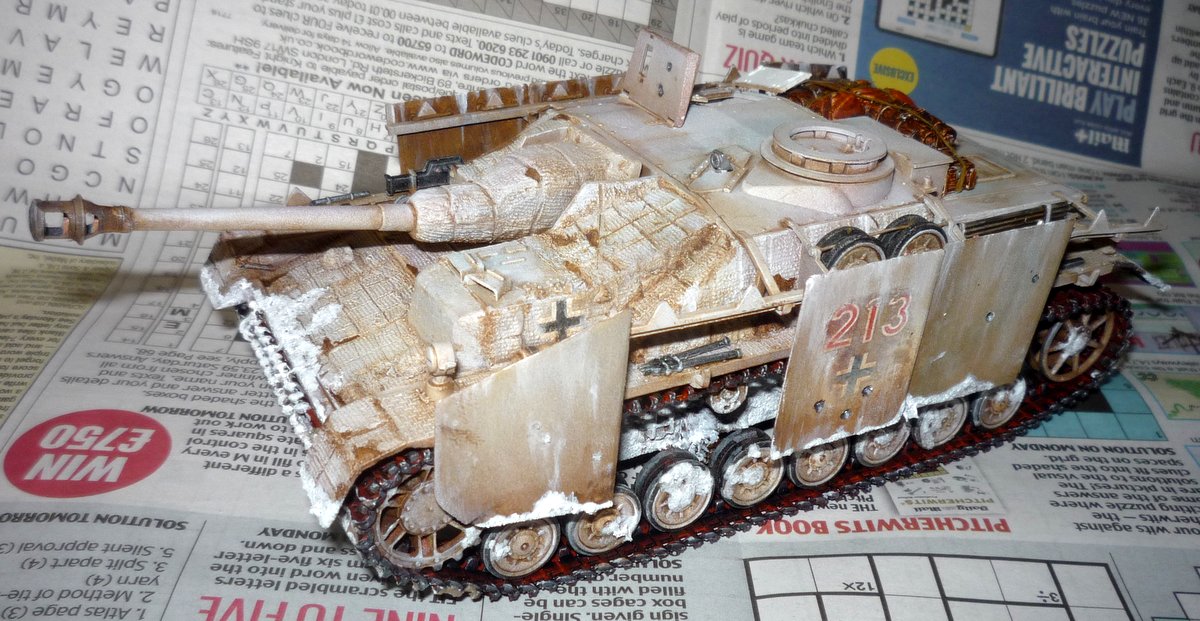
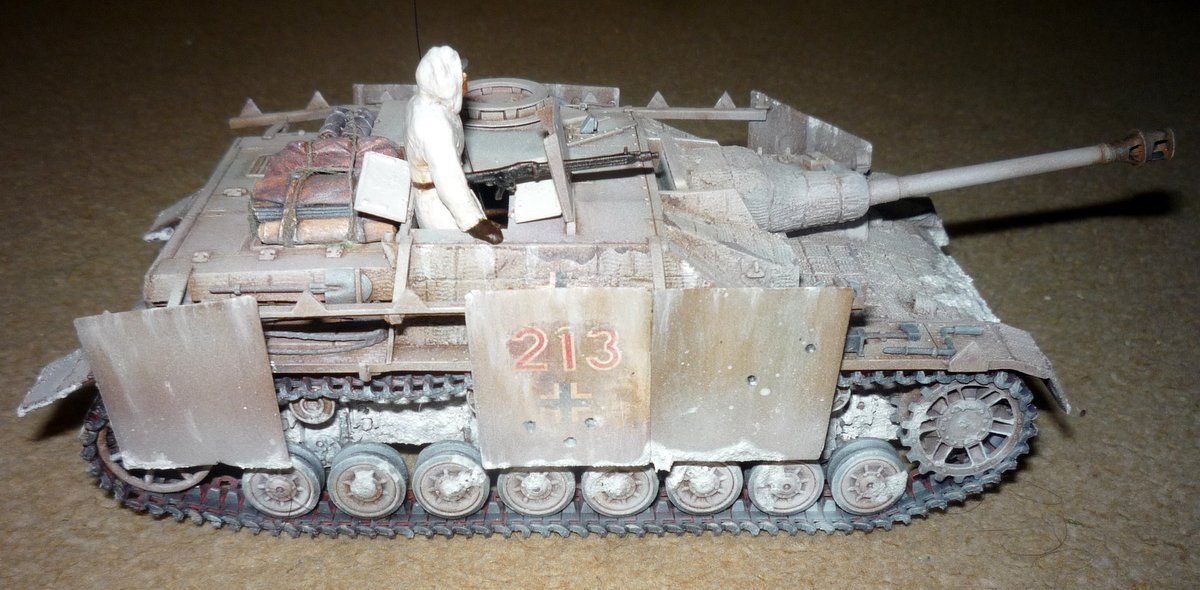
Now it is time for the two halves to be put together and snow effects (as described above) added again, particularly at the front, with white paint in upper areas to highlight this and show the wintry weather. Also the Machine gun mantlet and open hatches are fitted leaving only the Crewman and machine gun left spare. A decision is also made on which schurzen to use and I opted for 3 each side (which is probably high given that they seemed to have a short battle life) with the tank number and German cross on each side.
Pic 22, 23 & 24
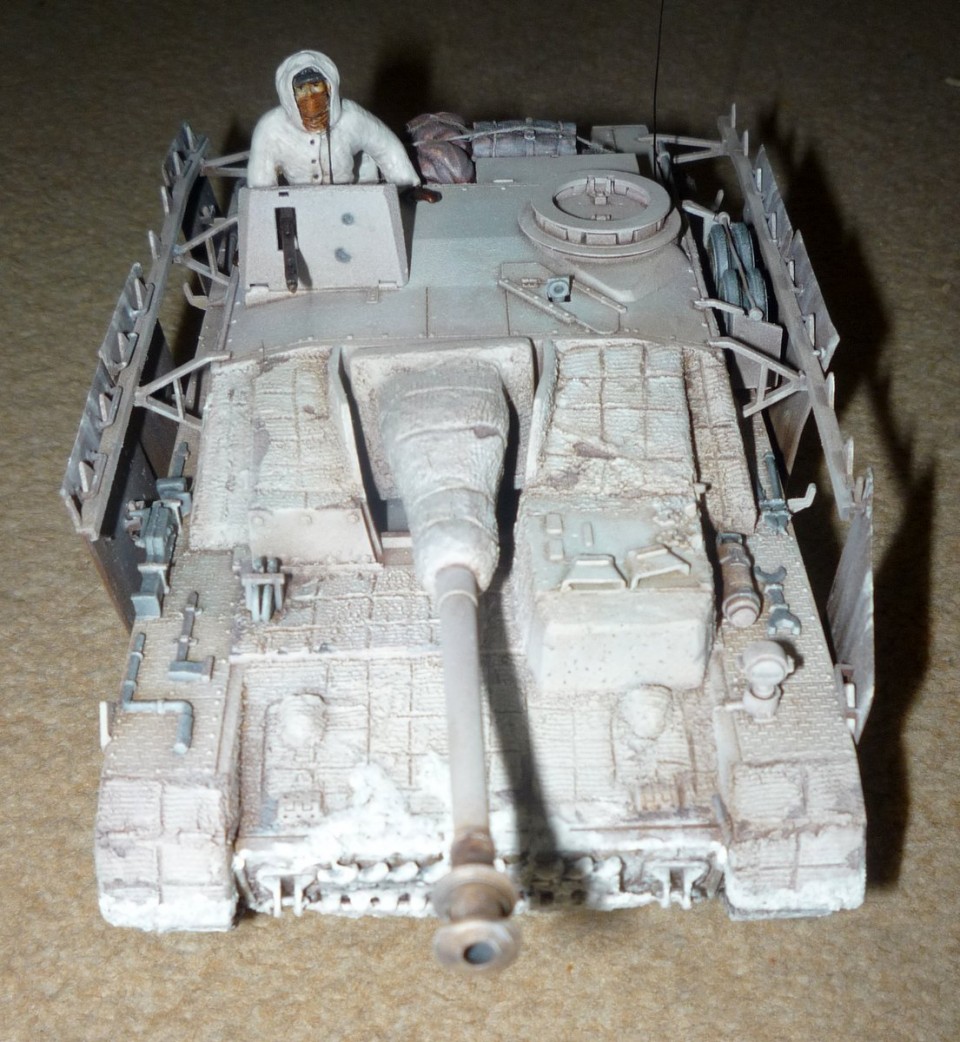
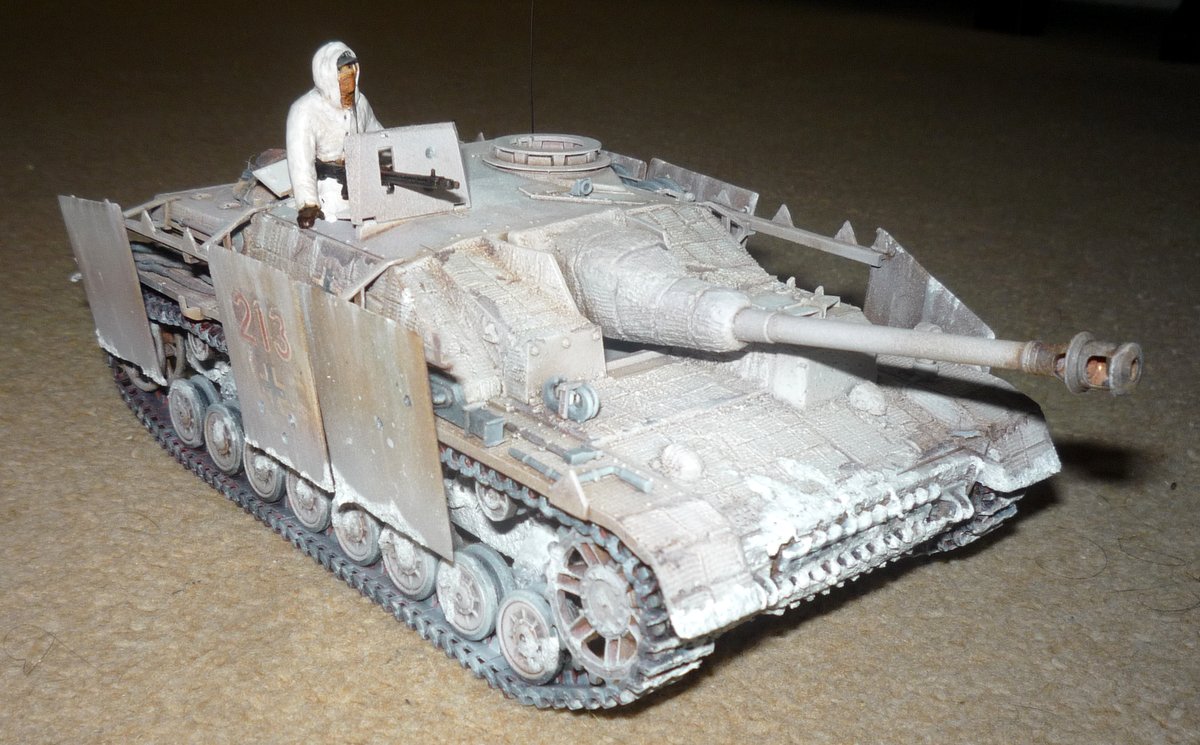
Almost done. It was now time for a light coat of white paint sprayed on to give a snow and frost effect and this should also help the snow already applied look more natural.
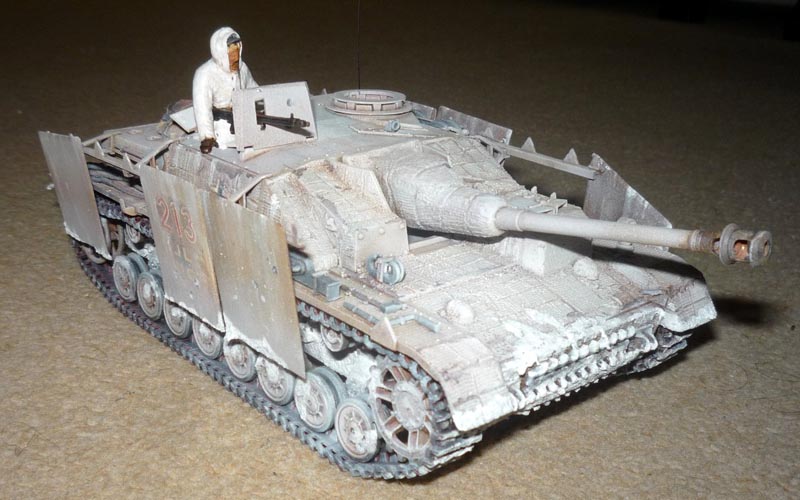
With this done the machine gun and the figure (painted to a moderate standard with a thin strand added as headphone cable) are put in hopefully now giving the effect of a battle-weary Stug IV fighting a retreat through the snow.
As always with any kit on completion there are some areas that I will probably revisit. I often have a close look at any model a few days or so later when I can look at it with fresh eyes and see what may have always been staring me in the face but I still managed to miss. There is only one aerial at the moment (these are actually whiskers shed by the cat and the wife assures me the second is on its way). The centre piece of the rear luggage is off the deck which somehow I managed to miss and that will be cured and I may yet revisit with a small brush for selected definition and weathering. On top of this I may place this on a suitable snowy base which can help show a winter model to its best advantage but other than that this is the old Tamiya Stug IV kit that is still cheaply available but still capable of much modelling entertainment.
Good luck with your own projects and I hope that this has been worth the read. Pic 25 - 30


About the Author


Comments

Curiously the Tamiya Stug 4 was my first build when I returned to the hobby 3-4 years ago.
JUL 08, 2020 - 11:47 PM

Boy, do I remember this kit!!
Built at least 2 of them during my modelling career.... with varying degrees of success, I must add.
Reading this brought back memories of the days when modelling was an easy, straight forward and relaxed thing. Now it has become so complicated at times.
JUL 16, 2020 - 06:18 PM
To be honest, if you know anyone wanting to start in this then this is a reasonable starting point - in both difficulty and cost. Thanks for the comment.
JUL 23, 2020 - 04:06 AM
Copyright ©2021 by Paul Endersby. Images and/or videos also by copyright holder unless otherwise noted. The views and opinions expressed herein are solely the views and opinions of the authors and/or contributors to this Web site and do not necessarily represent the views and/or opinions of Armorama, KitMaker Network, or Silver Star Enterrpises. All rights reserved. Originally published on: 2020-07-09 04:11:23. Unique Reads: 8238

WEB HOSTING BY


Copyright ©2021 Armorama and Kitmaker Network, a subsidiary of Silver Star Enterprises
All Rights Reserved. Please read our Conditions of Use and Privacy Policy.
All Rights Reserved. Please read our Conditions of Use and Privacy Policy.