

1⁄35Never Smile at a Crocodile!
Crocodile History
The Churchill Crocodile was developed in 1943 as one of Hobarts Funnies specialized vehicles for the D-Day assault on Hitlers Fortress Europe.
Although the Allies had used flamethrowers in The Pacific and Mediterranean theaters with success, most were either man-portable or carried in light vehicles. The anticipated intensity of combat, and the massive bunkered defenses of the Germans in Normandy would require a more survivable flame thrower vehicle with heavy armor and added firepower.
The Churchill tank was selected as the basis of this new flame thrower vehicle, and renamed the Crocodile to differentiate it from the more common Churchill gun tank. The Crocodile was built in large numbers during and after WWII, eventually putting 800 Crocodiles in service. It equipped three Regiments of the British 79th Armored Division on D-Day, and was so successful it was in demand by both British and American units, especially in dealing with the stubborn fortress ports on the Brittany Peninsula.
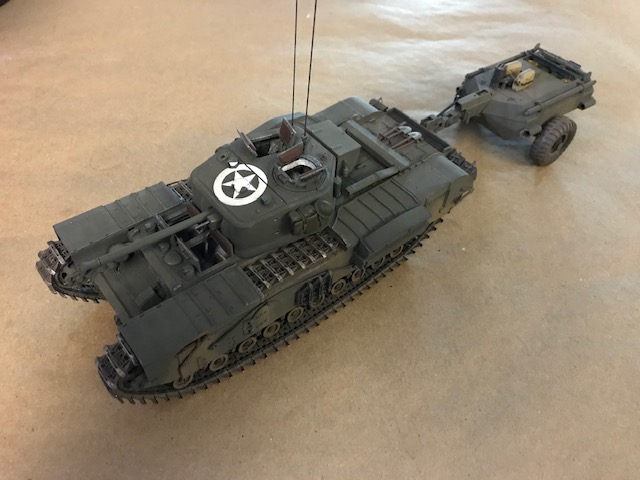
Where Infantry and mechanized flame thrower crews were vulnerable to counter fire, and had limited flame duration, the Crocodile delivered up to 80 one-second streams of flame onto a target up to 150 yards away. More importantly, it provided adequate crew protection from enemy fire where previous flame weapons couldnt. Its large flame fuel supply was carried in an armored two wheeled trailer behind, rather than inside the vehicle, enhancing crew survivability even more. However, re-fueling was a complicated process, taking over an hour to accomplish. But the presence of a Crocodile was often enough to convince enemy troops to abandon their positions.
Crocodiles supported the American VIII US Corps in capturing the Port of Brest on the Brittany Peninsula in September 1944, and later in the Anglo-American assault on Geilenkirchen, Germany. At Brest, they were instrumental in convincing some of the outlying German units to surrender. Hoping to copy the Crocodile, the Americans even converted up to four Sherman tanks to Crocodile standards, using the same fuel trailer and flame delivery system, however the Sherman Crocodile concept, although successful, was abandoned after one action.
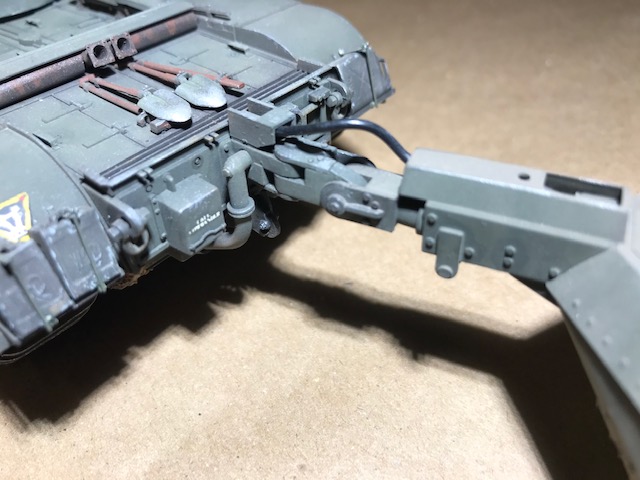
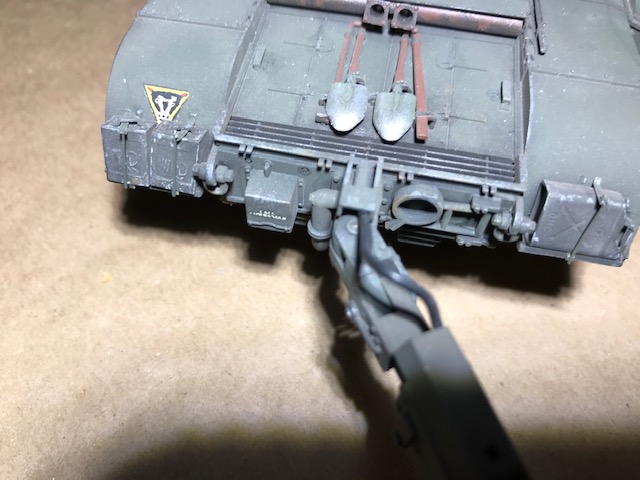
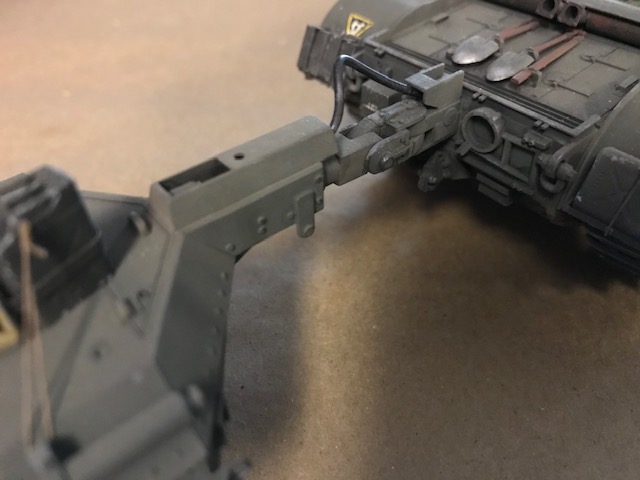
A standard Churchill Mk VII could be converted with an add-on package to tow the Crocodile fuel trailer with a unique universal joint towing mechanism attached to the rear armor plate. Flame fuel and compressed air lines ran beneath the Churchill hull in an armored conduit to a hull drain plug point, where they entered the crew compartment, and fed into a flame gun mounted in the hull BESA machine gun position.
This package could be applied to any existing Churchill Mk VII, but doesnt appear to have been done other than for Crocodile designated tanks. By dropping the fuel trailer, securing the rear universal joint in a retainer ring located on the rear plate, and replacing the hull mounted flame gun, any Crocodile could be easily converted back to a standard Gun Tank. Since the Crocodile retained the Churchills main turret mounted 75mm gun and coaxial BESA MG for use, it was a potent weapon system. It was such a fearful and destructive weapon, Crocodile crewmen captured alive in Normandy were executed on the spot by the Germans in at least one instance.
The Imperial War Museum has many interesting training films of the Crocodile in action, one is linked here A bit of a throwback to a WWI sponson tank, towing an angular armored trailer, it really does give the appearance of a slithering reptile moving across the battlefield. I knew if I ever got the chance, this was a vehicle Id want to model. When I was offered the opportunity to see a functioning Churchill Crocodile at the Flying Heritage and Combat Armored Museum in Everett Washington, USA, I finally took the plunge and built this interesting vehicle.
The Tamiya Kit
One of Tamiyas early kits, the 1/35 Crocodile was released in 1977, with an added rear hull plate, fuel trailer and appropriate flame thrower parts to build either a straight Churchill Mark VII or a Crocodile. A review of the kit was written by Andy Herbert for Armorama in 2002, and can be found here:
Crocodile reviewThe kit is nicely engineered, crisp and accurate in outline, but its basic typical of Tamiyas older kits, easy to build, nice fit, but a bit short of detail. I started researching the Crocodile, and bought a set of Fruil aftermarket Churchill Mk VII tracks to replace the too short early Tamiya vinyl tracks. A word of caution herebe aware that Churchill Mark VII tracks differ from those of earlier Churchill Marks (III-VI) if you buy aftermarket tracks, be careful to get the Mk VII ones! (more on that later).
The Tamiya kit represents a very late WWII or post-war version of the Mk VII, so there are minor tweaks to back date it to a Normandy version, mostly in modifying the deep air intake filter covers on the sponson sides, but I didnt bother modifying mine.
Starting the Build
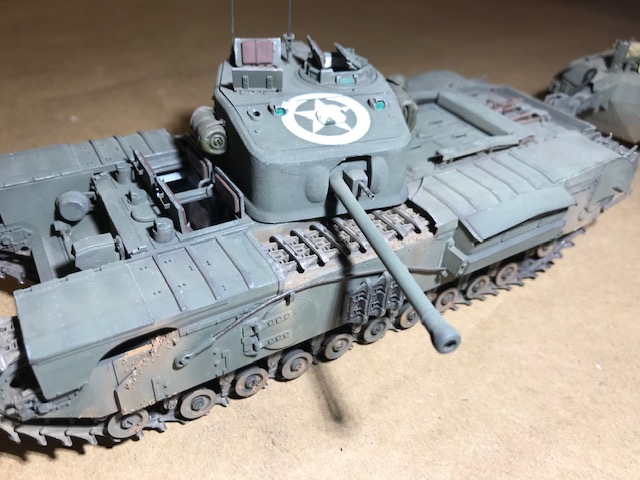
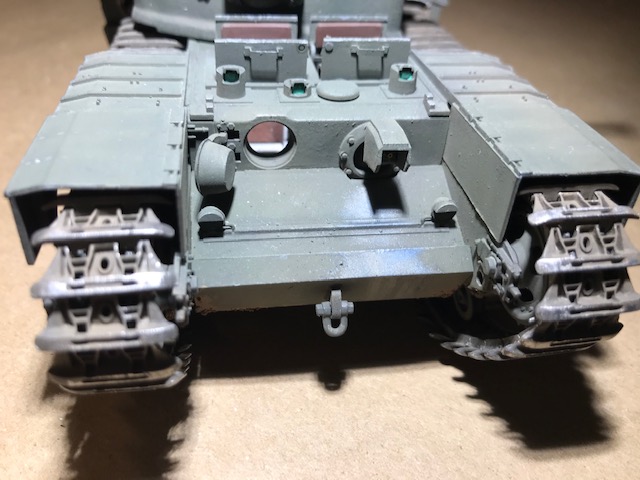
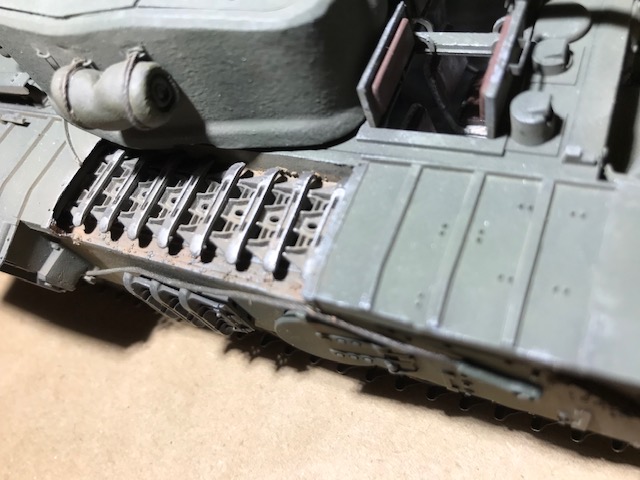
The first area needing work was removal of the fenders and track guards. Most Churchills in Normandy had the front mudguards and tops of the track guards below the turret removed (as seen in the IWM film above). This was because the front mudguards were easily damaged, and when the track guards were hit with enemy anti-tank fire, they had a tendency to bend or buckle, jamming the turret. Removing these sections on the Tamiya kit exposes large empty holes in the kit hull. So after carefully removing the fender tops with a circular razor saw chucked in a Dremel Tool, I built a new track race, and formed hull patches from styrene card to fill these gaps. The forward mudguards were easy to remove with a razor saw.
Interior Hull and Turret Details
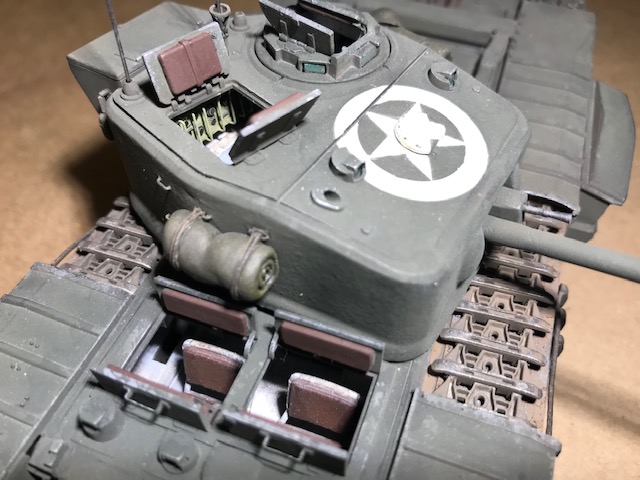
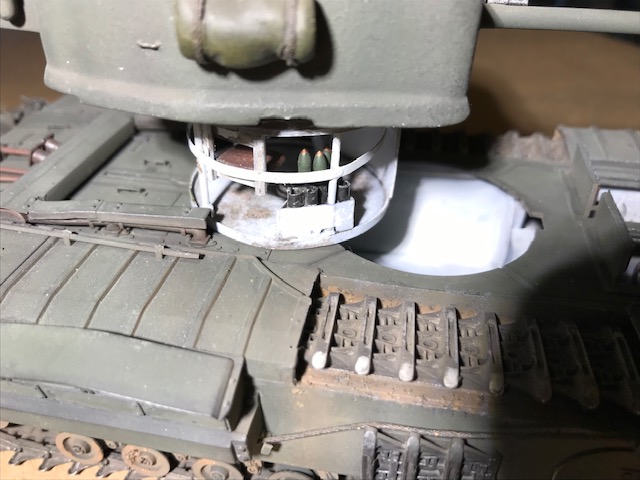
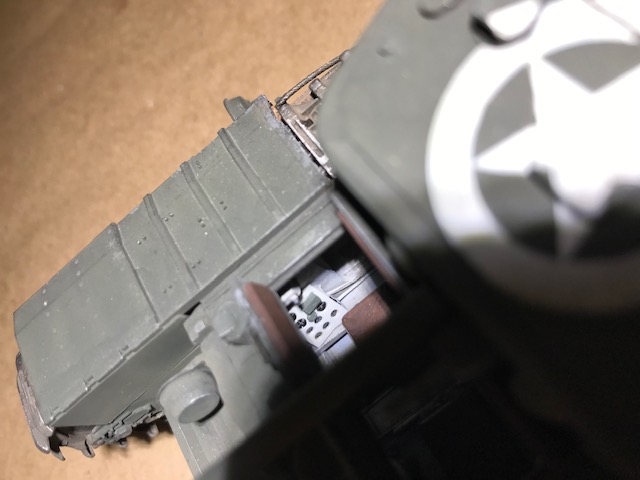
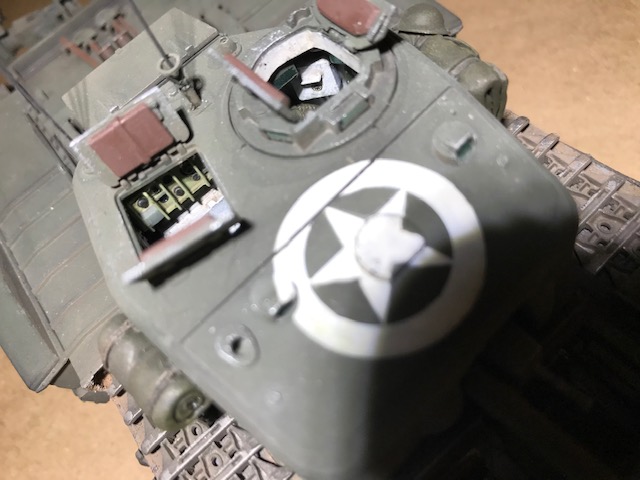
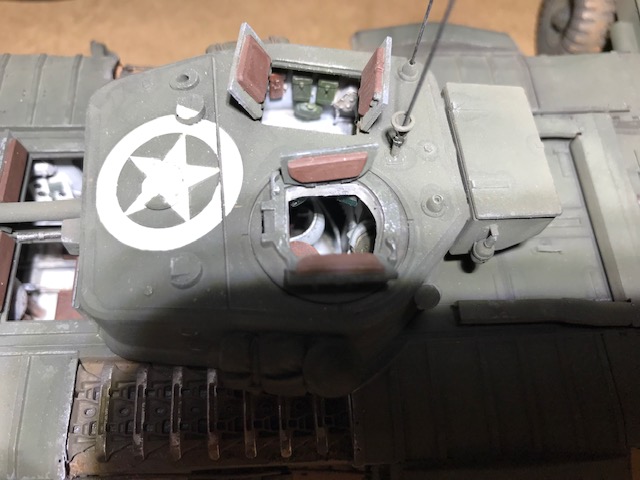
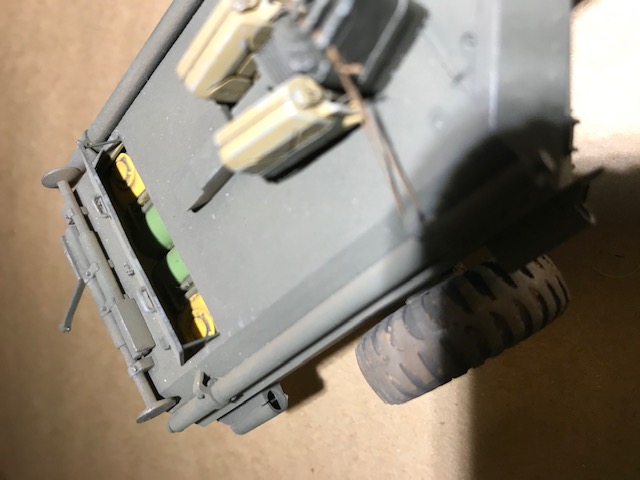
As this Crocodile is eventually headed for a diorama, I decided to scratch-build an interior of the crew compartment, so I could combine it with some British tank crew figures in a vignette, where a Crocodile has been called up to support US troops of the US 8th Division engaging pillboxes near the Port of Brest. Using on-line photos as references, I began scratch building interior parts out of plastic card, solder, and bits from the spares box. I constructed seats, control panels, the flame gun mechanism and fuel lines, steering gear and transmission levers for the hull driver/flame operator positions. Most of this was built from Evergreen sheet styrene and shapes. The turret needed a gun breech, COAX MG, recoil mechanism, seats, turret basket and 75mm ammunition rack, as well as crew items like ammo pouches, canteens, and map cases. A smoke grenade launcher tube was constructed for the right side of the turret roof. The drivers instrument panel was punched out of plastic card with Grant Line Instrument dials. A scratch-built turret command radio set was added, with a British style radio antenna mount. I realized the sponson hatches on the Tamiya kit could be made workable with some careful drilling and brass rod hinge pins. The commanders and loaders hatch are workable as well. This gives me some added flexibility in posing figures in a later diorama.
Once the hull was constructed, I added the scratch built interior bits, then began the work of priming the interior with a 50/50 mix of Testors Model Master flat white and burnt sienna, mixed 60:40 with lacquer thinner. This provides a bite to the plastic, and gets into the nooks and crannies.
I did some on-line research on British WWII interior colors and found conflicting references to interiors on some vehicles being silver while still others referenced white. I decided to go with white. Over my interior primer, I began airbrushing shades of very light gray, finishing with a final white in a post shading process, leaving the darker primercoat in the crannies and shadows around the hull interior. I also dirtied up the interior with washes of gray and brown, highlighting worn metal with a #2 pencil. I then added the additional details like radios, coax machine gun, ammo, seats, the instrument panels, etc., until the interior was convincingly well stocked and worn.
Exterior Details
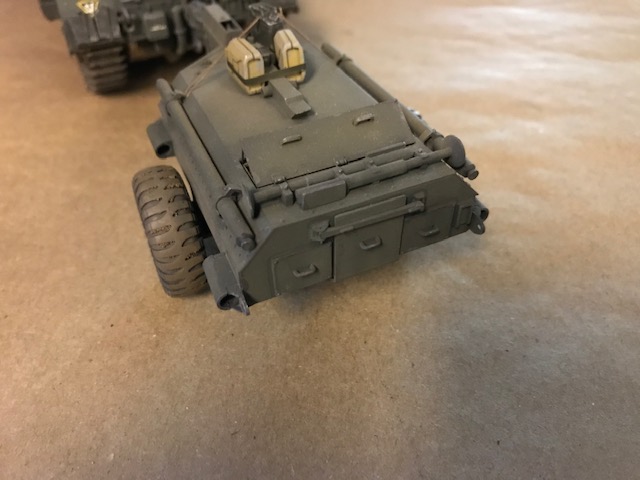
On the exterior I began by removing all the grab handles and tie down points, and replaced them with thin brass stock and wire. I added a flimsy rack on the rear fenders constructed of sheet and rod styrene, with Grant Line wing nuts as retainers, and some flimsy cans and a US style fuel can.
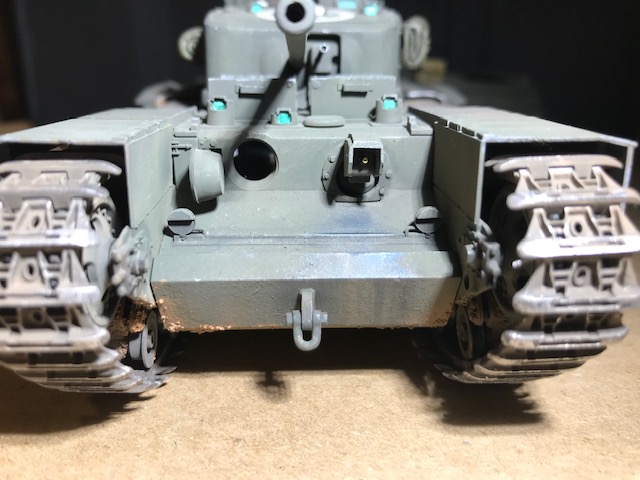
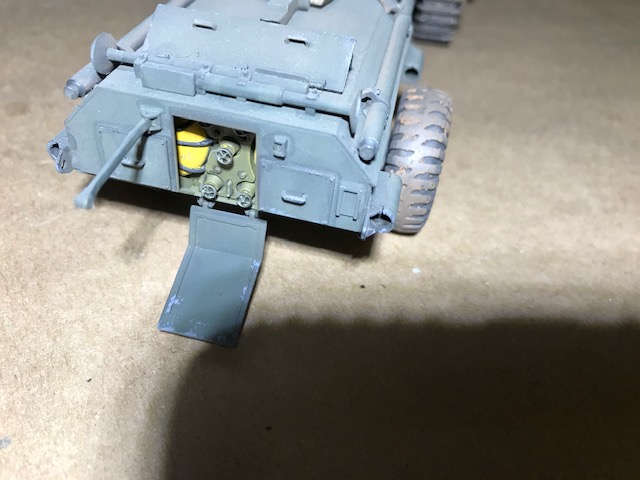
Since I was going to display the interior, I glued the drivers hatches open, adding the distinctive curved hinge supports in the drivers positions with styrene. I left the drivers forward vision port moveable. The periscopes in the Tamiya kit dont reflect reality, so covers were constructed for each periscope, with lenses made from styrene painted black, with Alclad aluminum, followed with Alclad clear green for the glass. The kit does not include vision blocks in the commanders cupola, so I constructed them from strip styrene, and gave them the same Alclad treatment. Im not really happy with the way this turned out, thinking they appear too green.
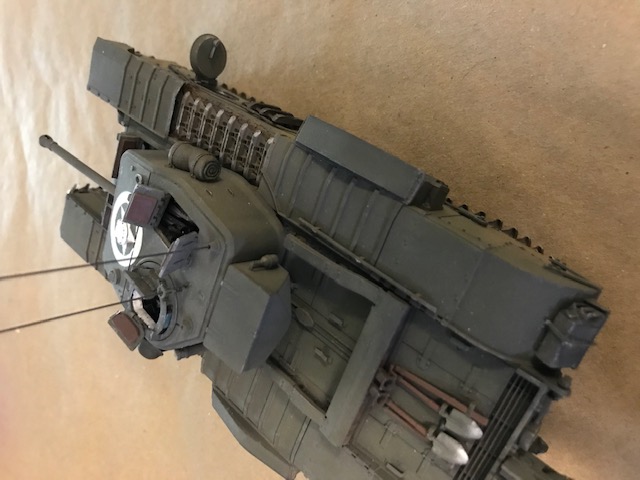
I replaced the Tamiya tow cables by winding strands of fine electrical wire chucked in a variable speed drill, with the Tamiya towing eyes attached. Footman loops on the turret were made using fine brass wire. The turret itself was a bit too smooth for me, so I stippled a thick coat of Gunze Mr. Surfacer 500 over the turret sides with an old heavy brush, adding a bit of texture. I also added Milliput rolled tarps and a Tommy helmet as cargo on the turret sides. The kit 75mm gun barrel was a bit rough and oval, so I replaced it with a length of K&S aluminum tube, using the muzzle brake from the kit.
The Flame Fuel Trailer
The trailer was a straightforward almost out of the box build. The rear access door is positionable in the kit. I made a brass pin hinge for the bar that secures the door, and added two tiny (very tiny) magnets on the securing bar and bar latch which keep the bar tightly in position when the door is closed (closing with a very satisfying snap I might add). Based on a photo I found on line, I added three jerry cans tied and strapped to the top of the trailer two captured German cans, and one US can.
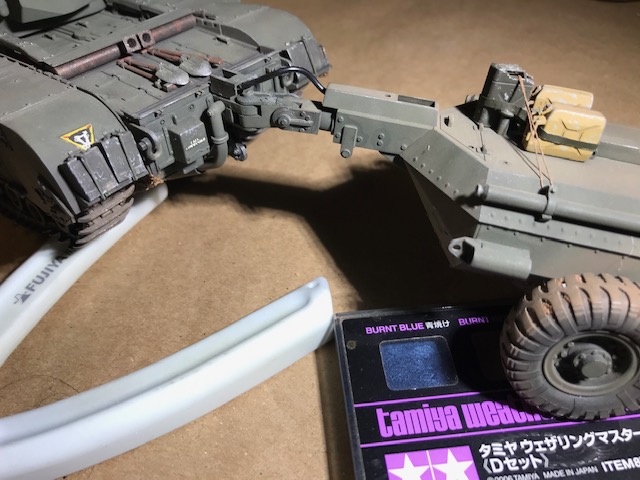
The fuel trailer on the Crocodile came with a set of tubular jacks to support it when detached from the Churchill tank, and a towing hitch atop the trailer (on long road marches, the trailer was detached from the tank and towed by a truck, while the tank itself was loaded on a tank transporter). These were weathered with a bit of Tamiya weathering powder and a silver artists pencil.
Exterior Painting
After masking the completed interior, I started the painting and weathering process. The tank was given an overall coat of Testors Model Master flat black, thinned 60:40 with lacquer thinner as a primer. I dont like gray primers, preferring to limit my painting to the fewest number of coats of paint possible. Over my black base coat, I began using successive lighter shades of Tamiya dark green and khaki paint, mixed to match the British Bronze Green color. This was post shaded in varying concentrations and hues on the hull, turret, and fuel trailer.
Tracks & final Weathering
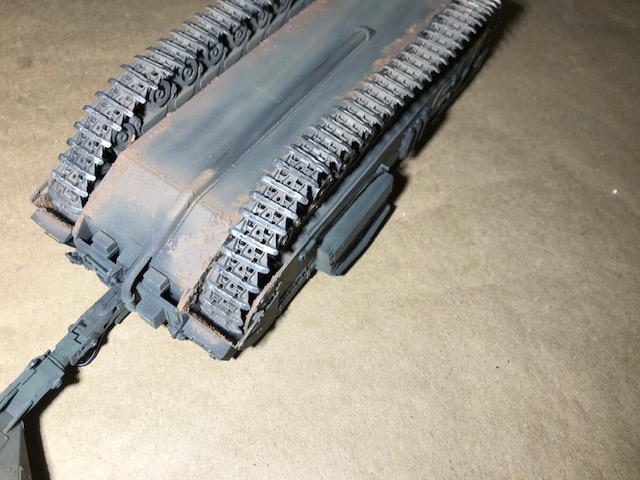
The original Tamiya vinyl tracks are a bit short, although this isnt to much of a problem, as they could be hidden under the fenders if needed. Although the kit tracks dont look bad, I preferred a heavier look for this build, so I purchased a set of Fruil Churchill Mk. VII tracks (See my notes above about differences in Churchill tracks I had originally purchased a set of AFV club tracks for this build, but learned the hard way they are not appropriate for a Mk VIIafter assembling them!).
I soaked the Fruil tracks for 15 minutes in Blacken-It solution to get a nice very dark gray-black hue. Its important to thoroughly rinse the tracks in clear water, as the Blacken-it continues to work to corrode the metal over time. I then gave the tracks a quick bath of thinned Testors Burnt Sienna enamel, working the color in with a stiff brush. When this was dry, I buffed the high points with a sanding stick to reveal a metallic sheen, as seen in the IWM film and in photos. The tracks were then assembled onto the model.
I found I had about eight extra links left, and was going to use them elsewhere on the model as extra armor. But I couldnt find any photos of such an arrangement on Normandy Crocodiles. Normandy Crocodiles typically carried few markings, although they usually had an air identification circle and star on the turret roof (also seen in the IWM films), and perhaps a unit marking on a fender. I used the kit decals for a vehicle in the UKs 79th Armored Division on a rear fender, and a Microscale circle and star for the turret roof. However, I ended up having to hand-paint a portion of the star as it wouldnt conform well to the features on the turret roof.
I began the weathering process on the Crocodile with a pin wash of Mona Lisa burnt umber oil and Turpenoid light thinner diluted in a 1:9 ratio. This was followed by a dry coat of Testors 50/50 Enamel thinner and Deck Tan, airbrushed at about 10 PSI from a distance of about a 12-15 inches from the model, ensuring a dry, dusty appearance as it sprayed on, with a higher concentration on the lower surfaces and sides. This was replicated on the trailer as well. This dry coat simulates a dusty vehicle in Normandy which has been traveling backroads to get to the objective.
Using gray, silver and dark brown artist pencils, I simulated chipping, and other wear/tear In appropriate spaces. I didnt bother with any oil modulation or other techniques, as I was aiming for an overall dusty appearance, and such techniques would likely be lost beneath it. I did replicate a bit of dark staining on the front hull with Tamiya pastels, as the area under the flame gun was subjected to high heat and drops of flame fuel, as seen in films of the Crocodile in action. I also mixed a matrix of brown acrylic paint and fine sand to represent dried mud and applied this to the trailer wheels and hull in various spots. The model was then given an airbrushed coat of thin 50/50 mix of decanted Testors Dull Coat and enamel thinner to affix the weathering in place.
Conclusions
The Tamiya Churchill Crocodile is a nice, simple to construct kit, with lots of potential for added super detailing. With a bit of extra effort, the rectangular lower hull and turret lends itself nicely to an added interior, and without too much trouble, you can make most of the hatches moveable, enhancing the kit for future diorama work. With careful gluing, the fuel trailer can mimic the real thing with a neatly engineered workable universal joint between the tank and trailer. The Tamiya kit is currently the only Mark VII Churchill kit on the market, and the only Crocodile offering, although I think Ive heard a rumor of AFV Club marketing a Mk VII in the future.
It was a fun build of a unique vehicle which doesnt get a lot of credit for being the Allies most numerous flame thrower tank during WWII, and perhaps the most heavily armored flame projector vehicle of all time.


About the Author


FROM: WASHINGTON, UNITED STATES
I'm a retired U.S. Army Officer, serving for 30 years on active duty. I've been model building in various genres off and on since 1959, when my Brother-in-Law and Sister gave me a Monogram Jeep and 37mm gun for my birthday that year (which I still have in the original box!). I appreciate and have e...


All Rights Reserved. Please read our Conditions of Use and Privacy Policy.