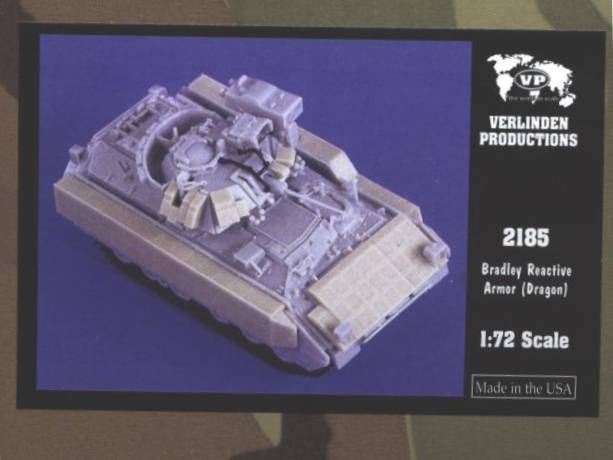
Recently Verlinden Productions released the Bradley High Survivability Armor Tiles in 1/72 scale. SABOT (Rob) did a great job reviewing that set for us. Rob noted how well molded the pieces where but showed reservation on the lack of detail. Upon news of this kit in 1/35 scale for the Tamiya M2A2 ODS Bradley, everyone’s expectations where high. Unfortunately, Verlinden has disappointed us with a kit, although nicely done, lacks key components and minor details.
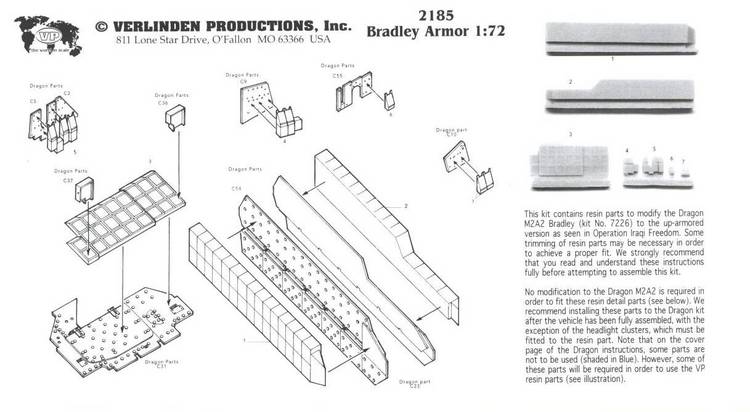
Now don't get mad at me for sounding like I am tossing this kit to the kerb. The pieces are well done and are a good start to making an accurate M2/M3 Bradley with Reactive Armor. So what I have done was locate the TM (technical manual) and parts manual that covers the High Survivability Armor Tiles (TM 9-1375-217-13&P), and pulled out the pages that cover the missing components and show better detail. So lets get on to the review and how to fix the inaccuracies.
Let's start with the more noticeable parts, the side armour...
Nothing much I can say here. Moulding is done nicely. Nice surface detail on the blocks. The spacing between the blocks line up with the bolts on the side armour plate. All the blocks are present. My only concern is, and it could be only my set, that most of all the little strap loops on top of the top row of blocks where broken. This is an easy fix. You can get aftermarket photo etch loops from several places or replace them with sprue or wire.
what's missing?
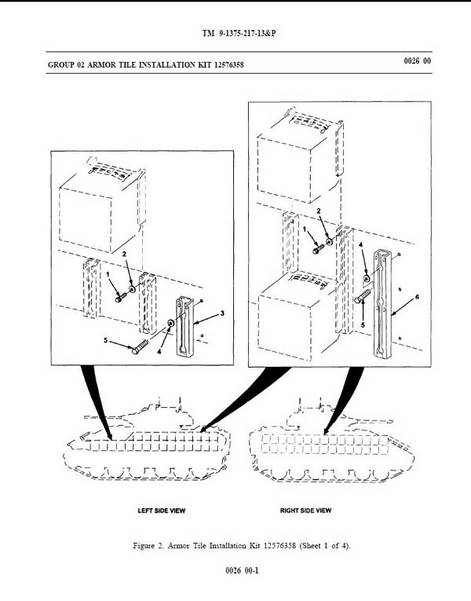
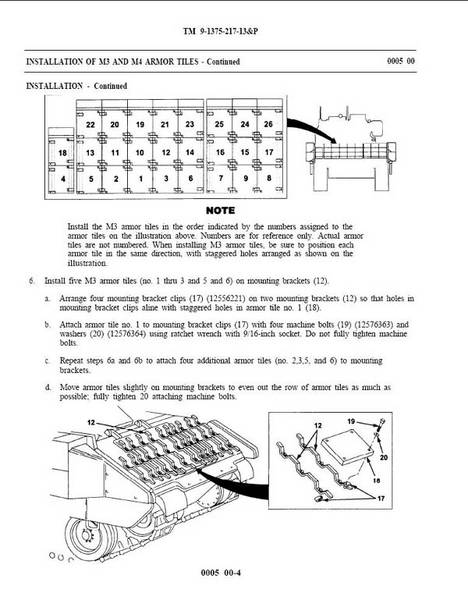
I have provided two pages from the TM to show what is missing, pages 0026 00-1 and 0026 00-4. If you look on page 0026 00-4, the more noticeable piece missing is item #17. Also notice on the same page item #22 and #23. Half of that is moulded to the block of tiles and the plate that actually bolts to the armour side plate is missing. These three items are easy fixes. Some card stock and bolt heads cut to size and shape fixes that right up.
The other more noticeable part, or parts, missing are the actual mounting brackets that the blocks slide on. They are very noticeable on the actual vehicle. They stick up past the blocks and can be seen. There are two different lengths of brackets. Look at page 0026 00-1 to see these brackets. As you can see, they are just bolted on to the side armour plate and the blocks slide on.
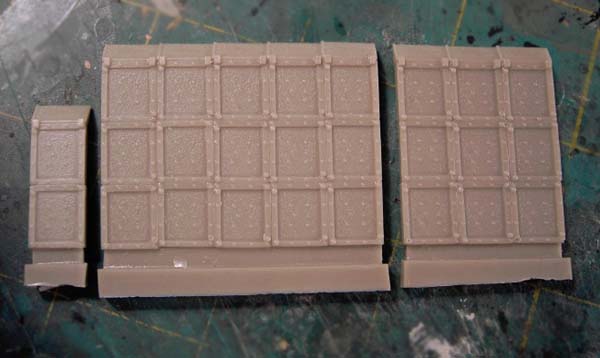
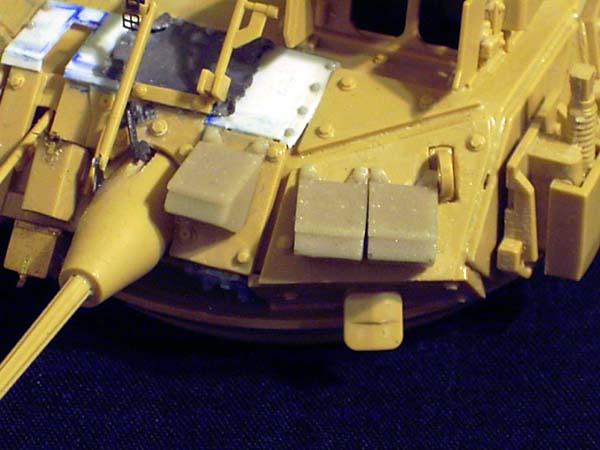
Now the front armour blocks:
Verlinden has provided three pieces here for the front armour, one piece over the engine access hatch, one piece for the right, and one piece for the left. Same as before, the moulding is done nicely and there are nice bolt detail added.
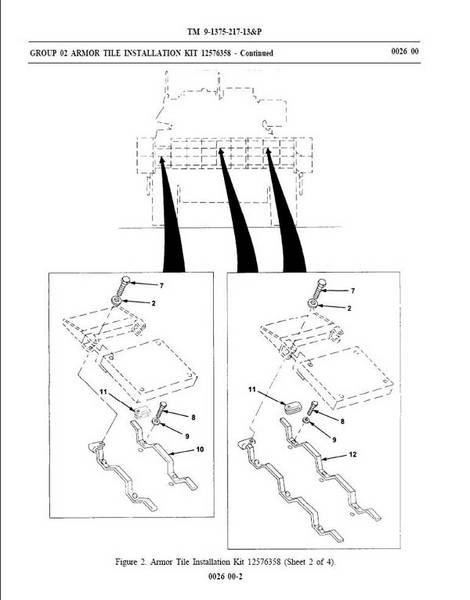
The kit has you gluing the pieces directly to the front of the hull in their perspective places. WRONG! The actual blocks are attached to brackets that are bolted using the existing bolts on the front armour plates. The blocks actually sit a couple of inches above the existing armour plates. If you look at page 0005 00-4 and 0026 00-2 of the TM I provided, the brackets sort of look like the brackets that held the Reactive Armour on the old USMC M60's back during Desert Storm.
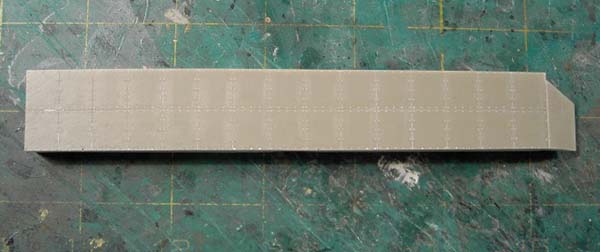
Once again, this is another easy fix. Some flat brass wire from the train section of your local hobby shop or some plastic strip will do nicely for these brackets. The instructions have you mounting the head light clusters directly to the left and right group of blocks. Although this is correct, the mounting plates for the clusters are missing. Two things you can do here, scratch build the plates using reference photos of the actual plate or grab the Voyager M2A2 ODS photo etch update set. The plates are provided in the set.
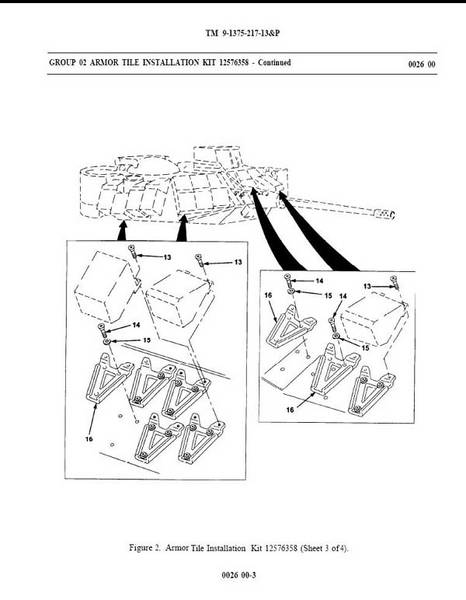
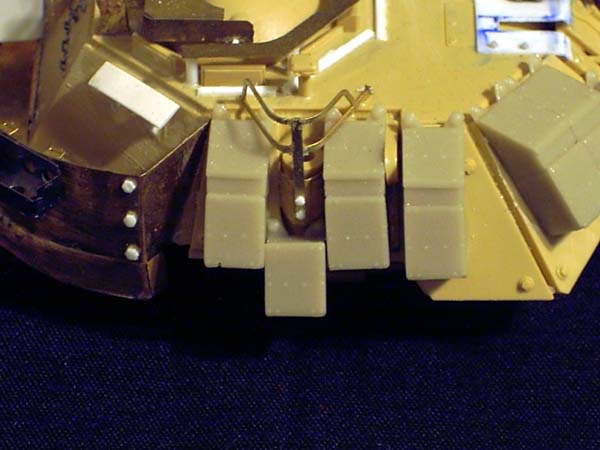
Last are the turret armour blocks:
Kit Parts:
There are nine pieces total for the turret blocks. Four blocks go mounted on the right armour plate located under the right antenna and next to the antenna. Three blocks mount on the right front armour plate and two on the left front armour plate. The blocks show the correct shape and correct mounting brackets. So essentially, there is nothing to annotate as missing parts.
I've provided page 0026 00-3 from the TM to show how the blocks are mounted on the real thing.
Using reference photos of the actual vehicle with the blocks on and off, and the parts manual, I found that the Tamiya kit has some added and misplaced bolts. Once again, easy fix. I simply removed the wrong bolt heads and positioned the block in the correct positions.
in conclusion
Even though this kit is missing some obvious details, it is still a good start by having the main components there. So it's not a total lost. With some good reference photos and these pages from the actual TM, a correctly detailed model can be turned out.
About Pete Becerra (Epi) FROM: TEXAS, UNITED STATES
I am 48 years of age. I have been modeling since I was around 8 years old. As you can see from my signature, I am retired from the US Army and Texas Army National Guard. I served 6 years in active duty from 1989 to 1995 and in 1998 I joined the Texas Army National Guard and been serving up unt...