Introduction
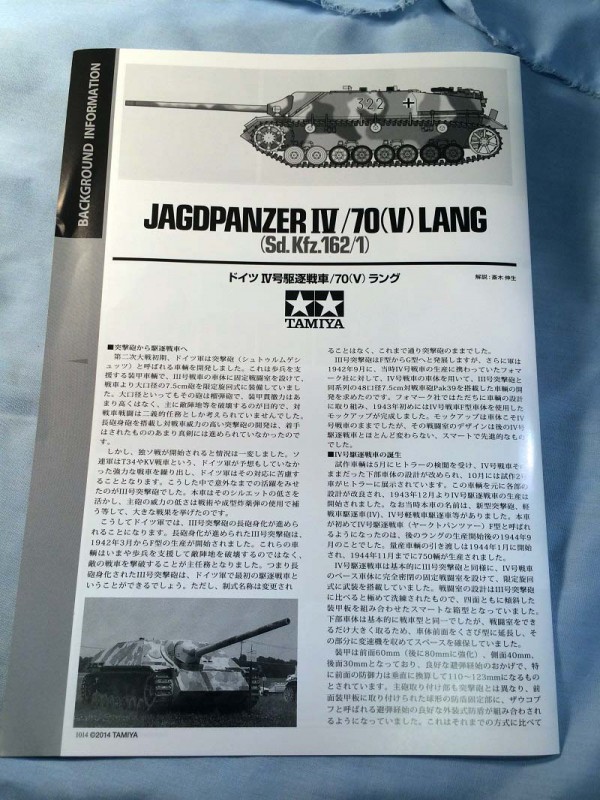
In July of 1944 the first of the German Jagdpanzer IV/70 (V) Lang assault vehicles rolled ofF the Vomag assembly line. Before the war was over 930 of these powerful units would be produced. Its powerful anti-tank gun and low profile made it an excellent weapon that caused havoc among Allied units.
Back in 1976
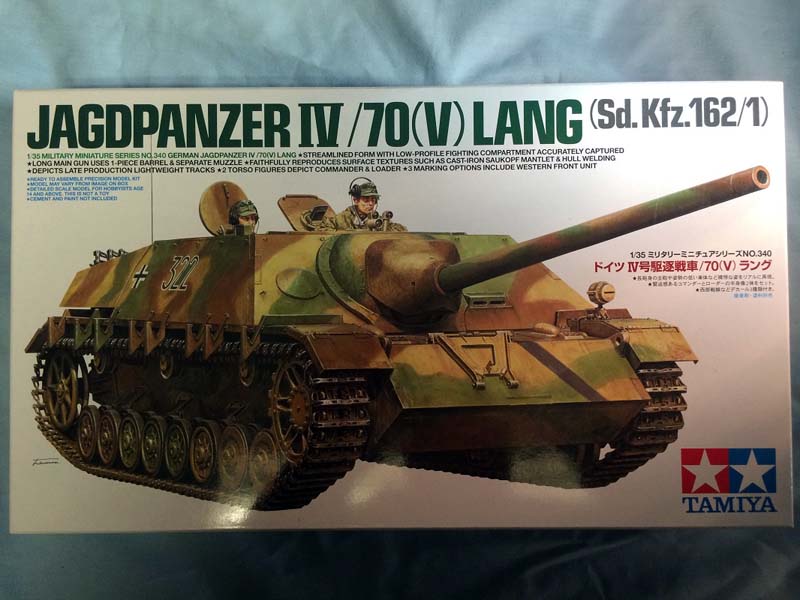
Tamiya took their first shot at kitting one of these beasts. Times being what they were; i.e. little real competition, the kit was a bit on the basic side in comparison to what we have today. Roll forward to today and we have a new, updated kit from
Tamiya, #350340. Clearly, competition from other producers has pushed
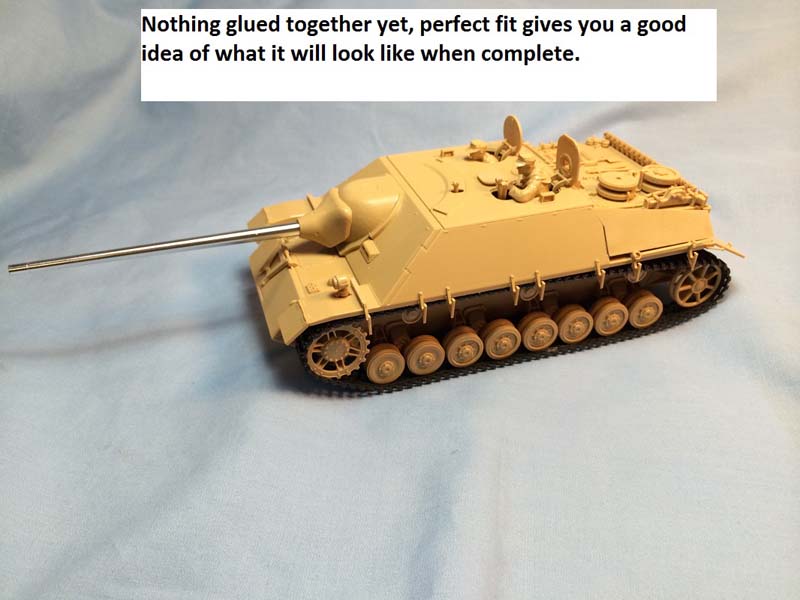
Tamiya to update the idea of acceptable for a kit and the new Lang shows this through and through. A long 38 years later chronologically from the first kit, but way beyond that in terms of detail, engineering, and overall fit.
The Build
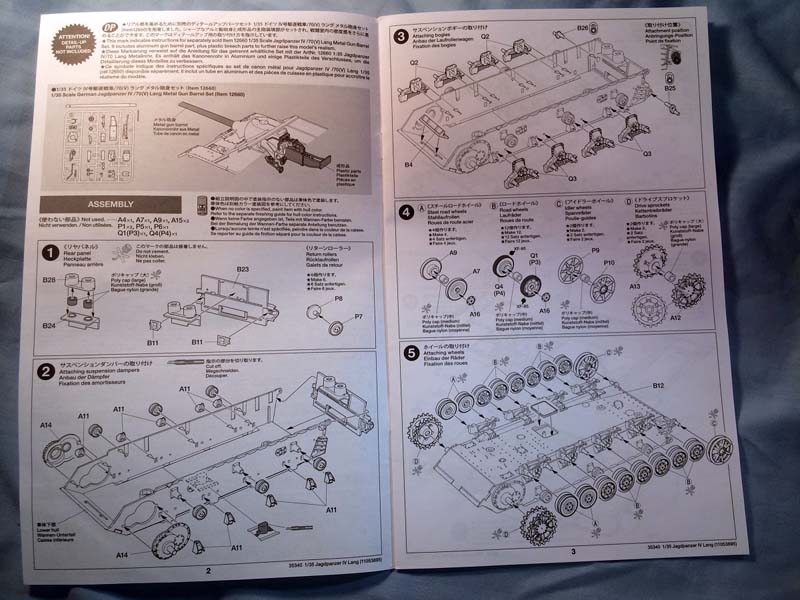
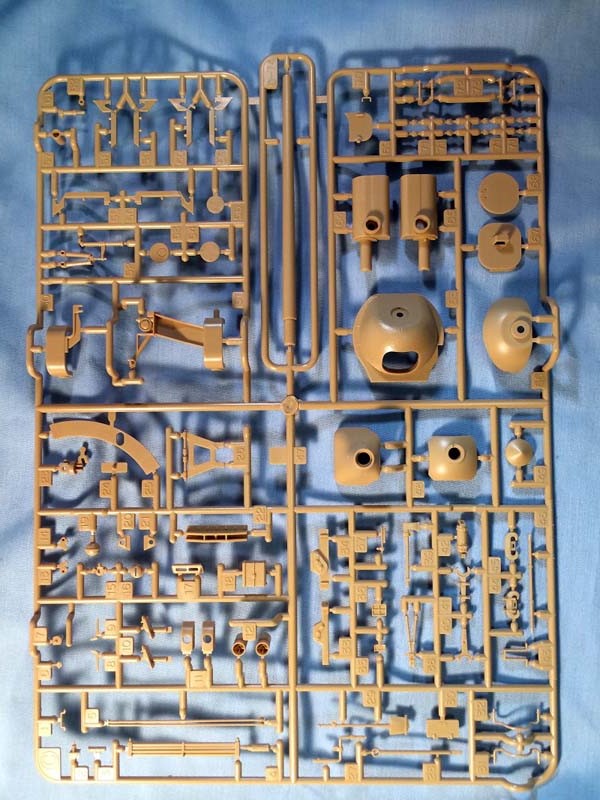
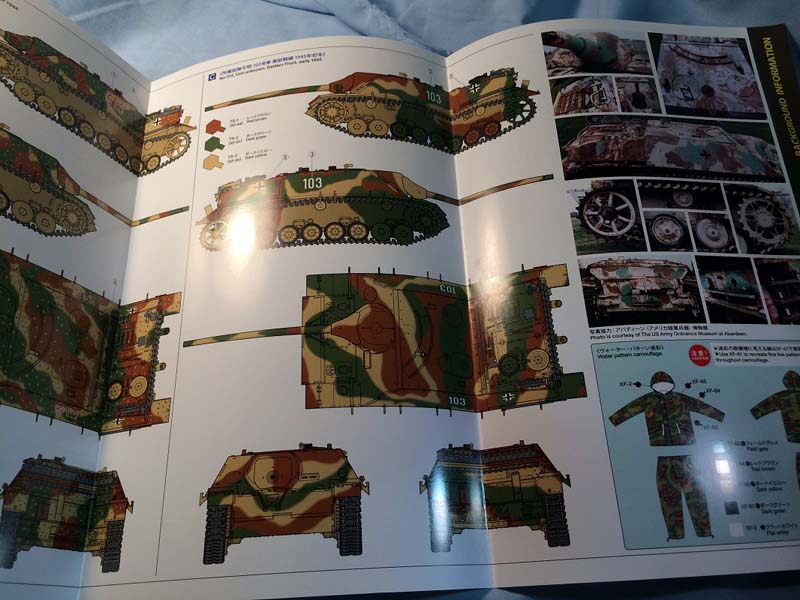
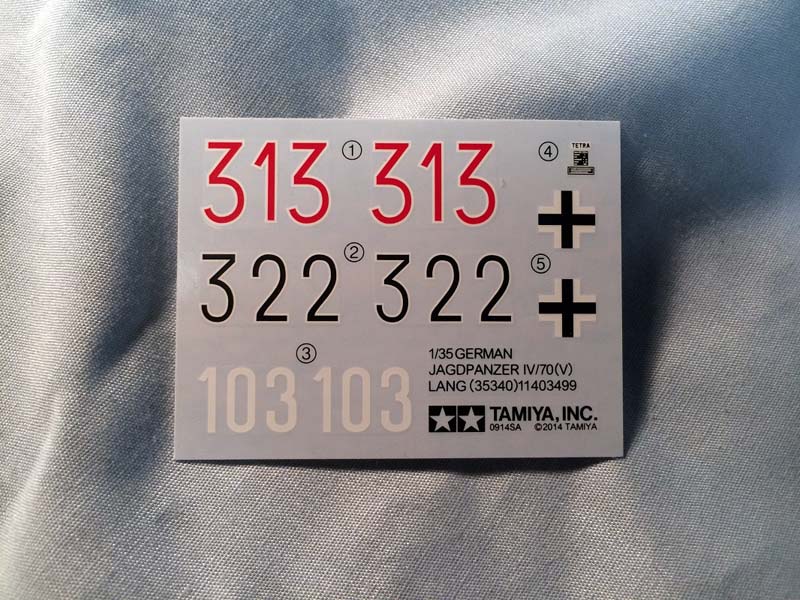
First, a quick general impression of what you get in the box. Two large sprues, 4 smaller ones, the hull tub, a very clear and well laid out instruction sheet, small set of decals, and an additional 8 page foldout. The extra foldout is a very nice touch; on glossy paper that provides extra background information on the vehicle including 4 full color pages of color schemes, uniform painting guide, and some photos of the Aberdeen example. If you want even more first impressions check out Jim Starkweathers video review, I have provided a link at the end of this review.
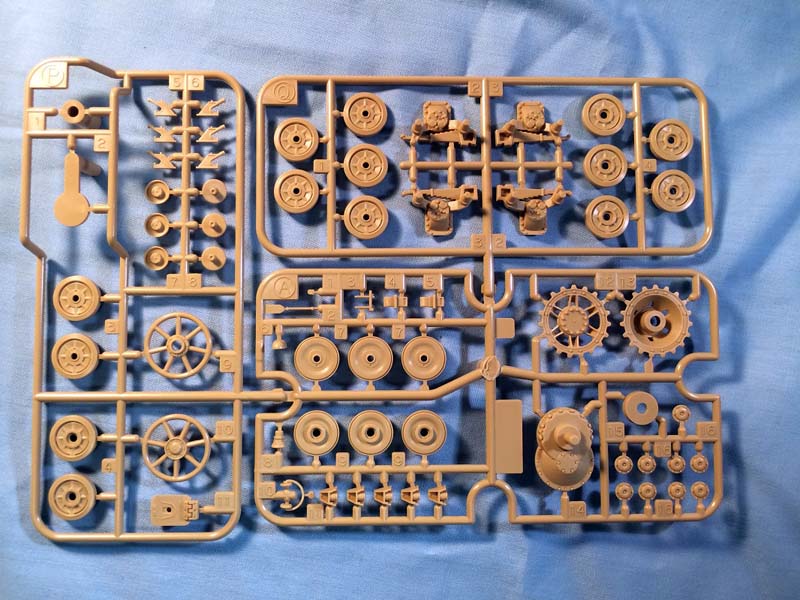
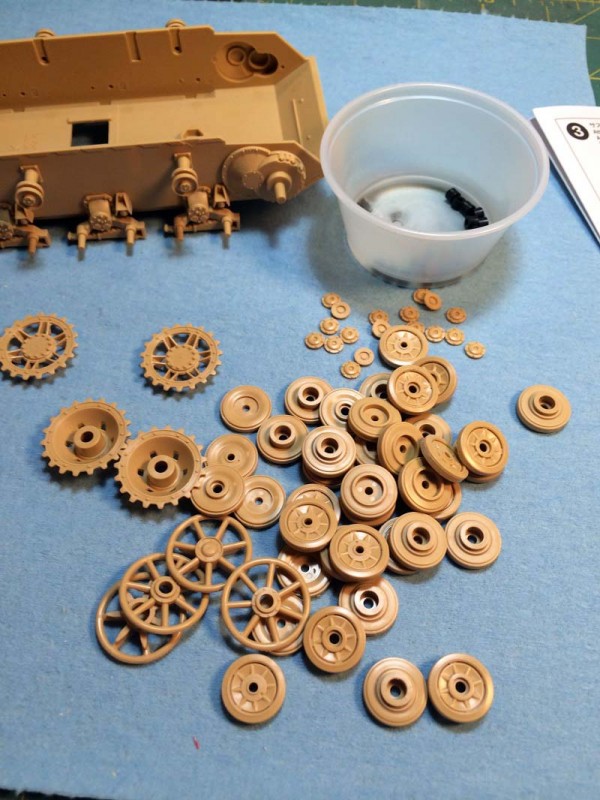
I started the build, like almost every
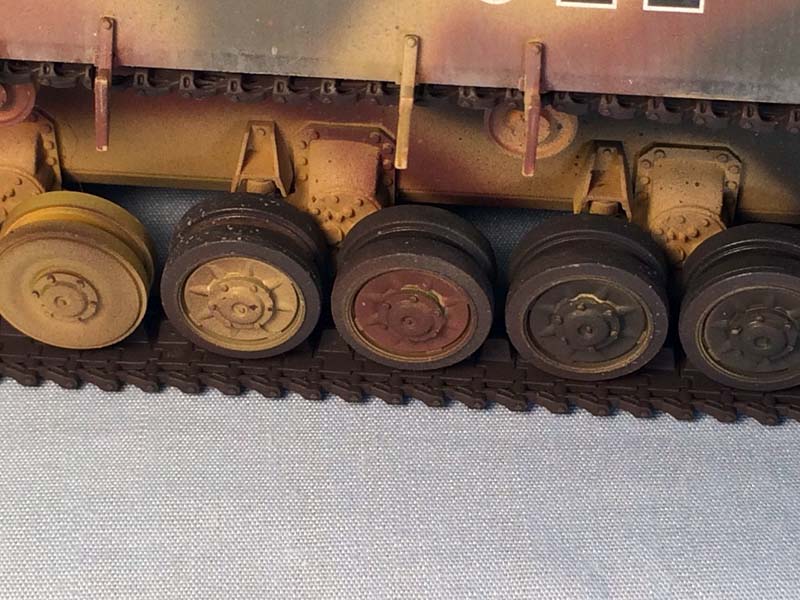
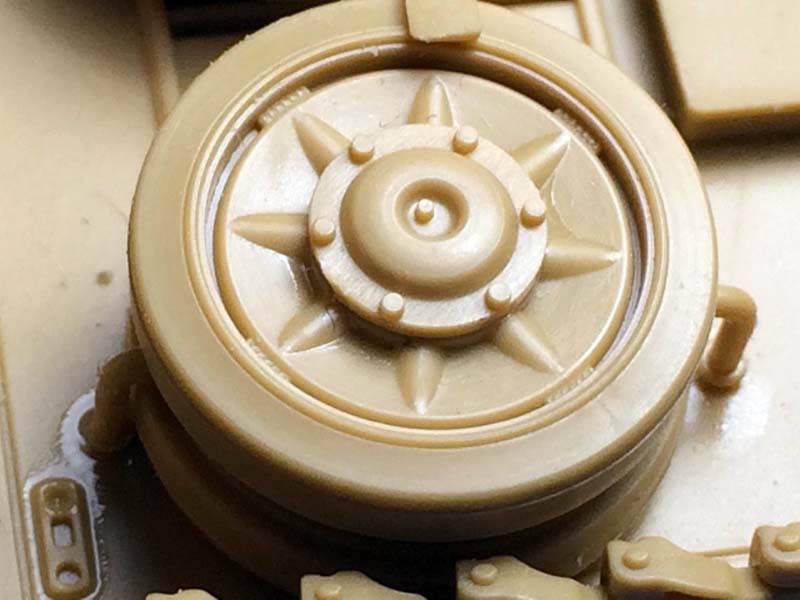
Tamiya build, with the wheels and suspension. No problems at all as everything went together easily with no real fuss. The bump stops are separate as are the drive covers and are all well detailed. Suspension spring swing arm bogies are well molded but are in one piece. I think that at one time
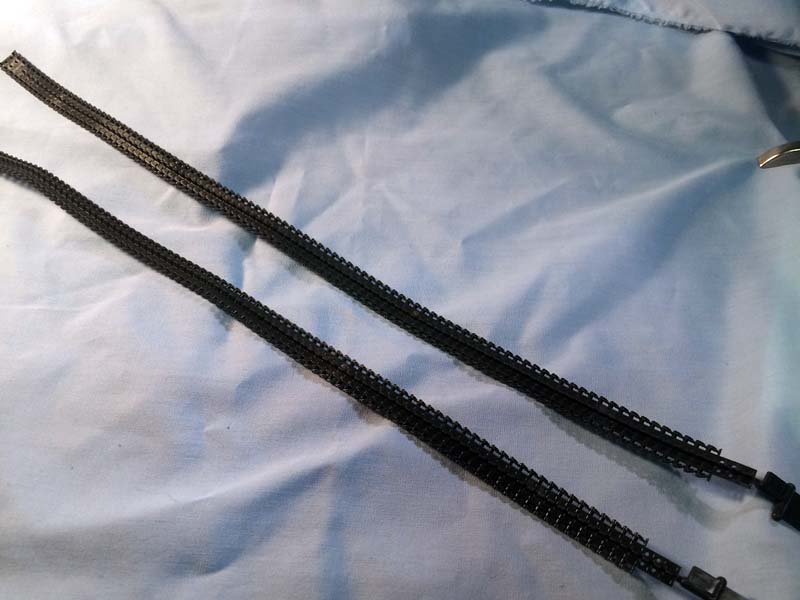
Tamiya had separate armored covers for the suspension but no longer. The wheels, sprockets, and rear idlers all have the poly cap trapped inside which makes removal for painting a real breeze. Everything is keyed so you dont have to worry about alignment (it is perfect). The swing arms for the rear idlers are handed and cleverly marked on the part just in case you confuse them after removal. They are keyed to provide the correct tension; I guess you could cut that insert off in order to provide whatever tension you wish which could be handy if you replace the one piece tracks with an aftermarket item. The tracks are the 40cm lightweight Pz. IV tracks and are kitted out in the now standard
Tamiya glue able black polystyrene plastic. I had no trouble with the tracks at all, the glued easily and securely and fit easily only the wheels. No real sag with tracks of this type so be aware if you are a big fan of the track sag.
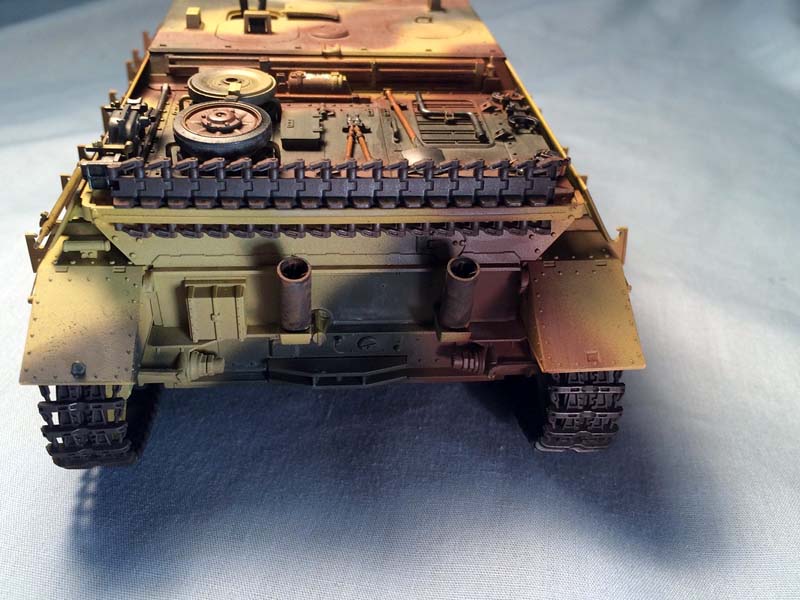
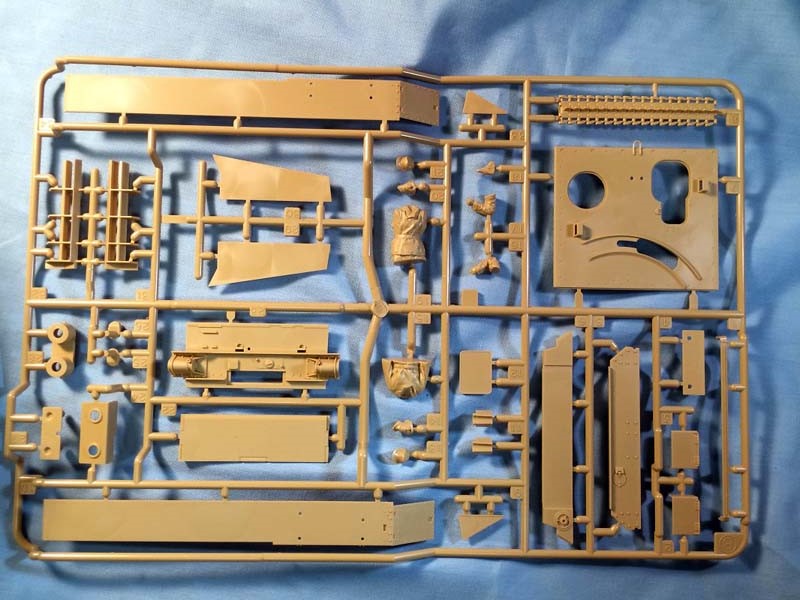
The next area to work on is the rear end. Again,
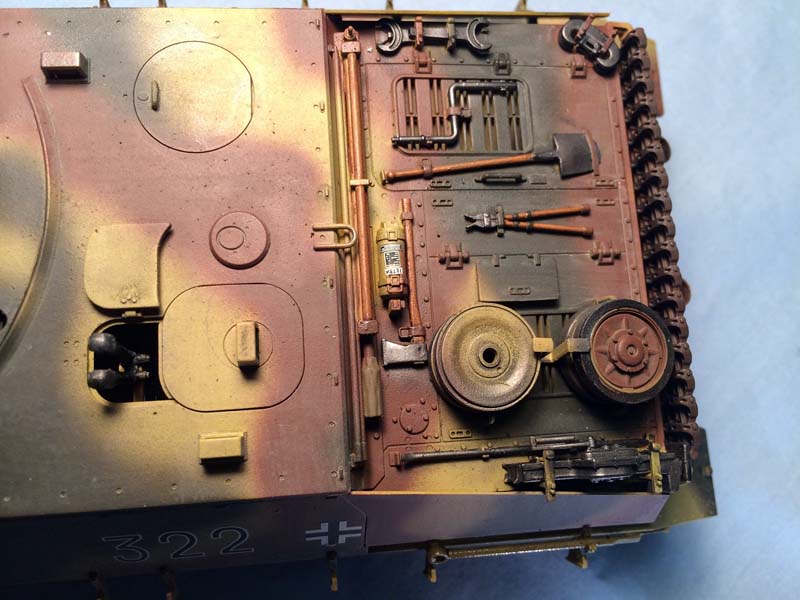
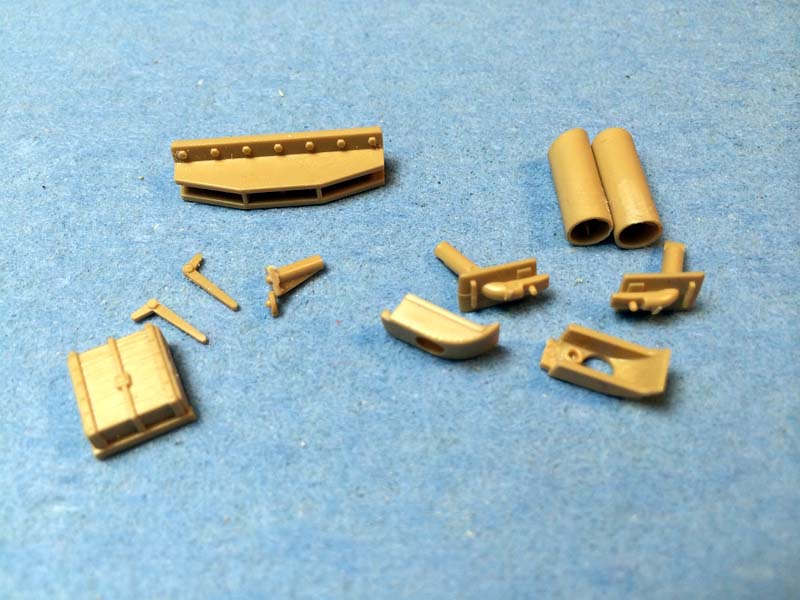
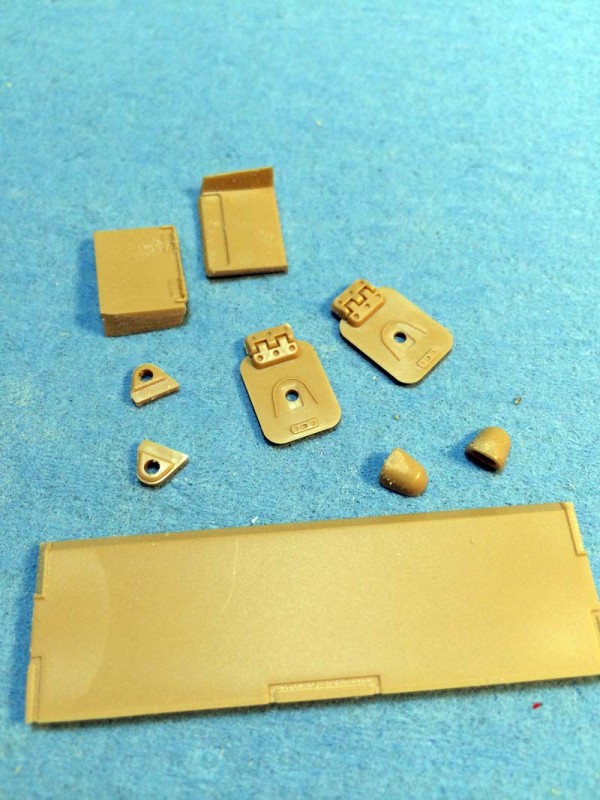
Tamiya has done a very nice job of laying out exactly where each part should go on the instruction sheet. You could decide to add some extra detailing to the jack block which has nice detail on the front but not the sides, I added some wood texture, probably unnecessary but I think it adds a bit. Exhaust pipes and dampers are well done and assemble easily, drain plug and idler adjusters are all separate pieces and well done.
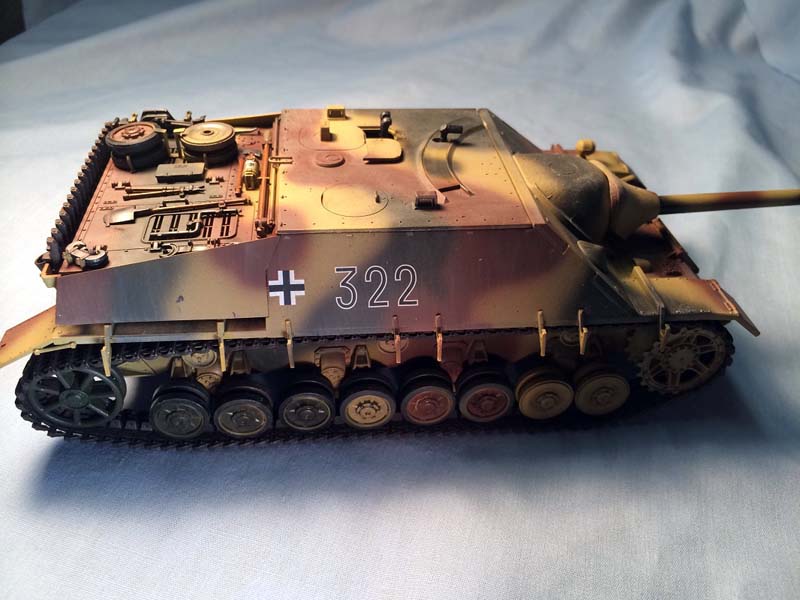
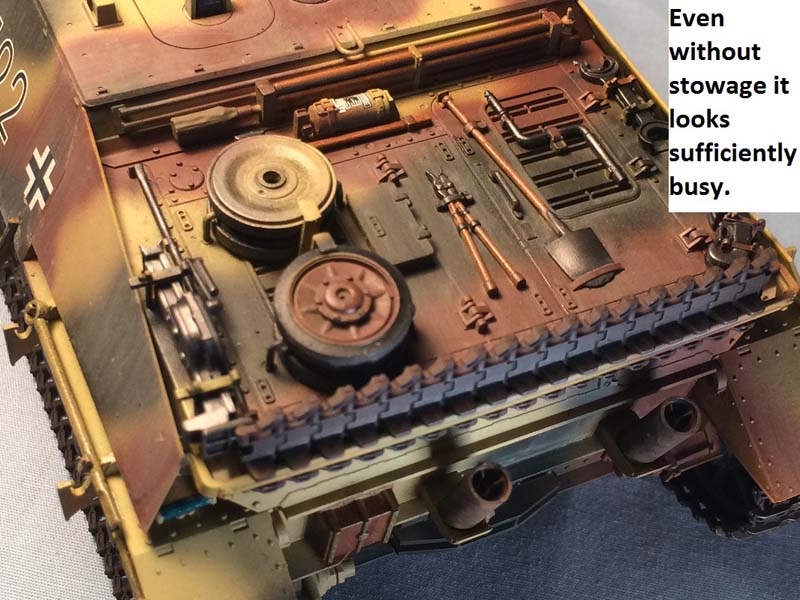
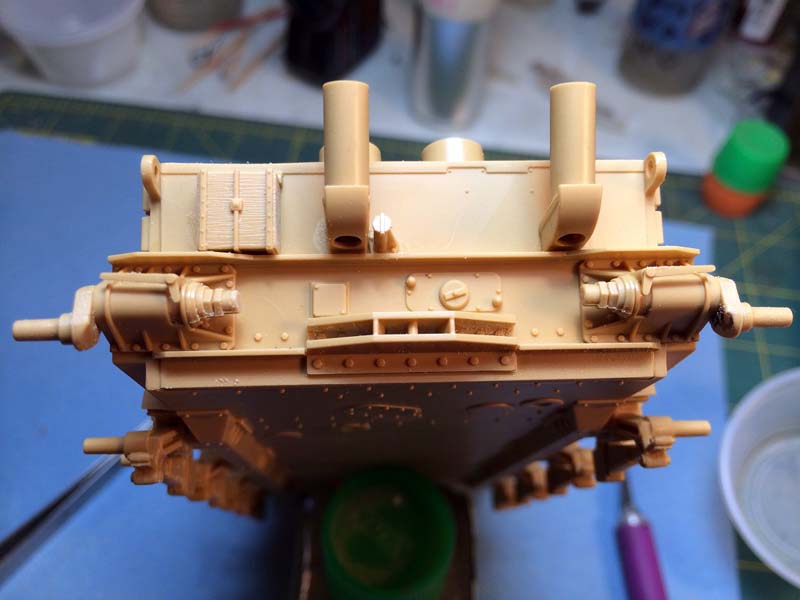
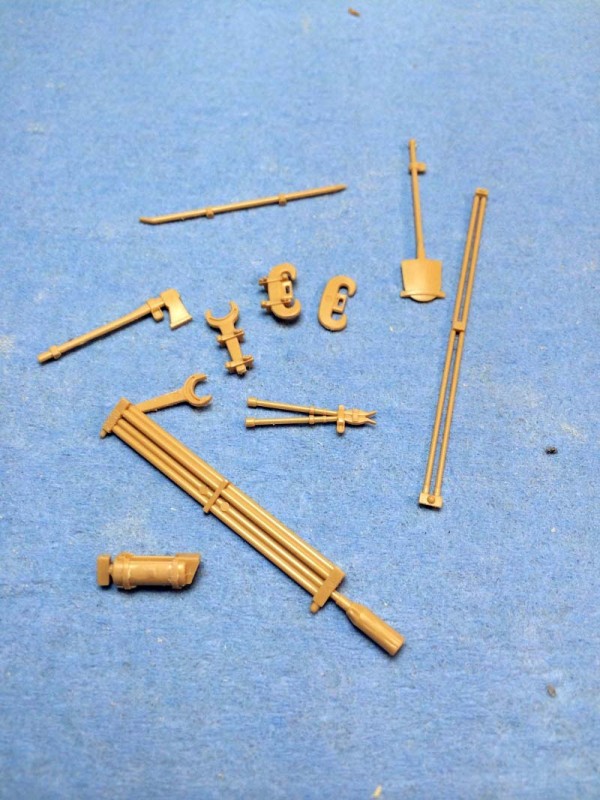
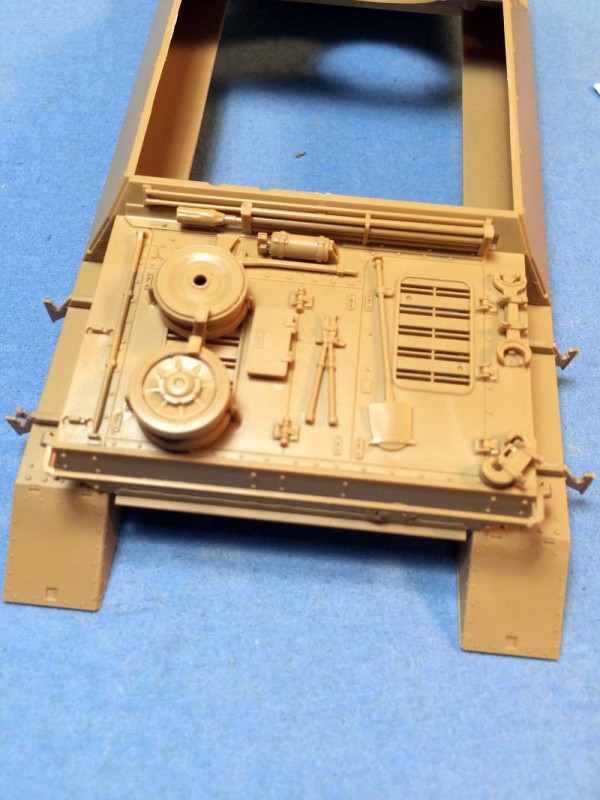
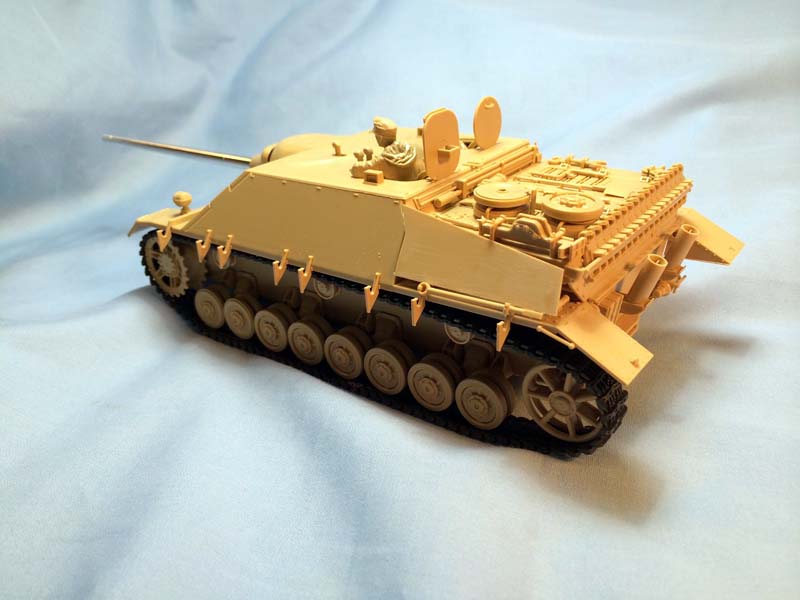
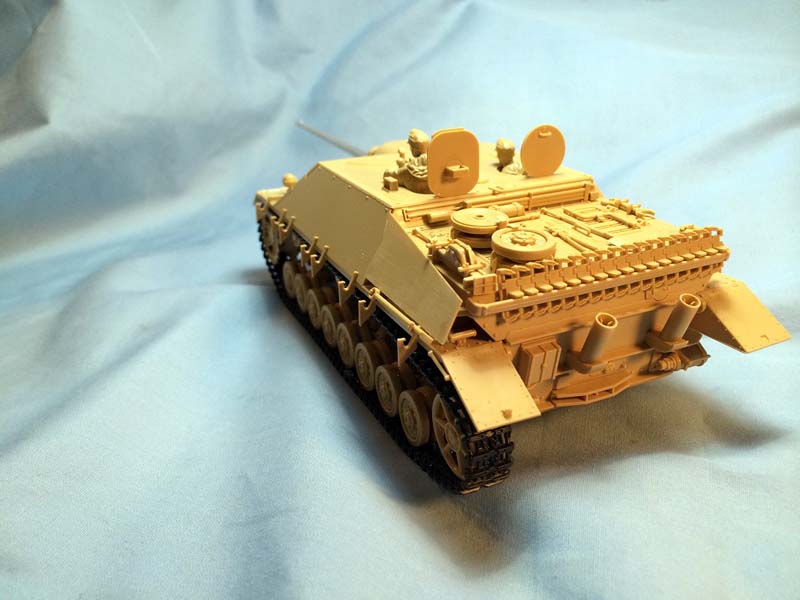
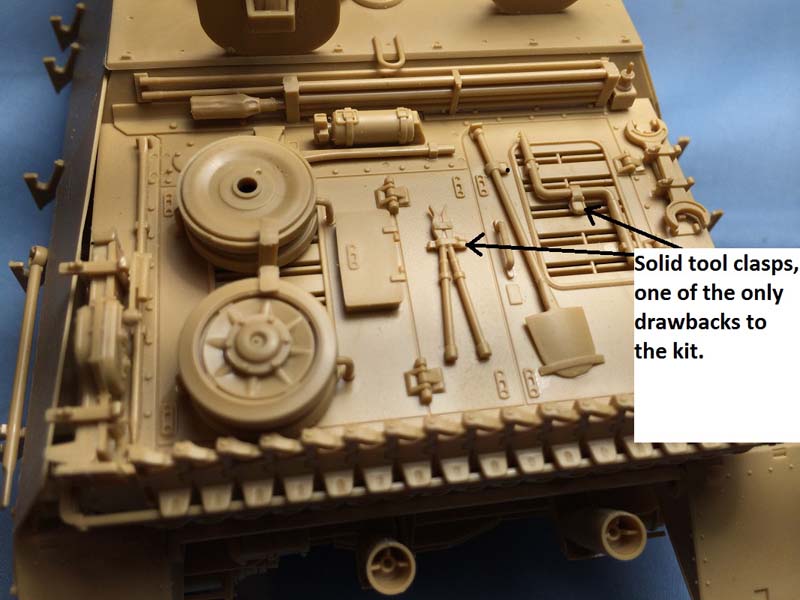
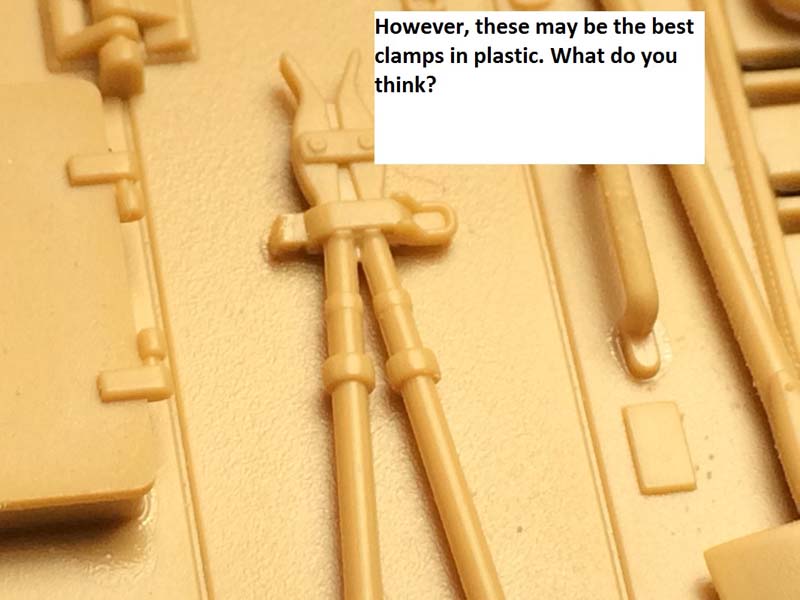
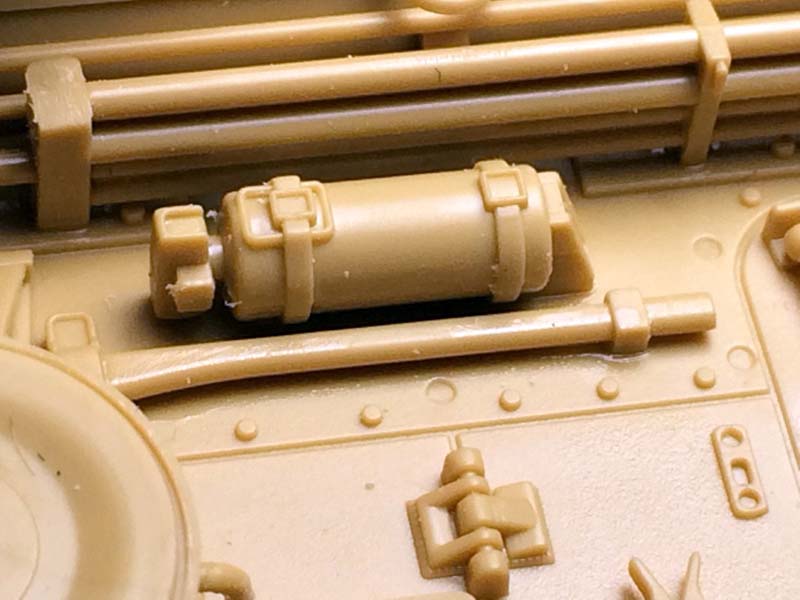
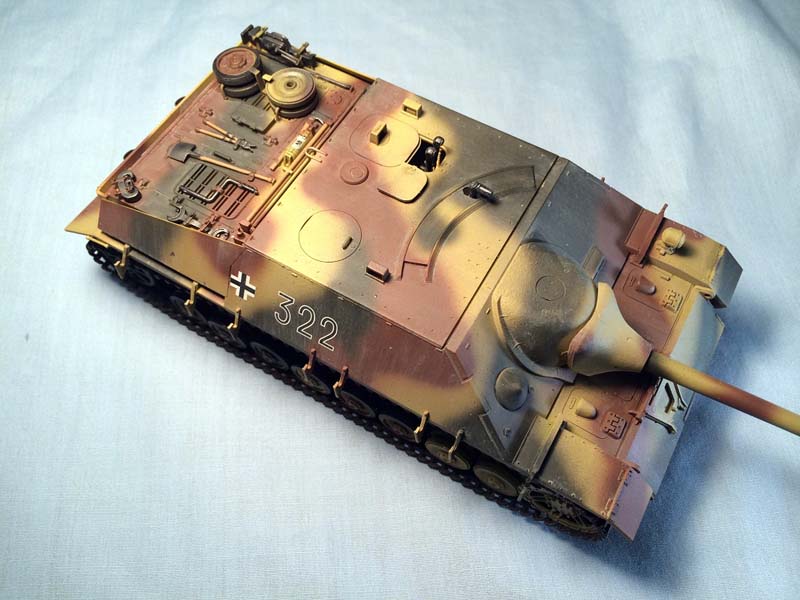
The upper rear deck carries nearly all of the tool suite as well as spare wheels and track. The rear deck itself is very well detailed, a true gem. The hinges for the engine access hatches are about the finest I have ever seen. The tools are all well done, clasps and holders all molded on but with true attention to detail. Some builders may wish to replace the clasp or at minimum the handle, which is molded in a solid piece, but I think they look pretty good and if I can get away from fiddling with PE I will. I am sure with PE clasps it would look even better, you will just need to decide what level of detailing is acceptable to you.
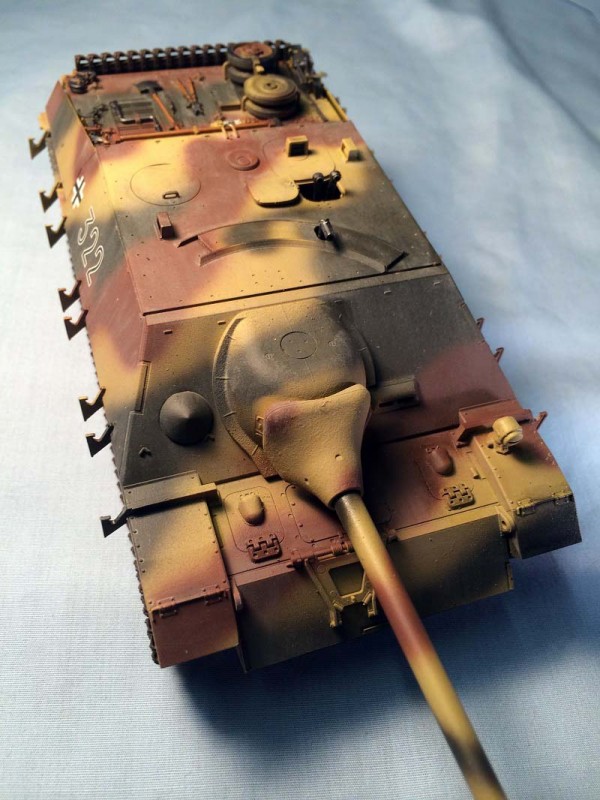
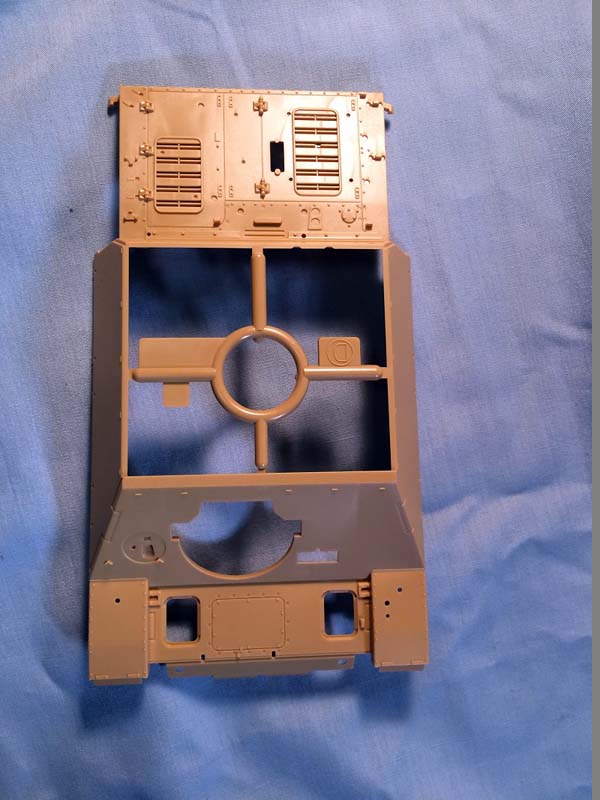
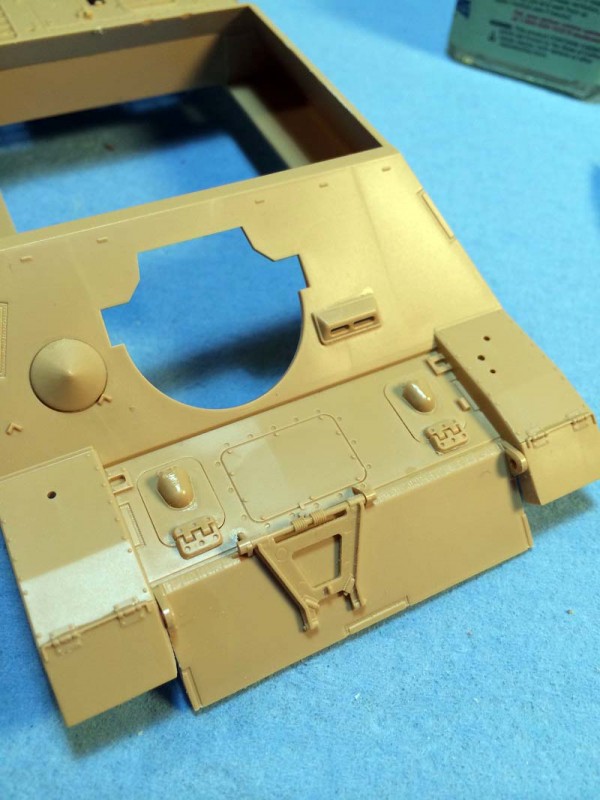
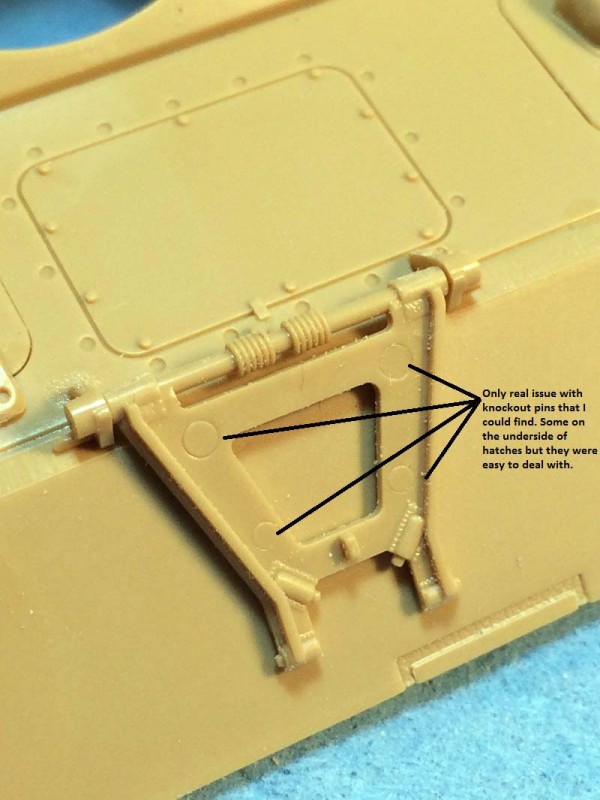
The front upper hull is again well detailed with great rivet and welding detail including a separate glacis plate with some very well done lifting eyes and nice flame cut detail work. Be careful that you get the right one in the right slot as they are handed. Attaching and cleaning up the separate transmission cooling hatches and armored intakes as well as front mud flaps is a breeze. The mud flaps have molded on hinge and pin detail which is well executed and should make most builders happy. The gun crutch is position able so be careful with the glue. The gun crutch does have some knock out pin marks that will need some attention.
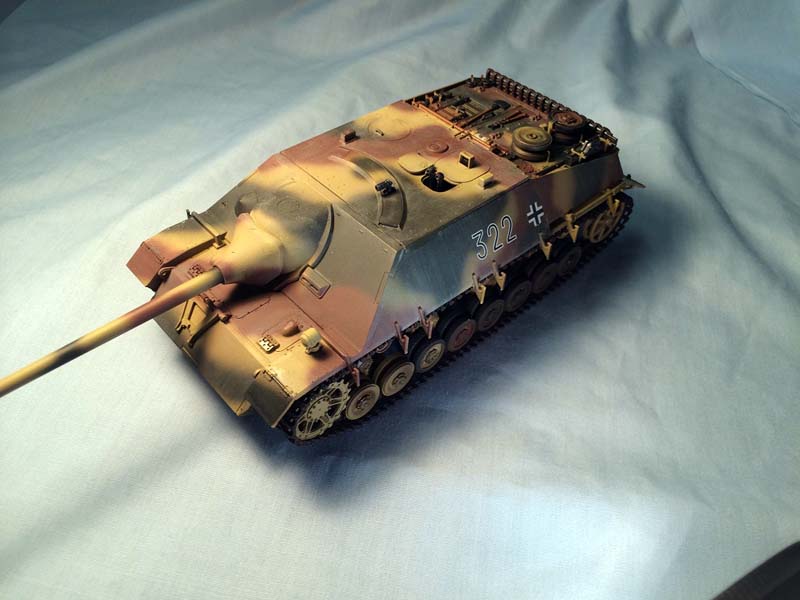
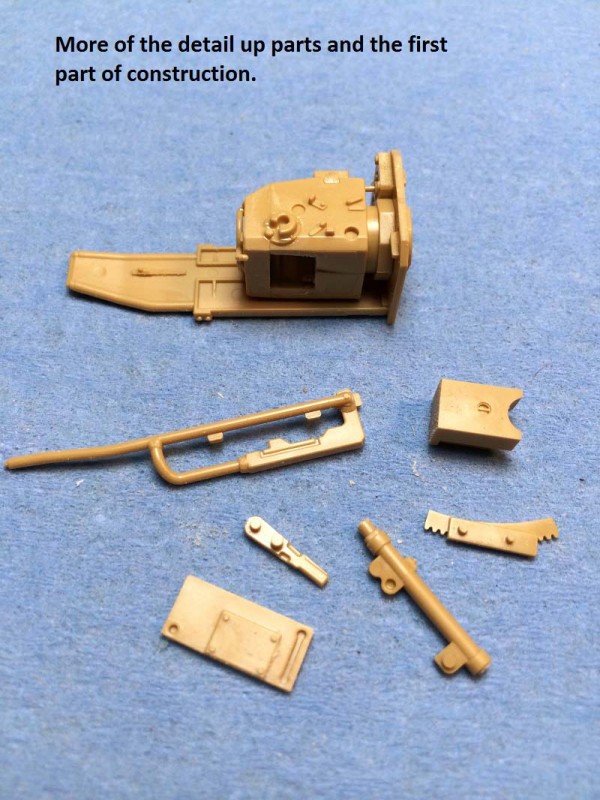
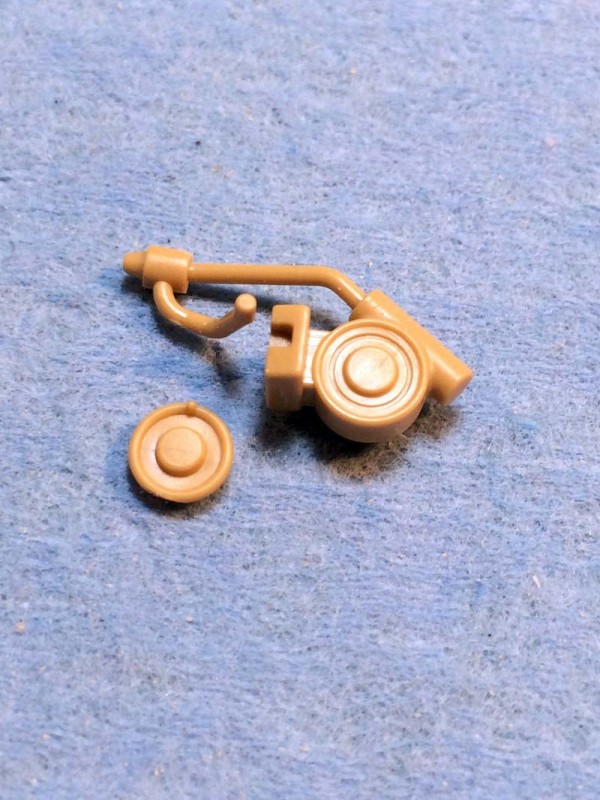
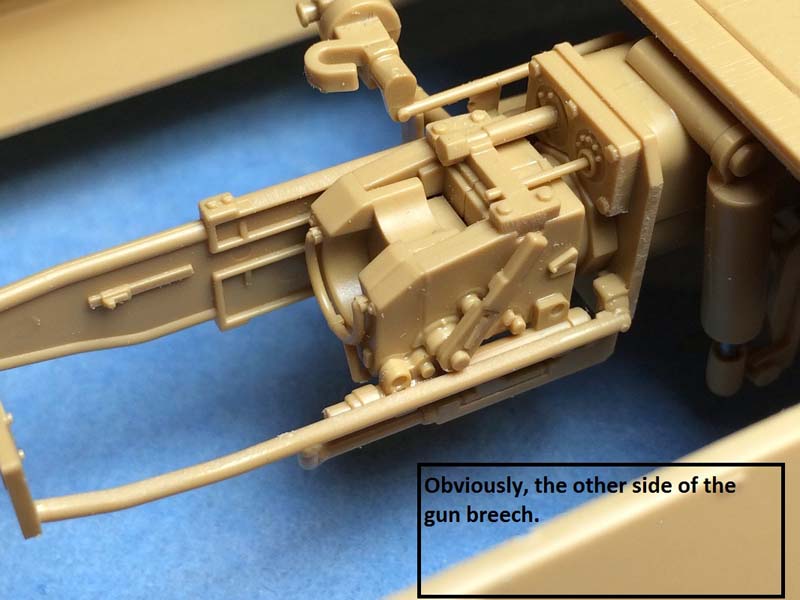
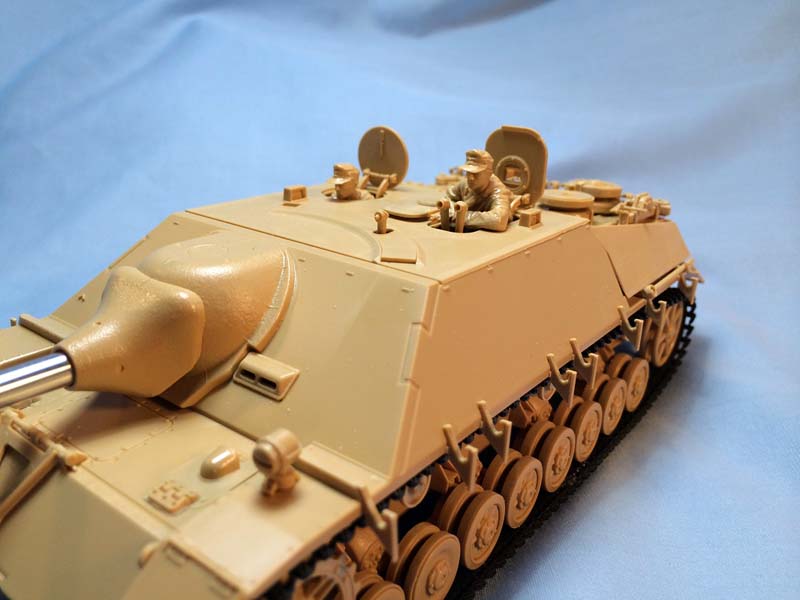
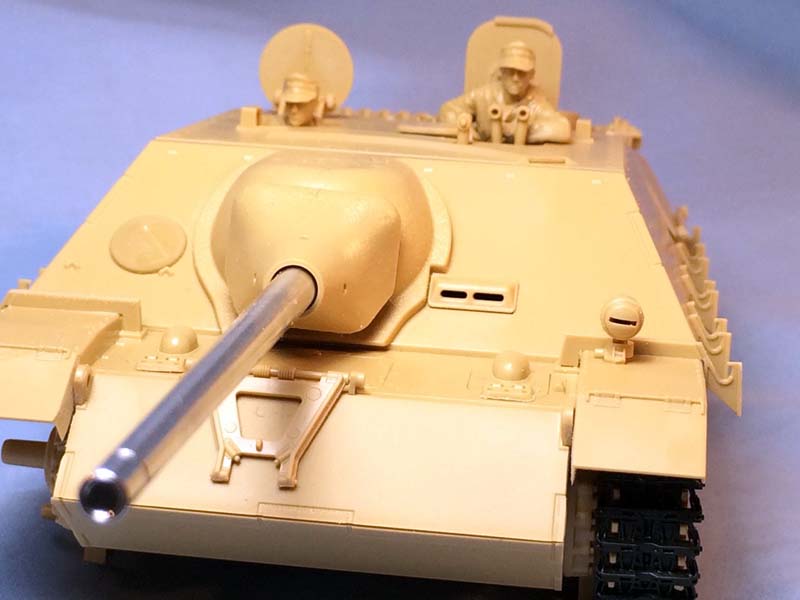
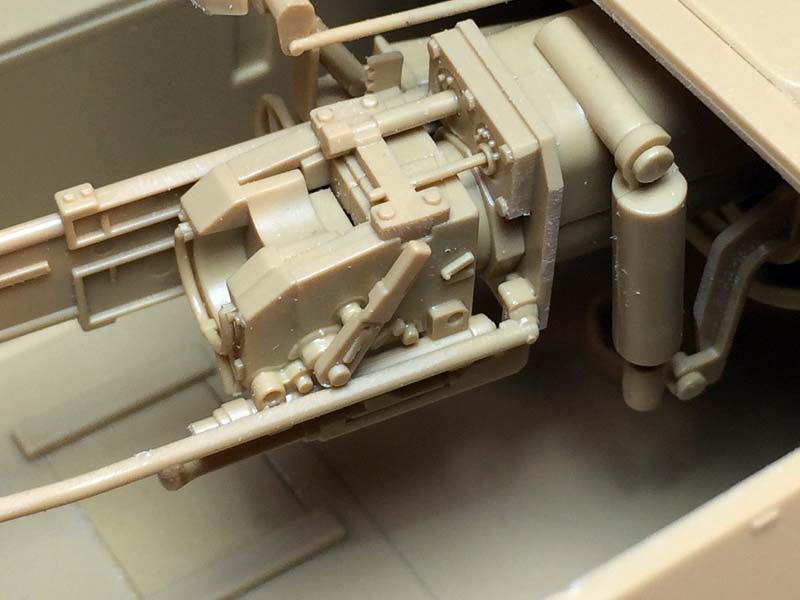
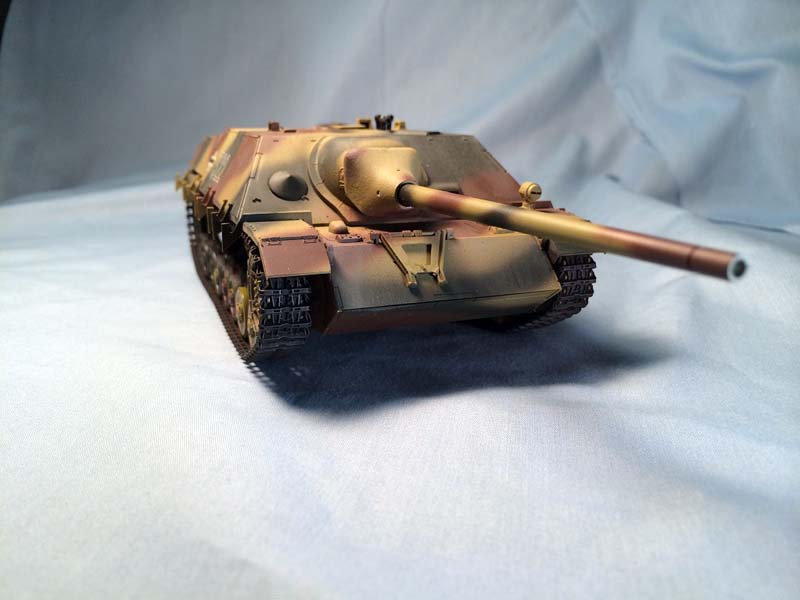
Of course, the most prominent feature of the upper hull front is the massive cast gun mount and mantlet. Both pieces are well detailed with excellent cast texture and bolt detail. They build up easily and fit like a glove. Jim sent along the detail-up set from
Tamiya which adds the full gun breech assembly as well as the metal barrel to add to the build. The extra pieces are an easy build that adds some nice interior detail. Unfortunately, it is the only real interior detail that the kit or the detail-up set provides. It does provide everything you need to make the gun/periscope assembly completely moveable, and while the obvious precaution of keeping glue away from moving parts always applies
Tamiya has eased that burden with the judicious use of some parts made of polystyrene and metal.
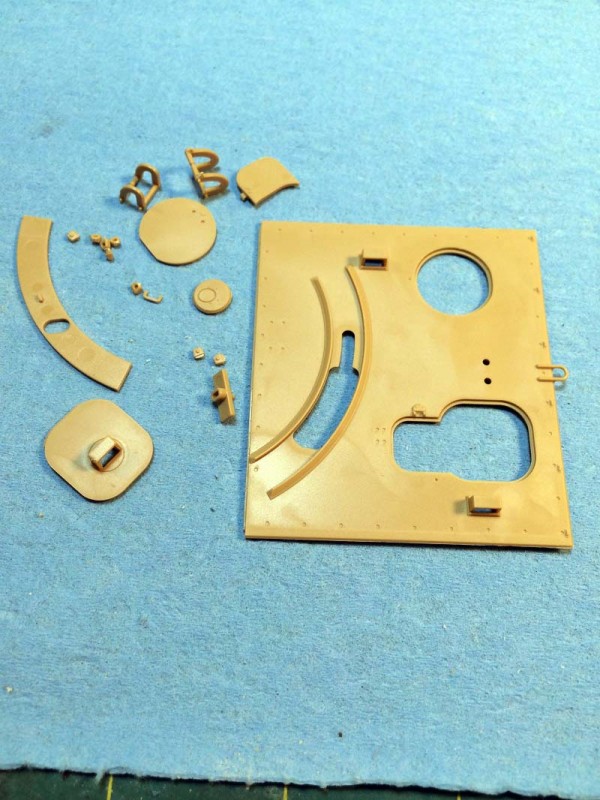
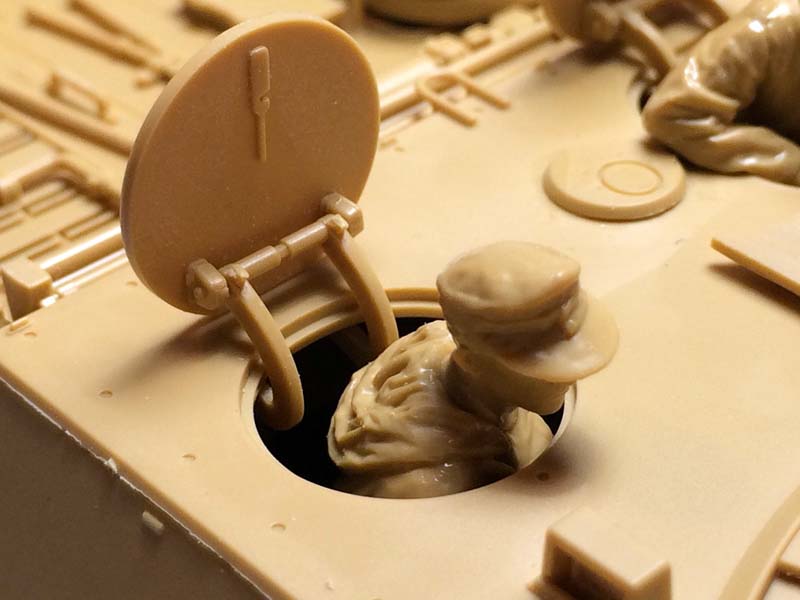
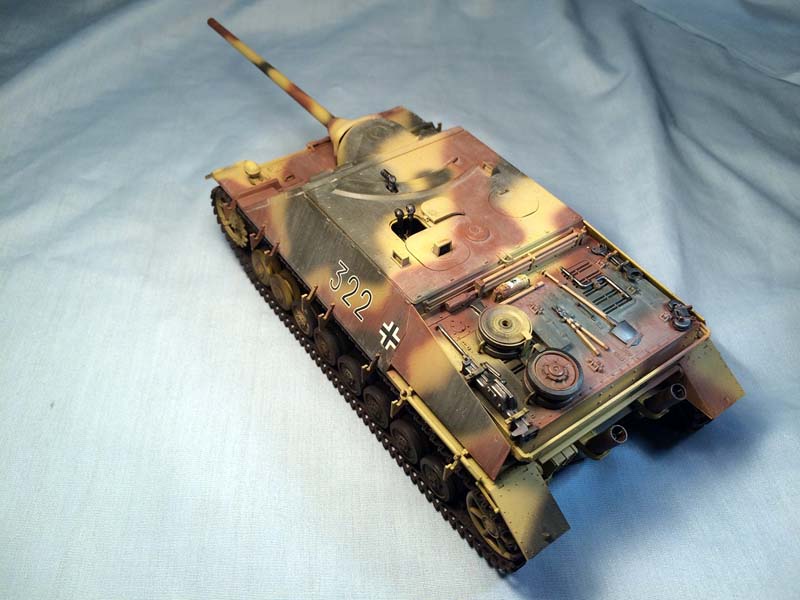
The roof of the fighting compartment is a bit sparse in actual details, as is befitting the actual vehicle, with only the hatches and the sliding periscope assembly that is connected to the gun breech. Again, despite the sparse nature of the roof
Tamiya has added recessed bolt/screw (?) detail as well as a nicely done, molded on, rear facing tie down loop. Not really sure what the purpose of the tie down is other than perhaps a lifting point for the roof but I am sceptical of that idea. The hatches themselves can be displayed open or closed and have decent detail on the inside. The hatch hinges are tricky with some very small parts. I sanded the bolt detail of the interior pieces in order to get a better grip and to help insure against an untimely tweezers launch. When all carefully put together the hatches work quite well.
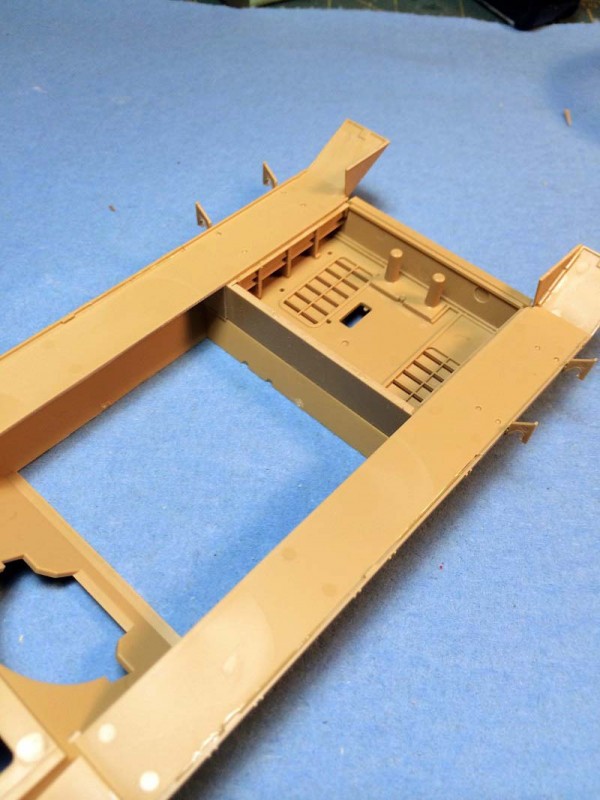
I tackled the fenders next. No real detail underneath unless you count knockout pins and locating holes! The top of the fender that you actually see is well done with very fine bolt detail and nicely done hinges for the mud flaps. Most of the work here comes from attaching the side skirt supports for the not included side skirts! Be sure to attach the correct ones in the proper place as the rear left side hold the large spanner for breaking track.
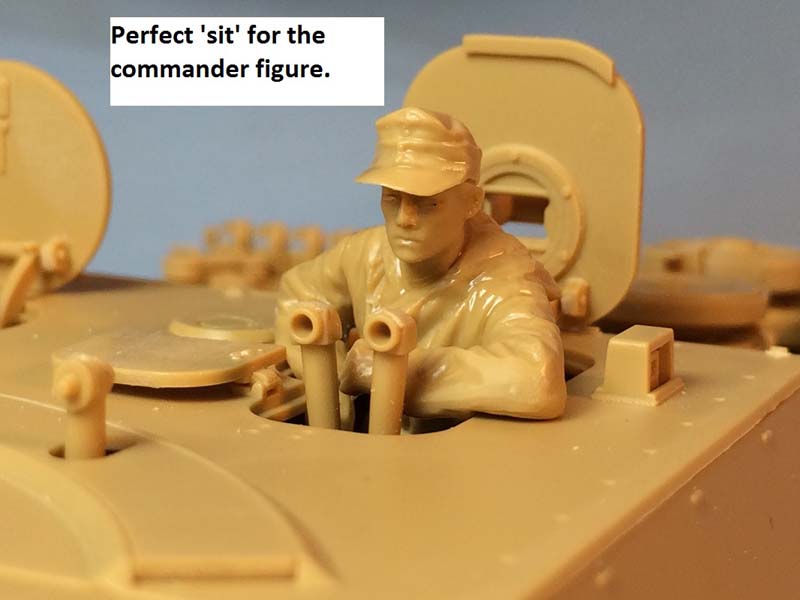
Other than little bits and bobs here and there this pretty much finishes of the kit. I built up the two kit figures and I have to say they are both really well done. I cant really comment as to whether or not these are the best figures I have ever seen in plastic to quote myself from some earlier review, I can say they are very nice and I look forward to putting some paint on them in the near future. One of the things that I really like about the commander figure in particular is the way that he fits so naturally into the vehicle without a lot of extra work.
Painting and weathering
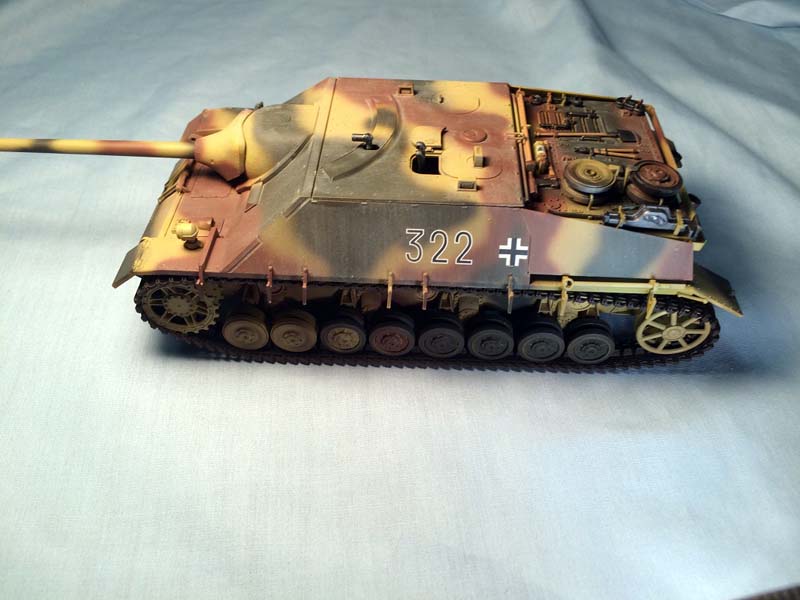
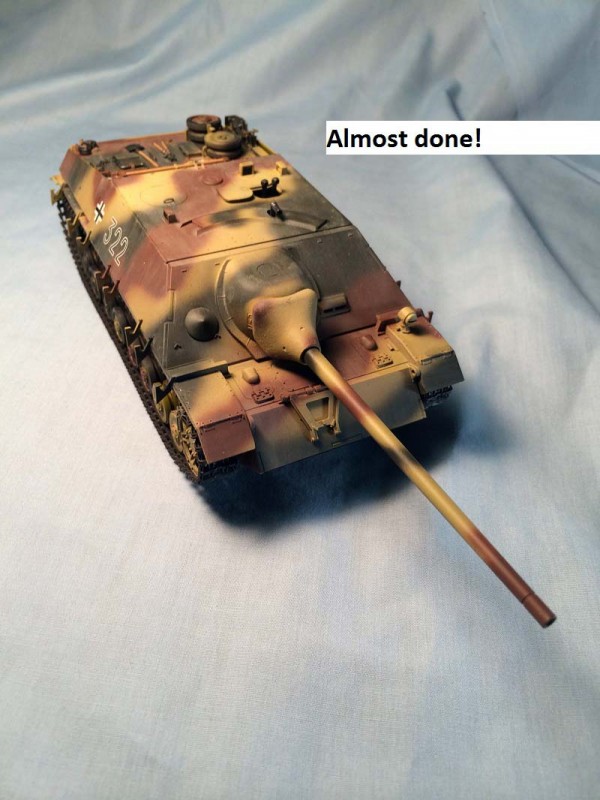
I started off the painting with a coat of off white inside the fighting compartment. Dont really know why as most all of it will be permanently hidden but I feel better about it! Moving to the hull I followed, roughly, the paint scheme for the only named marking option among the decals. There are three options, an unknown unit on the Western front in December of 1944, another unknown unit from early 1945 on the Eastern front, and the one I choose, the 655th Heavy Anti-Tank Battalion on the Western front in December of 44. That particular vehicle is in the standard German three tone camouflage of dark green and red brown over dark yellow. I used
Tamiya colors for all three of the camouflage colors (XF60, XF61, XF64). I picked out the metal parts in flat black, and when thoroughly dry burnished with dark steel pigment from AK (AK086). The wooden handles were given a coat of Vallejo cork brown (843) then finished off with some burnt umber oil paint. The tracks were done with an initial coat of flat black followed by a misted coat of Ammo dark track (A.MIG-035) and finished off with the dark steel pigment. I used a Mig grey for dark yellow filter (P400) and Mig deep green wash (P302) for the only real weathering which I kept understated, at least for the time being.
Conclusion
Like almost all of the recent vintage of
Tamiya kits this one was a true joy to build. Fit like a glove, looks great, easy to build with lots of nice detail. I dont know how you could go wrong with picking up one of these and getting out the hobby knife, a couple of files, and some glue. Highly recommended.
Related Reviews
Jim Starkweathers Video Review Live links


Comments