Introduction
The T-90 is a Russian built-third generation main battle tank. It was conceived in the late 80s as an upgrade to the mobilization MBT of the USSR, the T-72. To bridge the vast technological gap between it and the more advanced T-64 and the T-80, the latters fire control system was transplanted onto the T-72 and adapted to work with its autoloader. The resulting vehicle, known as the T-72BU, would be re-designated T-90, and in the early 1990s be selected as the sole MBT to be produced (albeit in small numbers).
It wouldnt be until the mid-2000s until standardization and actual serial production took place. The cast turret was replaced with a welded one, running gear was updated. Until 2011, when apparently orders ceased pending a new platform, over 1300 units were produced in Russia. Russia has about 200 units in reserve, around 300 units in service went (or will go) through a series of update programs including replacing reactive armor and adding active defensive systems, new night sights, etc. Foreign users include India (which also purchased a license to build 1000 vehicles), Algeria, Azerbaijan, Turkmenistan and Uganda.
Previous kits
The cast turret variant was kitted by
ACE of Ukraine over a decade ago, followed in 2013 by
Modelcollect of China and
Revell of Germany. The latter two also issued the welded cupola variant in 2013 and 2014, respectively. As a result of the used technology the earlier
ACE kit is not up to the standard of the other two companies' releases.
Contents
Zvezda announced their welded-turret T-90 back in 2013, but it wasnt until May 9 2015 that it became available. Recent 1/72 armor kits from
Zvezda have mostly been snap-fit sets, seemingly targeted at the wargamer. This kit is completely different starting with the way it is packed in a large, sturdy box with a glossy outer shell, the number of parts, and the quality of molding and detail finesse. In my opinion
Zvezdas Braille scale T-90 can only be rivalled by their own SS-25 kit.
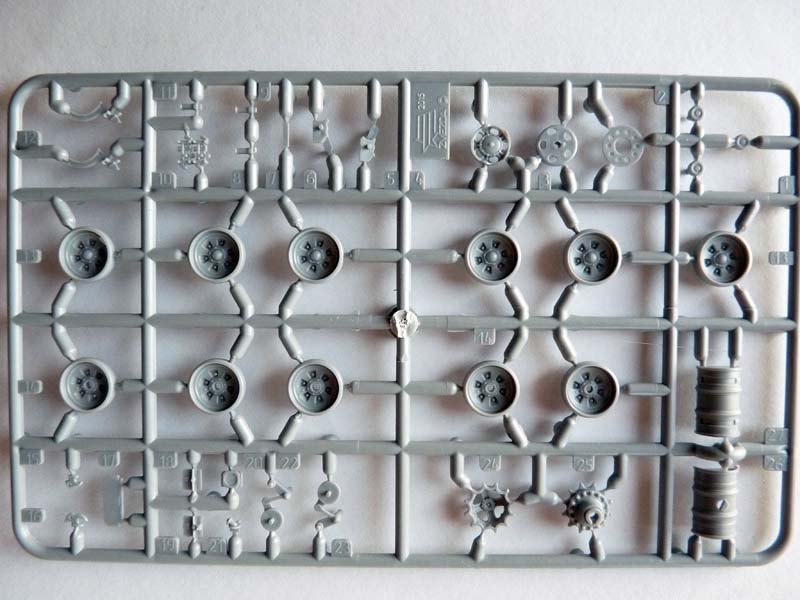
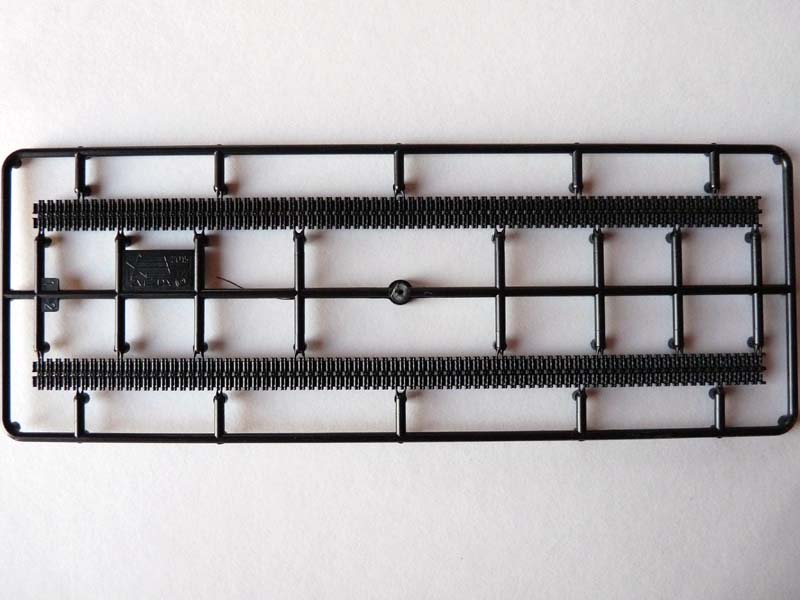
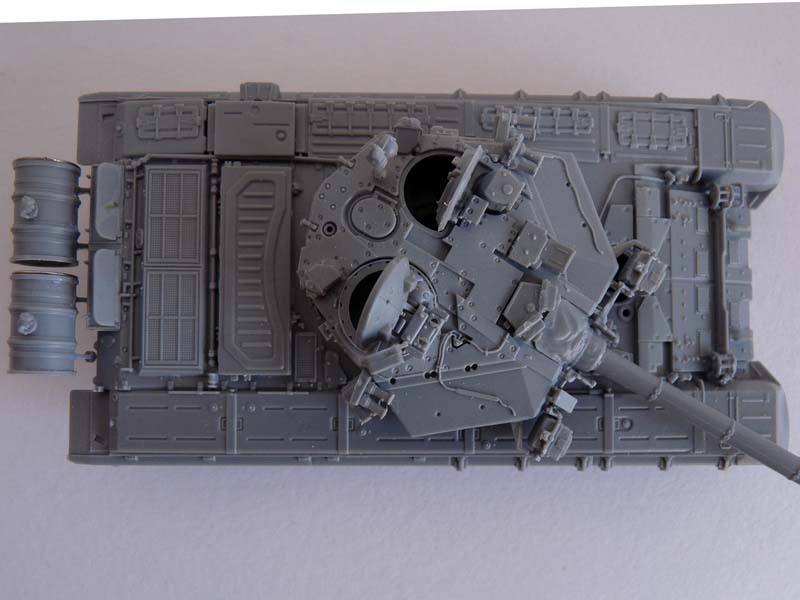
Aside from the upper and lower hull halves, kit parts reside on 4 sprues: a black one for the tracks, 2 identical ones for the running gear, IR projectors and fuel drums, and a large frame with gun barrel, turret parts, ERA bricks and a host of other details. There is no flash, the mold parting lines are smaller than on the SS-25 kit and can easily be dealt with.
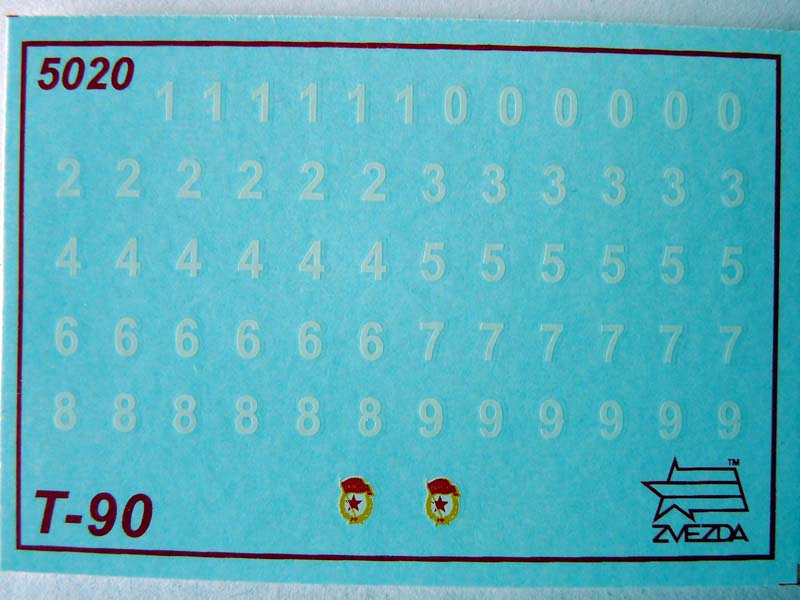
There is also a decal sheet supplying 5 copies of 0 to 9 numerals, and two guard Russian badges. On my example both the red star and the RF scripture are out of register to the left on the badges, so I am using aftermarket decals.
Review
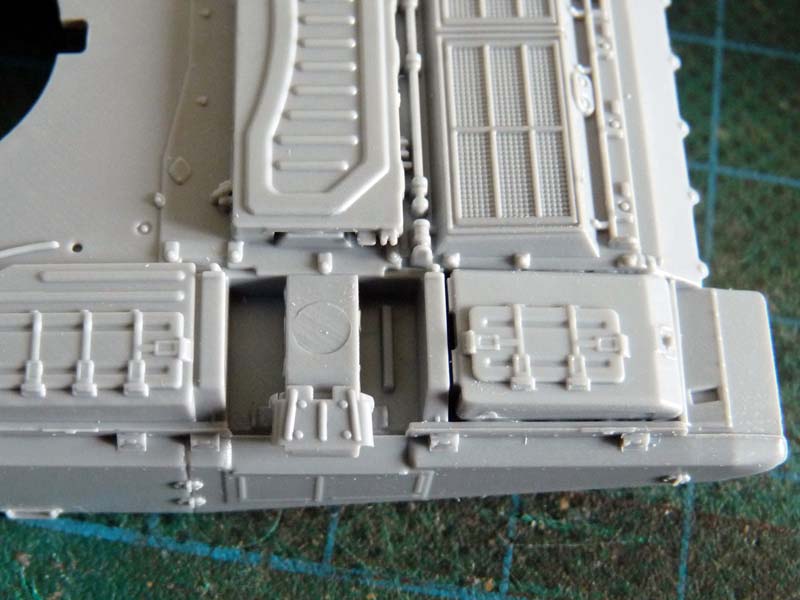
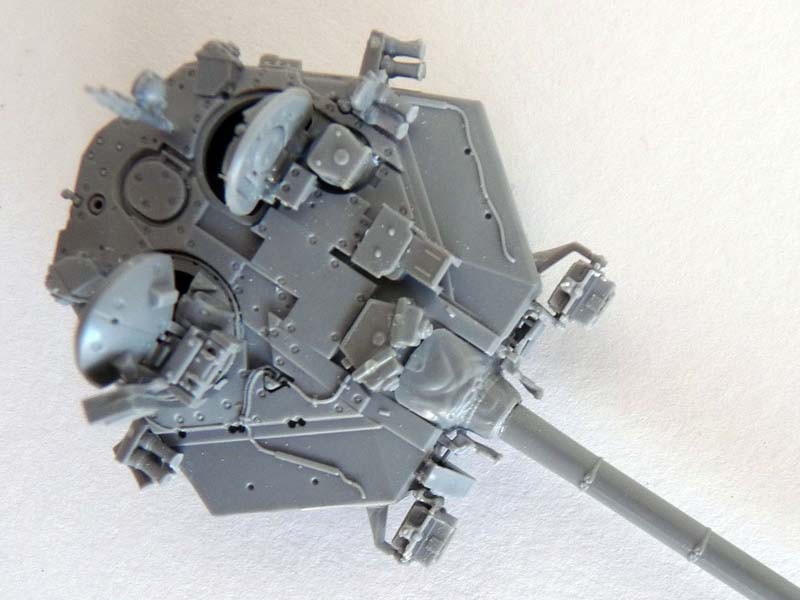
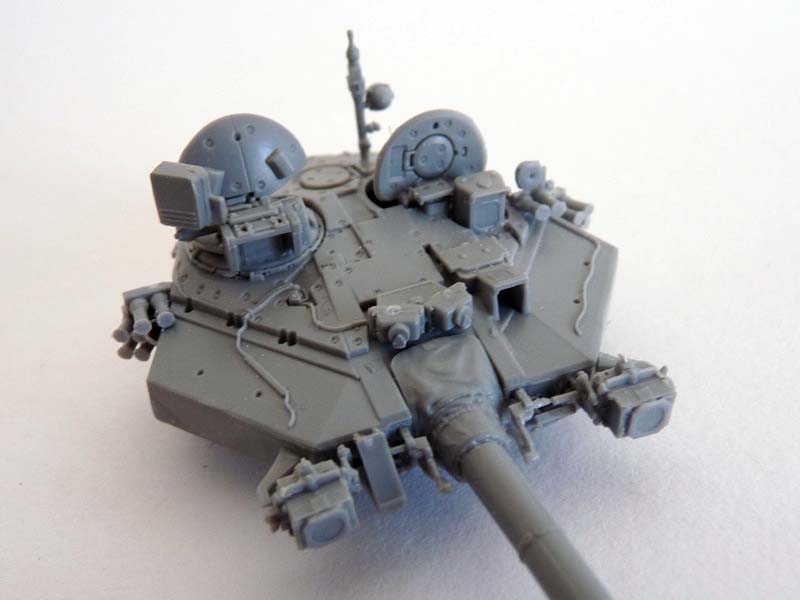
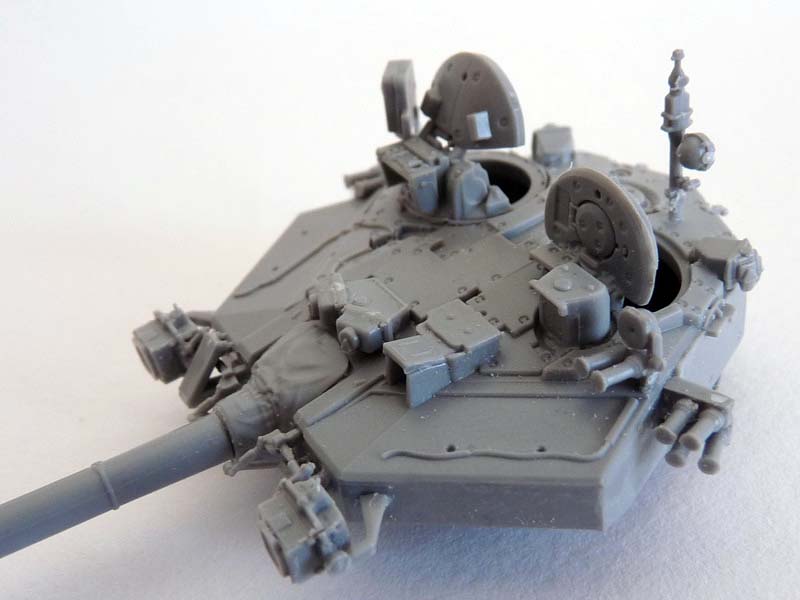
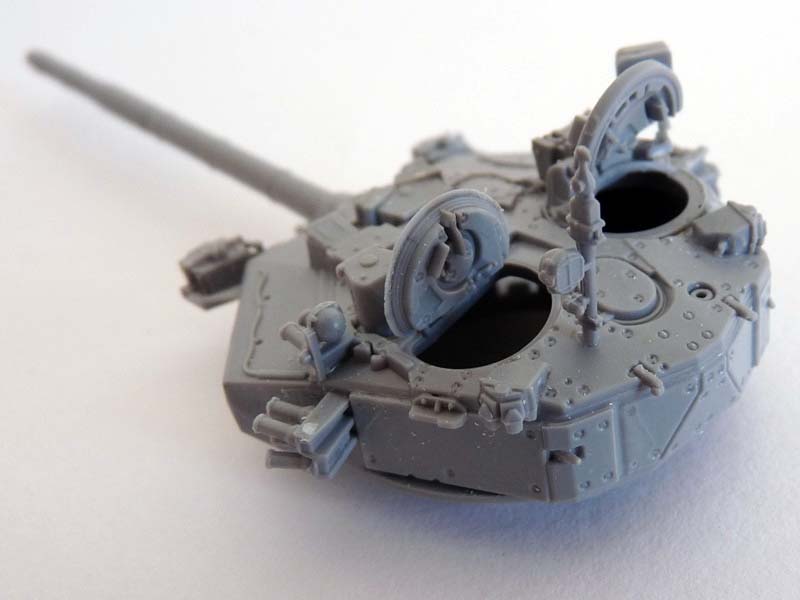
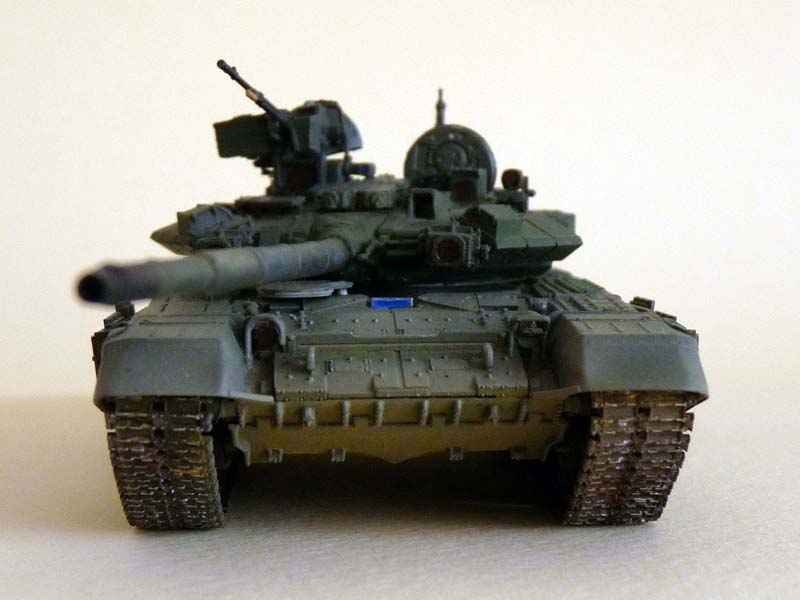
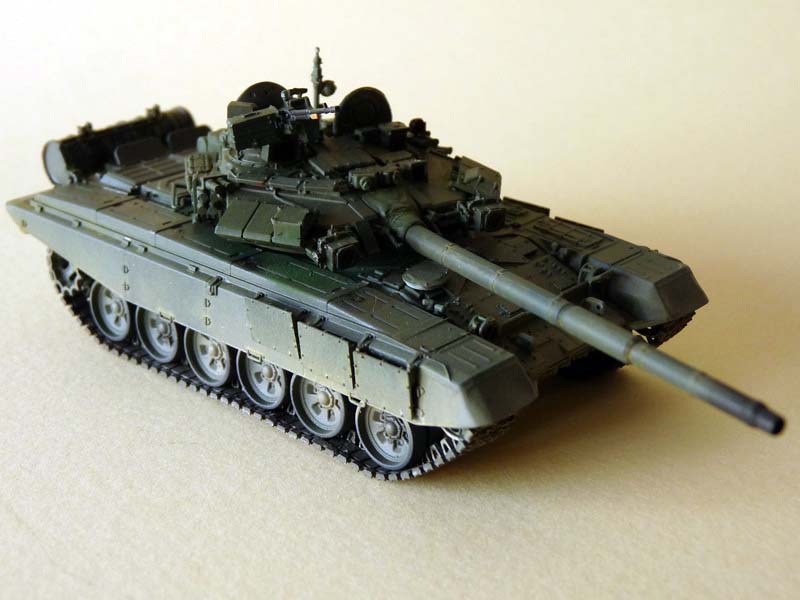
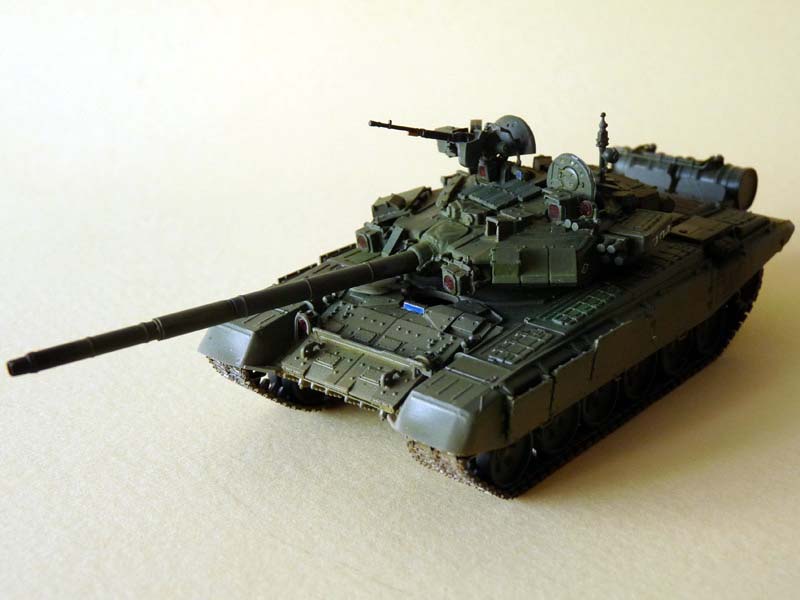
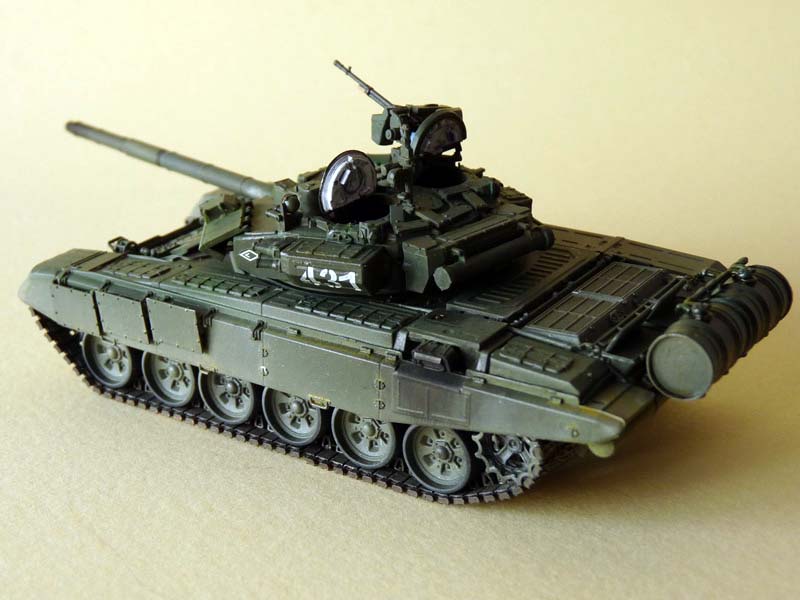
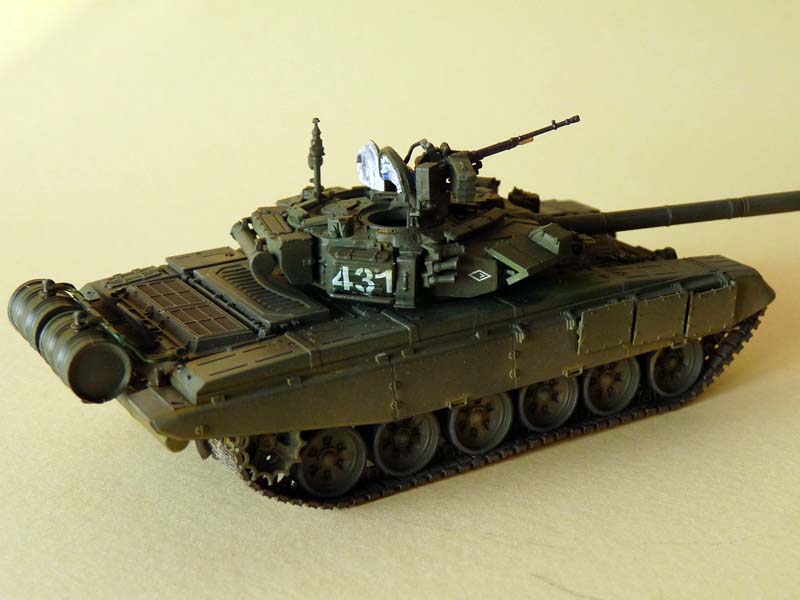
All crew hatches are molded separately, so you can pose them open or closed without modifying the parts (detail is present on both sides of all hatches). The commanders machine gun station is a little gem, as are the IR dazzlers (made up of 8 parts each) the most detailed plastic ones in the scale. The stowage boxes appear to match available references. The storage tube for the deep wading intake has a mold parting line that needs removing. The one-part main gun barrel features well-defined thermal sleeve detail.
With the exception of the upper glacis where they are molded on, kit ERA blocks are grouped together but molded separately from the tank (as opposed to the
Revell and
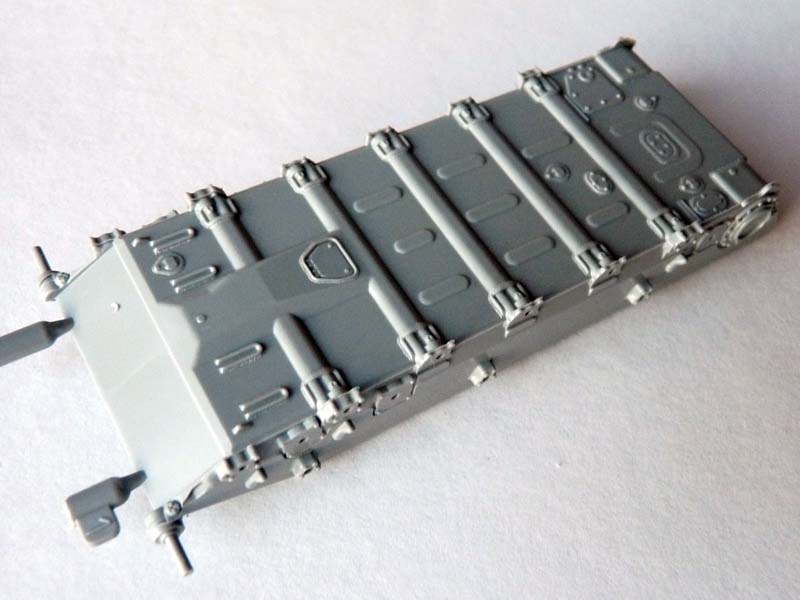
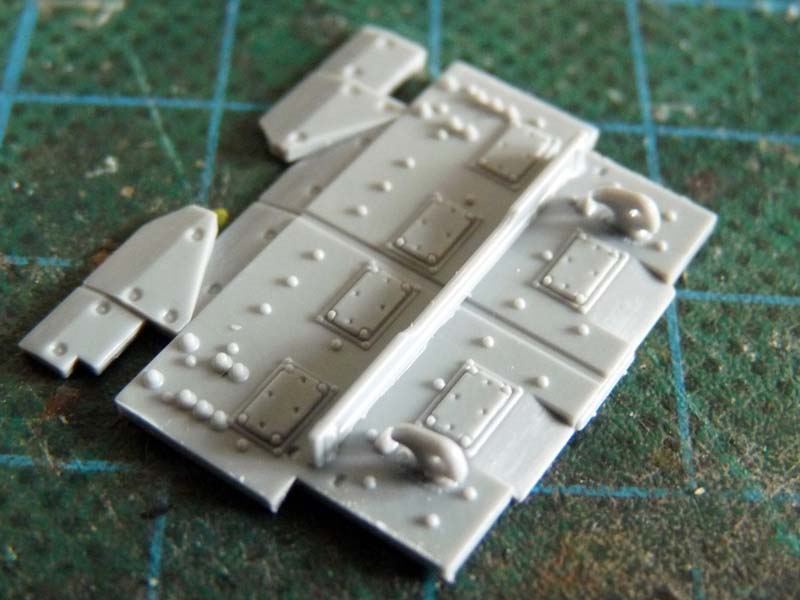
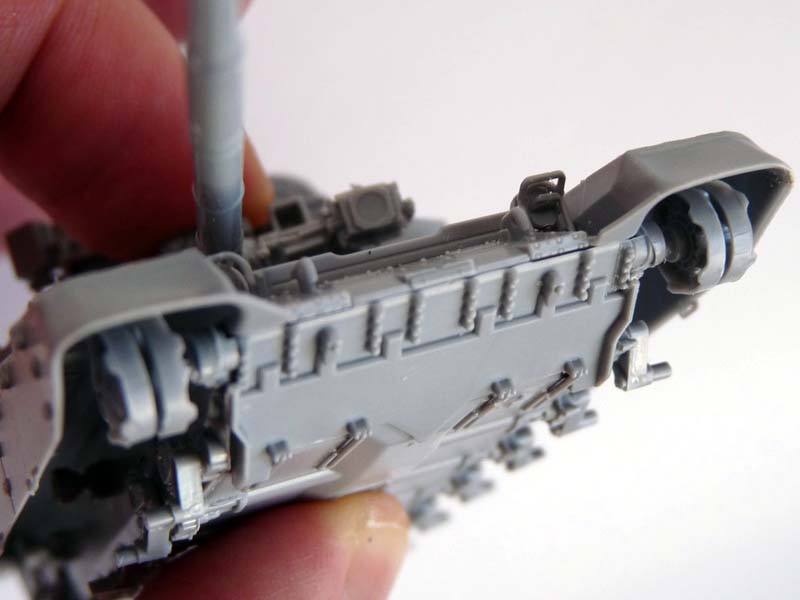
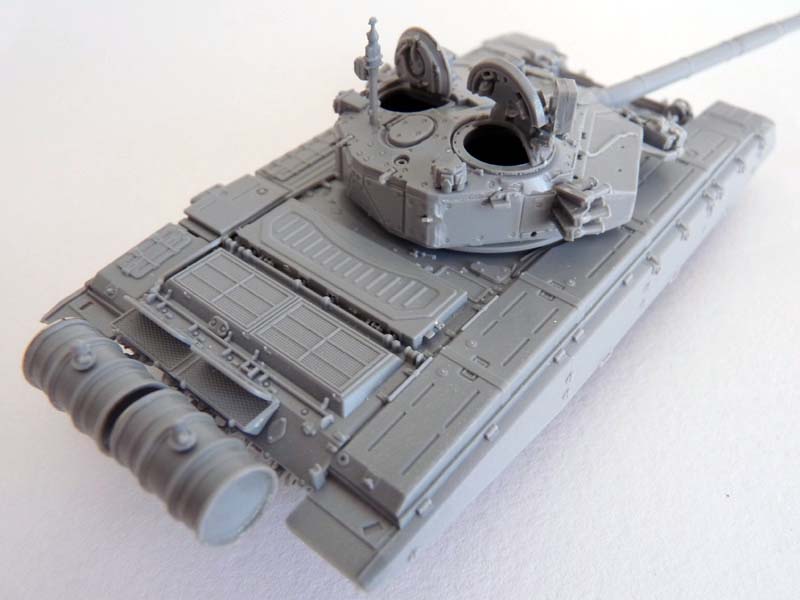
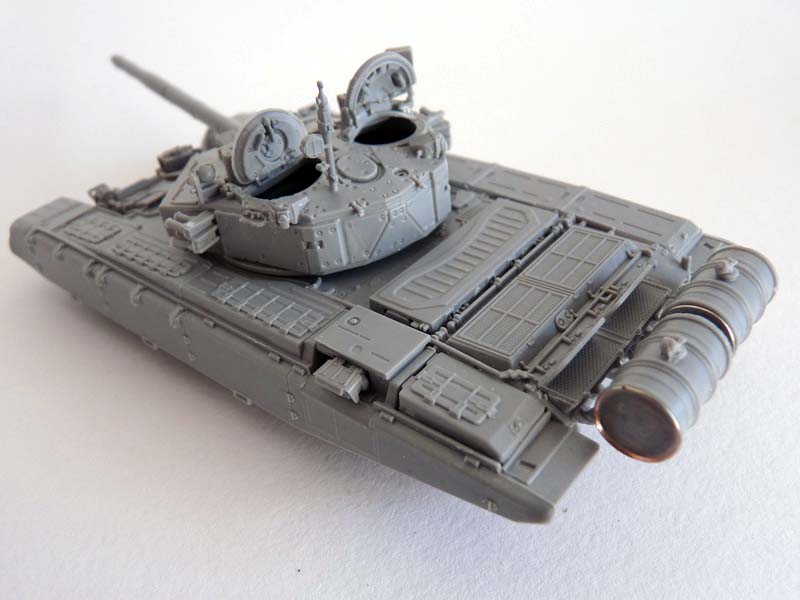
Modelcollect kits which have them at least some of them partially cast onto the turret). The upper hull is well detailed, the exhaust is a finely-cast 3-part assembly, and the hot air outlets at the back have positionable covers with hinge and spring detail. Fuel drums both feature a flat bottom, so you need to address that if youre adding them.
Zvezda provides a part to simulate the fuel lines connecting them to the hull.
When you compare the model with images of an actual T-90 you will notice the kit hull itself (or at least its side skirts) are higher than the original as I lack the exact dimensions I cannot provide an accurate measurement of the difference in scale. The retaining strip of the rubber-fabric side skirts is not represented, and screens themselves are molded flat as on
Modelcollect kits (
ACE and
Revell mold the screens separately, making the typical ripple detail possible on their kits).
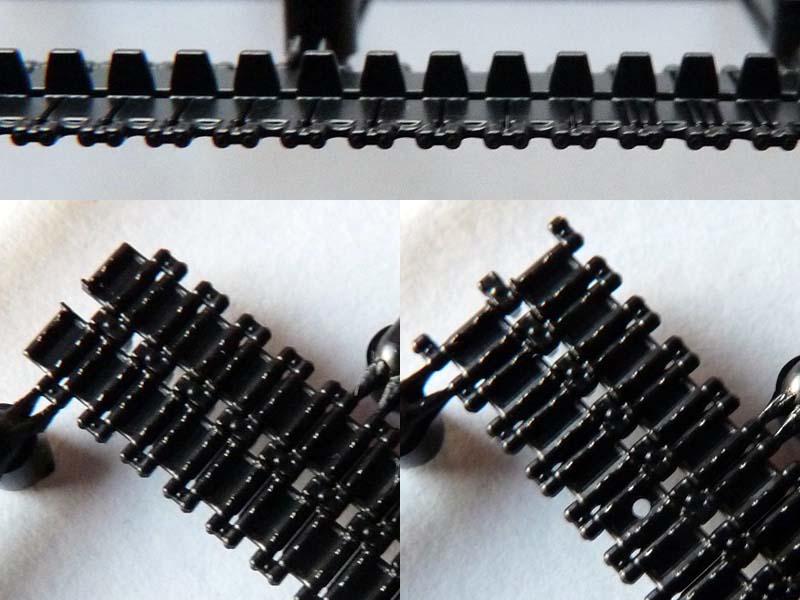
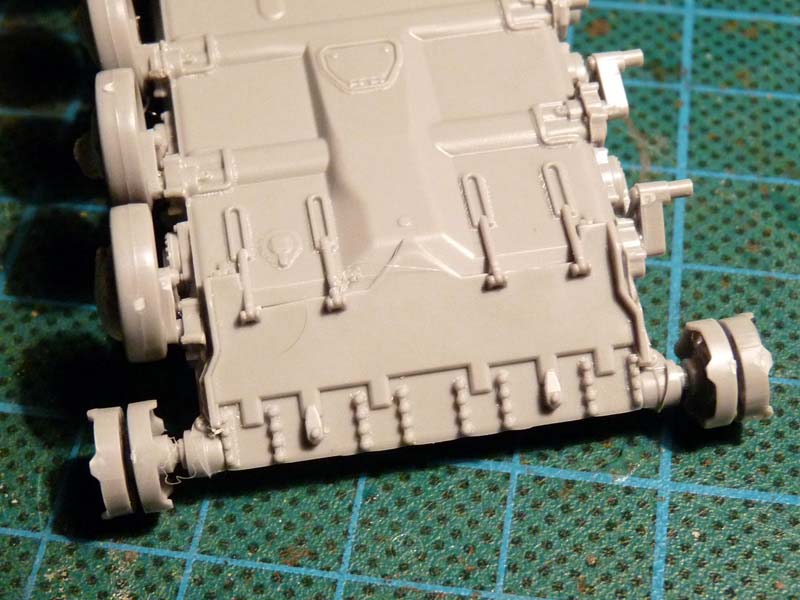
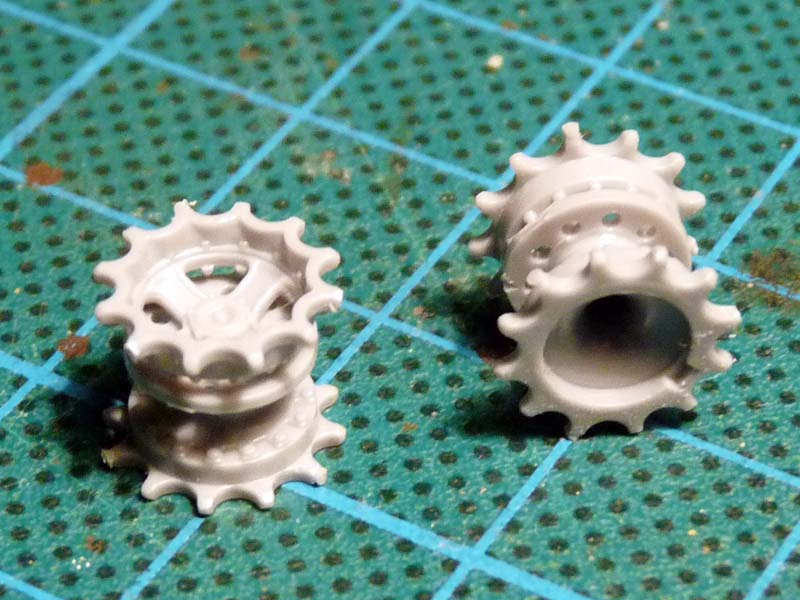
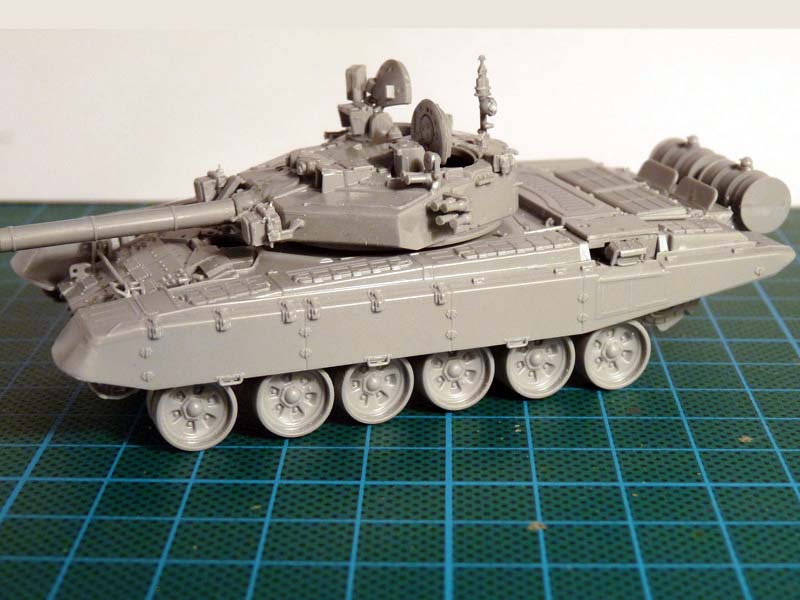
The tracks appear to represent the prototype ones pretty well, although technology limitations have left detail a bit on the soft side and the guide teeth solid rather than hollow. The sprockets and idlers appear spot-on, and the suspension arms are separate. The road wheels are of the correct pattern, and the diameter is just 0.1 mm smaller than the correct scale dimension. However due to the lack of representation of its edge or too thin rubber bandage the overall appearance of the wheels is a bit on the unrealistic side (they look like wheels with low-profile tires).
Overall: the kit appears to represent tanks produced during the 2000ths. The kit appearance seems to match the layout of the Victory day parade participants from 2009 onwards (please see references).
Build Observations
Step 1: Turret roof. Subassembly 1c is the front laser detector if you switch parts C18 and C19 there will be a gap beneath it. The hatches are all shown closed, you can pose them open.
Step 2: Turret side walls and base. On step 2a the turret roof is inverted, beware as the rear turret wall fits even if it is upside-down. I left part C120 (ERA block cluster on the roof) until final painting. Part C42 (the coaxial machine gun) can be easily broken when handling the turret at the early stages. Adjust C107 (gun cover) according to photo reference on my example it could move up and down and the gun tube angle would have changed. C96 (turret base) is drop-fit.
Step 3: Smoke grenade clusters and stowage. I glued smoke grenade supports to the turret and then mounted the tubes 1 by 1, checking with photos. Stowage boxes fit is excellent; I assembled them and put them aside to attach after the base coat. ERA blocks were also left out at this stage.
Step 4: IR dazzlers, machine gun station. The two projector boxes only fit one way, and Ive build mine adding one part at a time using slow setting glue to adjust part position. Part C83 (an IR light) has a sinkhole at the center, so it was drilled out and filled. I built the MG station and set it aside to paint separately; the ammo box attachment is very flimsy and prone to breaking. Yes, it should not be perpendicular to the MG.
Step 5: More turret details. The gun tube and the separate part to simulate the front opening both feature notched aligning pins to match the position of the real thing. There is a mold parting line down the sides of the gun tube and especially fume extractor which needs some careful removal. Part C104 fits over the right Shtora mechanical link to the gun.
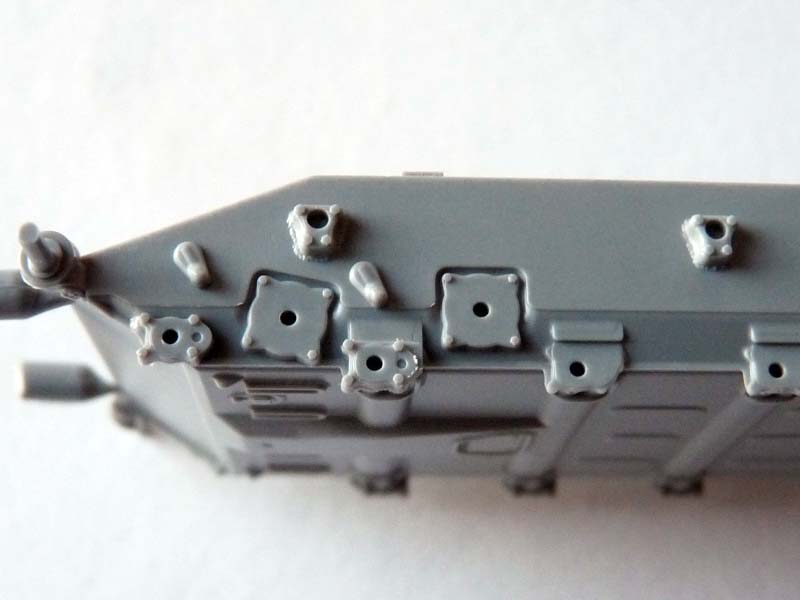
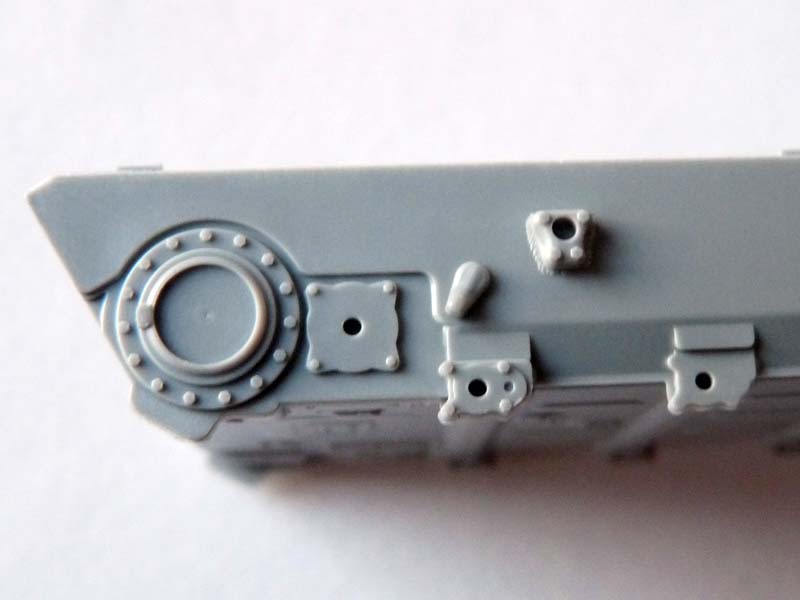
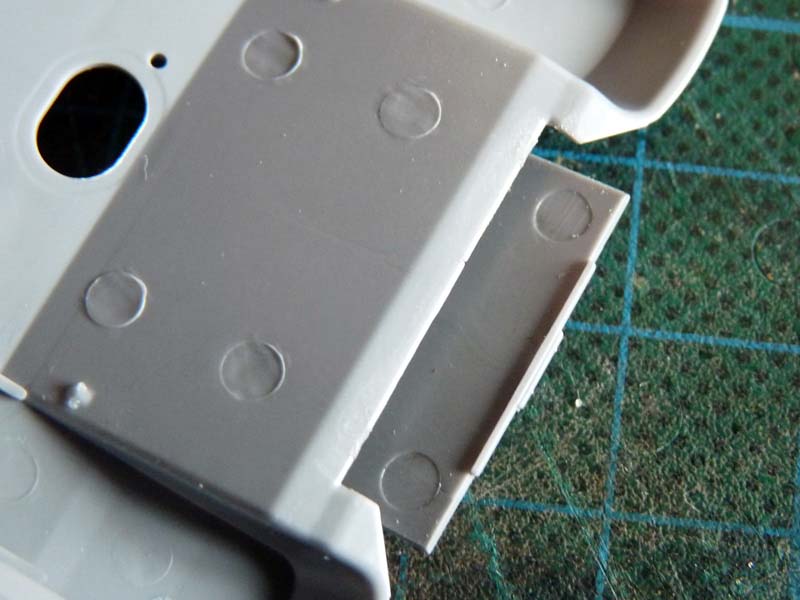
Step 6: Hull details. The exhaust assembly appears complicated but fits very well, as do the two parts on the engine deck simply follow the instructions. The upper glacis plate features an aligning edge so you will be able to slide it at the correct position. Ive left side screens (C92-97) off until final assembly.
Step 7: Front lights. I first glued position marker lights (C26 and 27), then the rear light guards (C38 and 39), then lights themselves and finally the front guard frames. Both front light guards were approx. 1mm short in my example. Part C24 (right light with IR filter) required filling because of a sinkhole.
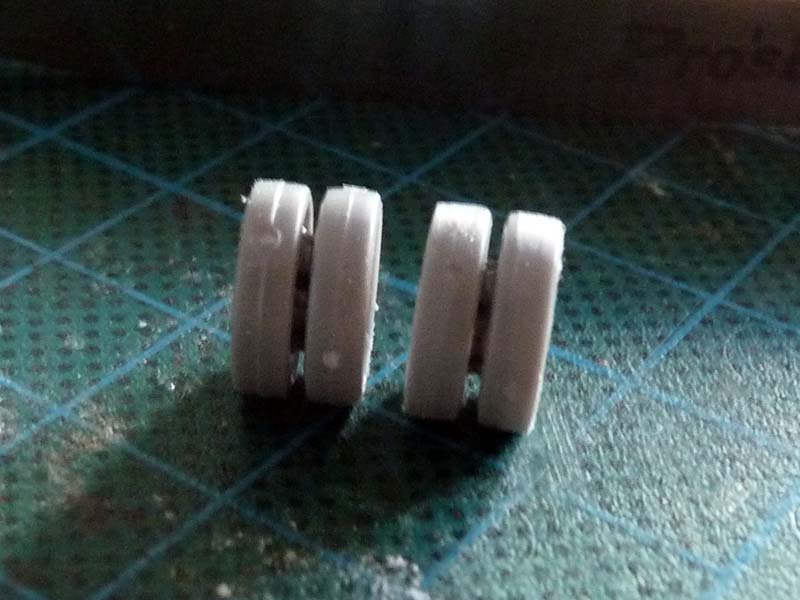
Step 8: Running gear. Carefully separate parts for stations 1, 2 and 6 from the sprue as the extra linkages are prone to breaking. Station 3 on either side features a different part with a notch this is where two special road wheels are placed, locking the tracks in place. Road wheels have a notable mold parting line that needs cleaning.
Step 9: Road wheels and rear hull wall.
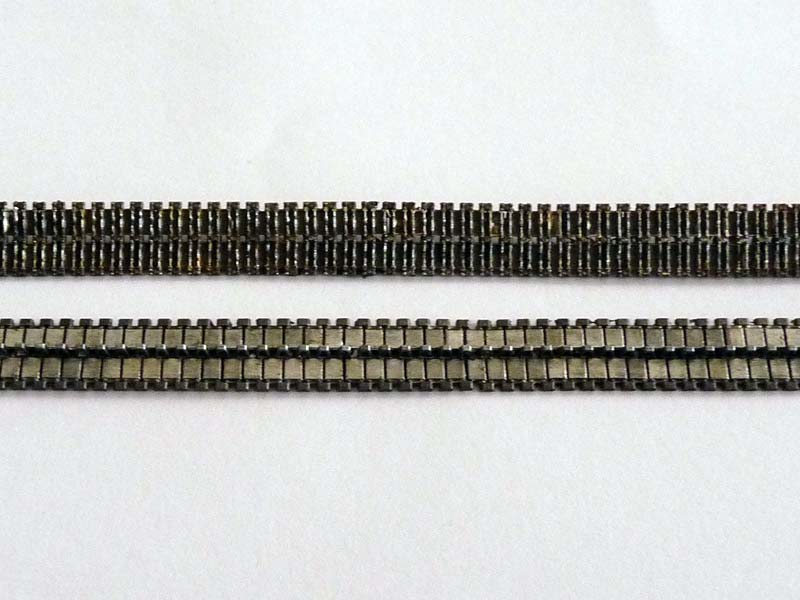
Step 10: Adding the track runs. Both parts have molded-in lines which are supposed to help you wrap the threads around the sprockets and idlers. The plastic is a bit on the hard side and I would recommend using moderate heat to bend the runs to avoid breaking them. Other modellers have reported they are too tense the tracks have the exact same link count as the actual tank, their length is spot on, so there is absolutely no room for error, or you will be breaking off wheels and suspension. You can turn the tracks around so they join at the top it wont be (as) visible.
I used aftermarket tracks from OKB Grigorov, as they have hollow guide teeth, richer detail and are easier to put on.
Step 11: Fuel drums supports, unditching log and closing the hull. Nothing extraordinary to report.
Step 12: Fuel drums both need a ledge at the bottom. I used a single copper strand from a network cable, superglued in place. The tow cables are nicely molded, but I used 0,6mm steel cable from
RB Models after annealing and washing it with drawing ink it gets the exact look I am aiming for.
Step 13: final details and assembly.
Finishing
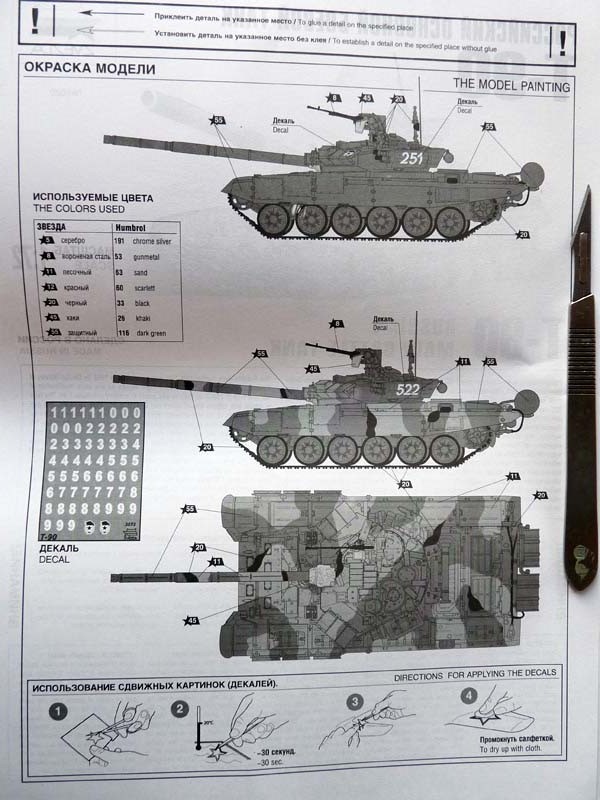
The tank was airbrushed with a mix of
Revell green enamels 65, 67 and 48, gloss coated and decalled using
DDecals Airborne set. Rubber bandages were simulated with dark grey 78. Bare metal is drybrushed
Tamiya X-11 and MM Gun Metal. I used dark brown and grey washes and oils to bring out details, using different colors to highlight the differences on the hundreds of sloped surfaces the kit features.
Tracks were coated with Mr. Surfacer, then MM Gun and Burnt metal. Raised track detail was picked out with
Tamiya X-11, then everything went through oils and dark brown wash. Dirt is matt varnish mixed with pigments and airbrushed.
Conclusions
The kit is difficult to judge, because it features an odd combination of the best and worst in contemporary molding. It is very well detailed for the most part (overall the turret is the best in scale), features outstanding fit and requires no filler. Yes, it does have omissions (e.g. the missing mounting strips rubber-fabric side skirts and fuel drum bottom ledges) and obvious inaccuracies (thin road wheels, hull height), after all it is a plastic kit.
The tracks are the scary part, so when I was done photographing them I knew they were getting replaced I didnt want to risk breaking the suspension or the tracks themselves.
In the end it is a fine kit especially if you have a solution for the running gear.
Reference
Scale Models Russia Live links
Vitay Kuzmin Blog Live links
Igor 113 Live Journal Live links


Comments