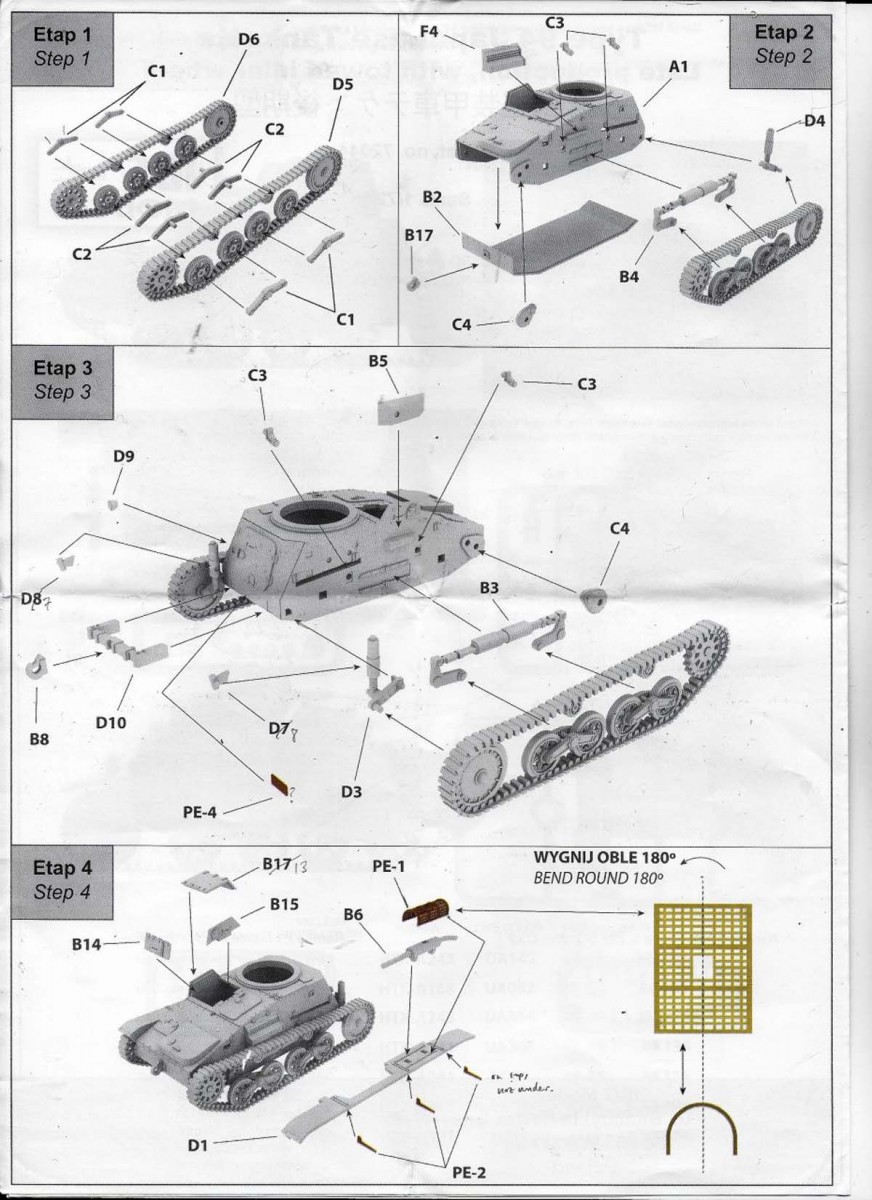
In 1933 the Imperial Japanese Army commissioned Tokyo Gas & Electric to develop a fully tracked, lightly armoured infantry support vehicle. The resulting Type 94 had a two man crew, the driver at the front, with the commander standing behind in an unpowered turret armed with a machine gun. Following active deployment of the initial design, improvements were made both to the suspension, lengthening the track ground contact by means of a large ground level idler, and to the armament, the original 6.5mm machine gun being replaced by a 7.7mm weapon. That improved version is the subject of this recent kit from IBG Models, and which we will see built up in this review.
Contents
The kit is packed in a proper tray and lid box, big for this tiny model, and consists of six small sprues, IBG following the modern way of dividing kits up in to sprues that can be utilised to produce a number of different kits.
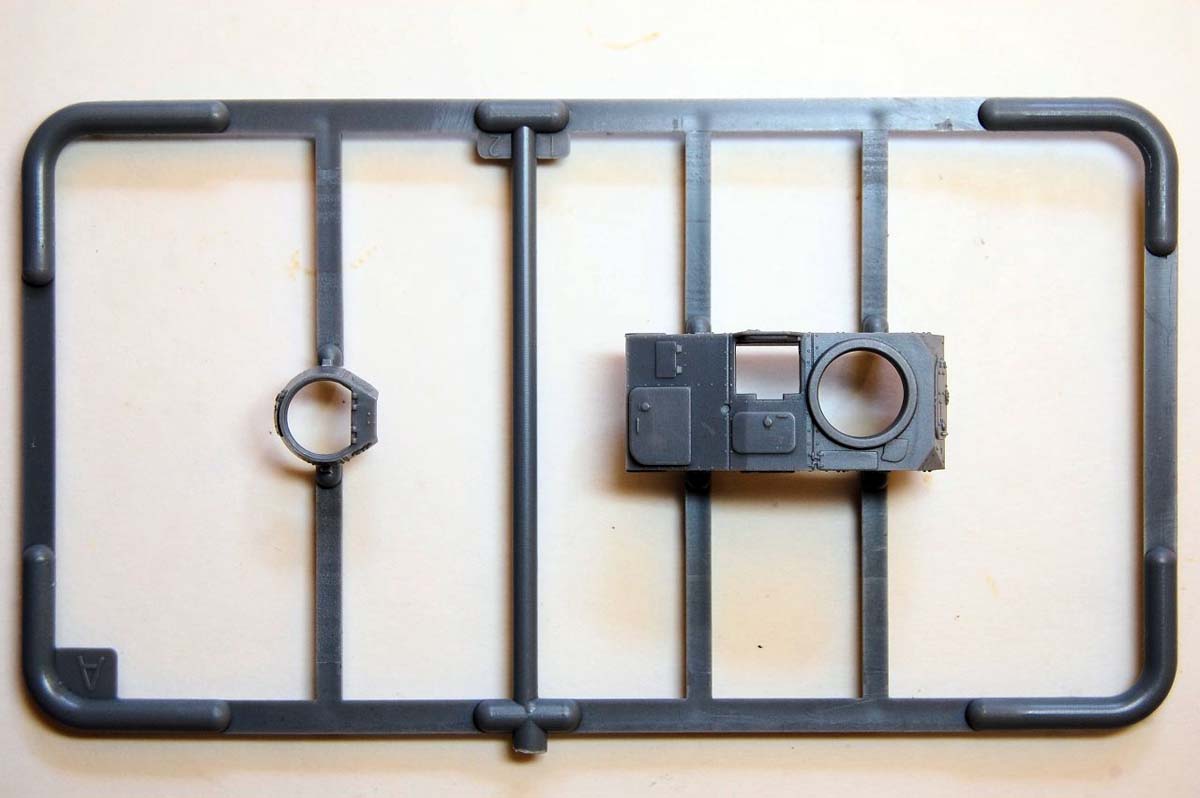
Sprue A: body and turret superstructures
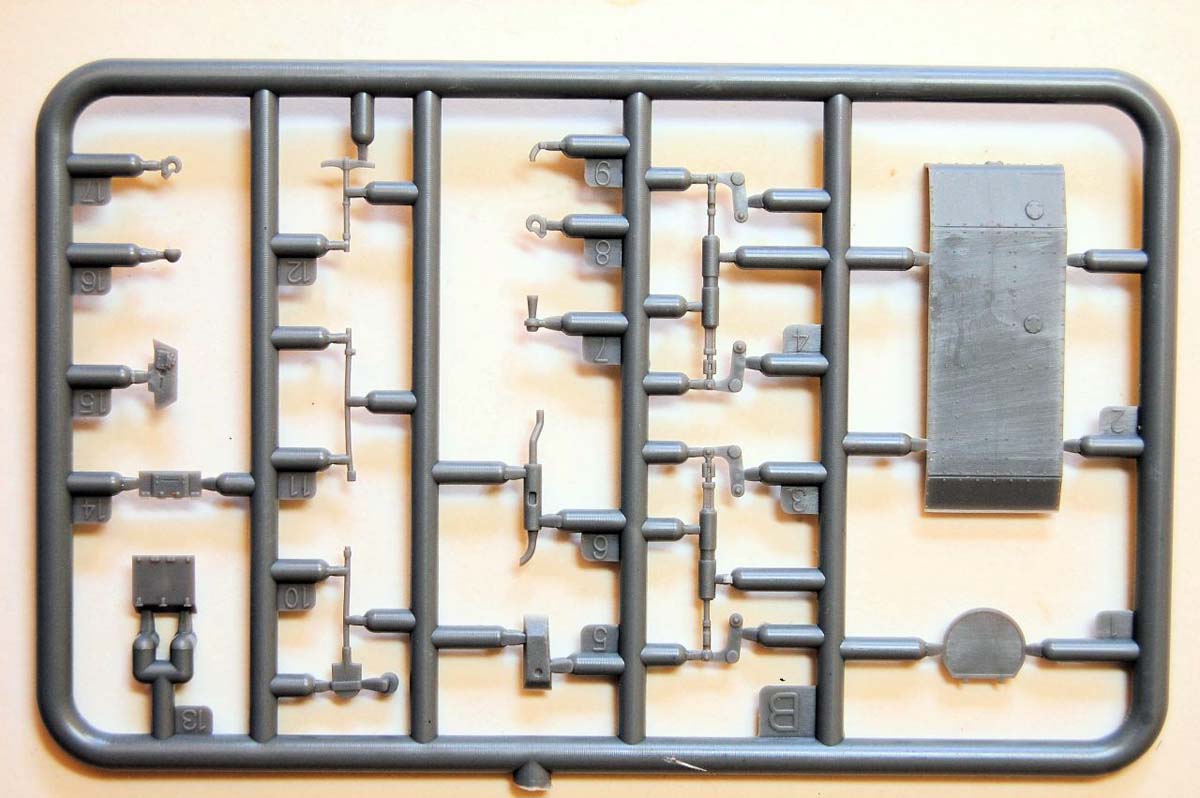
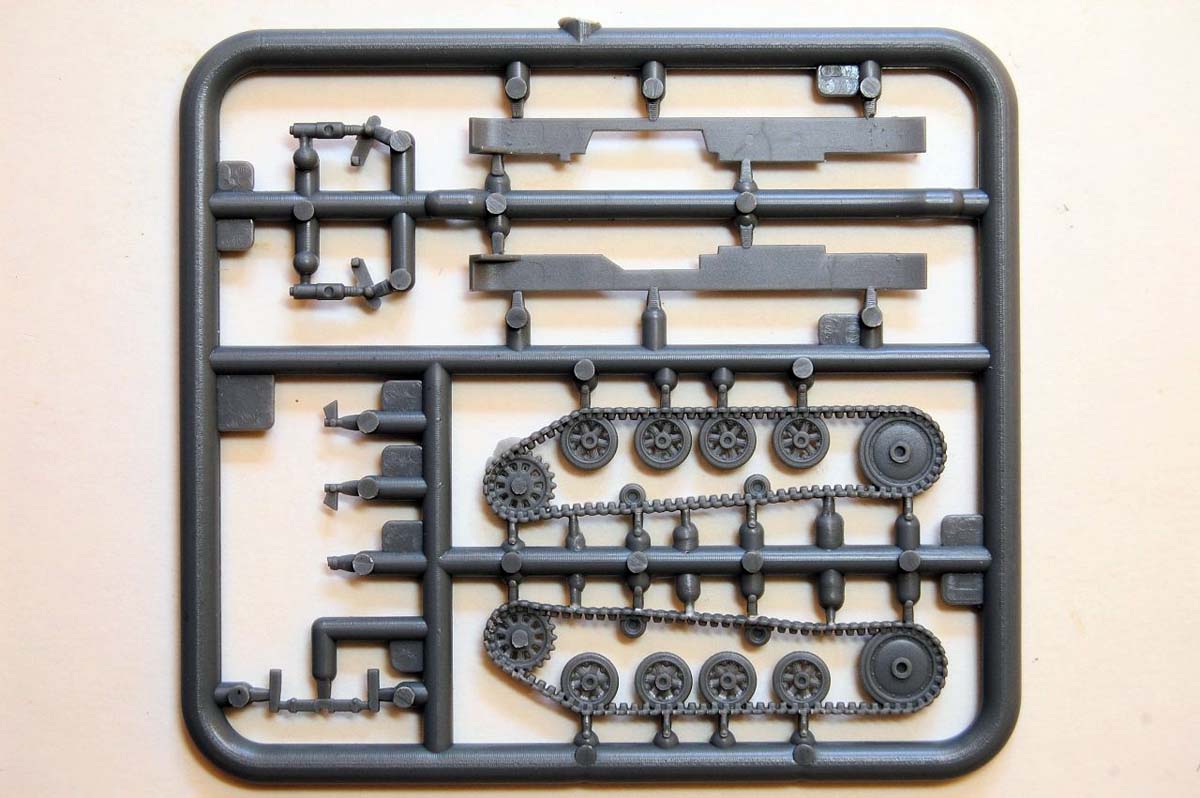
Sprue B: lower hull and fittings
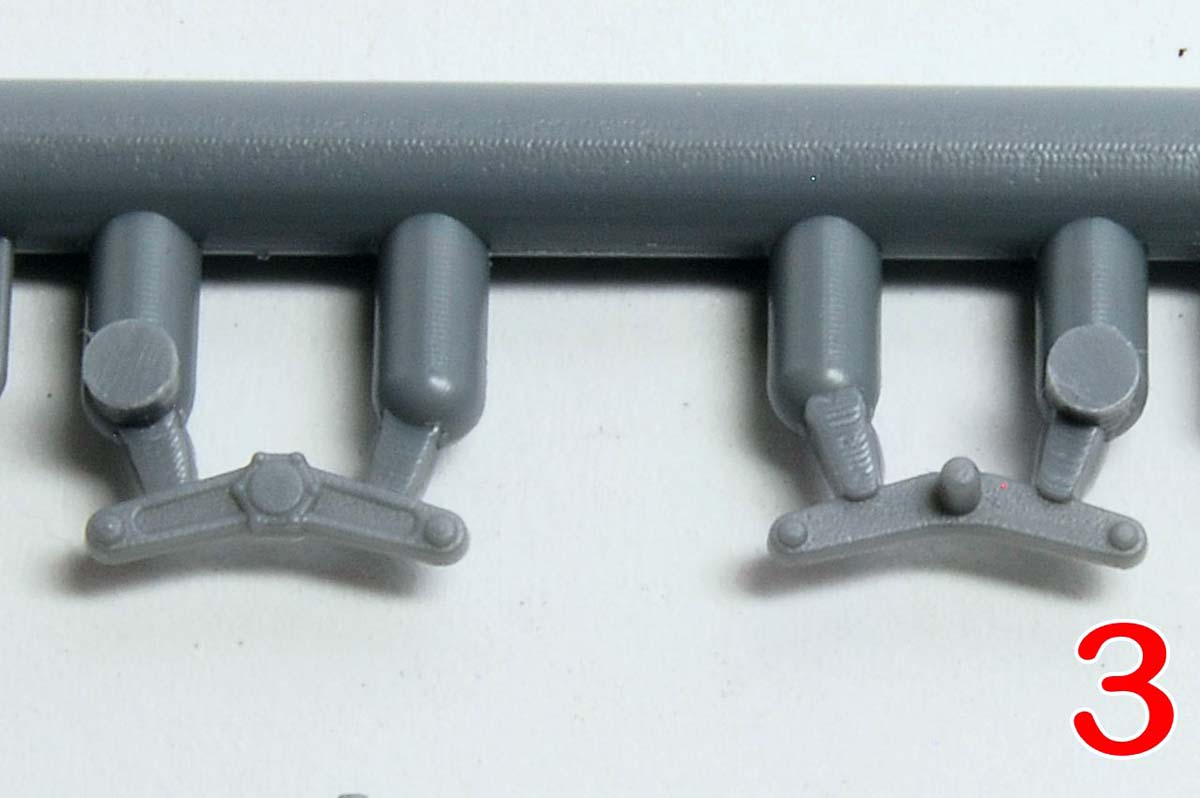
Sprue C x 2: suspension fittings
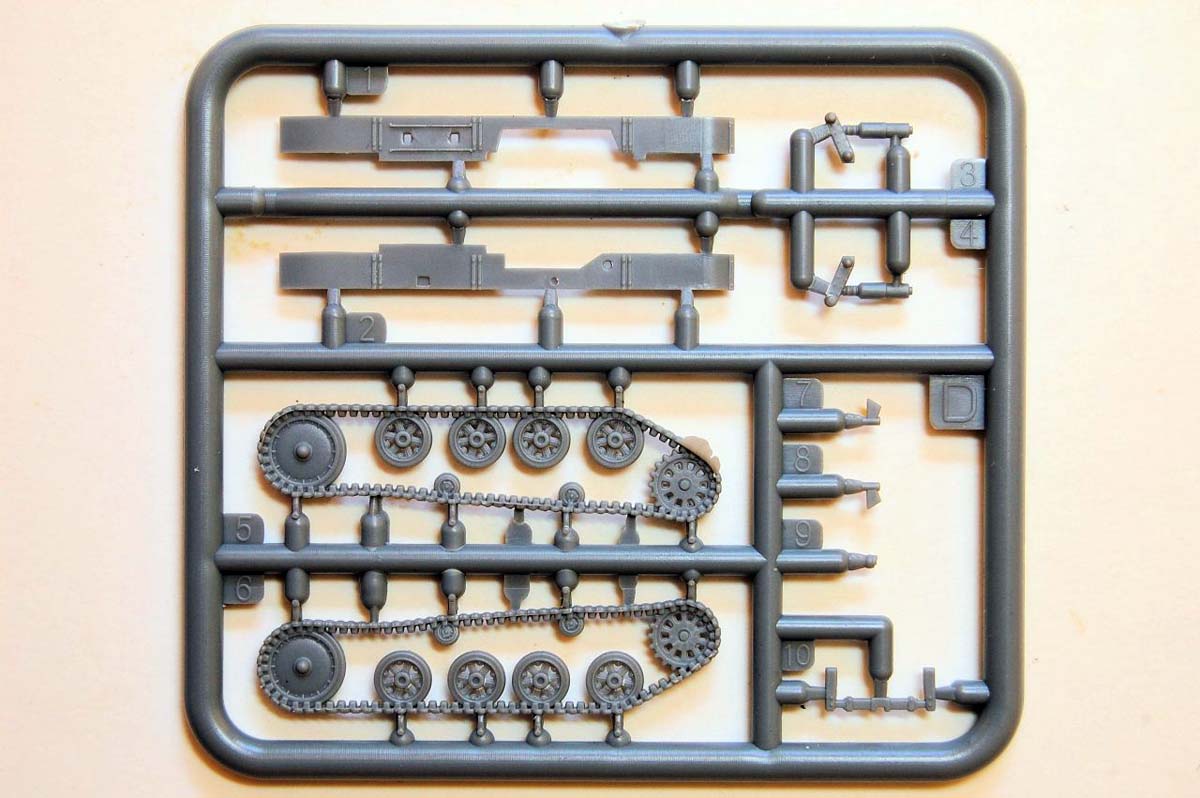
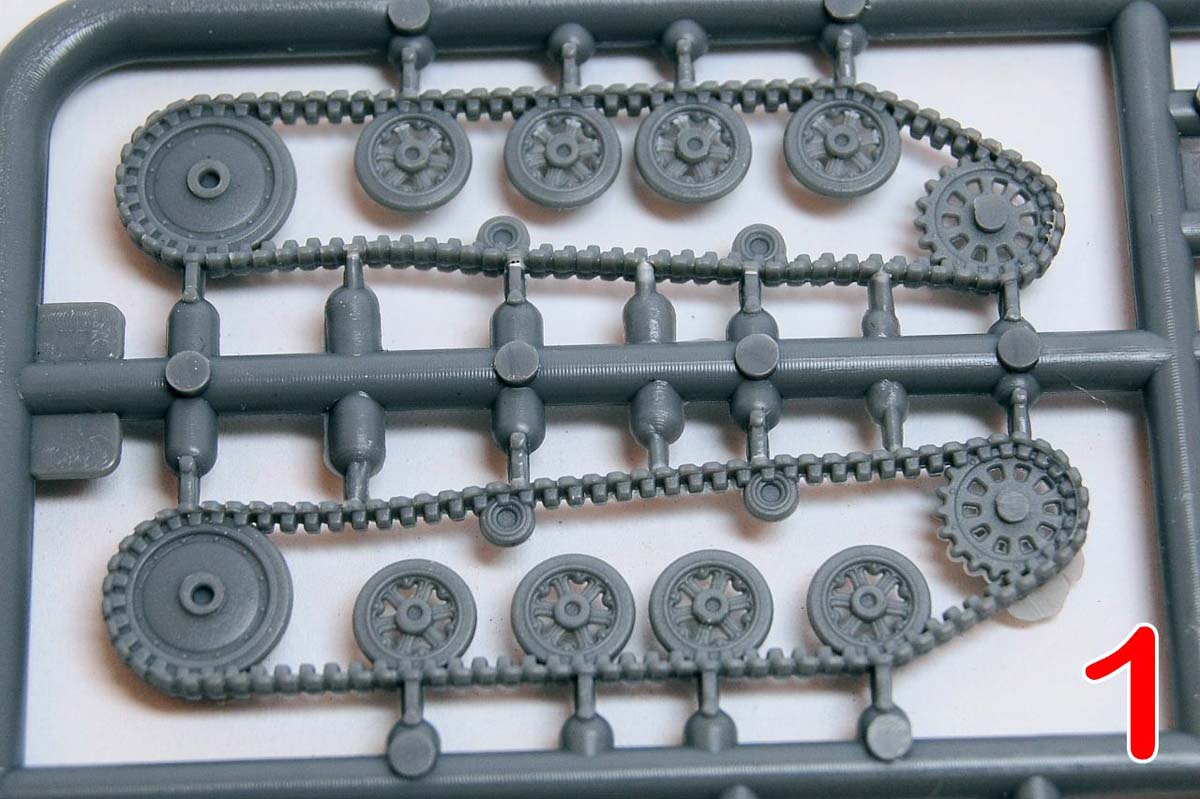
Sprue D: wheel / track units, track guard
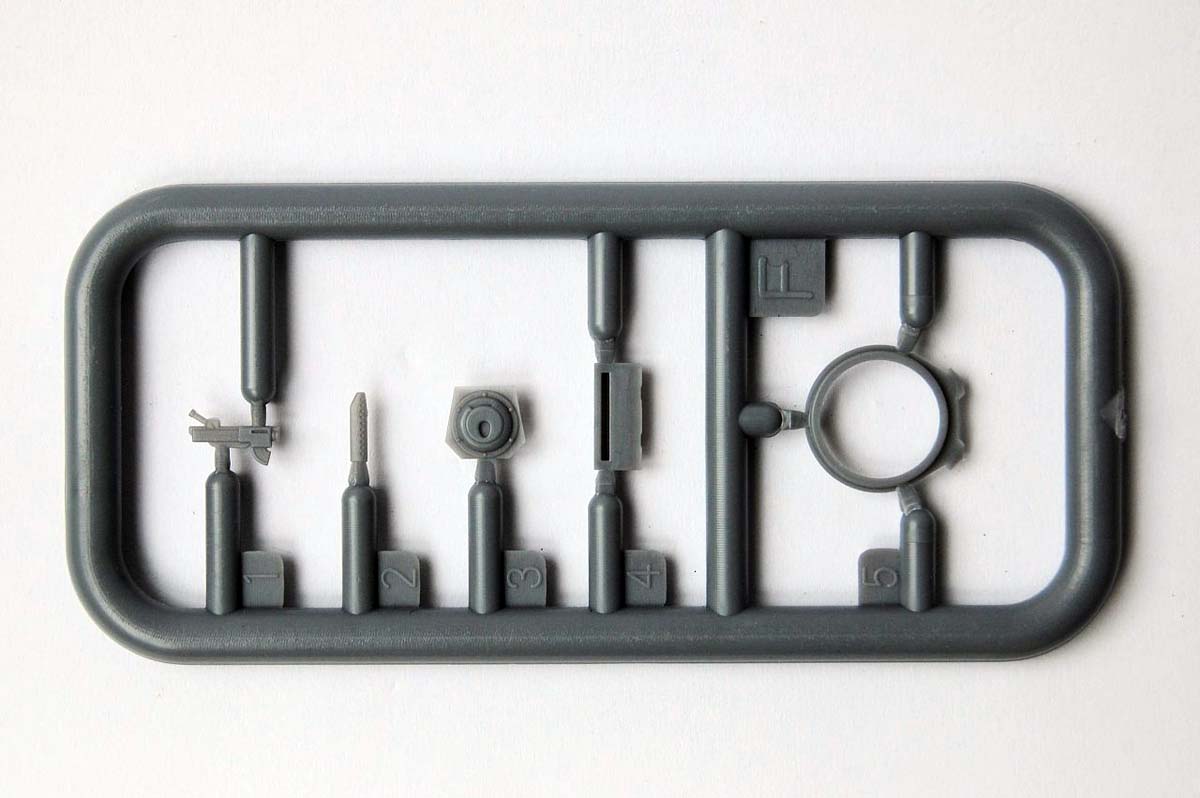
Sprue F: turret parts
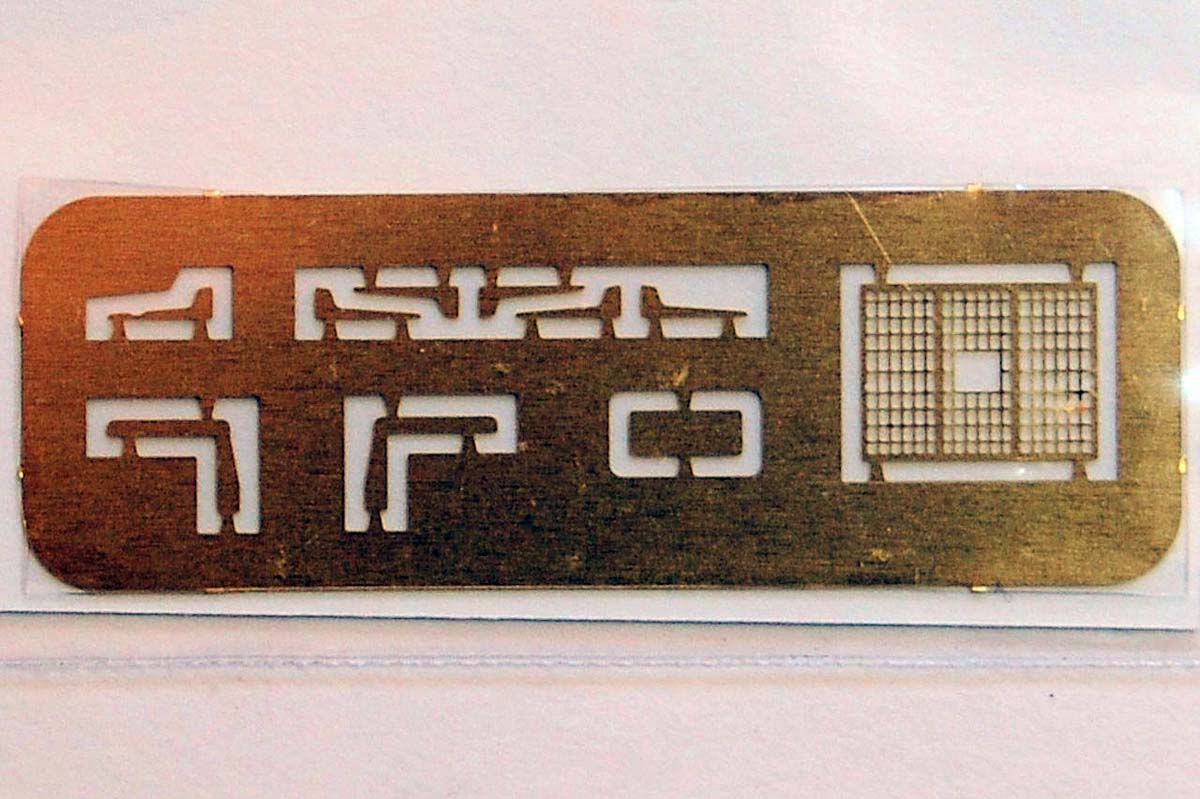
Photo-etched metal sheet
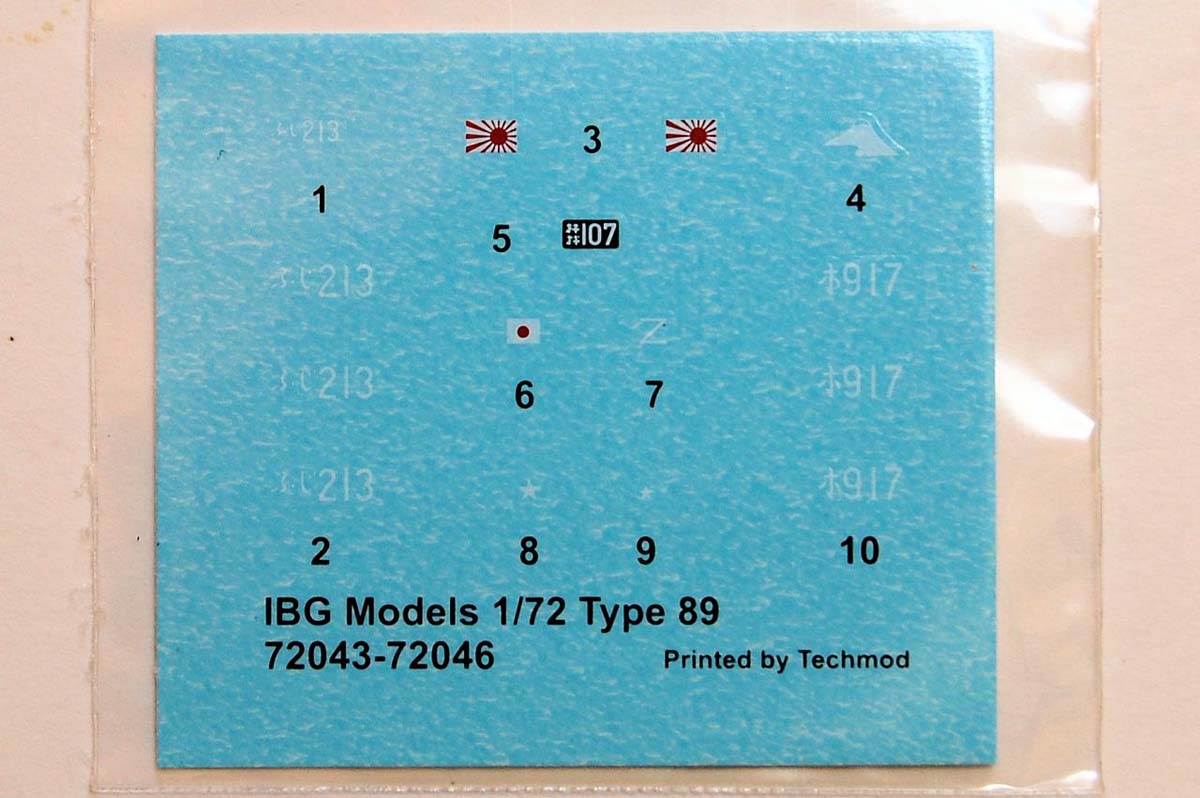
Decal sheet
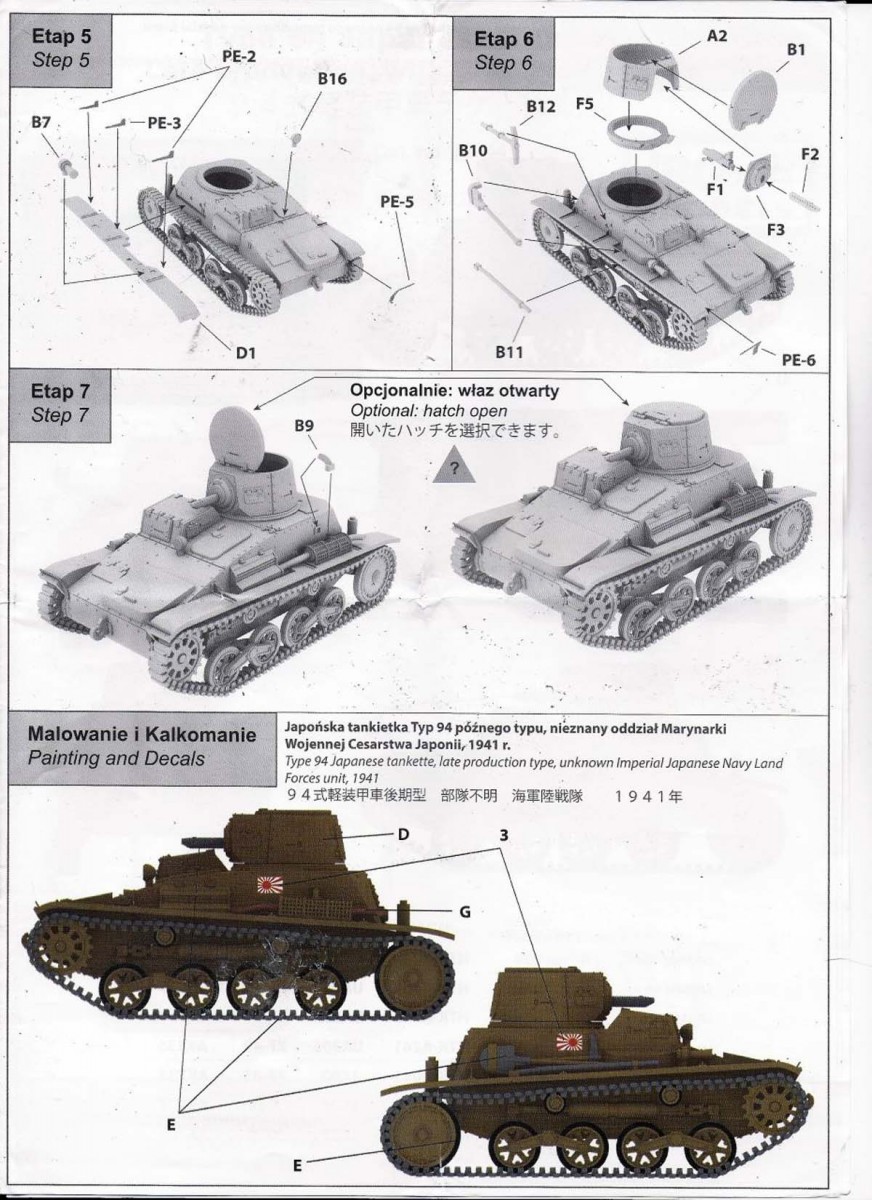
The instructions are a nice folded A3 sheet, using 3D CAD images, and includes two different finishing schemes in full colour: Unknown Imperial Japanese Navy Land Forces unit, 1941 being all over Khaki, and Unknown Imperial Japanese Army unit, 1942 in a four colour camouflage, which is very helpfully illustrated by a five view colour profile. Paint references are included for five popular brands.
The Build
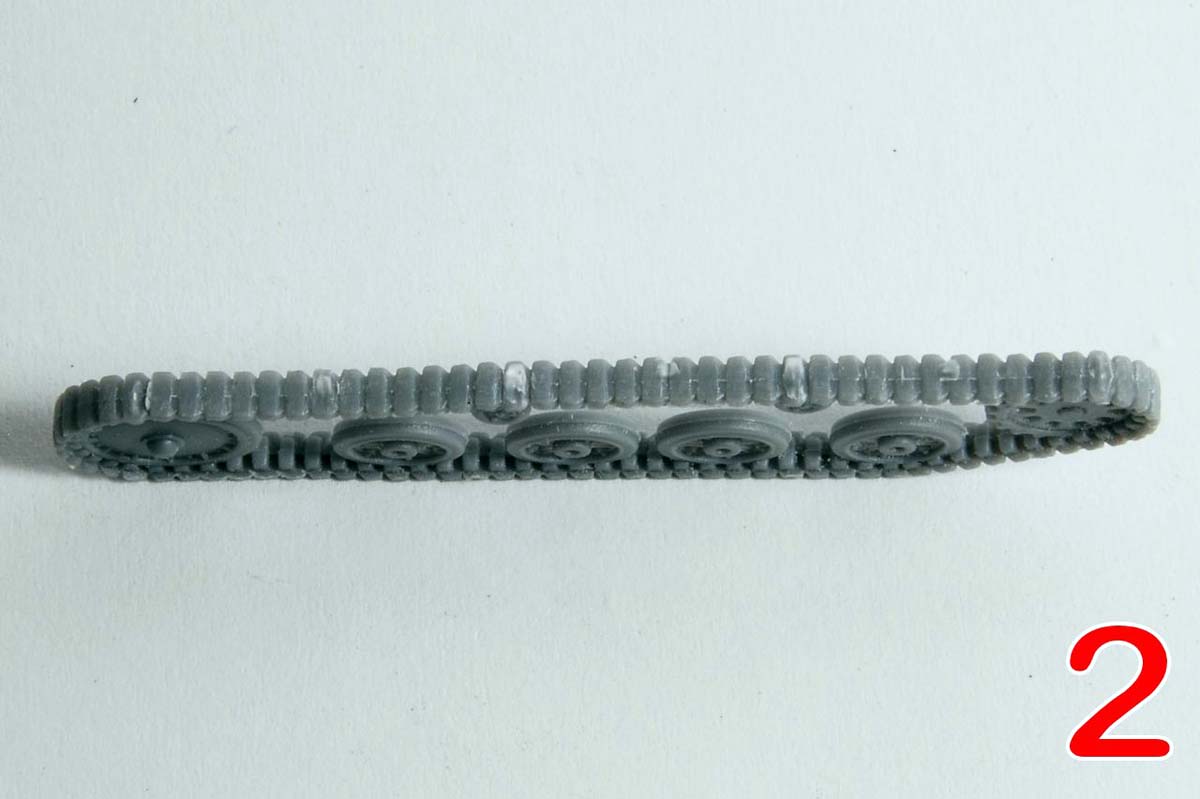
Construction kicks off with cutting the wheel / track units from the sprue. All the wheels including the return rollers are moulded in place with the tracks. The upside of this is not having to cut and tidy lots of individual wheels and then attaching separate tracks, the main downside being the lack of detail on the track itself. I think photo 1 shows the level of detail on the wheels is pretty good, and the way the track sits around the wheels, including sag, is probably better than youd get by attaching separate tracks. There is still a fair amount of cleaning up to be done here as each unit is attached at eleven fairly chunky points, presumably to ensure the plastic flows all the way round. Apart from the connector tags, there is a mould seam around the centre of each track, but cleaning things up to a reasonable standard wasnt too time consuming (photo 2). Each pair of road wheels is then sandwiched by inner and out suspension arms (photos 3 and 4) the fit of which presented no problems.
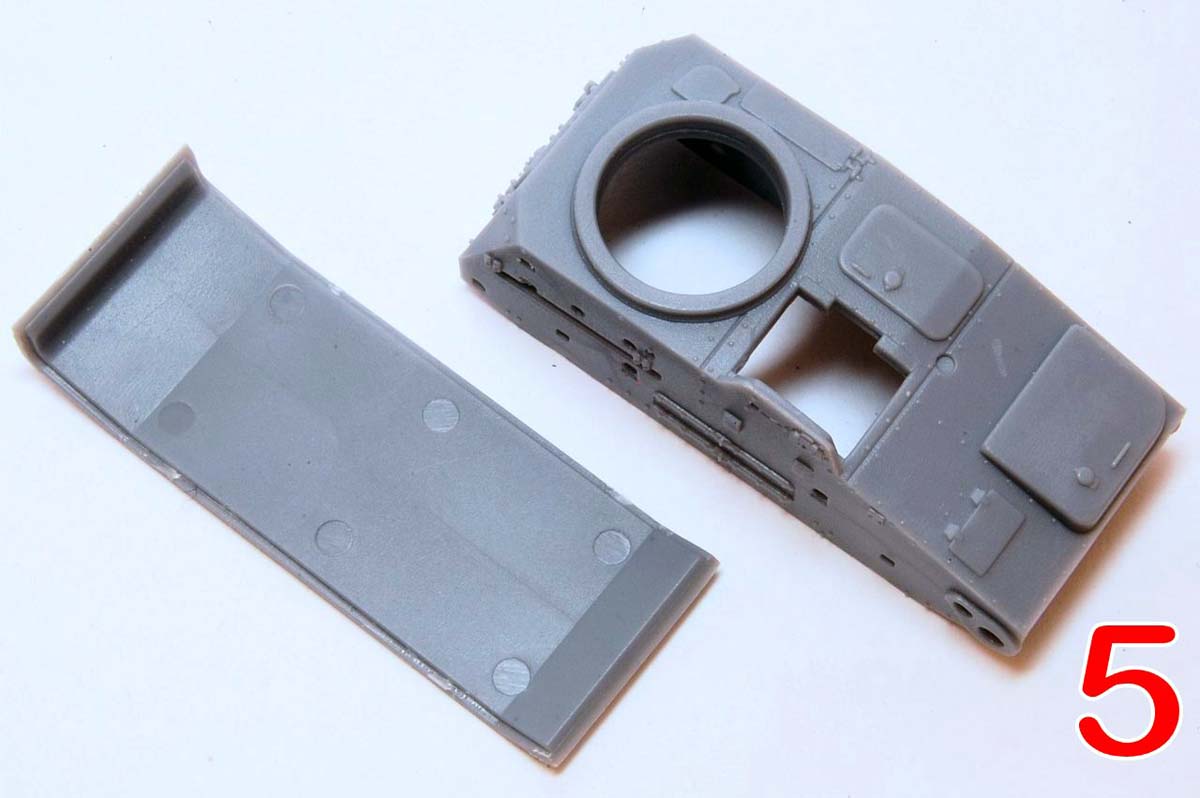
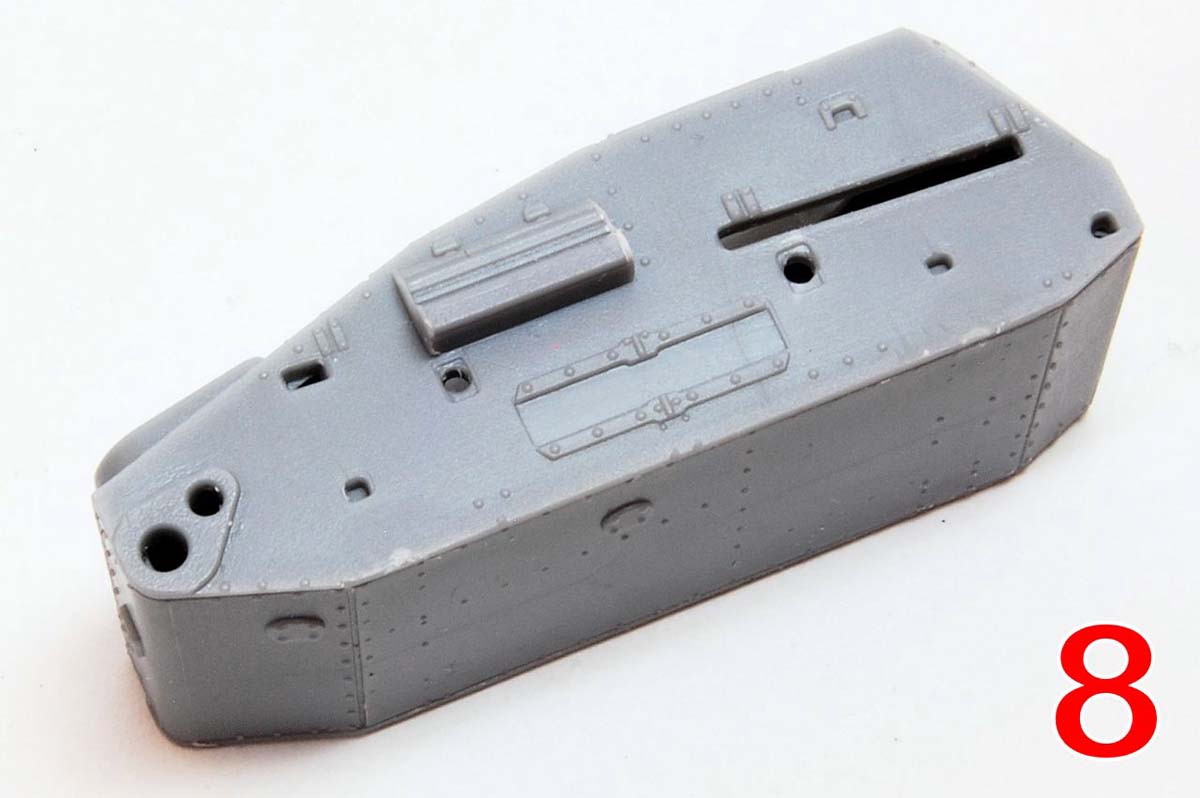
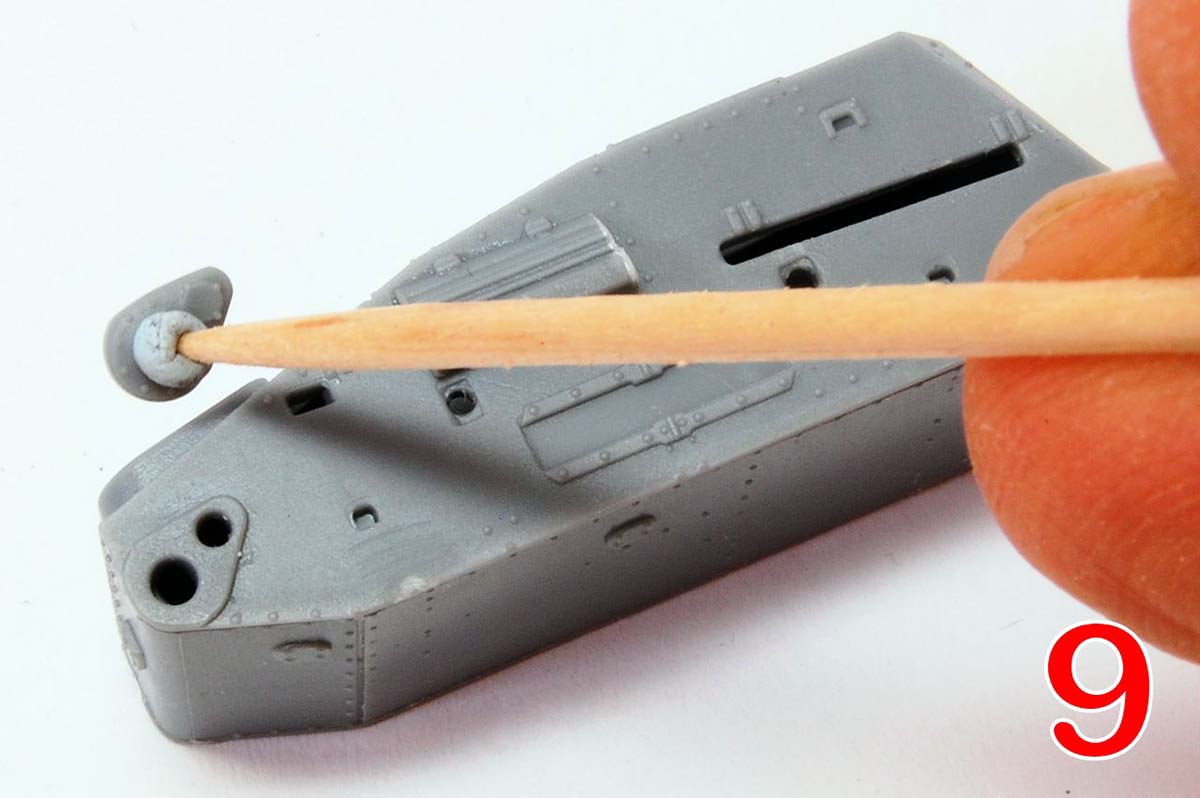
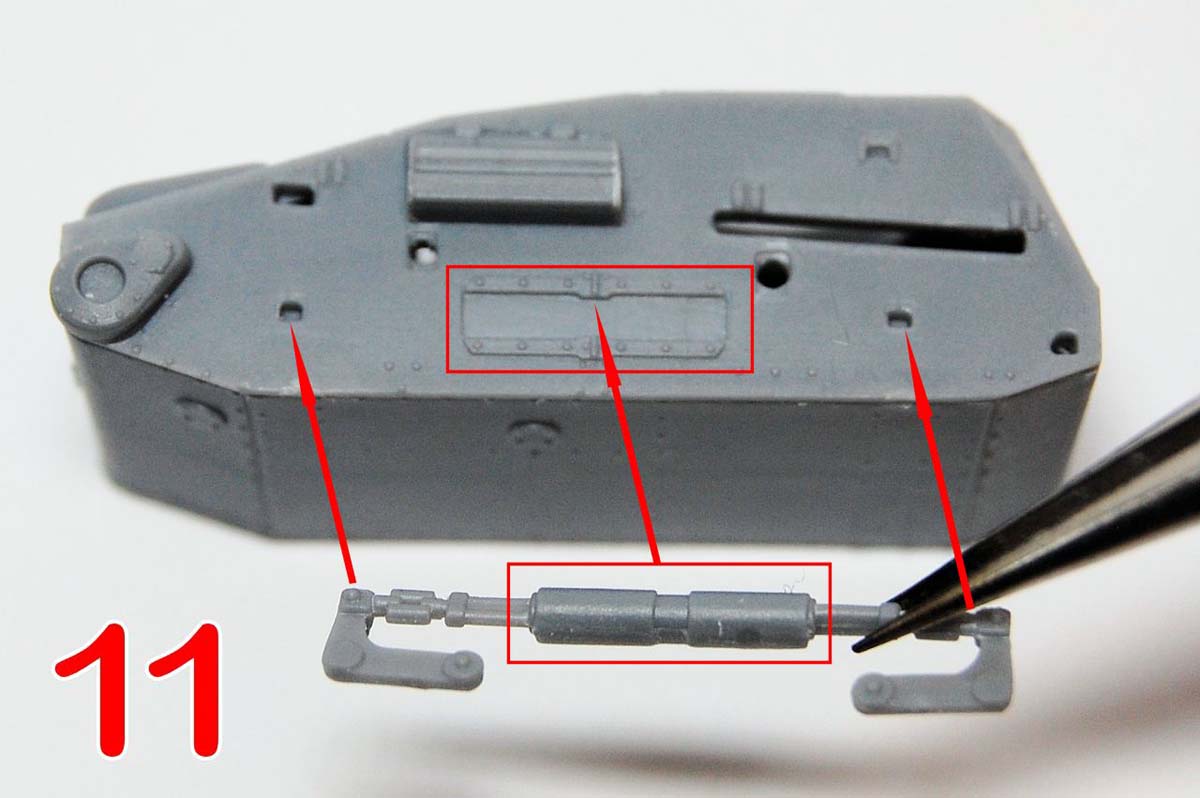
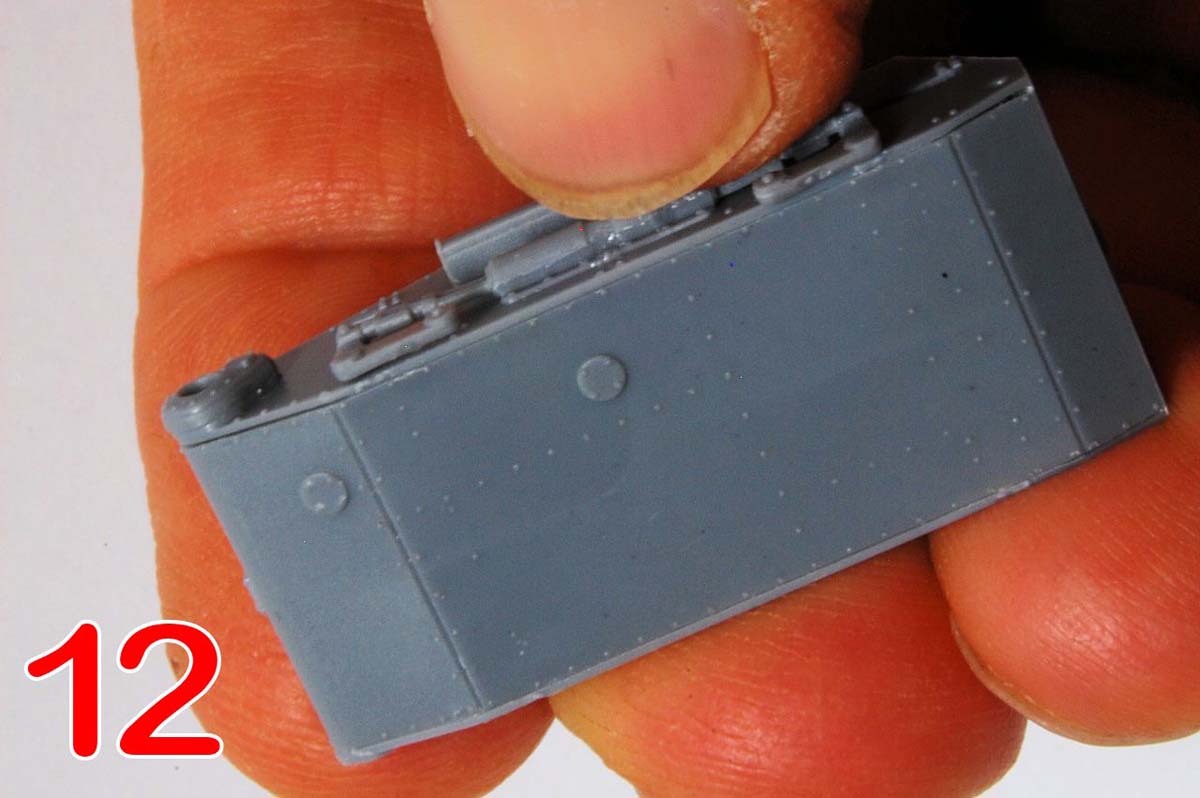
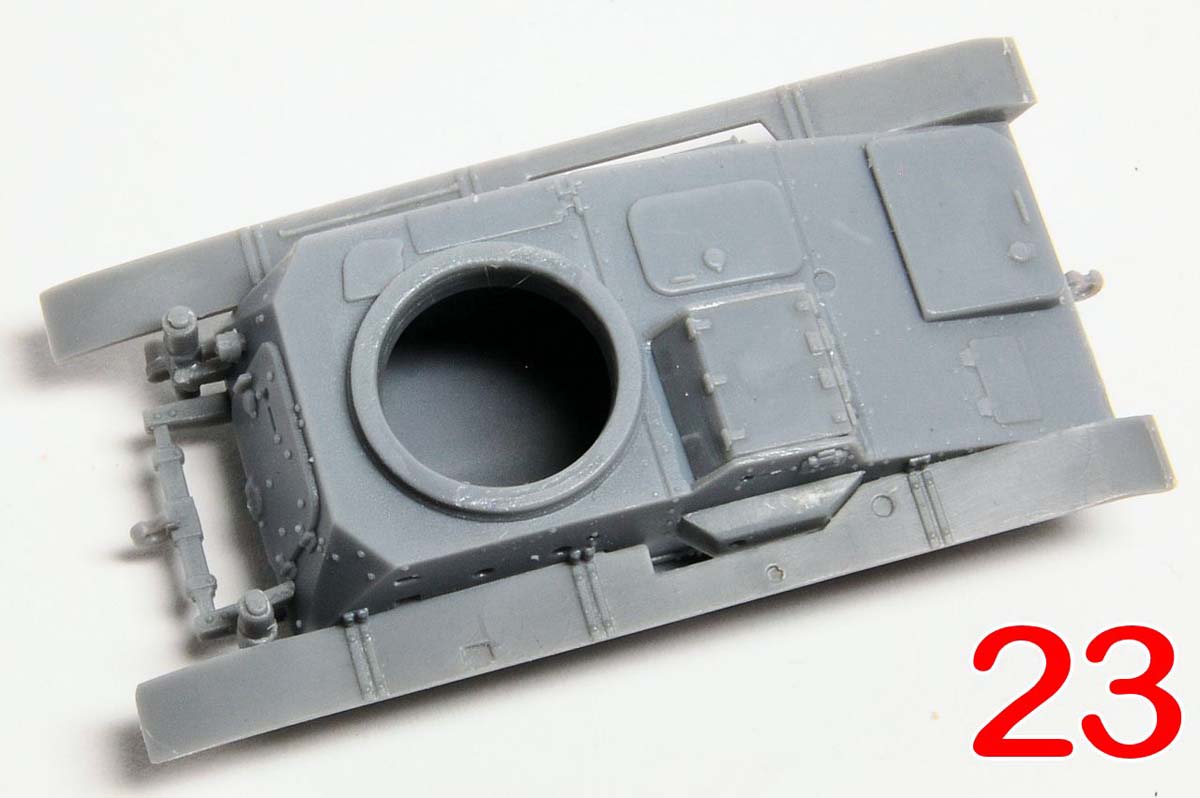
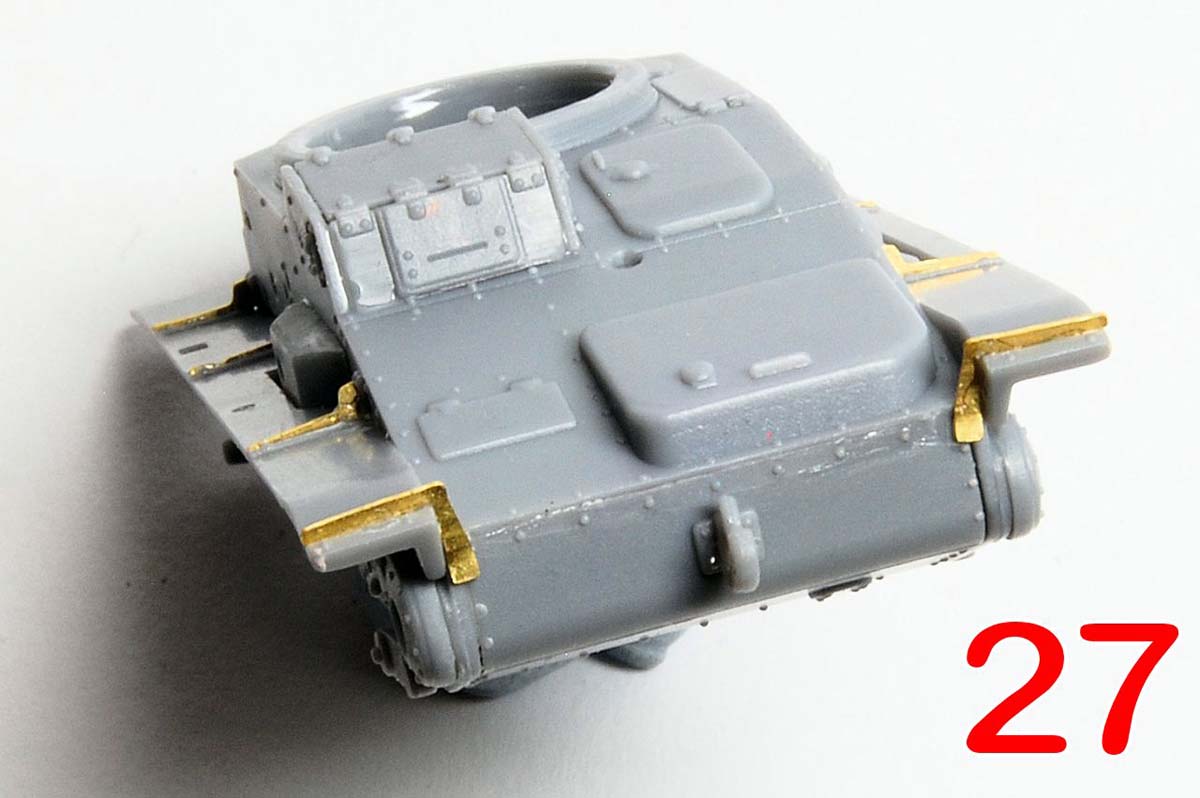
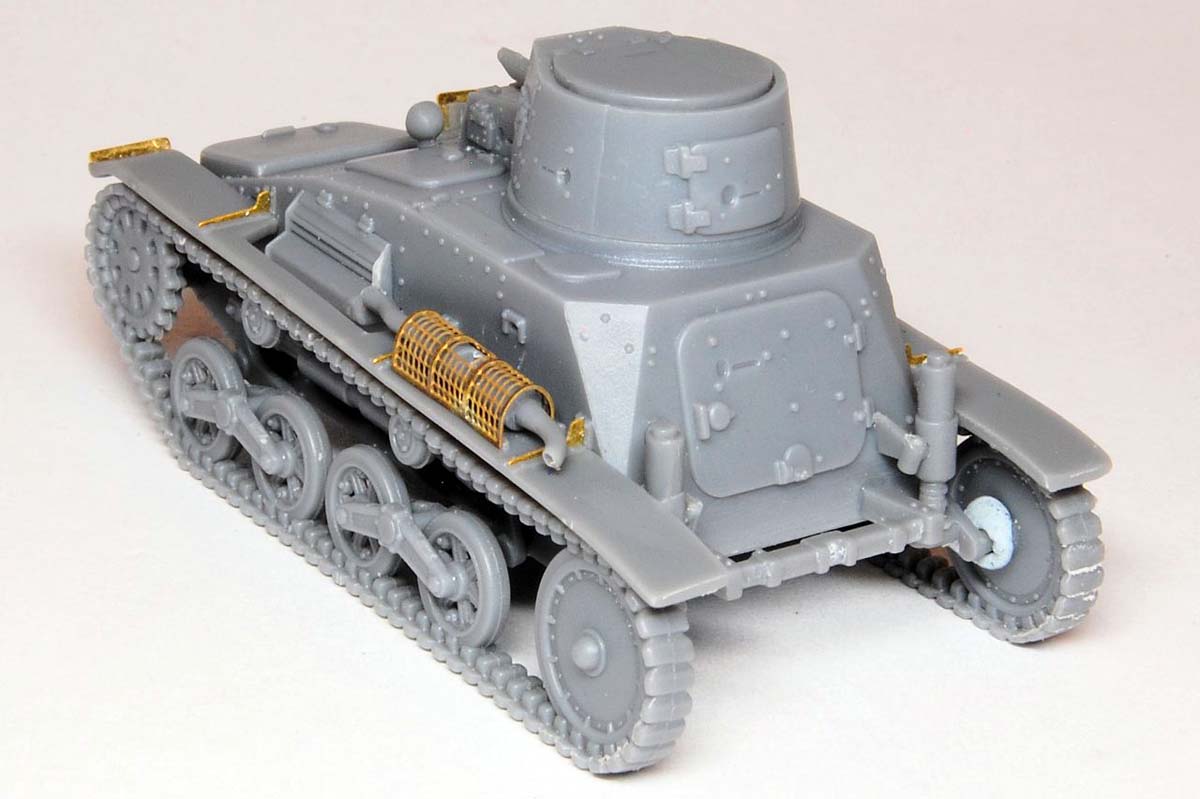
The body is assembled next, from the simple lower plate and the big (for this kit) slide moulded superstructure, and again, this goes together without any issues, it being possible to do most of the cement application on the inside, through the openings. Step 2 shows the track units being added already, but there is no reason not to leave them to one side so that they can be painted separately. The next few photos show various fittings being added to the body, from steps 2 and 3: photos 7, 8 show the cooling louvre being added, and photos 9, 10 the final drive cover. In photos 11, 12 the suspension units are added, and note a couple of things here: they are delicate, so somewhat prone to bending, and they locate via two pegs at each end which locate into holes, while the central spring case attaches to the grooves between the two riveted plates (photo 11); the holes seem a tiny fraction too close together with the result that when the pegs locate, the central section lifts slightly away from the body, hence my thumb applying a good deal of pressure to that part while the cement sets in photo 12.
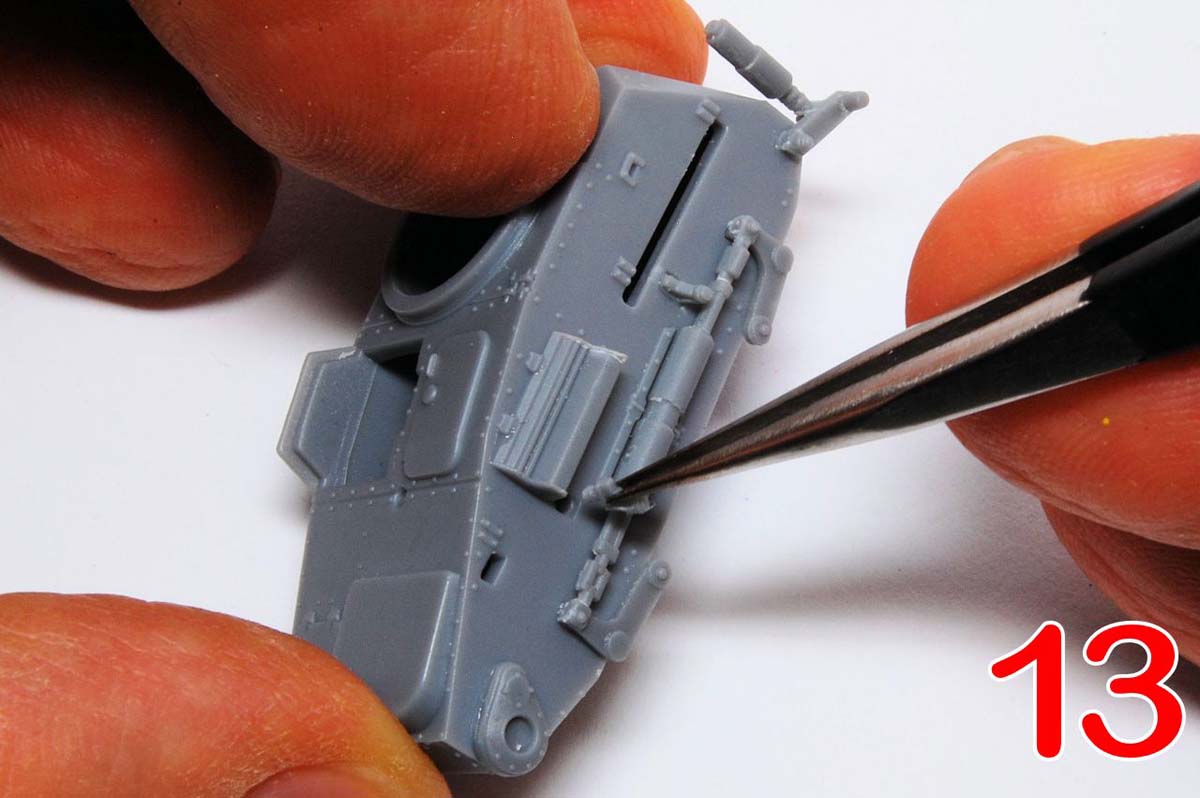
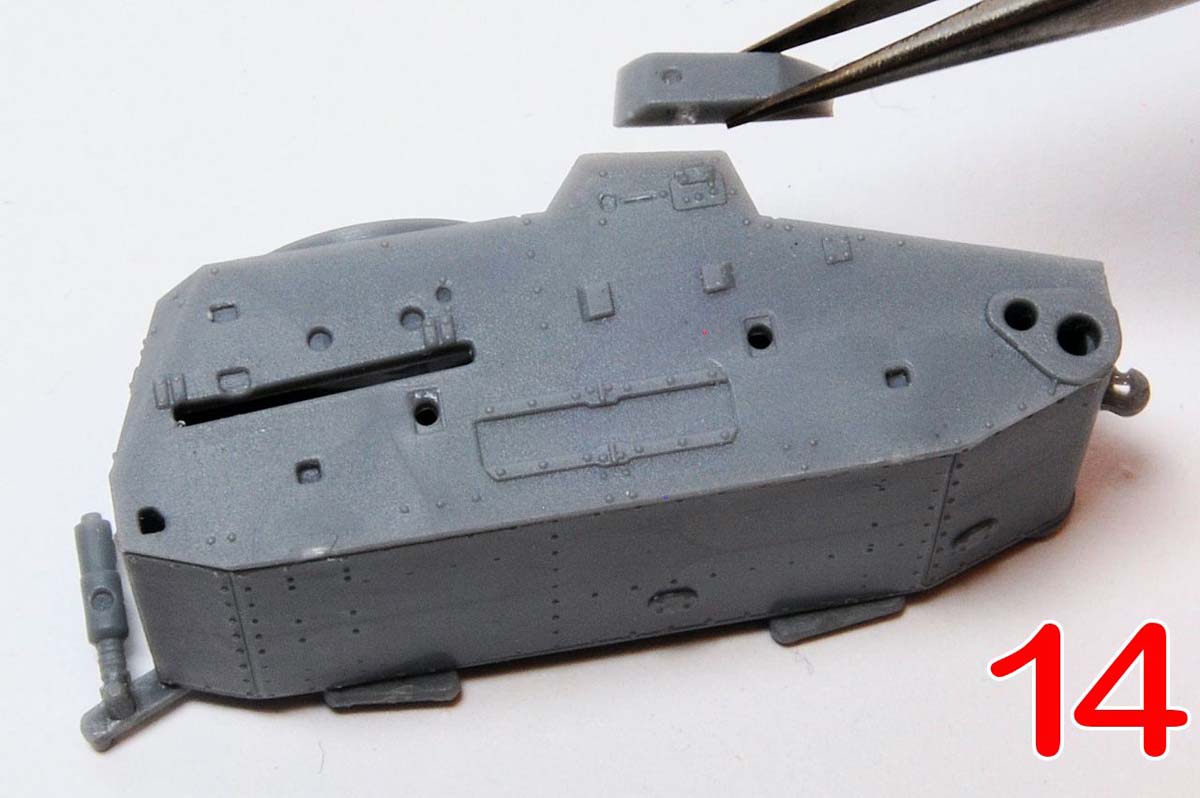
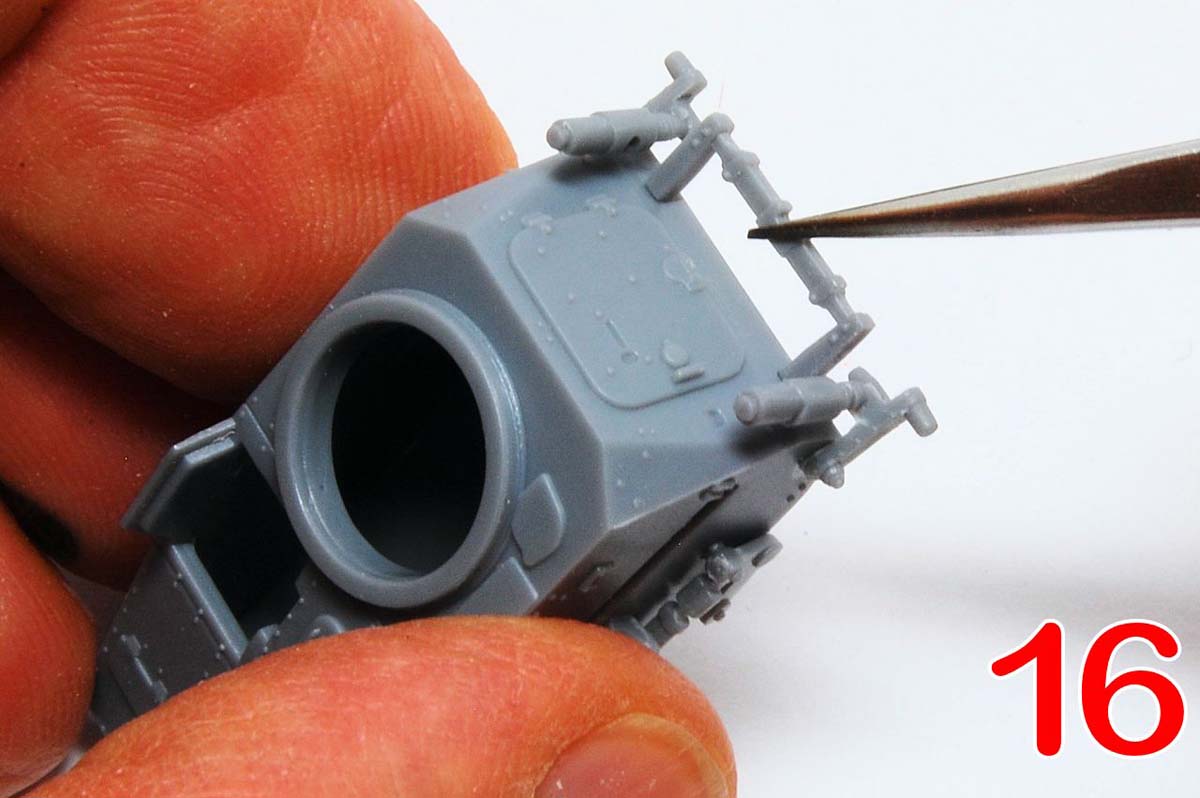
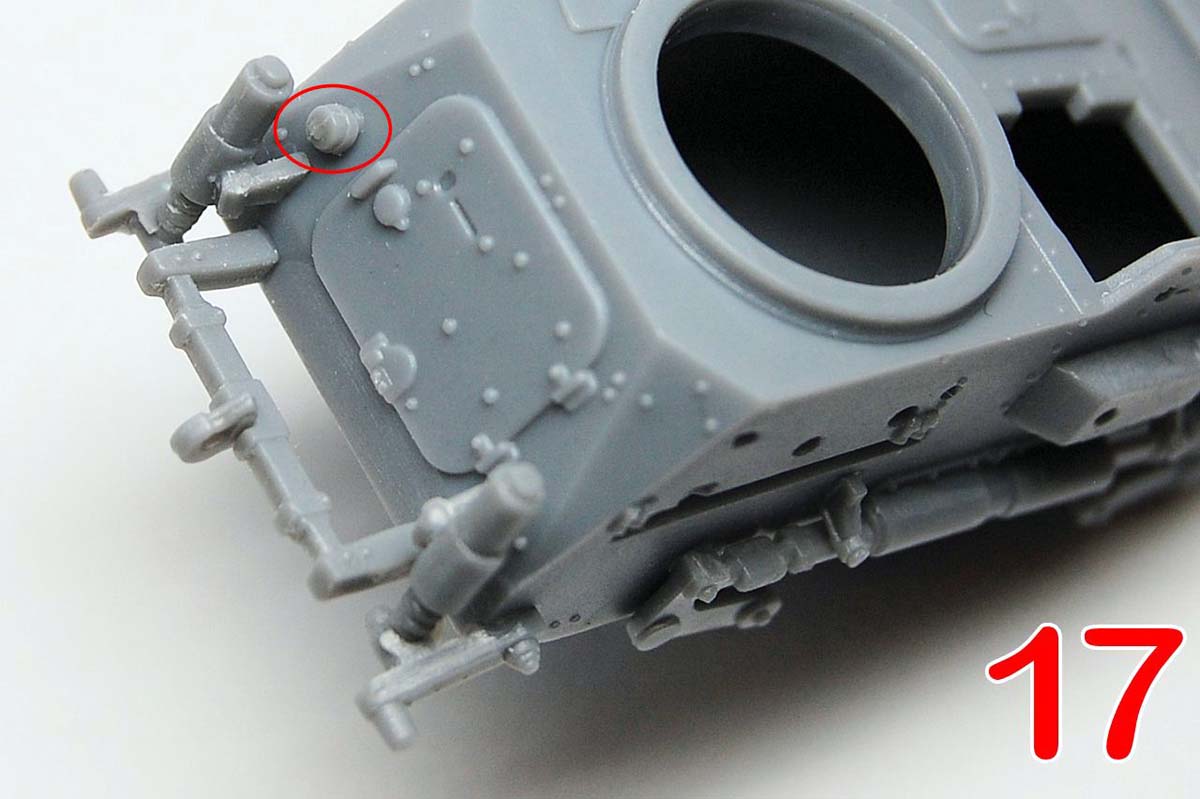
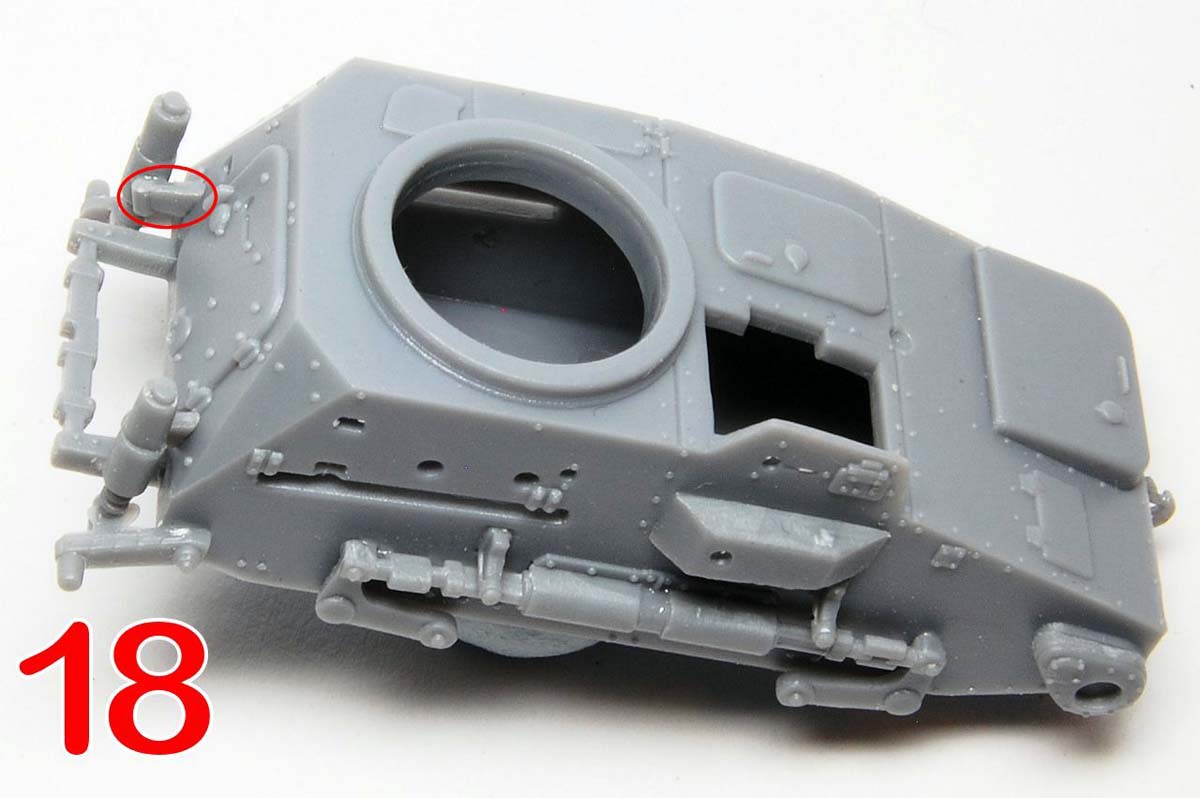
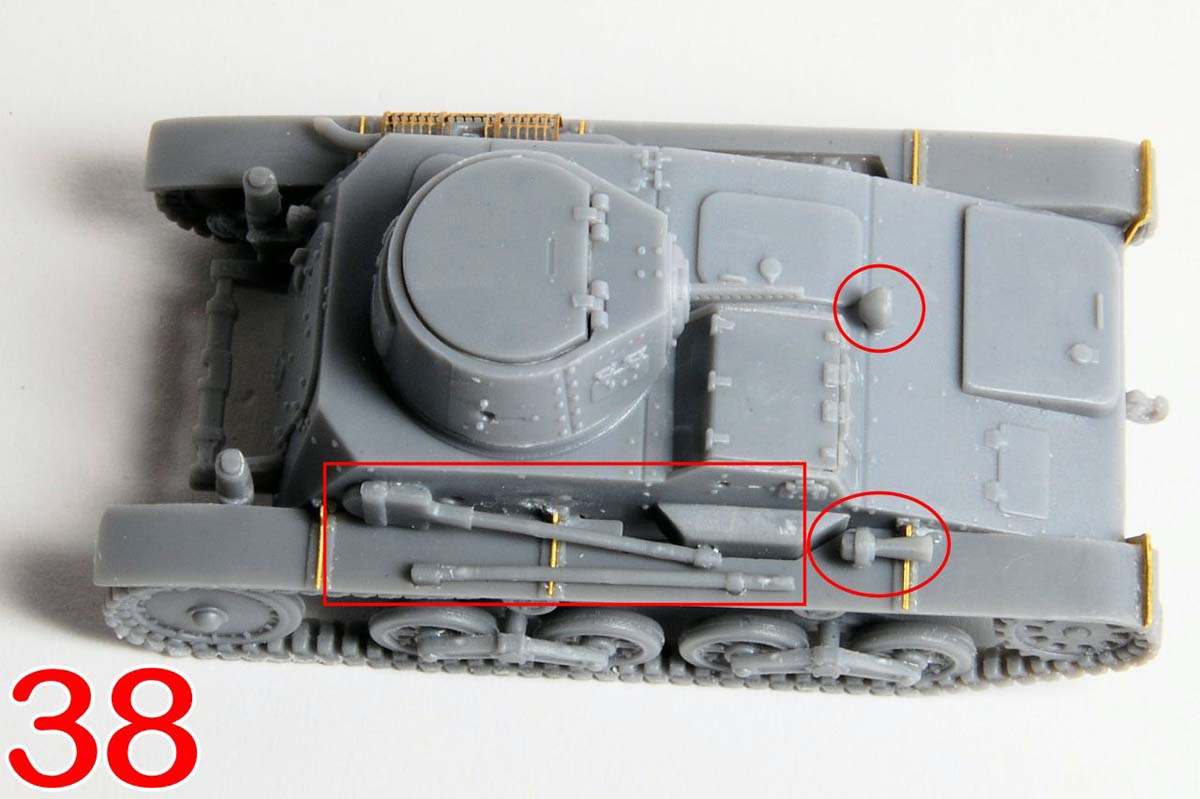
The mounts for the return rollers are very tiny but shaped so as to be easily handled with tweezers without too much risk of them launching into the void photo 13 shows them going in. Turning to the right side, a small bulge is added next to the driver position (A in photo 15) and in the same photo the external idler suspension arm has been added to the left rear (B), and the tow hook to the front (C). The idler suspension arms locate via a hole in the body, that on the left being slightly too small and needing to be enlarged slightly. The holes are triangular so that the arms locate at the right angle, but enlarging the hole spoilt that, but the alignment should in any case be checked against the track units to make sure the idlers engage with their mounts. Standing out beyond the idler suspension arms is the rear tow bar, cemented in place in photo 16, in the centre of which (photo 17) is added the rear tow hook. Also visible in photo 17, ringed, is the rear lamp which is again tiny and quite hard to handle, but I managed to position it using the blob of blu-tack on a cocktail stick method. A further detail added to the rear is two brackets that appear to brace the idler arms against the rear plate, one is ringed in photo 18, and note that the instructions transpose the numbers of these parts, D7 and D8.
The final detail to be added in step 3 is a photo etched part, PE-4, which I think is a registration plate and would appear to match up with decal 5. However, checking photos of Type 94 rear ends I couldnt see any examples that appeared to include such plates. The instructions indicate it is to be attached in the centre at the bottom of the rear plate, which would result in it being mostly obscured by the tow bar, and I think if you do want to use it then it would more likely attach further up on the left side of the rear, near the lamp. Note also that decal 5 and the plate are not shown in the finishing instructions. My conclusion was to leave it in the box.
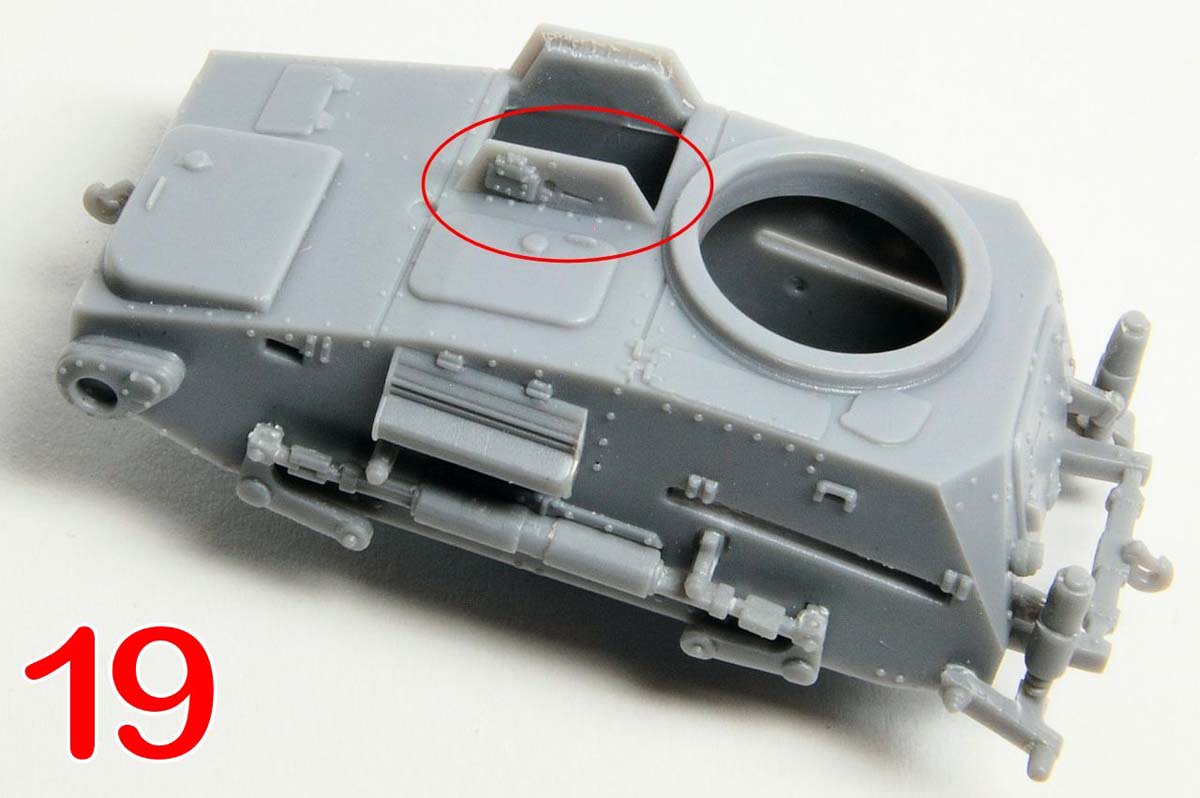
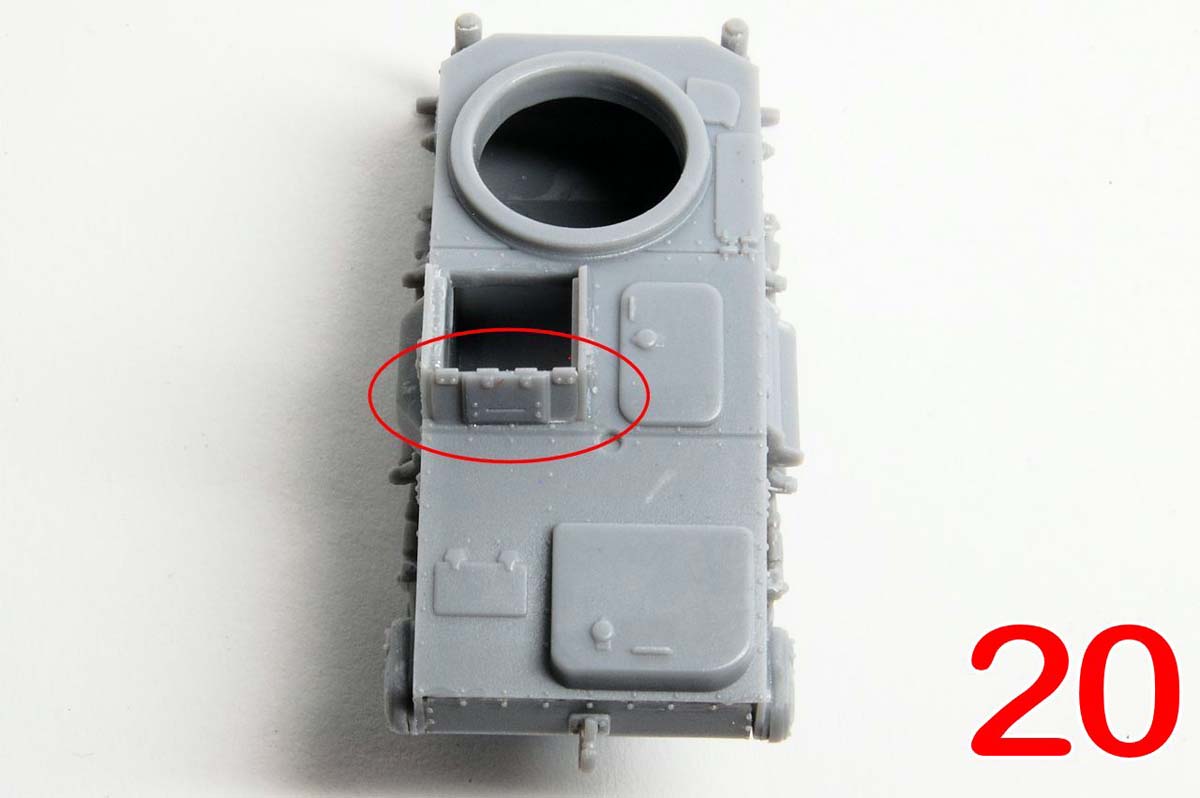
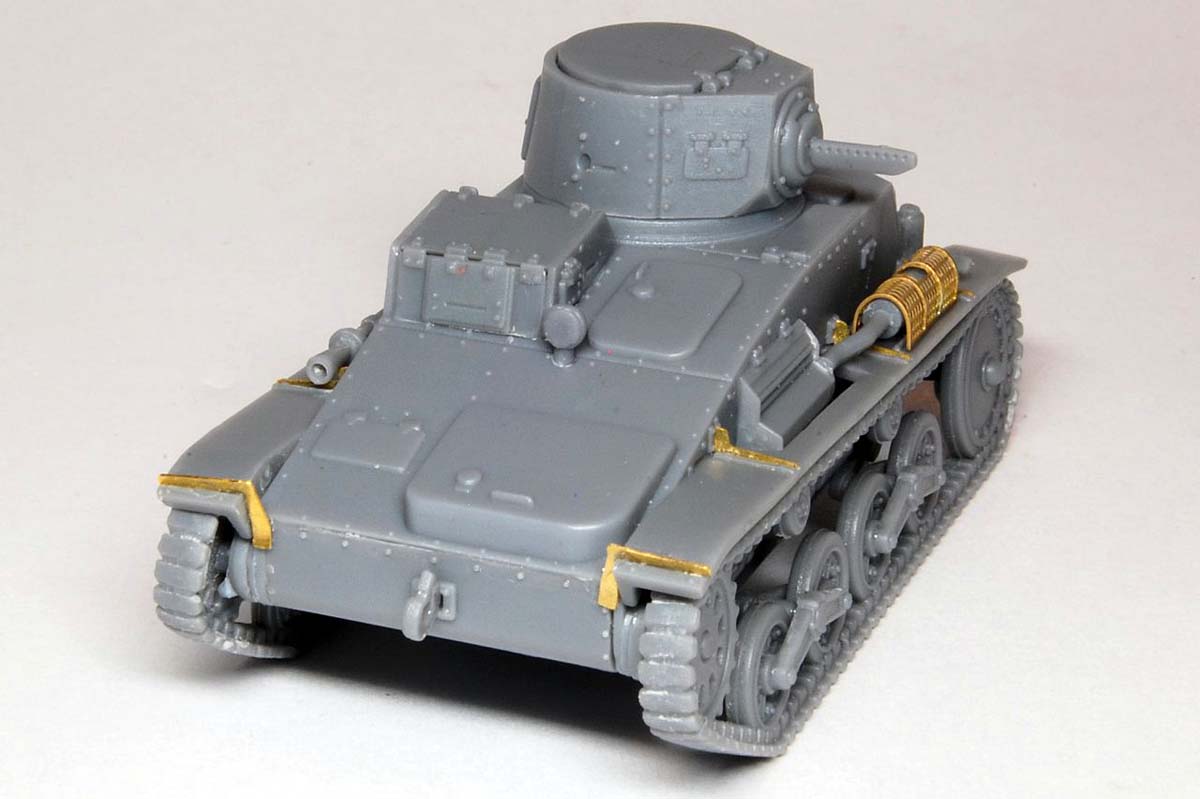
Moving on to step 4 we assemble the drivers compartment from three parts which fit together well, although the usual care is required when building up such box structures to ensure that the edges all align, and note another mis-numbered part is the drivers hatch, which should be B13, not 17. I suggest that the assembly sequence should be as shown in photos 19-21: side plate, front plate, then hatch top.
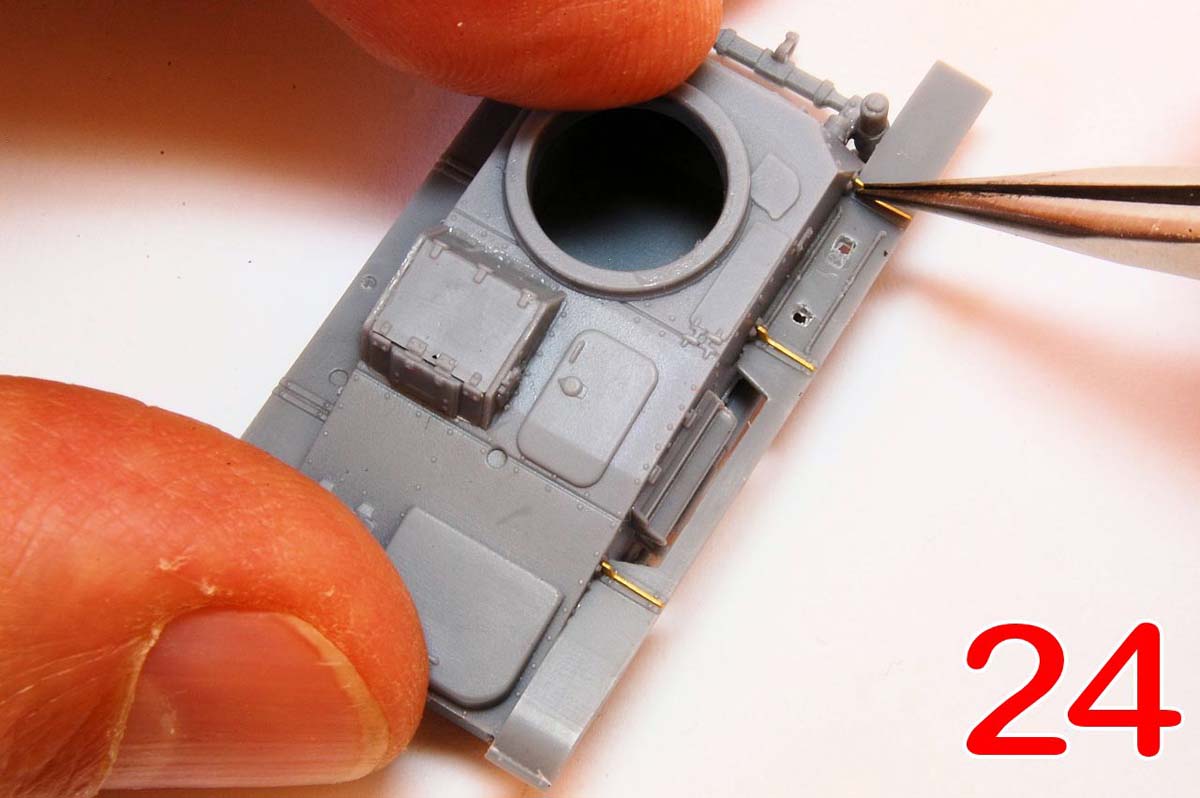
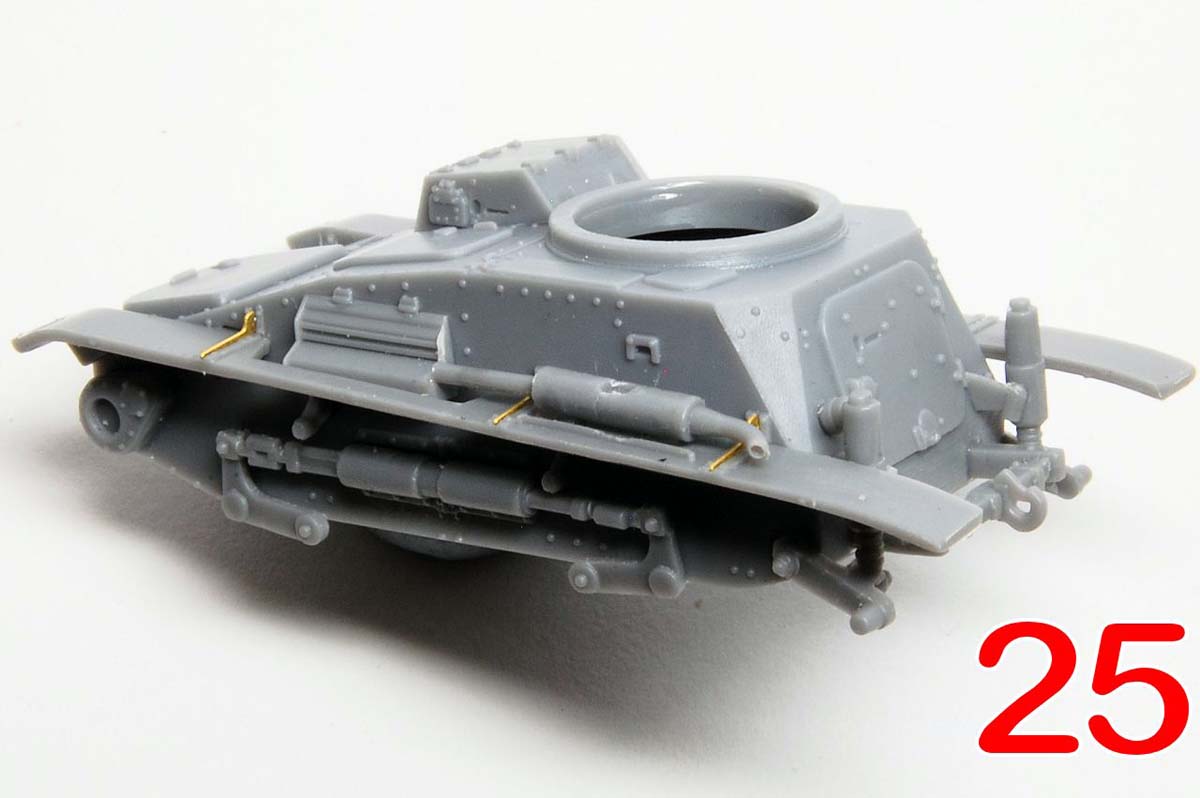
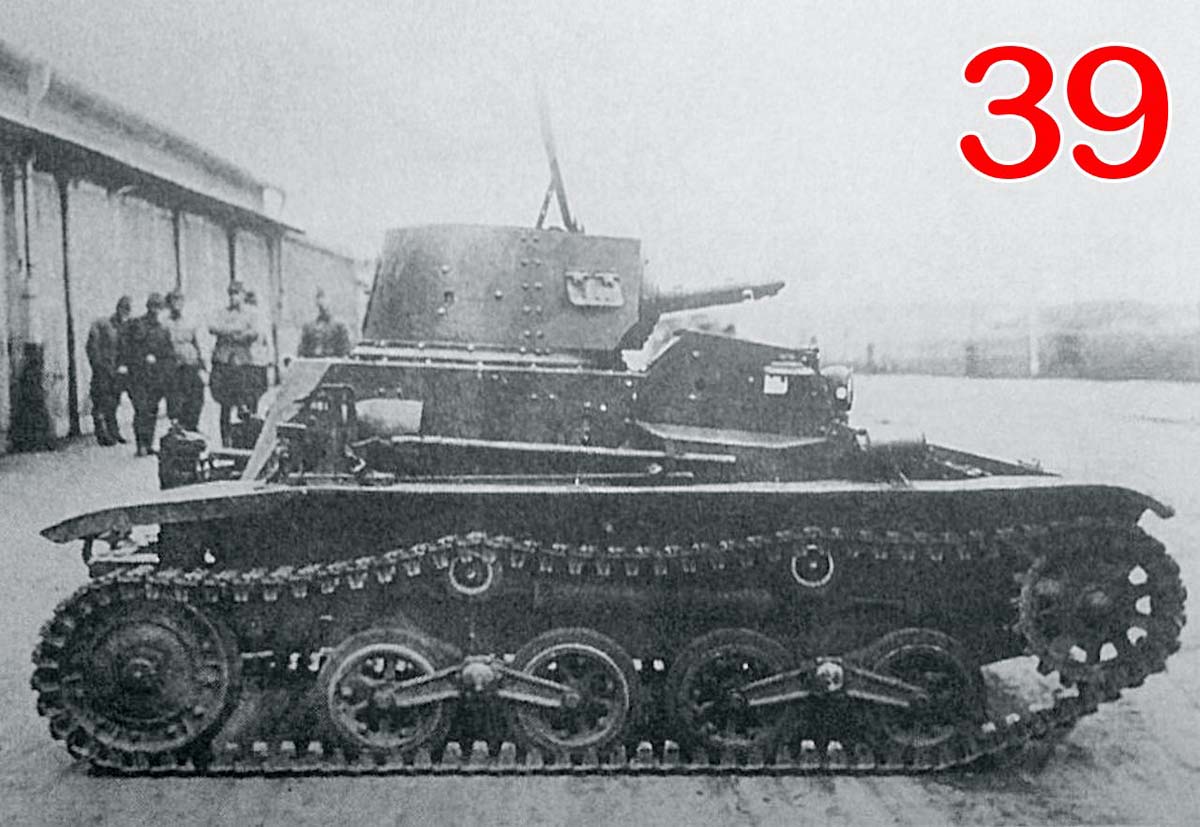
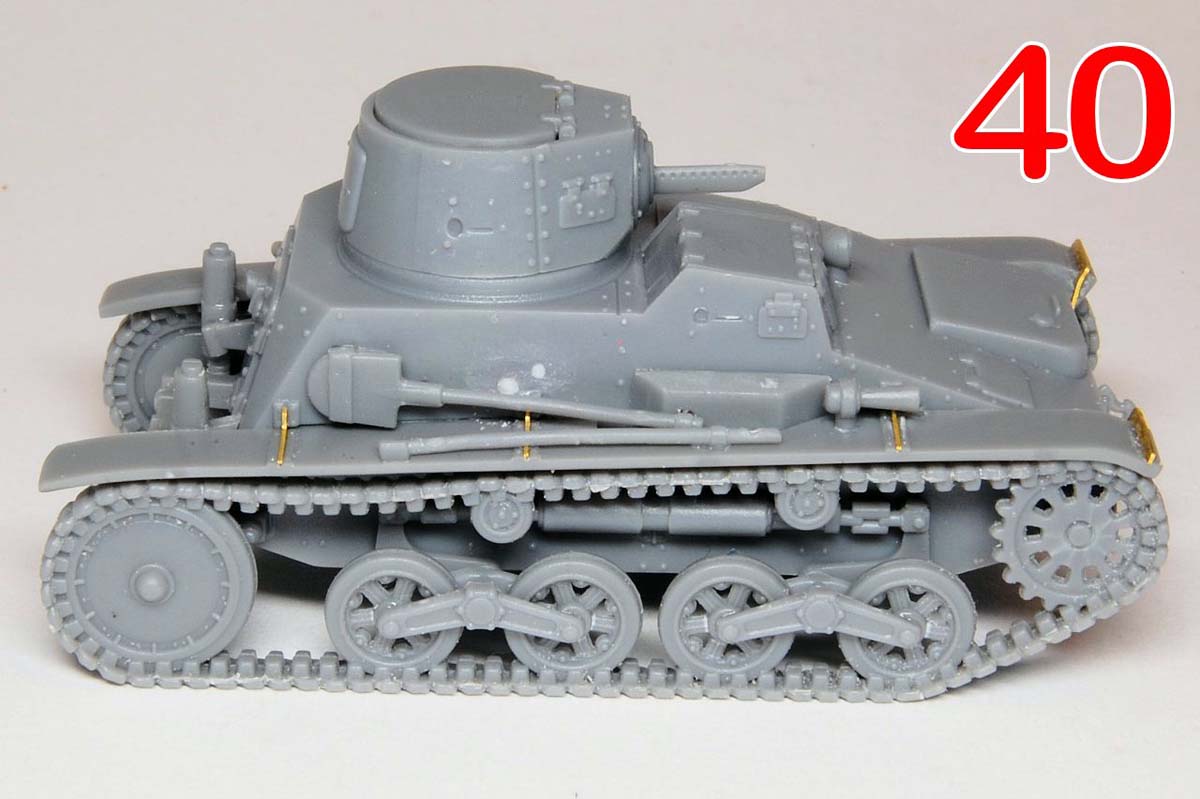
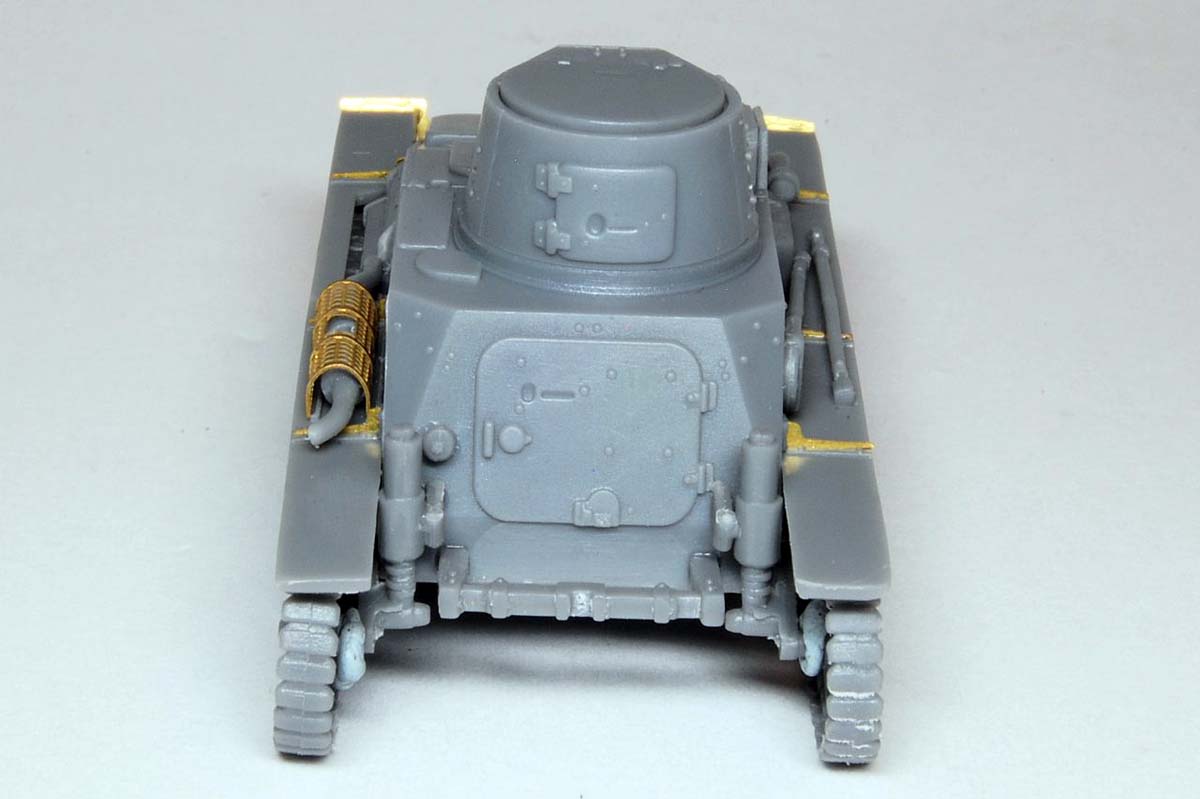
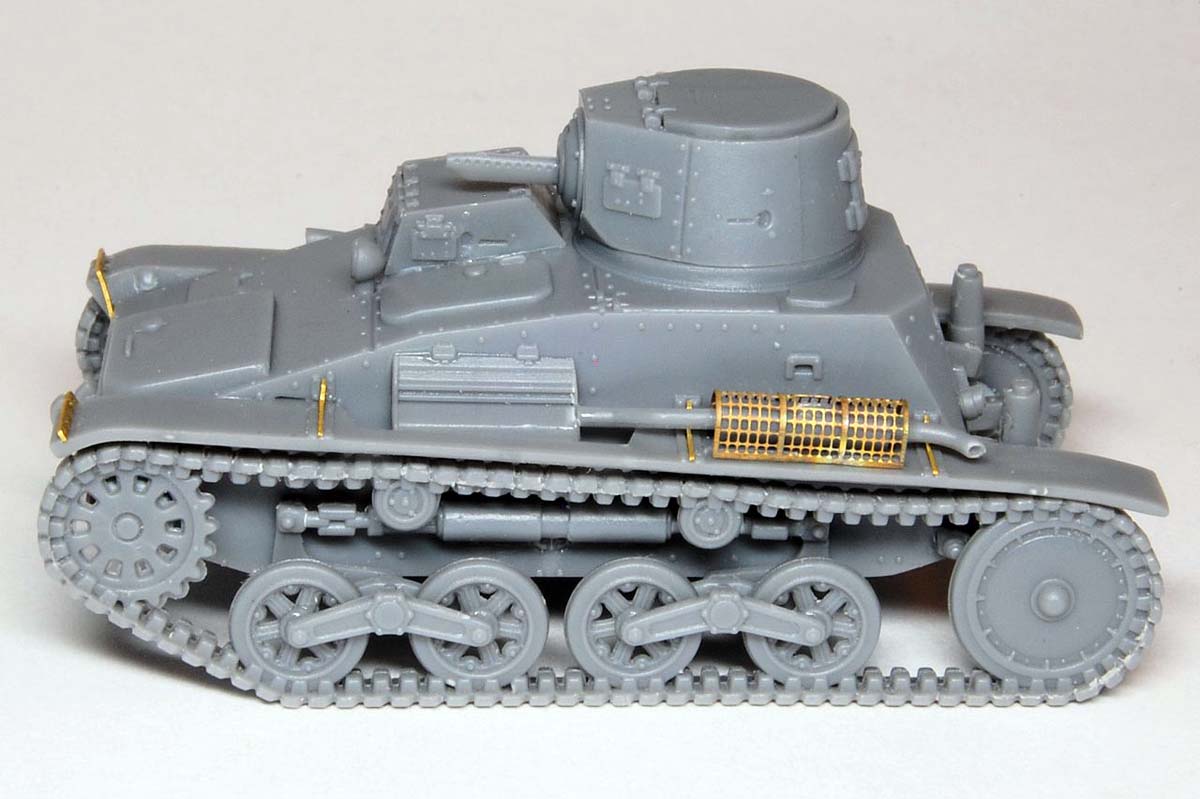
The track guards locate very securely into a big slot (photo 22) just taking care not to bend the right hand item when cleaning it up. Thinning down the edges of the track guards would probably be appropriate, although there should, I think, be a considerably thicker bent edge on the rear section of the track guard; compare the section above the idler on photos 39 and 40. The track guard brackets are on the PE sheet, and should be added to the left side (photo 24), before the exhaust muffler, the front of which joins to the side of the cooling louvre, and the open end of which I drilled out a little (photo 25). This step includes the addition of the exhaust mesh cage, but I chose to leave this to the end and in any case it makes sense to paint it separately.
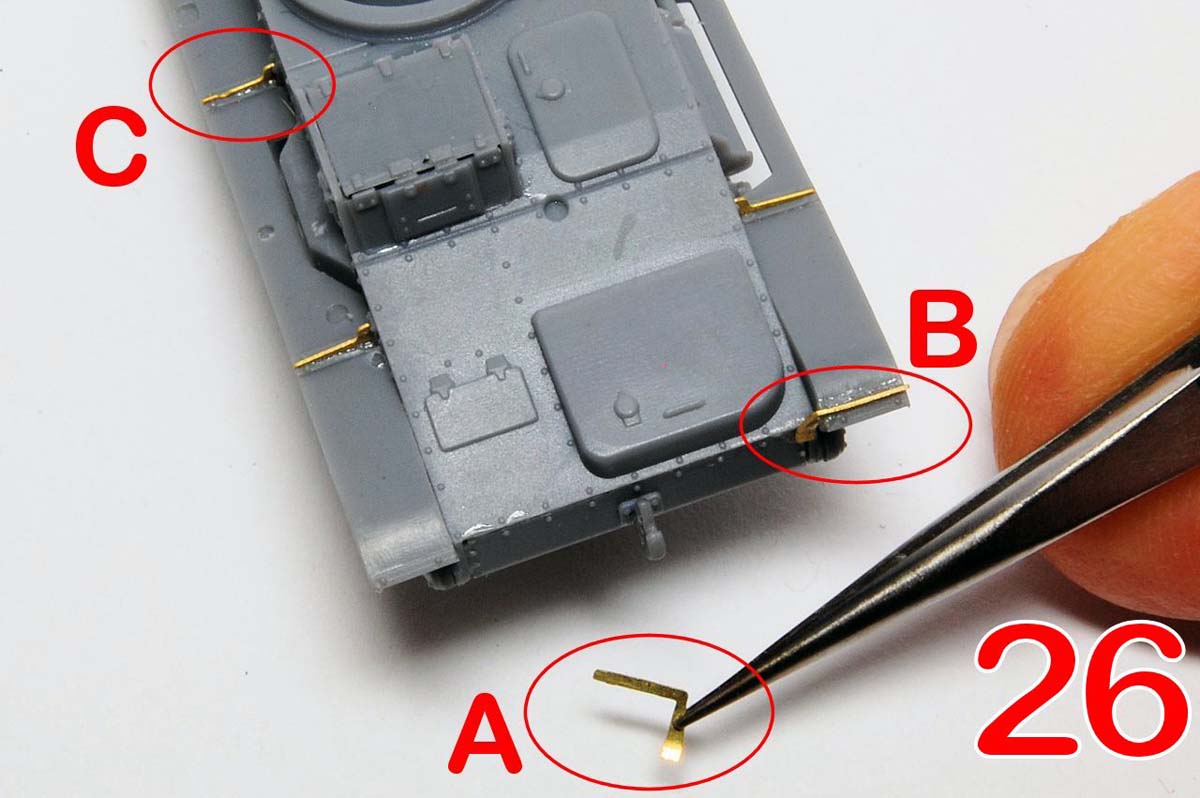
The brackets on the right track guard are added in step 5, noting that the slightly different central bracket is very thin at the end (photo 26, C). The brackets at the very front (photo 26, A, B) need to be slightly bent at the lower end to make contact with the front plate, something that is shown, but almost unnoticeably, in the instructions.
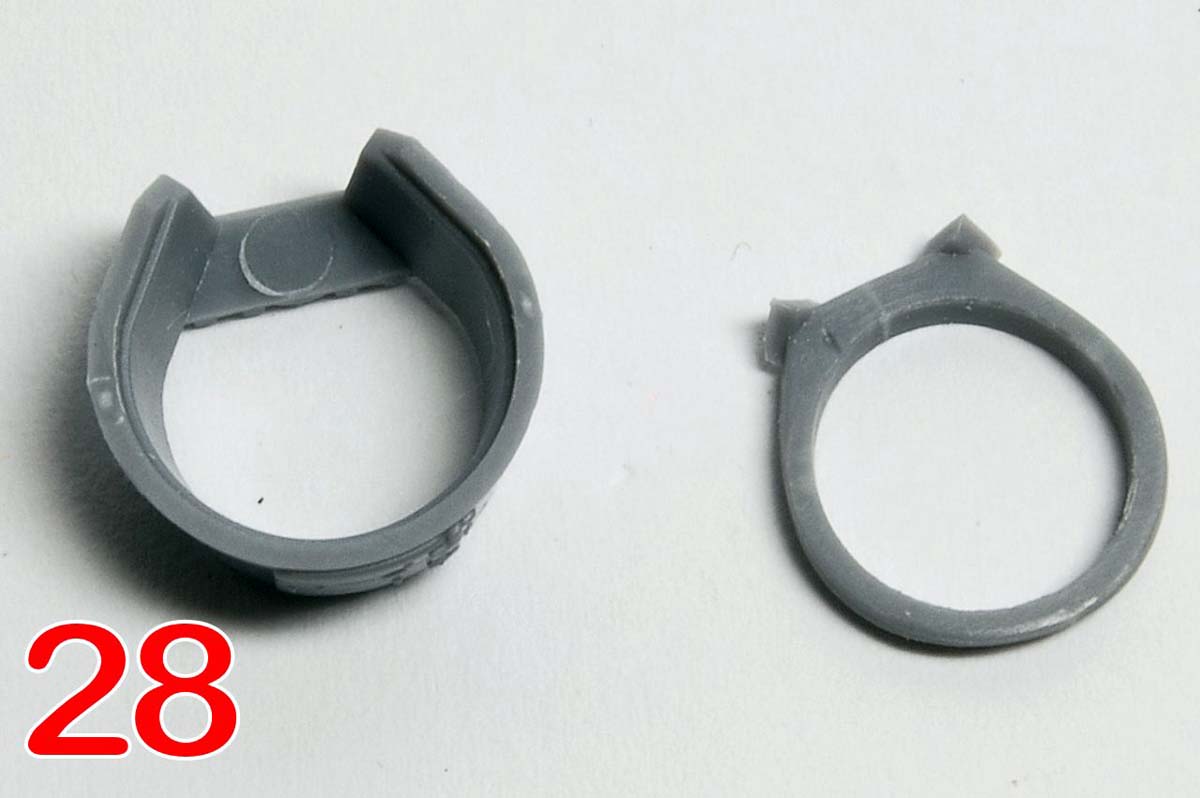
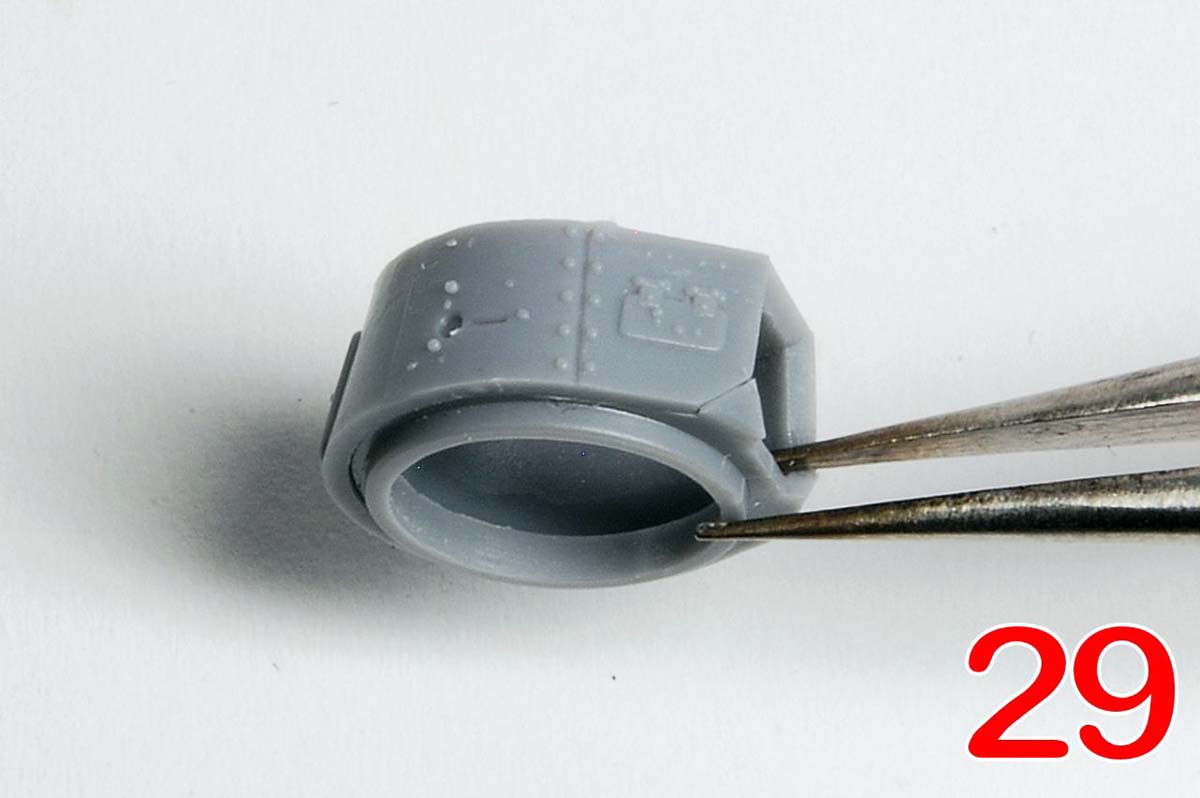
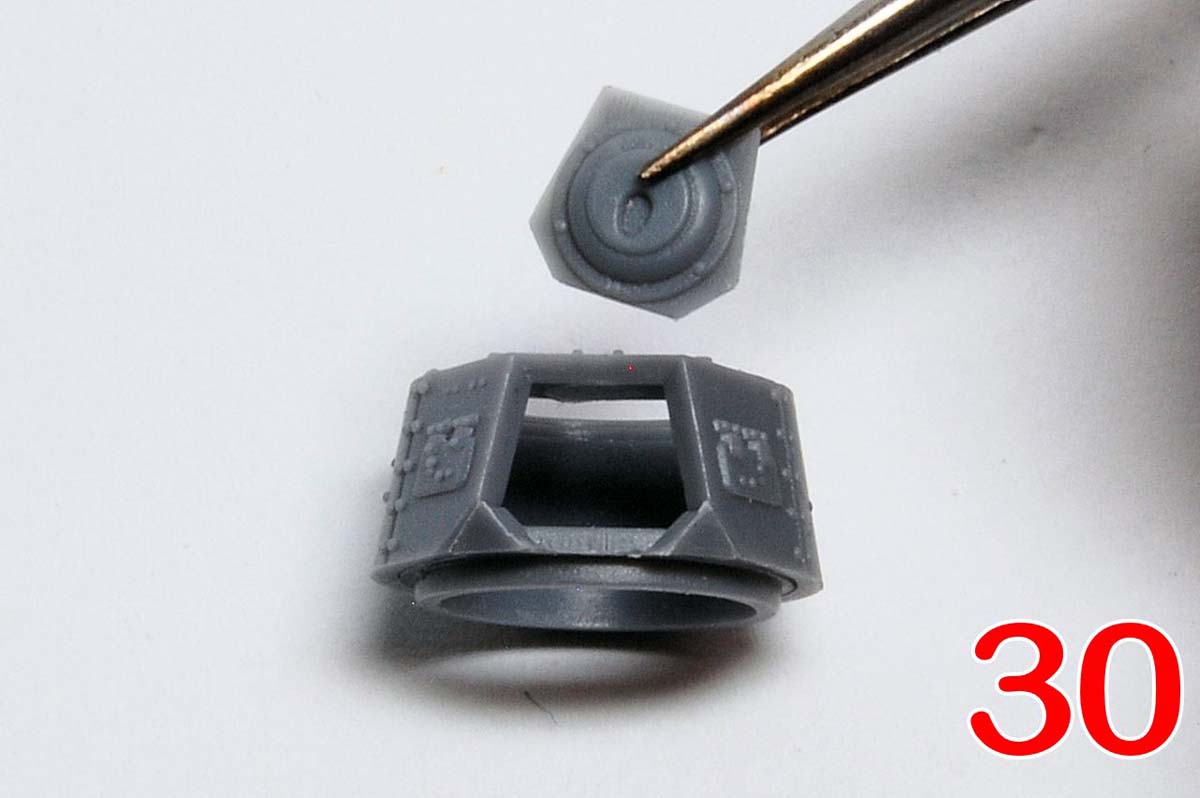
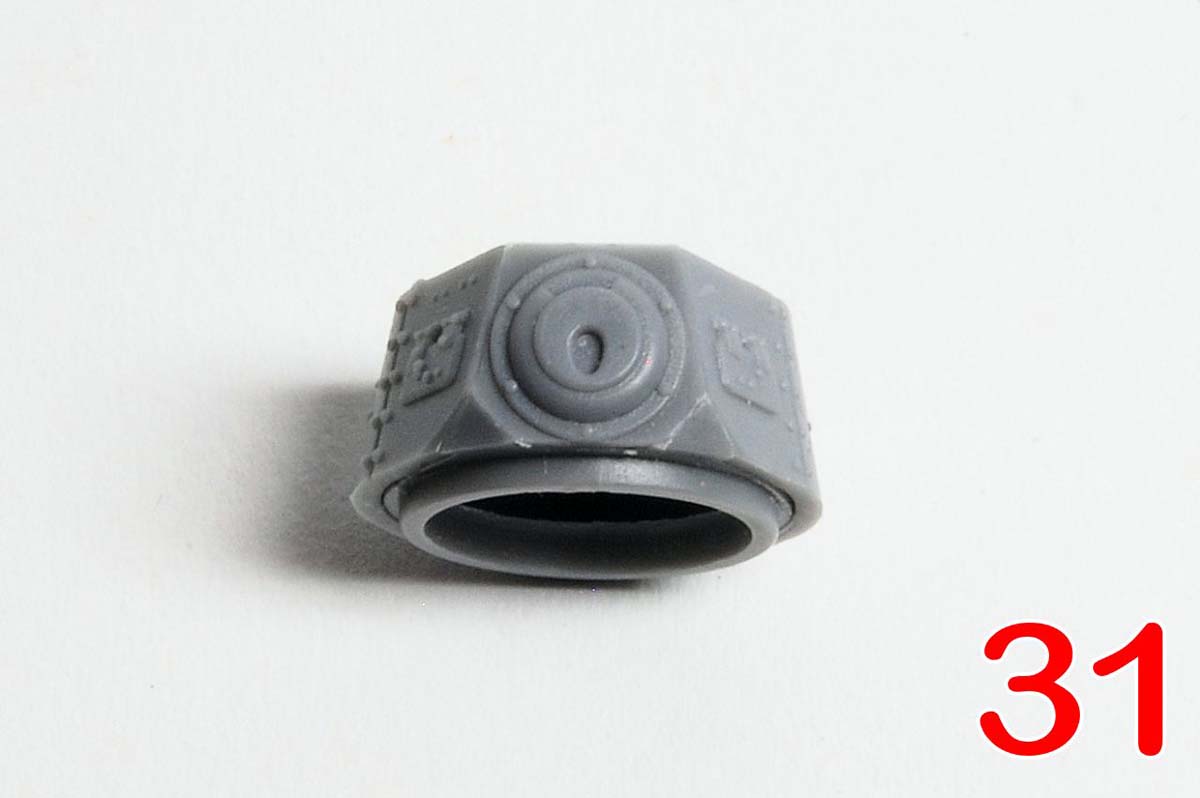
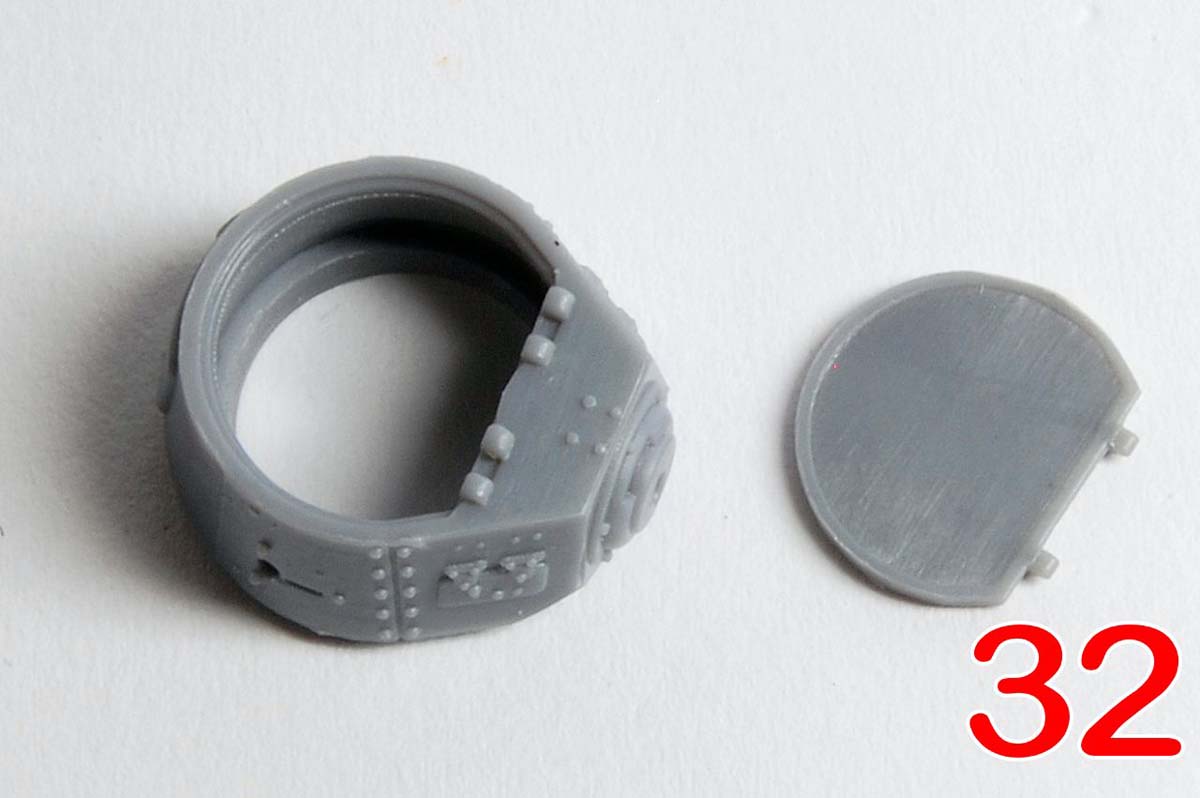
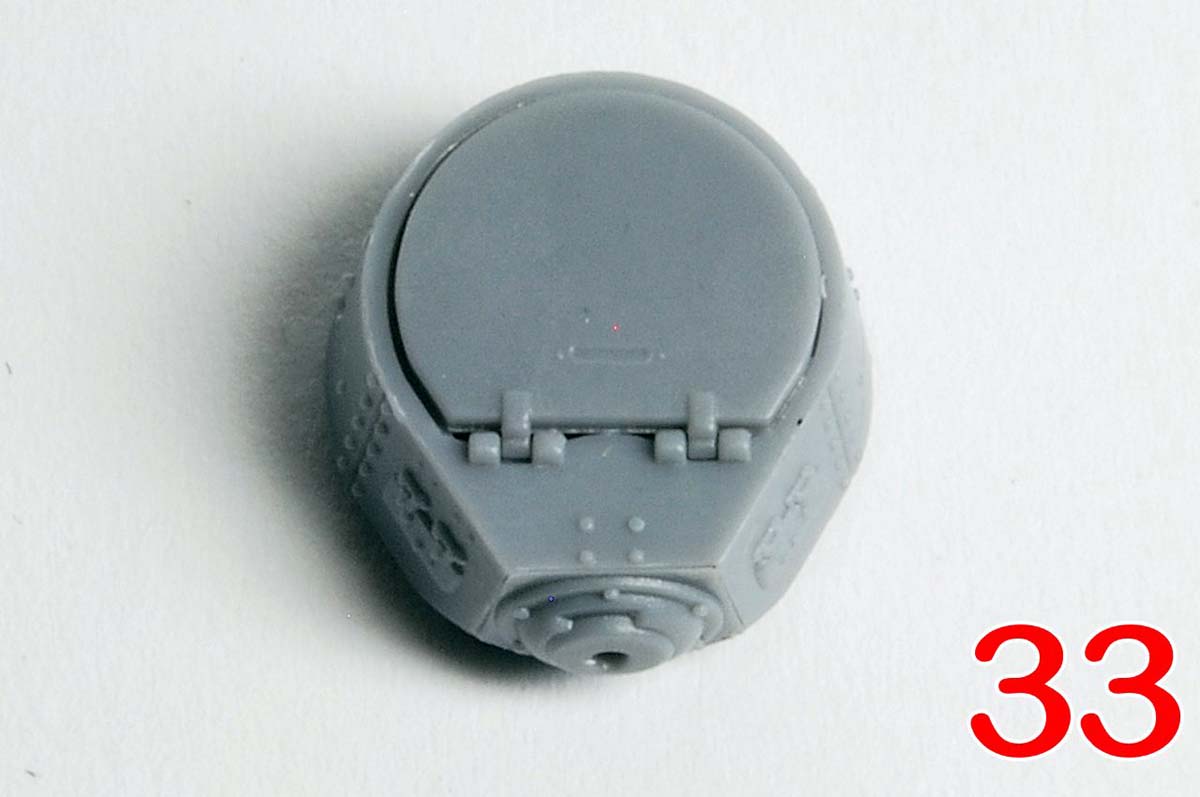
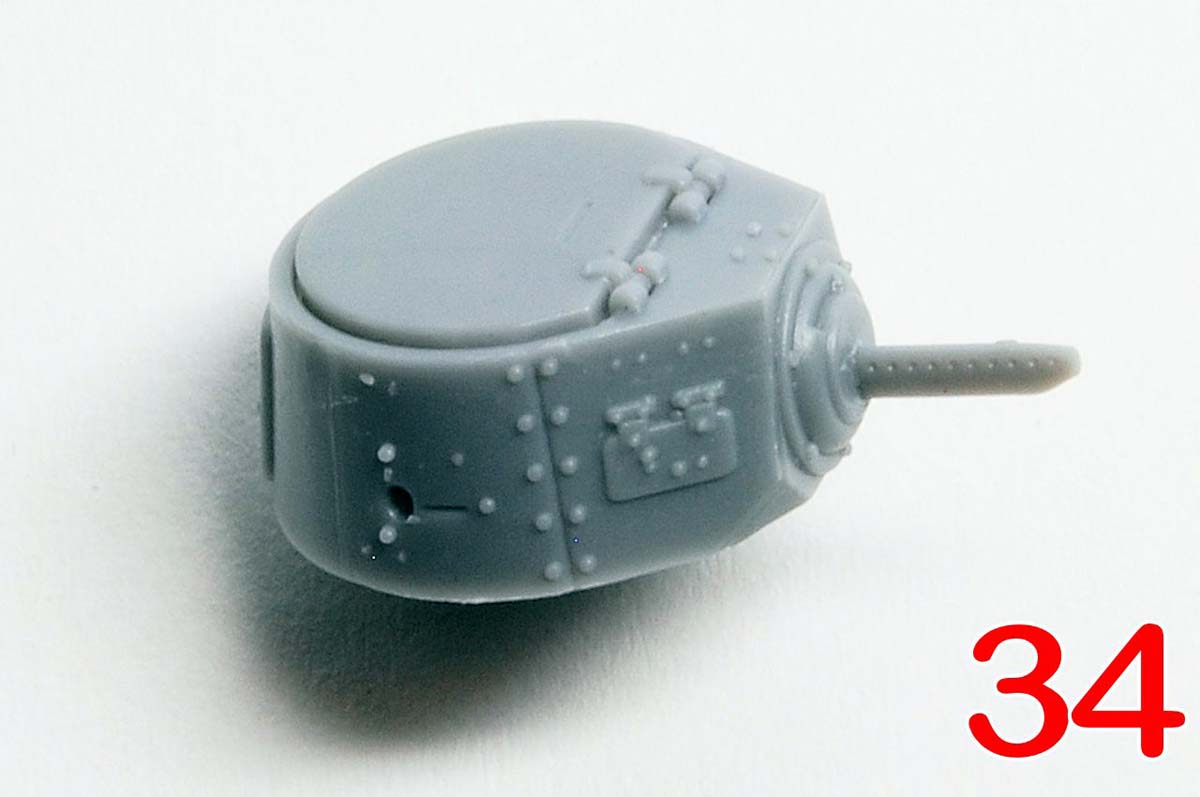
Moving to the turret, the turret ring and superstructure fit well (photos 28, 29) as does the machine gun mantlet (30, 31) and the turret hatch (32, 33). The commanders hatch is shown as optionally being fitted open in step 7, although as is common, the hatch underside has no detail other than the ridge around the edge, which is correct, if not as deeply dished as I think it should be, and there should also be a handle / locking mechanism of some kind, perhaps not too difficult to scratch. The small rectangle embossed near the hinge is, I think, a vision slit for the commander to use with the hatch open and acting as a shield, and this could be carefully cut out. Leaving the hatch open however opens up further issues, as the only interior detail provided is the breech end of the machine gun; the usual option would be to add a figure to fill the void, but good luck with sourcing a decent 1/72 Japanese tank commander So, with the hatch cemented down, I add the machine gun (photo 34).
The photo-etched exhaust cover is a well-executed piece of mesh (photo 35) and I found that a cocktail stick was the right diameter to bend it around (photo 36). Very nice it looks too when in place (photo 37). A horn is to be added to the right track guard, although sometimes seems to be missing from photos of the real thing, but I added it as instructed and drilled the opening out a little, and also added the front lamp (photo 38). Three separate tools are included, a rod, a shovel and a pick, all mounting on the right track guard. The pick broke in two places, and checking photos, this was again something that can safely be left off, although the location holes for it then need to be filled in (I like individual rather than moulded on tools, but wish designers wouldnt include location holes for them). Consequently I shortened the shovel mounting bracket as it no longer needed to accommodate the pick (photo 38, 40), and to me this seems to match better with our example in photo 39.
Conclusion
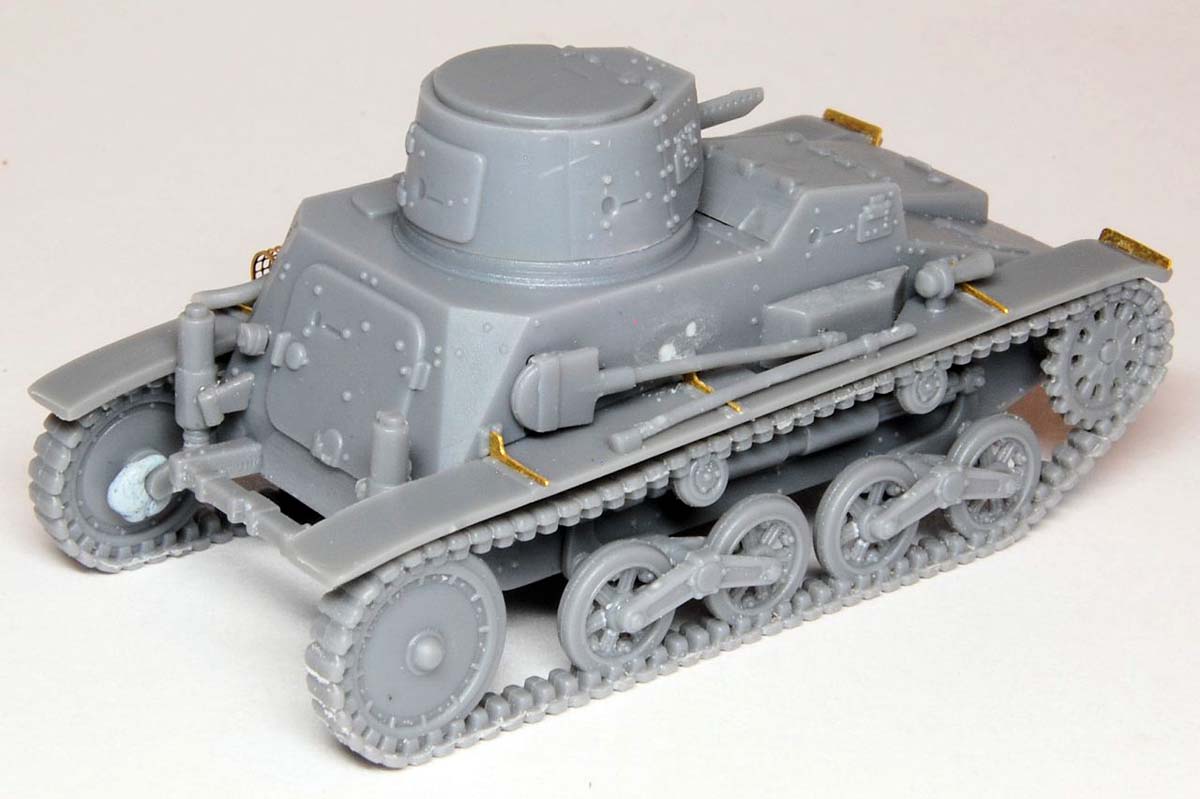
I enjoyed building this kit, it goes together quickly with a minimum of fuss and all of the parts fit well. I think a sensible balance has been struck between simplicity, while still providing a reasonable amount of detail. The quality of the moulding is very good, if not perhaps really top notch, but something to remember when looking at the photos is that the finished model is only 45mm long, so about half the length of most tanks, with the result that you are looking at a photo with double the magnification compared to a photo of, say, a Panther. The inclusion of the photo etch parts is a real plus, and they work well, particularly the exhaust guard, which is excellent and adds a lot to the final appearance. The presentation of the kit was fine, with good instructions and very decent colour painting guides; in a few places I could have done with a clear as-built picture of what I was assembling, and you never get a 3D view of the assembled rear of the model, as apart from step 3 when it is only half-built, all other views are from the front.
In terms of accuracy, the shape of the rear section of the track guards, as already mentioned, is perhaps the most noticeably incorrect aspect of the kit, though not hard to put right if you felt the need. The open / closed hatch conundrum appears here as with so many small scale kits its nice to have an openable hatch, but it really needs to come with some detail for the underside of the hatch itself, and could really do with a figure to make the most of it; at least the potential is there if you want it. The suspension arms at the rear are an area where there has been some simplification in terms of their shape, but still seem very acceptable, and then there is the relatively undetailed track faces; some may not like the integrated wheel / track units, but bearing in mind how fiddly separate tracks of this width might be to fit, I was quite happy with them and thought them well executed.
This kit can be had for around £8 in the UK, and although the model may be very small, it is top value modelling enjoyment, with the slide moulded hull, etched parts and two decal finishing options, producing an unusual vehicle that we havent previously seen in this scale. All I am missing is a tank commander
SUMMARY
Highs: Nice fit, easy to build, separate tools, loved the photo etch exhaust guard.Lows: Simplified track link faces; no detail for interior of hatch. Verdict: Fun and quick build, excellent value model of an attractive and unusual subject.
Our Thanks to IBG Models! This item was provided by them for the purpose of having it reviewed on this KitMaker Network site. If you would like your kit, book, or product reviewed, please contact us.
About Matthew Lenton (firstcircle) FROM: ENGLAND - SOUTH EAST, UNITED KINGDOM
Earliest model memory is a Super Sabre my grandmother bought for me around 1972. Have always dabbled in painting and making things, and rediscovered doing that with plastic in 2008. Vowed then to complete the 30 year old stash, and have made some progress. Hobby goes hand in hand with BBC Radio 3...
Matthew,
Very informative review of this barely inch and a half long model. The kit looks nicely detailed but the suspension leaves a bit to be desired. I can understand the small size being a limiting factor but other manufacturers have shown that a bit more can be achieved even with these more or less completely moulded suspensions.
Cheers,
Jan
FineMolds do this late version (kit no. FM19) and the early version (FM17). Supposed to be a decent kit, has PE parts and vinyl tracks and is still available - from Japan; eBay is probably your best bet.


Comments