Introduction
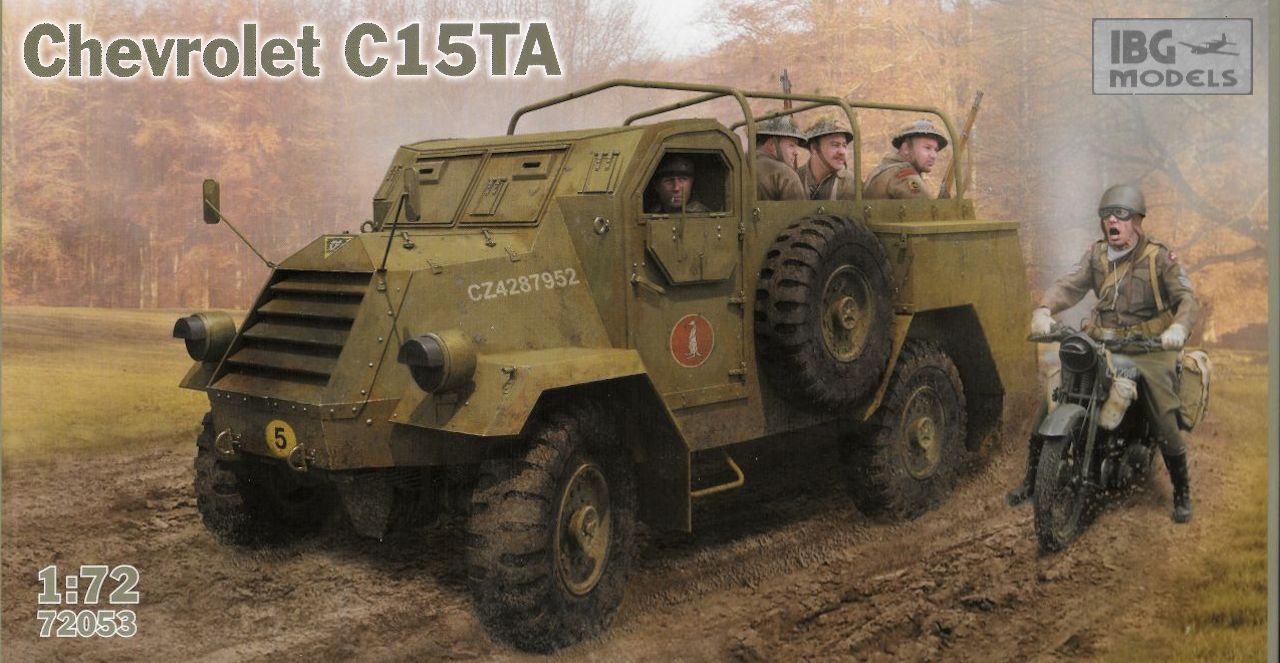
The C15TA was an armoured personnel carrier based on the C15 Canadian Military Pattern truck, almost 4000 of which were manufactured during 1943-45. Used by Canadian and British forces in NW Europe, a large number remained, post war, to be transferred to various European armies, in some cases remaining in service through to the 1960s. It was also supplied to South Africa and Malaysia, and saw service in Vietnam, as well as some of the actions in Africa conducted by Spain and Portugal.
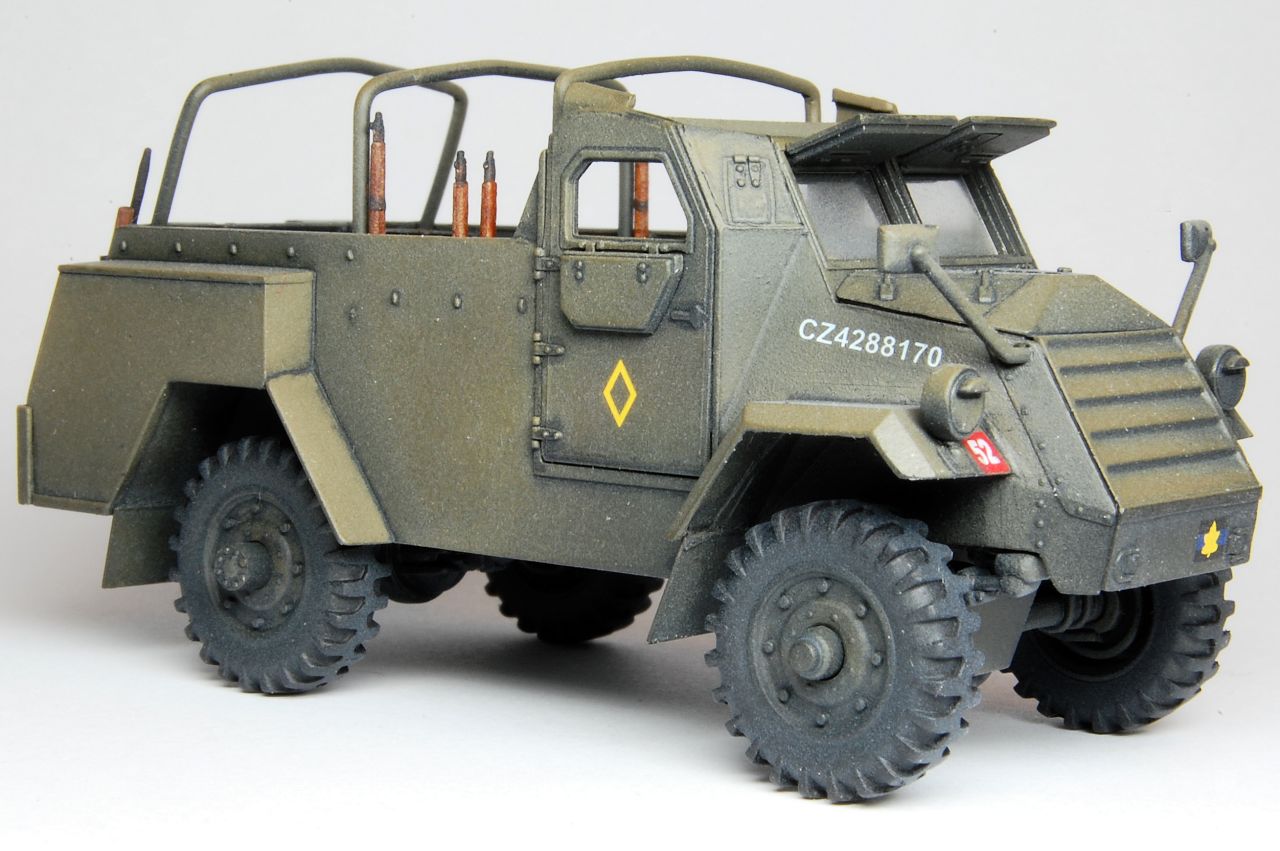
So a long history and lots of interesting possibilities, but IBGs small version of their earlier 1/35 release is ostensibly an example belonging to Canadian units in 1944. Ill describe the build and painting and look at a few accuracy issues along the way, but first lets reflect that this is the first time this noteworthy vehicle has been presented as a 1/72 kit.
Contents
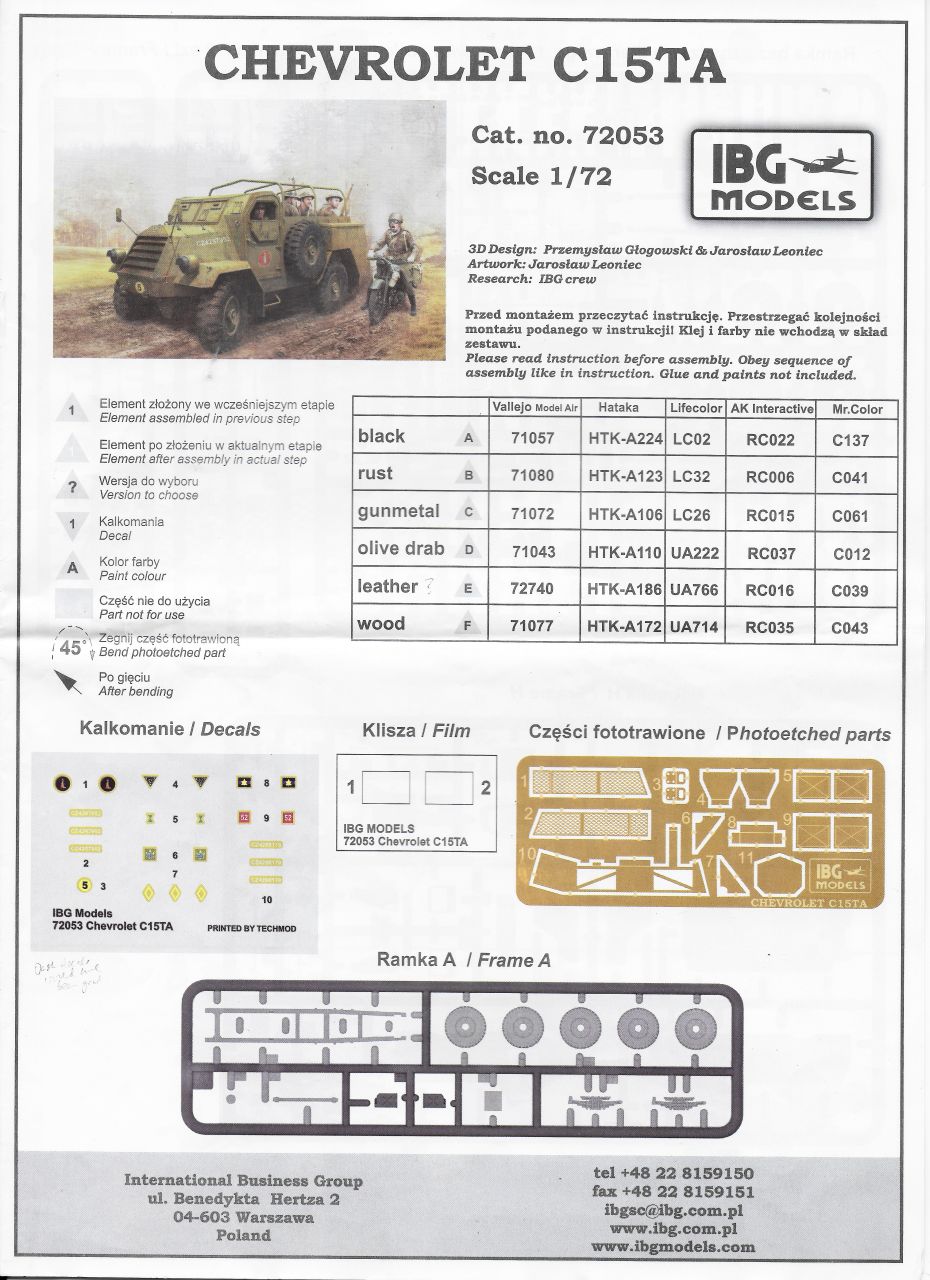
Striking art work tops a big tray type box containing the following:
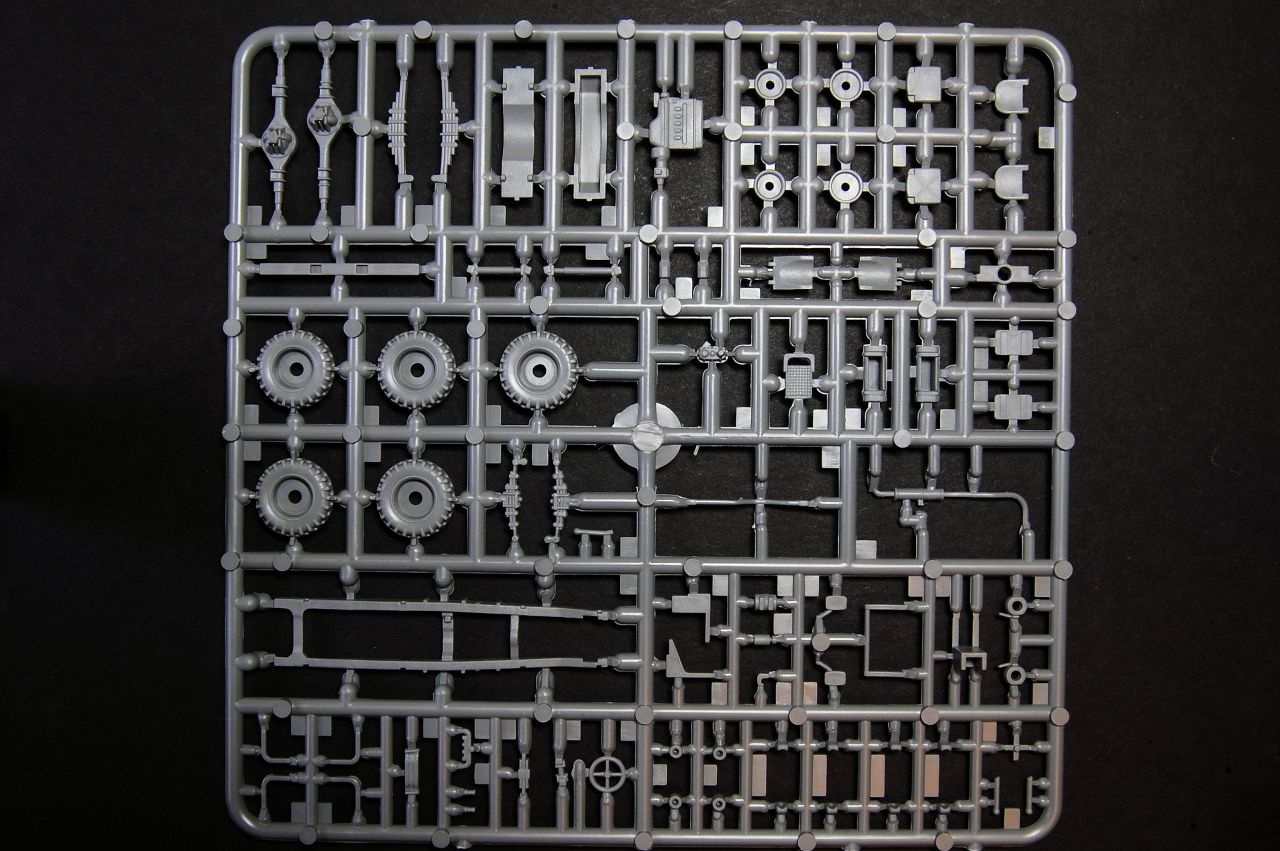
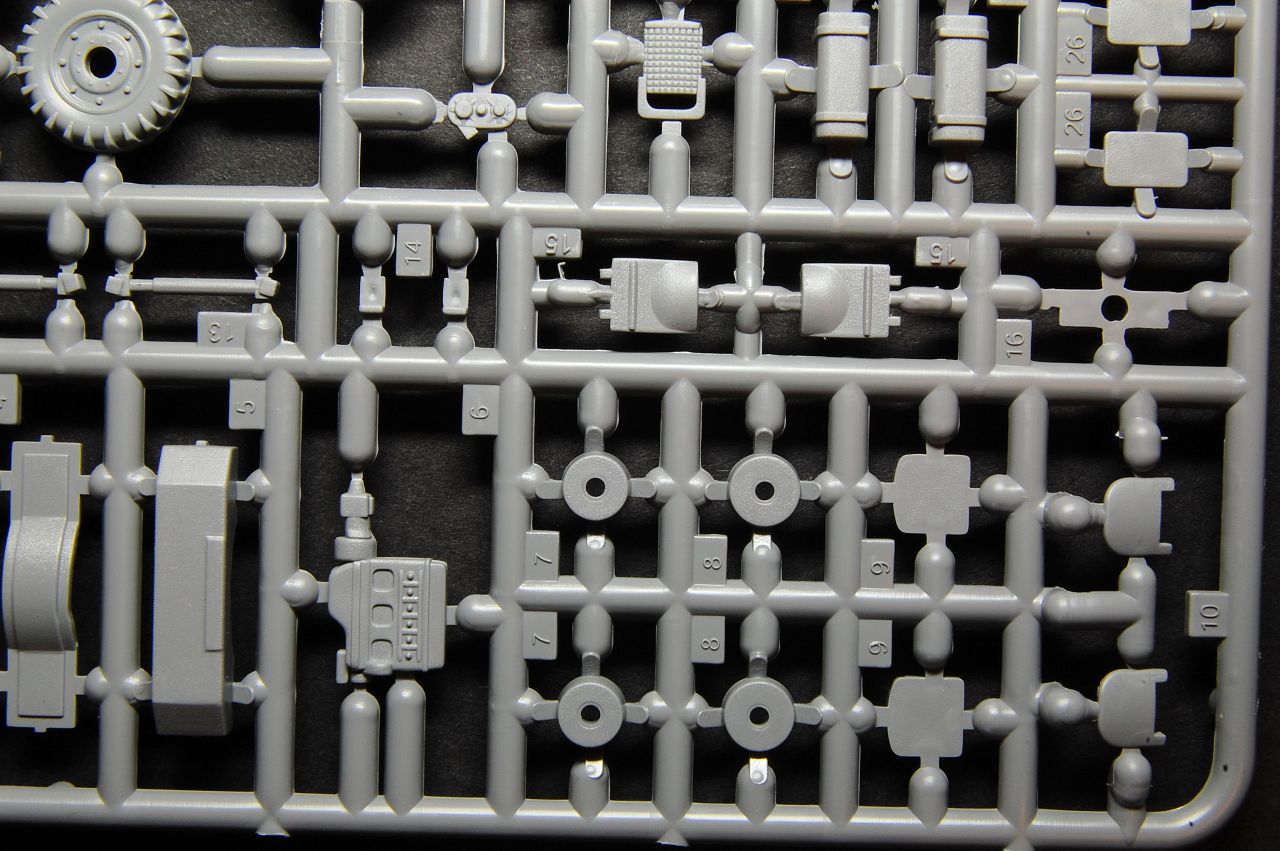
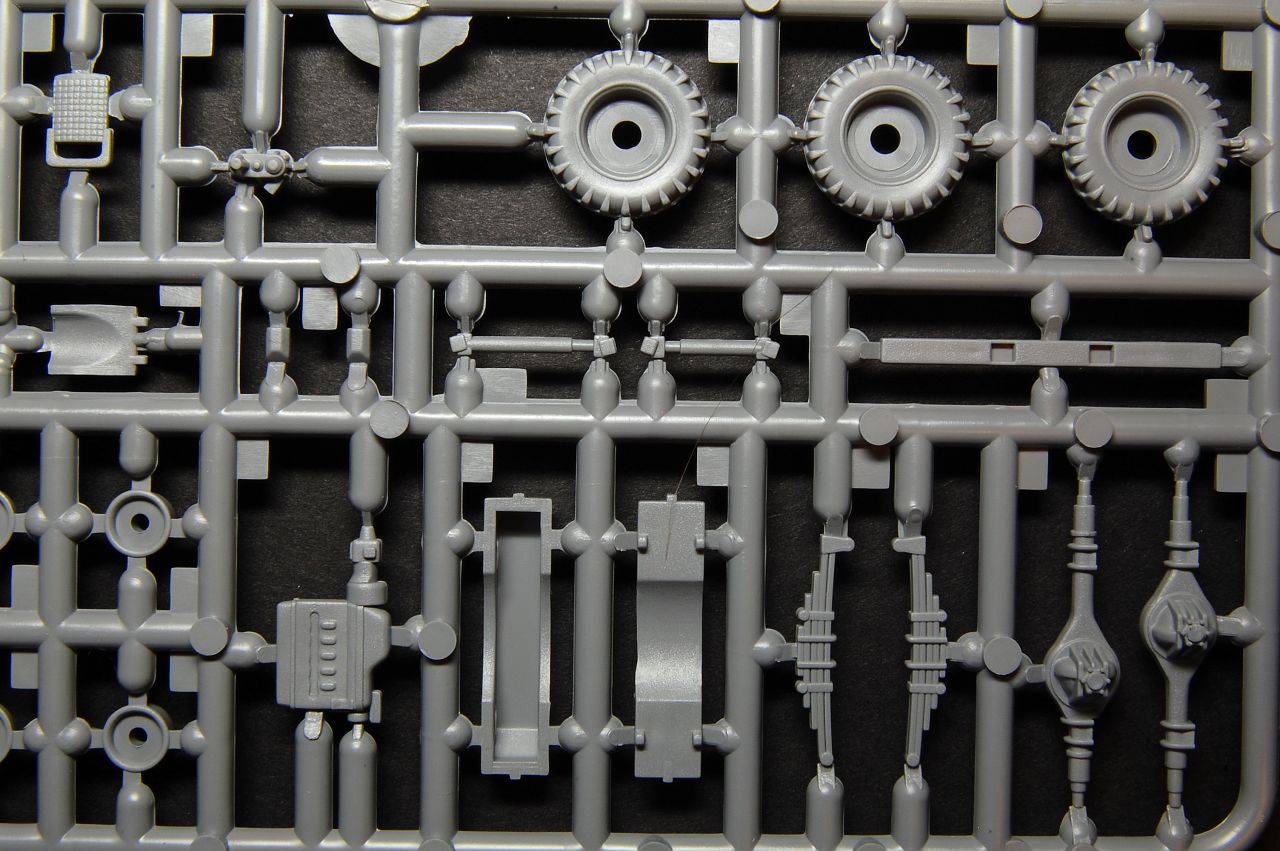
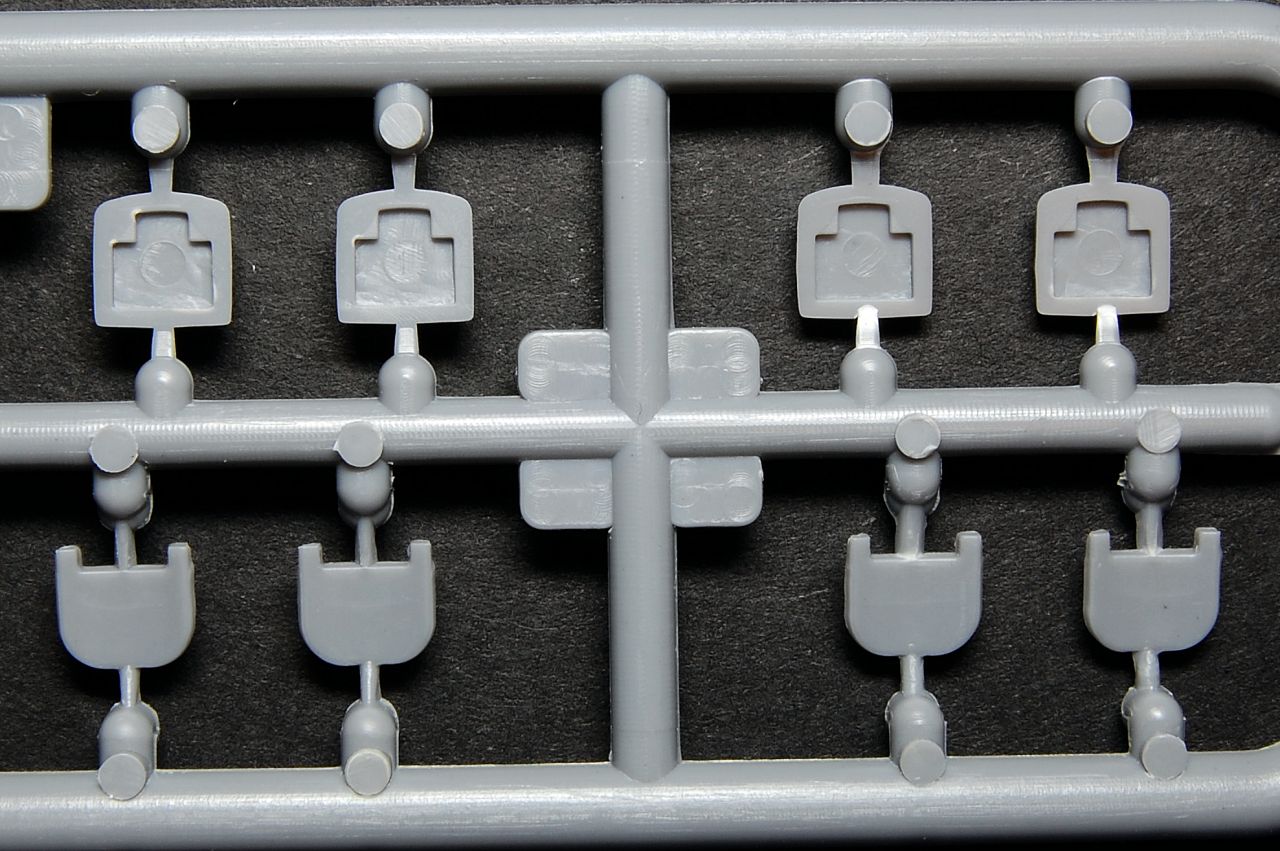
- Sprue with no letter: all of the chassis and wheels.
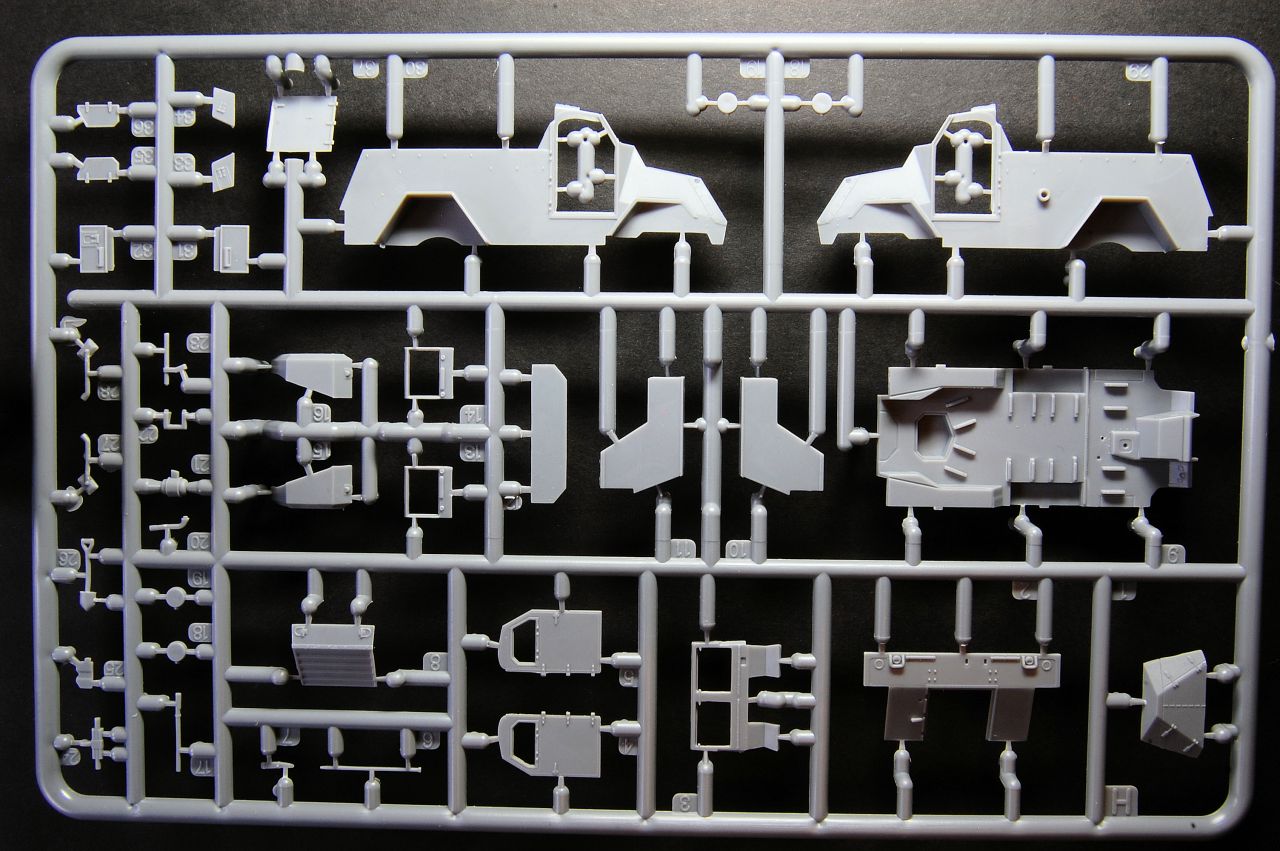
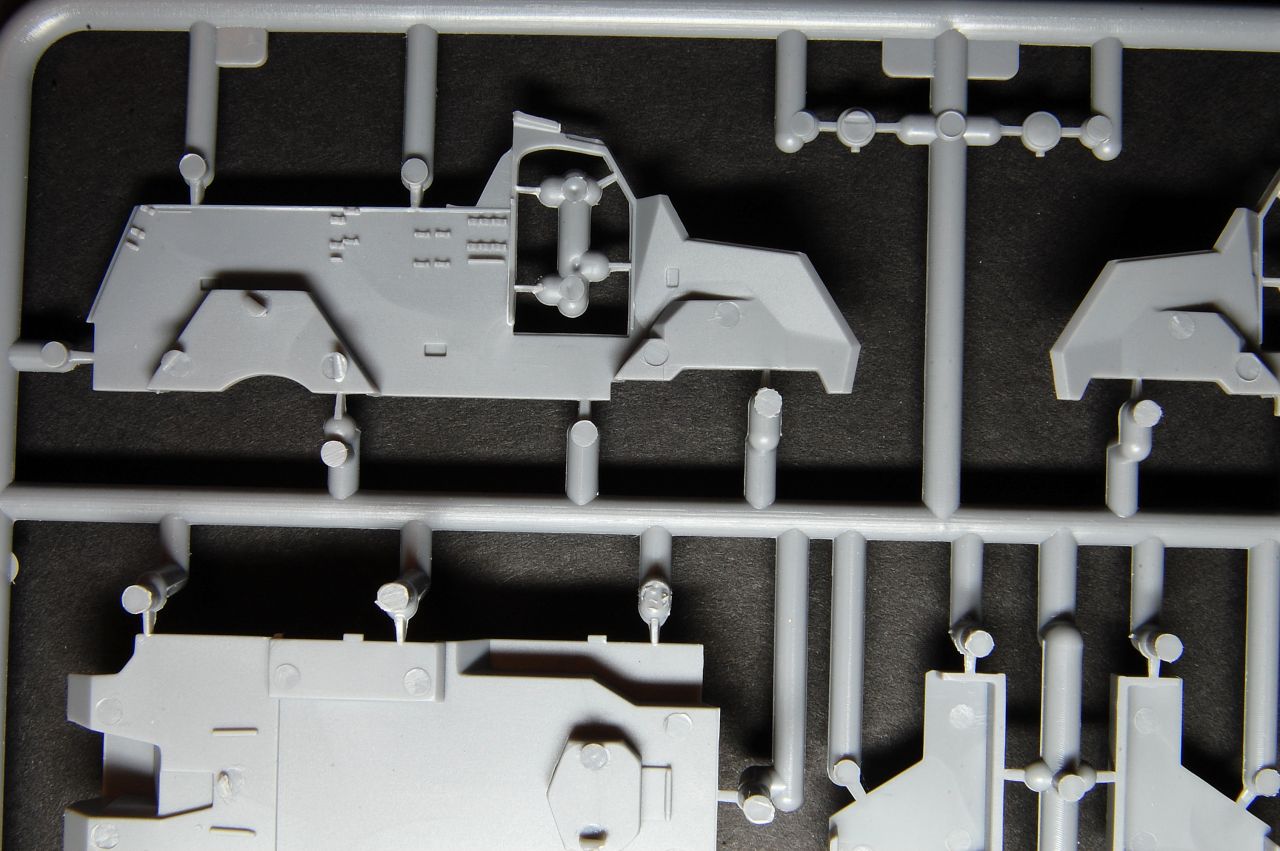
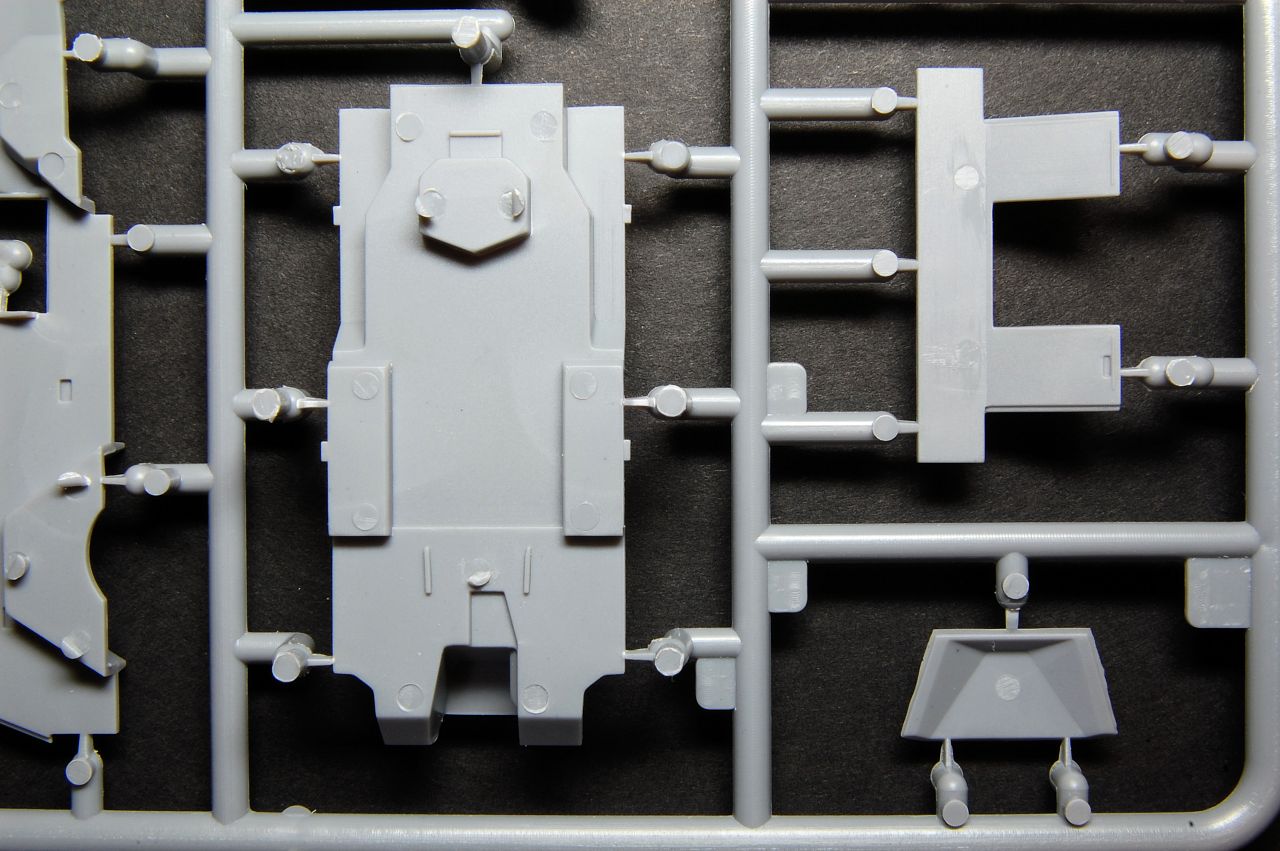
- Sprue H: Bodywork
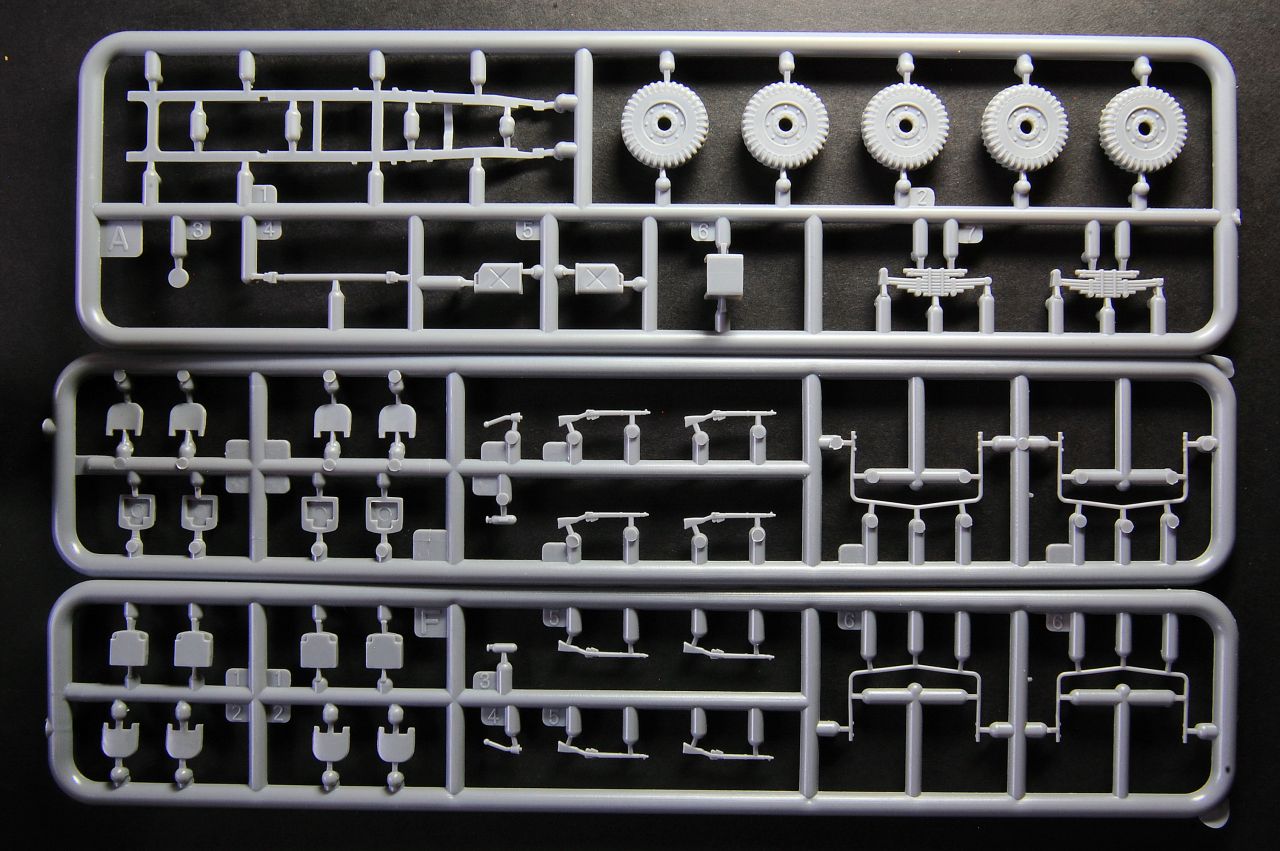
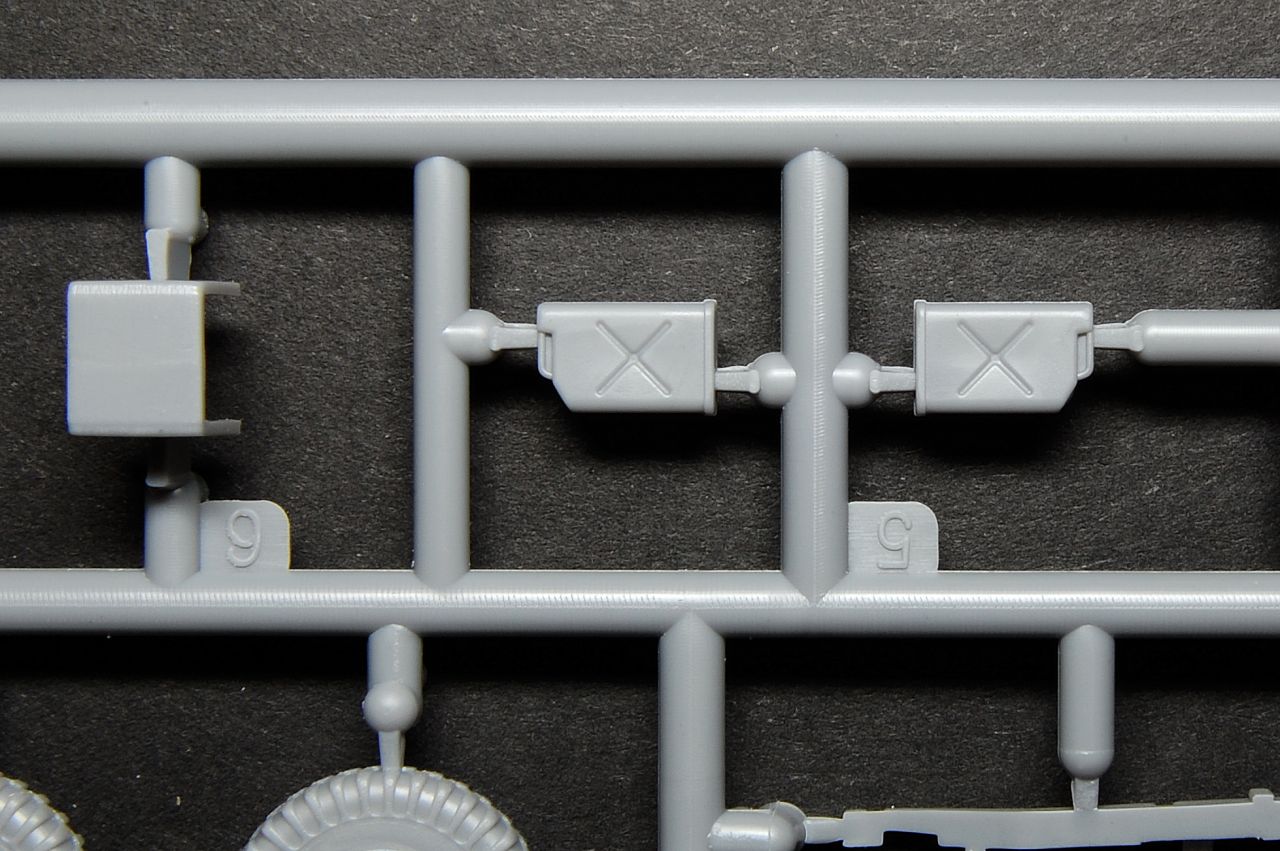
- Sprue A: Jerry cans x 2 everything else here is unused.
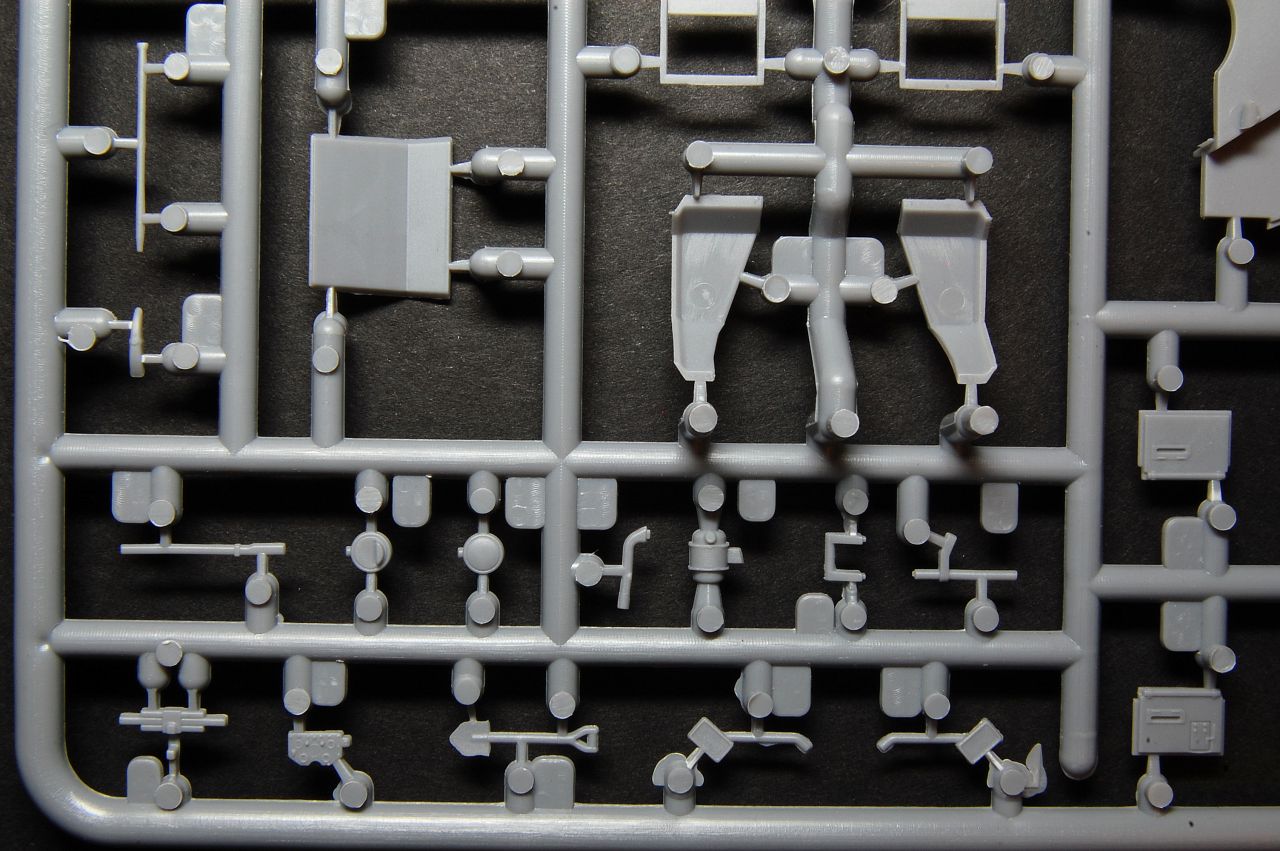
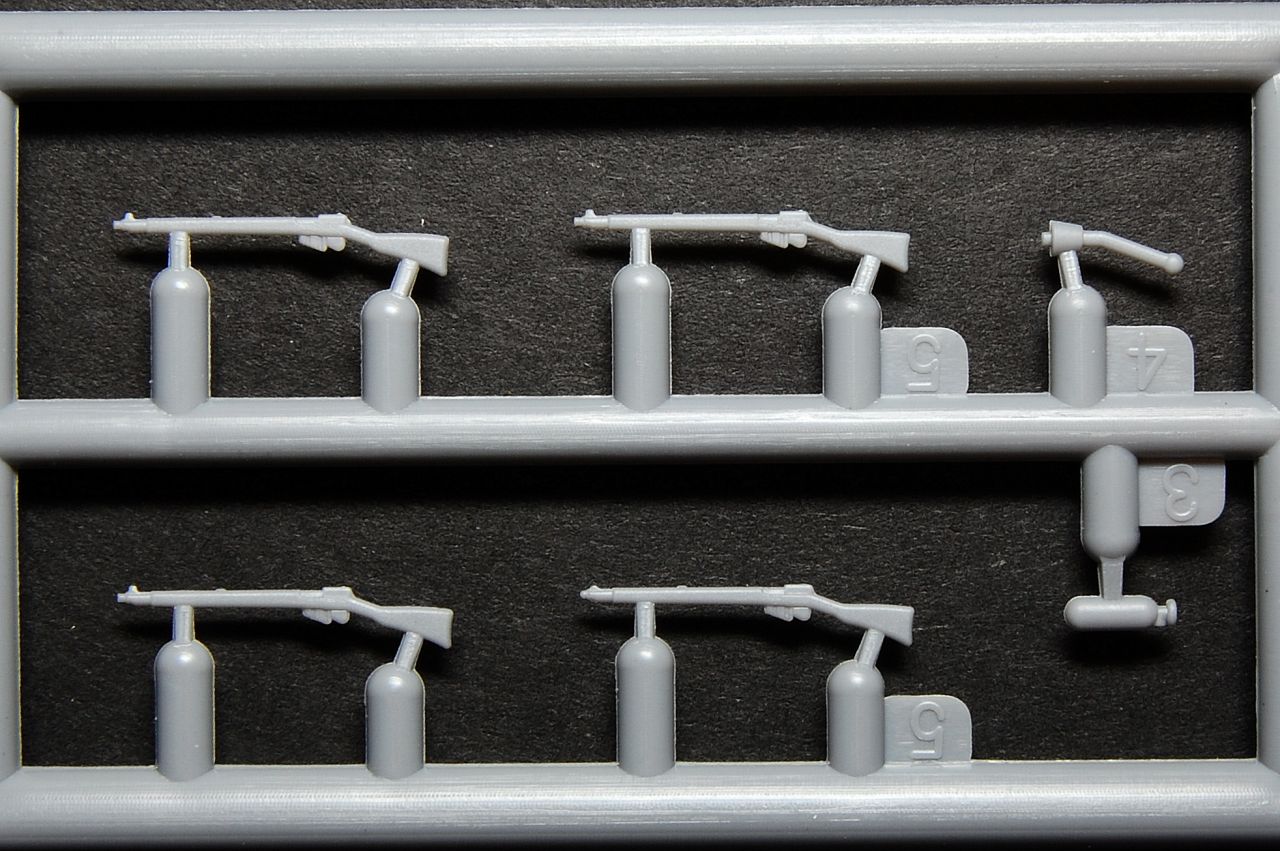
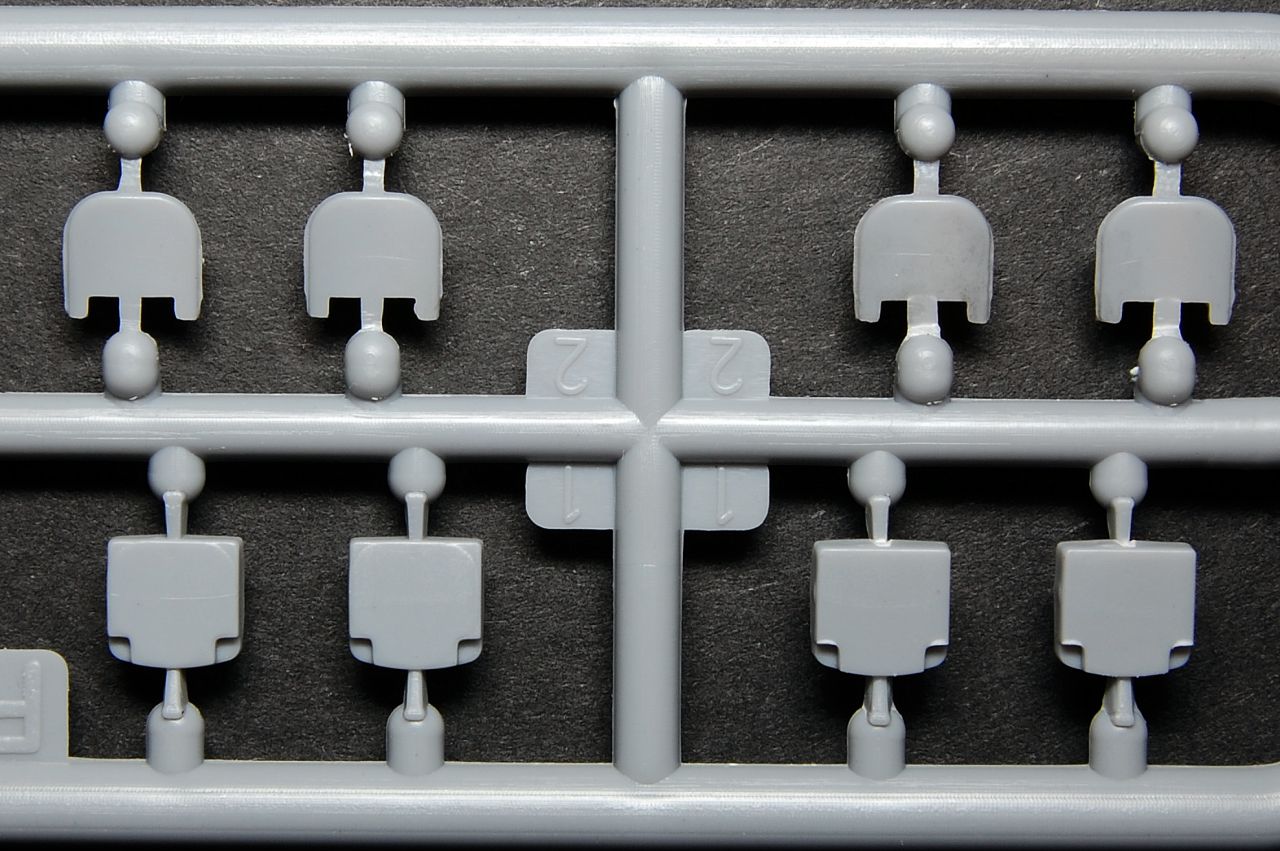
- Sprue F: Seats, rifles, roof supports
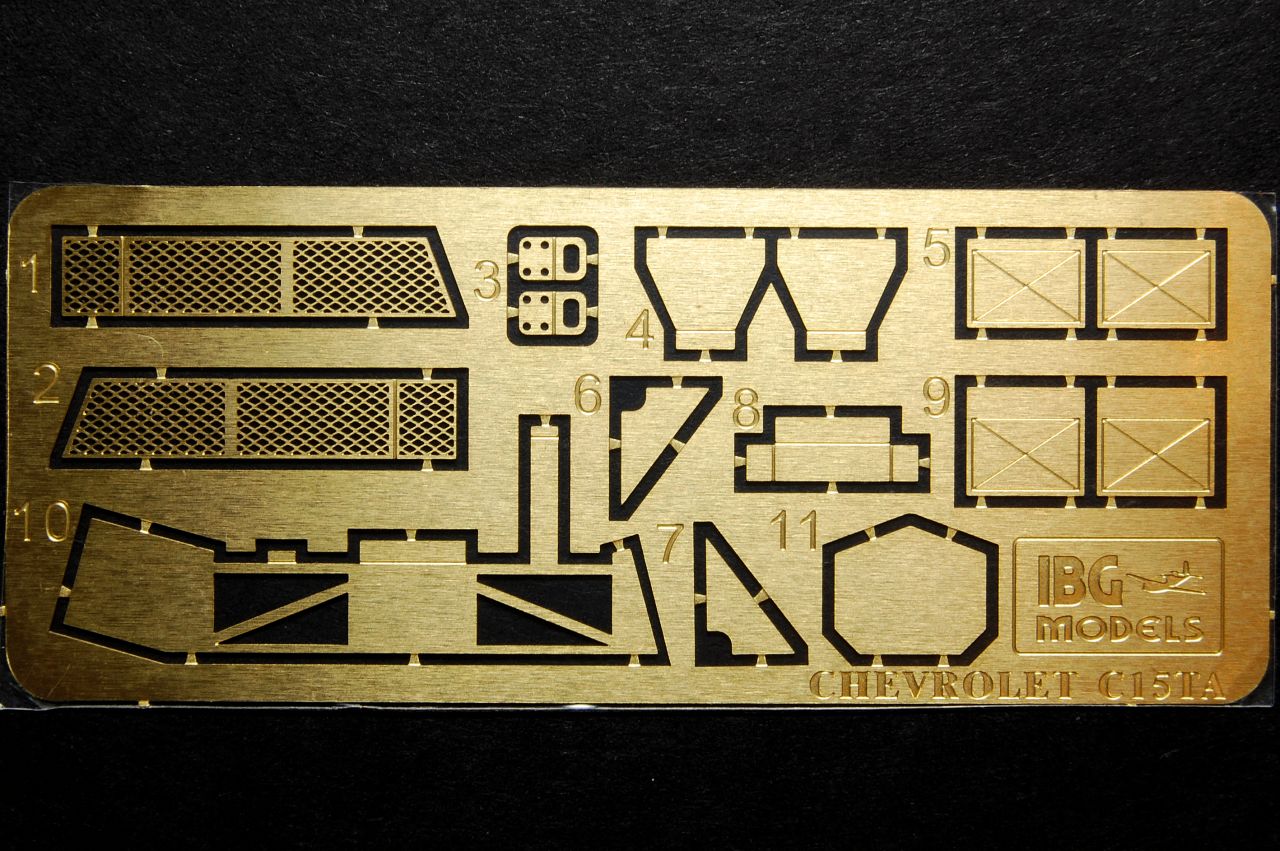
- PE Sheet
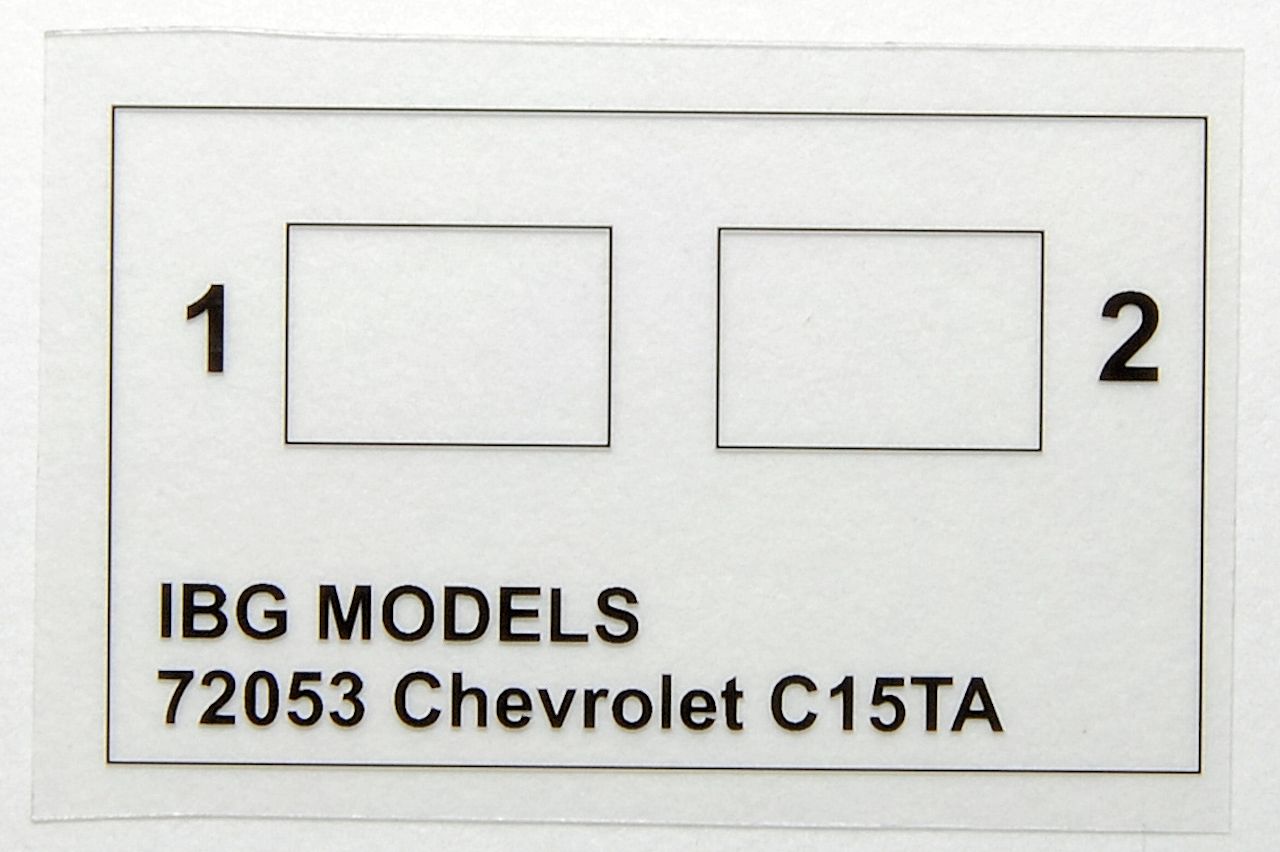
- Clear sheet for windows
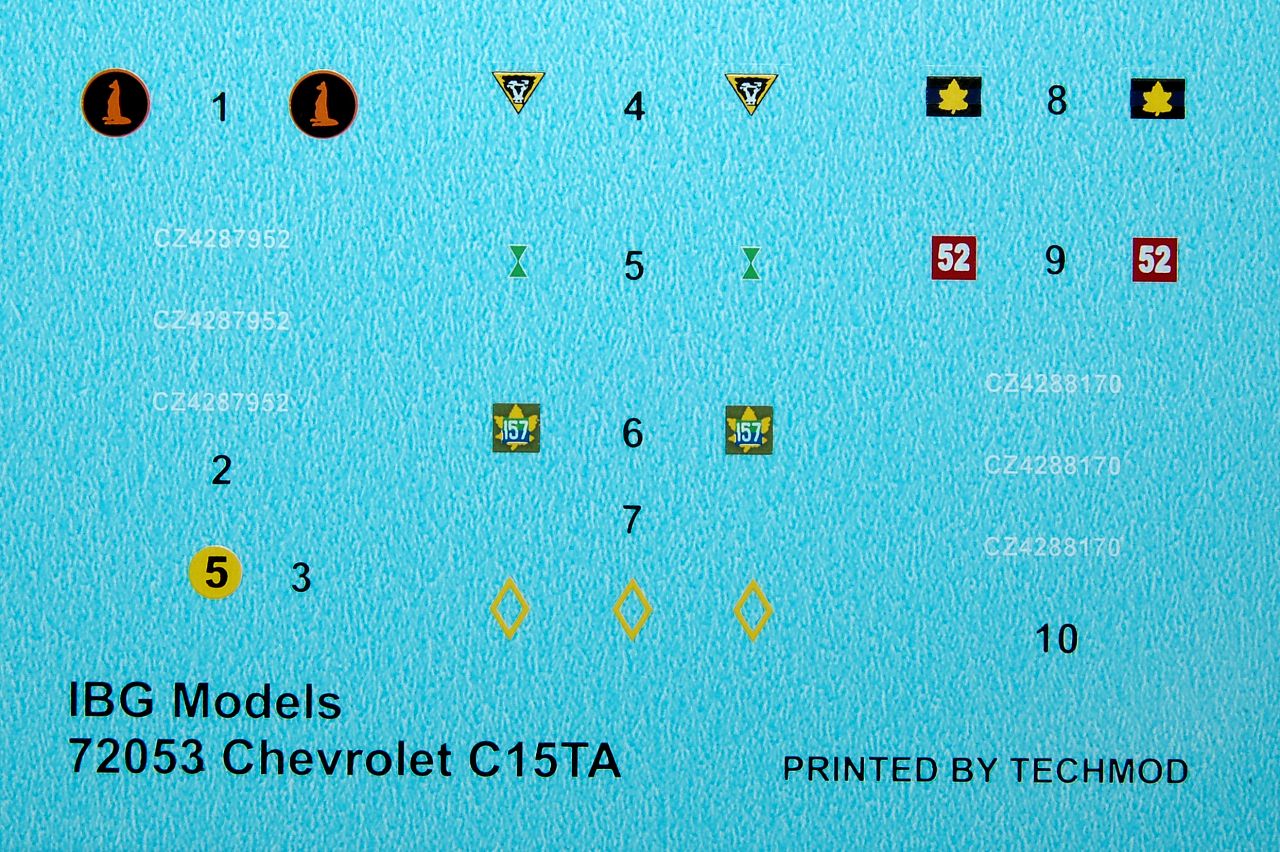
- Decals
The parts are cleanly moulded, and while the sprue with no letter is quite densely packed with many fairly heavy sprue gates, sprue H is noticeably a bit more delicate in terms of wider spacing and fewer, thinner attachment points, which should make removing parts without breakage easier. Sprue A is a bit of an oddity, with only the two jerry cans being used, the rest being the wheels and chassis from other IBG Chevrolet kits. The two sprue Fs are a bit of a disappointment, but well get to that in the build. The etched sheet is mostly nice, particularly the mesh stowage bins and the fuel can rack.
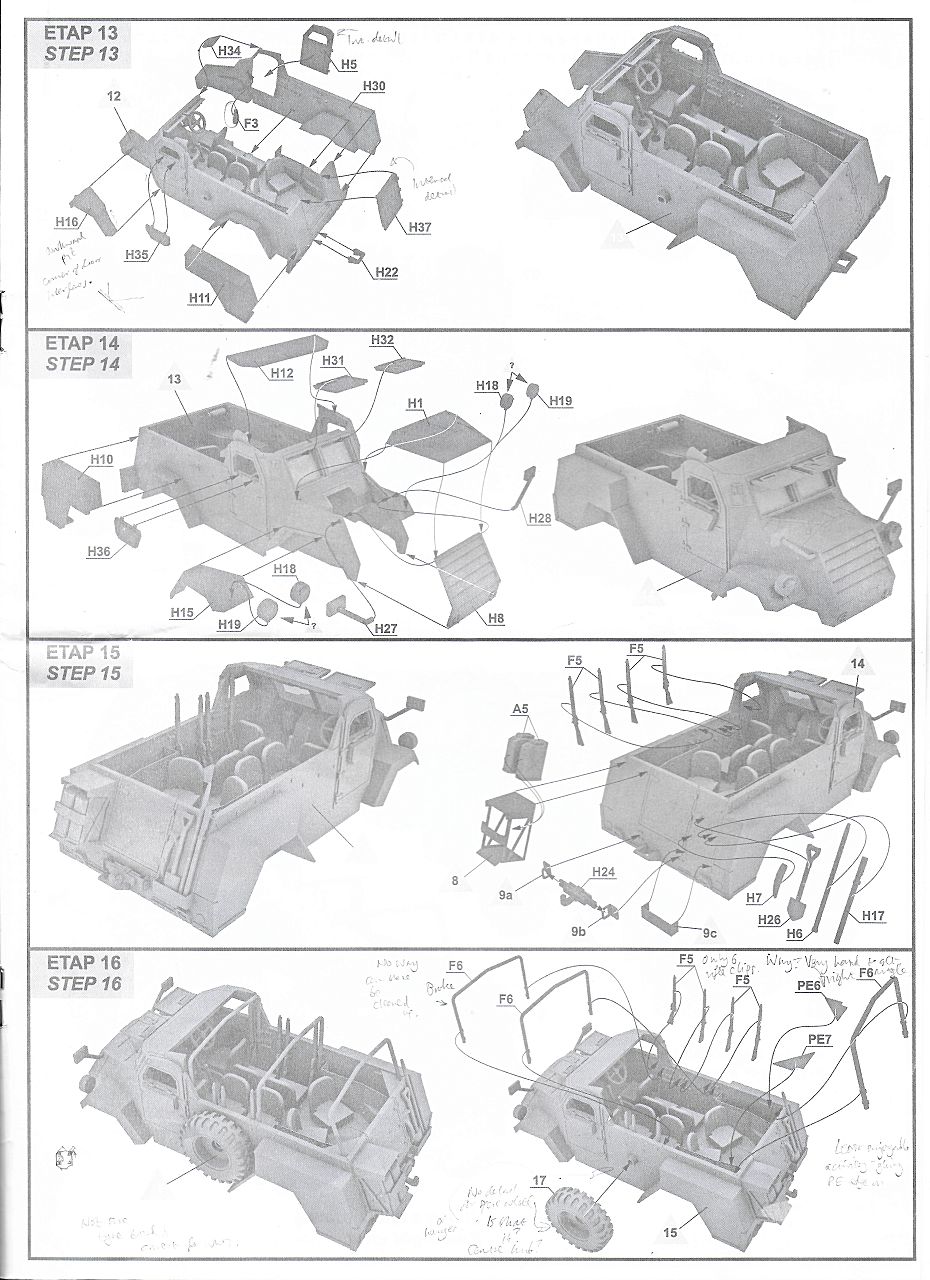
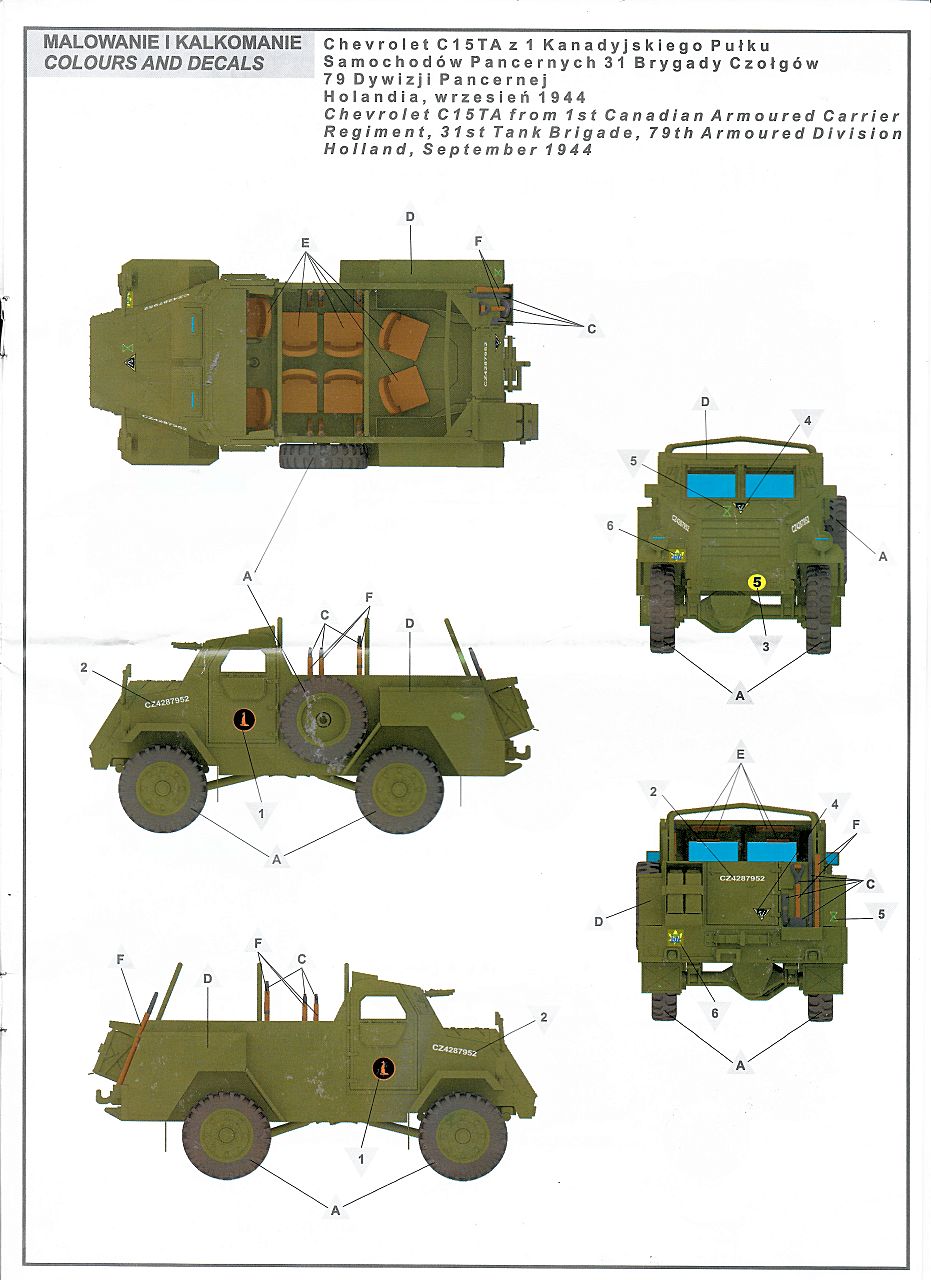
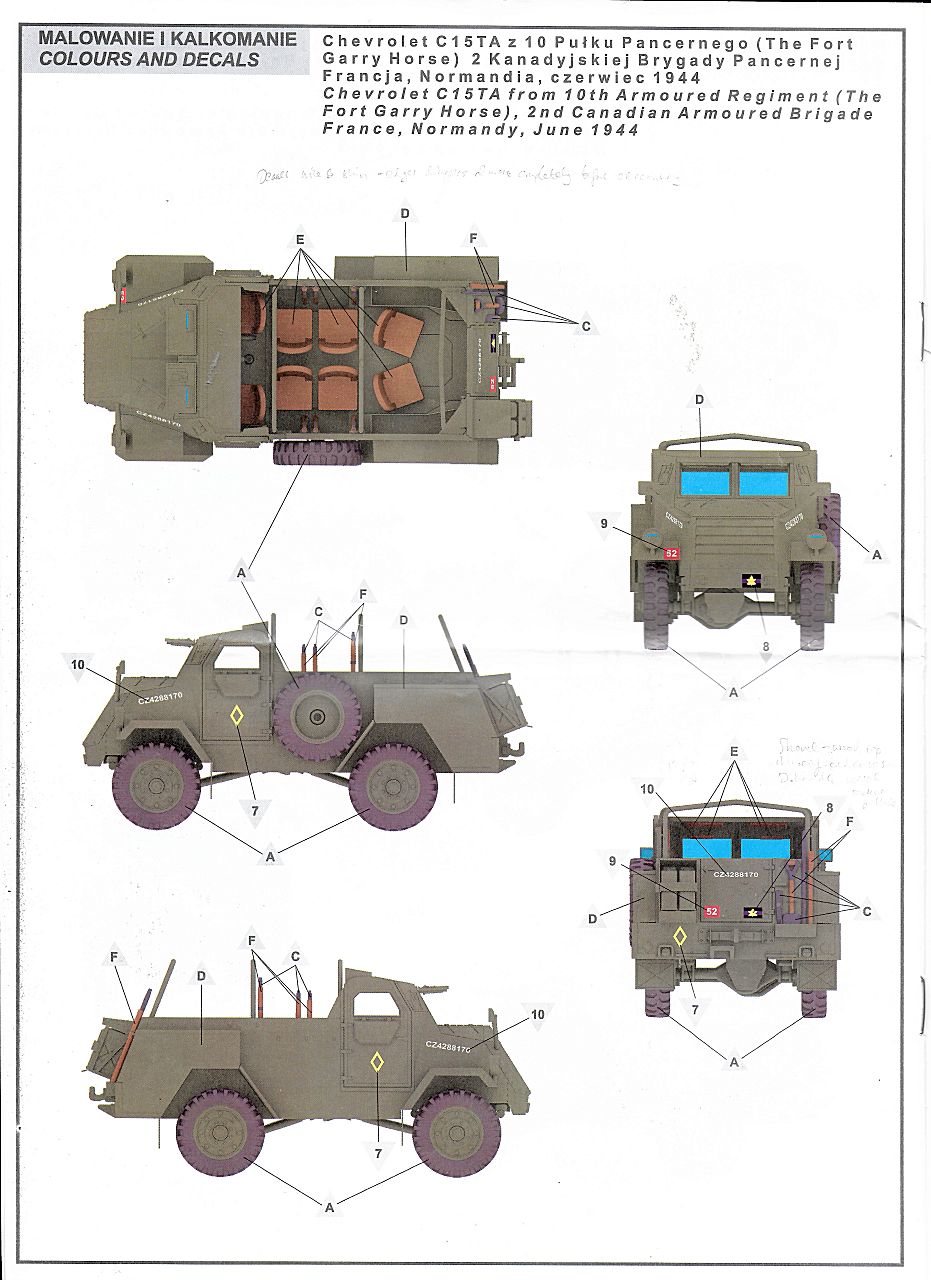
The instruction sheet was a little frustrating, firstly because it is printed in grey and white with some of the images being too pale to see clearly, secondly, the common issue of there being no clear illustration of a part in place. Both the colour finishing guides are for Olive Drab vehicles with alternative decals for 2nd Canadian Armoured Brigade, June 1944, or 1st Canadian Armoured Carrier Regiment, 79th Armoured Division, September 1944.
The Build
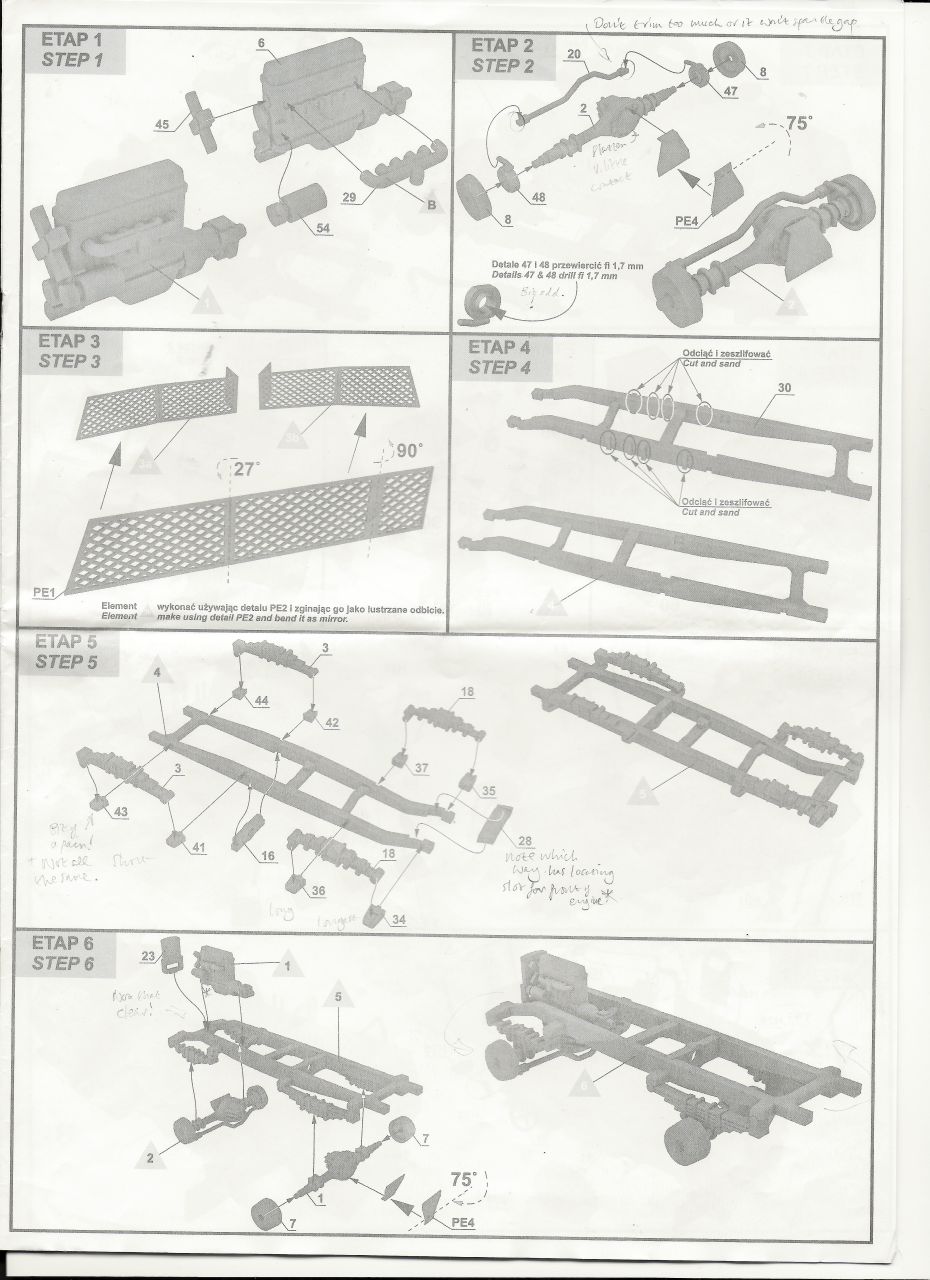
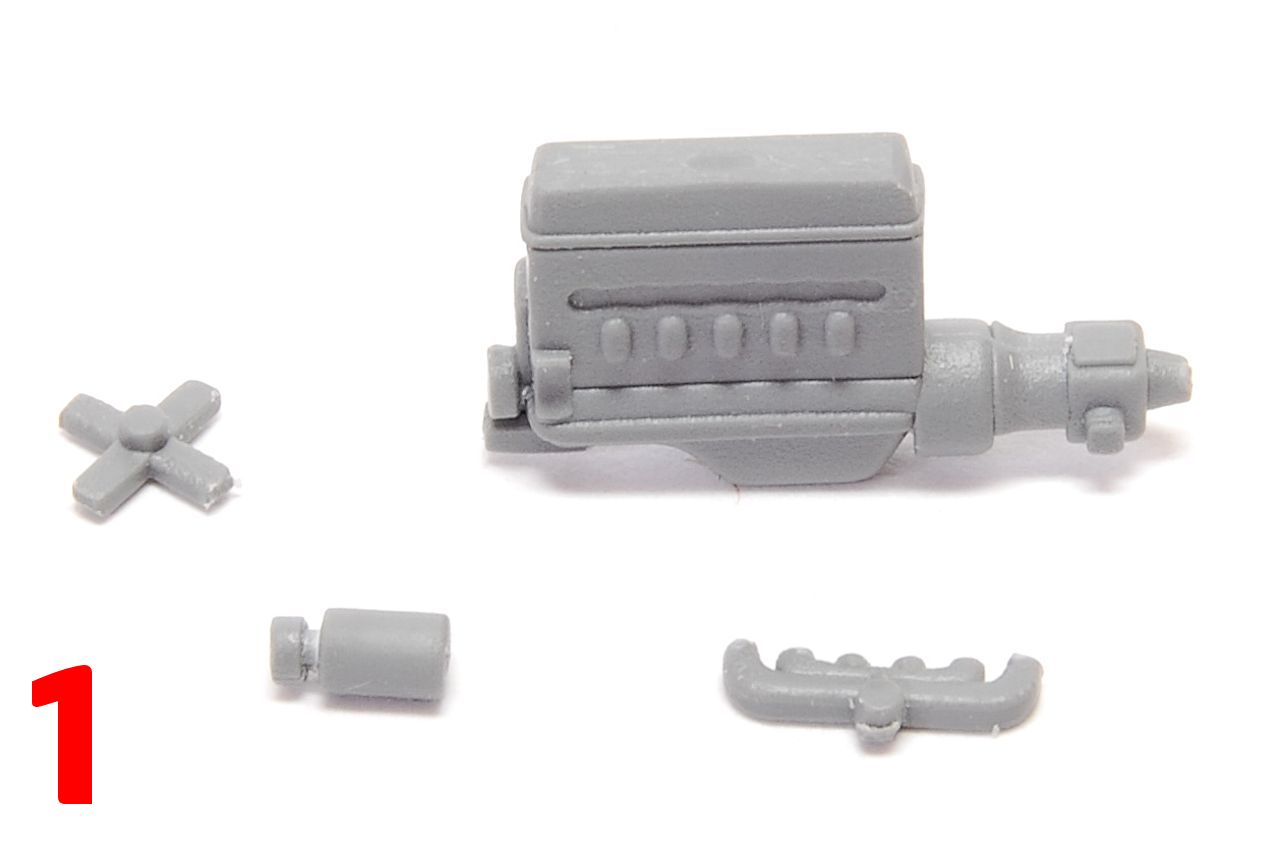
We start with the rudimentary engine that includes fan, generator and manifold, and which cannot be made visible other than by turning the finished model upside down; but it is a good inclusion. (Photo 1).
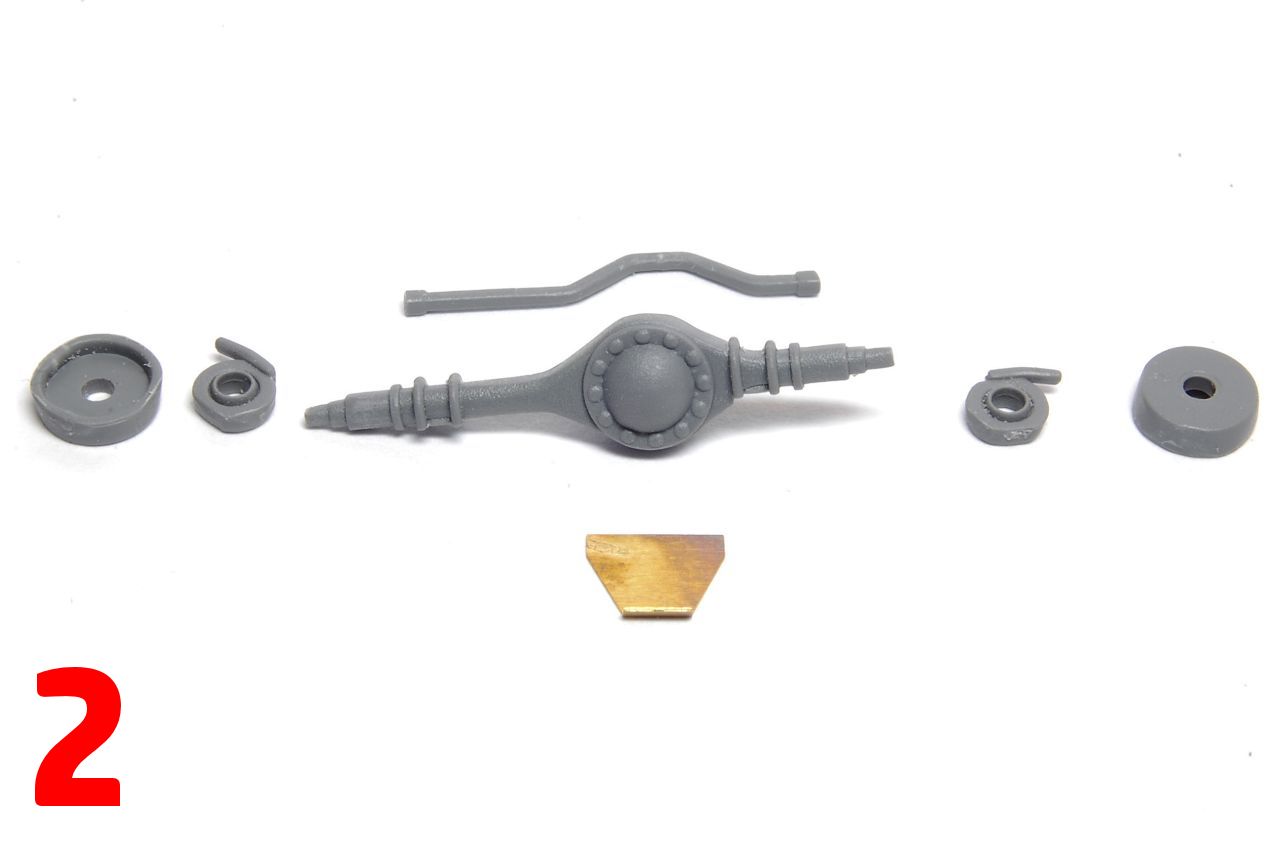
Now for the front axle which features excellent bolt detail on the differential cover, some of which will be obscured by the armoured plate of etched metal; it has no real attachment point, so a good blob of glue was needed to secure it. There is also a steering rack and drum brakes that will look quite good once the wheels are on. (2, 3, 4).
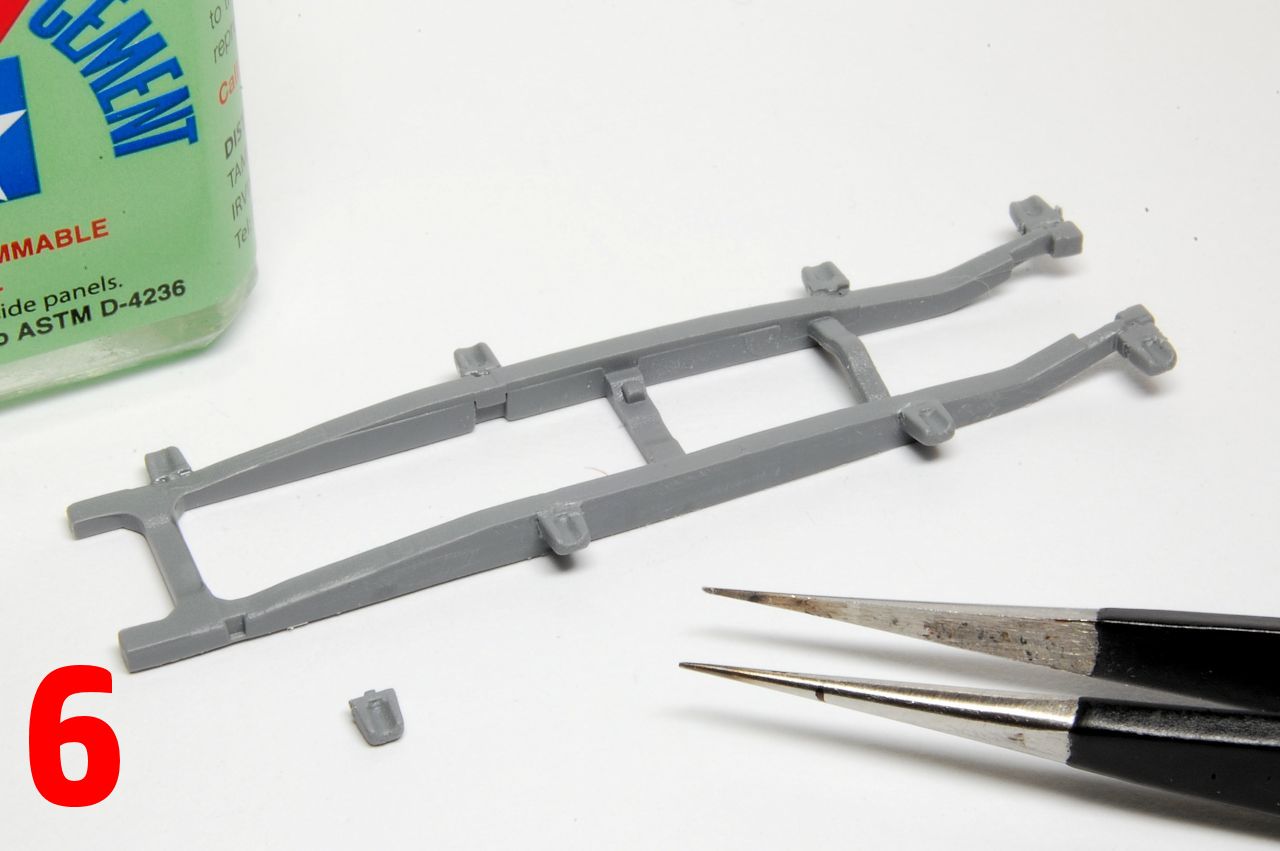
Step 3 is to form the mesh PE stowage bins, though Im not sure why as they arent installed until step 11, so ignoring them I prepare the chassis frame (5). Slightly oddly the brackets for the leaf springs have to be added rather than being moulded in place (6), and some care is required to make sure they are good and straight in order to take the springs (7), bearing in mind that the axles and then the wheels will also be relying on them.
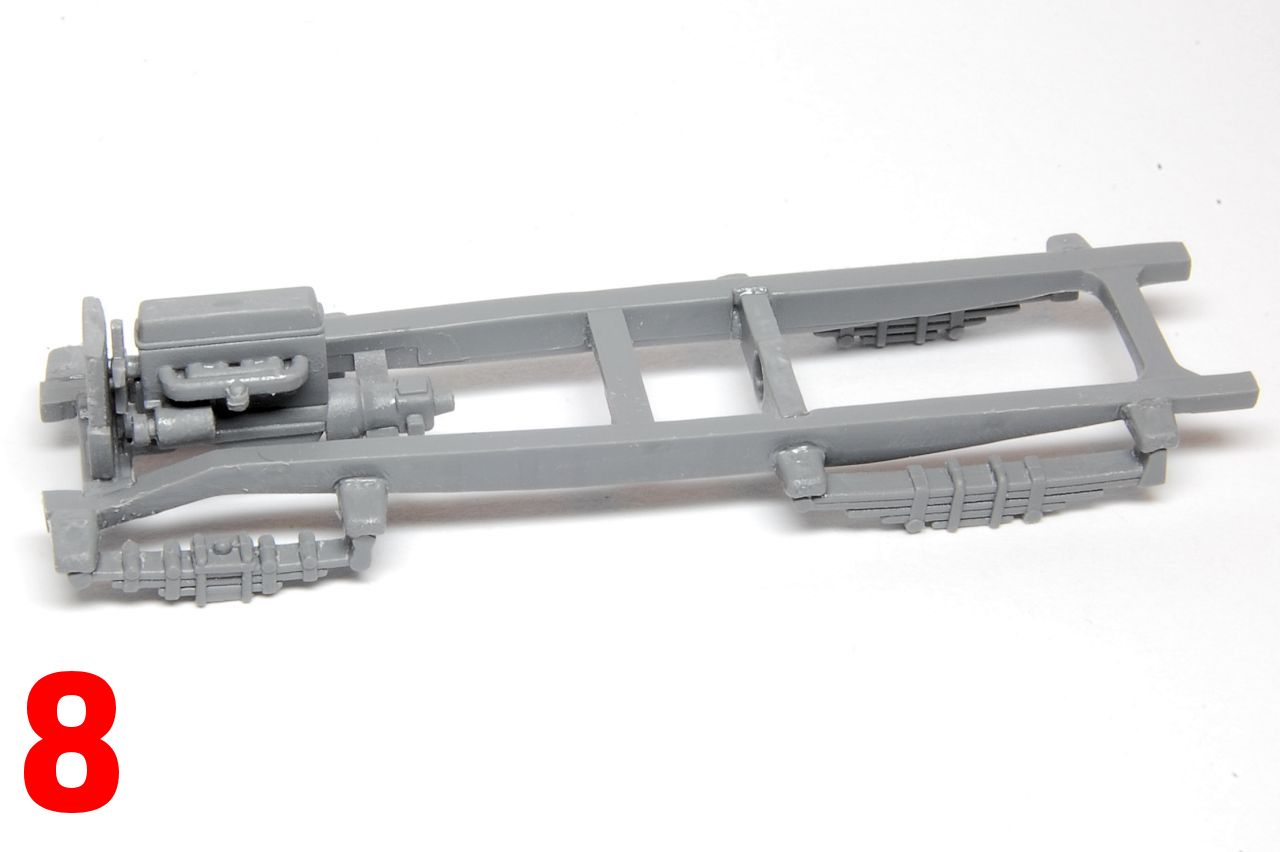
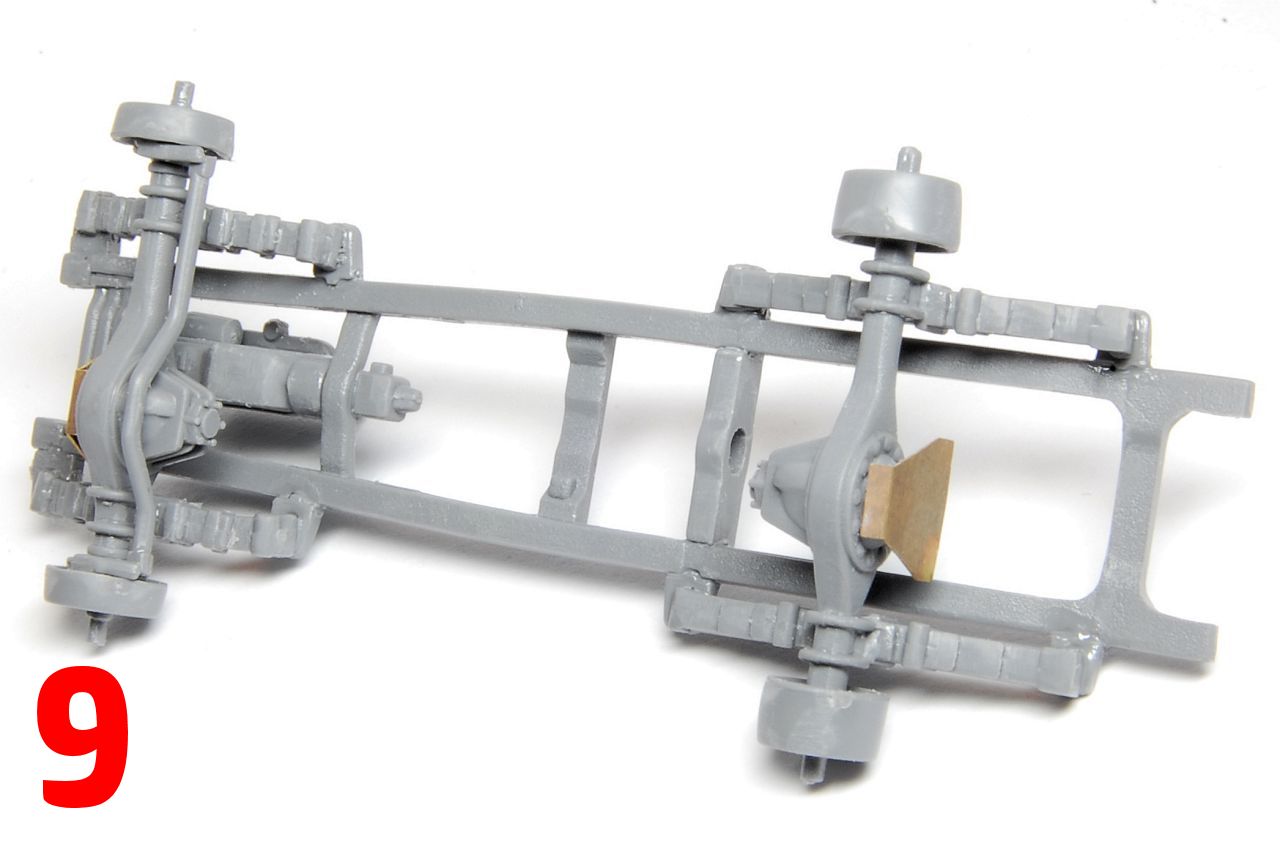
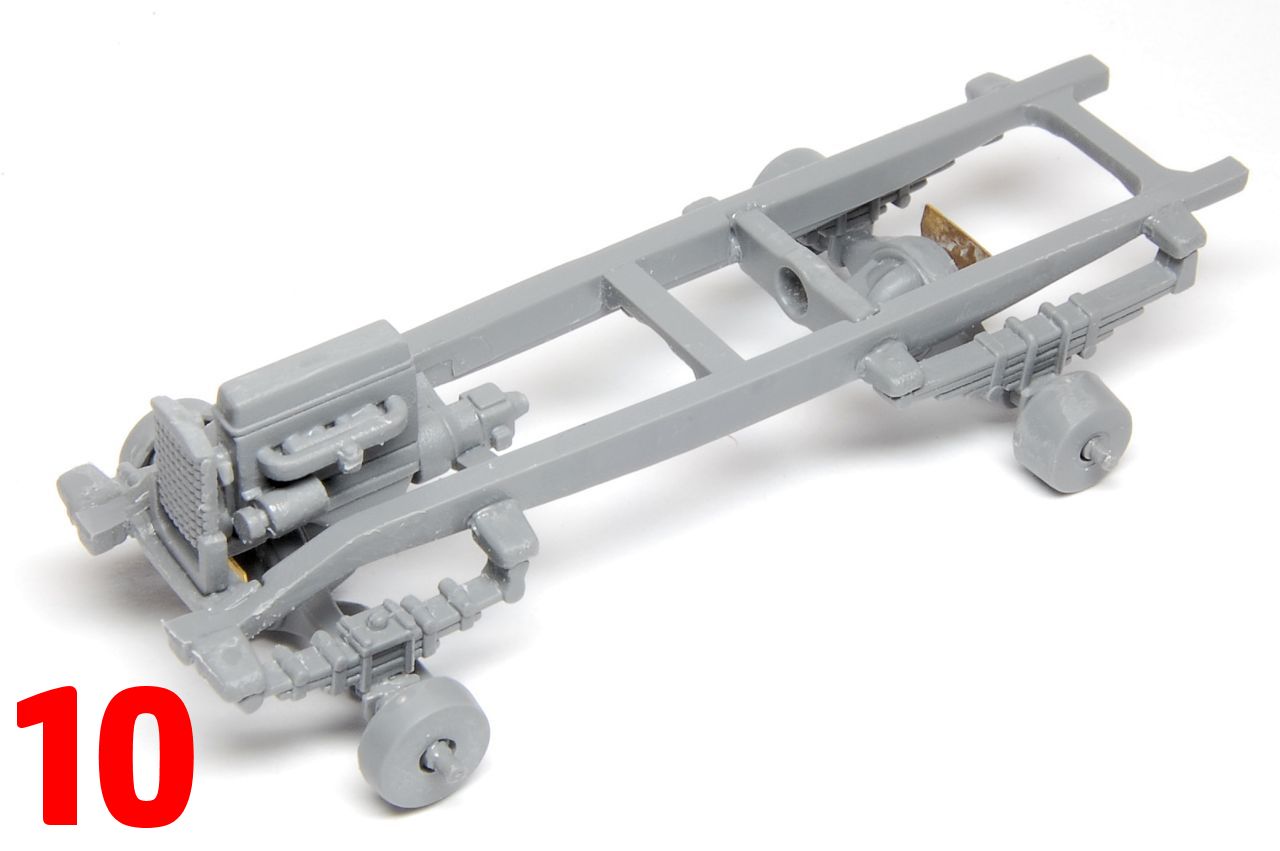
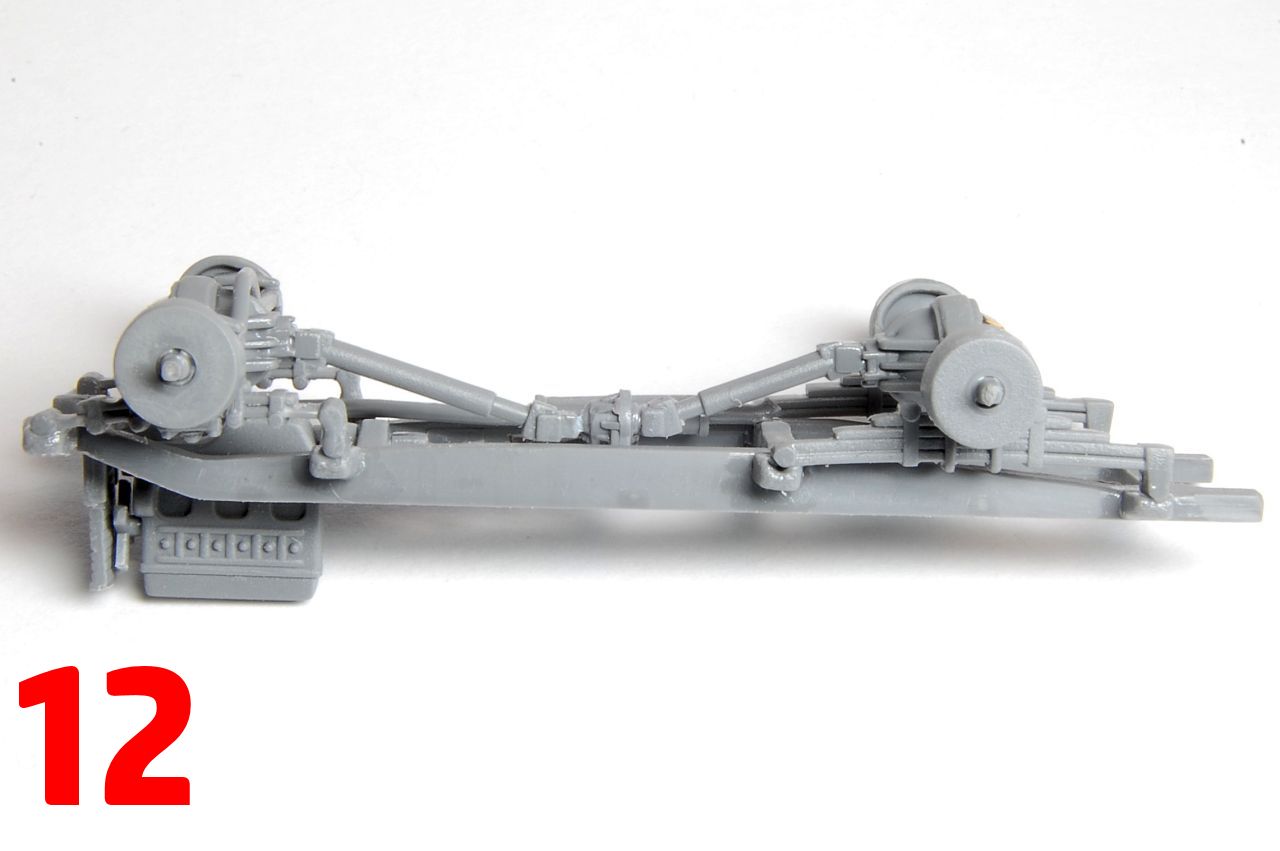
The engine is added (8), and the front axle, followed by the rear axle which assembles just as the front, minus the rack (9, 10). The chassis is turned over for the fitting of the exhaust system, front and rear drive shafts, central differential case and the transmission shaft. I found that the transmission shaft and the front drive shaft didnt quite reach the central differential, and had to add small fillets of sprue (red boxes in photo 11, 12).
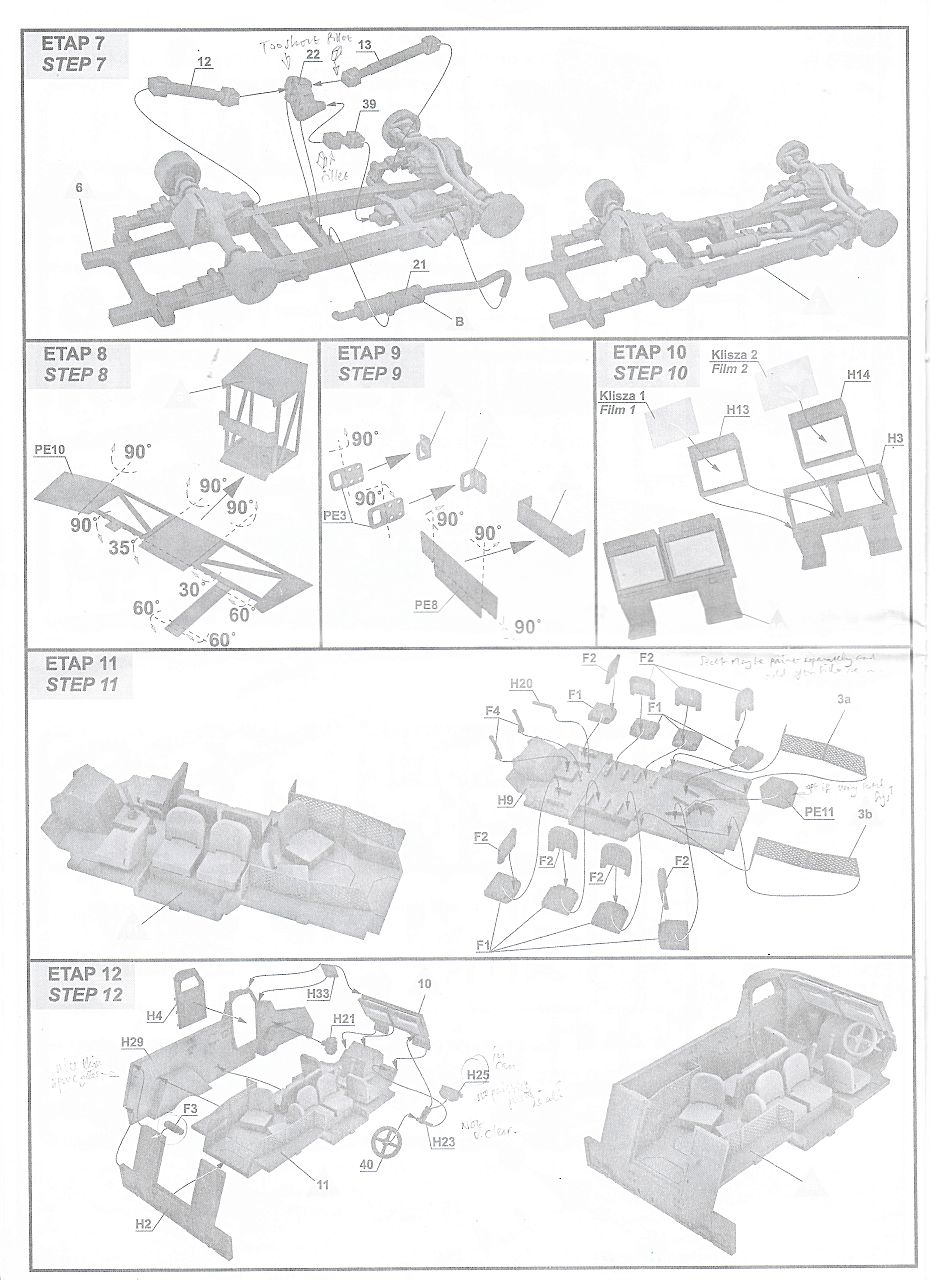
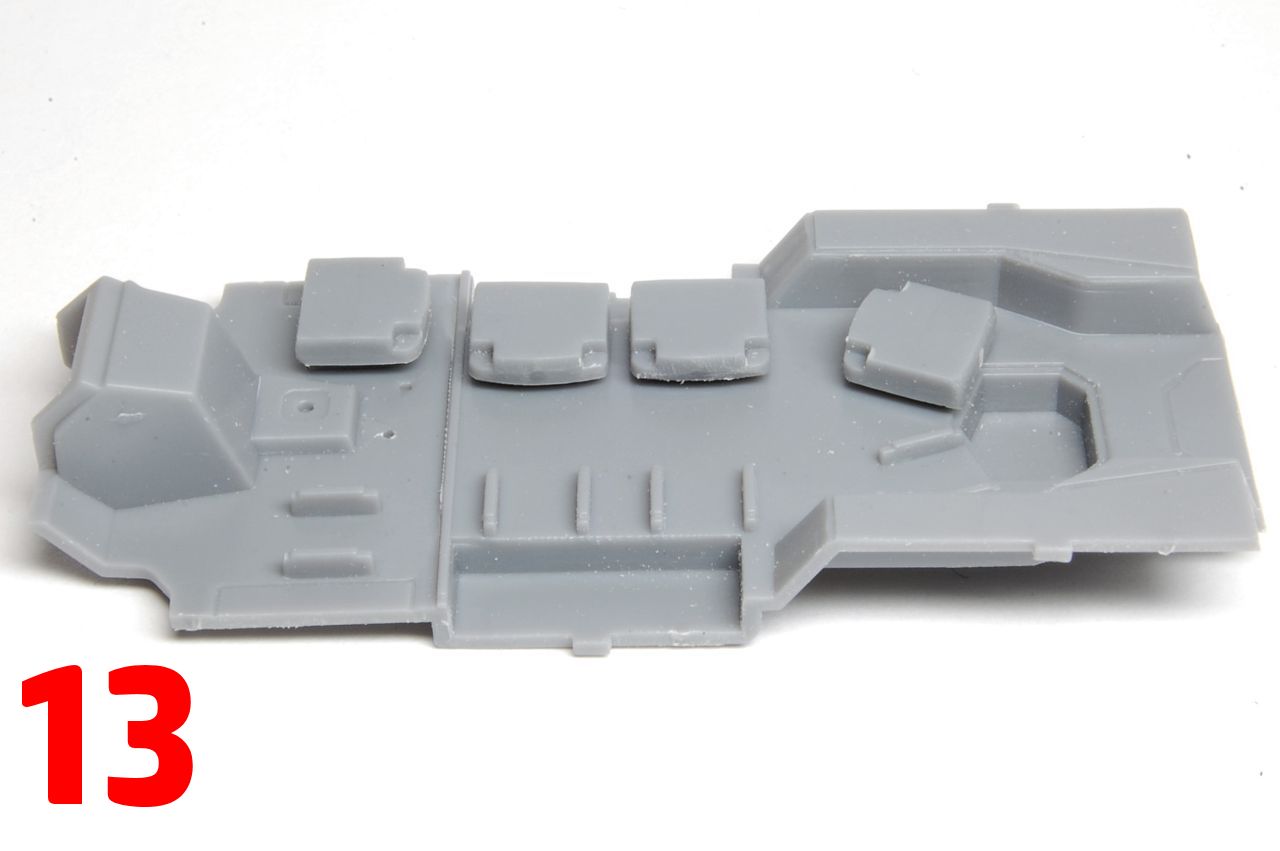
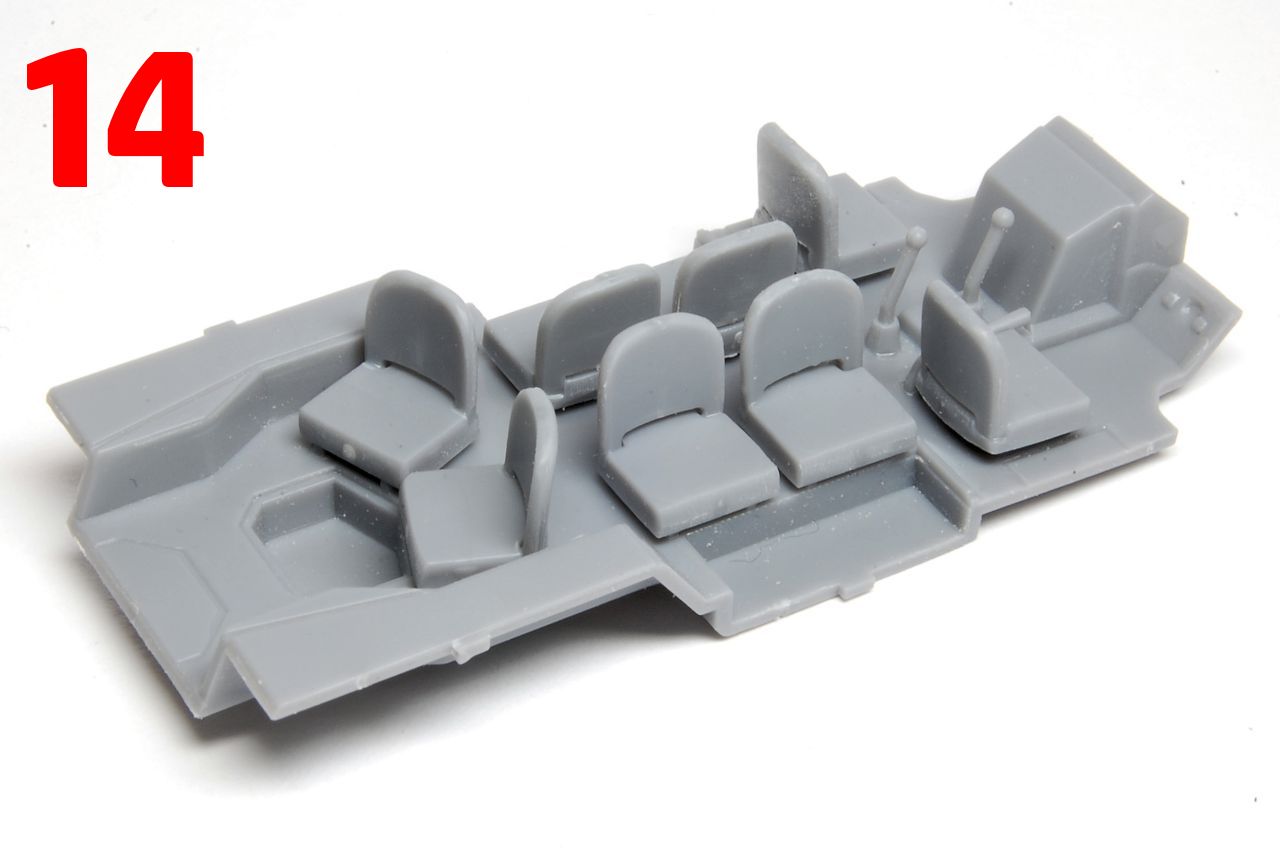
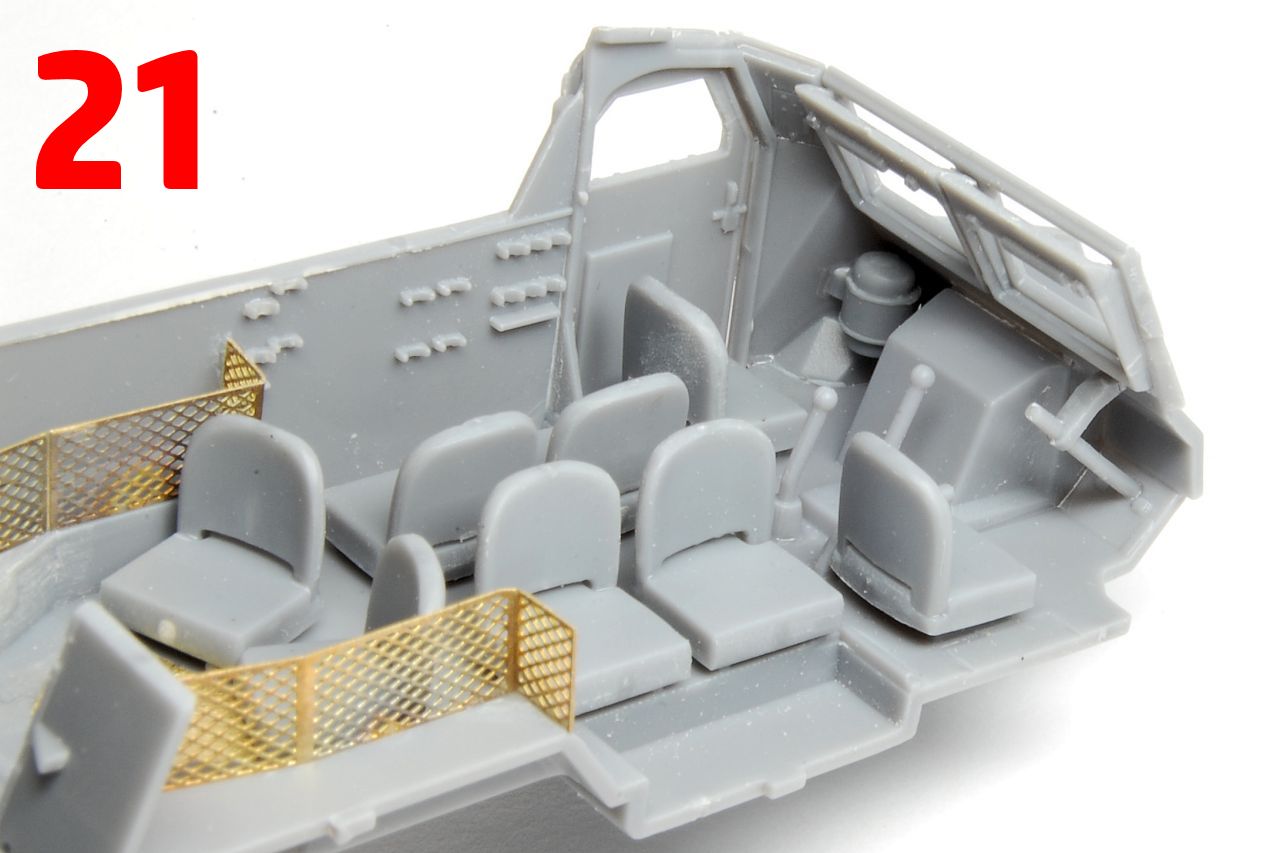
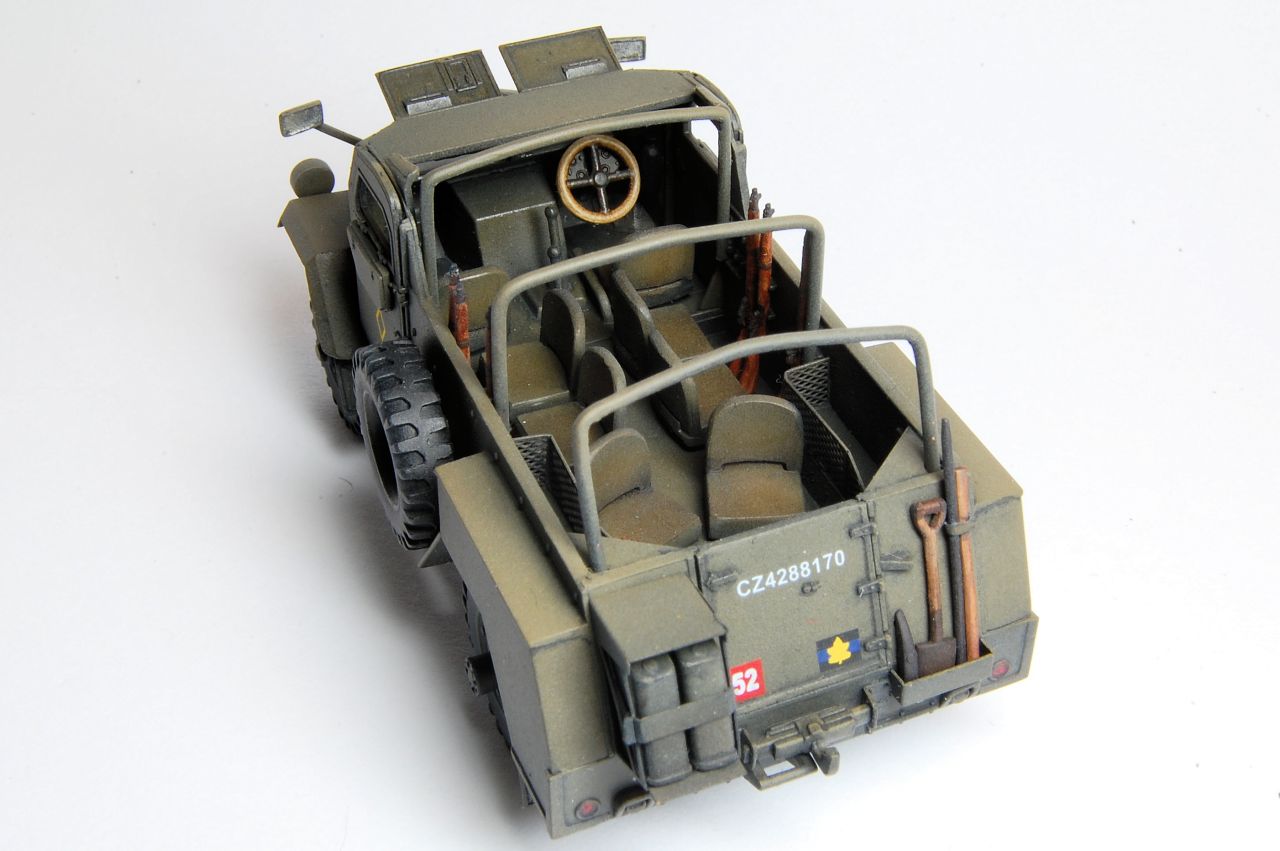
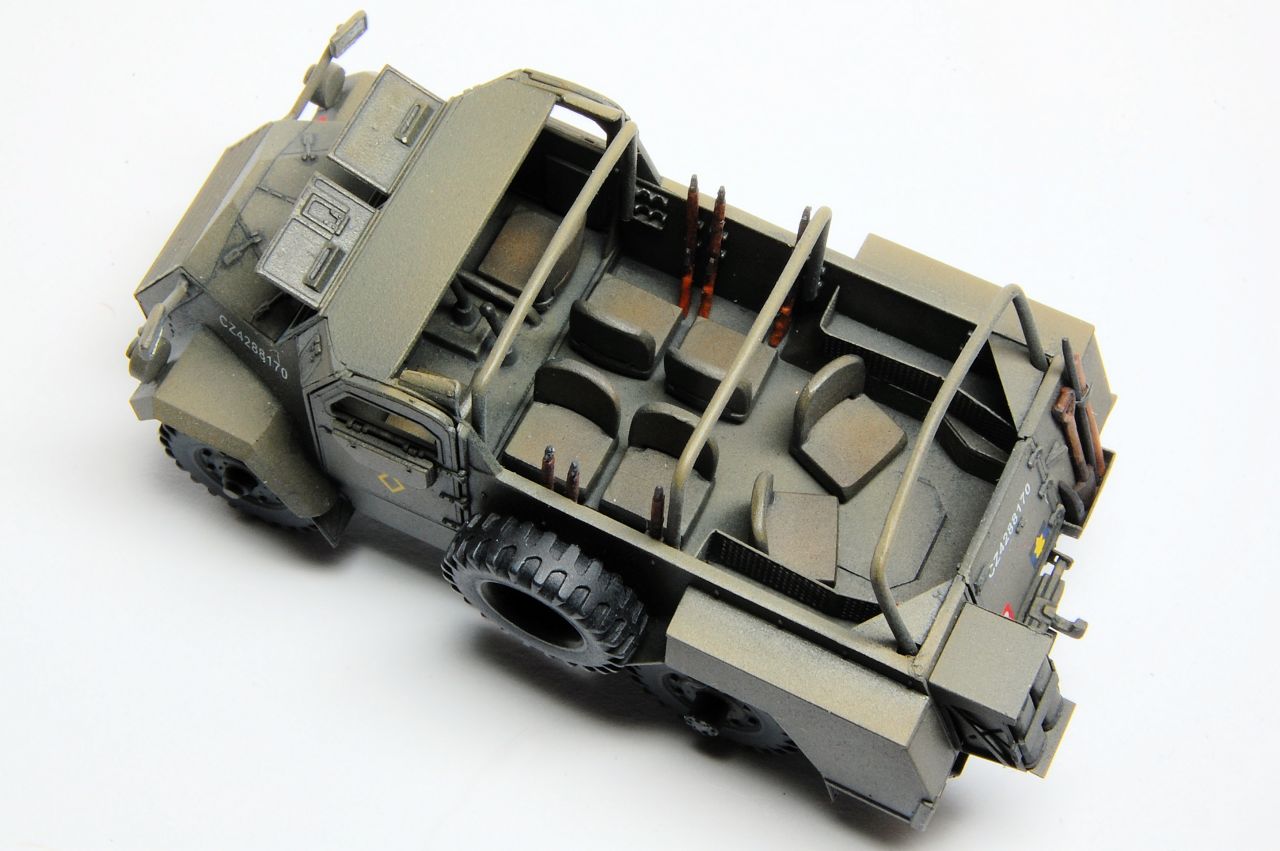
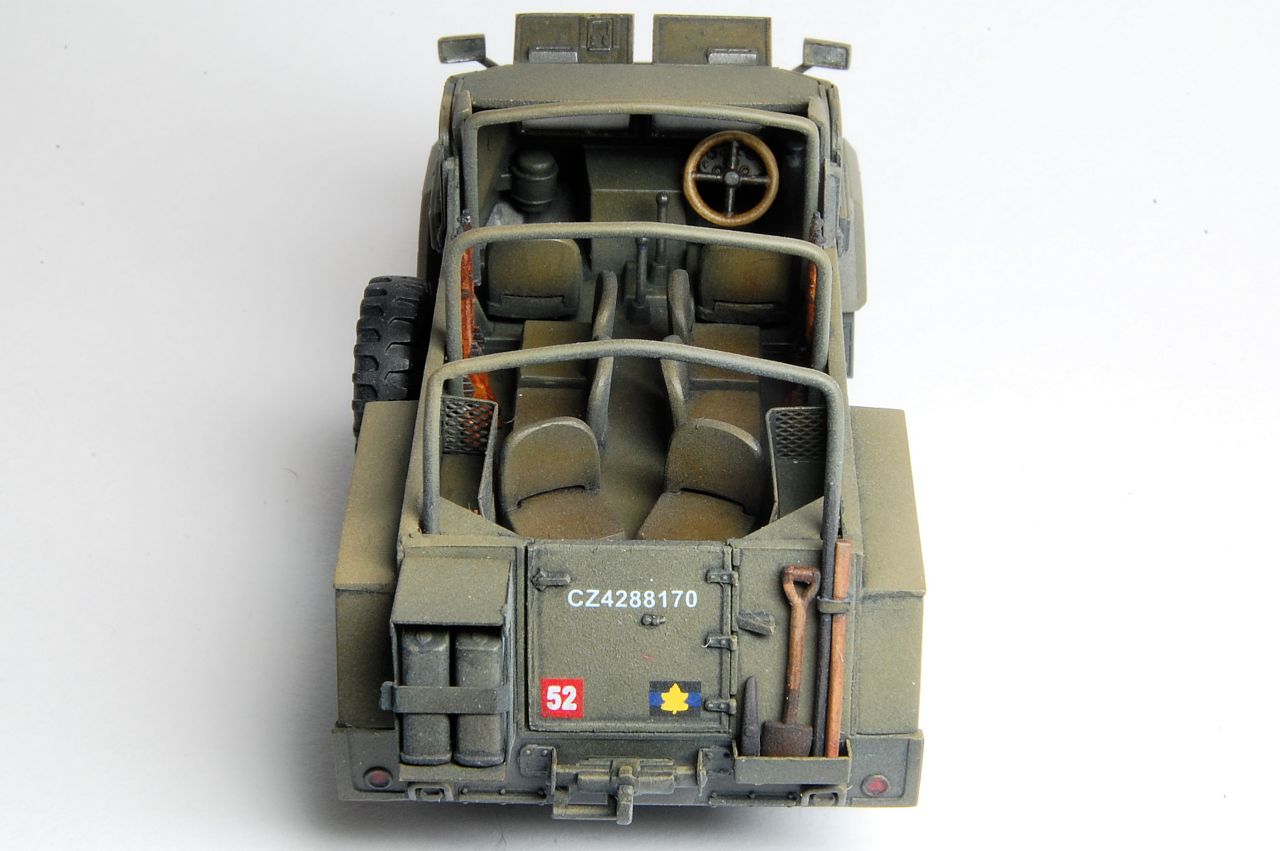
The chassis is put to one side to set, and turning to the interior we start to add the seats (13). I mentioned the disappointment of sprue F earlier, and it starts with seats that look a bit too much like plastic garden chairs or stadium seats. They have been made so that the backrests can fold over, which is authentic and a good feature, but even at this small scale I think the backs could look more like they are fabric over a tubular frame.
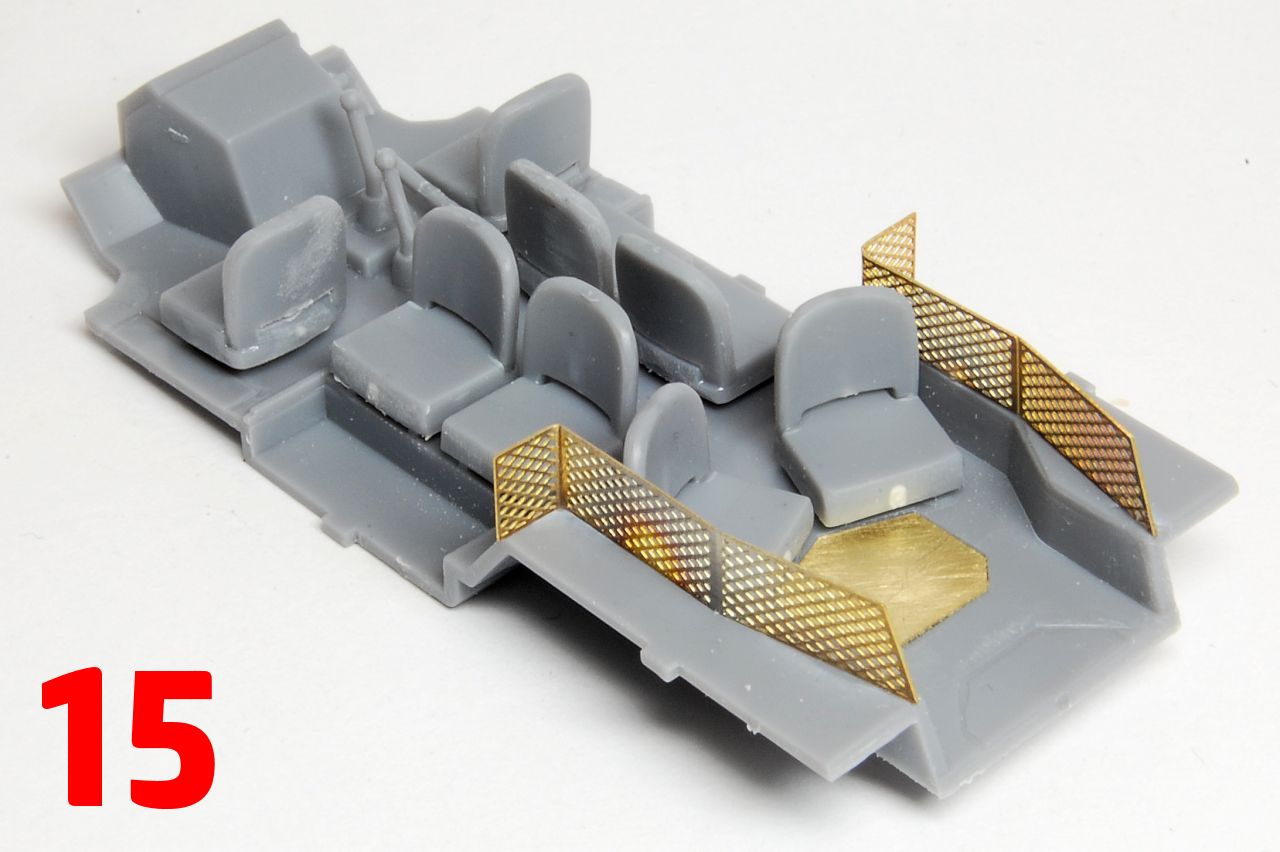
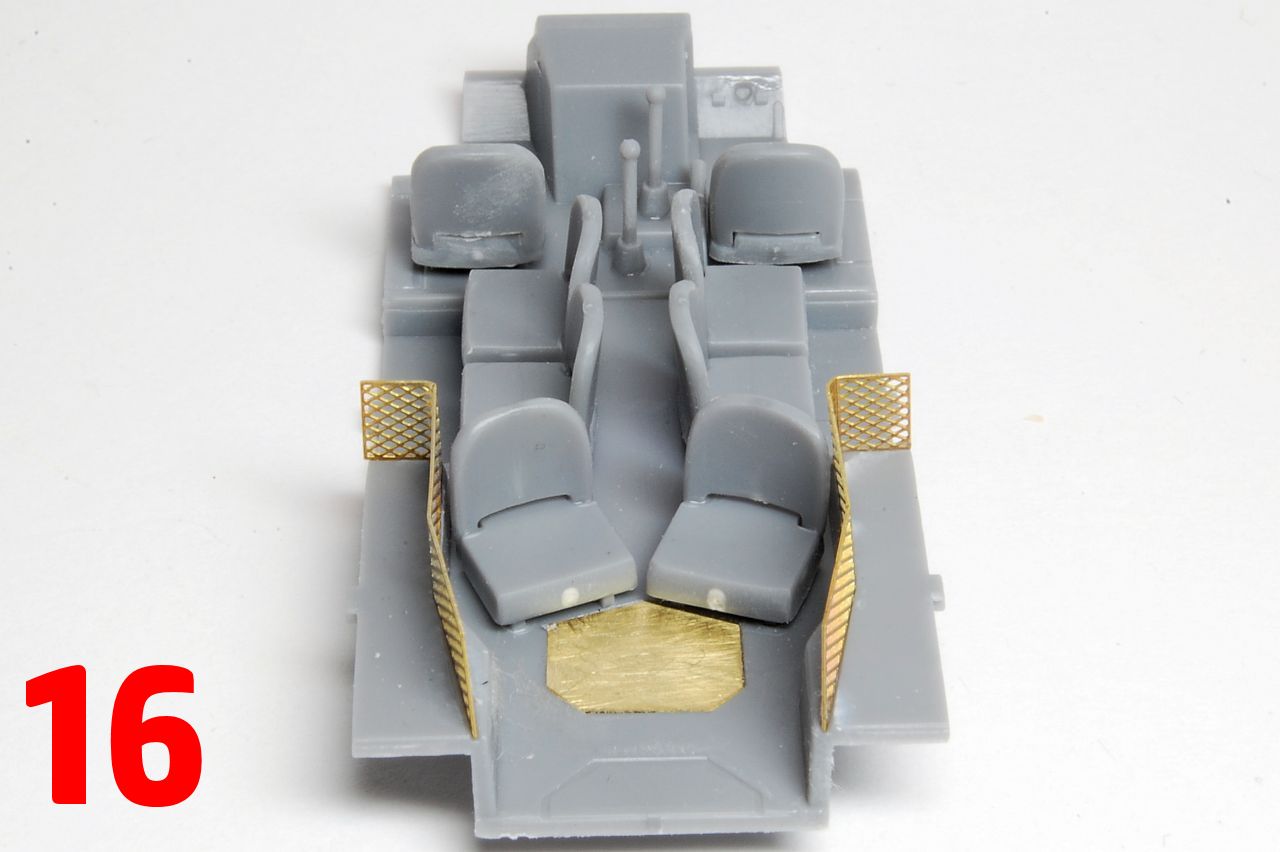
With them all in place, the drivers levers also go in (14), followed by the PE cover for the foot well behind the rear seats (15). Having this in place is really optional, though not shown as such in the instructions, and if you intend to put figures on the seats, then leave it off. In real life it would be stowed in a narrow bin inside the rear door. Now the mesh stowage bins are bent into shape and carefully glued in place (15, 16).
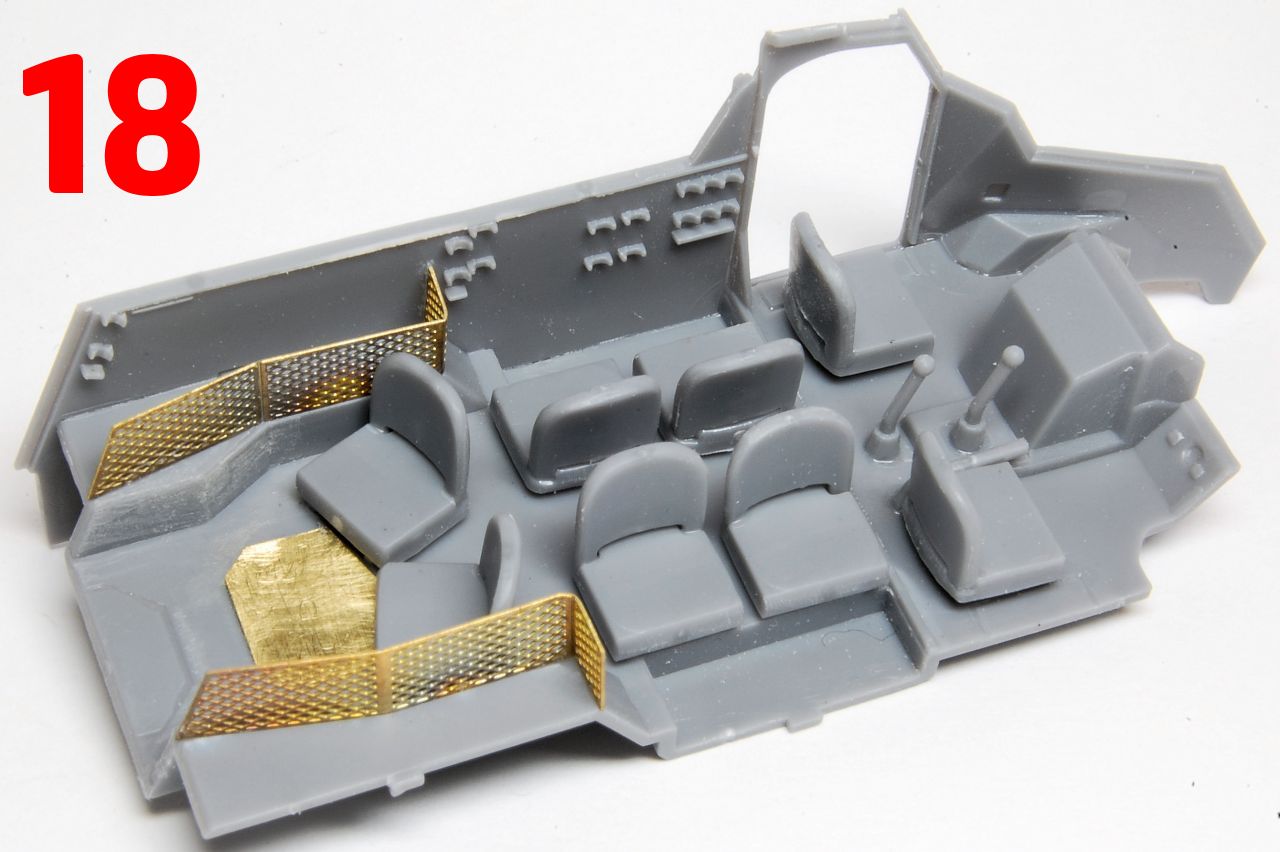
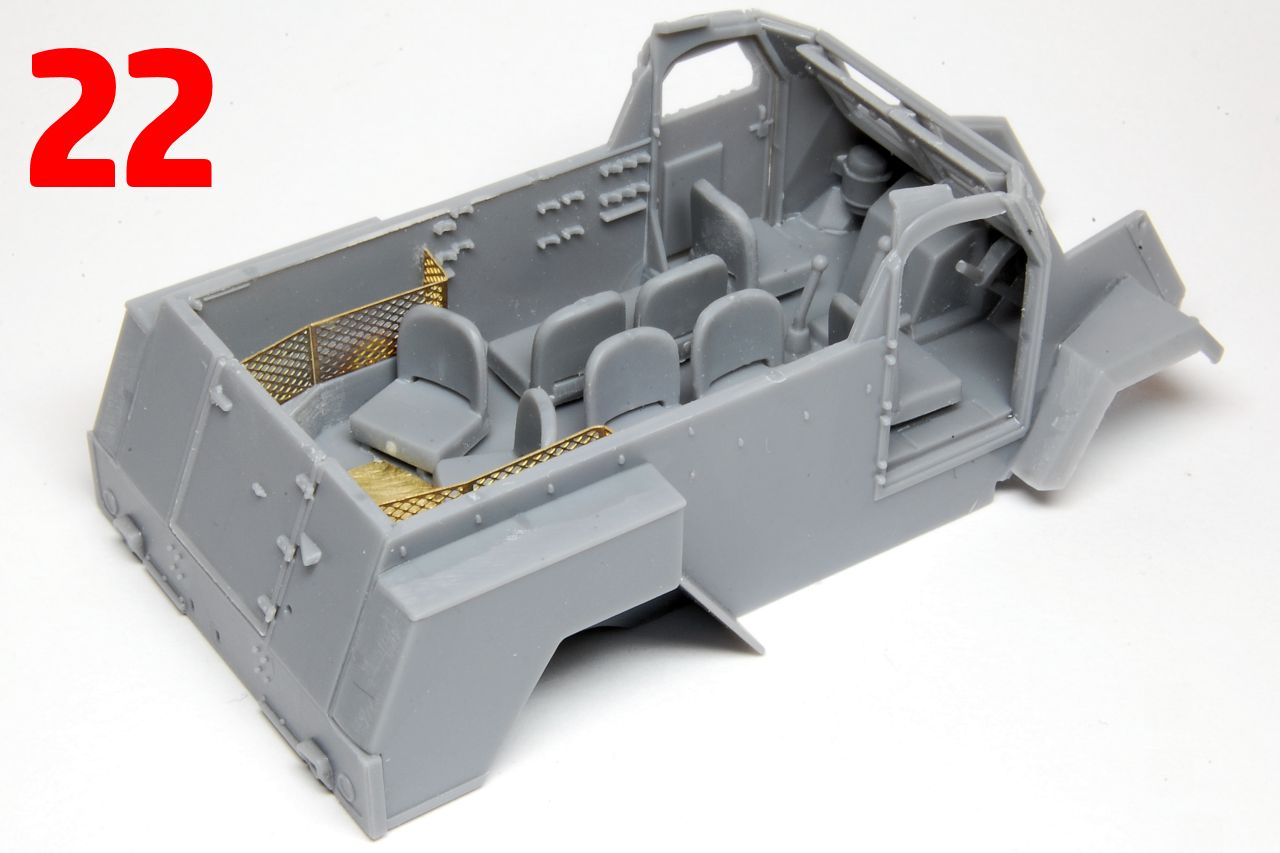
I read a review of the 1/35 version in which the front door pillar cracked when removing the sprue, so I was especially cautious with this even thinner part (17). I fitted one side to the floor plate (18), followed by the rear (19) and front plates (20, 21), including the steering column, but leaving off the dash and steering wheel for now. The other side wall was added in the same session to make sure they could be adjusted and all lined up before the cement was completely set.
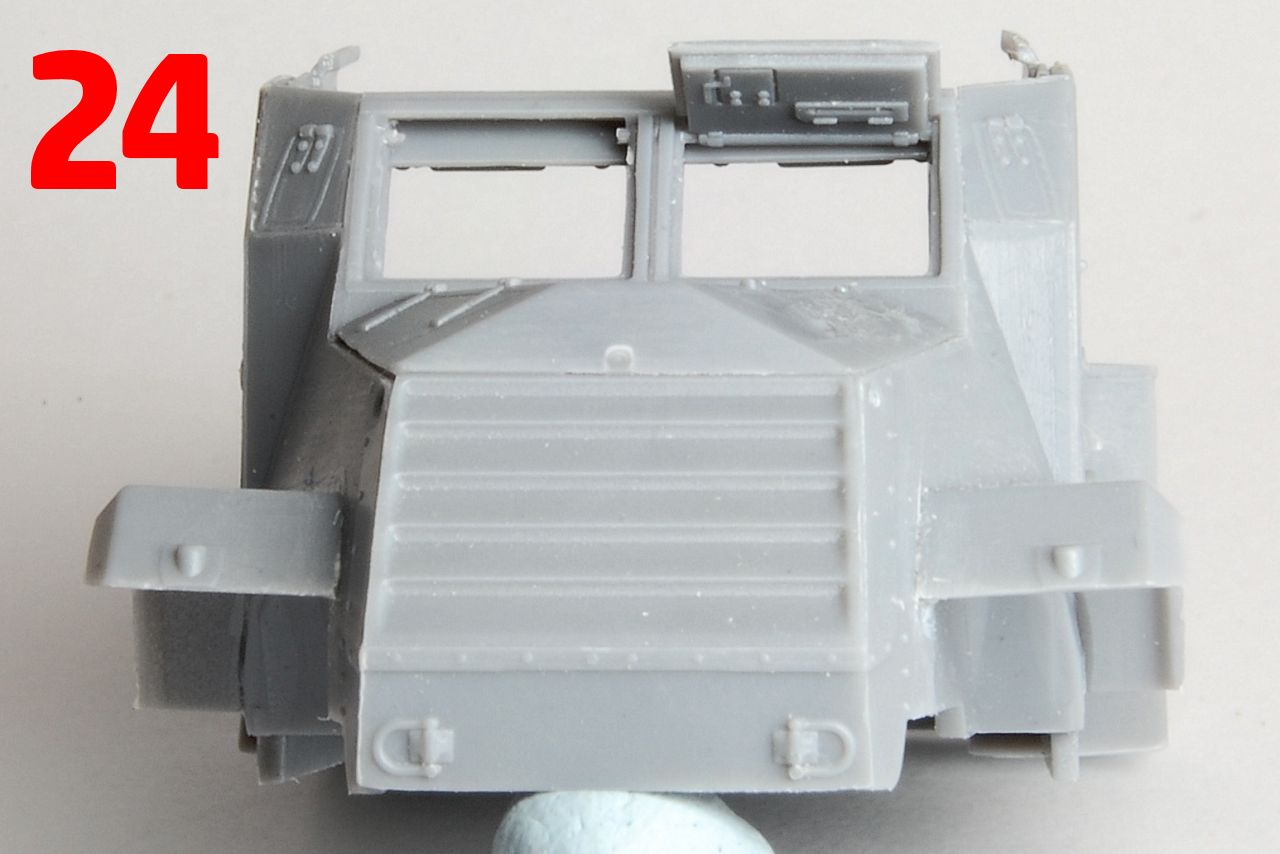
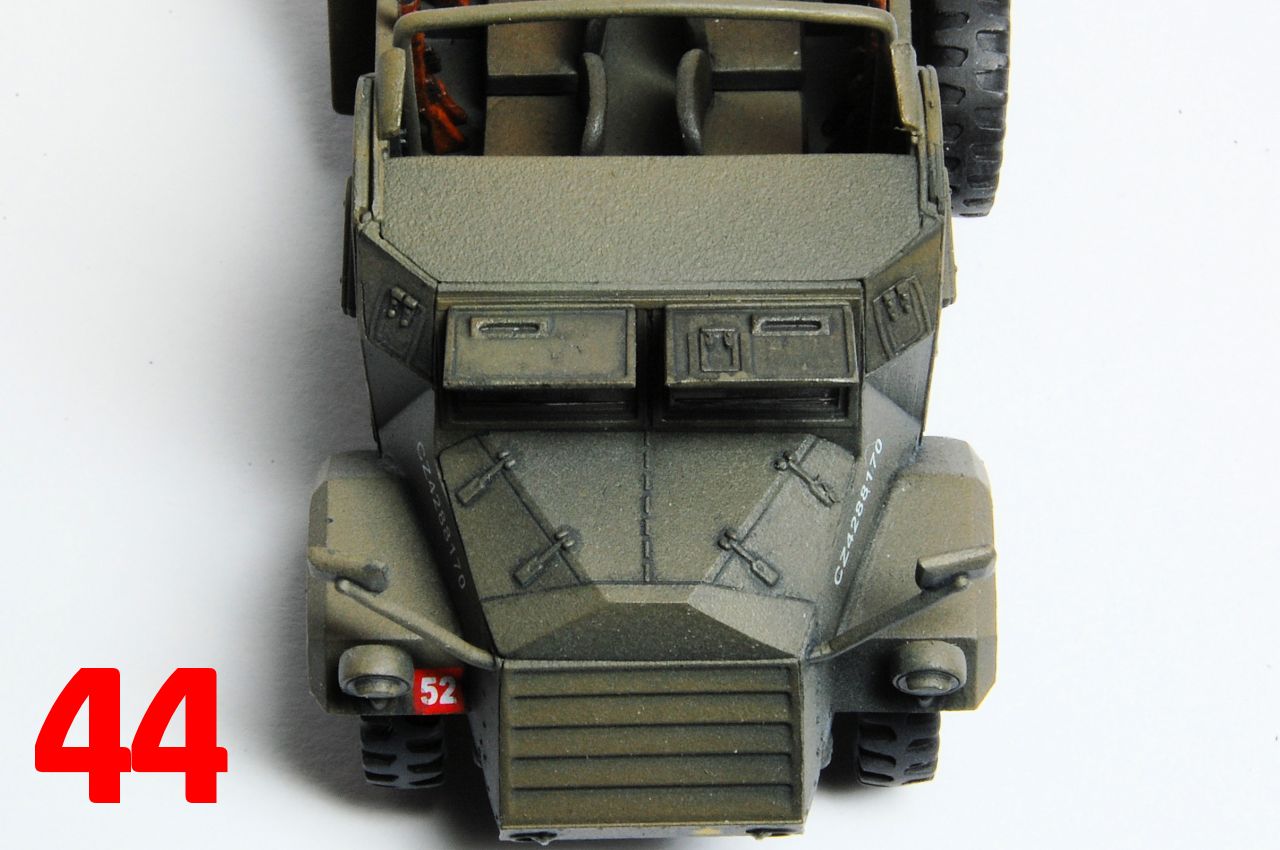
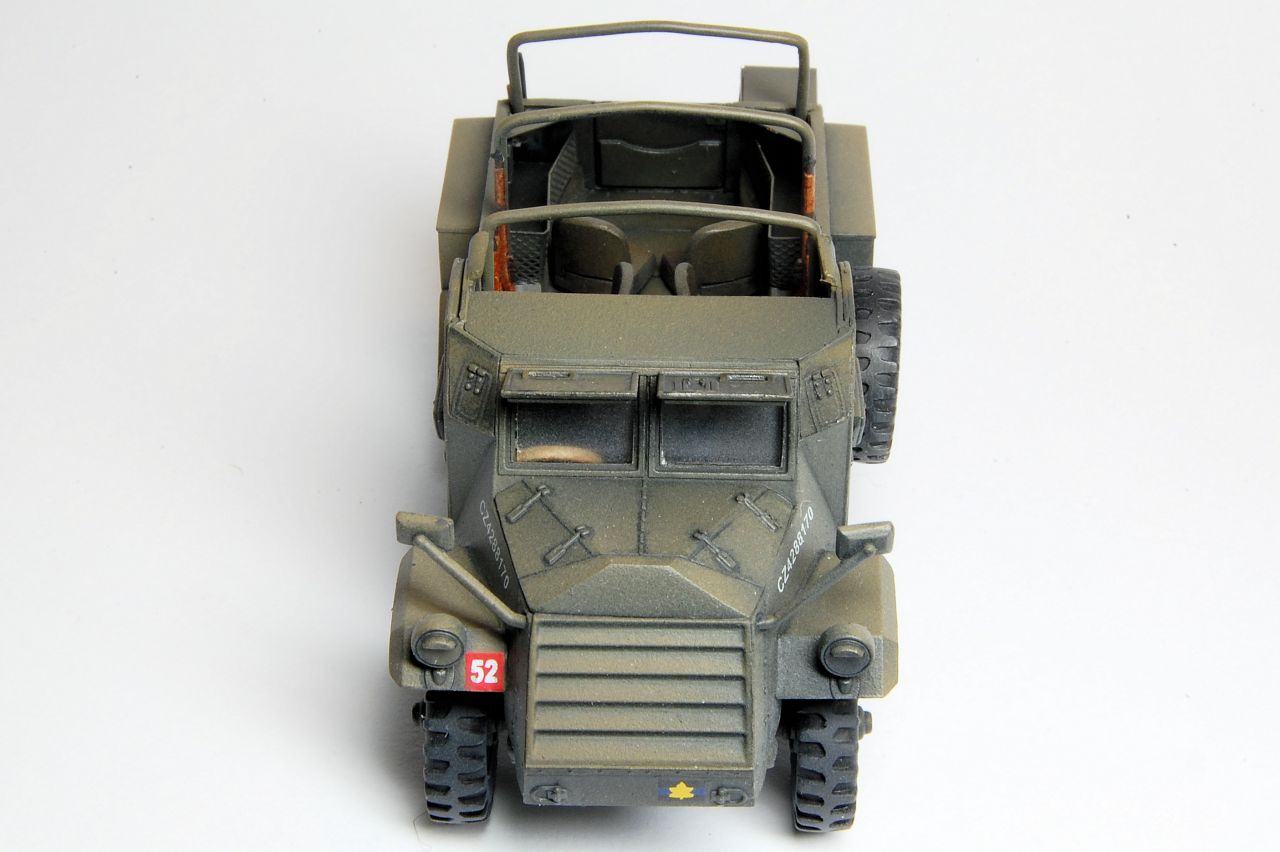
The big external stowage bins over the rear wheels fitted well (22), although I only noticed after painting that there is a tiny horizontal mould line near the bottom edge that I failed to remove. The front wheel arches were slightly awkward to fit, with a tiny part of the corner of the door frame being shaved off so that the arches made full contact with the bodywork (23). Front and rear doors all include decent internal details, so could be cemented in open positions. Equally the armoured covers for the side and front windows are also well detailed and can be fixed open or closed. The front end with the big radiator grille fits on well, then the engine cover also fits OK, I ended up with a slight gap on one side that I didnt fill in for some reason (24). The front roof plate was left off for now so that I could slide in the front window panes later as they look too delicate to take masking tape, though they can be left off altogether if preferred as they were removable for when the armoured visors were down, and could be stowed in the front doors.
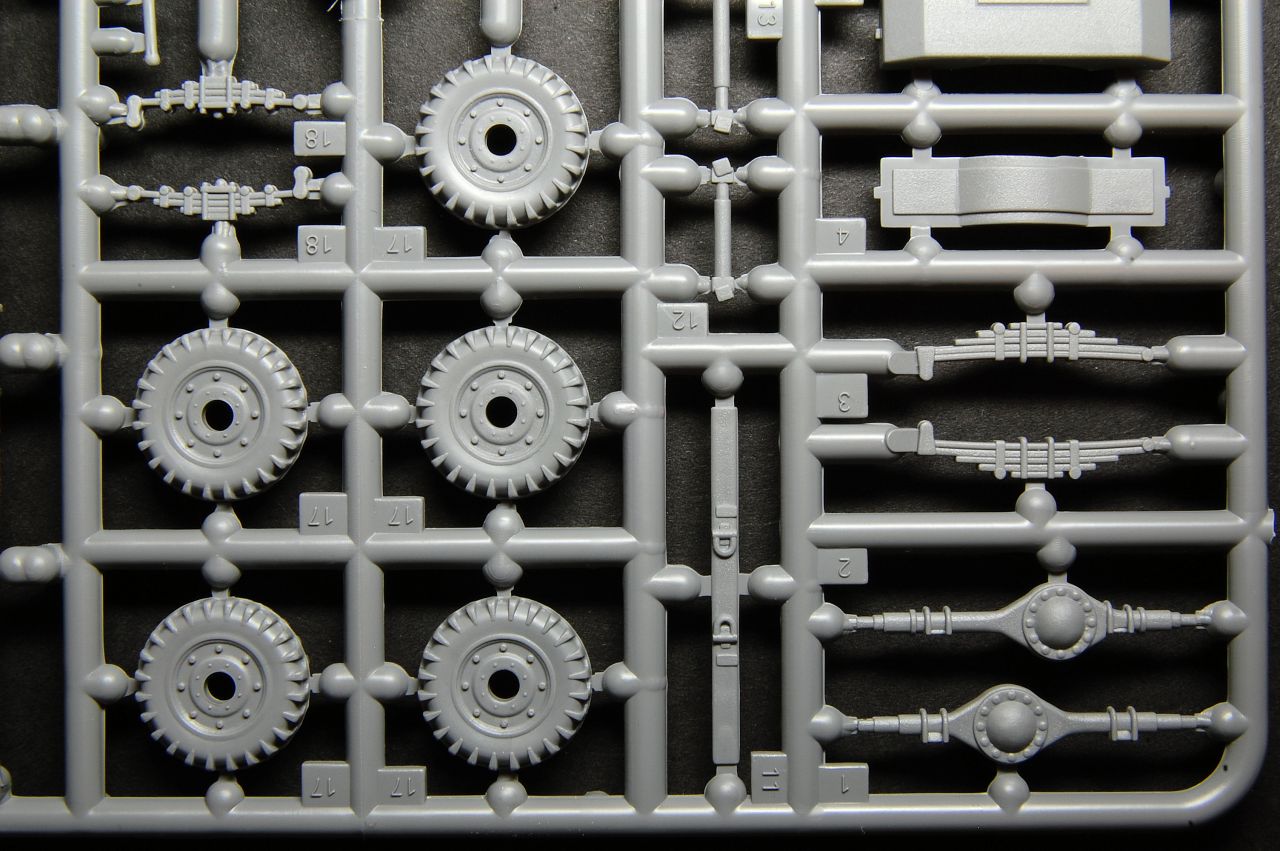
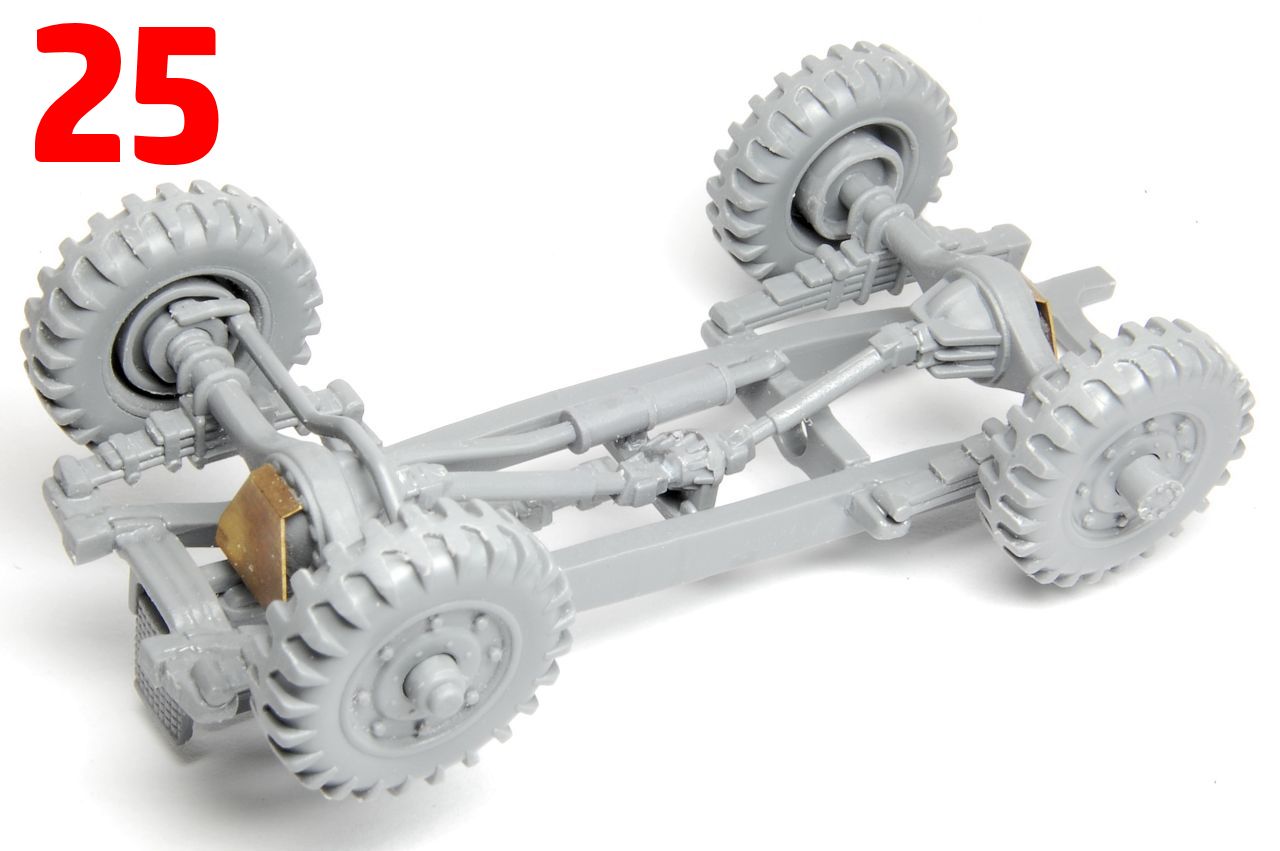
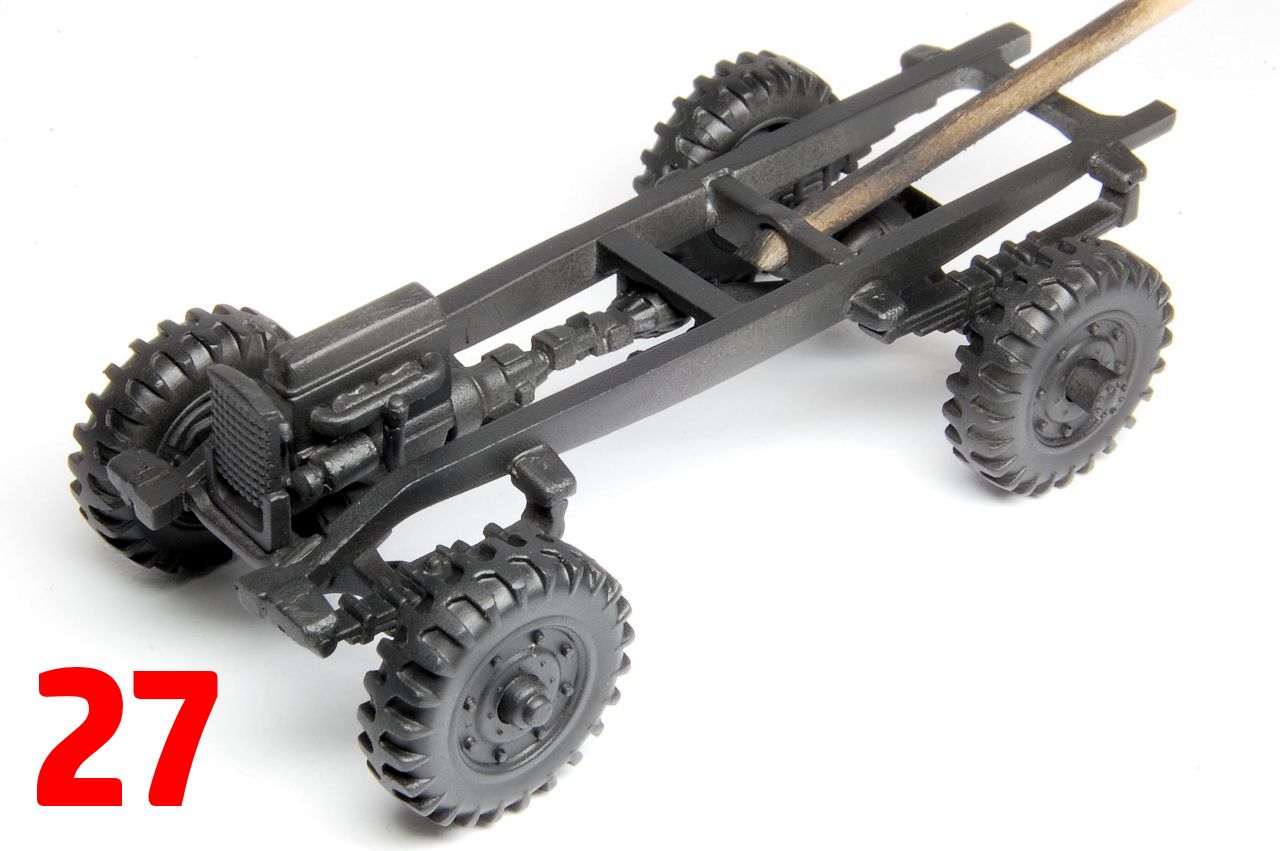
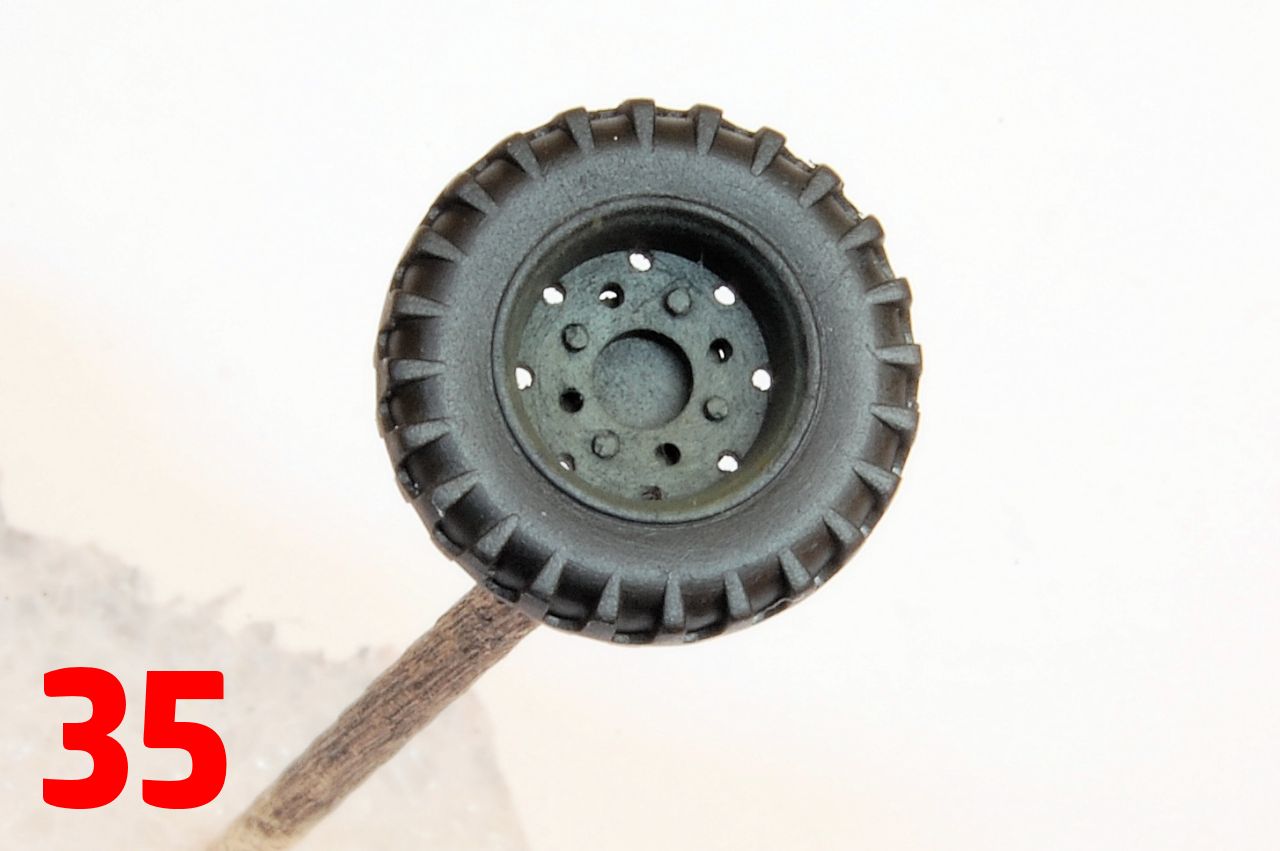
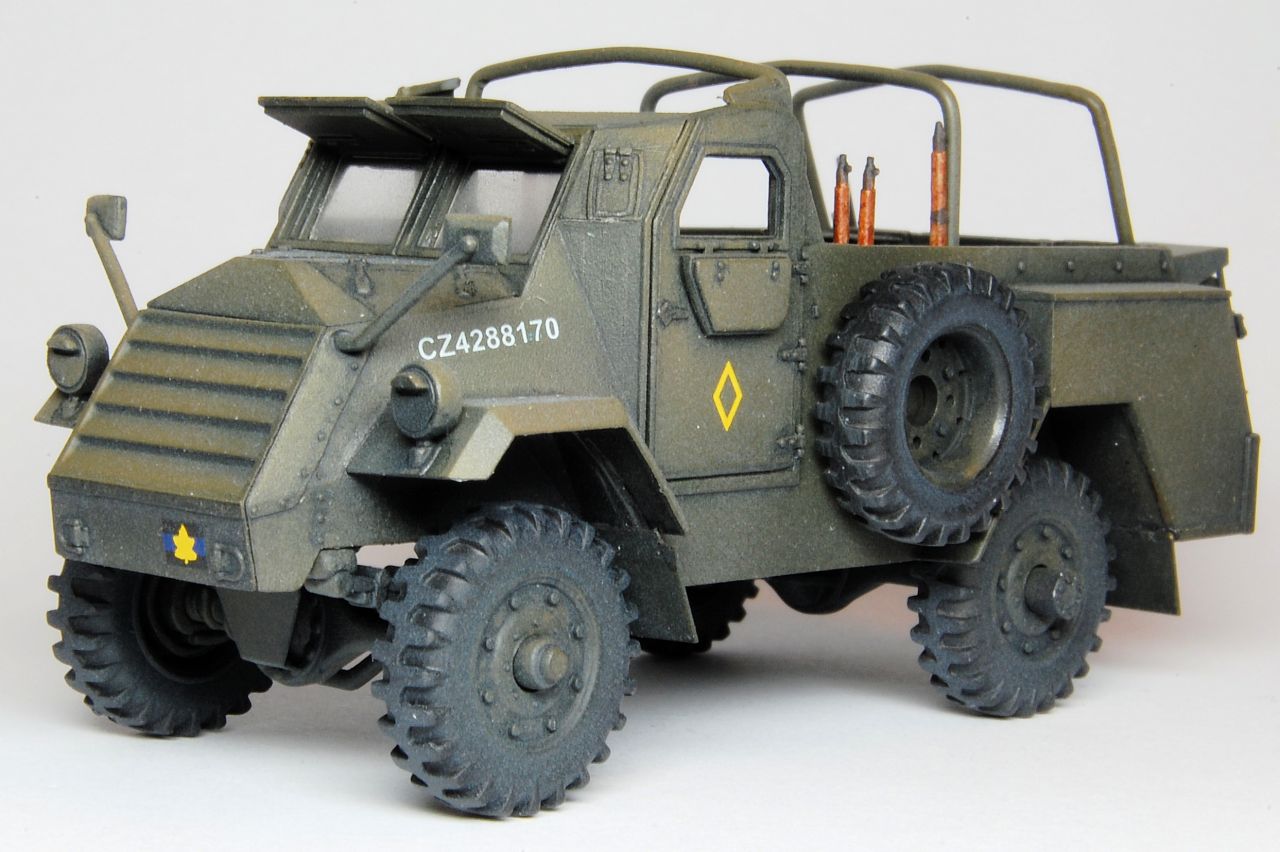
By now the chassis was set, ready for the wheels (25). There was some discussion over IBGs tyre choice for the 1/35 big brother of this kit, the consensus is that they arent right for WW2, having an alternating horizontal bar tread, while period photos appear to almost universally show a chevron pattern tread in use at that time. The tyre type represented is fitted to at least one surviving example, and vehicles in use post WW2 can be seen with various other tyres. Despite that, these not necessarily correct tyres look pretty good and clean up easily for assembly. It looks like IBG have the correct domed front wheel hub for WW2 on this small scale kit, while their 1/35 version seems to have a dished hub as seen on some post war examples.
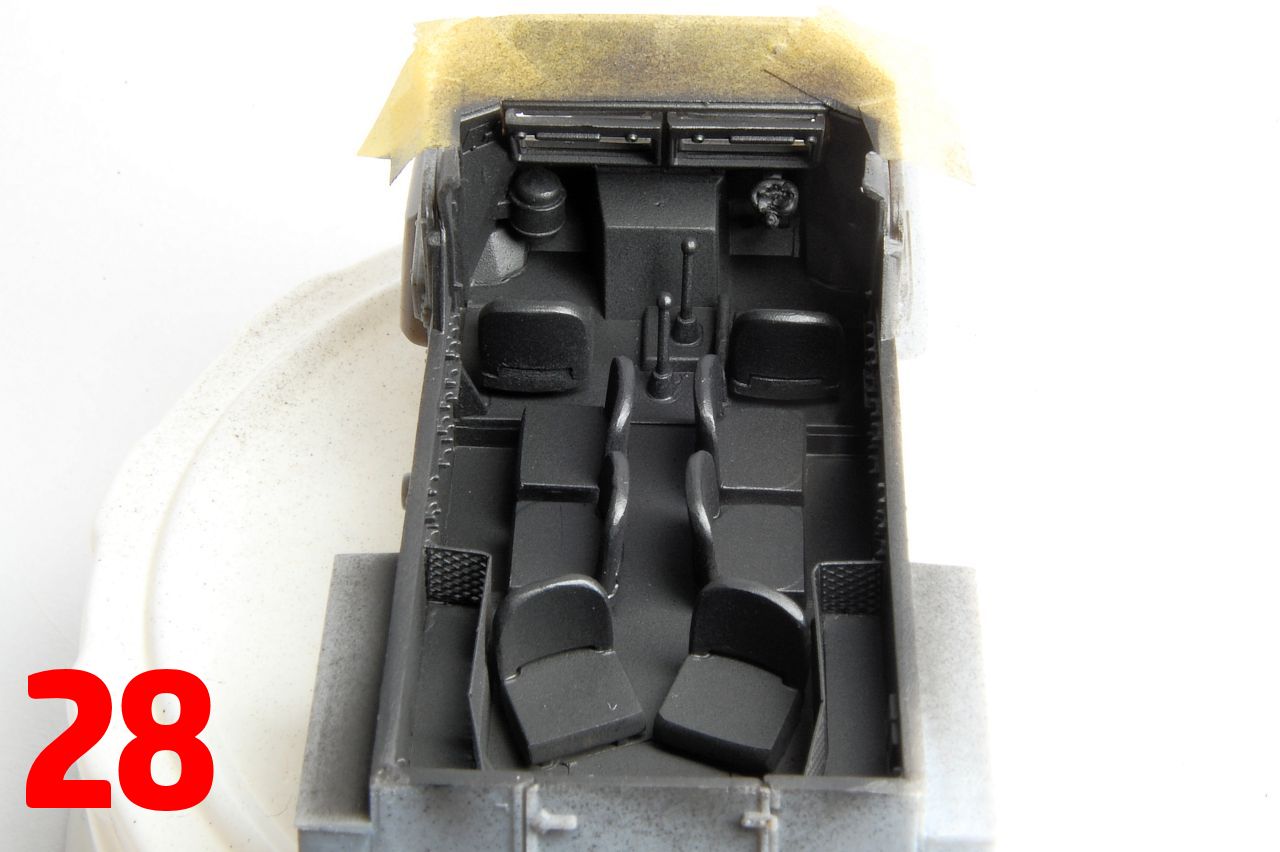
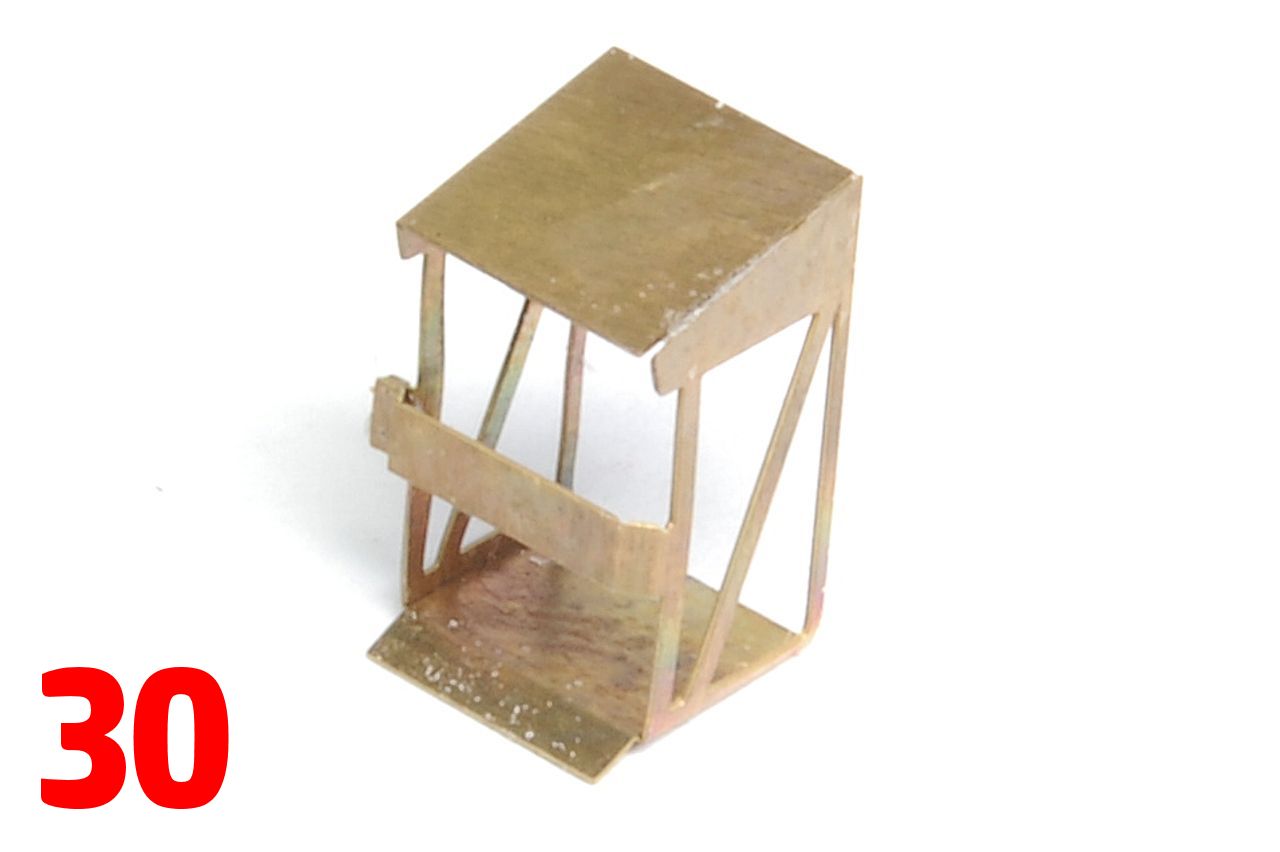
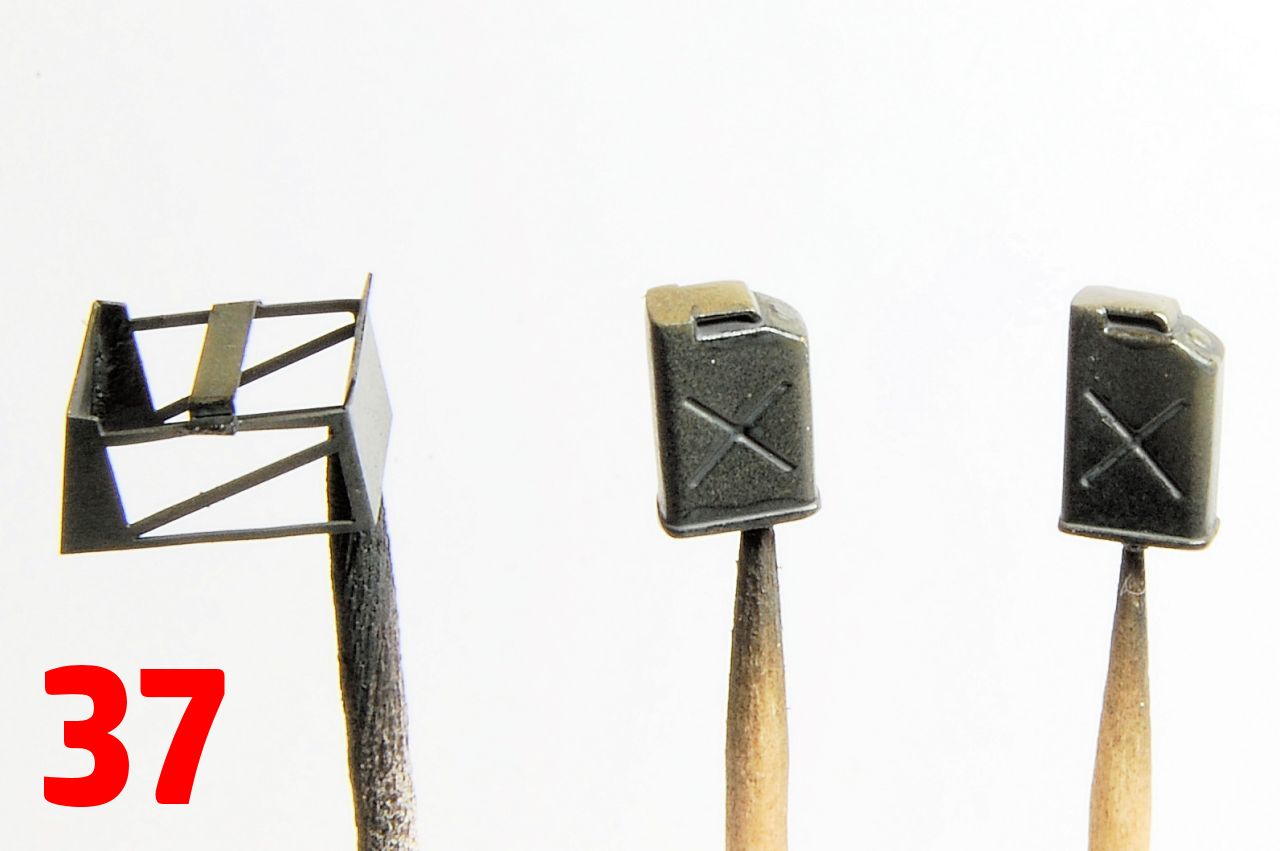
Breaking the painting down into modules, I went ahead with priming the chassis (27) and the interior (28) with the attachment points for the front compartment roof and the dashboard masked off. The interior was then sprayed with Model Air Olive Drab and over sprays of Khaki (29). Also visible here is the added PE tool stowage, the tow bar and brackets, and the wing mirrors and headlamps. Continuing with the external details, the PE fuel can stowage was then formed (30).
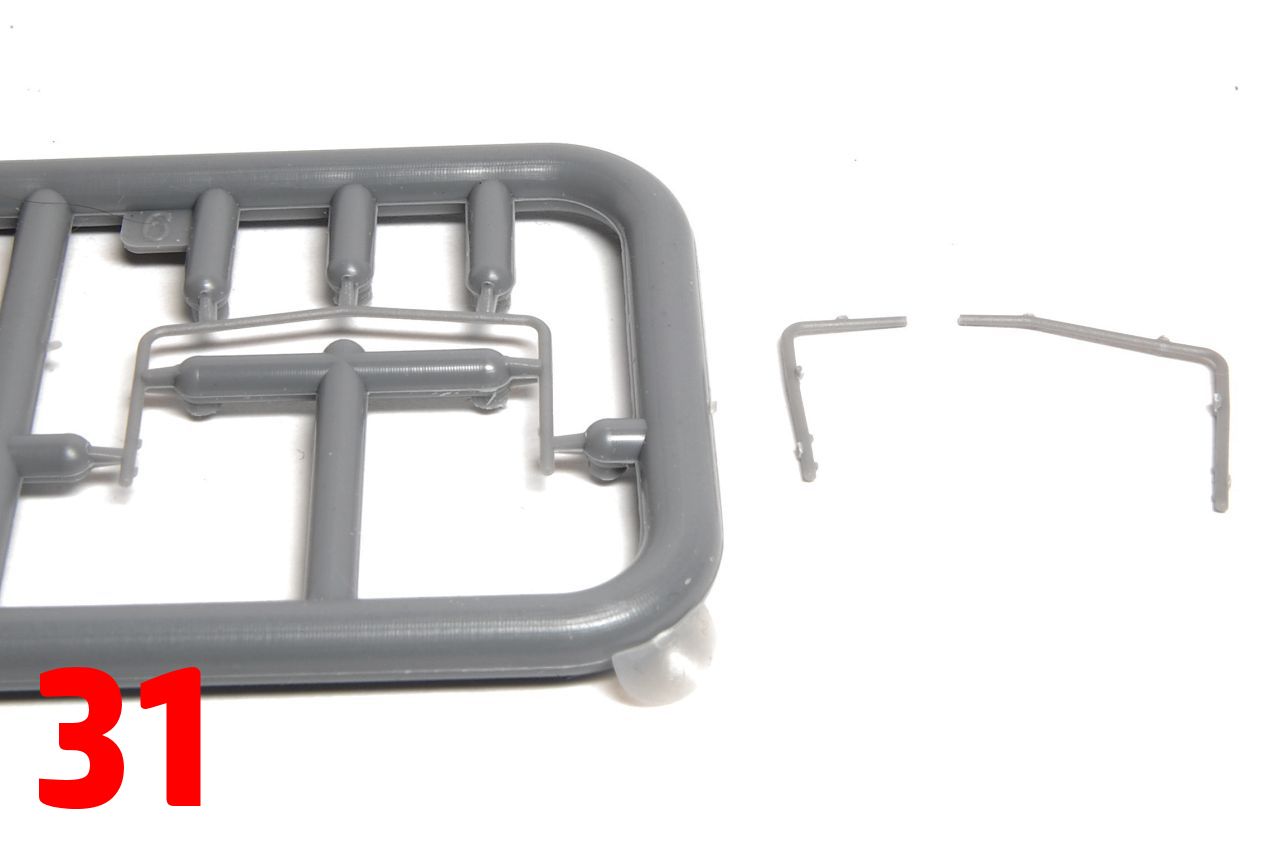
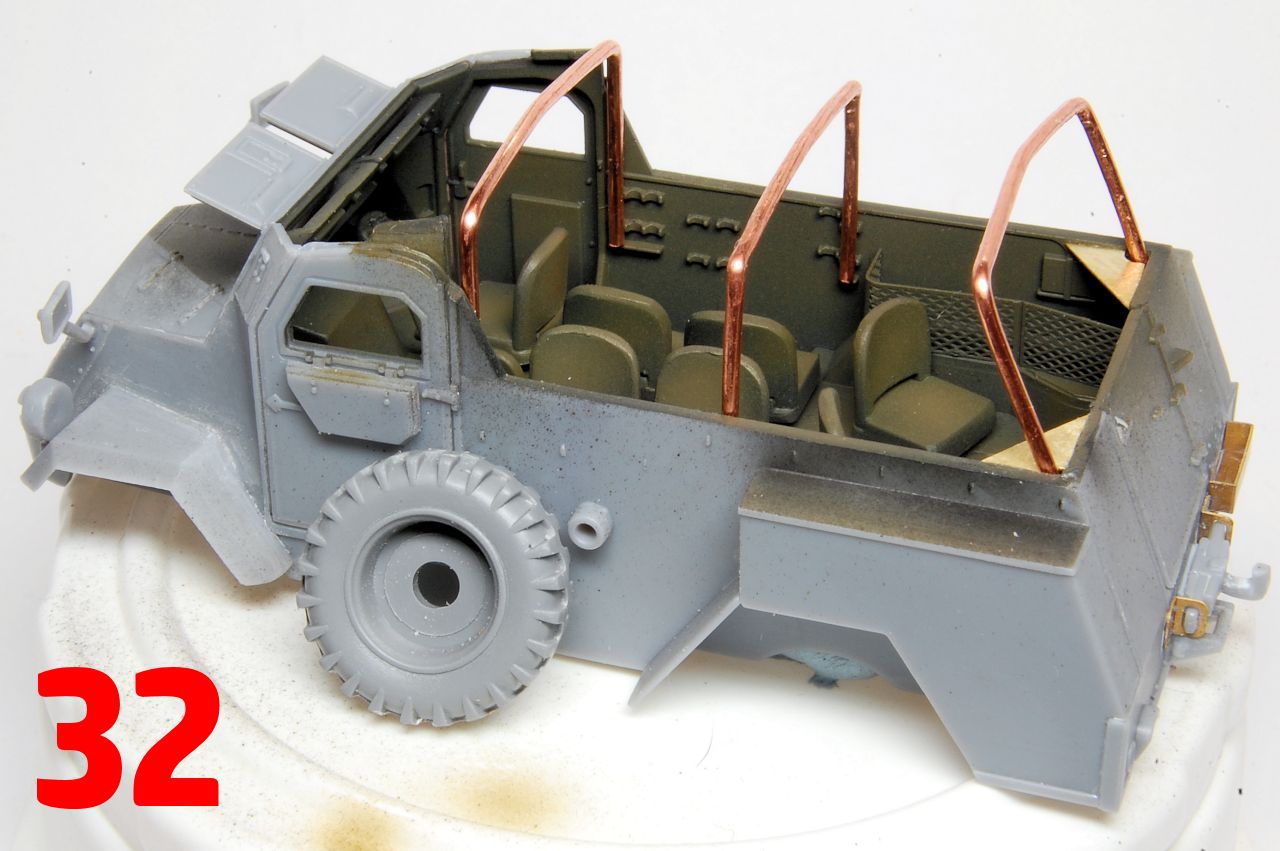
Further disappointment with sprue F was the supports for the canvas roof: having managed to remove one of them from the sprue in one piece, I found it impossible to clean up the sprue tags and mould lines without it breaking (31). I gave up and went for something much stronger, if over scale, in the form of a strand from a copper high voltage cable (32).
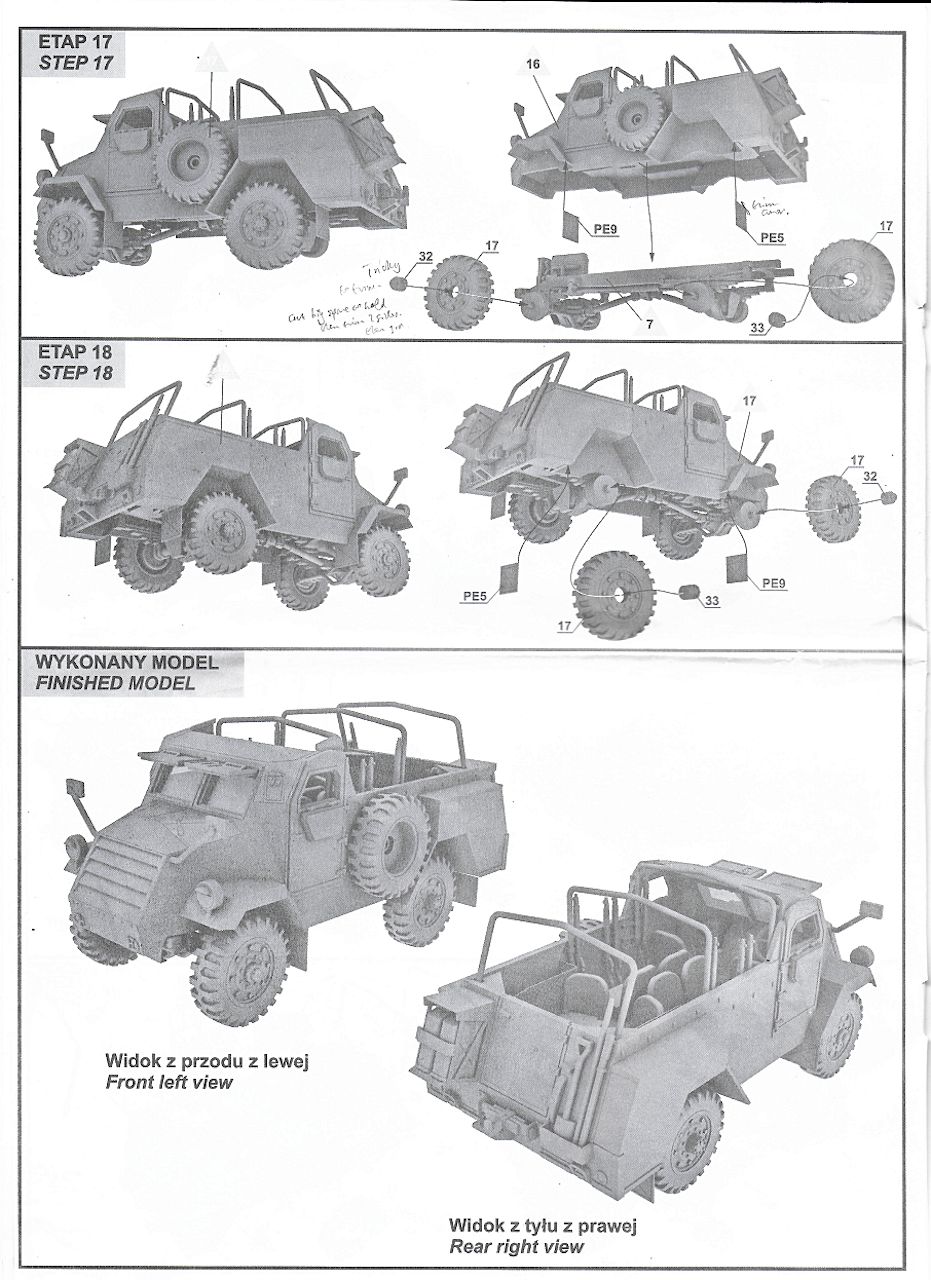
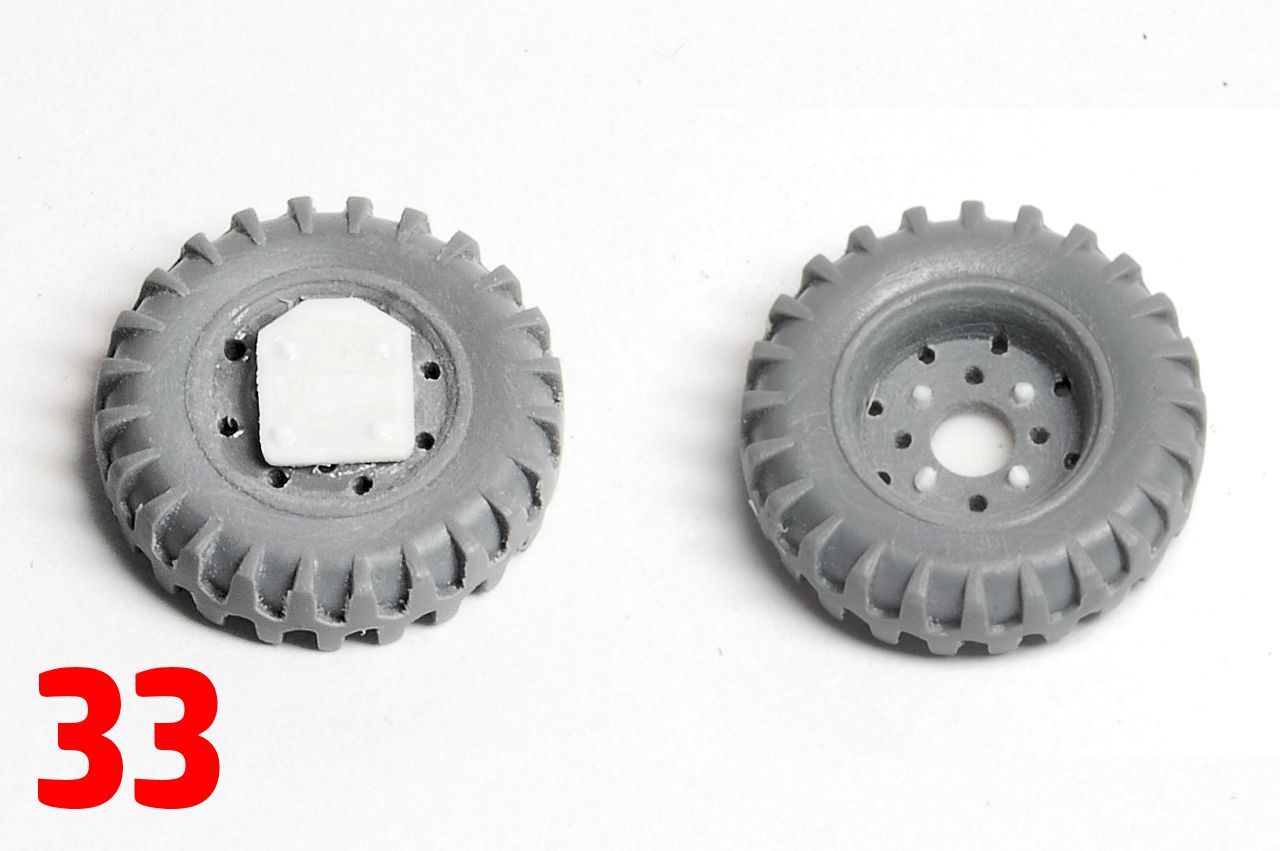
It seems like IBG took a short cut with the spare tyre in that it is identical to the other four wheels (32); as it would be bolted with its outer side facing towards the mounting bracket, it leaves a completely blank inner face with no detail at all on display, added to which no authentic mount is provided, just a circular peg. This doesnt seem acceptable, so I attempted to create some detail by drilling out some of the bolt holes, adding a rudimentary plate on one side and four bolts on the other (33). This isnt strictly accurate either, but looks better than nothing. Something to look out for is that the moulded peg for the spare tyre on the side of the vehicle is quite long, so may need shortening if such additional detailing is added.
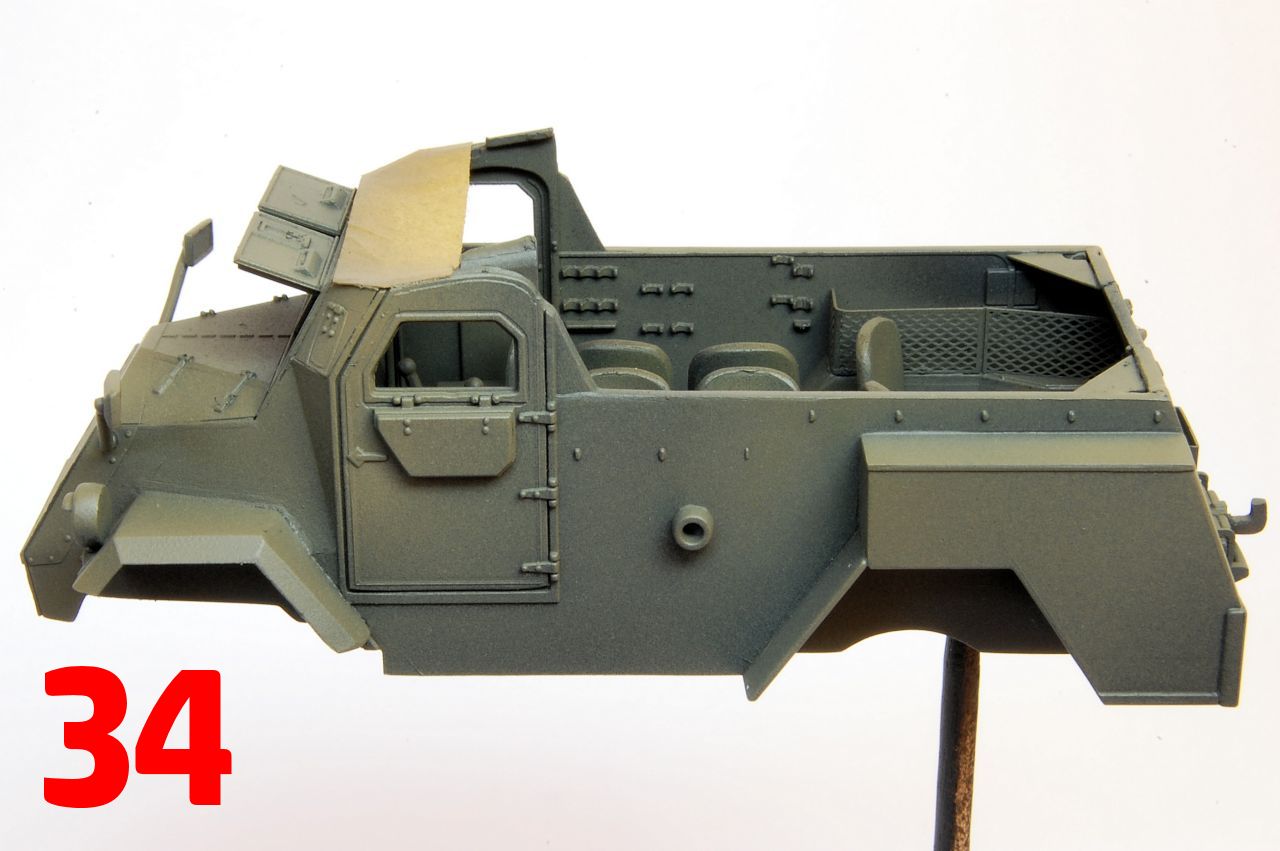
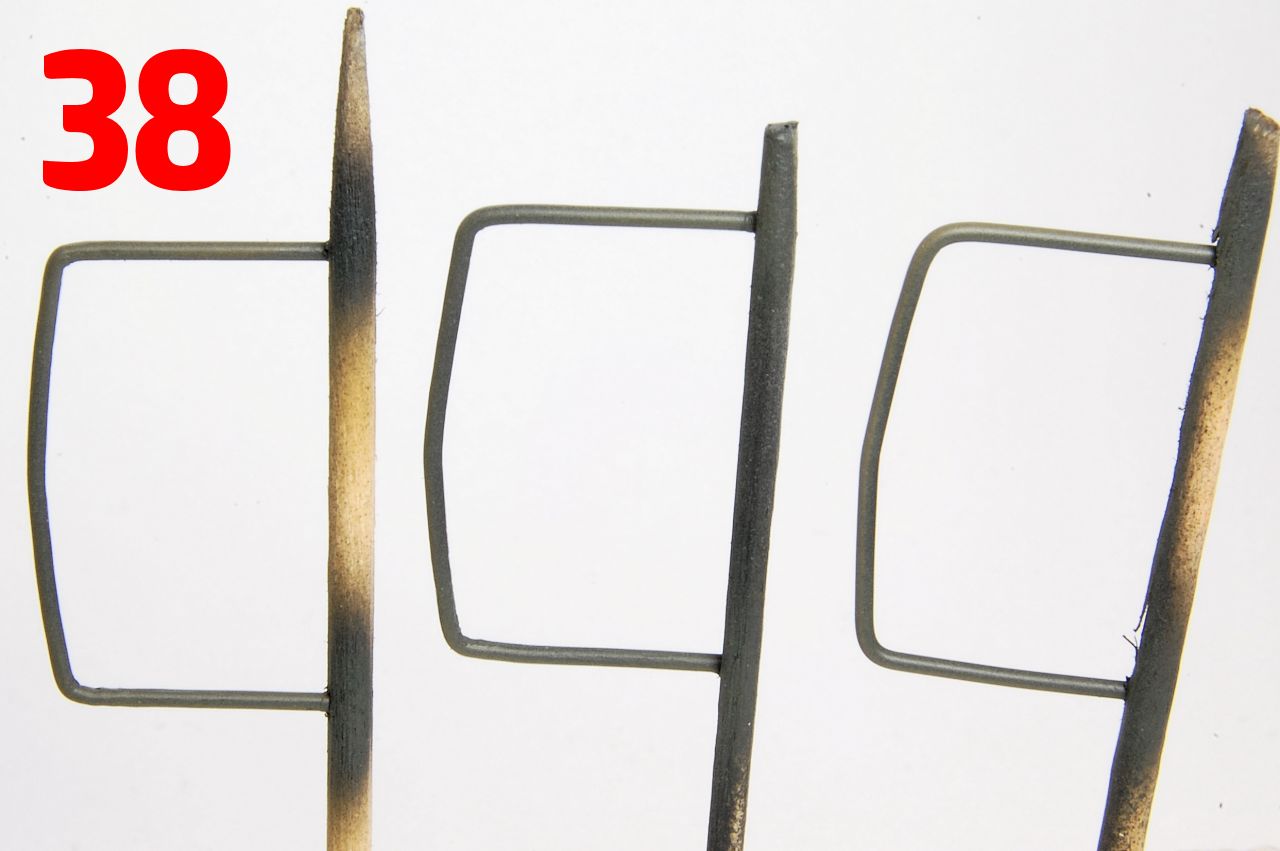
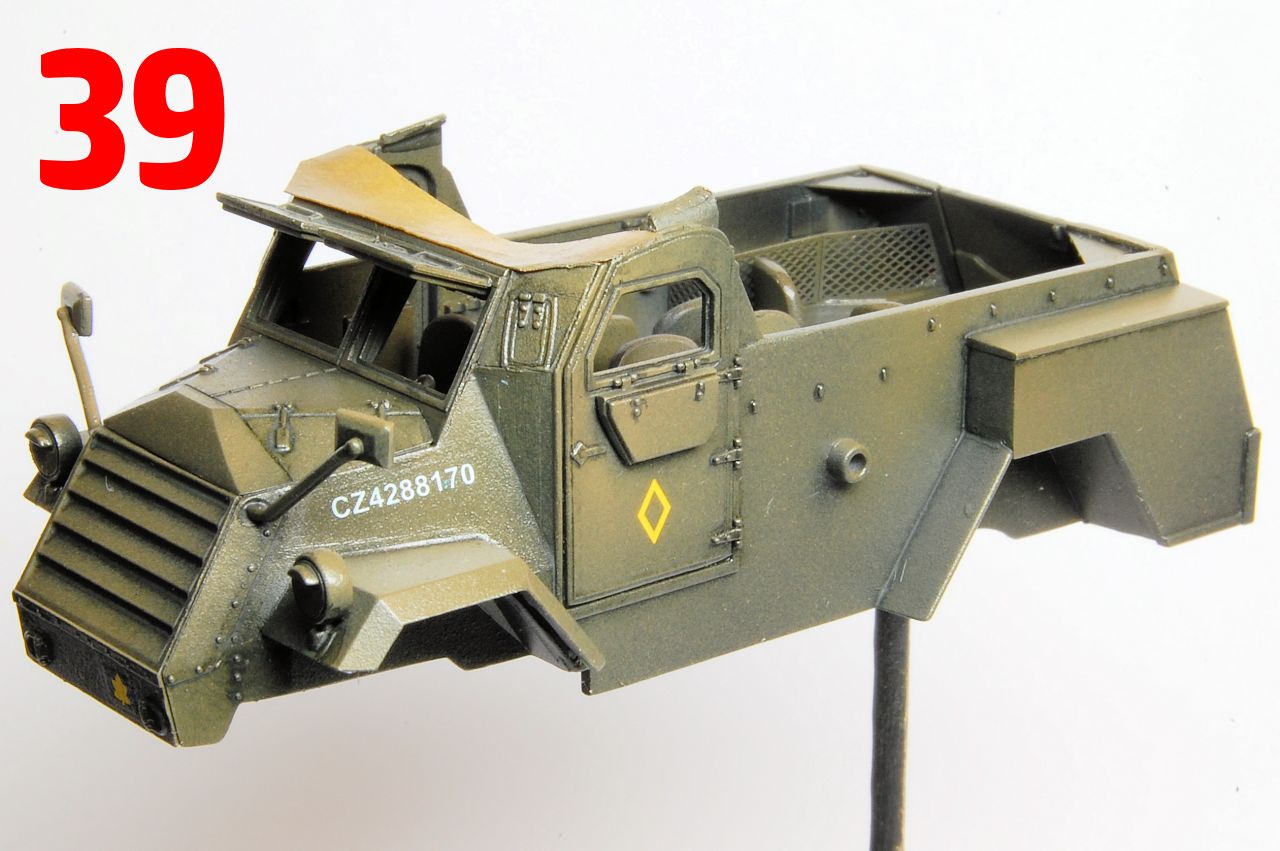
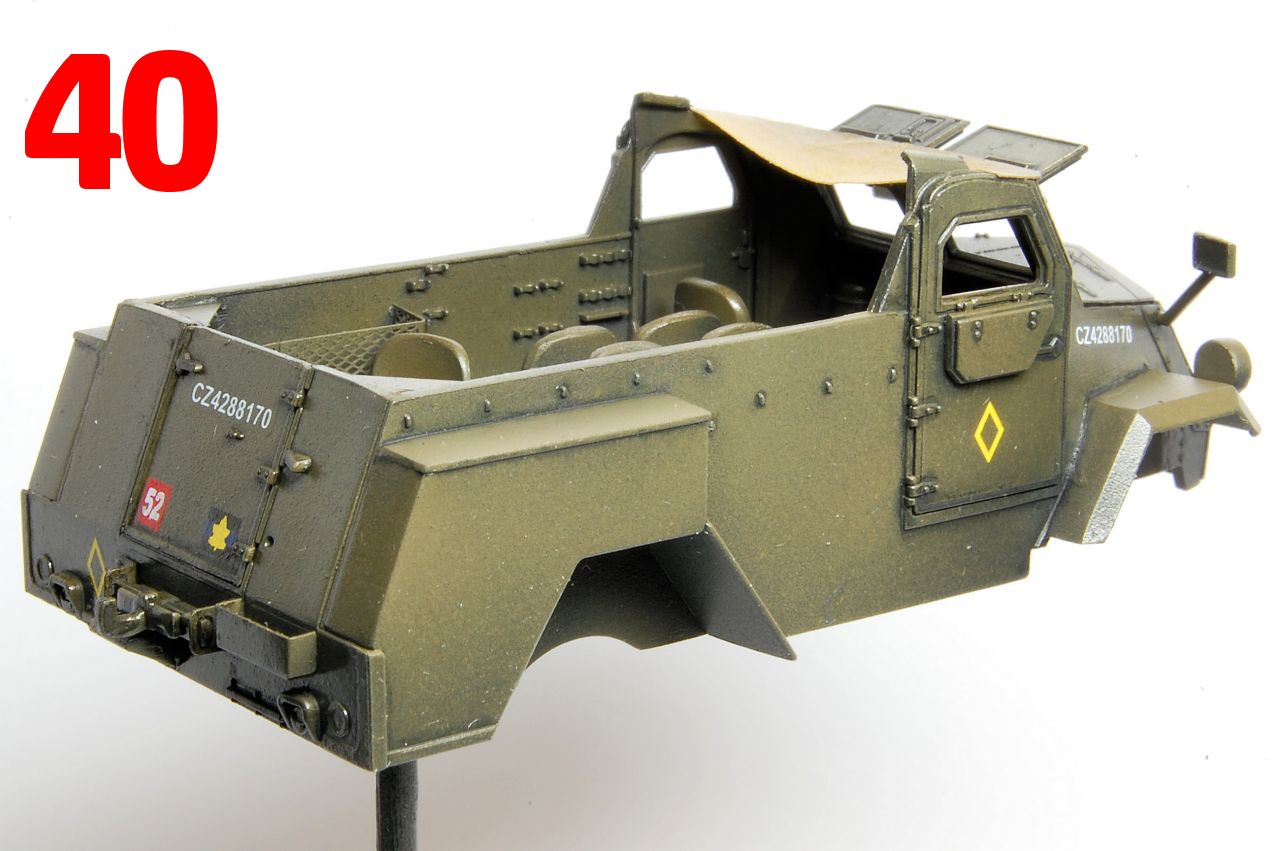
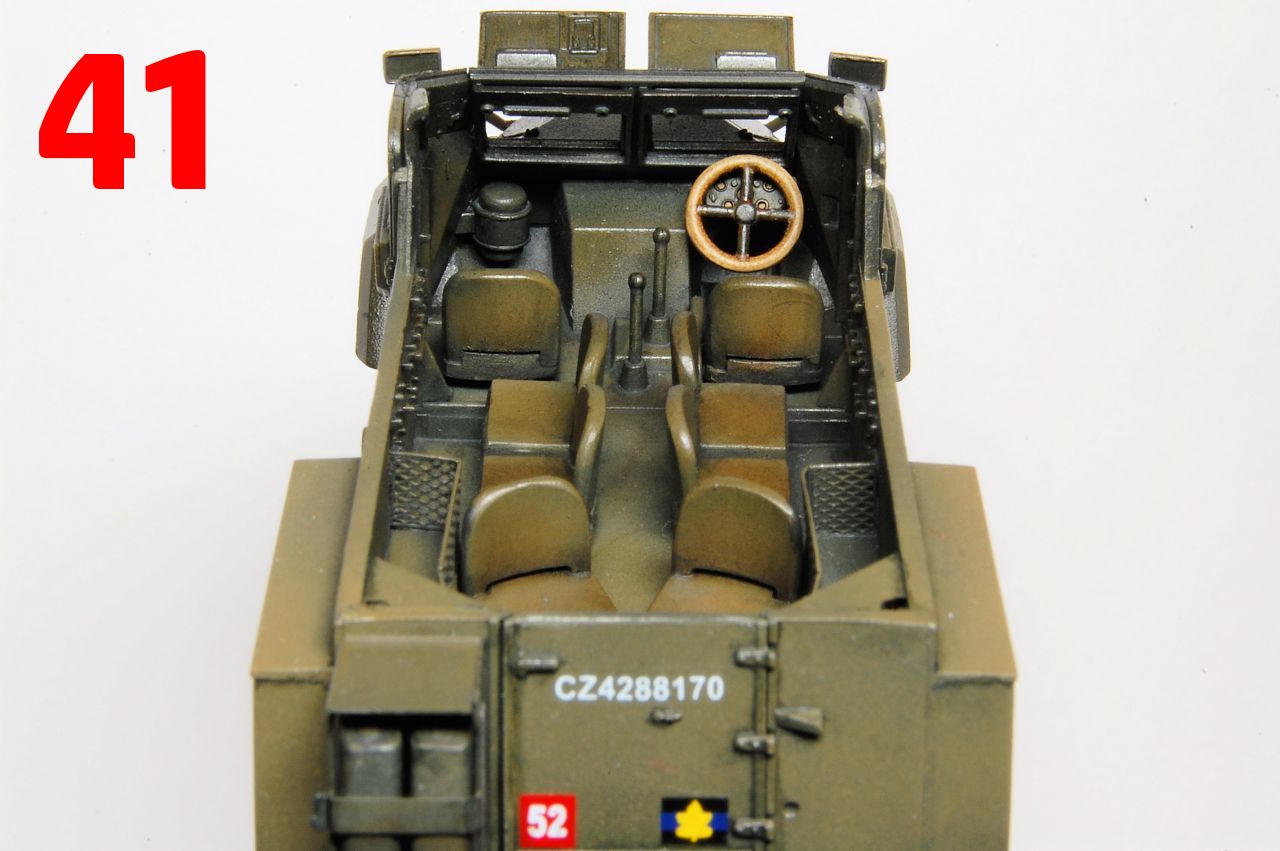
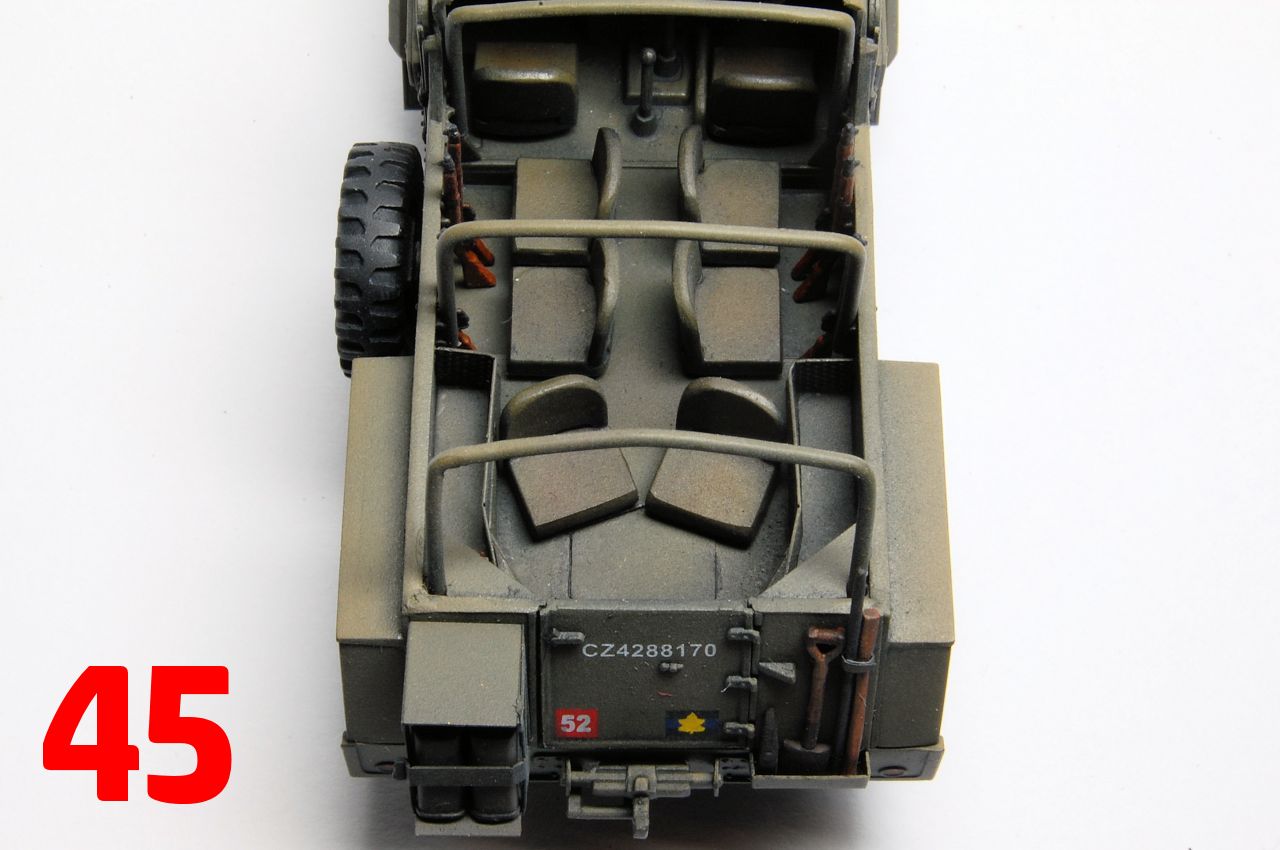
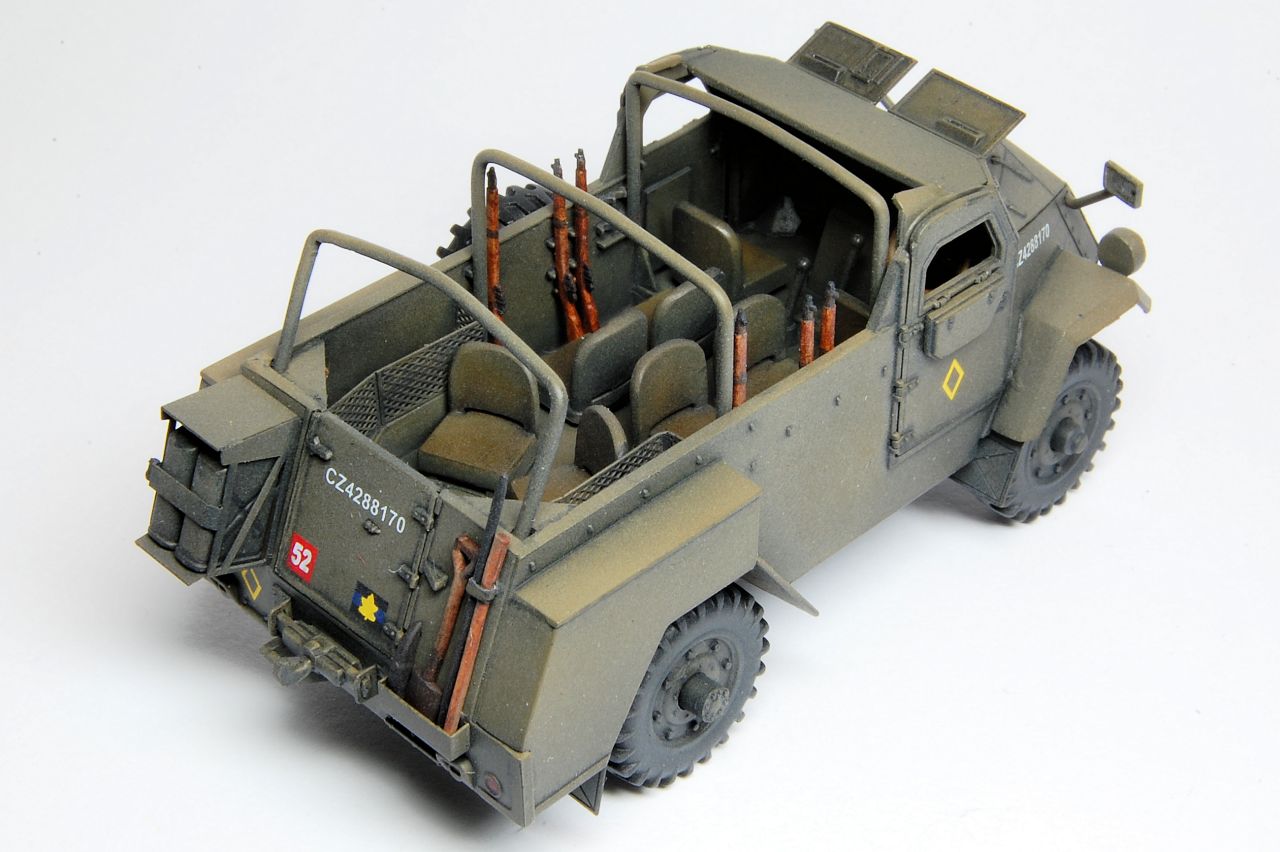
The exterior and all the separate detail parts were then also primed and painted as before (34 to 38), then gloss varnished in preparation for the decals (39, 40). The decals were absolutely fine, quite thin, so care needed not to tangle the long serial numbers, and these were followed up with another gloss coat and then an enamel pin wash. In the interior (41), the dash has been added (dials blacked in with a paint pen) and the steering wheel, painted to resemble wood. On the back, the fuel stowage is now in place, and at the front, the mirrors have been painted with a silver paint pen.
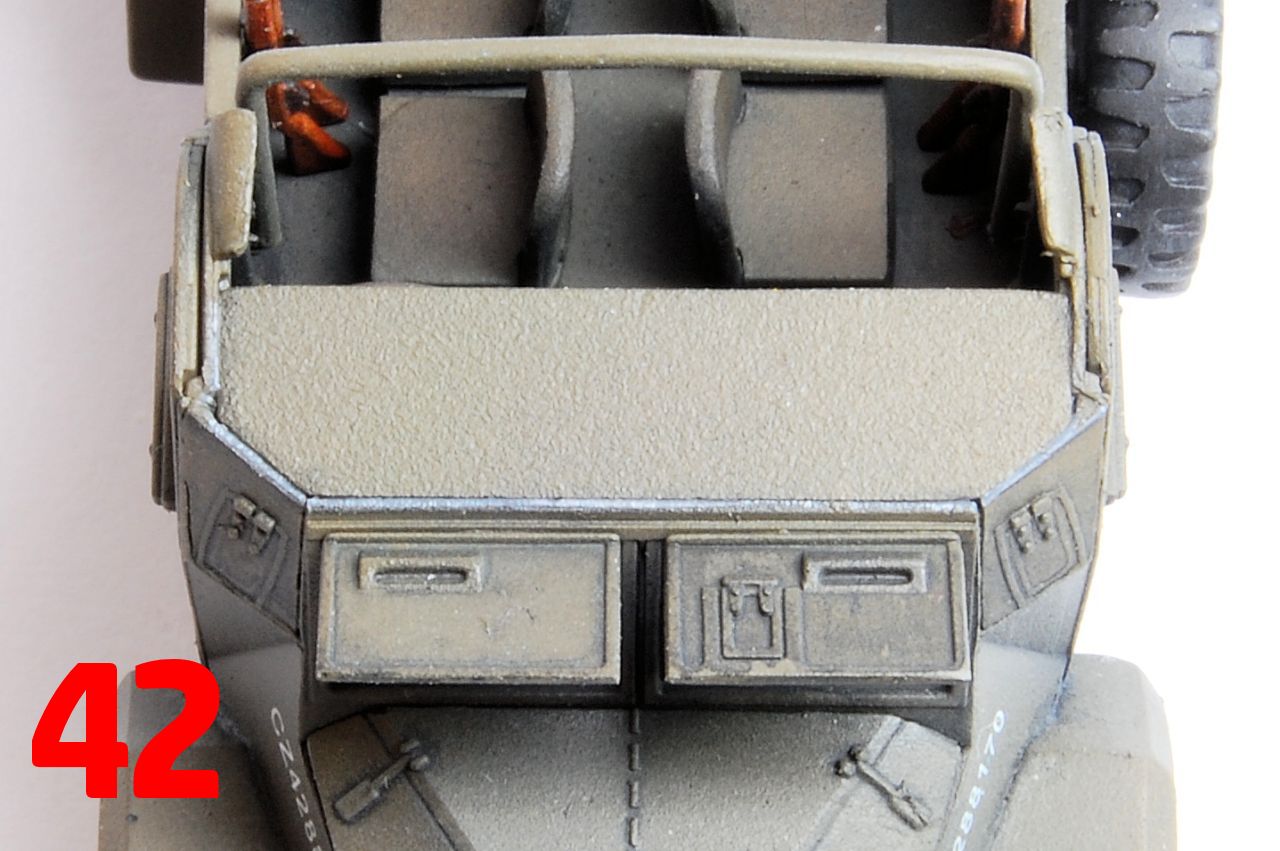
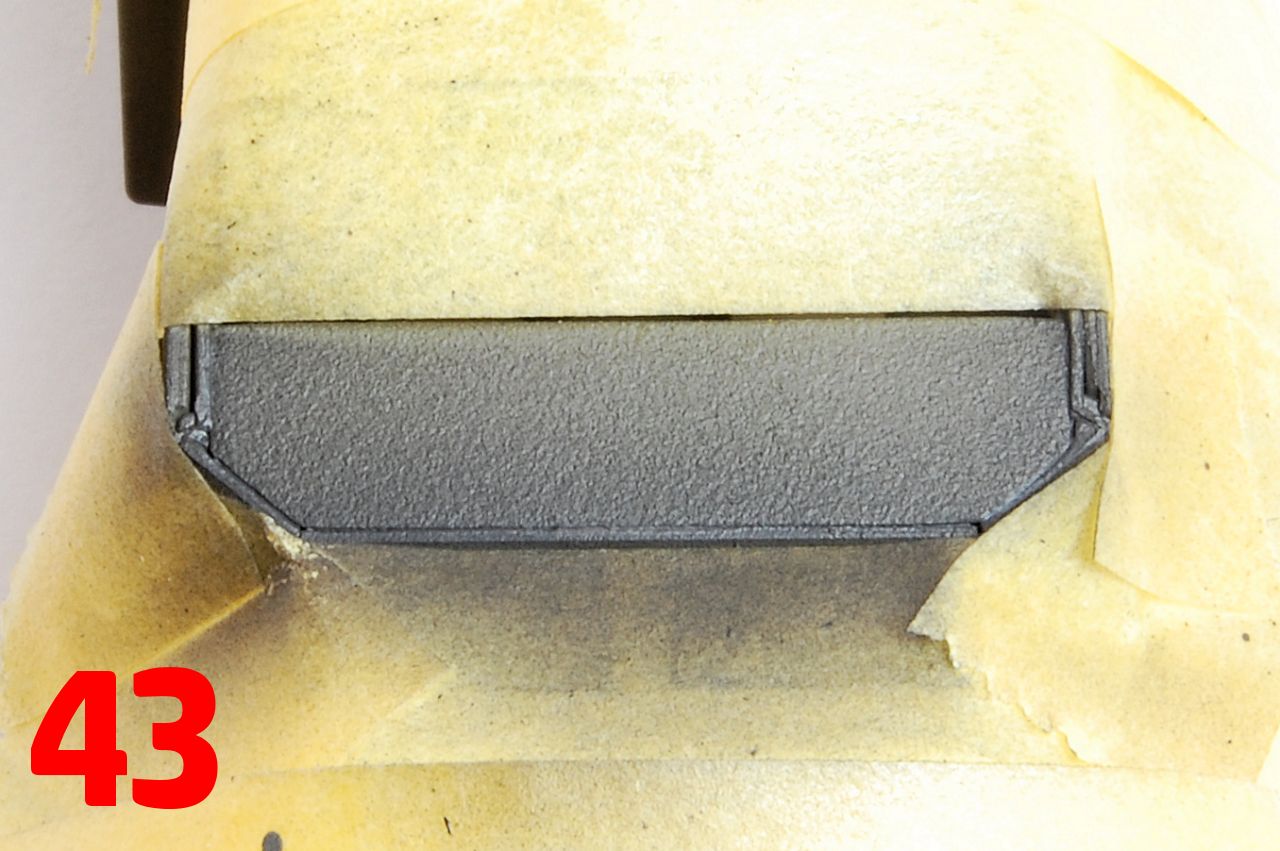
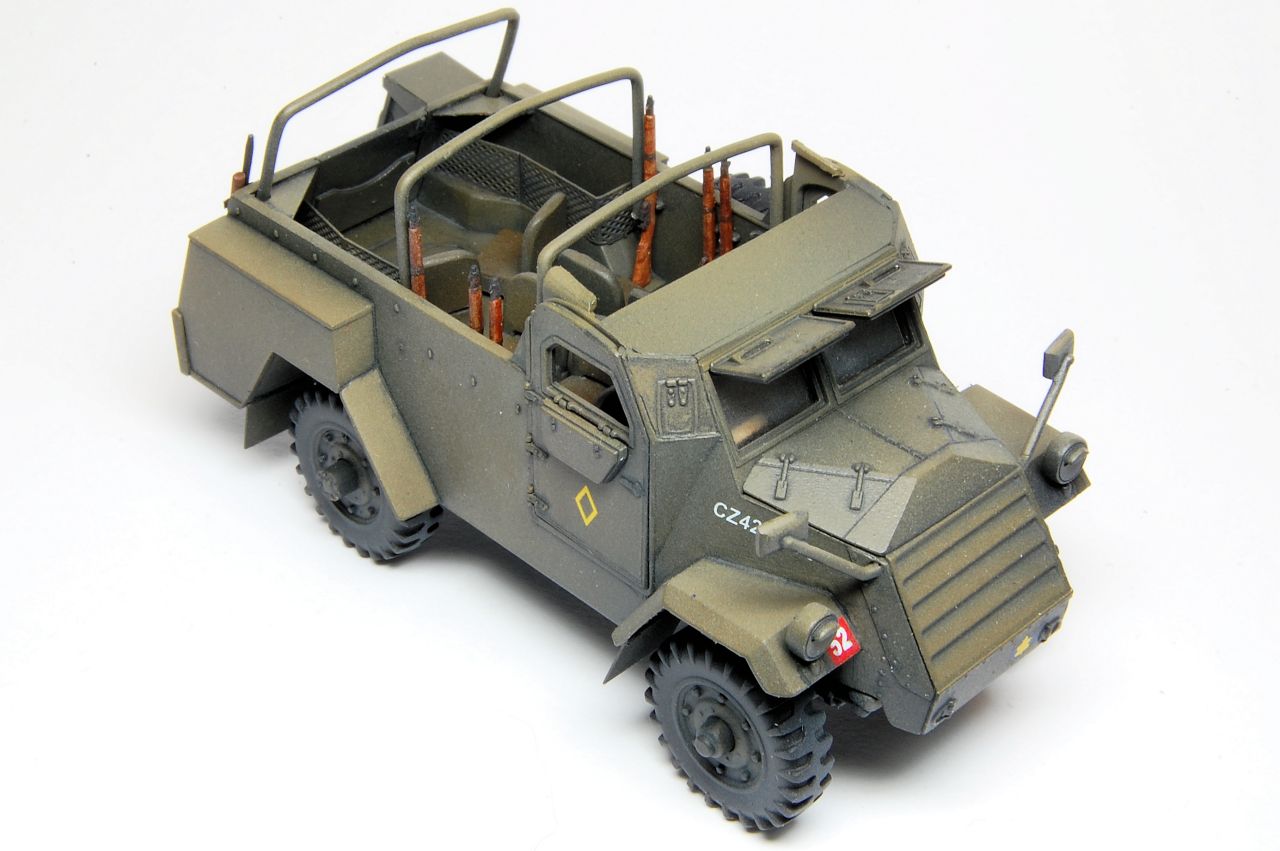
A couple of photos of the roof plate which I added near the end. Its just visible that the right corner front plate isnt quite true to the windshield and that the right hand door isnt positioned identically to the left. Although these misplacements are tiny, its enough to cause the roof plate to not fit in easily, but note that it should sit inside the surrounding plates, not on top of them, and I had to gently file down the right corner plate to allow it to sit flush (42). Note the small bent over sheets at the top of the doors; I think these should meet up with the roof plate, but for some reason there is a gap. Photos showing this detail are not plentiful however, so perhaps the way it is rendered is correct, at least for some vehicles. The surrounding area was masked off and the roof plate and edges of the other parts was painted (43) to match the rest of the bodywork (44).
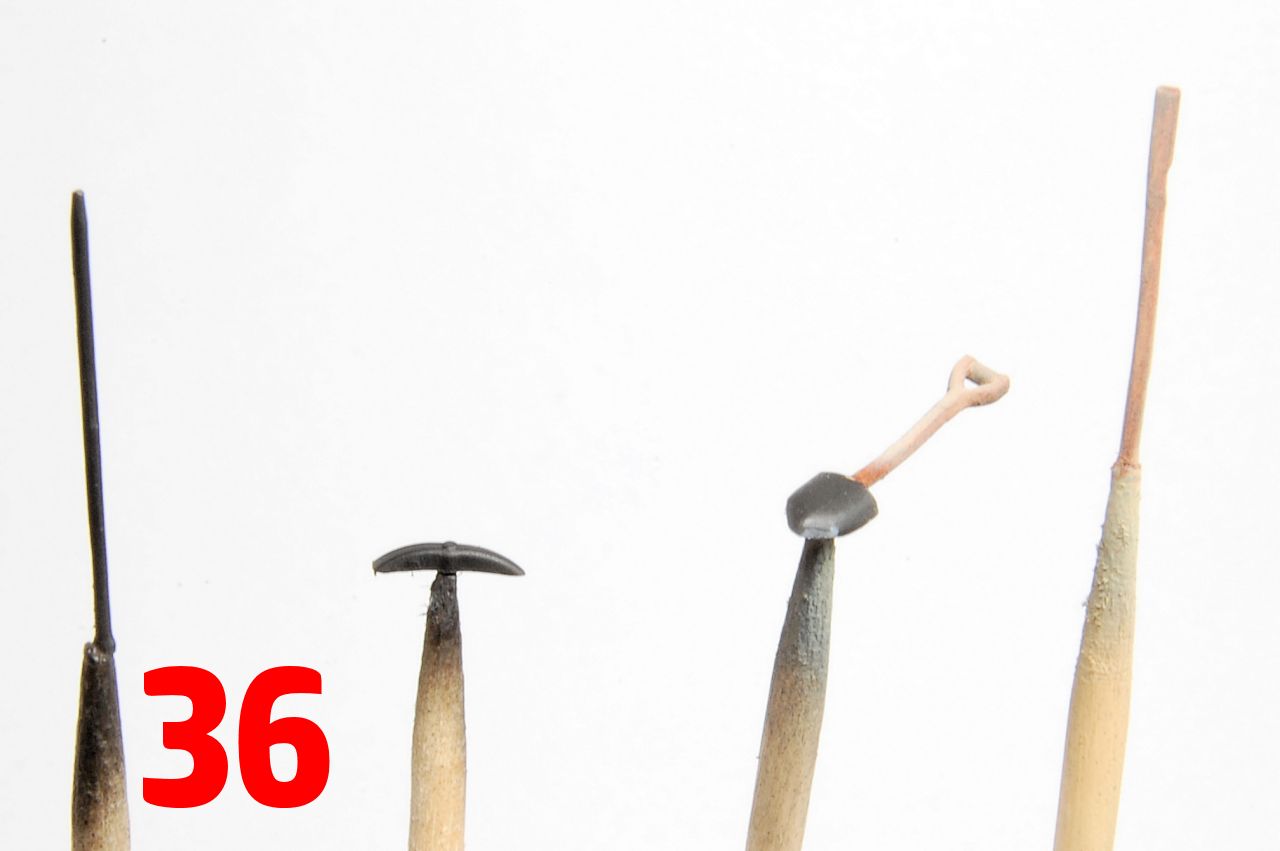
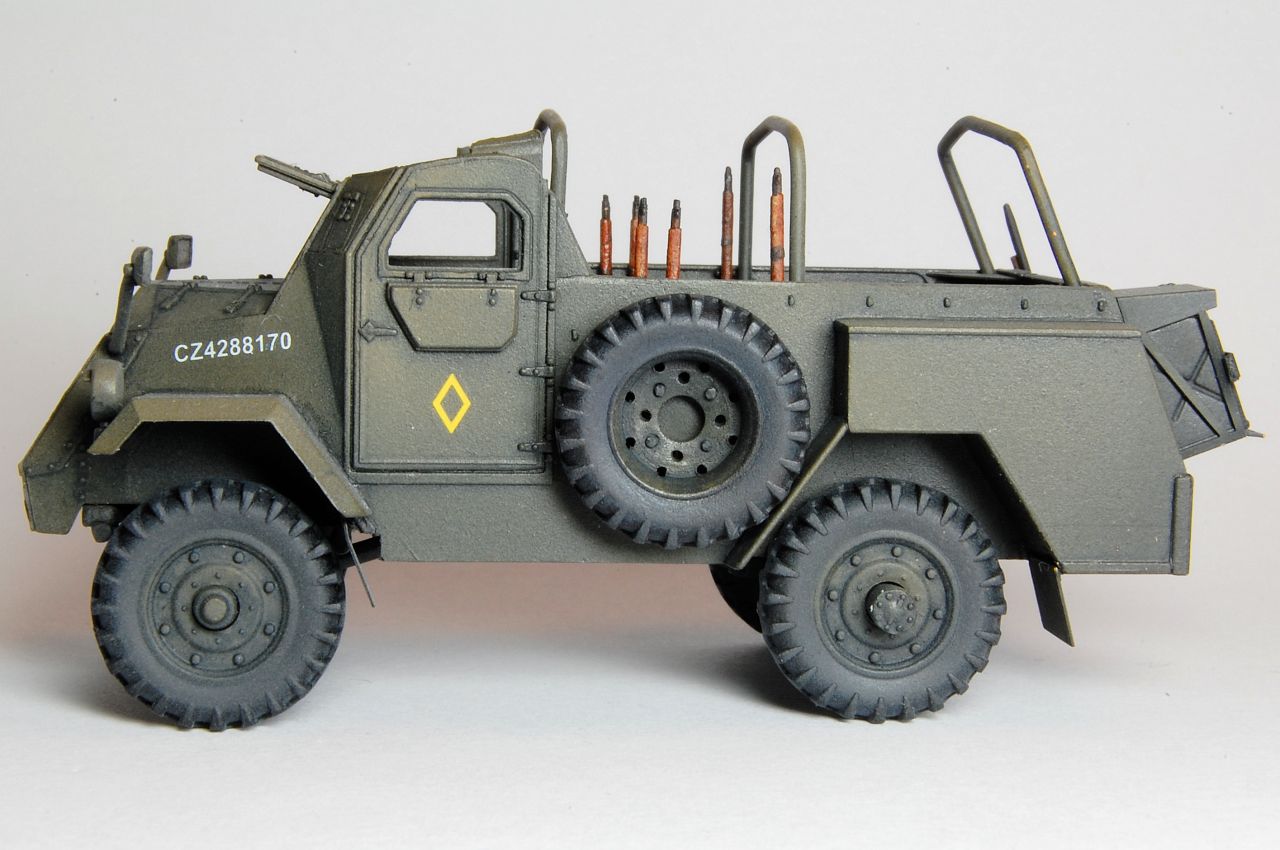
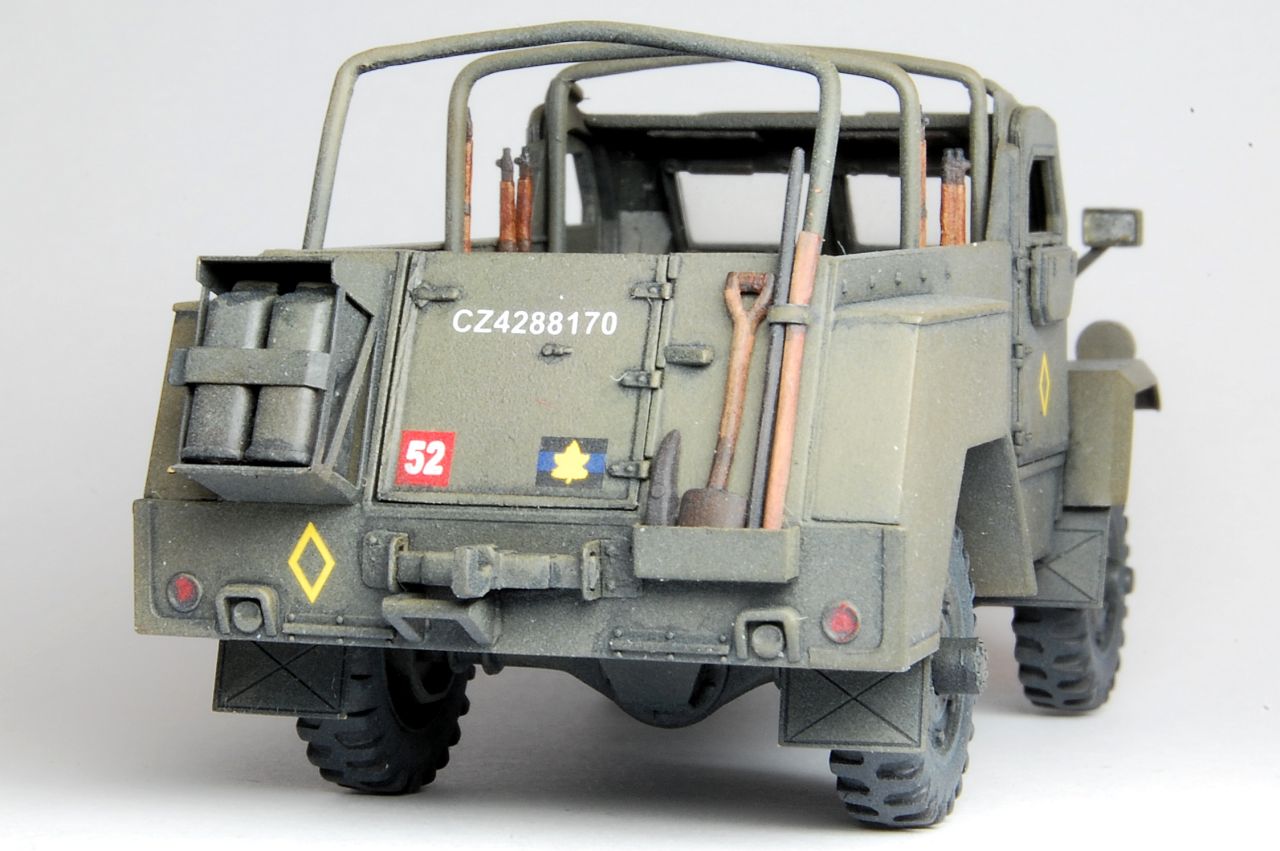
The tools (36) are provided as separate parts, including the pick being provided as handle and head (which lacks a hole) for placement in the rear tool stowage bin. The pick handle has a moulded on ridge to represent a clasp, which I accidentally sanded away, while the shovel, pick head and digging bar have nothing. I added a small strip of metal around the bar and pick handle to represent a clasp but did nothing for the shovel (45). Some photos appear to show a bracket that clamps the tools a few inches away from the vehicle, while others show them clamped against the body; Im not sure which is correct for WW2 era.
The rifles are OK in terms of detail for this scale, and these were fairly carefully painted as they are quite prominent once mounted in their clamps. Eight are provided, but only six clamps to hold them; I guess the other two are for the occupants of the front seats, but theres nowhere obvious to put them. (45)
The body attached to the chassis very easily, just a small dab of superglue to hold it in place. I then added the mud flaps, a small piece of the inner corner needing to be cut off on each one in order for them to fit in place correctly.
Conclusion
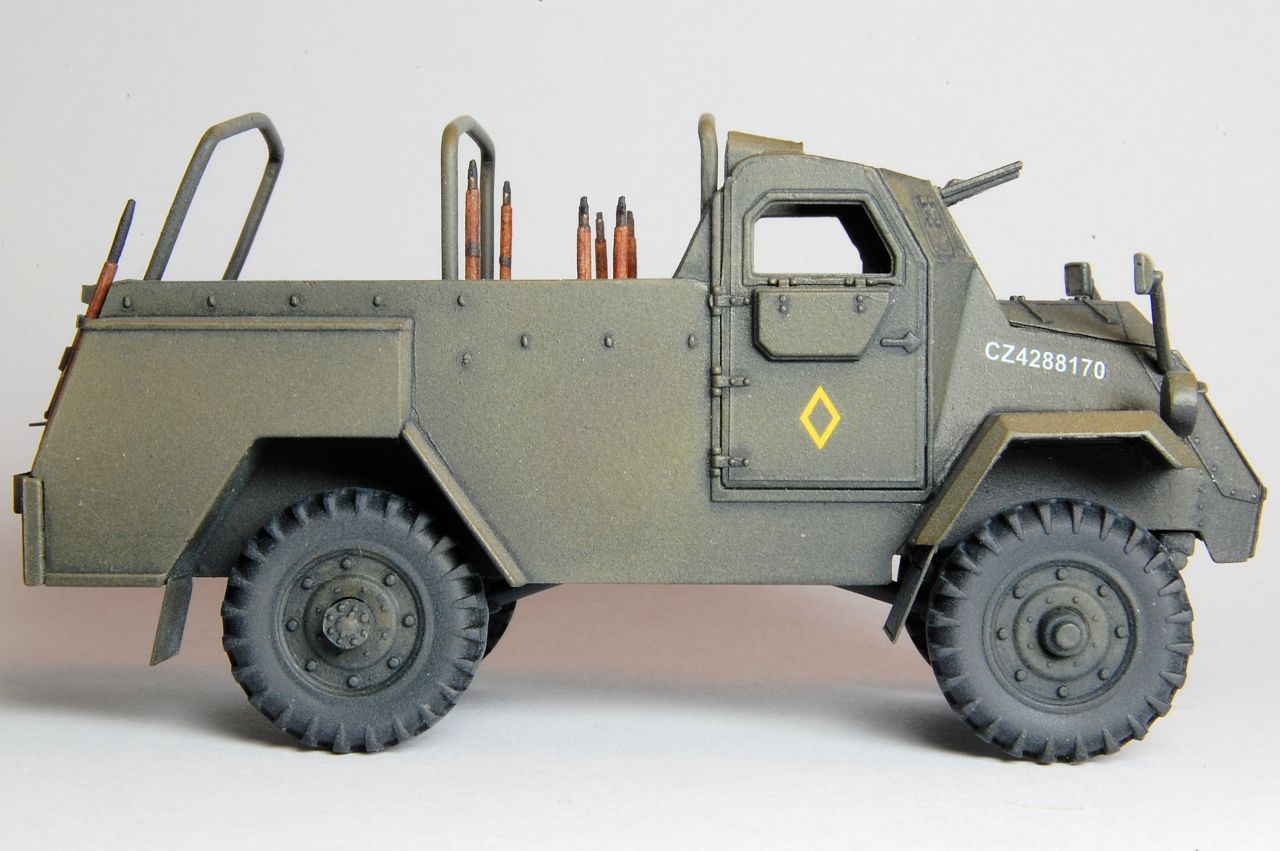
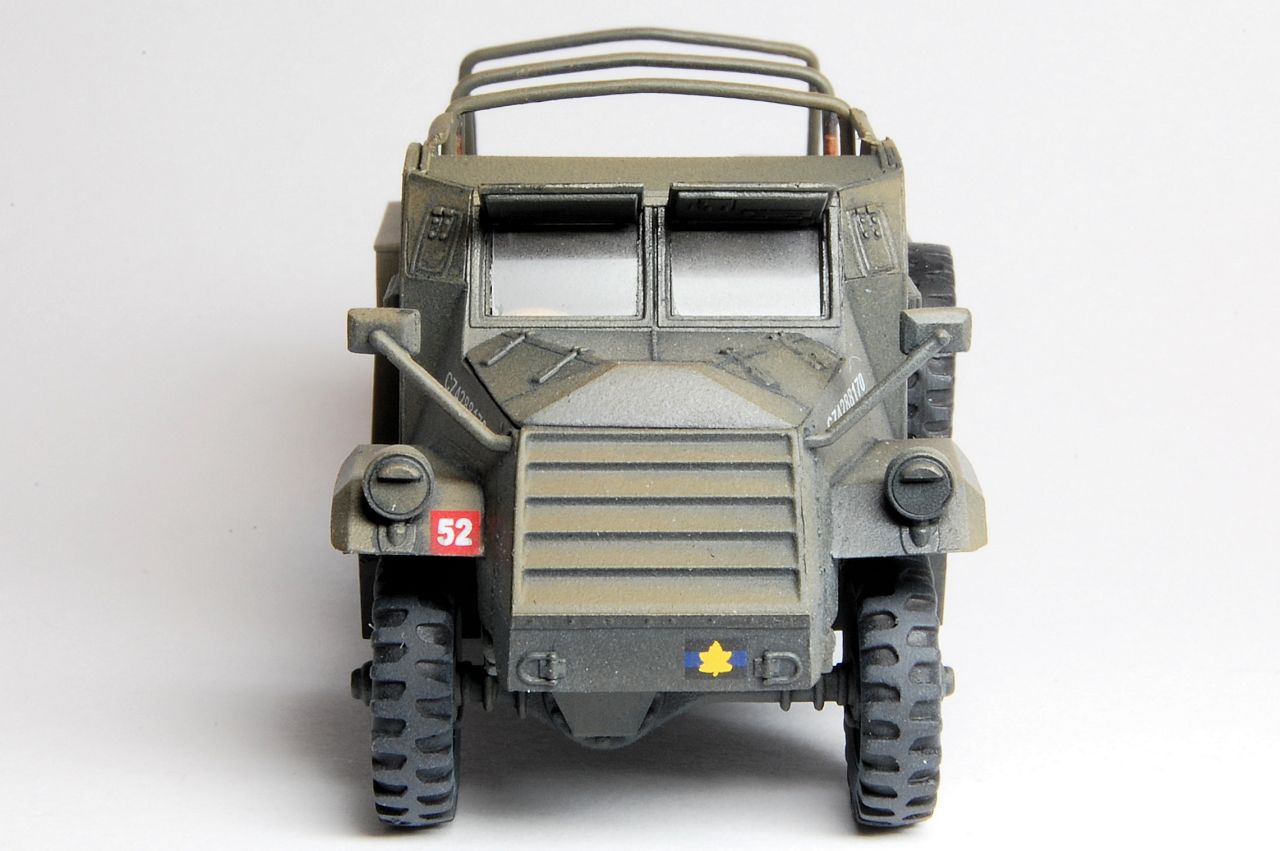
I think this builds into an impressive looking model, the vehicle having some presence with its big radiator grille, angled bodywork and high profile. It has one or two accuracy issues for a WW2 finish, probably caused by IBGs research being carried out on a post war example, principally the tyres, but also the rear light arrangement appears to be from a later version. As noted the spare wheel plus bracket and the seats could perhaps have done with a bit more work from IBG.
In terms of moulding and fit it went together very well, the only real problem I had being with the roof supports. Inevitably there are a few areas that could be enhanced if you wanted to improve parts or add detailing, the missing steps under the front doors, and the clasps on the external stowage bins come to mind, but overall it looks very decent. The bodywork is quite finely rendered, with the fronts of the rear mudguards, the window flaps, and armour plate walls all having a pleasingly in scale appearance, enhanced by the thin etched mud flaps, fuel can rack and especially the internal wire stowage bins.
Like many open topped vehicle models, this is really asking to have lots of stowage added both internally and also on the outside, there being some great photos of examples with boxes, tarps and cans stowed over the front wheels and on top of the raised window shields. If considering adding figures inside, bear in mind that there is not a lot of room and the 25mm figures I tried were too big to sit on any of the seats.


Comments