Introduction
In the Spring of 2018, Tamiya announced it would release an entirely new 1/35 kit of the Vietnam M551 Sheridan, then Rye Field Models followed suit by announcing a new 1/35 release of the later M551A1/TTS in a "two in one" kit. With the release of this RFM late model Sheridan, modelers can now build one of the US Army's most interesting vehicles in at three versions (including Tamiya's Vietnam version). This review is an in-box review of the RFM M551A1/M551A1 TTS kit, with added long commentary on the instruction steps based on personal experience with the real vehicle. If you don't want the commentary, stop at the CONSTRUCTION STEP NOTES below.
For photos of the real vehicles, there is a comprehensive walkaround
here
Sheridan Development
By 1952, The US Army realized its new 76mm armed M41 light tank as still too heavy to deploy rapidly. So development began on the front engined, 76mm T92 light air-transportable tank. However the T92 program was cancelled in 1957. In the meantime, the Soviet Union successfully developed the PT-76 Amphibious Light Tank, and the ASU 57, "Airborne Assault" vehicle, establishing an urgent need for a lightweight, air-transportable and amphibious vehicle for US forces. The new US Army requirement for an Armored Reconnaissance/Airborne Assault Vehicle (AR/AARV) was met by the Cadillac Division of General Motors, in cooperation with Aircraft Armaments Incorporated (AAI) which had developed the T92. The resulting XM551 vehicle began a series of tests and modifications in 1962. By June 1966, the first production M551 "Sheridan" rolled off the assembly line of the Allison Division of GM at the Cleveland Tank Plant.
The M551 was technologically advanced to fulfill its new doctrinal role. It was never intended to do combat as a Main Battle Tank (MBT). But it had the "punch" and "first round kill" capability to defeat any enemy armor. It's new 152mm M81 gun-launcher fired the Ford designed MGM-51 Shillelagh Missile at significant stand-off range. Weighing just 16.5 tons fully loaded, the M551 was designed for speed and mobility. It was air-droppable and Low Altitude Parachute Extractable (LAPSE) from C130 aircraft. It's on-board amphibious capability used self-contained rubberized screens stored in compartments along the upper hull with a "surfboard" deflector on the front glacis. It's wedge shaped aluminum inner hull was surrounded by extruded polyurethane foam and covered with a thin aluminum skin for increased bouyancy. The hull could withstand 12.7mm fire at the front, and the turret was constructed of steel ballistic armor. It was powered by a 300 horsepower 6 cylinder, turbo-charged GM 6V53T Diesel engine capable of speeds up to 45mph, making it one of the fastest tracked vehicles of its time. The optically tracked, infrared-guided Shillelagh missile was accurate, and possessed an armored-piercing shaped charge. In theory, all the gunner had to do was keep his sights on the target, and the missile would fly there. But the missile was expensive, and it's electronics were sensitive to high humidity. Of 88,000 missiles produced, few were fired, and even fewer were fired in anger (maybe 9-20), largely due to expense. For these reasons, a unique, low velocity 152mm round was developed with a HEAT-T (High Explosive Anti-Tank-Tracer) shaped charge or the M625 anti-personnel flechette round. For training there was also a Target Practice-Tracer (TP-T) round of solid aluminum. Unlike conventional tank-gun ammunition, these rounds had a consumable propellant case which burned entirely on firing. The breech of the gun-launcher was an electrically-initiated "half screw type", opening and closing like an an Artillery breech. When firing the MGM-51 missile there was almost no recoil. However, the 152mm caseless round produced considerable recoil for such a light vehicle, leading to frequent maintenance failures.
Initially, the M551 used an Open Breech Scavenging System (OBSS) to clear the barrel of hot gasses and burning remnants after firing. The initial production M551s could be identified by a large cylindrical bore evacuator 2/3rds down the breech end of the barrel. However, the OBSS frequently left burning residue in the chamber, which could ignite ammunition stored in the turret or when a new round was rammed into the chamber. Therefore, the OBSS was scrapped for a compressed air system called the Closed Breech Scavenging System (CBSS). The CBSS blew burning materials out of the gun tube before opening the breech. All Sheridans were eventually retrofitted with the CBSS, but early versions often retained their large OBSS bore evacuators. This accounts for at least three different barrel types seen throughout the Sheridan's lifetime: a large pre-CBSS barrel bore evacuator; a small diameter barrel with a slightly visible ring 1/4 of the way back from the muzzle (part of the fitting for the older bore evacuator); and a late model smooth barrel found on later production vehicles. The M551 was also armed with a .50 Caliber M2 machine gun for the commander, and the rather un-dependable coaxially mounted M73/M219 7.62mm machine gun on early M551s and M551A1s. The M240 7.62mm coax MG replaced the M73 after 1982.
Service History
The Sheridan was pressed into service in Vietnam, with the first vehicles arriving in 1969 to replace M48s in Armored Cavalry units. Although the M48 was a good vehicle, it was prone to becoming mired and throwing tracks in the difficult Vietnamese terrain. The Sheridan's light weight, speed and maneuverability, combined with the heavy blast of its 152mm gun firing either conventional HEAT-T or M625 "beehive" rounds was welcomed by it's crews. The missile was never used in Vietnam because there were simply no worthwhile targets, and the humidity made it difficult to maintain. Although crews appreciated the Sheridan's mobility, it soon became apparent the lightweight aluminum hull was susceptible to significant mine and RPG damage. For this reason, added appliqué armor was developed for the forward lower hull, which became standardized for many M551s, M551A1 and TTS Sheridans. In addition, armored plate protection was typically added to the Track Commander's positions on most vehicles.
M551A1 vs TTS Sheridan Variants
With the withdrawal of US Forces from Vietnam, the US Army adopted the Sheridan for US mainland and European based Armored Cavalry Squadrons. To aid it's "first round kill" capability with the HEAT-T round, the Raytheon AN/VVG-1 Laser Range Finder (LRF) was added to Sheridans coming off the assembly line and to rebuilt vehicles, bringing them up to newer "M551A1" standard. Minor changes were also made to the engine and suspension. The Vietnam era AN/VSS3 Xenon/IR searchlight was upgraded to the AN/VSS3A searchlight on the M551A1. The Sheridan began to be withdrawn from European service by 1980, but was selectively upgraded for Rapid Deployment Forces (RDF-A) with the AN/VSG-2B low-light gunner's Tank Thermal Sights (TTS) first fielded on the M60A3. Units like the 82nd Airborne Division's 3rd Bn, 73rd Cavalry Regiment (3/73 ACR) were the first to receive these updated vehicles. TTS Sheridan's can be distinguished by a notch cut into the forward right side of the turret "cheek" to accommodate the TTS gunners sight, which was given a new housing. An external "Slave Cable" port to the left of the driver's position on the hull was also added. Low-light TTS vehicles had no need for a searchlight, although some vehicles retained their searchlights. Other less distinguishing minor changes were made for TTS vehicles such as the smaller smoke dischargers mounted on either side of the front turret cheeks, and new "curved" headlight frames, although these features could be also be found on some retro-fitted M551A1s. And, occasionally, the old Vietnam/Cold War smoke dischargers could be found on TTS vehicles. Almost all M551A1s and TTS tracks were given a new production standard turret bustle rack. Vietnam/70s era Sheridan's either had issue standard bent iron channel type of cargo rack or "one-off" crew created racks. The 3/73rd's ACR M551A1 and M551A1/TTS Sheridan's were deployed to "Operation Just Cause" in Panama, Operation Desert Shield/Storm which was the last deployment of the M551A1. The Sheridan was withdrawn entirely from front-line service by 1997. However, it continued to serve at the National Training Center at Ft. Irwin California, as Visually Modified (VISMOD) Opposing Forces (OPFOR) vehicles. These vehicles used fabricated wood and fiberglass shells made to look like T-80s, ZSU-23/4s, BRDMS and other Eastern Block Armored vehicles. The last Sheridan was retired from service in 2003.
Inside the Kit Box
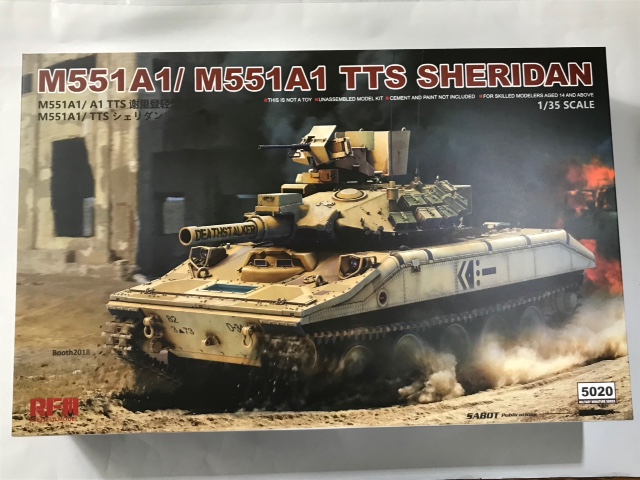
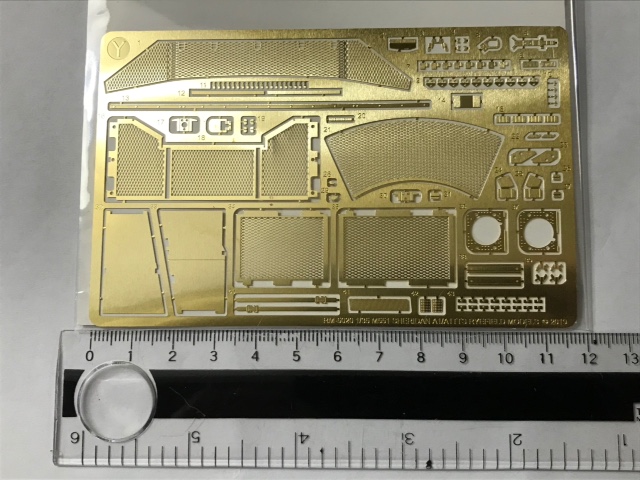
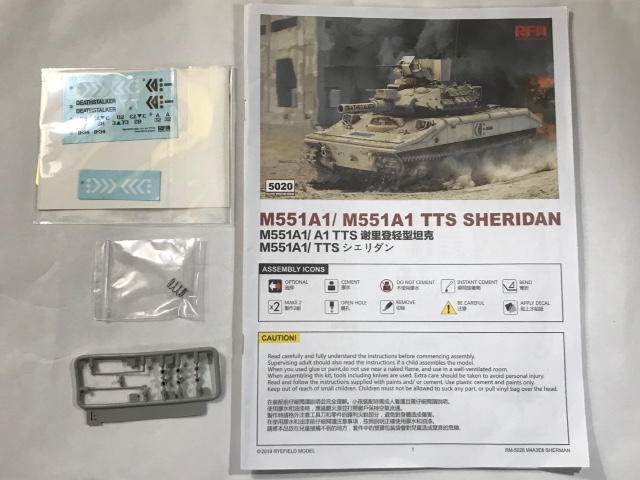
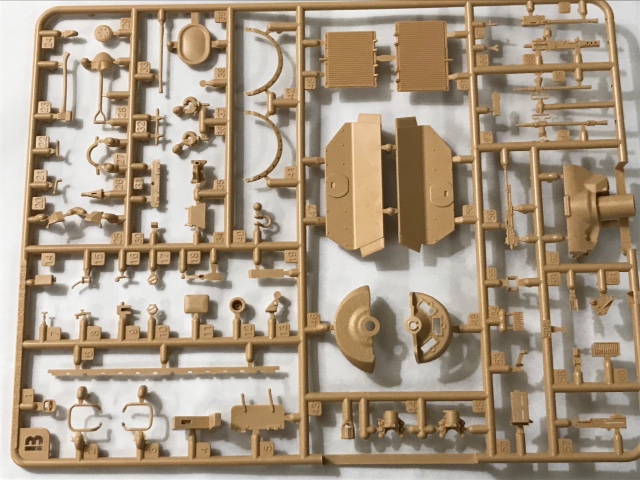
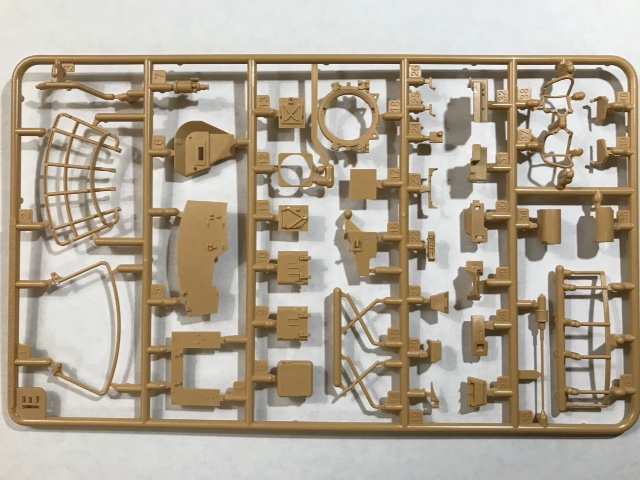
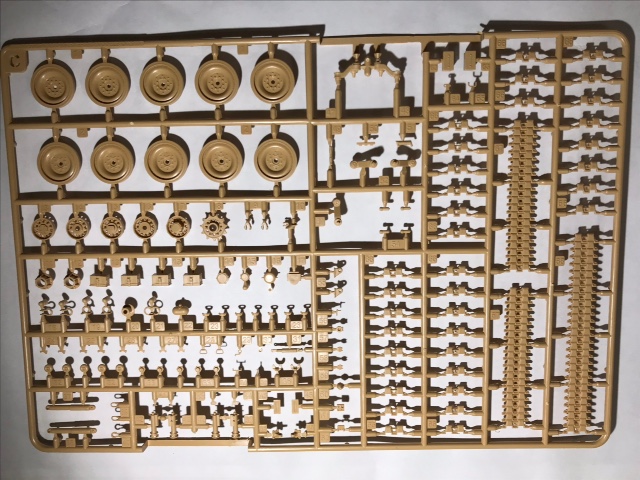
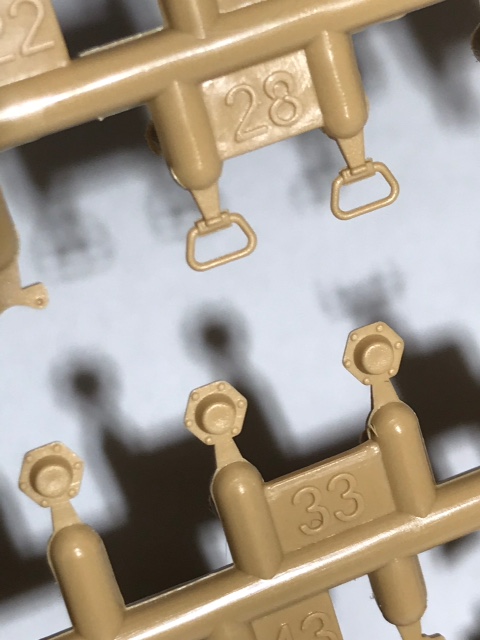
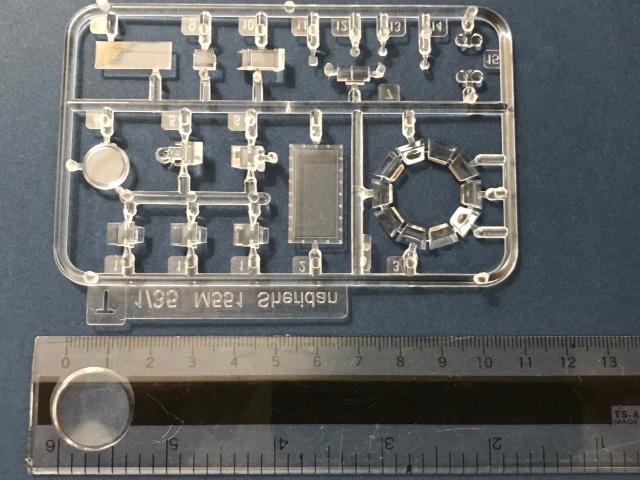
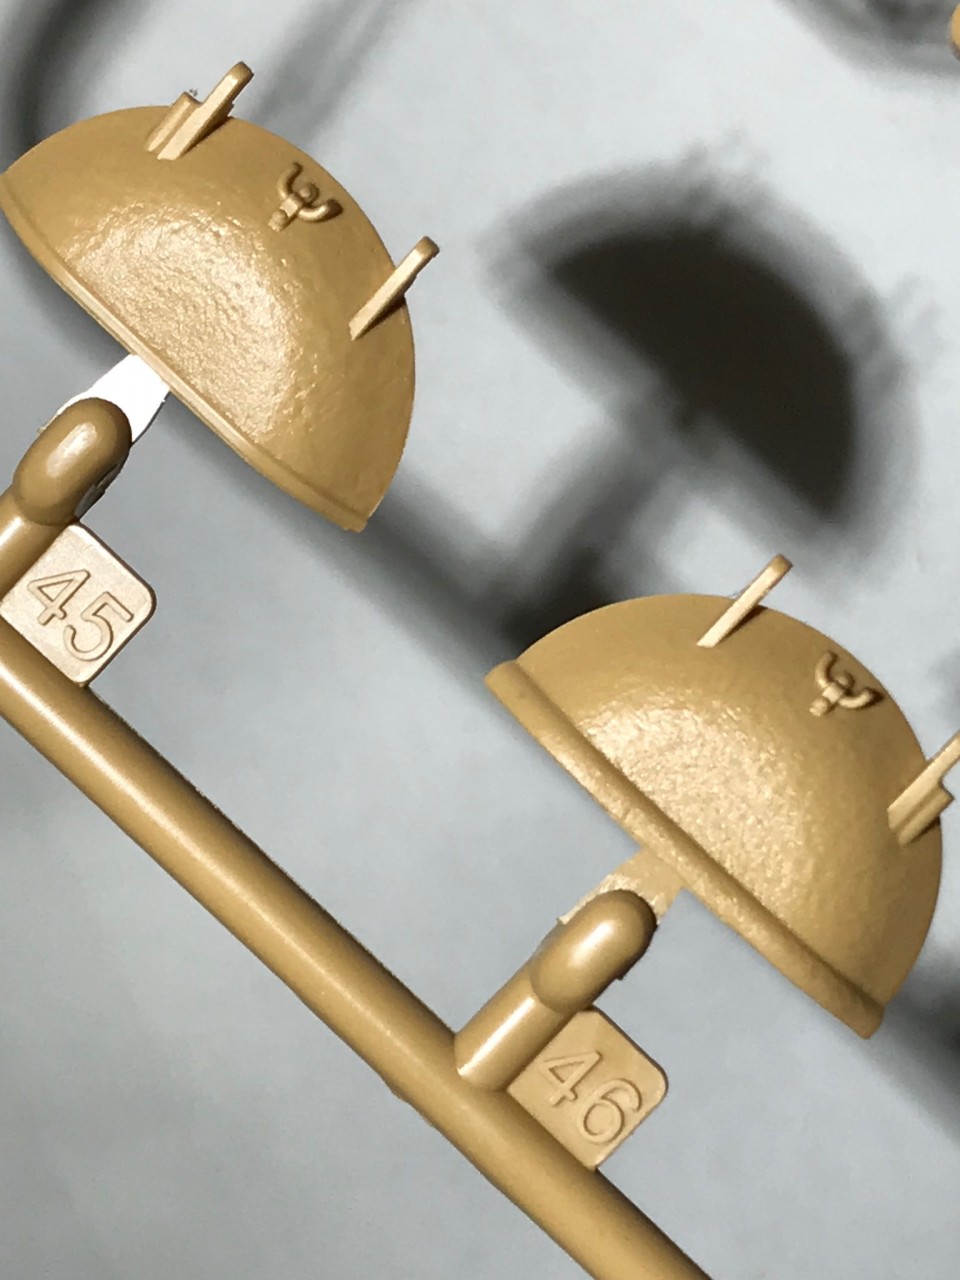
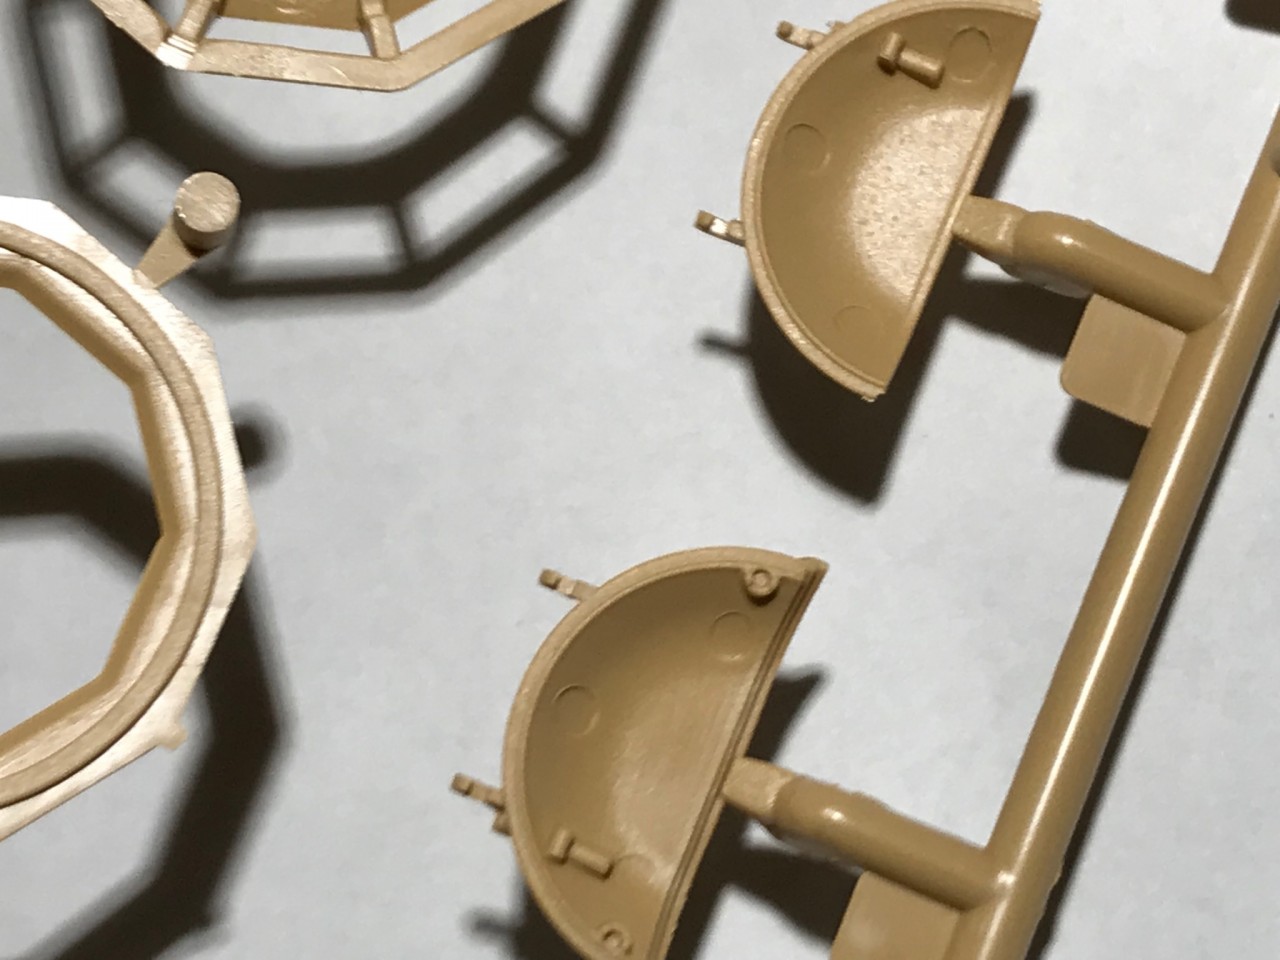
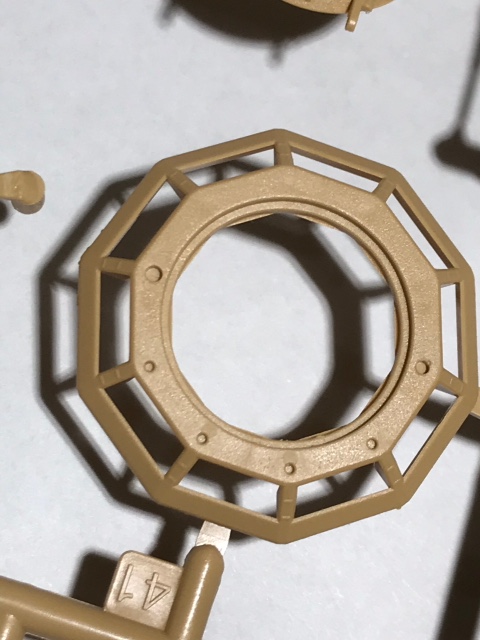
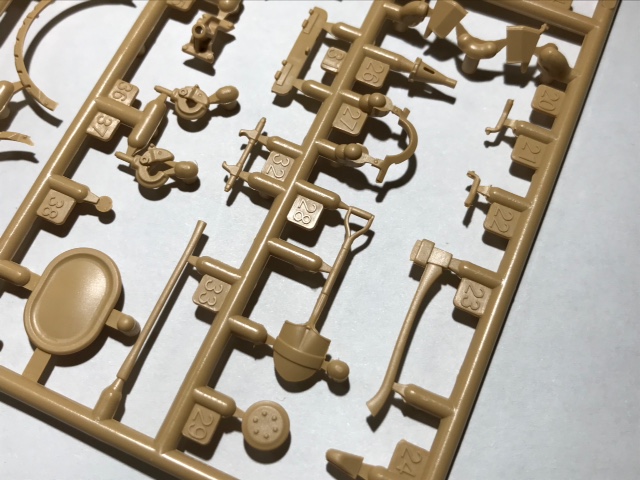
The Rye Field Models kit contains parts for building either a late model M551A1 or an M551A1/TTS Sheridan of the 3/73rd Armored Regiment. There are 655 parts on 8 tan plastic sprues; one (1) crystal-clear sprue of periscopes, vision blocks and headlight/taillight/searchlight lenses; a Vinyl parts sprue with idler/driver/gun mount polycaps and searchlight cables; a Photo Etch sheet containing various detail parts; a sheet of decals for two 3/73rd Armored Regiment Sheridans; and a metal spring for a "simulated recoil system". Instruction diagrams are printed on a 36 page, A4-sized manual with 55 steps (however, steps 19 and 23 are missing from the instructions-more on that later). A half-page "errata sheet" is included for the track and suspension system. The two tan "C" sprues contain suspension parts and have additional bolts/rivets of various sizes molded along one leg of each sprue for a total of 86 bolt/rivets-- but only a few of these will be used. The separate parts and kit design may enable the builder to also create a late Vietnam era or 1970s M551 or M55A1, but a different cargo rack would be required.
Instruction Review
IMPORTANT!!!Although the instructions are nicely illustrated, model builders should carefully study each instructional step before beginning the build. Rye Field has co-mingled steps for M551A1 or TTS versions, and the sequential process of building a TTS version begins in steps 21-24 before getting to the M55A1 sequence steps which are not numbered but thoughtfully highlighted in green ink. But steps for the TTS version AND the generic M551A1 are also in black ink.
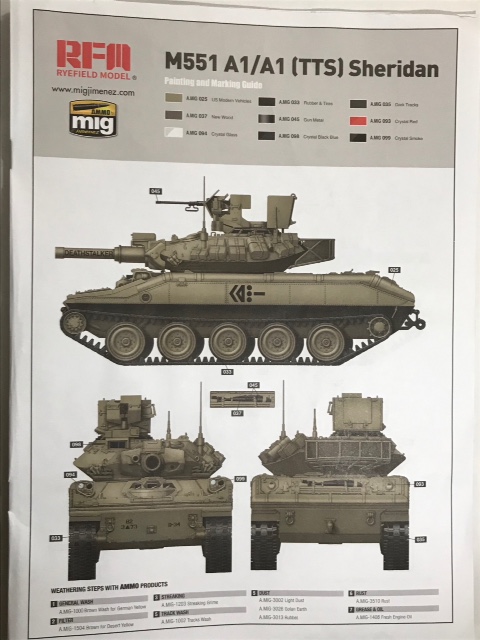
Because of this, there is a high potential for making a mistake in the building sequence. It would have been better to use a different ink for the TTS version. There are also a few errors in the instructions which will be explained below. The last two pages of the instructions contain 2 full color profiles for different vehicles of the 3/73rd Armored Regiment, along with color call-outs for "Mig" brand paints. There are no color call-outs in the various instructional steps, which may cause the builder to miss some paint details. Although the two color profiles "allege" they are for TTS Sheridan's, they are not-- they have the standard gunners periscope sights of M551A1s, mingled with features often found on TTS vehicles, such a as Smoke dischargers and curved headlight guards.
Kit Summary
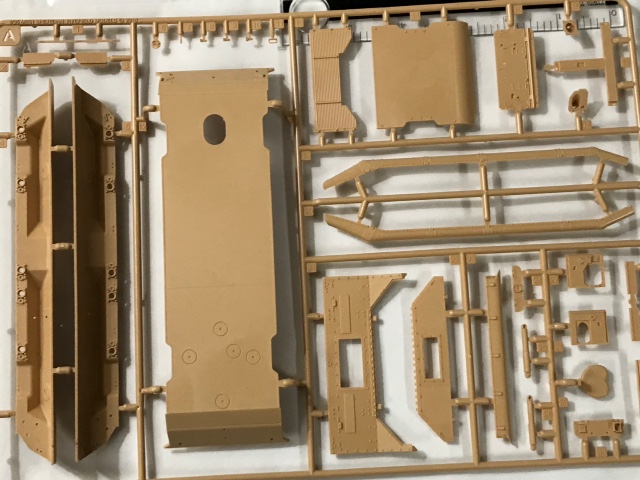
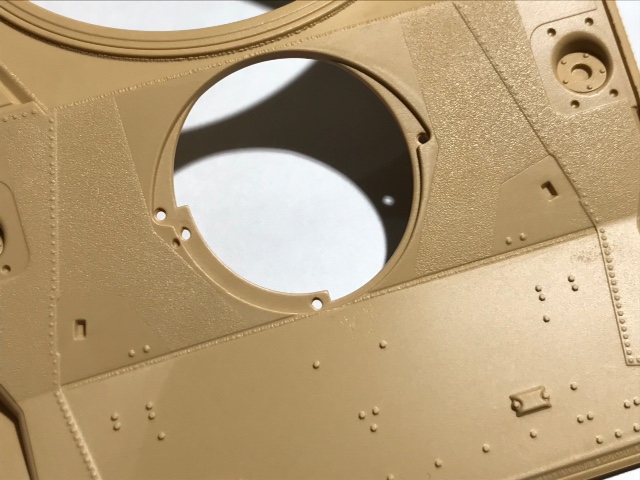
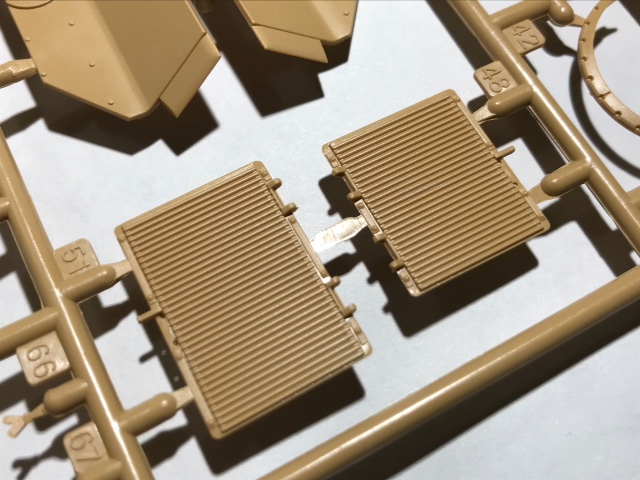
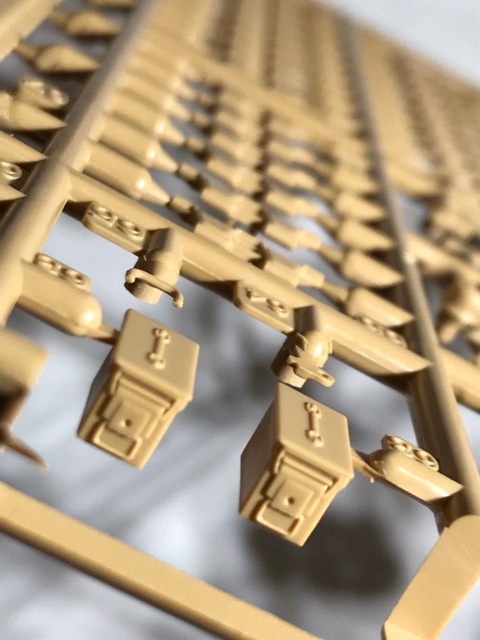
Upper Hull: All the parts are finely cast with small sprue gates, although some detail parts are very tiny and it may be a challenge to remove and clean up these parts. The upper hull is cast in one piece, with cut-outs for the driver's hatch, grill doors and screens, storage boxes and the rear light fixtures. The hull storage boxes and external telephone box can be displayed open. Basic Issue Items (BII- including track jacks, shell rammer, bore cleaner and muzzle plug) and OVM tools are all nicely cast separately. There is a very fine non-skid pattern on the hull, and the "surfboard" planning surface has several separate parts including clear viewing panels and "piano hinge" folding detail. There is a channel on either side of the upper hull assembly for the floatation screens, and a single piece cover is provided to represent the flotation screen cover on either side of the hull. It wouldn't be too hard to construct these screens in the "up" position as a modification. The rear hull has a nicely detailed drain strip (part B6). Engine grill doors are separate and nicely molded with add on PE screen covers and separate grab handles.
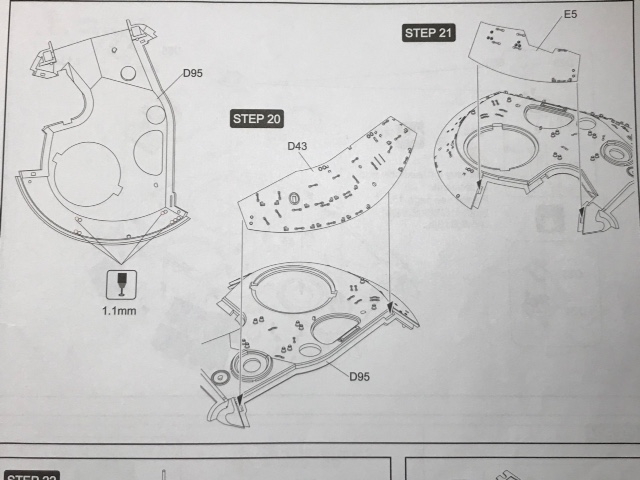
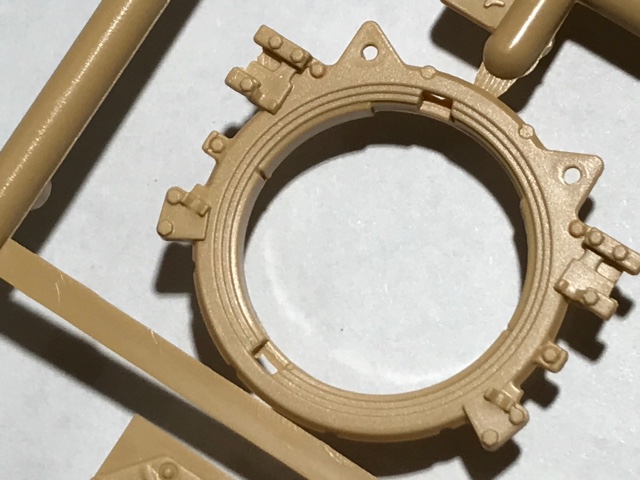
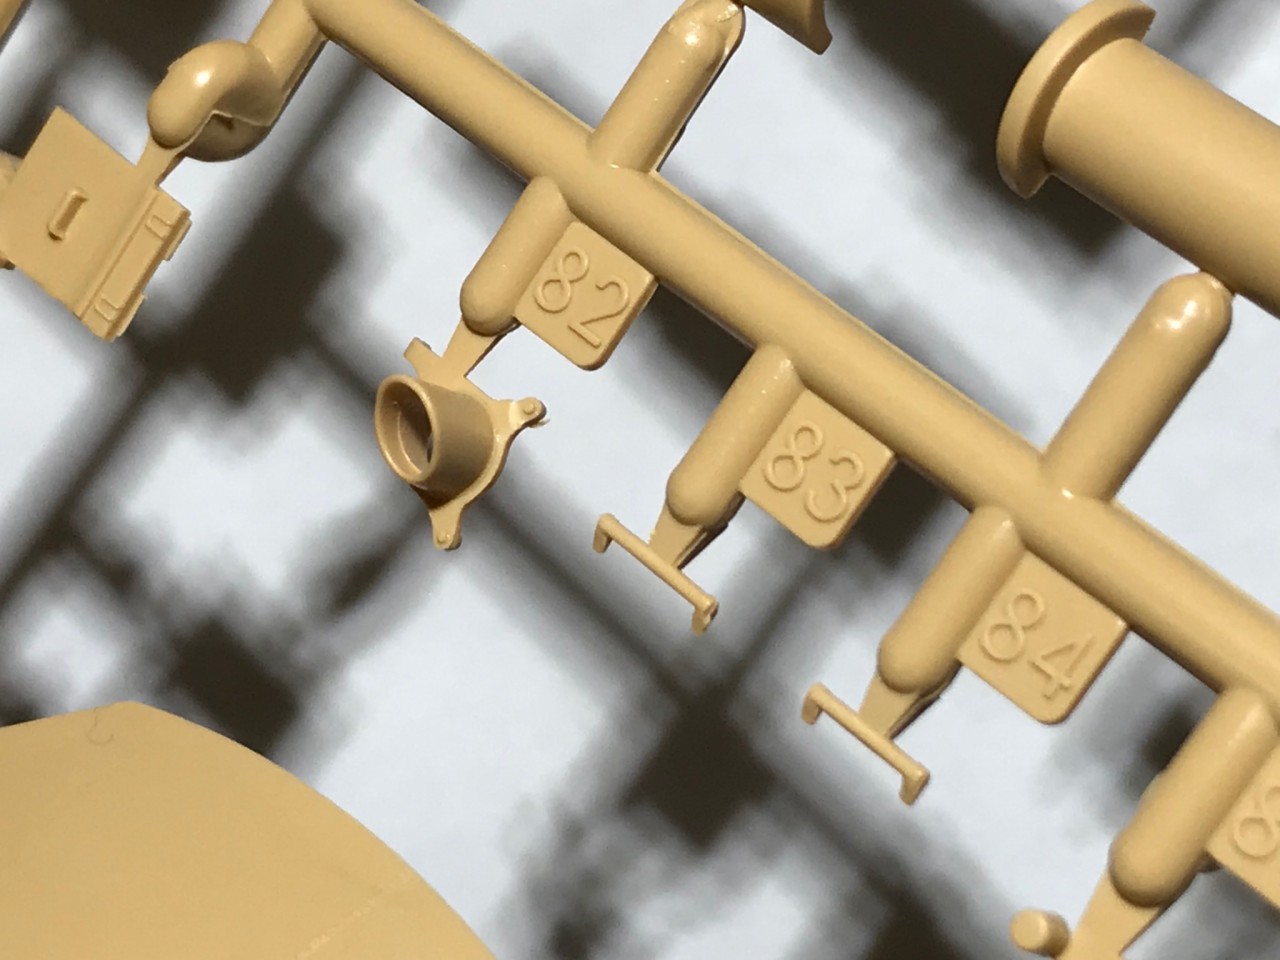
Turret: The turret is finely molded and consists of three main assemblies to accommodate the two building options. The TC cupola has some incredible detail for the scale. Including all levers, bolts and locks. The hatches and gun mantlet are molded with an excellent cast appearance, although there are some unfortunate ejector pin marks on the inside of the TCs hatch. The turret "footman loops" are in-scale, nicely molded, but come integral with the turret sides so "rivet counters" may elect to replace them. Under a coat of paint, they'll look fine for most modelers. There's a detailed water can and eight very detailed .50 Cal. ammunition cans for the turret sides with the securing straps and buckles molded on. Again, some modelers might want to replace the straps. There are also 4 separate detailed ammo cans without straps (and one open can of .50 Cal. Ammo). There are two photo-etch track hangers for the turret right side. There's an abbreviated interior, with gun breech, two choices of coaxial machine guns (early and late), loader and TC seats, commander's LRF sighting gear, and loaders periscope. All hatches have full interior and exterior detail, including the driver's hatch with separate clear periscopes, periscope wipers, the washer fluid reservoir and a choice of IR or TTS night driving scopes. The turret "basket" is highly detailed with PE netting, but it represent a late model production cargo rack, so modelers seeking to build earlier vehicles will need to modify, scratch-build or buy aftermarket racks. Interestingly, the inside bottom rear half the turret has some indentations where the radio rack would be found-- this may imply another version with a more complete interior will follow.
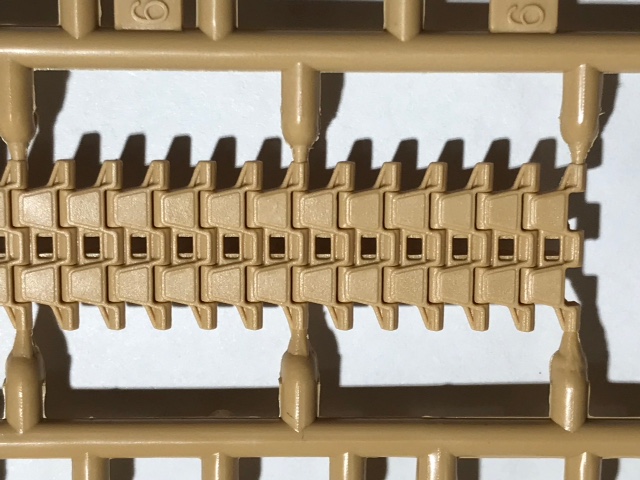
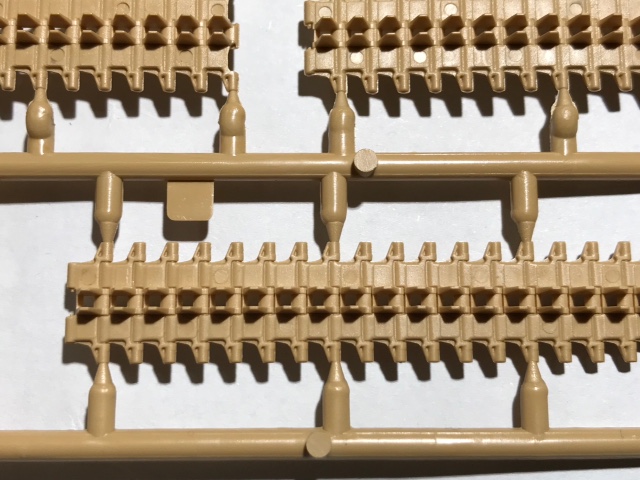
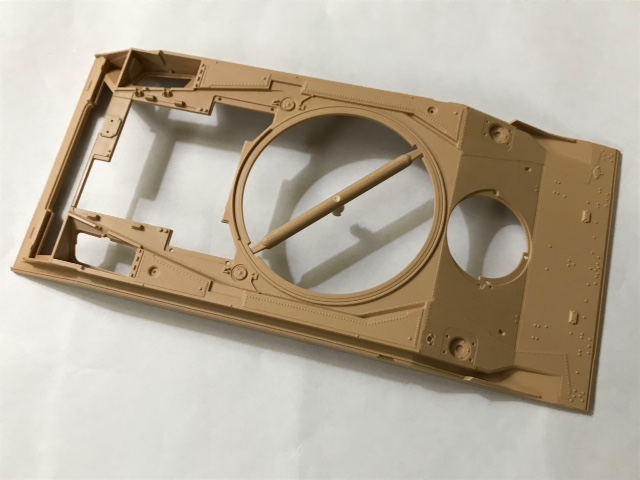
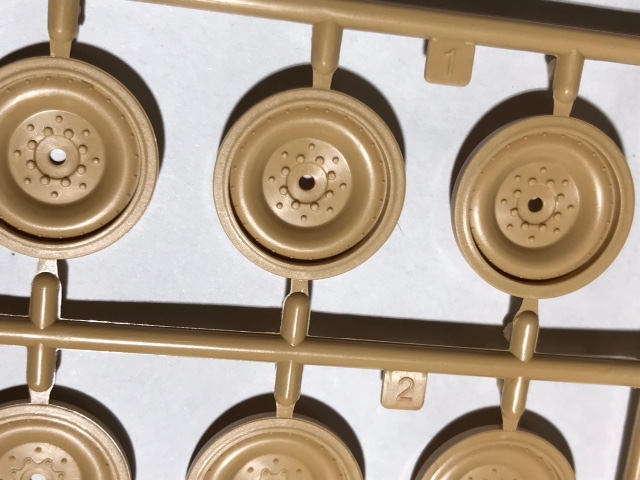
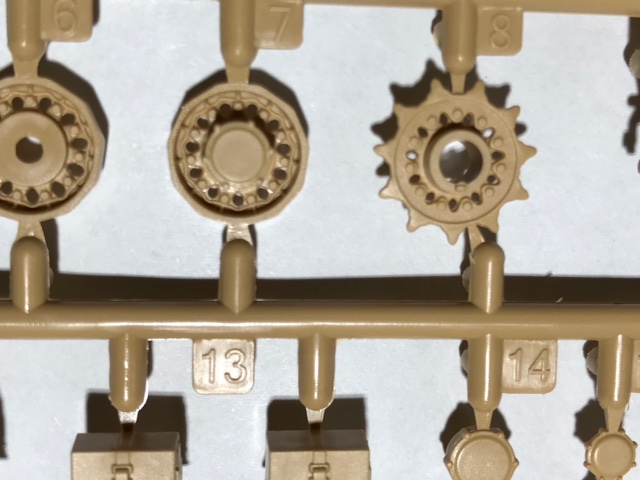
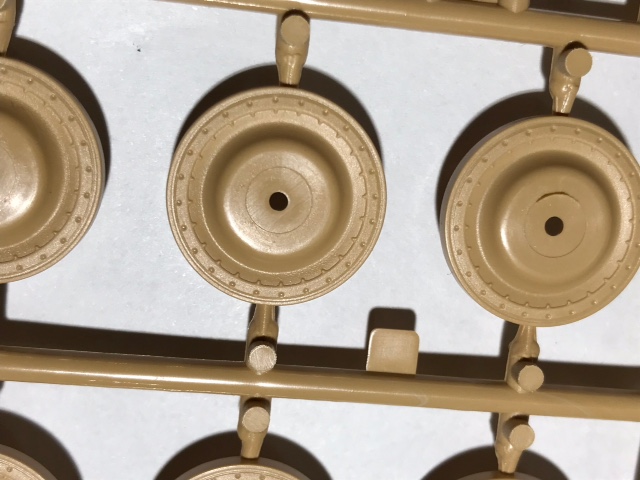
Lower Hull:The lower hull is assembled from three parts-- hull bottom and two sides, with a separate add-on armored appliqué set, drivers seat, and detailed drivers escape hatch, and full exterior suspension details. There are no torsion bars, but it wouldn't be hard to add them as the external anchor points are well marked. The road wheels and drivers/idlers are fully detailed on both sides, including the inner wheel steel rims. The tracks are styrene "link and length" type. It may be possible to assemble the drivers, idlers, road wheels and tracks all together in one set, using the driver/idler polycaps to remove the set for ease in painting. The tracks have minor injection pin marks on the insides of my review kit, but I've seen deeper marks on photos and heard some complaints of deeper marks on other kits. The tracks themselves are very detailed, but the definition of the track pads are in scale, so they almost disappear. This was indicative of worn tracks on the real thing, and I suspect RFM was using a worn set for research. Some modelers may elect to replace them with more clearly defined tracks and pads.
Overall Impression: Speaking from the experience of being a former Sheridan TC, if you're after exceptional detail, this is the best Sheridan model on the market. RFM has gone to a lot of trouble to get small details as accurate as possible. Although it comes in options for late versions, with minor modifications (cargo rack) it could be built as either a late Vietnam or 1970s M551 or M551A1. The instructions are a bit confusing, and some references will come in handy while building the kit. The large number of small detail parts will challenge novice builders. I'm very impressed with the completeness, potential for other options, and accuracy of the kit. As I looked through the sprues, it became apparent RFM may has the potential to consider other versions or perhaps a complete interior kit similar to what they've done with their Tiger and Panther kits. In the interest of helping other modelers, I've looked critically at some of the construction steps below:
Construction Step Notes
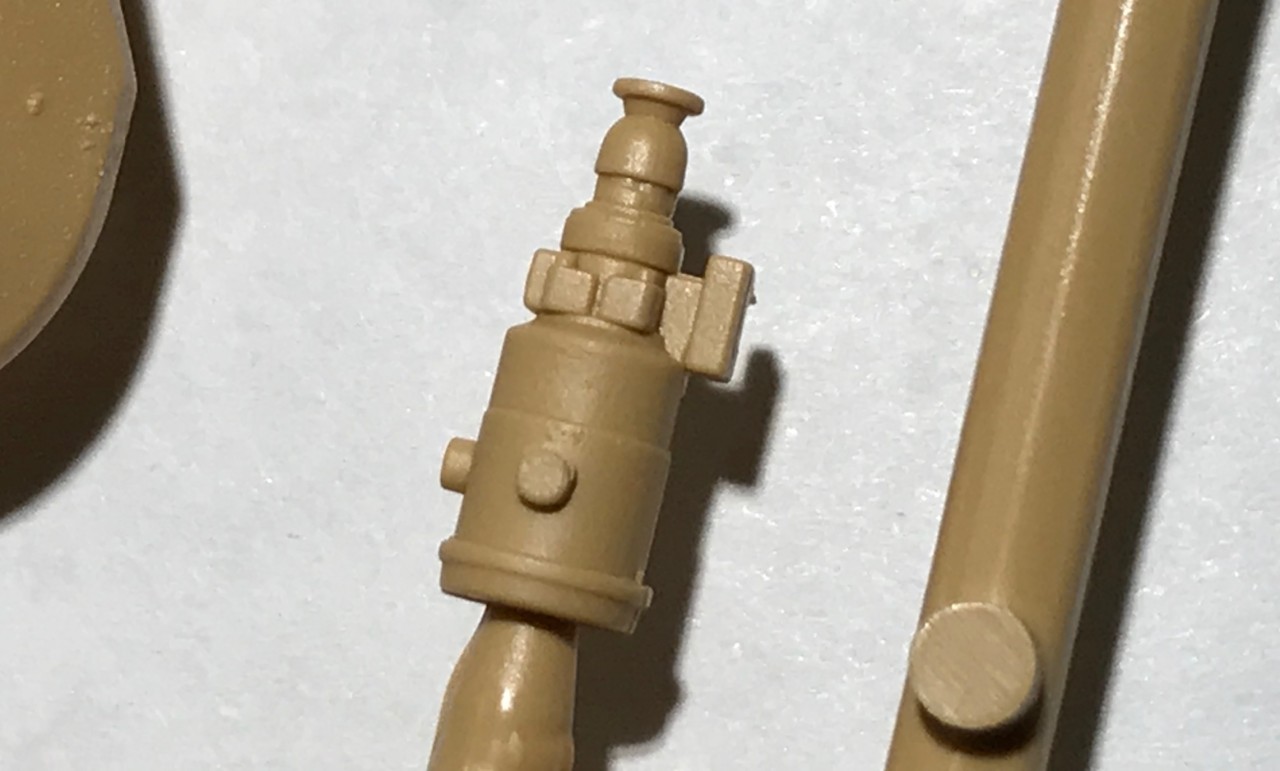
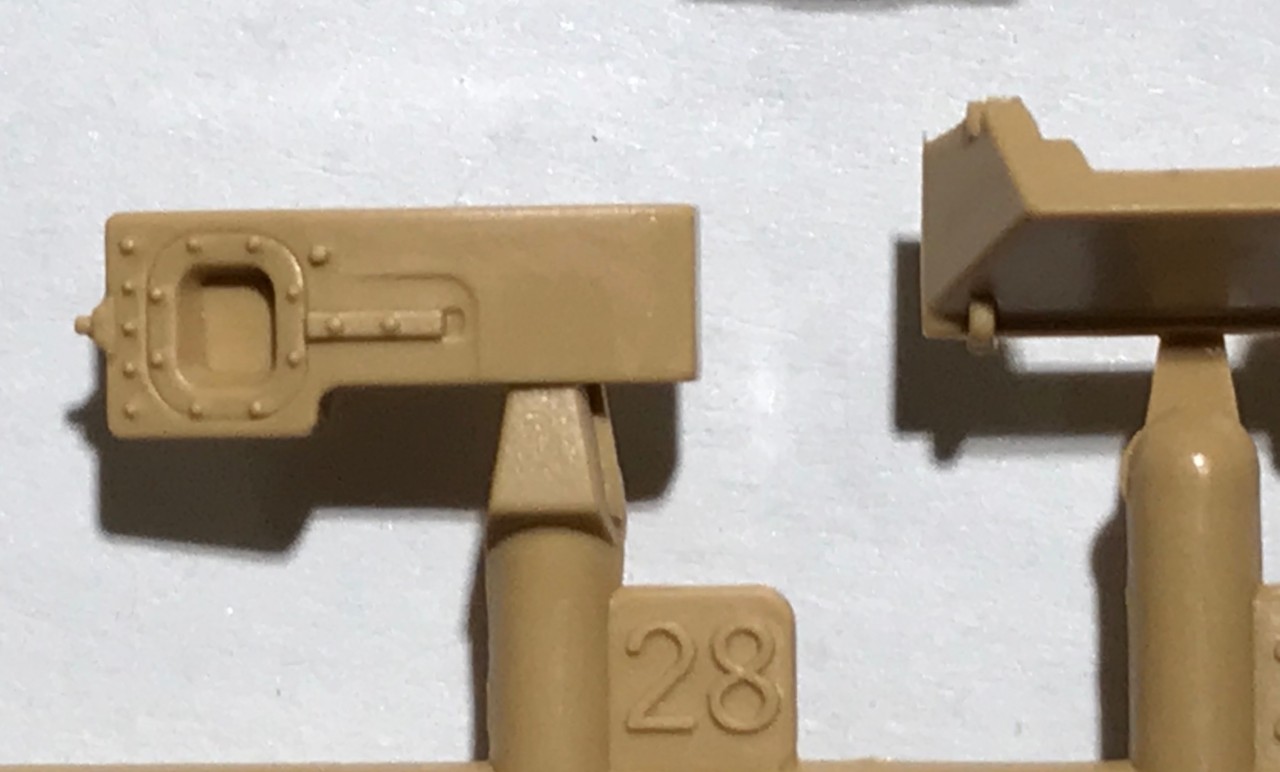
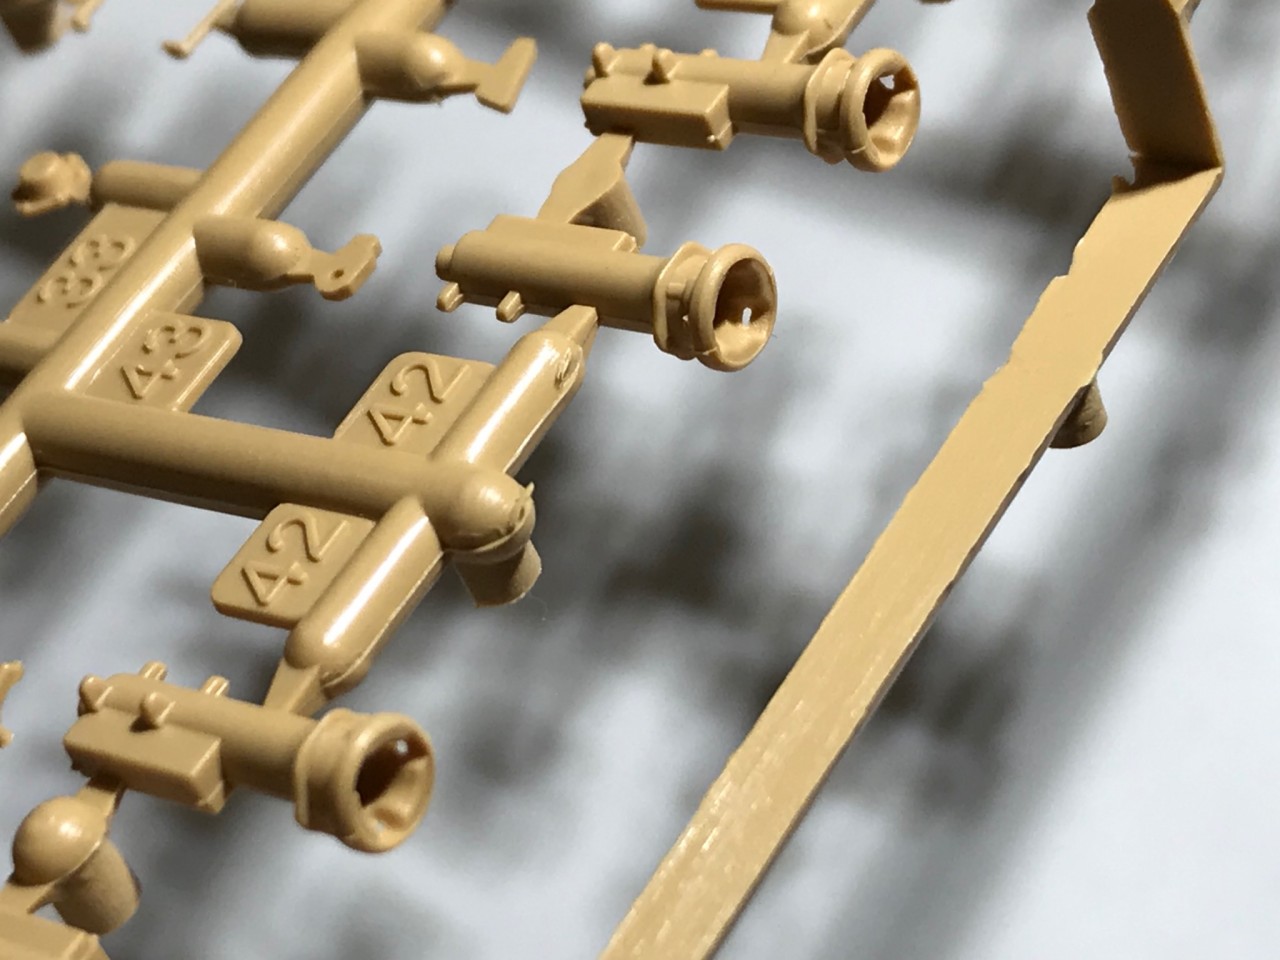
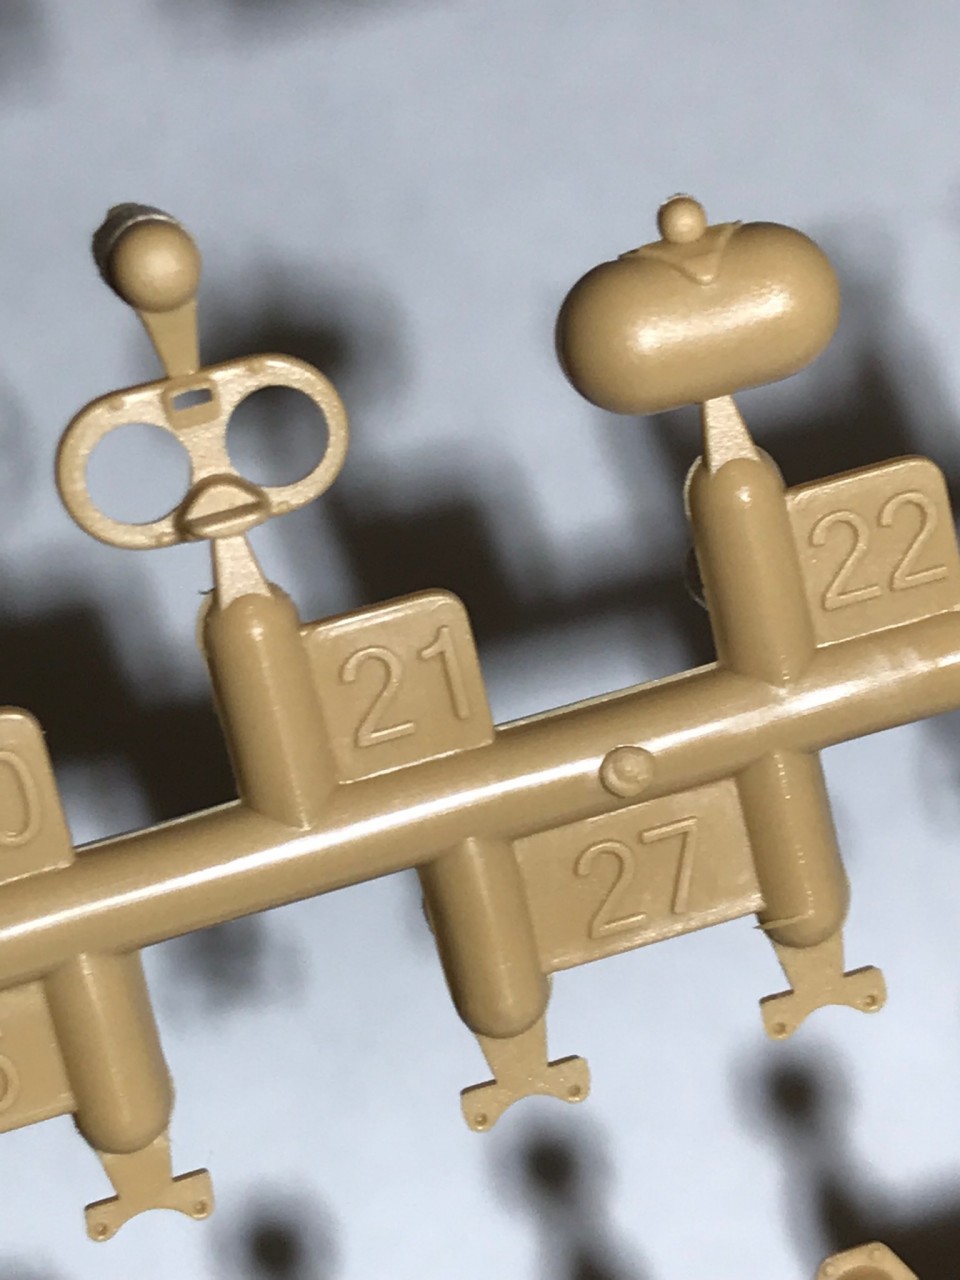
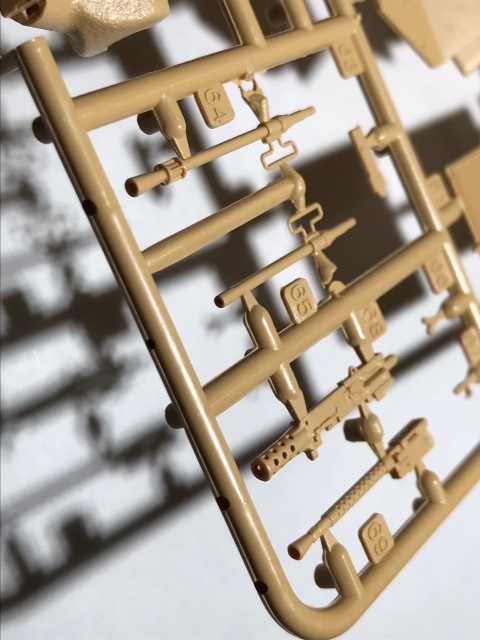
STEPS 1-13 consist of building a very detailed Track Commander's armored cupola and .50 caliber machine gun (with two barrels--one with, or one without a flash adapter), a late model AN/TVS-5 night vision scope (for the TTS version), vision blocks, ammo can with separate ammo belt, Laser Range Finder (LRF) and LRF battery packs. The .50 Cal. has the potential option for an open receiver (if one desires), and consists of 11 parts with the gun mount. The parts on the sprues are exceptionally well molded with the .50 Cal. slide molded with an open bore. My only negative comment here is the casting of the barrel carrying handle is a tad heavy, and it should either be thinned or replaced with wire.
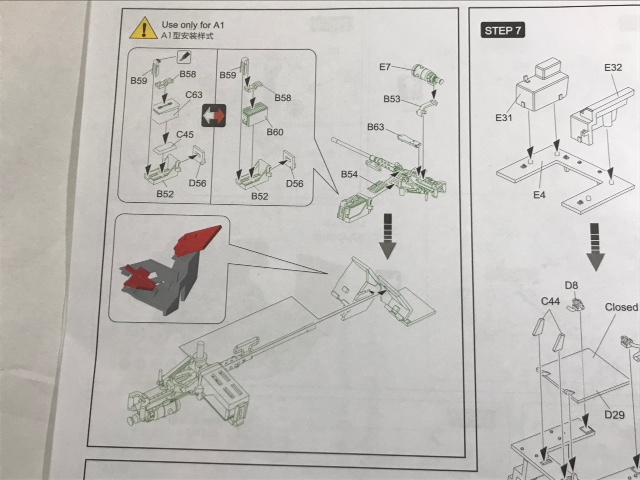
NOTE #1: If you were to choose to build an earlier M551 without the LRF, you could do so by leaving off parts E31 & E33 (Battery pack) in STEP 7, leaving off parts E22 & E24 (commander's LRF sight and ranging return panel) and
NOT cutting out the clear vision block in STEP 8, then skip all of STEP 9 (LRF assembly). Eliminating these parts, and with a different cargo rack at the rear of the turret, will build a straight Vietnam era or '70s M551.
NOTE #2: On the real vehicle, the commander's cupola features two handgrips bolted to the cupola ring on either side of the Commander's optical laser sight (part E24). These grips are highly visible inside the hatch, but are missing from the instructions. However, there are two "handgrip looking" parts (E25 & E26) just to the side of part E24-- I suspect these are the grips that have been inadvertently left out of the instructions.
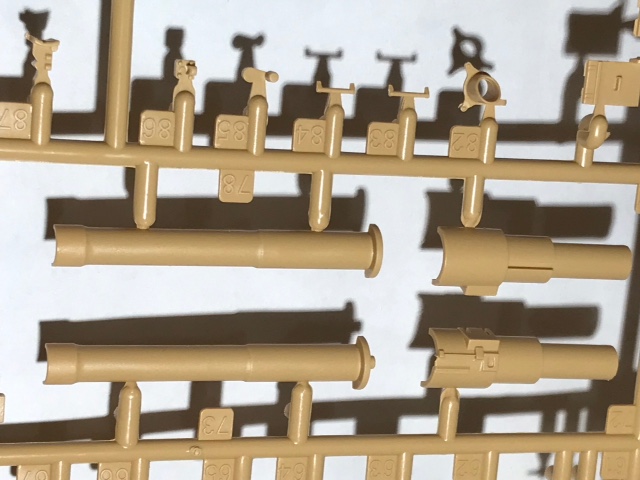
STEPS 14-18 involve construction of the gun breech which can be displayed open or closed (but the breech does not have an accurate "screw type" seal), the Coaxial MG(s), gun mantlet and Missile IR box (parts D30 & D27), the barrel assembly with PE lans & grooves (part Y-41), and recoil return spring. Unfortunately, RFM has chosen to cast the barrel in halves, which have two injection plugs that need to be removed. It would have been better to slide mold the barrel in one piece, but I believe it was done this way to incorporate the separate lans & grooves for a scale appearance. You'll use two polycaps here for the gun trunnions-- a nice touch which should keep the gun from drooping. And this is where the "recoil return spring is added.
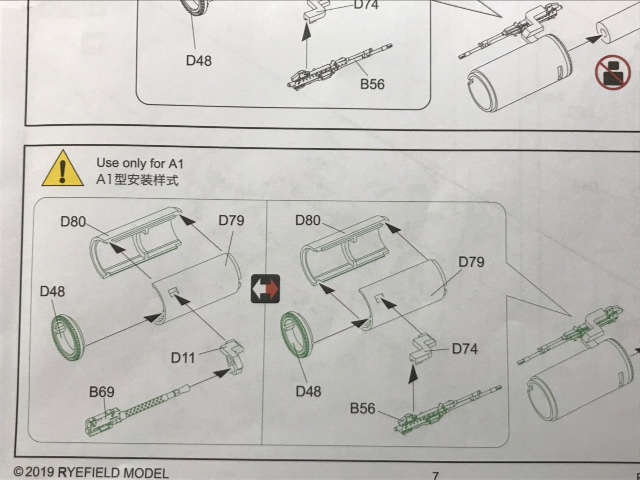
NOTE #3: You'll need to chose between which versions you want to build at this point-- an early M551A1 has the M73/M219 machine gun (part B69- highlighted in green in STEP 15) or the M240 coax MG (Part B56) found primarily on TTS vehicles. This could be confusing as the TTS version M240 is illustrated first, in black ink, then again in green ink for the M551A1 as an "either/or" option. What this means is after about 1982, the M240 could be found on the M551A1 since the M73 was being retired from service. So you should consult references or have a specific version firmly in mind before you start these steps. The coax MG with the perforated jacket is the M73/M219 gun
STEP 19--there is no "step 19" as it's completely missing from the instructions, but I think this is just an oversight as the assembly sequence is all there.
NOTE #4: STEP 18 shows an "either/or" option for part D-90, which is the barrel plug- this plug was made of rubber and placed in the end of the barrel during travel or long term storage to keep dirt from entering the gun tube. I mention this because it's not clear what the part is in the instructions. It seems to me this part would better go in one of the hull sponson boxes, but I suppose it can be inserted into the barrel just as well depending on preference. It may be a poor fit with the PE part Y-41 (lans & grooves) though.
STEPS 21-24. STEP 23, like STEP 19, has has also been left off the instructions. It's possible it was intended to be the assembly step for the turret mounted auxiliary water can, but again, it's not "missing" so much as "mis-numbered".
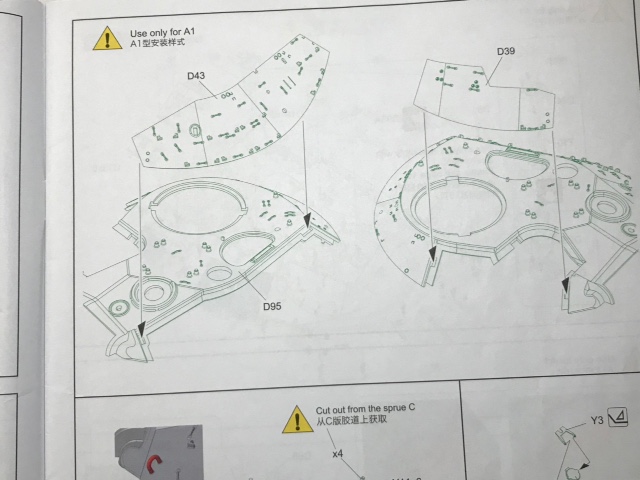
NOTE #5: STEP 24 begins turret assembly for the TTS vehicle, with diagrams illustrated in black ink. These are followed by 5 un-numbered steps in green ink for constructing the M551A1 turret version. The differences in these two version are the TTS version has different parts for the right turret cheek (E5) with a notch, gunners sights (E34/36, T7, E6, & Y5), AUX radio antenna base (E33). The M551A1 version uses a different right turret cheek (part D39) without a notch, AUX antenna base (D54), gunners sight (D16, D12, T9, D35, Y5 & D1). Be careful to study these steps to be sure you're building the version you want, as it would be easy to get the details mixed up.
NOTE #6: Theres an error in the diagram of the loader's periscope cover--(parts D23, D24, T10), showing the cover (D23) "kicked back" into the full open position. On the real thing, this cover is spring loaded, and the cover snaps back in place over the top of the loaders periscope when the scope is fitted to keep rain water out.
STEPS 25-33. These steps cover "generic" assembly steps adding detail to the turret for both versions, assembling the turret with the gun, searchlight (for M551A1 version), bustle rack basket (parts E1, E2, E14, E15, E35, Y1 & Y21) and smoke grenade launchers. The bustle rack "basket" parts provided will build the tubular framed turret "baskets" found on late M551A1s/TTS vehicles circa 1983-97. The "baskets" found on earlier versions were generally one-offs, produced in the field, or the production standard small bent "aluminum channel" rack found on early production M551A1s or M551s. So if you want to build an earlier Vietnam or 70's Sheridan, you're going to have to scratch build, modify parts, or find aftermarket racks.
STEPS 34-45 are generic steps for building and detailing the upper hull, driver's hatch, swimming "surfboard" and engine grills; the hull Basic Issue Items (BII) storage boxes; Infantry Phone compartment; OVM tools; swimming side screen covers; headlights and tail lights (including "cat eye" blackout drive markers). These steps contain several extremely detailed assemblies (i.e.; head and marker lights with an inner clear lens, outer casing and separate cover). A very nice touch is partial BII including a track connector set, shell rammer and cleaning brush (and the muzzle plug D90 if desired) to add to the positionable lid BII boxes. Another hinged compartment under the left rear marker light contains the Infantry phone/control box, but you'll need to add wire to the phone connection.
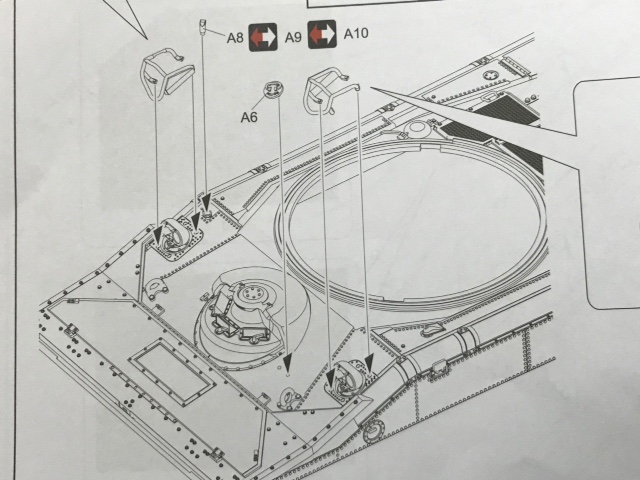
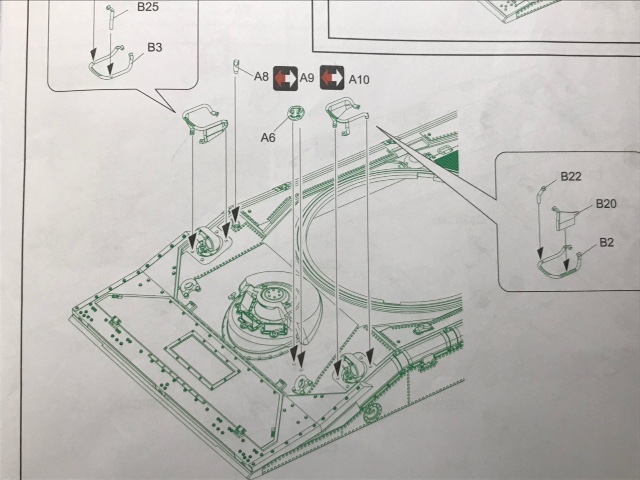
IMPORTANT NOTE: Step 34 begins with drilling two .8mm holes in the hull just to the left of the driver's position.
DON'T DO THIS IF YOU WANT AN EARLY M551 or M551A1! These holes are for part A6-- the cover for the Slave Cable Receptacle added to TTS versions during rebuild. Most M551A1s didn't have this feature. The slave receptacle was added so the coaxial slave cable (jumper cable) didn't have to be passed through the side opening driver's hatch of the M551 (which was a hazard if the easy sliding hatch was inadvertently closed on the cable--don't ask how I know!).
Beginning at STEP 46-51, the remaining construction of the upper and lower hull are continued, with differences delineated between the TTS version starting out in black, followed by the M551A1 version in green. Specific differences in the headlight guards (straight vs curved) are clearly shown, but again, be sure you understand the instructions before Proceeding.
NOTE #7: There is clearly an error in the instructions in Step 47, which is supposed to show a "generic" diagram showing features of both vehicles-- but it doesn't include the addition of the appliqué armor plate package found on many M551A1 and TTS vehicles (parts B47, B50 & A14) applied to the lower hull. Yet these steps are later highlighted in green for the M551A1 version later in the instructions. I also have questions about part A14, which if used, would cover the driver's belly escape hatch. To my recollection, this hatch was accessible on my M551 Sheridan, which had the appliqué package in 1977-78, but I might be mistaken-- more research is necessary here. I have seen and photographed at least one late TTS Sheridan without the appliqué armor package.
Step 52-55 covers construction of the road-wheels, suspension items, and track, along with final assembly of the Cupola, Turret, and hull together. You'll use the remaining four provided polycaps from sprue F for attaching the running gear. With a little forethought to the running gear assembly, you could potentially glue the track to the road-wheels/driver-idler assemblies and then remove the entire assembly for painting.
The kit tracks are molded with wear on them, so there isn't much definition between the track pad and shoe. My kit has some very minor ejection pin marks on the inside surface of the tracks needing cleanup, but I understand these can be quite deep in other kits. Some modelers may elect to replace them with aftermarket tracks, but I think the kit tracks will look fine when built.
Conclusions
The kit was worth the long wait, and modelers finally have what they've asked for for decades, but it won't be a quick build. Rye Field offers a state of the art kit with excellent detail and several options. With some minor changes to the bustle rack, the addition of an earlier searchlight (optional) and eliminating the LRF, it could even be built into a Vietnam era M551 or late 70's version. Molding is crisp, well defined, with a minimum of flash. However, the parts count is high, and there are a multitude of tiny parts which put the kit in a category for more experienced modelers. Novices will likely be frustrated by the complicated instructions and tiny parts count. It will help to have knowledge of the real thing, or good references to build the model. There are some steps which are not called out properly (i.e.; the missing Step 19 and 23), lack of detailed color call outs, and confusion between the "green" M551A1 and "black" TTS versions. These requiring modelers to carefully study and understand the instruction steps fully before starting the kit.
Recommendations
The best Sheridan kit on the market for modelers with a little experience. Novices will likely have difficulty with the complicated instructions and large parts count. The kit is well molded, with exceptional detail and few flaws, with the exception possibly being the injector pin marks in the tracks. It would be beneficial to have some references available to consult while building the kit. If you've wanted a late Cold-War Sheridan, This kit is for you right out of the box. If you want an earlier Vietnam or '70s version, you can attain it with a little work on the turret bustle rack and perhaps an aftermarket searchlight. When the kit is completed, it will be a stunner.


Comments