Lately we have been blessed with more and more, extremely well-detailed models which have full interiors provided. I admit, I do have a fetish for interiors, so these years I switched from resin aftermarkets to ready-made interior models. (I still long for a Churchill with interior, but I was really happy to see a T-72 coming out.)
In this review I would like to discuss my experience in building RFMs Panther Ausf A with transparent parts -and, obviously- full interior. This is not a step-by-step review as the model is incredibly complex and would take hours to review. If interested my blog has some in-progress posts. I just would like to talk about the positives of the model and negatives I ran into during the build. As I am not a Panther expert I am only focusing on the building experience; accuracy and other issues I leave to the more qualified people. This article is the view of an average modeller -mileage may vary.
Positives
First the positives: it is incredibly detailed, in fact so detailed it is a perfect model for someone who wants to build a tank as a wreck, in the process of maintenance or construction. The model comes in a HUGE box. And I mean it is big, and it is stuffed to the brim; the part number is astronomical. The box art I found a bit artificial-looking (the crew members look stiff and posed), until I found the exact same scene on a photo... so I have to say the box art is very much on the spot.
The plastic is great, the casting is great, and the instructions are well designed, easy to understand and use colors where it helps the building process. There is some confusion with some of the options provided, but that is a minor issue. All in all, it is not bad for the first look.
One very important piece of advice: follow the instructions religiously. Sometimes (most of the time) I do deviate from the suggested sequence of build because the instructions usually do not take painting into consideration, and I do not want to all paint tiny parts separately. I prefer working on larger sub-assemblies at the painting stage, but do not yield to this desire. I scored several own goals by deviating from the instructions, further complicating my life. If you need to paint ten different parts to ivory at ten different times, so be it.
The model comes with workable, individual tracks and working suspension. The tracks are surprisingly easy to assemble, but the suspension is kind of weak (one or two torsion bars broke during the construction and I did not drive it over rough terrain.) The links already have the teeth attached and they are hollow -the only negatives I found were the injection pin marks, which are not really hard to deal with. (And it is generally easier to sand once the whole track is assembled.)
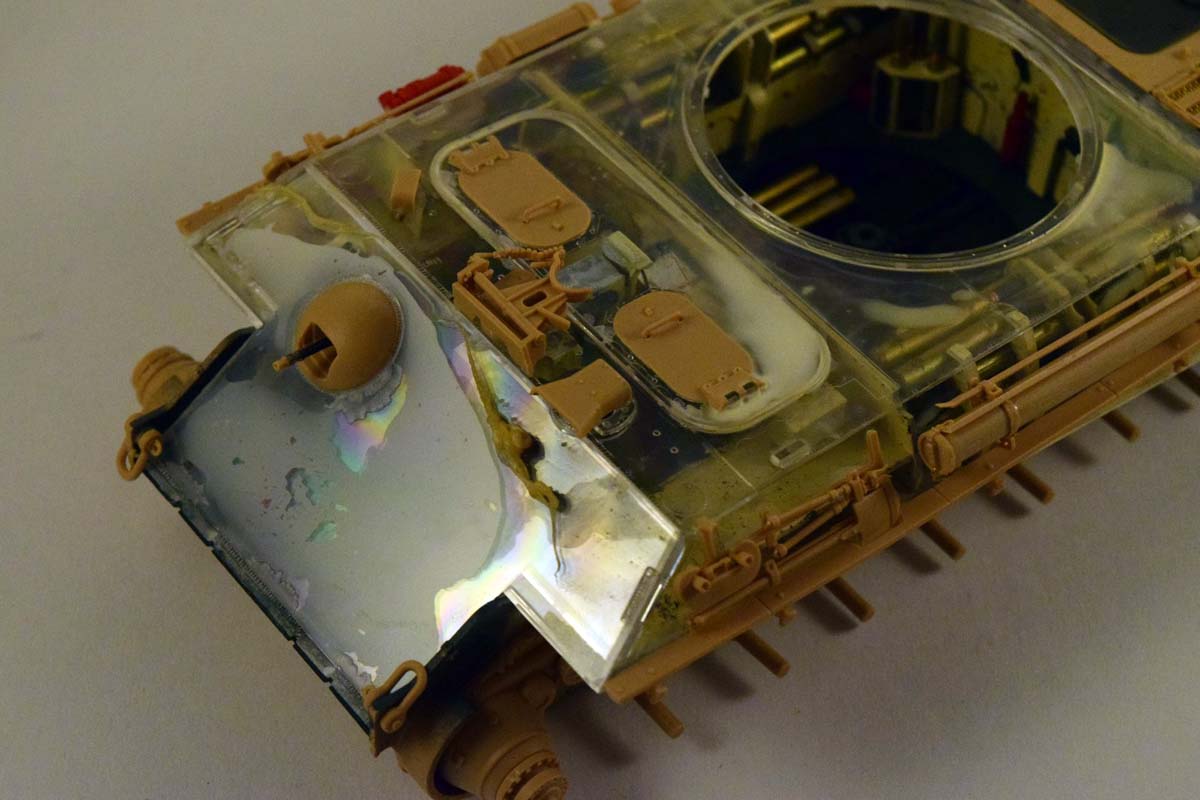
The clear parts are great, because they make the detail visible, although it took me a long time to figure out how to display the model best. (I masked big patches and painted the rest.) If you have a choice I think the cutaway version of the same model would be a better option, though, as even the clear parts obstruct some of the detail. (Obviously nothing is completely transparent.)
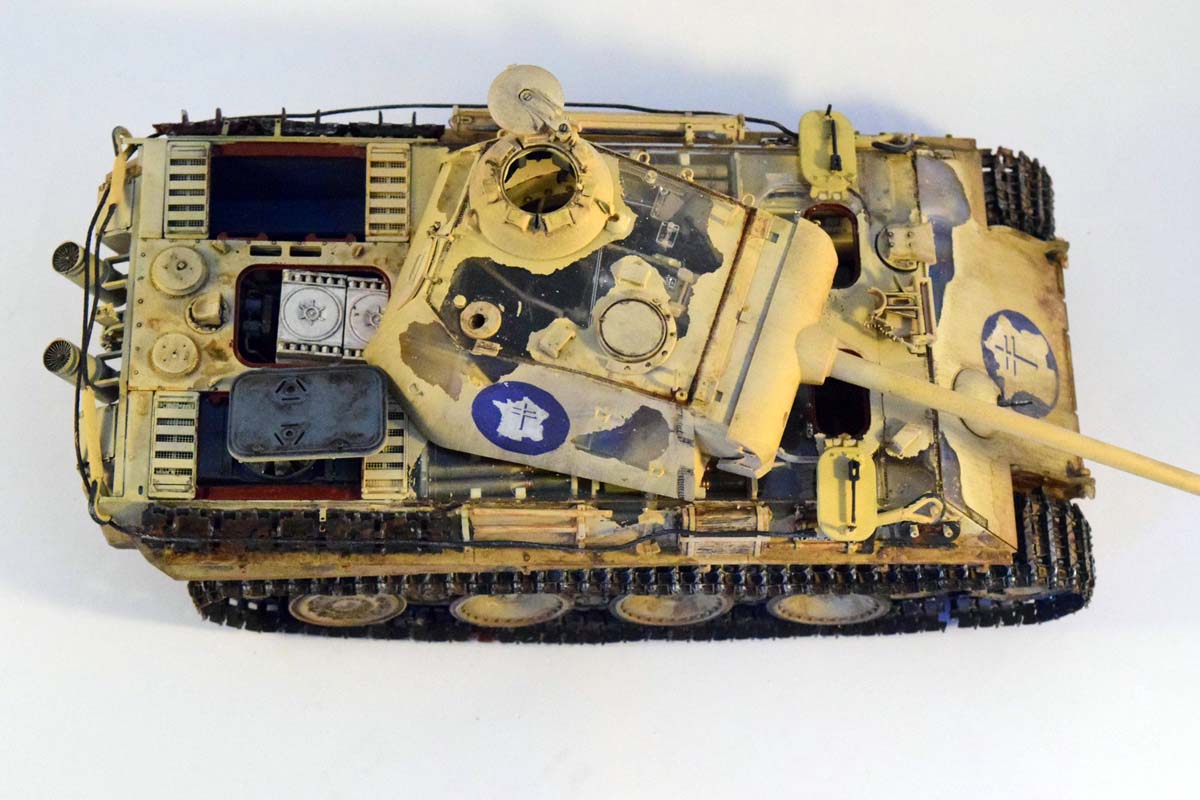
Talking about clear parts: gluing them is sometimes problematic. I ran into a problem with the frontal armor: you are supposed to glue a large, transparent part onto the transparent upper hull to achieve the scale thickness of the armor. The problem was that even though I did use a thick plastic glue, the capillary force drew it deep between the two parts, fogging the plastic, so I only used it sparsely. And when I applied the masking solution well the same thing happened only to an even worse degree. Fortunately I wanted to build a French Panther with a gigantic ensign on the front, so I could just cover up the areas where the masking fluid went.
The model takes full advantage of the use of PE -sometimes I felt too much (this is a matter of personal taste: some love it, some not so much) and the huge part number is reflected on the amazing number of tiny parts -both plastic and PE- that need to be glued in position.
The included decals provide a comprehensive set for the interior, too, which is an often overlooked aspect. You also get decals for the ammunition, which is an even more overlooked detail in models. (The primer on the bottom of the round is also provided as a decal.) Talking about ammunition: you get much more than needed, so do count how much you need, and only paint those Dont ask why I am giving this advice.
The model is extremely detailed; so much detail was crammed into this tank that only a Panther expert could give it justice. There are other, also excellent models available with full interiors, but this model blows them out of the water when it comes to detail. However this comes at a price.
Negatives
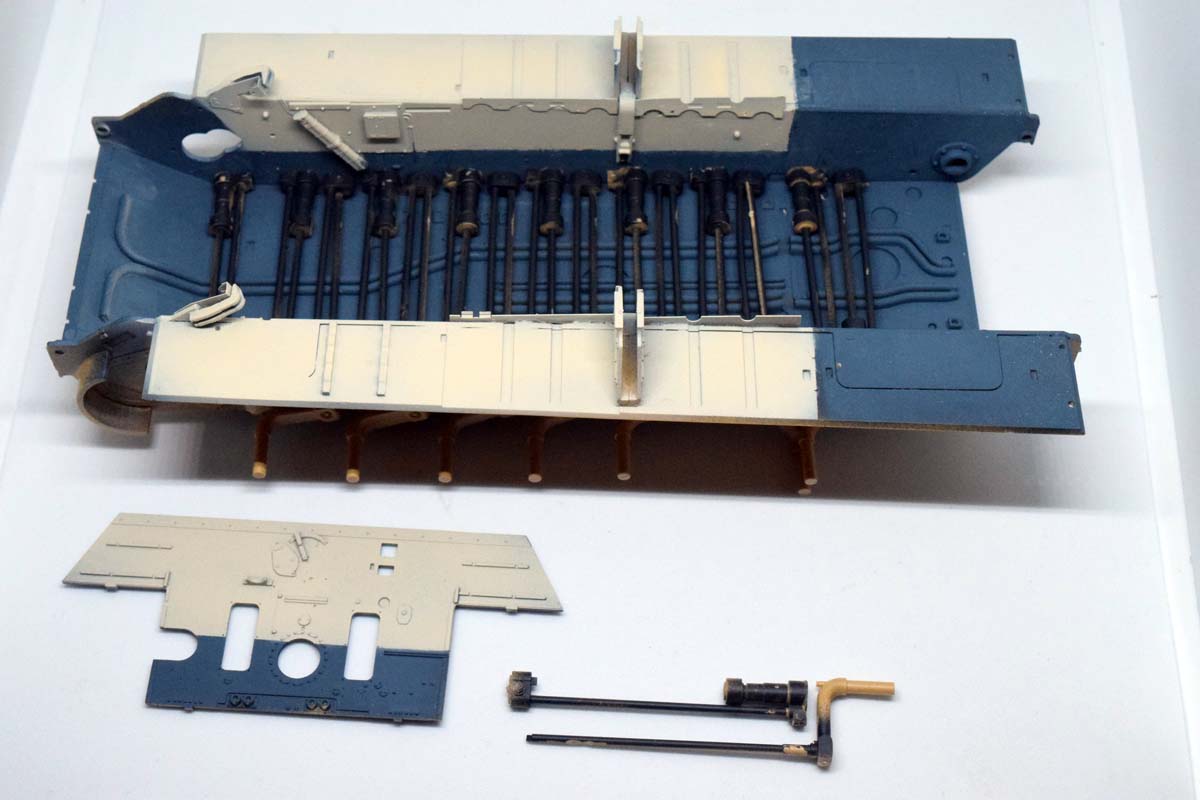
Serious fit issues: this is my main problem with the kit. This really surprised me, to be honest. The lower hull is a tad too narrow for the torsion bars, PE brackets and the transmission -see photos. Some was easy to remedy (just cut a little bit off the torsion bars), but as the model is extremely well designed with very little fitting allowance. When you adjust the position of the PE brackets to fit them into the hull, it throws the fit of all other parts that are attached to them and the bottom of the hull, cascading the problem further downstream the building process.
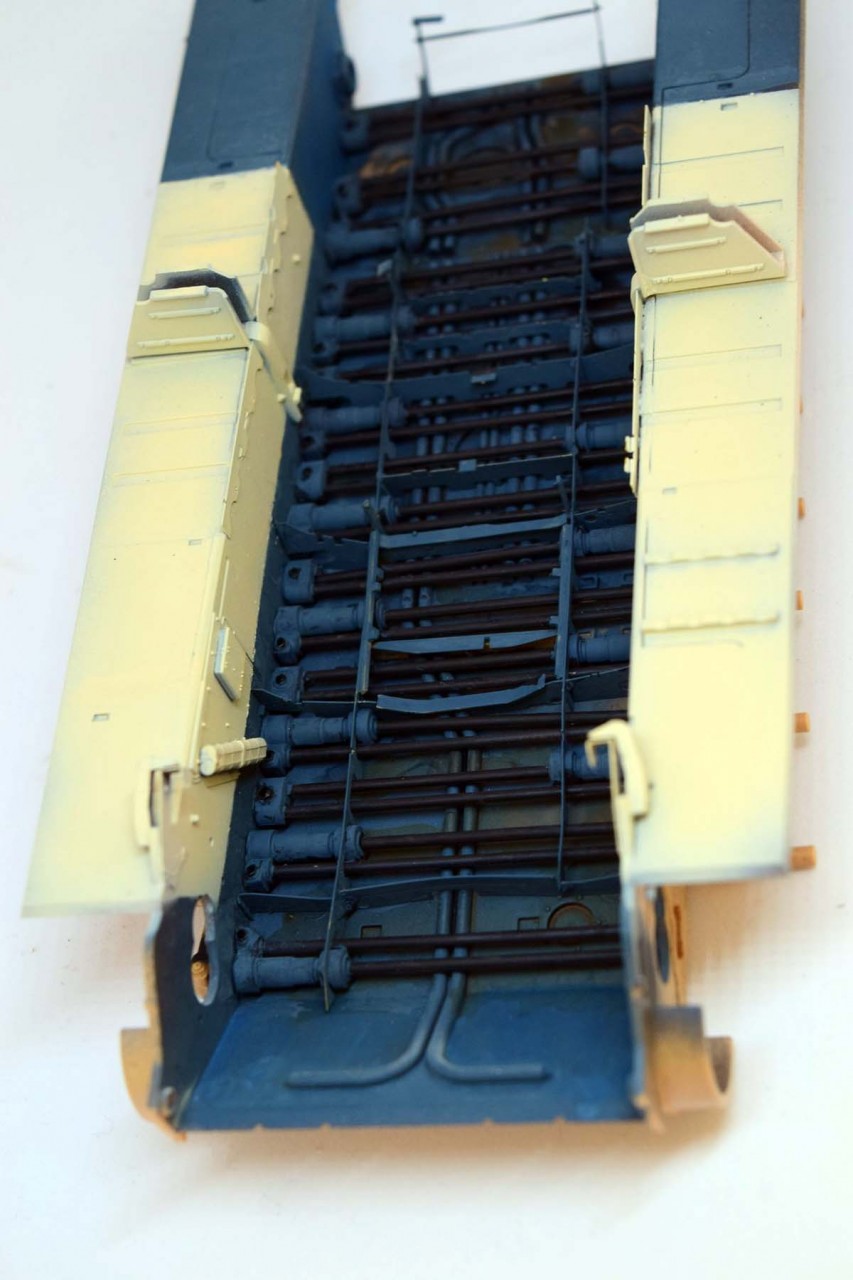
The very tight fit was also an issue with the installation of the metal floorplate around the turret basket. This is a very elaborate piece with holes for the ammunition holders. You need to slide it into position from above, while all the ammunition holders are in place, and there is literally no room for error -everything has to be in its exact location with absolutely no wiggle room - and the fit is so tight that even then it would be next to impossible to install it without a struggle. Because I had to slightly adjust the PE brackets on the floor to which some of these ammo holders are attached, this was not the case. The tight fit also meant that as I was gently pushing the floor plate down to its place it scratched the paint on the sides of the hull So that was a bummer. I ended up taking the ammo holders out, modifying them so I could slide them in from above, and installed them after the floor was in place.
There was also a fit issue with adding the top of the hull to the lower hull; they did not fit perfectly, and I did have to struggle to make them meet. I ended up forcing them together, and filling in the remaining seams, but this is not an ideal solution, especially with the transparent parts.
The model felt (quite a) bit over engineered; as if the designers had decided to go all in when making this model. The design philosophy can be summarized as why use one part when we can use five? Sometimes I did feel it would have been better if they just moulded a particular detail in place. (For example the bolt heads on the turret rotating mechanism.) Sometimes relatively simple parts need to be assembled from a myriad of tiny parts which, frankly, feel unnecessary. (Again: see photos about the universal joint holding the turret in place on the bottom of the hull.) The same is true for hidden details: there are things which will NOT be seen (bottom of the engine cooling fan housing), even after using the transparent parts, and sometimes they do not even look like they should (like the final drives in the transmission under the drive wheel housing), yet there they are, waiting for you to be assembled. They may come handy if you display the model in a state of repair, construction or as a wreck, however.
There are some dubious choices when designing the parts. The first was quite a bit annoying: many sprue gates were designed so that they were attached to the part on two planes rather than one (see the first photo), necessitating cleaning the leftover plastic from two planes it does become old fast, especially with small parts that are hard to hold. The other weird thing was that some parts of the model were designed with a huge seam running right through the middle of them once you build them, like in an old-school model. See photos again of the notorious turret turning mechanism which was previously mentioned in conjunction with the individual bolt heads or the gun breach. Other models can solve the mating of the halves without having to have these enormous seams. It is not difficult to deal with, but this was strange because otherwise the whole model is oozing high-tech design and technology. These parts looked like a bit of a throwback to the 70s in comparison.
The other strange design choice was the horizontal part of the lower hull (the plates where the ammunition is placed). These are attached to large flaps moulded onto the lower hulls sides, which will leave a huge, visible seam unless you fill it with putty. Its all good and all, but still, it should not be necessary, or, at least the flaps could have been placed on to the bottom side. A bit clumsy in my opinion.
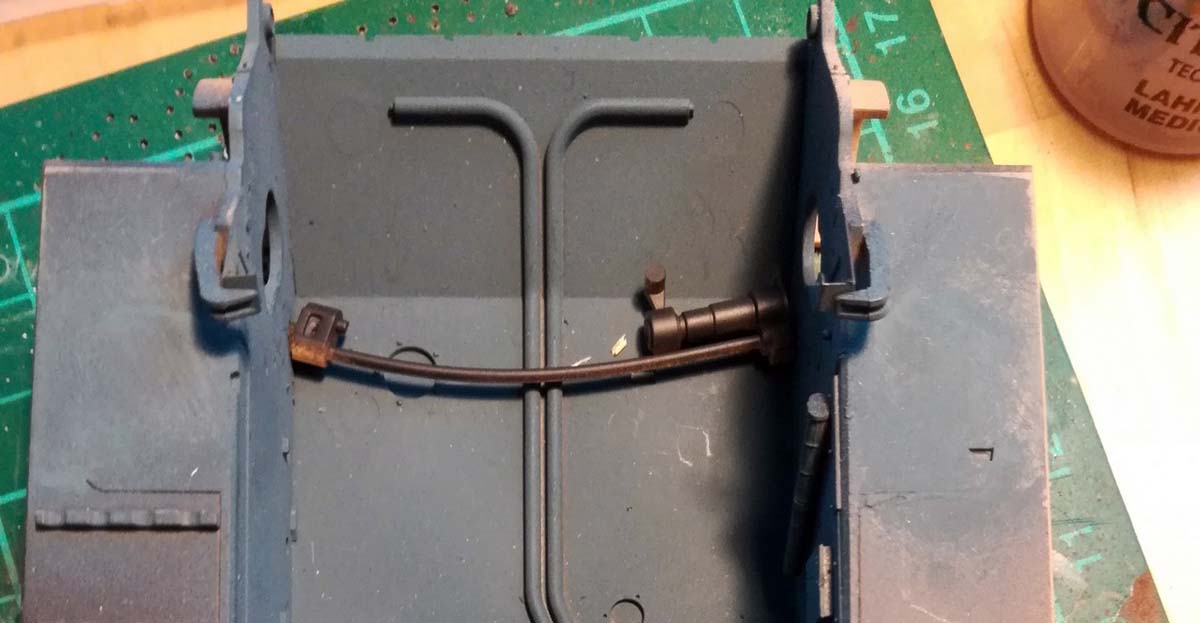
The fume evacuator system has a hose running down to the box where the discarded shell casings are stored this is a two-part affair, and it is really unwieldy and difficult to properly install, as one part should be installed while the turret is not yet assembled, and the second part goes in once the whole turret basket is attached to the turret itself. Not a good solution. (If it was, at least, one part, it would be easier, but the best would be a flexible hose.)
There is also a missing detail (I bet you didn't see this coming ): the compressed air bore evacuation systems tube around the gun breech is not replicated.
Conclusion
Overall it is an incredibly complex model; the most complex I have ever built - and it could easily be the most complex model out on the market. This alone would make it into a challenge to build; however due to the fit issues described above sometimes I felt the model actively fought me. (Yeah, I know. Get good.) I am not saying this to discourage people from it, far from it, but if you go for this model you should do so with open eyes. There are a LOT of good things going for it; especially if you are a rivet counter (and I am not using this term pejoratively), you will love the model to bits (sorry, weak pun). If you want to build a diorama with the tank in a state of disassembly (repair, build, wreck), this is the model for you; or if you just want to challenge yourself. I am an average modeller with very little time to build, and found this model very close to the limit of my endurance -again, not for the incredible detail and part number but for the above detailed difficulties this model presented. Once the hull was ready, I was exhausted by it, and overall it spent several months in the pile of shame over the last two years. Building really took off once the lower hull was finished and dusted (painted). Regardless now it is done I am pretty happy with it -but if this is any sort of indication, I would not build another one. It was a marathon, something I am glad I have done, but in this case I will not build a second version.
SUMMARY
Highs: incredibly detailed, interior, clear partsLows: fit issues, overengineeredVerdict: recommended for Panther enthusiasts, and for people looking to challenge themselves
I am a biologist by trade, and as a hobby I've been building scale models for the last twenty years. Recently I started to write reviews of the models I bought. These reviews are written from the point of view of an average model builder; hence the focus is on quality of the model, how easy it is to...
Thank you; glad to be of use (the main reason for these reviews). I thought it would be of interest as I have not seen many mention of these issues in reviews.


 (1).JPG)
.jpg)
.jpg)
.JPG)
.JPG)
.JPG)
.jpg)
.jpg)
.jpg)
.jpg)
.JPG)
.JPG)
.jpg)
.jpg)
.jpg)
.jpg)
.jpg)
.jpg)
.jpg)
.jpg)
.JPG)
.JPG)
.JPG)
.jpg)
.jpg)
.jpg)
.jpg)
.jpg)
.JPG)
.JPG)
.JPG)
.JPG)
.JPG)
.JPG)
.JPG)
.JPG)
.JPG)
.JPG)
.JPG)
.jpg)
.JPG)
.JPG)
.JPG)
.JPG)
.JPG)
.JPG)
.JPG)
.JPG)
.JPG)
.JPG)
.JPG)
.JPG)
.JPG)
.JPG)
.JPG)
.JPG)
.JPG)
.JPG)
.JPG)
.JPG)
.JPG)
.JPG)
.JPG)
.JPG)
.JPG)
.JPG)
.JPG)
.JPG)
.JPG)
.JPG)
.JPG)
.JPG)
.JPG)
.JPG)
.JPG)
.JPG)
.JPG)
.JPG)
.JPG)
.JPG)
.JPG)
.JPG)
.JPG)
Comments