DRAGON MODELS [ MORE REVIEWS ] [ WEBSITE ] [ NEW STORIES ]

Built Review
172
LRDG Truck
Long Range Desert Group Patrol Car w/Lewis Gun
  • move

by: Jan Etal [ TREAD_GEEK ]

Introduction

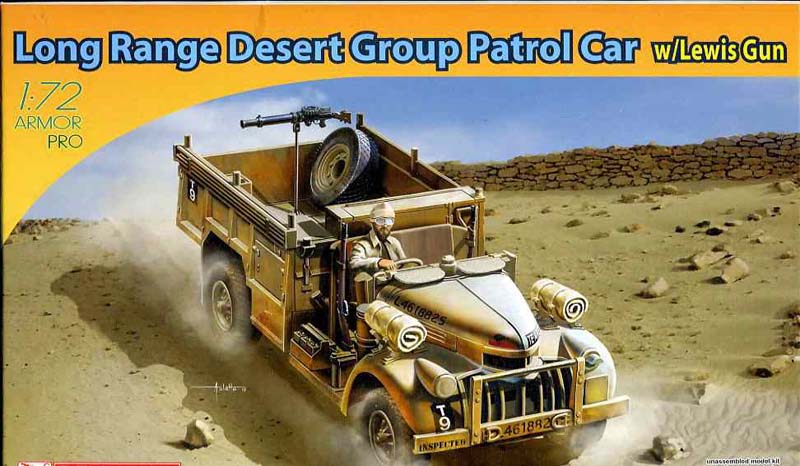
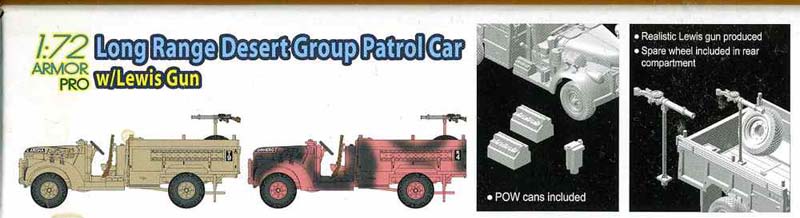
The Long Range Desert Group (LRDG) was a reconnaissance and raiding unit of the British Army during WWII. Between December 1940 and April 1943, the vehicles of the LRDG operated constantly behind German lines. The requirement for covert transport, the distances involved and the environment meant the vehicles used were usually stripped of all non-essentials and specially adapted for the task. Specifically, they were equipped with large desert tires, a larger radiator, a water condenser for the radiator, sand mats, sand channels, a sun compass, and numerous other modifications that made it possible for a small band of soldiers to operate in the desert conditions.

The first vehicles used by LRDG were Chevrolet WB 30cwt and were actually bought from a local Chevrolet dealer (and the subject of this review). Further vehicles were borrowed from the Egyptian Army and relatively few were procured through regular army channels. All the vehicles were modified as outlined above, and each fitted with a variety of armament. Only 35 of these particular trucks were initially acquired.

The subject of this review is the Dragon Models 1/72 Armor Pro Long Range Desert Patrol Car w/Lewis Gun, kit #7439.

Contents

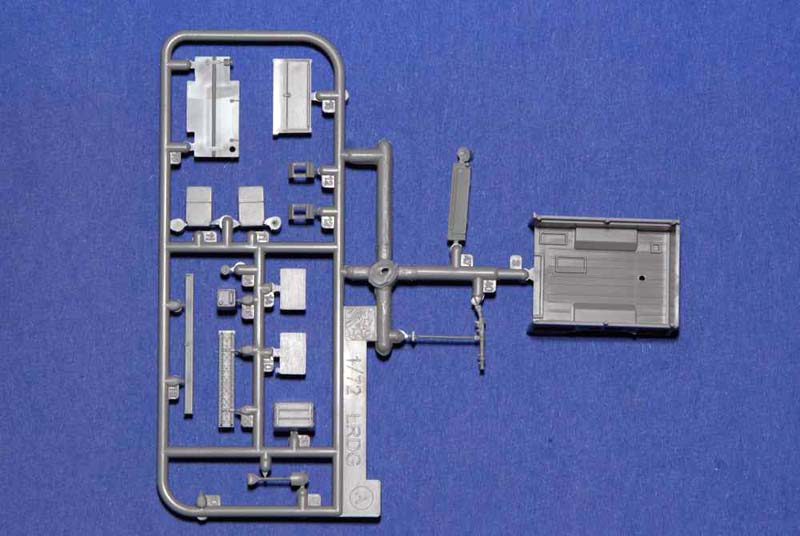
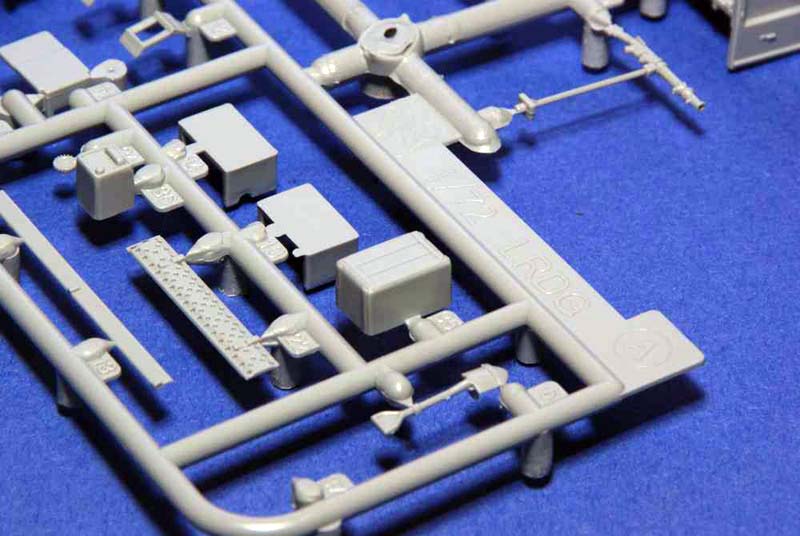
In the box will be found three medium sized sprues in typical Dragon Models light gray styrene. The sprue breakdown is as follows:
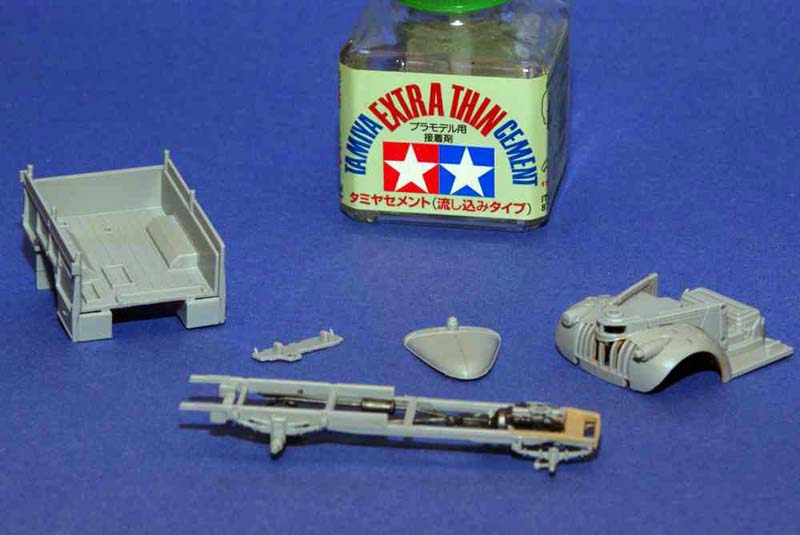
  • Sprue ‘A’ = 18 parts - Truck cargo bed and associated details.
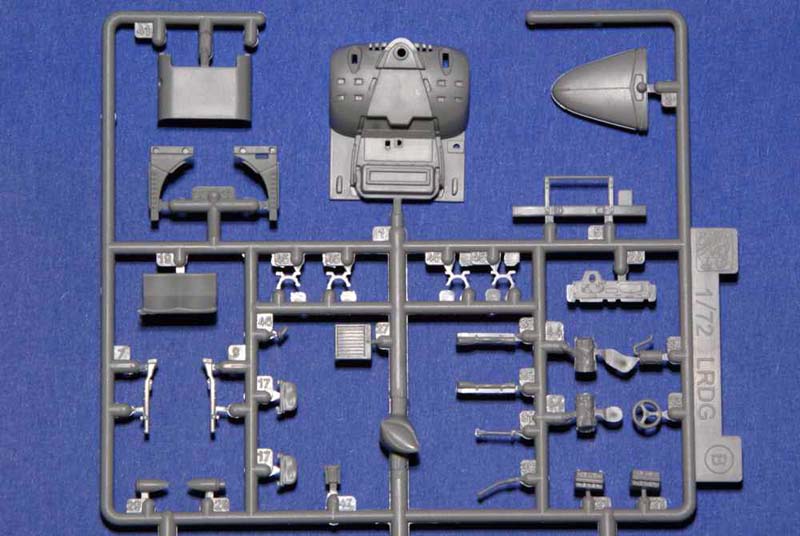
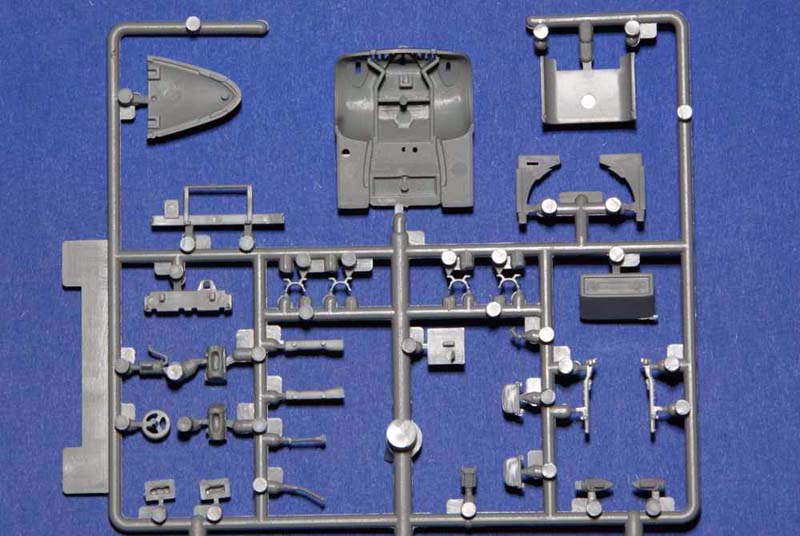
  • Sprue ‘B’ = 31 parts - Front cab and engine area with associated details.
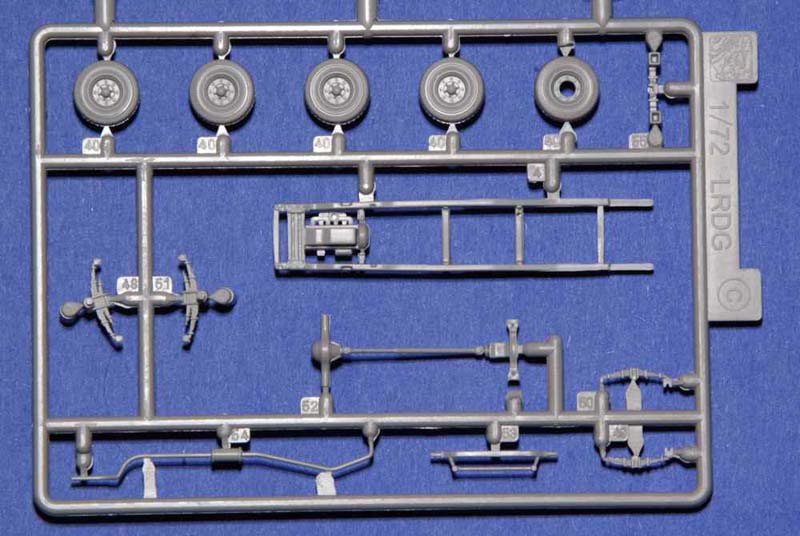
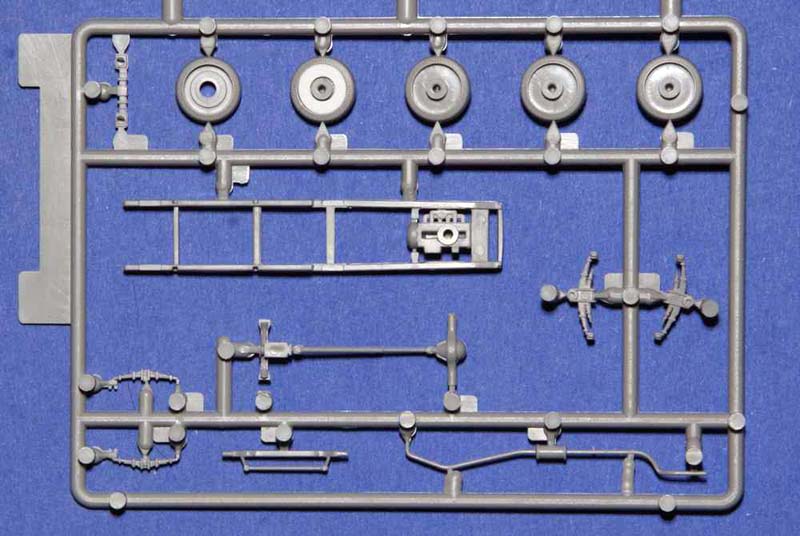
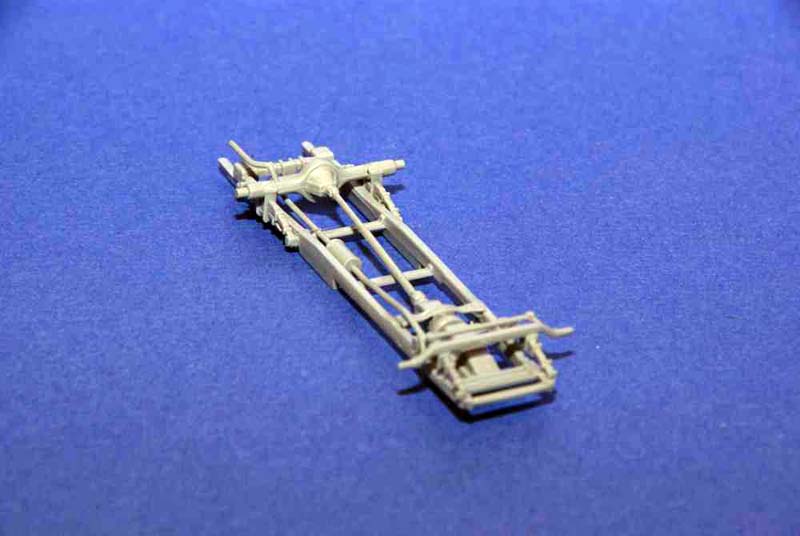
  • Sprue ‘C’ = 14 parts - Vehicle frame and chassis components.


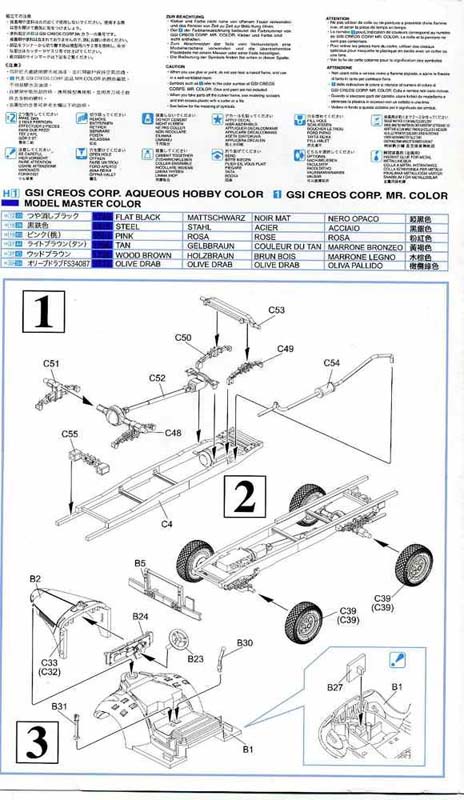
Also present is a small plastic bag containing a sheet of Cartograph water slide decals and a four sided instruction card. The card contains one page of sprue parts layout and two pages of build diagrams in the form of exploded view line drawings. The last page provides painting and marking options for one of two vehicles.

Review

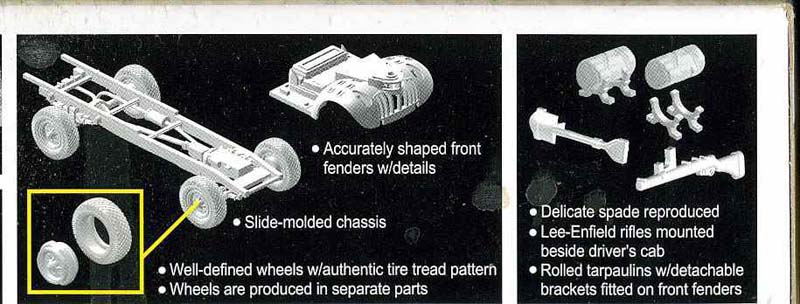
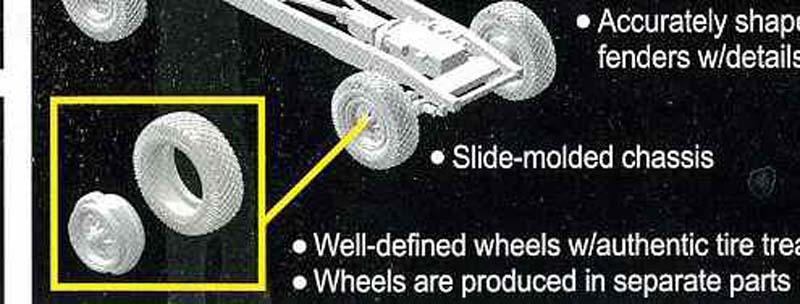
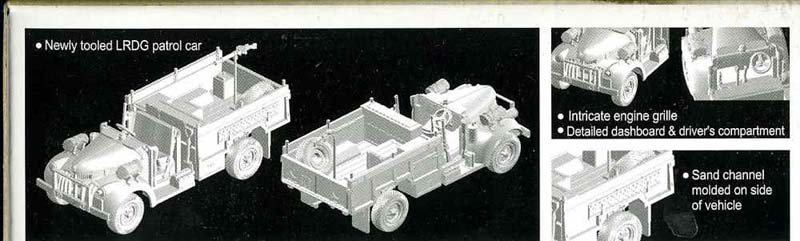
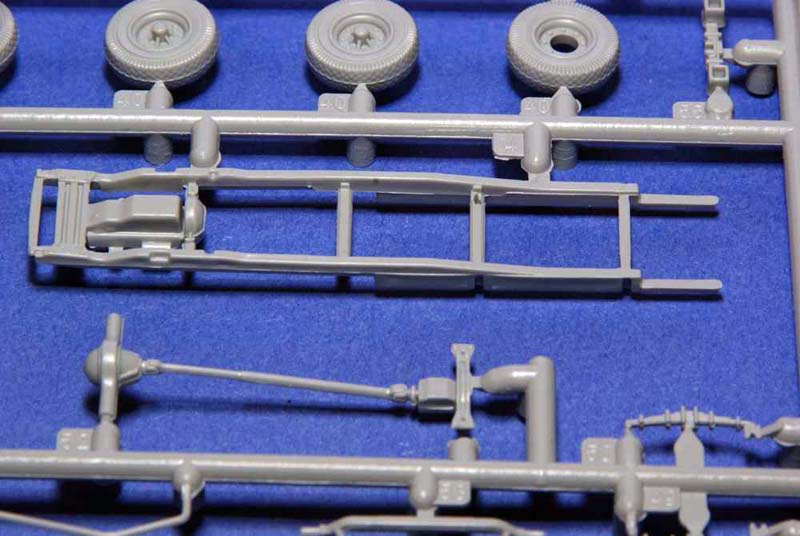
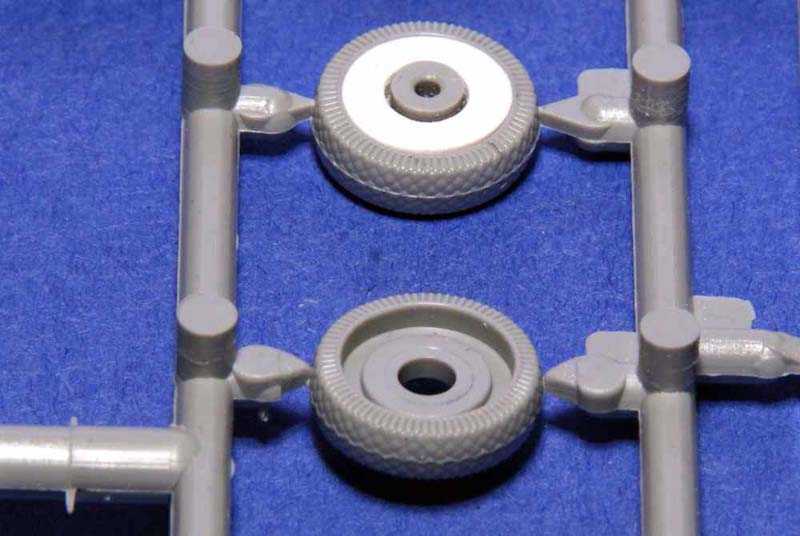
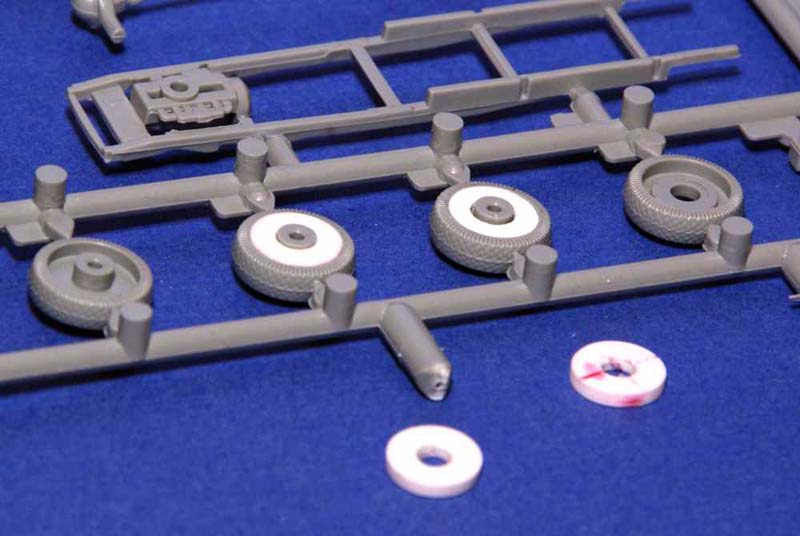
Looking over the sprues one will see that while there is some great detail molded in, there are a few areas that are sadly lacking. Immediately noticeable were the wheels, which the box side CAD image takes pride in showing as a separate wheel rim being inserted into the tire. The truth inside the box raises its ugly head. The wheels are one-piece and they do give a decent interpretation of the tread, although quite shallow, but there is also a nice moulding seam along the outside that will need to be removed and oddly, they are also moulded with a hollow back side, even the spare.

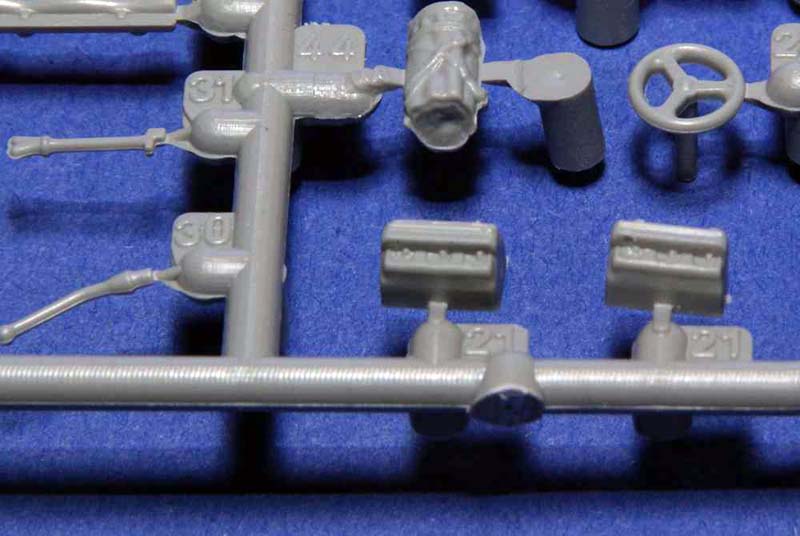
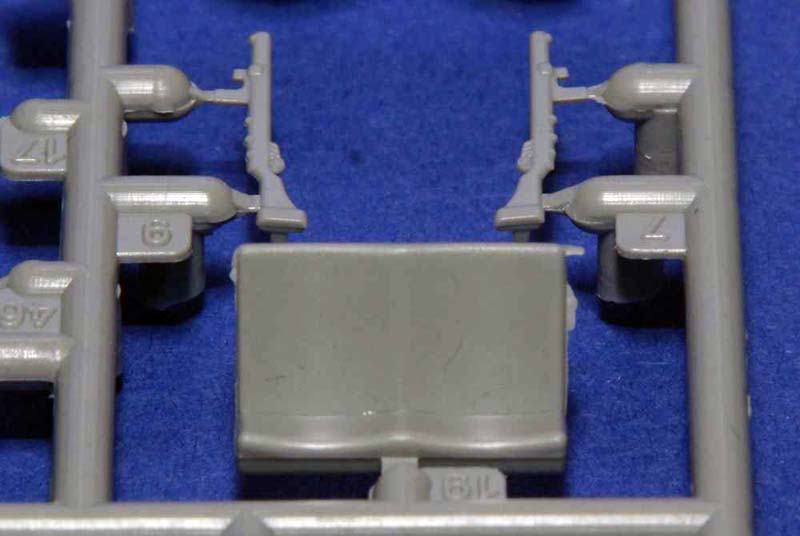
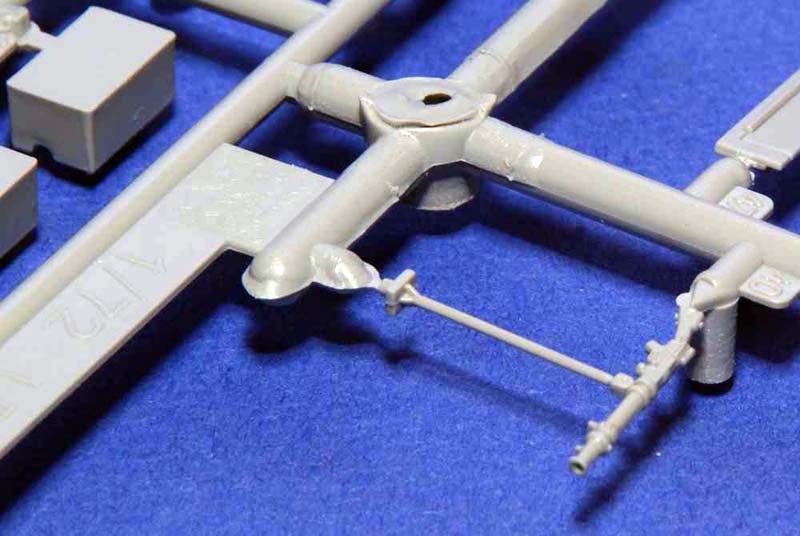
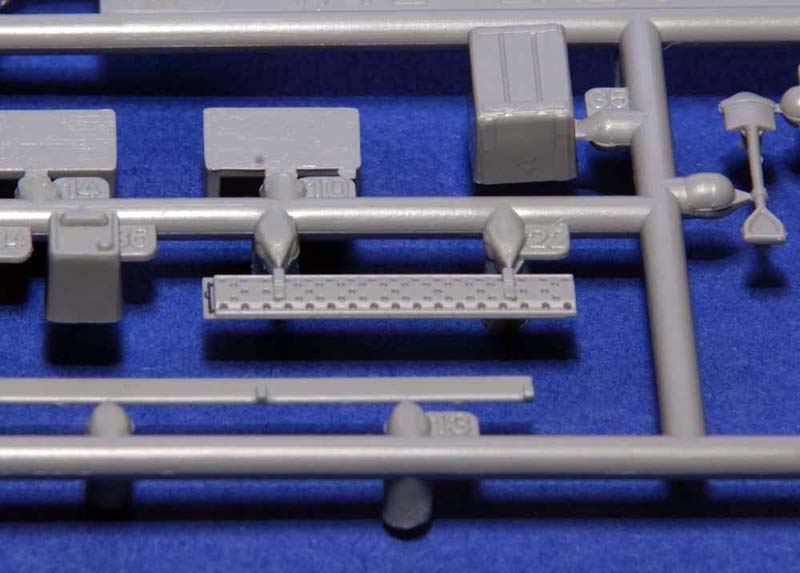
There were sink holes on three ends of the two sand mats and numerous ejector pin marks are present (both depression and projection type) in a number of areas and not all will be hidden after assembly. One example of this was the racks of flimsy cans (B21) that reside on the front running boards. These were of the projecting type on the part’s base that will require careful sanding. Flash was found on a number of parts on Sprue ‘A’ including the front bench seat and in the open radiator grill area. The majority of moulding seam lines in some other areas are light and should be easily removed with a scraping of a sharp hobby knife.

Sprue connection points (gates) were all over the place (size wise) when compared to previous kits and this will be a disappointment to many. Several of the smaller or more delicate parts did have equally small gates to them. However, some parts, such as those on larger pieces have larger connectors at awkward locations, which will require careful clean-up.

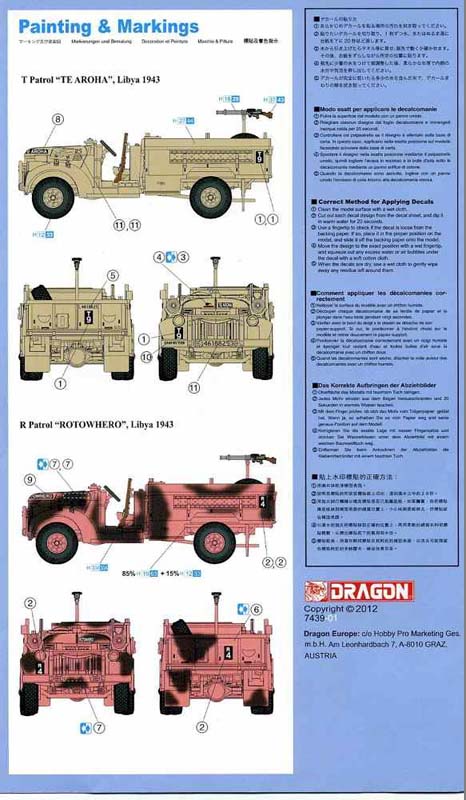
The options for painting and markings are as follows:
  • An overall Sand coloured vehicle of ‘T’ Patrol “TE AROHA,” Libya 1943
  • An overall Desert Pink and Olive Drab coloured vehicle of ‘R’ Patrol “ROTOWHERO,” Libya 1943


A full set of water-slide decals is provided for the “TE AROHA” vehicle. Unfortunately, while a good selection of decals is provided, markings for a second vehicle will prove frustrating for the majority of modellers. The “ROTOWHERO” vehicle numbers are provided for in the form of individual numbers and letters to make up your own. These are absolutely tiny and will prove awkward to individually place and line up in this scale. I think that while one or two modellers will love this, more will find it very frustrating and look for an alternative option.

The colour references provided are for the GSI Creos Corp Aqueous Hobby Color, the same company’s Mr. Color and Model Master enamels.

Build Observations

As with any kit, it will serve the builder well to review the instructions prior to letting glue meet plastic. While this kit breaks construction up into eight steps, it is the modellers responsibility to determine the logical order in which parts should be applied to ensure a trouble free (or as close as possible) build. This is because the Dragon Models instructions do not specify in what order parts should be attached.

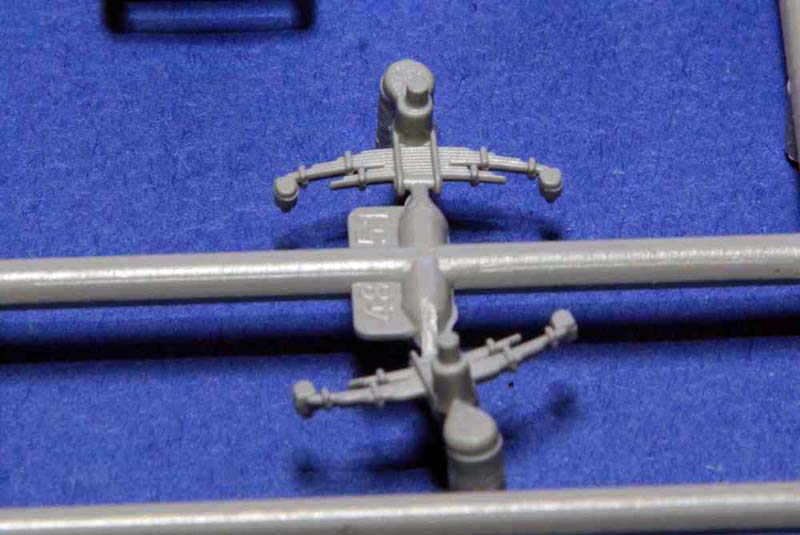
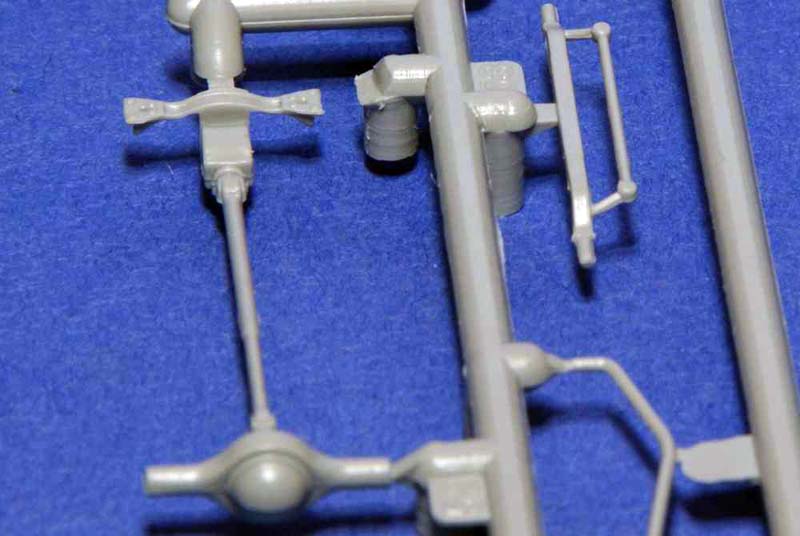
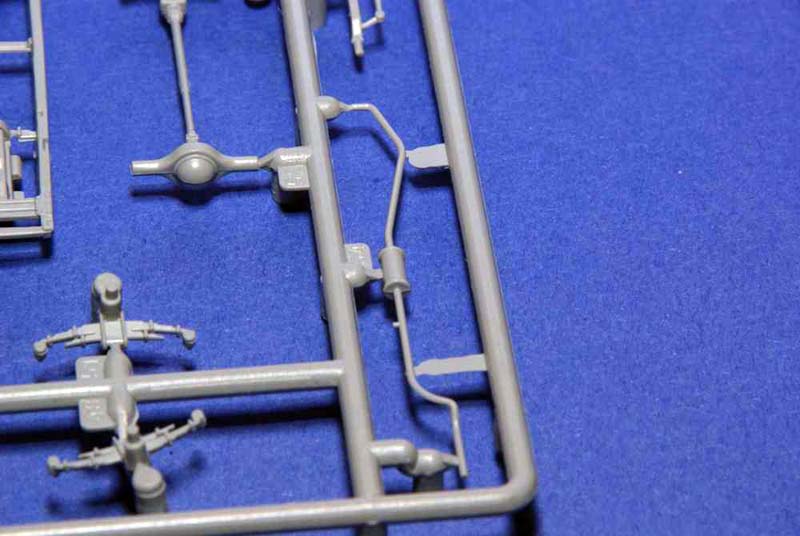
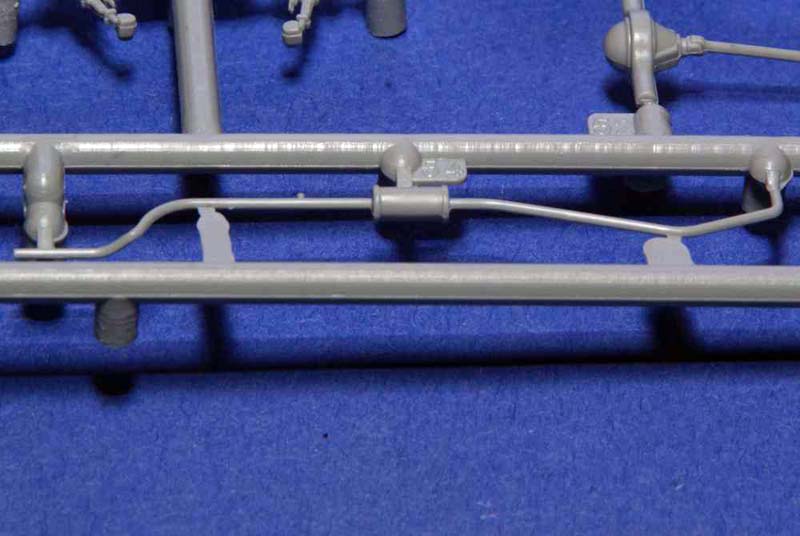
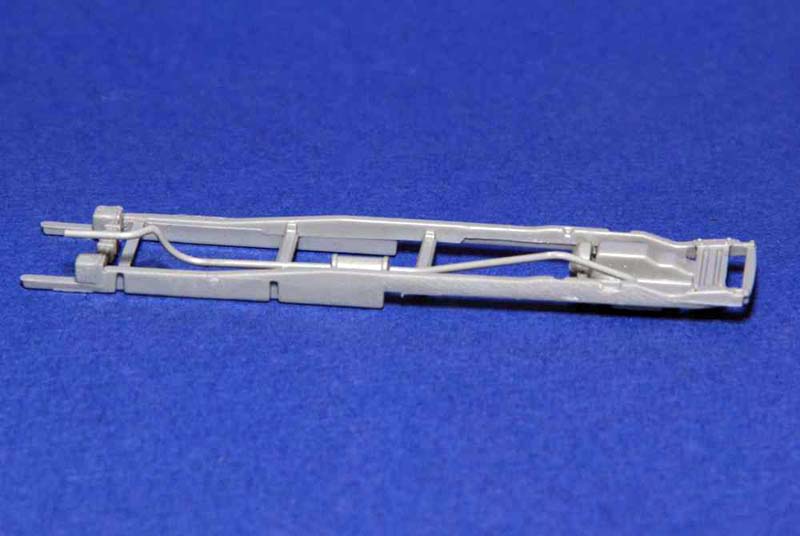
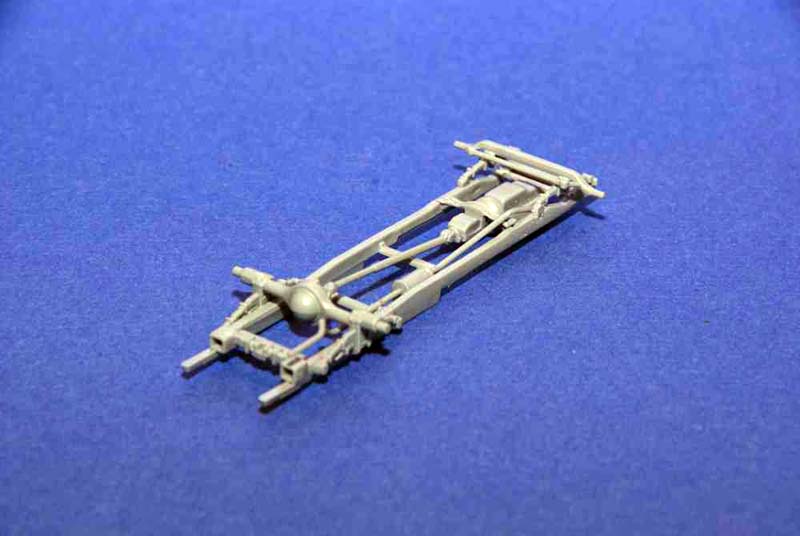
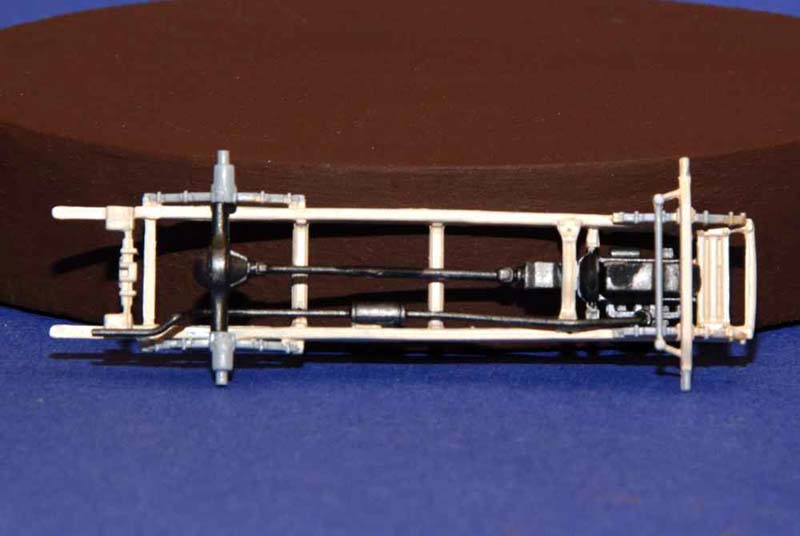
Steps 1 and 2 involve the construction of the entire frame and chassis. After reviewing the instructions it seemed obvious that the entire exhaust system (C54) should be attached first. Failure to do so would result in numerous impediments interfering with its placement at a later stage. Next up is the attaching of the four leaf-spring parts (C49 to C51) onto the truck frame. In this case the placement should follow the instructions as each piece has it own location.

Following the installation of the springs will be gluing the driveshaft (C52) with its attached axles into position. The fit is rather poor as the mating features result in a very loose and sloppy fit. Part C53 (the steering linkage) was next and also possessed poor mating features that required careful filing and trimming to achieve an acceptable fit. The last piece to be fitted in Step 1 is a cross beam (C55) between the frame sides near the rear.

Step 2 has the wheels attached as well as the front bumper (B5). This reviewer decided against placing these parts on at this stage. However, appropriately sized Evergreen plastic tubing was cut and shaped to fill the void at the back of the wheels. The bumper was left to be attached after the front hood was at least dry fit to best determine at which stage it should be placed.

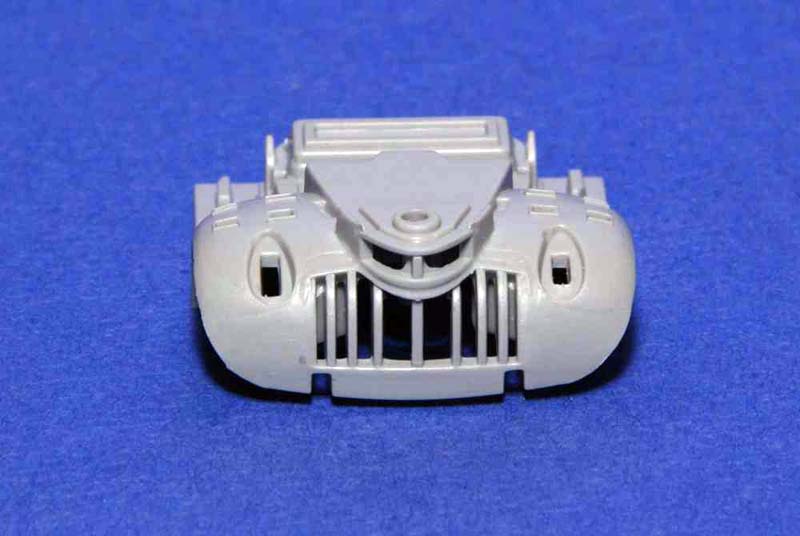
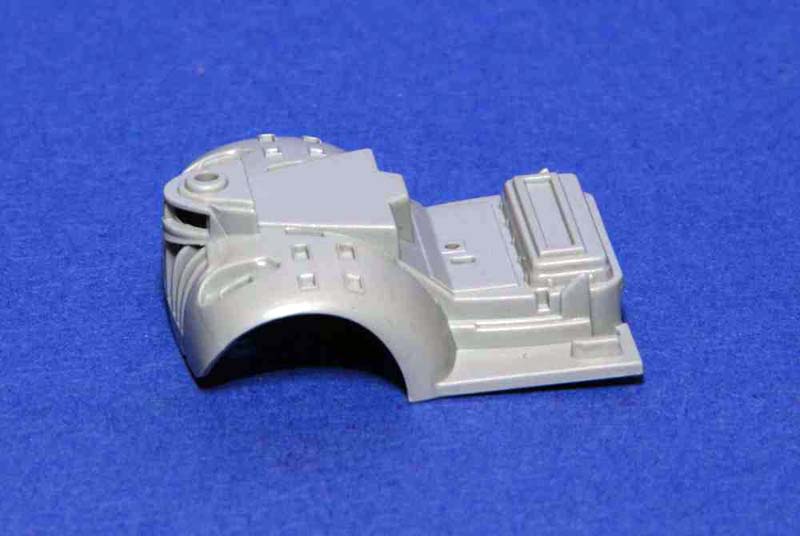
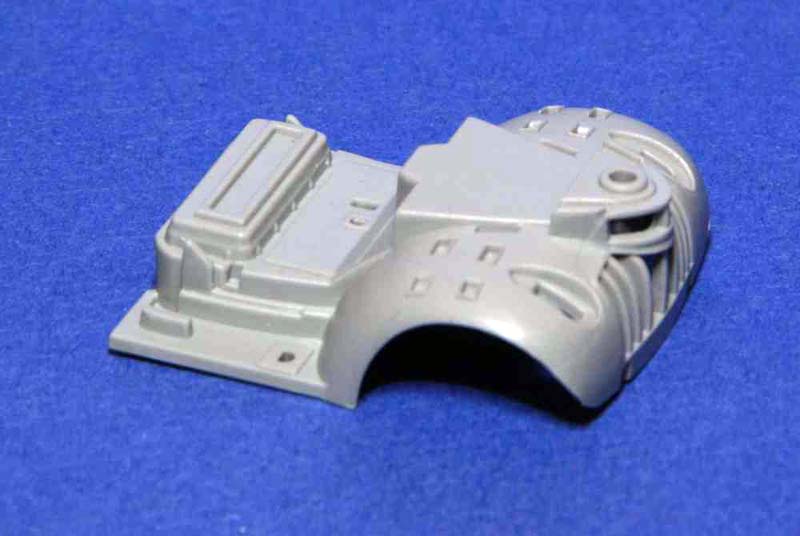
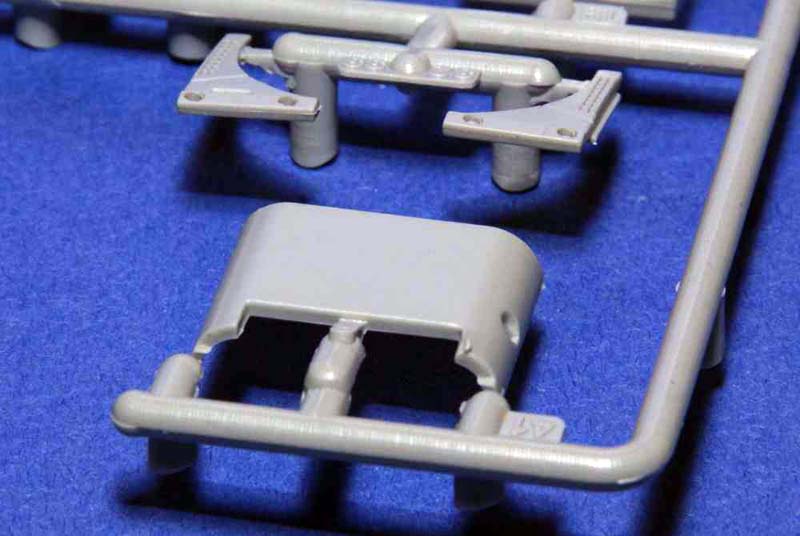
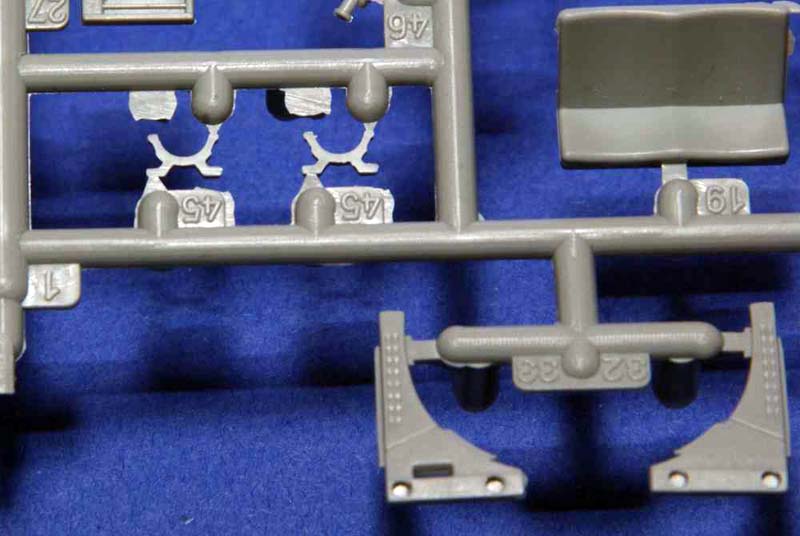
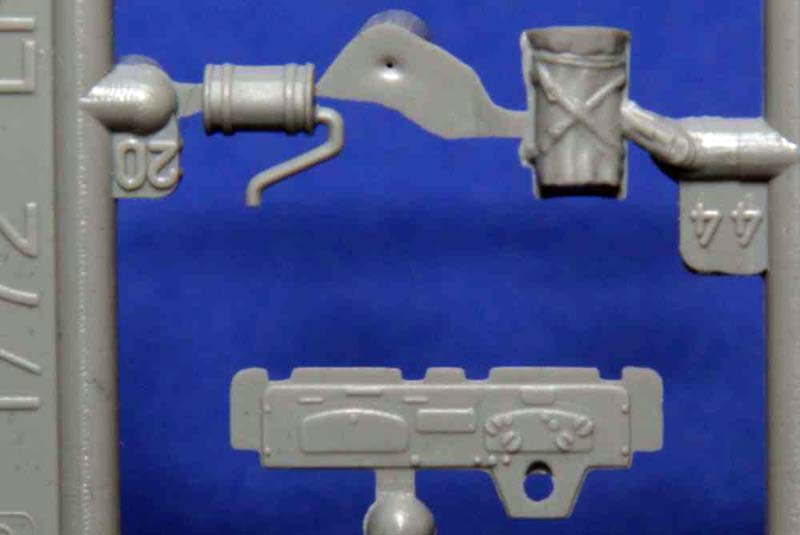
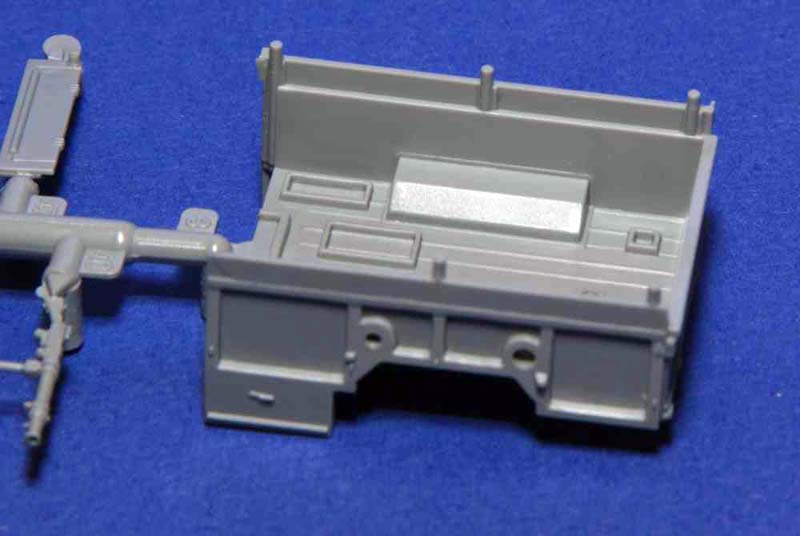
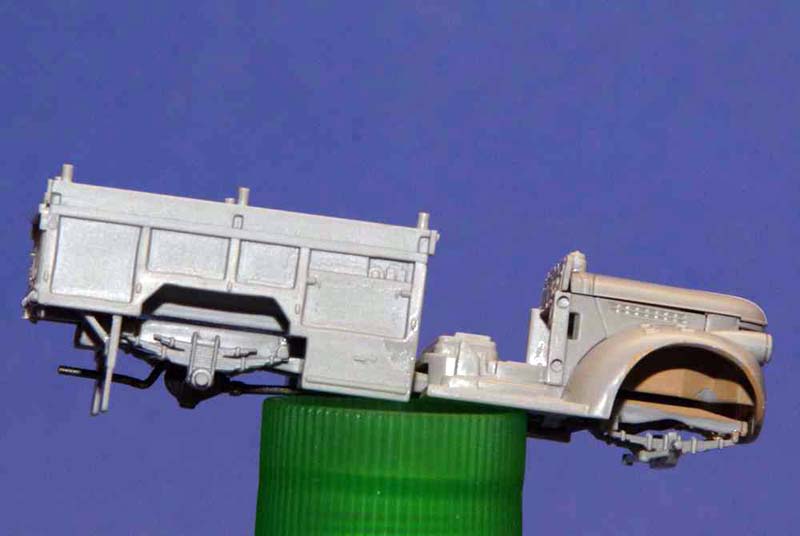
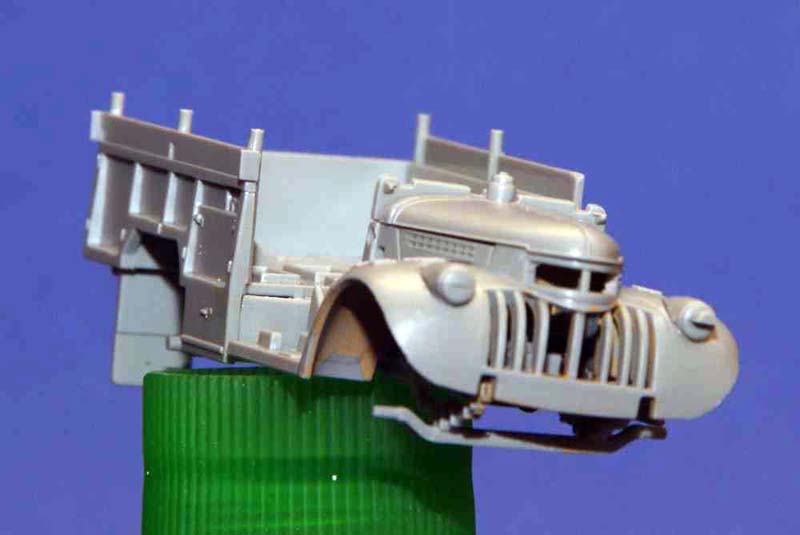
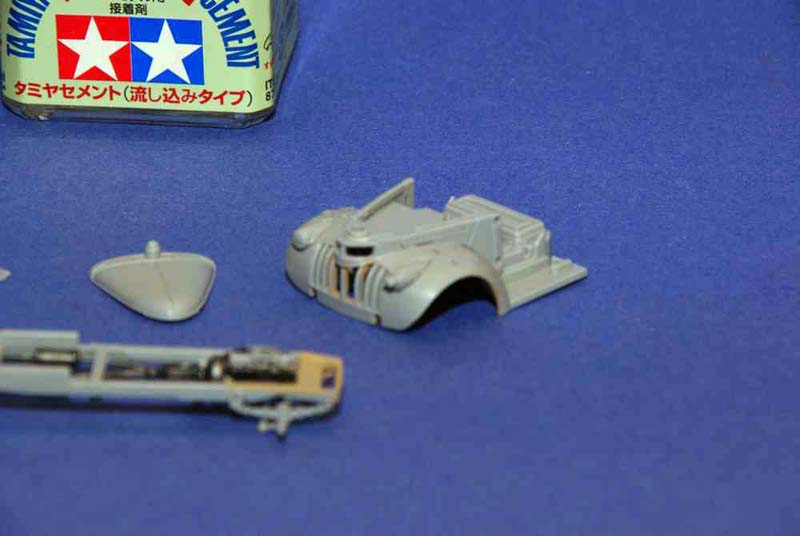
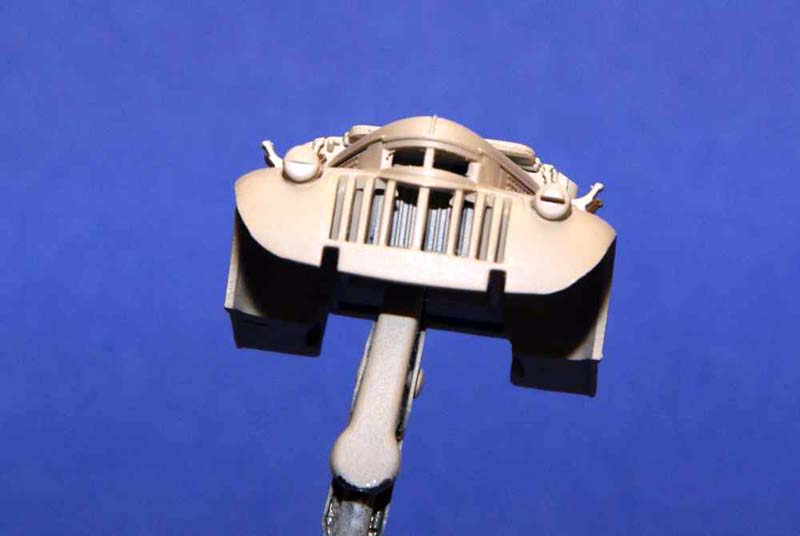
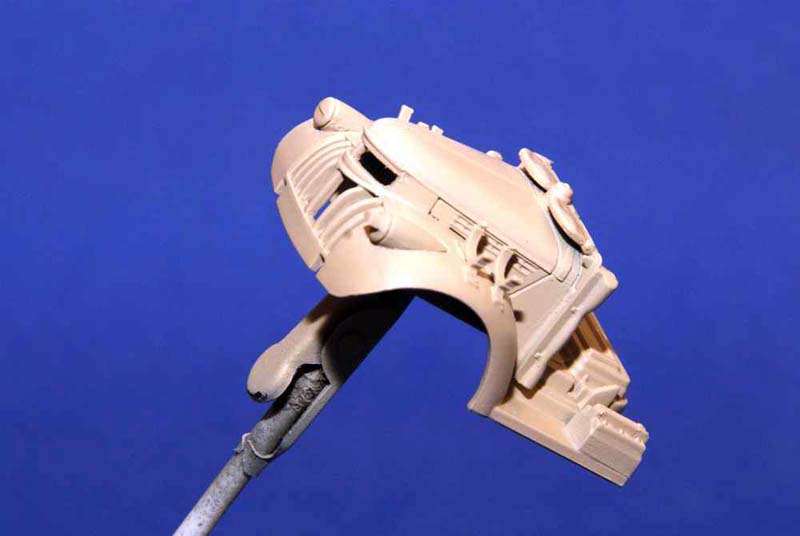
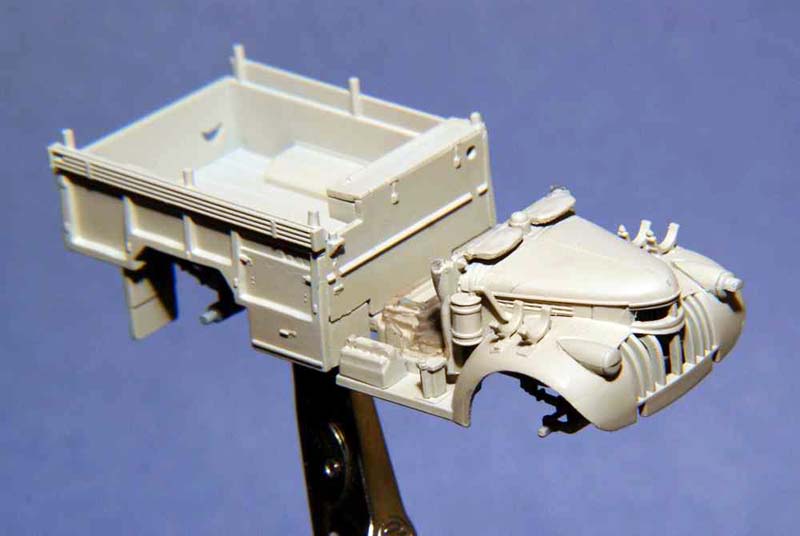
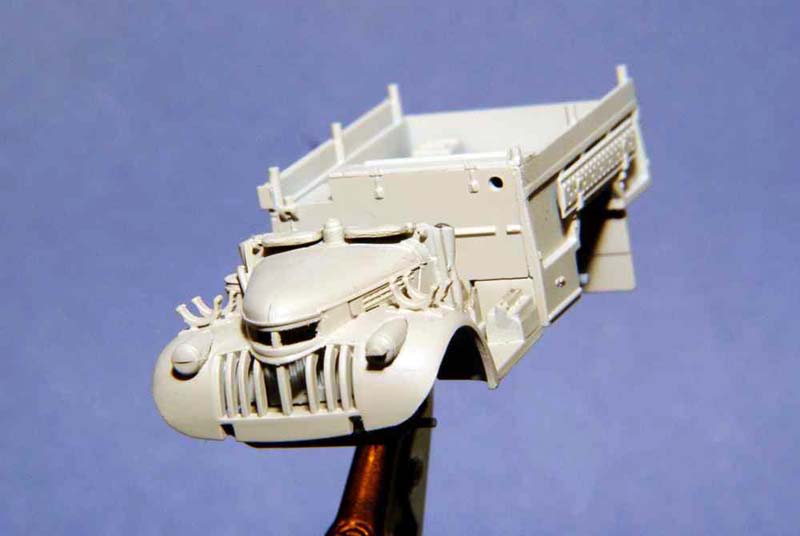
Step 3 begins the construction of the cab area. The main part is B1 and represents the entire base body of the forward portion of the truck, including the fenders. To this are added several detail pieces that start with the engine radiator (B27). This part fit well after some light sanding to the vertical sides. Parts C32 and C33 are the lower sides of the engine compartment and had a somewhat loose fit. Part B2 (the engine compartment hood) is a separate part that also has the dash panel (B24) attached to it. The final three parts to attach in this step are the gear shift (B30), hand brake (B31) and steering wheel (B23). It was at this point that I added some pedals to the driver’s side floor made from shaped Evergreen plastic strip. While the instructions call for the steering wheel to be attached at this point I decided to wait until the area under the dash had been detail painted as the wheel would interfere with the painting process.

In 
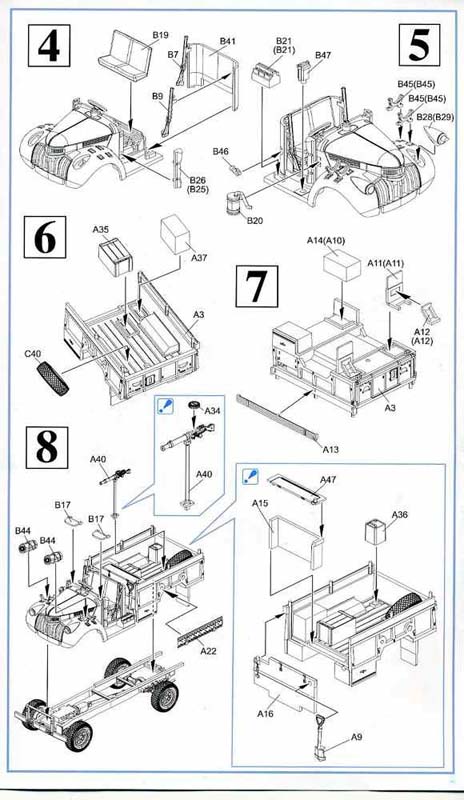
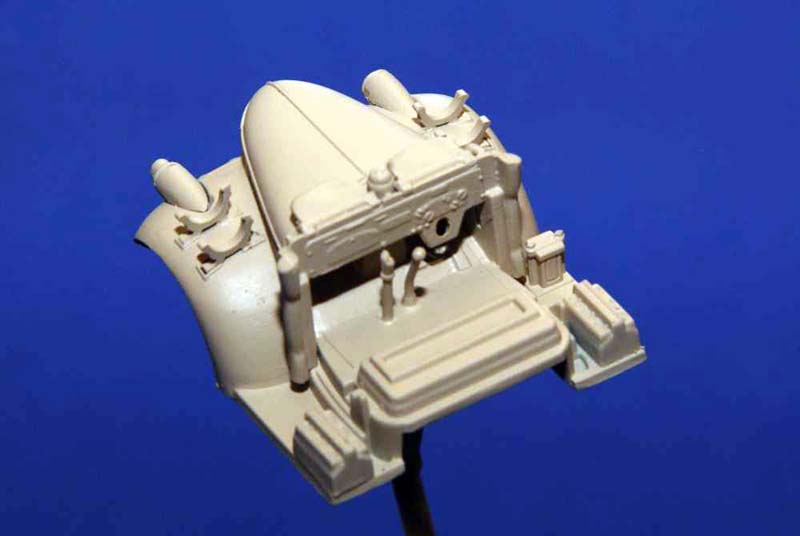
Step 4 further detailing of the forward area of the truck continues. The cab back, seat, rifles and side fabric door panels are to be attached. These rolled up door panels fit well but are side specific. The other parts were dry fit but left off and their fit seemed fine.

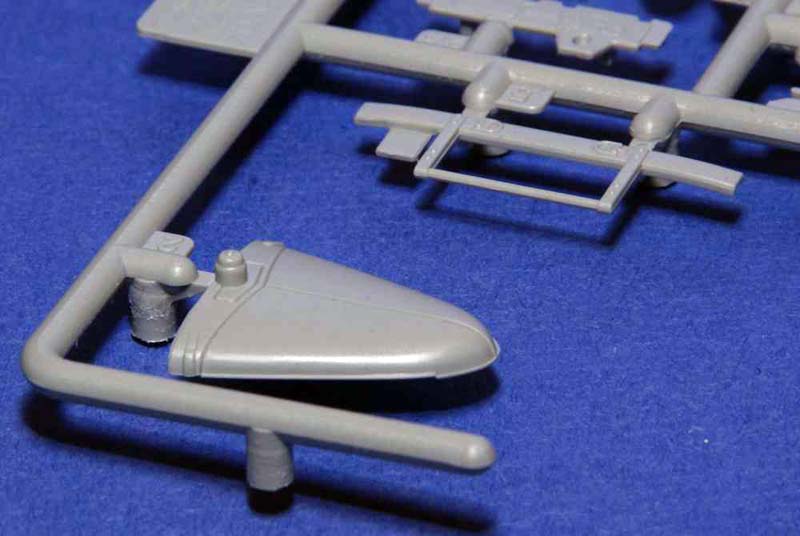
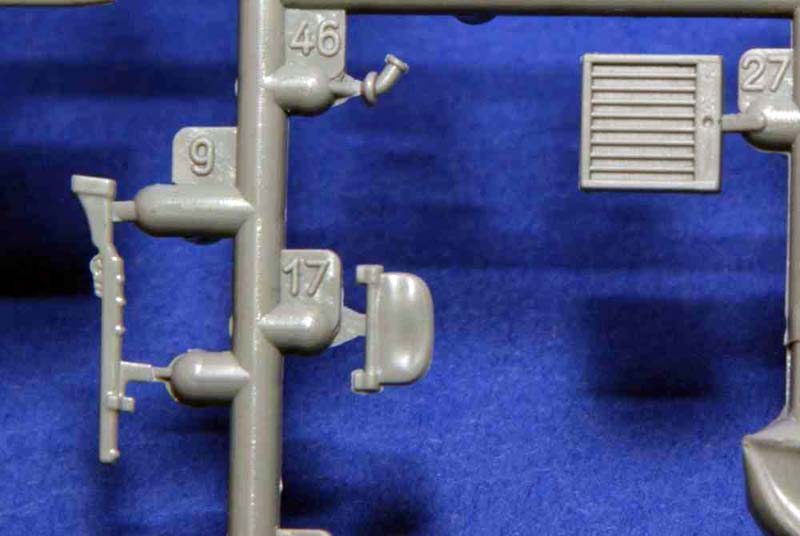
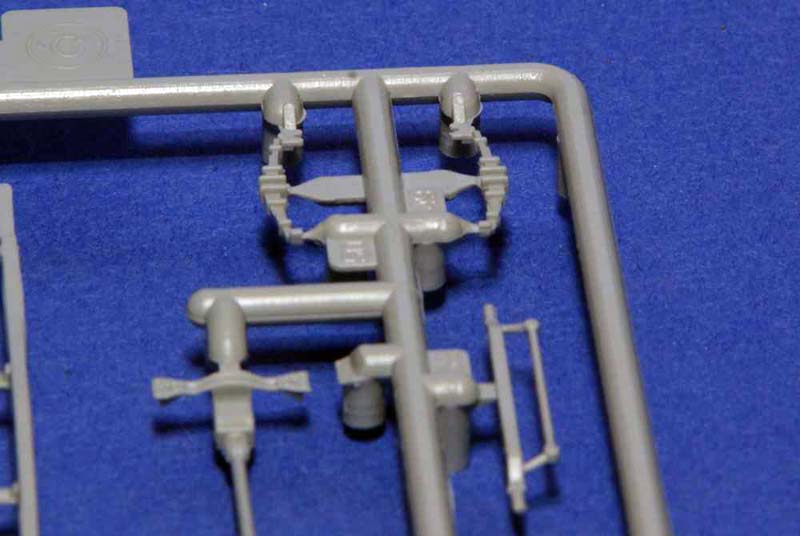
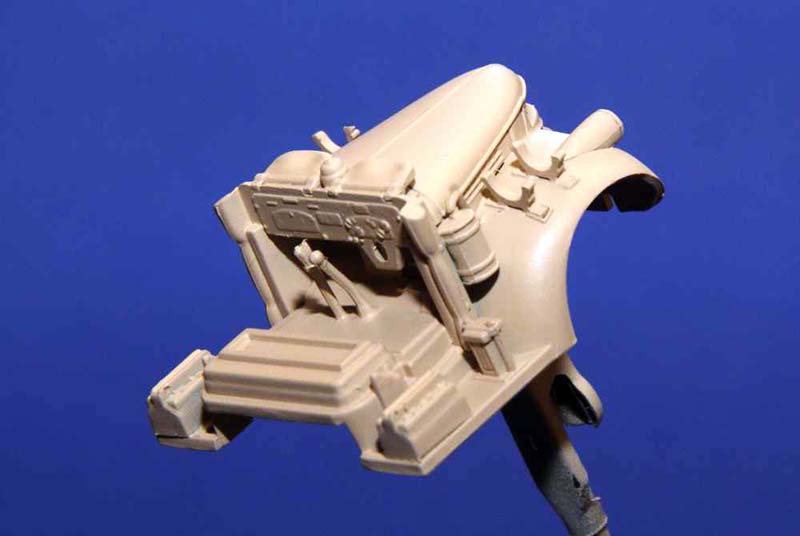
Step 5 sees even more detail pieces fitted to the truck front. As mentioned above, the smaller flimsy container racks (B21) need some filing or sanding to get them to sit properly on the running board. Other parts in this step fit reasonably well but care will need to be taken with removing the condenser (B20) from the sprue as it has a rather thick and awkwardly placed attachment point to the sprue. The rest of the parts in this step are the racks for the sand mats, the fuel filler cap and the headlights. The headlights are side specific and in the review sample had a rather loose fit.

During 
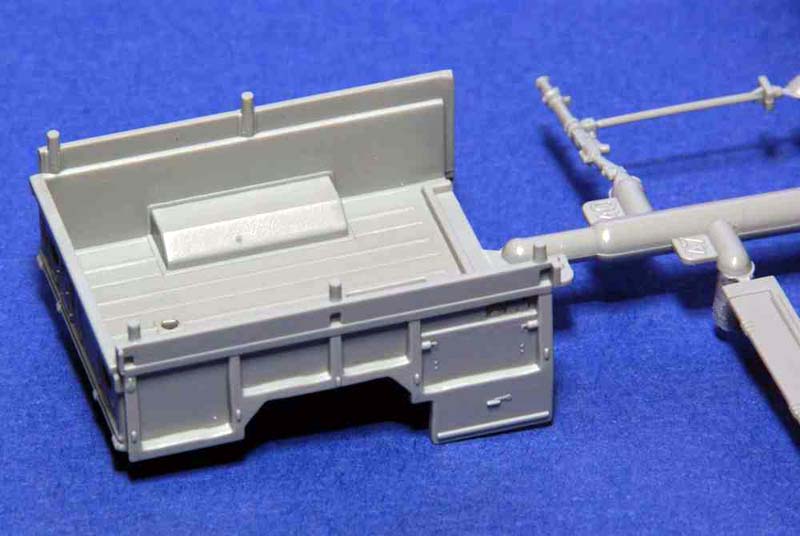
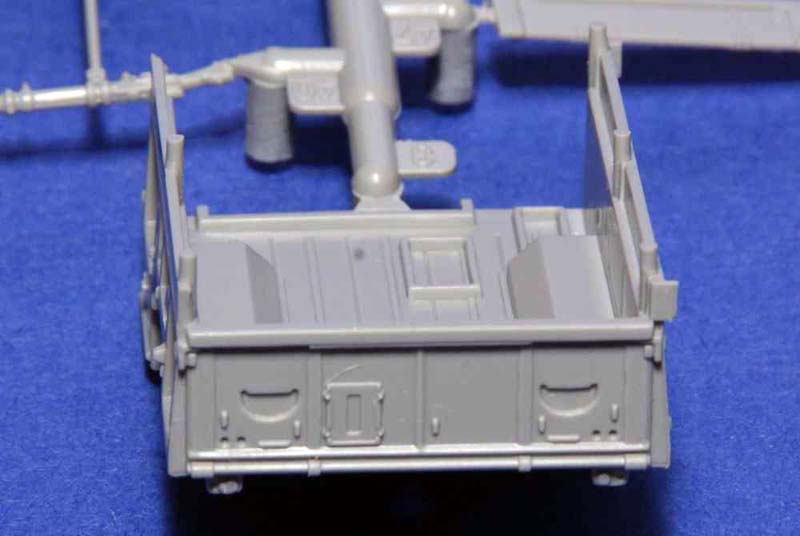
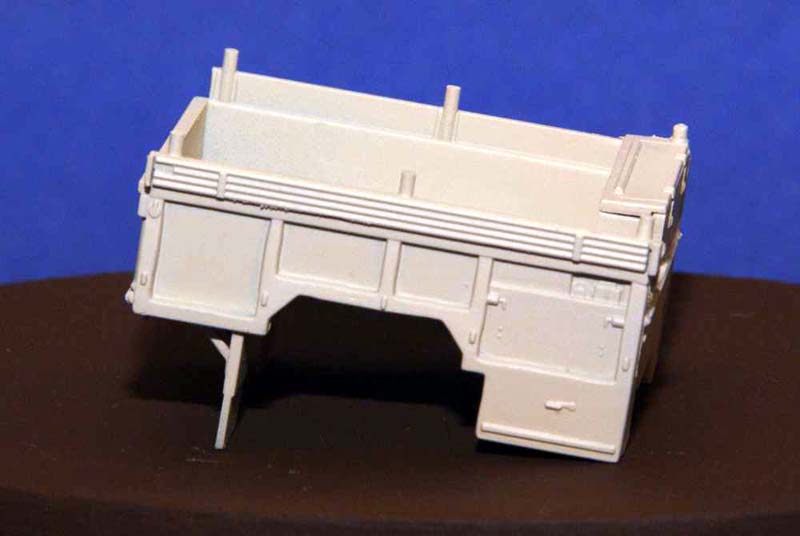
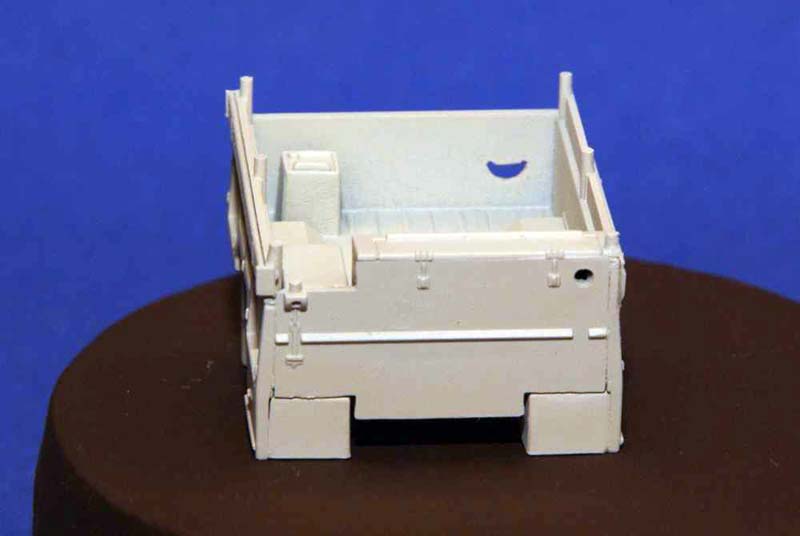
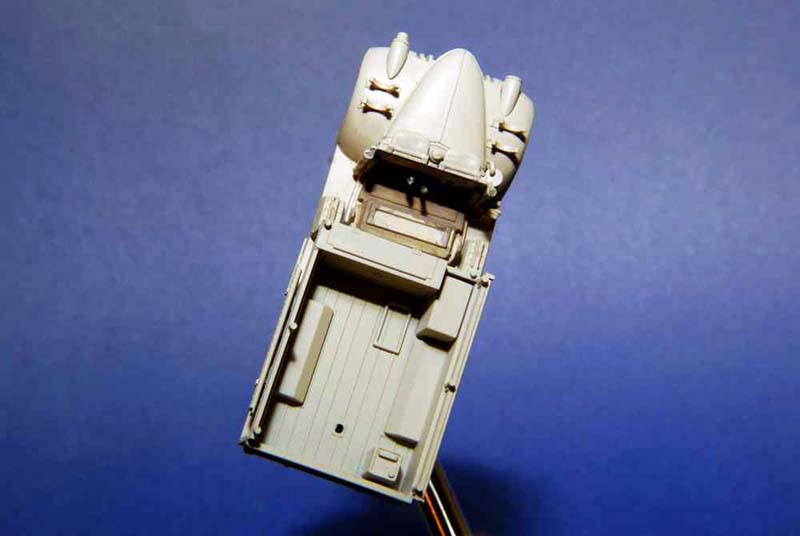
Step 6 three parts are added to the truck cargo bed. These are the spare tire, a wooden box and what appears to be the main fuel tank.

The underside is the main concern in 
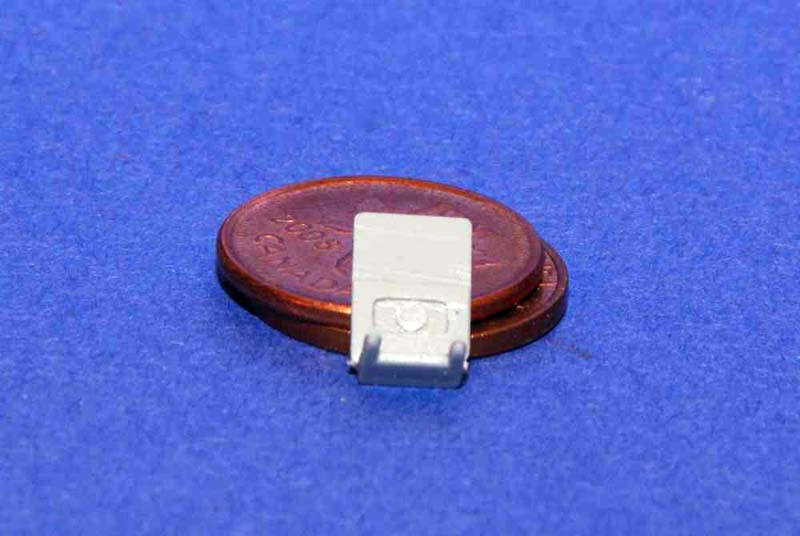
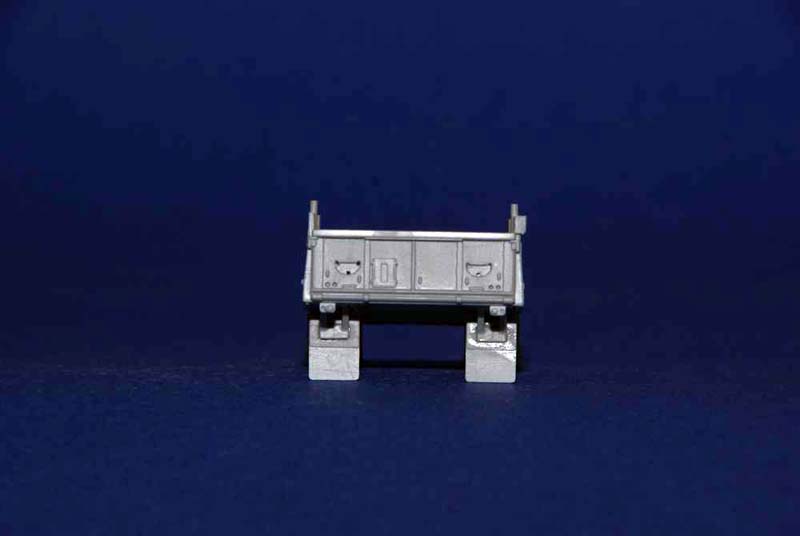
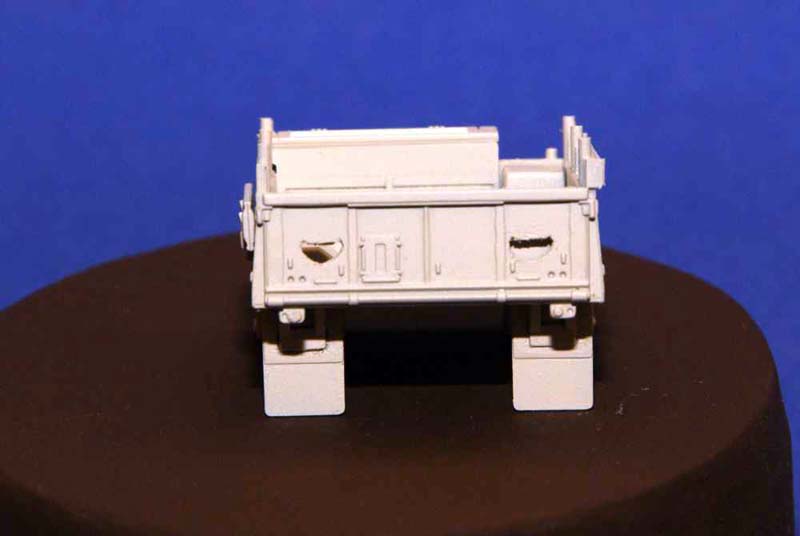
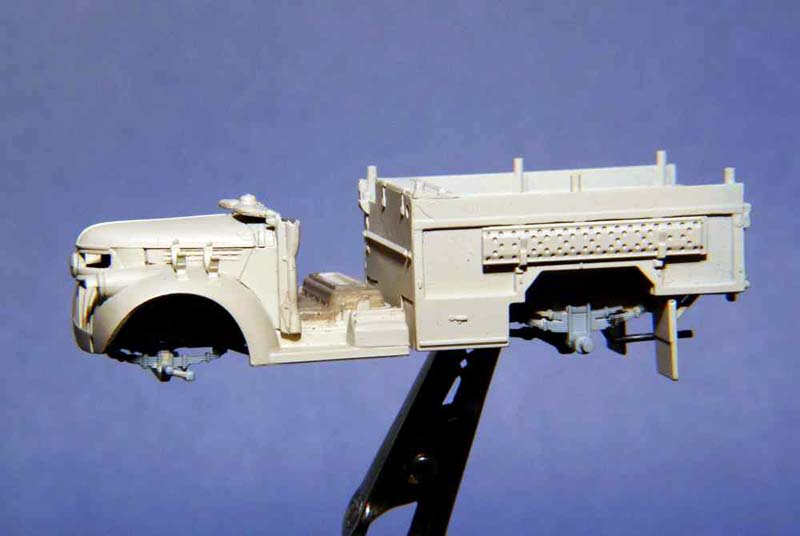
Step 7 with two storage boxes (A14, A10) and the two part mud flaps being added. The mud flaps consist of the actual flap part (A11) and the support for it (A12). They are meant to interlock with each other and then fit into a depression in the bottom of the truck cargo bed. Sadly, to fit properly the builder will need to do some serious trimming of raised circular moulding projections. It should be noted at this point that the built-in steps on the tailgate should be open but are covered by a thin layer of styrene. It will be up to the modeller to decide if they wish to open them up as was done in this build.

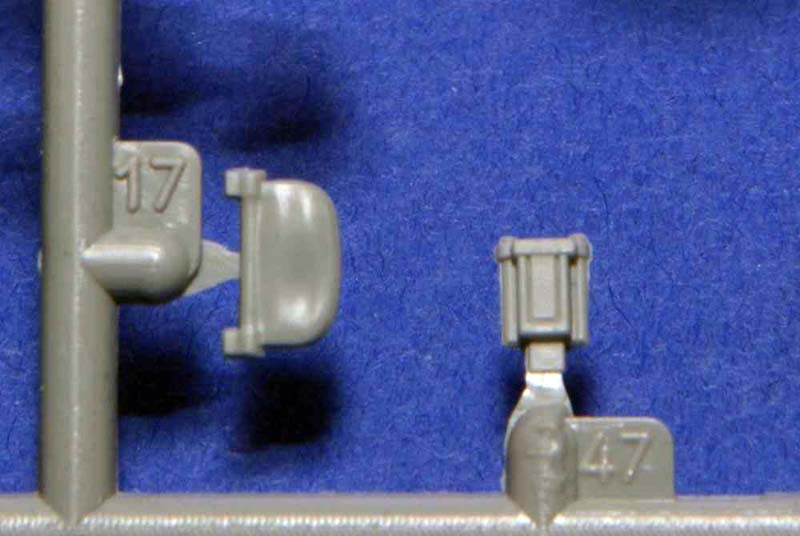
Step 8 is final construction step. In it a few parts are added to the cargo bed as well as the forward cab potion. Parts fit is acceptable but the two small covered front windscreens (B17) did require some filing to fit well. This step ends with the attachment of the cab and cargo area to the frame. Care will be required for this step as with the exception of a single pin under the engine compartment, they are no positive locating features. It will be up to the builder to align these subassemblies so that everything looks correct.

Conclusions

While definitely an interesting subject, this kit is unquestioningly a step backwards for Dragon Models. It is neither a “quick-build” war gaming kit nor, in this reviewers opinion, worthy to be considered a member of the “Armor Pro” branding family. While moulding in some areas is superb, in others it is sorrowfully lacking. With slide-moulding we have come to expect exceptional three dimensional details throughout the kit parts but this is not the case with this kit. With the exception of a handful of parts, there appears little improvement of this subject vehicle when compared to the ancient Matchbox incarnation. Further, with the old kit you get not only a lot more stowage but also figures.

For those that would still like to have one of these trucks in their collection, there are a number of aftermarket resin and photo-etch brass add-ons available. These additions address many of the deficiencies in this kit but will definitely have an impact on your modelling budget.
SUMMARY
Highs: A potentially nice base for those not averse to further detailing.
Lows: Substandard moulding in areas, minimal stowage, poor wheels.
Verdict: Interesting subject but will disappoint many with its flaws and omissions.
Percentage Rating
65%
  Scale: 1:72
  Mfg. ID: 7439
  Suggested Retail: $19.95
  PUBLISHED: May 27, 2013
  NATIONALITY: United Kingdom
NETWORK-WIDE AVERAGE RATINGS
  THIS REVIEWER: 84.51%
  MAKER/PUBLISHER: 86.16%

Our Thanks to Dragon USA!
This item was provided by them for the purpose of having it reviewed on this KitMaker Network site. If you would like your kit, book, or product reviewed, please contact us.

View This Item  |  View Vendor Homepage  |  More Reviews  

About Jan Etal (tread_geek)
FROM: ONTARIO, CANADA

I've been building models since about age 10 with the occasional hiatus due to real life events. First armour model was a 1/76 Airfix Tiger I and was followed by a 1/72 Revell F4U Corsair. I've built primarily 1/76 and 1/72 armour and aircraft but occasionally have tinkered in other larger scales....

Copyright ©2021 text by Jan Etal [ TREAD_GEEK ]. All rights reserved.


Comments

Finally, a decent review of this kit (I've read a few others that paint a mostly rosy picture of it)! Jan, I must say that as I read through it I found it quite disturbing yet in a way refreshing to see a more objective appraisal. While I like the subject I know that if I had bought this kit I would have been more than disappointed at what I got. When I buy a kit I don't want to throw extra cash at it to make it what it should be from the box. Is this the shape of things to come from Dragon in this scale? Will you be doing a completion Blog like you have with other similar reviews? Cheers, AJ
MAY 28, 2013 - 03:07 AM
@CMOT - Darren, Thanks for getting this review up! @weathering_one - AJ, Thanks for your kudos about the review. I try to review things based on my experiences so they are hardly totally objective. As to your first question, I've noticed this manufacturer "drop" or lower their previous norm or standard for over a year now. What the future holds, I can't predict but hope they find a balance between then and these recent offerings. As for a Blog with this kit taken further, probably. Not sure when though. Cheers, Jan
MAY 28, 2013 - 01:47 PM
Dragon's last few 1/72 releases have been increasingly disappointing - poor fit, hatches moulded shut, absence of PE, and, of course, the ever-present instruction errors. They're even losing their edge in 1/35! DML should stop resting on their circa 2000 laurels and get back to serious work! At least Dragon still excel at model ship kits.
MAY 29, 2013 - 02:20 AM
Yet another super-detailed review from you, Jan. I have to say that the issue about the wheels seems quite bizarre and I'm almost shocked! Still, it has long been obvious that the left hand of the instruction compilers doesn't seem to be in direct contact with the right hand of the tool makers, so it's perhaps not so surprising that the same disconnect should affect the box side CAD images. I notice that the same is said about the wheels on box for the more recent LRDG Chevy release, the one with the 2cm Breda cannon, 7504. Actually, that made me wonder if that wasn't in fact the kit that you were meant to have been reviewing since it was released in January 2013, rather than the Lewis Gun version which came out in April 2012... I don't suppose someone sent someone the wrong kit did they? No doubt you've noticed that Dragon publish some reviews of their products on their own site, and the Vinnie Brannigan review of the Lewis version is largely favourable, while the Cookie Sewell review of the Breda version actually does make some similar points to yours, albeit in more general terms: "Overall the gun is a nice improvement but it still seems more oriented on wargamers model than scale modelers."
MAY 29, 2013 - 11:33 AM
@Biggles2 - Leo, With the last three or four newer kits that I've seen, the omnipresent Dragon Accessary Card has not been present (decals are just thrown in the box or in one of the sprue bags). Lets also not forget the moulding of tools in place as opposed to them being separate parts. As has been stated by modellers in more than a few threads, Dragon appears to be focussing more on the pre-built market to the detriment of the modeller. @firstcircle - Matthew, Thanks for acknowledging this review, it is much appreciated. Bizarre is quite an appropriate word to describe the wheels on this kit and I was a bit stunned when I first saw them. I have never seen anything to this "extreme" from Dragon nor from any other mainstream manufacturer short of die-cast "toys." I have a friend who is a pattern-maker and he has more than a few times commented on Dragon's design process and stressed that there is definitely a lack of communication between all the stages from design to production. Part of the blame is from what he sees happening in his occupation and what he refers to as the "90 Day Cycle." Basically it is 30 days from concept to production, 30 days of production and sales followed by 30 days of sales before production is terminated and they move on. Obviously neither Kitmaker nor I have any control as to when a manufacturer sends a kit for review. Let us just say that this kit was made available prior to the release of the Breda version and I have no recollection of Armorama receiving the second version. My normal methodology of preparing a review is to research the subject, visually inspect the sprues and instructions in depth (making copious notes) and then write a rough draft of my findings. If the review involves glue meeting plastic, that is also incorporated. After all this I will search out other reviews and see how my findings compare to them. I have seen Dragons reviews by Vinnie Brannigan but they are mostly short and almost always positive. As you point out, Mr. Sewell's may go a bit further but not to the degree that might be helpful to the "scale modeller." I have seen Blogs on Armorama that were far more helpful to me when I first returned to the hobby than most reviews. When I started doing reviews I patterned my review style after the one's that I found most helpful. This kit review was quite long in preparation due to the many "hurdles" that needed to be overcome. A quicker and easier solution to rectify the wheel issue required considerable trial and error. What many (yourself excluded) may not realize, writing a review that might be helpful to the wide skill range of modellers that might read it can be quite difficult. How does one cater to the beginner or novice while not forgetting or boring the more advanced modeller! On to the next victim...errr review! Again, thank you two for your interest and comments. Cheers, Jan
MAY 30, 2013 - 04:19 AM
@tread_geek – Jan, Excellent and well written review!!! When I decide to make a purchase on a kit I usually make an effort in finding a review on the subject kit first, sometimes there isn’t one. Then I’m on my own hoping that I won’t be spending a lot of extra time in having to scratch make items if I don’t have a suitable replacement in the parts stash or making corrections / modifications to the kit, as you’ve done on the tailgate for example, to enhance the details. I certainly wouldn’t be frustrated with putting together a war gaming piece knowing that the detail will be soft, incorrect for the most part and often times non-existent but then again these are substandard kits, certainly not holding a ‘Pro’ this or that label. The price for such kits are usually much less equating to getting what you pay for. There’s no excuse for doing otherwise and expecting to keep an edge on the competition. The smaller scale kits have long been popular in the European market and have recently seen an upsurge in the western and Asian countries. Most of the smaller scale modelers that do take this hobby seriously, and surprisingly there are a lot, in any county will likely find it harder and harder to trust in making a high dollar investment for a kit that includes molded on undistinguished clumps of plastic that are supposed to represent separate detailed parts on kits with ‘Pro’ labeling on the box art. Adding to that are unclear and ill prepared assembly instructions. This becomes the equivalent of almost taking a hamburger back to the counter because you couldn’t find the meat because it was embedded in the bun and hidden beneath the ketchup and you thought you were making a purchasing of the same item on the advertising poster hanging on the window, where you bought the burger, with the larger than life meat hanging off the sides of the bun (you know, like the toes overhanging the undersized shoes that some girls seem to like wearing) really what’s up with that! Let’s see you go and spend your money there again? Jan, thank you very much for your honestly in presenting us, your viewers, with your views on the kits you review here on Armorama. I do believe that these forums here on Armorama do serve a greater good in that the builders, both pro and novice, can and often do present the viewers with sound information in their build logs and build reviews. Nothing is better than an unbiased account of the kit build process presented via the photographs and text given by a modeler for modelers. So, will I be interested in adding this kit to the stash? Let me see how much it will impact my budget in aftermarket items and my patience to bring this particular kit up to the current out of the box standards that I had come to enjoy in past Dragon releases. So, does anyone here know where I can get a really good burger? ~ Eddy
JUN 03, 2013 - 02:28 PM
Eddy, Thank you very much for your appreciation of the review and also for your comments/observations. I feel that we, the buying public, need to be informed to help make a proper purchasing decision. While I try to be unbiased in my reviews it is not humanly possible to be 100% objective. I try to "tell it like I see it" based not only on my personal experience but also based on what others post in various forums. It's not always easy and with this kit took far longer than I normally would have expected. I and other "serious" 1/72 scale modellers have seen a steady decline in the standard of the Dragon Armor Pro series of kits. As of late we are seeing quite an inconsistency in the quality of the kits. I have no objection to them reusing sprues from previous releases (these are usually the better ones of the kit) but when you compare the quality of the newly added sprues you see this inconsistency (shallowly moulded on tools, poorly thought out mating features, etc). As for aftermarket additions, these should NOT be necessary for a properly designed modern kit that retails for in the $20 range. For this kit there was a set of resin wheels that retailed for $13, from what I've read they were of rather mediocre to poor quality and have been discontinued. Black Dog offers a resin and PE accessary set that doesn't include new wheels ($16.45 + $12.15 shipping). So roughly combining the individual costs to make this model acceptable we are talking $50.00 (excluding shipping charges that would bring it to the $70 range) for a smaller 1/72 model!!! As far as I am concerned this is ridiculous (call me cheap). I intend to complete this build but it is requiring some time intensive preparation as I try to determine what from my spares boxes should be added and what may need to be scratch-built. As for the burger, my SWMBO swears by Wendy's while I prefer a good old Harvey's (don't know if you have the latter in the States.) Cheers, Jan
JUN 04, 2013 - 04:17 AM
I believe Dragon took a wrong turn off Excellent Avenue on to Cynical Road, not far behind Tamiya. Both of them think they don't have to work hard any more - if their name is on the box, someone will buy it!
JUN 05, 2013 - 06:26 AM
   
ADVERTISEMENT


Photos
Click image to enlarge
  • move
  • move
  • move
  • move
  • move
  • move
  • move
  • move
  • move
  • move
  • move
  • move
  • move
  • move
  • move
  • move
  • move
  • move
  • move
  • move
  • move
  • move
  • move
  • move
  • move
  • move
  • move
  • move
  • move
  • move
  • move
  • move
  • move
  • move
  • move
  • move
  • move
  • move
  • move
  • move
  • move
  • move
  • move
  • move
  • move
  • move
  • move
  • move
  • move
  • move
  • move
  • move
  • move
  • move
  • move
  • move
  • move
  • move
  • move
  • move
  • move
  • move
  • move
  • move
  • move
  • move
  • move
  • move
  • move
  • move
  • move
  • move
  • move
  • move
ADVERTISEMENT